Topic
How to configure Single Sign-On (SSO) for use with the Everbridge Manager Portal.
Description
Configuring Single Sign-On for an Everbridge account can vary based on the Identity Provider (IdP).
Overview
Setting up SSO for the Everbridge Manager Portal consists of the following tasks:
- Prerequisites
- Configure Manager Portal SSO Settings
- Obtain the Everbridge Login URL and Everbridge Service Login URL
- Update User SSO IDs
- Test the Manager Portal SSO Configuration
- Download the Account Metadata
Prerequisites
See knowledge article EBS: Single Sign-On (SSO) Prerequisites.
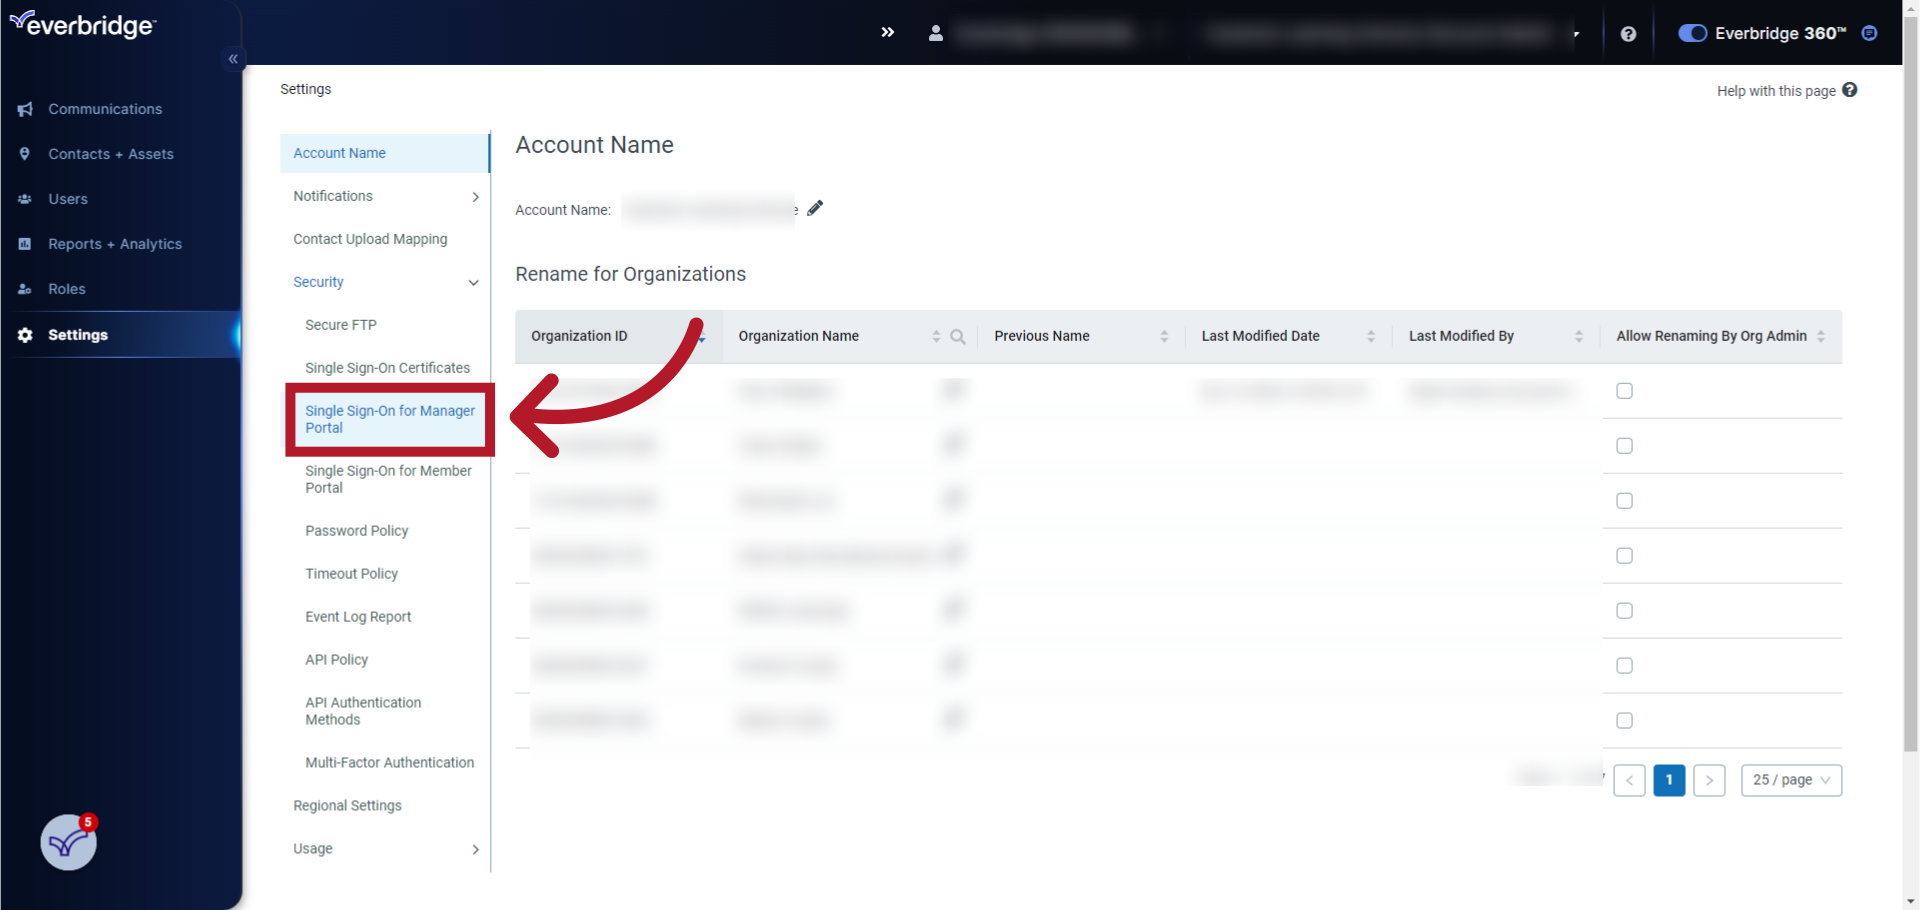
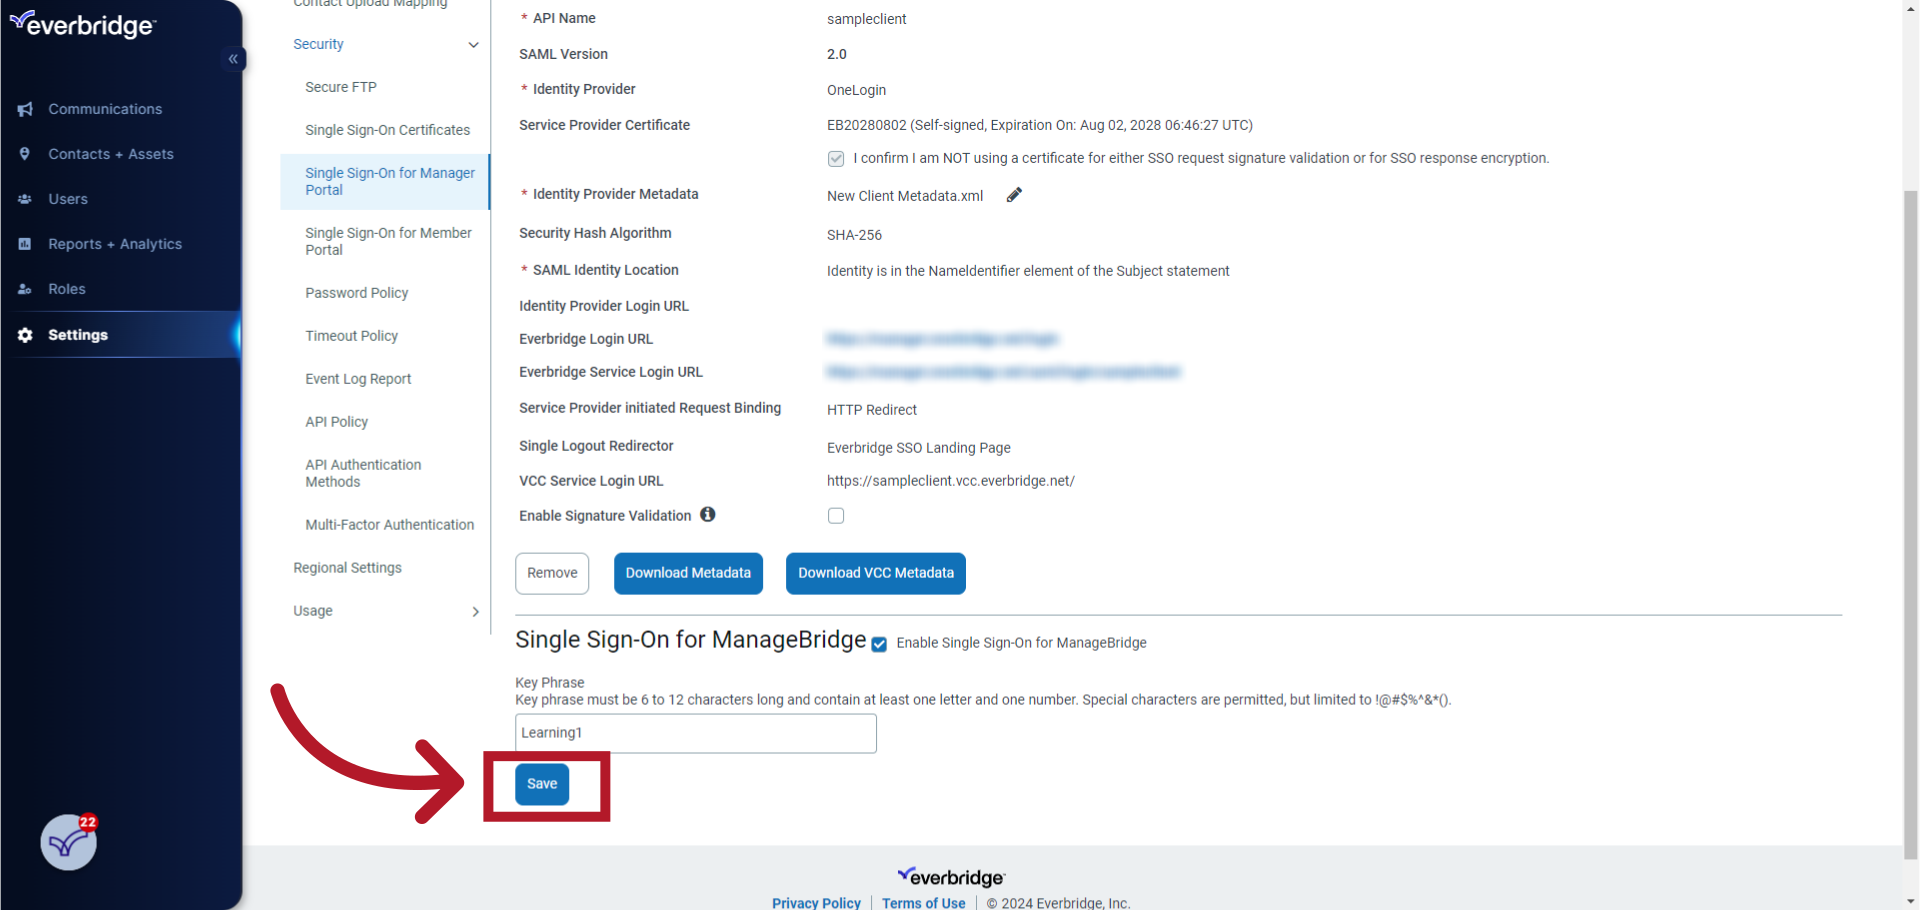
Configure Manager Portal SSO Settings
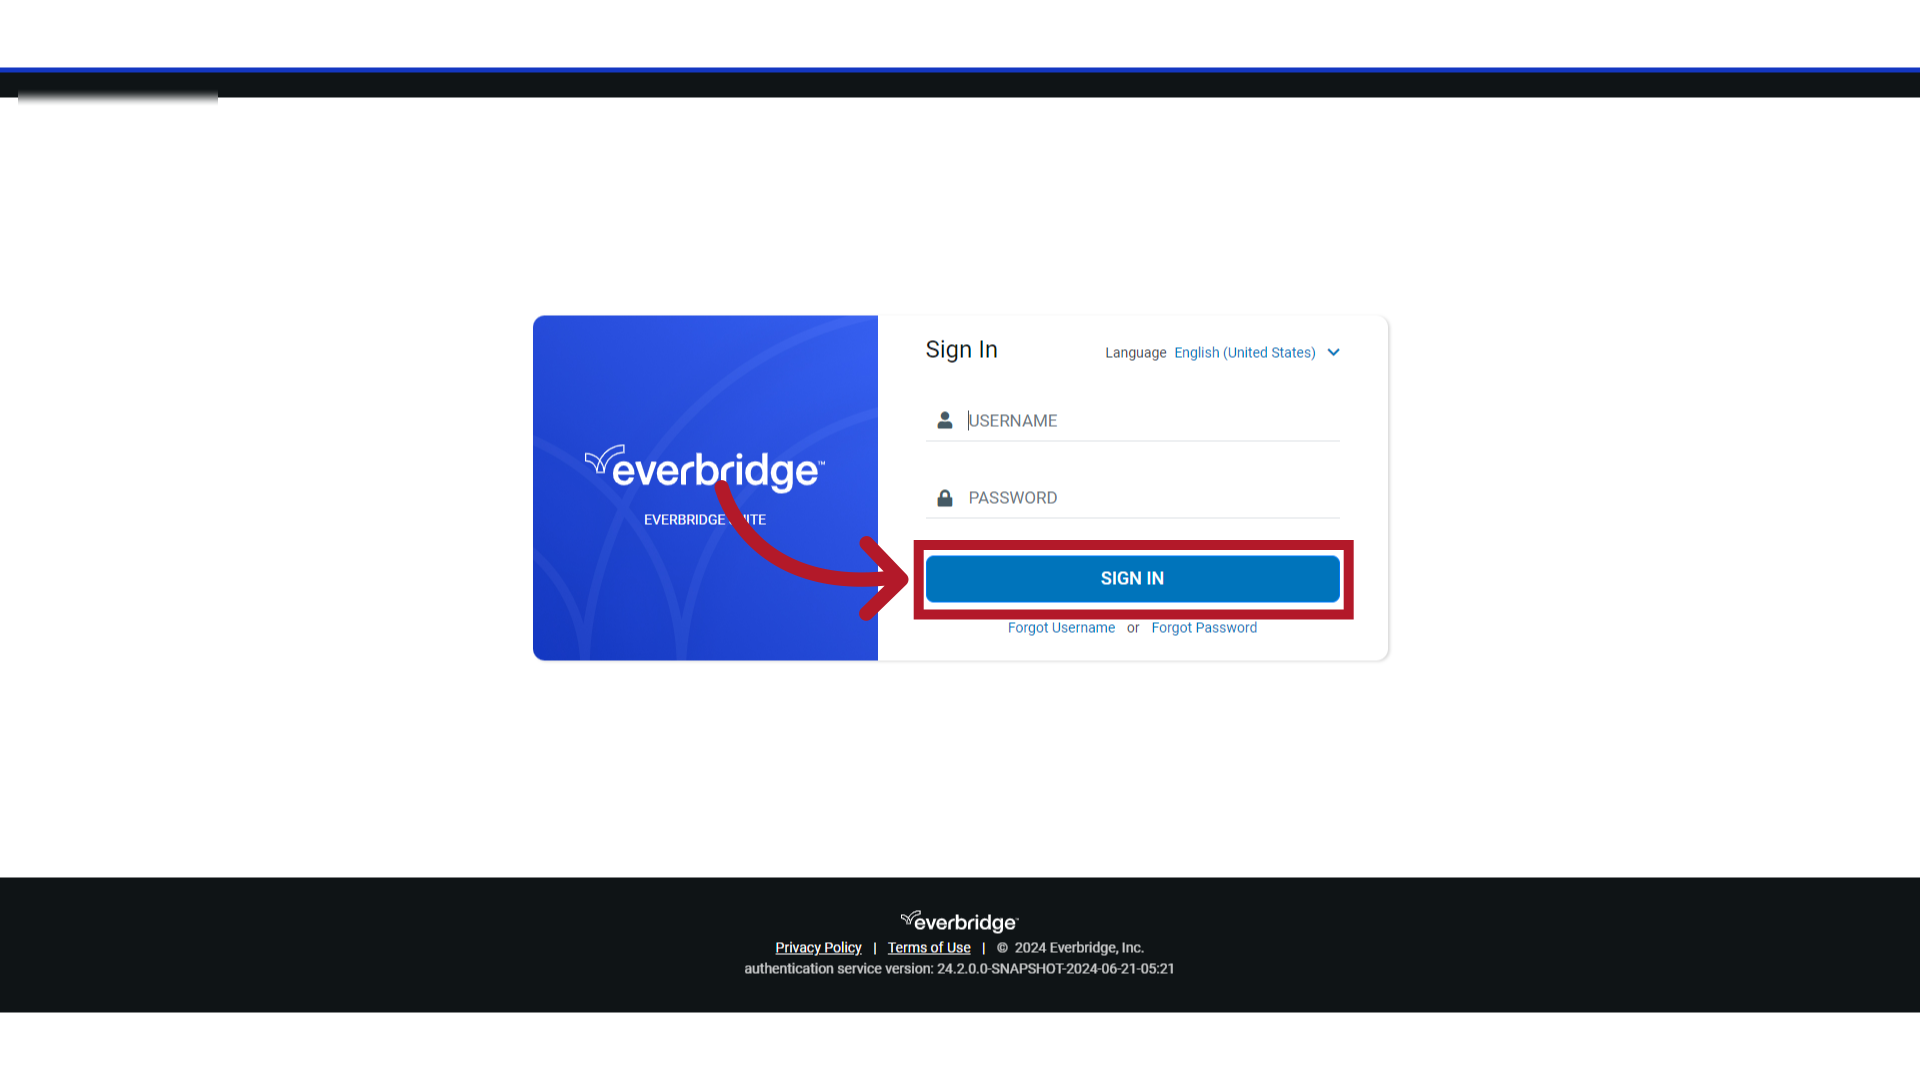
1. Login Page
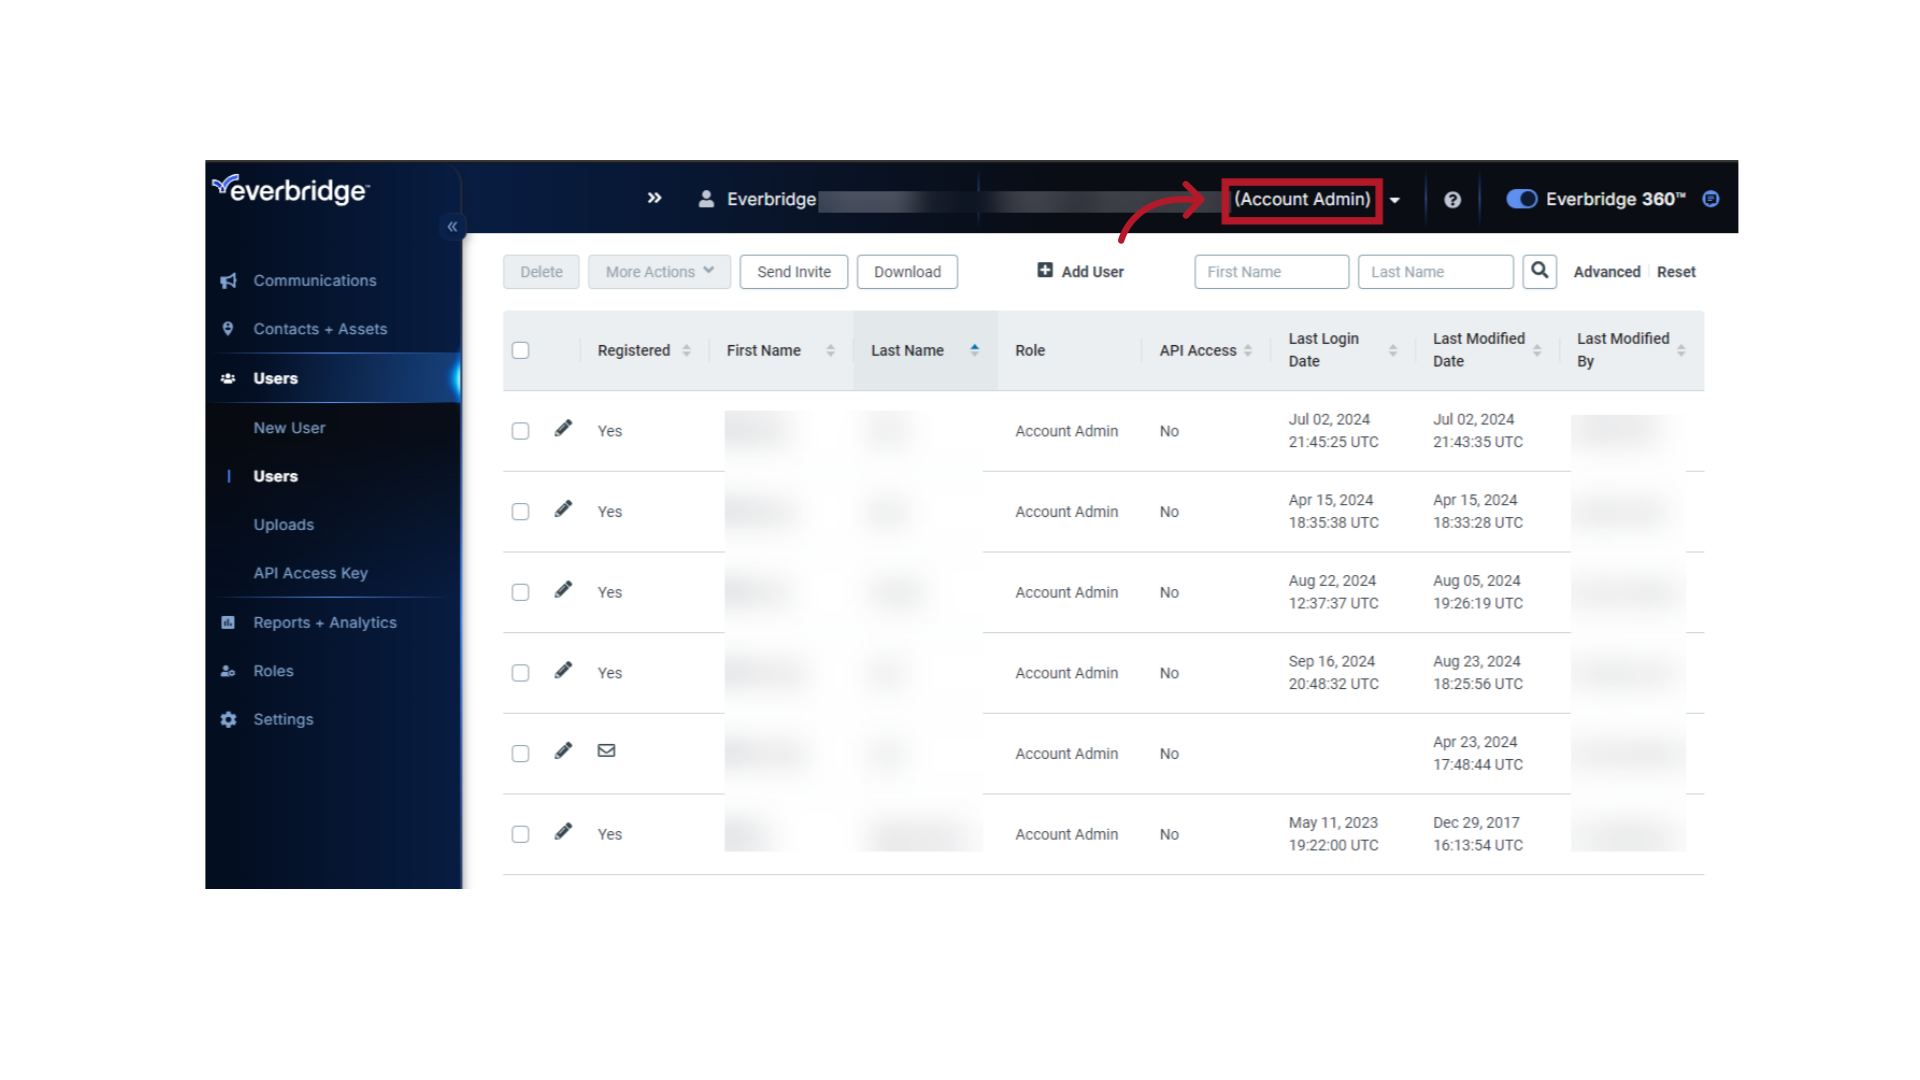
2. Manager Portal
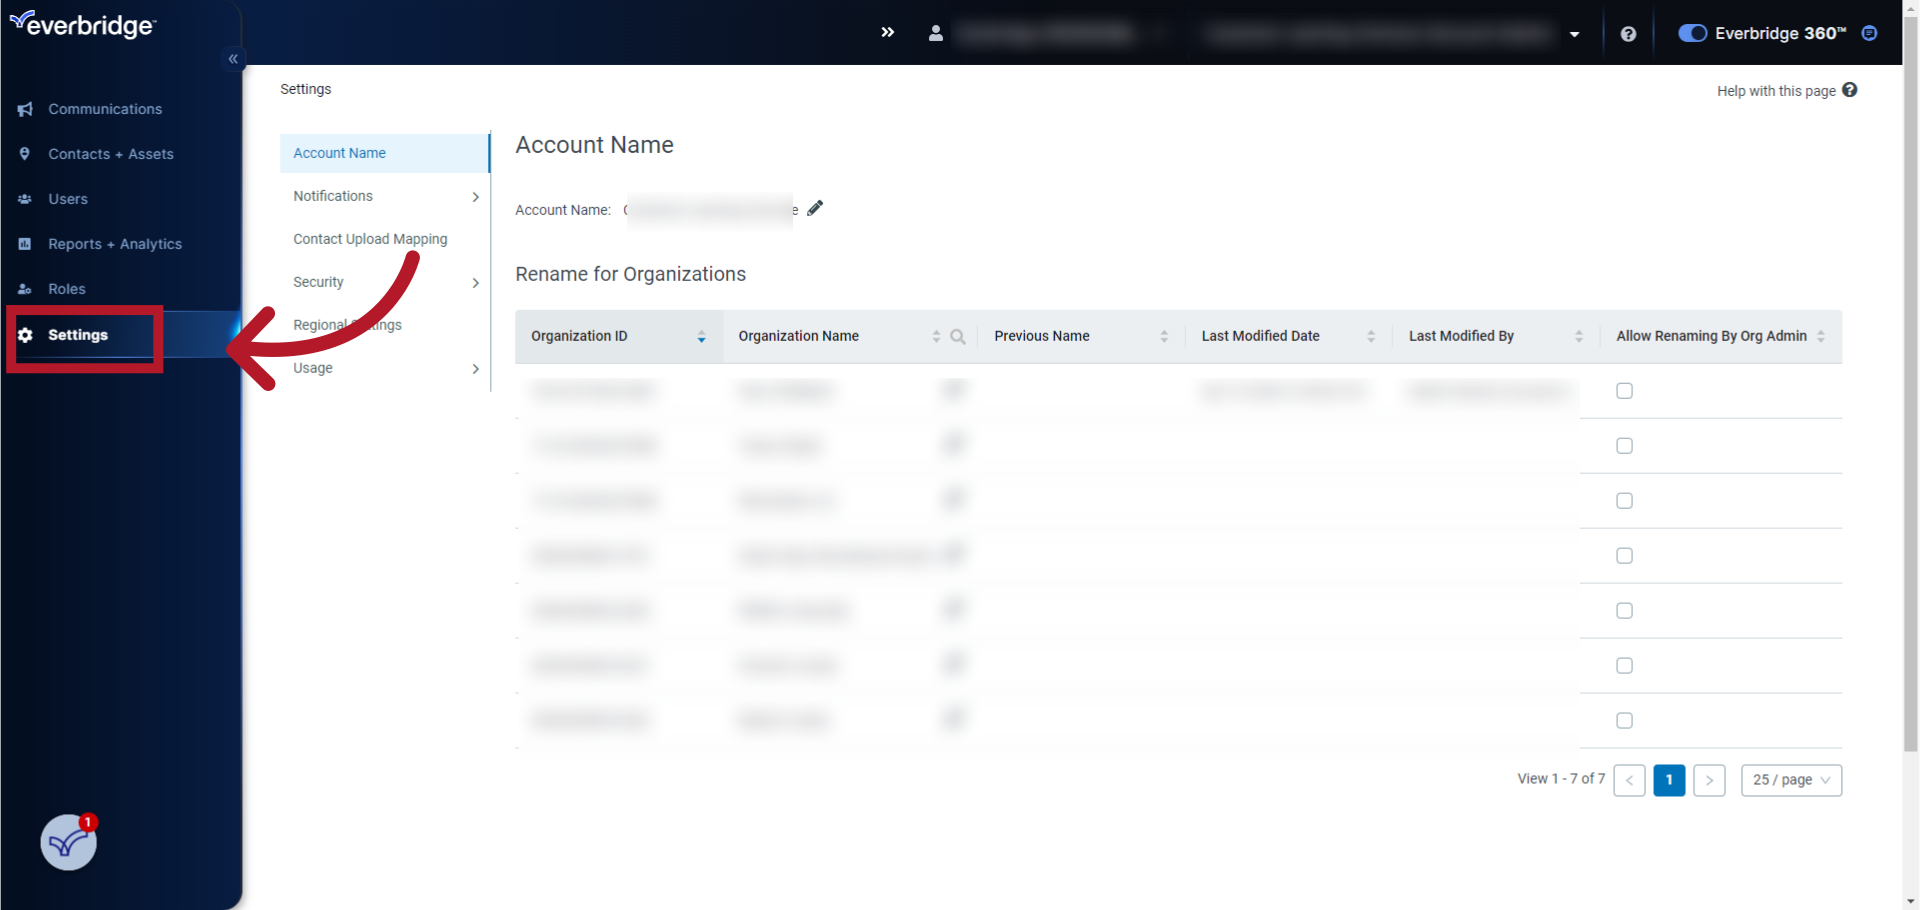
3. Settings
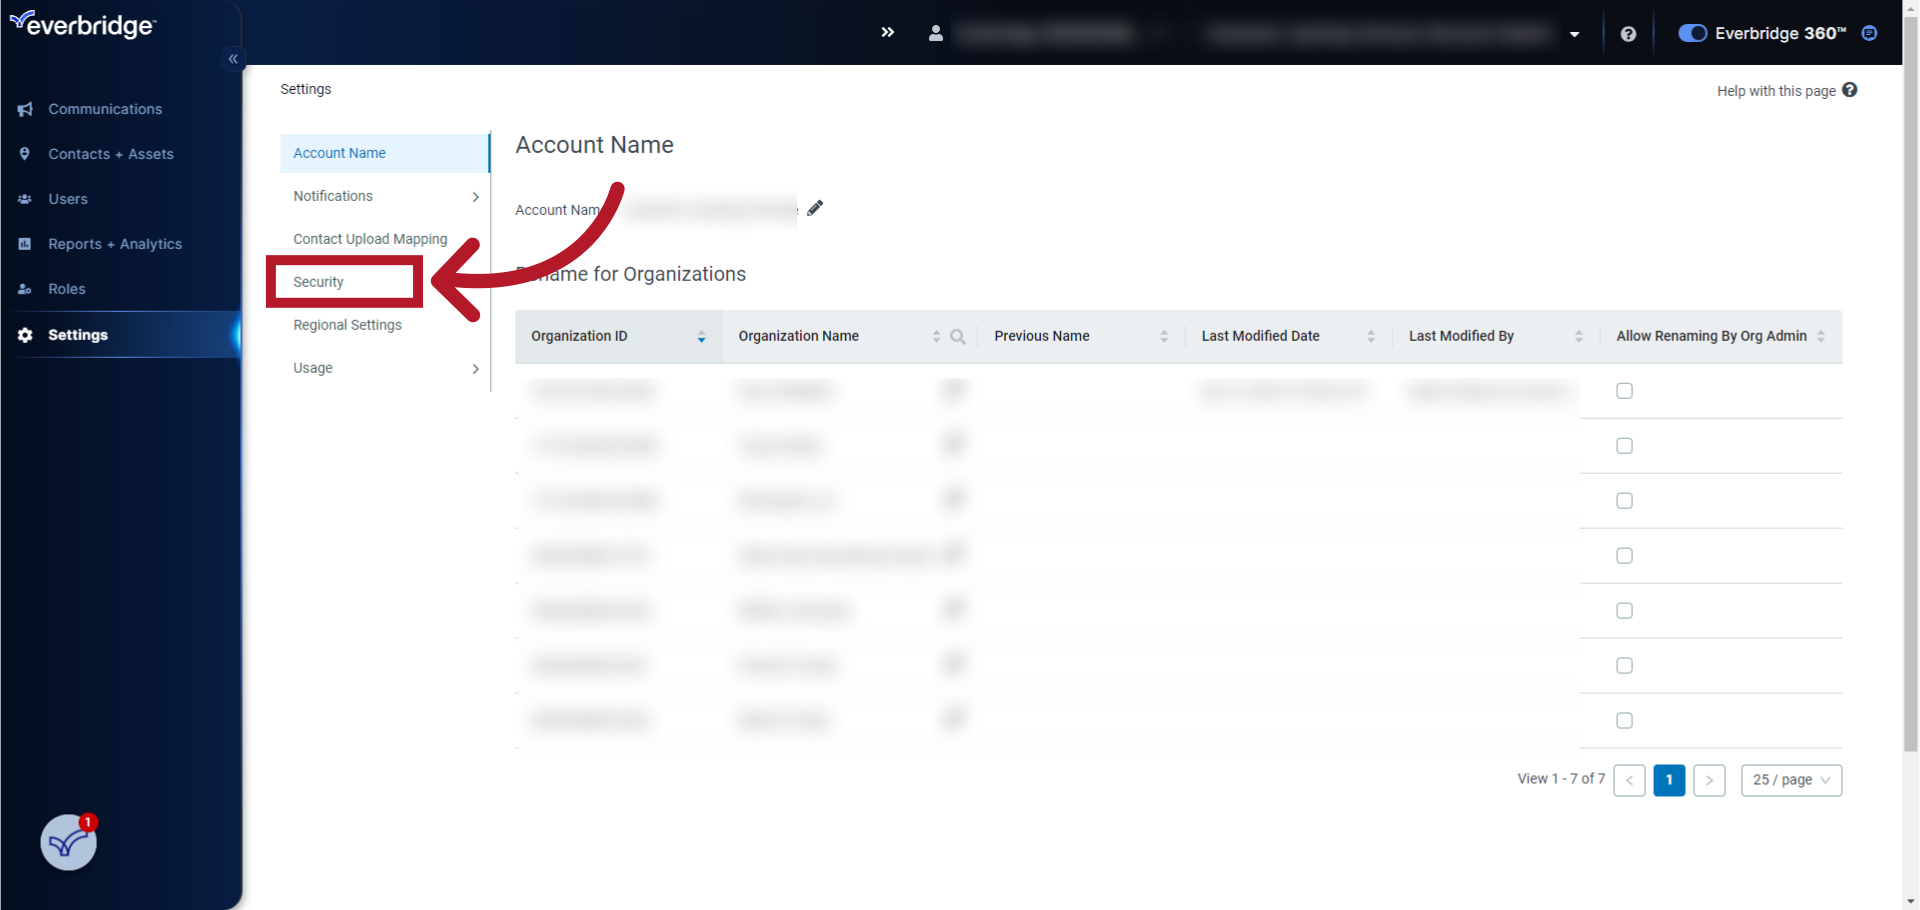
4. Security
5. Single Sign-On for Manager Portal
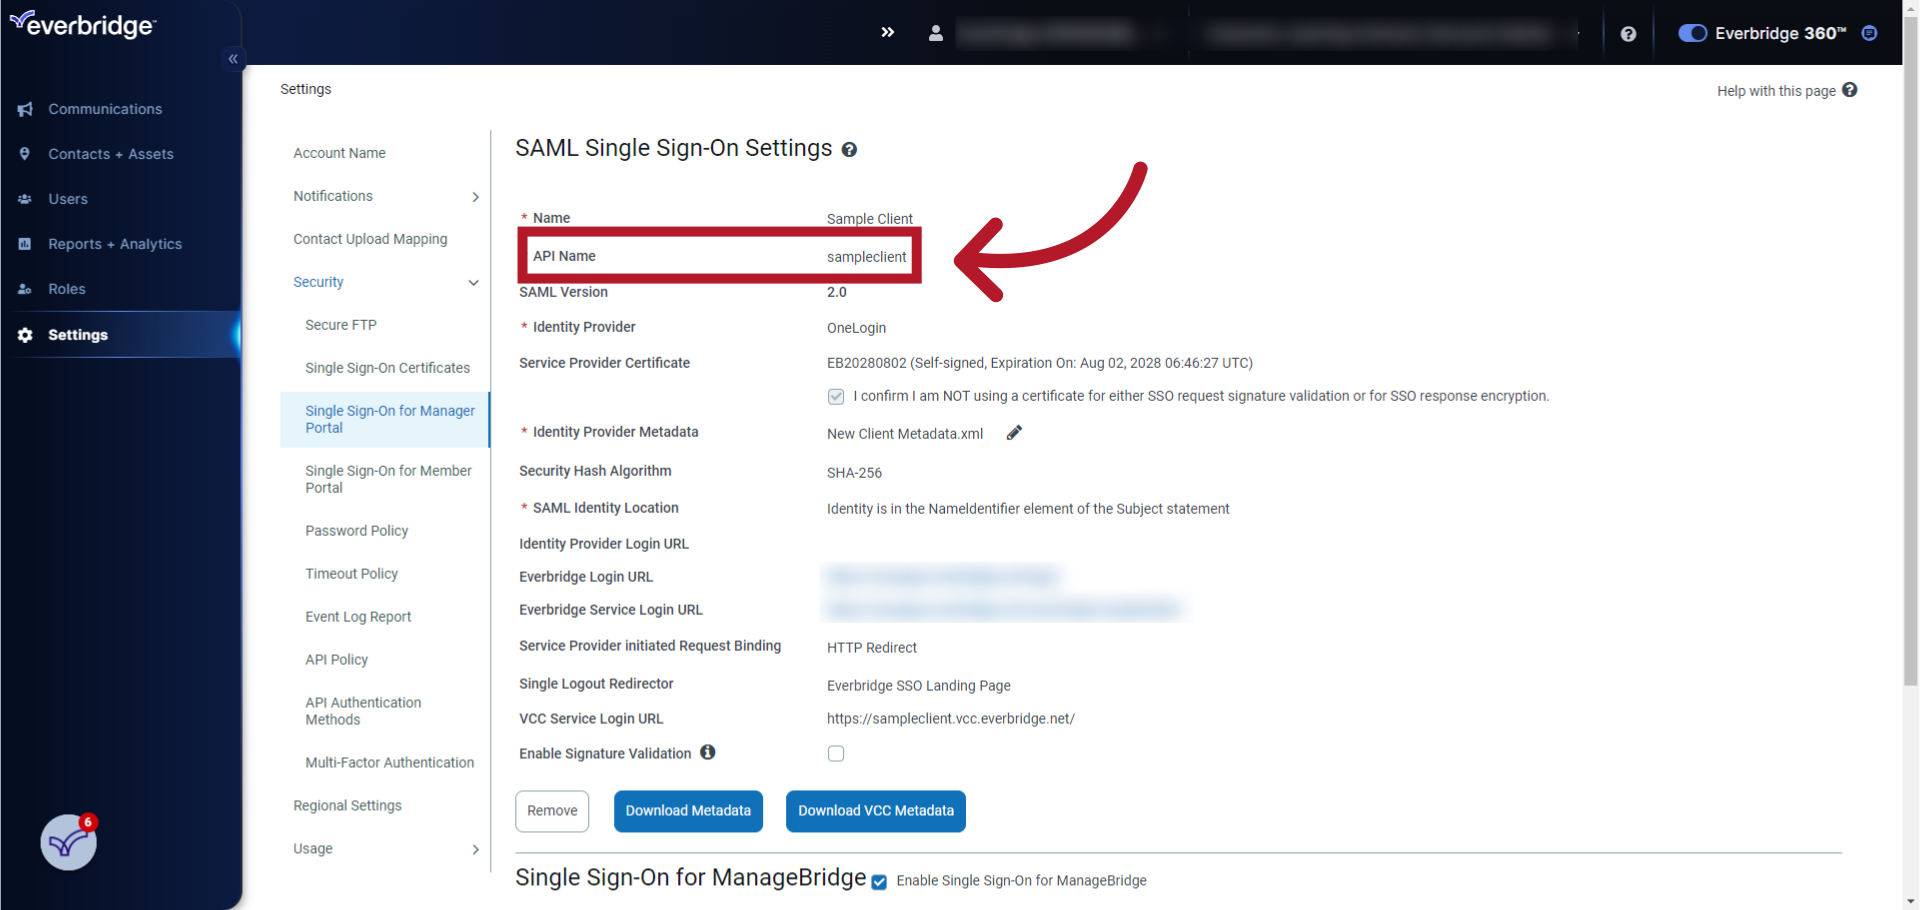
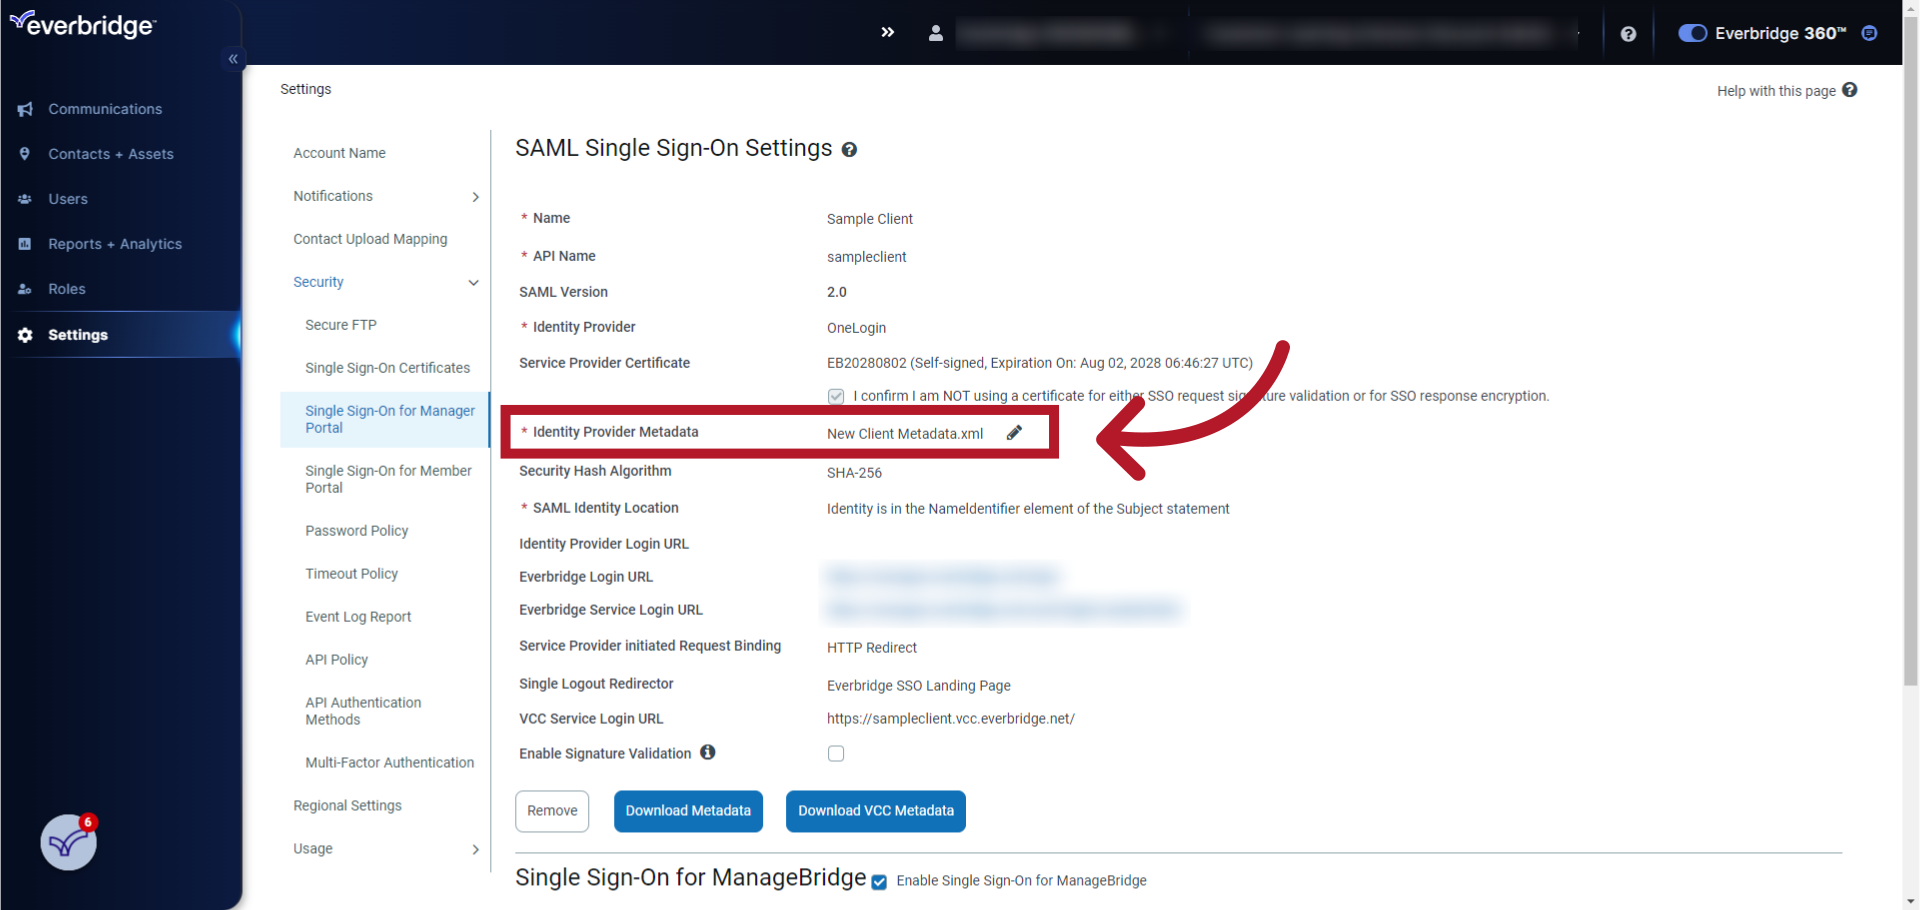
6. Name

7. API Name
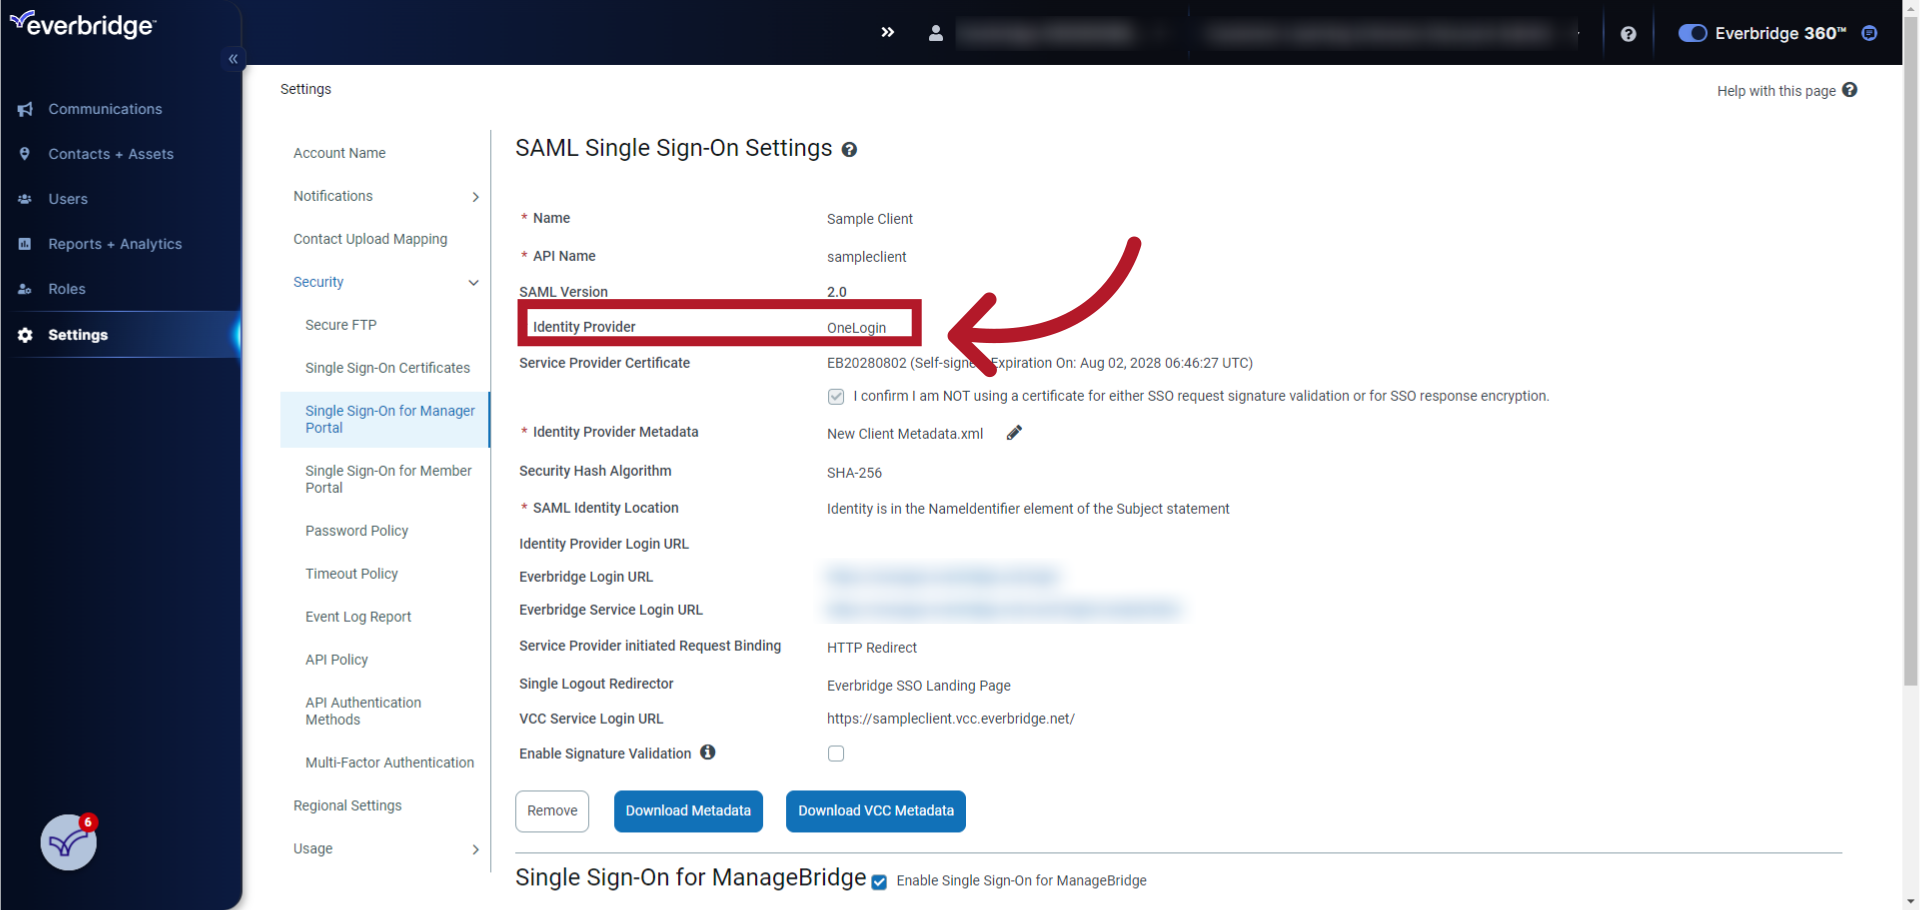
8. Identity Provider (IdP)
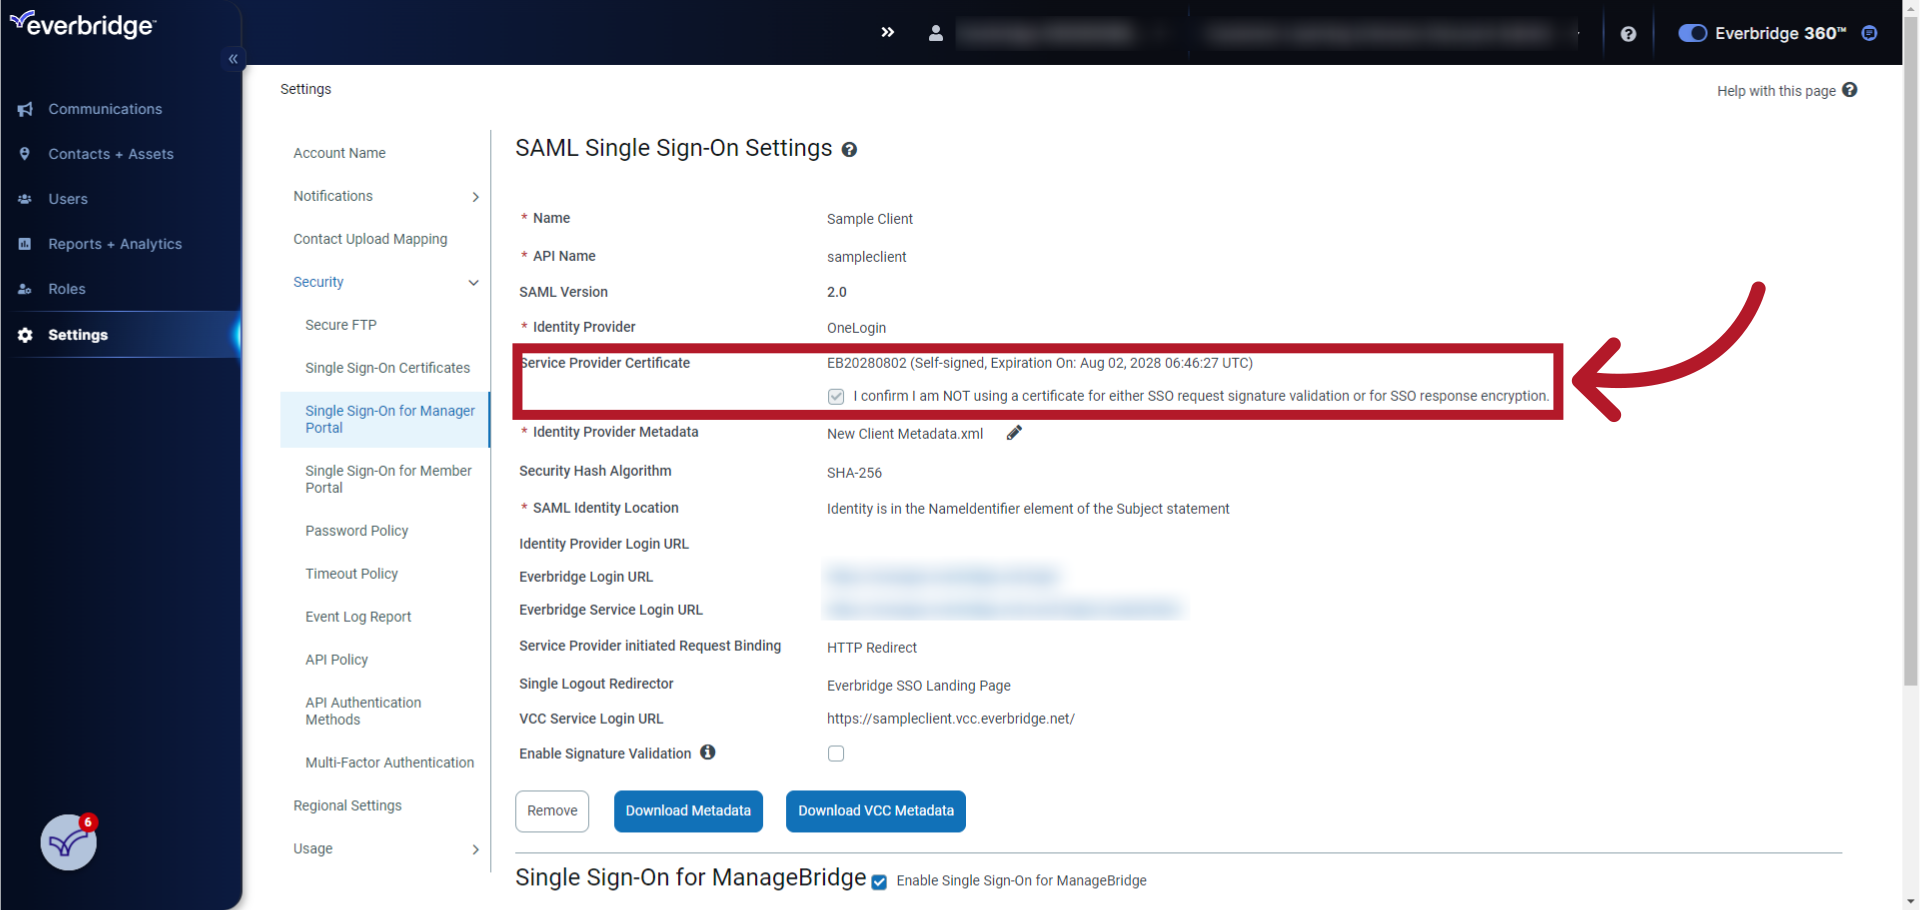
9. Service Provider (SP) Certificate information
10. Upload the Identity Provider (IdP) Metadata file
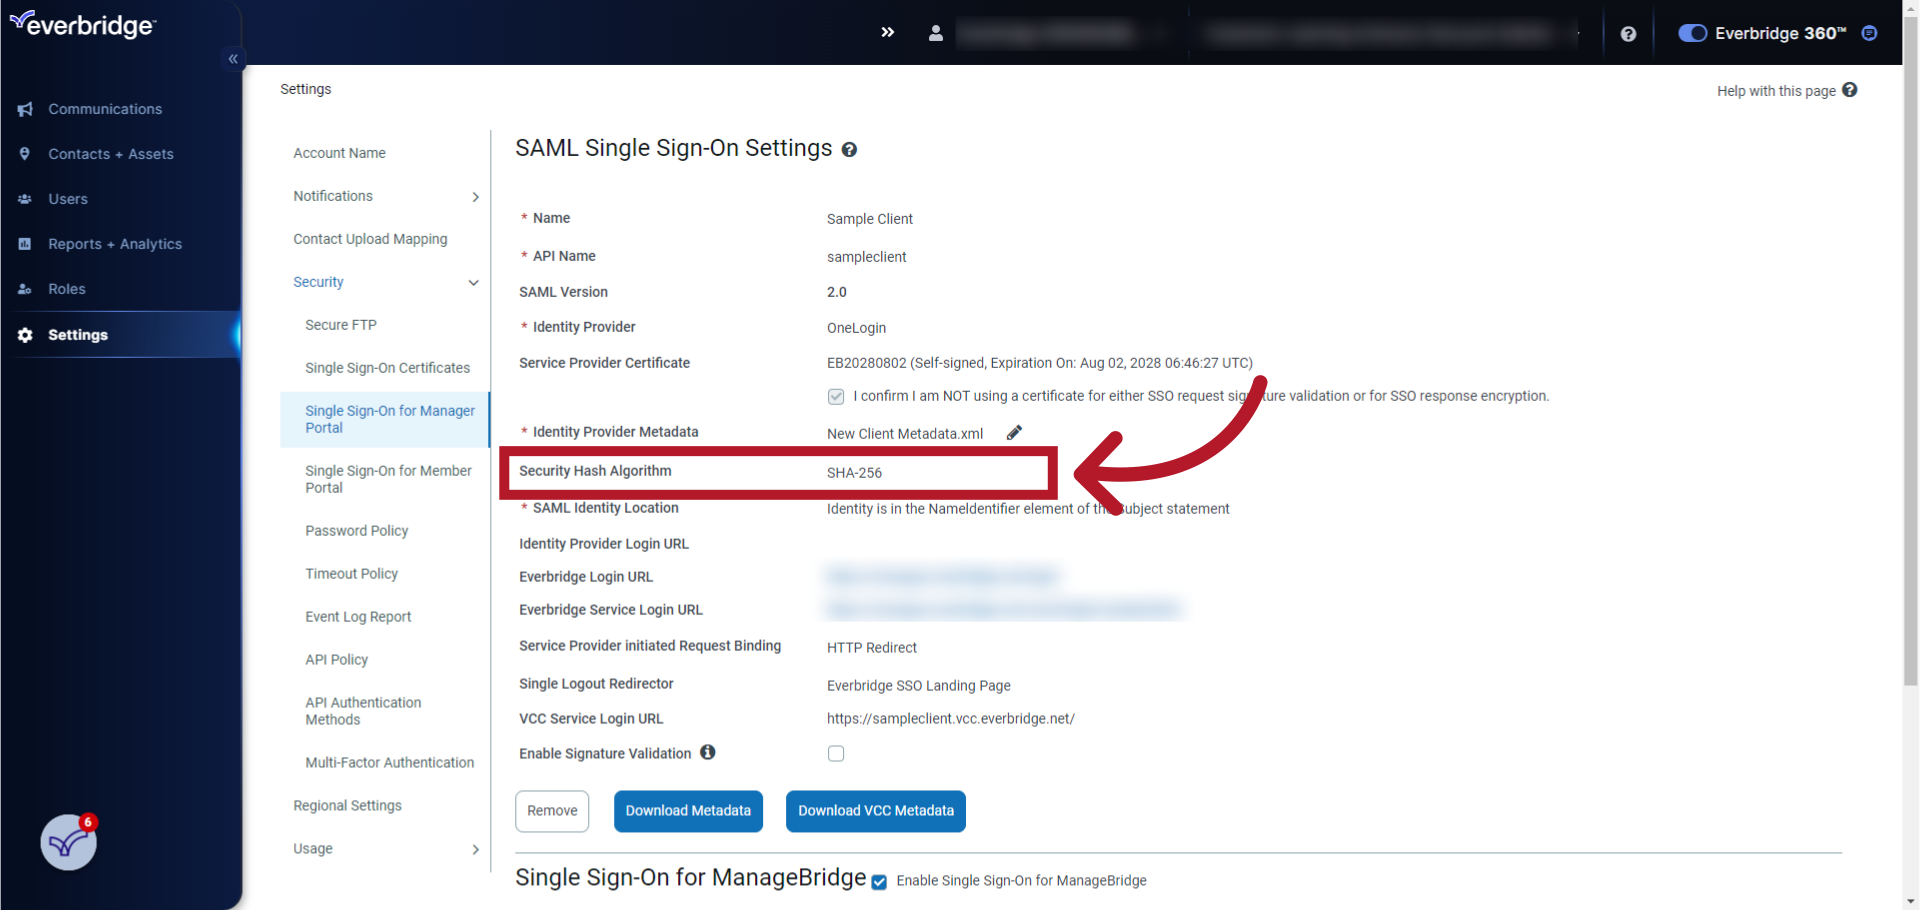
11. Security Hash Algorithm
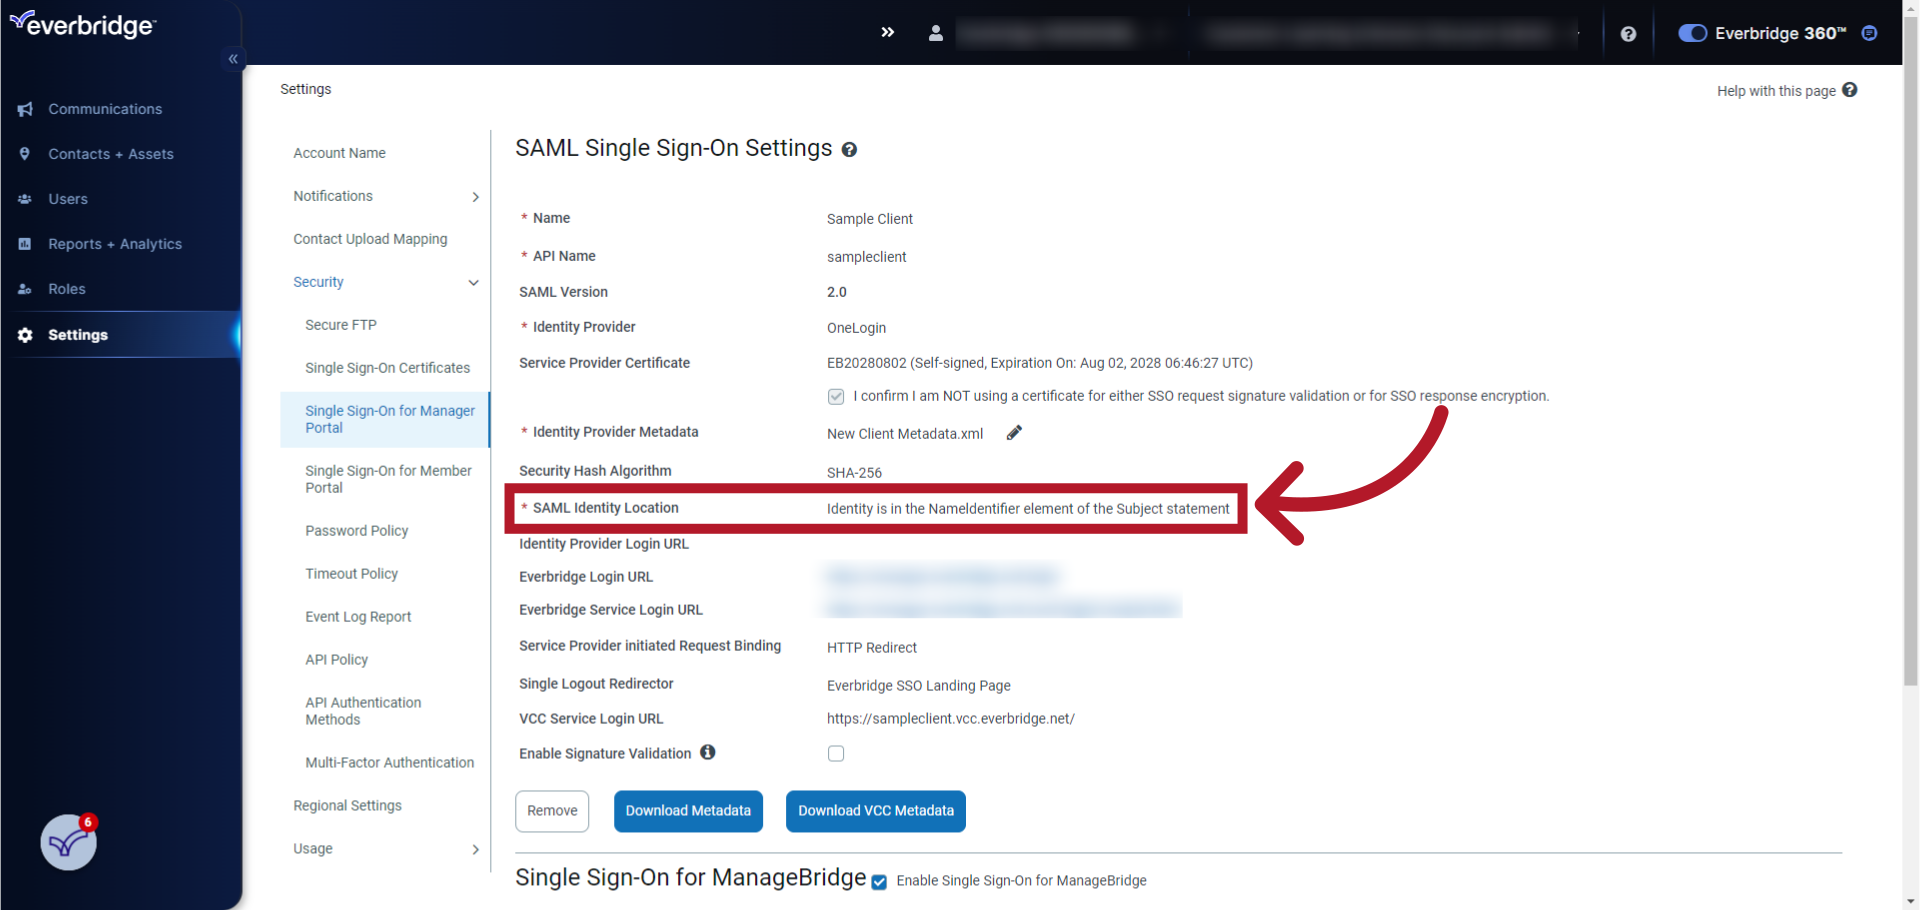
12. SAML Identity Location
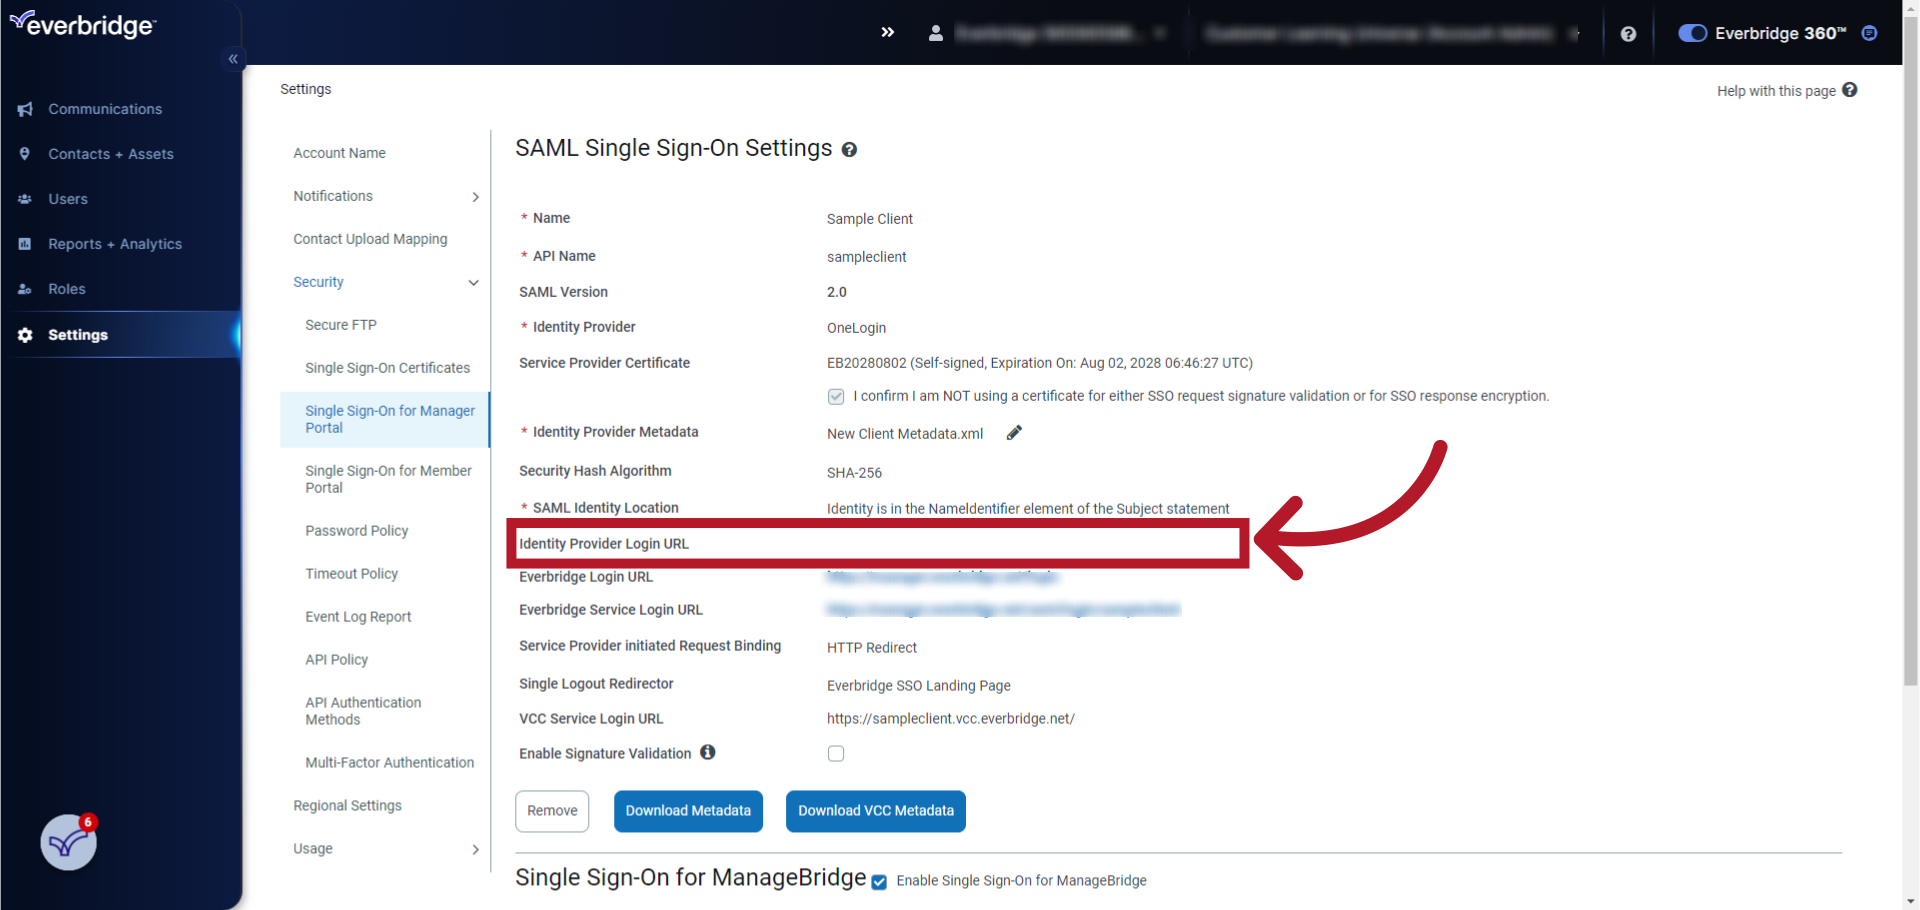
13. Identity Provider (IdP) Login URL
14. Everbridge Login URL and Everbridge Service Login URL

15. Save
Obtain the Everbridge Login URL and Everbridge Service Login URL
After saving, two new entries will become available: Everbridge Login URL and Everbridge Service Login URL:
- Everbridge Login URL: the web address for logging in to the Manager Portal directly using a username and password (otherwise known as a breakglass account).
- Everbridge Service Login URL: the unique URL that users will access to log in to the Manager Portal using SSO.
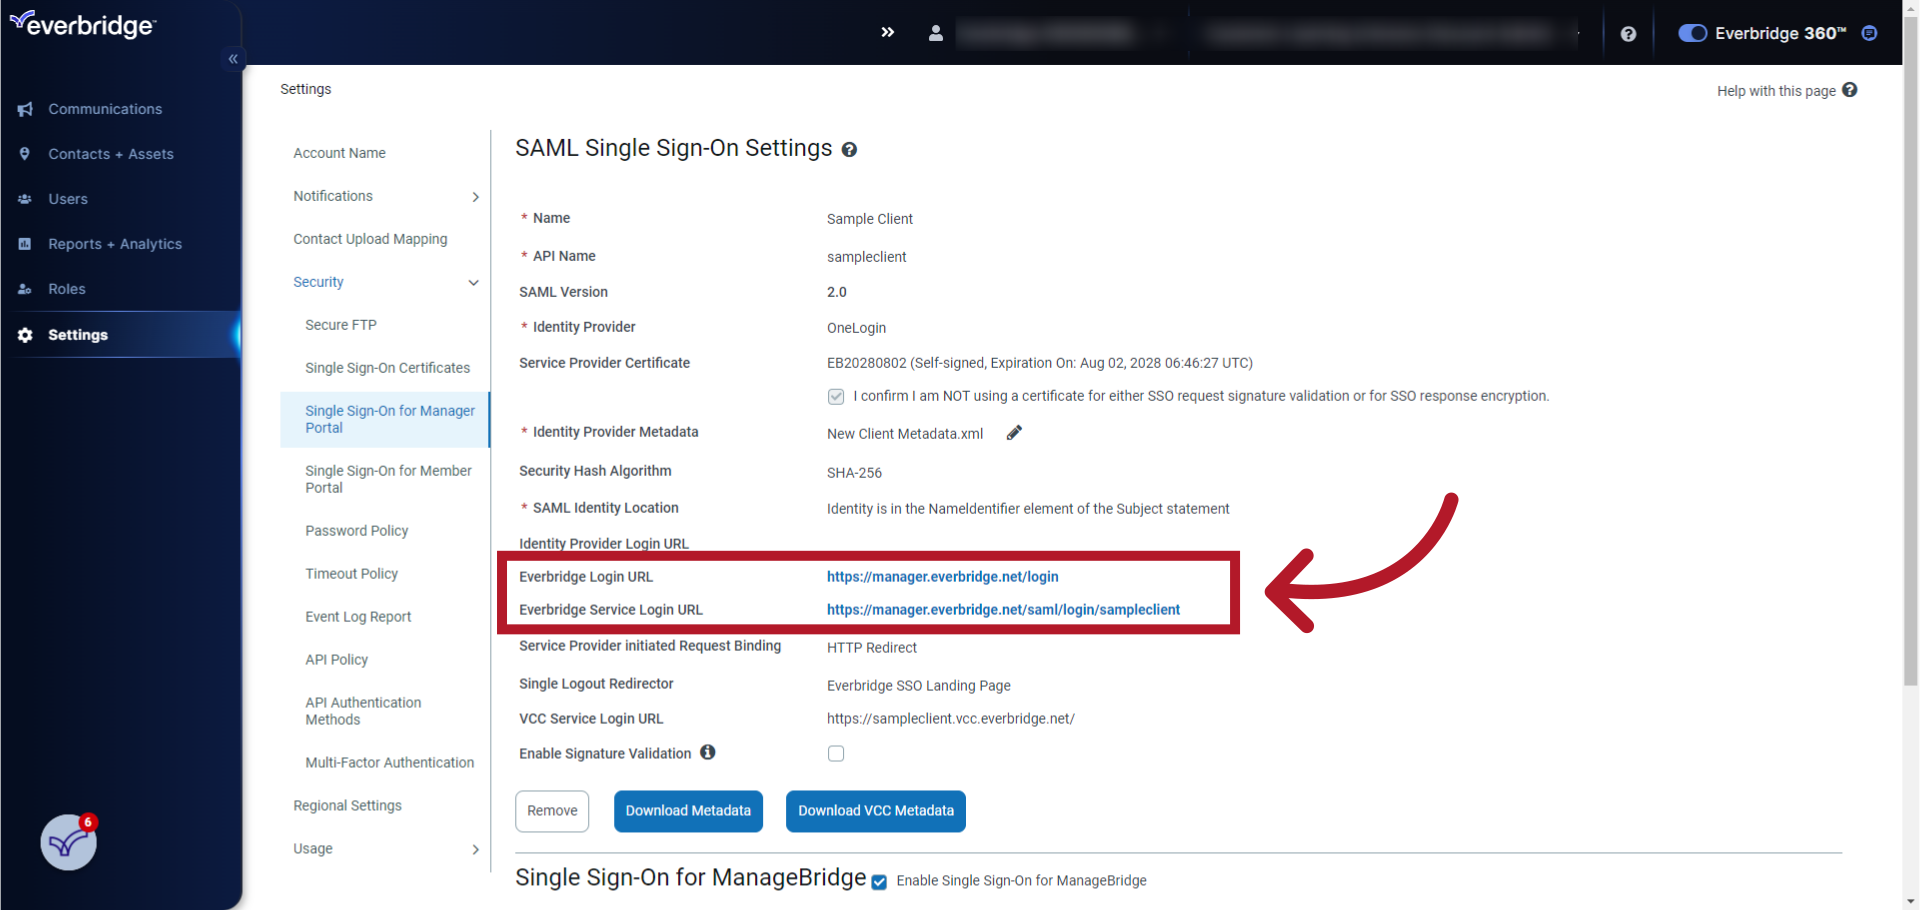
Notice that the end of the Everbridge Service Login URL matches the value entered for the API Name (sampleclient in this example).
Update User SSO IDs
See knowledge article EBS: Updating User SSO IDs in Everbridge Suite.
Test the Manager Portal SSO Configuration
See knowledge article EBS: Testing the Manager Portal Single Sign-On (SSO) Configuration.
Download the Account Metadata
Once you have configured SSO and confirmed via testing that it is working as you expect, Everbridge recommends downloading a copy of the account metadata XML file for record keeping. See knowledge article EBS: Downloading the Manager Portal Single Sign-On Account Metadata.
Important Notes
- Remember that setting up SSO requires Account Admin access. If you only have Organizational Admin permissions, you'll need to request an Account Admin role from your organization's Account Admin before proceeding with the SSO configuration.
- Once SSO is configured, users will need to use a separate SSO login URL that is different from the standard Everbridge login page. This SSO-specific URL can be found in your Everbridge account's SSO configuration settings.
- After enabling SSO, if you need to deregister users, you can do so by deleting and re-creating them. However, it's crucial not to send a registration email to these users after re-creation, as the username and password login will still be available if SSO is not functioning properly.
- It's recommended to implement SSO gradually for users in your organization. This approach allows for a smoother transition and easier troubleshooting if any issues arise.
- If you encounter any difficulties during the SSO setup process or need additional assistance, don't hesitate to contact Everbridge Technical Support for guidance.