Topic
How to configure Single Sign-On (SSO) for use with the Everbridge Manager Portal.
Description
Configuring Single Sign-On for an Everbridge account can vary based on the Identity Provider (IdP).
Overview
Setting up SSO for the Everbridge Manager Portal consists of the following tasks:
- Prerequisites
- Configure Manager Portal SSO Settings
- Obtain the Everbridge Login URL and Everbridge Service Login URL
- Update User SSO IDs
- Test the Manager Portal SSO Configuration
- Download the Account Metadata
Prerequisites
See knowledge article EBS: Single Sign-On (SSO) Prerequisites.
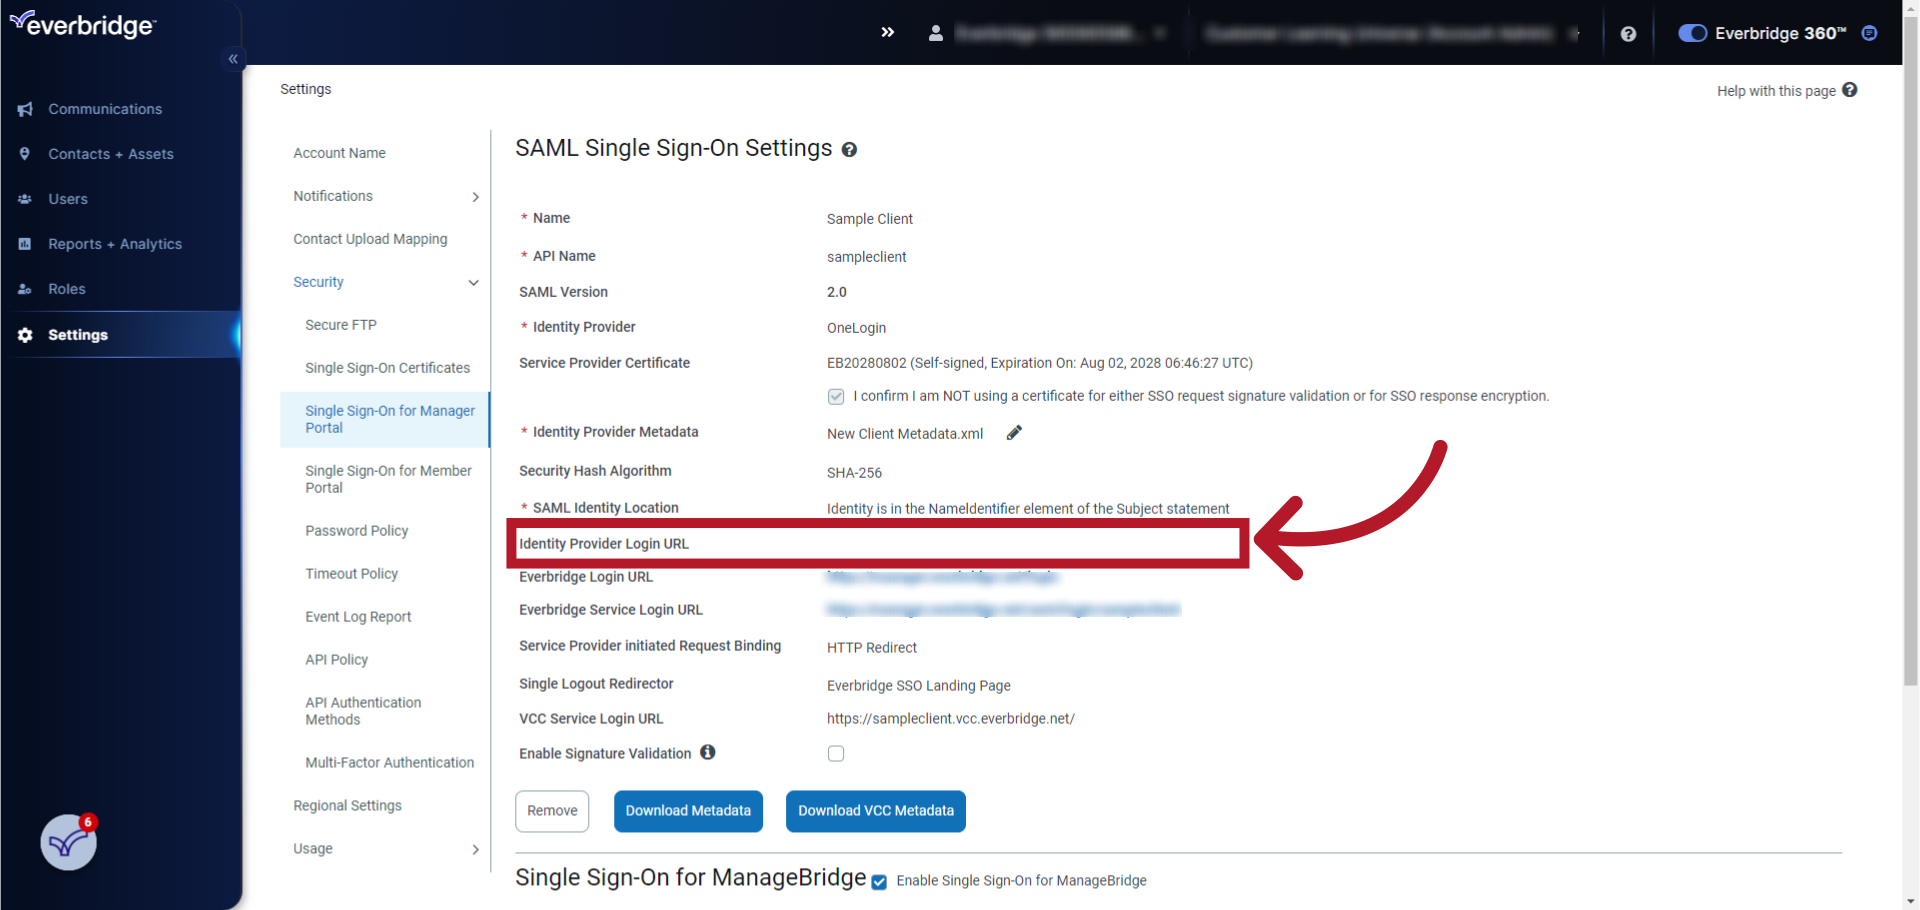
Configure Manager Portal SSO Settings
This guide will walk you through configuring Manager Portal SSO Settings in Everbridge.
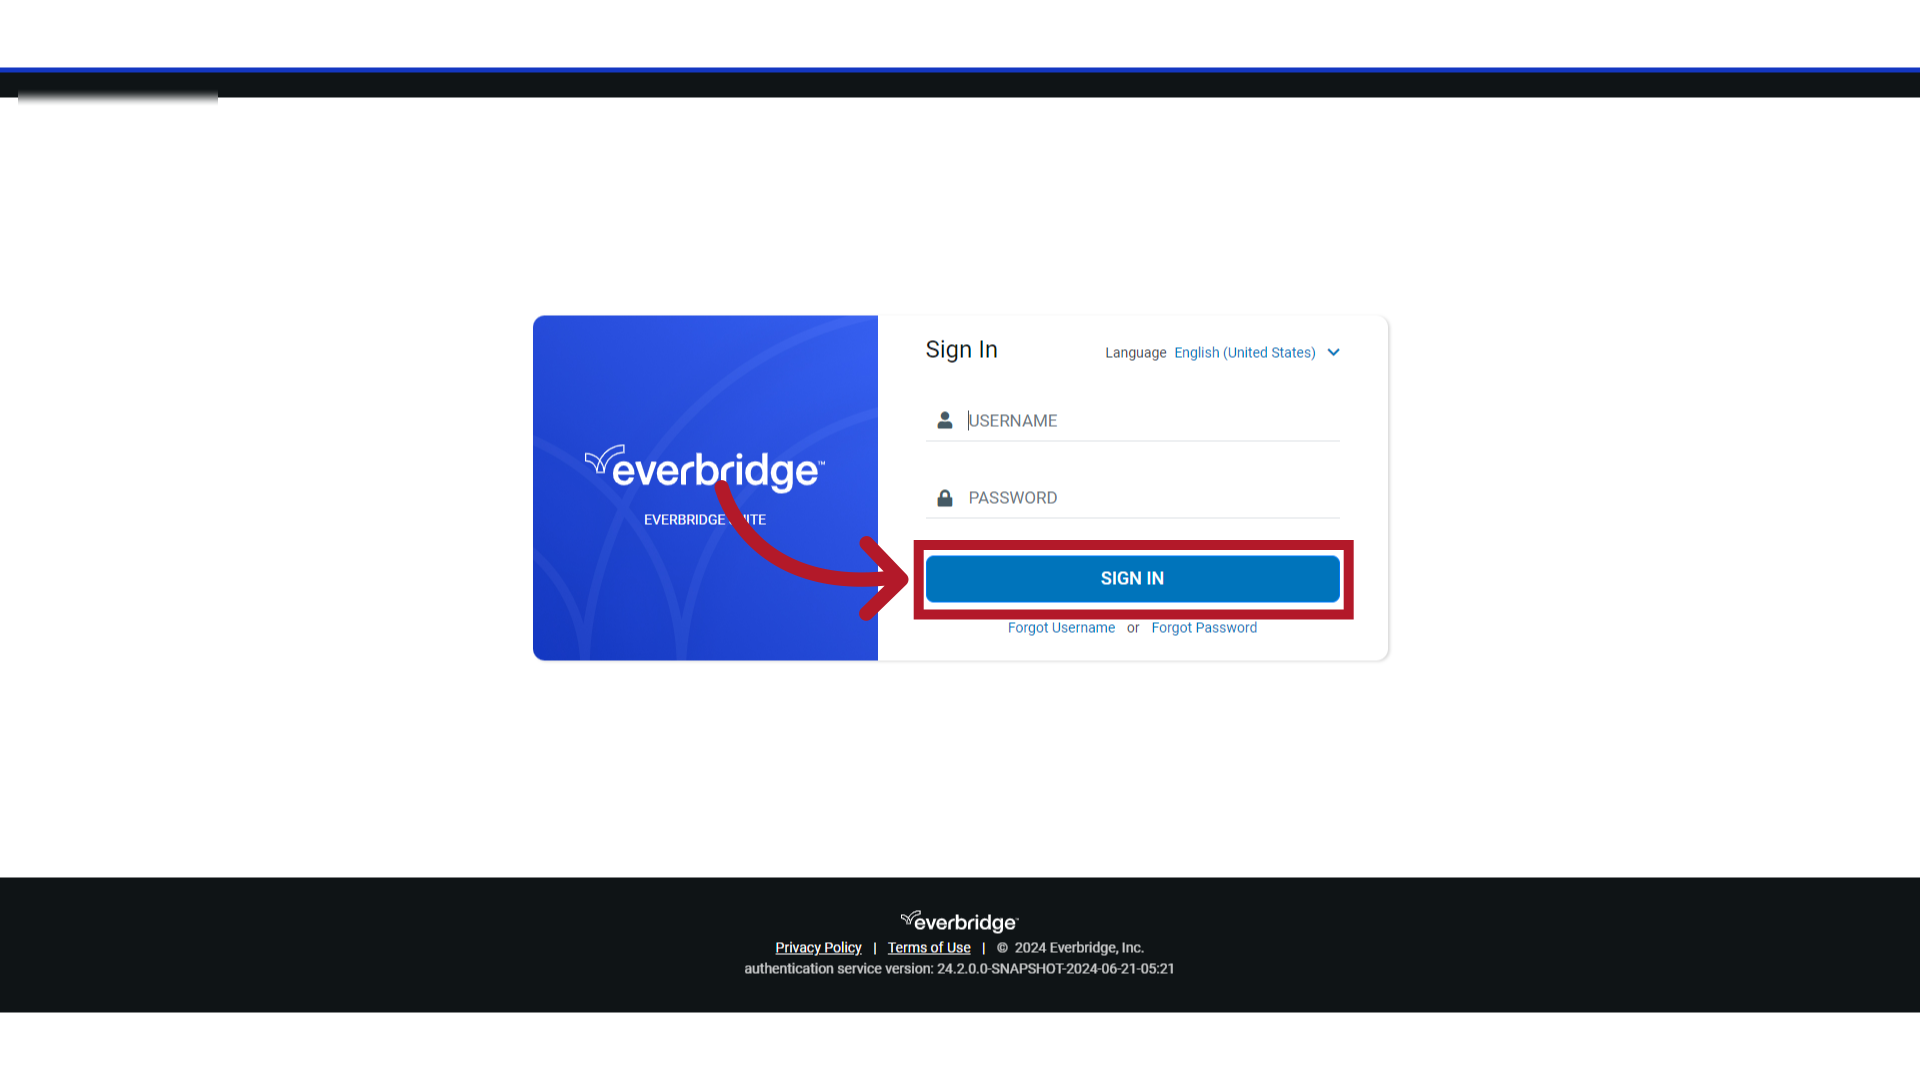
1. Login Page
Log in to the Everbridge Manager Portal as an Account Administrator.
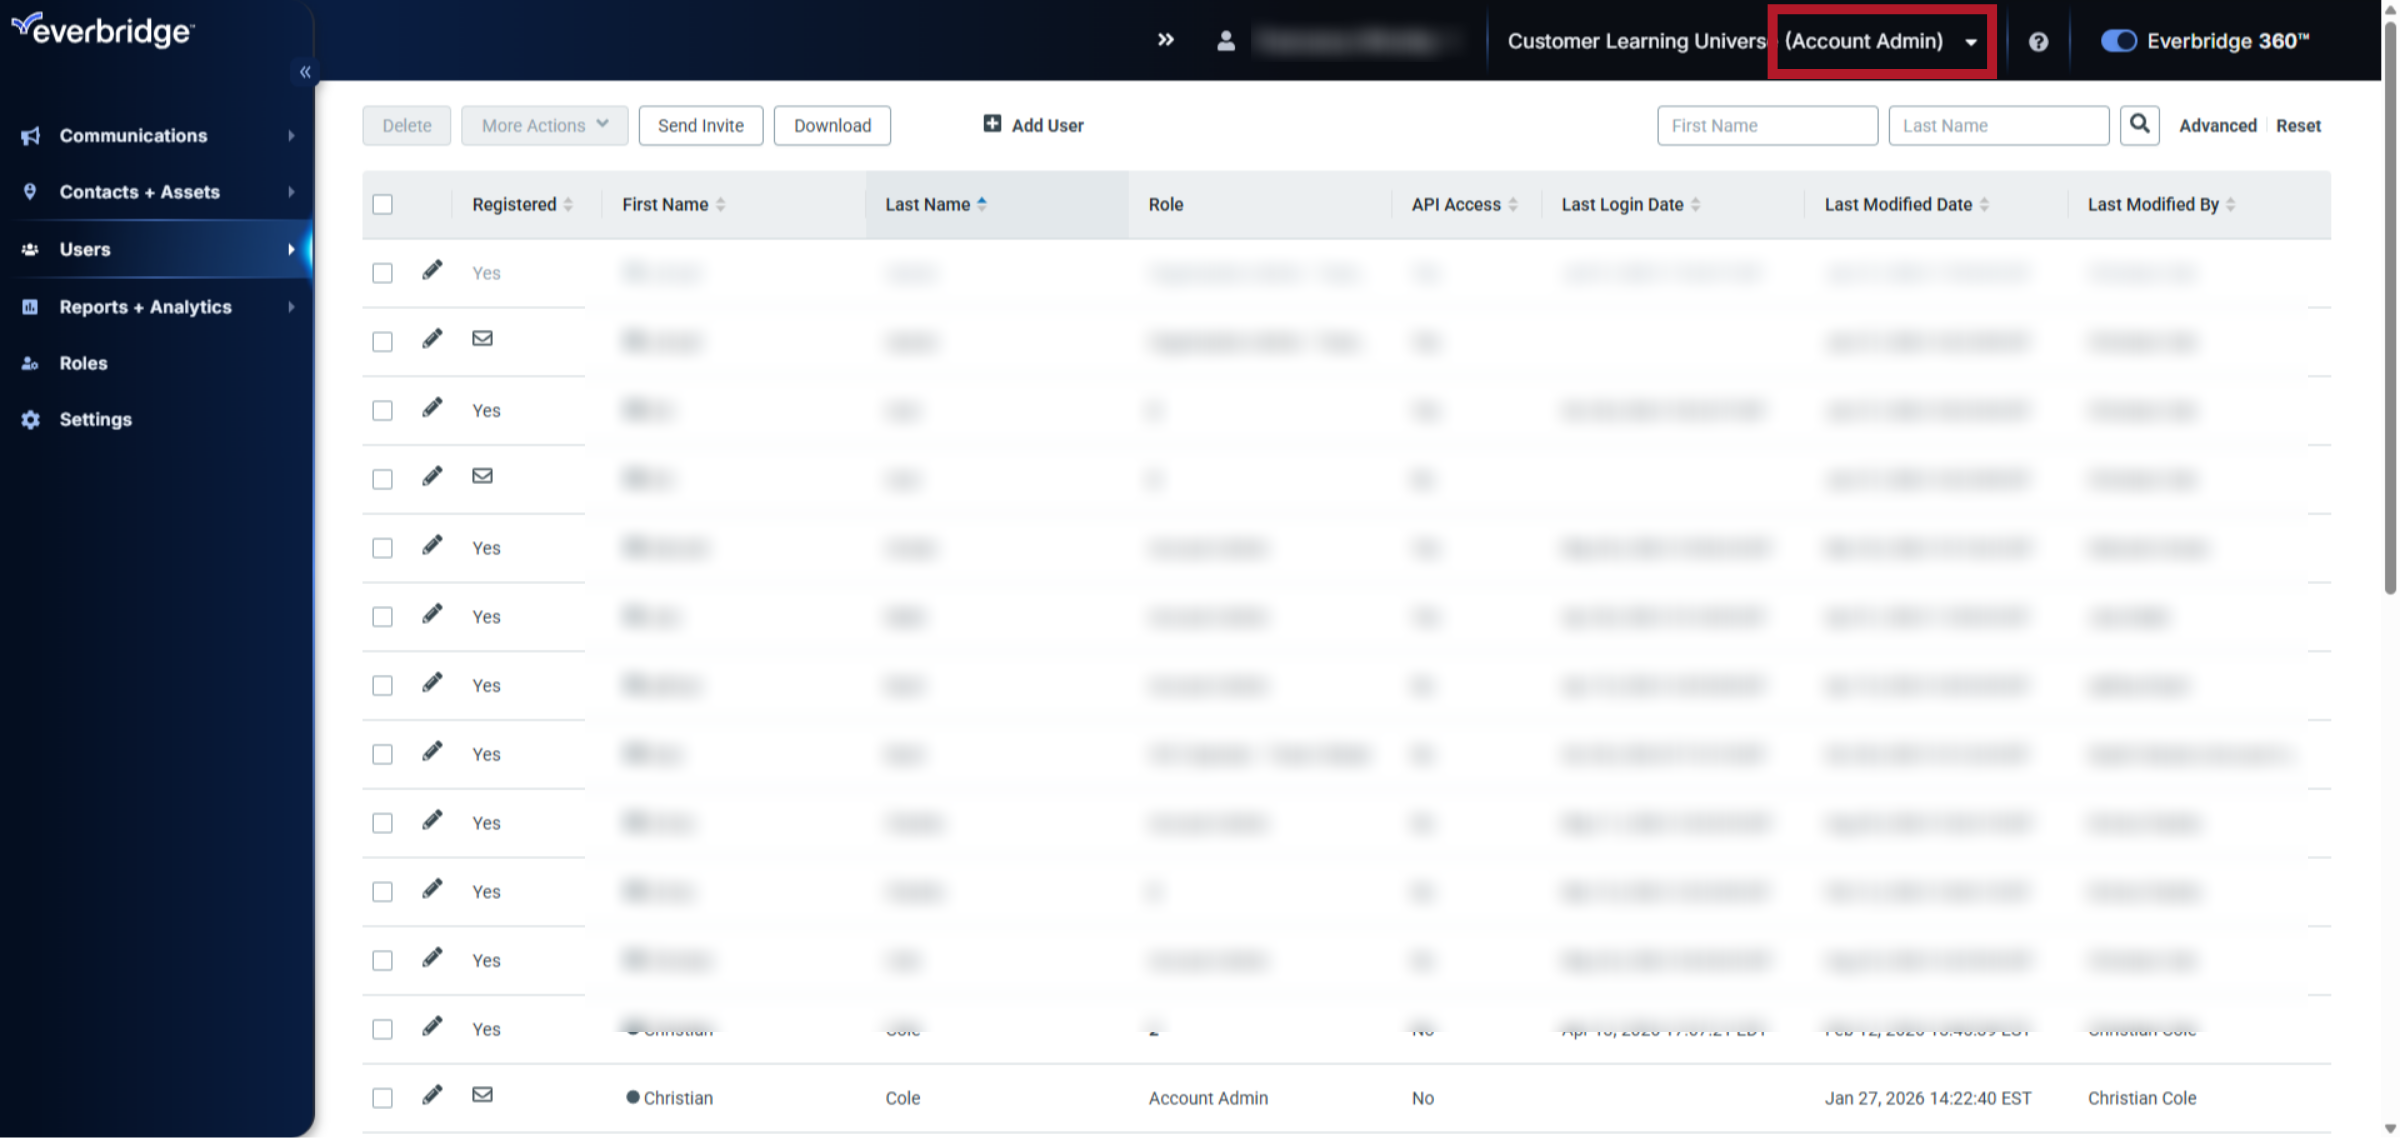
2. Manager Portal
Ensure you are at the Account level.
3. Settings
Select "Settings".
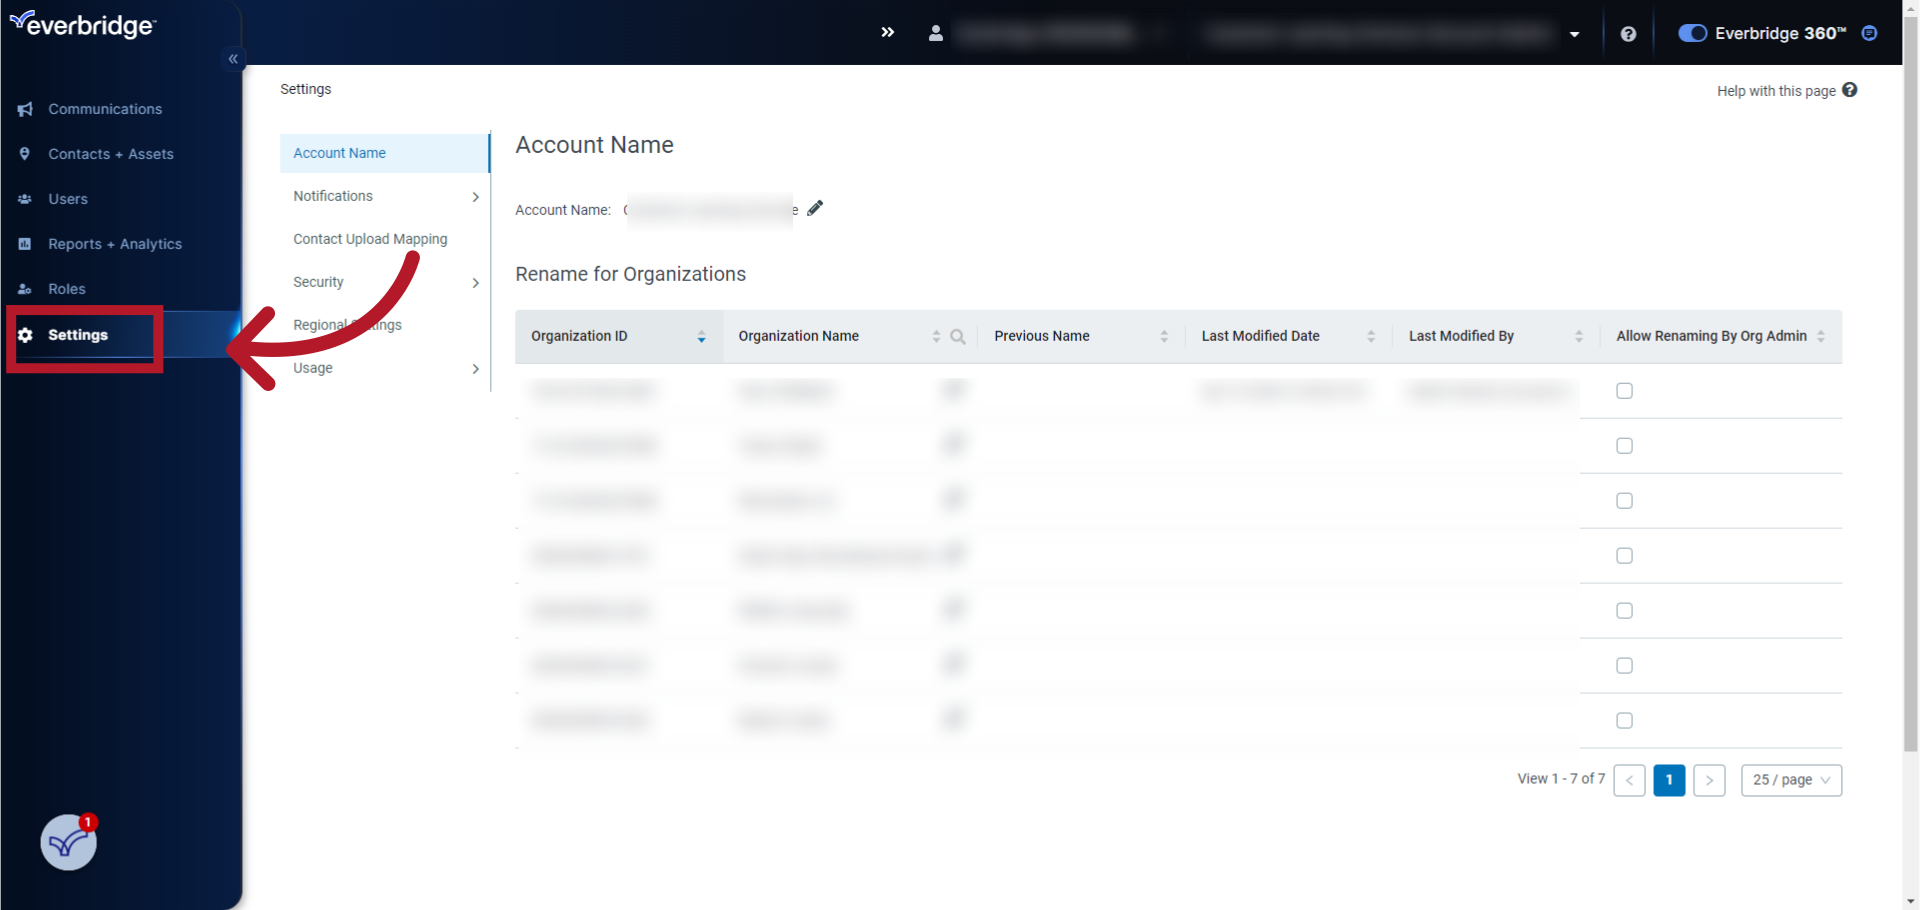
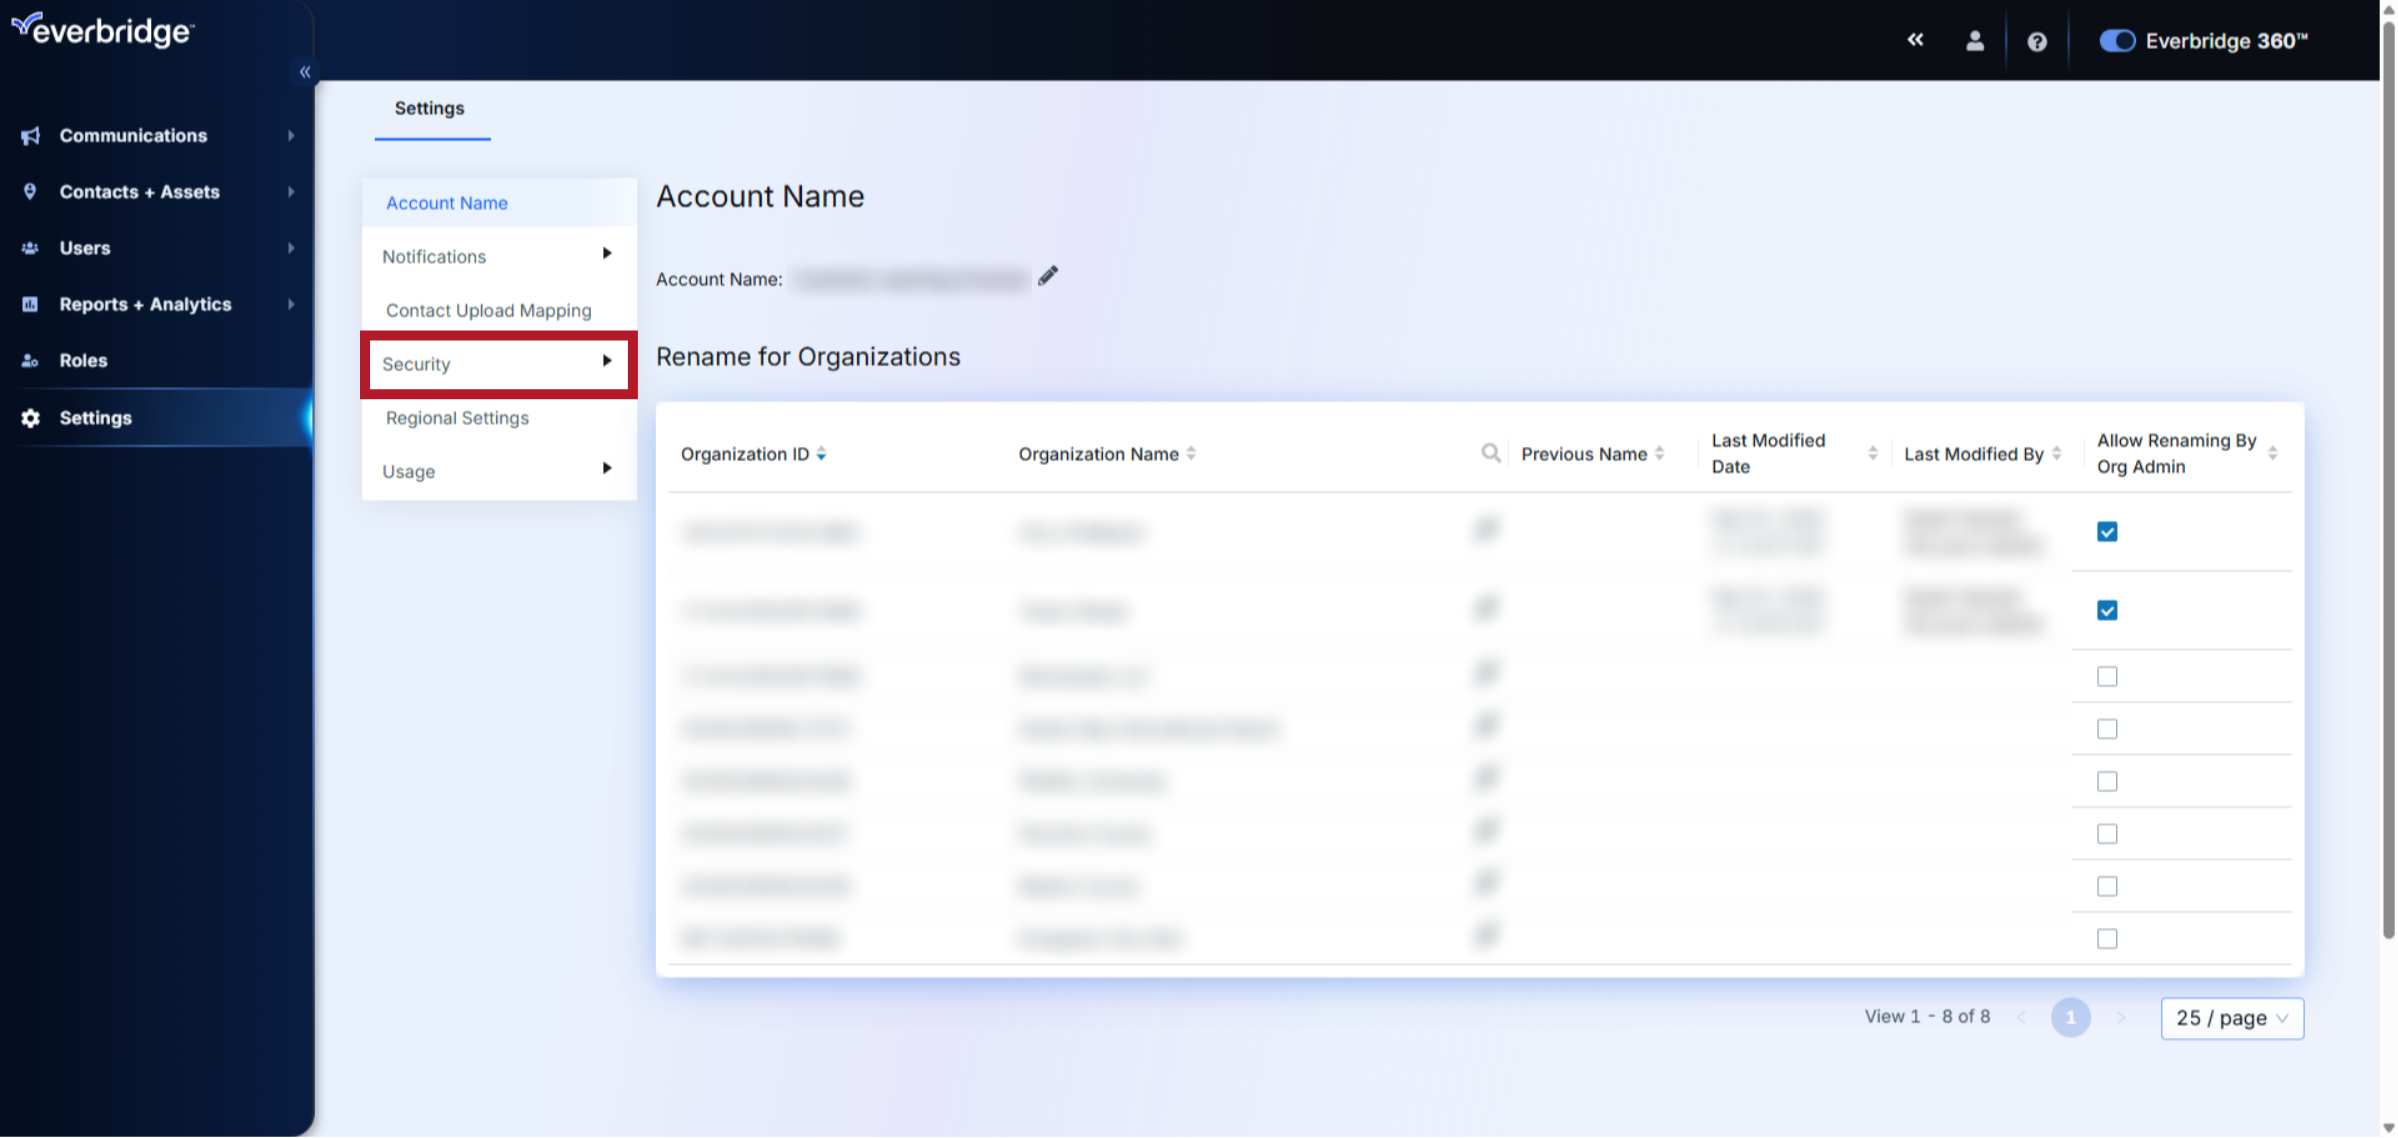
4. Security
Select "Security".
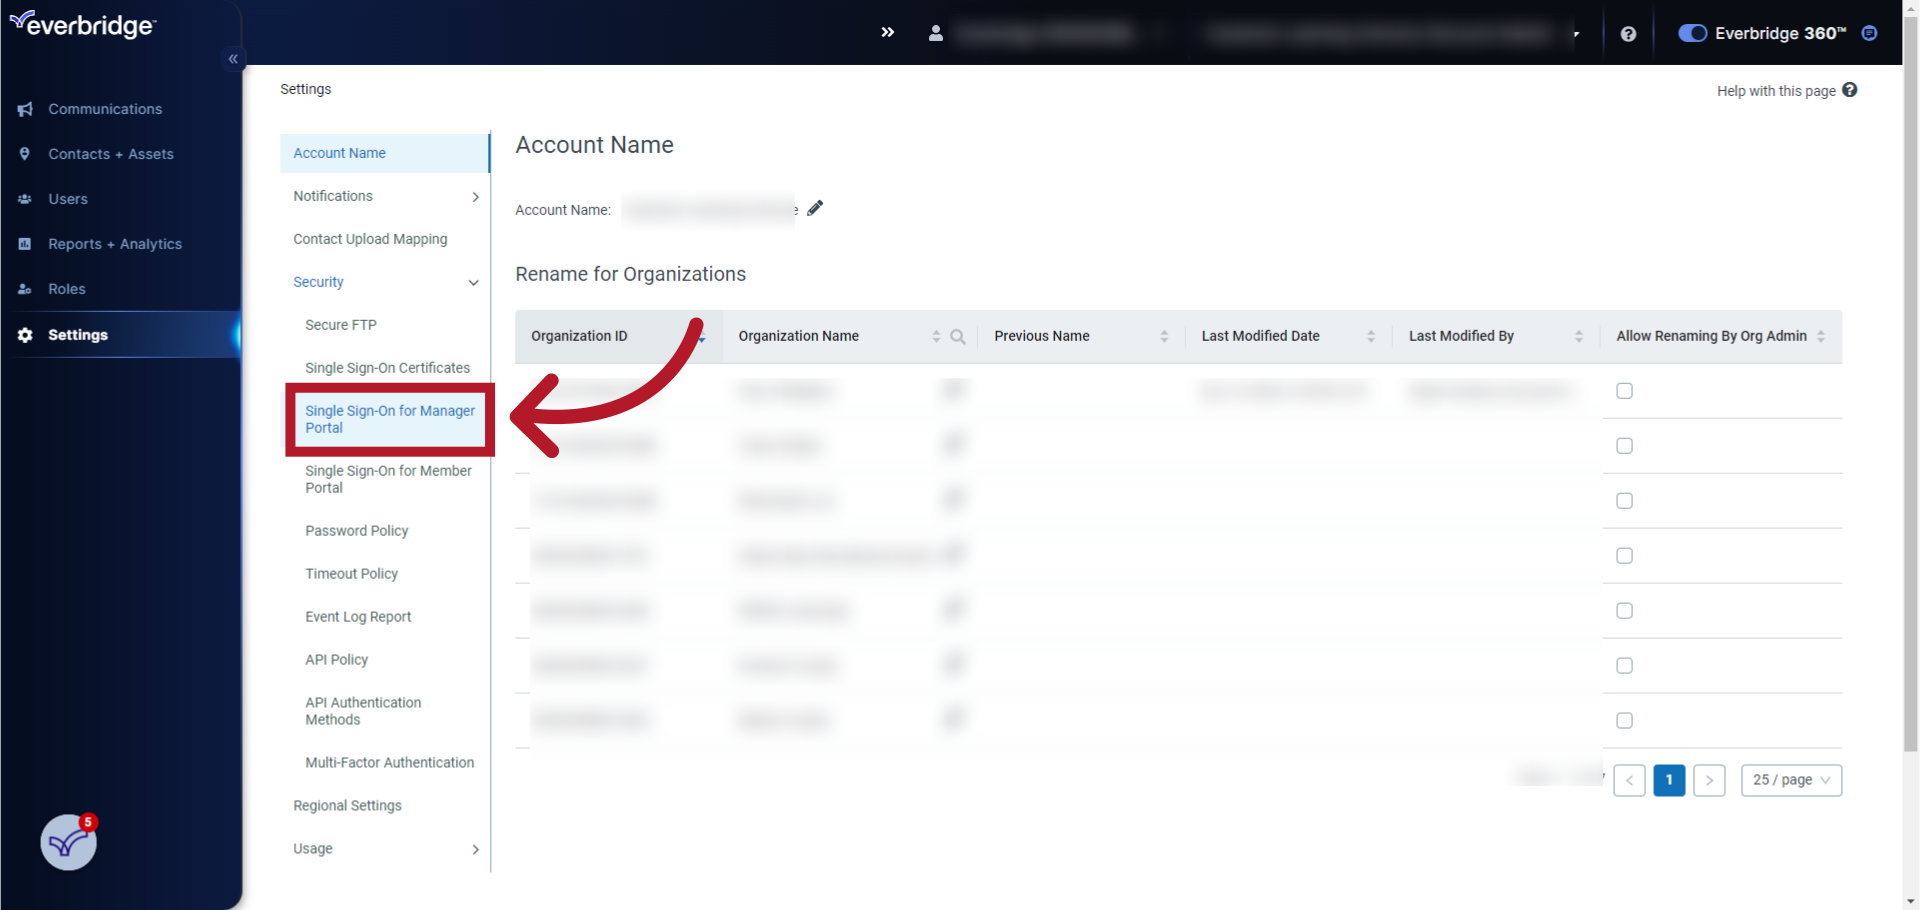
5. Single Sign-On for Manager Portal
Select "Single Sign-On for Manager Portal".
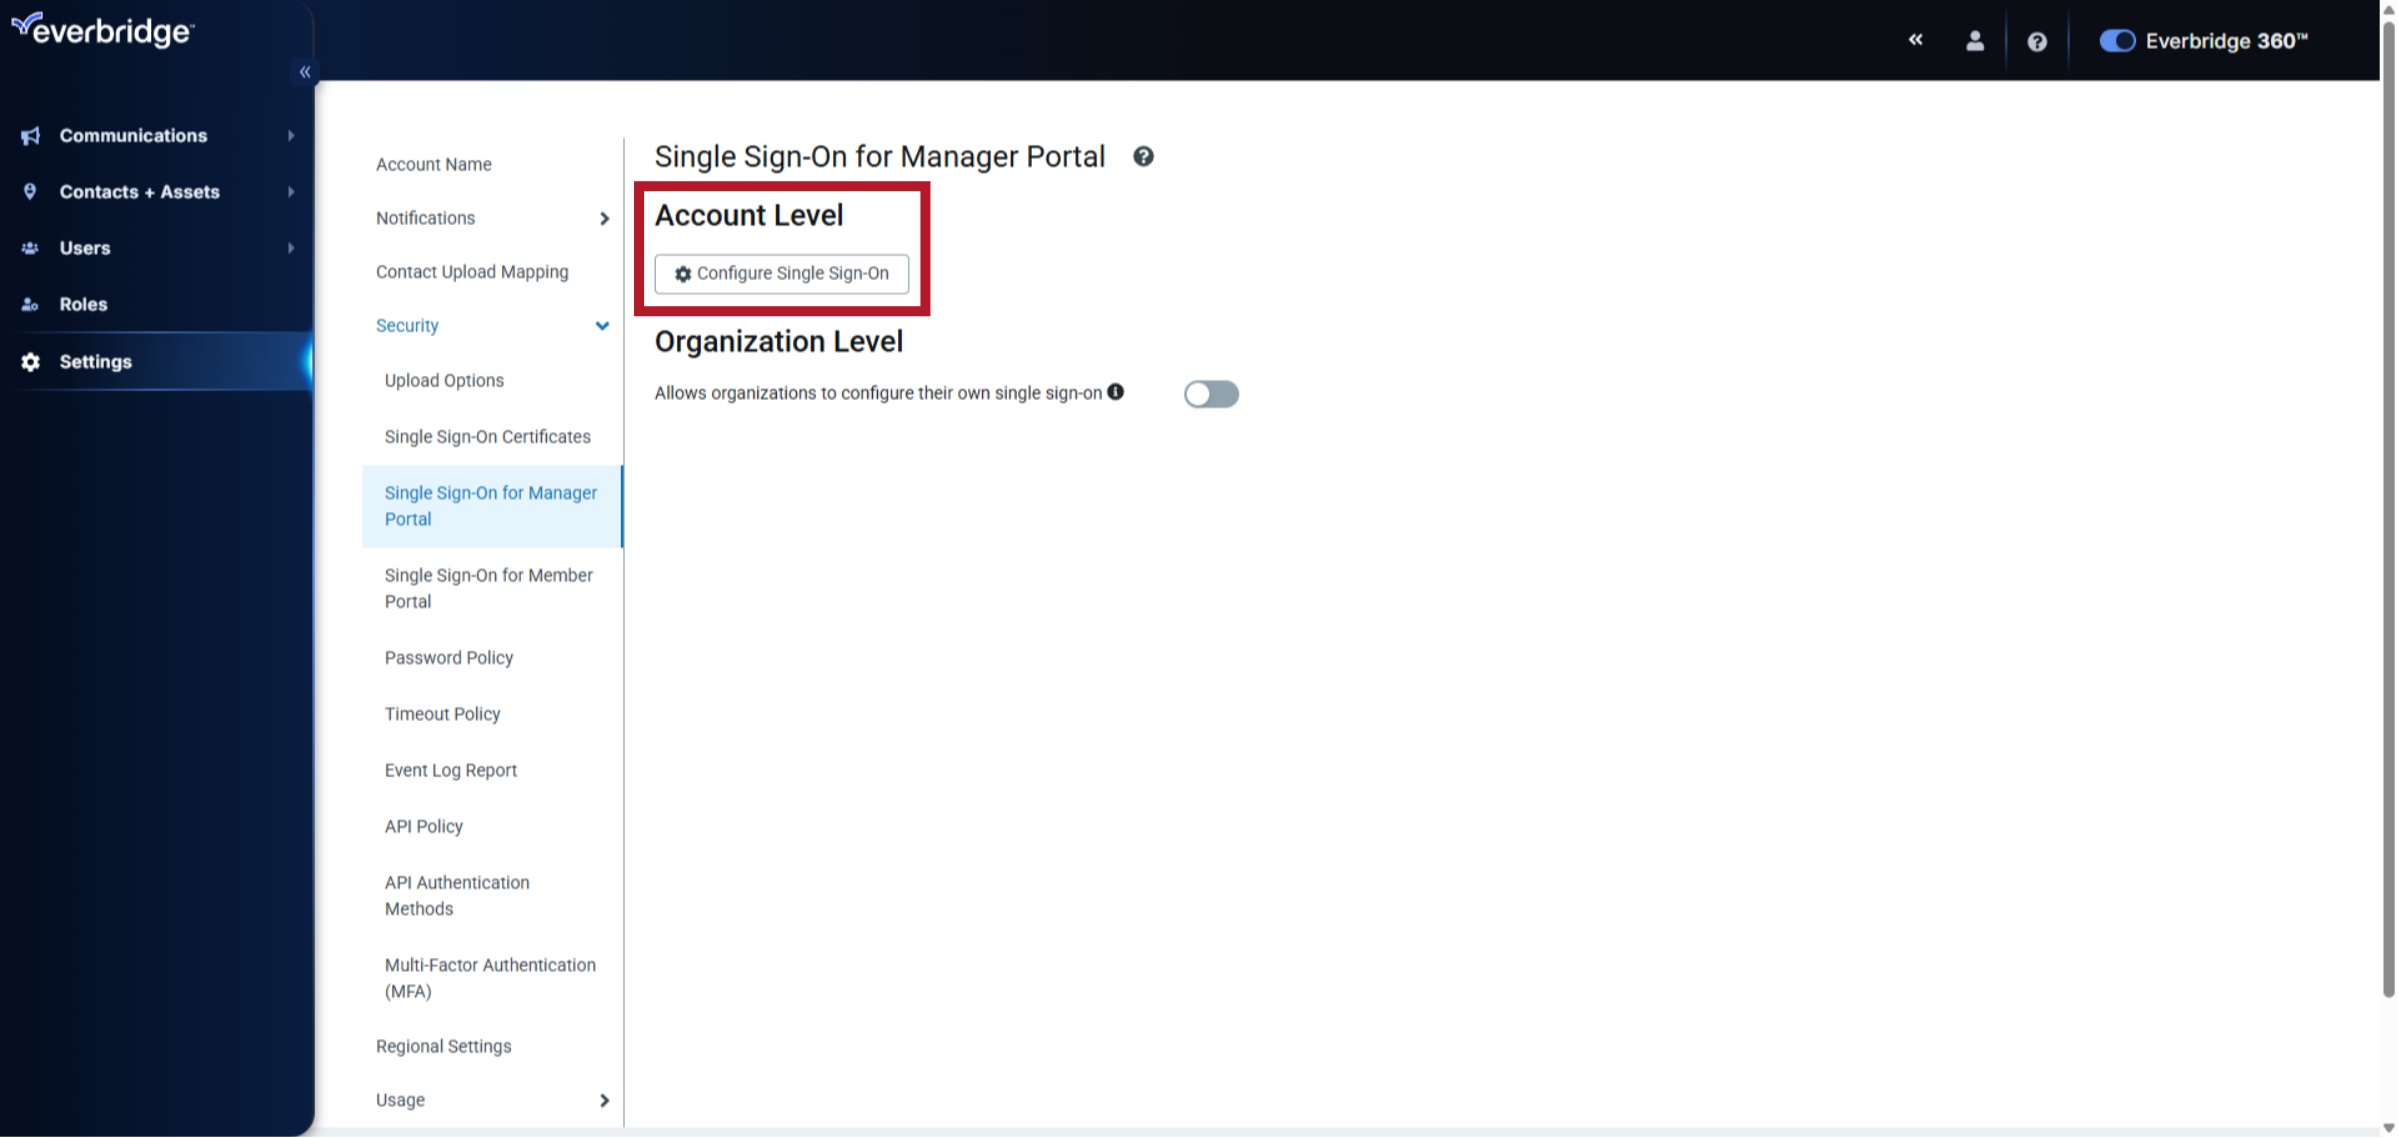
6. Configure Single Sign-On
Select "Configure Single Sign-On"
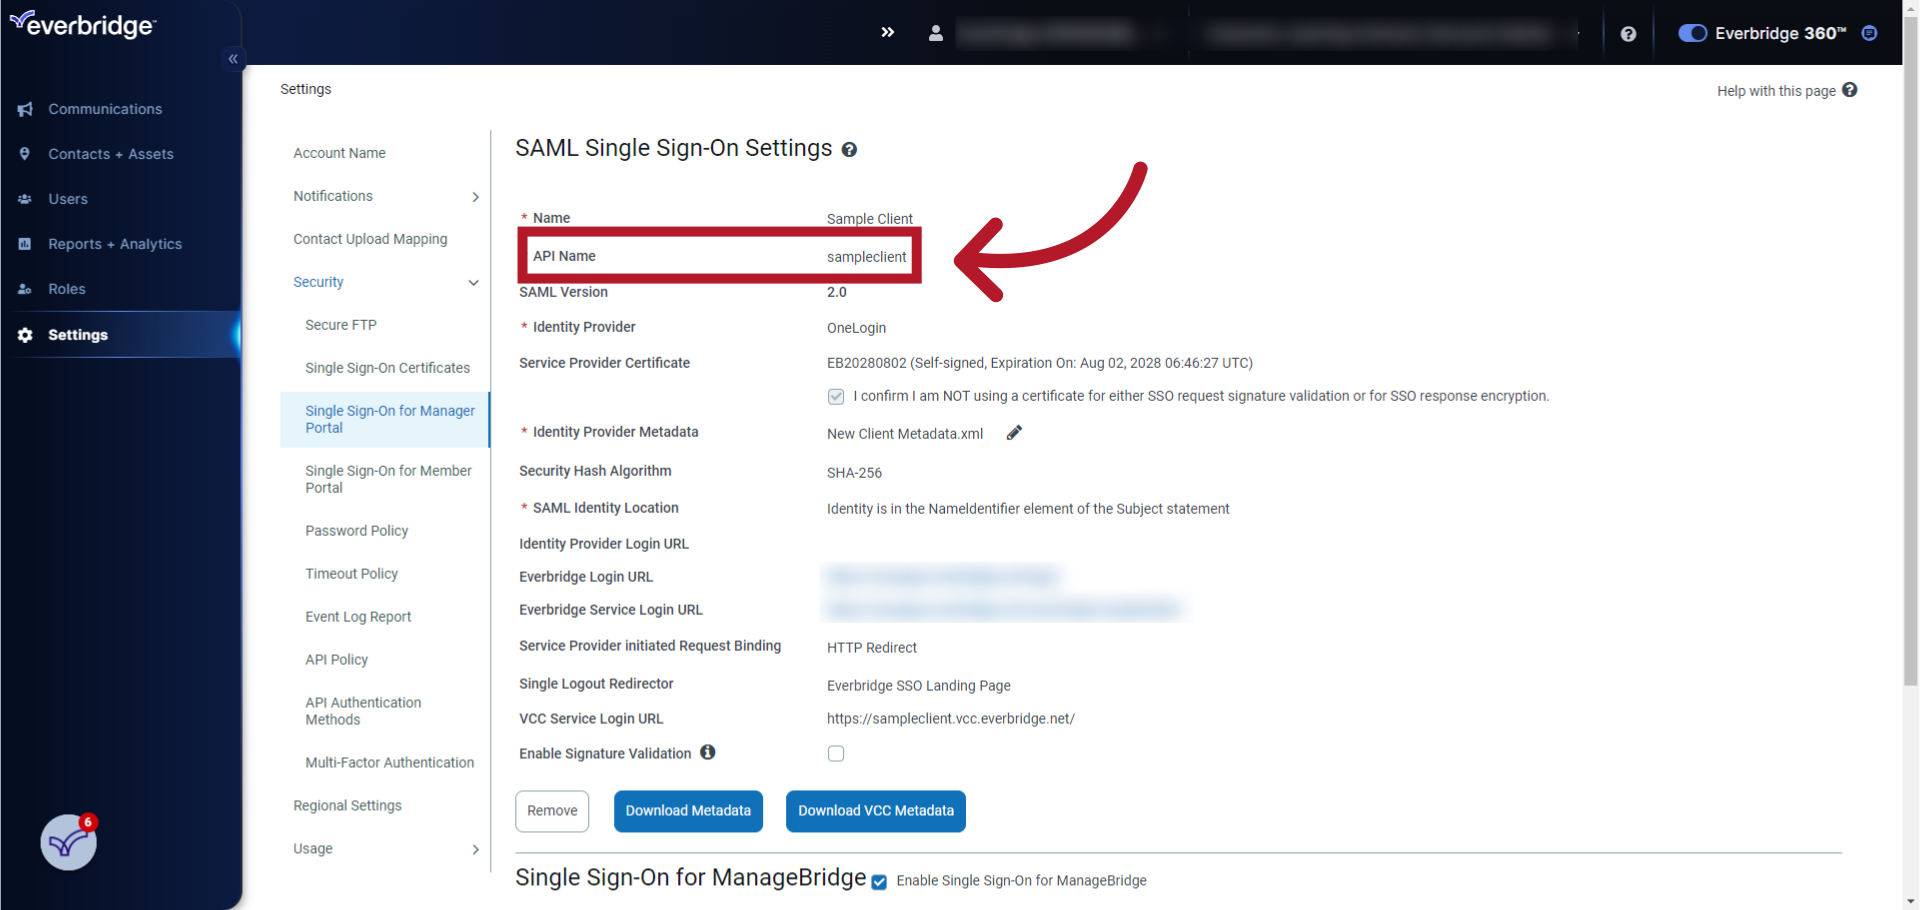
7. Name
Enter a "Name" for your Single Sign-On configuration.

8. API Name
Enter the "API Name" for your Single Sign-On configuration. The API Name must match exactly what you provided in the Entity ID and Reply URL fields in your IdP. Everbridge recommends using all lowercase as a best practice.
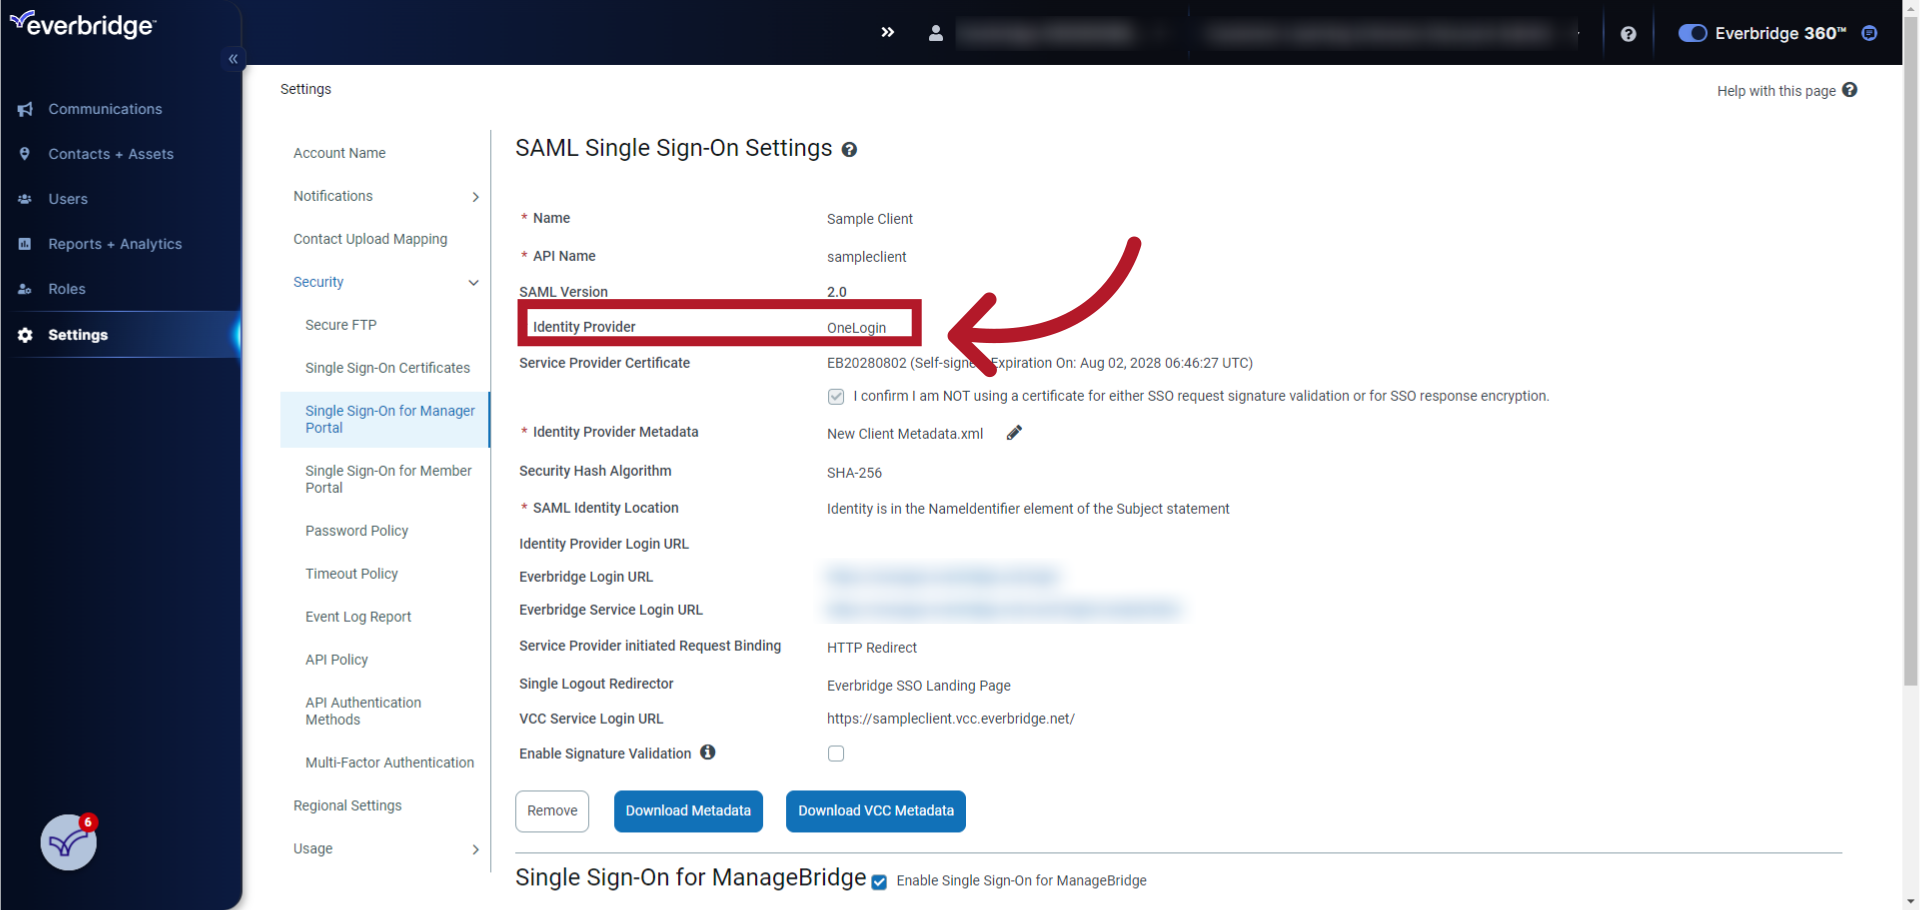
9. Identity Provider (IdP)
Select your "Identity Provider" from the drop-down menu.
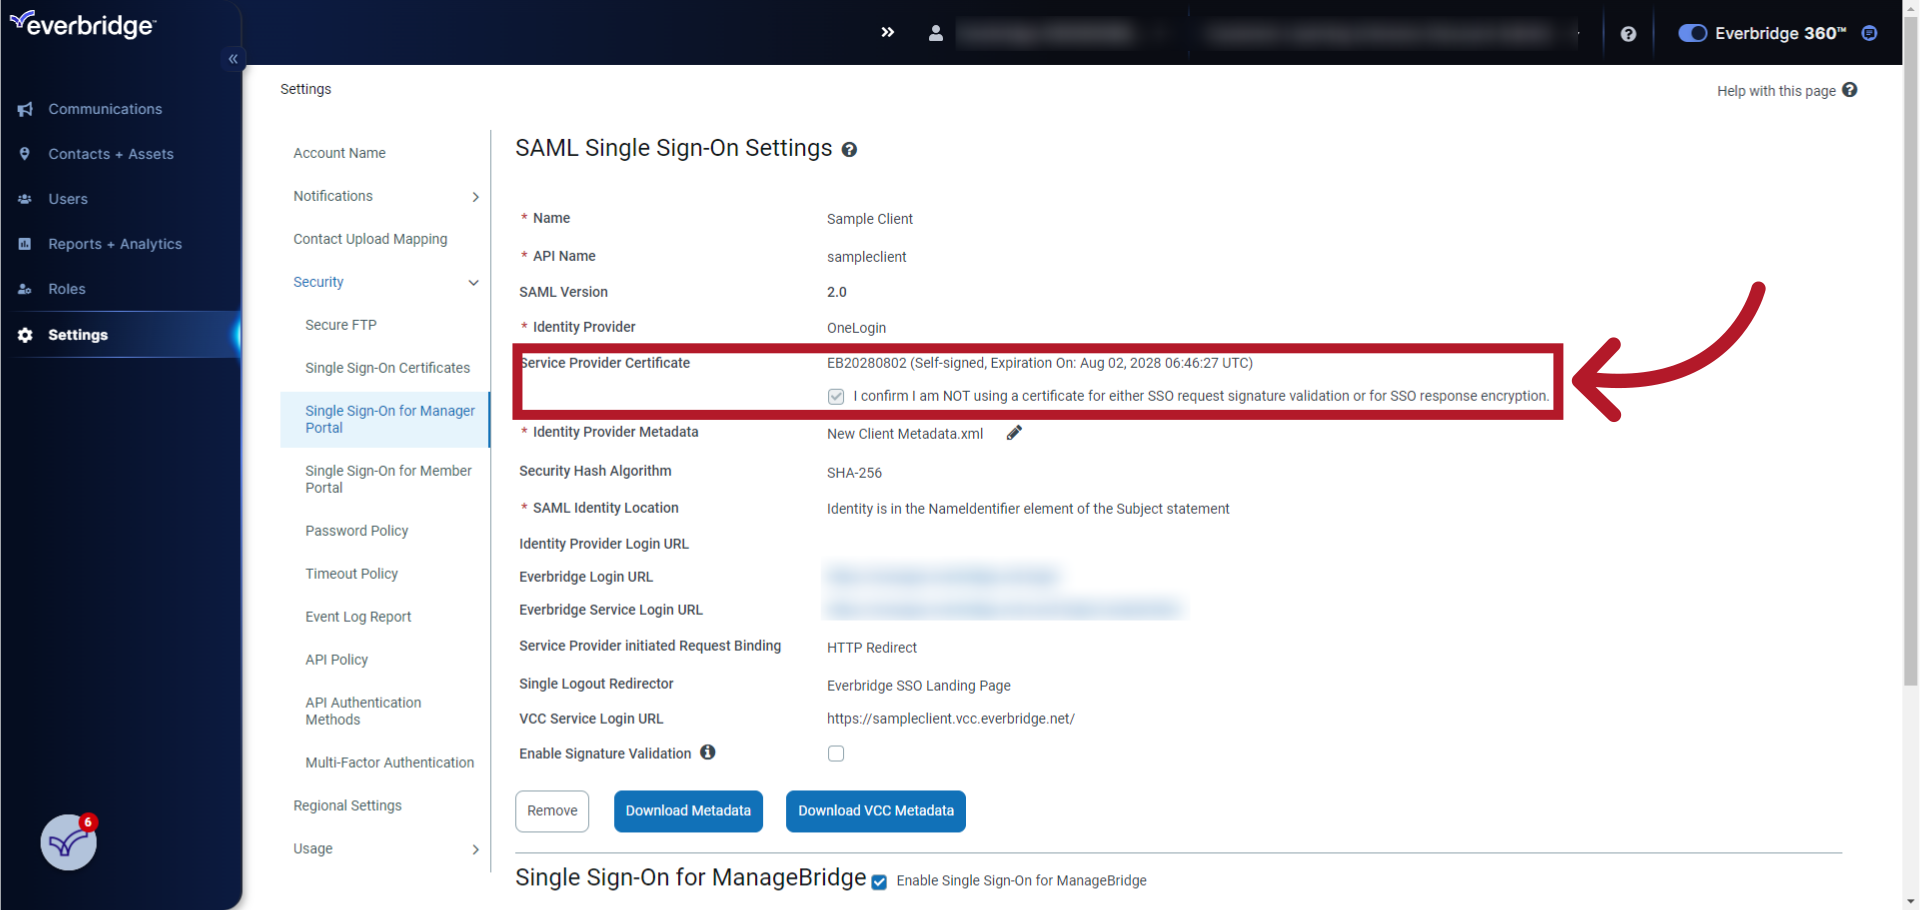
10. Service Provider (SP) Certificate information
Enter the "Service Provider Certificate" information.
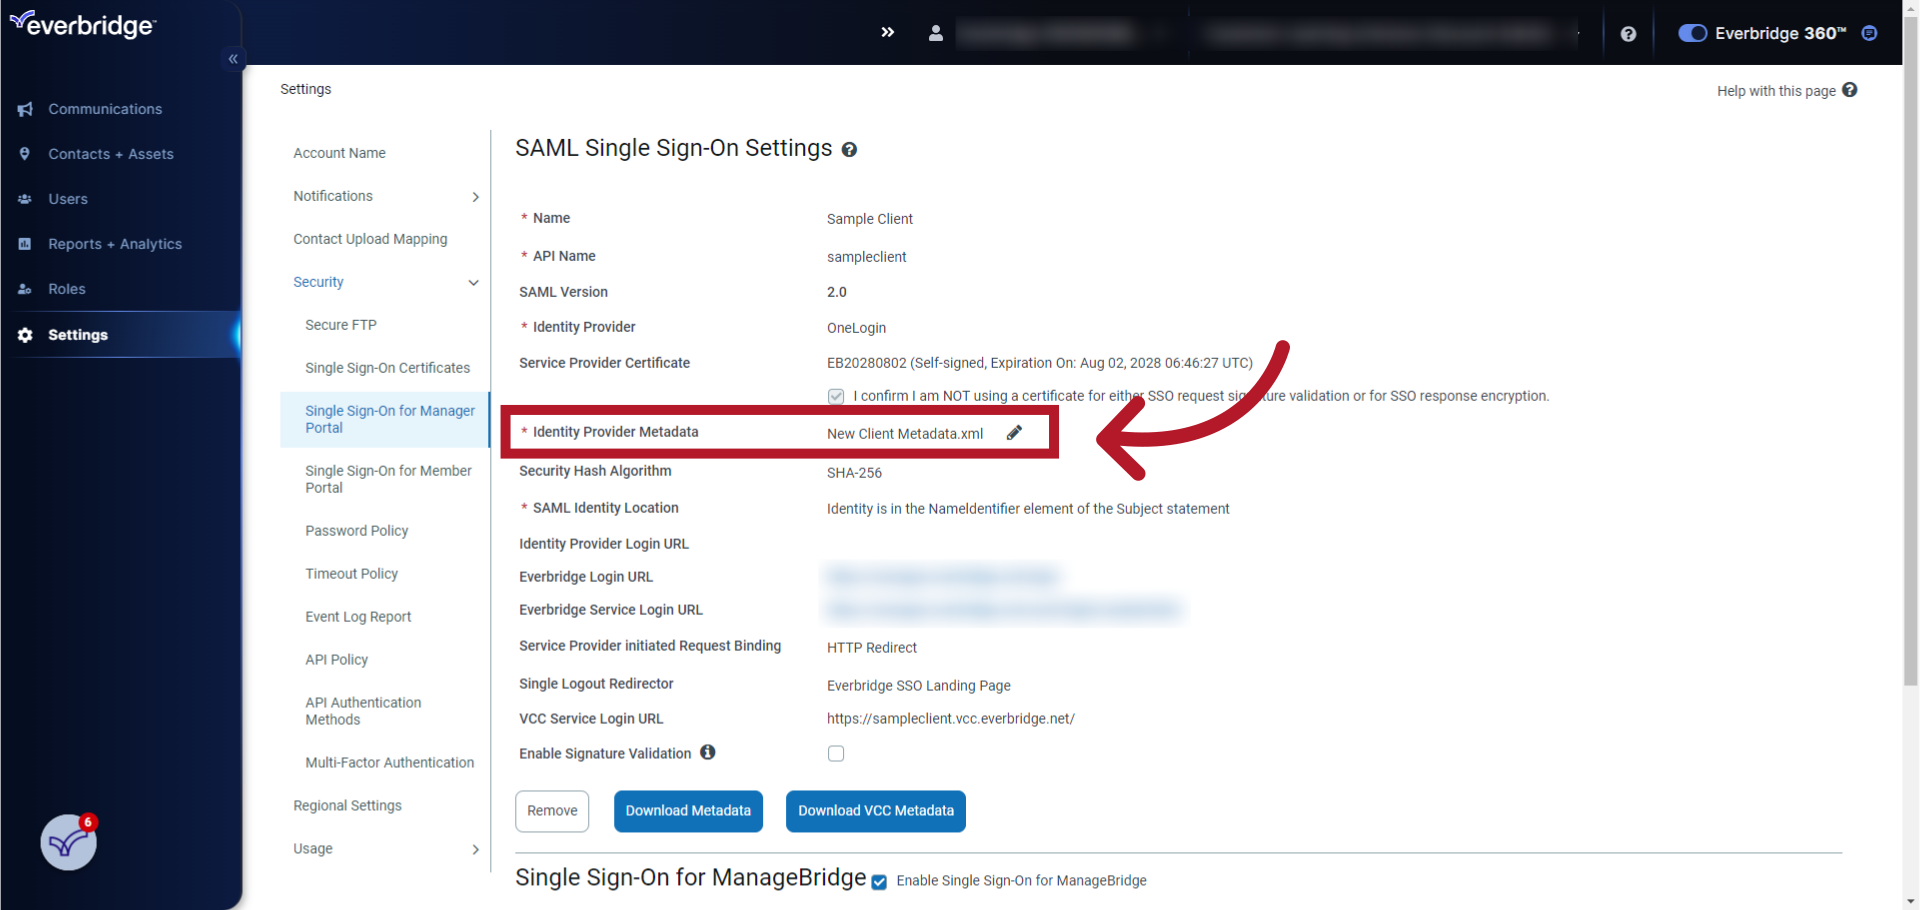
11. Upload the Identity Provider (IdP) Metadata file
Upload the "Identity Provider Metadata" file.
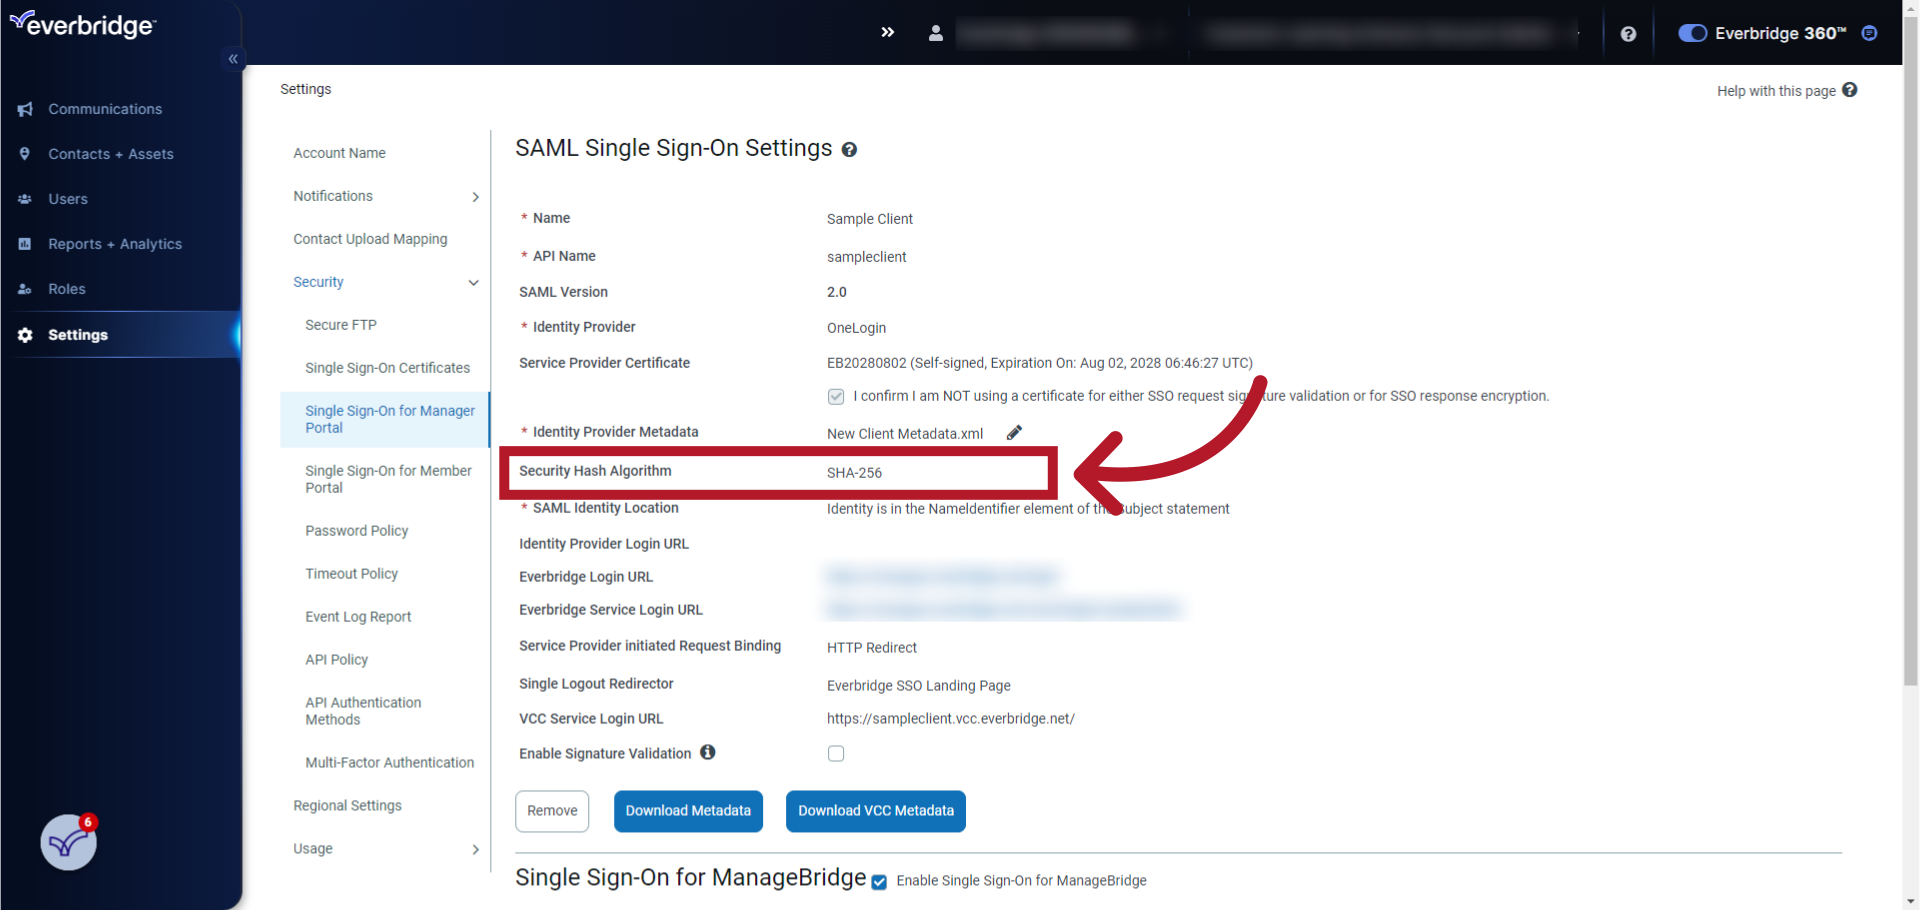
12. Security Hash Algorithm
Choose your "Security Hash Algorithm."
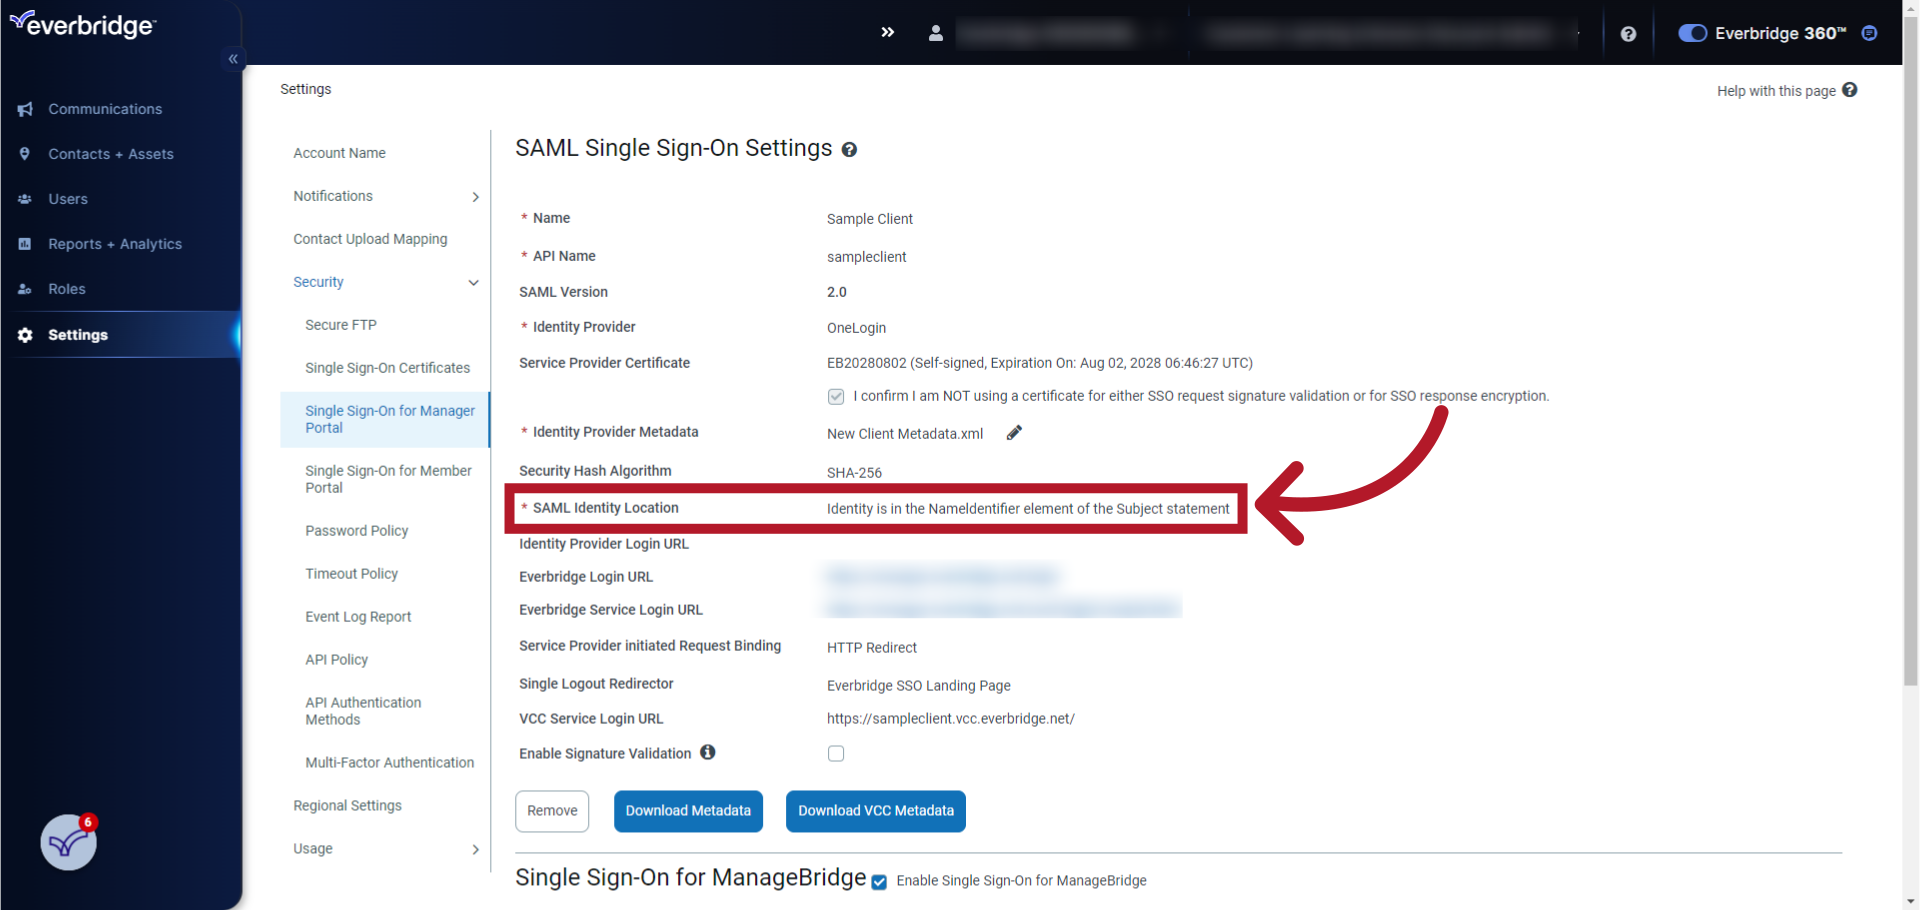
13. SAML Identity Location
Note the "SAML Identity Location."
14. Identity Provider (IdP) Login URL
Optionally enter the login URL of your Identity Provider.
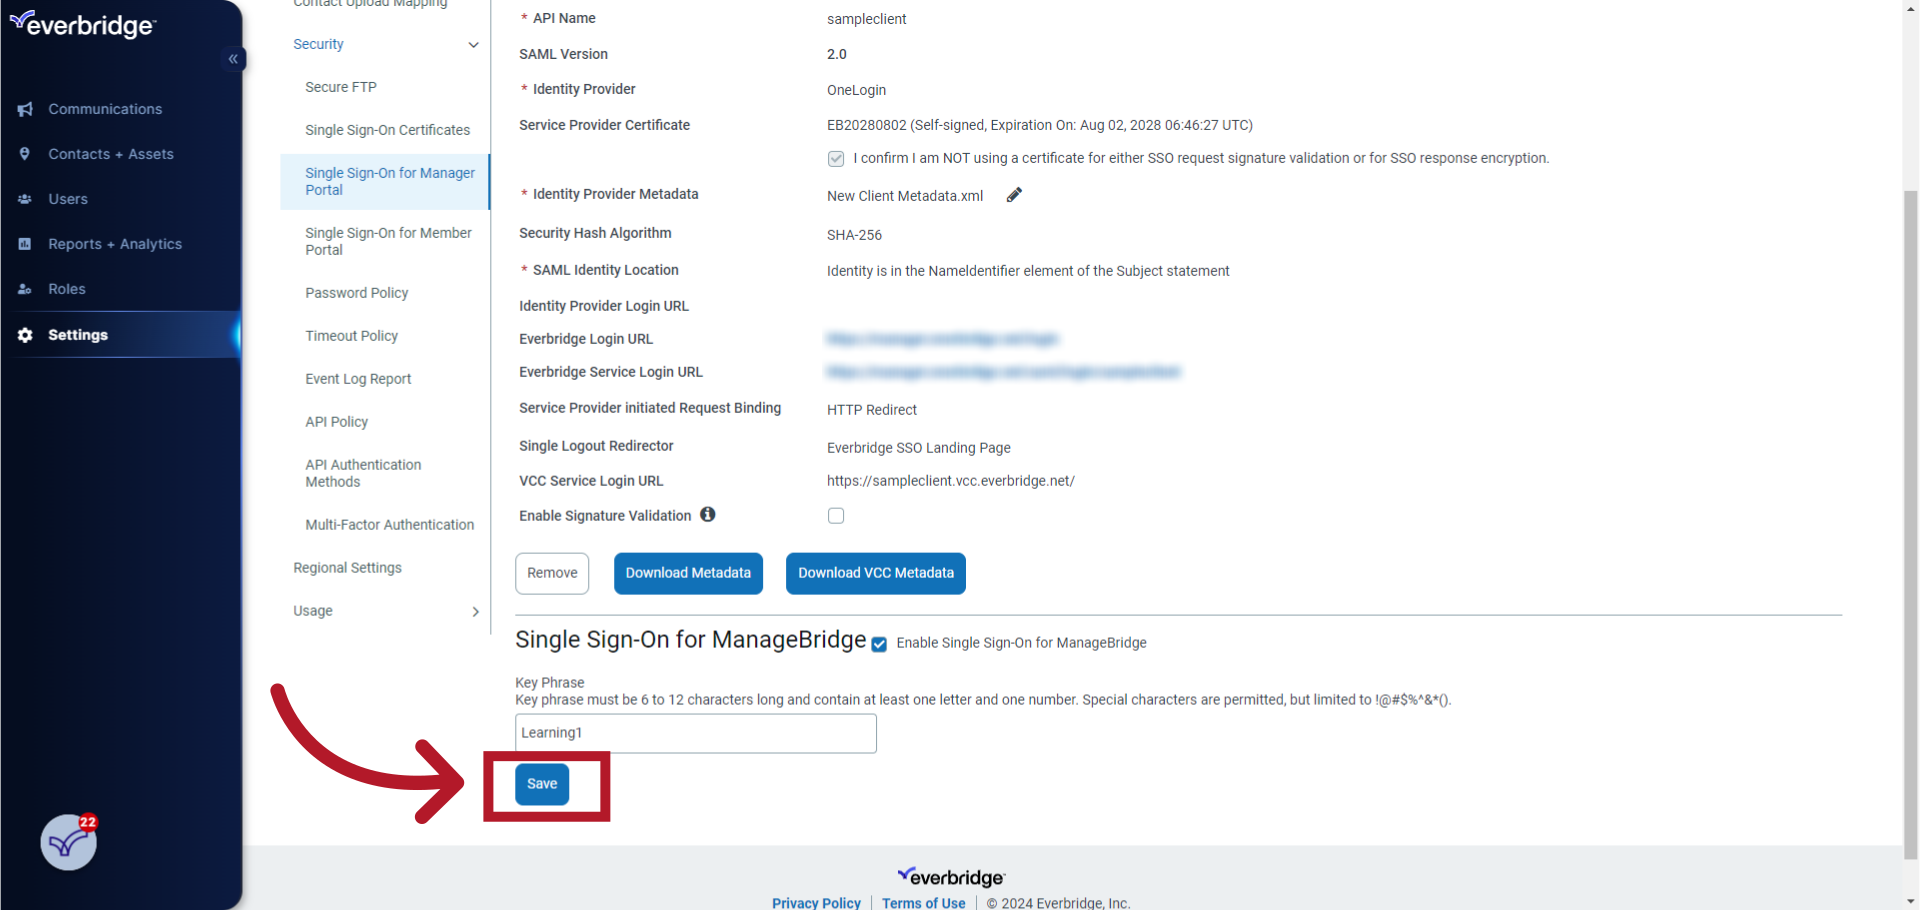
15. Save
Scroll to the top and click "Save."
Thank you.