⚠️ This is Part 2 of a two-part series on Everbridge 360™ CEM Orchestration Workflows. If you haven't yet reviewed the basics, please start with Part 1: Overview & Navigation before proceeding with this article.
Topic
CEM: Everbridge 360™ CEM Orchestration Workflows (Part 2) - Filters & Actions
Description
The Everbridge 360™ Enterprise solution provides preconfigured alerting workflows through CEM Orchestration, allowing you to easily generate alerts in Visual Command Center when a risk event occurs near your contacts or assets. In this tutorial, we will take a closer look at how to modify the default Filters and Actions within a workflow to better support your alerting requirements.
Go to manager.everbridge.net
1. Modify
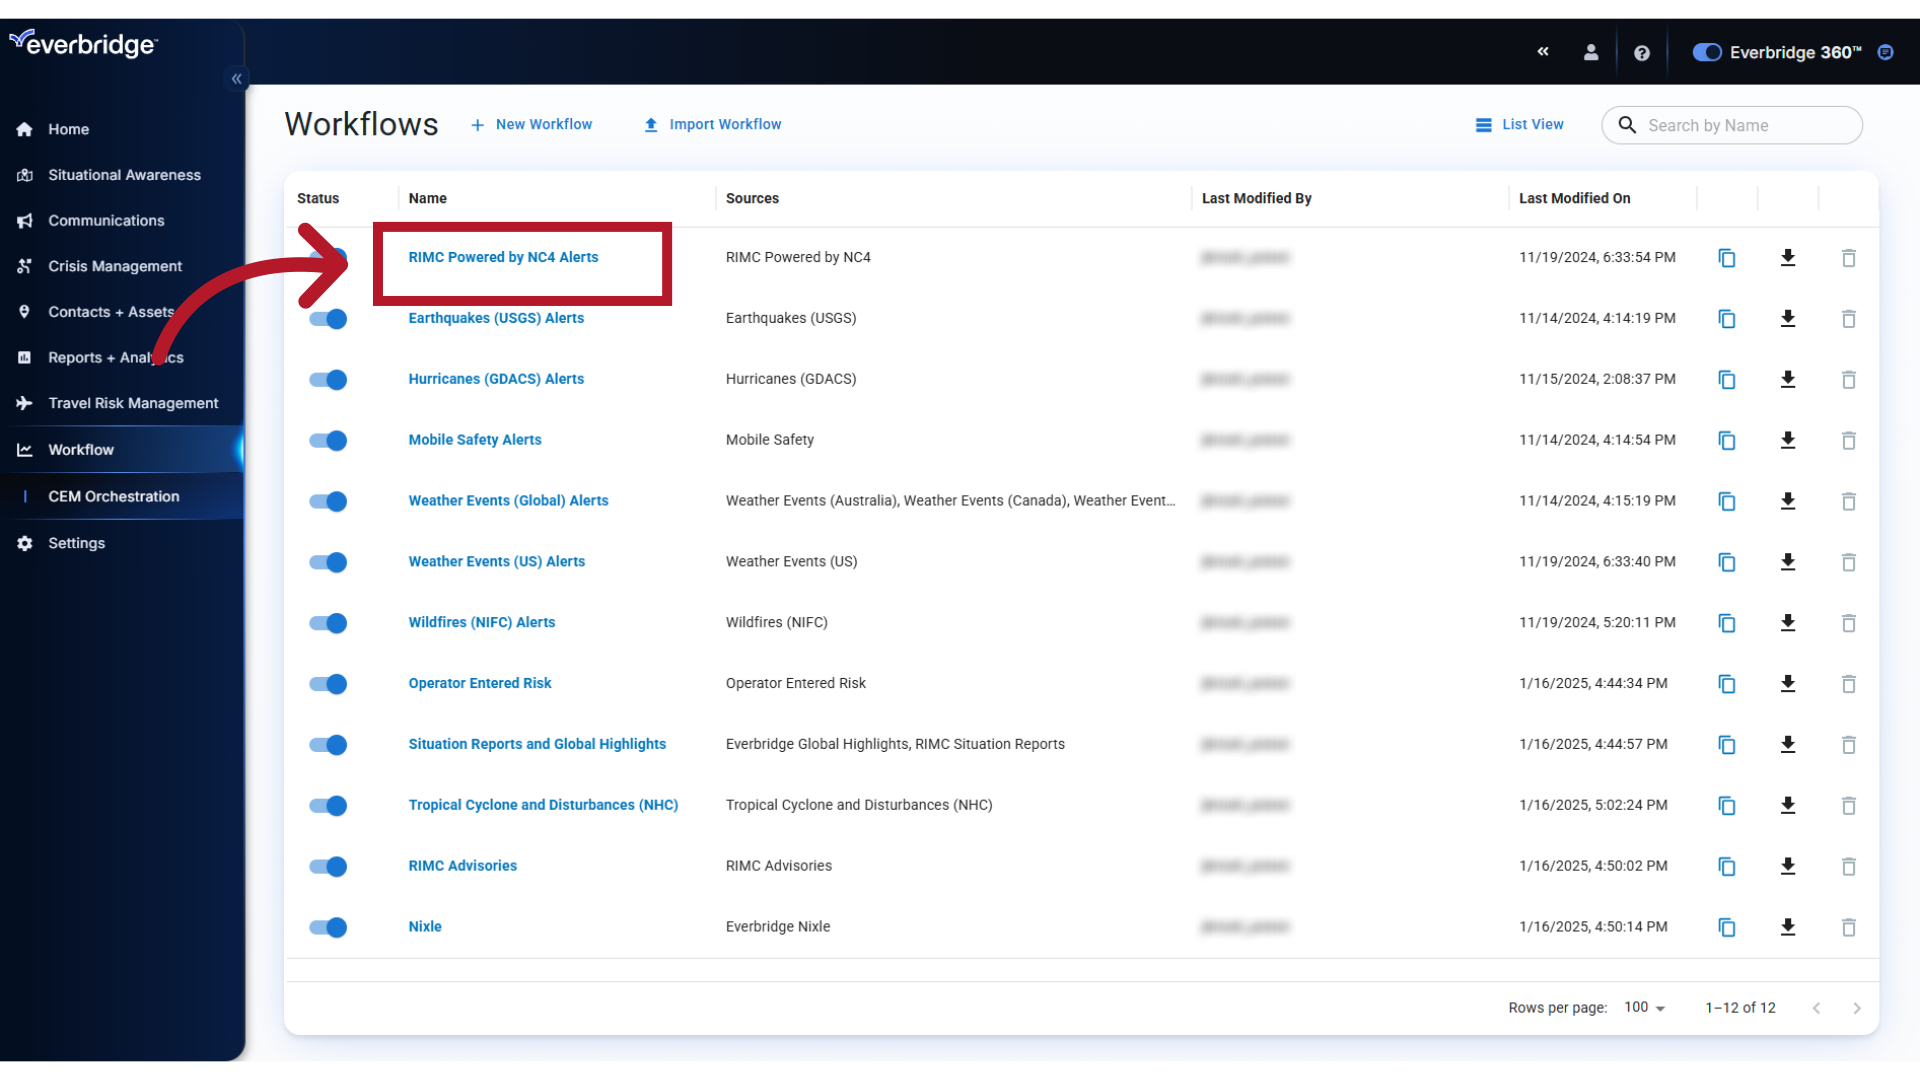
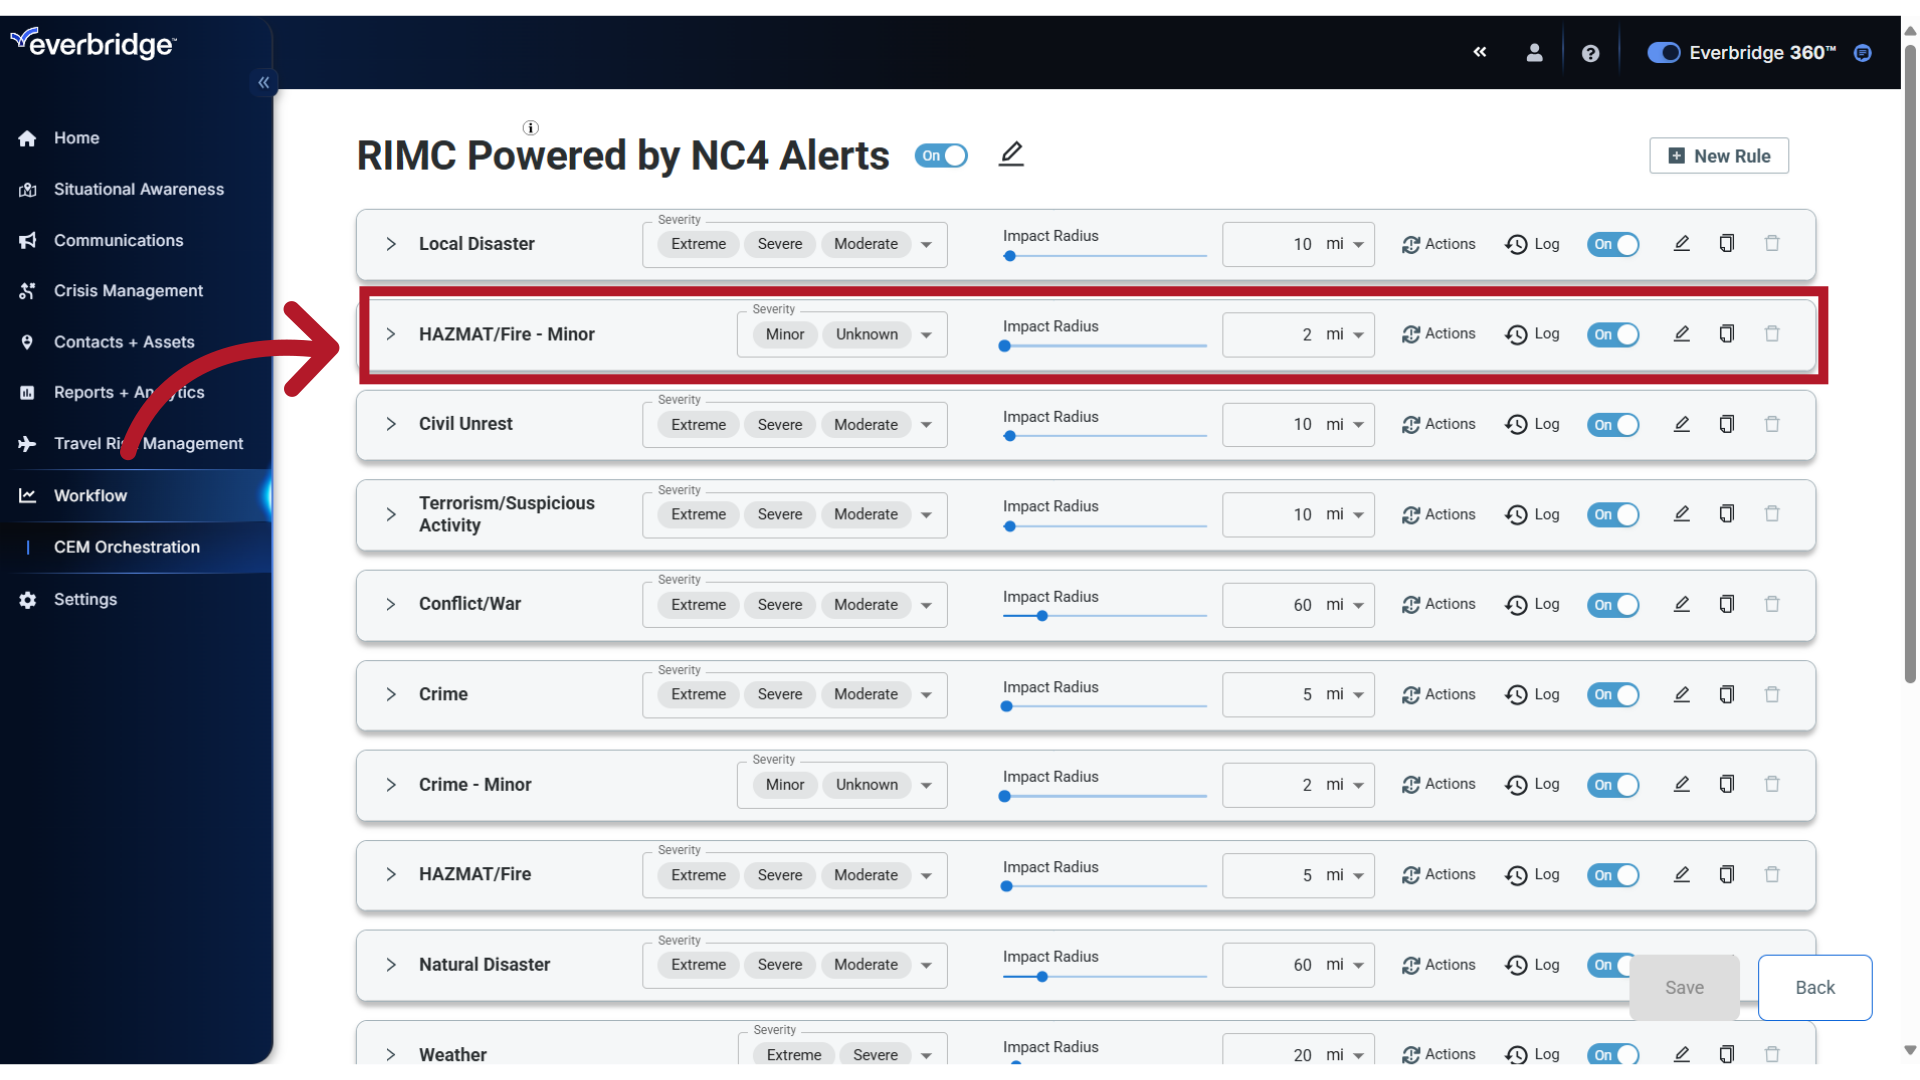
To modify the default Filters or Actions, start by making a selection from the preconfigured list of CEM Orchestration Workflows. In this example, we will select "RIMC Powered by NC4 Alerts."
2. Select
Click the menu or Edit icon from the toolbar of the Rule you wish to modify.
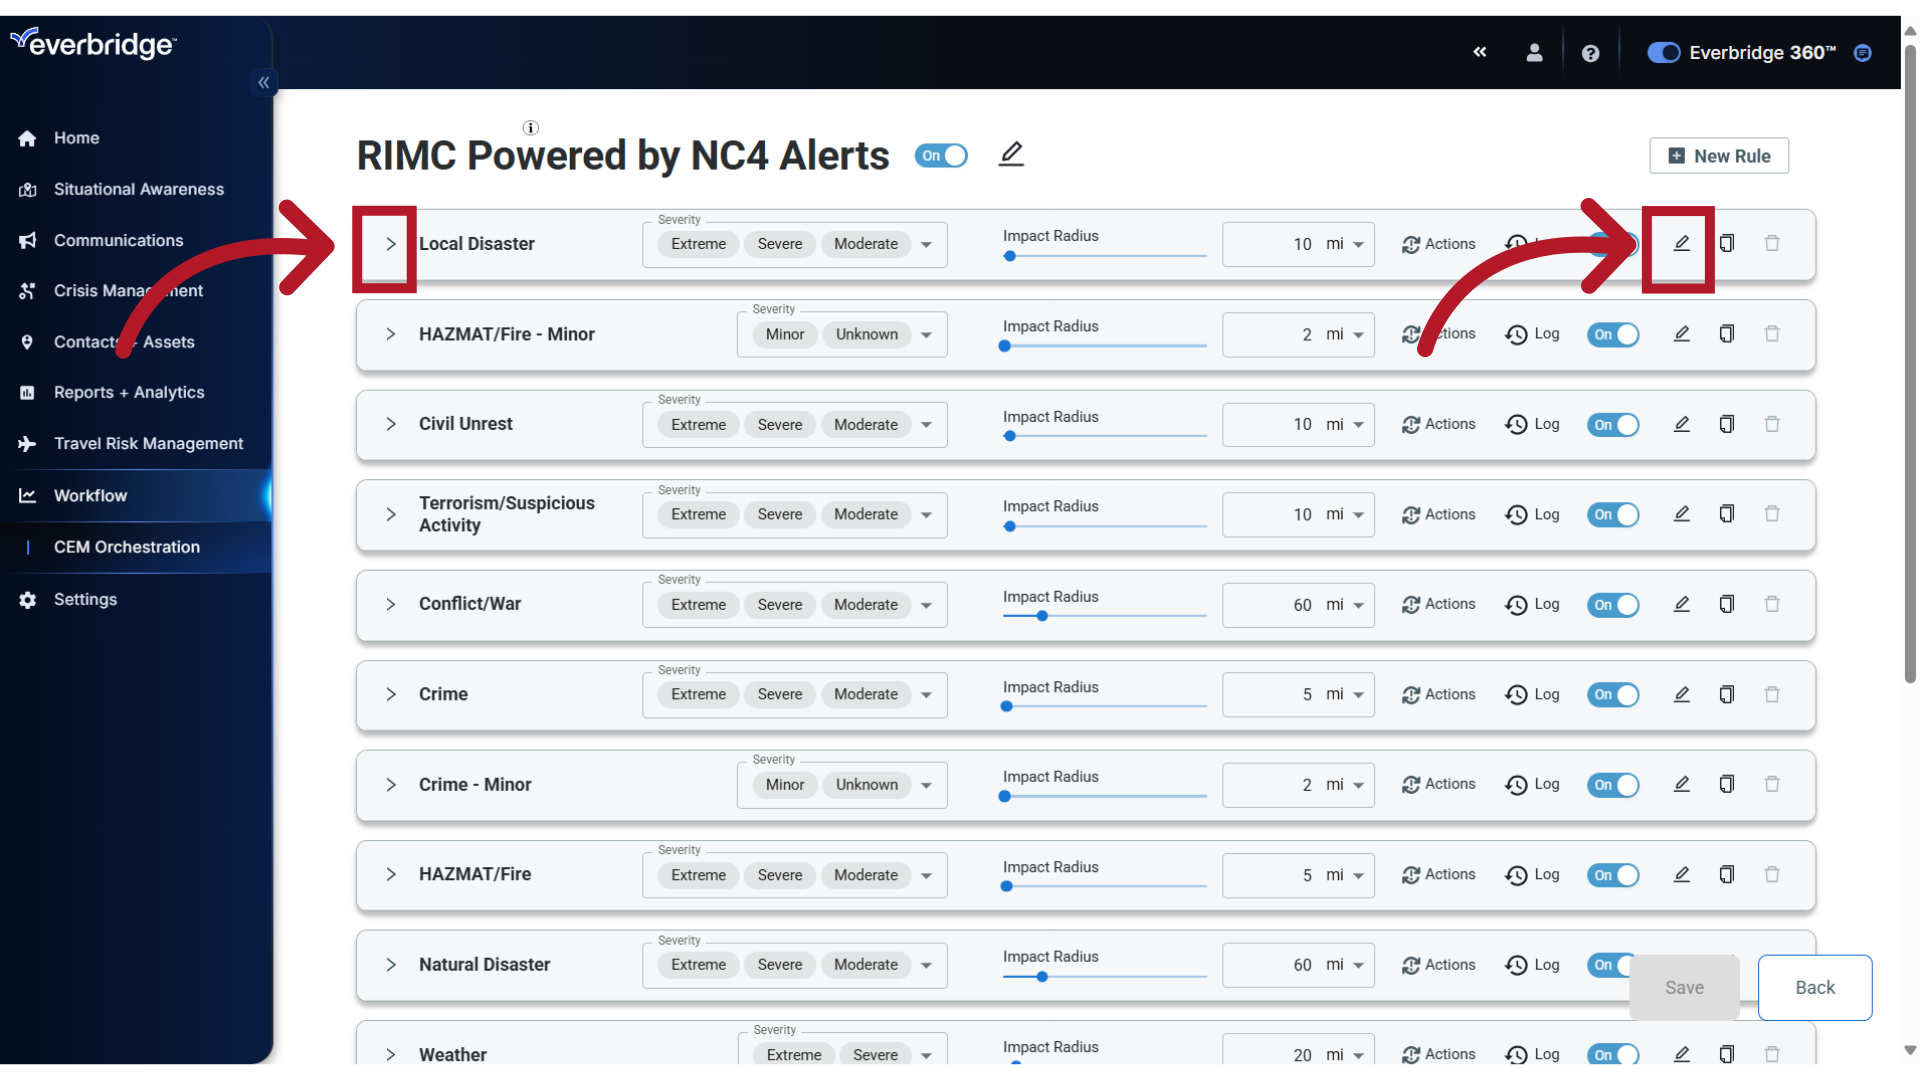
3. Filters
This will display the configuration options. Let's start by reviewing the default configuration for Filters.
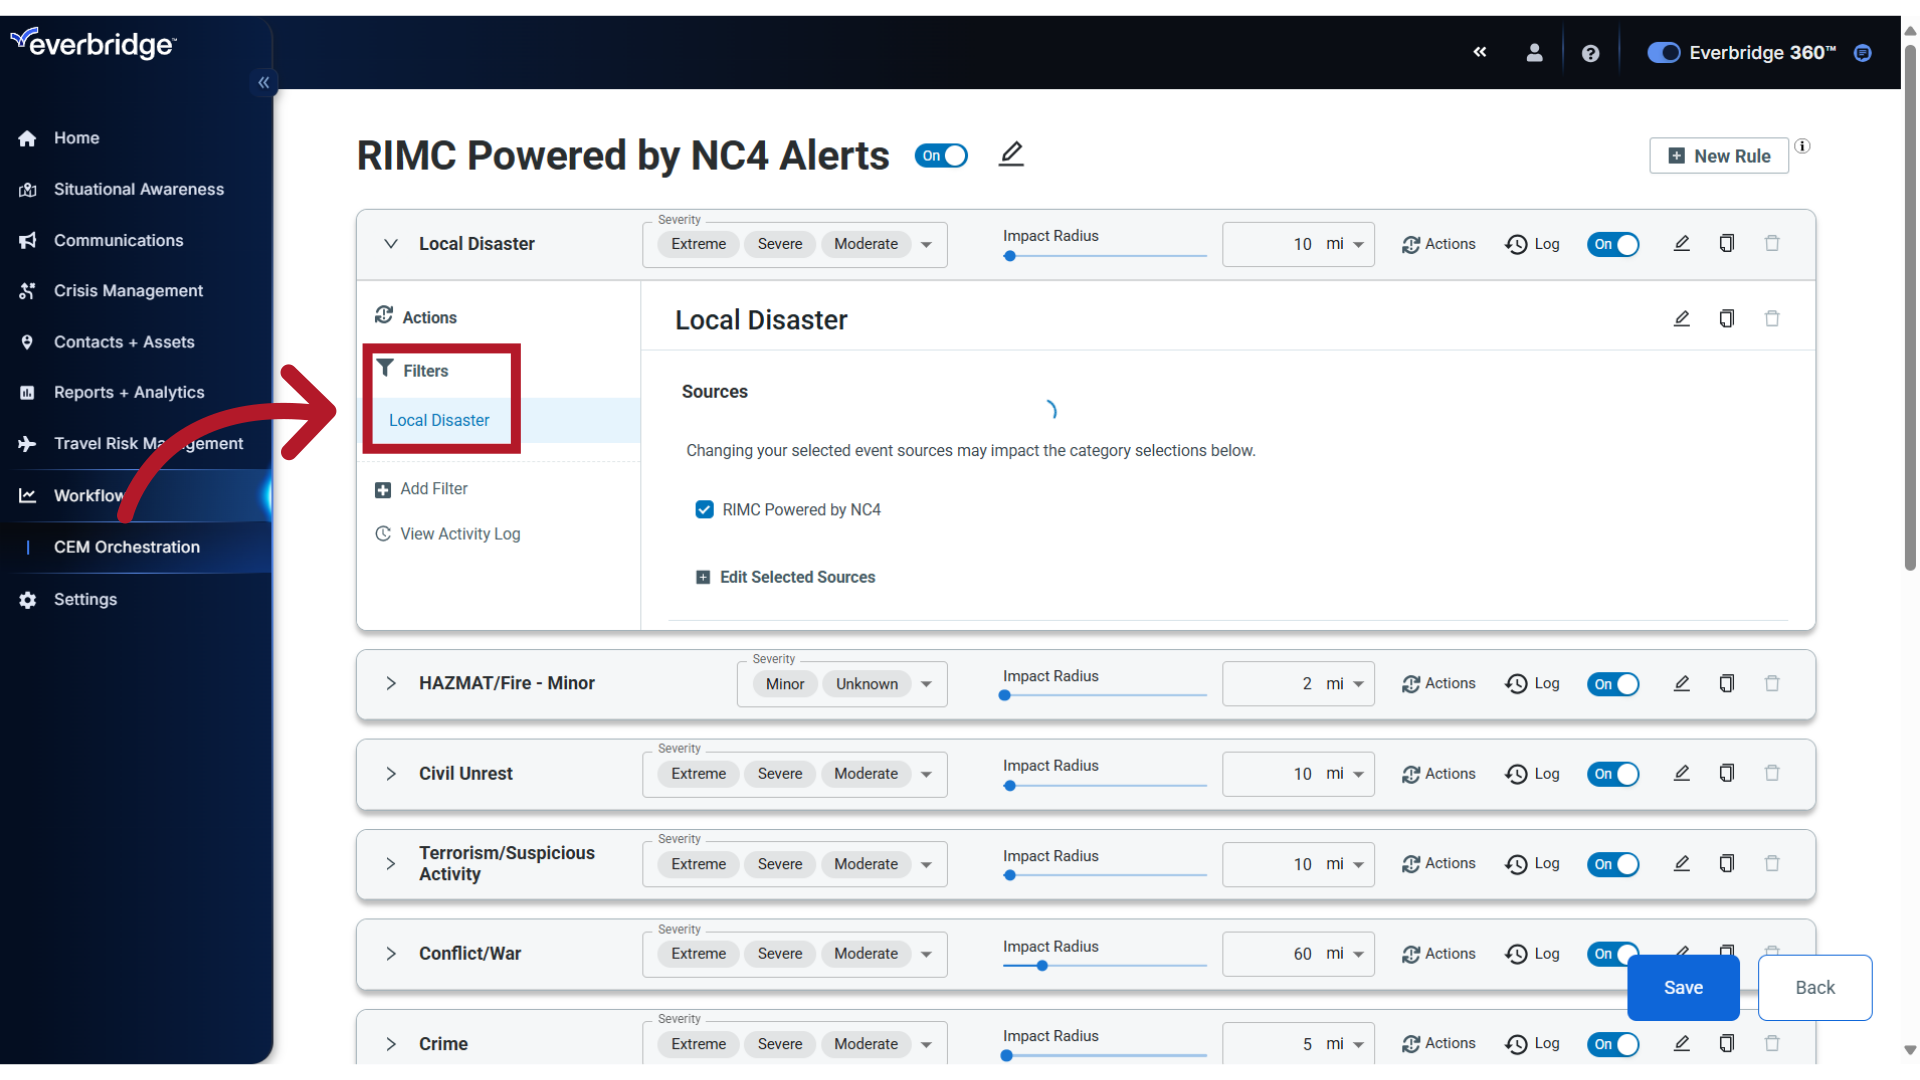
4. Sources
The risk event Source represented by the Workflow name is preselected.
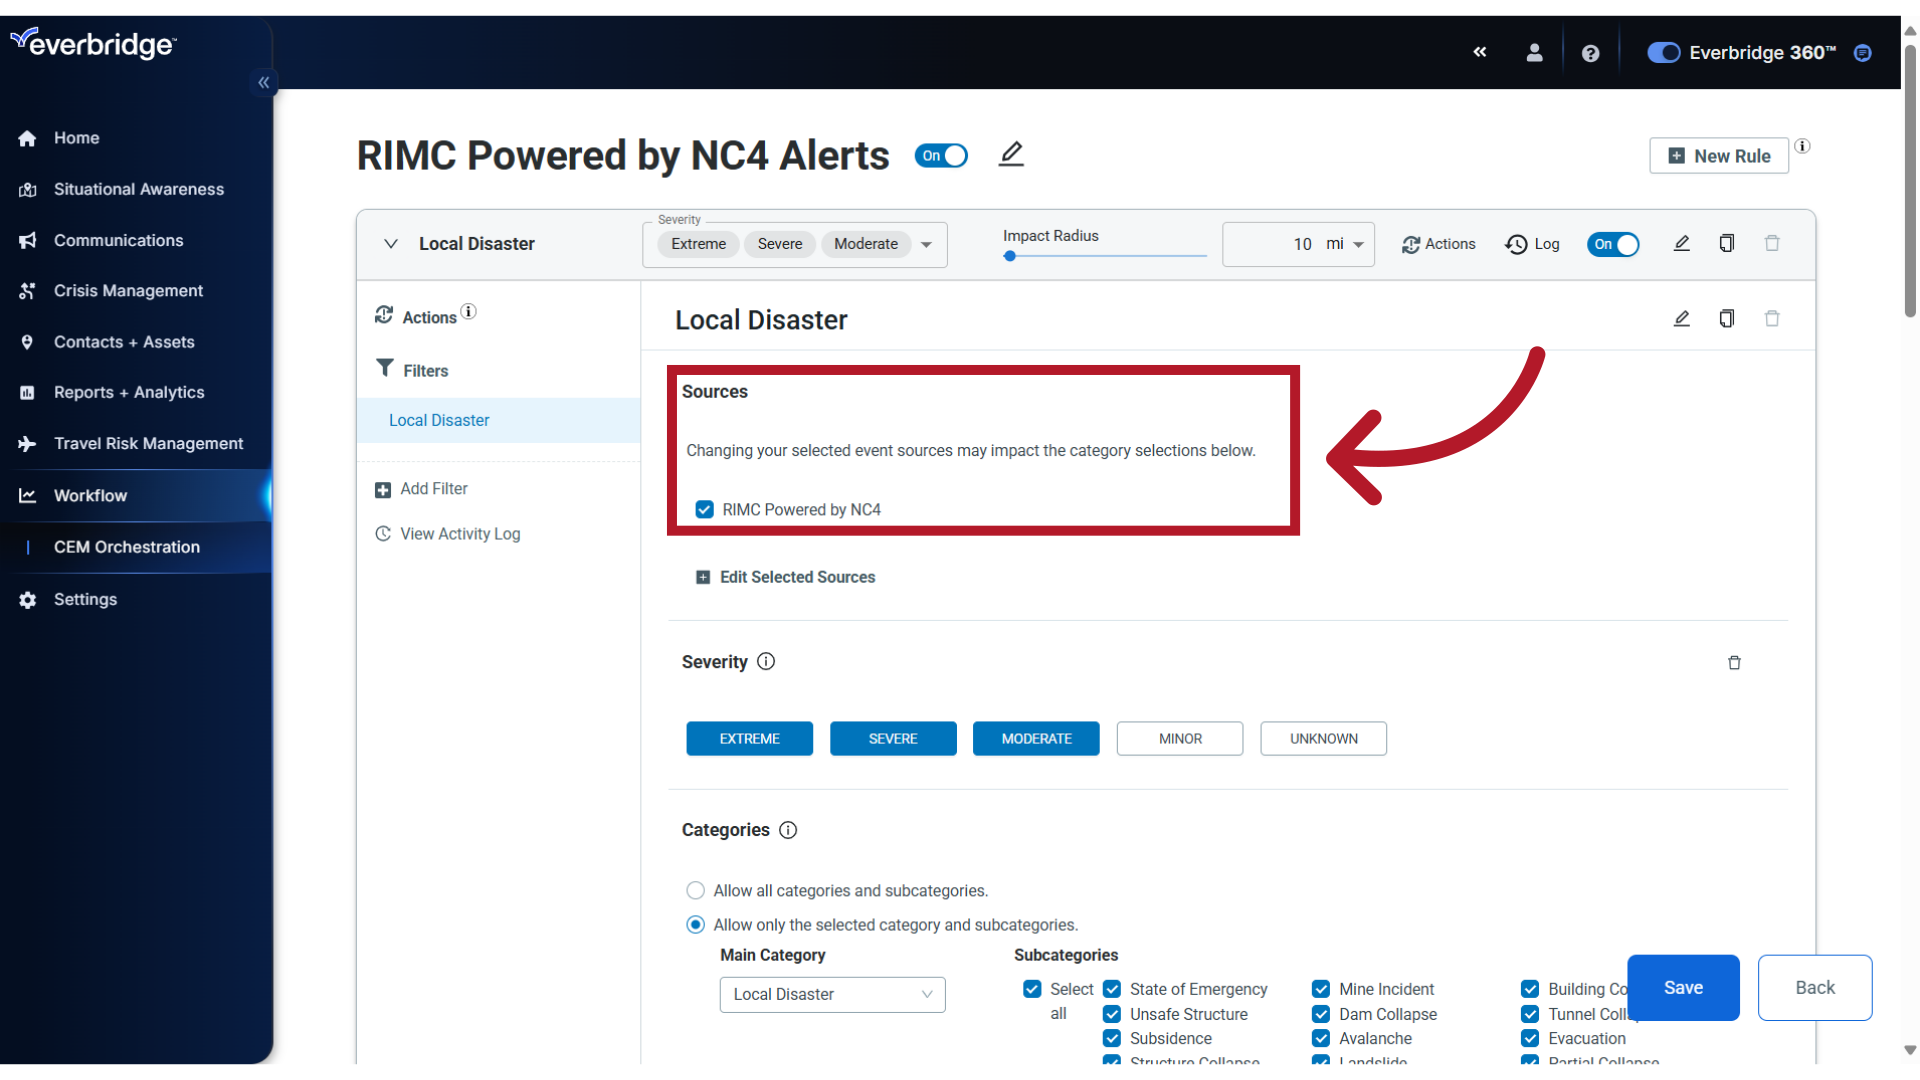
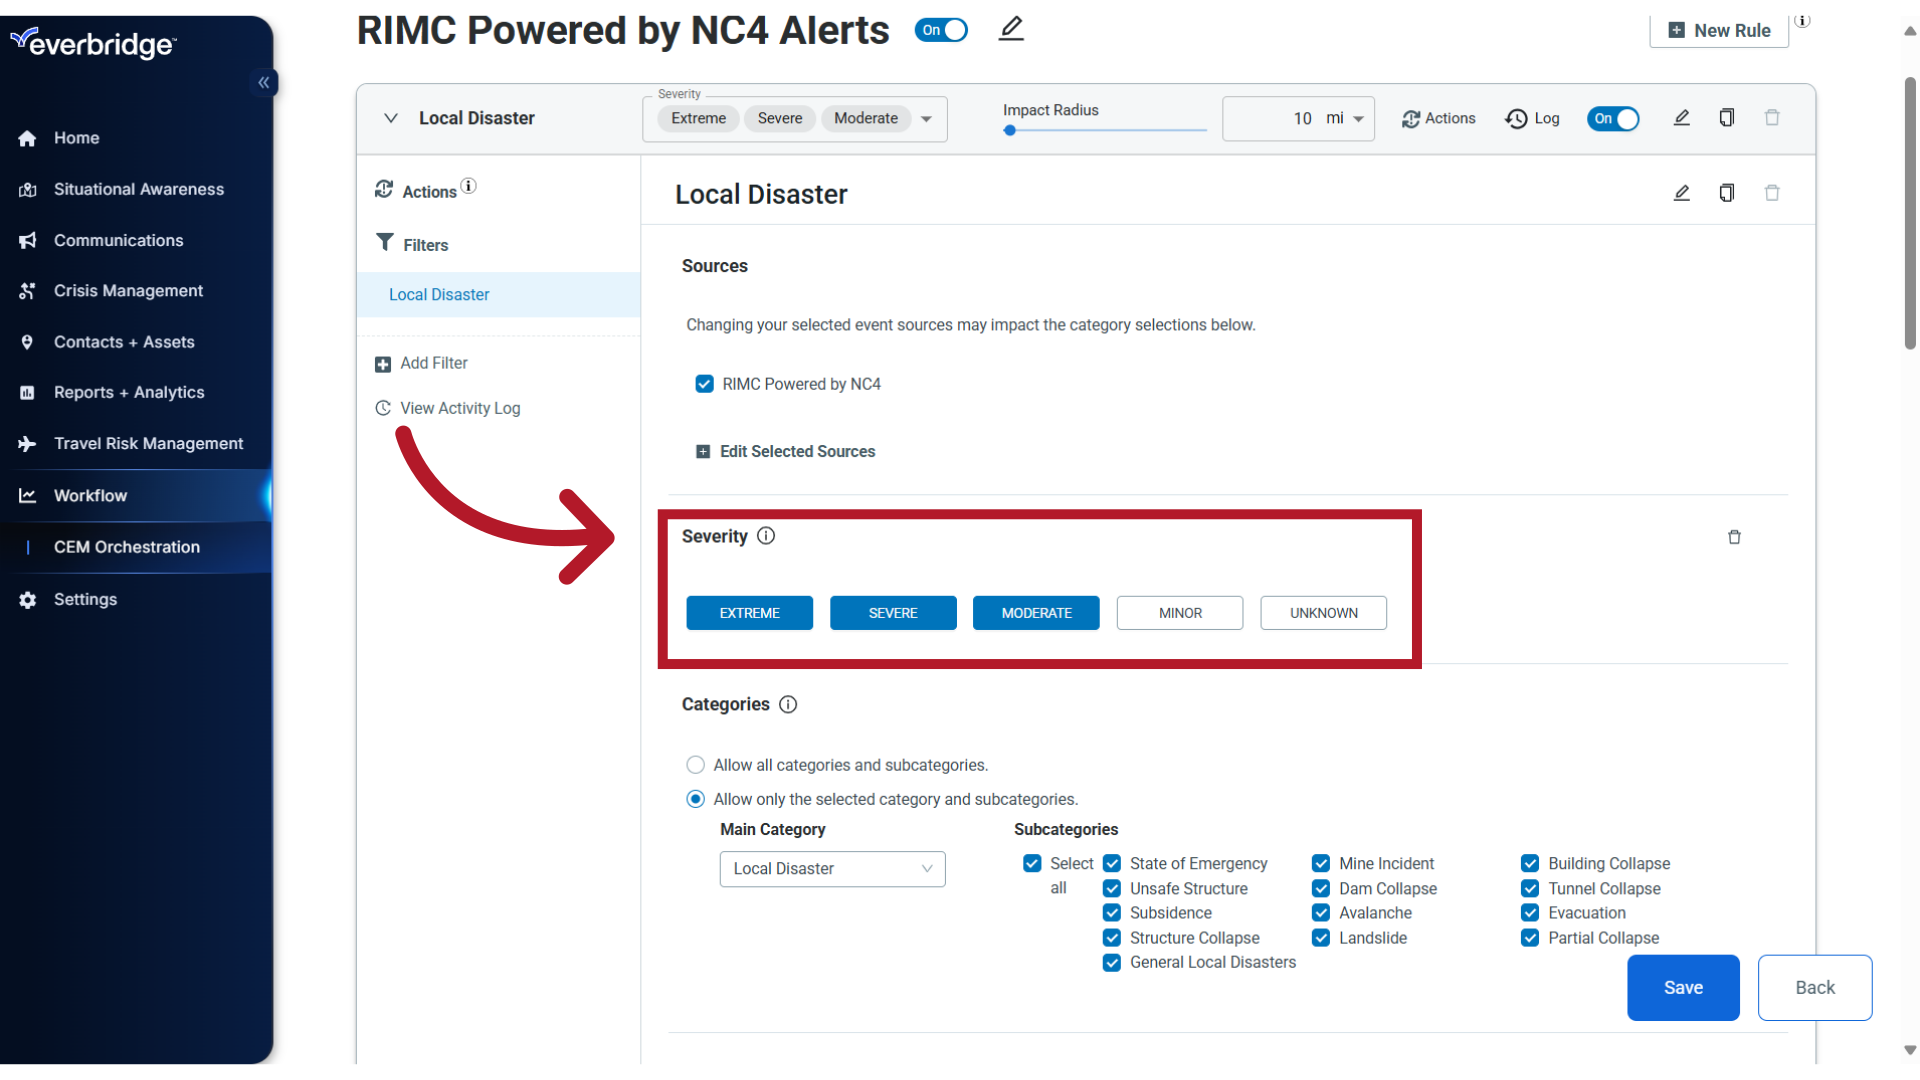
5. Severity
The same Severity options displayed in the toolbar also appear in the Filter. Any changes made here will be reflected in the toolbar, and vice versa.
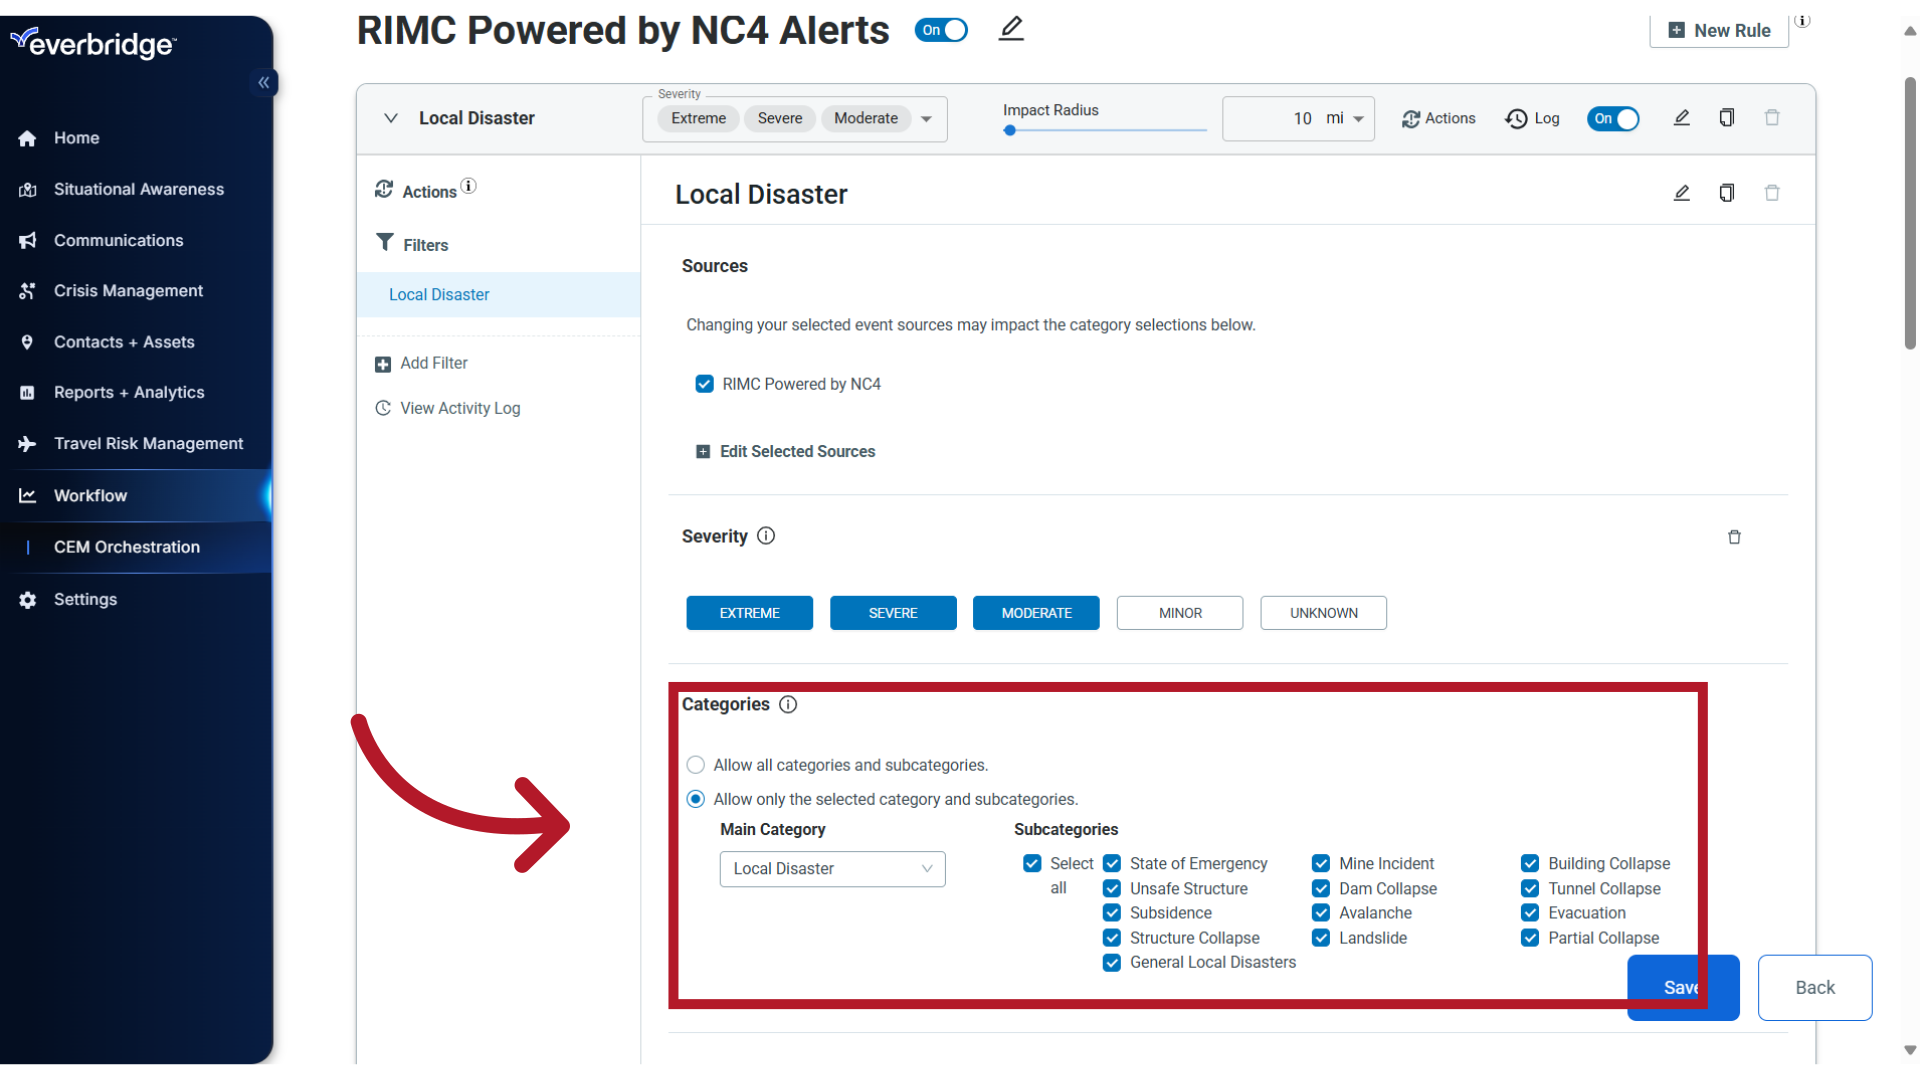
6. Categories
By default, the event category represented in the Rule name, and all of its Subcategories, are preselected.
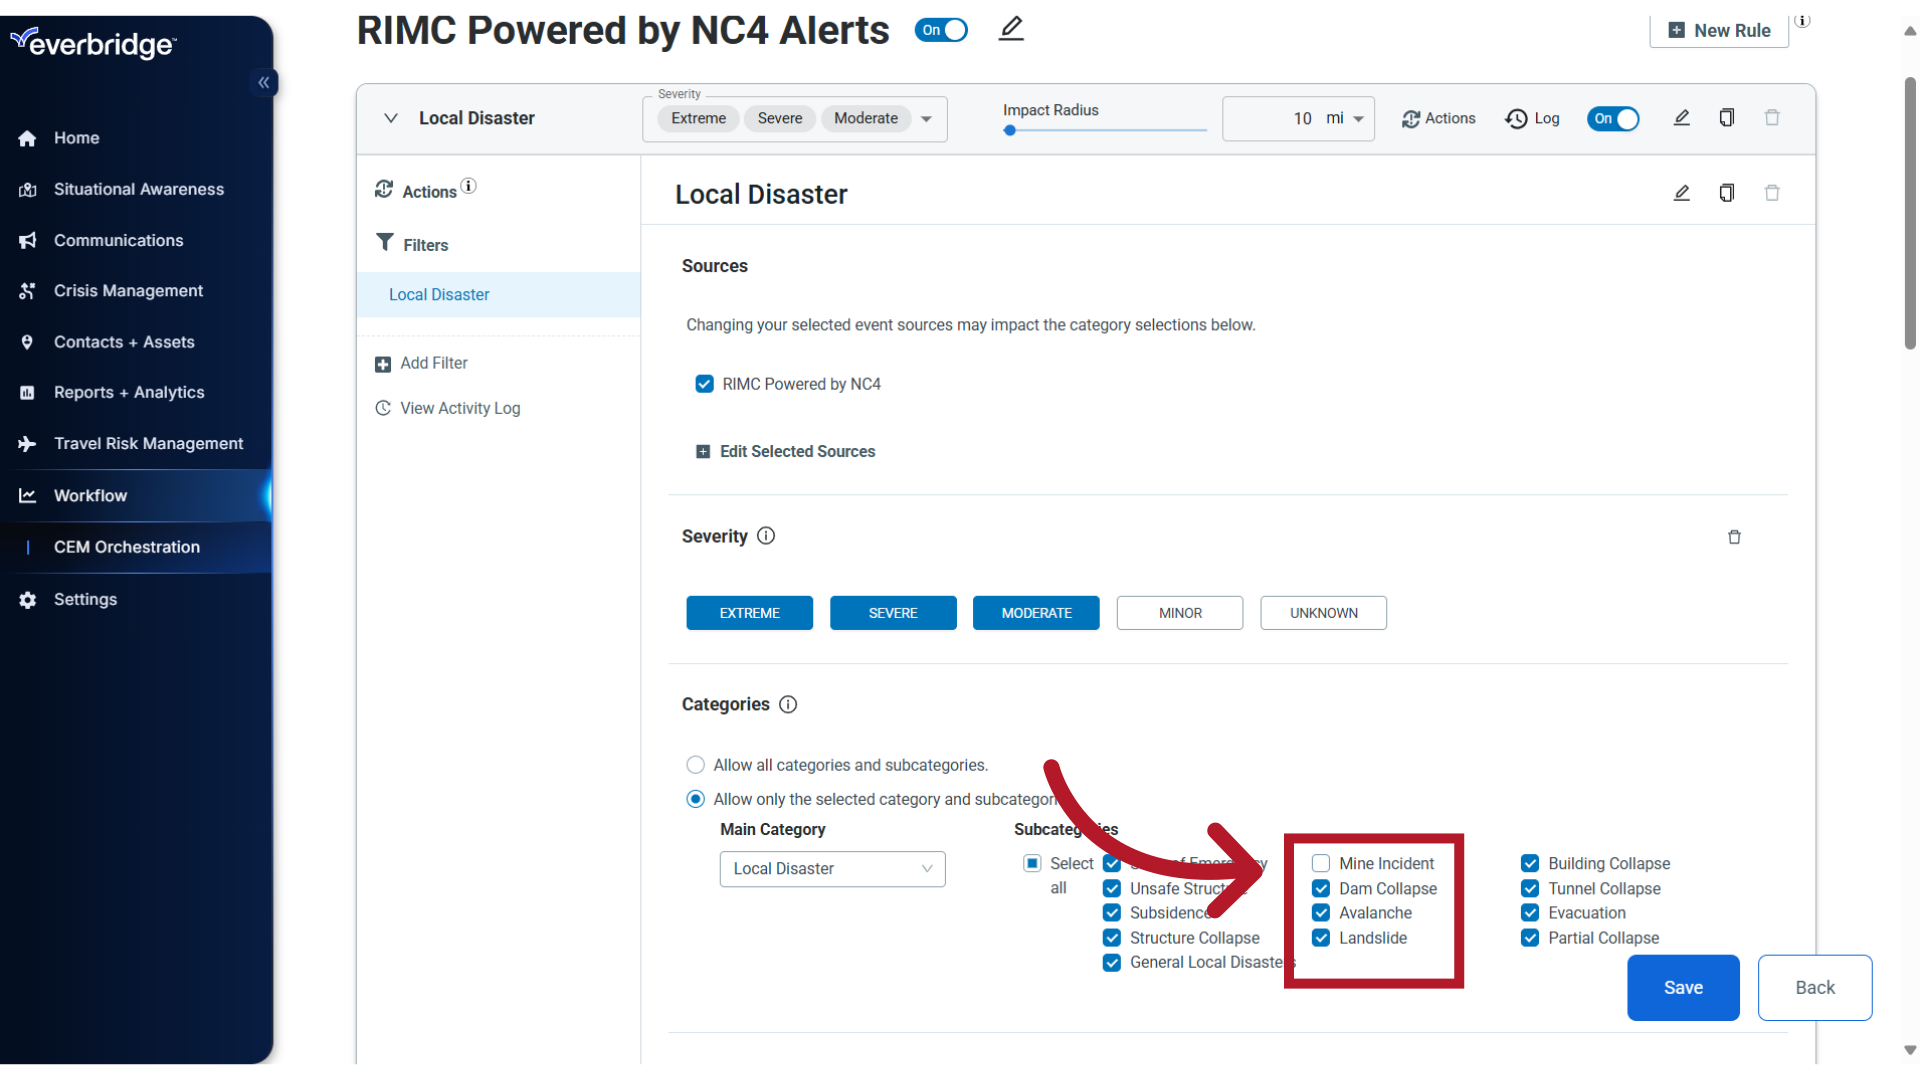
7. Subcategories
If needed, you can deselect one or more subcategories if they do not apply to your alert monitoring needs.
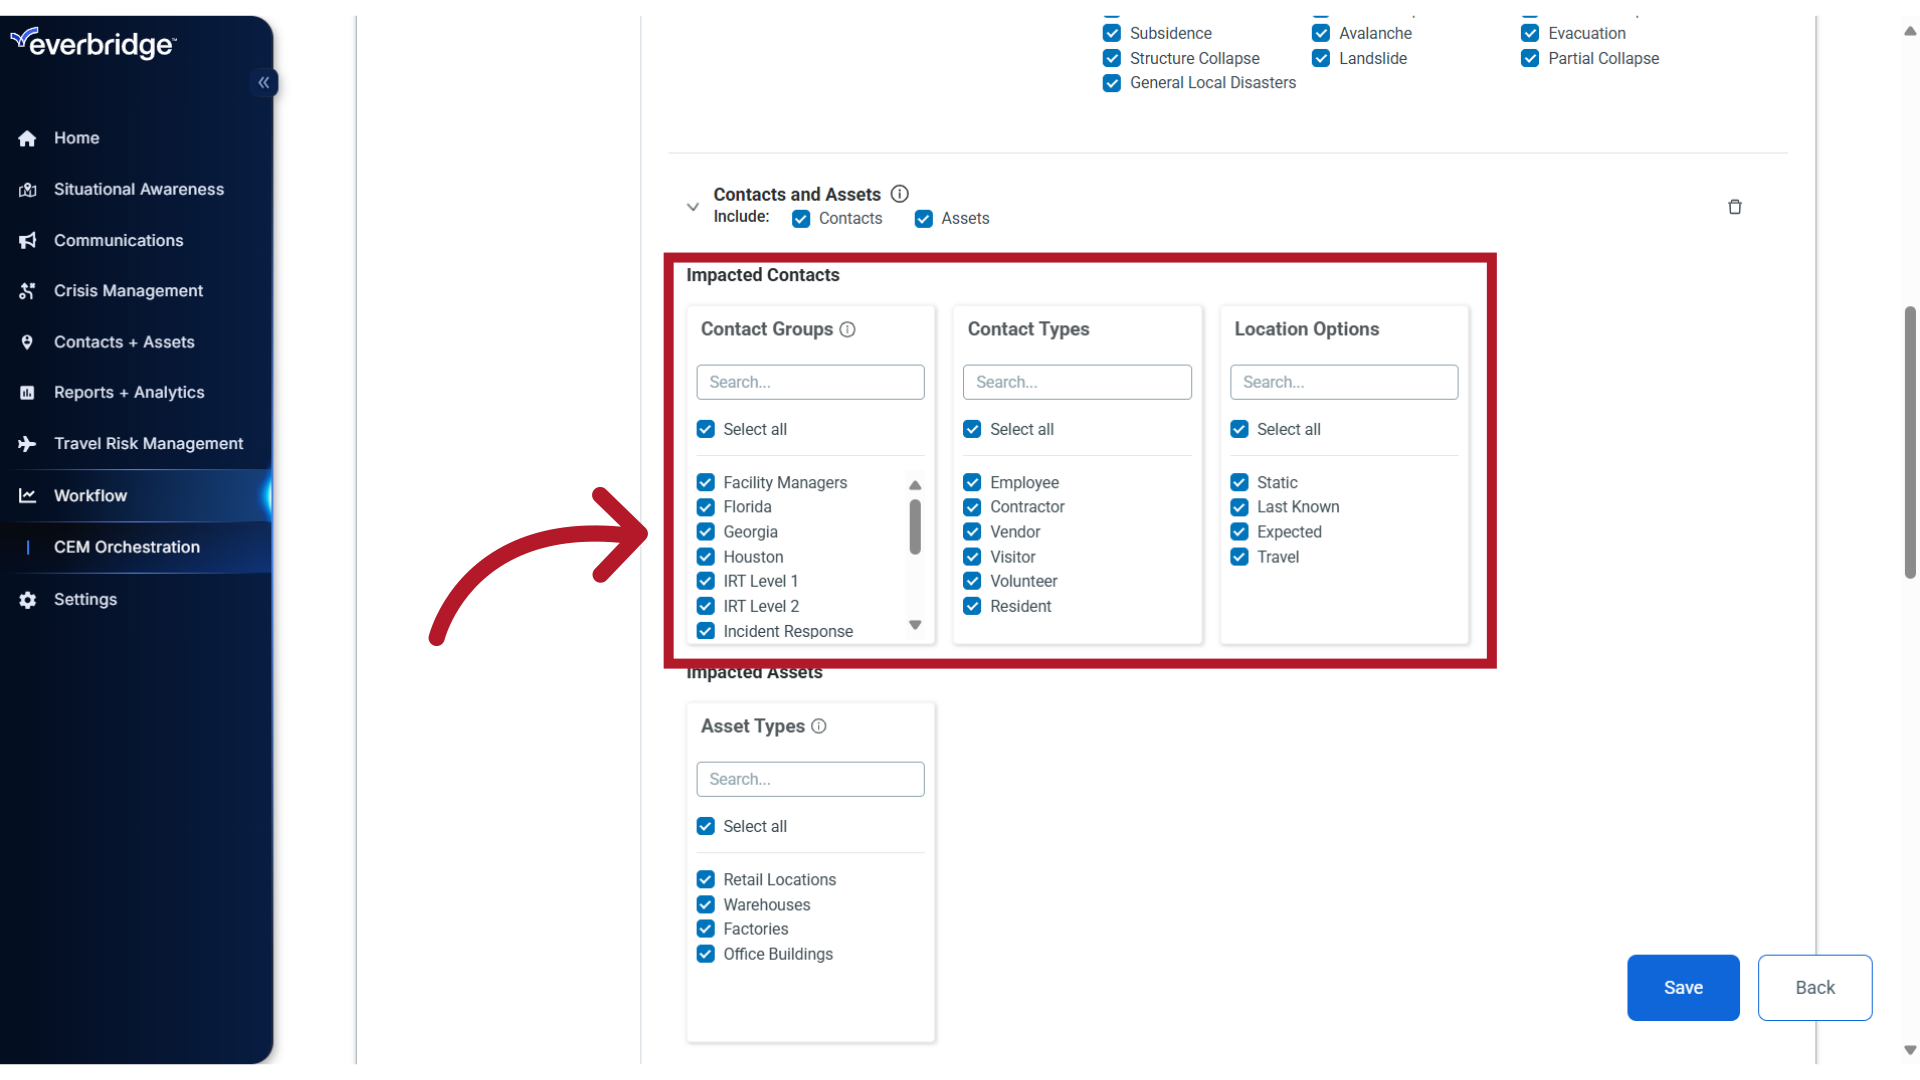
8. Contacts and Assets
The next section contains the filter criteria for Contacts and Assets. By default, all Contacts and Asset types in your organization are included, and their locations can trigger an alert.
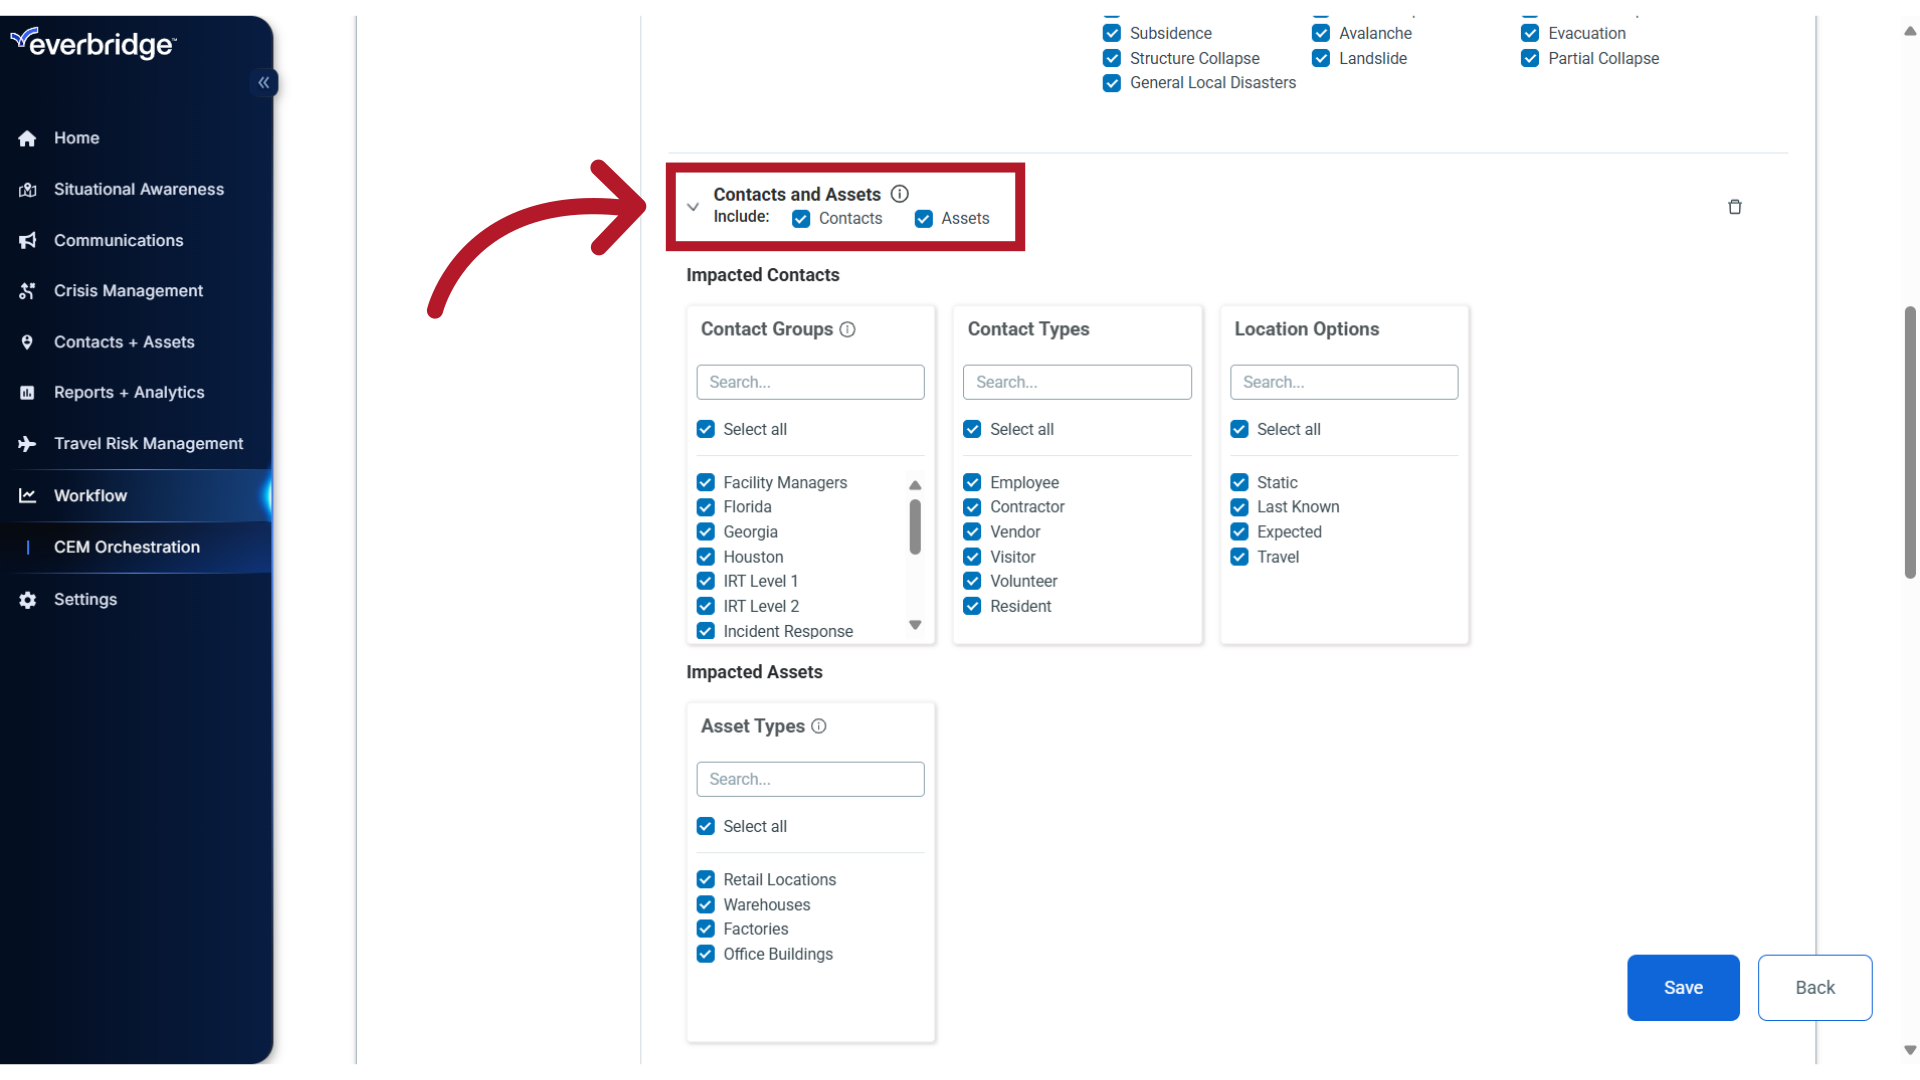
9. Modify Contacts
If needed, you can modify these inclusions. For example, you can limit which Contact locations generate alerts by changing the Group, Contact Type or Location Option selections.
10. Exclude Contacts
Or, if you do not want any Contact locations to generate alerts, simply uncheck the Contacts option.
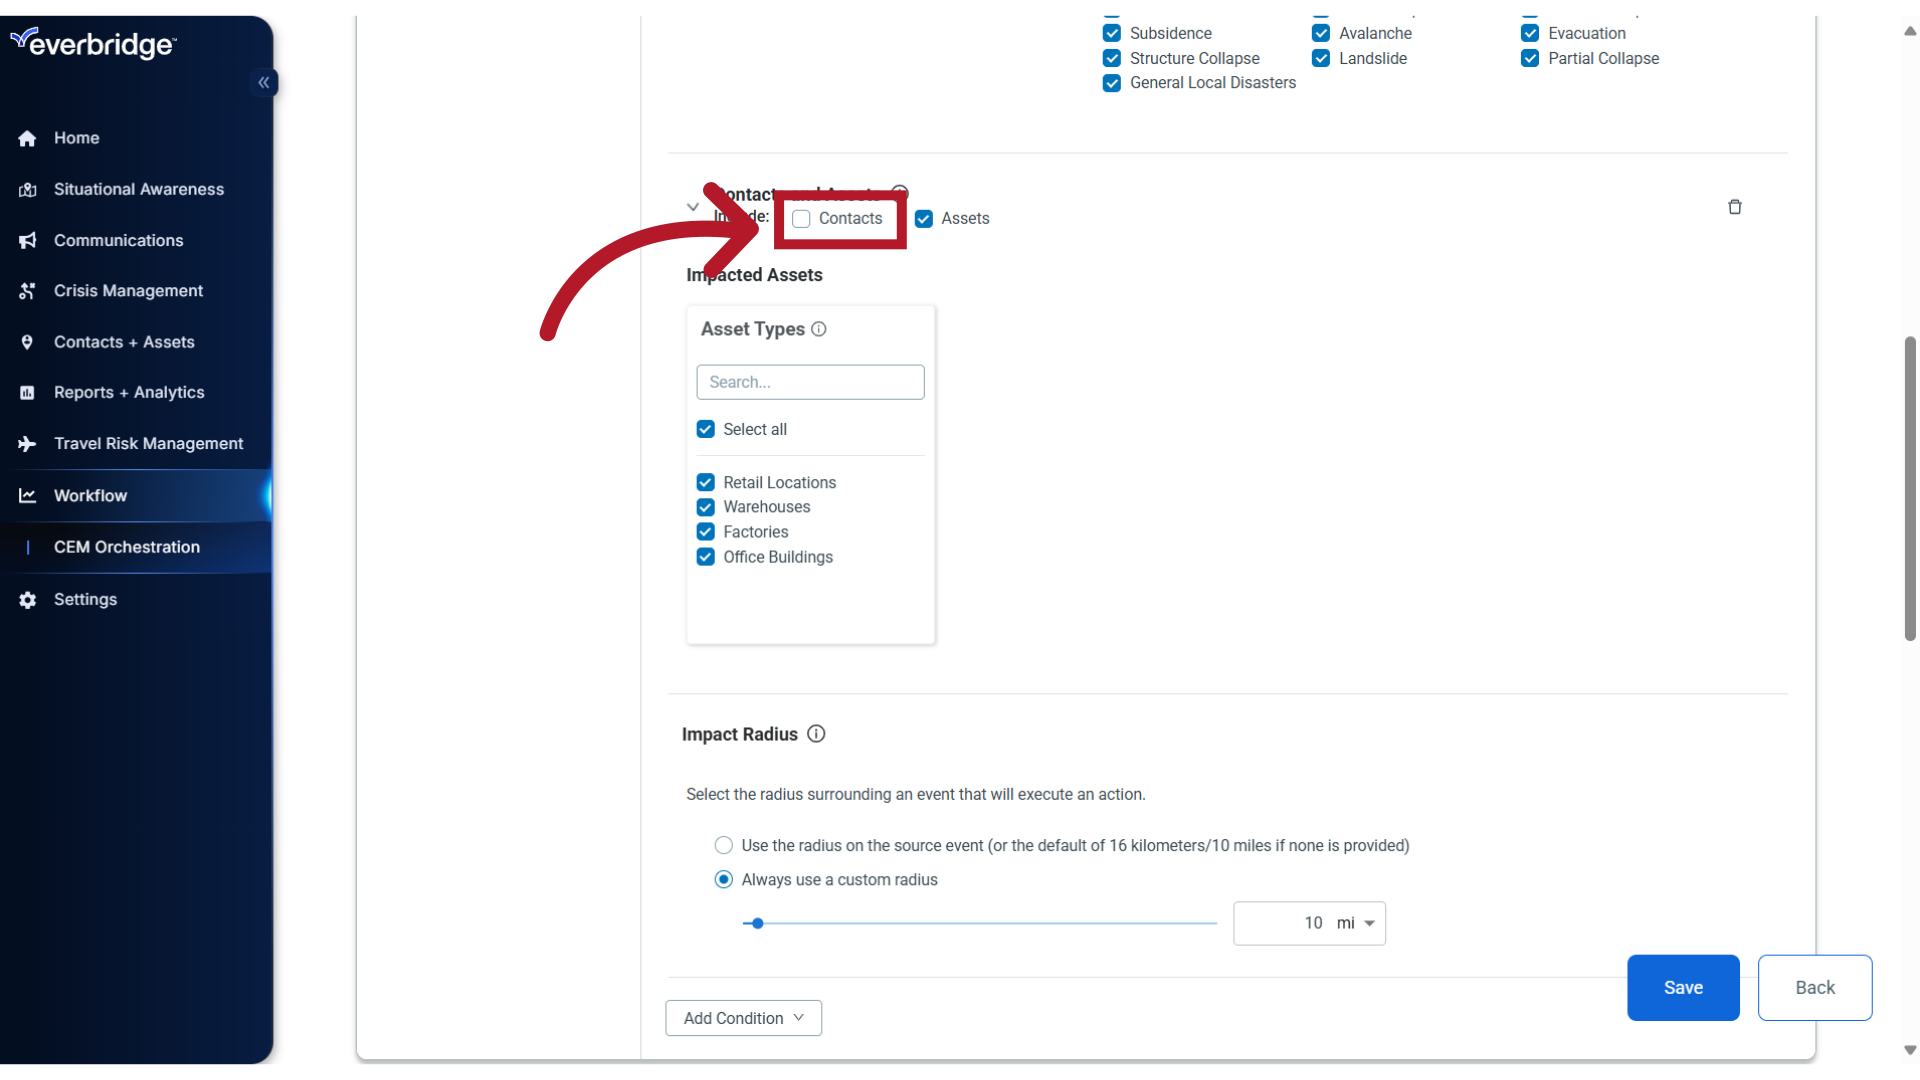
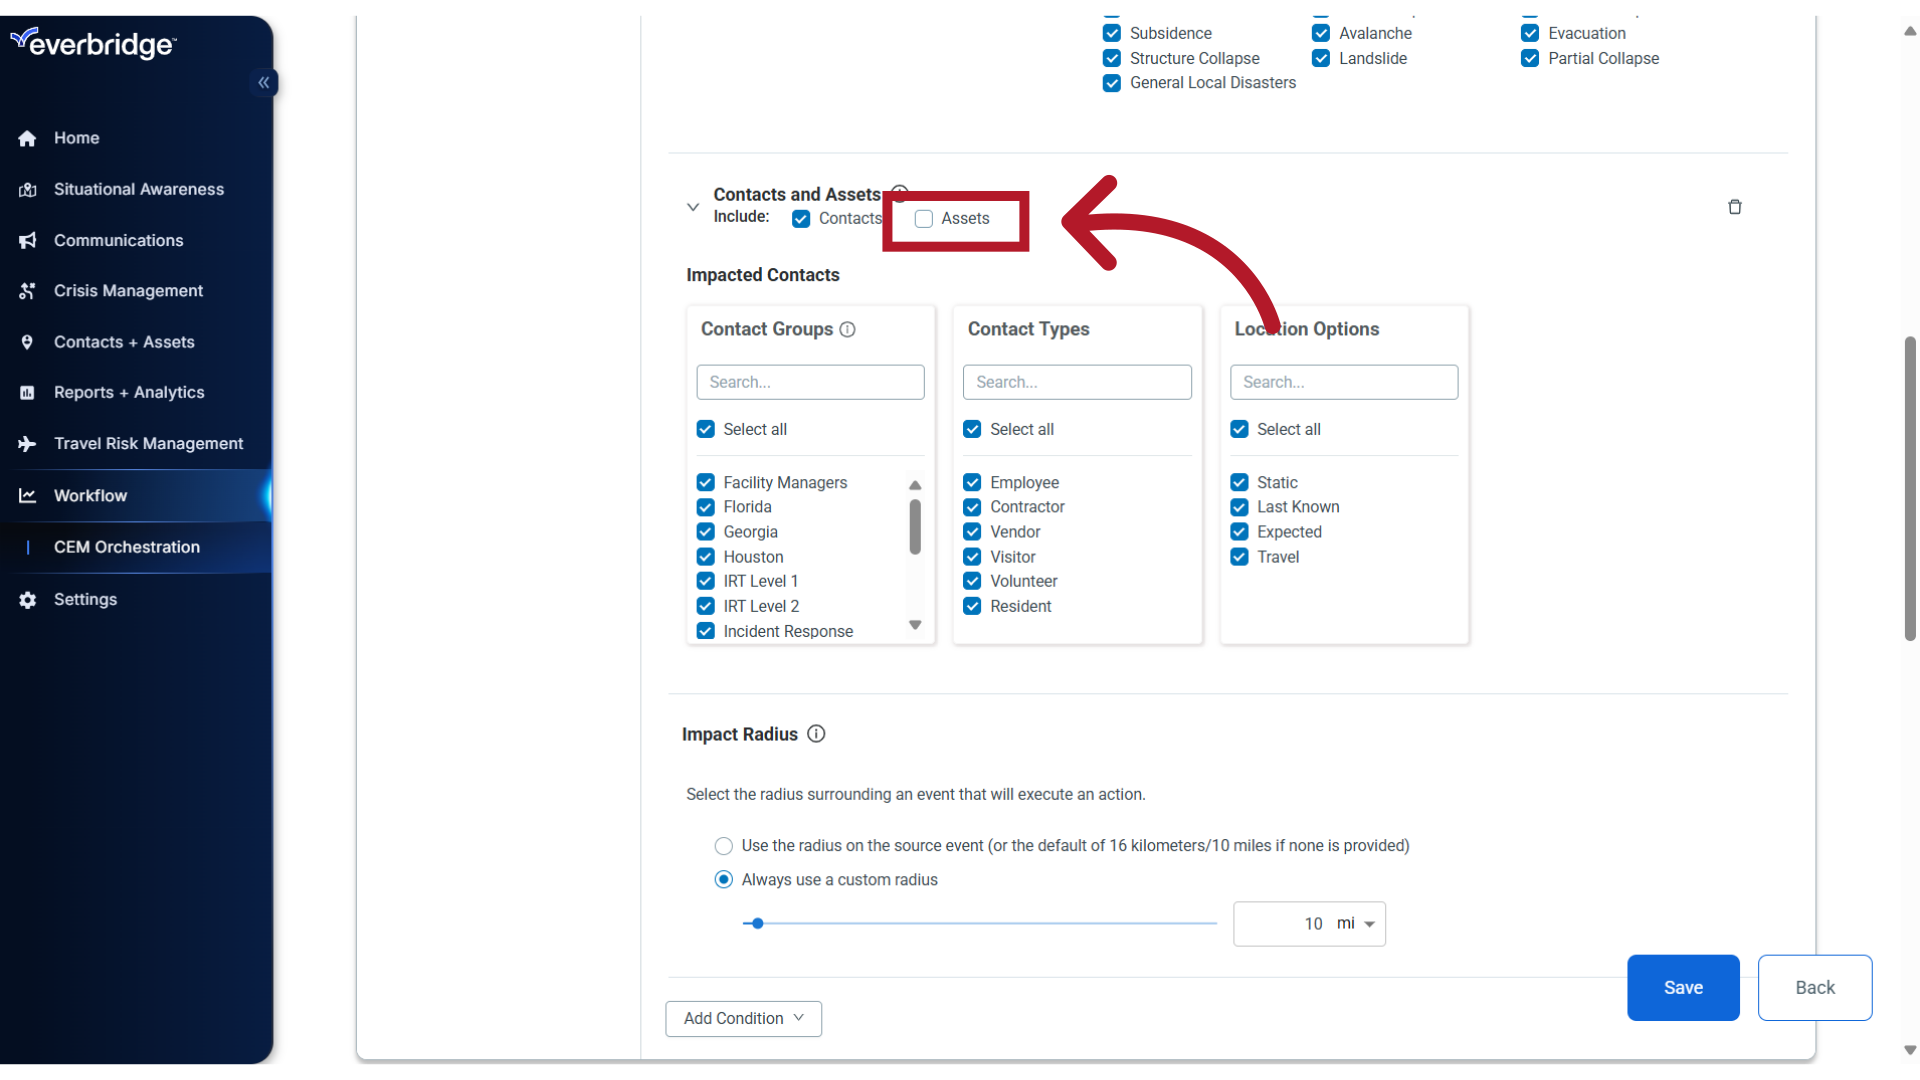
11. Exlude Assets
Similarly, if you do not want any Asset locations to generate alerts, uncheck the Asset option
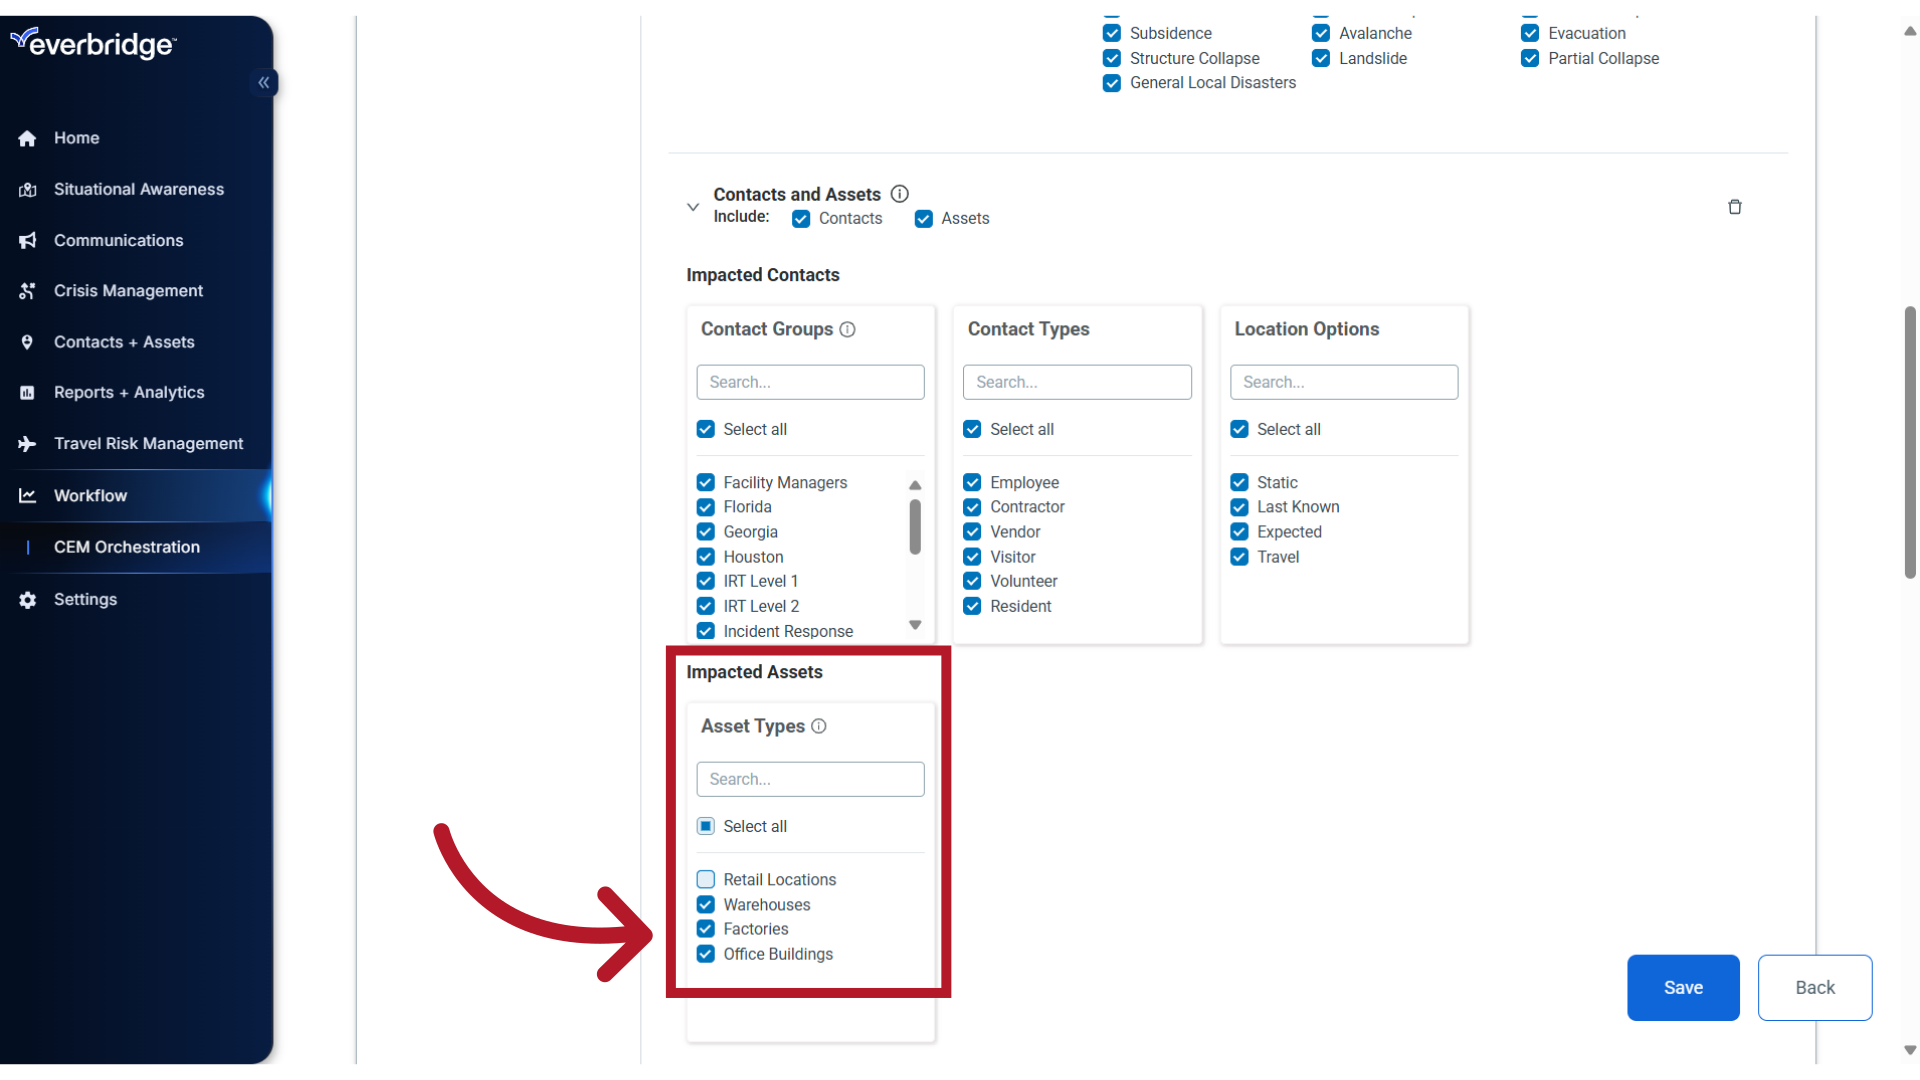
12. Modify Assets
or, select just the Asset Types that should trigger alerts for this Category.
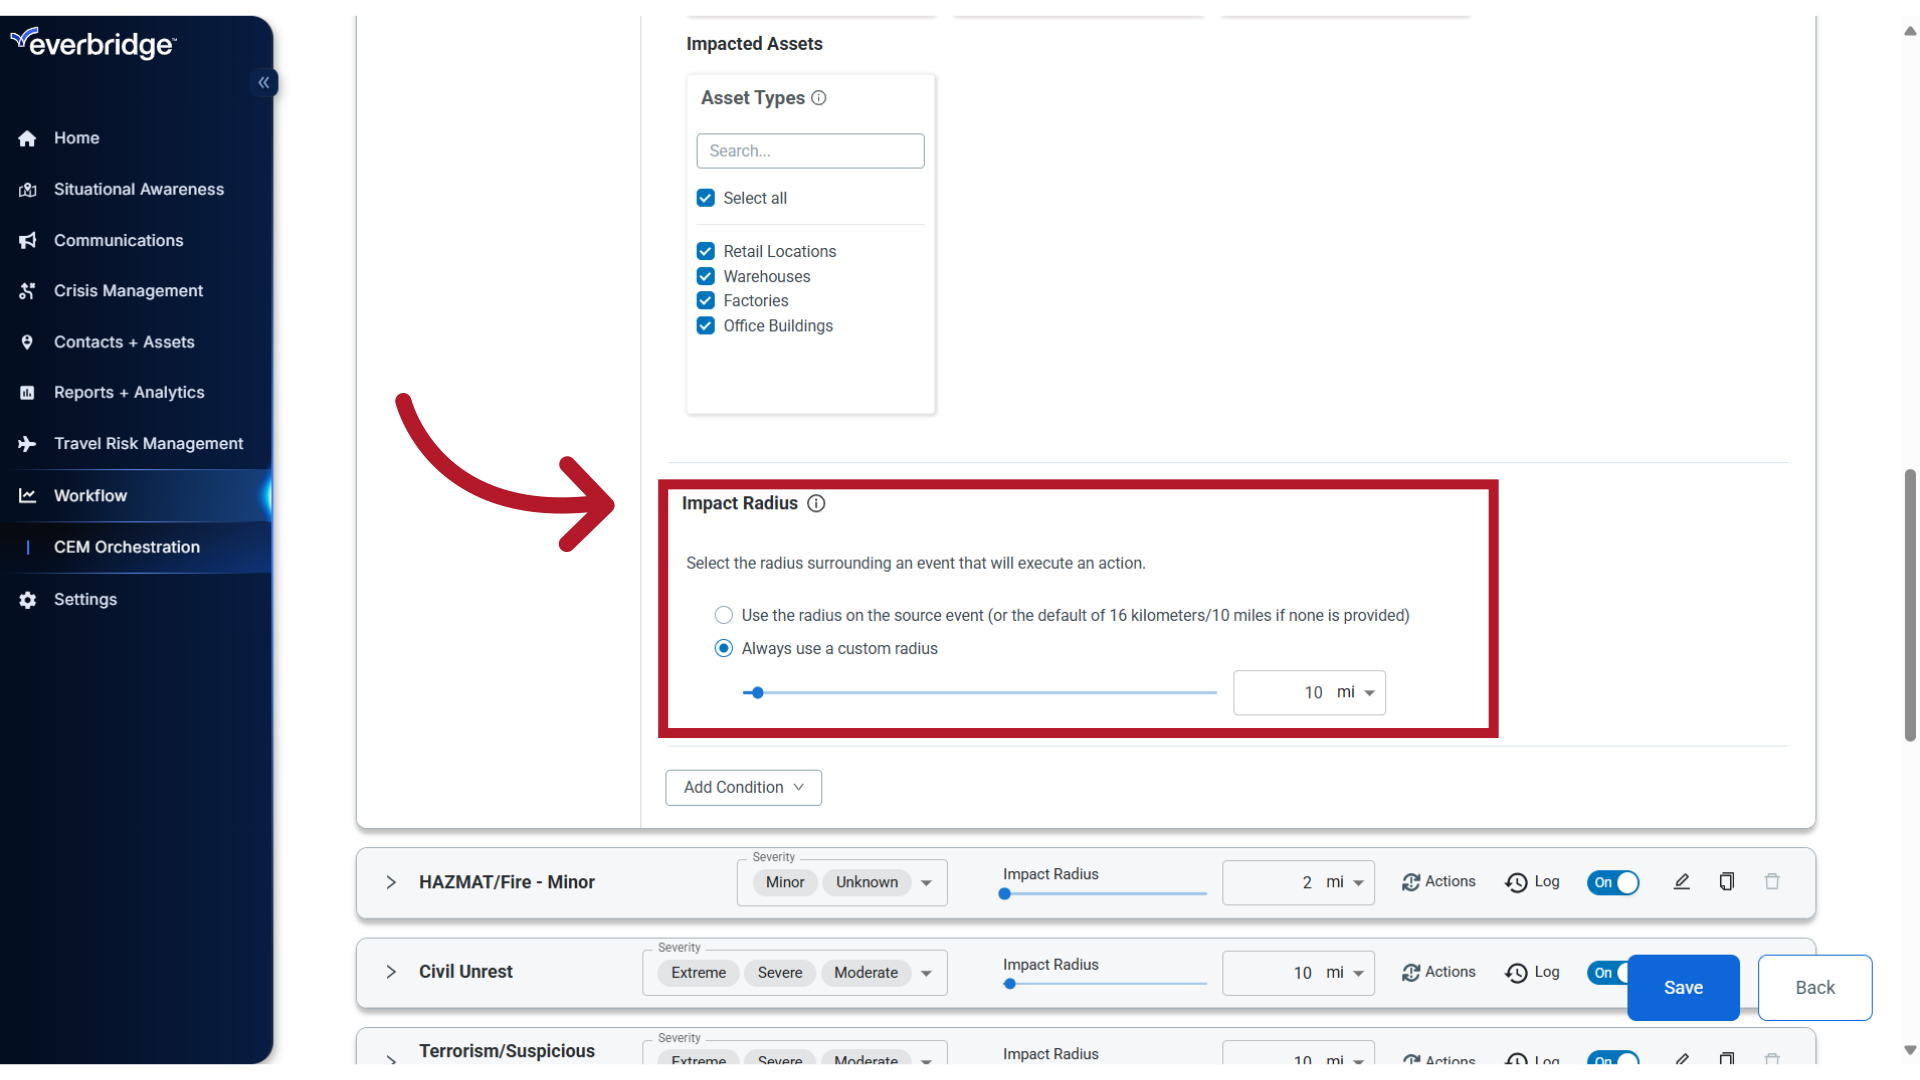
13. Impact Radius
For point-based alerts, the same Impact Radius options displayed in the toolbar also appear in the Filter. Any changes made here will be reflected in the toolbar, and vice versa.
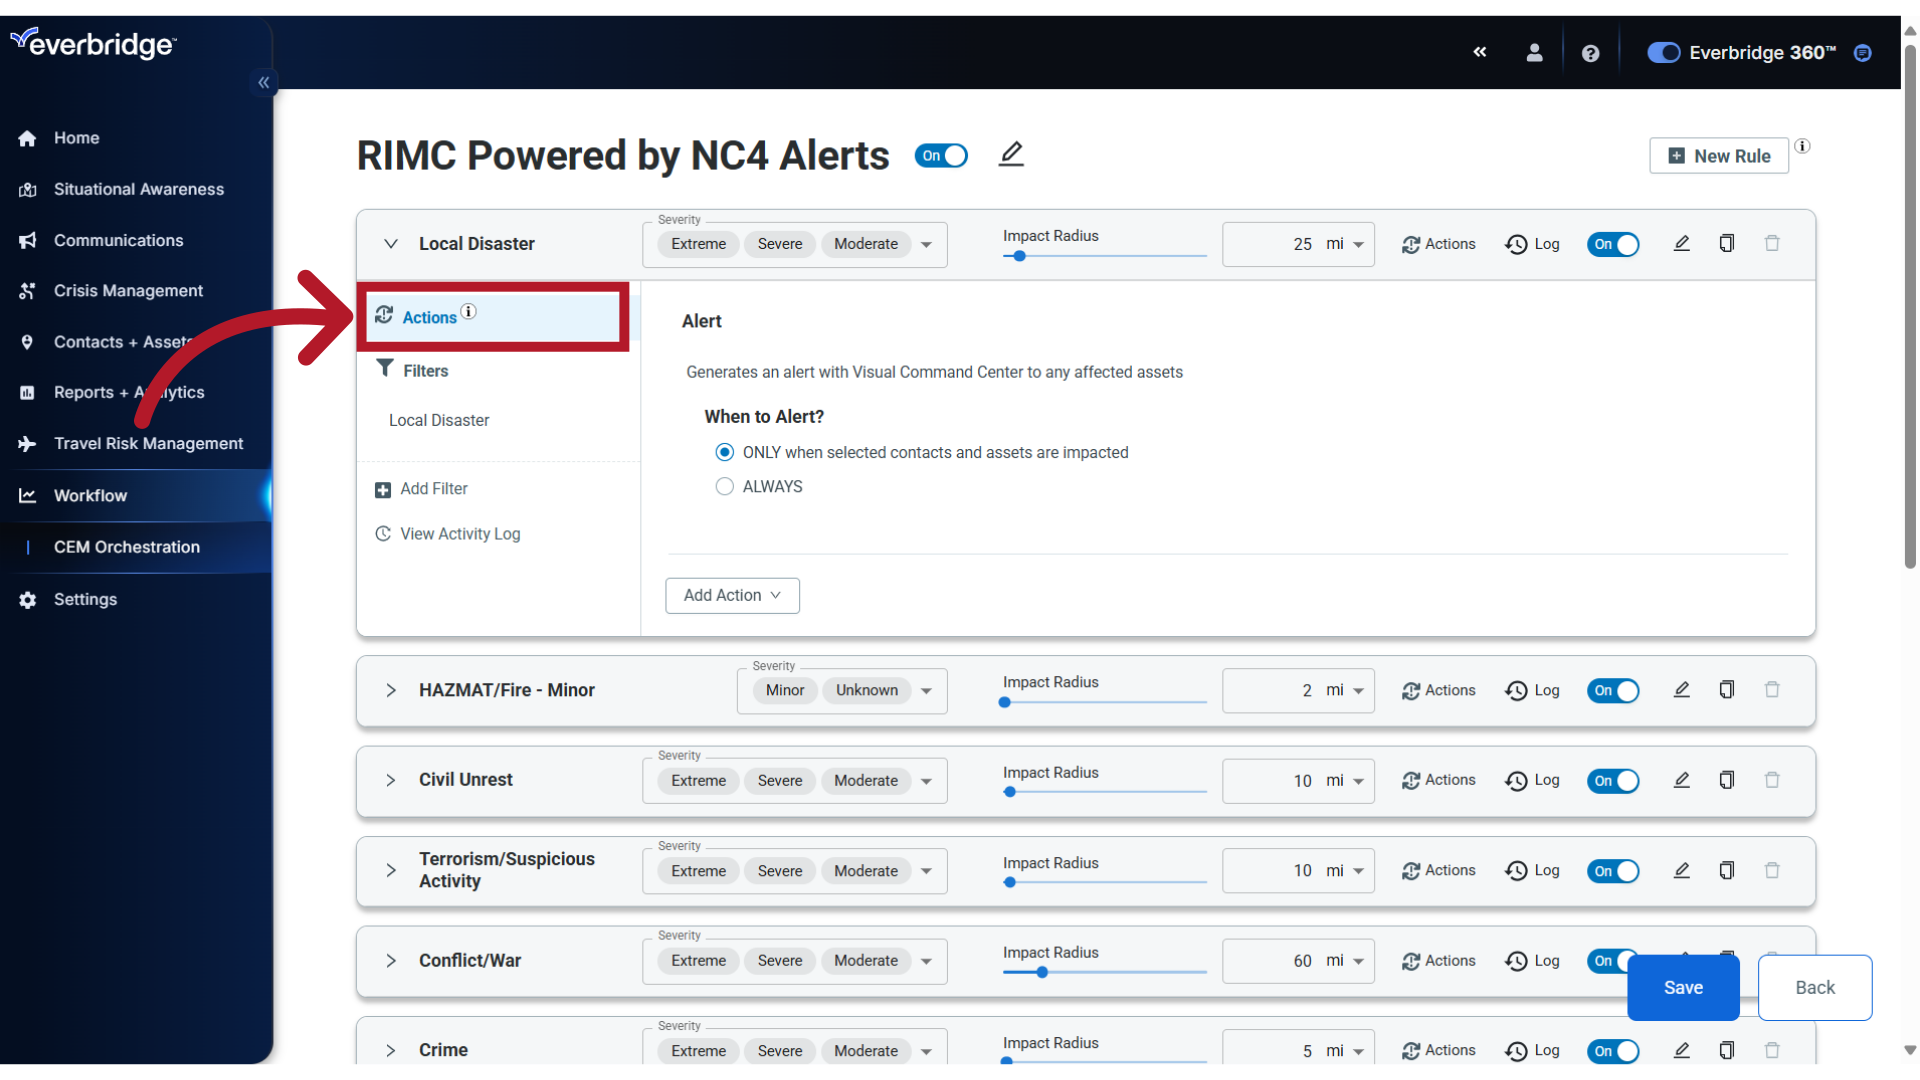
14. Actions
Now that your Filters are set, let's return to the Actions menu. Actions occur once the Filter criteria is met.
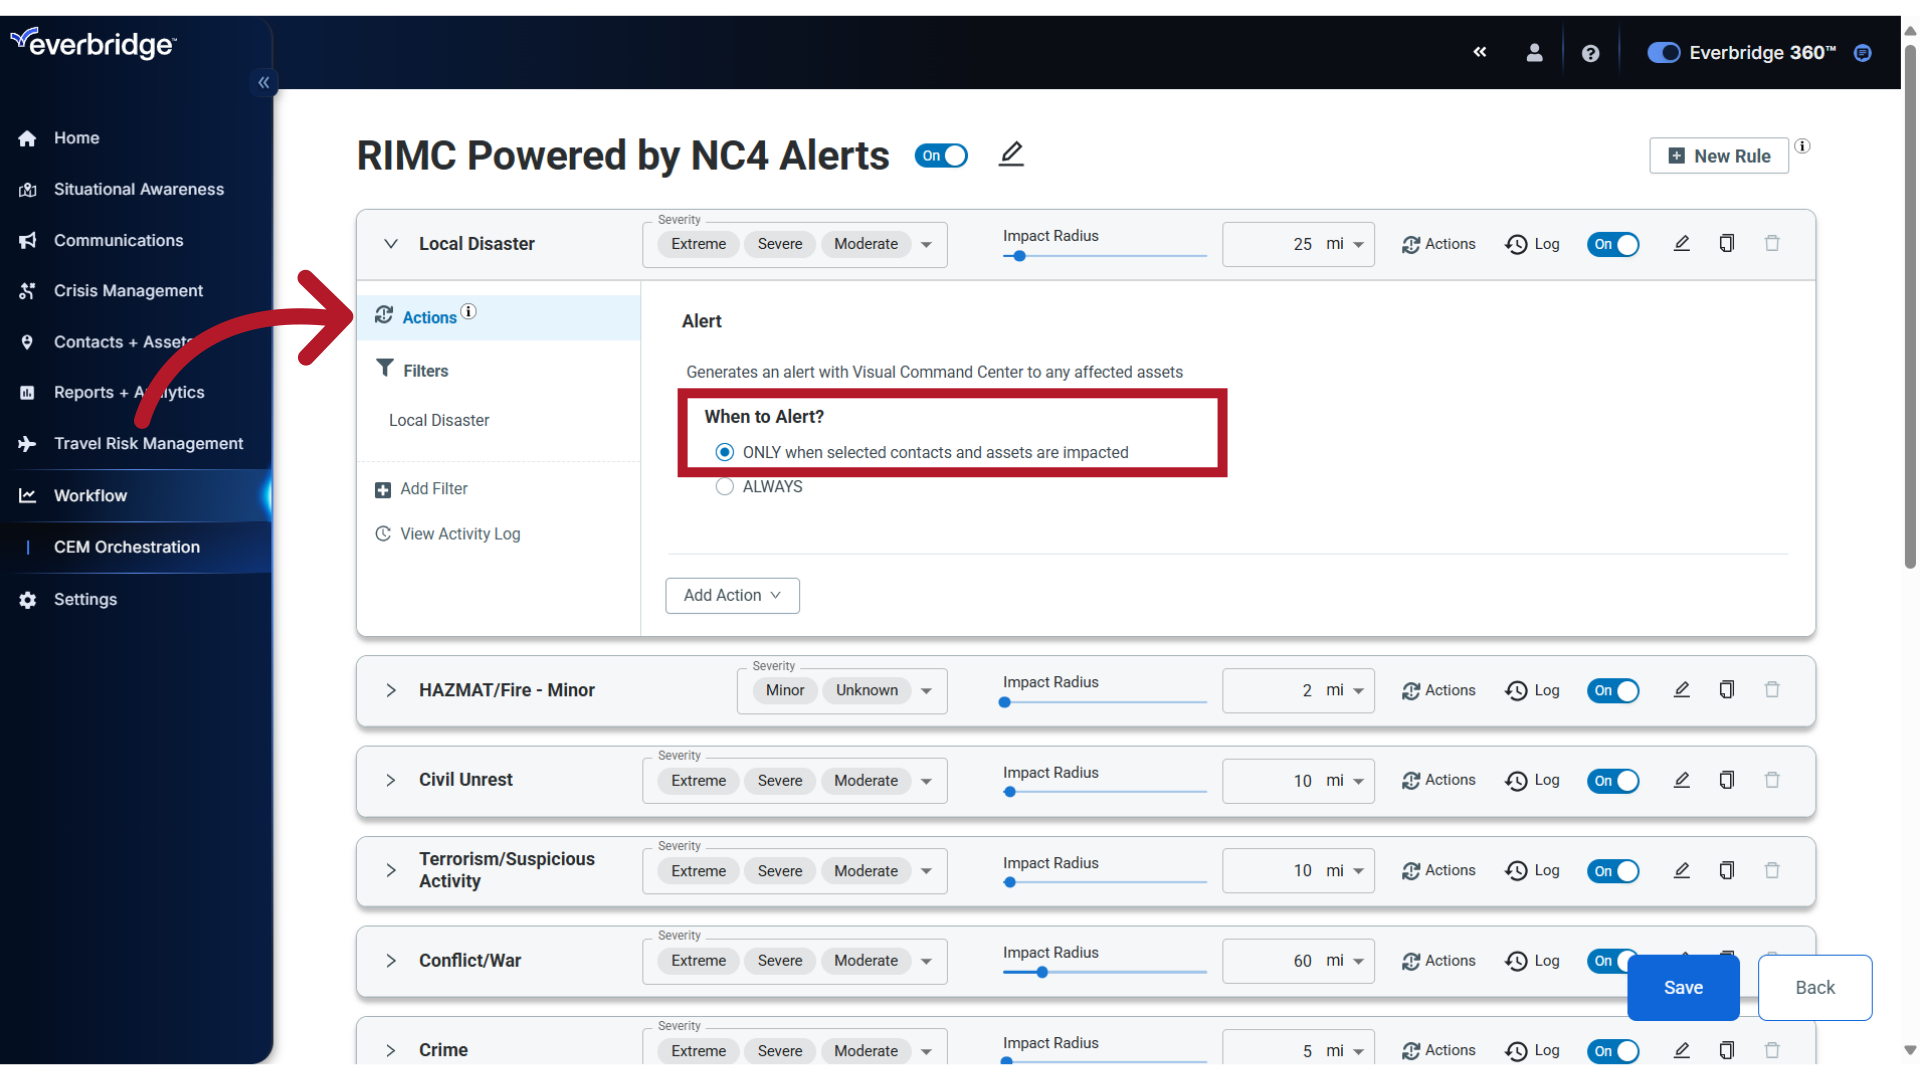
15. Alert
Most of the preconfigured Workflows will be set to generate alerts only when the selected contacts and assets are impacted.
16. Always Alert
If the proximity of a risk event to your assets is not a factor for generating alerts, you can change the selection to Always Alert. This option will ignore any Contact and Asset filters and only use the other criteria configured within the filter. Note: A few Workflows, such as those for Mobile Safety and Tropical Cyclone and Disturbances, will be set to Always Alert by default.

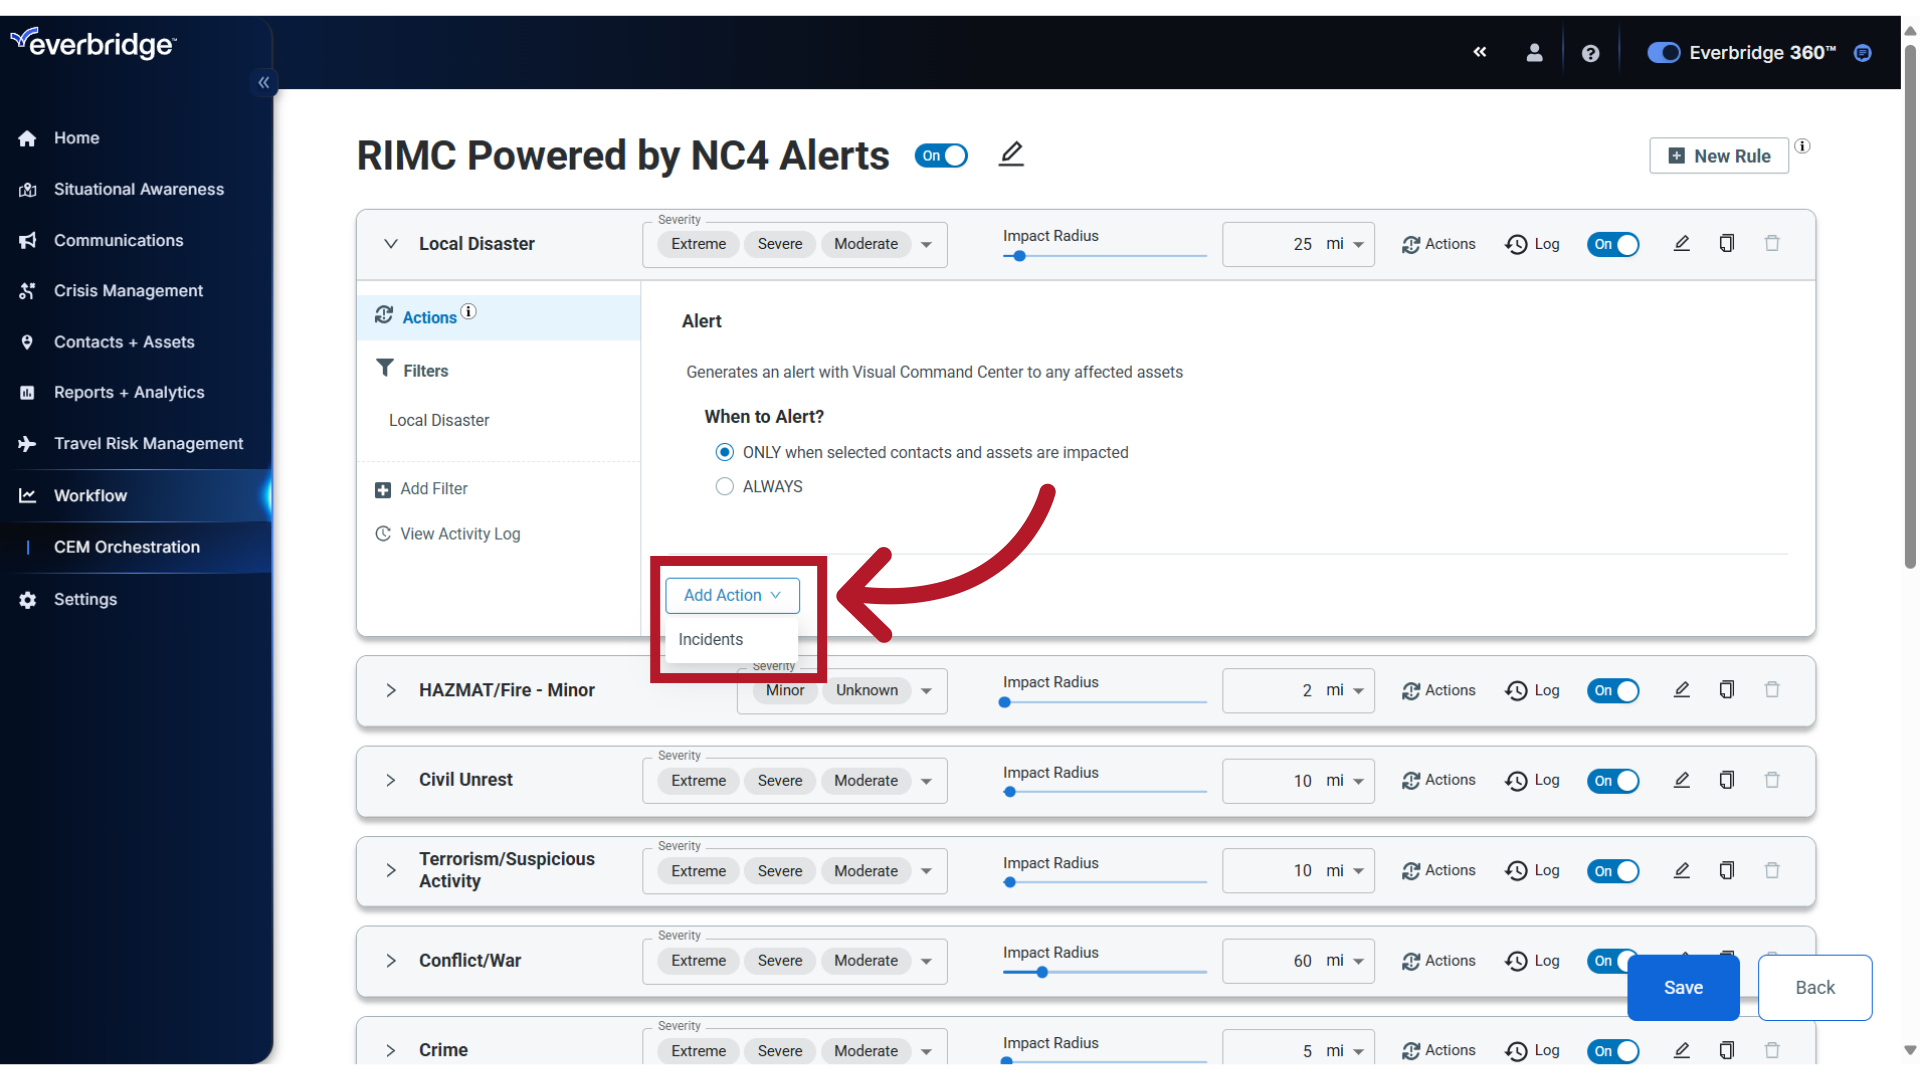
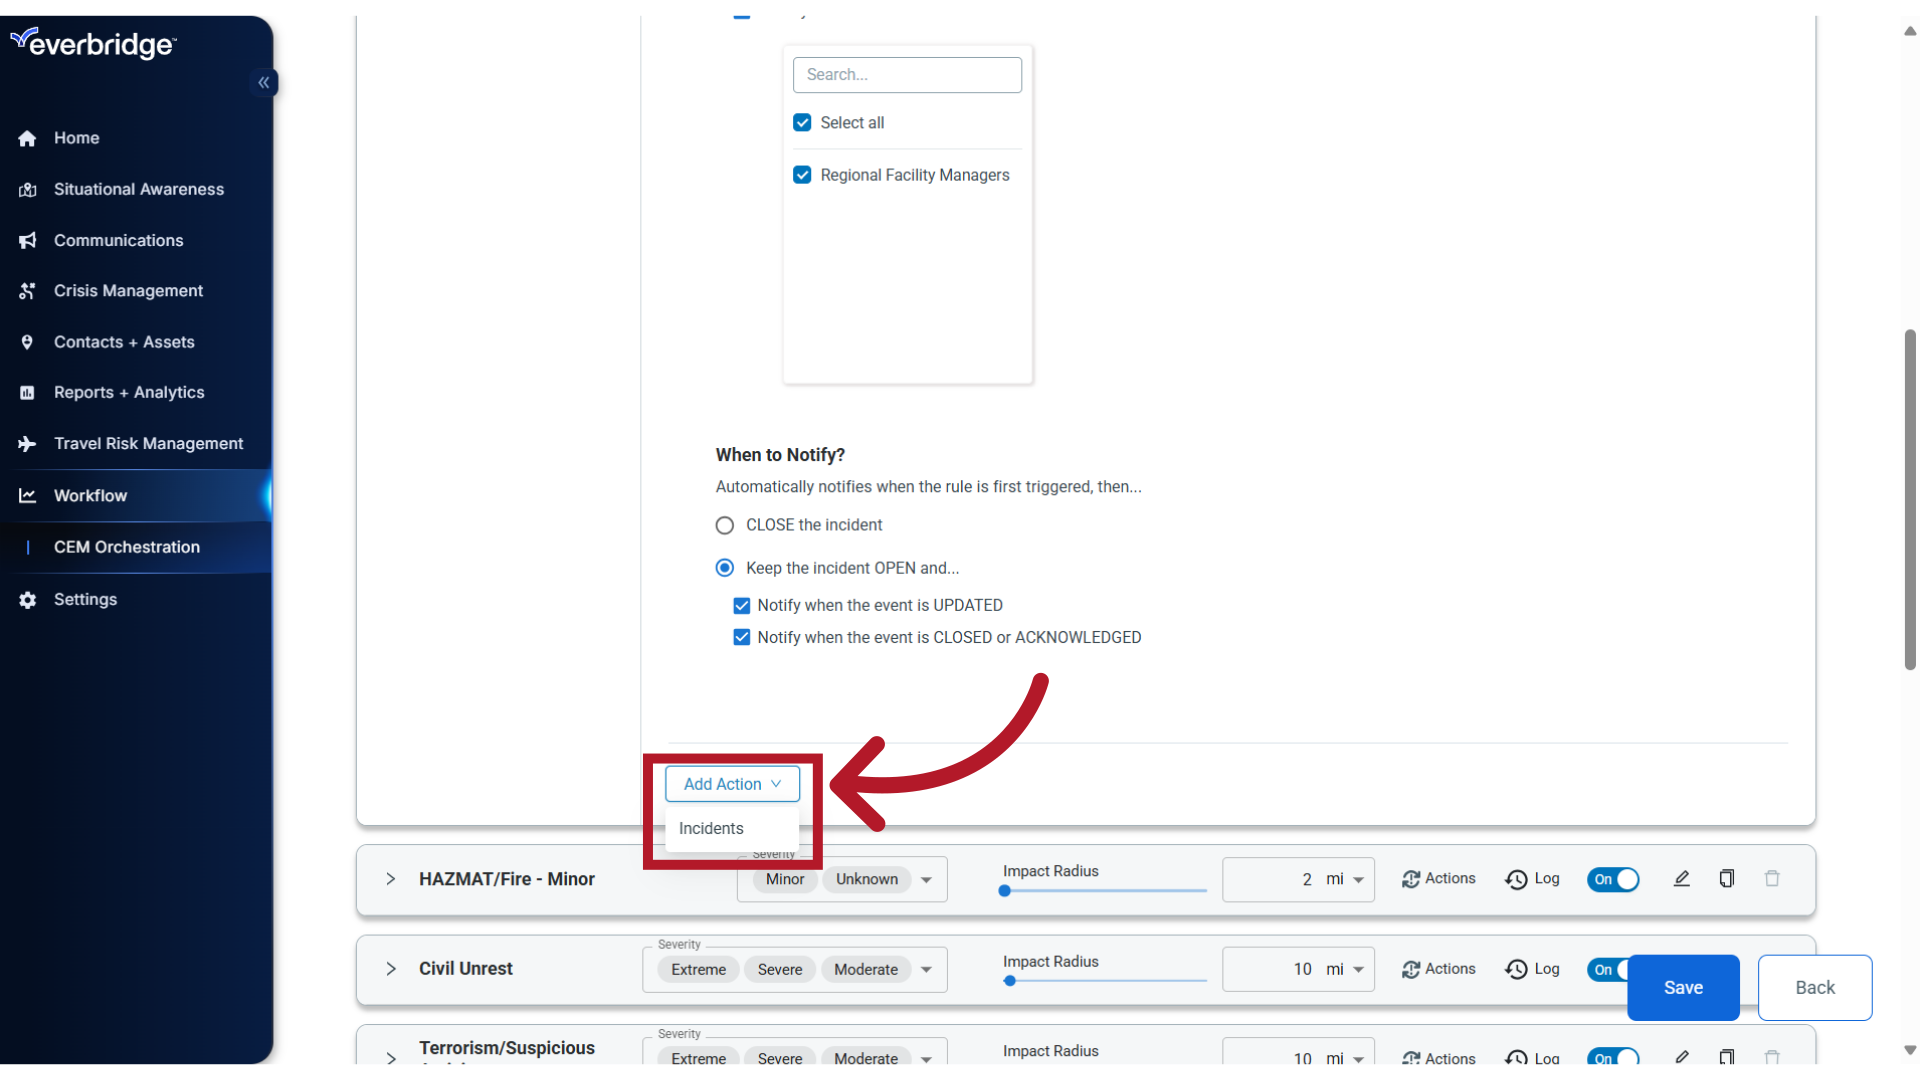
17. Incidents
When an alert is generated, it can also launch an automated notification. This can be helpful when you are not monitoring alerts directly in Visual Command Center. To enable, select Incidents from the Add Actions menu.
18. Template
This is where you will assign an incident template to launch for this alert.
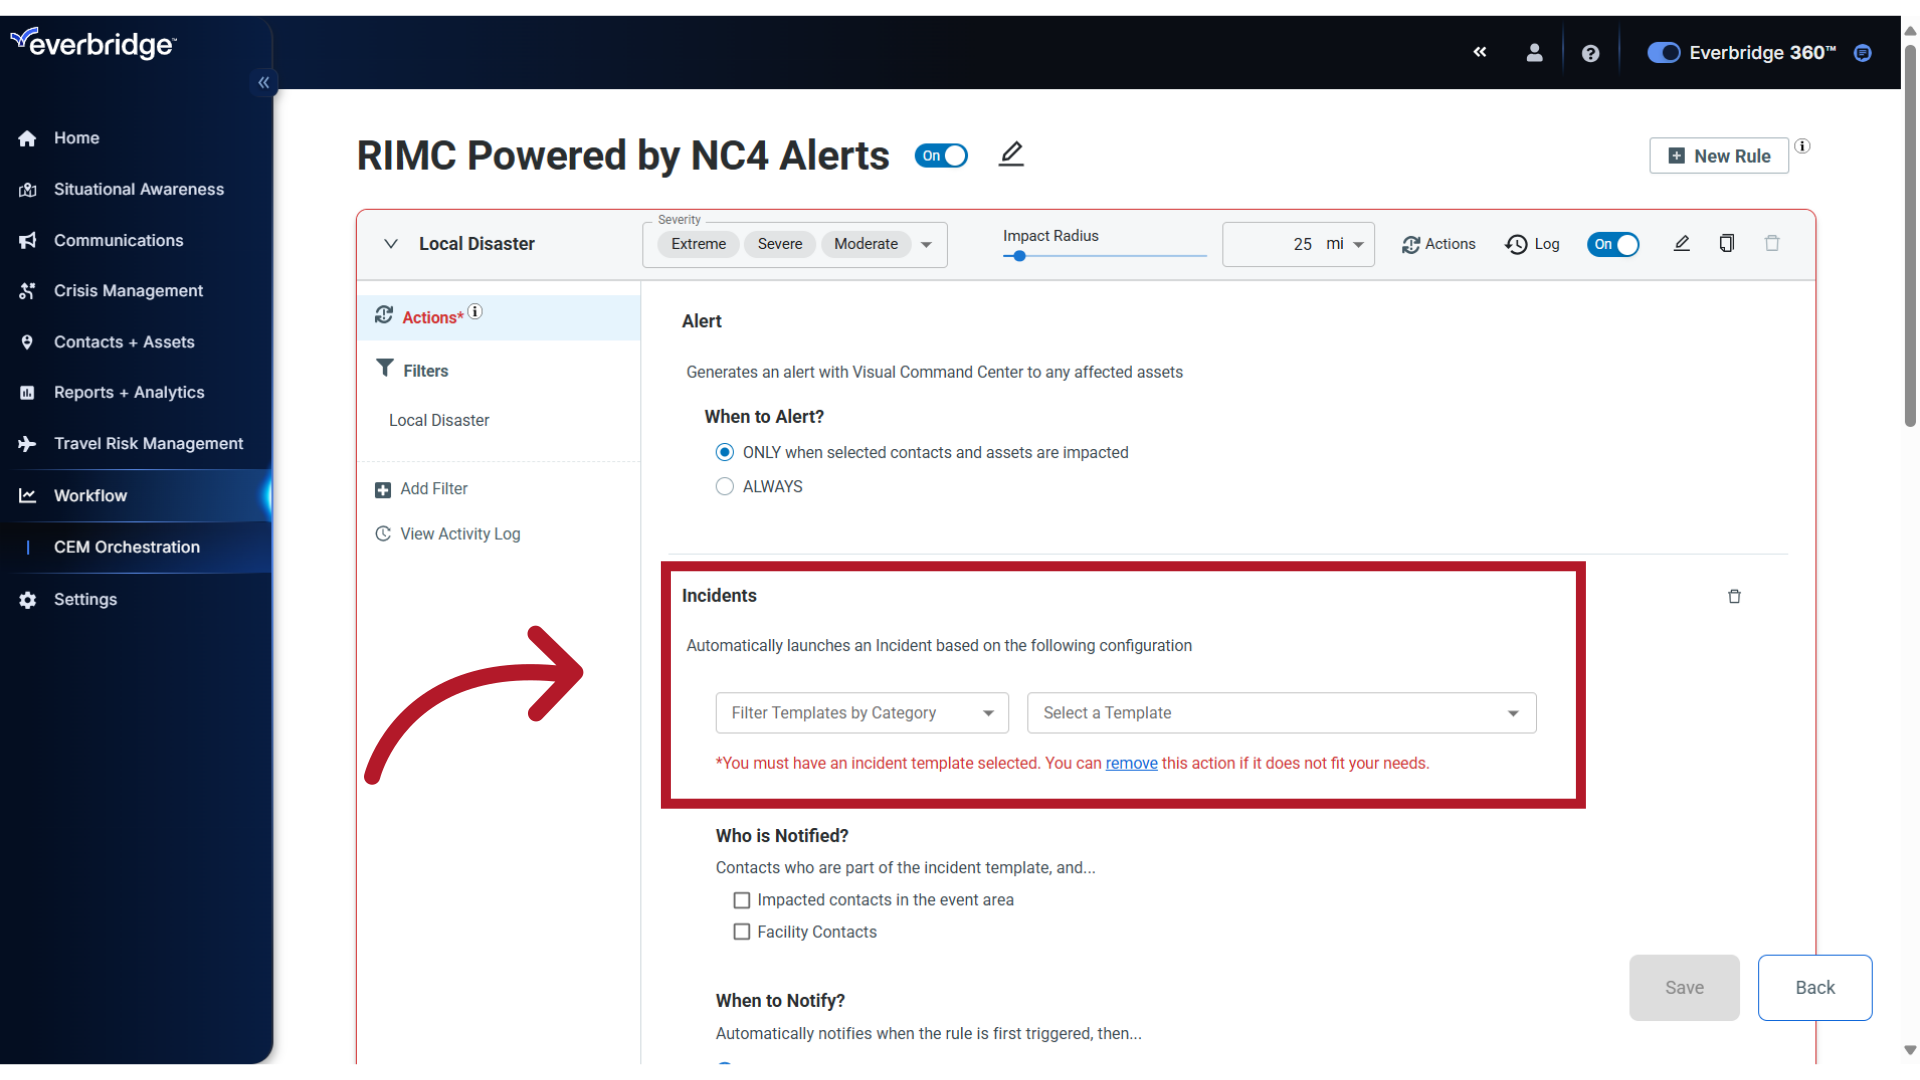
19. Select
Select the Category and Template from your preconfigured list. Sample templates suitable for auto launch is provided in your organization. It is recommended that you review these templates in advance to customize the content, settings and contacts.

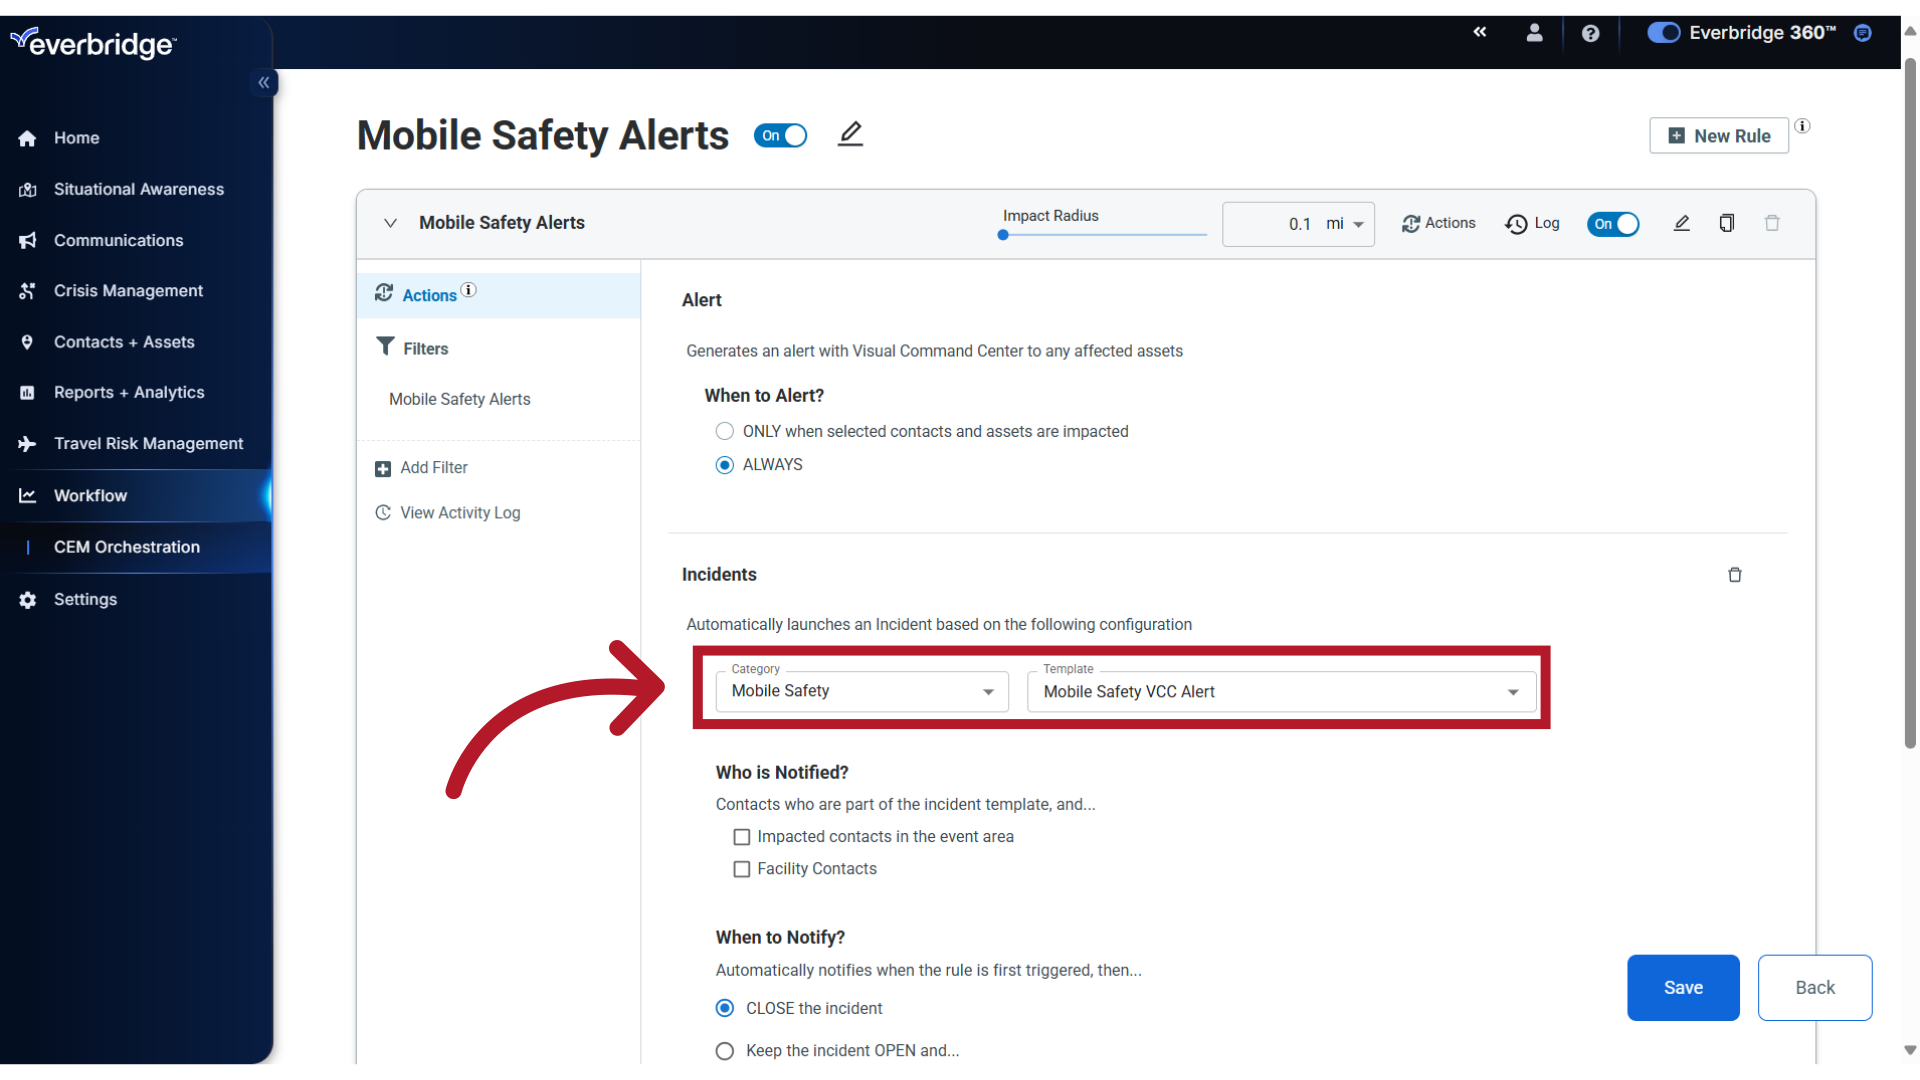
20. Mobile Safety VCC
Note: if launching an automated incident notification for the Mobile Safety alert workflow, use the designated template provided in your Organization that is specific to this alert type.
21. Contacts in Area
To launch the incident to all alertable contacts in the event area, select the option to "Send to Contacts in Area." This setting is not recommended for the Mobile Safety Alert workflow.
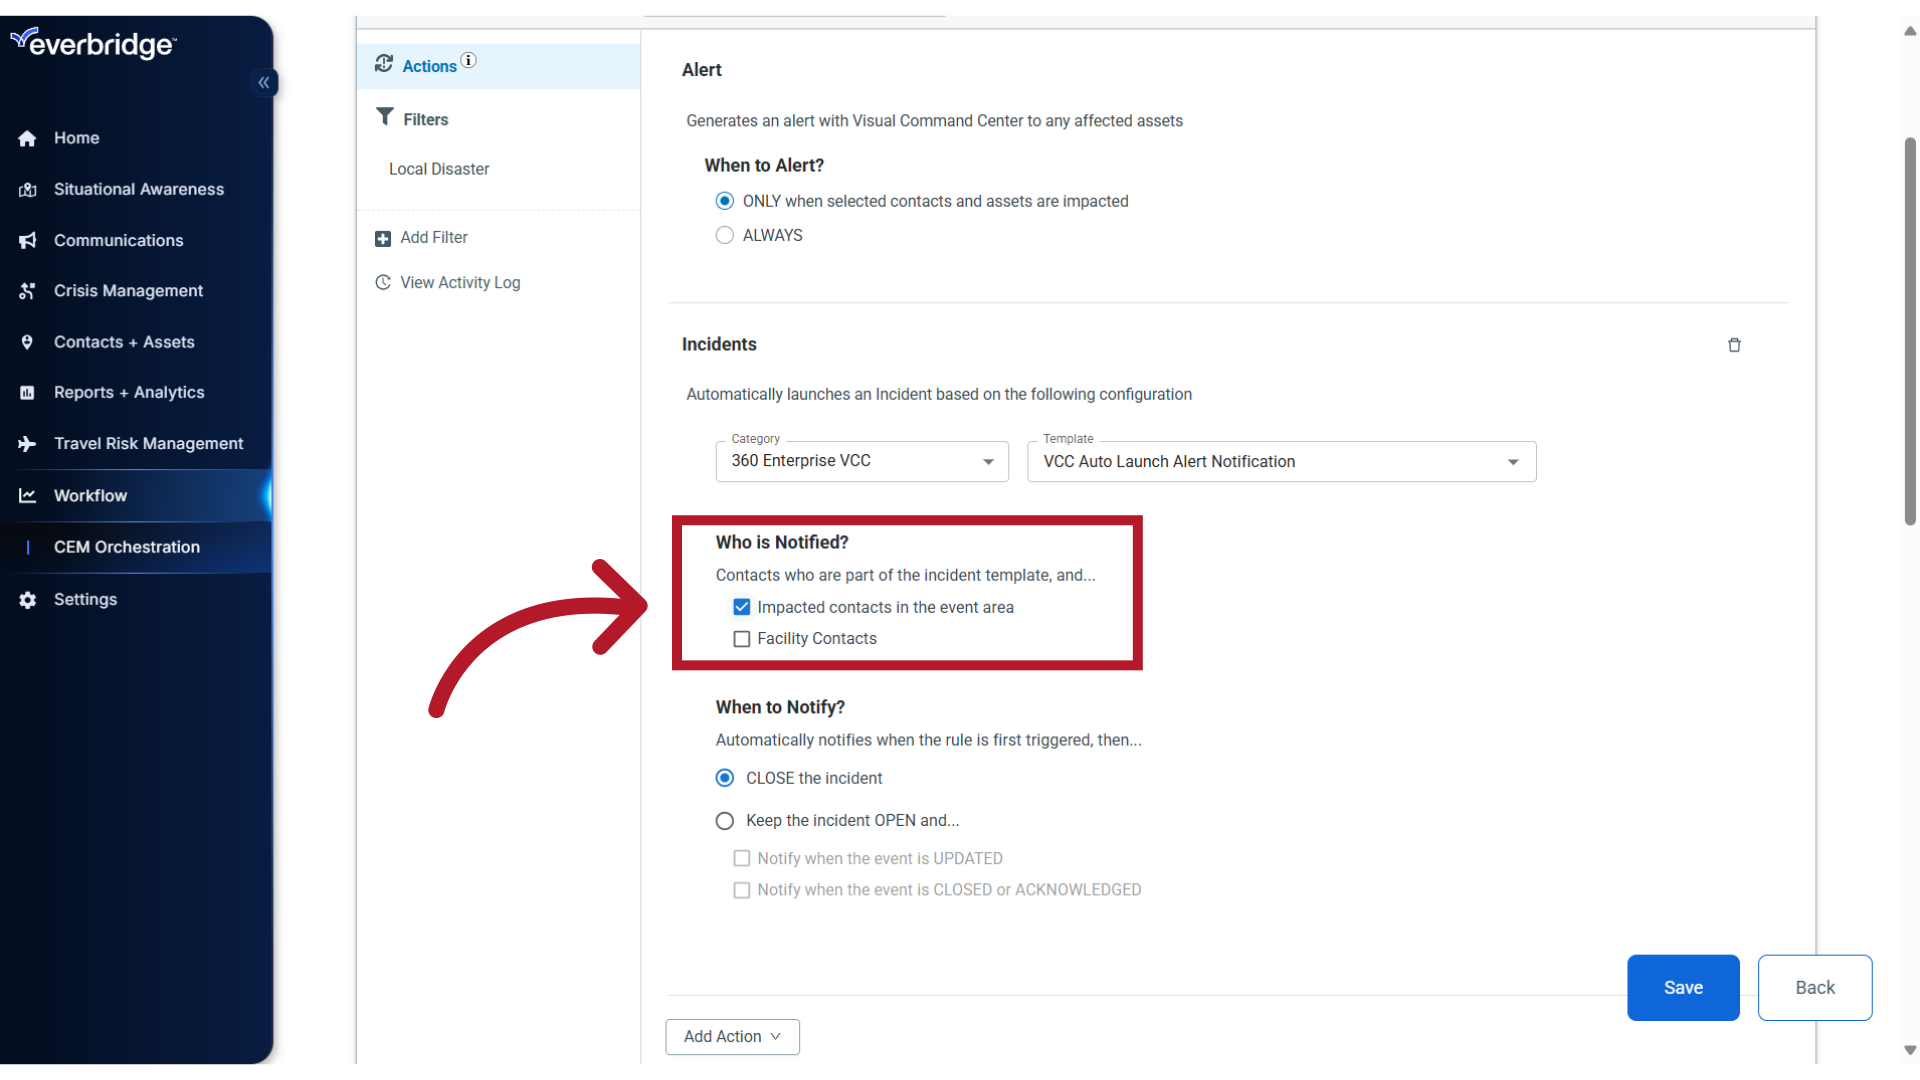
22. Facility Contacts
If configured for any of your Assets, you can also select the option to notify Facility Contacts.

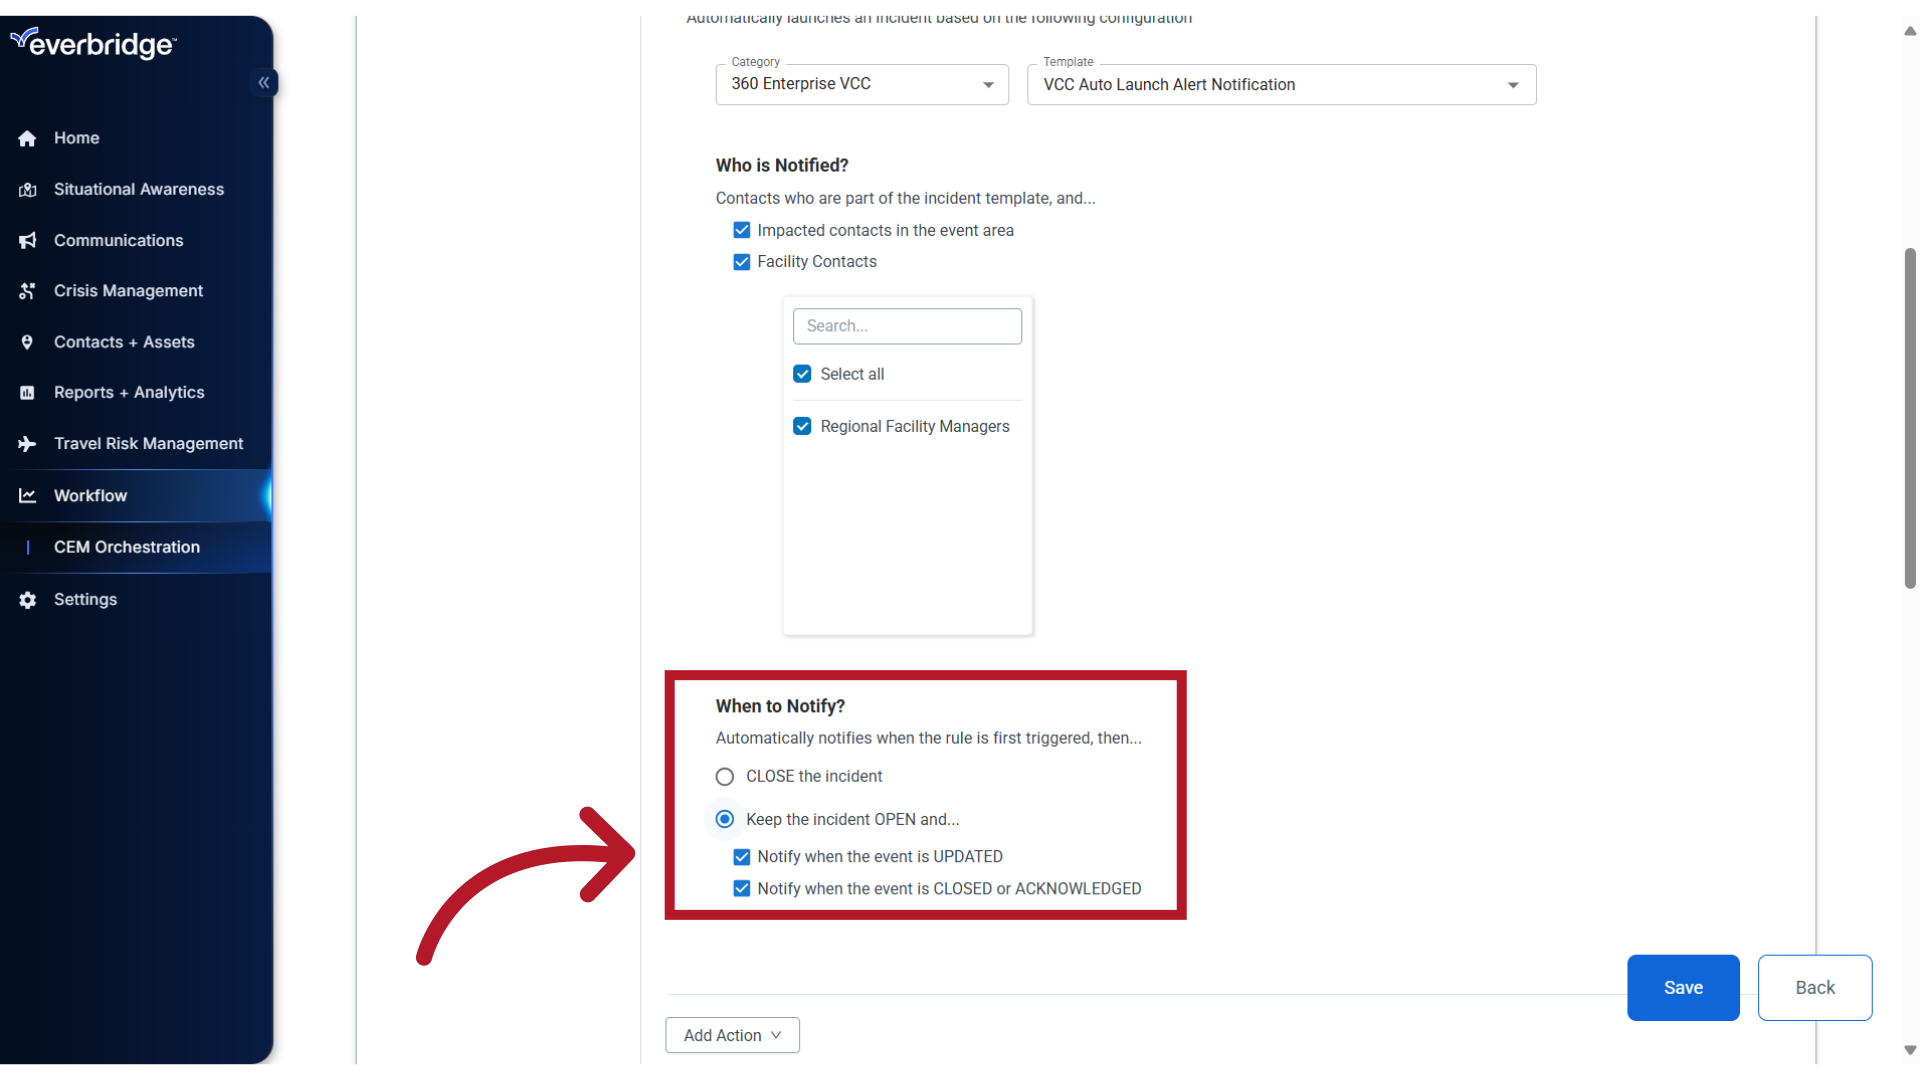
23. Frequency
When determining the frequency of alert notifications, you can select to close the incident after the initial notification is received or keep the incident open to be notified when the event is updated, closed or acknowledged.
24. Add Action
If needed, you can Add an Action to launch additional templates for this alert. For example, you may want to launch one incident notification to preselected recipients to inform them of the event and provide a list of who is impacted, while simultaneously launching a different notification to the contacts in the alert area to check on their safety status.
25. Modify
Repeat these steps if you need to modify the Filters or Actions for any other category in the Workflow.
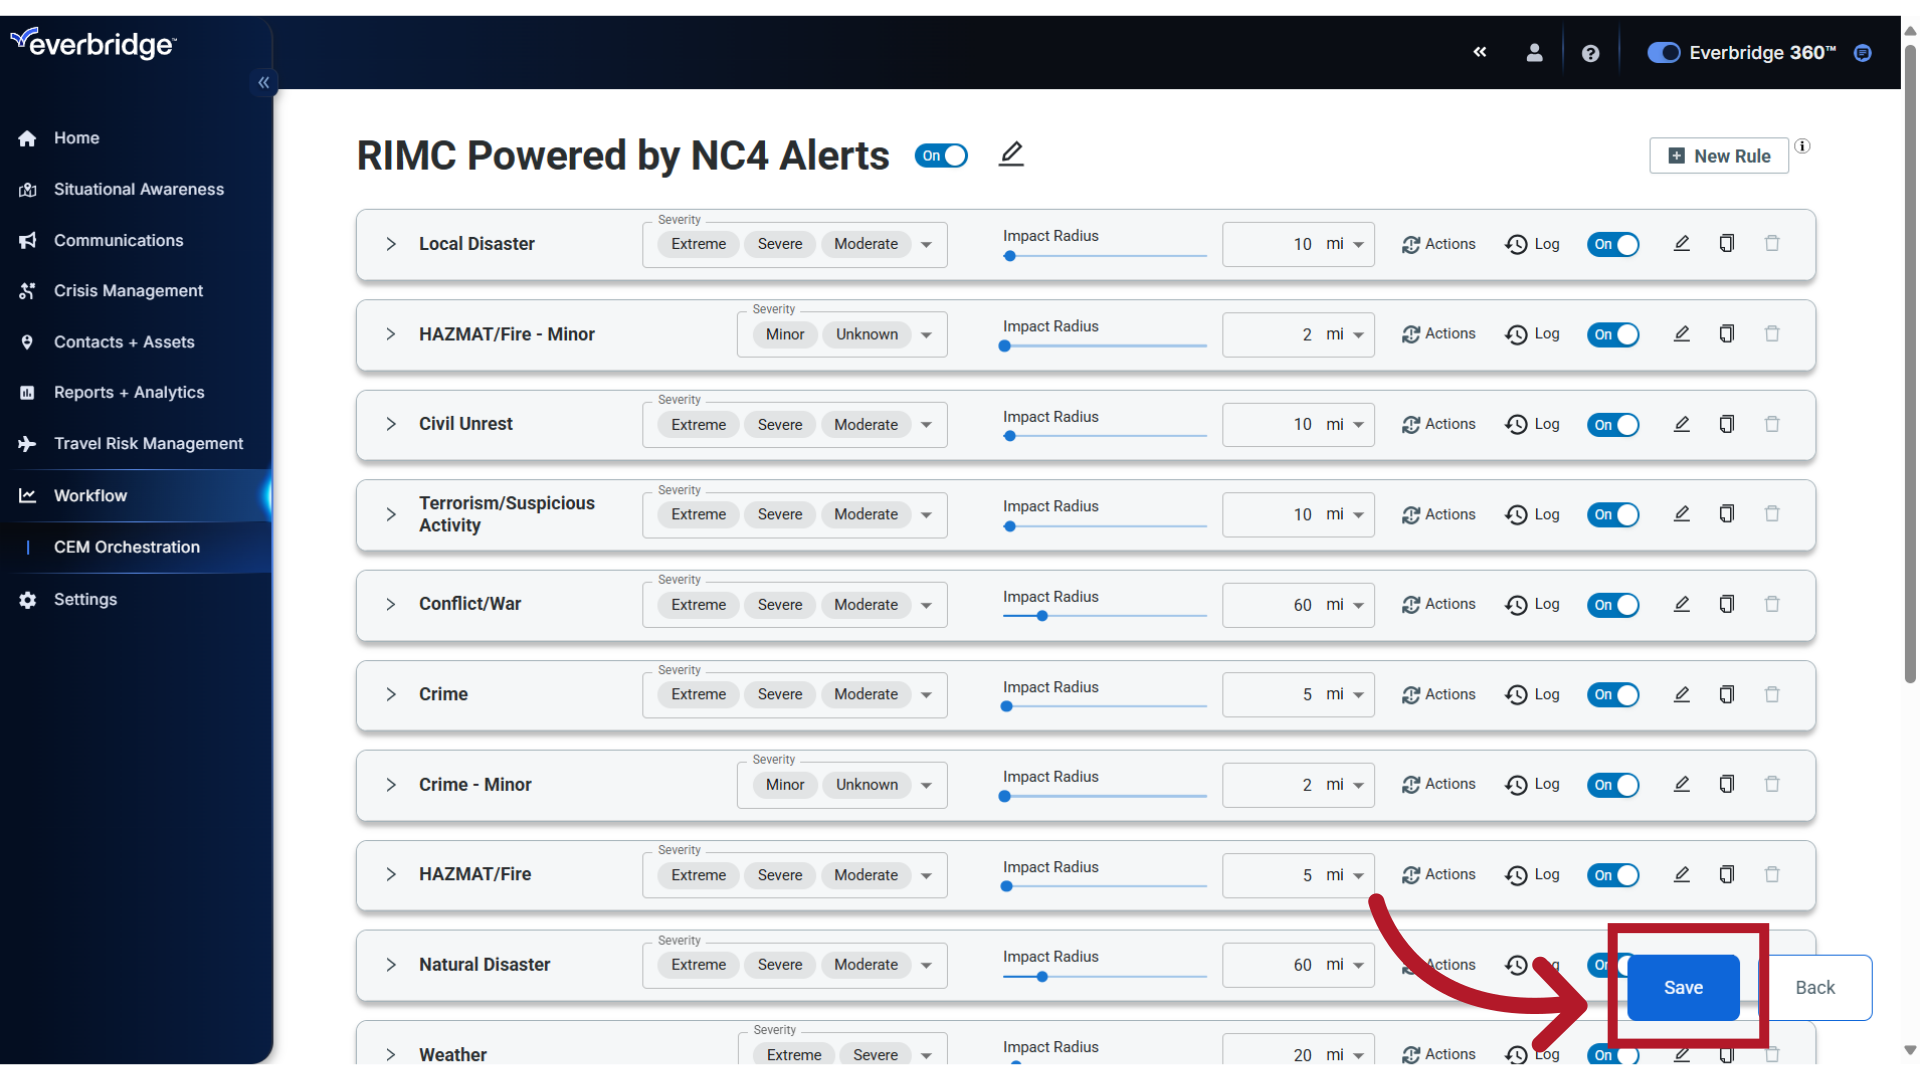
26. Save
When you are finished making any changes to the Workflow, click Save.
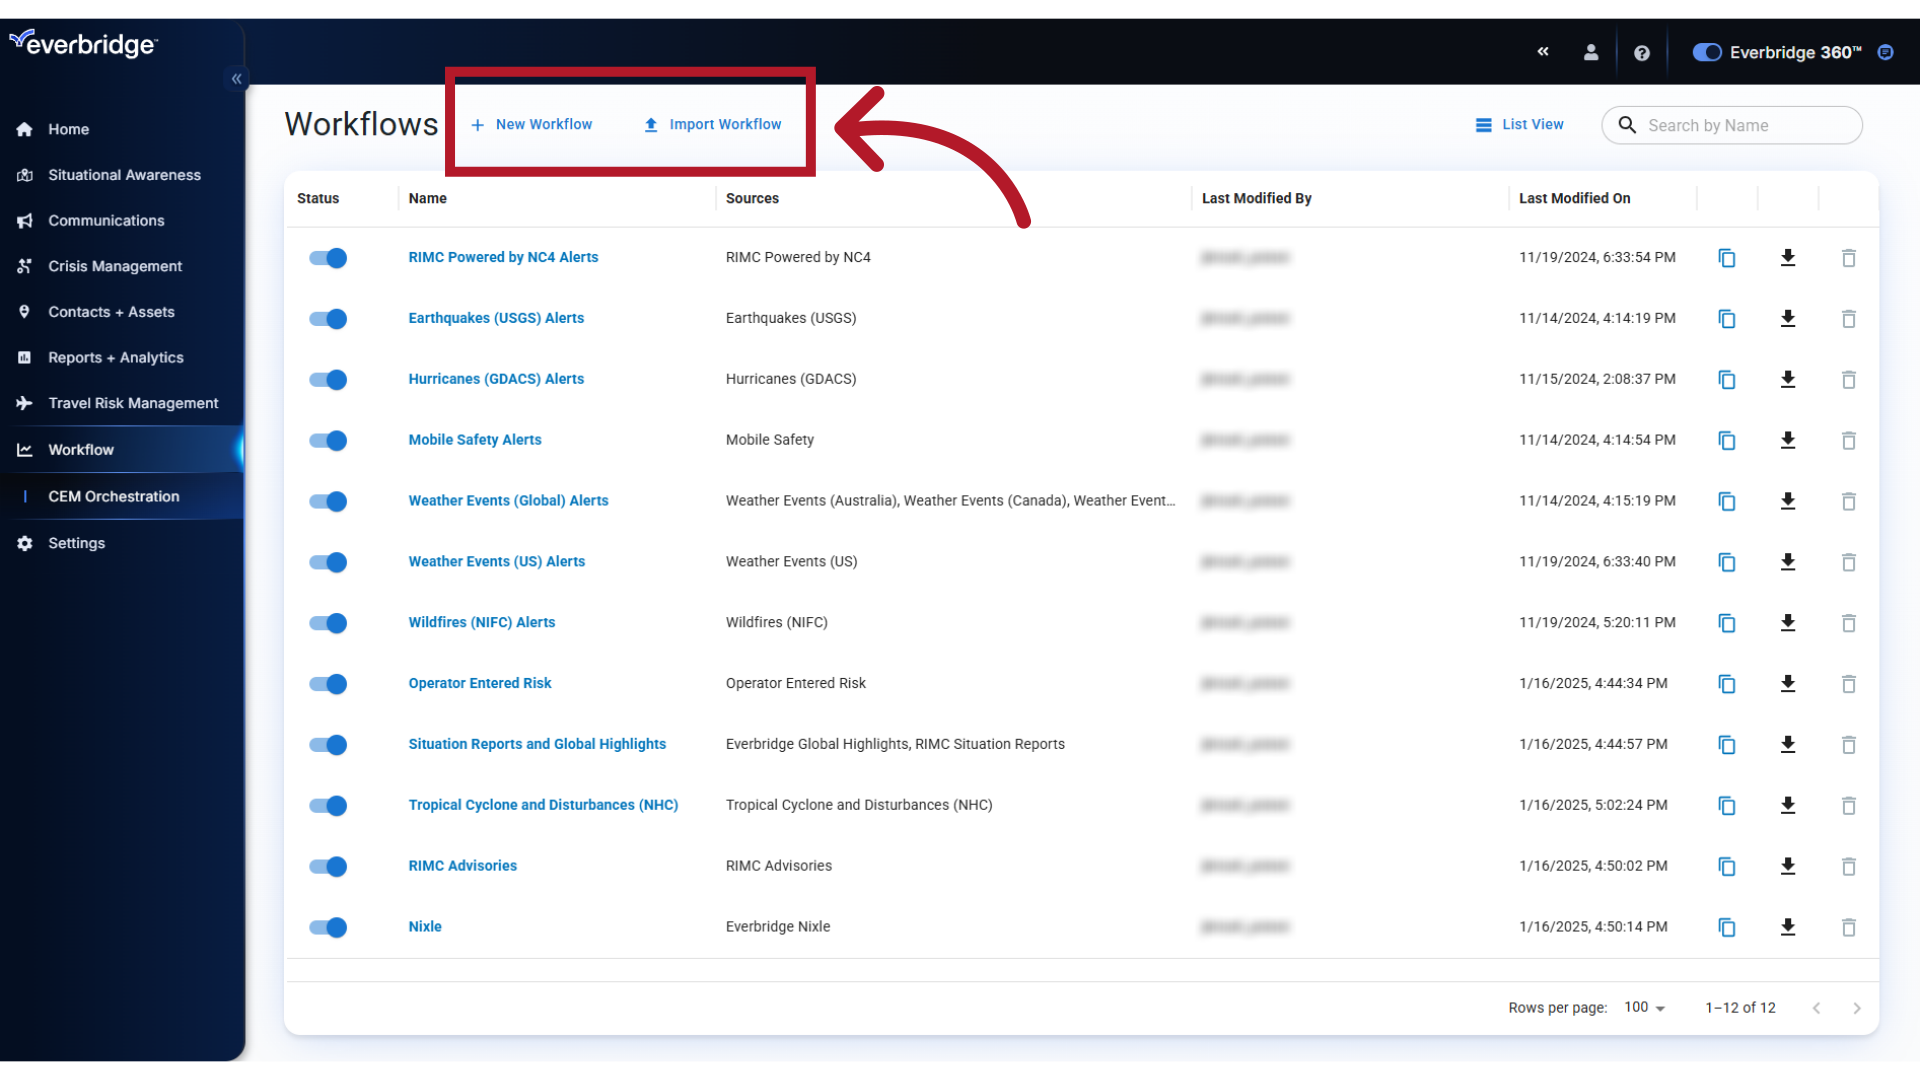
27. Custom
If your alerting requirements cannot be met by modifying the default Workflows, you still have the option to create custom ones. You can also import other Workflows that were built, for example, in your Test organization.
28. Help
For more information on creating or importing new Workflows, click the Help icon to access the Everbridge Online Support Center.

This guide provided instructions on modifying the Filters within the preconfigured Everbridge 360™ Enterprise Workflows for Visual Command Center alerting. Thank you for watching!