Topic
Integrating IPAWS credentials into an Everbridge organization.
Description
This guide will walk you through configuring IPAWS settings in an Everbridge organization.
1. Introduction
Once you have integrated your IPAWS credentials into your Everbridge organization, there are several remaining settings that need to be configured before you can send IPAWS alerts. Before configuring these settings, you will need a copy of your COG profile.

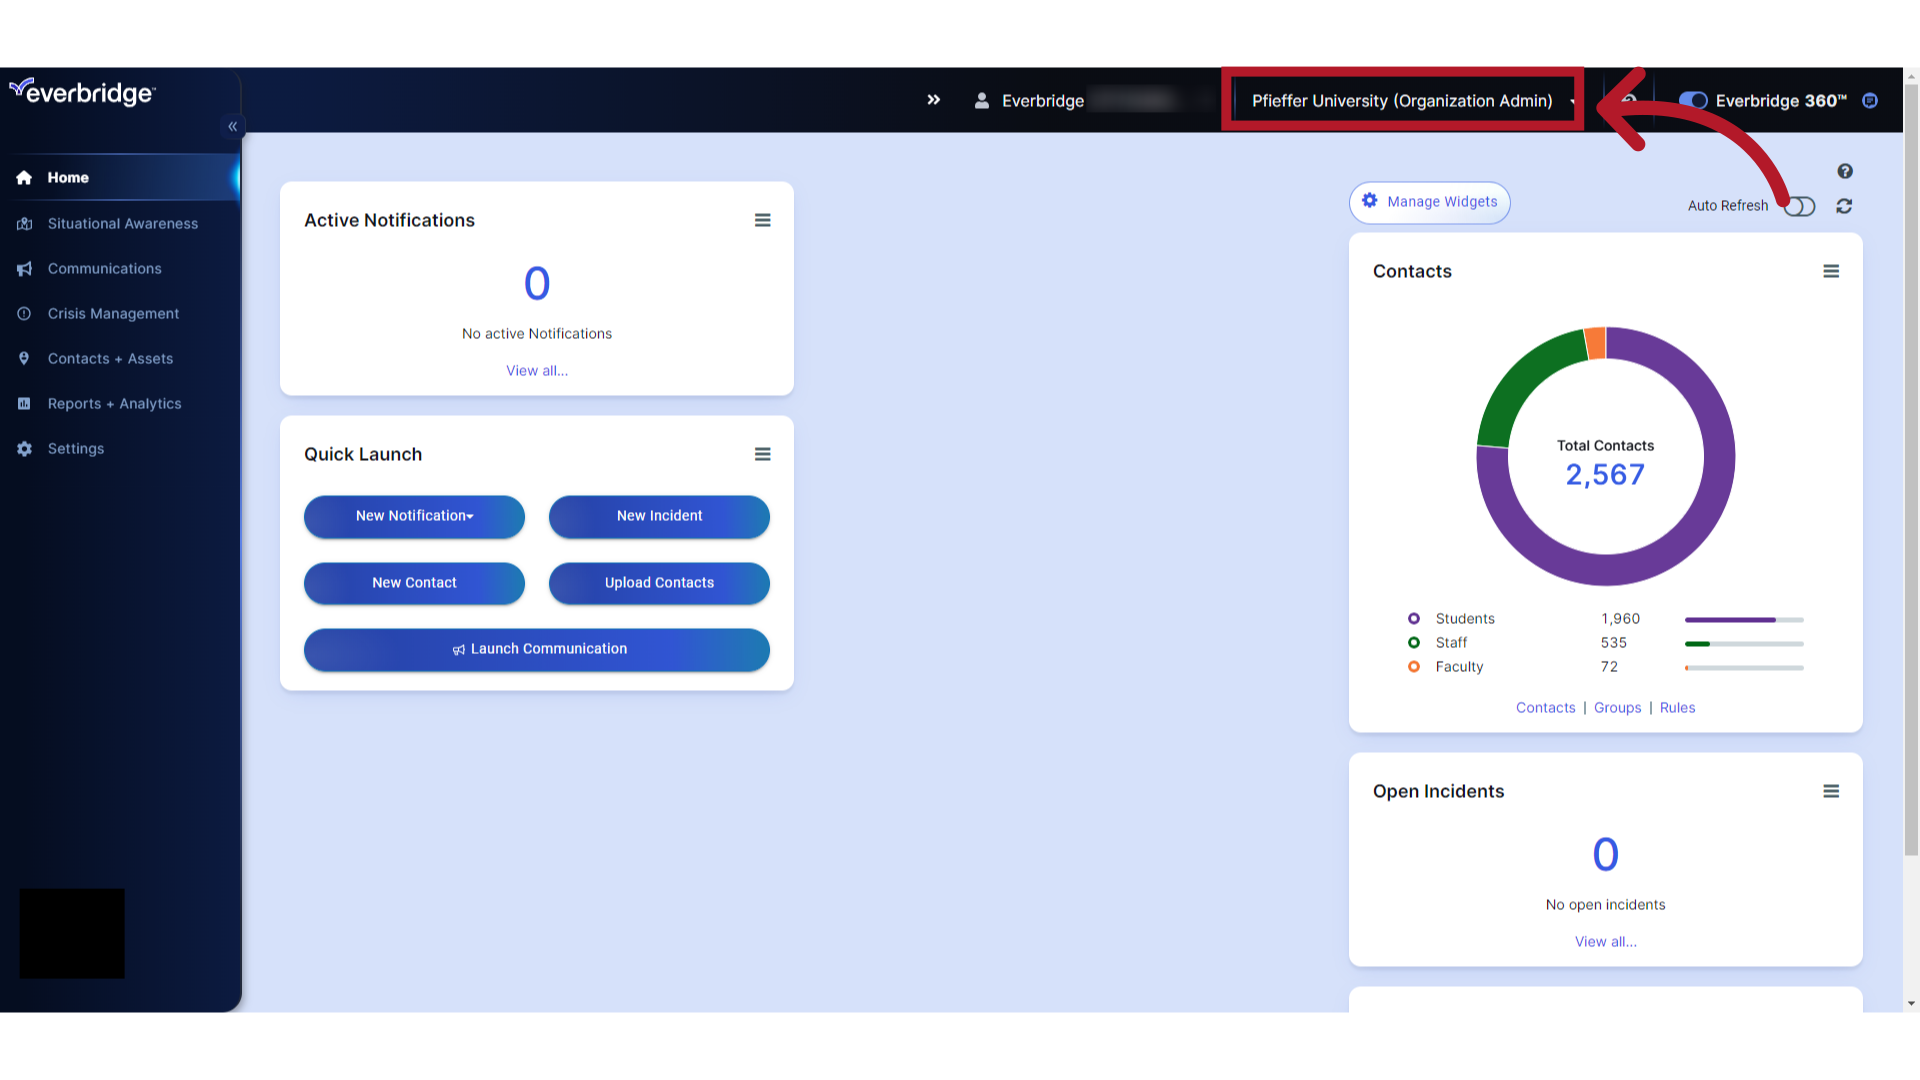
2. Manager Portal Login
Log in to the Everbridge Manager Portal and select your Organization.
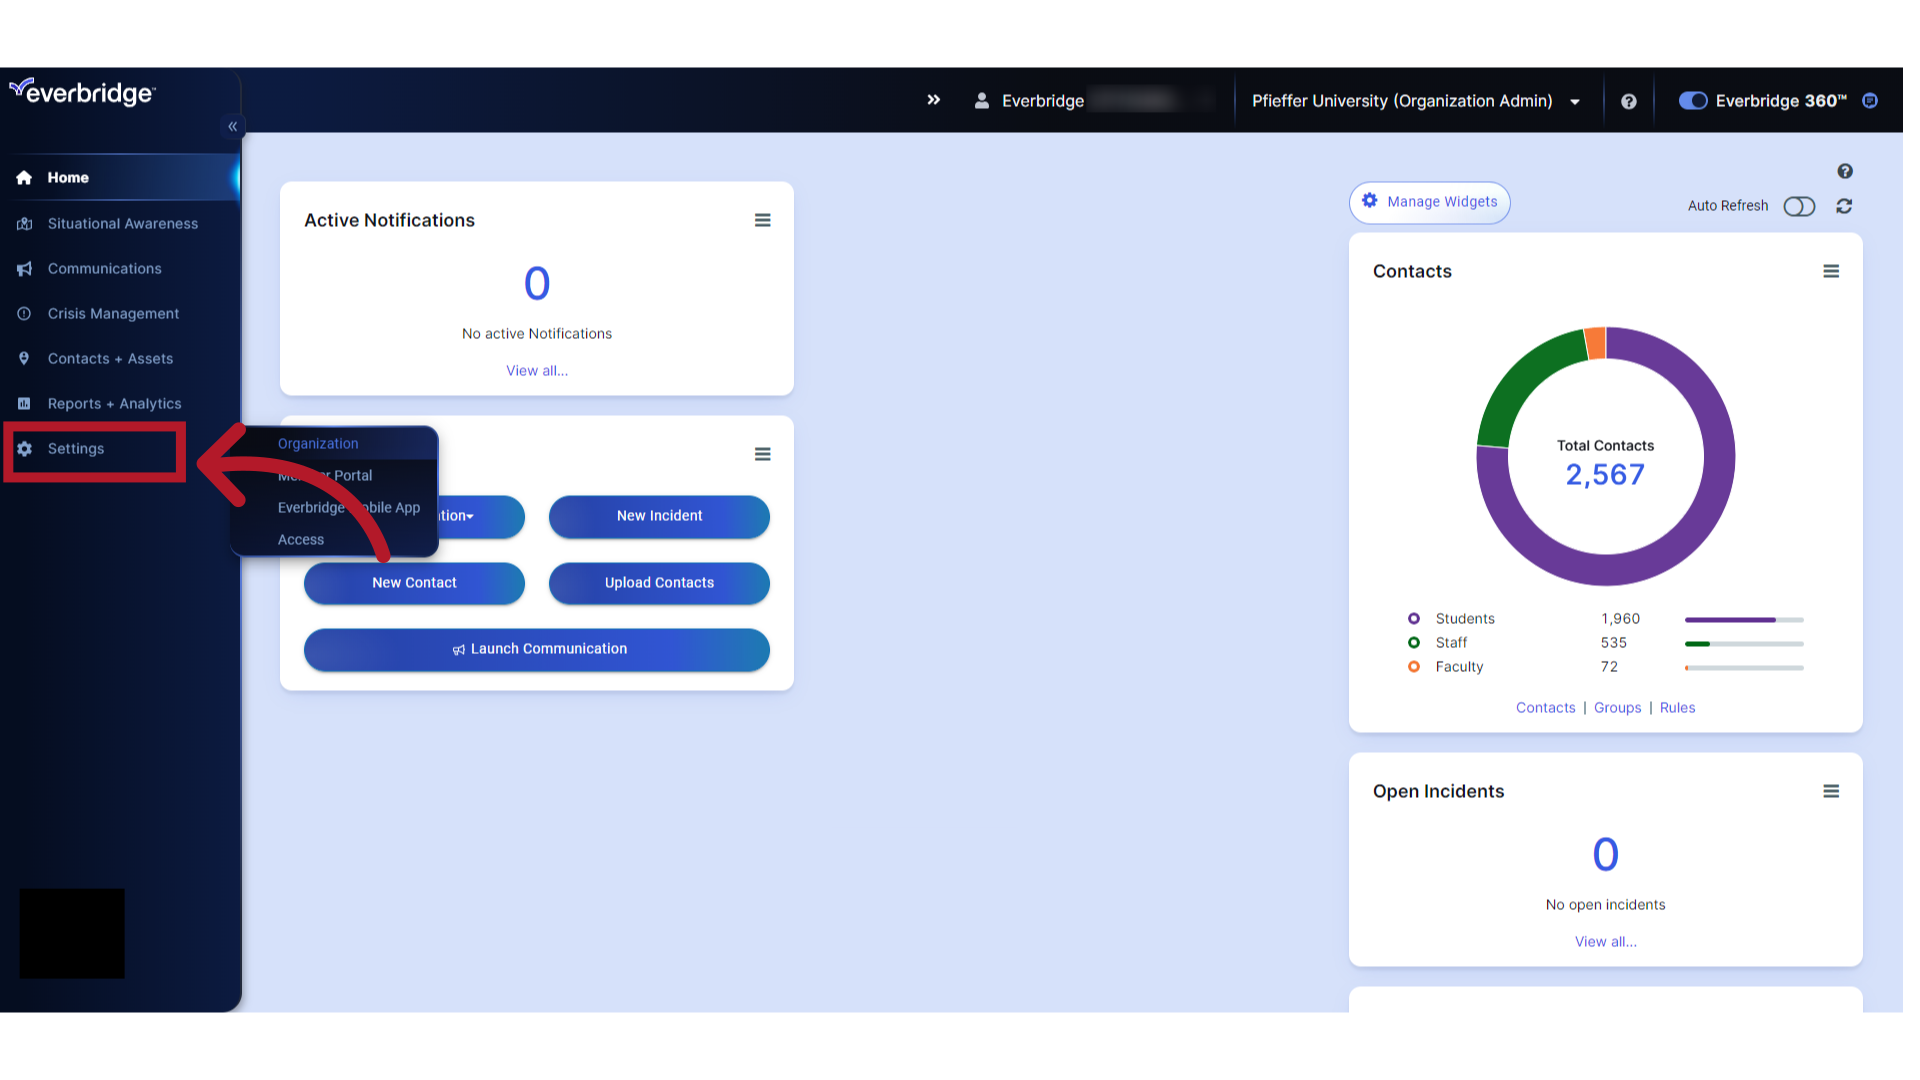
3. Settings
Select "Settings".
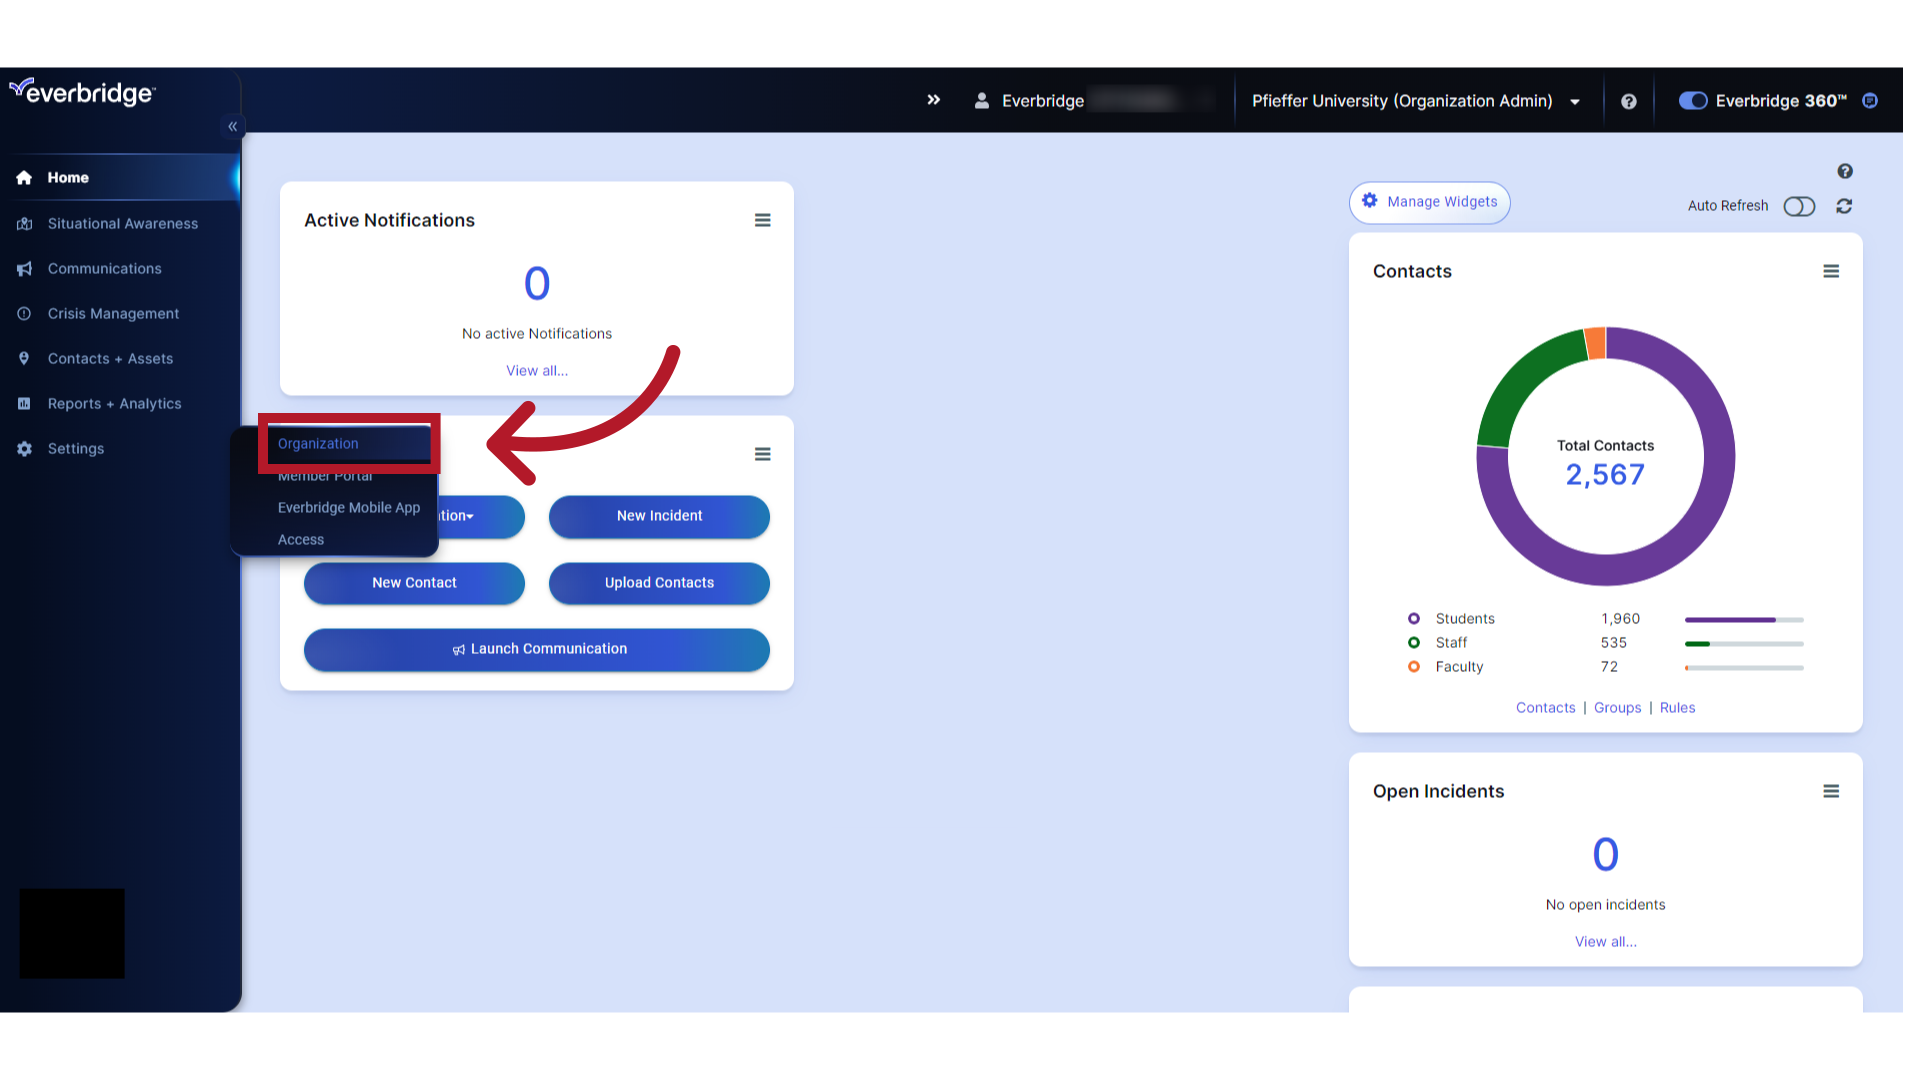
4. Organization
Select "Organization".
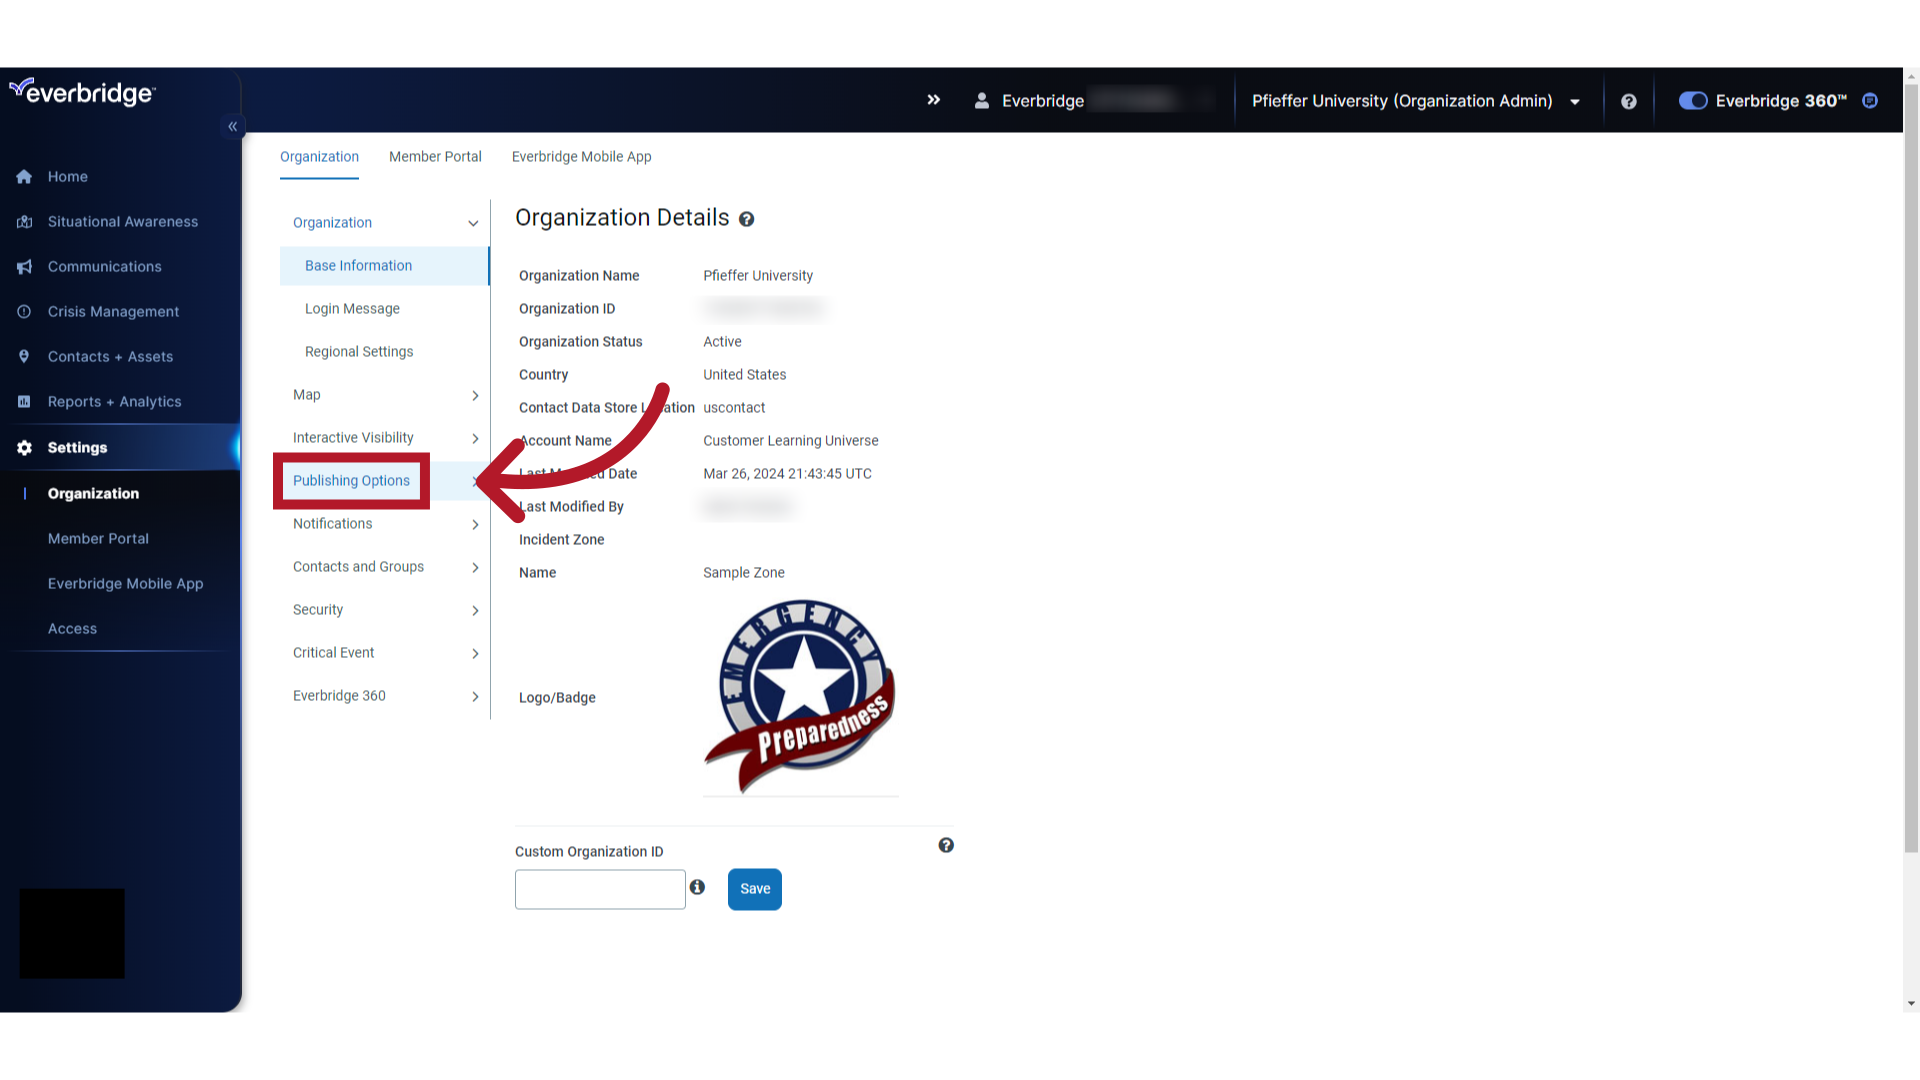
5. Publishing Options
Choose "Publishing Options".
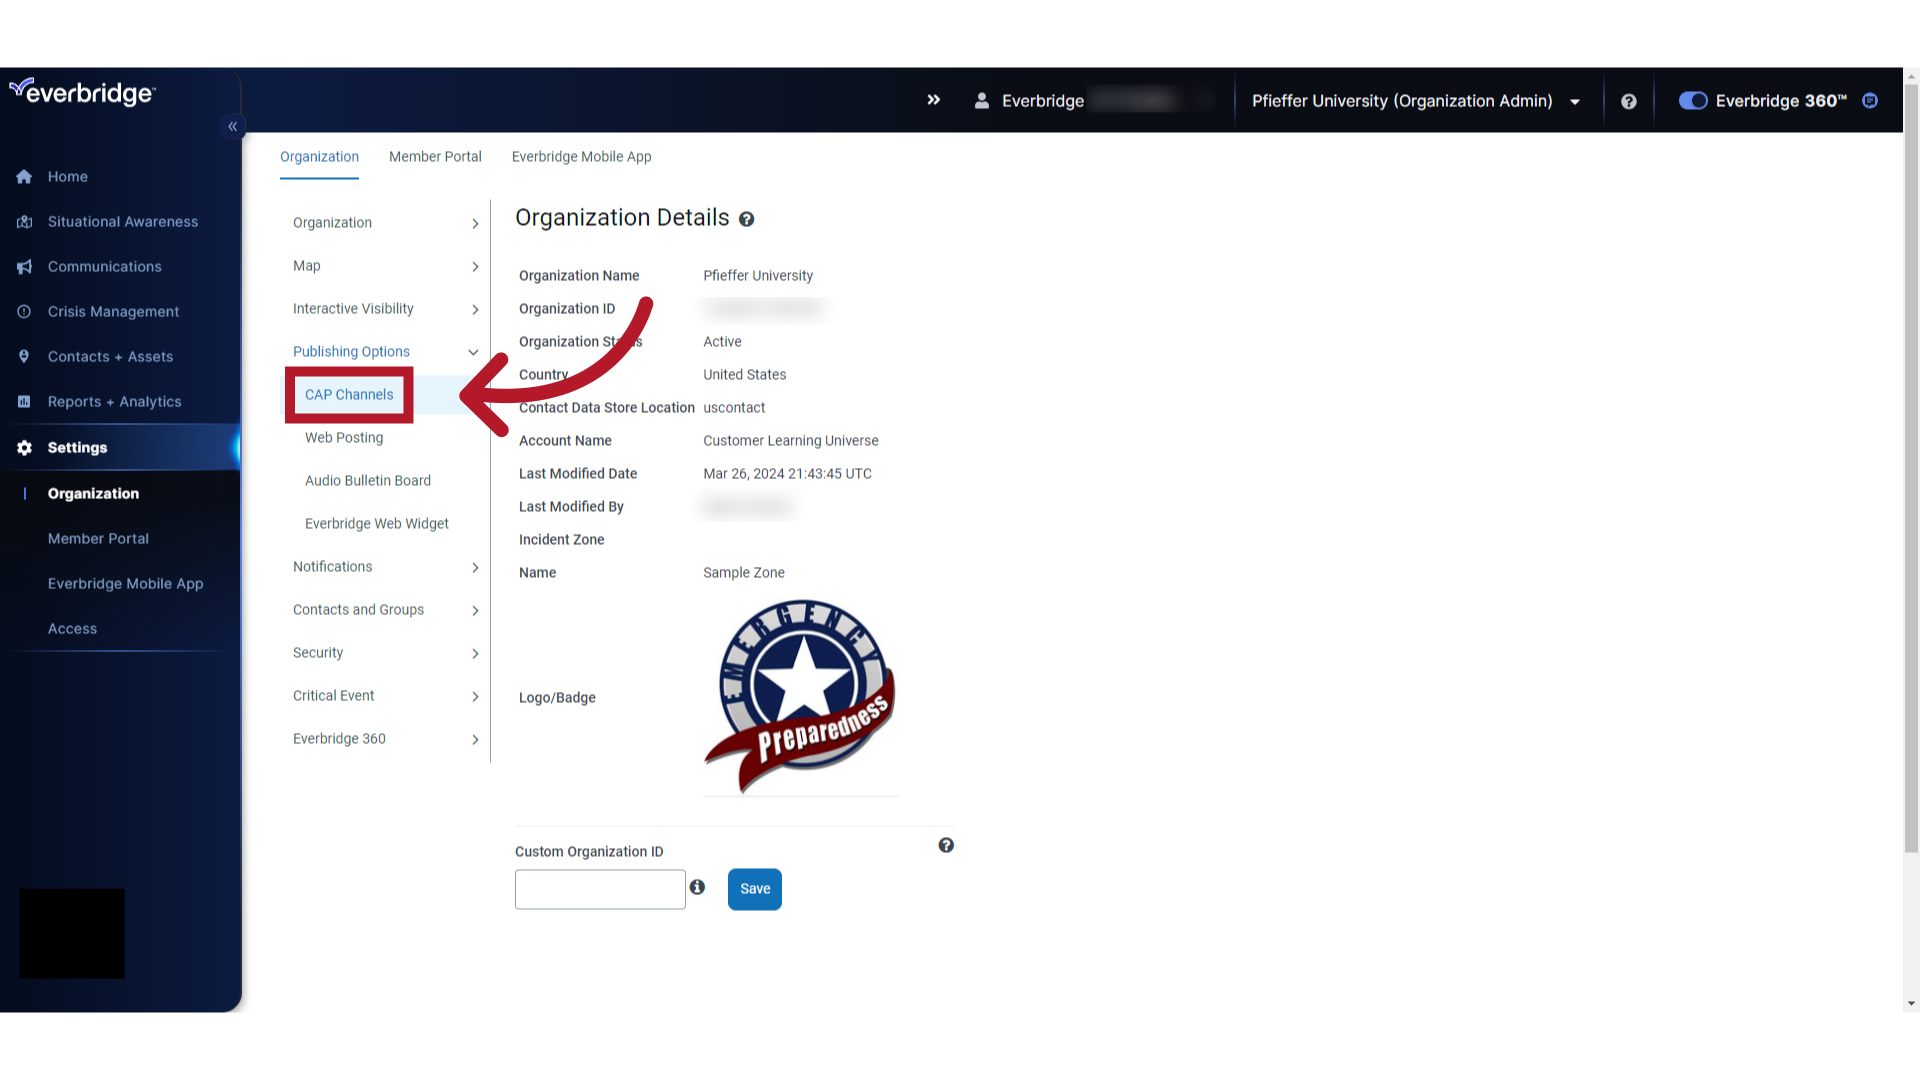
6. CAP Channels
Click on "CAP Channels".
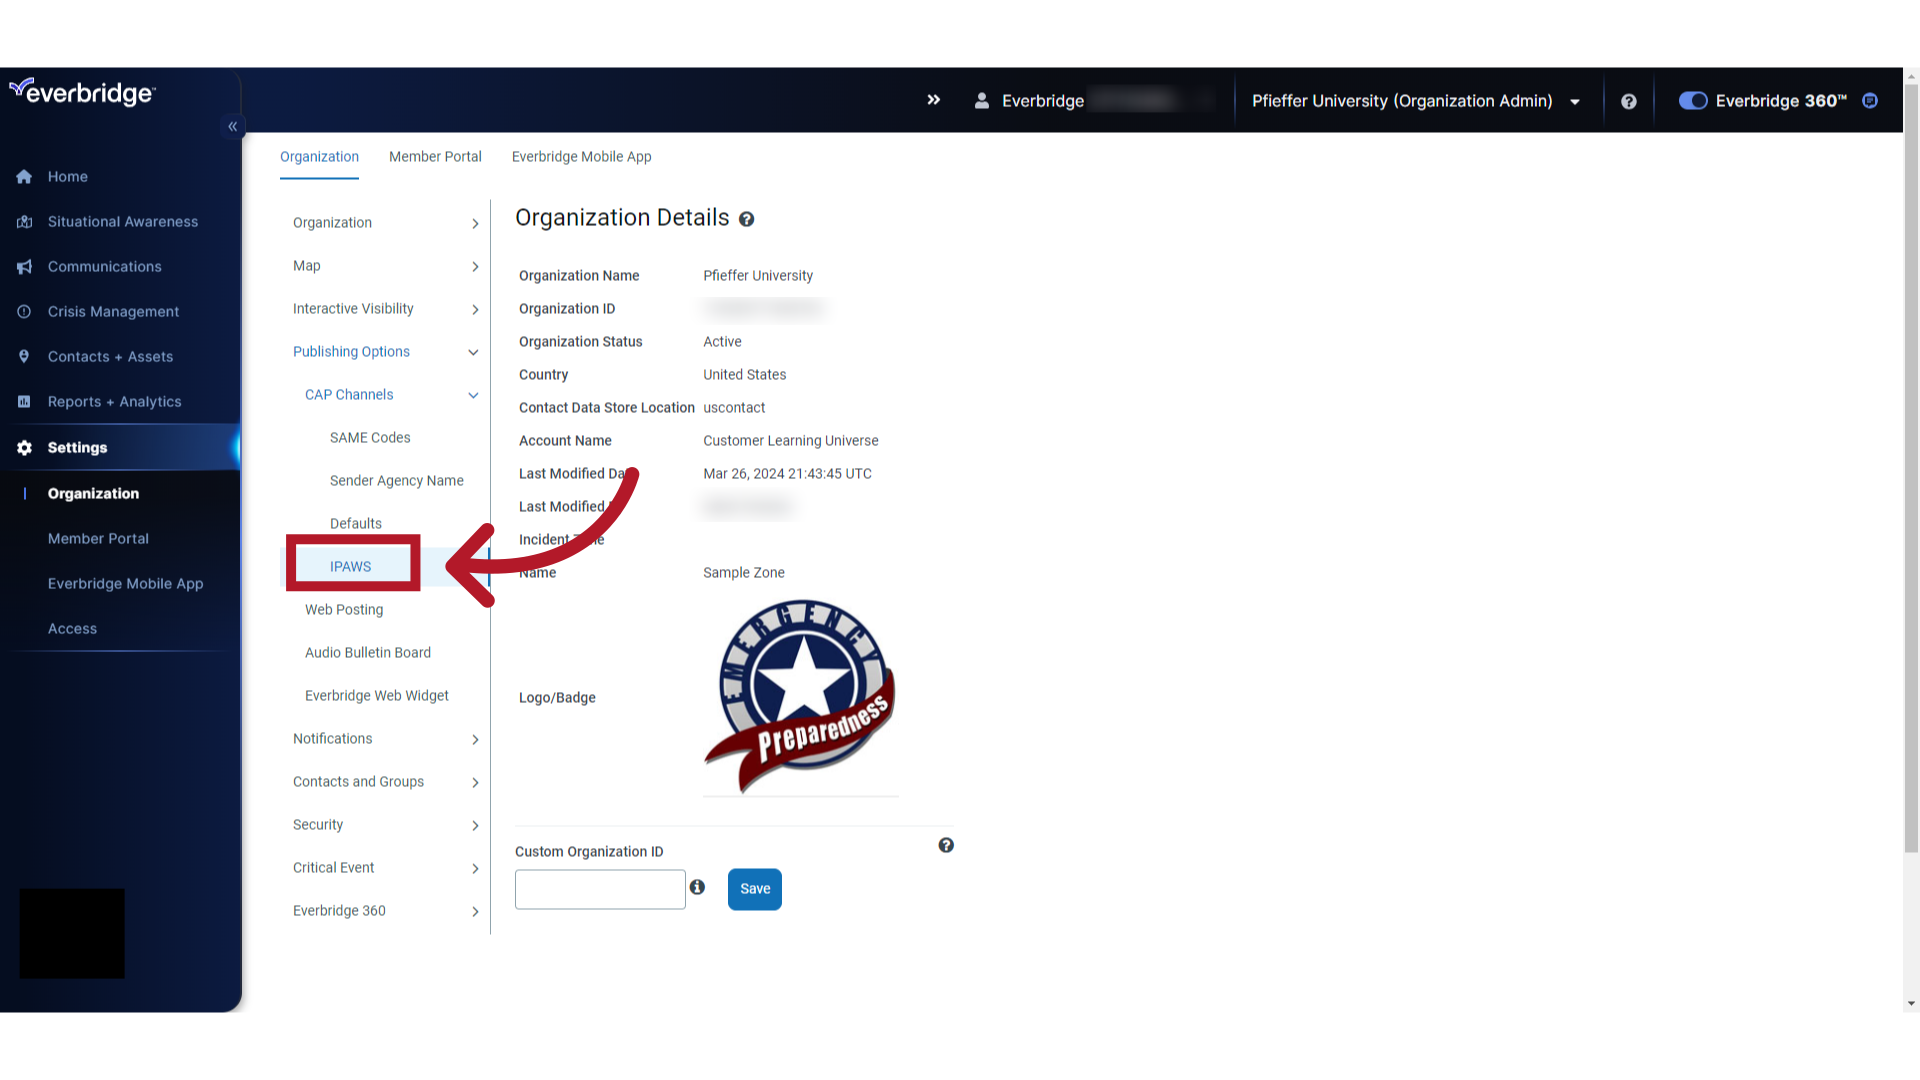
7. IPAWS
Optionally select "IPAWS" to verify you have configured your IPAWS credentials and to obtain a copy of your COG profile if you have not already done so.
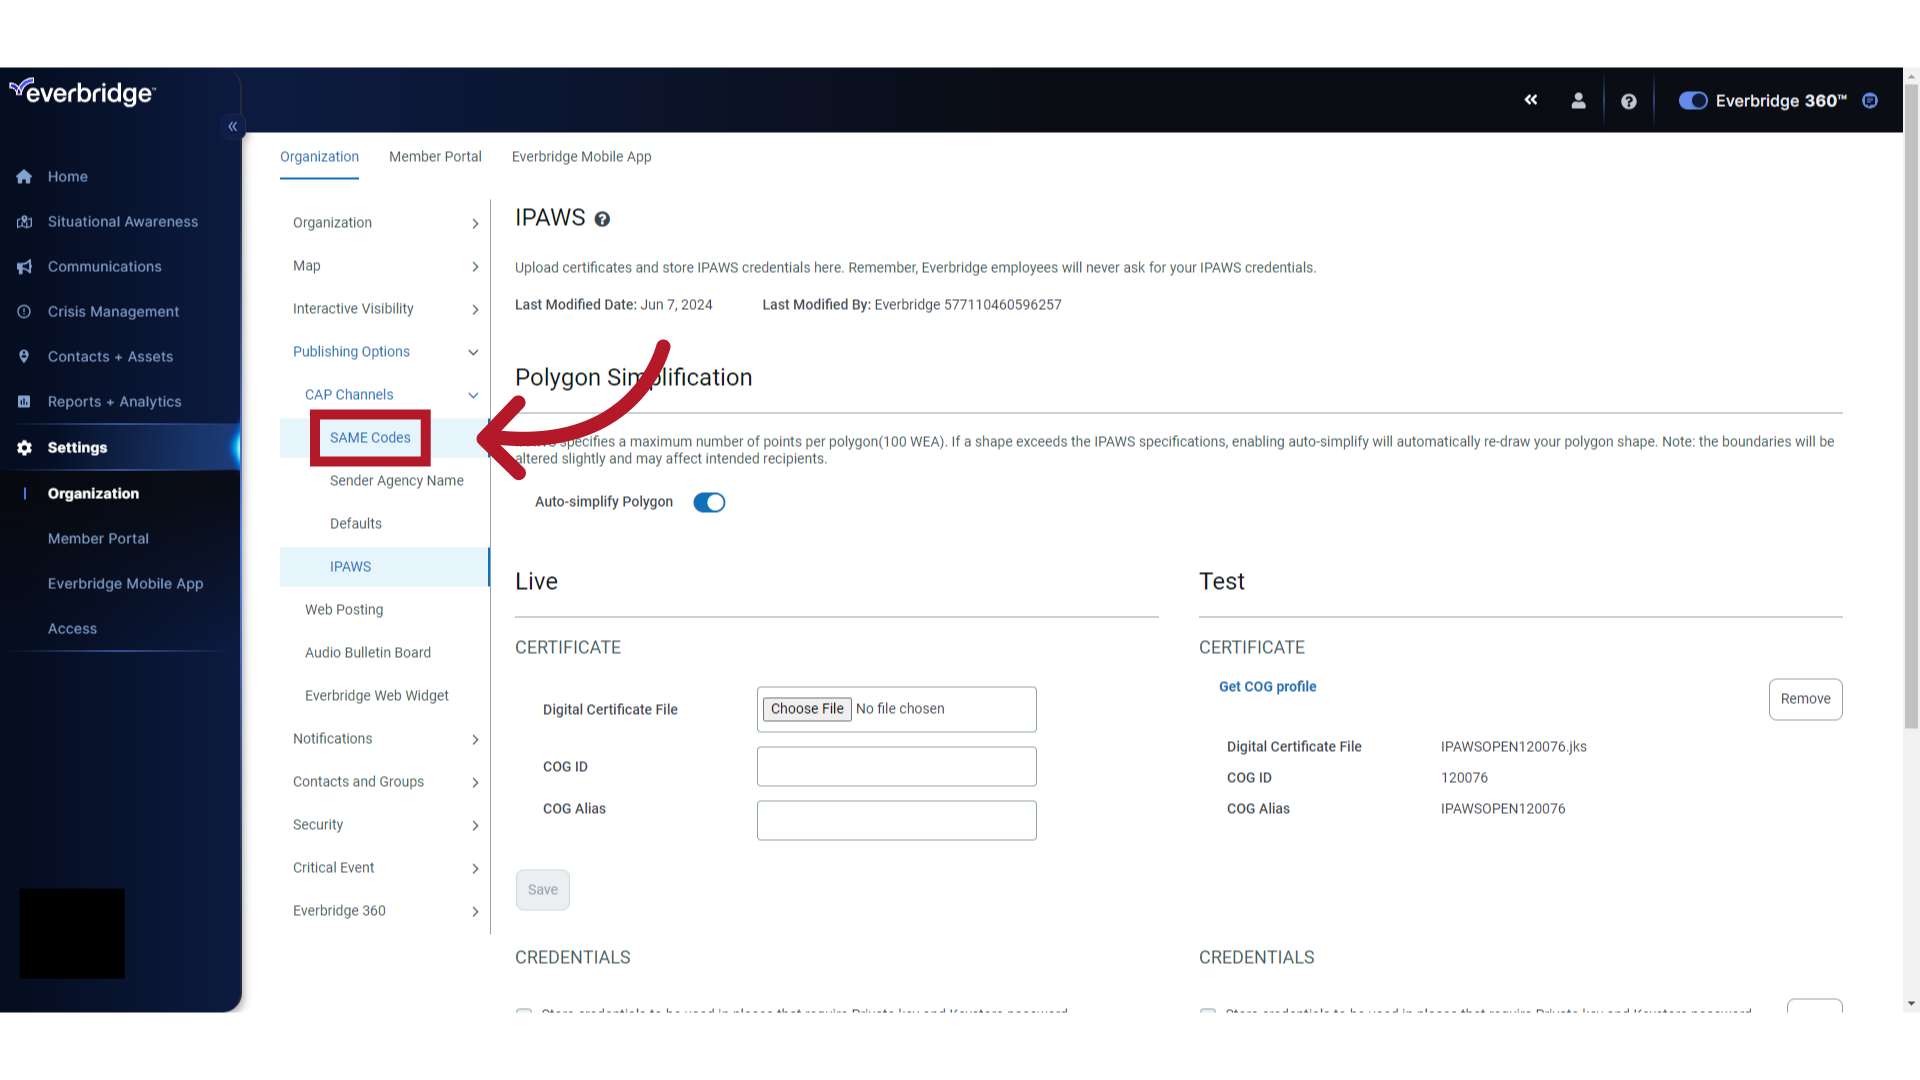
8. Specific Area Message Encoding (SAME) Codes
Select "SAME Codes".
9. SAME Code Field
Enter your FEMA-issued Specific Area Message Encoding (SAME)code or codes. A minimum of one code is required. Use the SAME codes from your COG profile under the "GEOCodes Permitted" section. Entering SAME codes not issued to you by FEMA will result in your IPAWS alerts not being properly verified. Note that there is a maximum limit of 31 SAME codes per alert as set by FEMA. If you attempt to send an alert with more than 31 SAME codes, you will receive an error code 521.
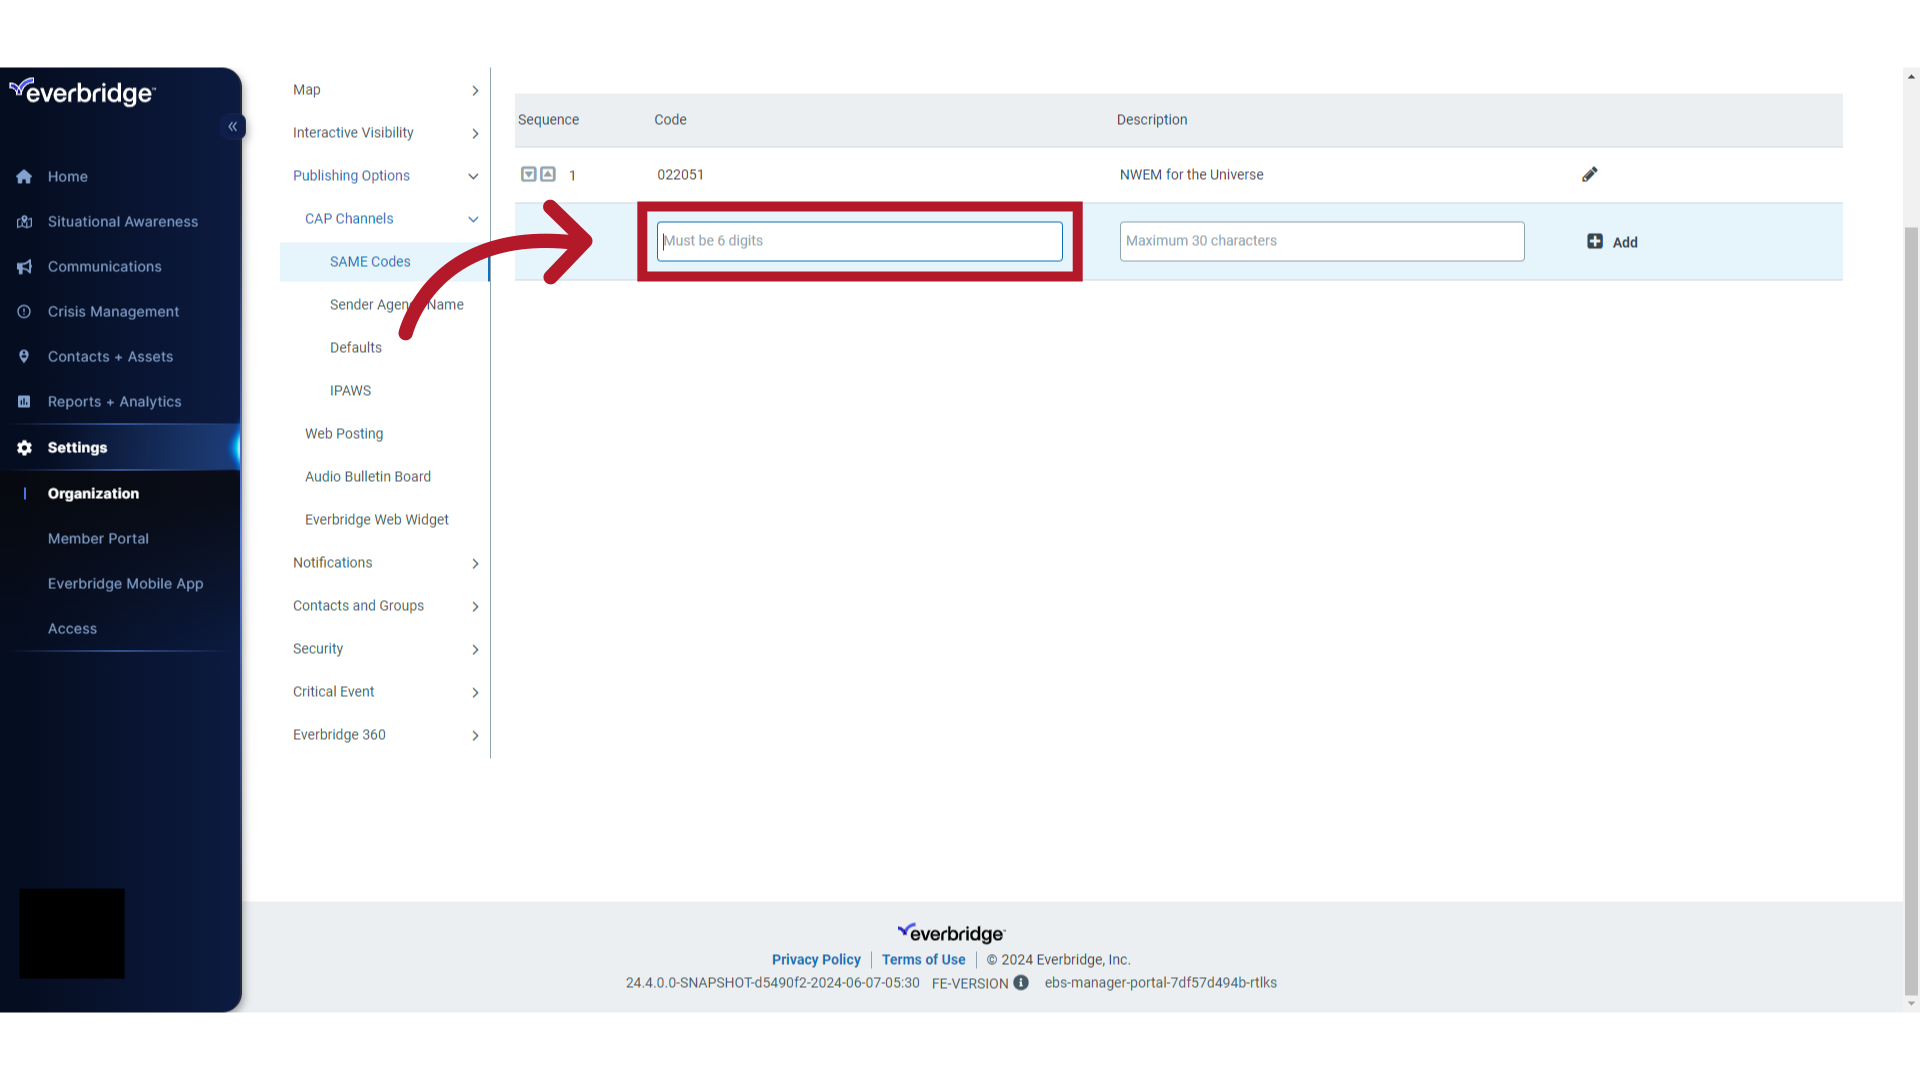
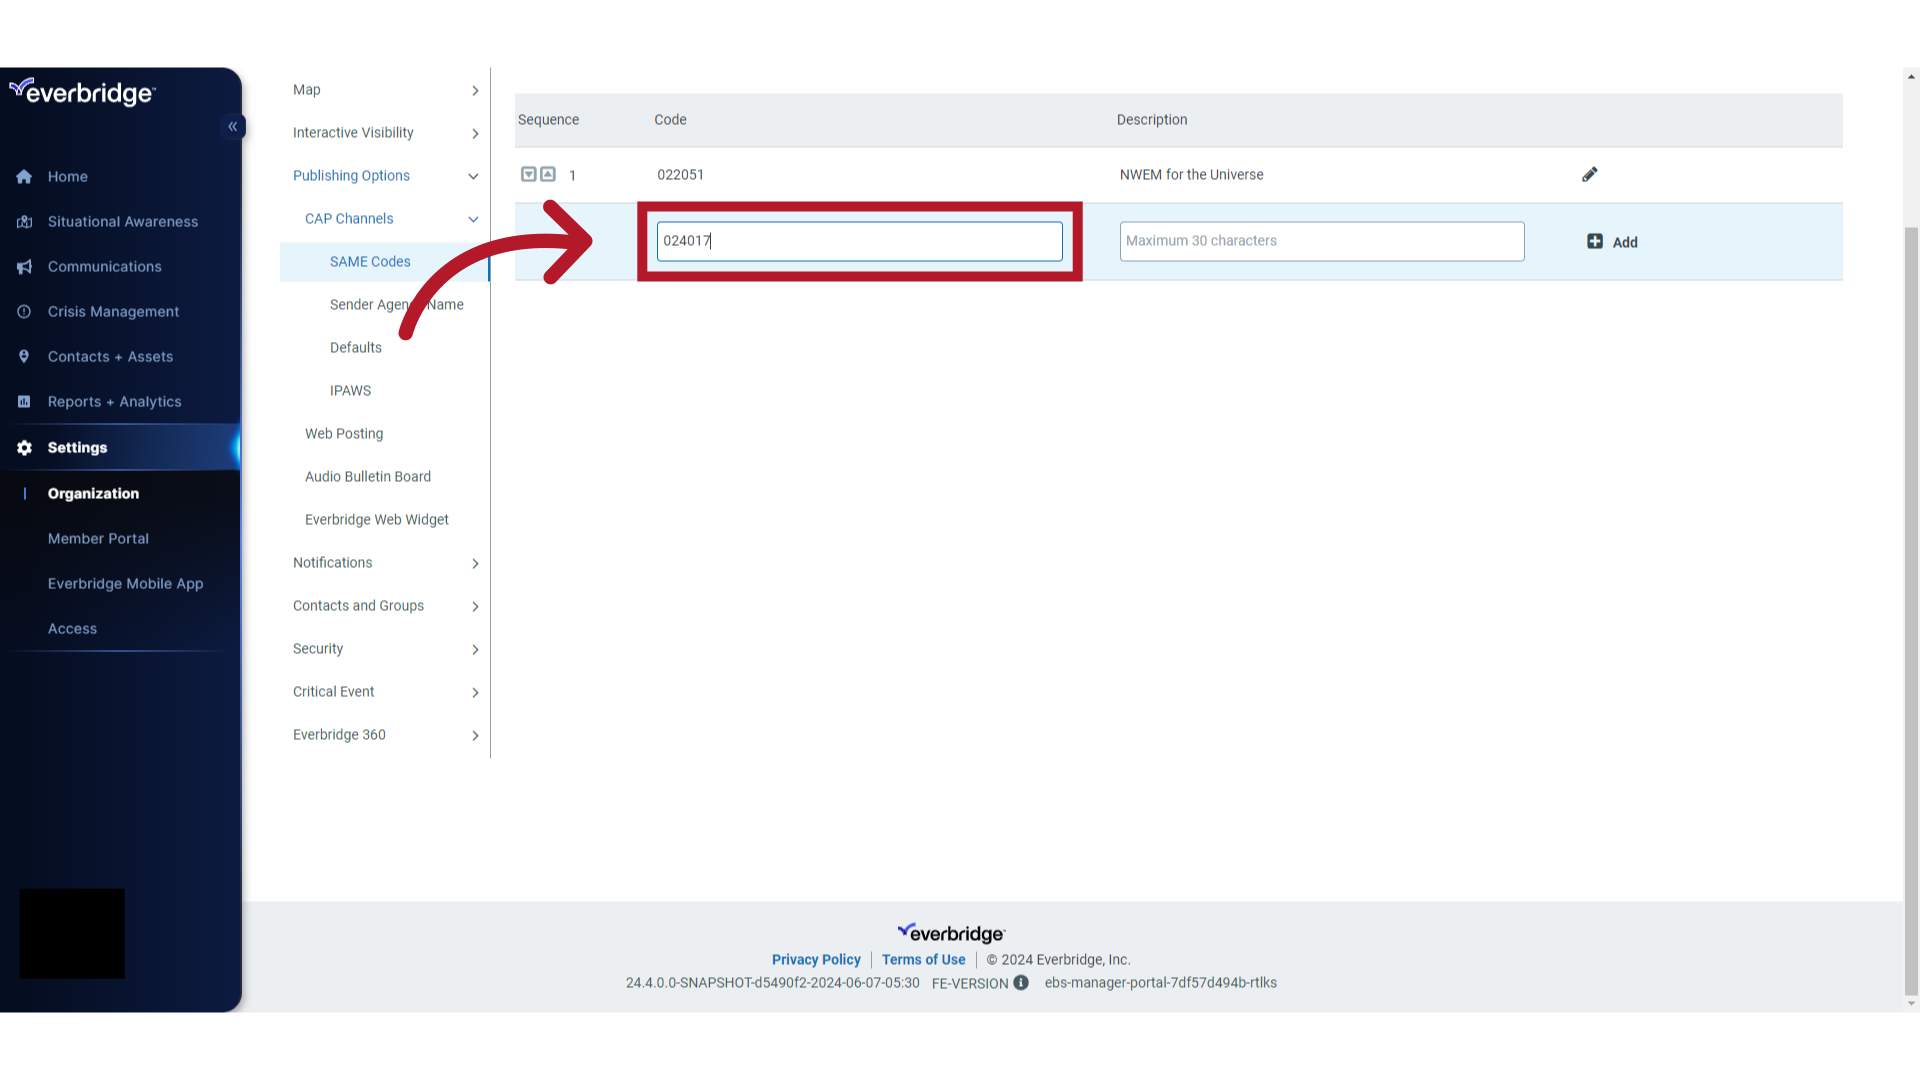
10. Enter SAME Code Value
Enter the 6-digit SAME code in the Code field.
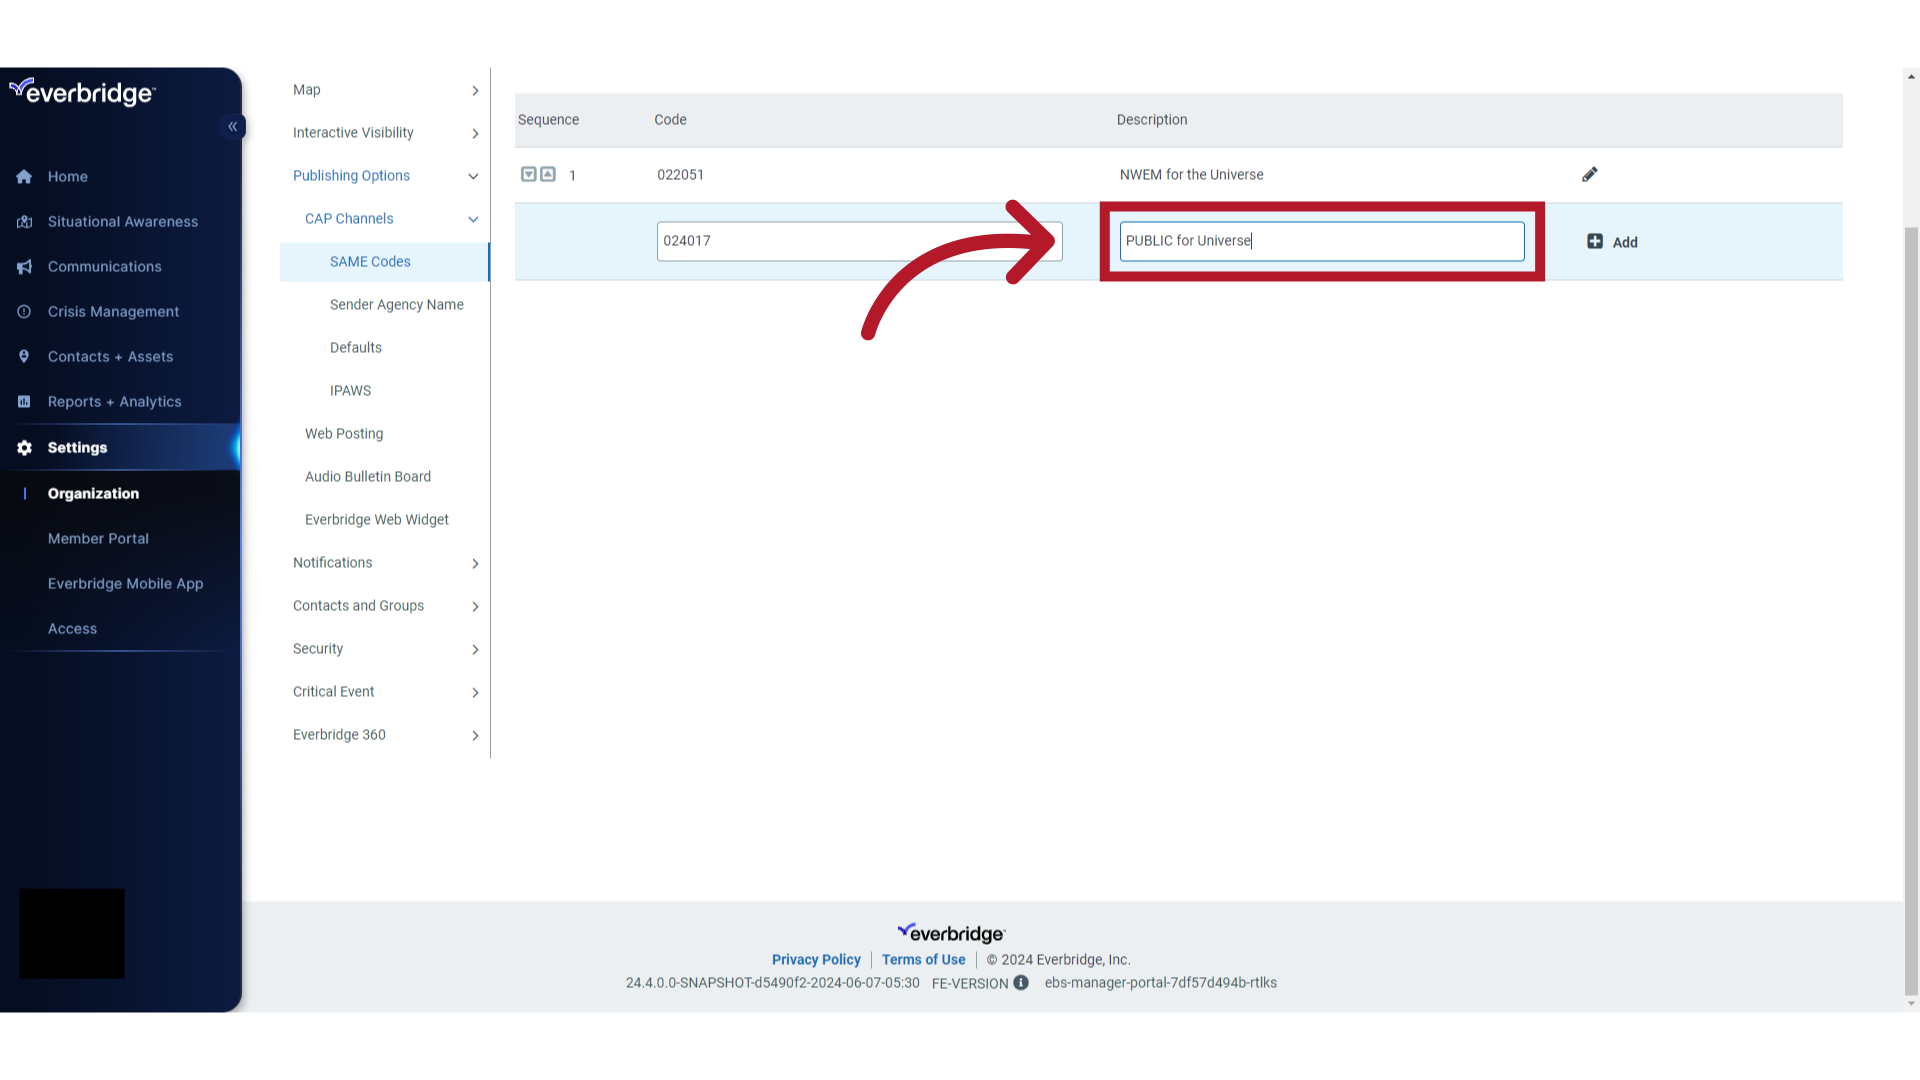
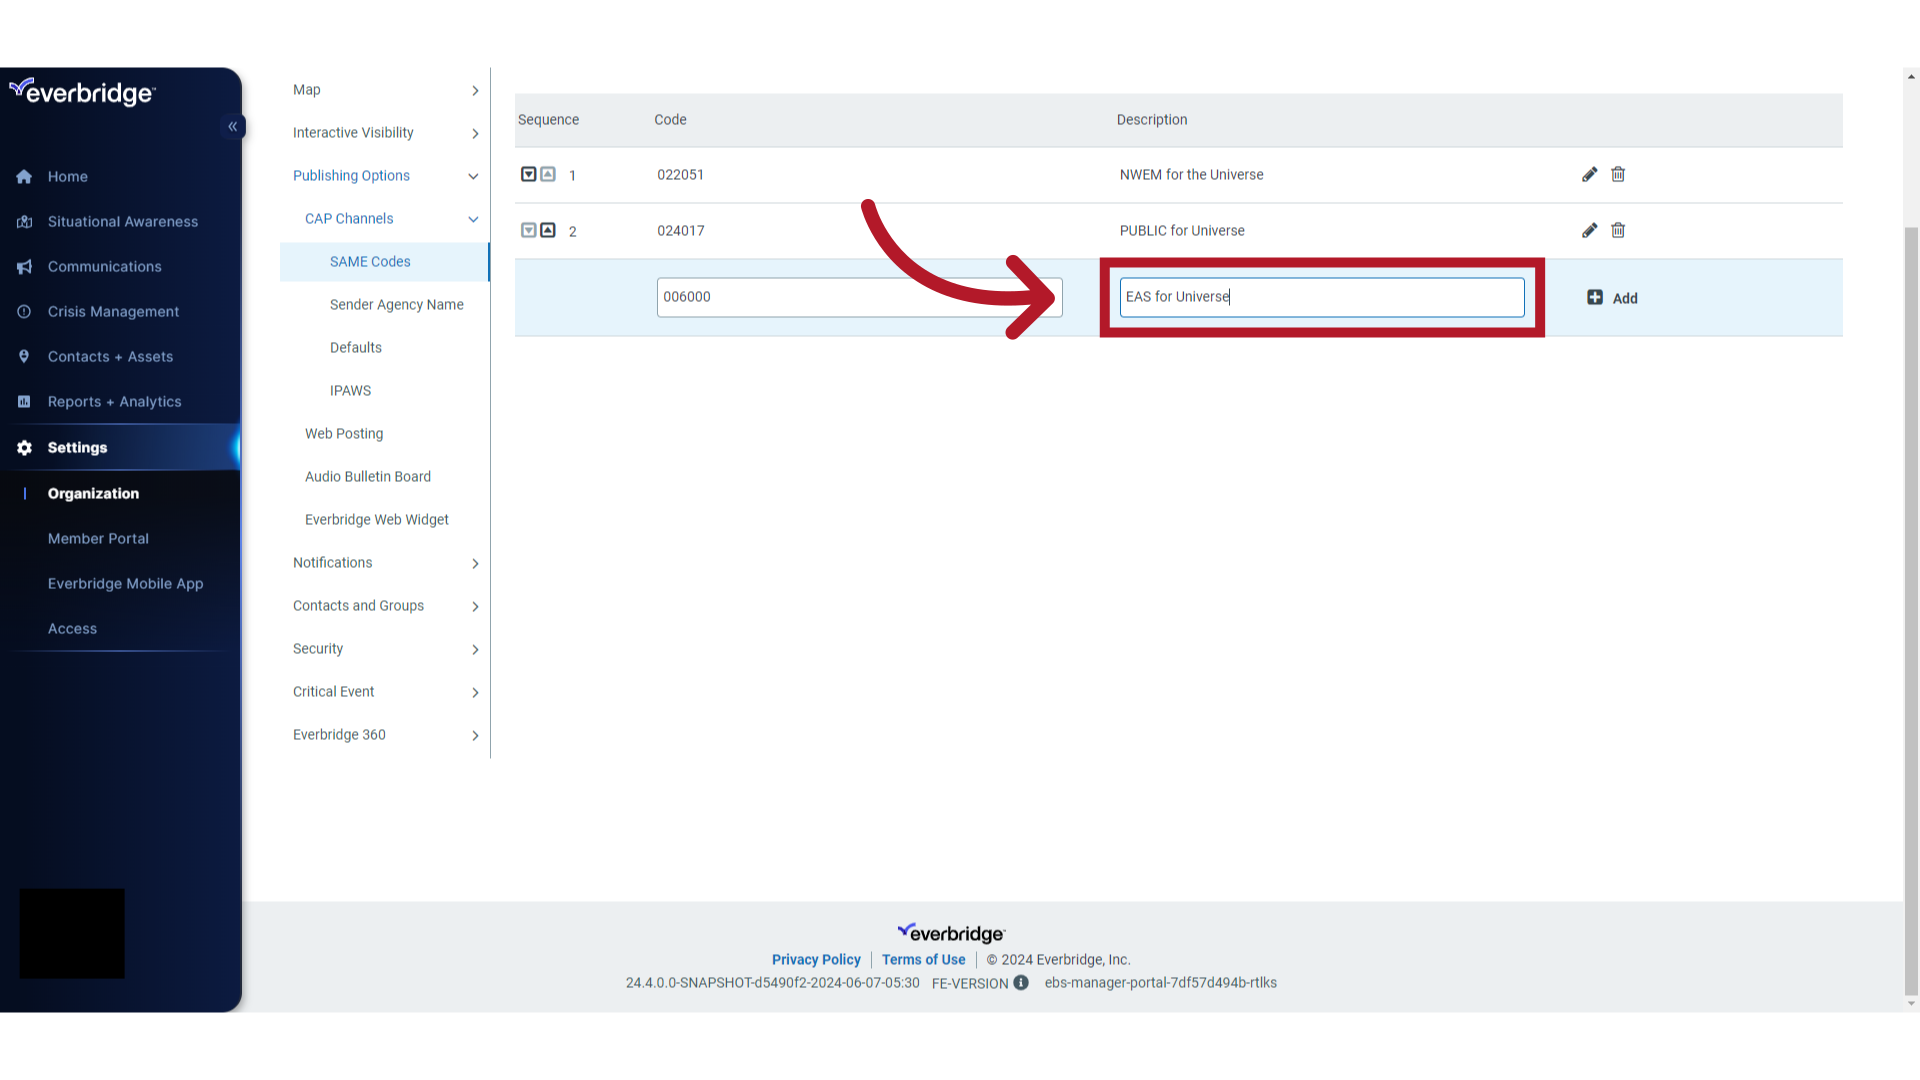
11. SAME Code Description
Enter a description for the code.
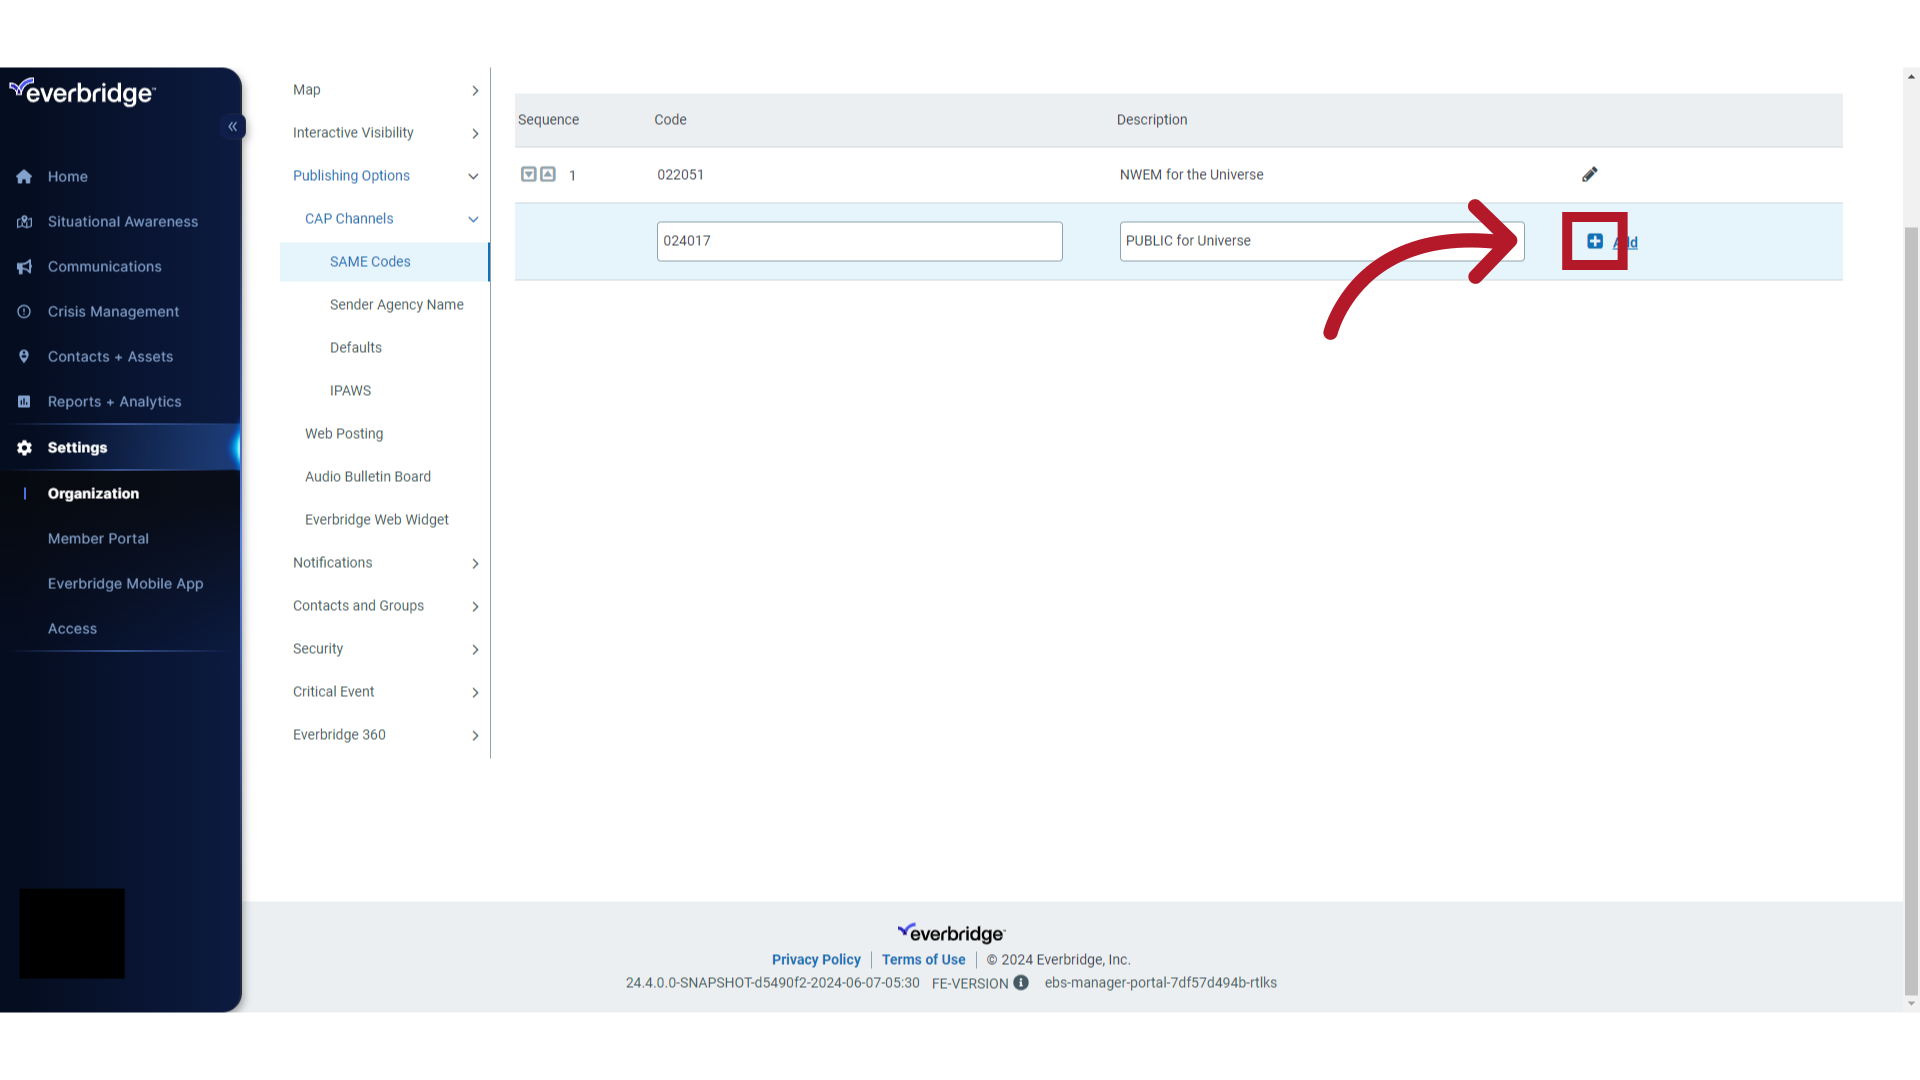
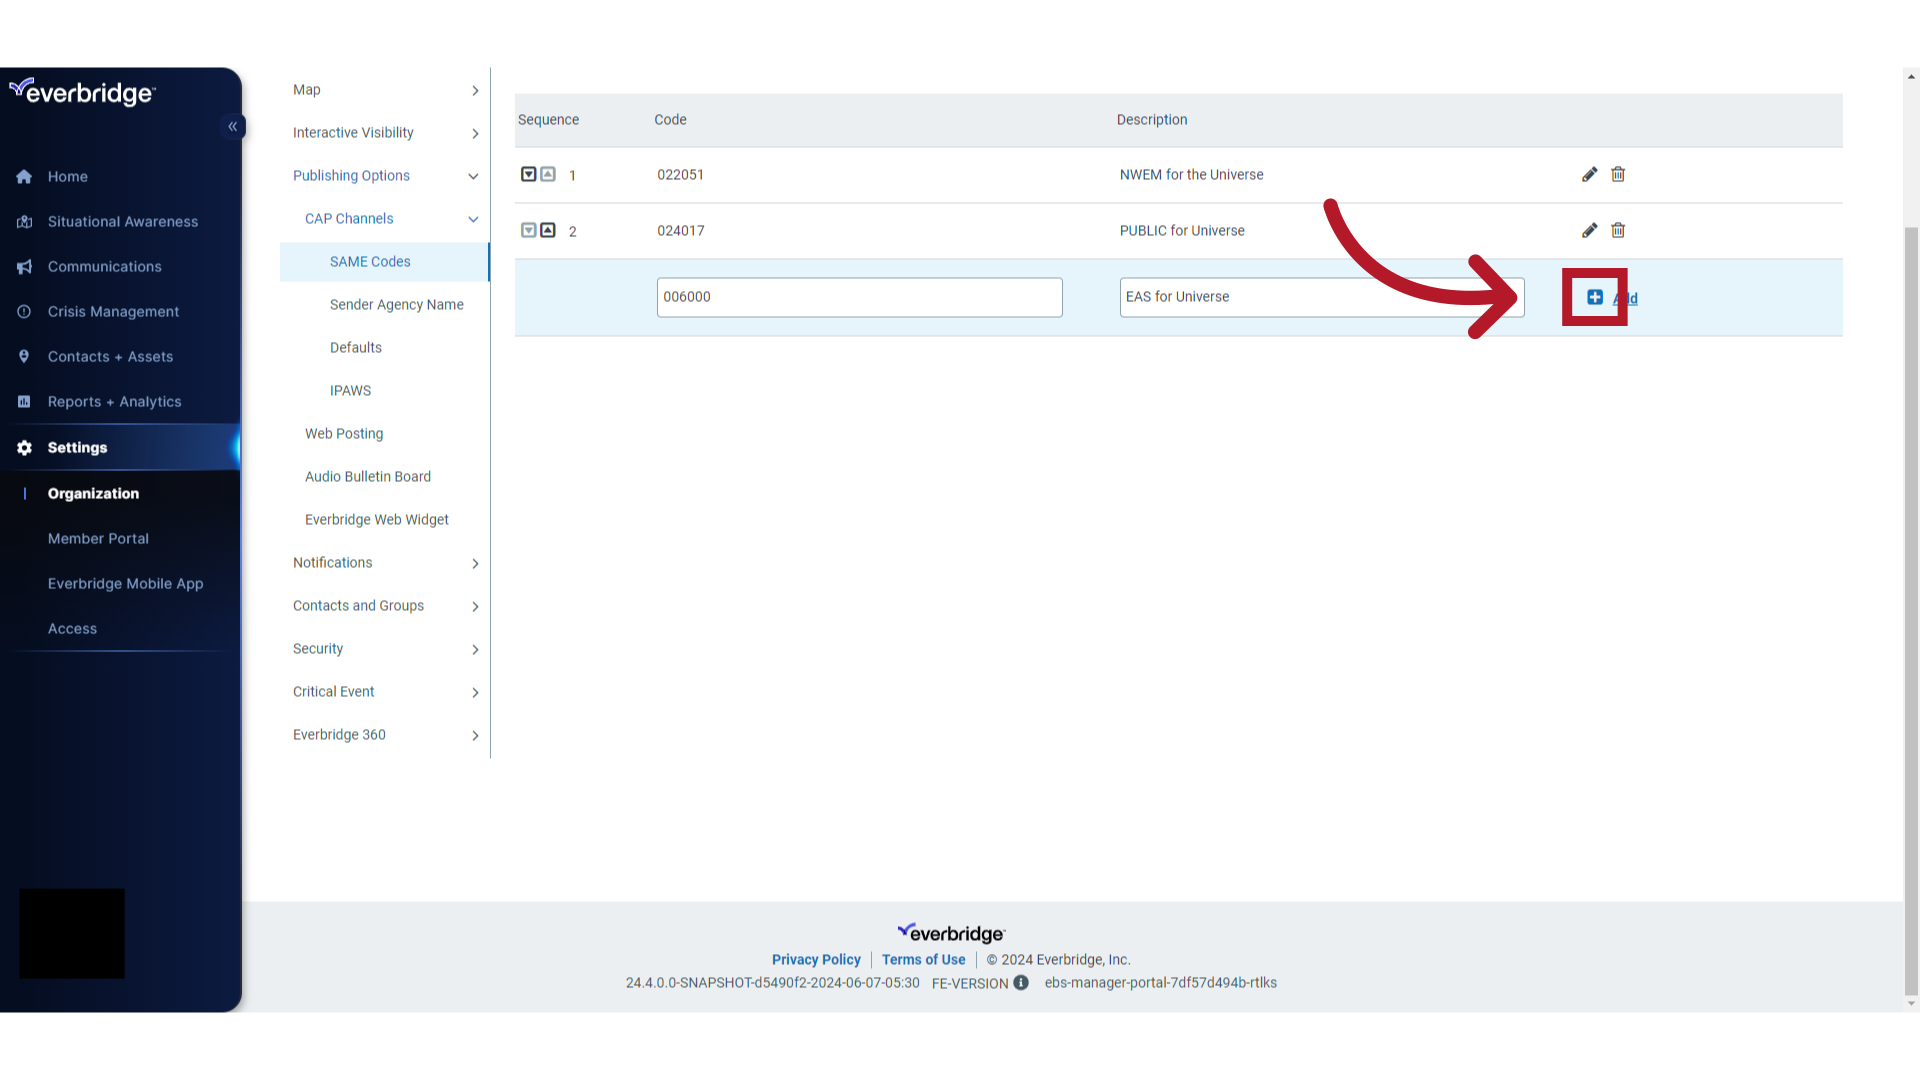
12. Add SAME Code
Click on "+ Add".
13. Enter Multiple SAME Codes
Continue this process until you have added all the SAME codes issued to you by FEMA.
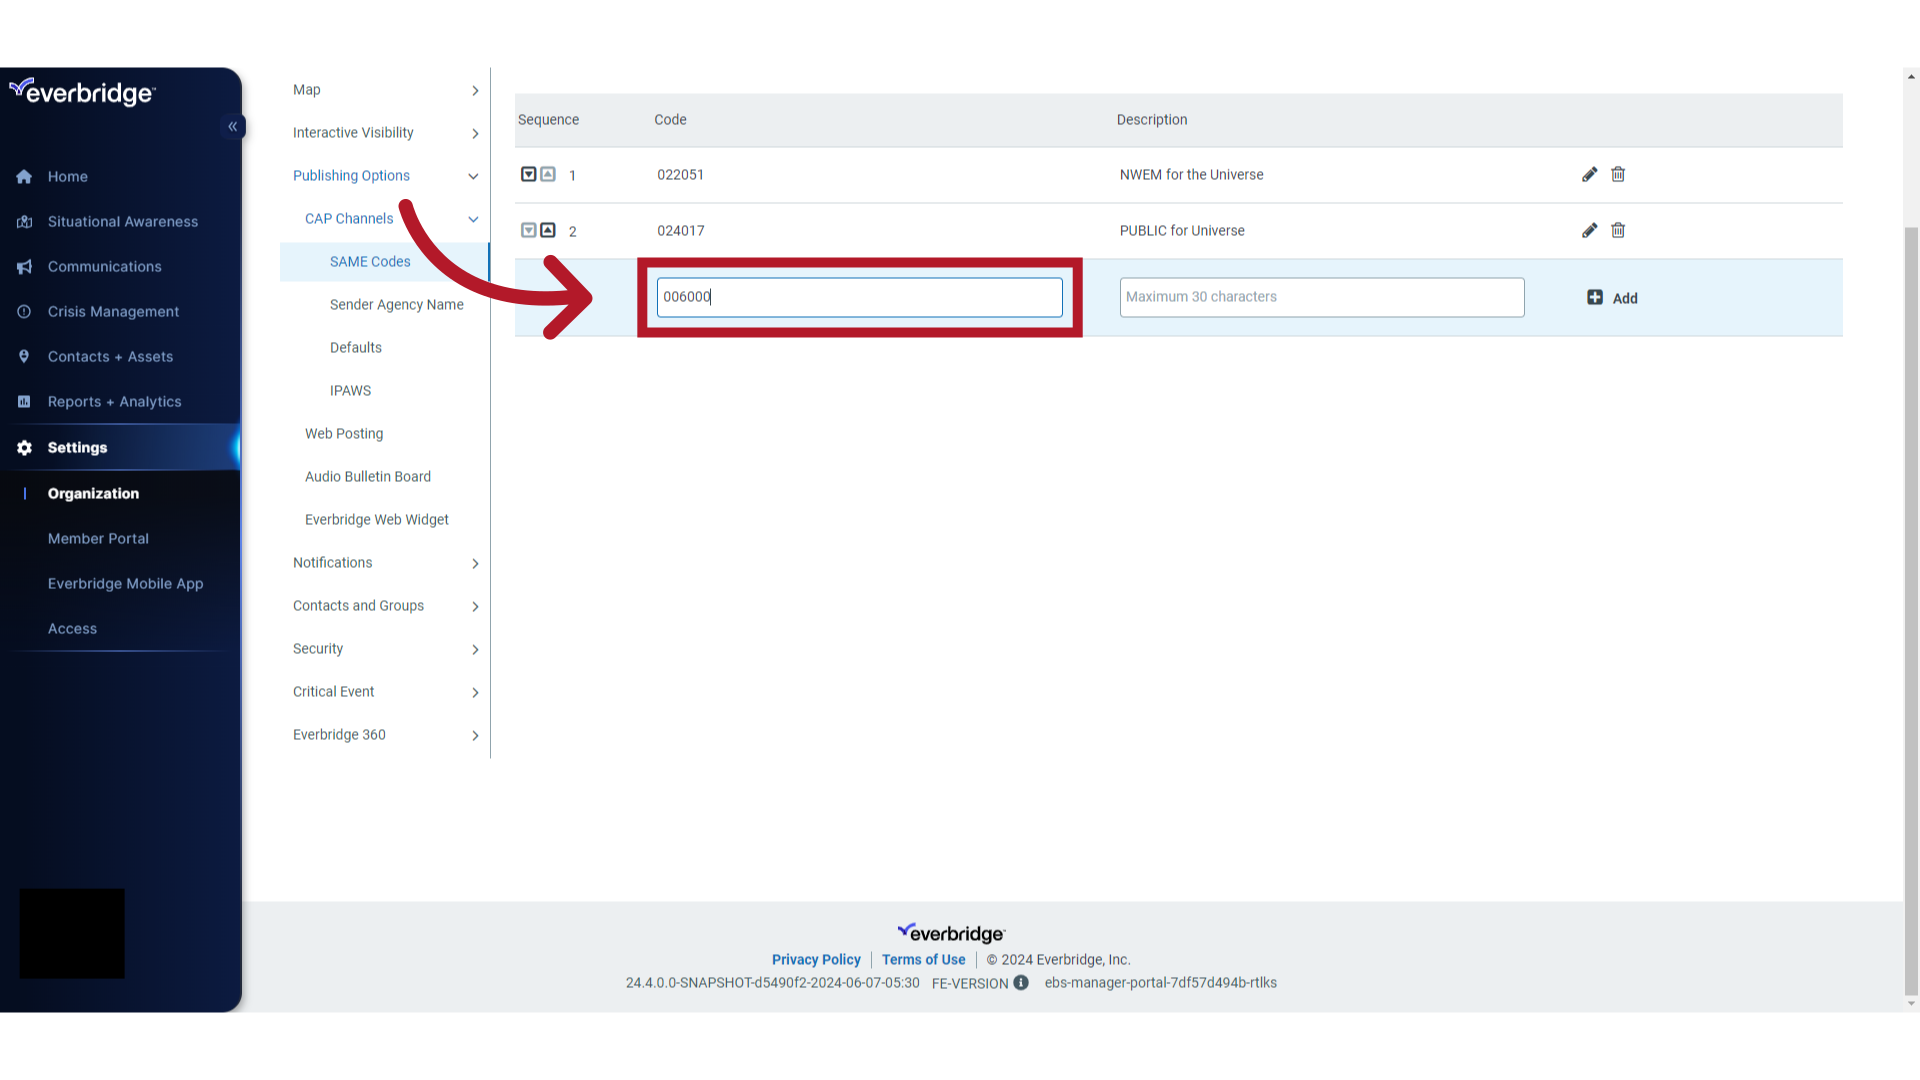
14. SAME Code Description
Enter a description for each code.
15. Add Multiple SAME Codes
Click "+ Add" to add each SAME code.
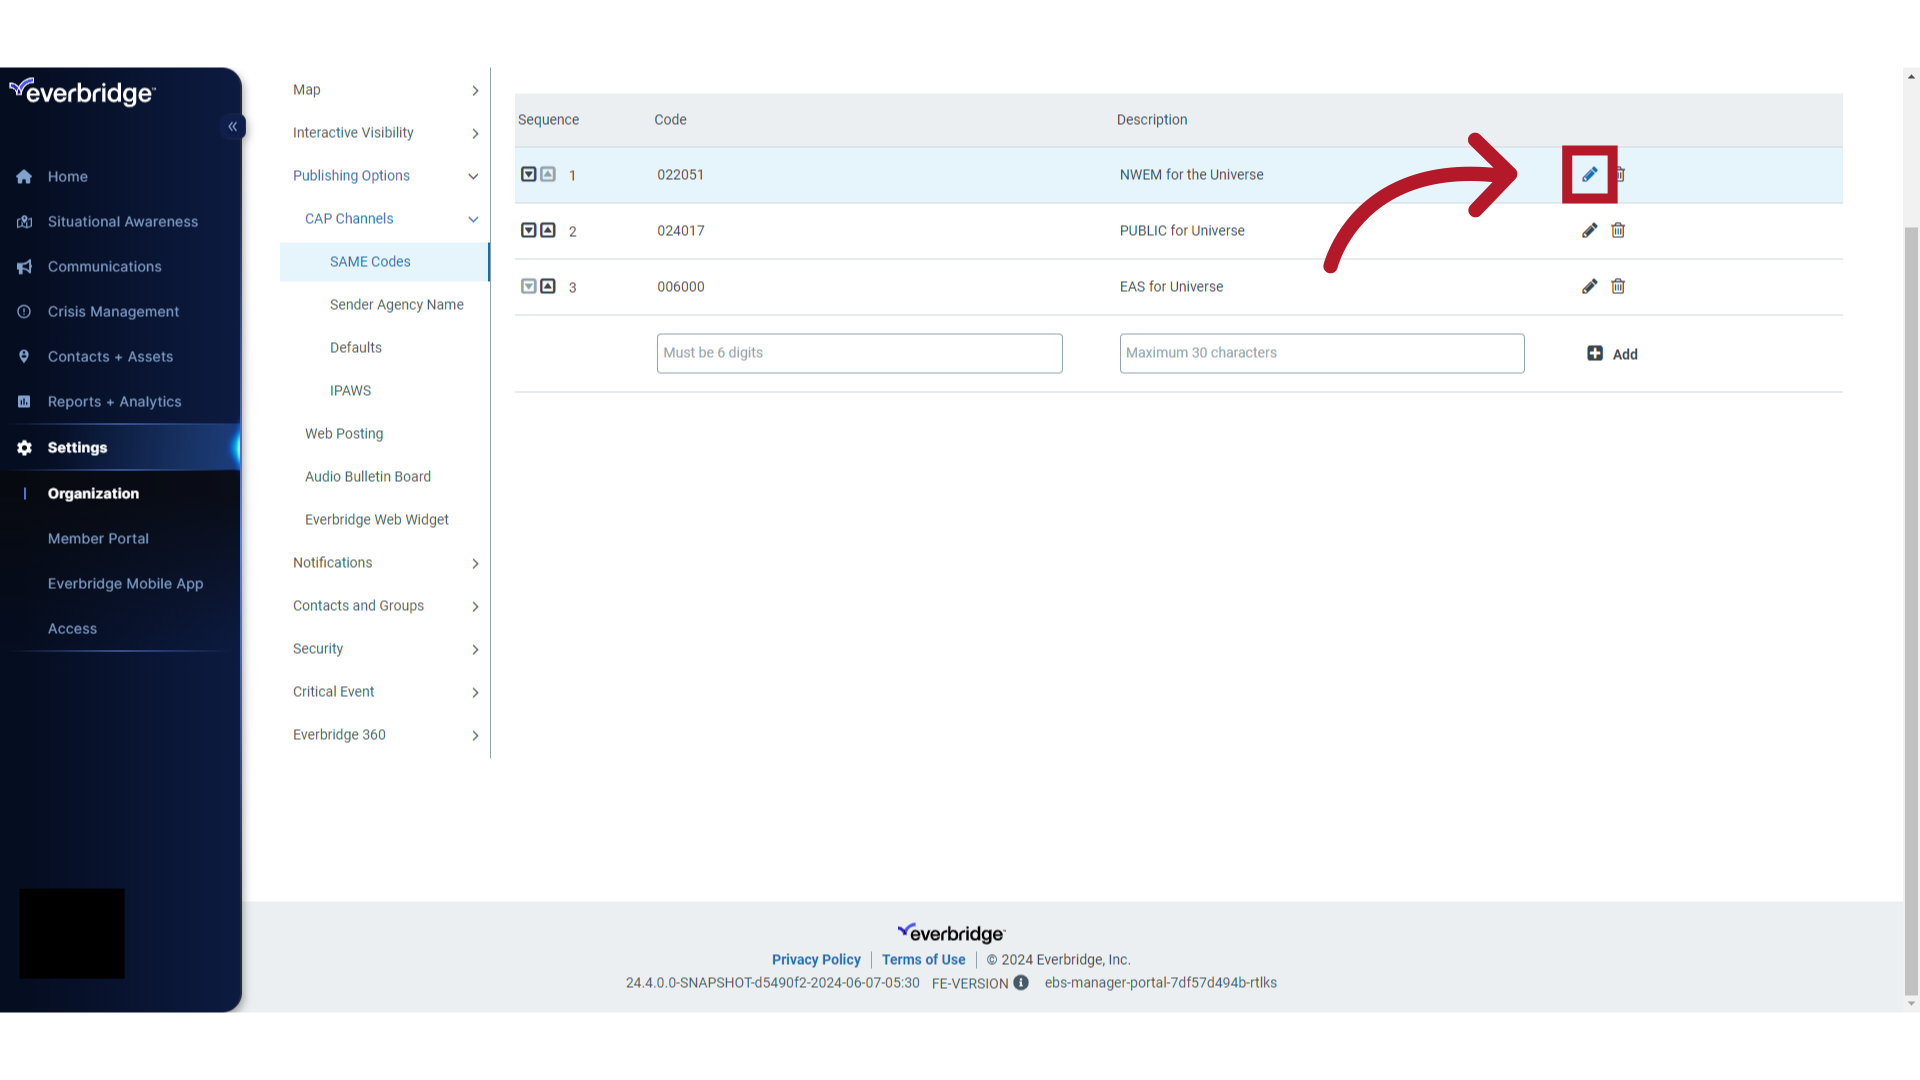
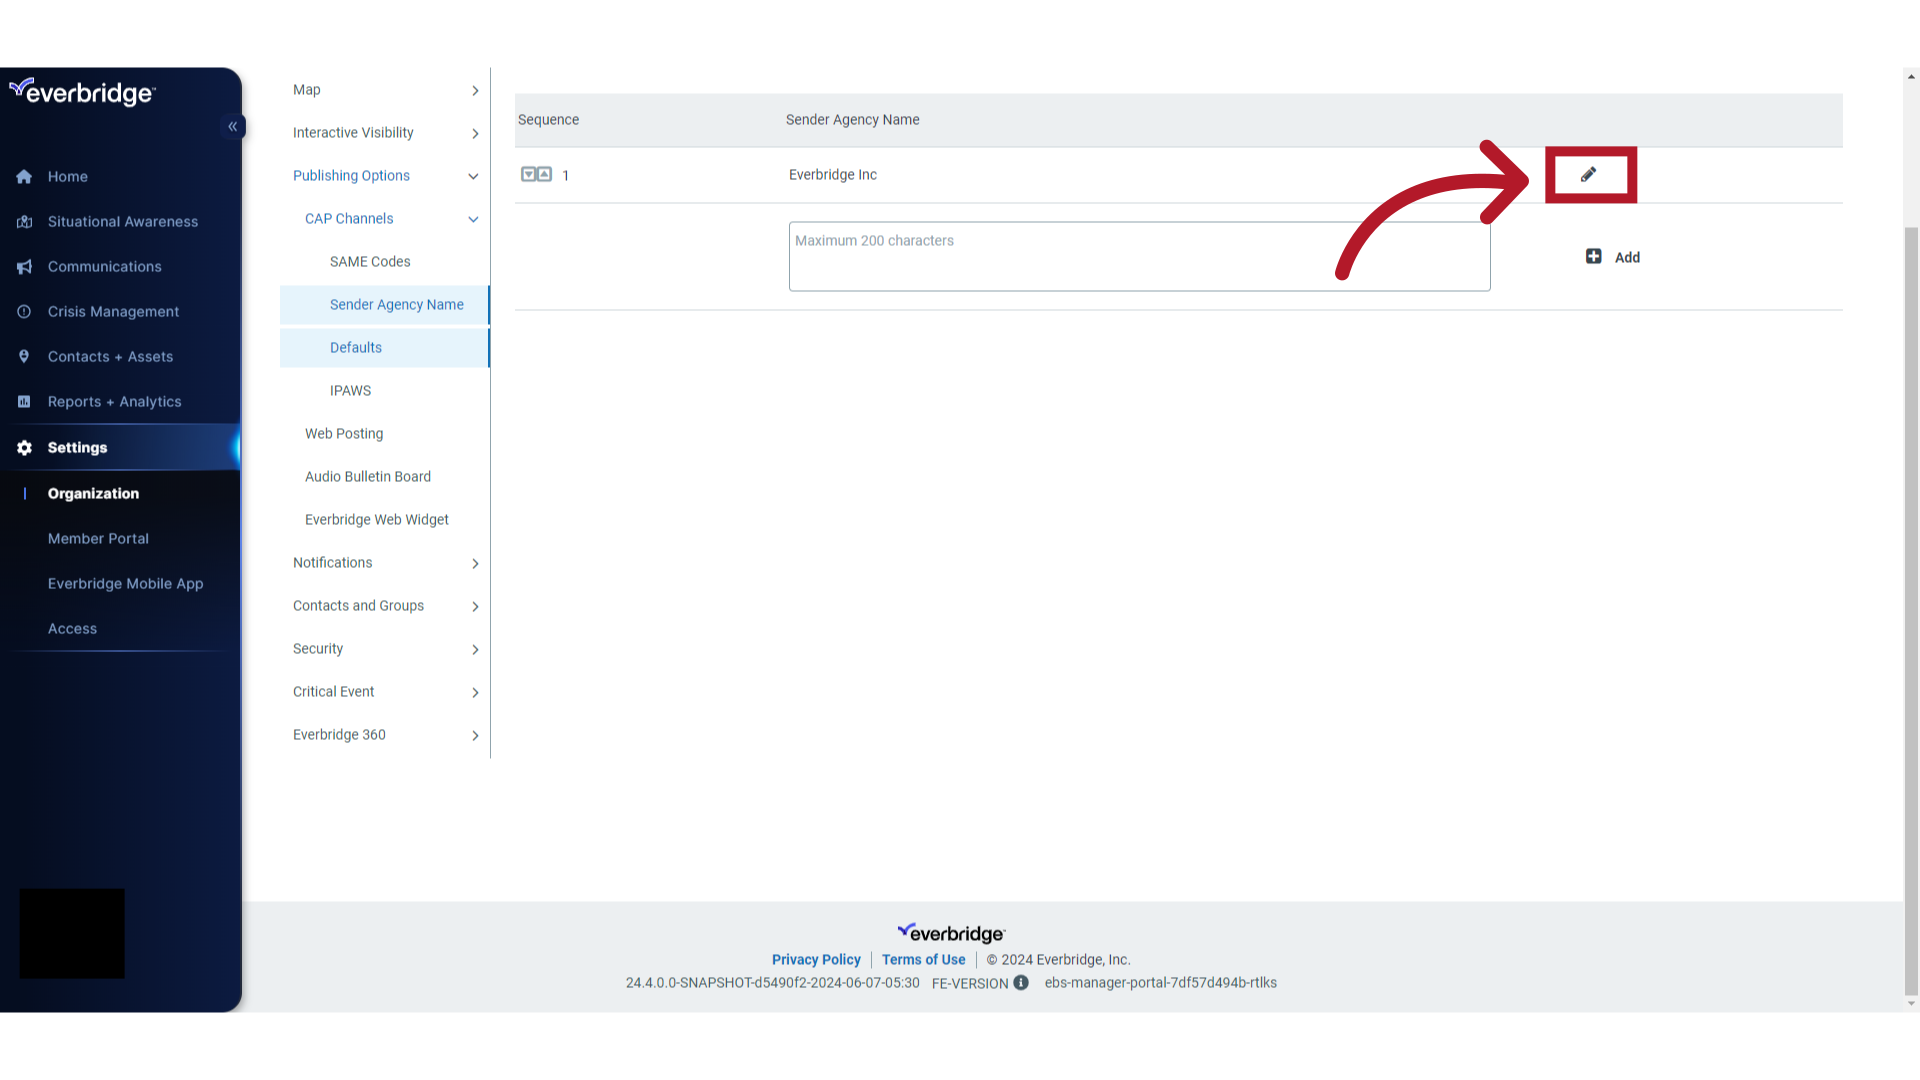
16. Edit SAME Code Description
Note you may edit the description fields by pressing the pencil icon.
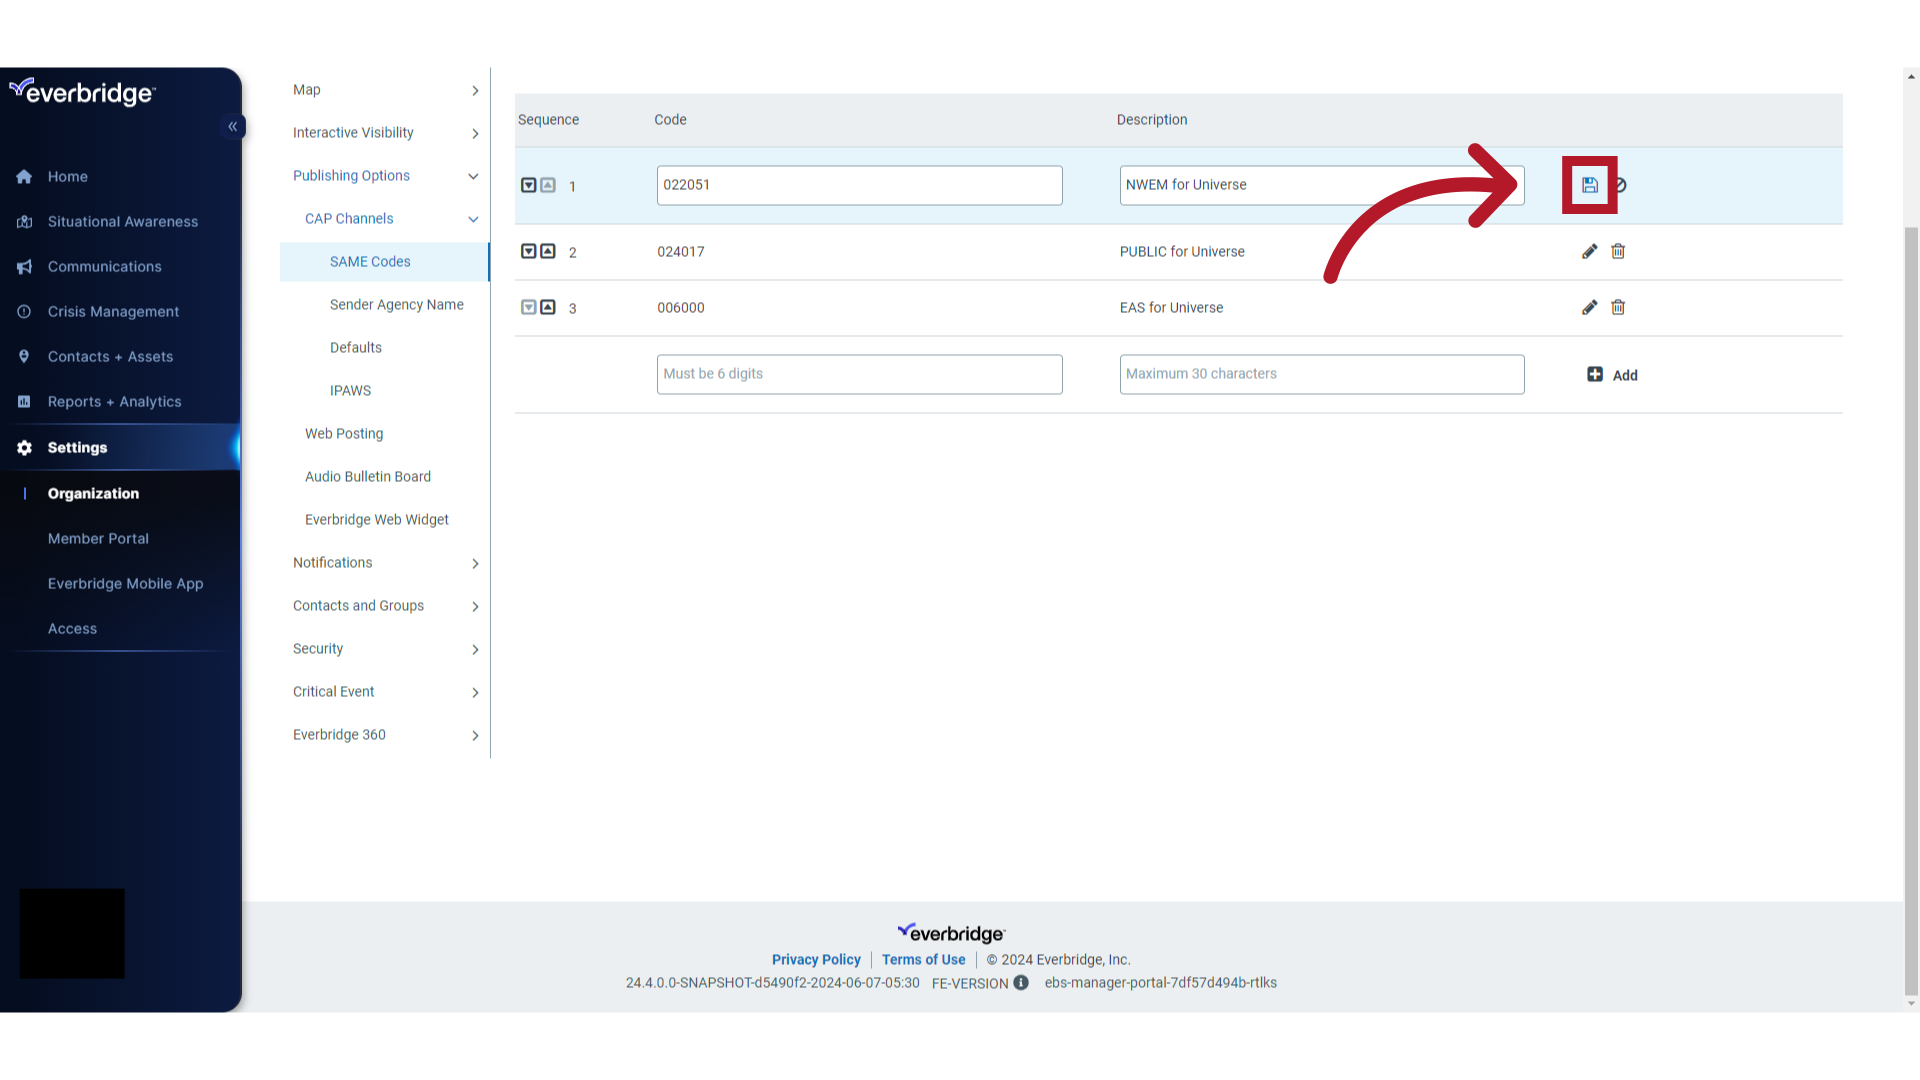
17. Edit SAME Code Description
Edit the description field.
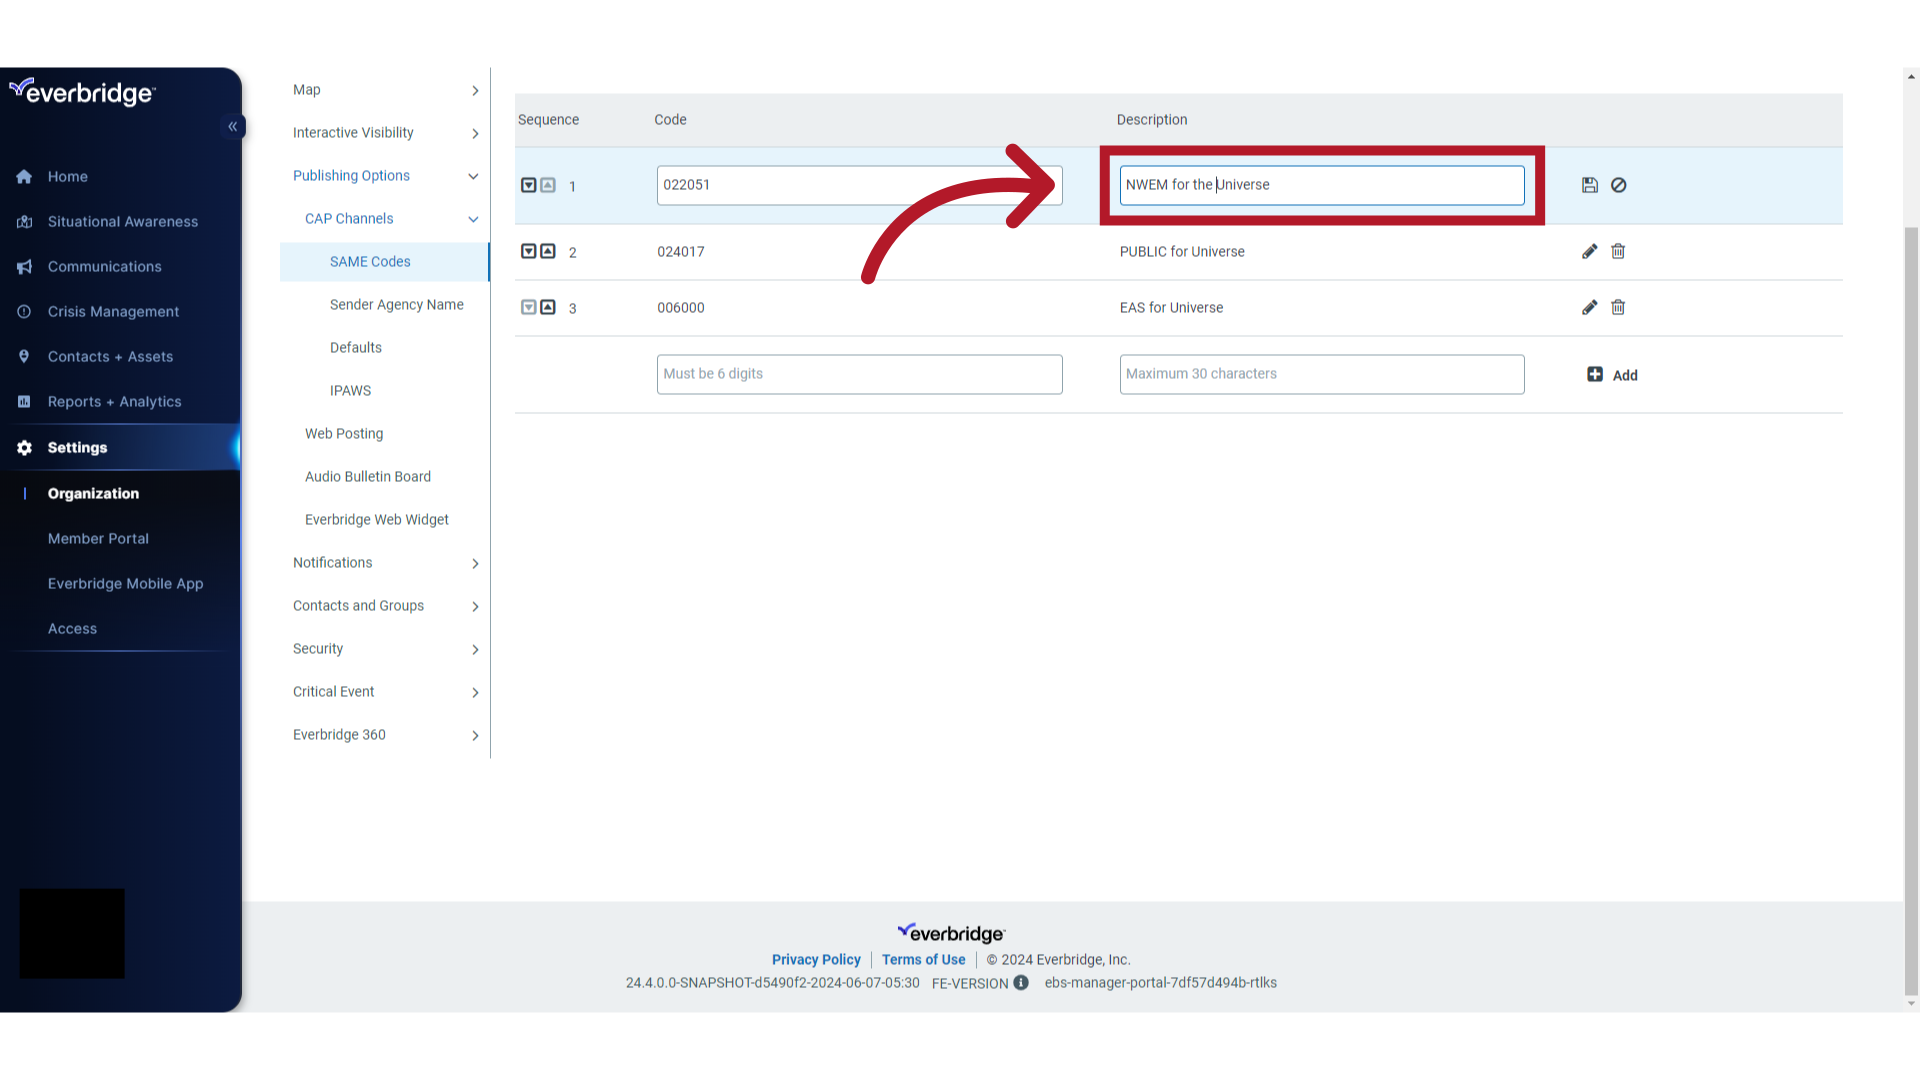
18. Save
Click on the save icon.
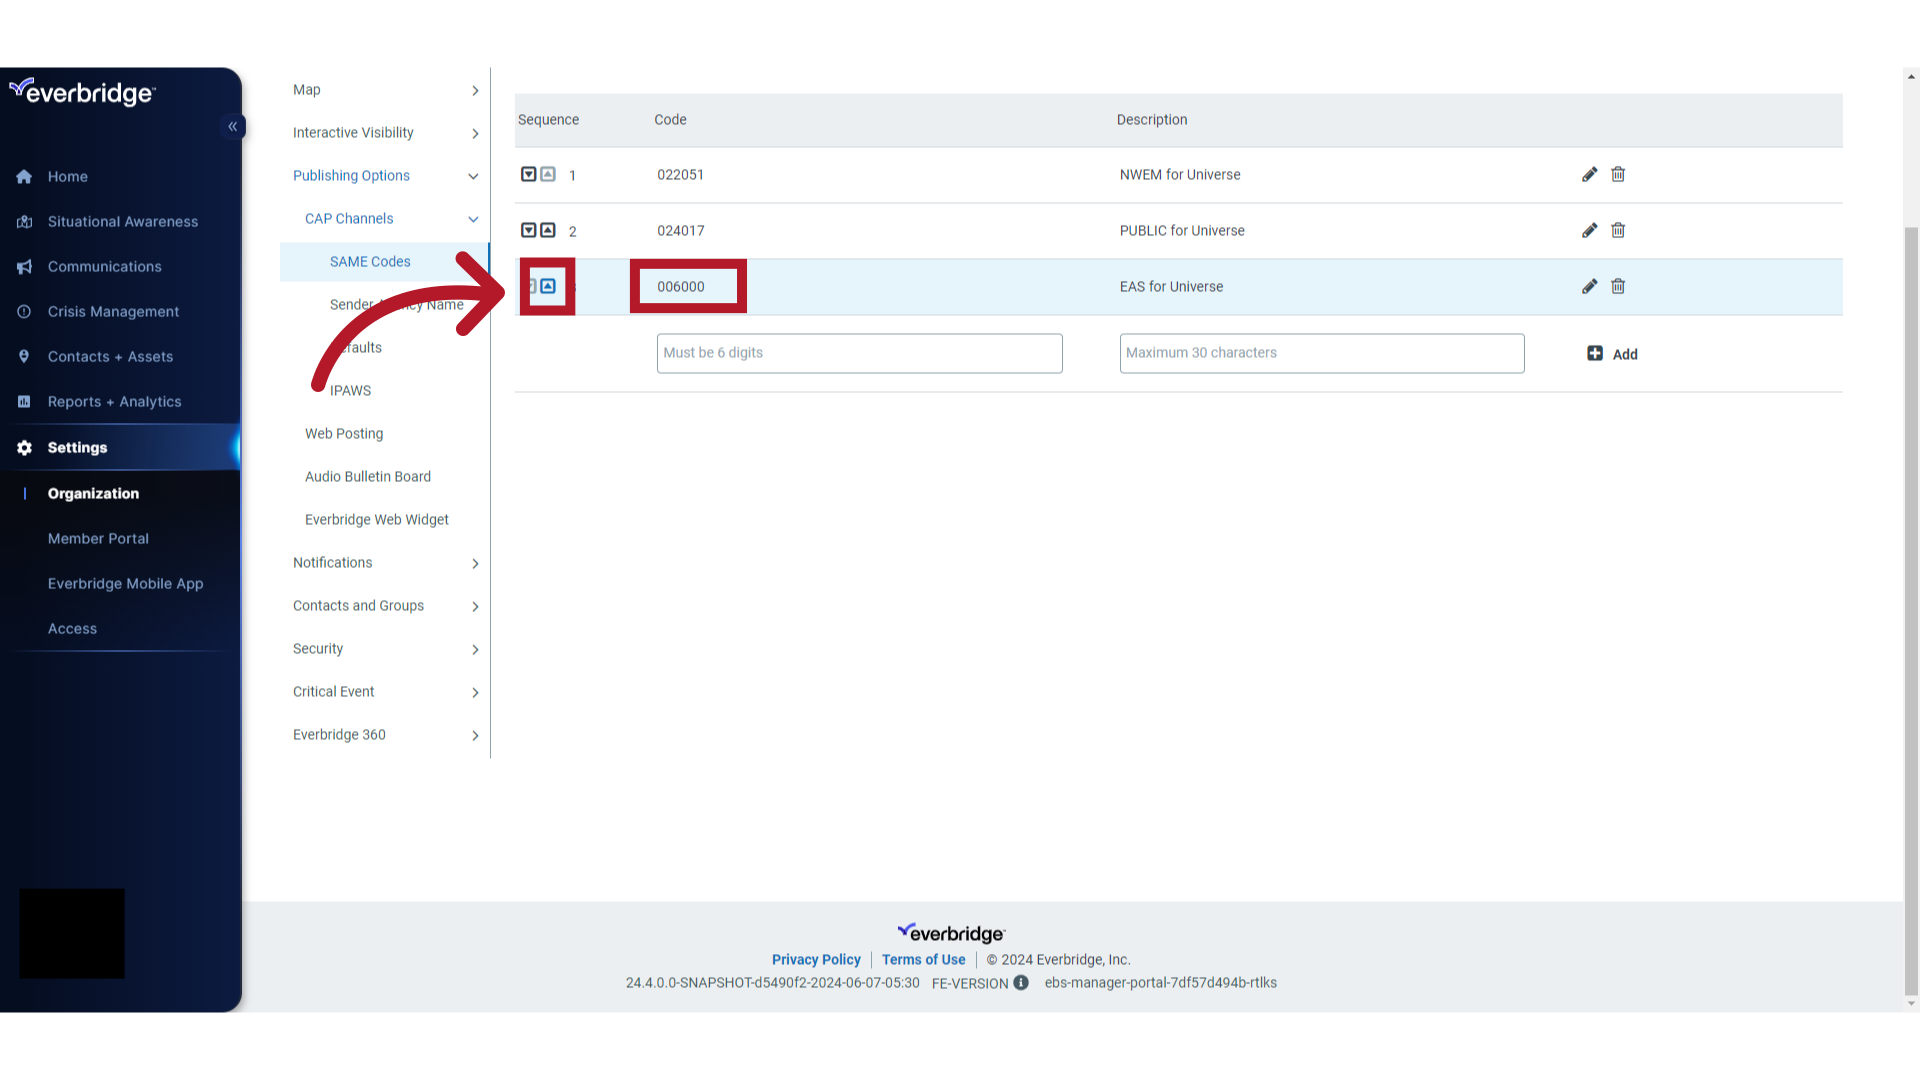
19. Reorder Fields
You may reorder the list of SAME codes using the up and down arrows. The top option in the sequence will be chosen by default when creating an IPAWS alert.
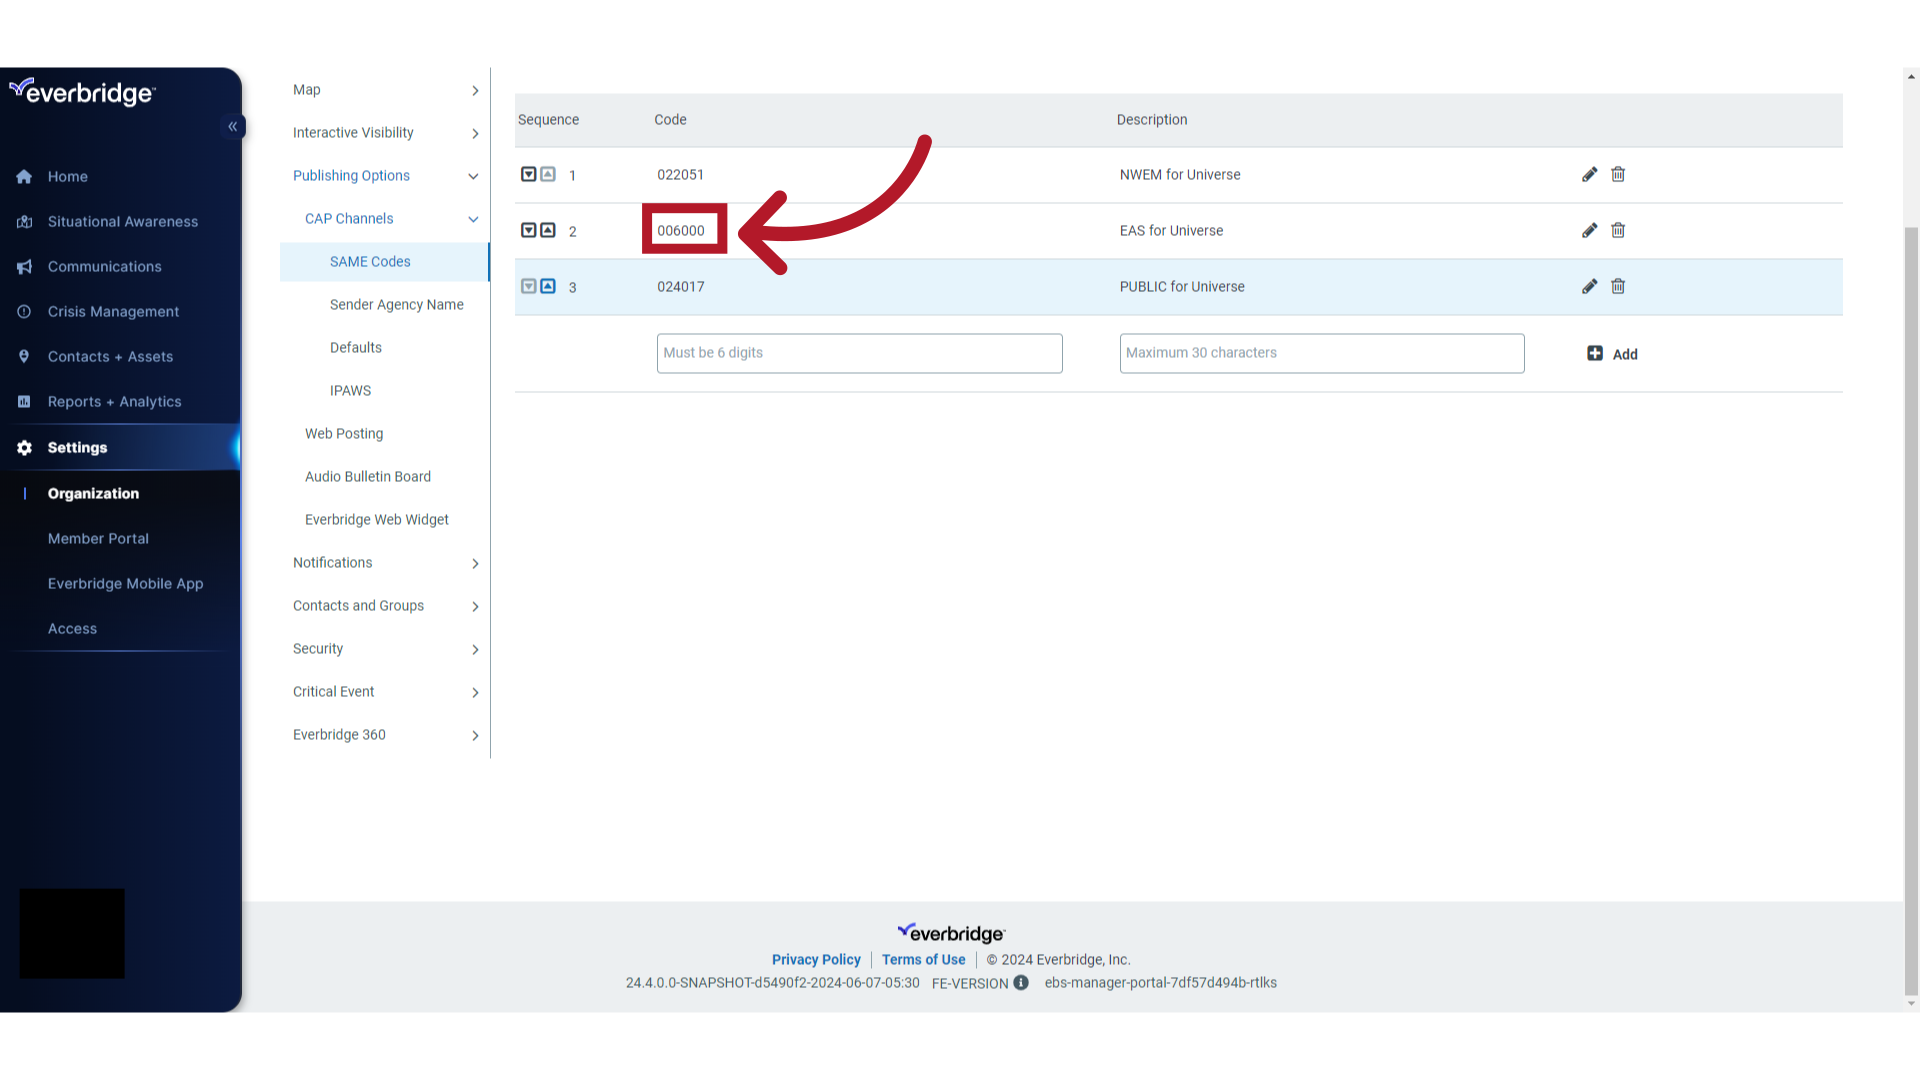
20. Reorder Results
Note SAME code 00600 was moved from the bottom position to the middle position.
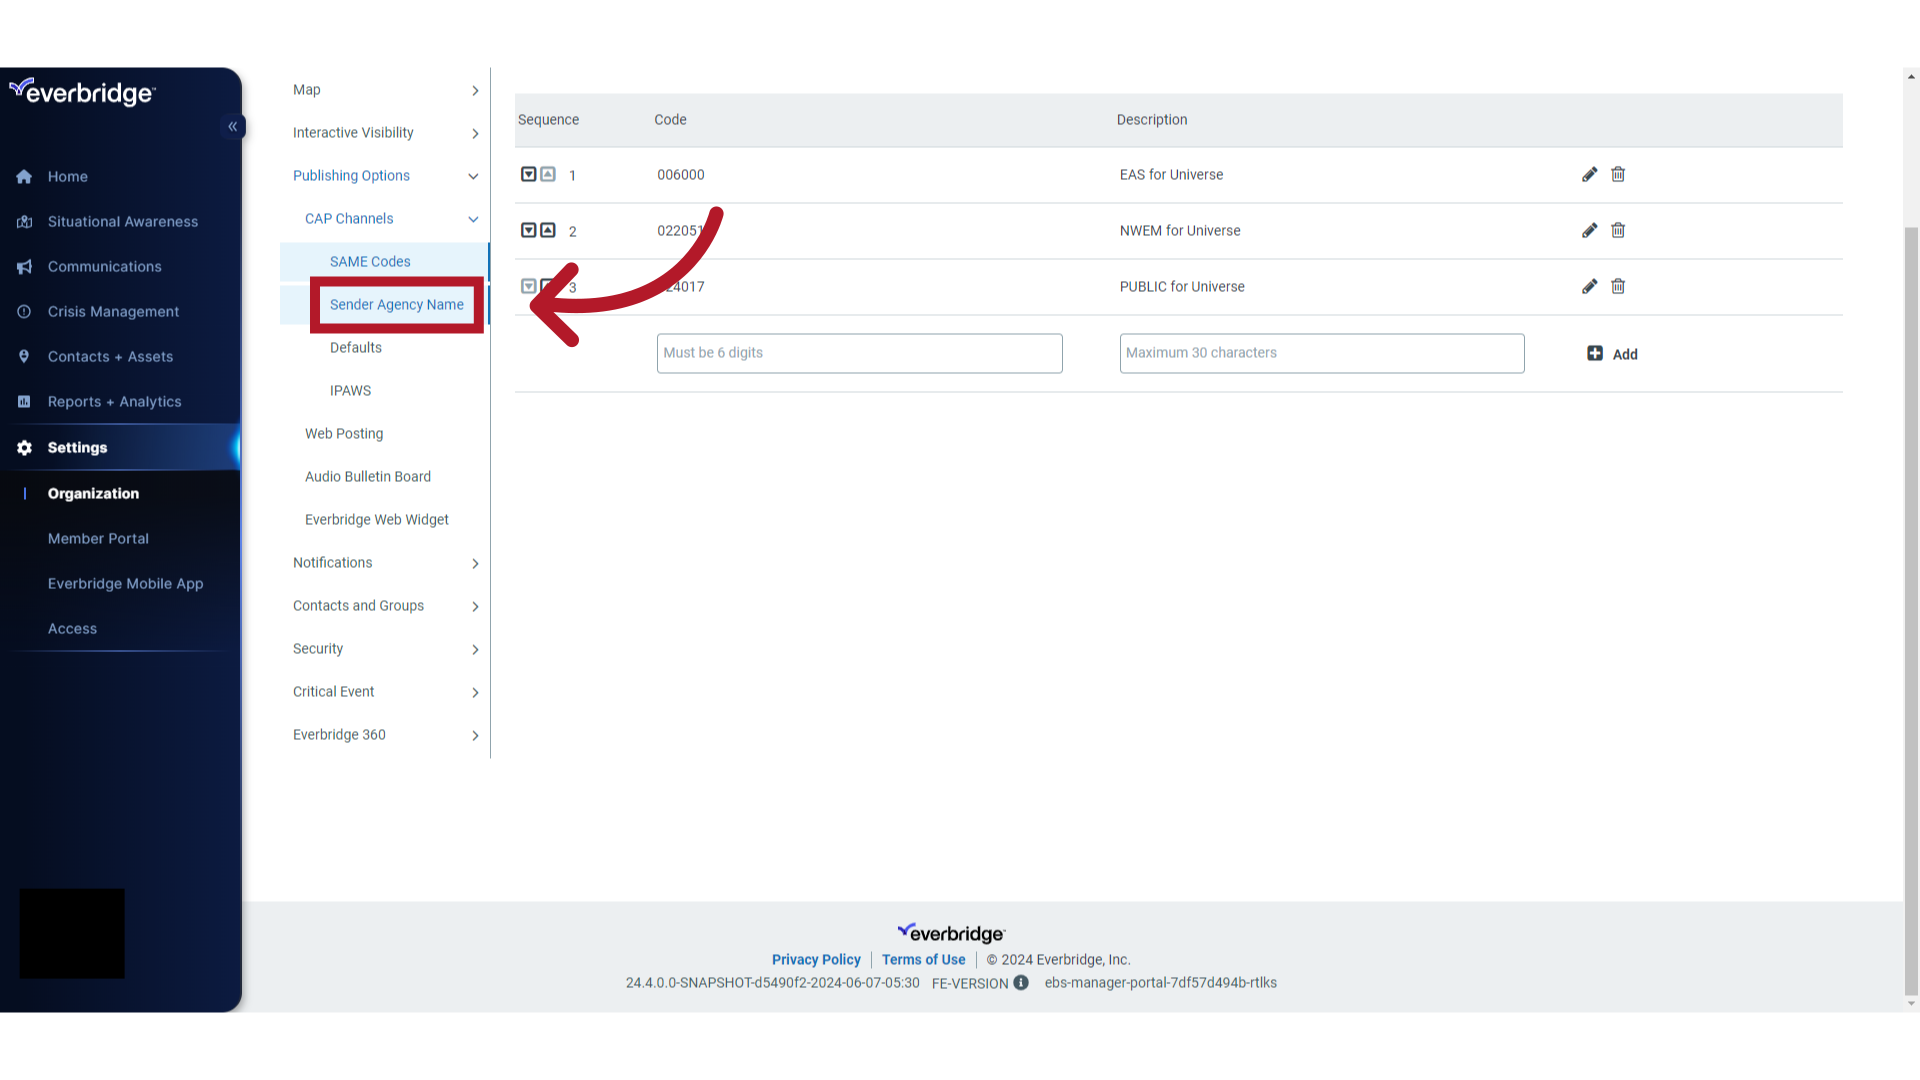
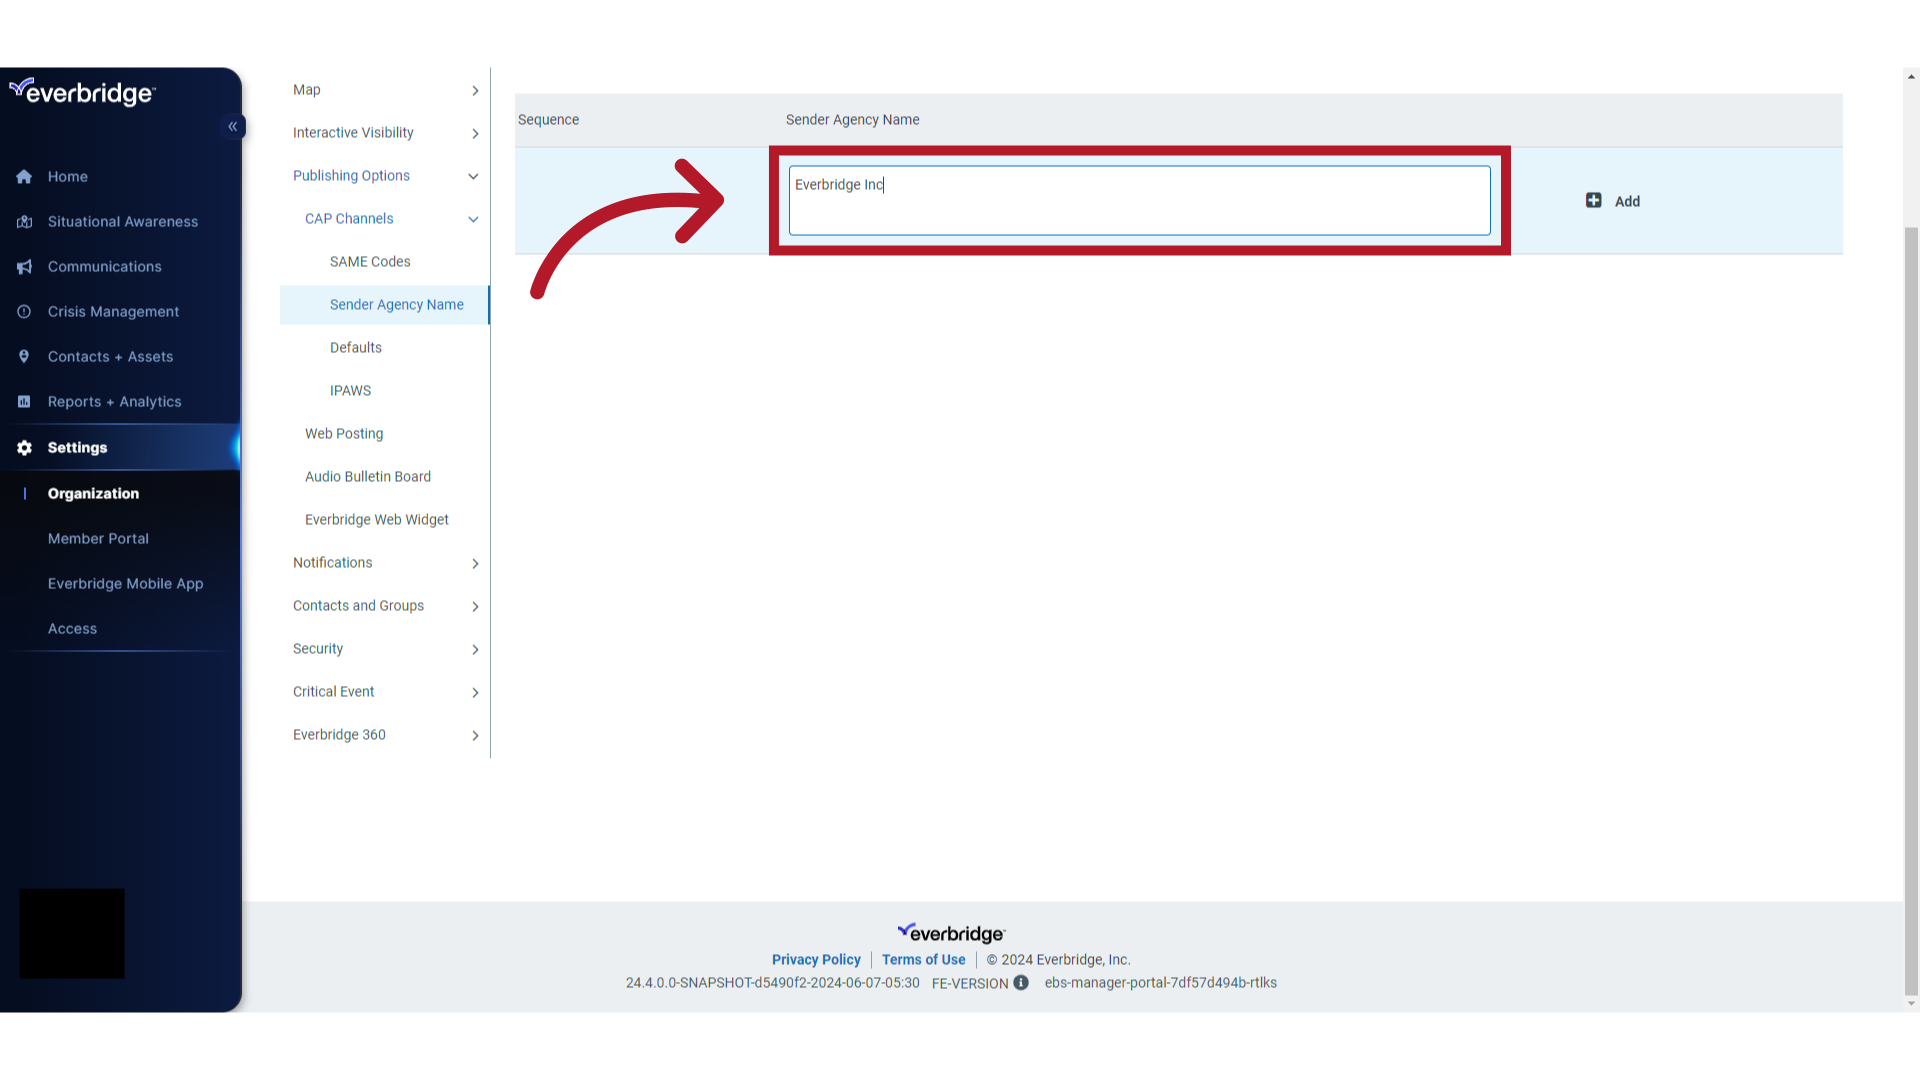
21. Sender Agency Name
Select "Sender Agency Name."
22. Character Limit
Note the Sender Agency Name field has a character limit of 200.

23. Sender Agency Name
Enter the Sender Agency Name in the provided field.
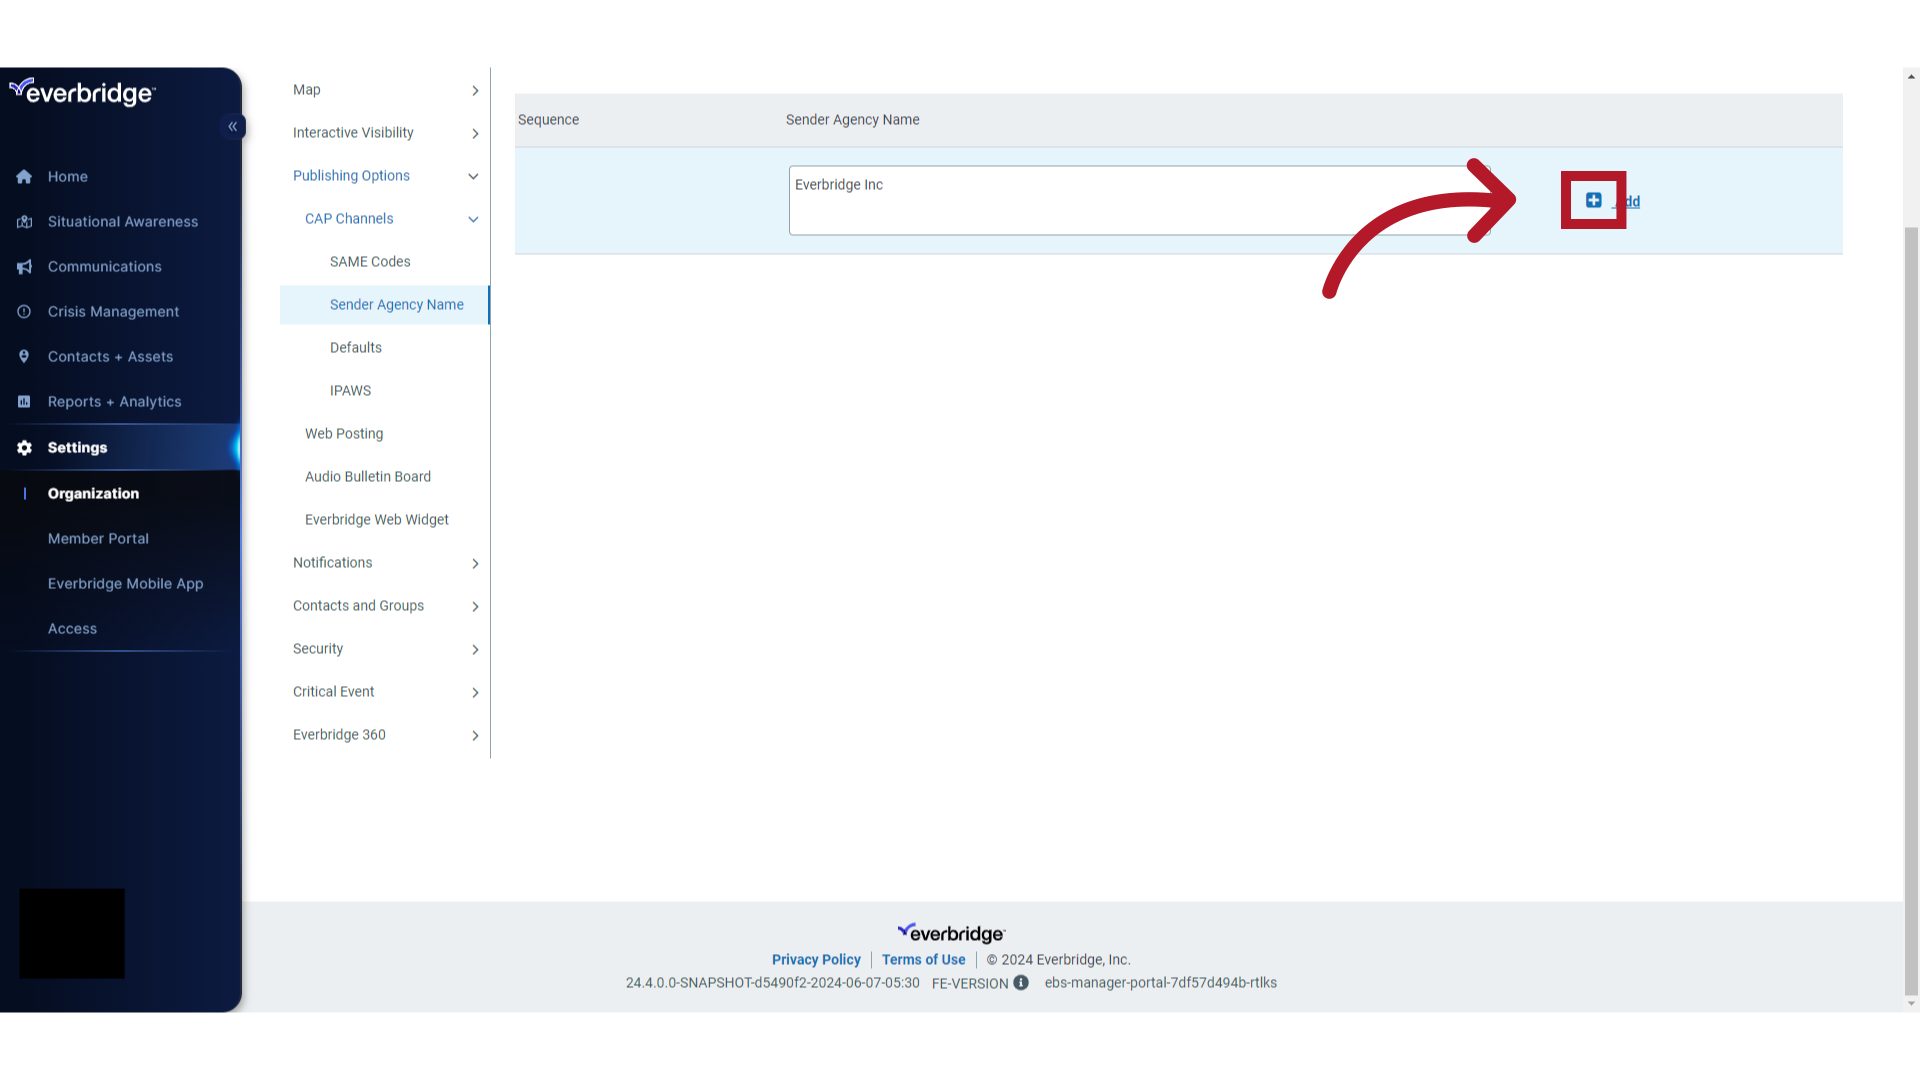
24. Add Sender Agency Name
Click "+ Add".
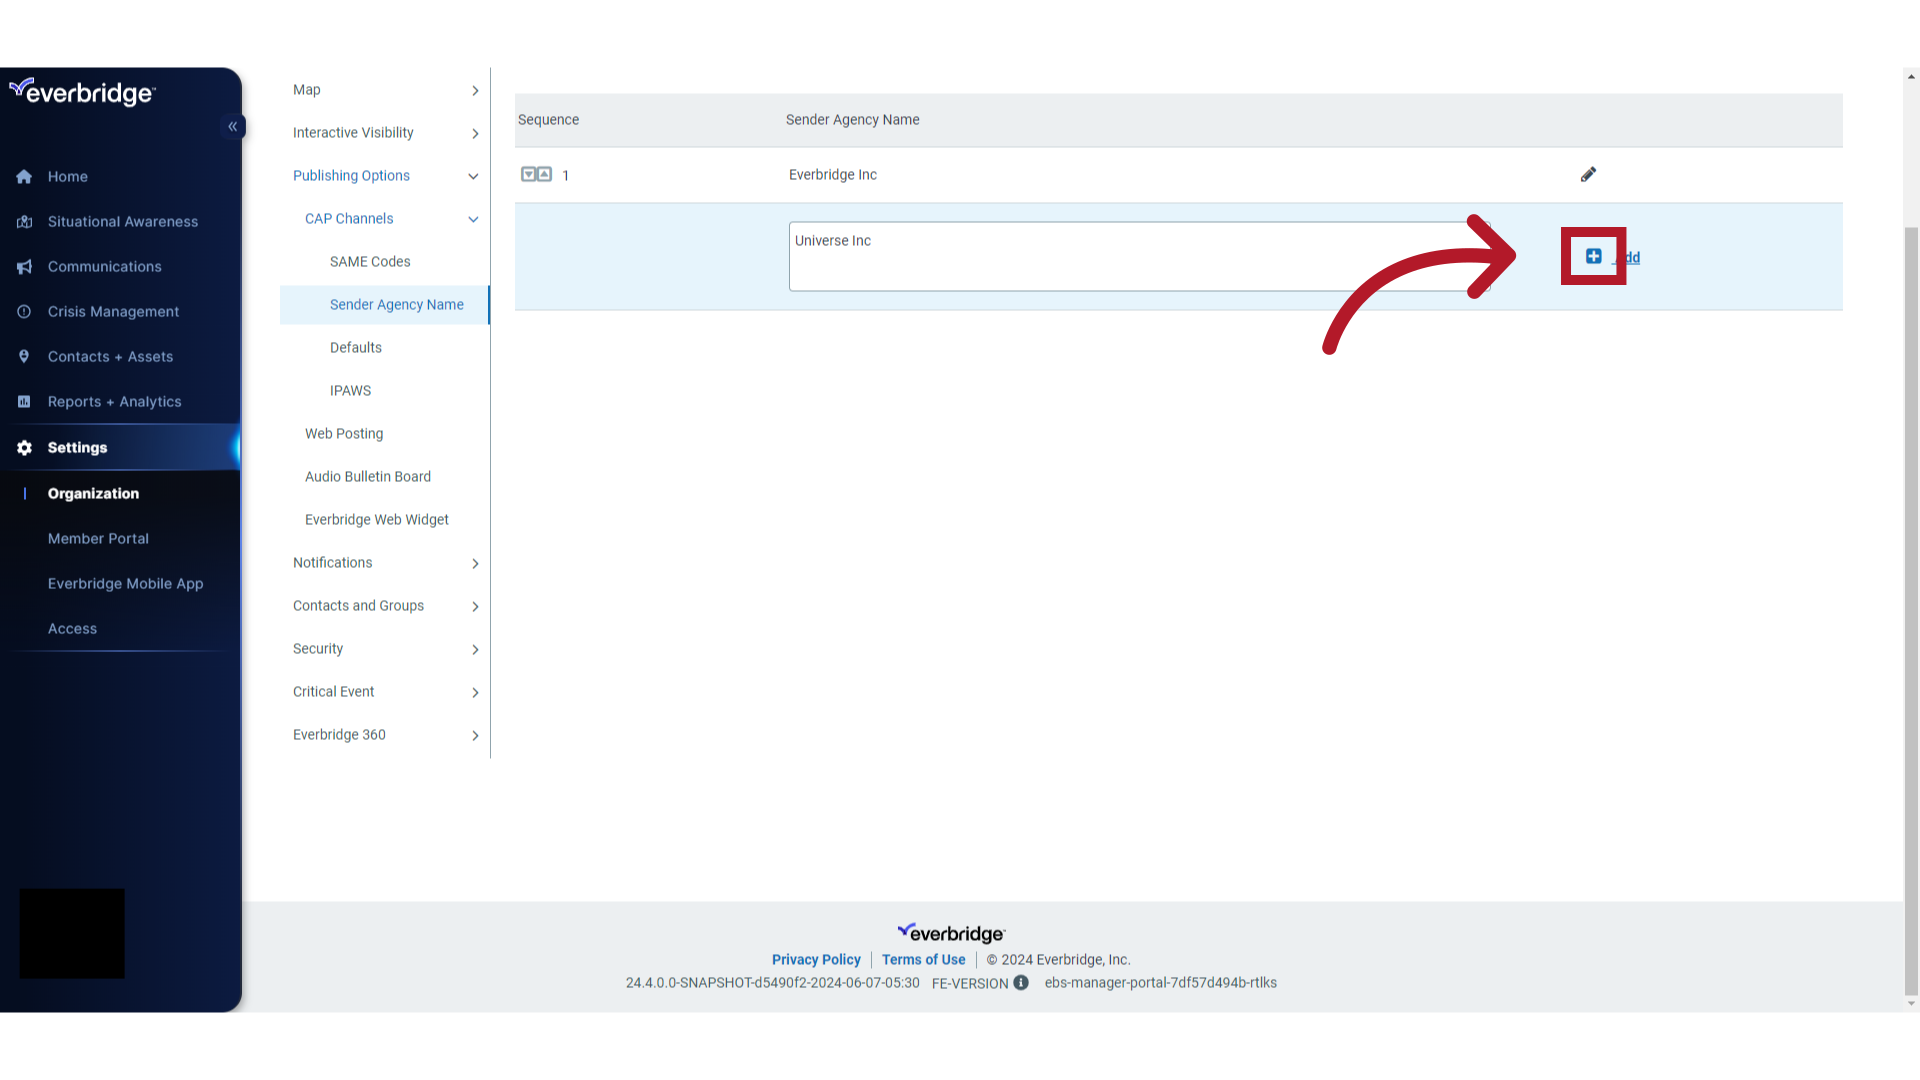
25. Enter Multiple Sender Agency Names
Continue this process until you have added all your Sender Agency Names.

26. Add Multiple Sender Agency Names
Click "+ Add".
27. Delete
You may delete all but one of the Sender Agency Names. This is also true of the SAME Codes.
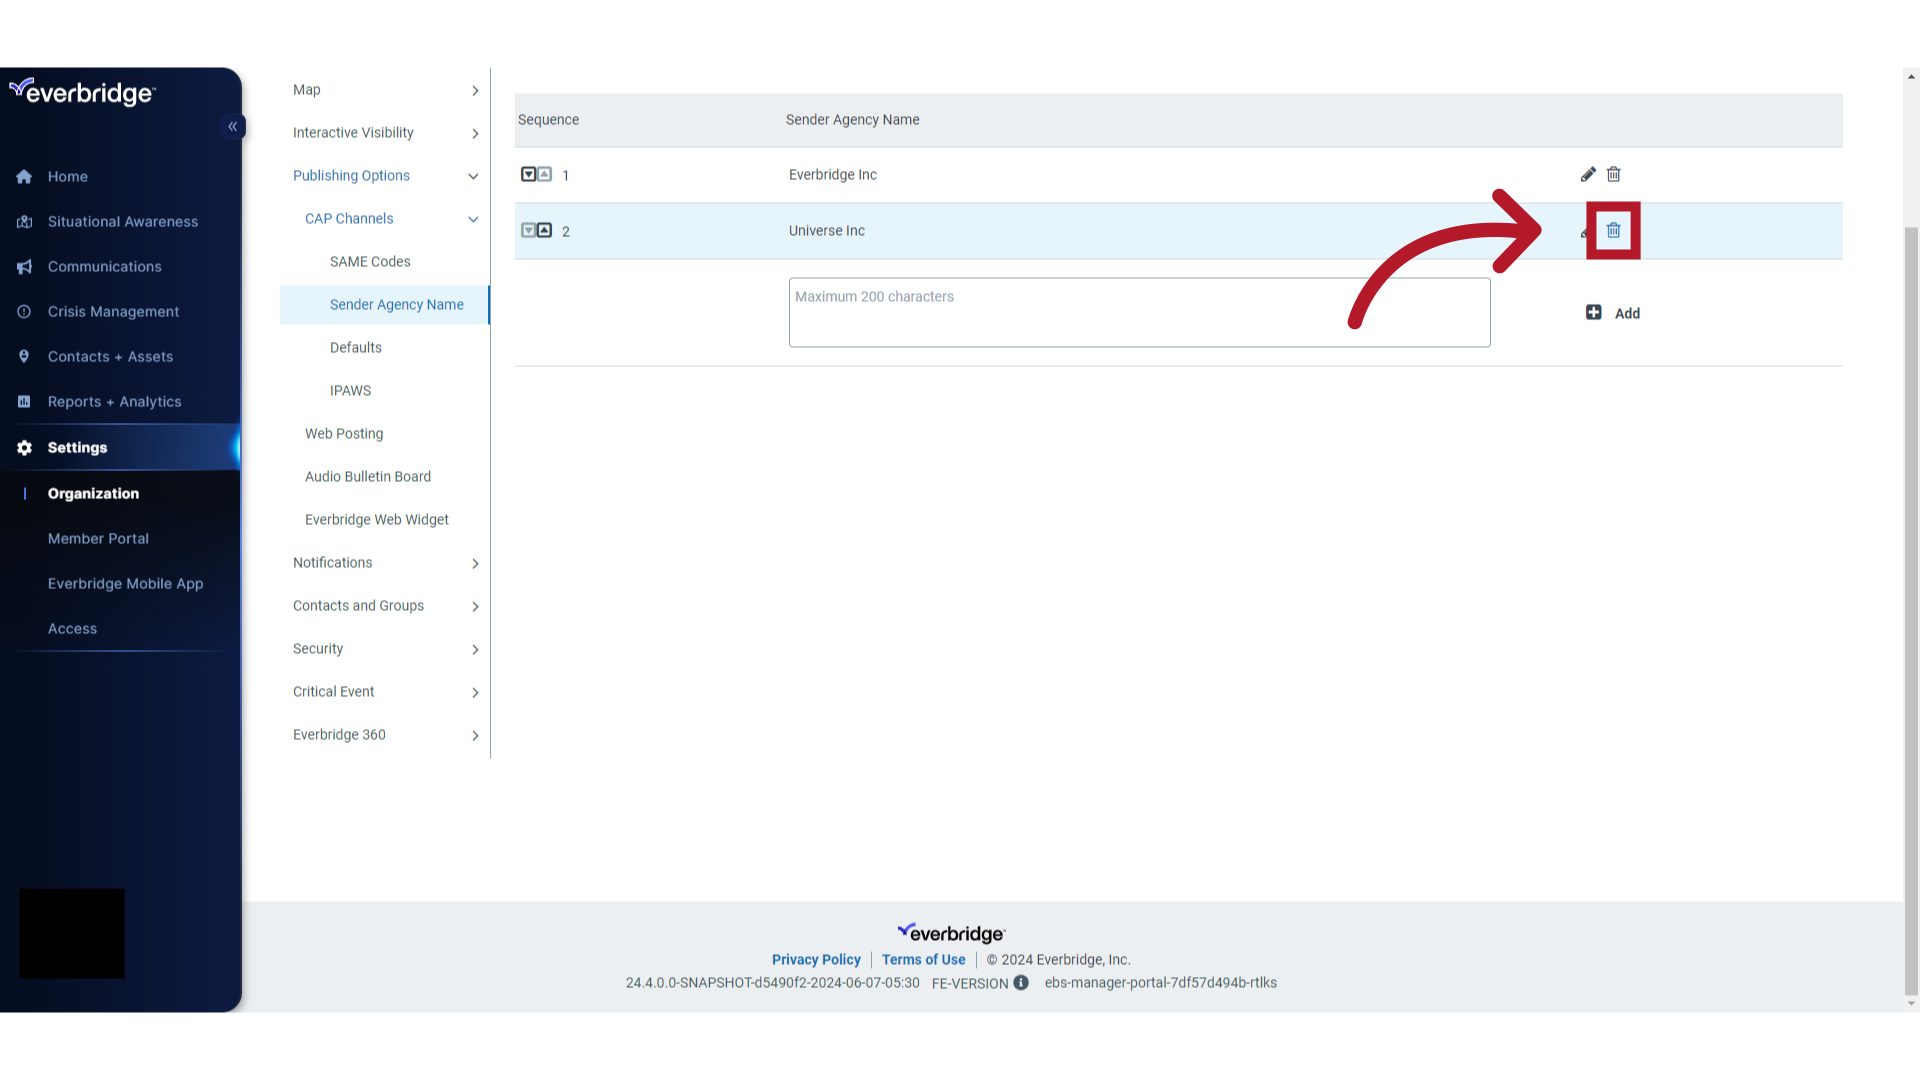
28. One Value Required
Once you have only one item in the list, you may edit the item (SAME Code or Sender Agency Name) but you cannot delete it.
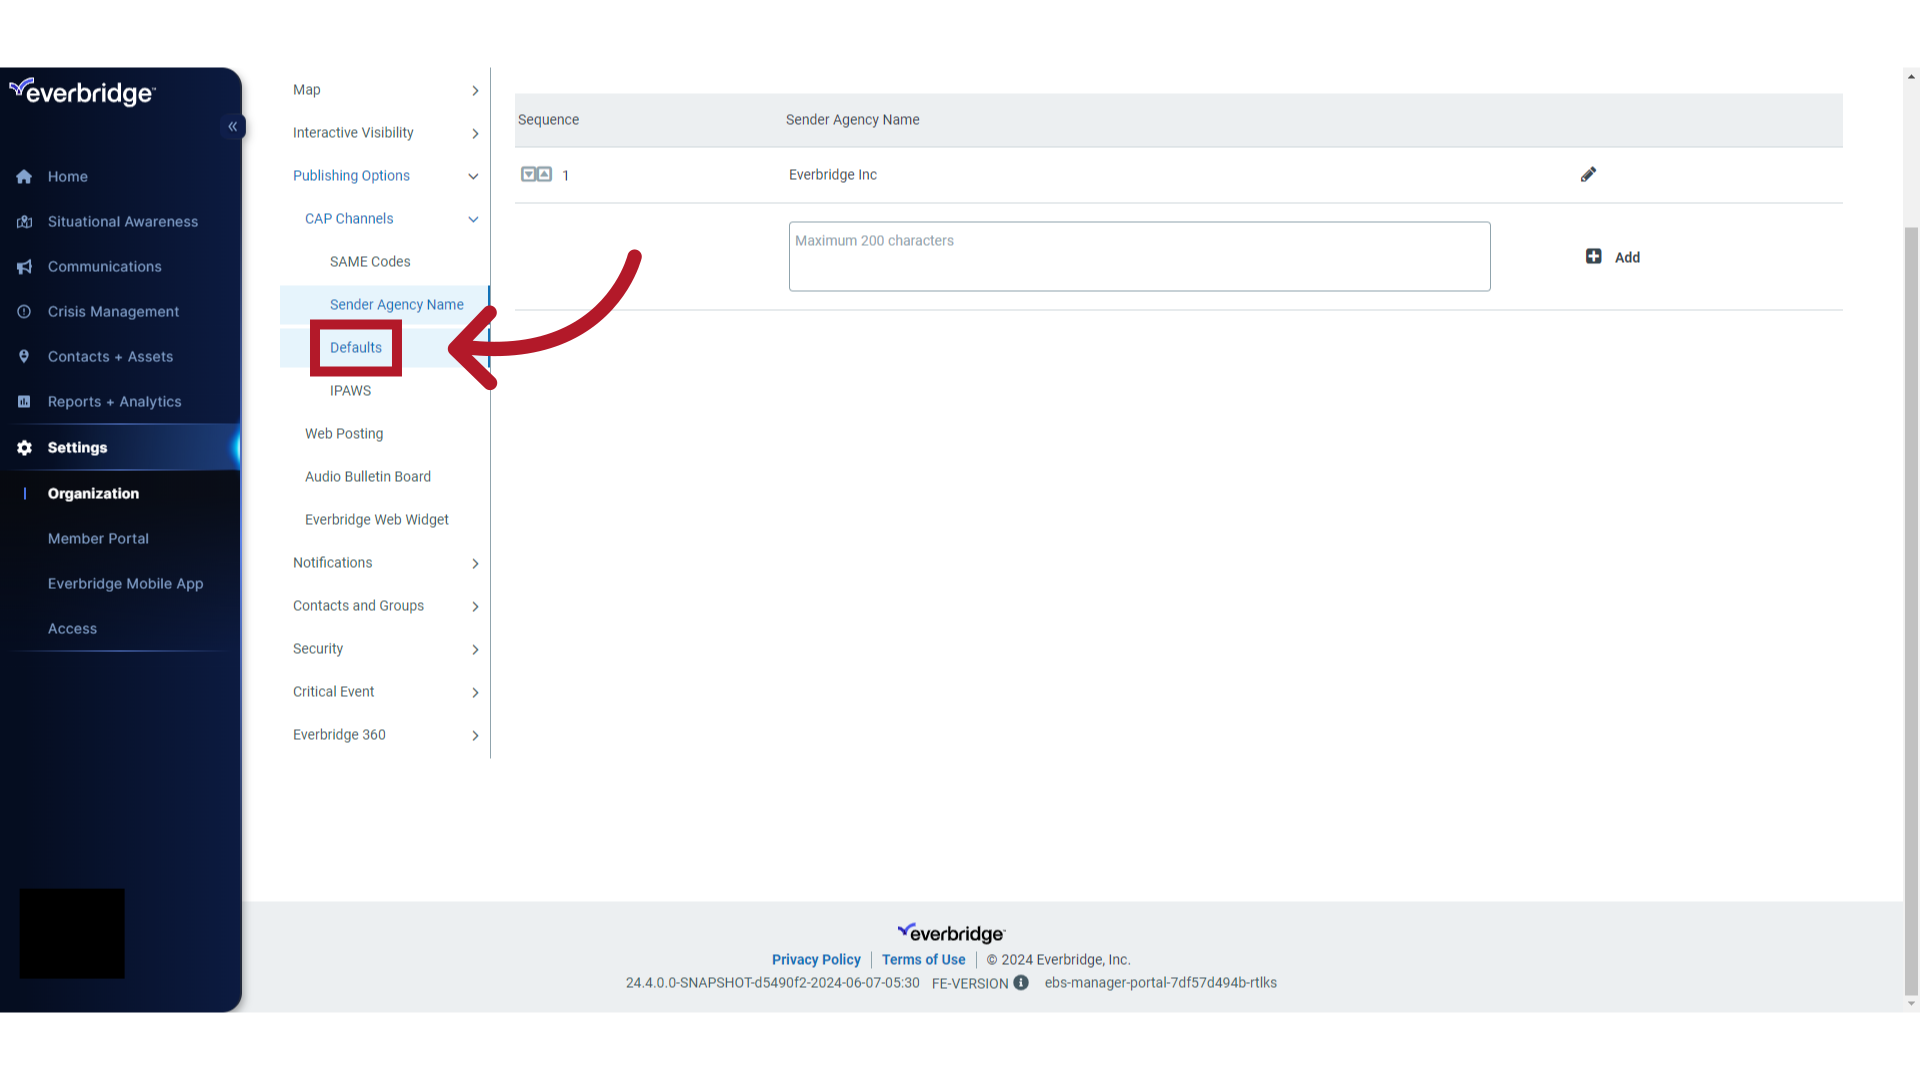
29. Defaults
Select "Defaults".
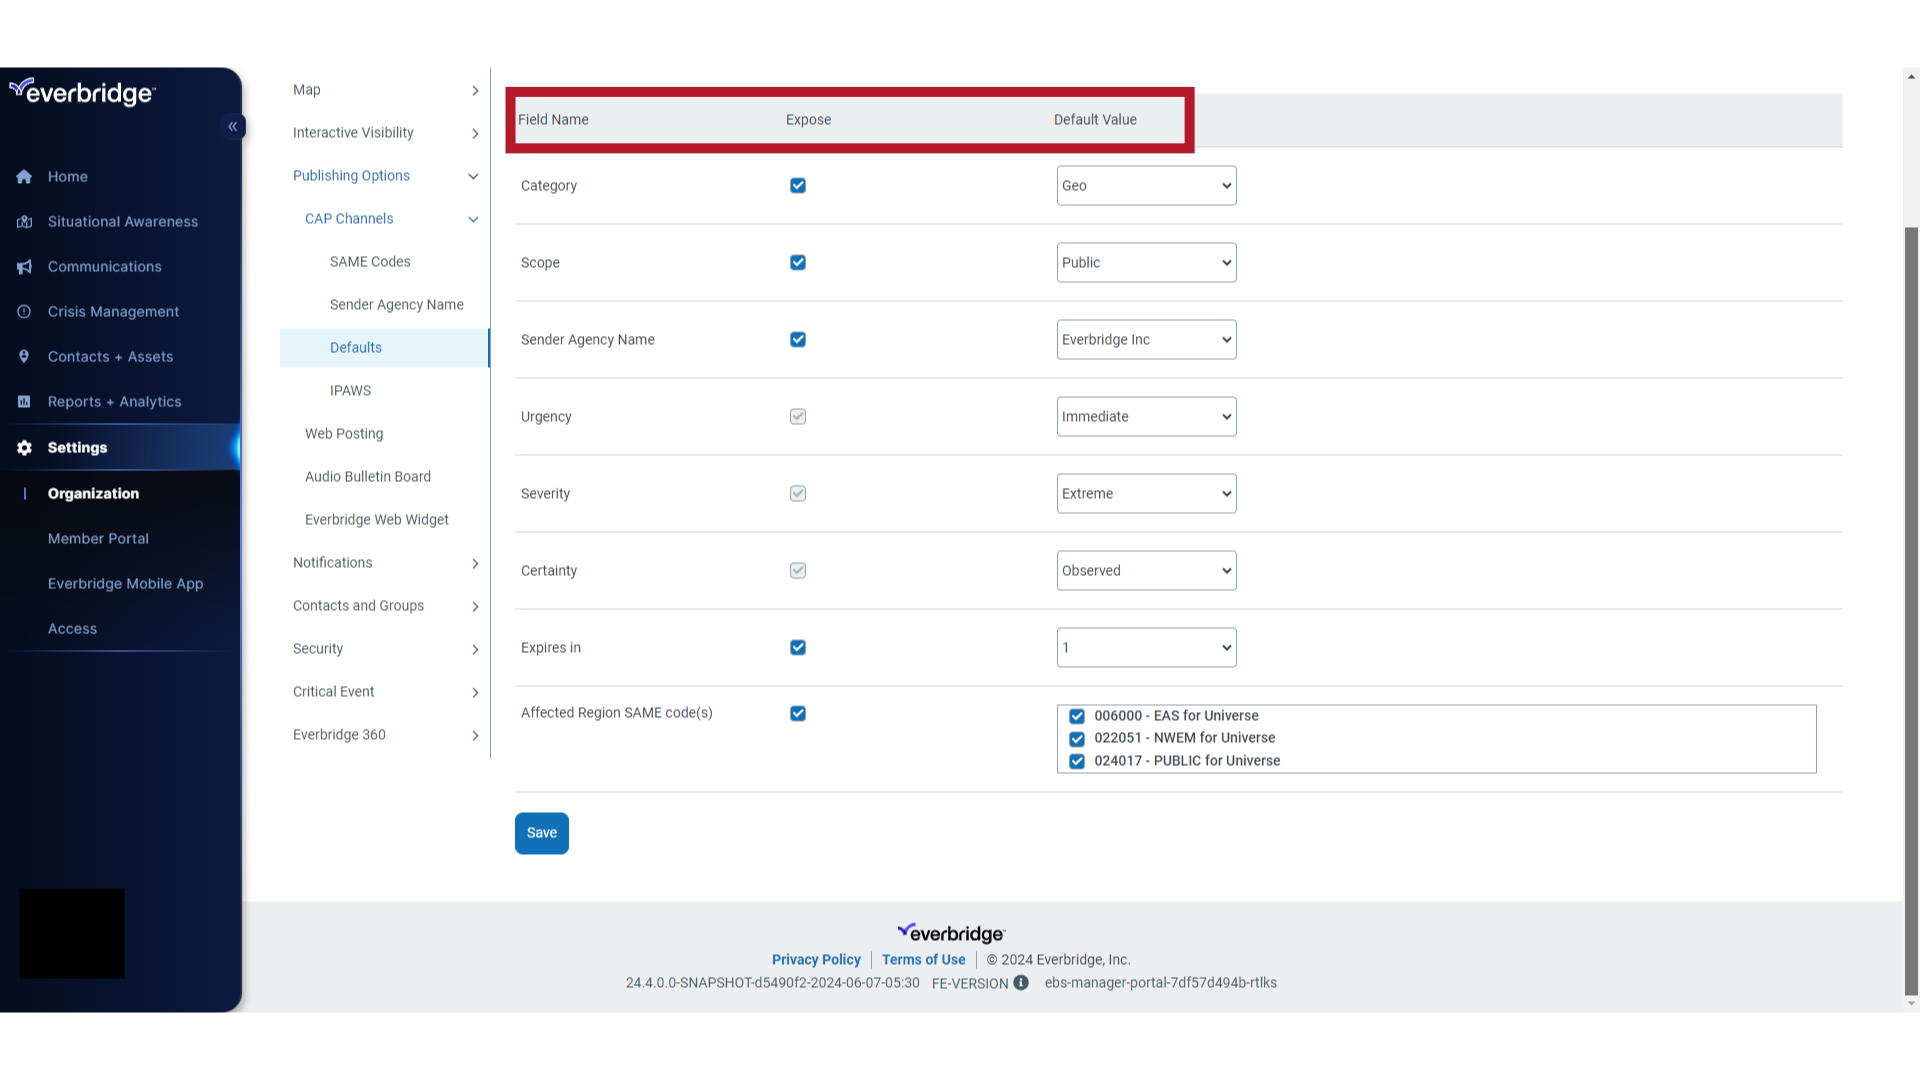
30. Column Names of Default Fields
The administrator can select the default values for each field using the drop-down menu options in the Default Value column. This eliminates the possibility of a user entering incorrect values on the user form. Initially all fields are exposed to the user on this form. To hide a field, clear the checkbox for that field under the Expose column. The Urgency, Severity and Certainty fields cannot be hidden on the notification form. These fields are dependent on the Event Name selected in the notification.
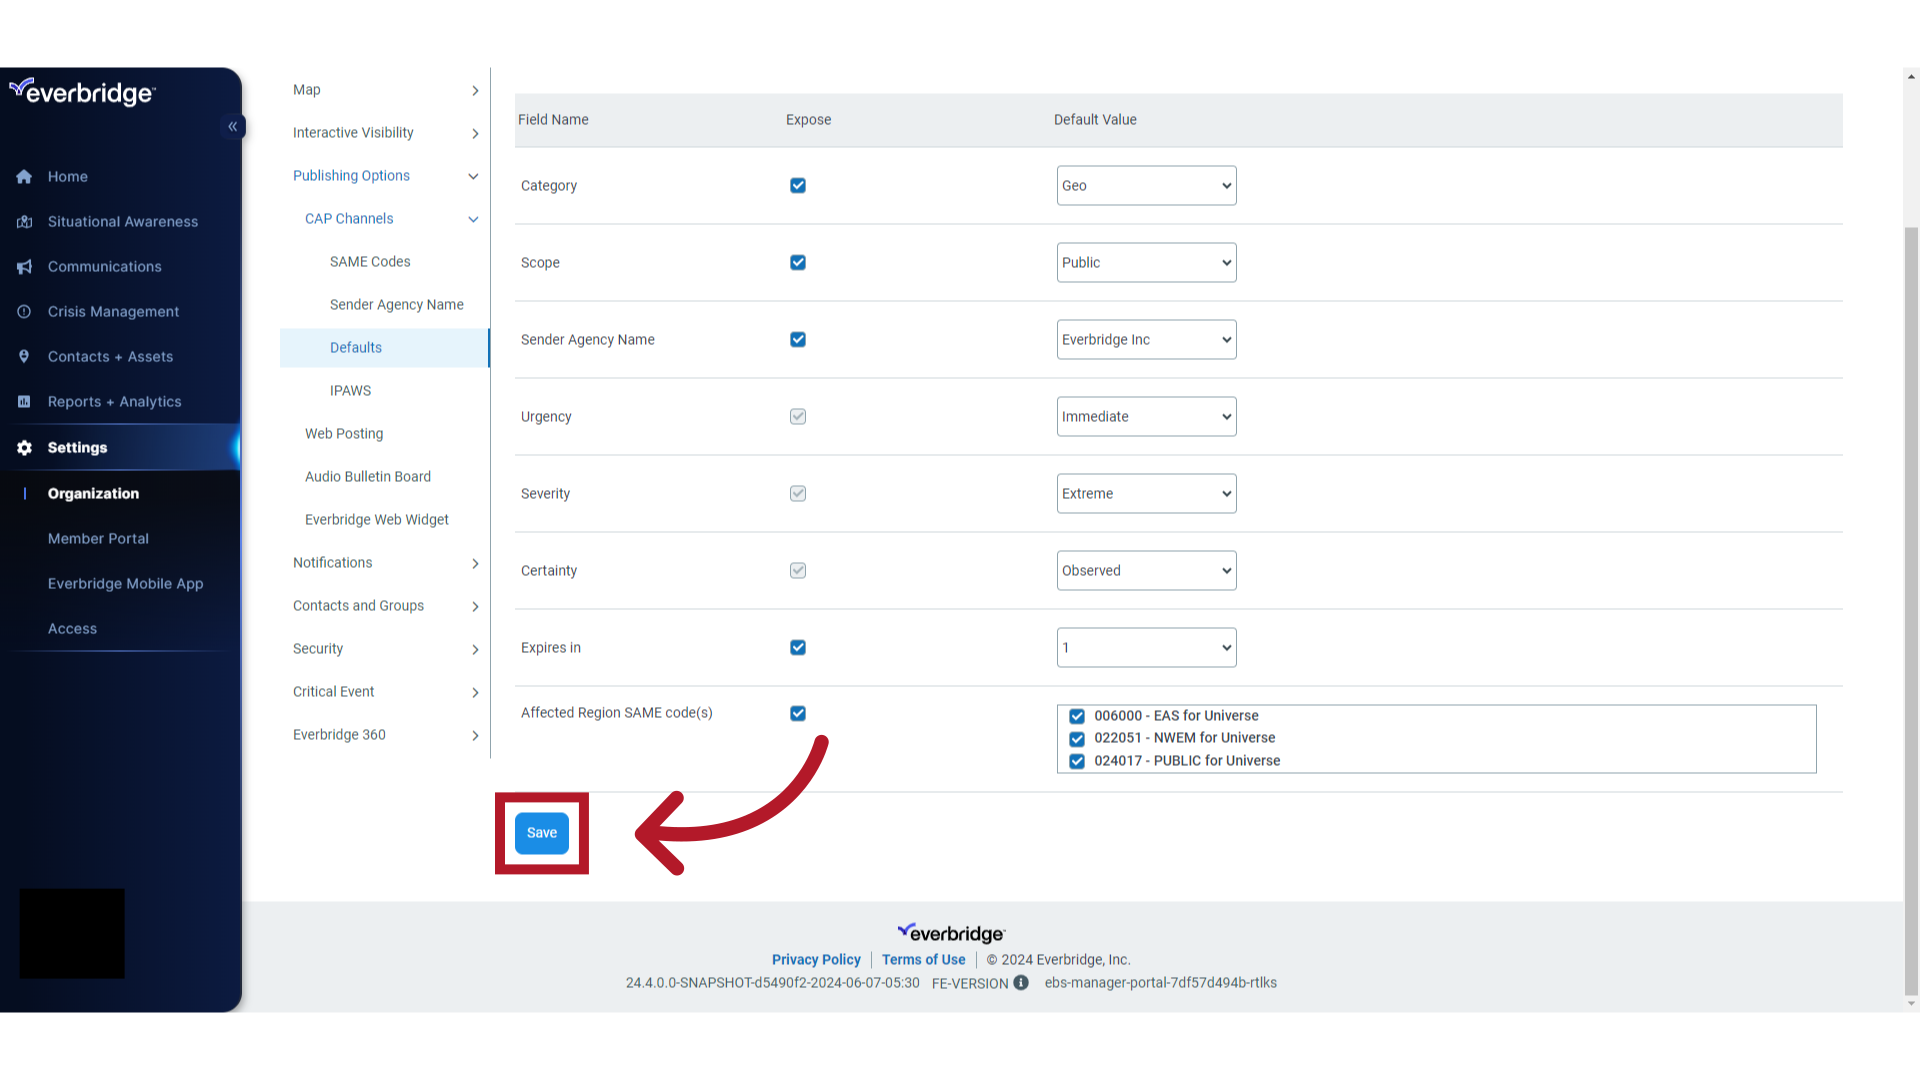
31. Save
Click "Save" to save the changes.
32. Recap
The guide covered the IPAWS settings that can be configured once you have integrated your IPAWS credentials with Everbridge. Settings covered were SAME codes, Sender Agency Names, and default values for fields displayed on IPAWS notifications.

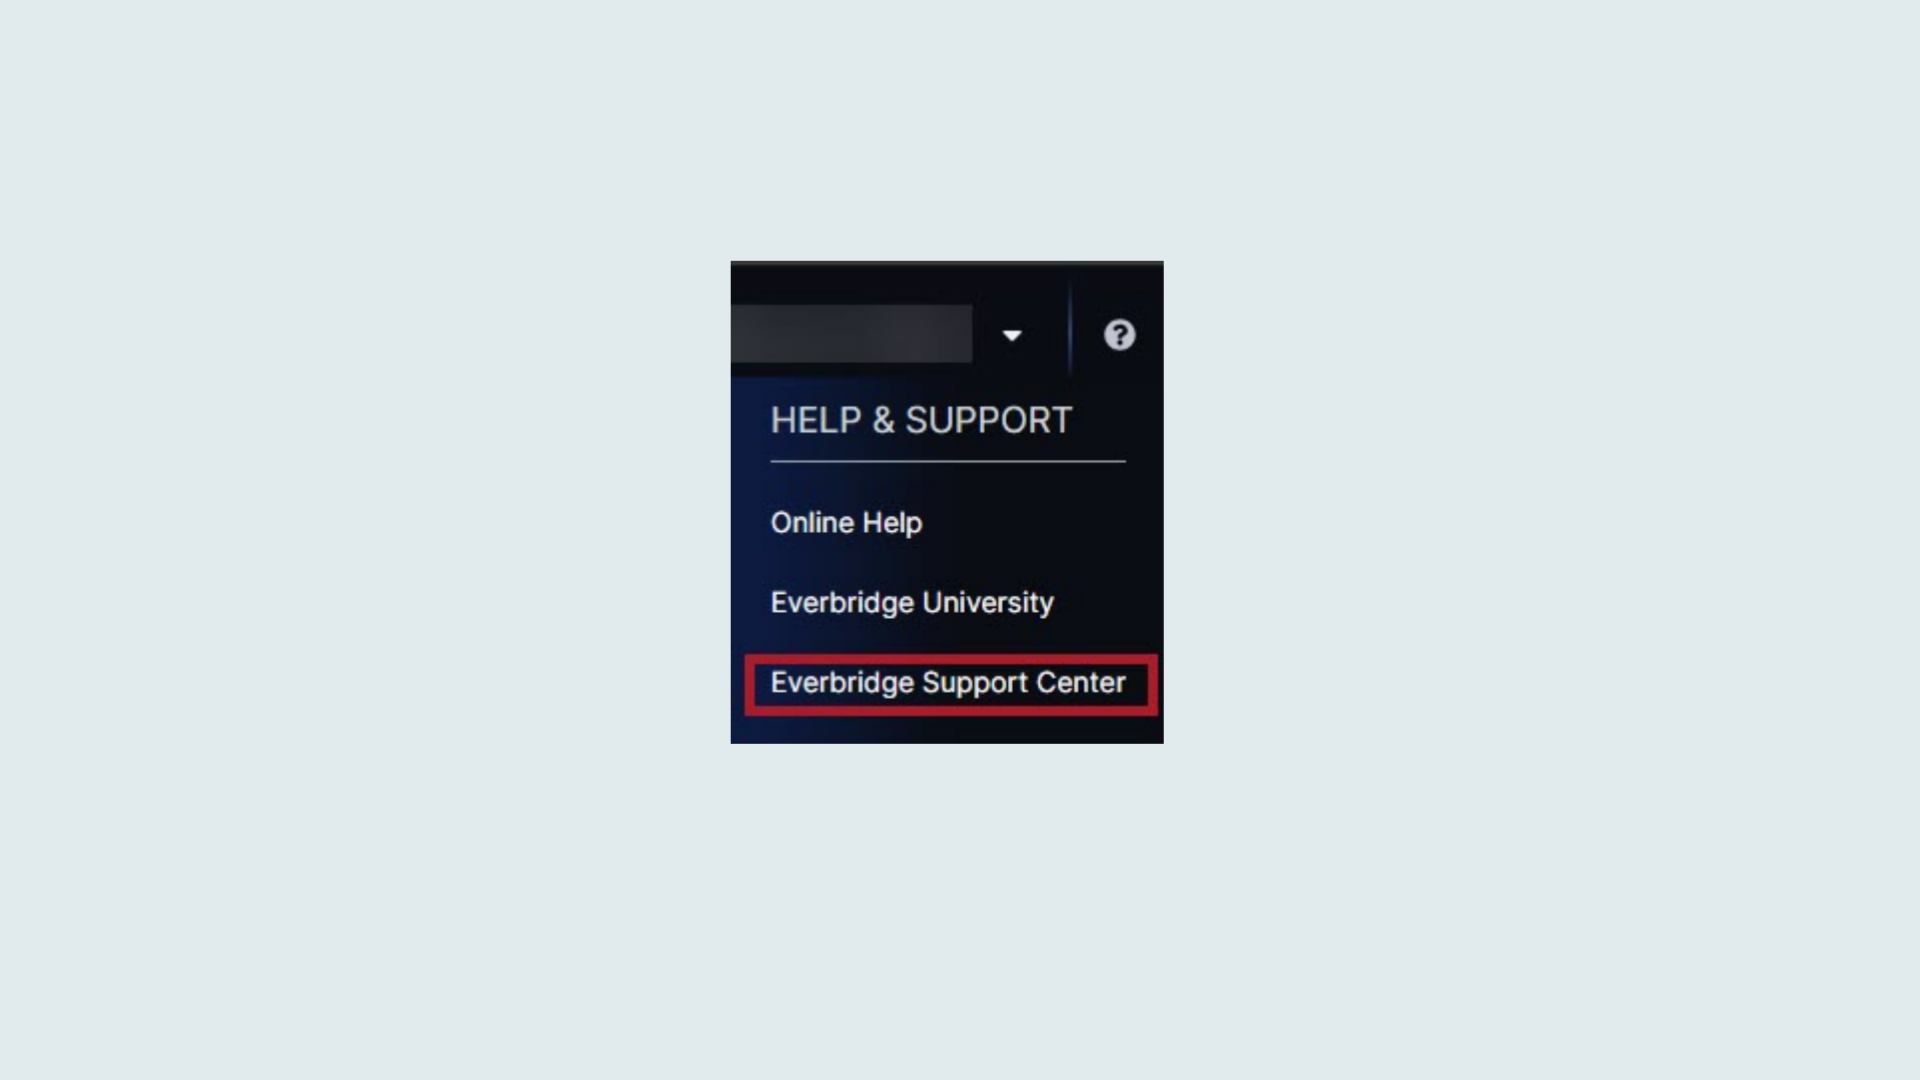
33. Everbridge Support Center
Access the Everbridge Support Center from the top-right corner of the Manager Portal for more microlearning, release notes, documentation, knowledge articles, Everbridge University training, community Q&A and ideas, security bulletins, service advisories, system status, and for submitting and managing your support tickets.
This guide covered the detailed steps to configure IPAWS settings in your Everbridge organization. From accessing different sections to filling in specific information and saving the changes, you now have a comprehensive understanding of the configuration process.
Additional Resources
EBS: Integrating IPAWS Credentials Into an Everbridge Organization