Topic
How to create an Incident Template.
Description
Incident Templates are created by Incident Administrators to streamline the message-sending process by pre-populating important aspects of a message ahead of time.
Go to manager.everbridge.net
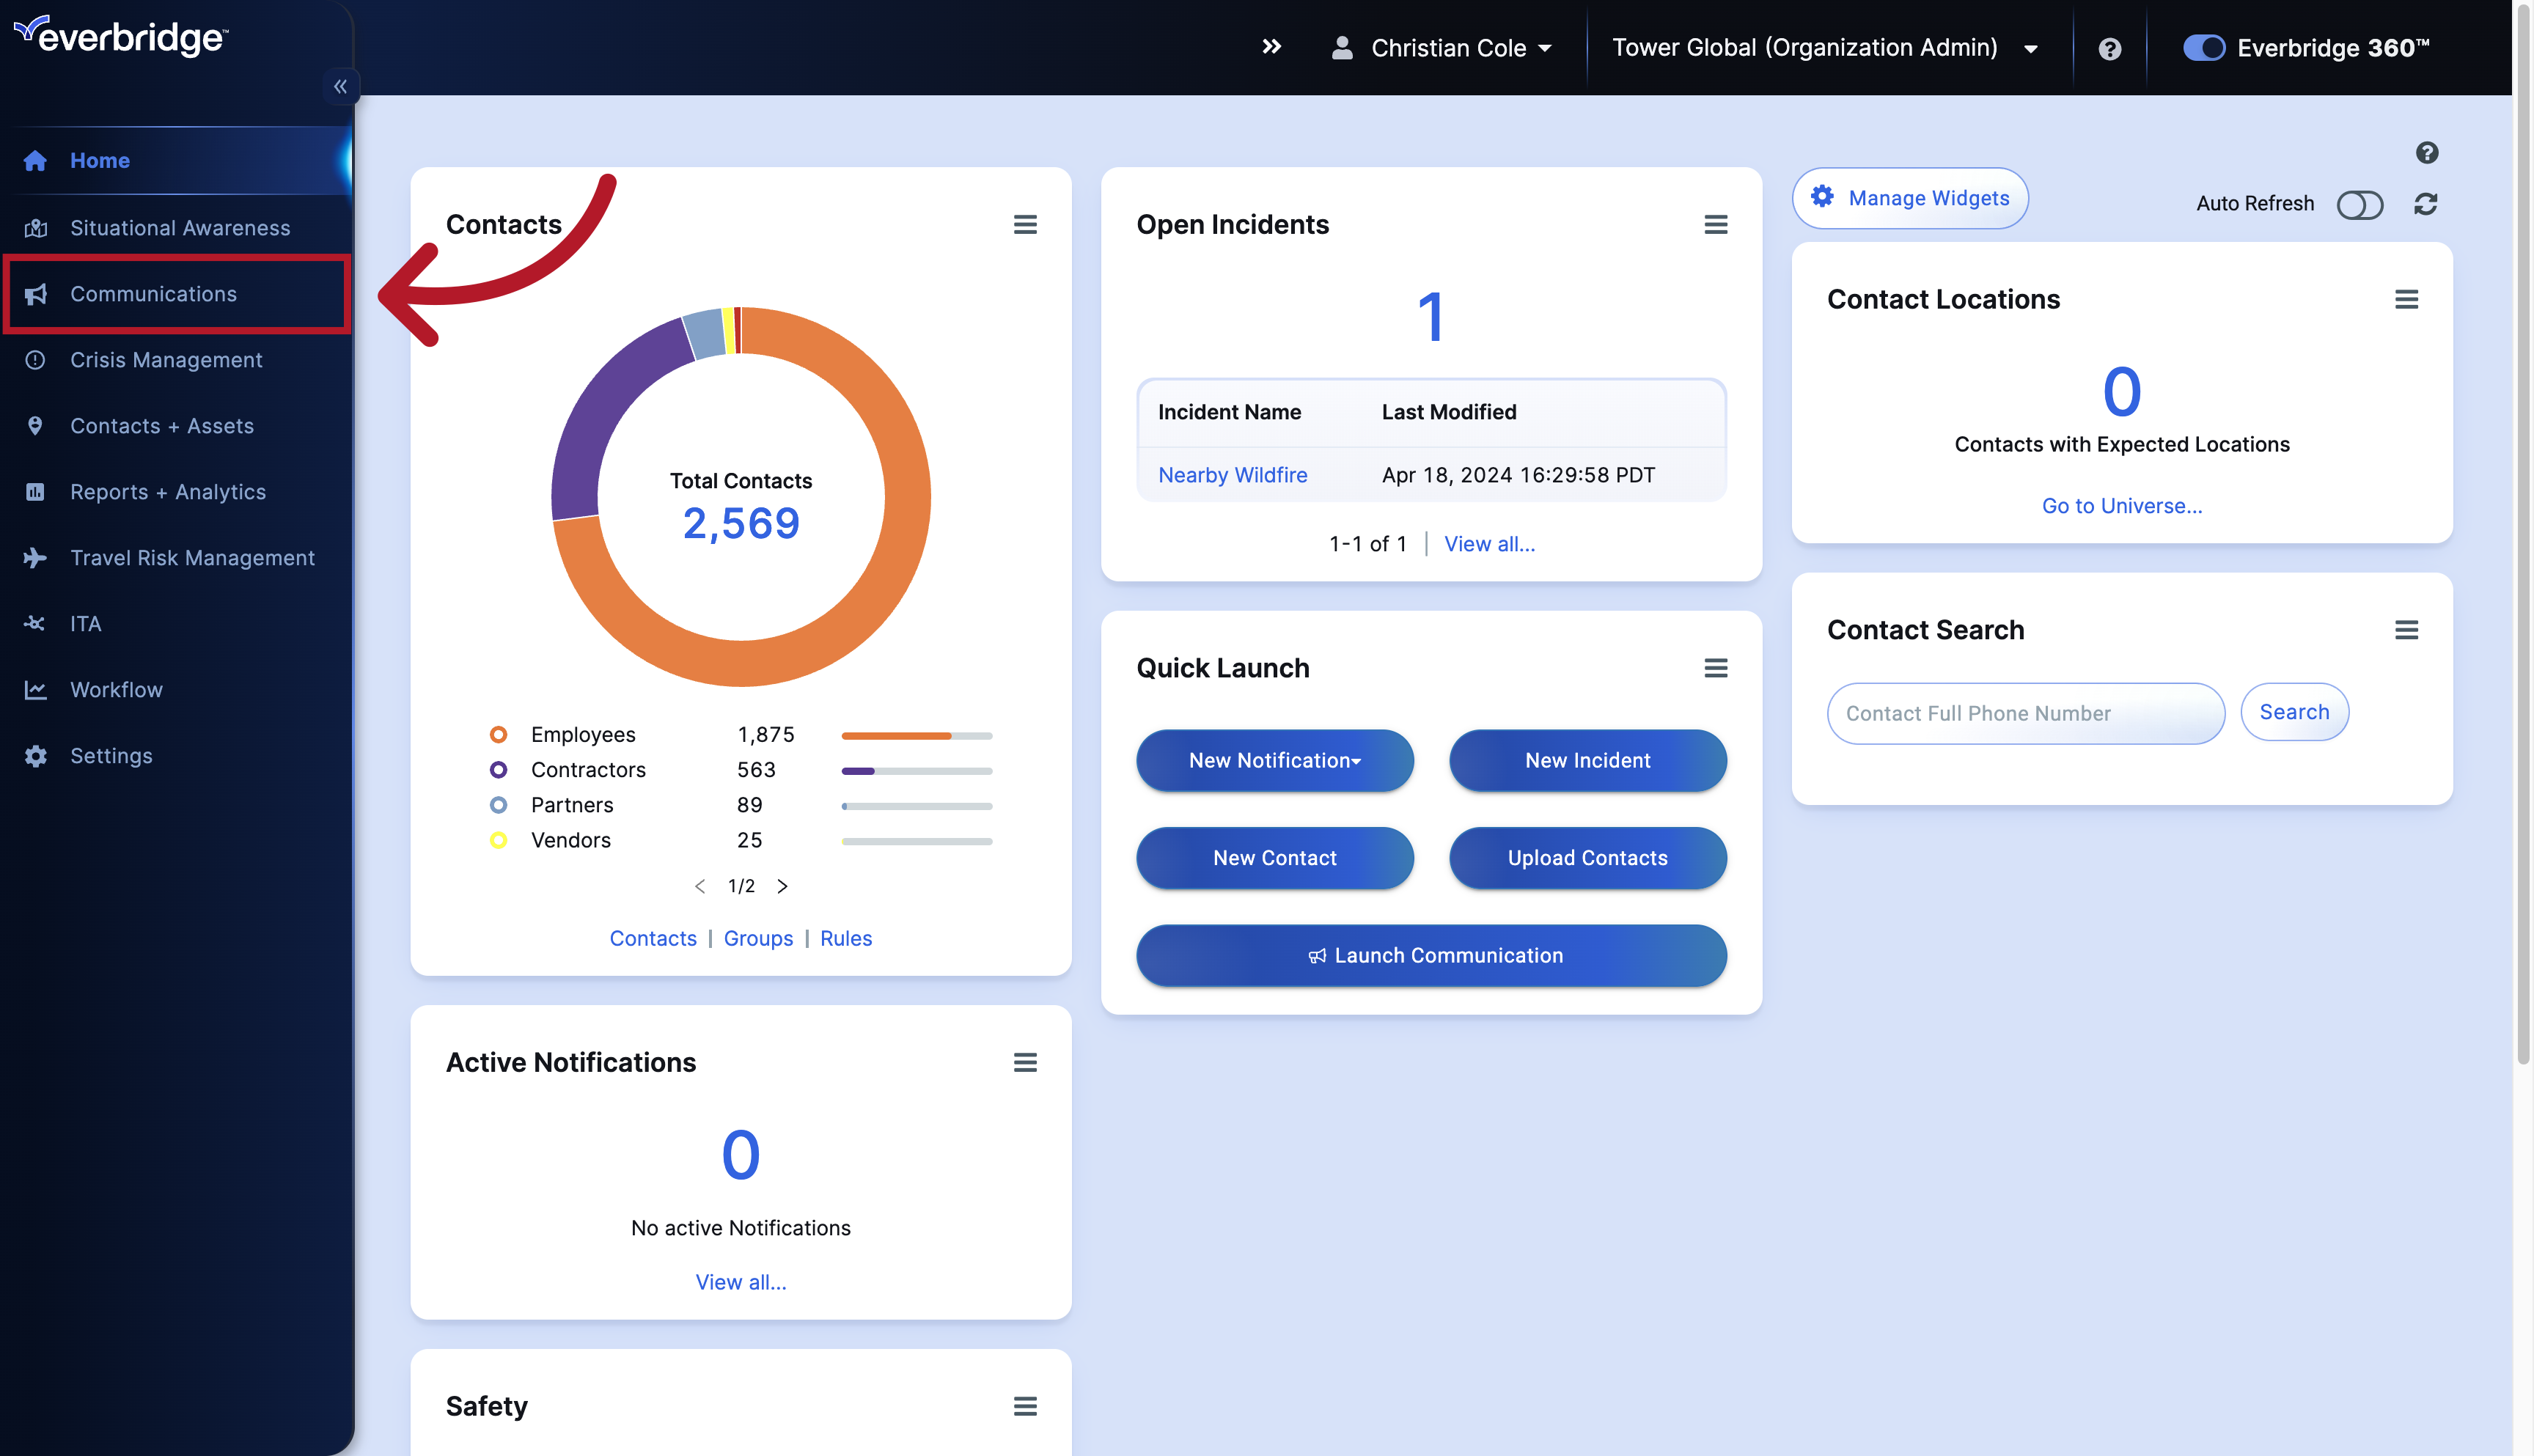
1. Dashboard
To create an Incident Template, start by hovering over the Communications Tab.
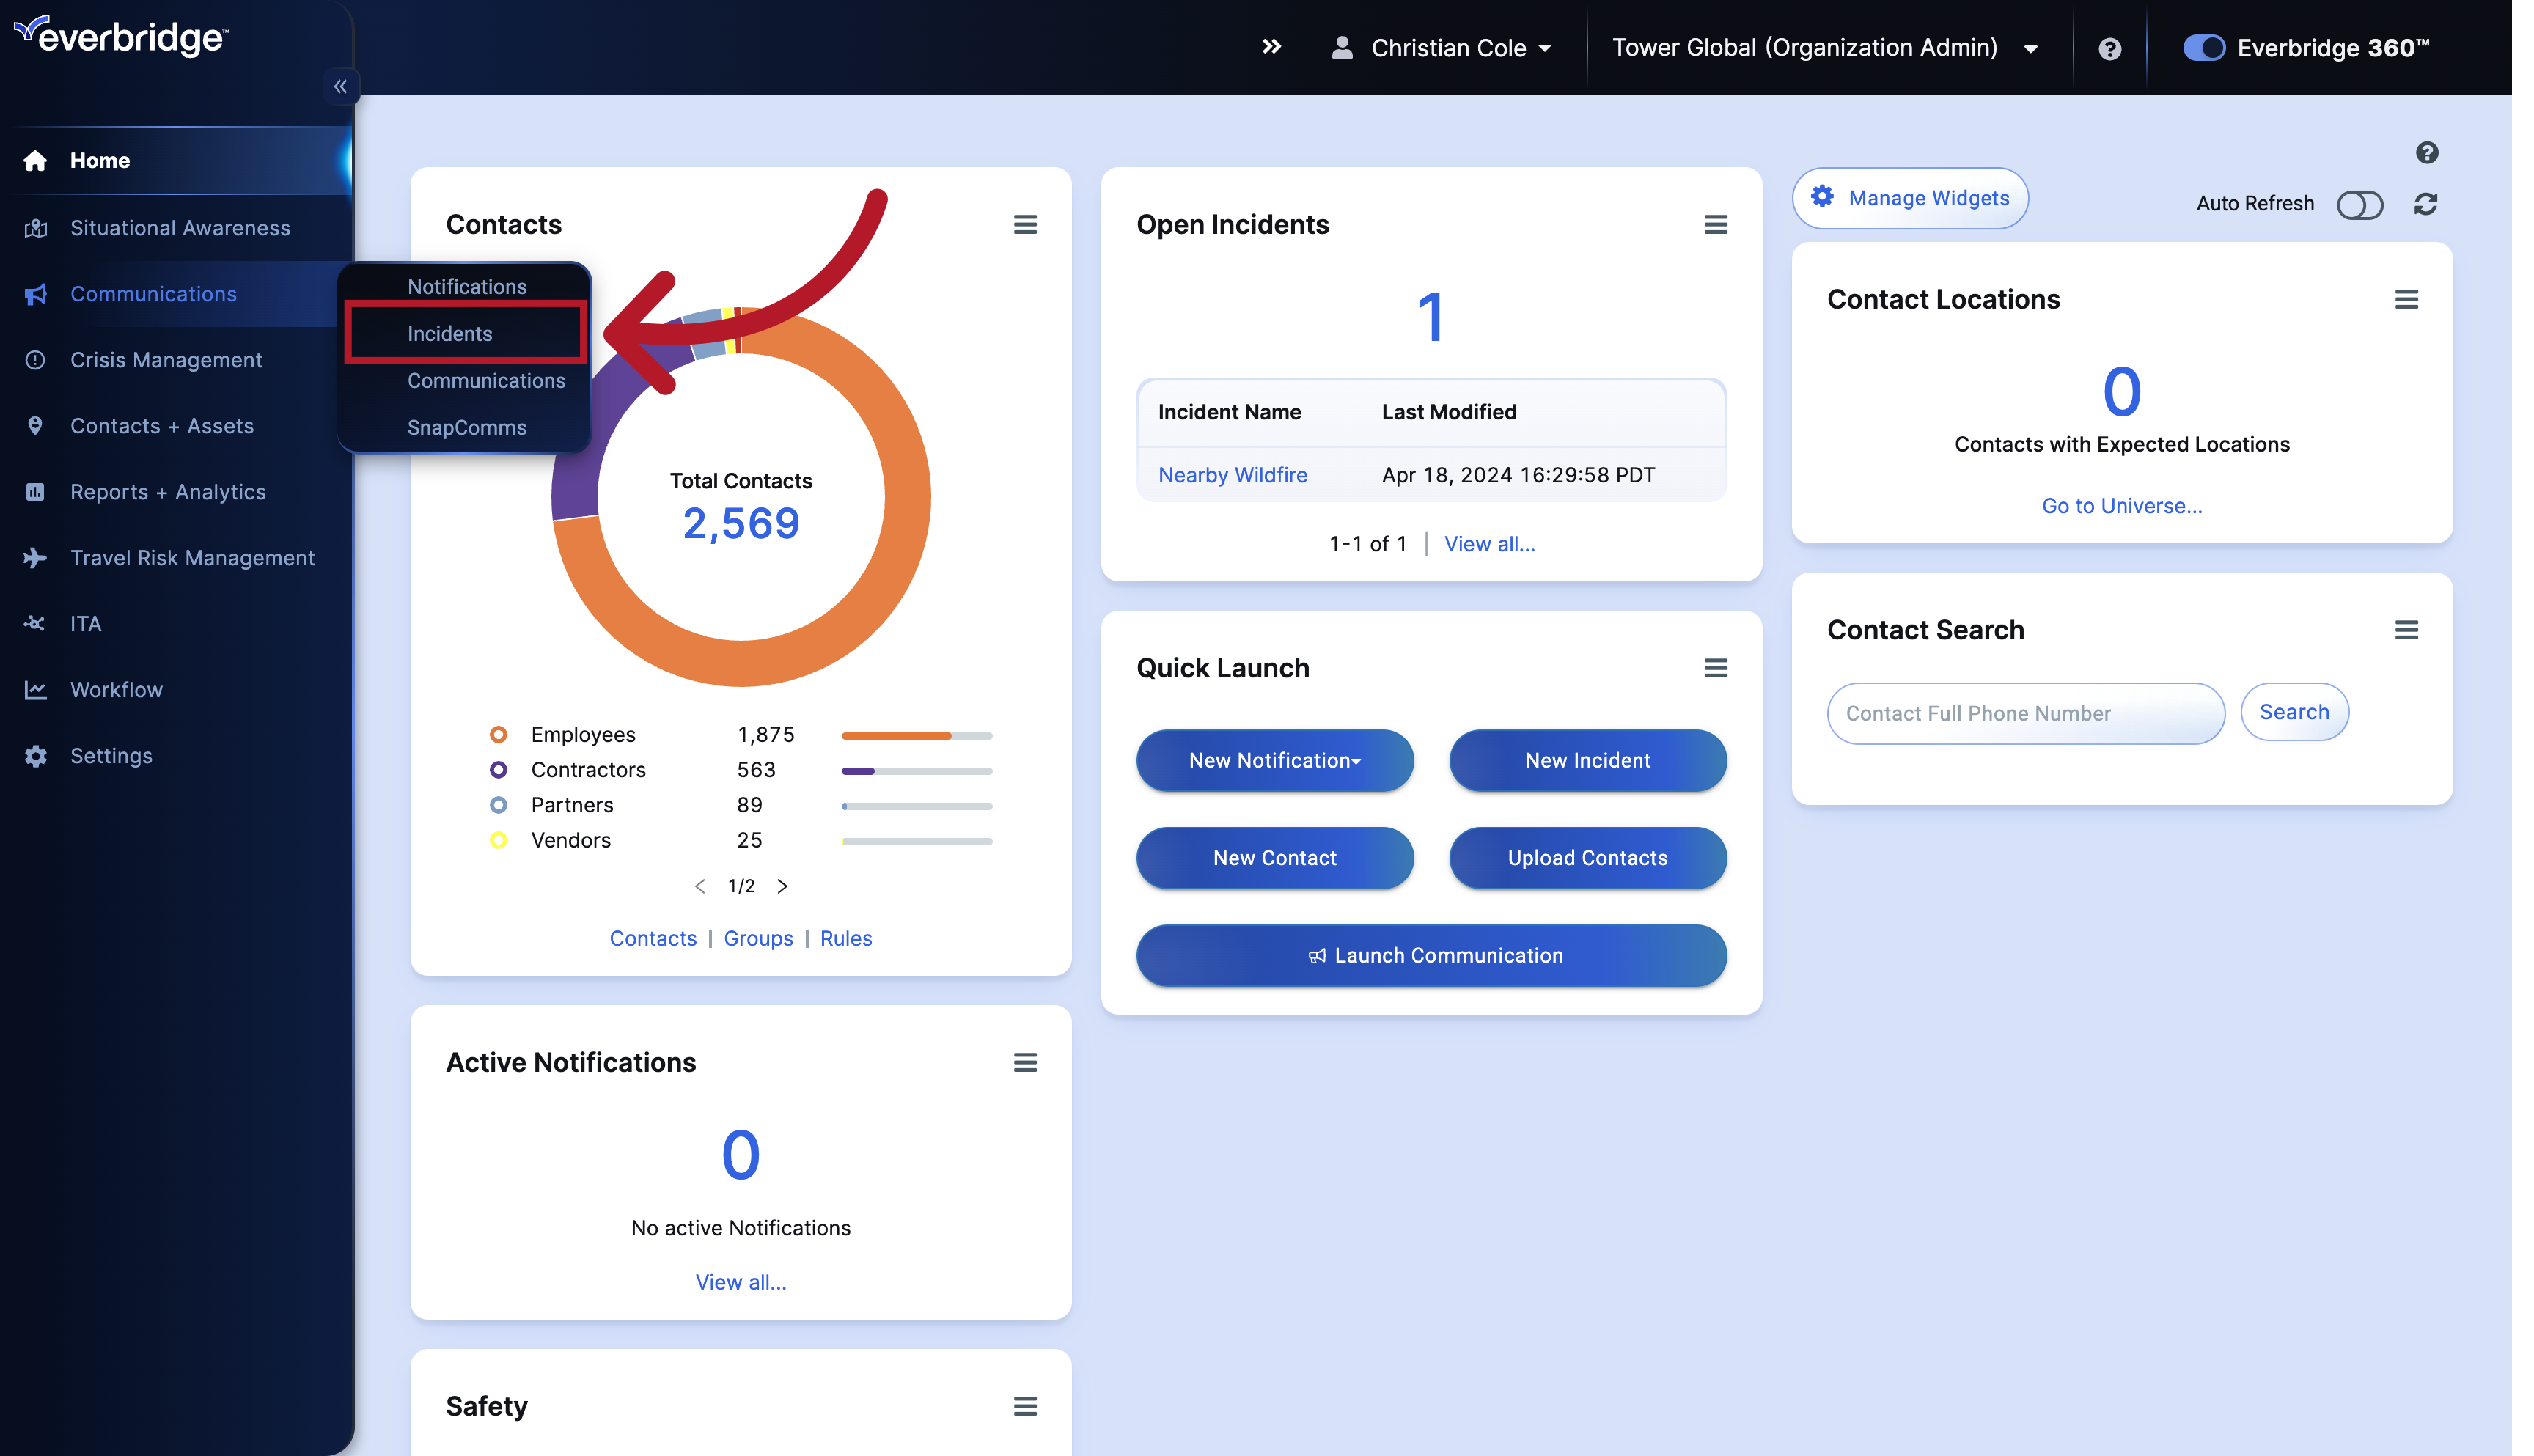
2. Dashboard
Then hover over Incidents.
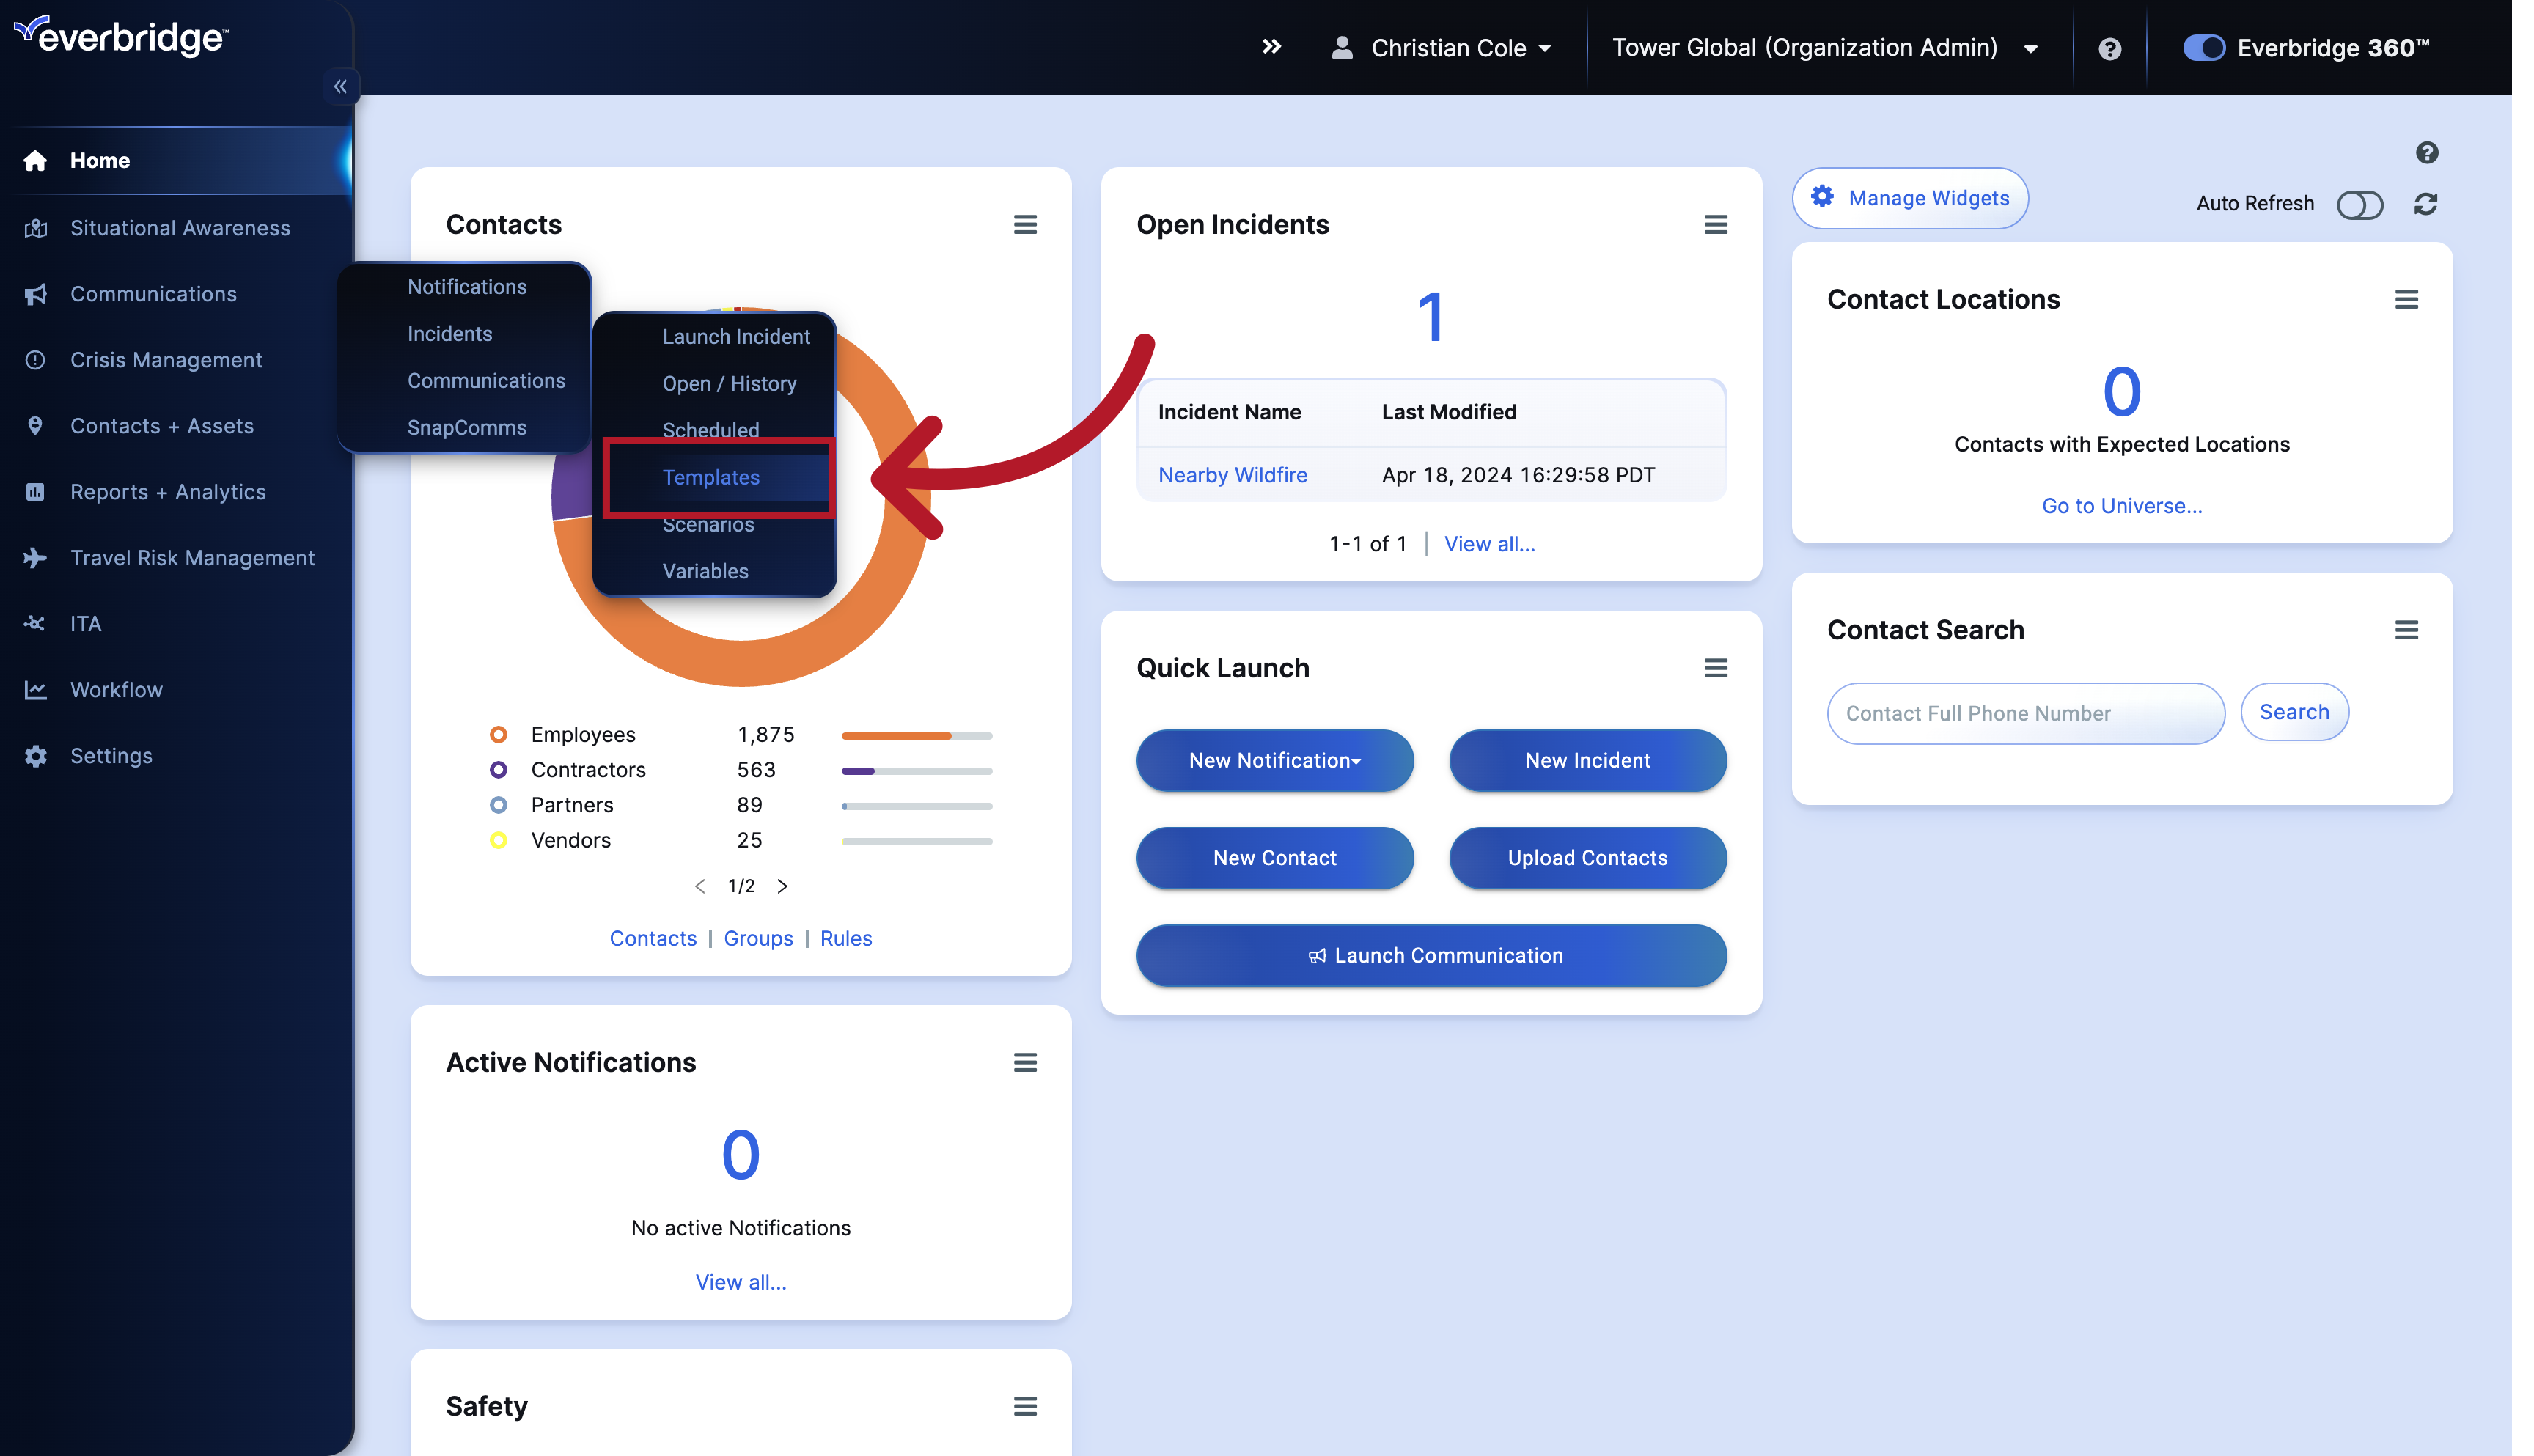
3. Dashboard
And then select Templates.
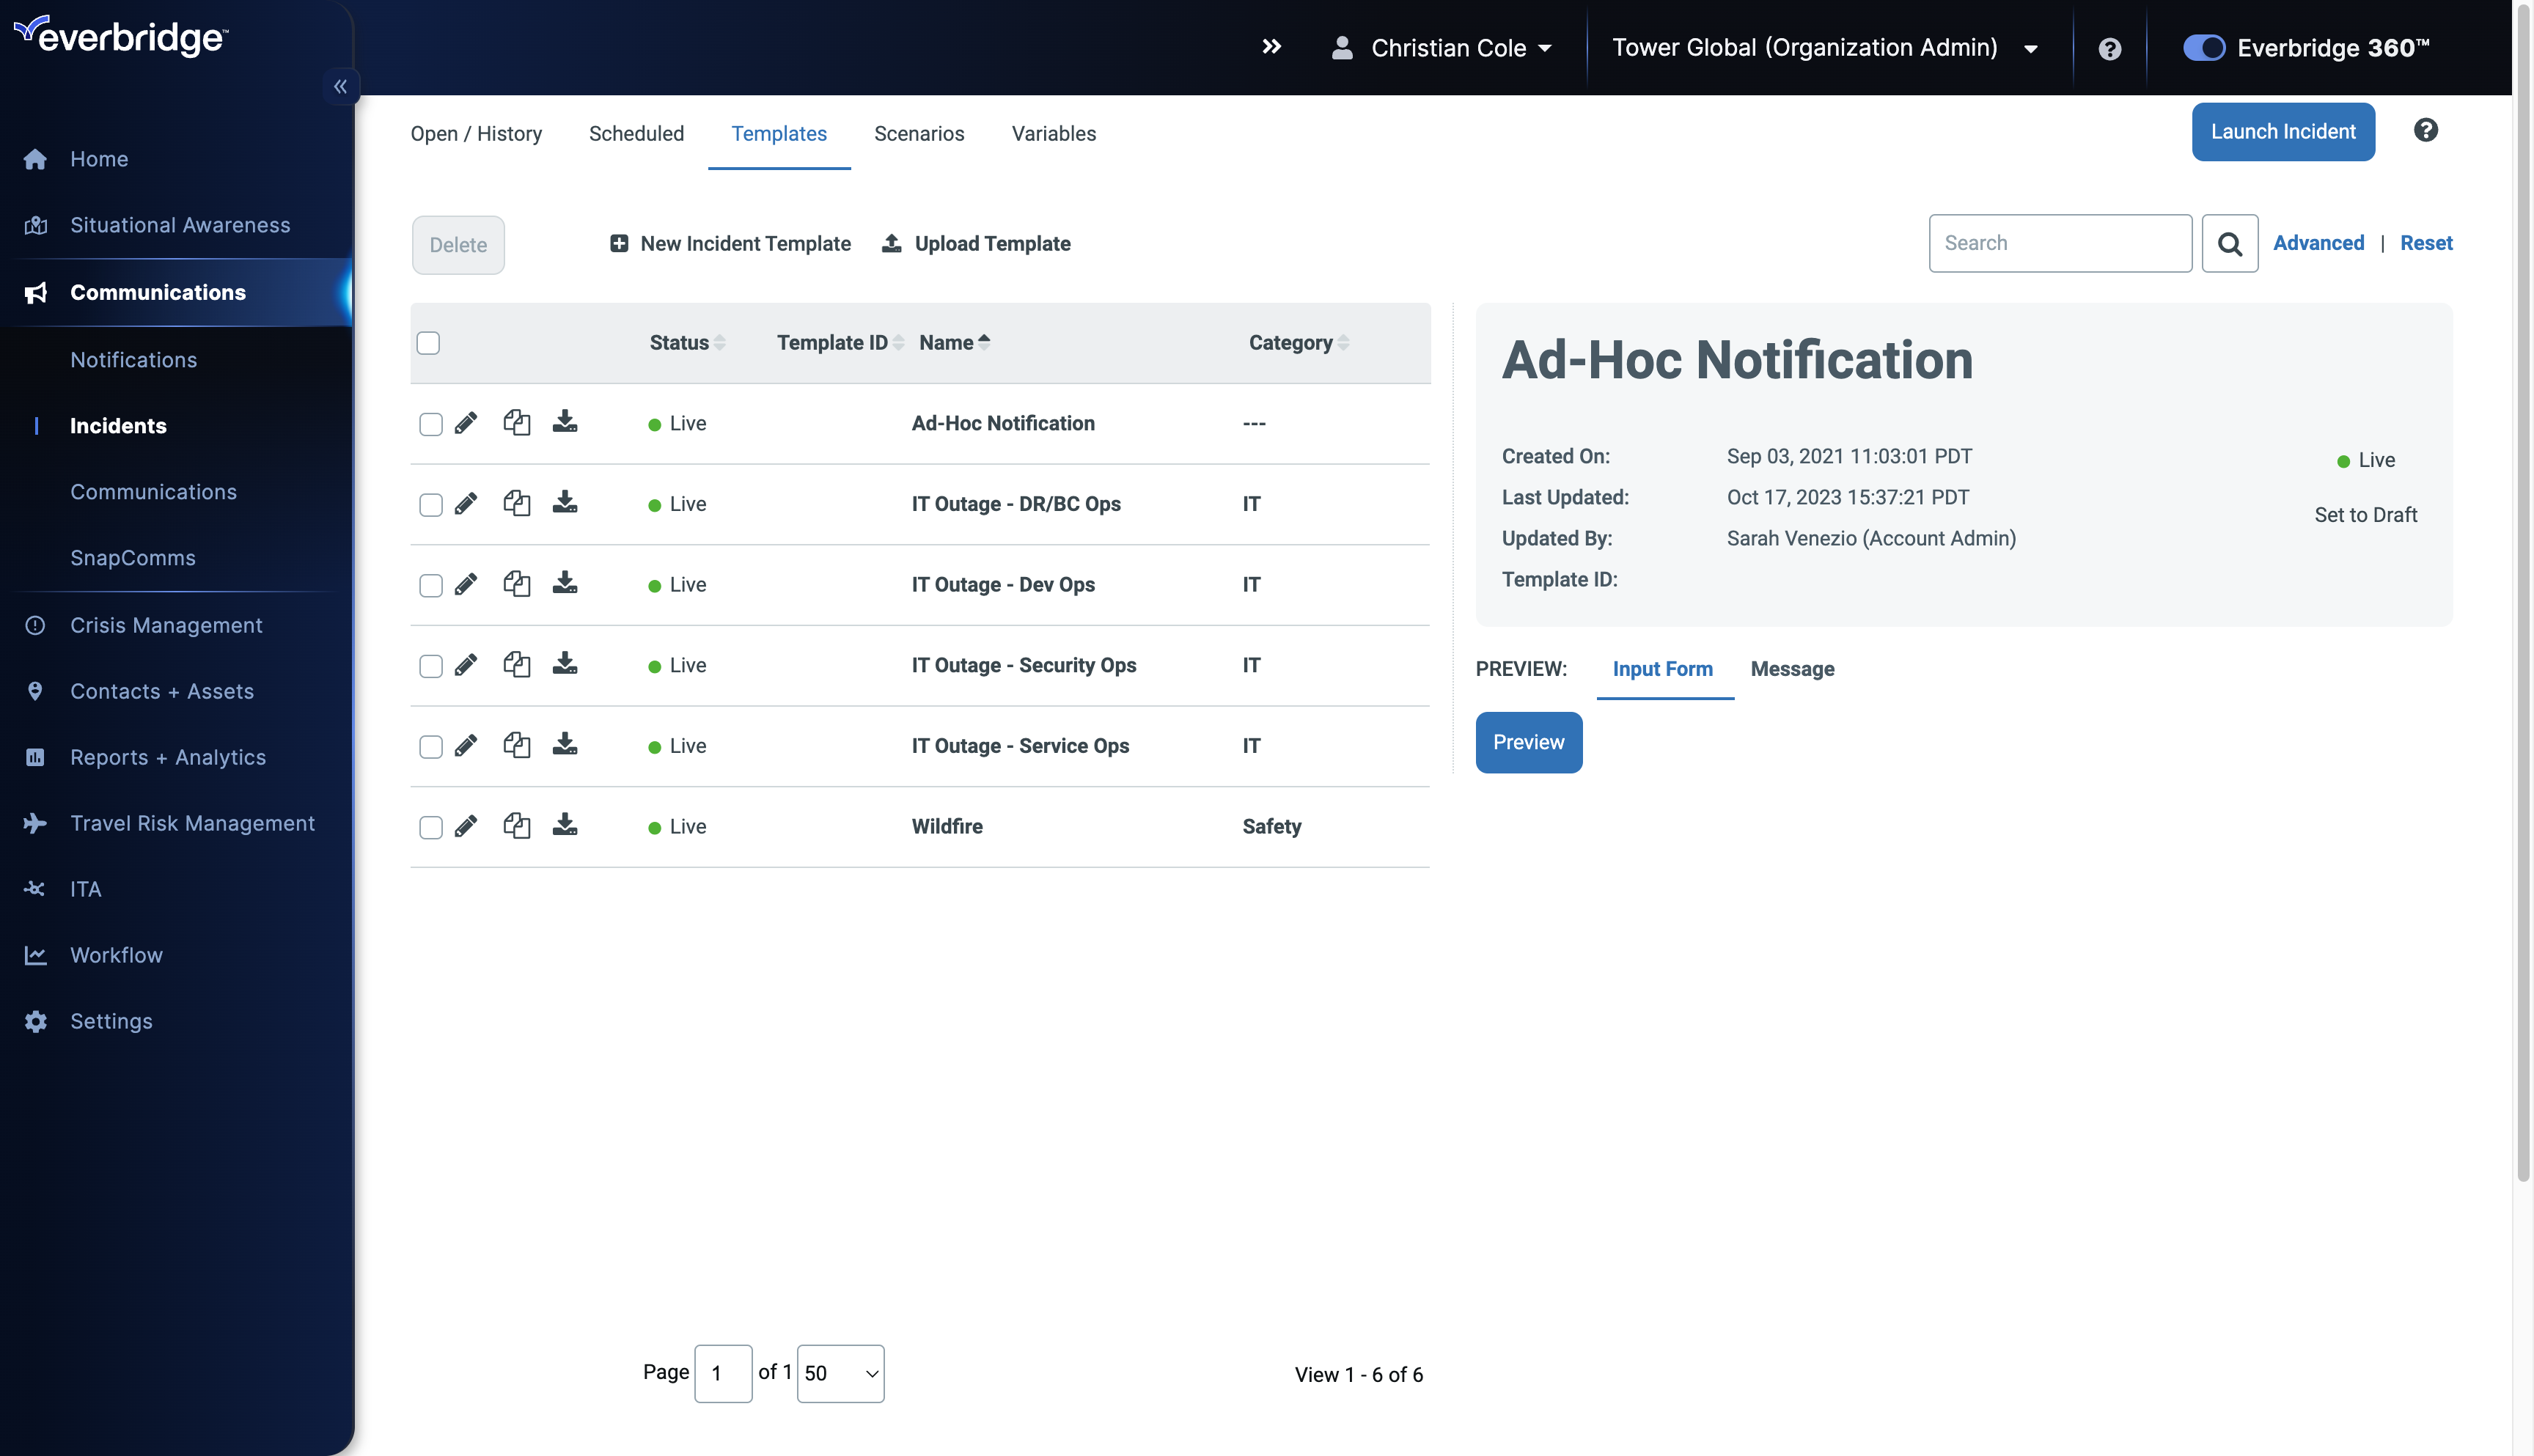
4. Templates
Here you will see a list of Incident Templates, if any have already been created.
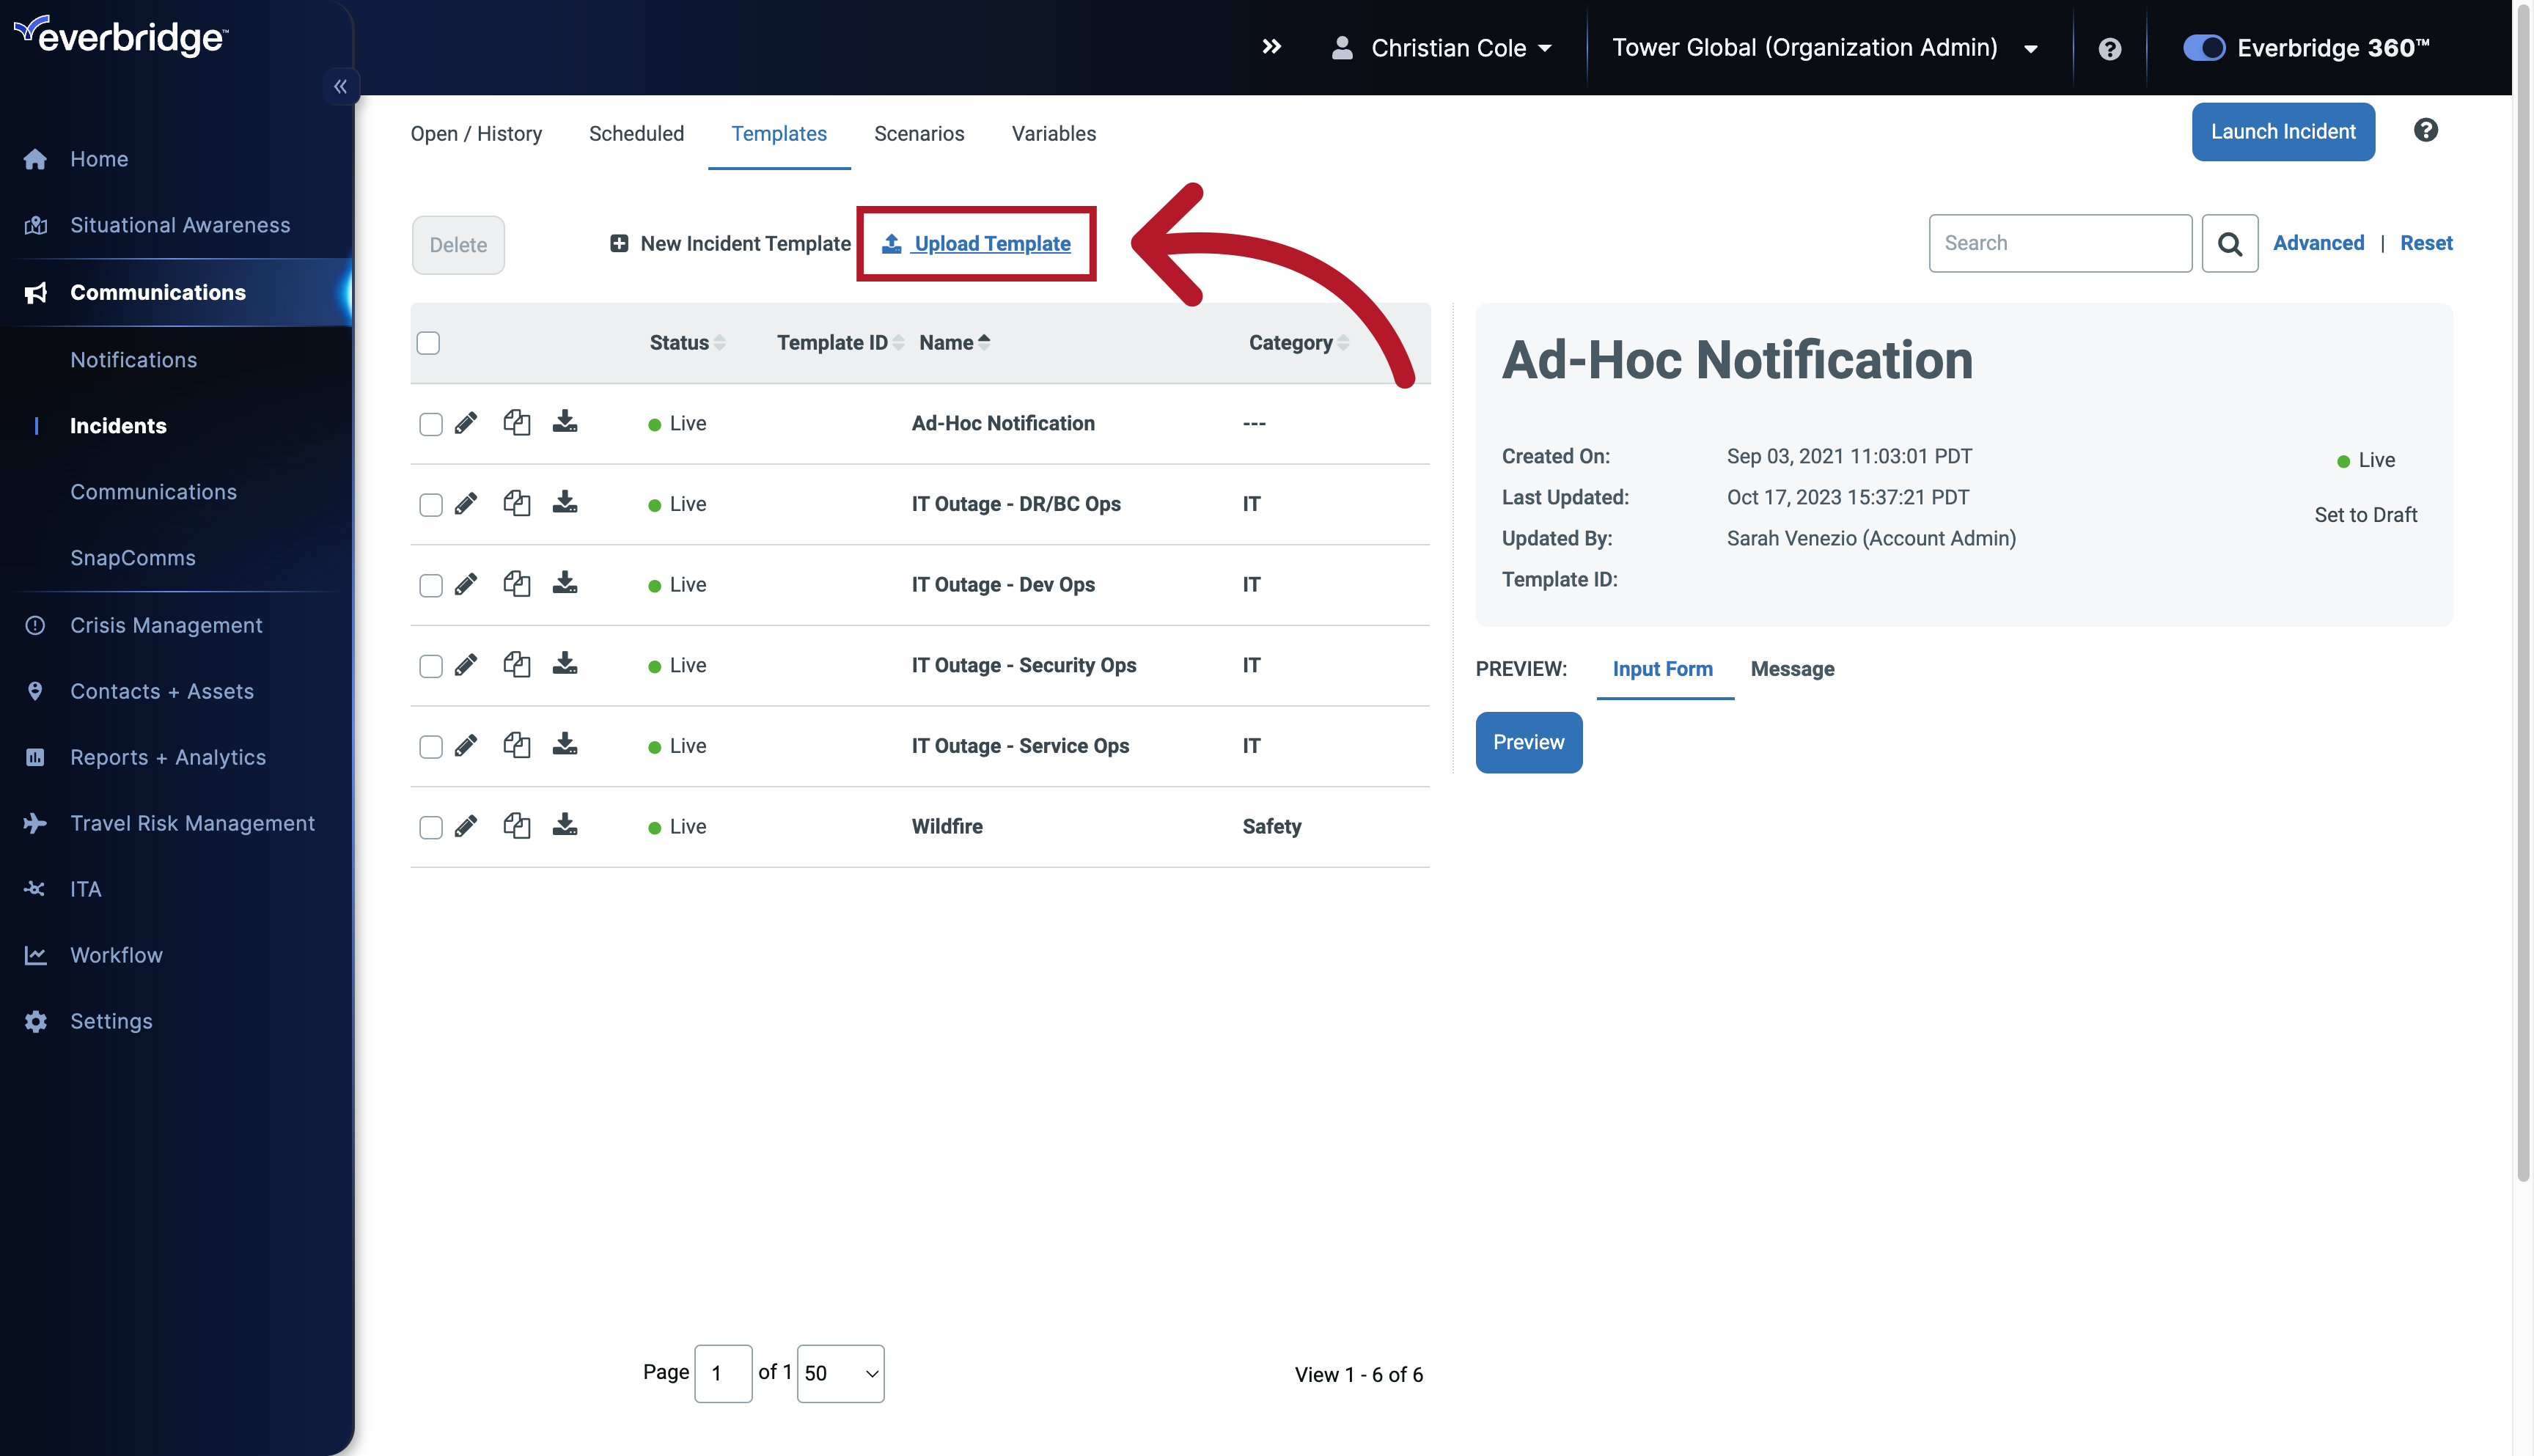
5. Upload Template
Upload an XML file to import an Incident Template from another Organization.
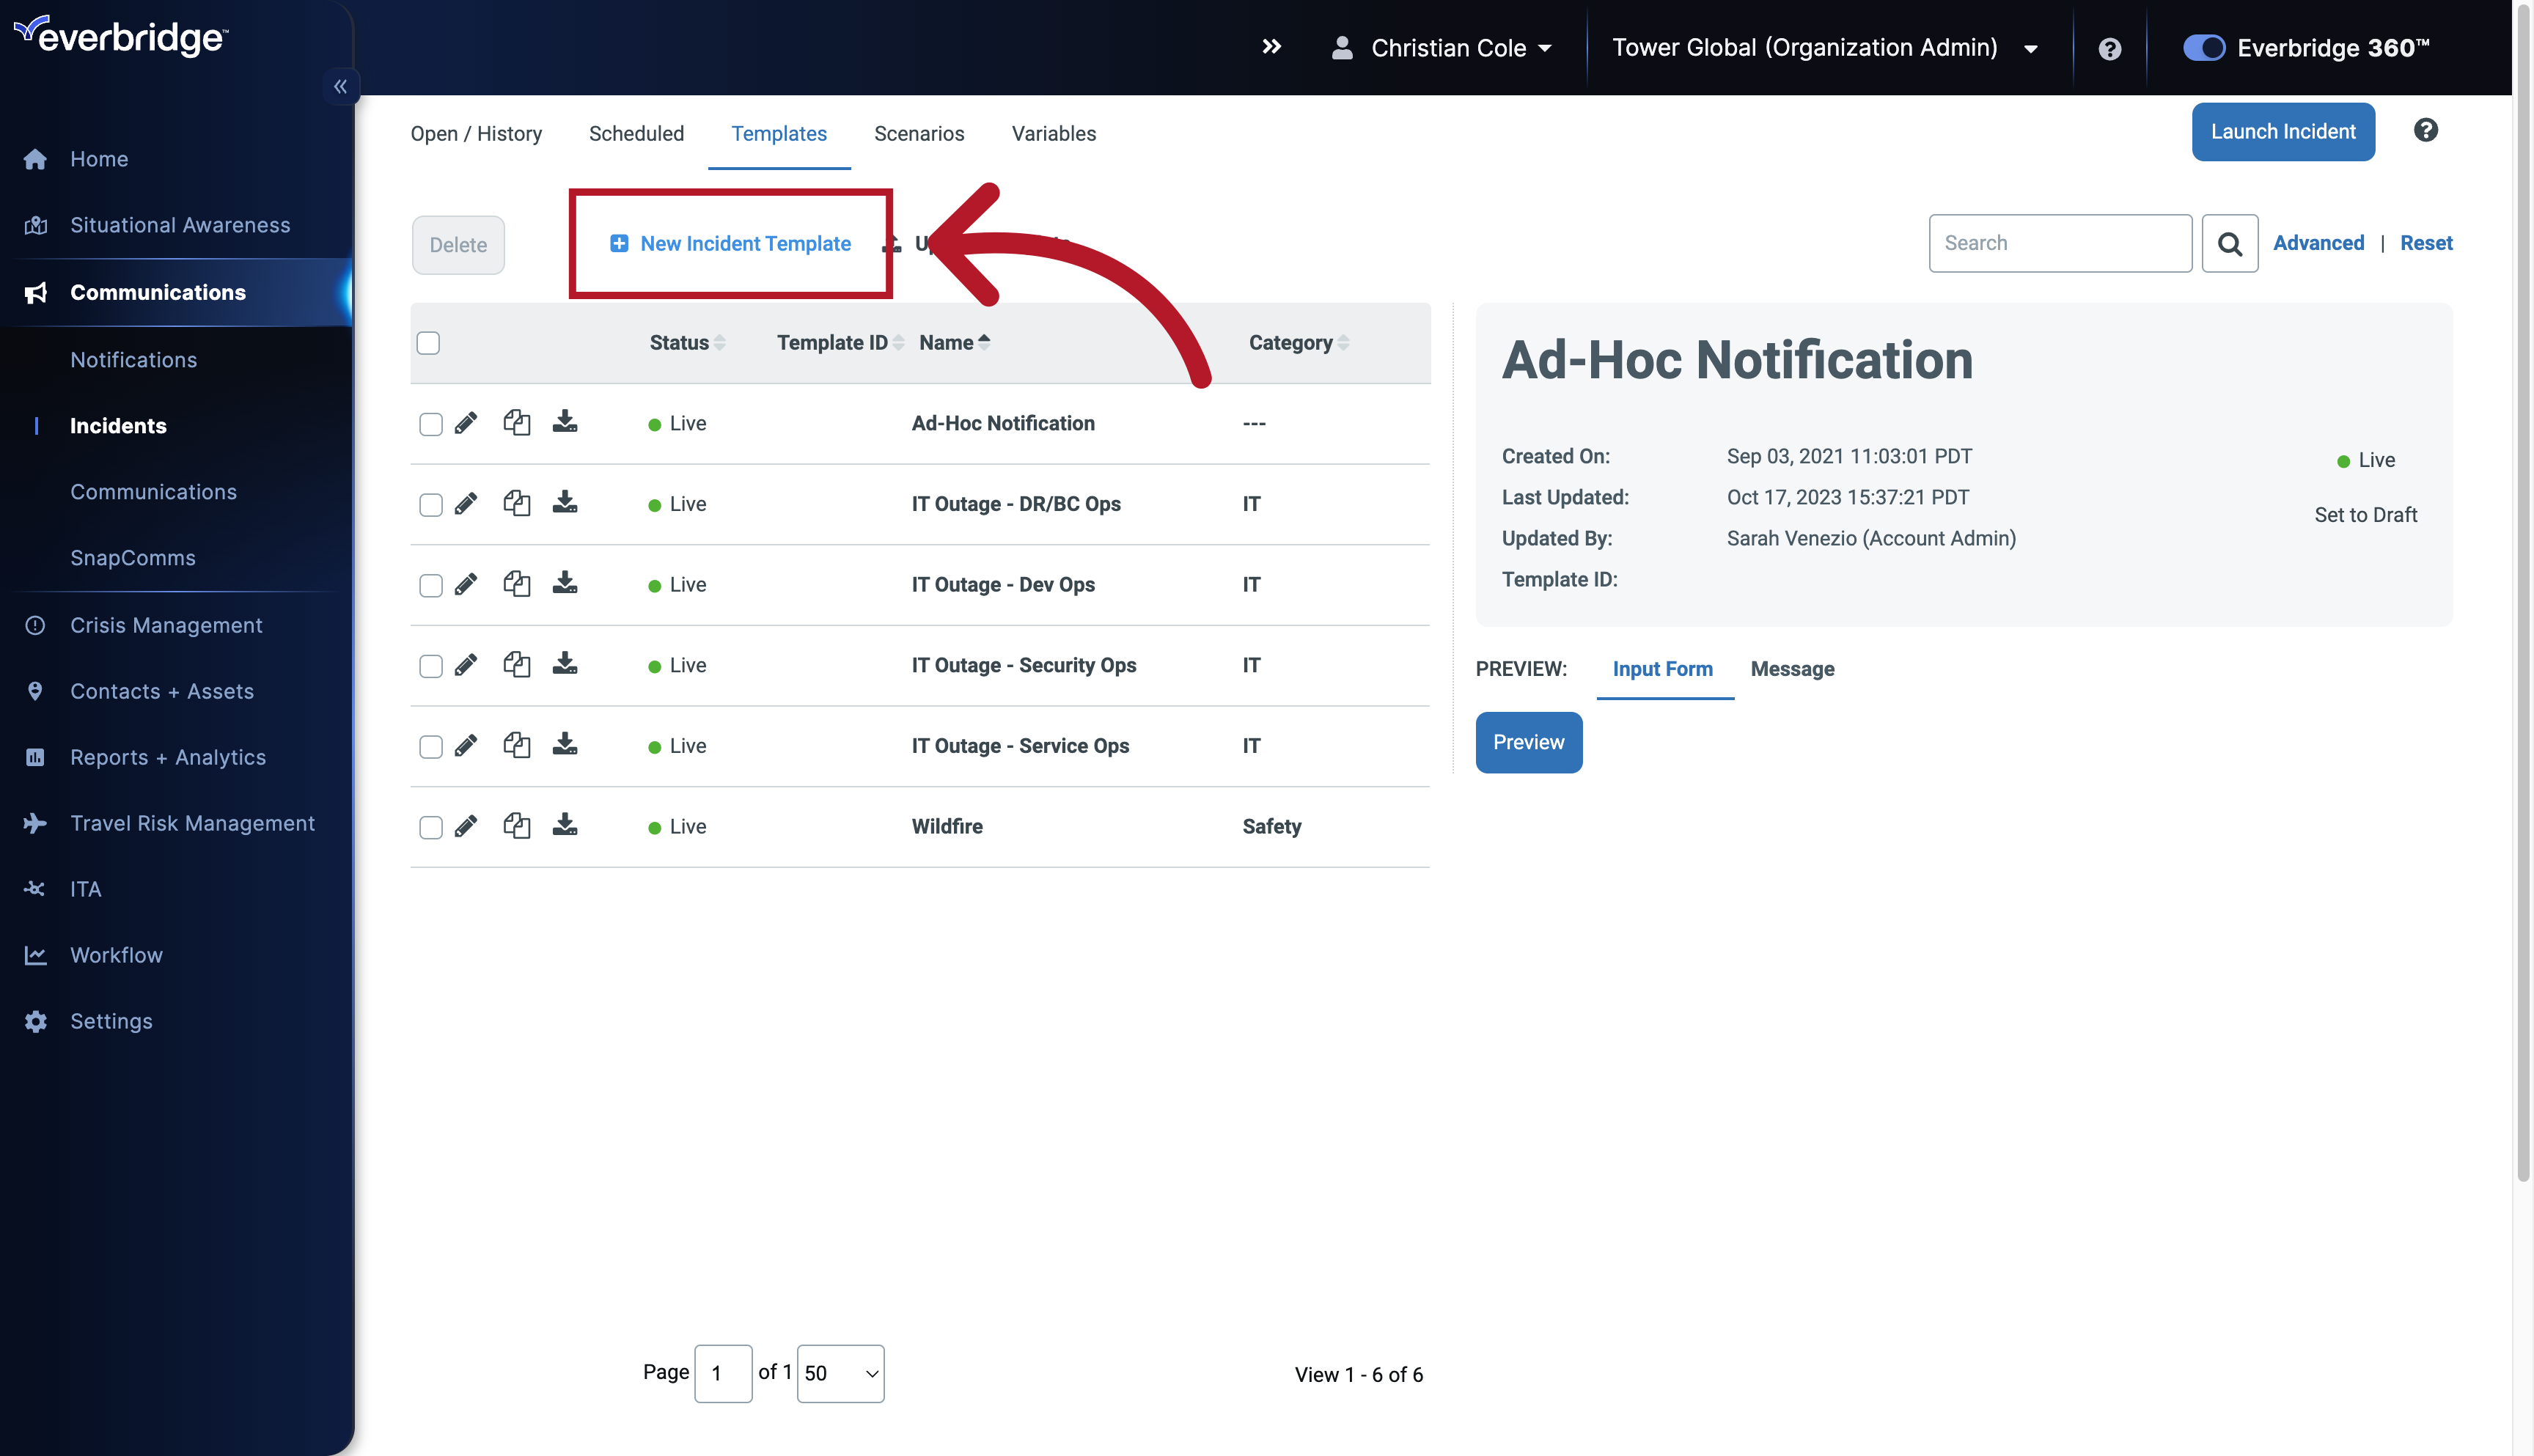
6. New Incident Template
Or, click New Incident Template to create a template from scratch.
7. Templates
There are multiple settings available in this pane to fully configure your Template for an Incident.
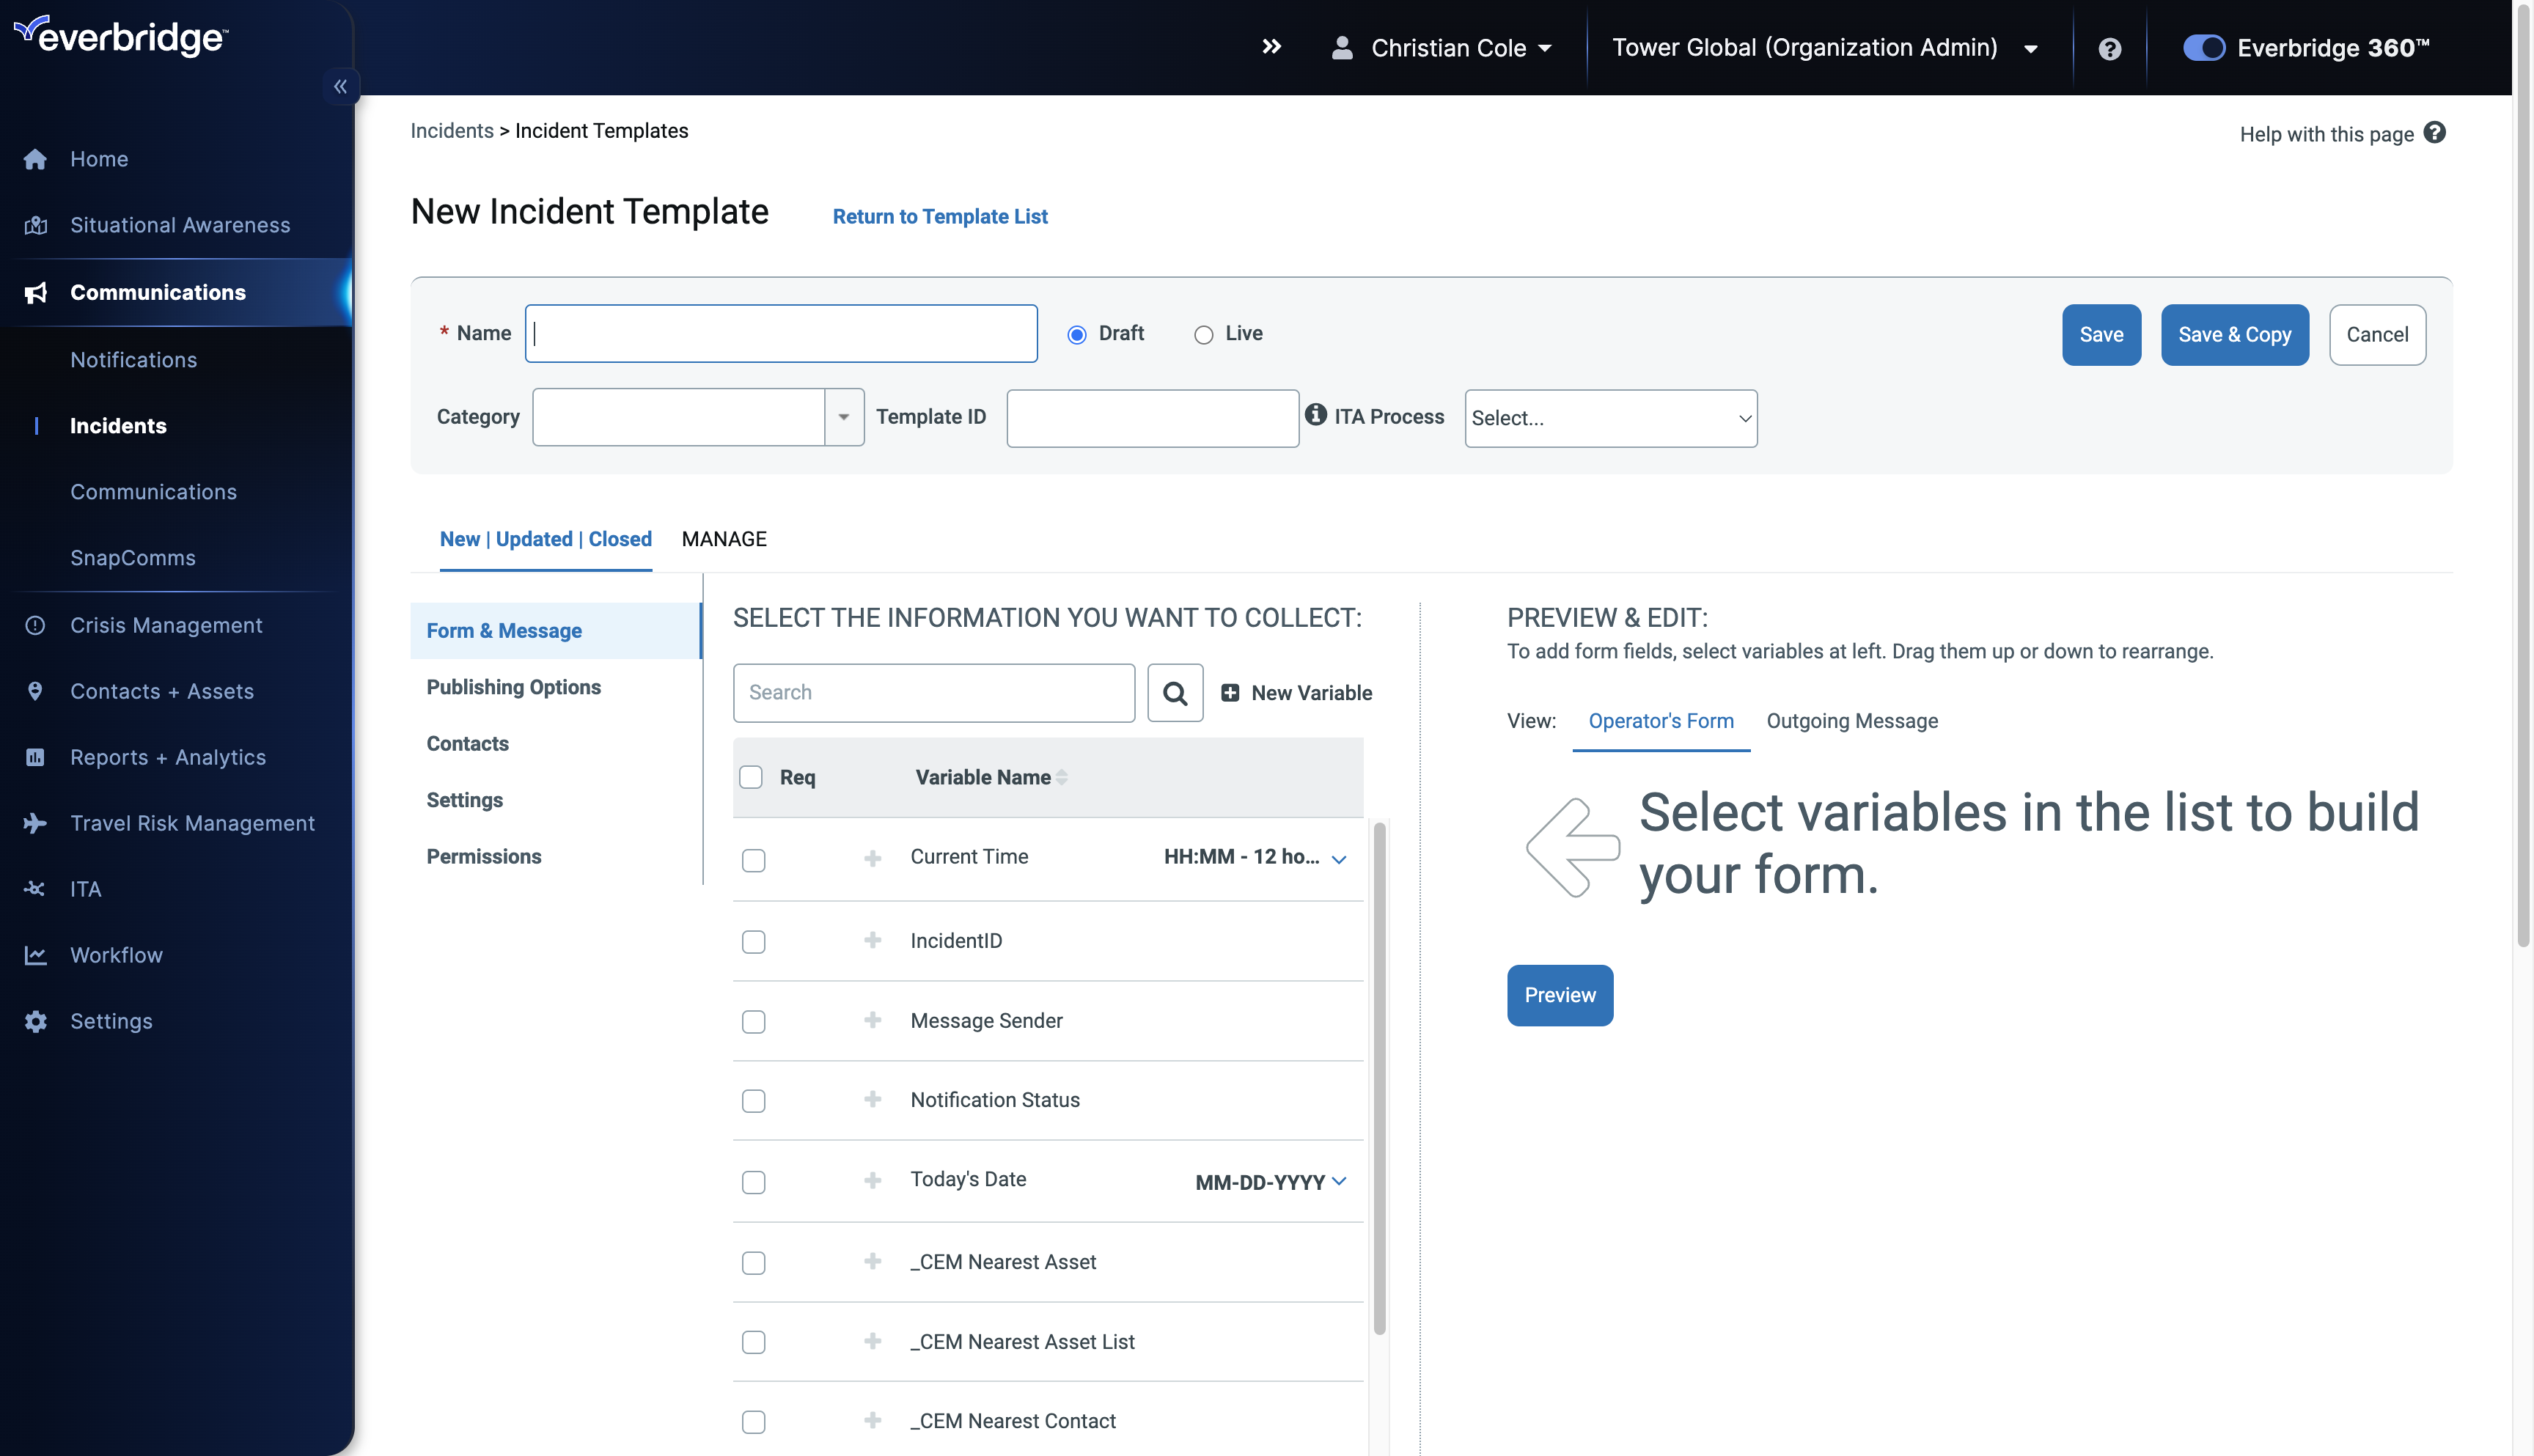
8. Template Name
Let's start with the name for this New Template.

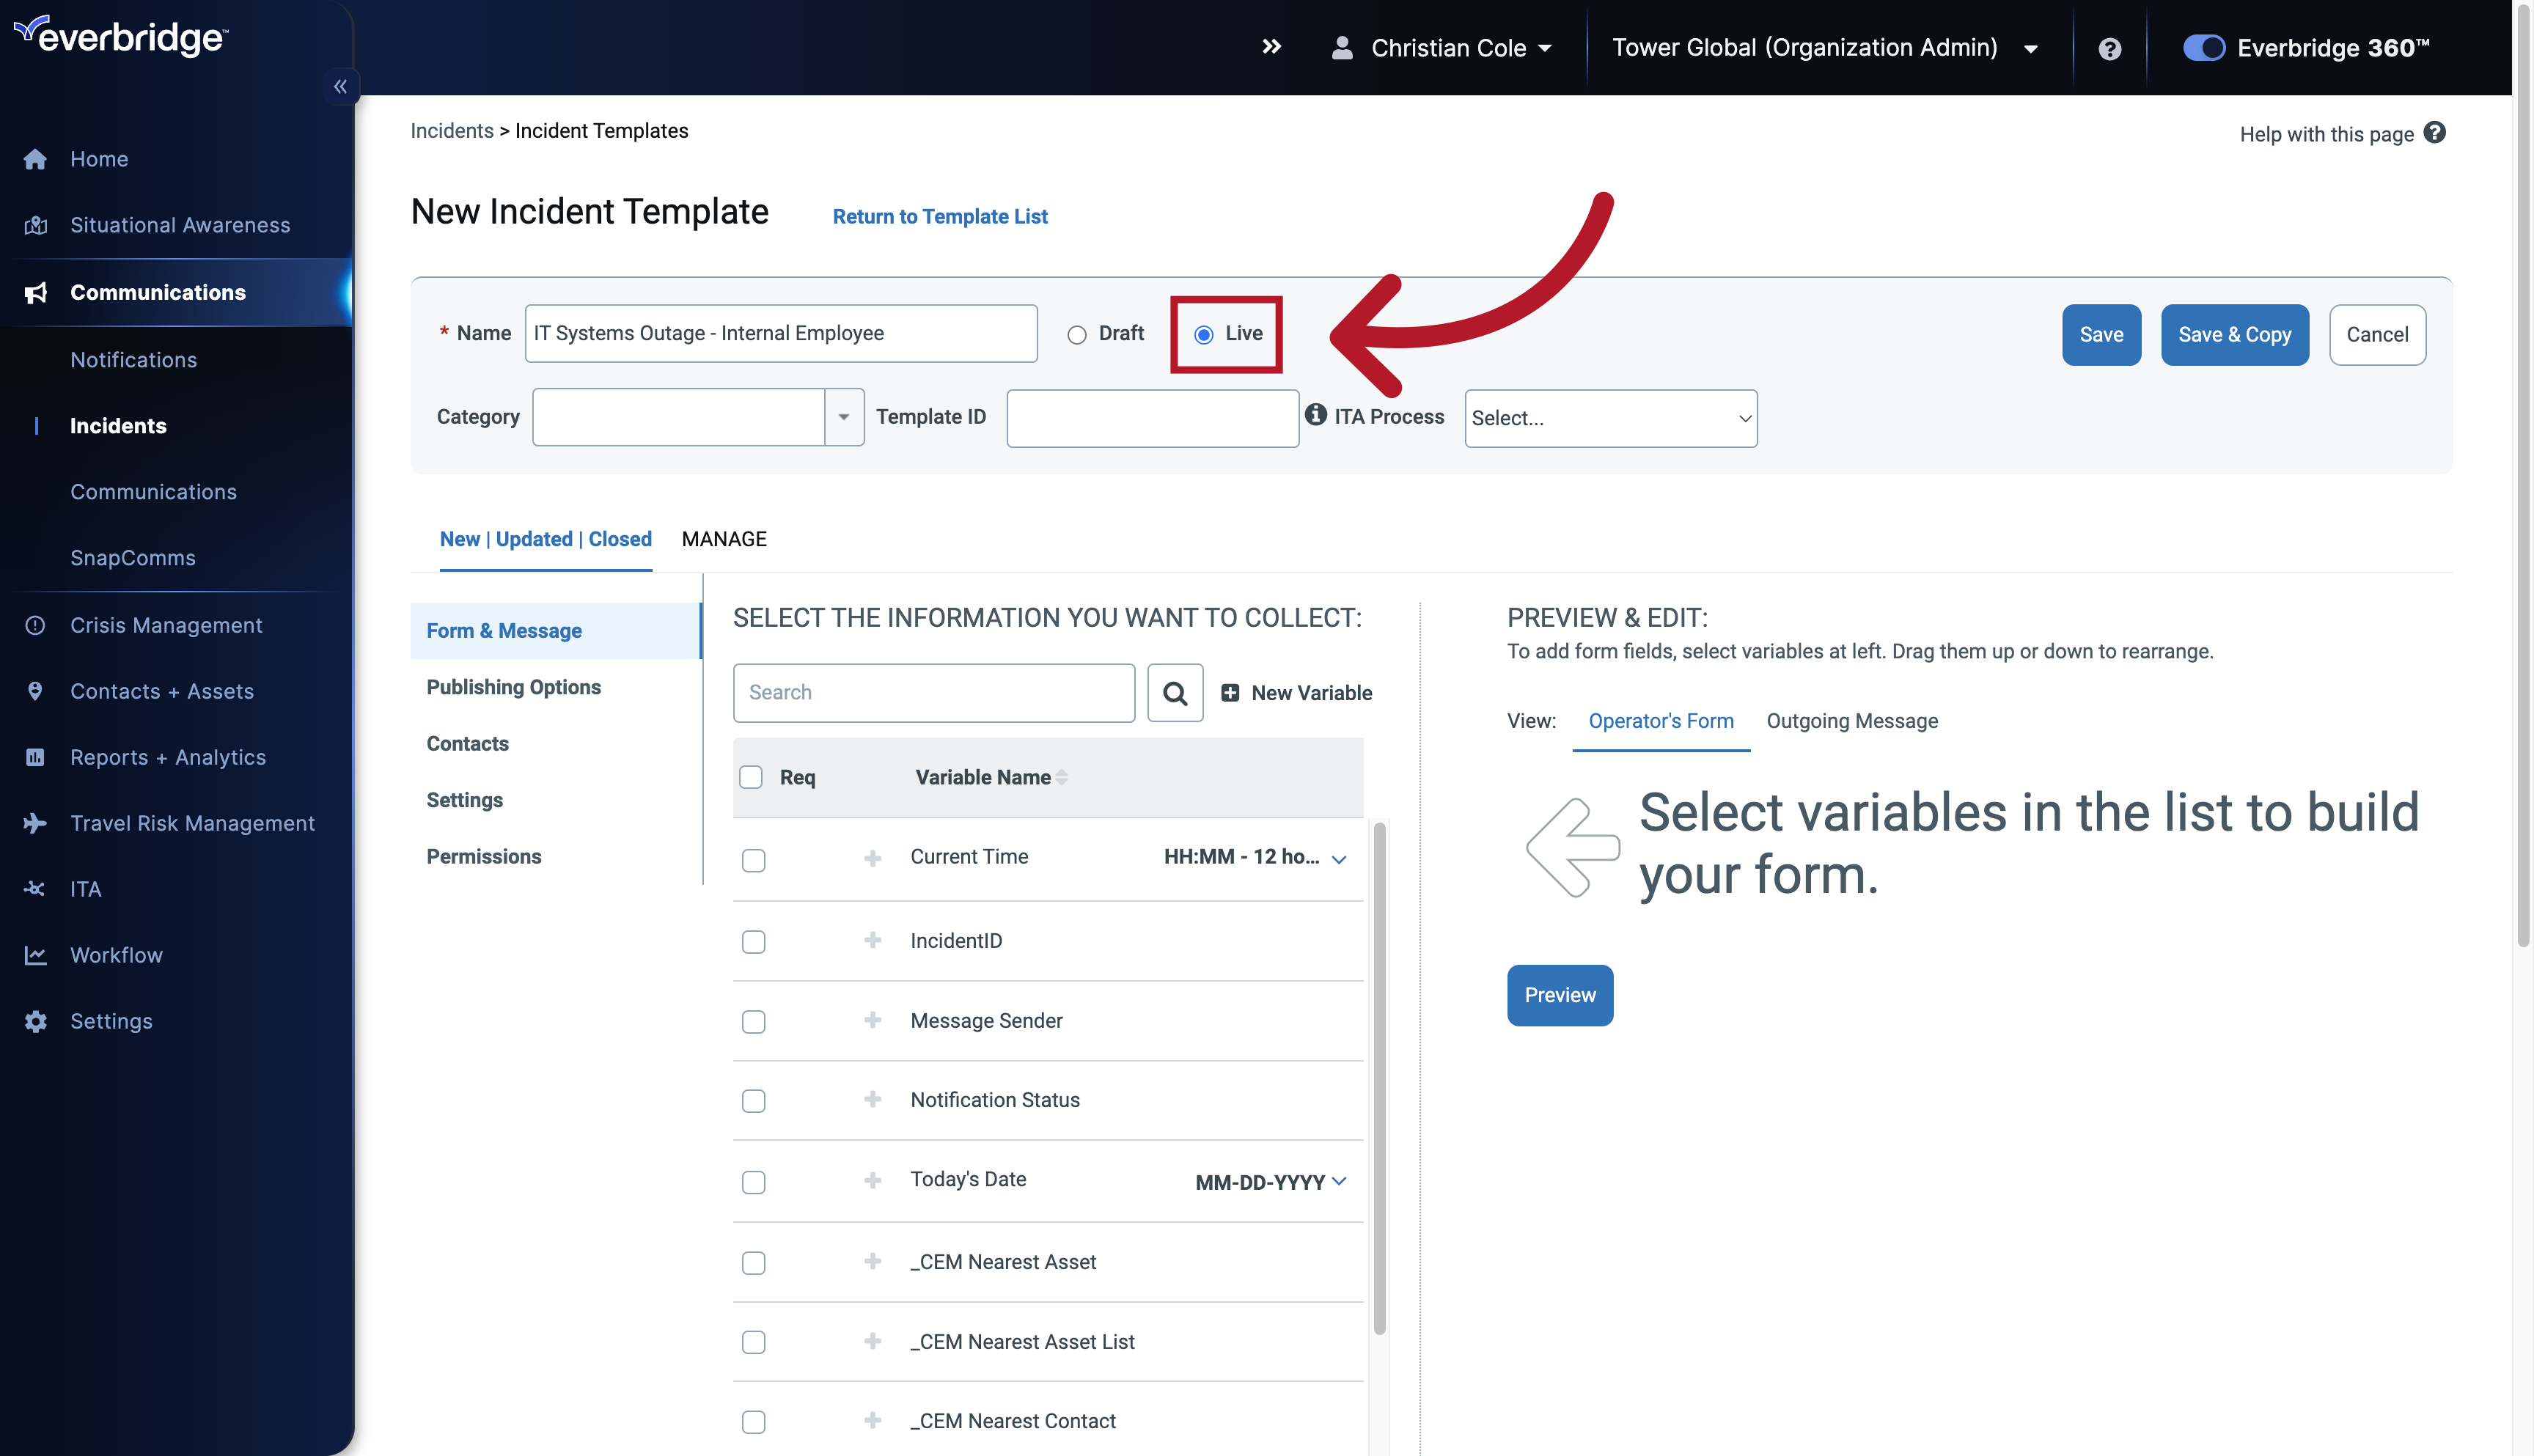
9. Live & Draft
Setting a Draft Template to Live makes it visible and available for launch, while you can toggle between them as you edit the Template.
10. Templates
If you're creating multiple Templates.

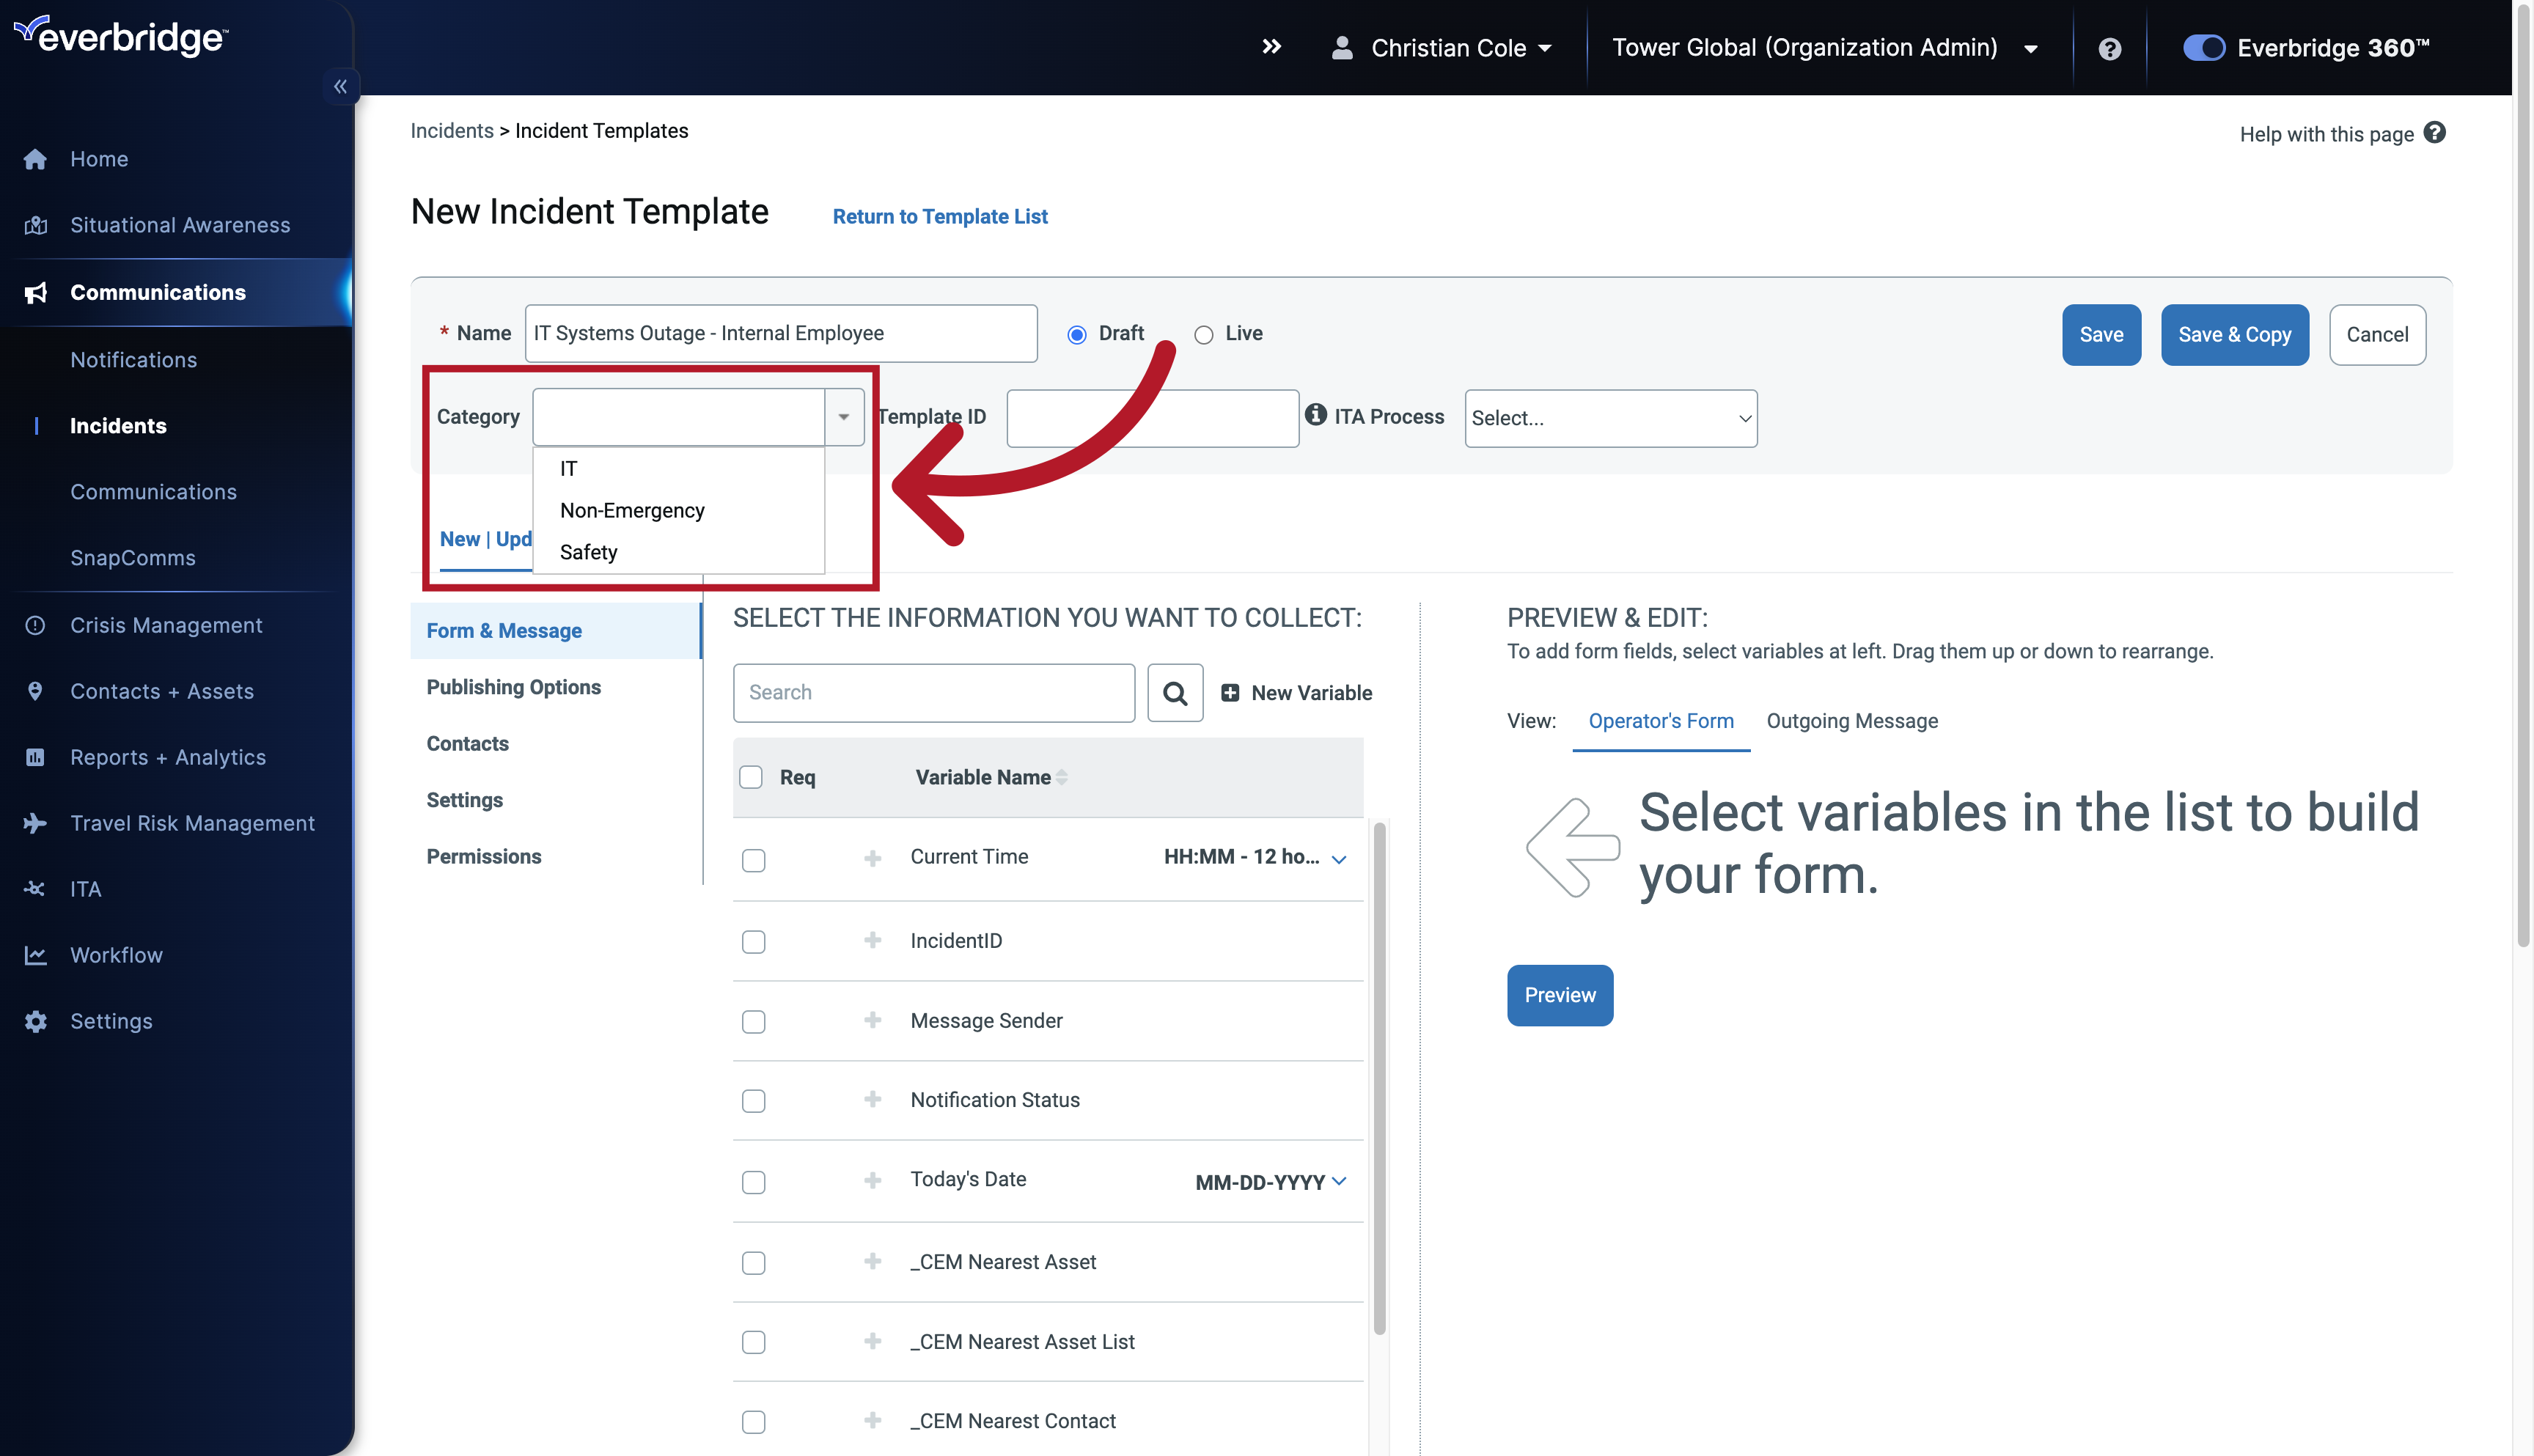
11. Template Category
it is important to sort them, by creating, or assigning categories for each Template. If a country or market you need is not in the existing dropdown list, you can simply type the new category name directly into the blank category field. This will automatically add the new entry to the dropdown list for future use.
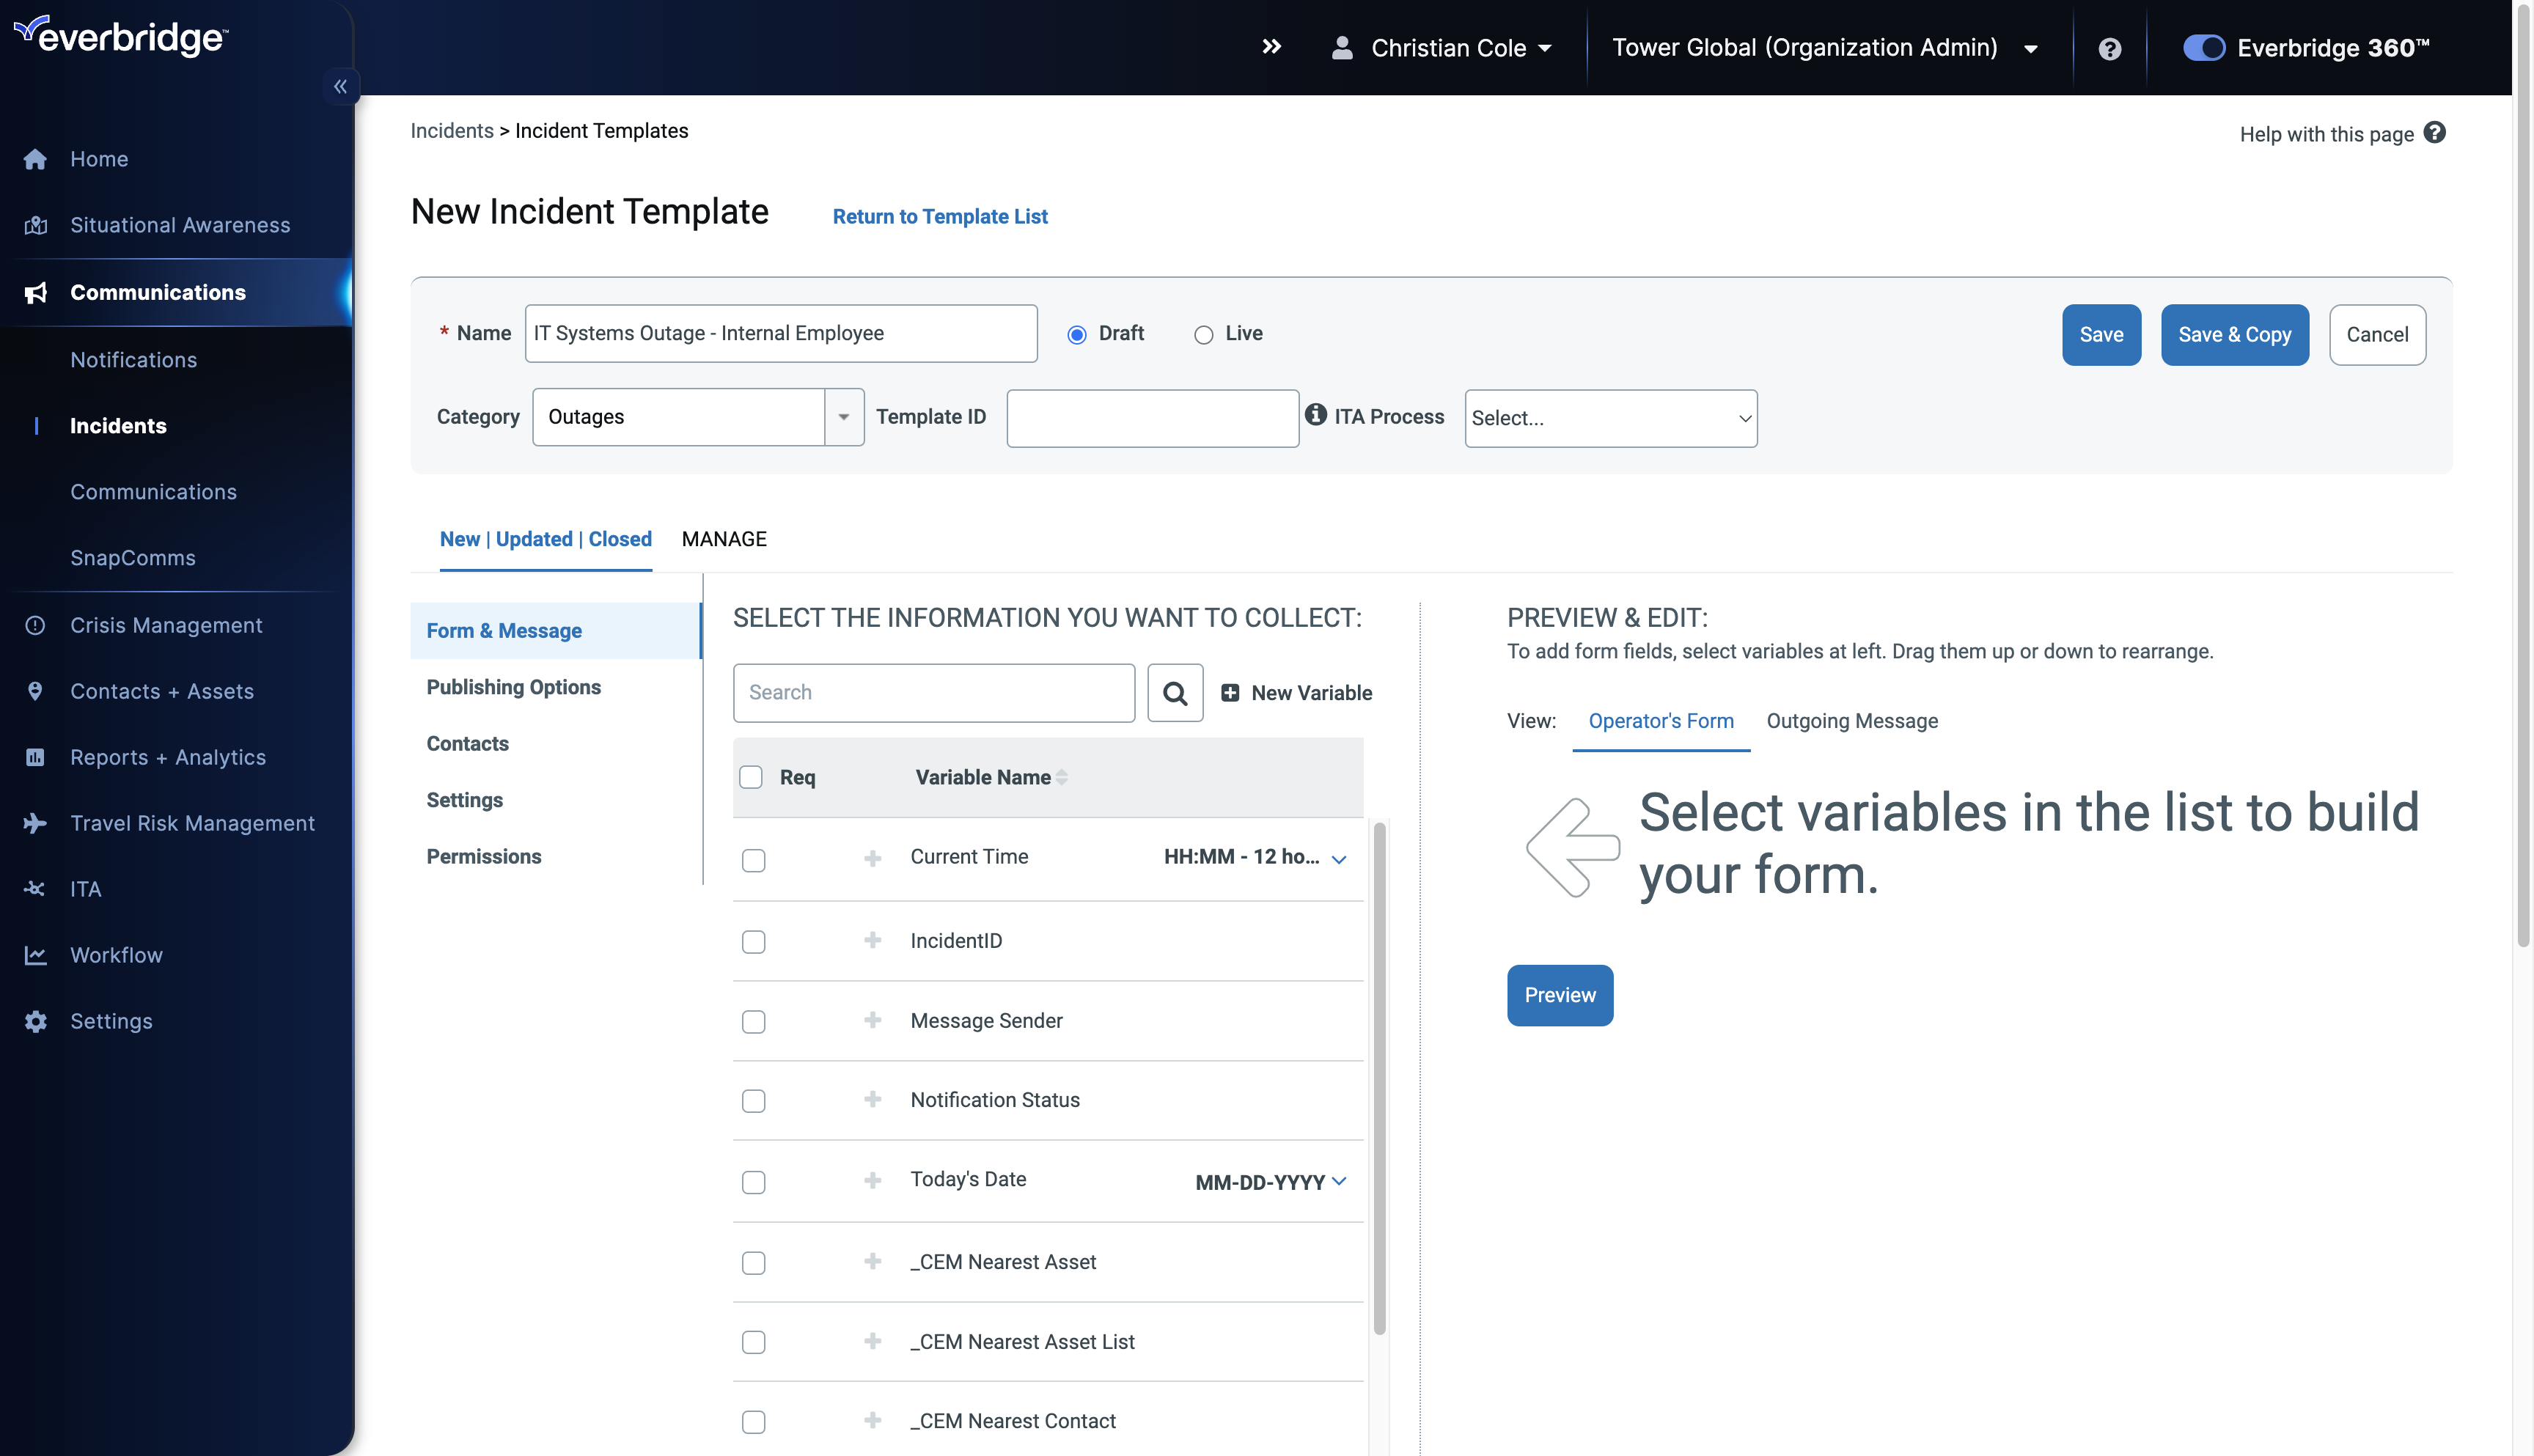
12. Templates
Enter the type of incident.
13. Template ID
Adding a Template ID allows you to launch your Incident by phone.
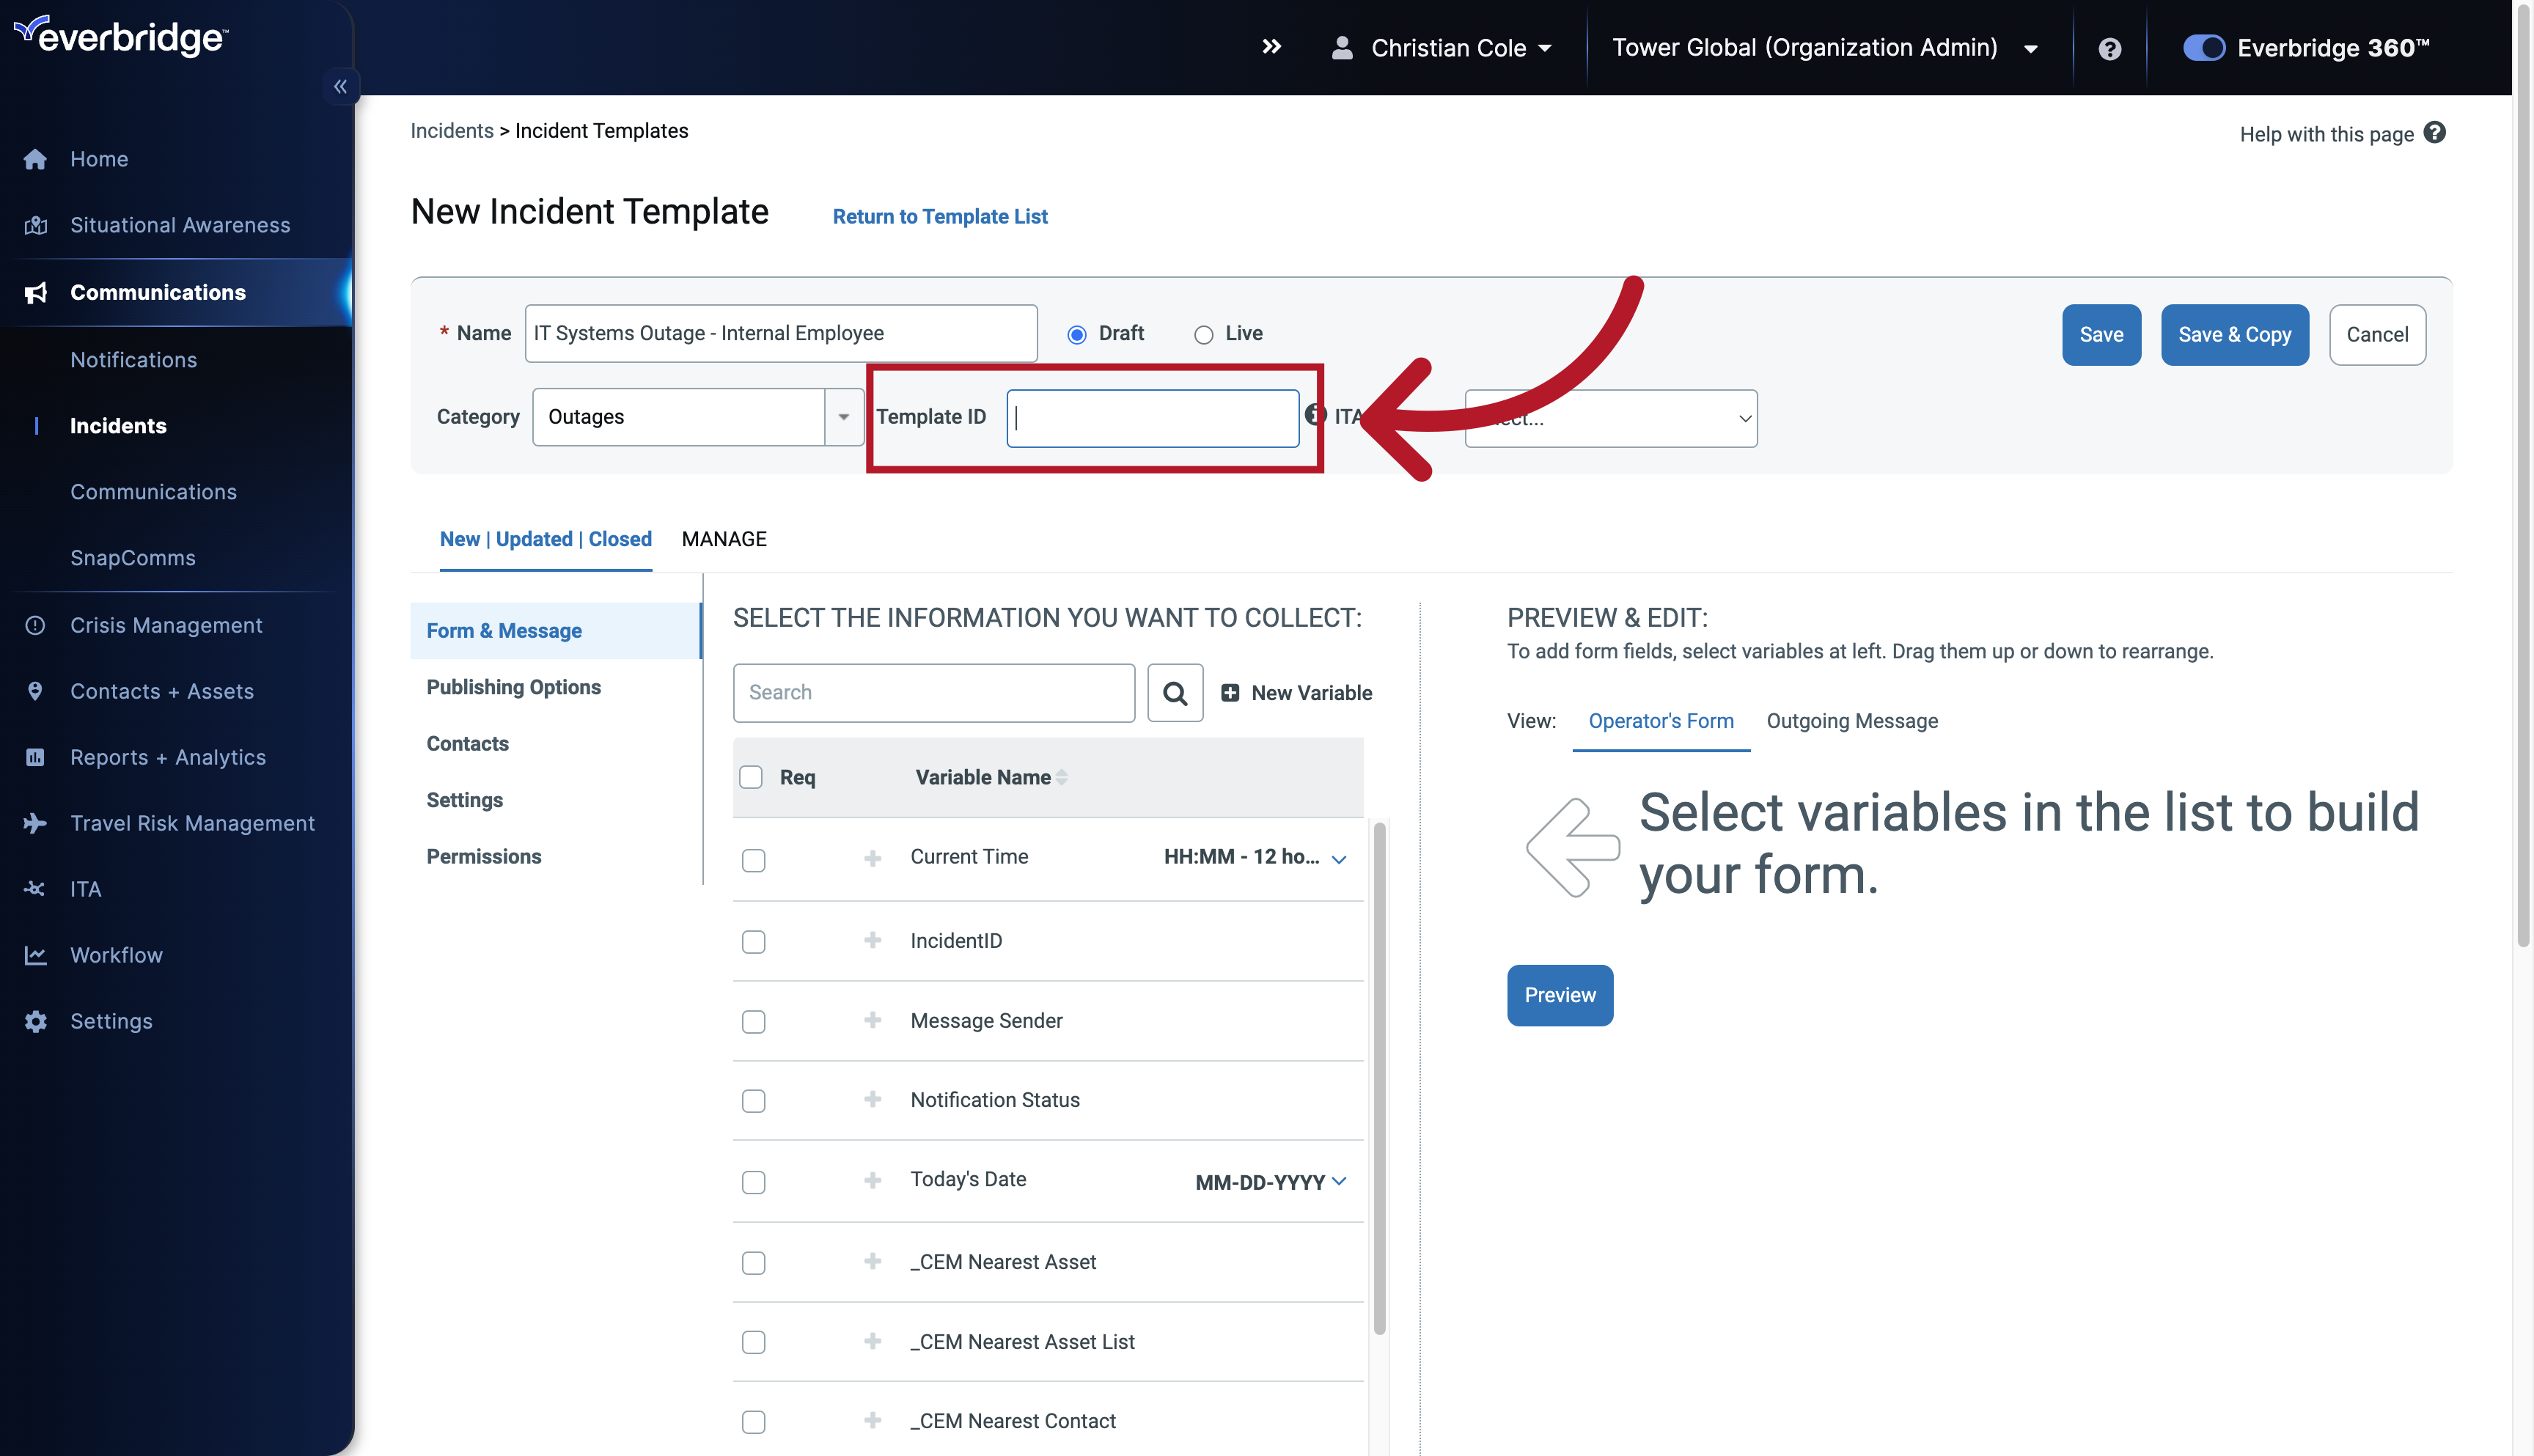
14. Templates
Enter the template ID number.

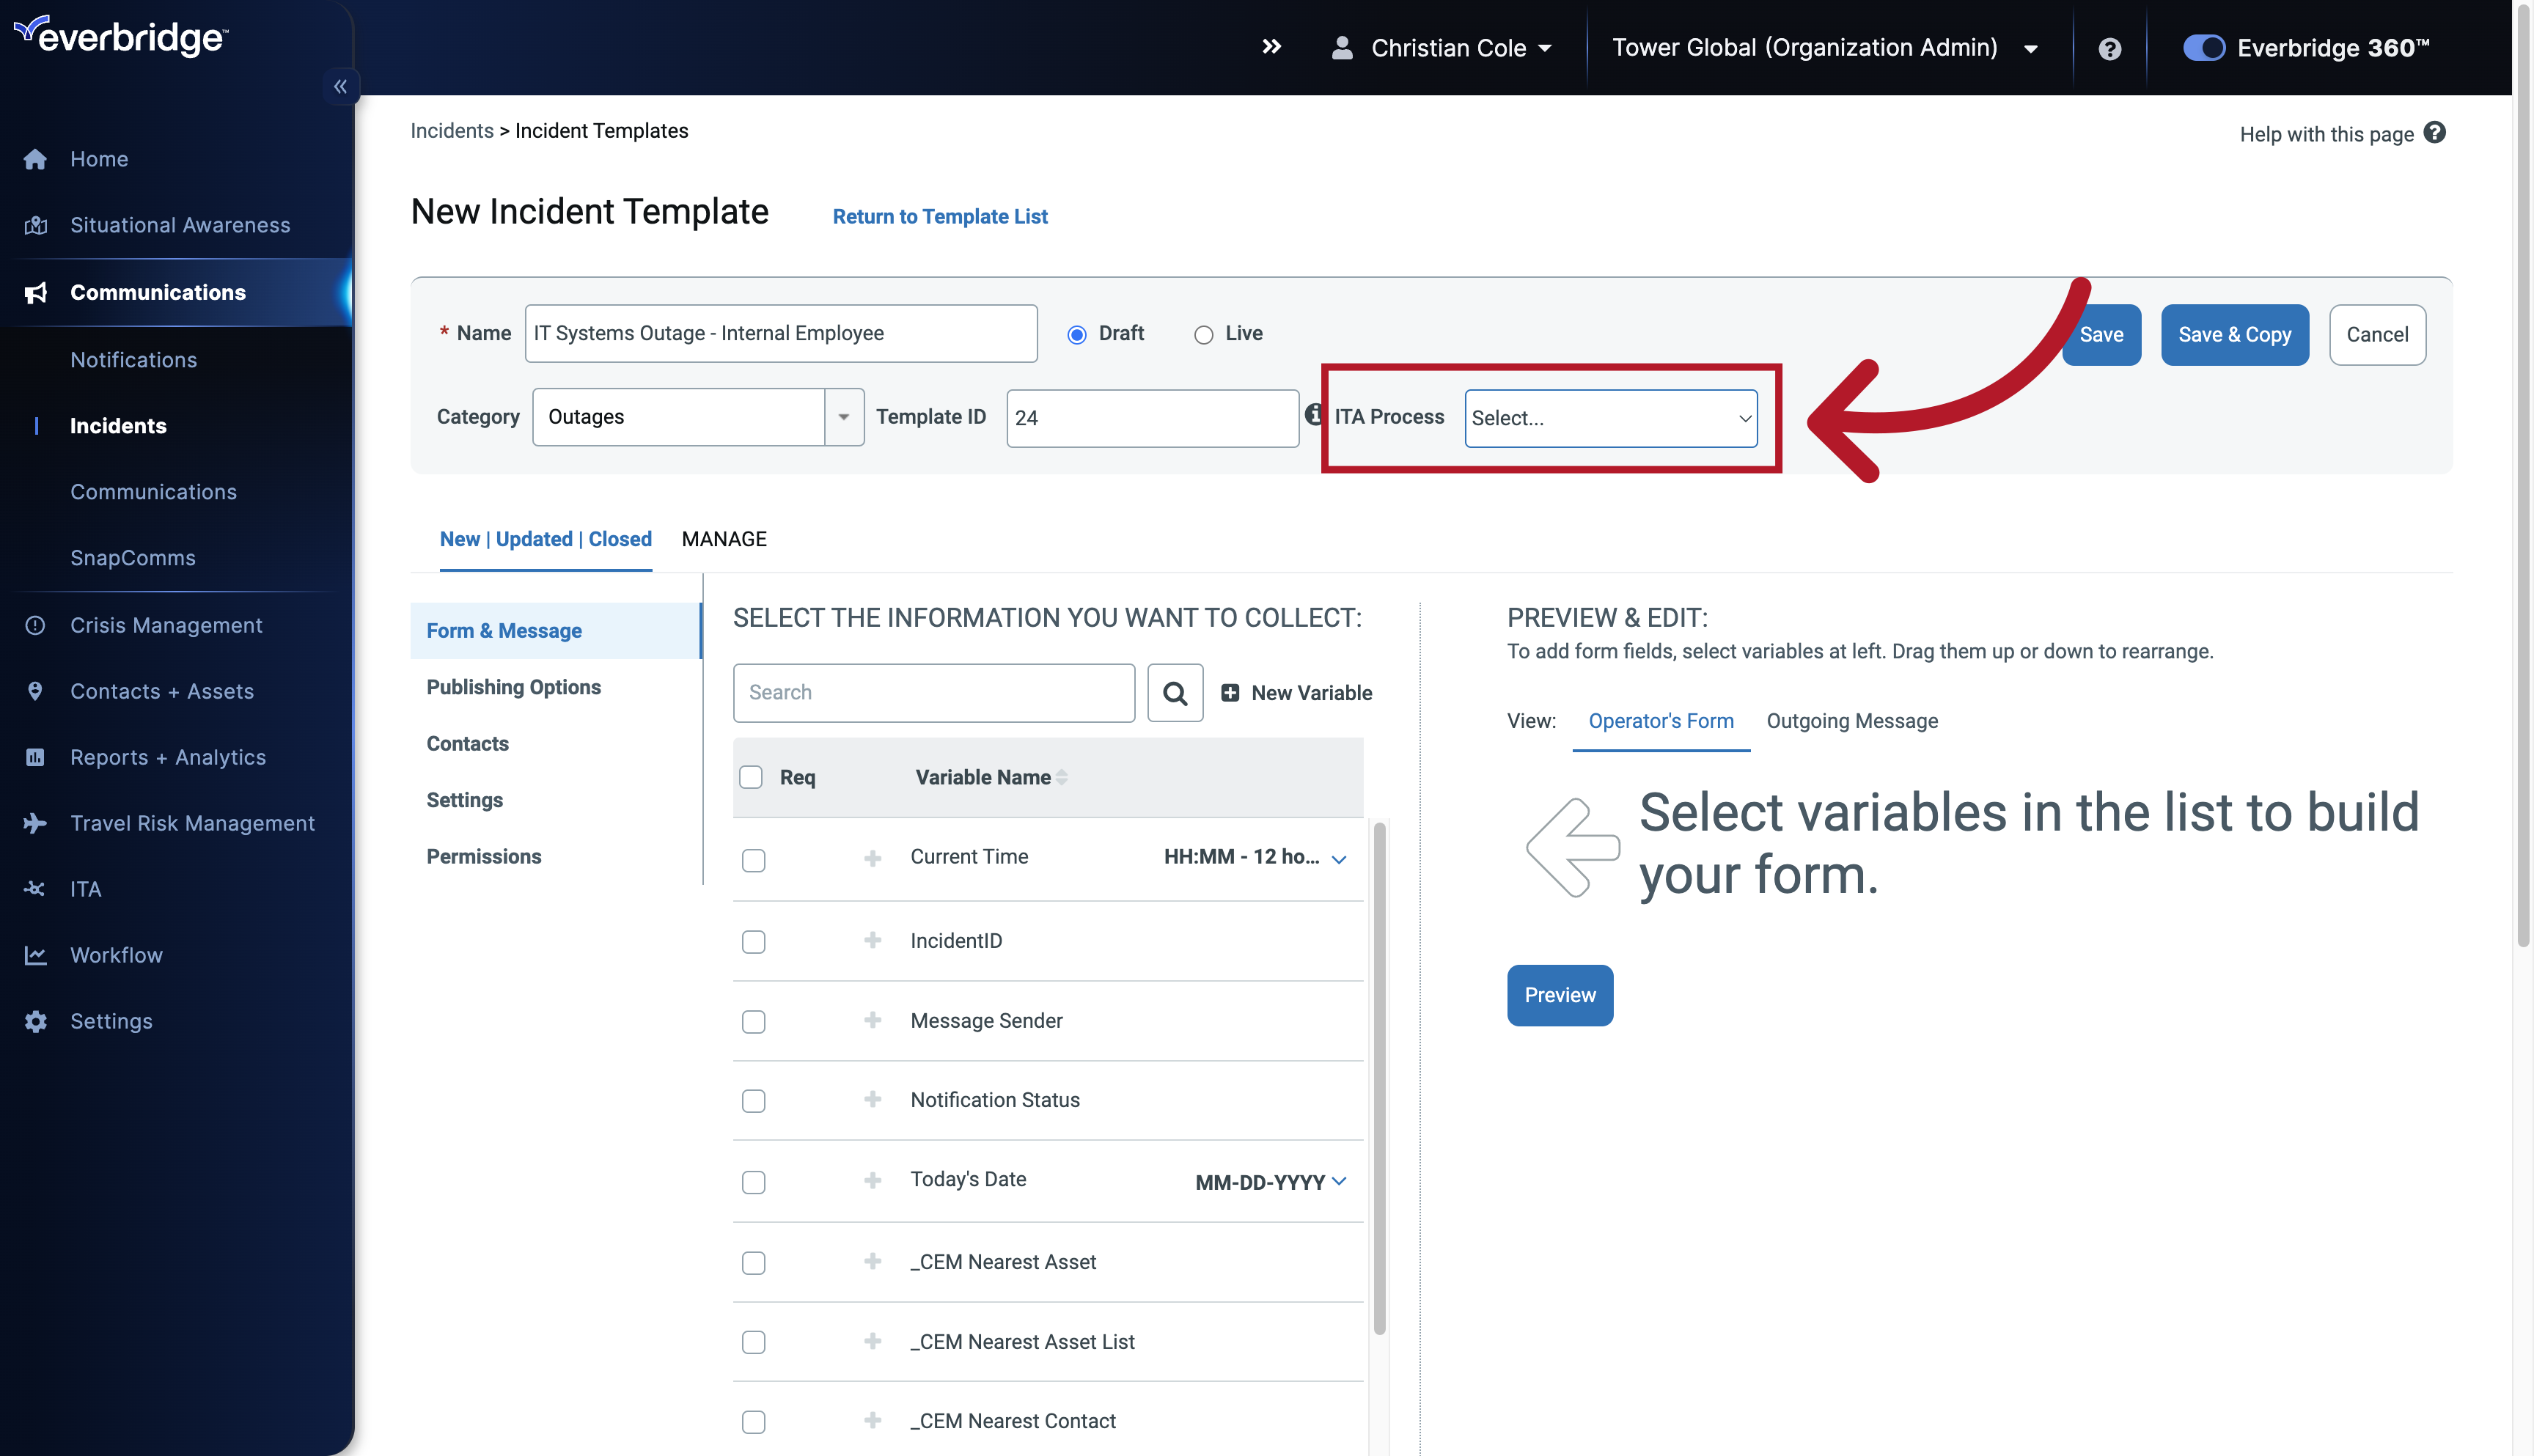
15. ITA Process
Additionally, if you have IT Alerting enabled for your organization, this option can enable you to include an ITA process.
16. Templates
Select the appropriate category.

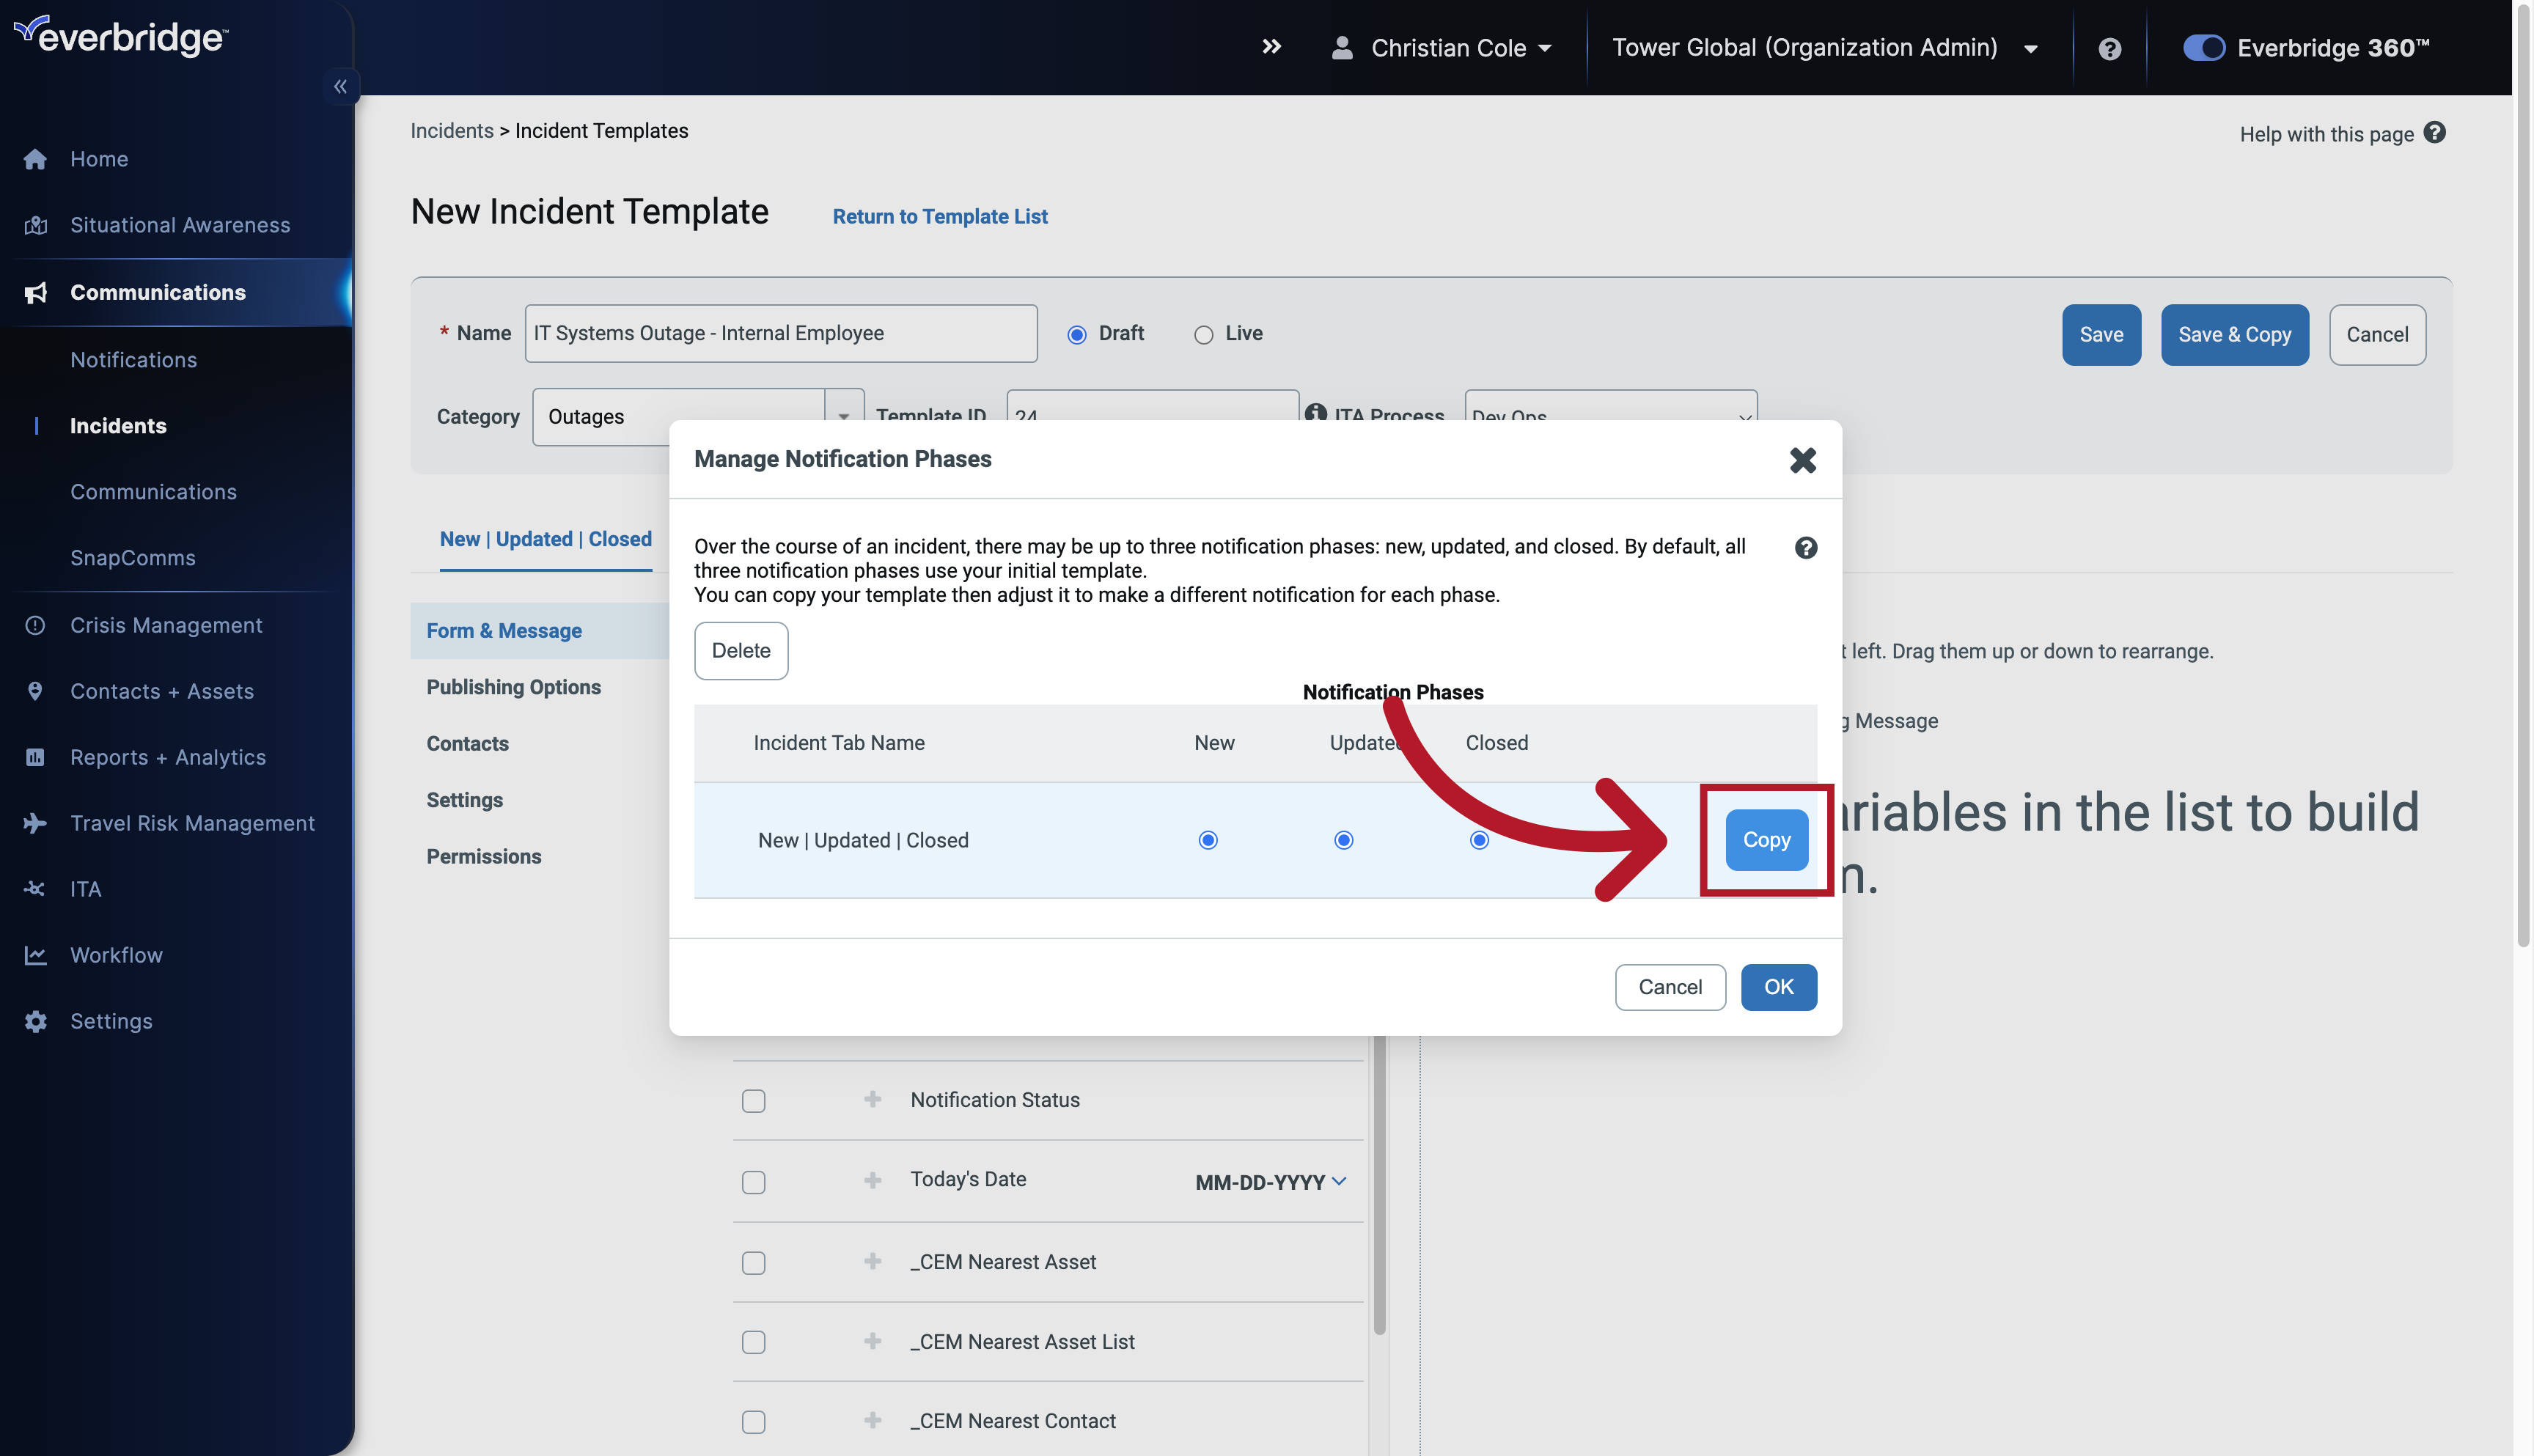
17. Notification Phases
The menu option here allows you to divide the incident template into three notification phases. In order to predetermine how this incident will function.

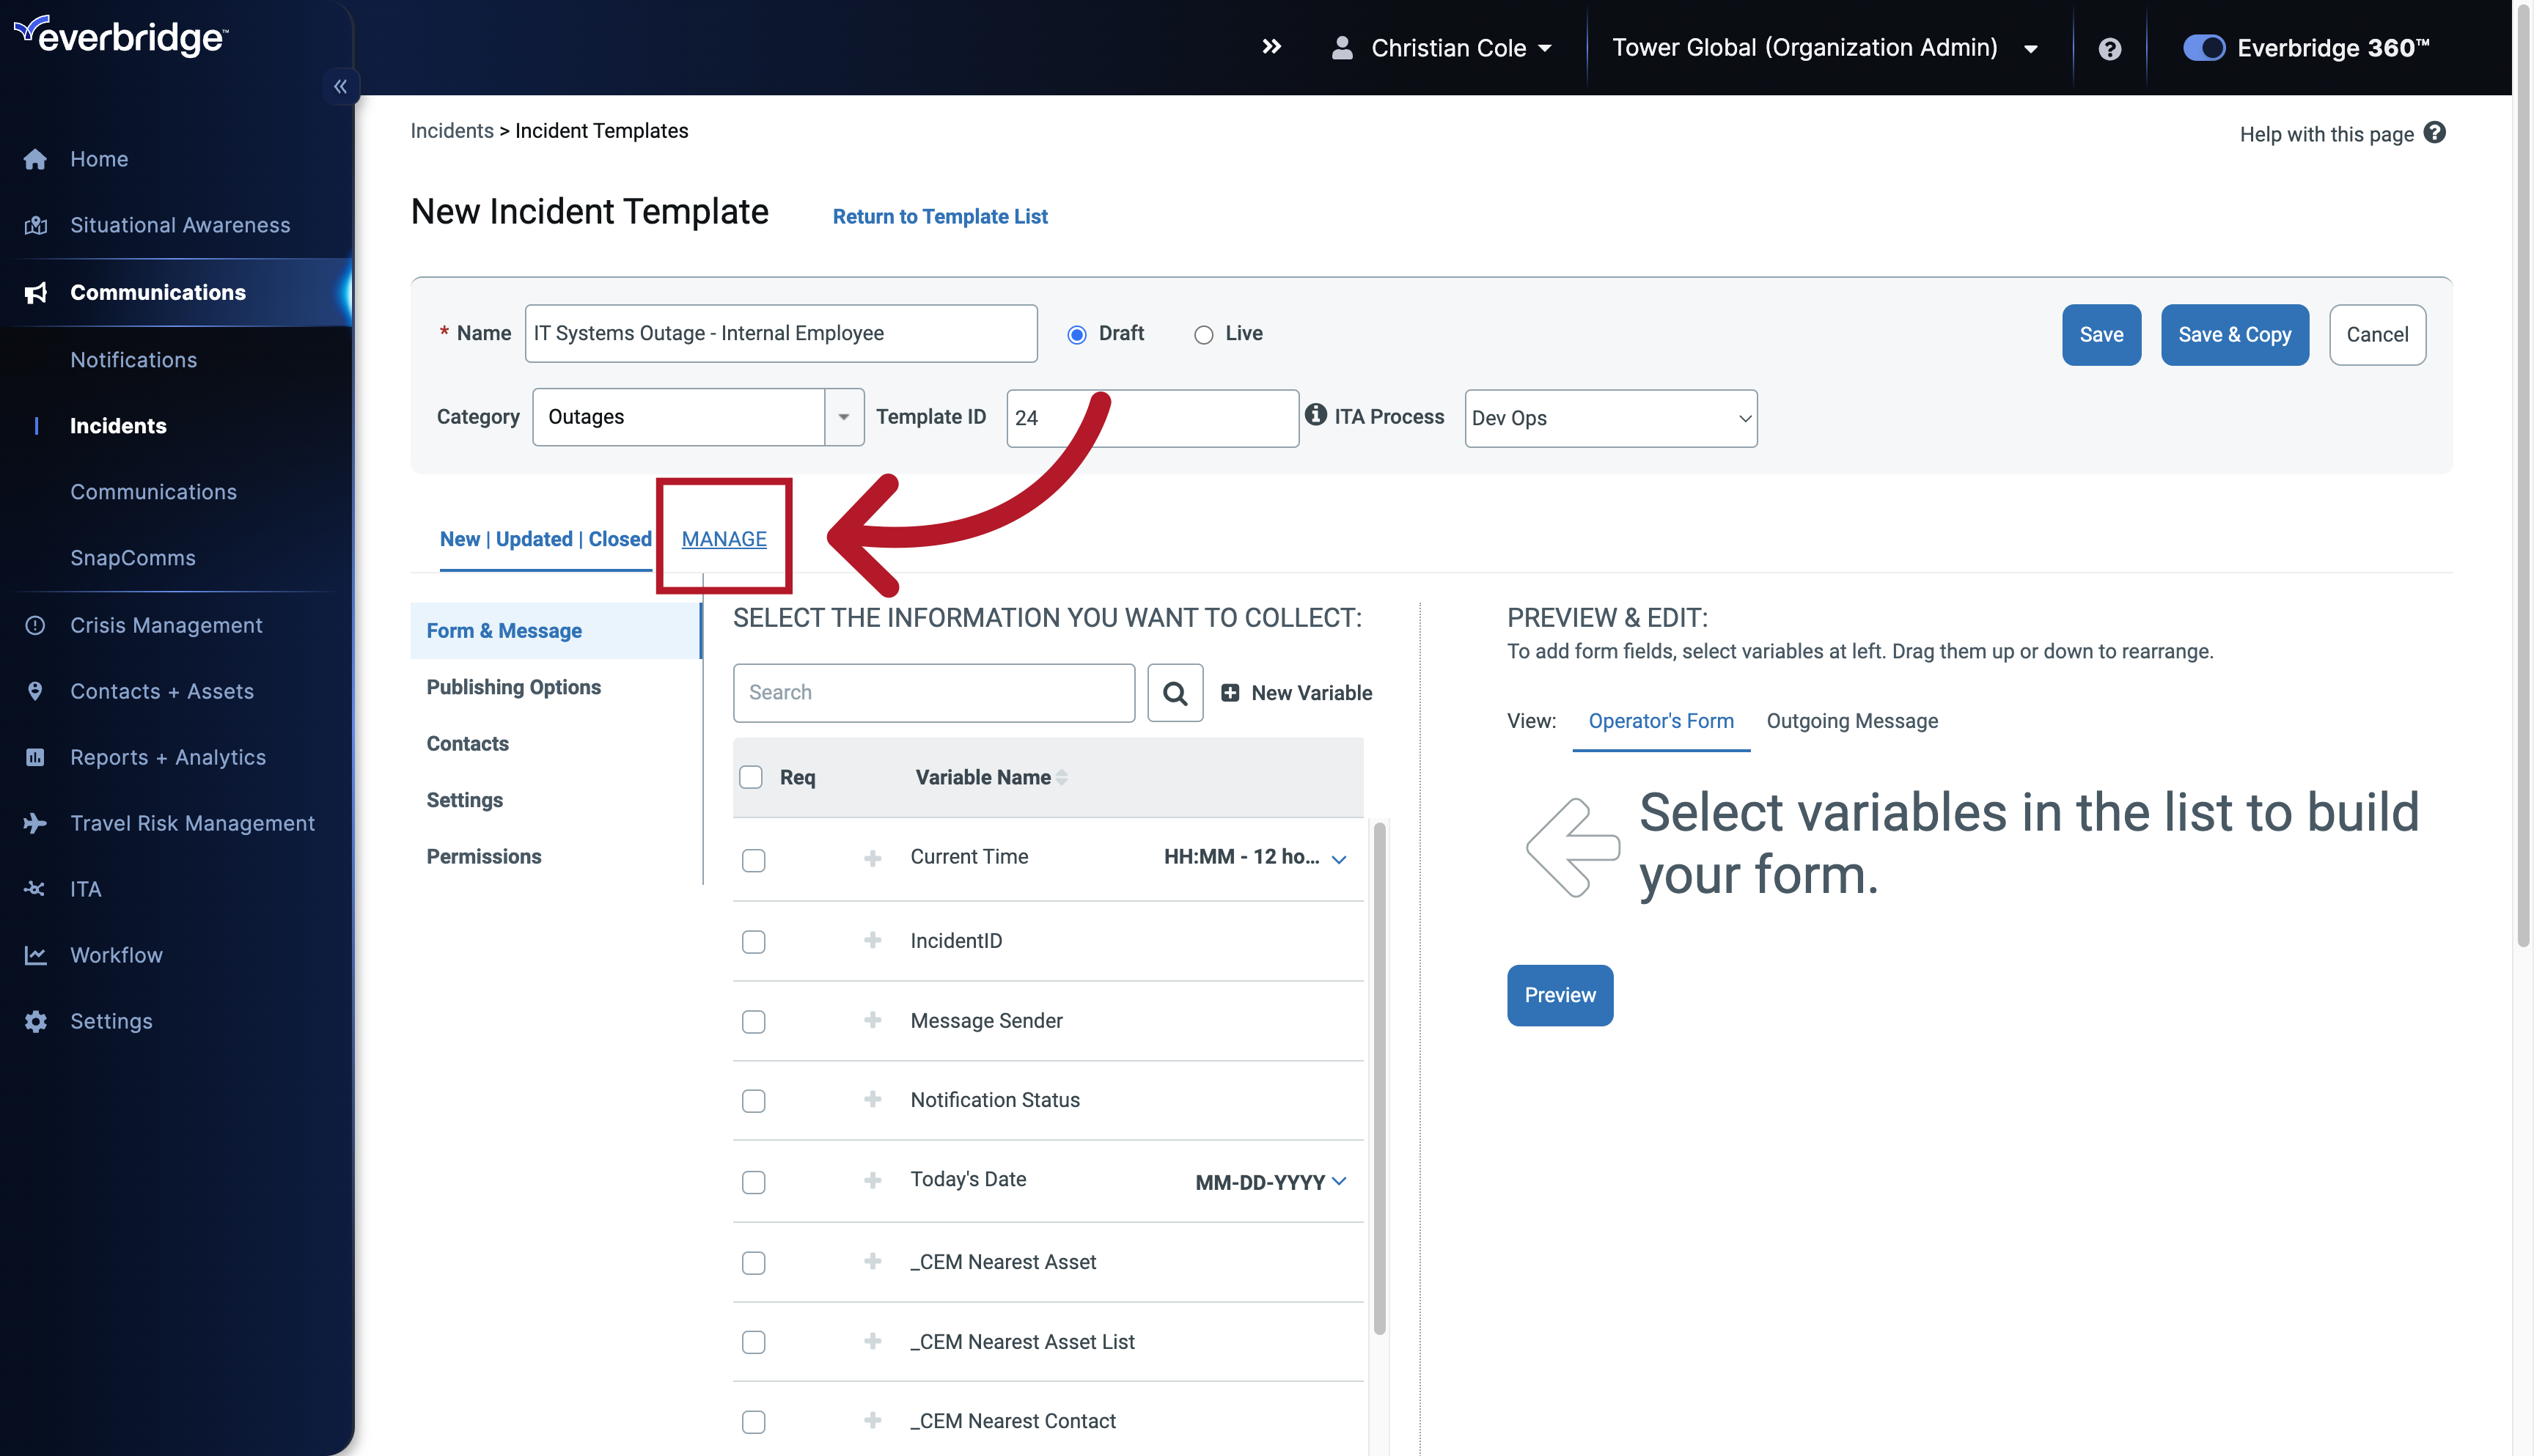
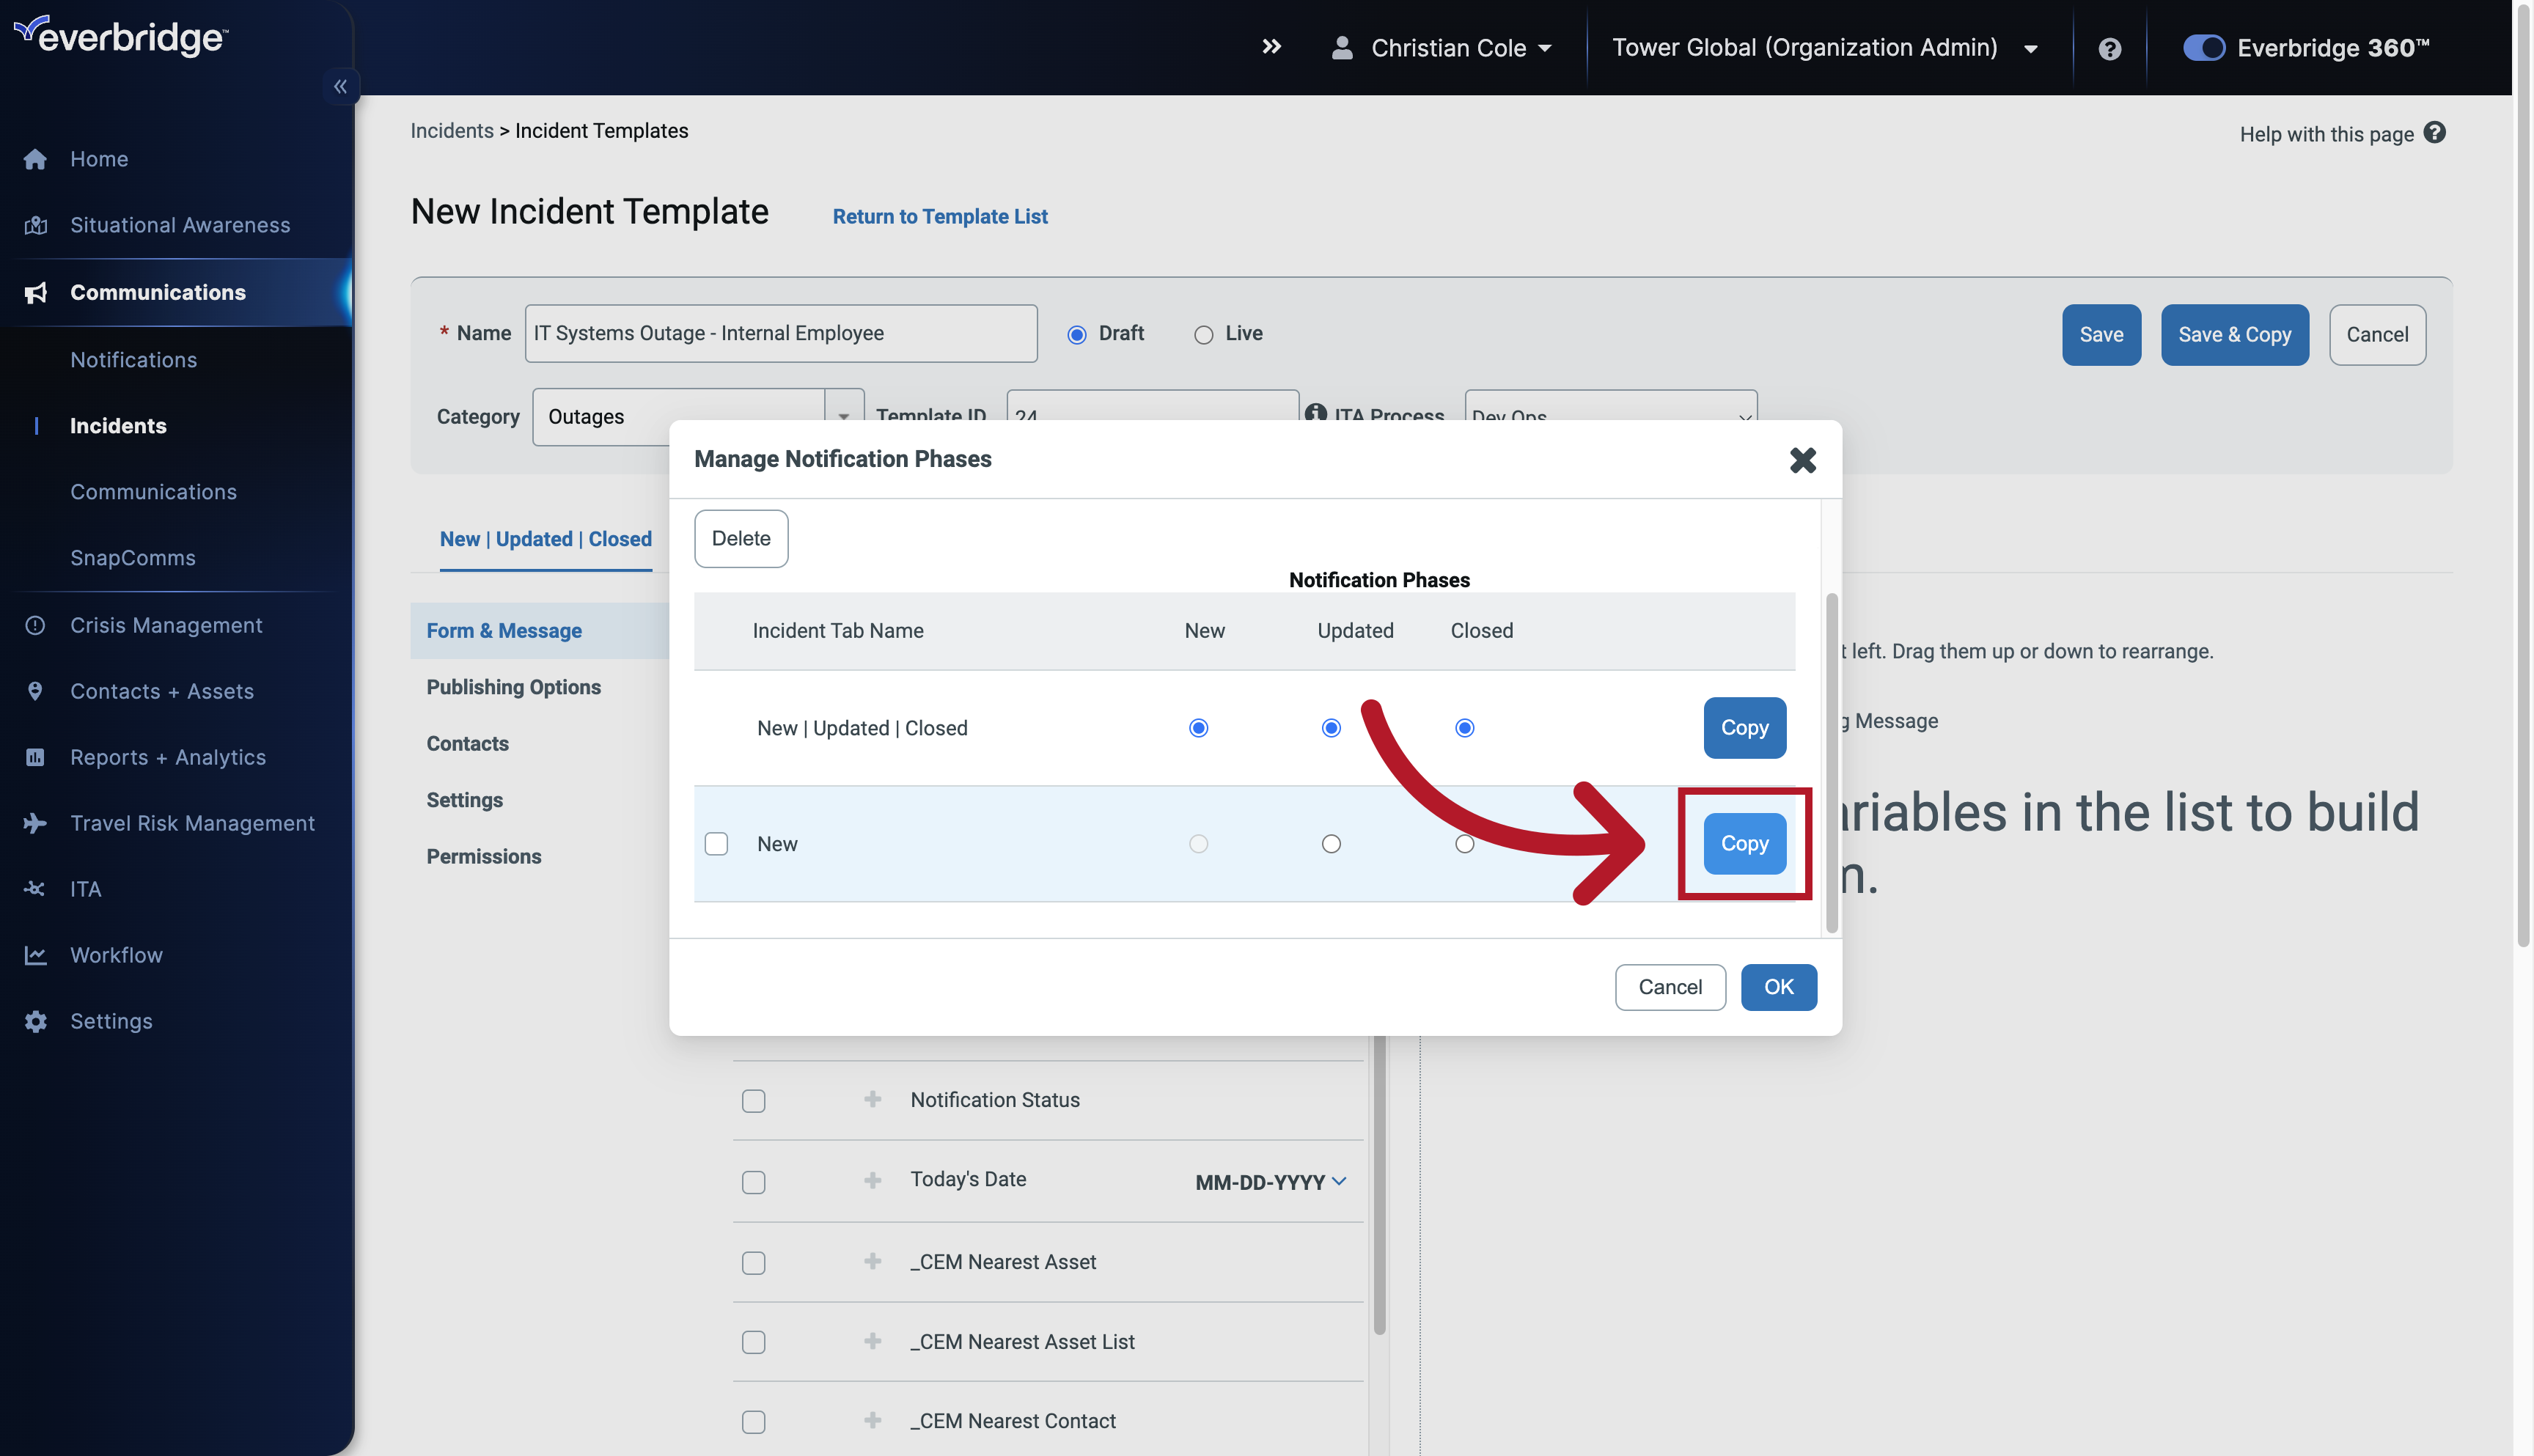
18. Manage Notification Phases
You can manage them by clicking Manage, next to the menu.
19. Manage Notification Phases
Manage the notification phases.

20. Manage Notification Phases
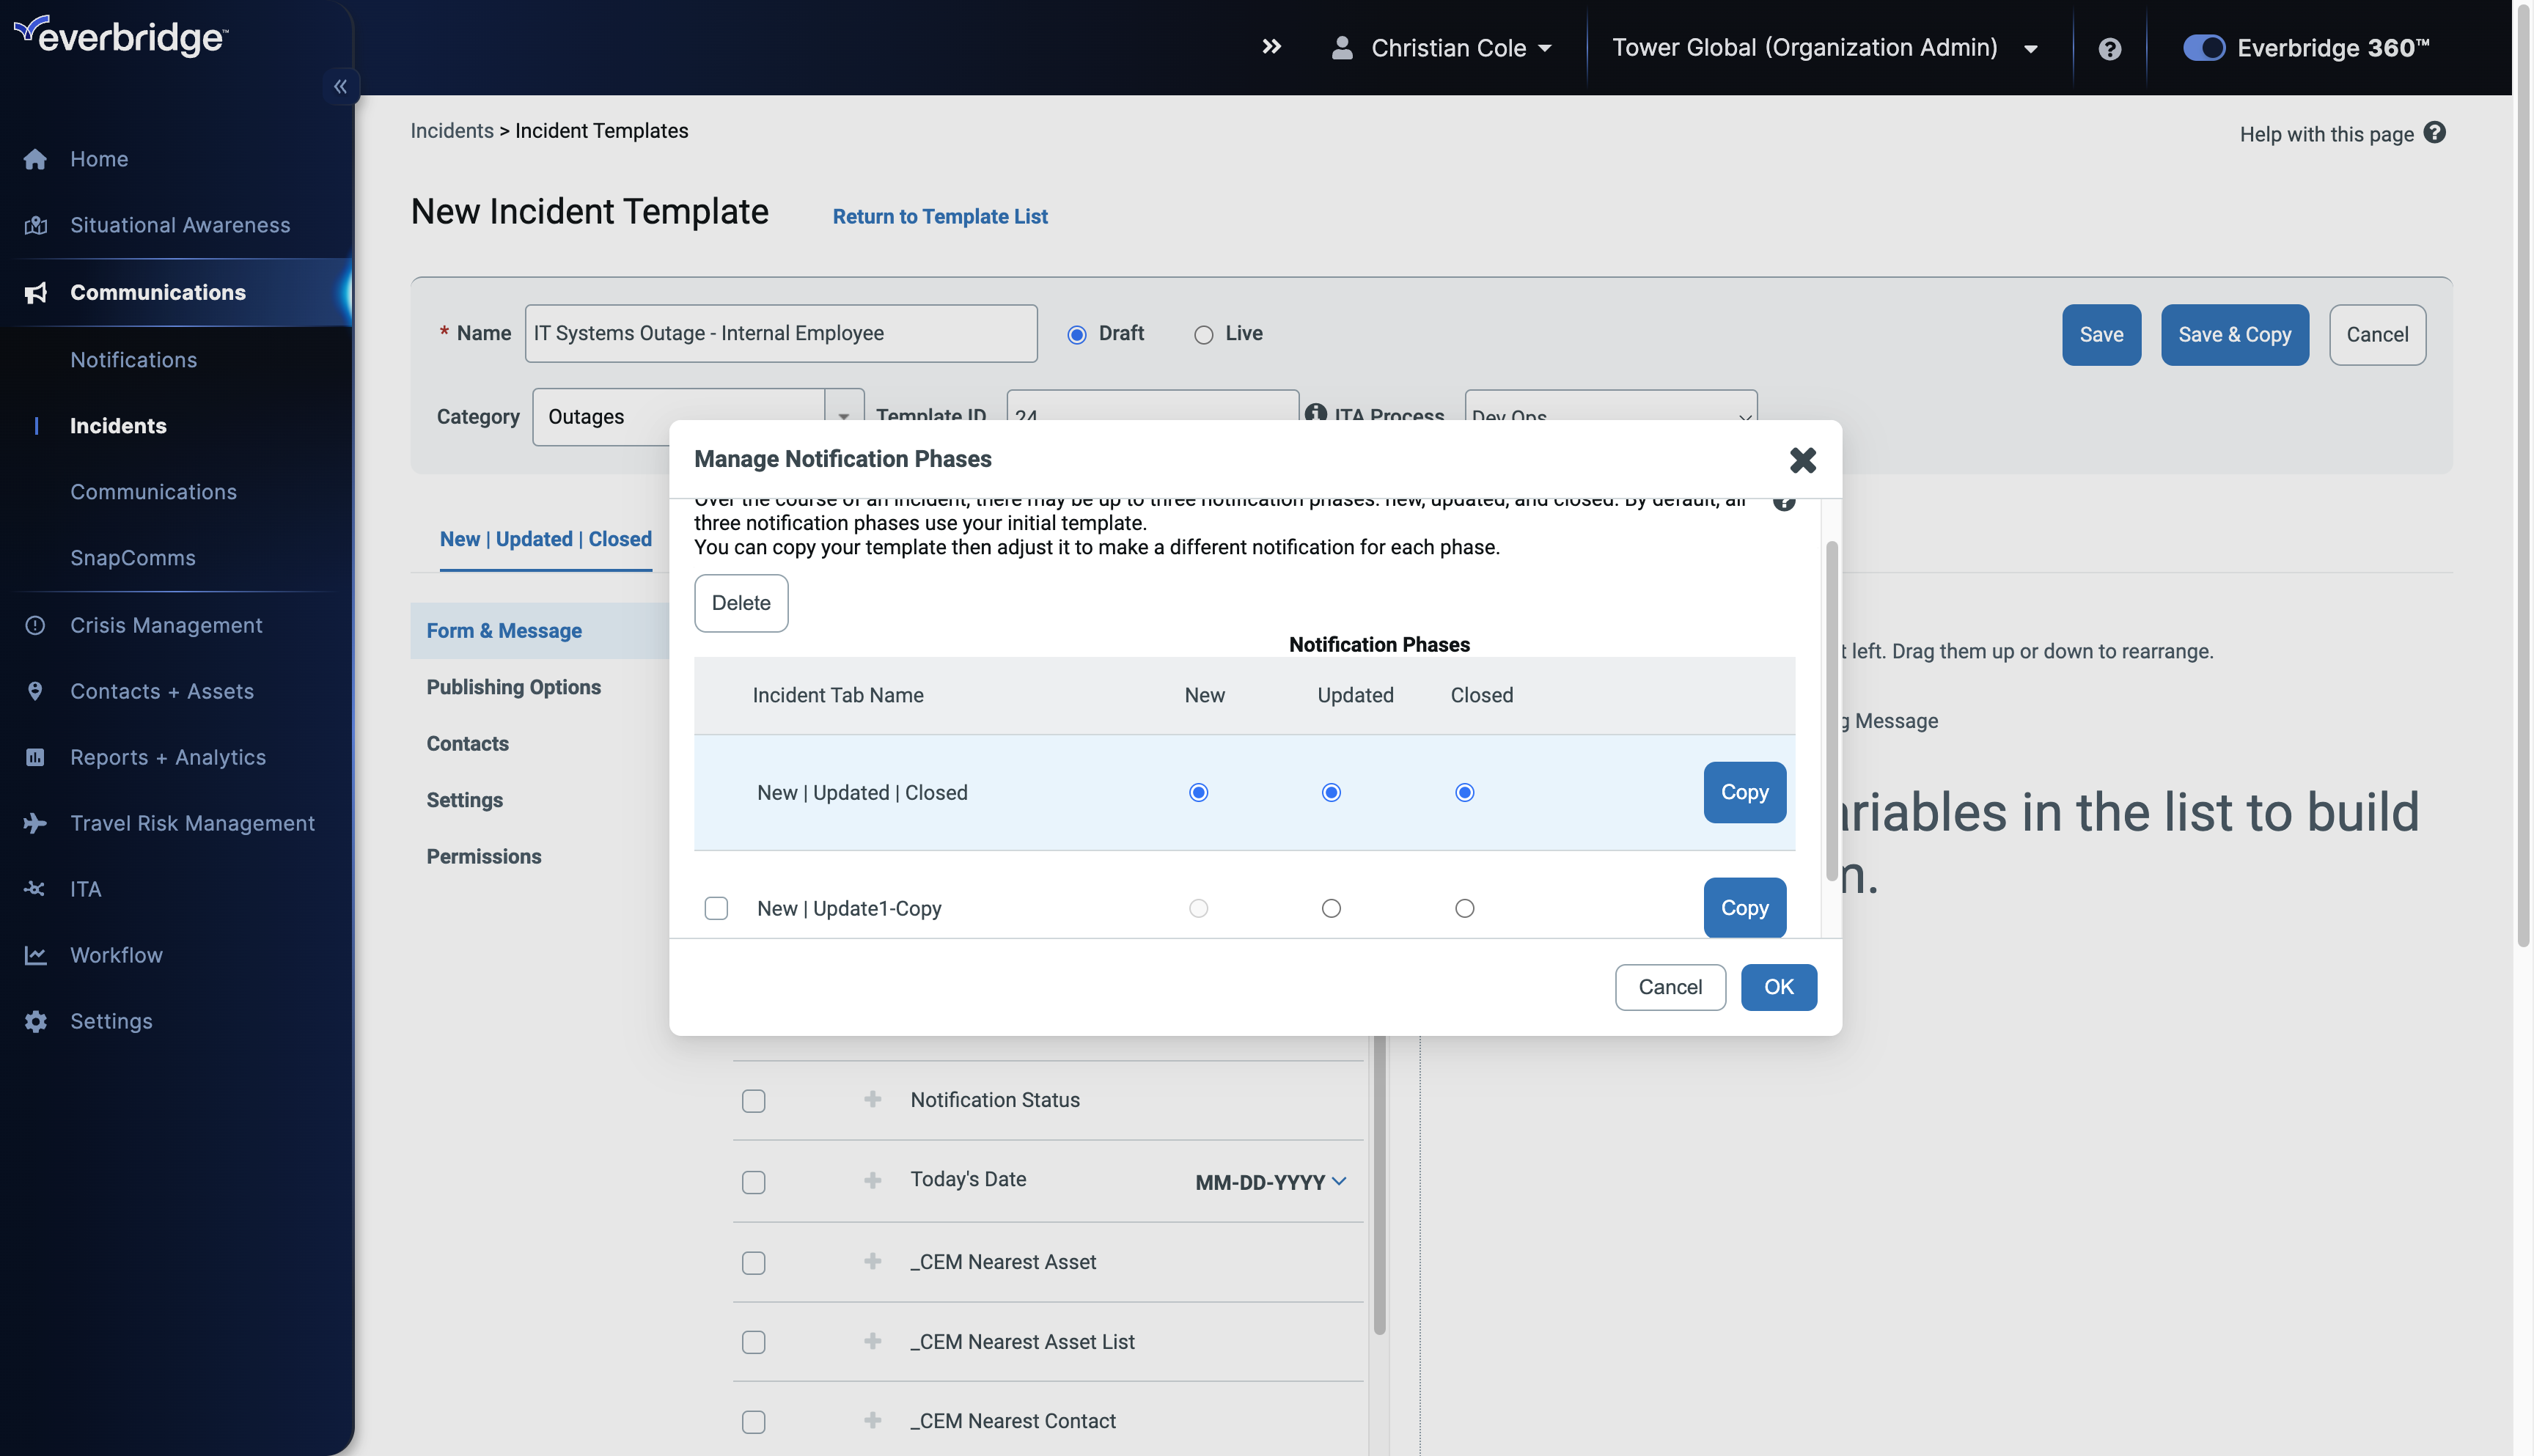
Click Copy to create a different new phase off of a copy of the current one.
21. Manage Notification Phases
Access the updated or closed template options.
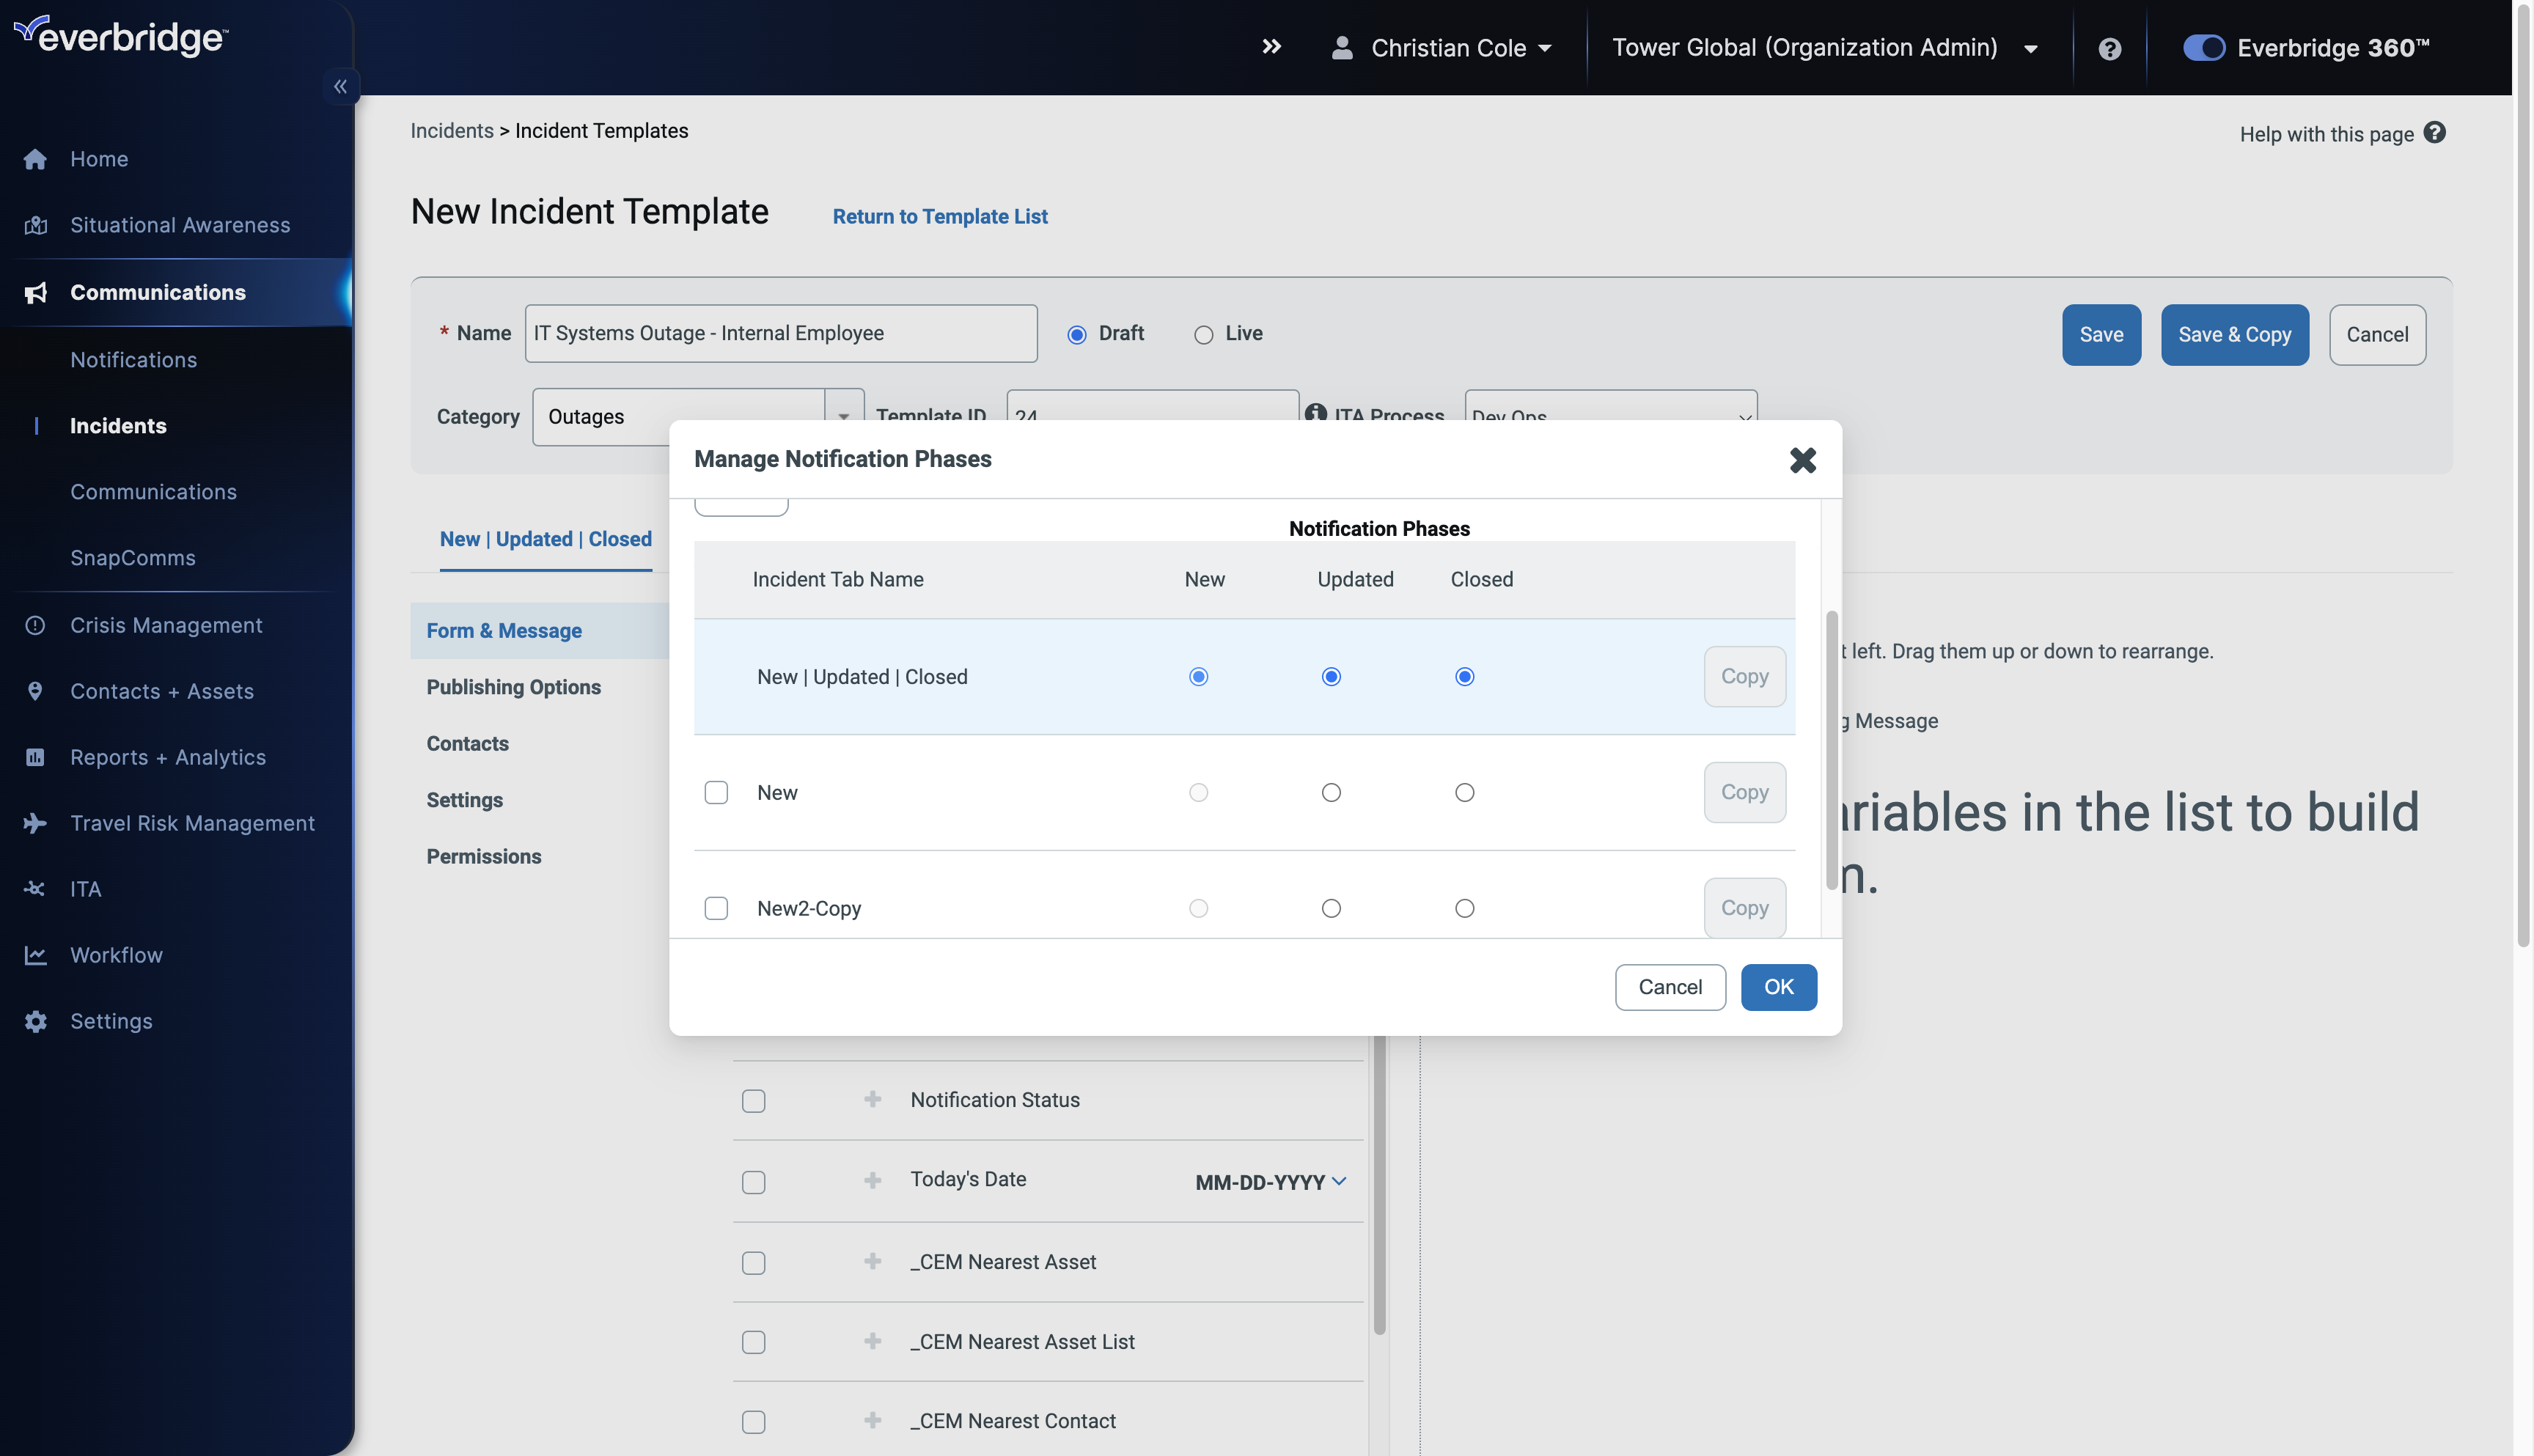
22. Manage Notification Phases
Confirm the duplication.
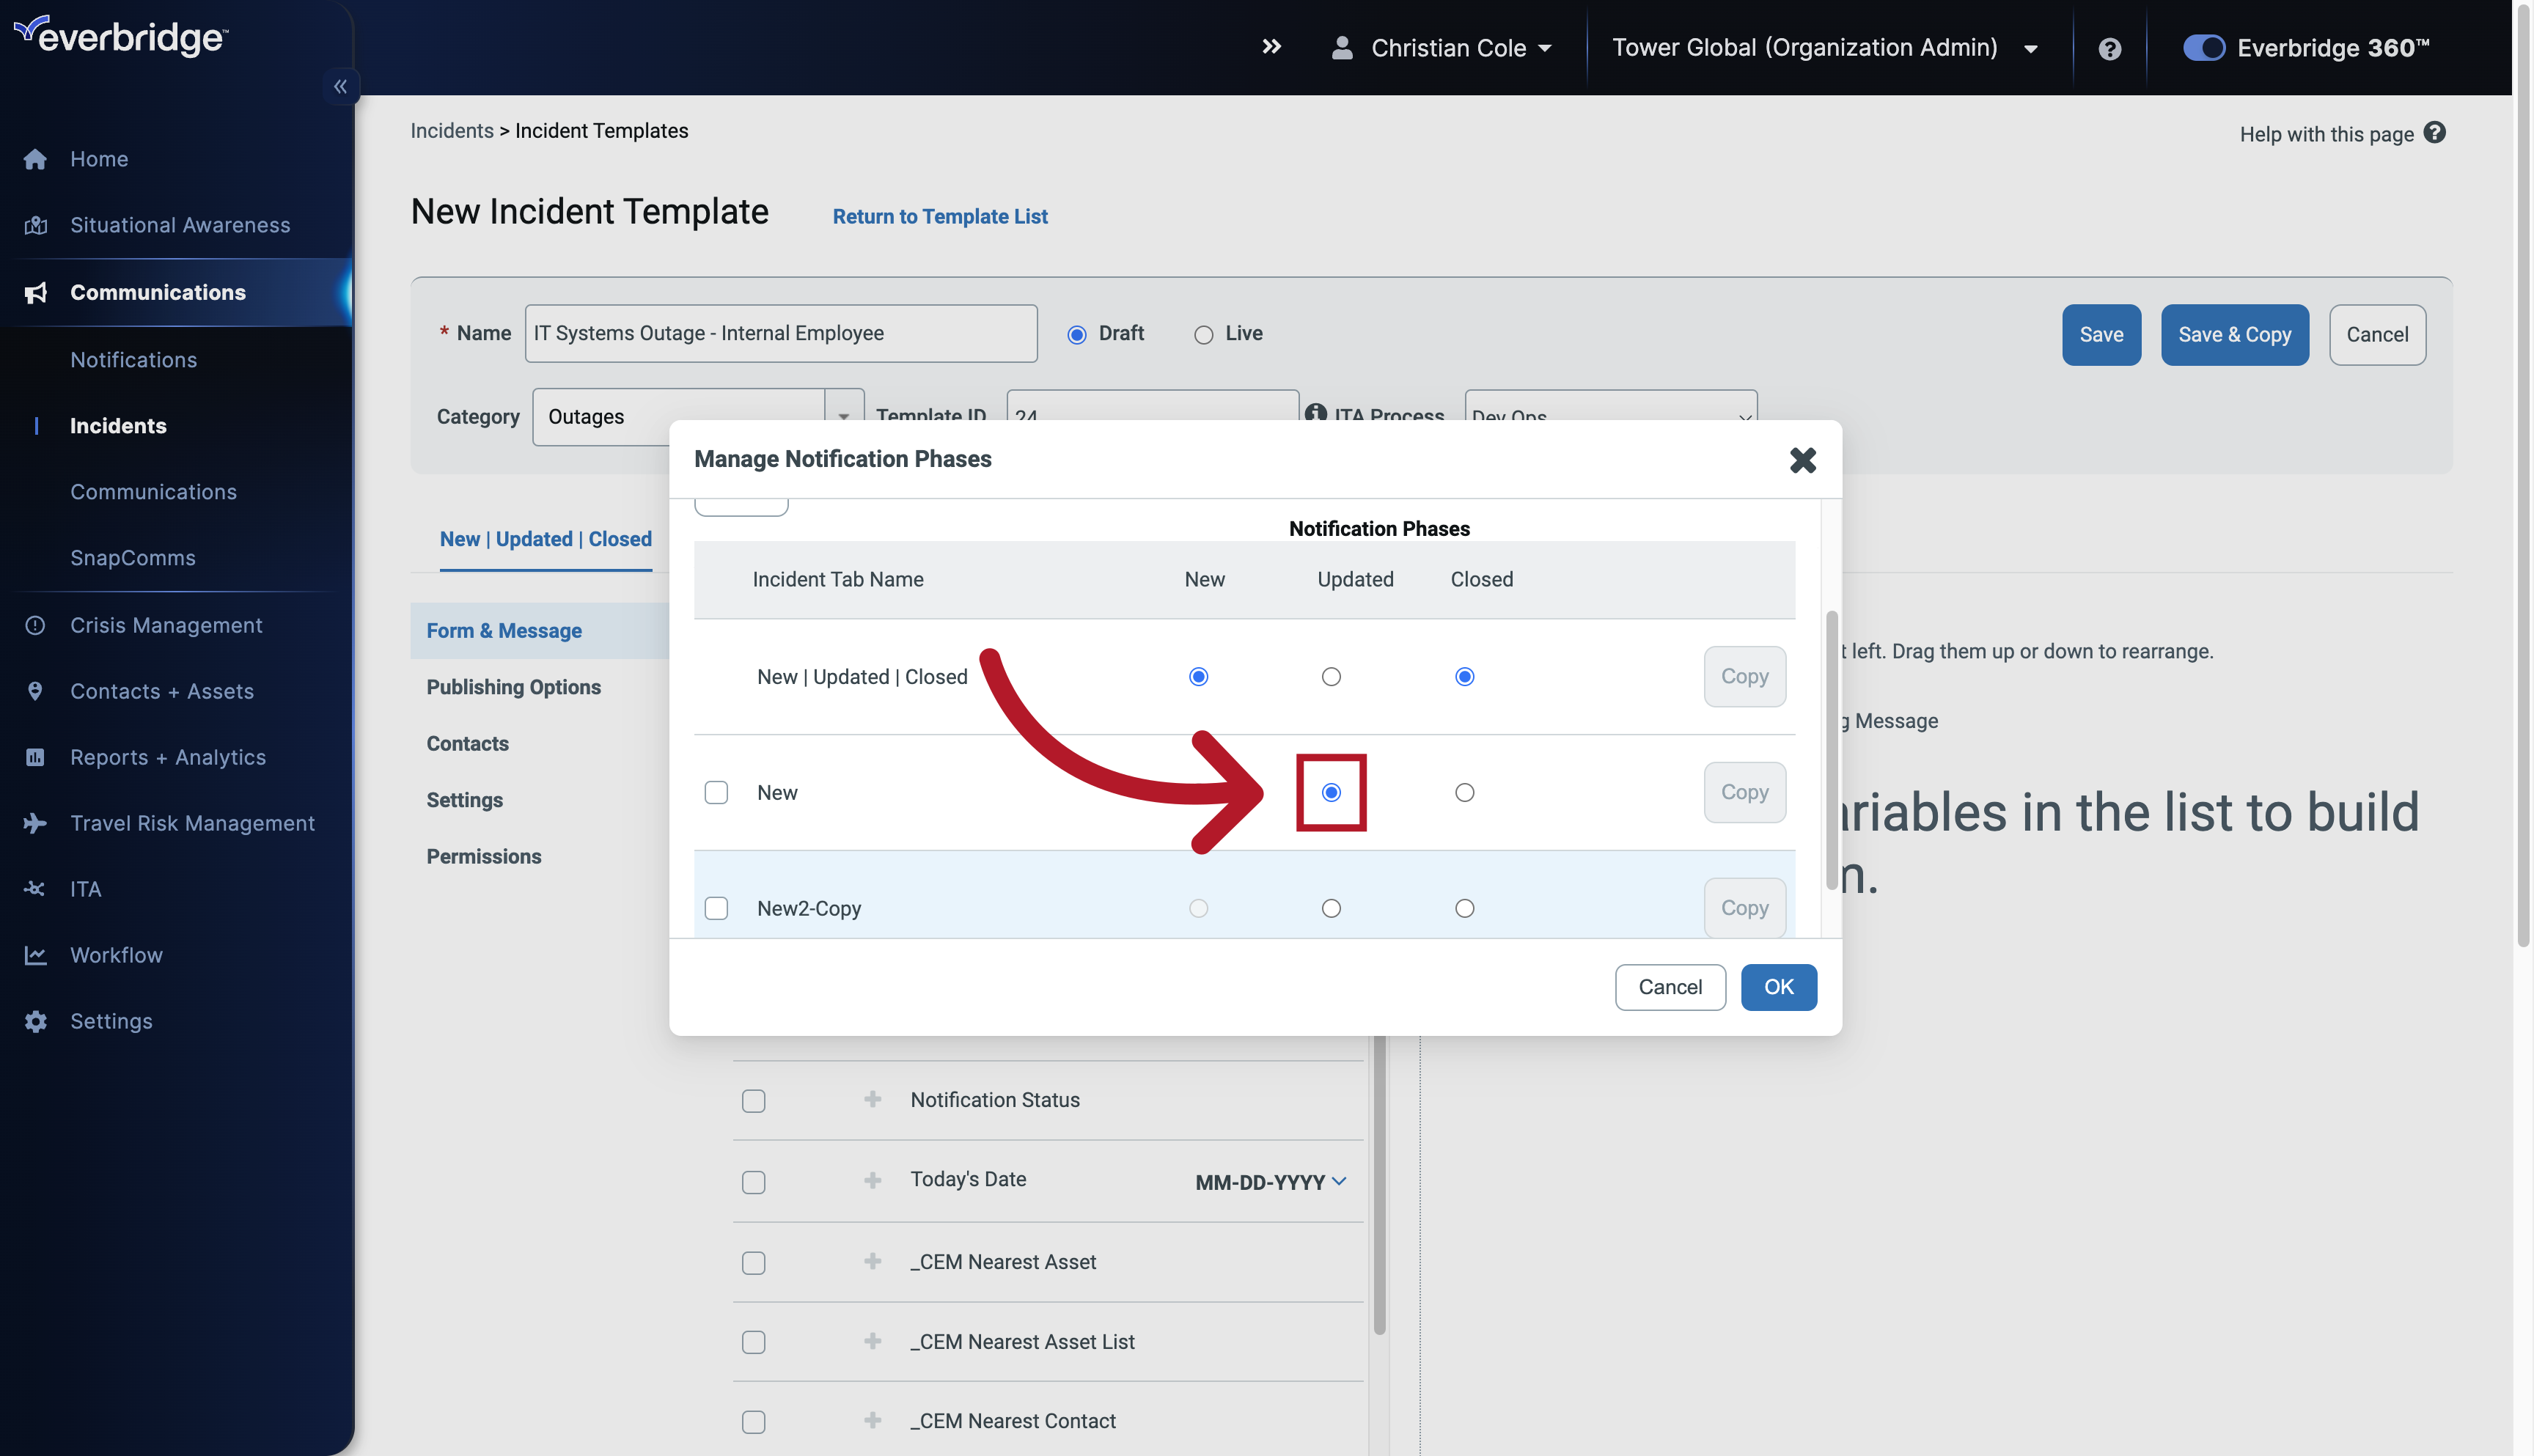
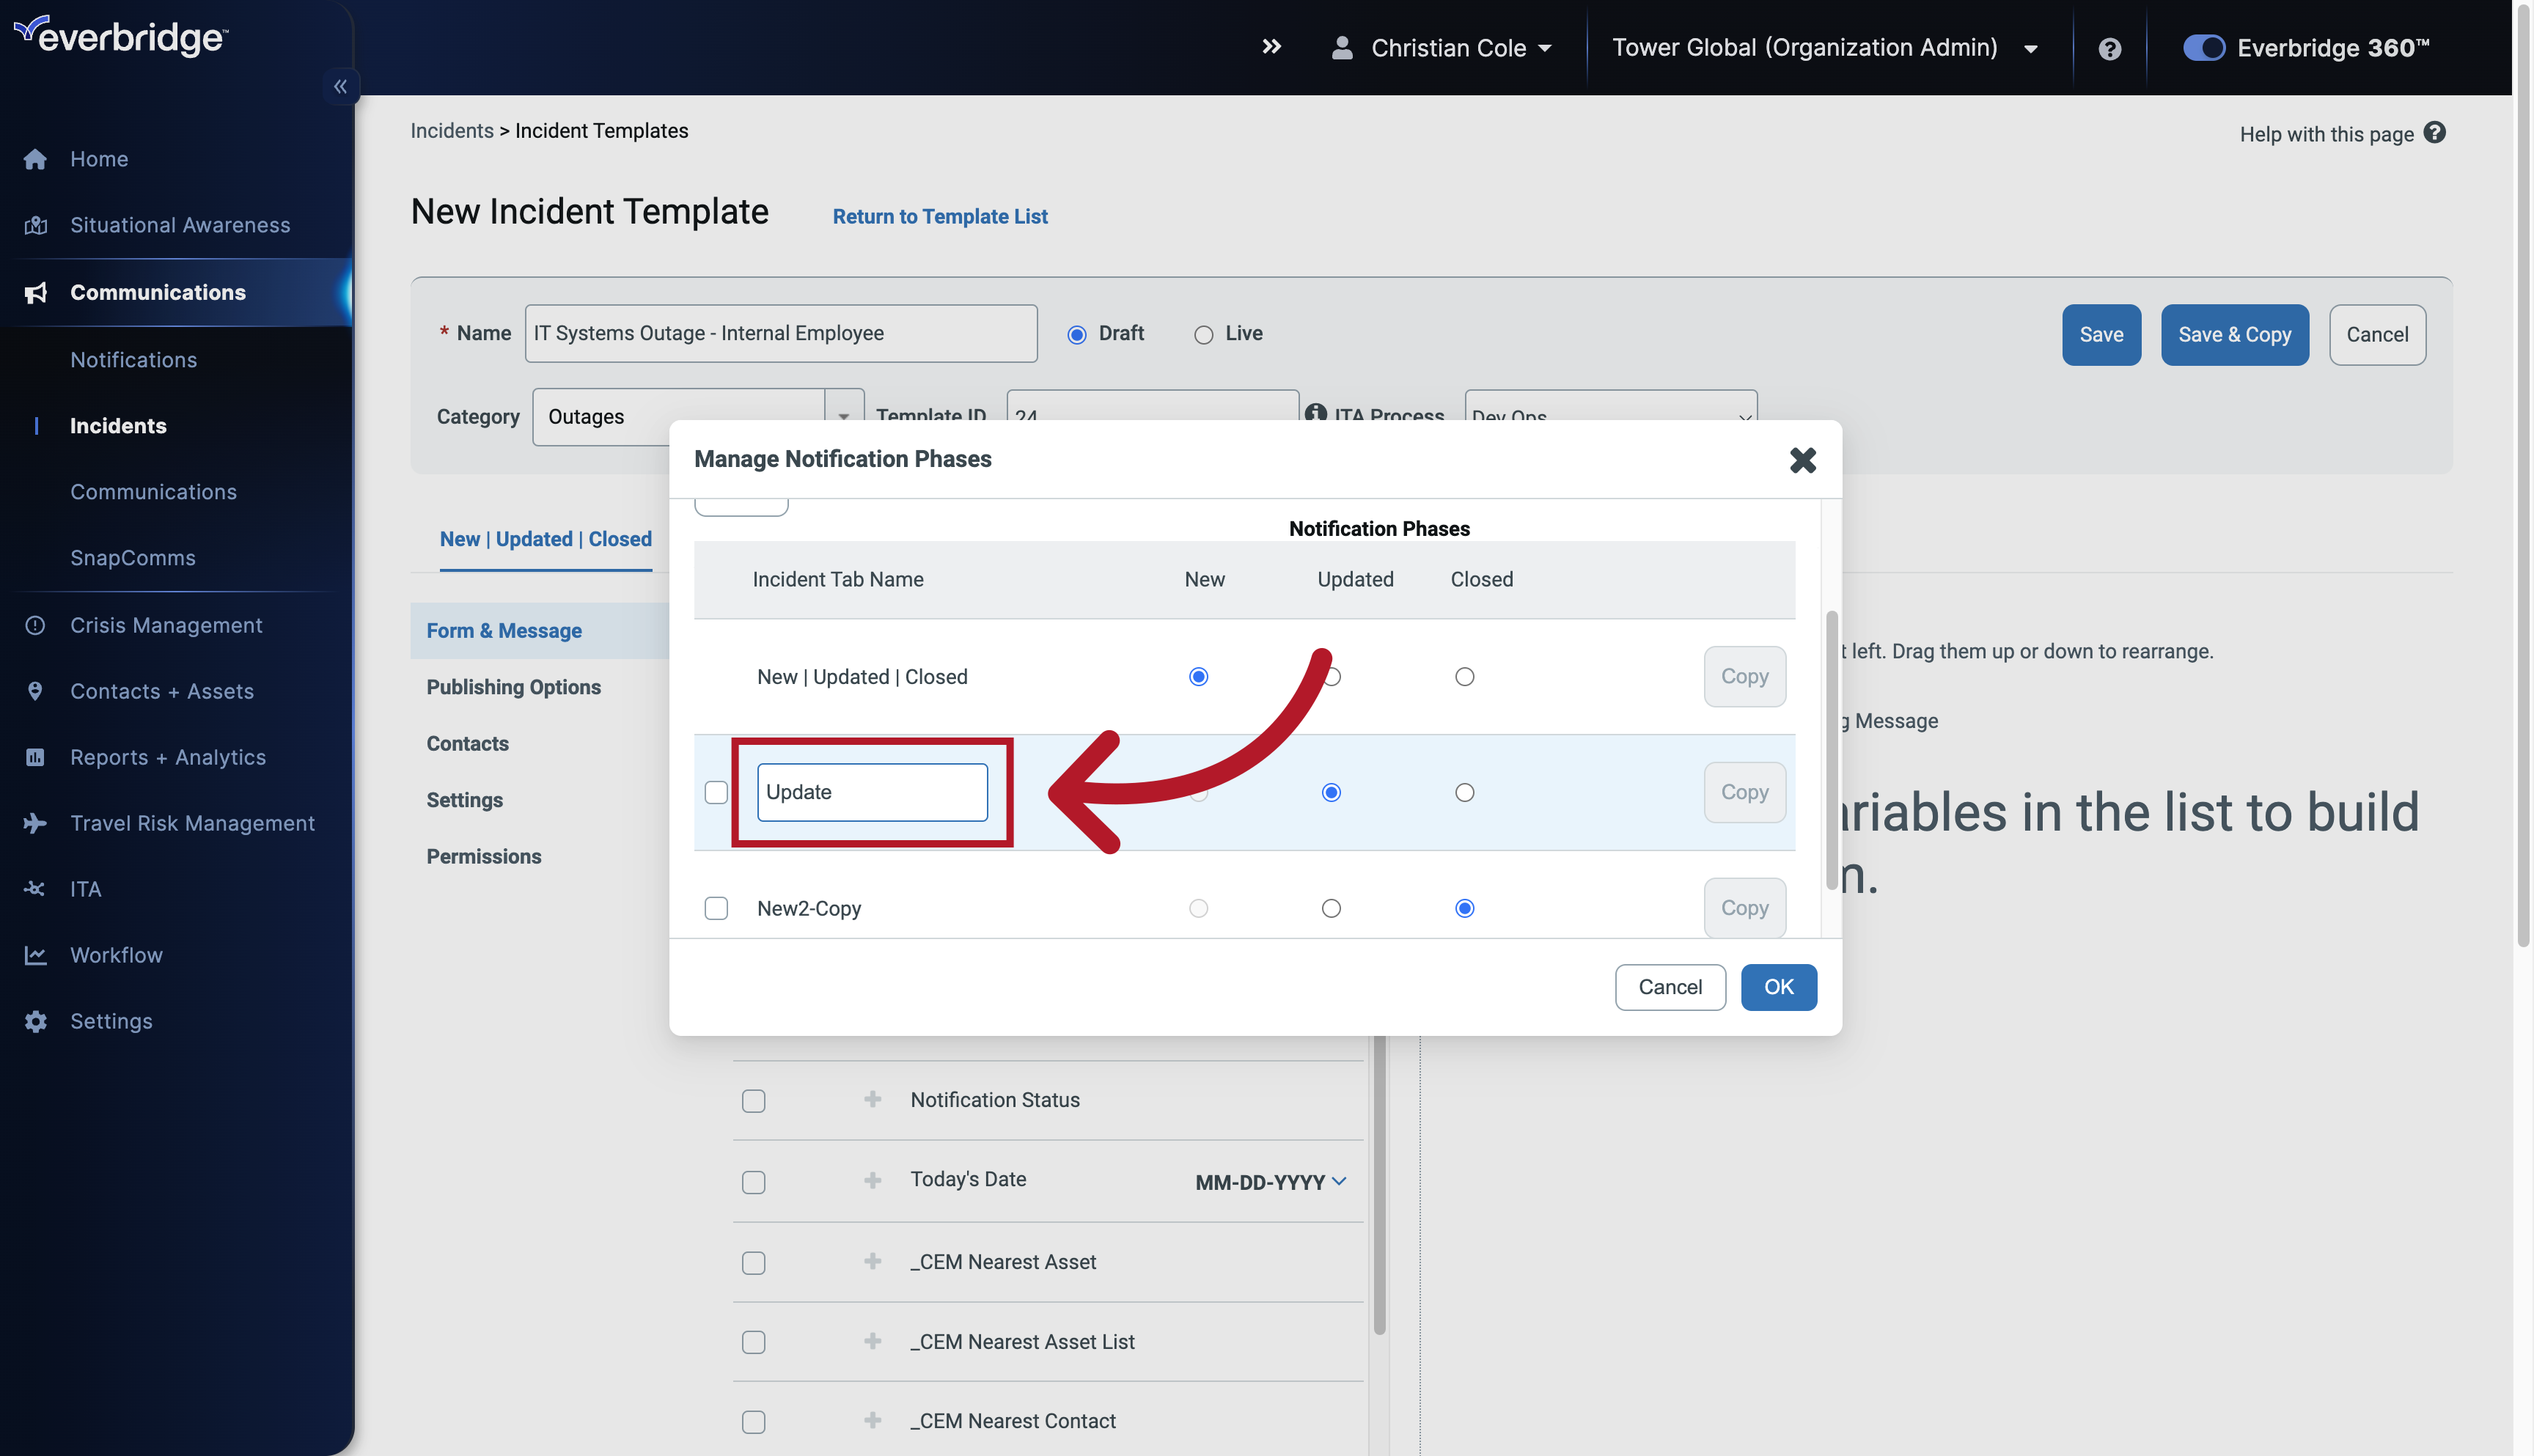
23. Manage Notification Phases
Select the new option.
24. Manage Notification Phases
Enter the update details.
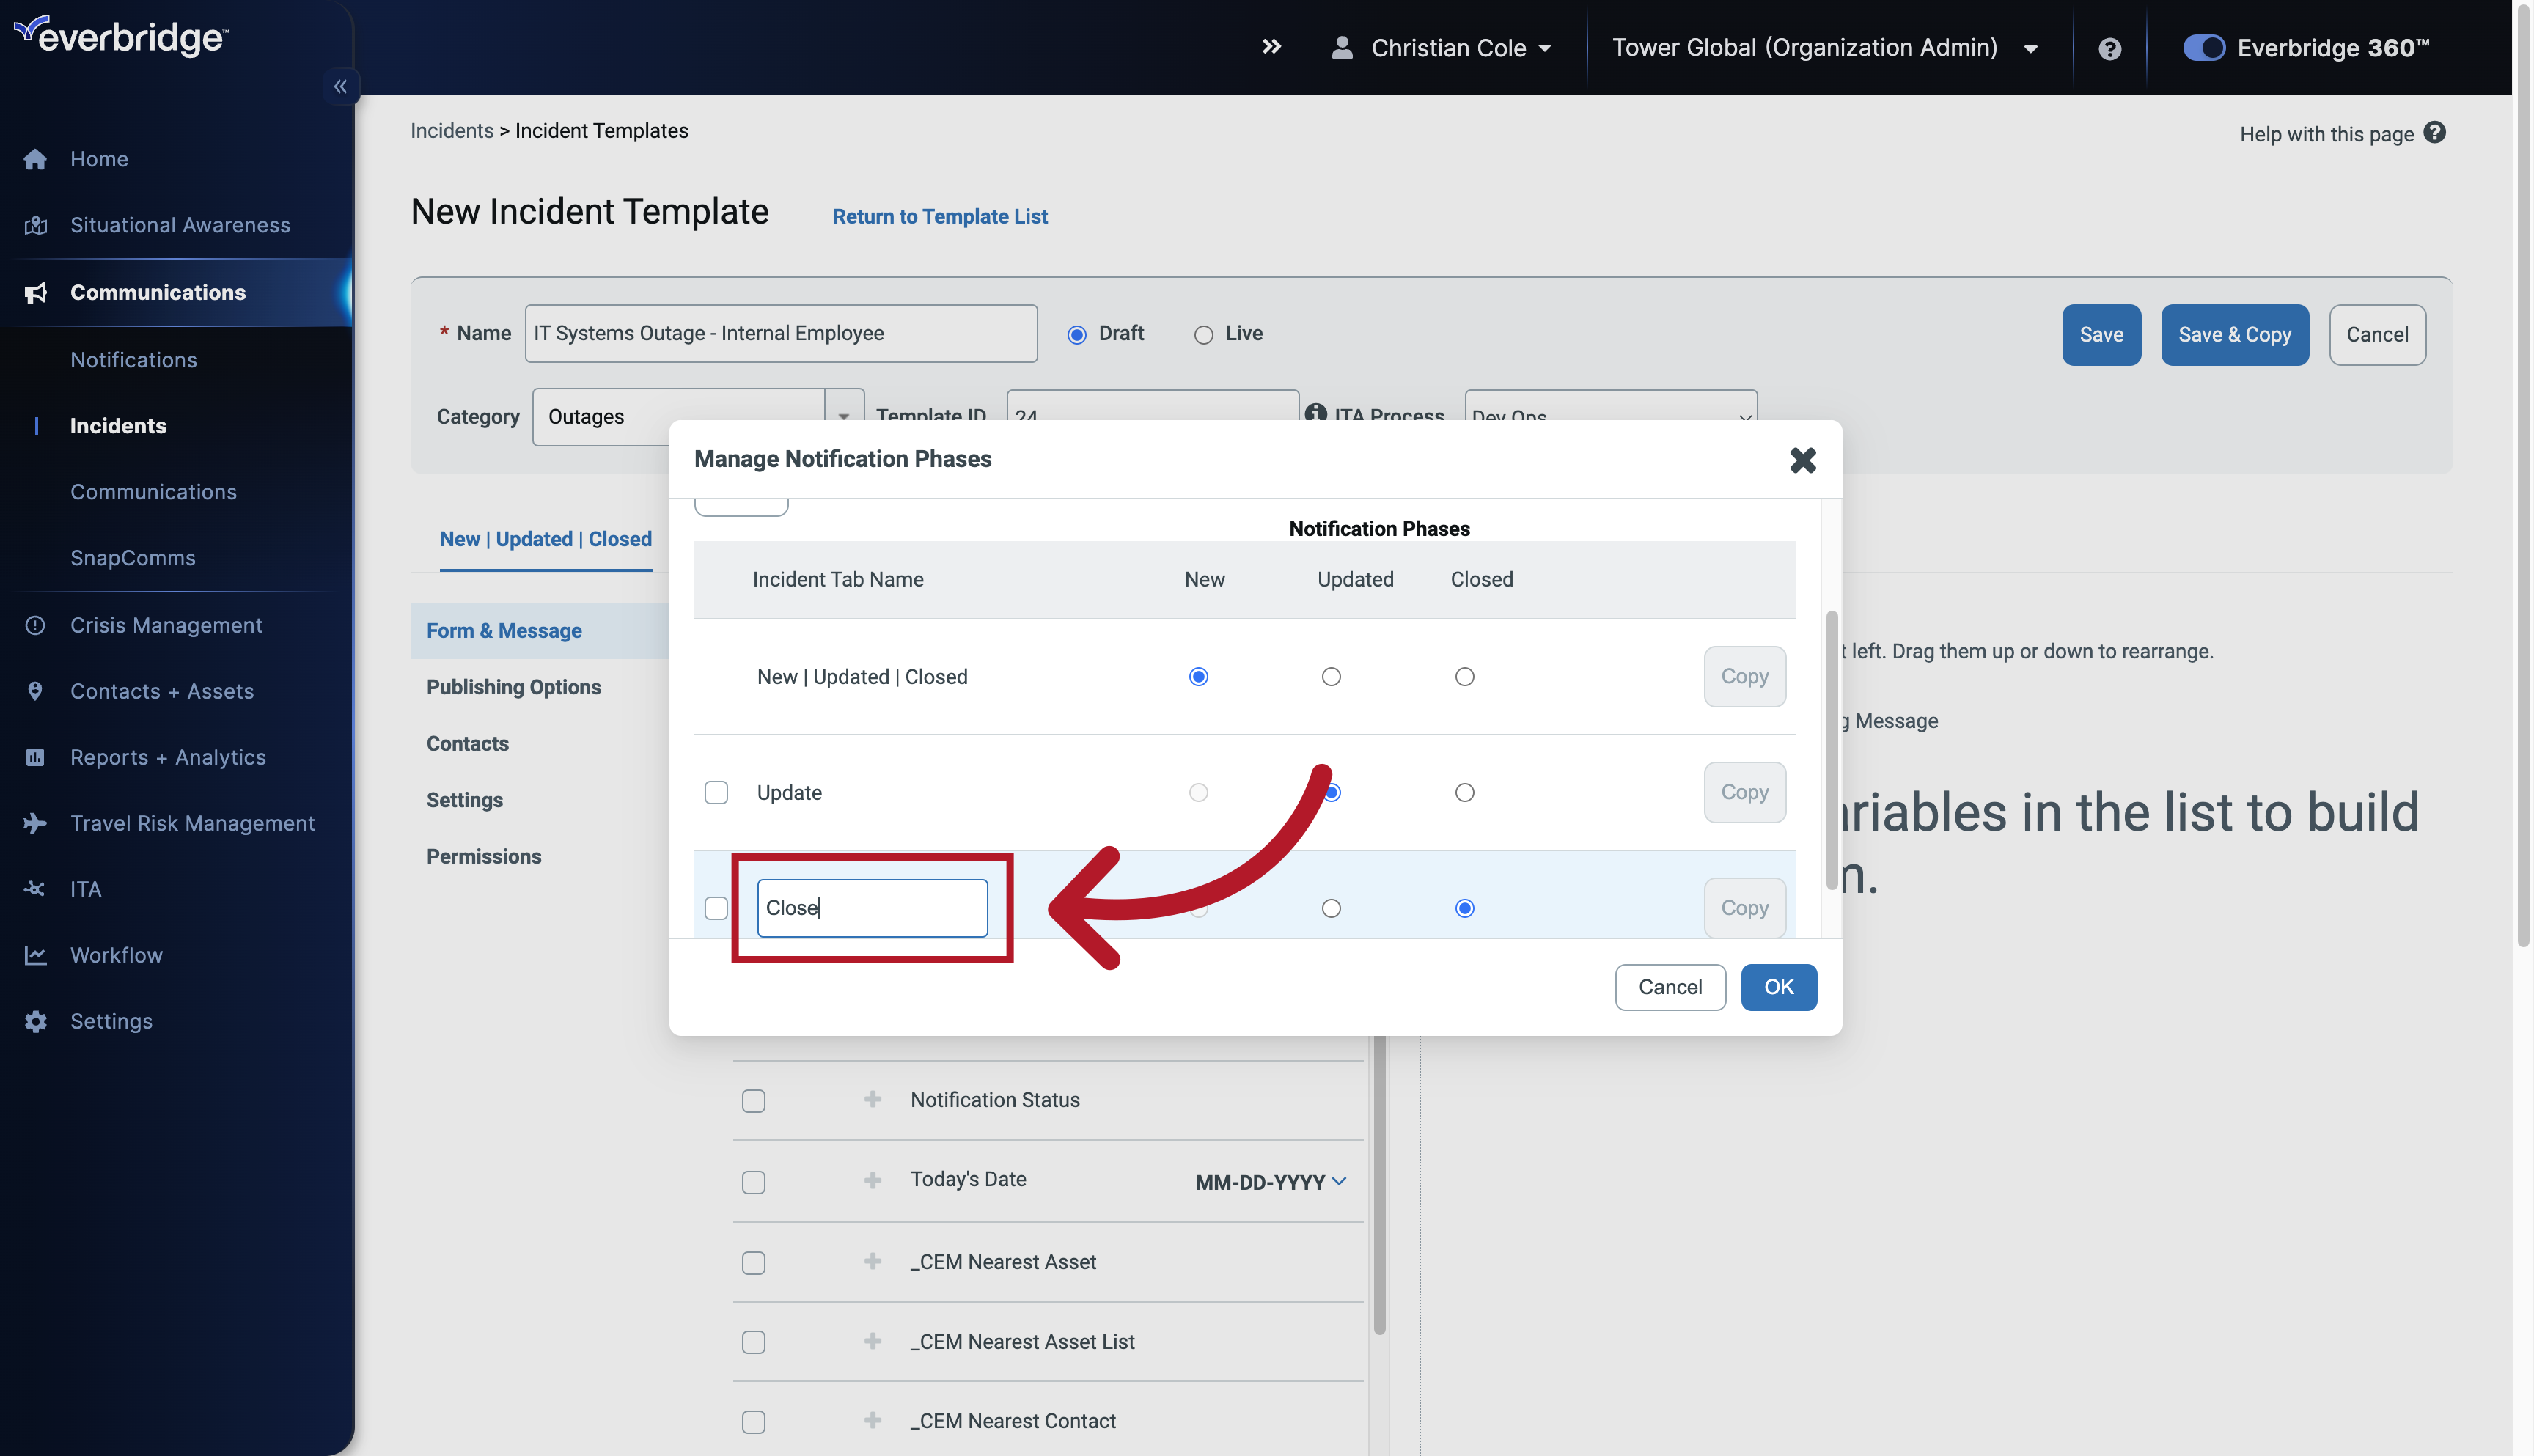
25. Manage Notification Phases
Enter the closure details.
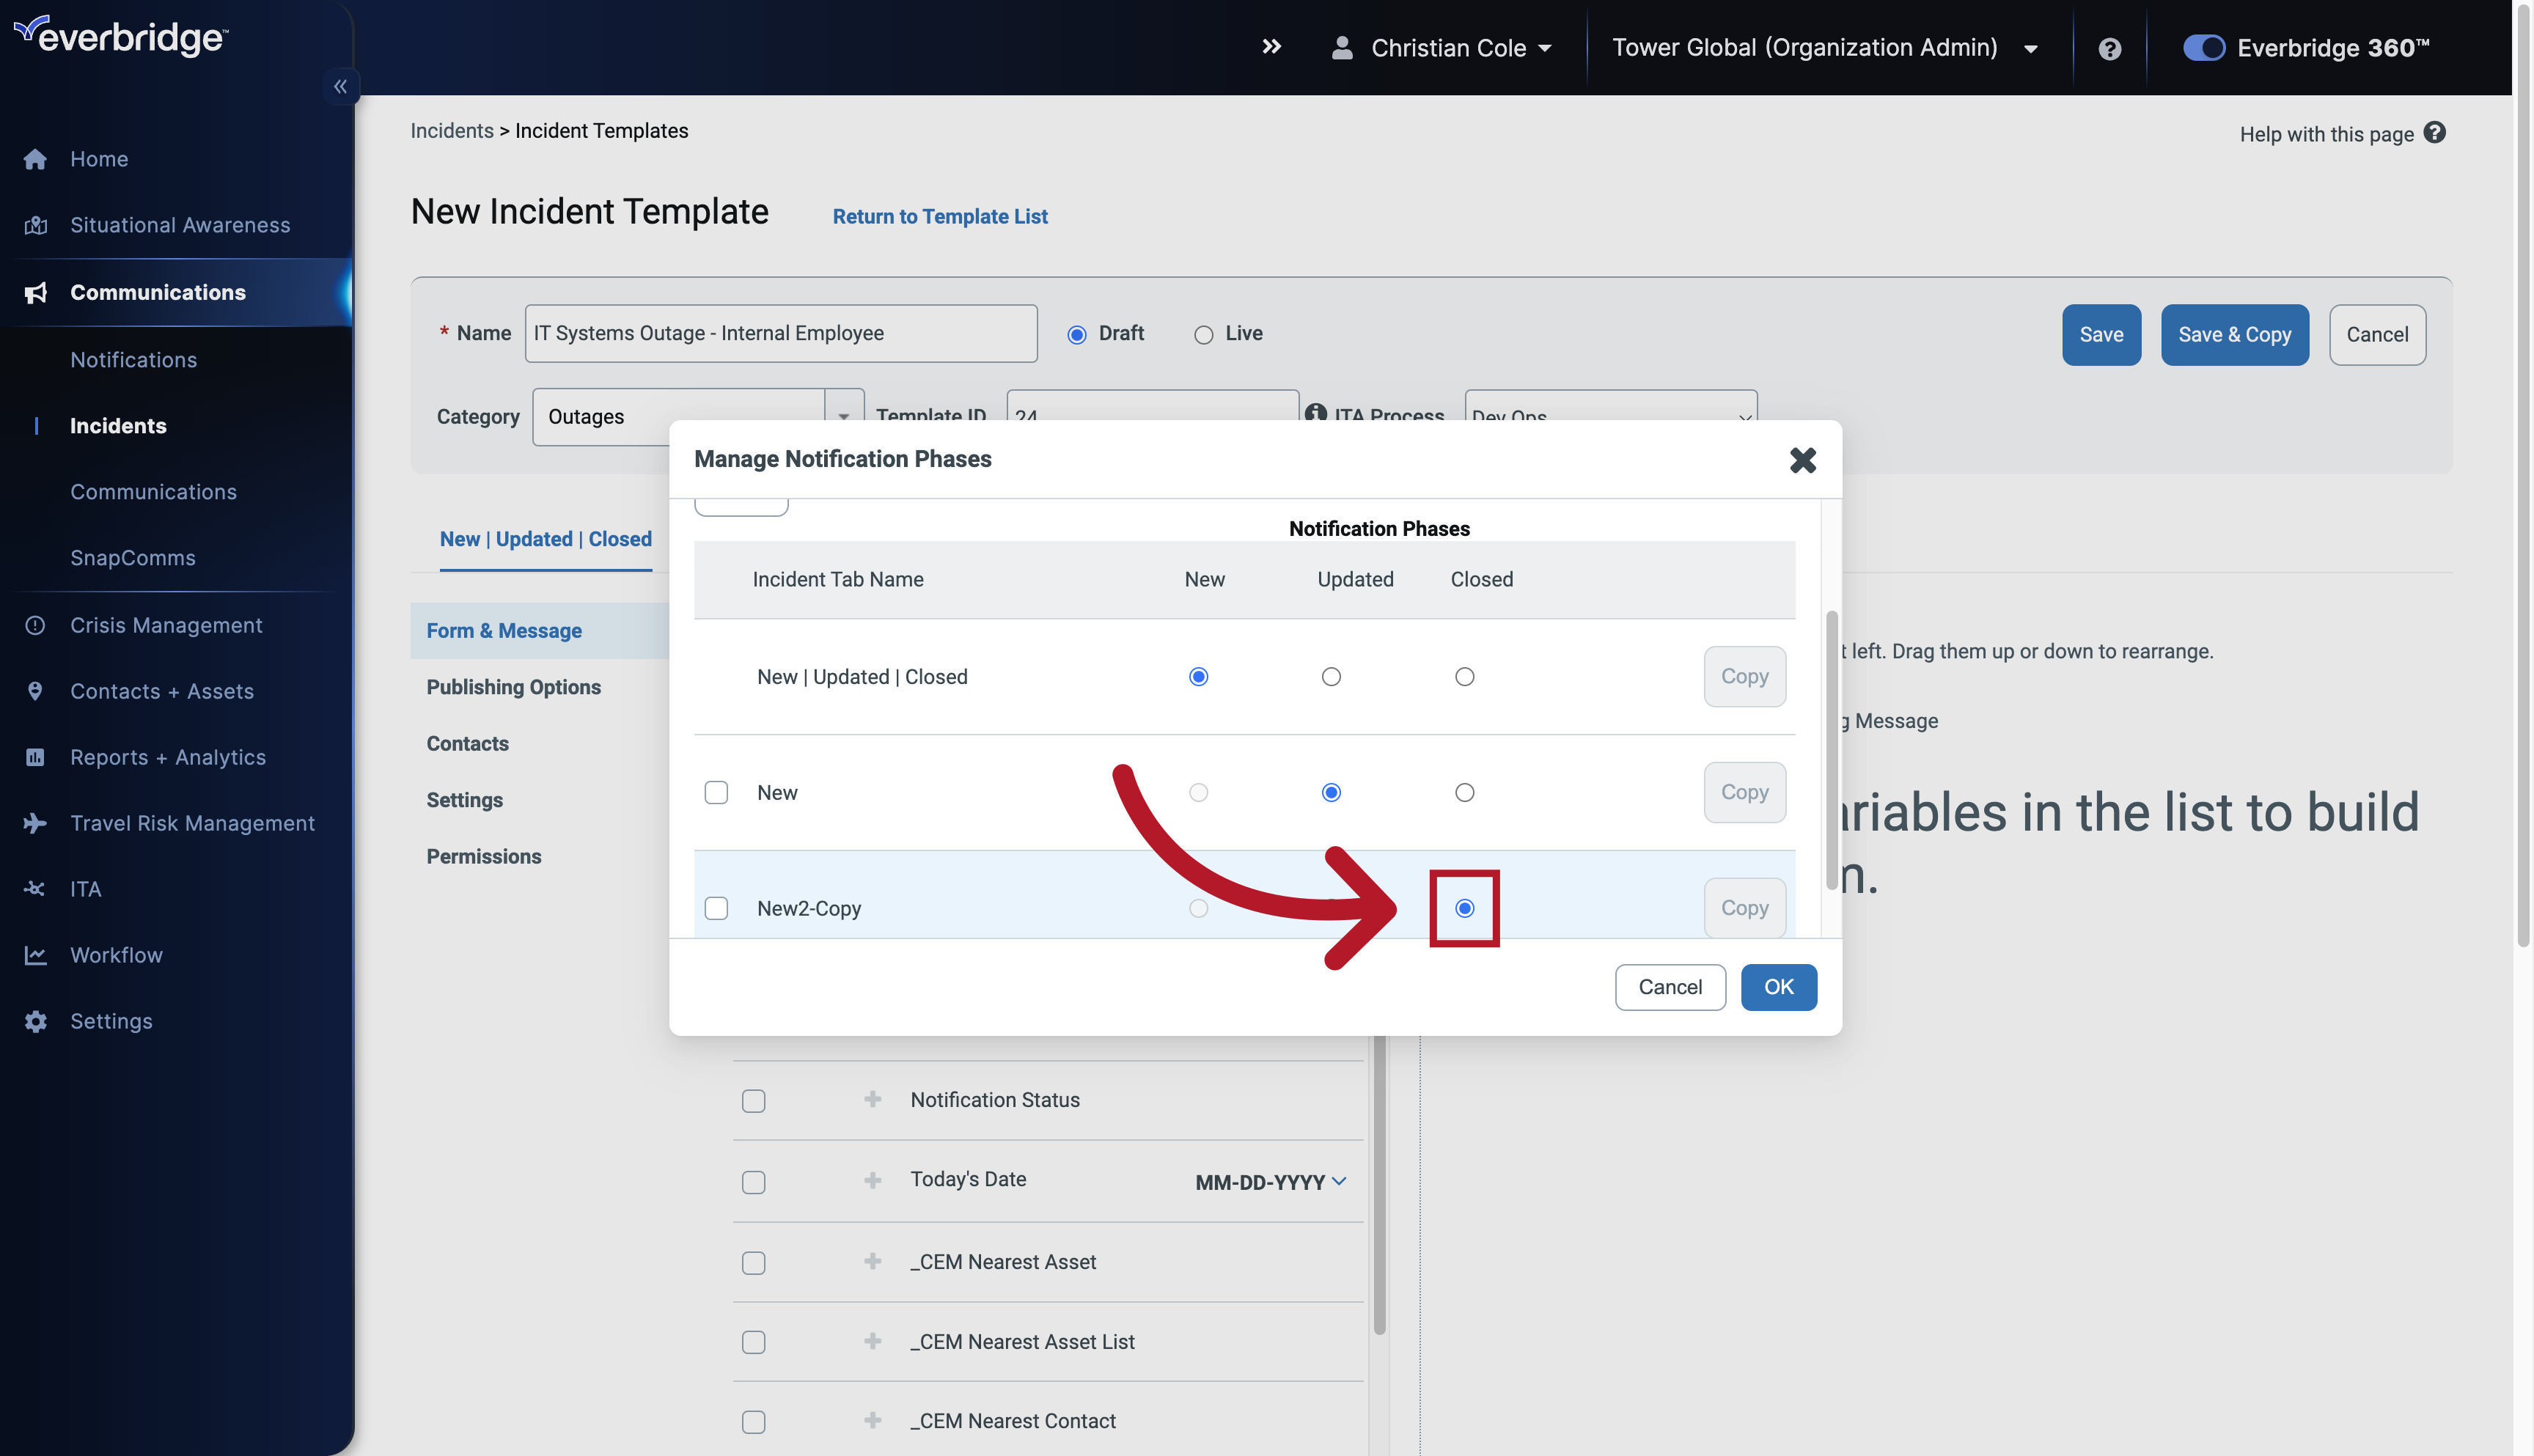
26. Manage Notification Phases
Enter the update information.
27. Manage Notification Phases
Enter the closing details.
28. Save Notification Phases
Keep in mind. You will need to save a configuration for each notification phase you create.
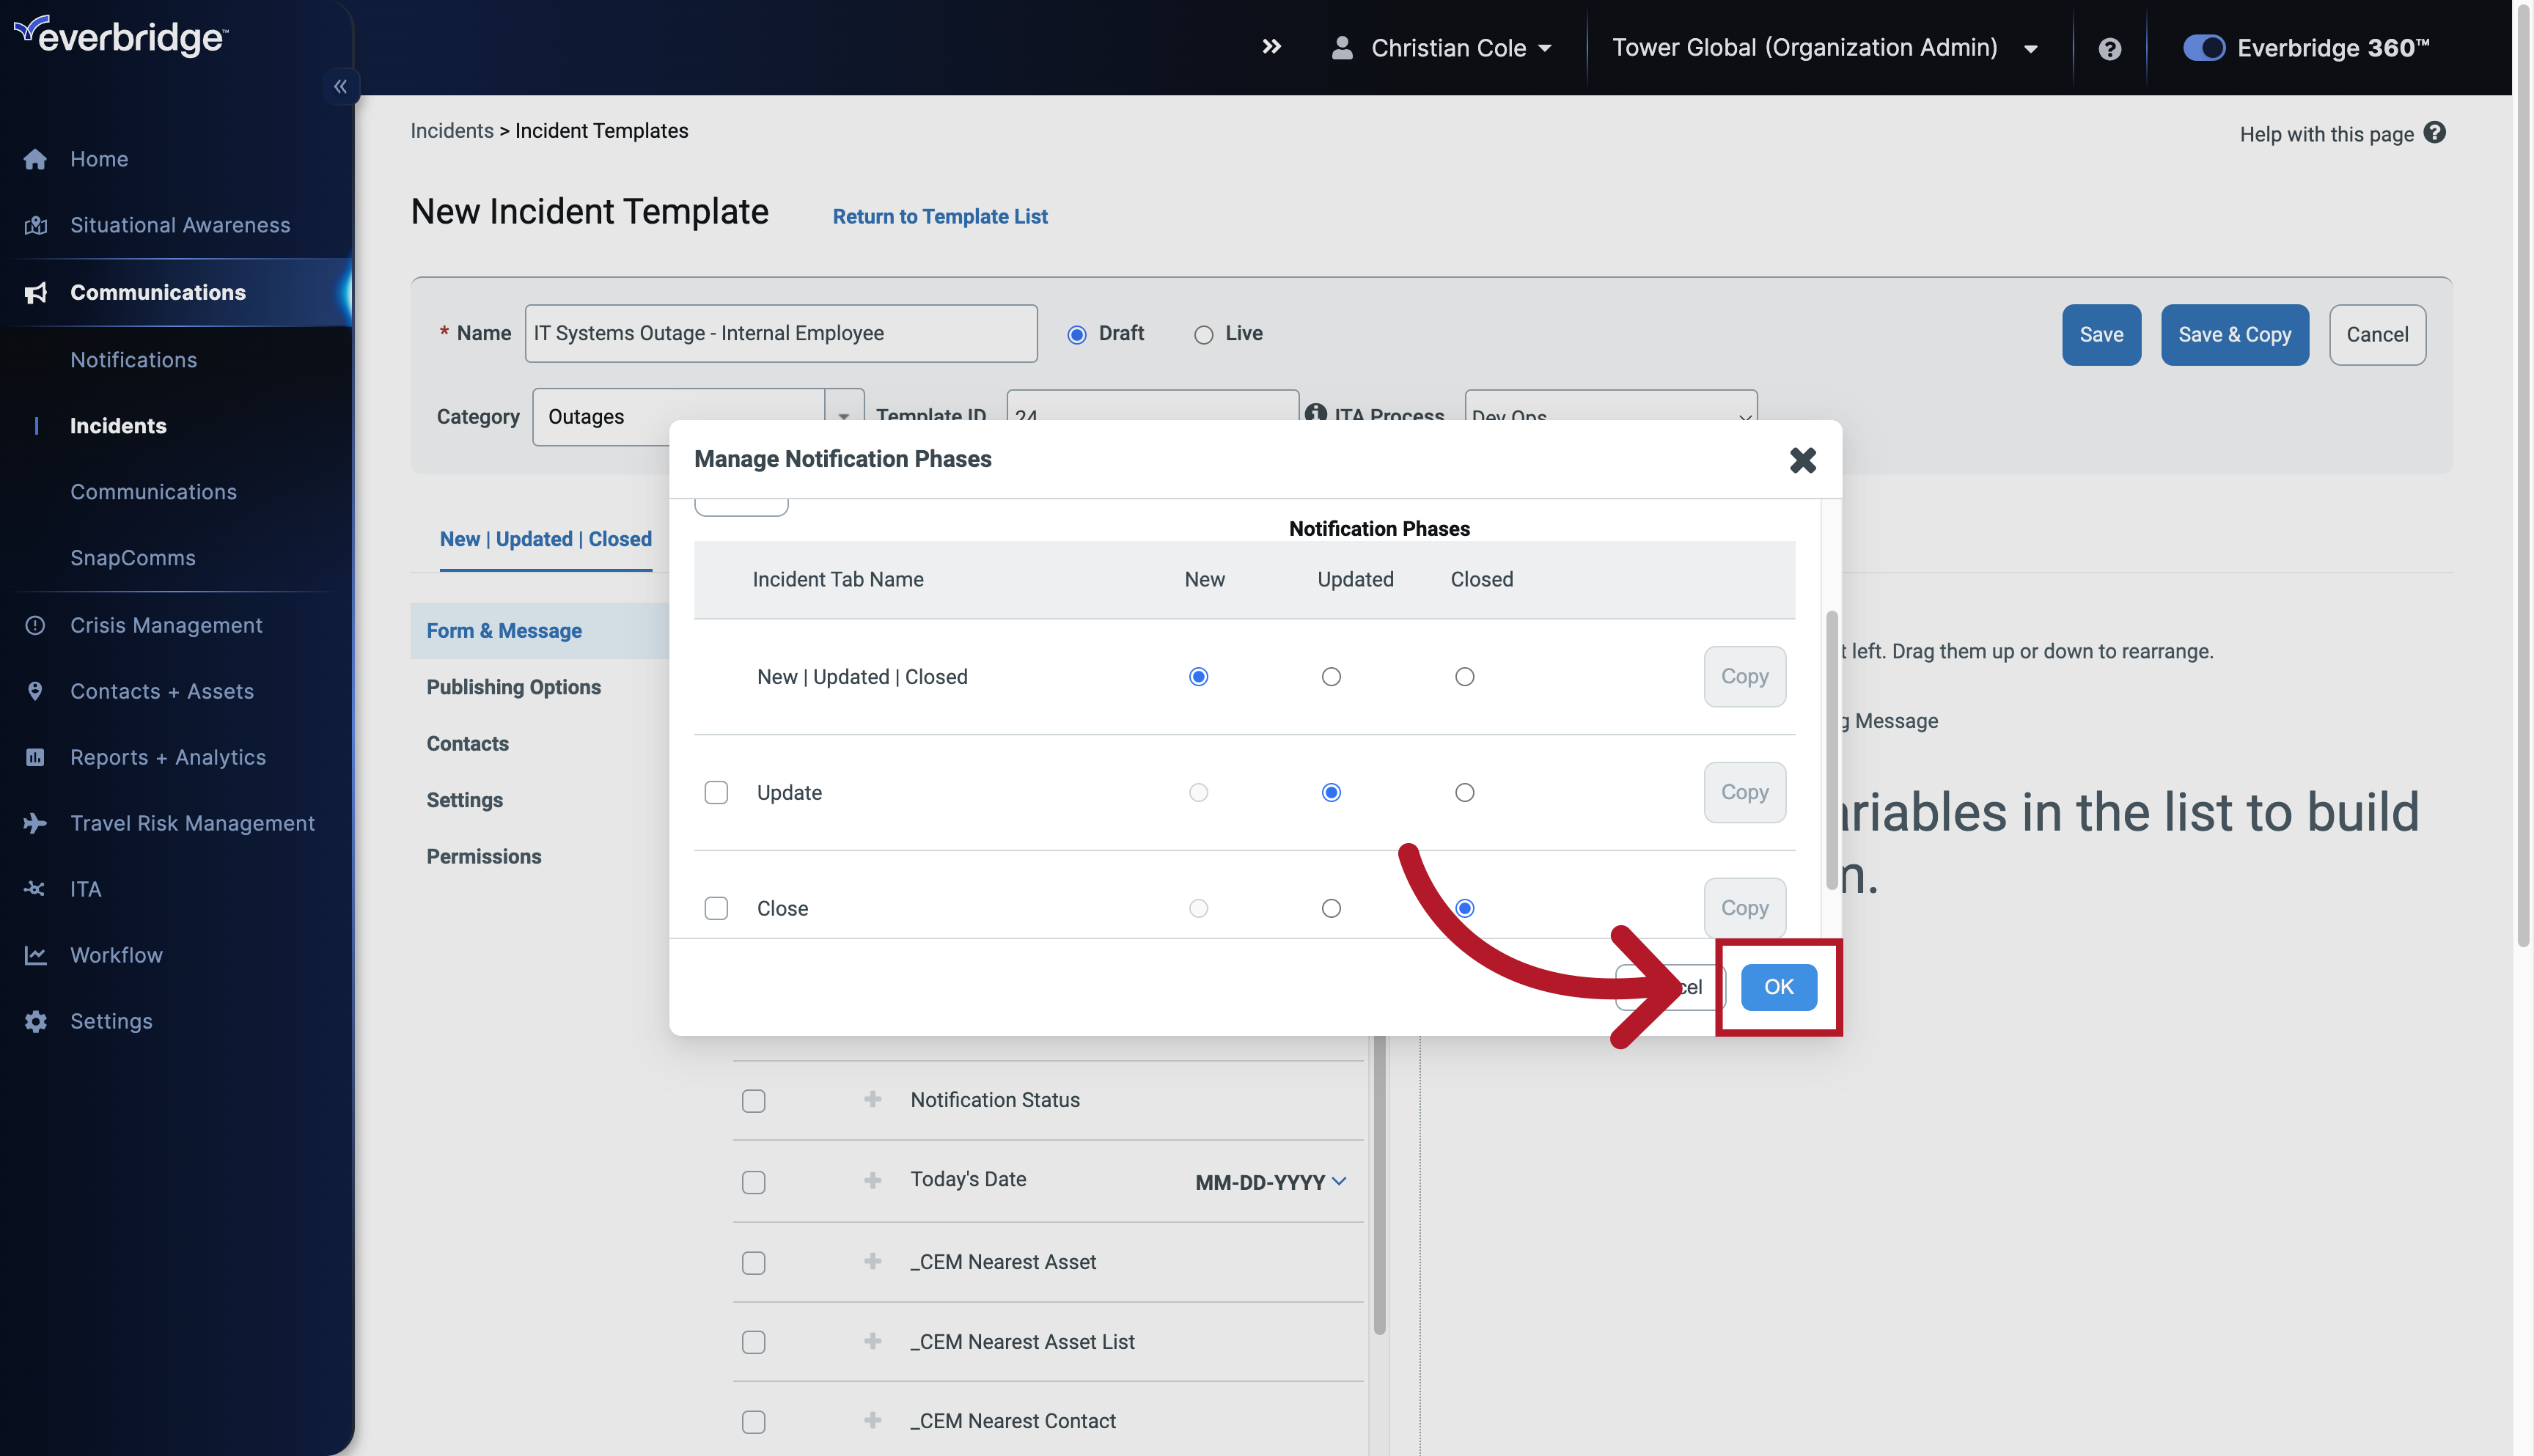
29. Notification Phases
For our example, we will need to configure each of our three notification phases.
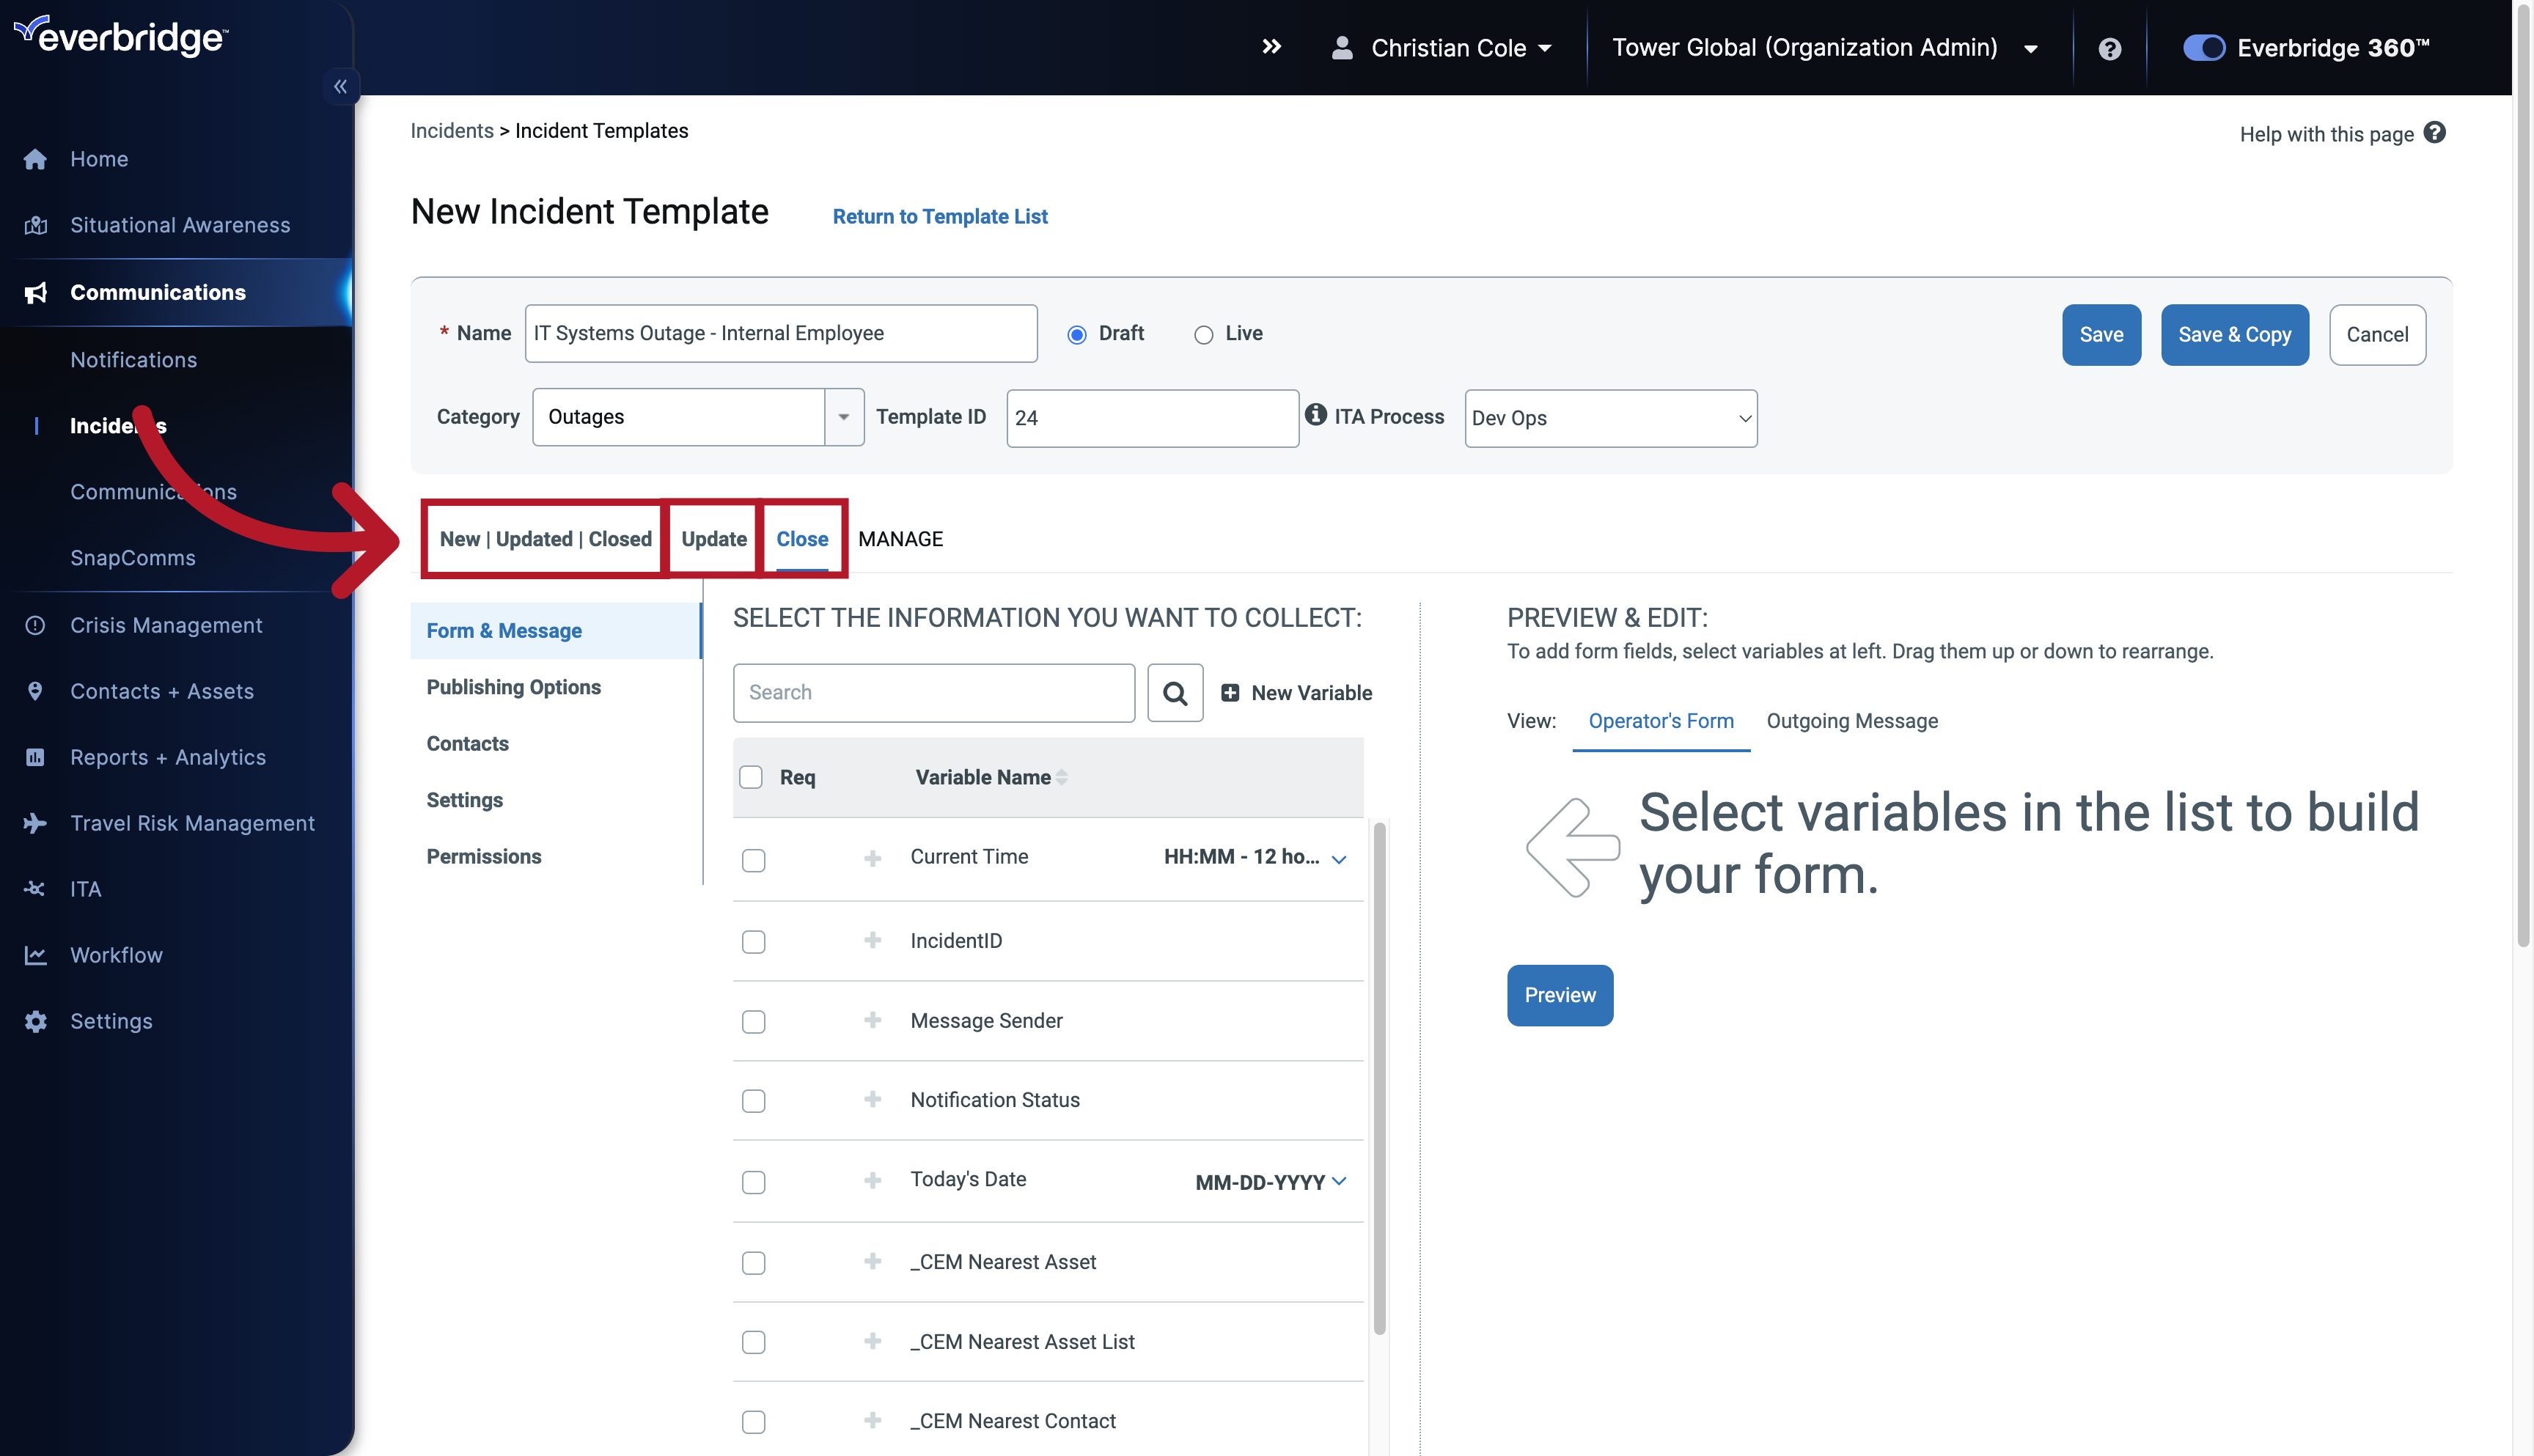
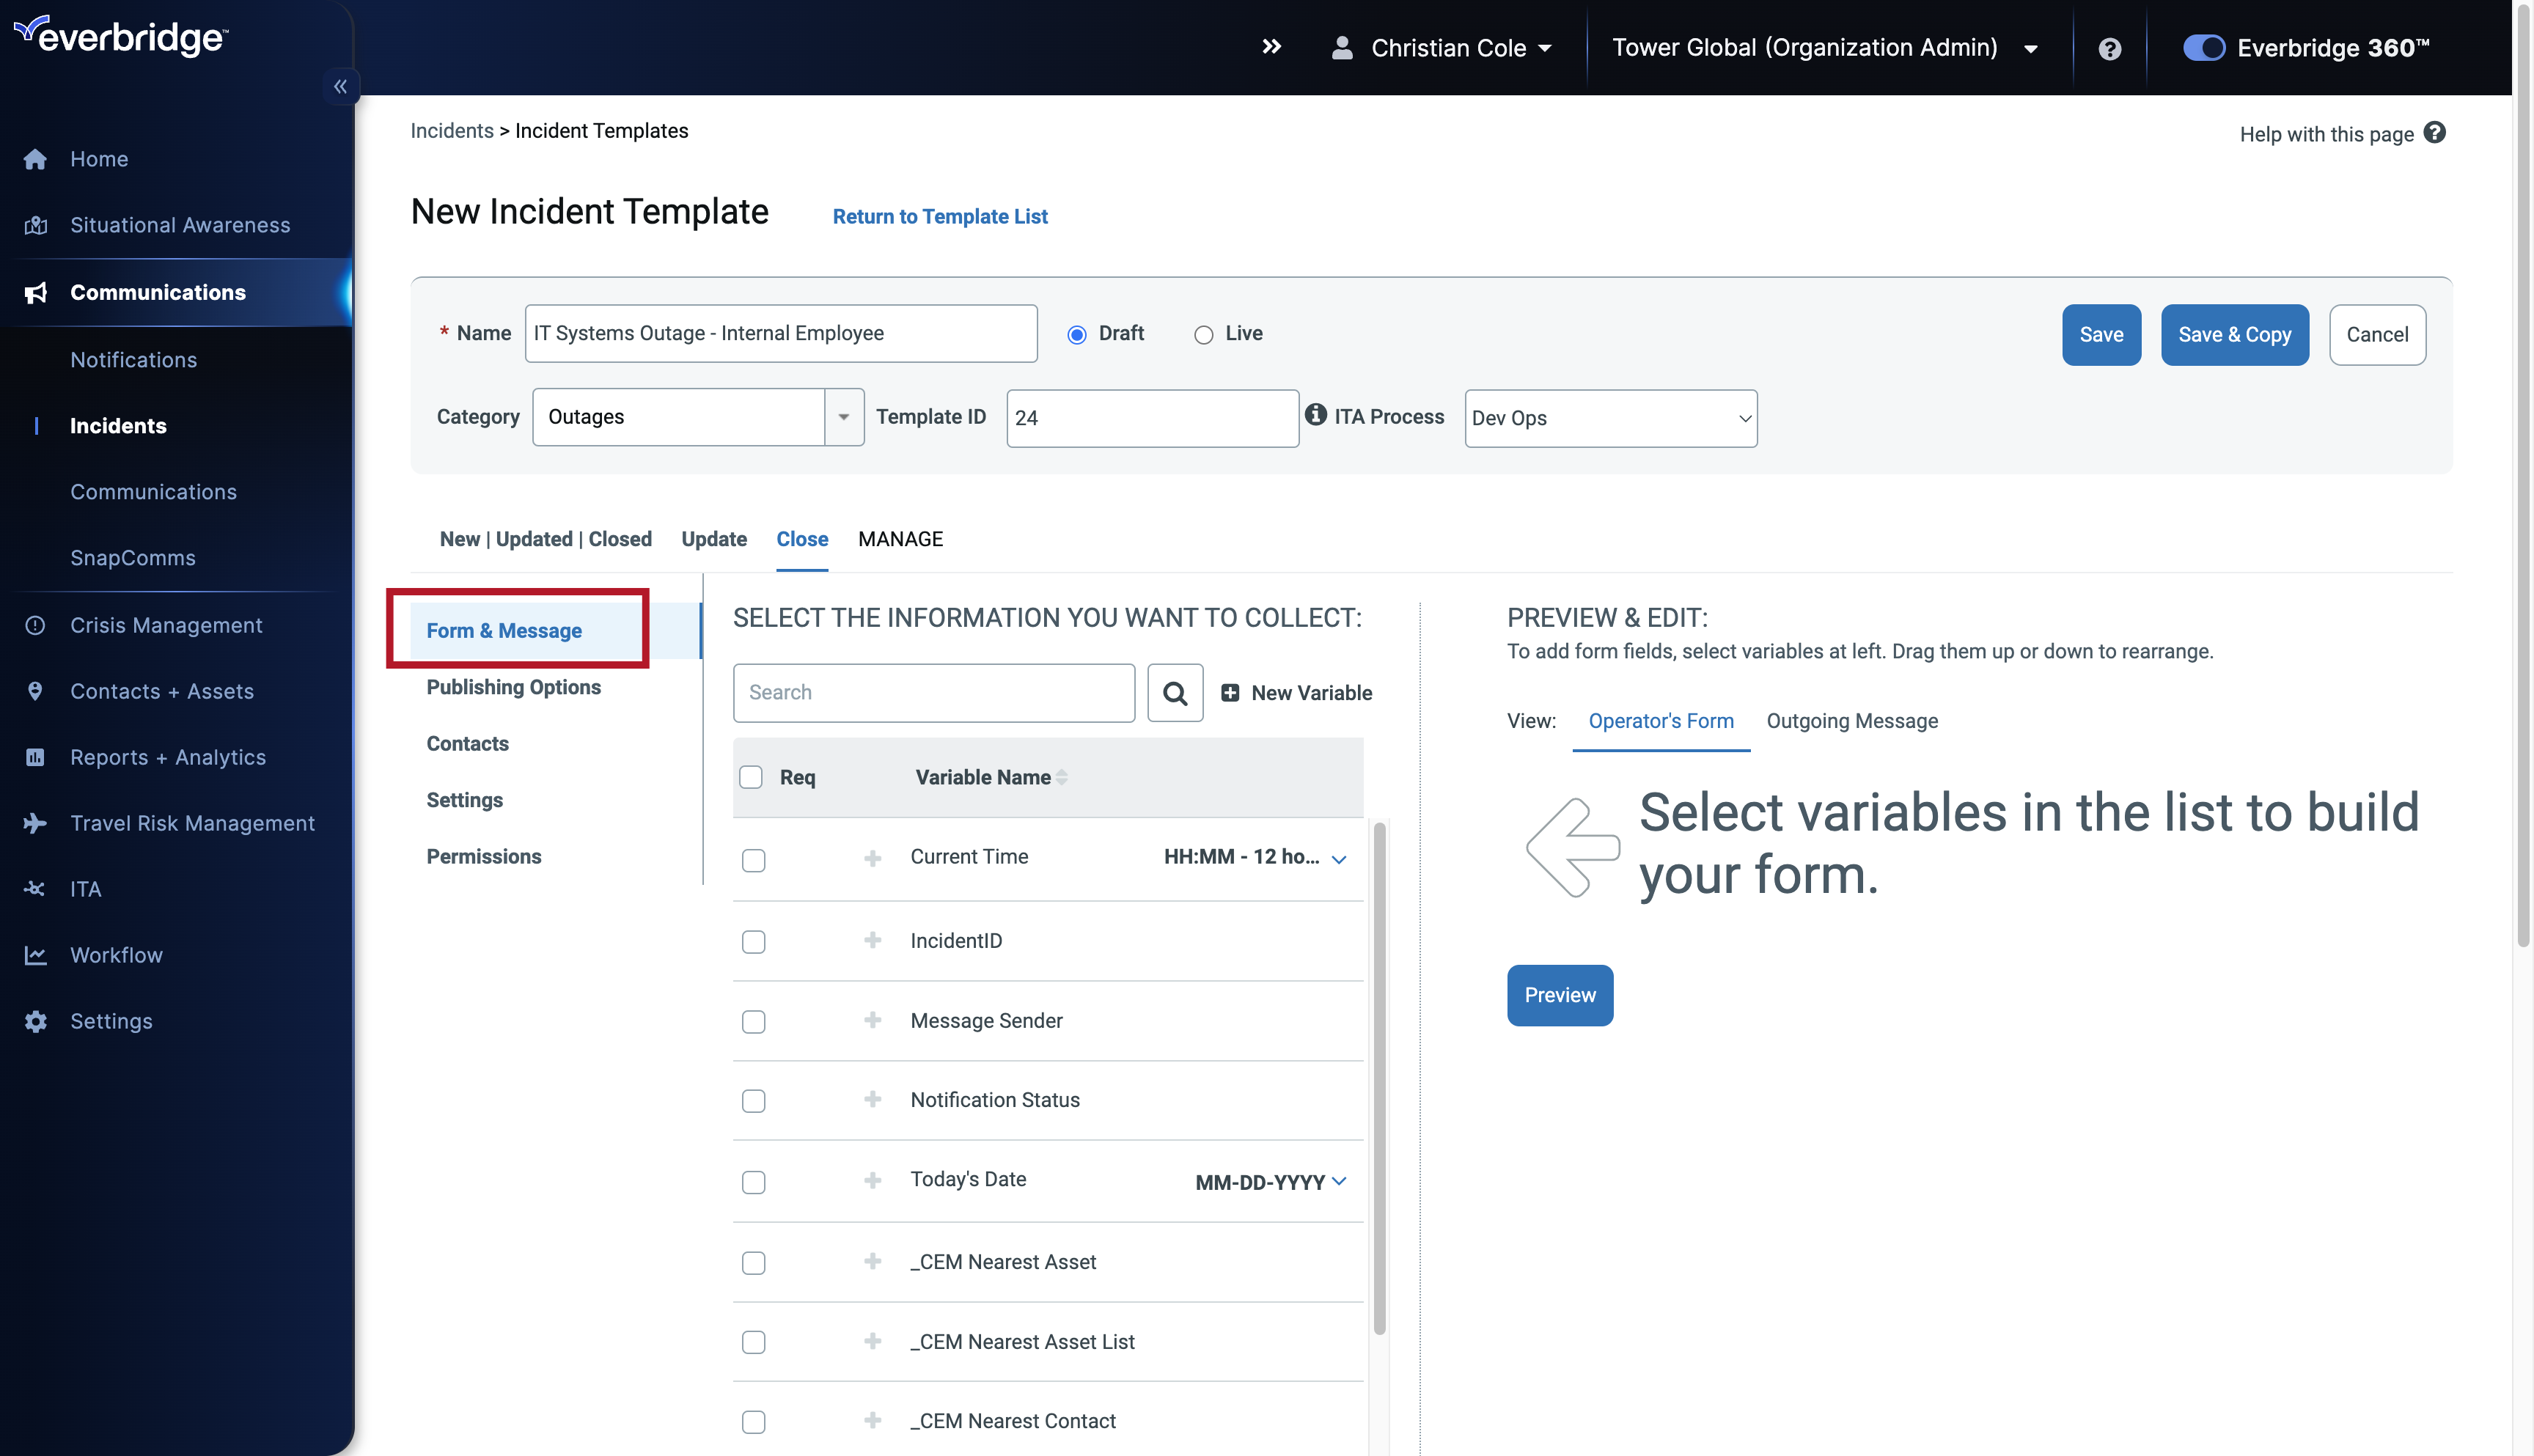
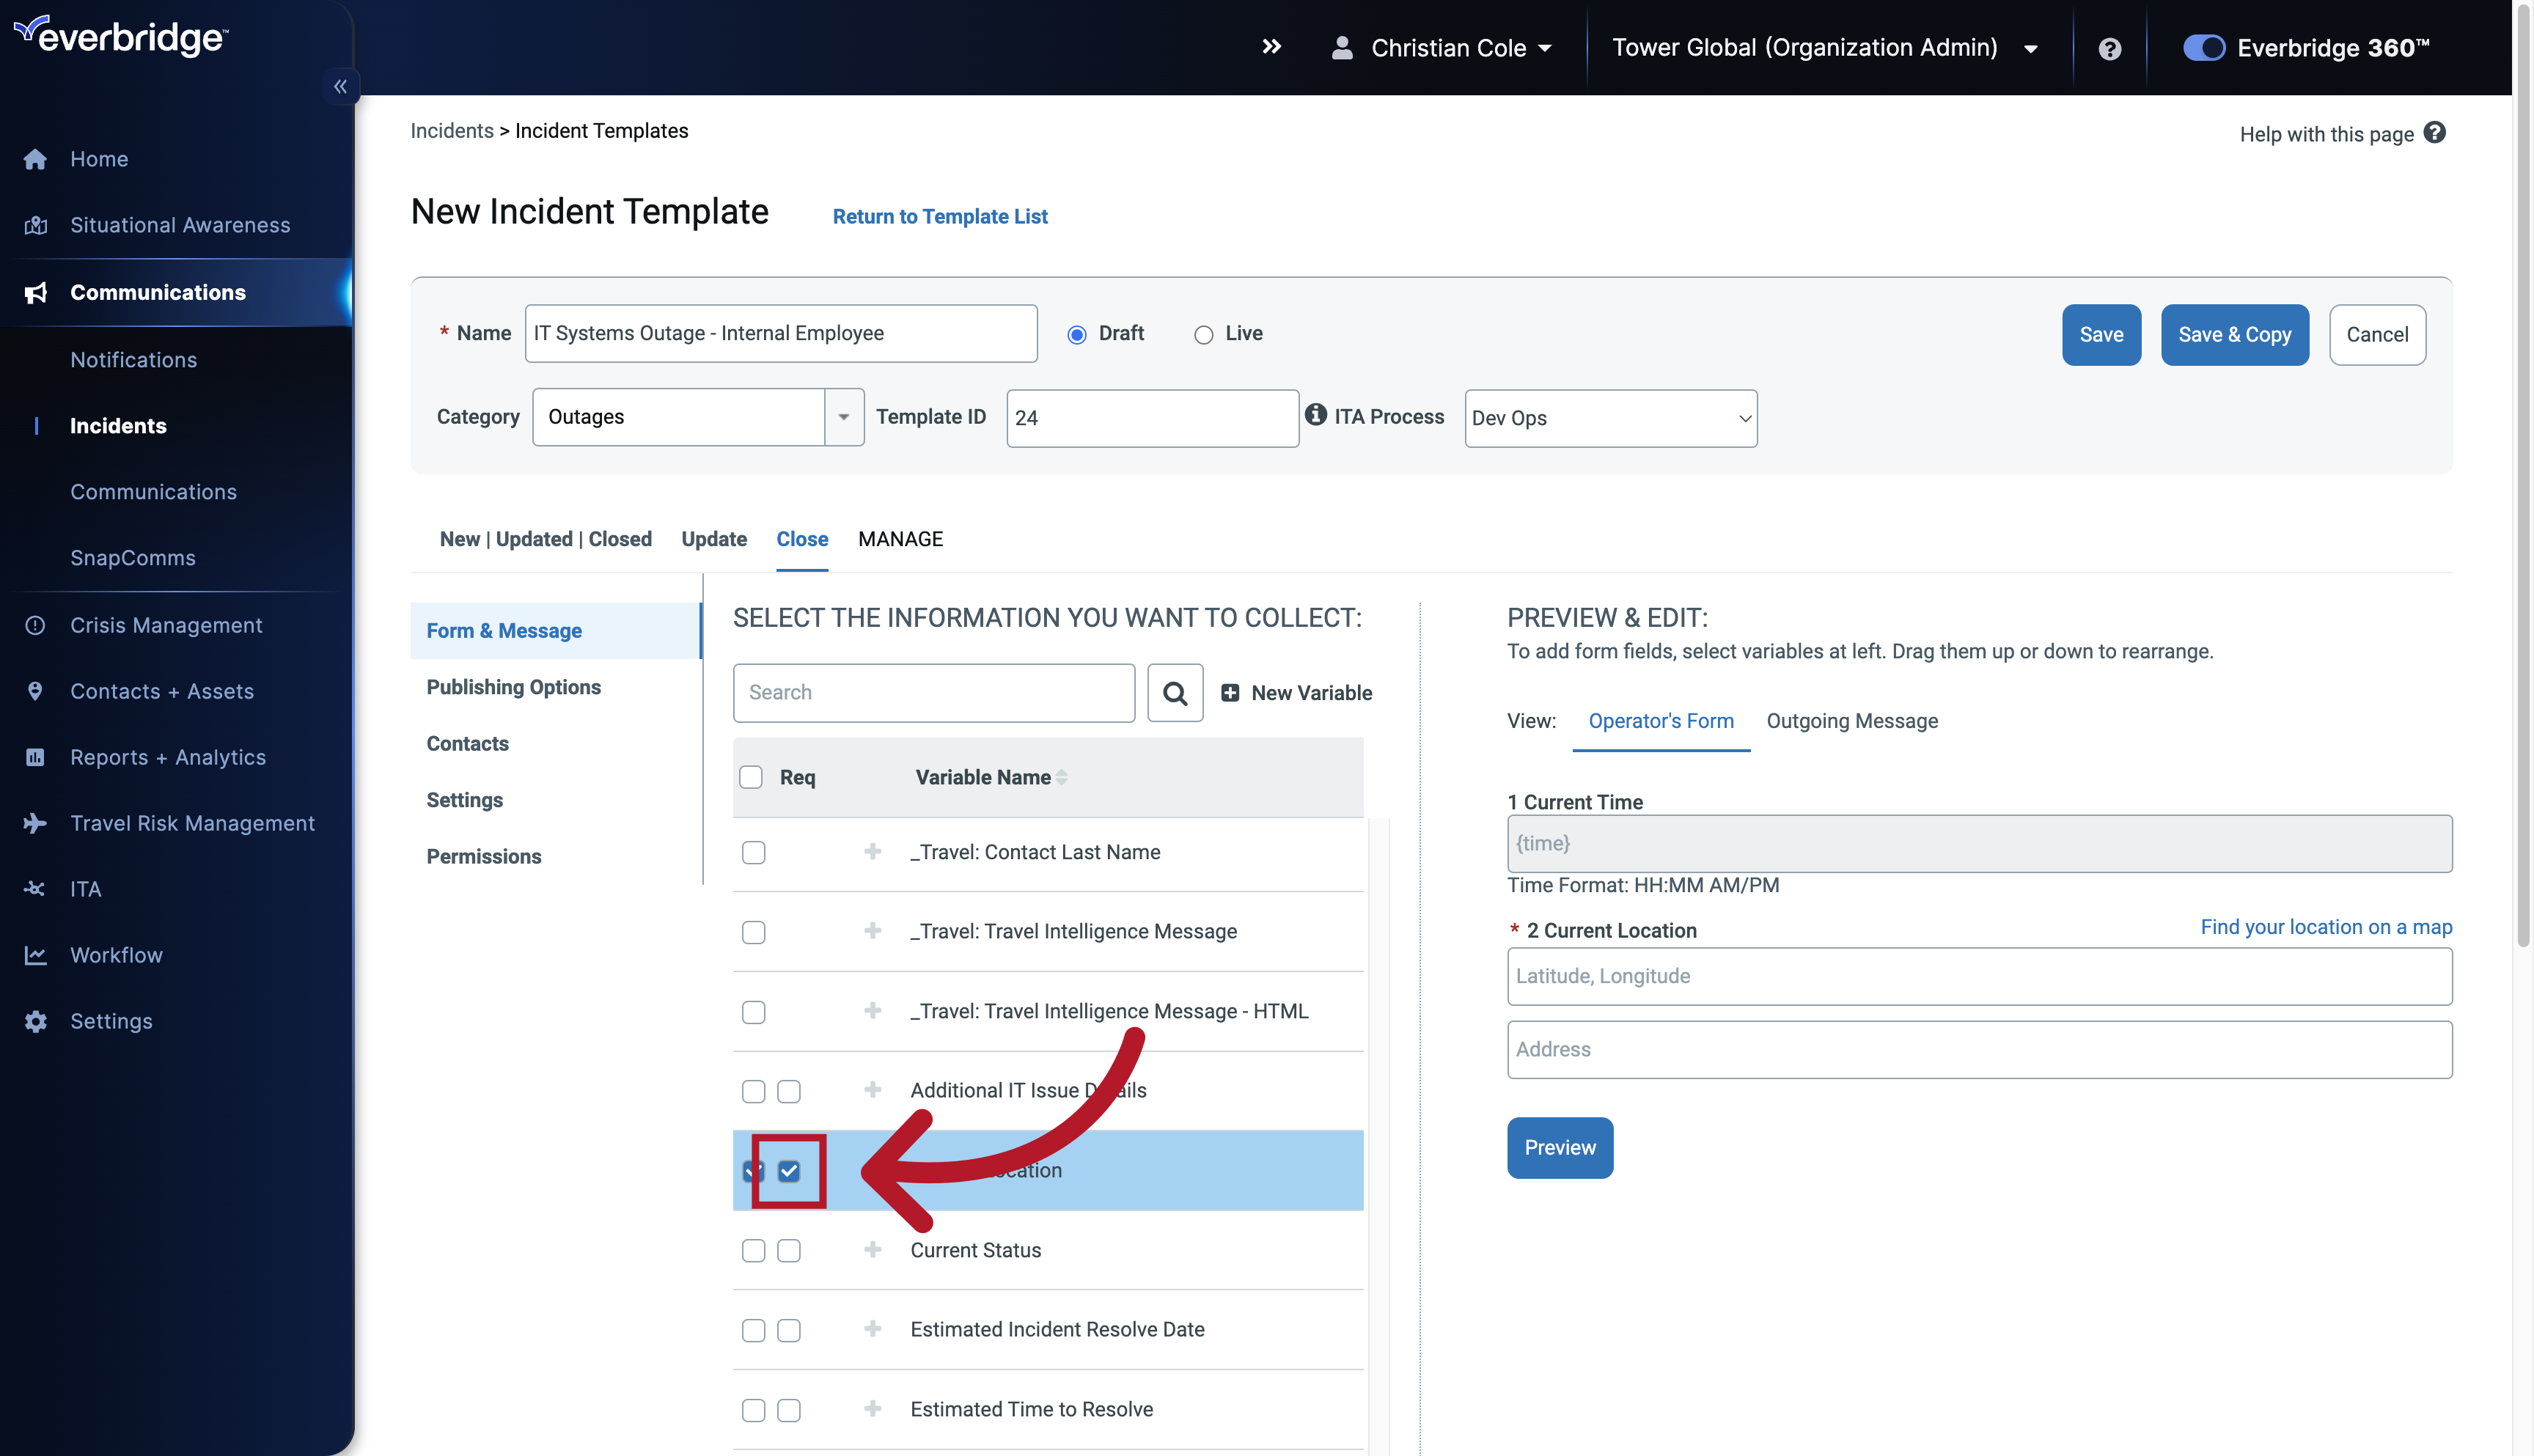
30. Form & Message
The Form and Message options guide the content and structure of your Incident Notification.
31. Variables
Let's begin by adding Variables to the Template.
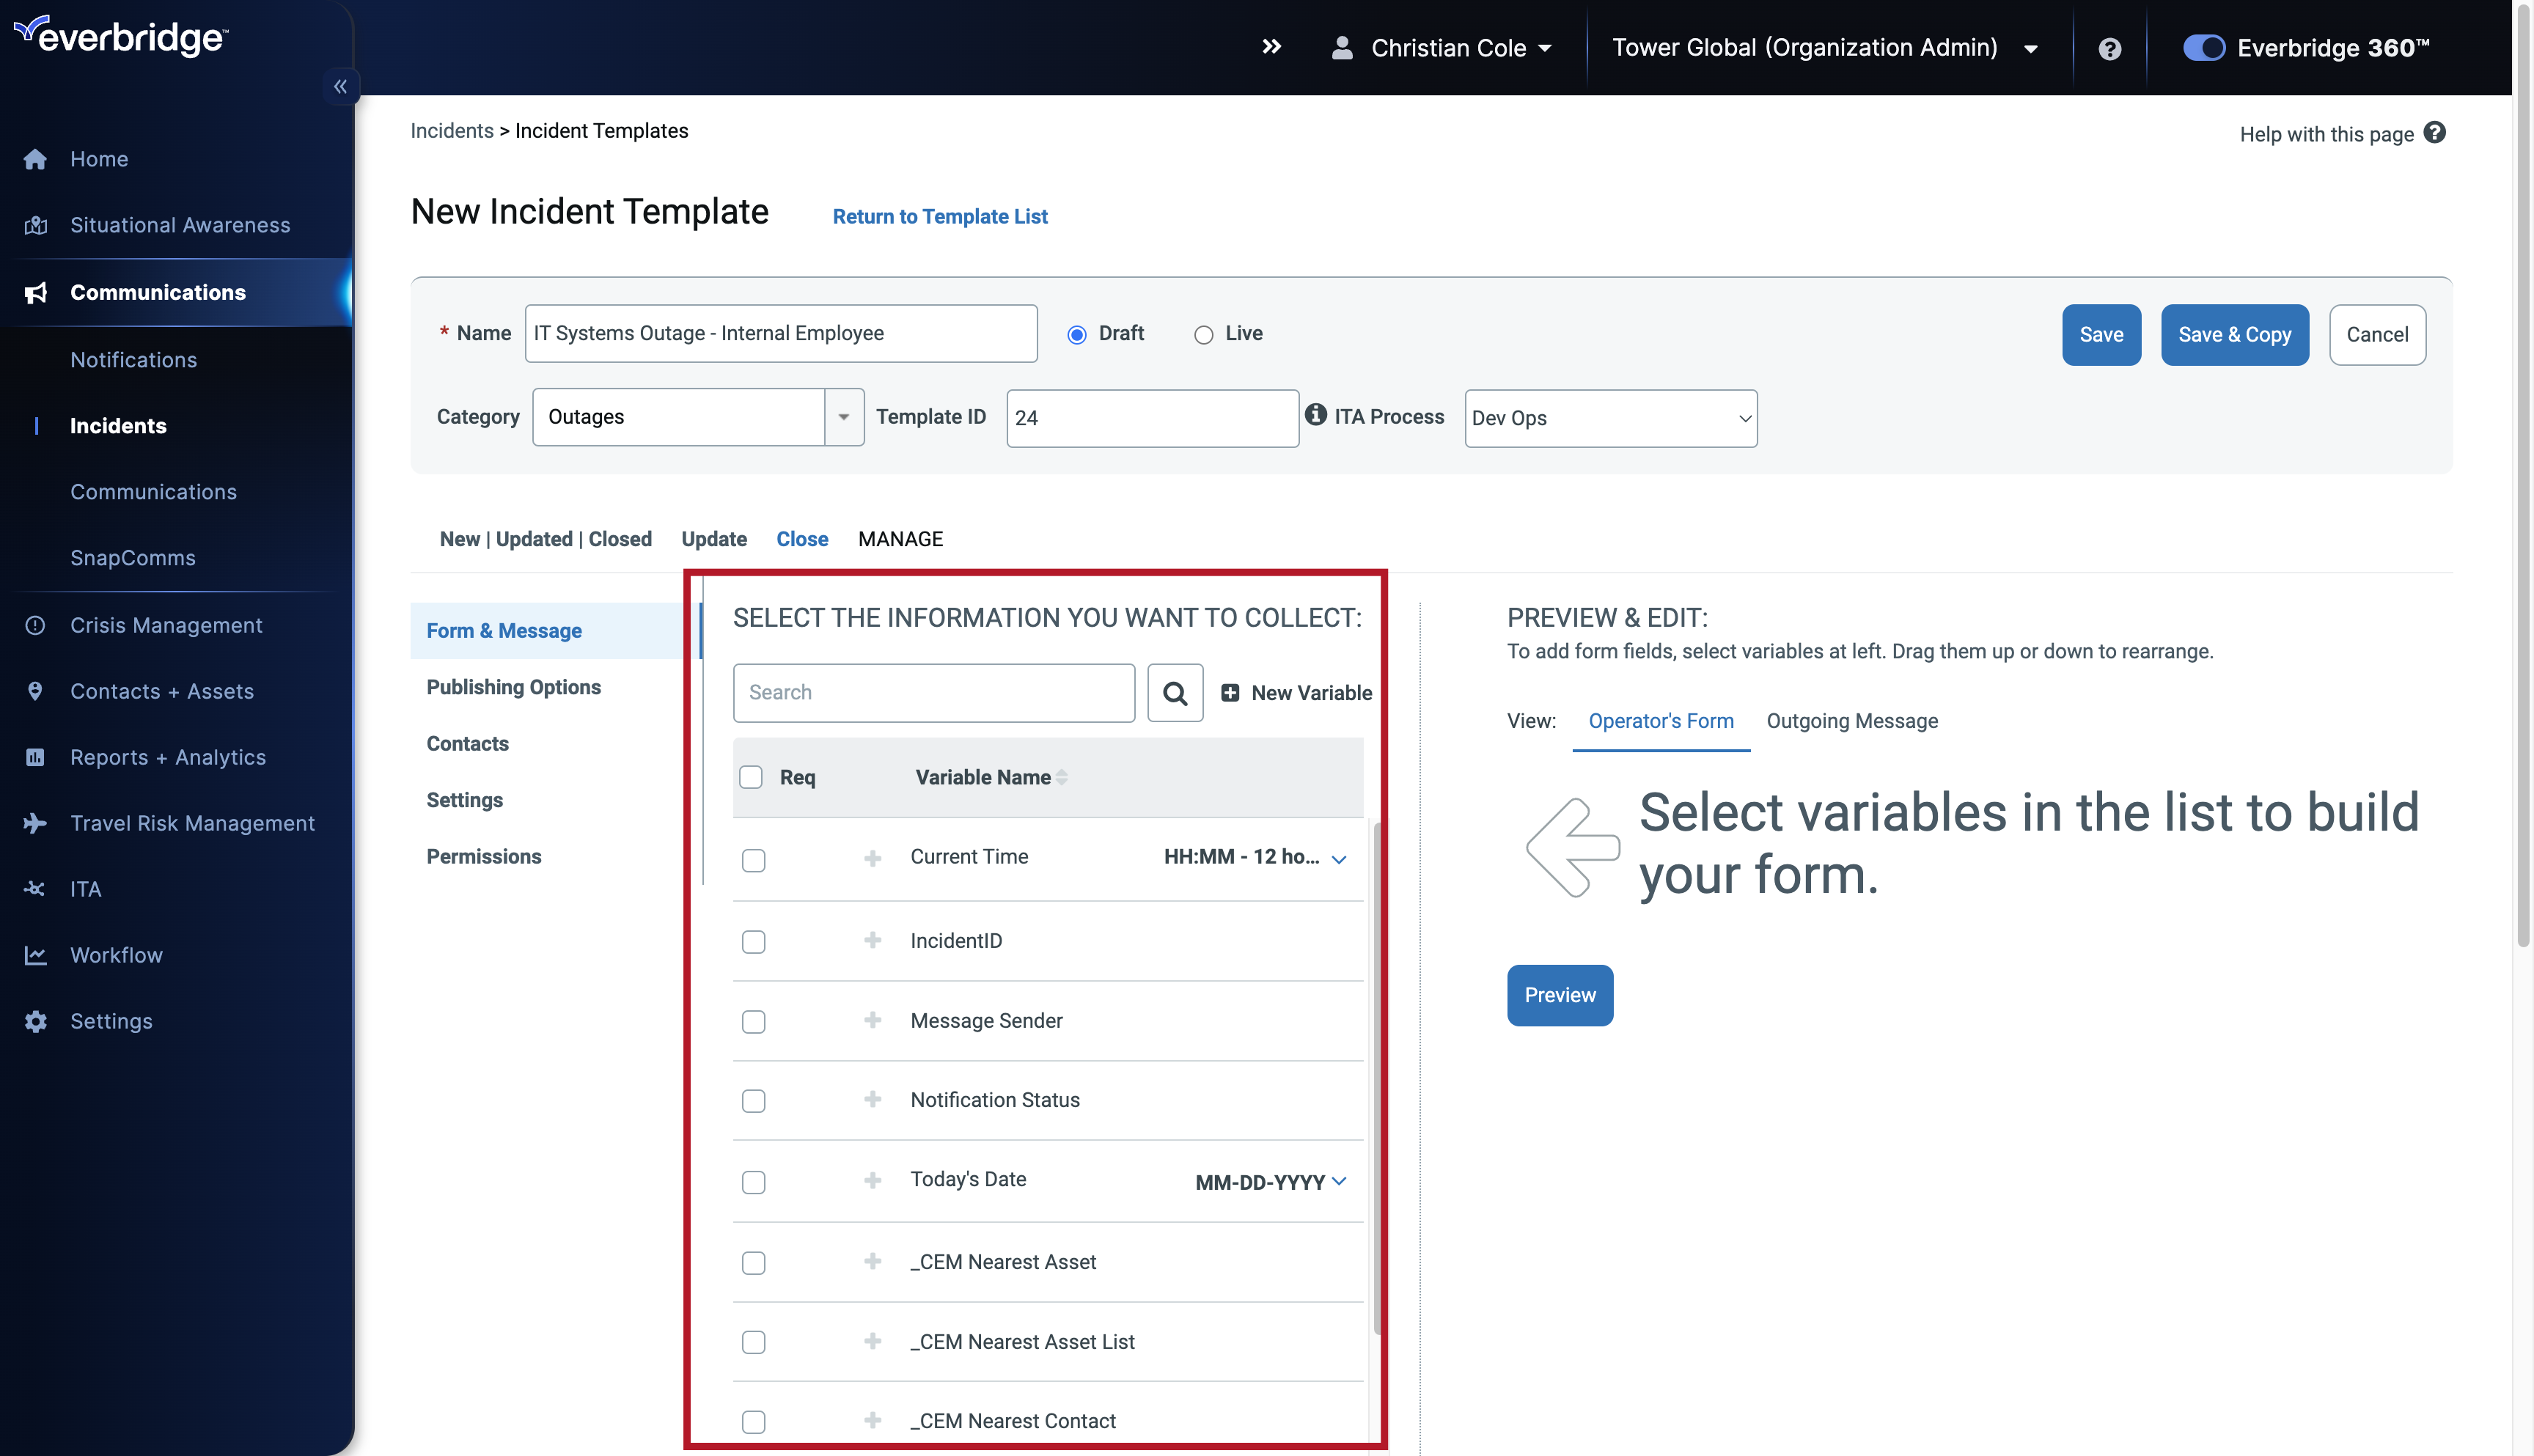
32. Variables
Identify which Variables need to be included.
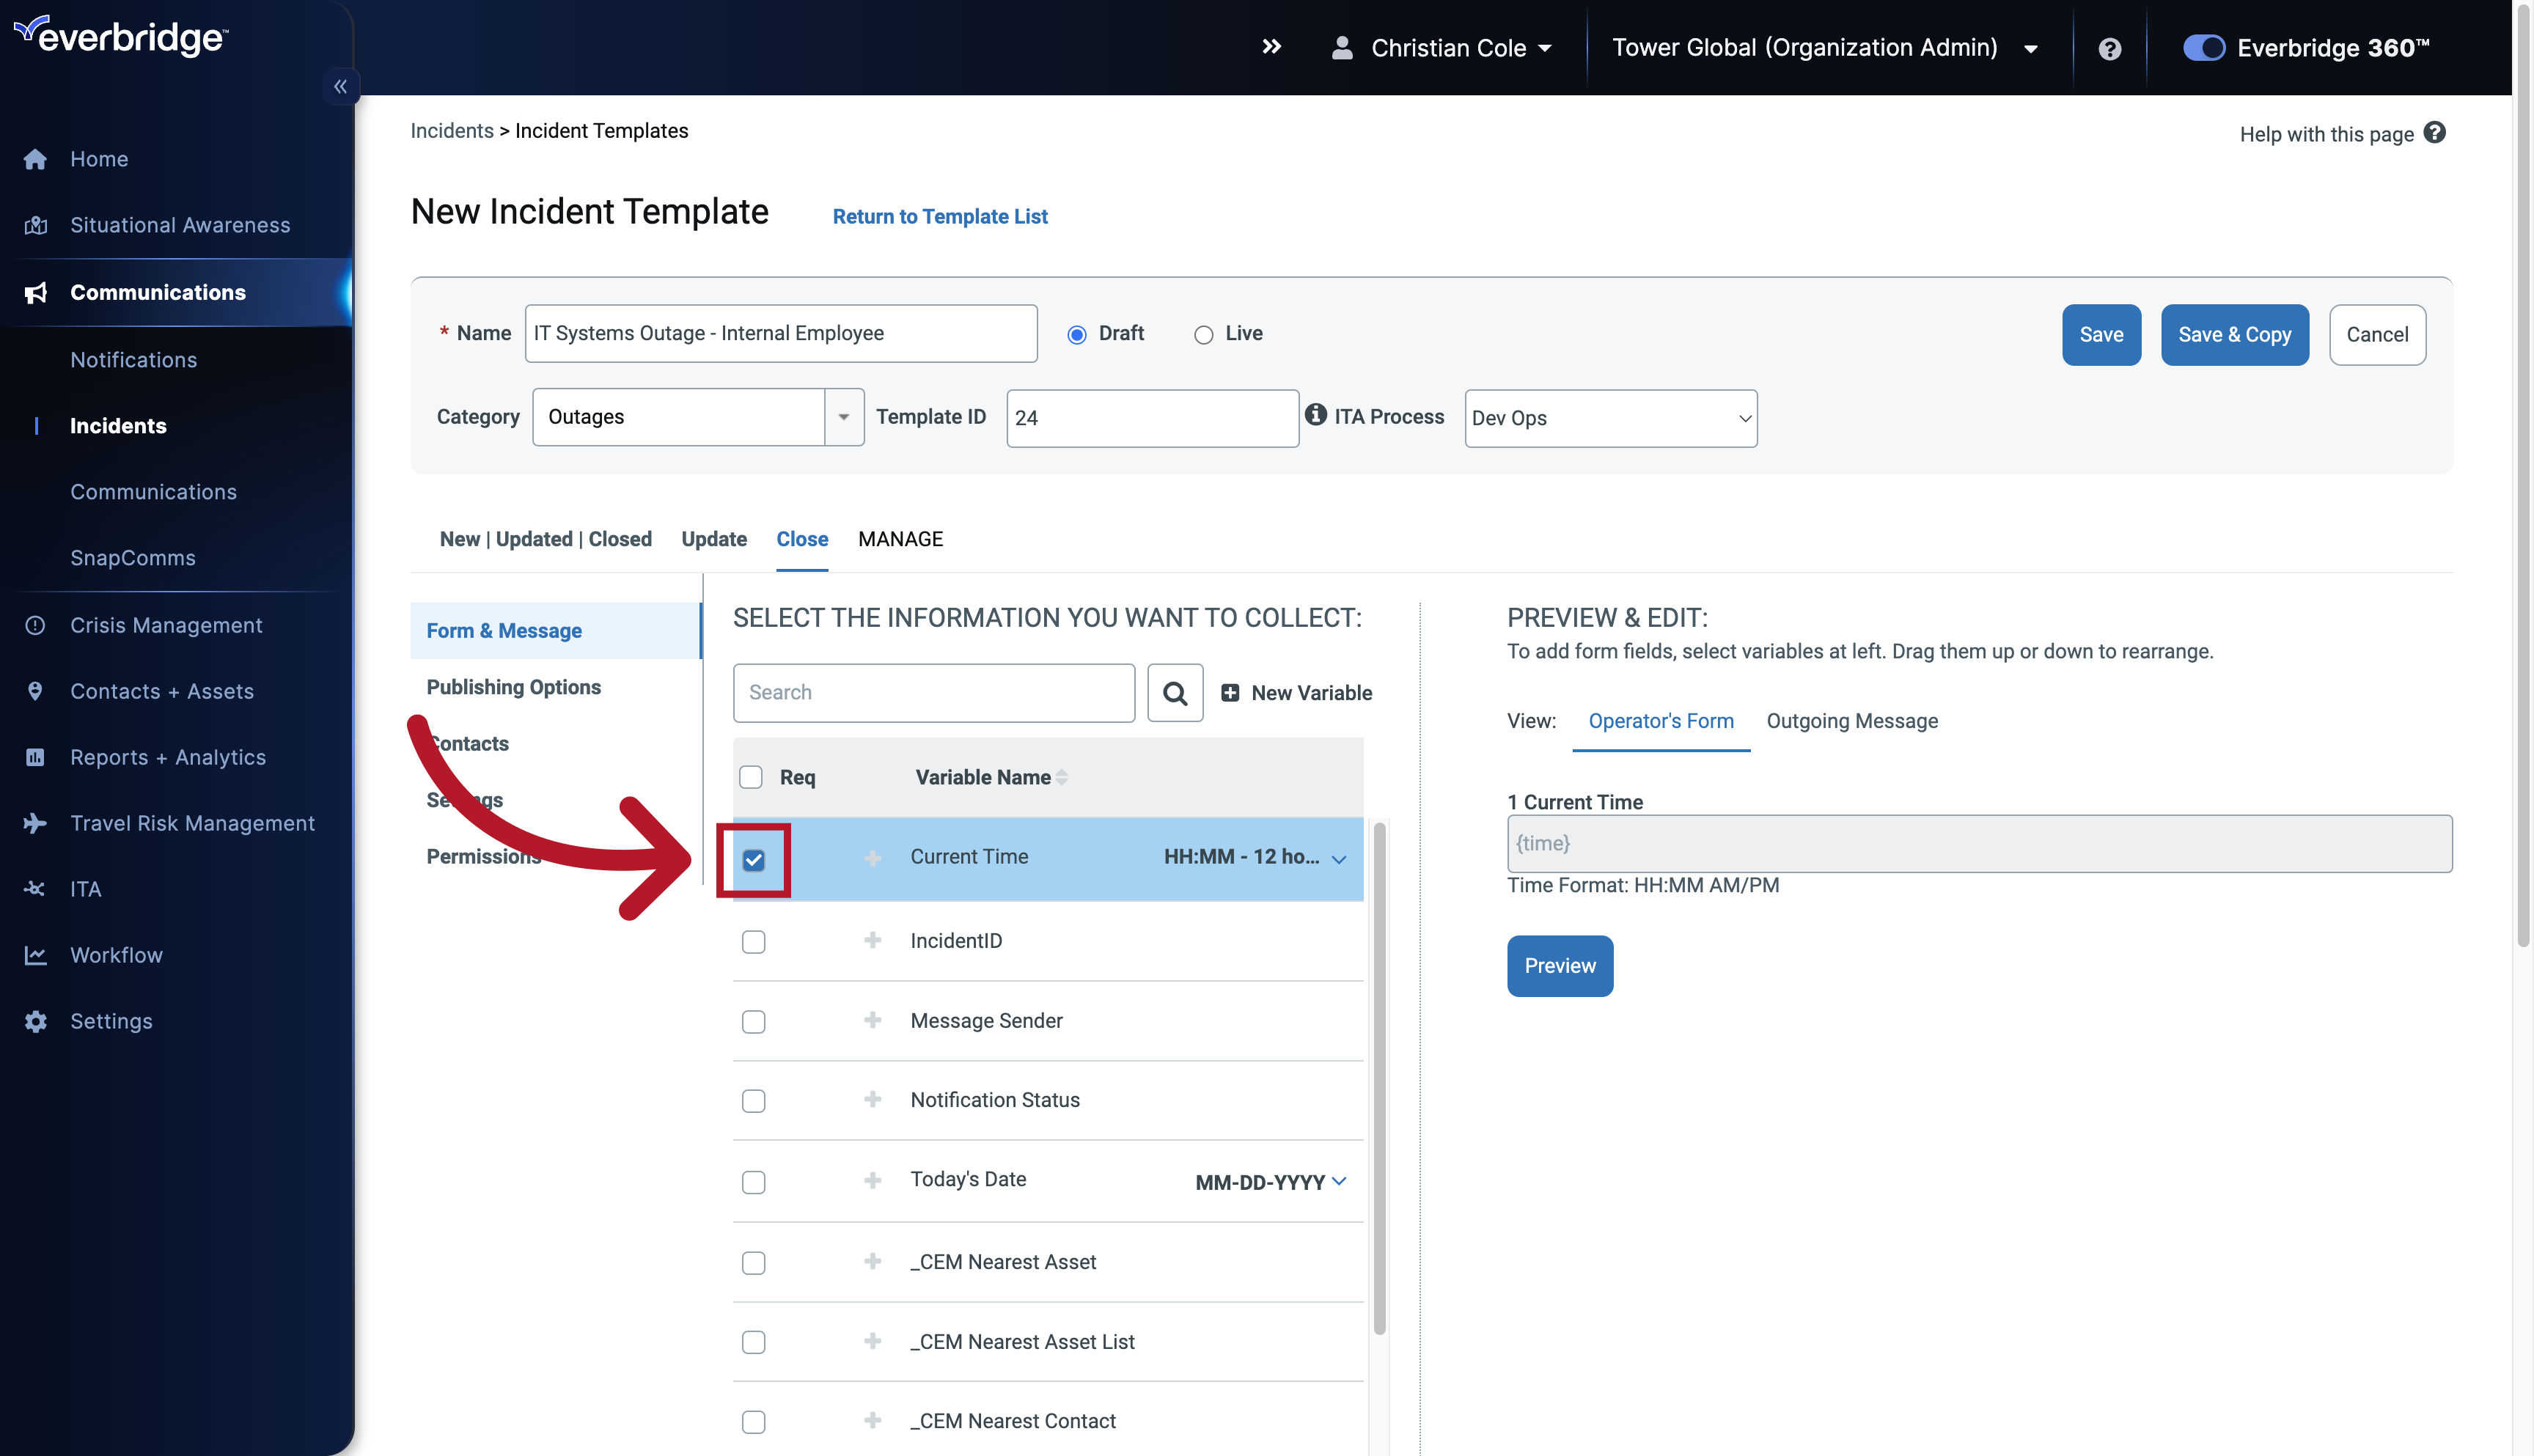
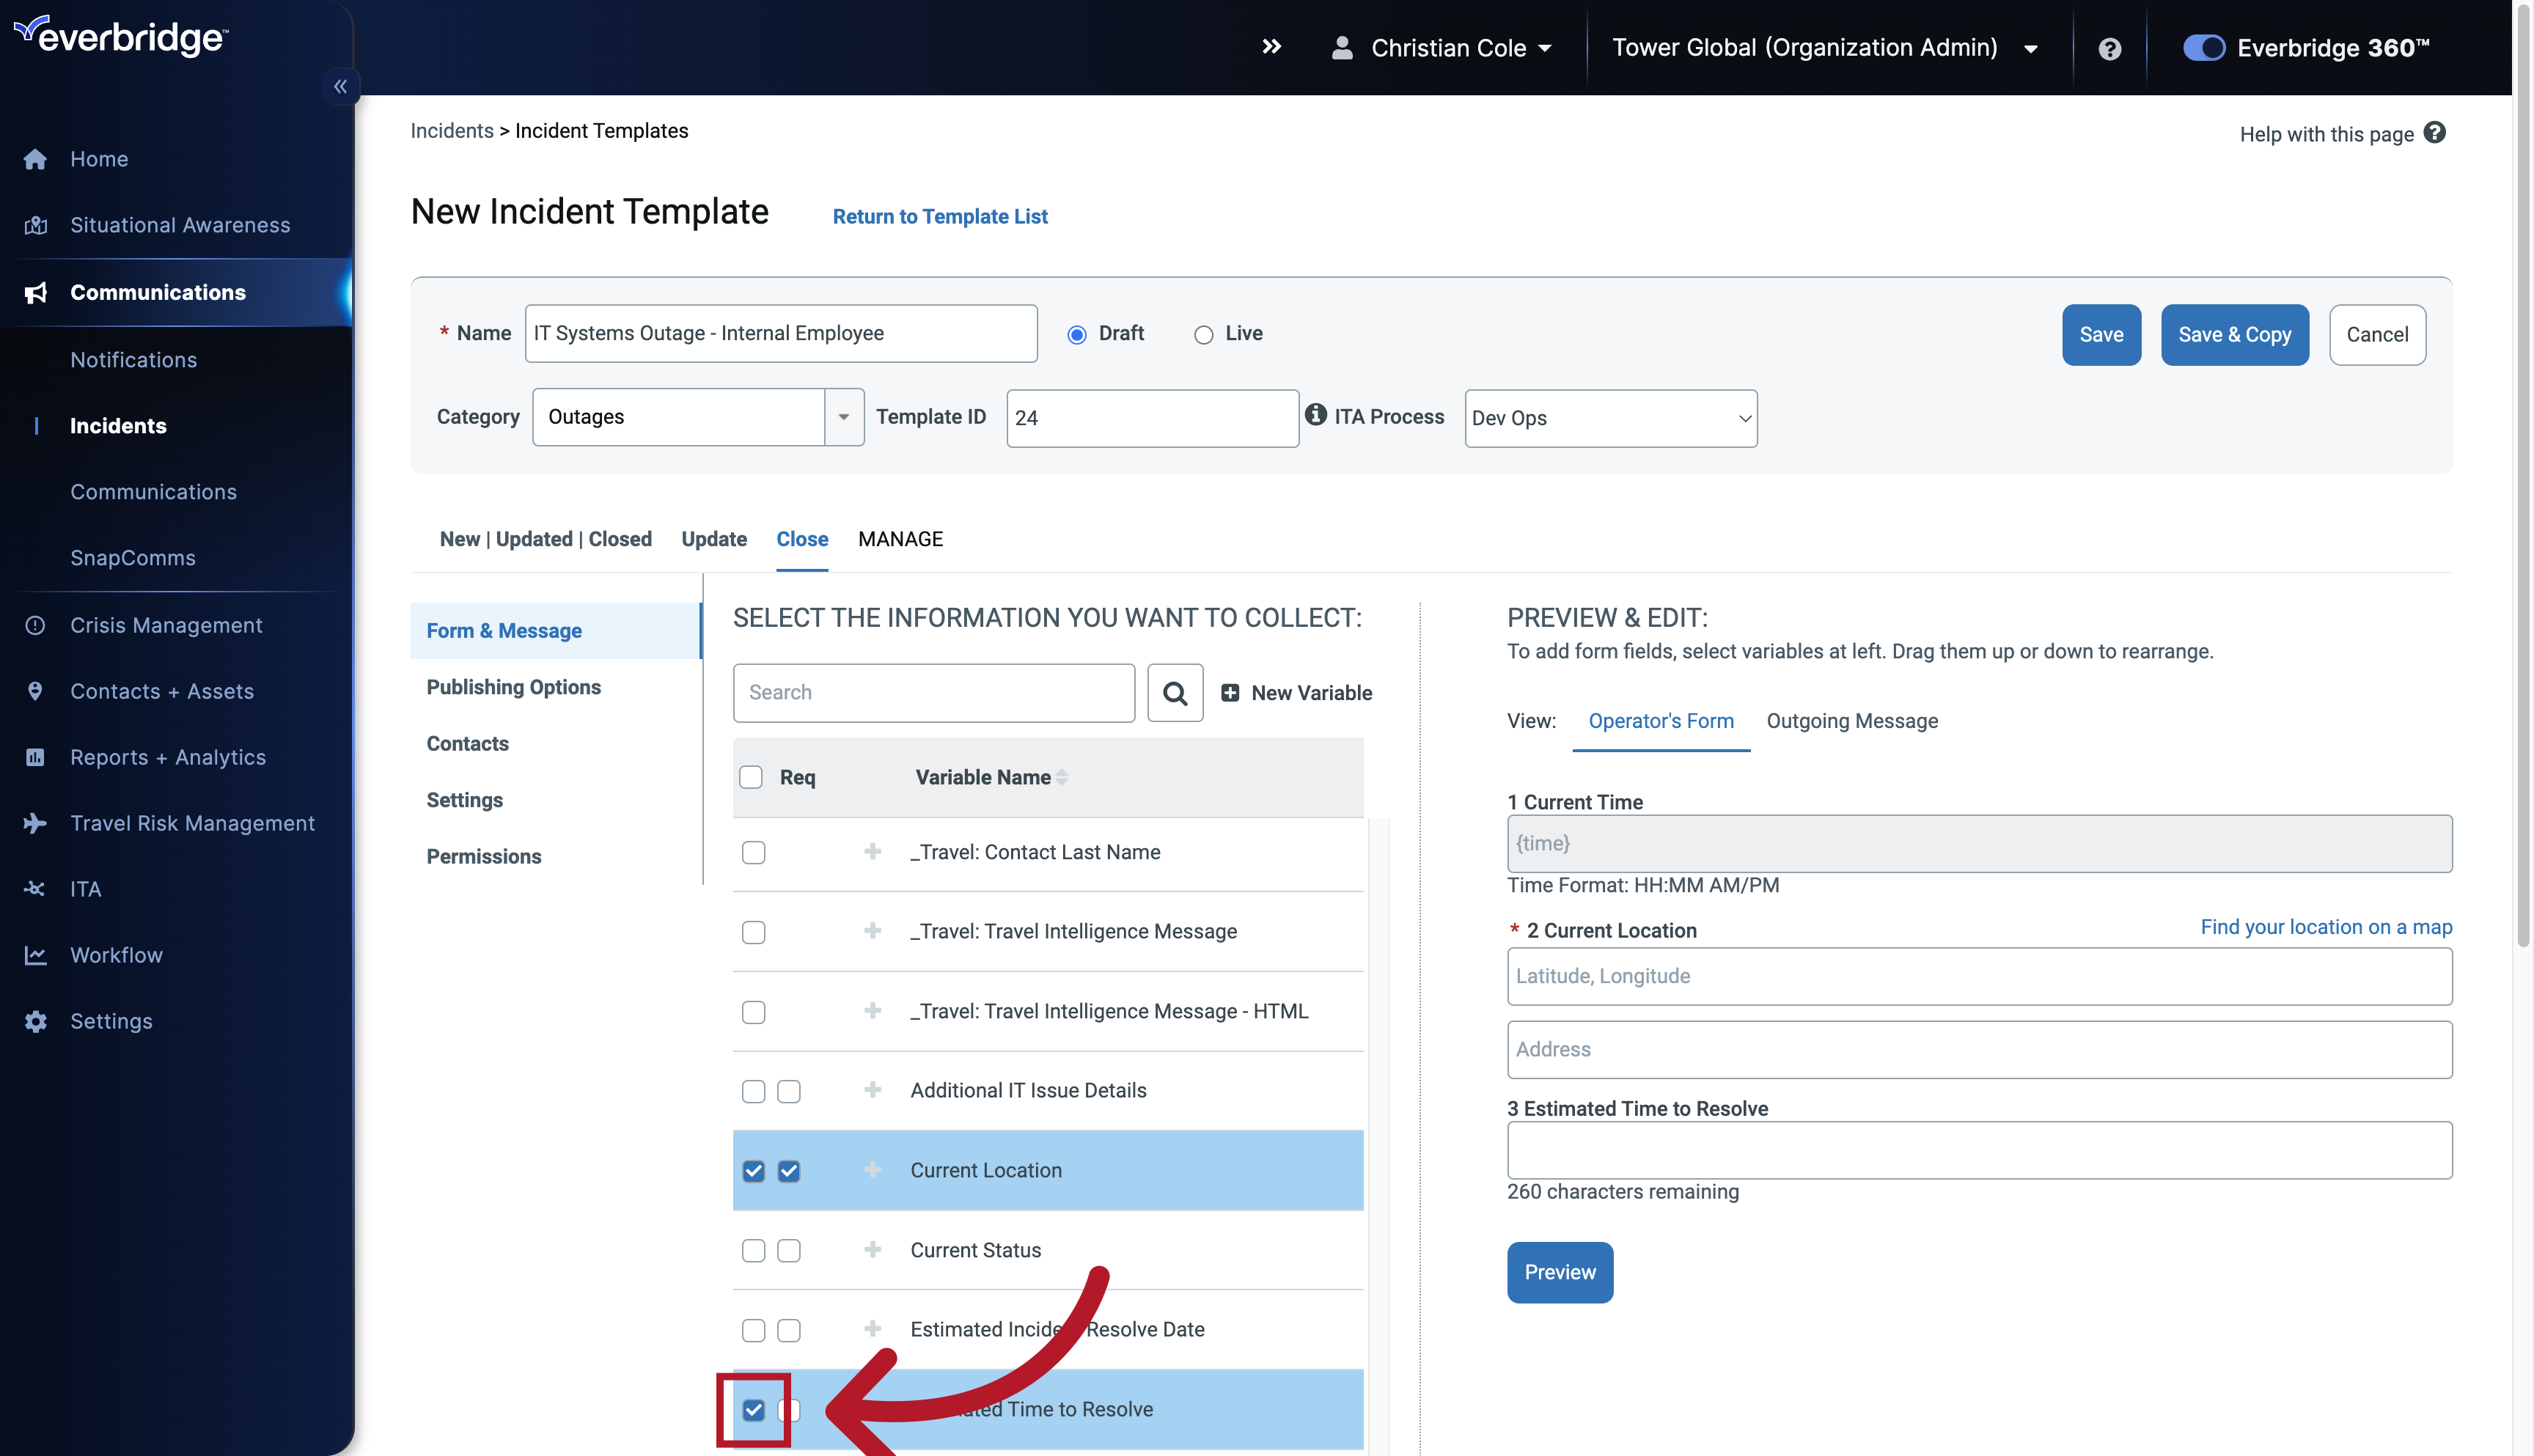
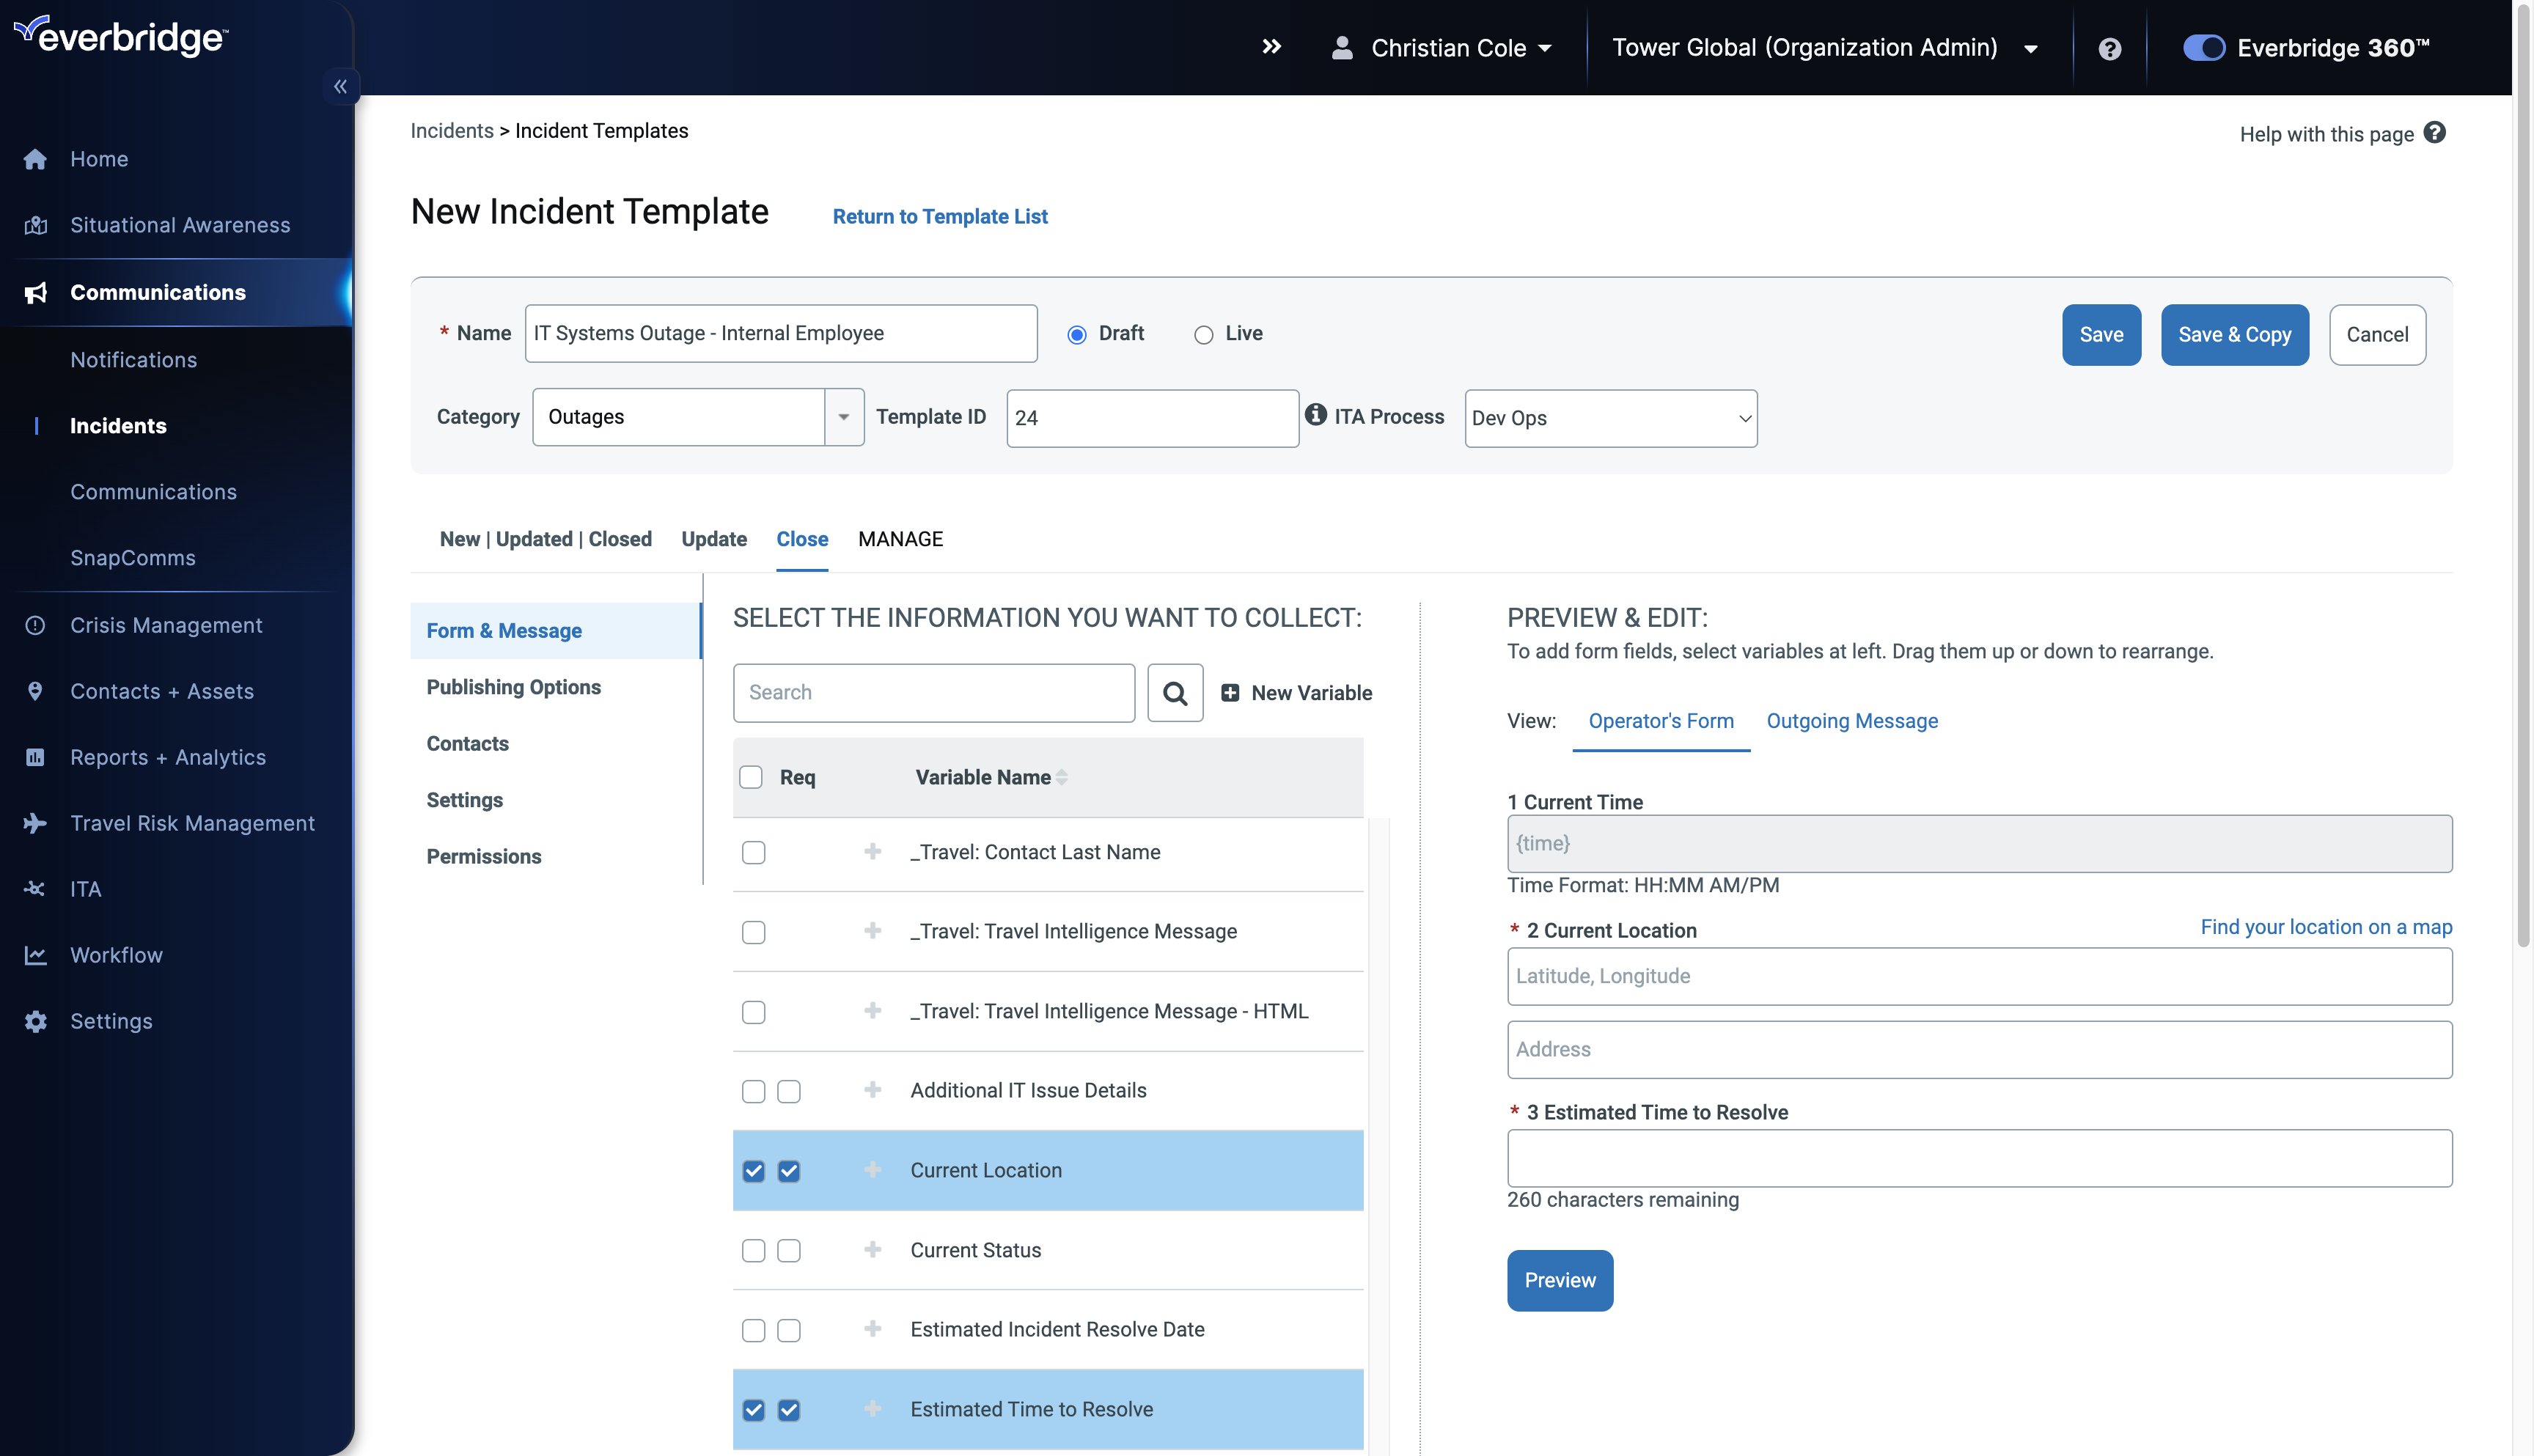
33. Variables
Next to the Variables, you'll be able to see two checkboxes. The box on the far left adds the Variable to the Template.
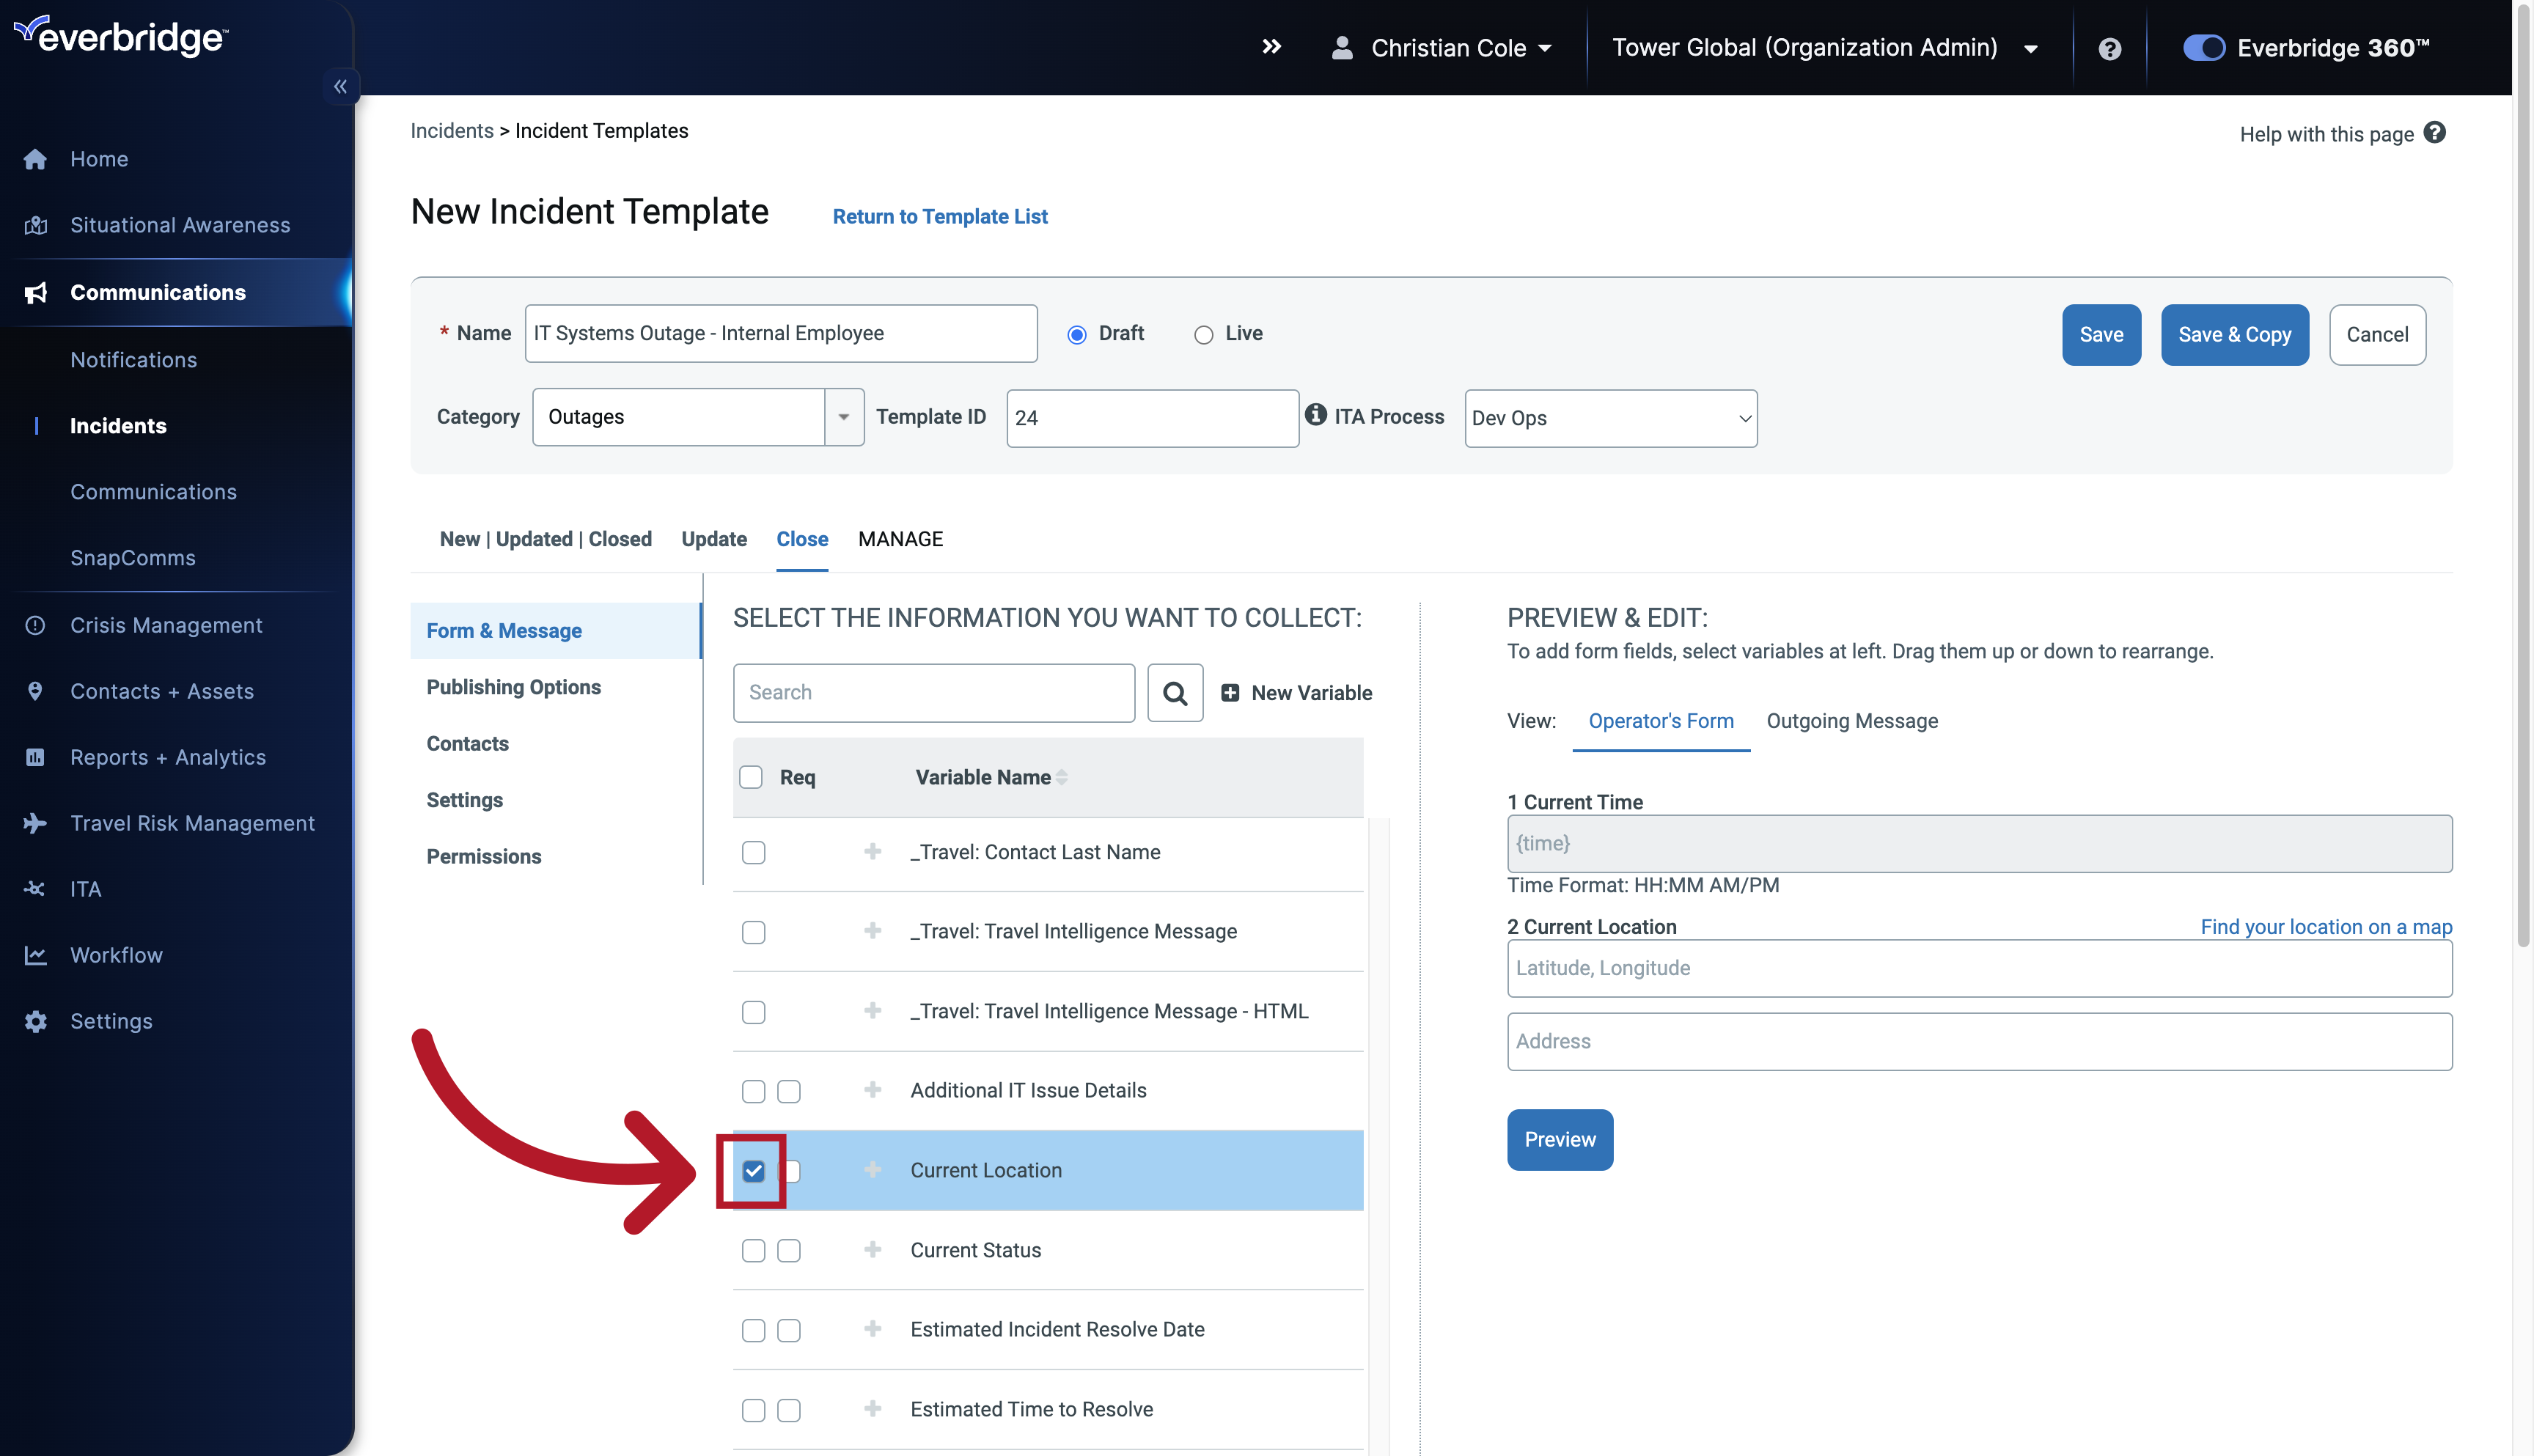
34. Variables
The second box makes filling out that Variable required.
35. Variables
Enter the necessary information.
36. Variables
Enter the ID number.

37. Variables
Next, we'll move on to the message itself.
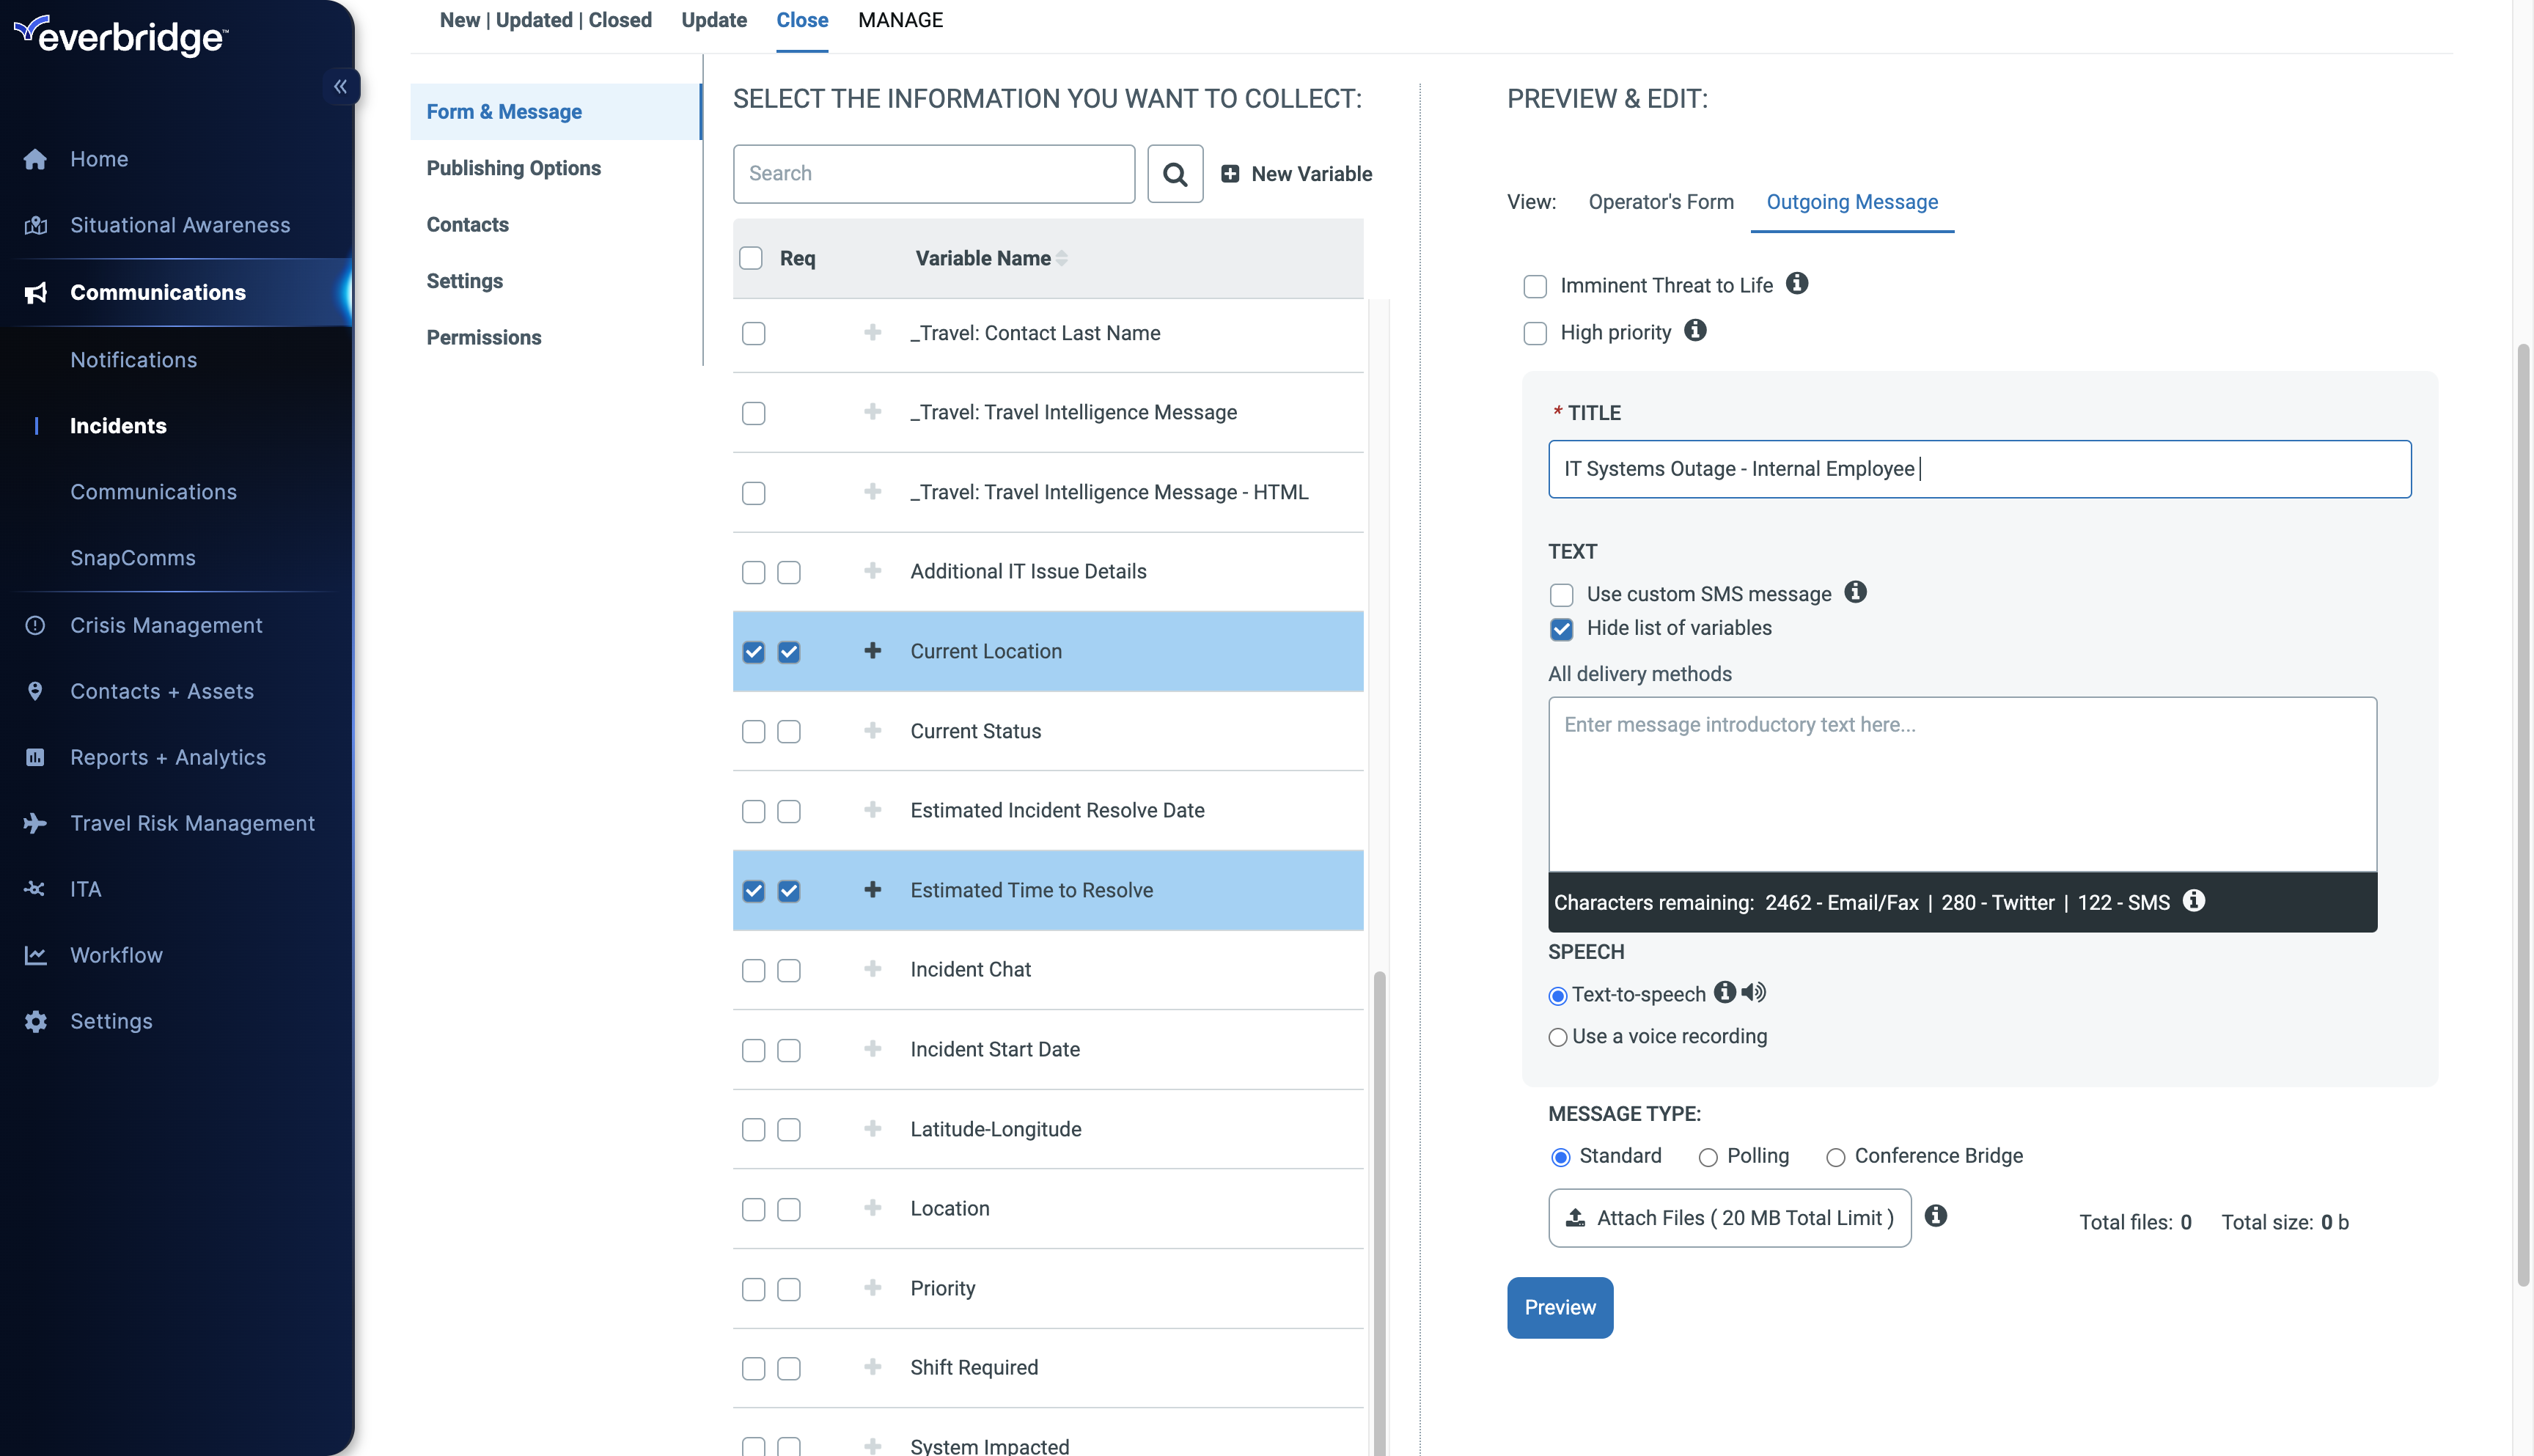
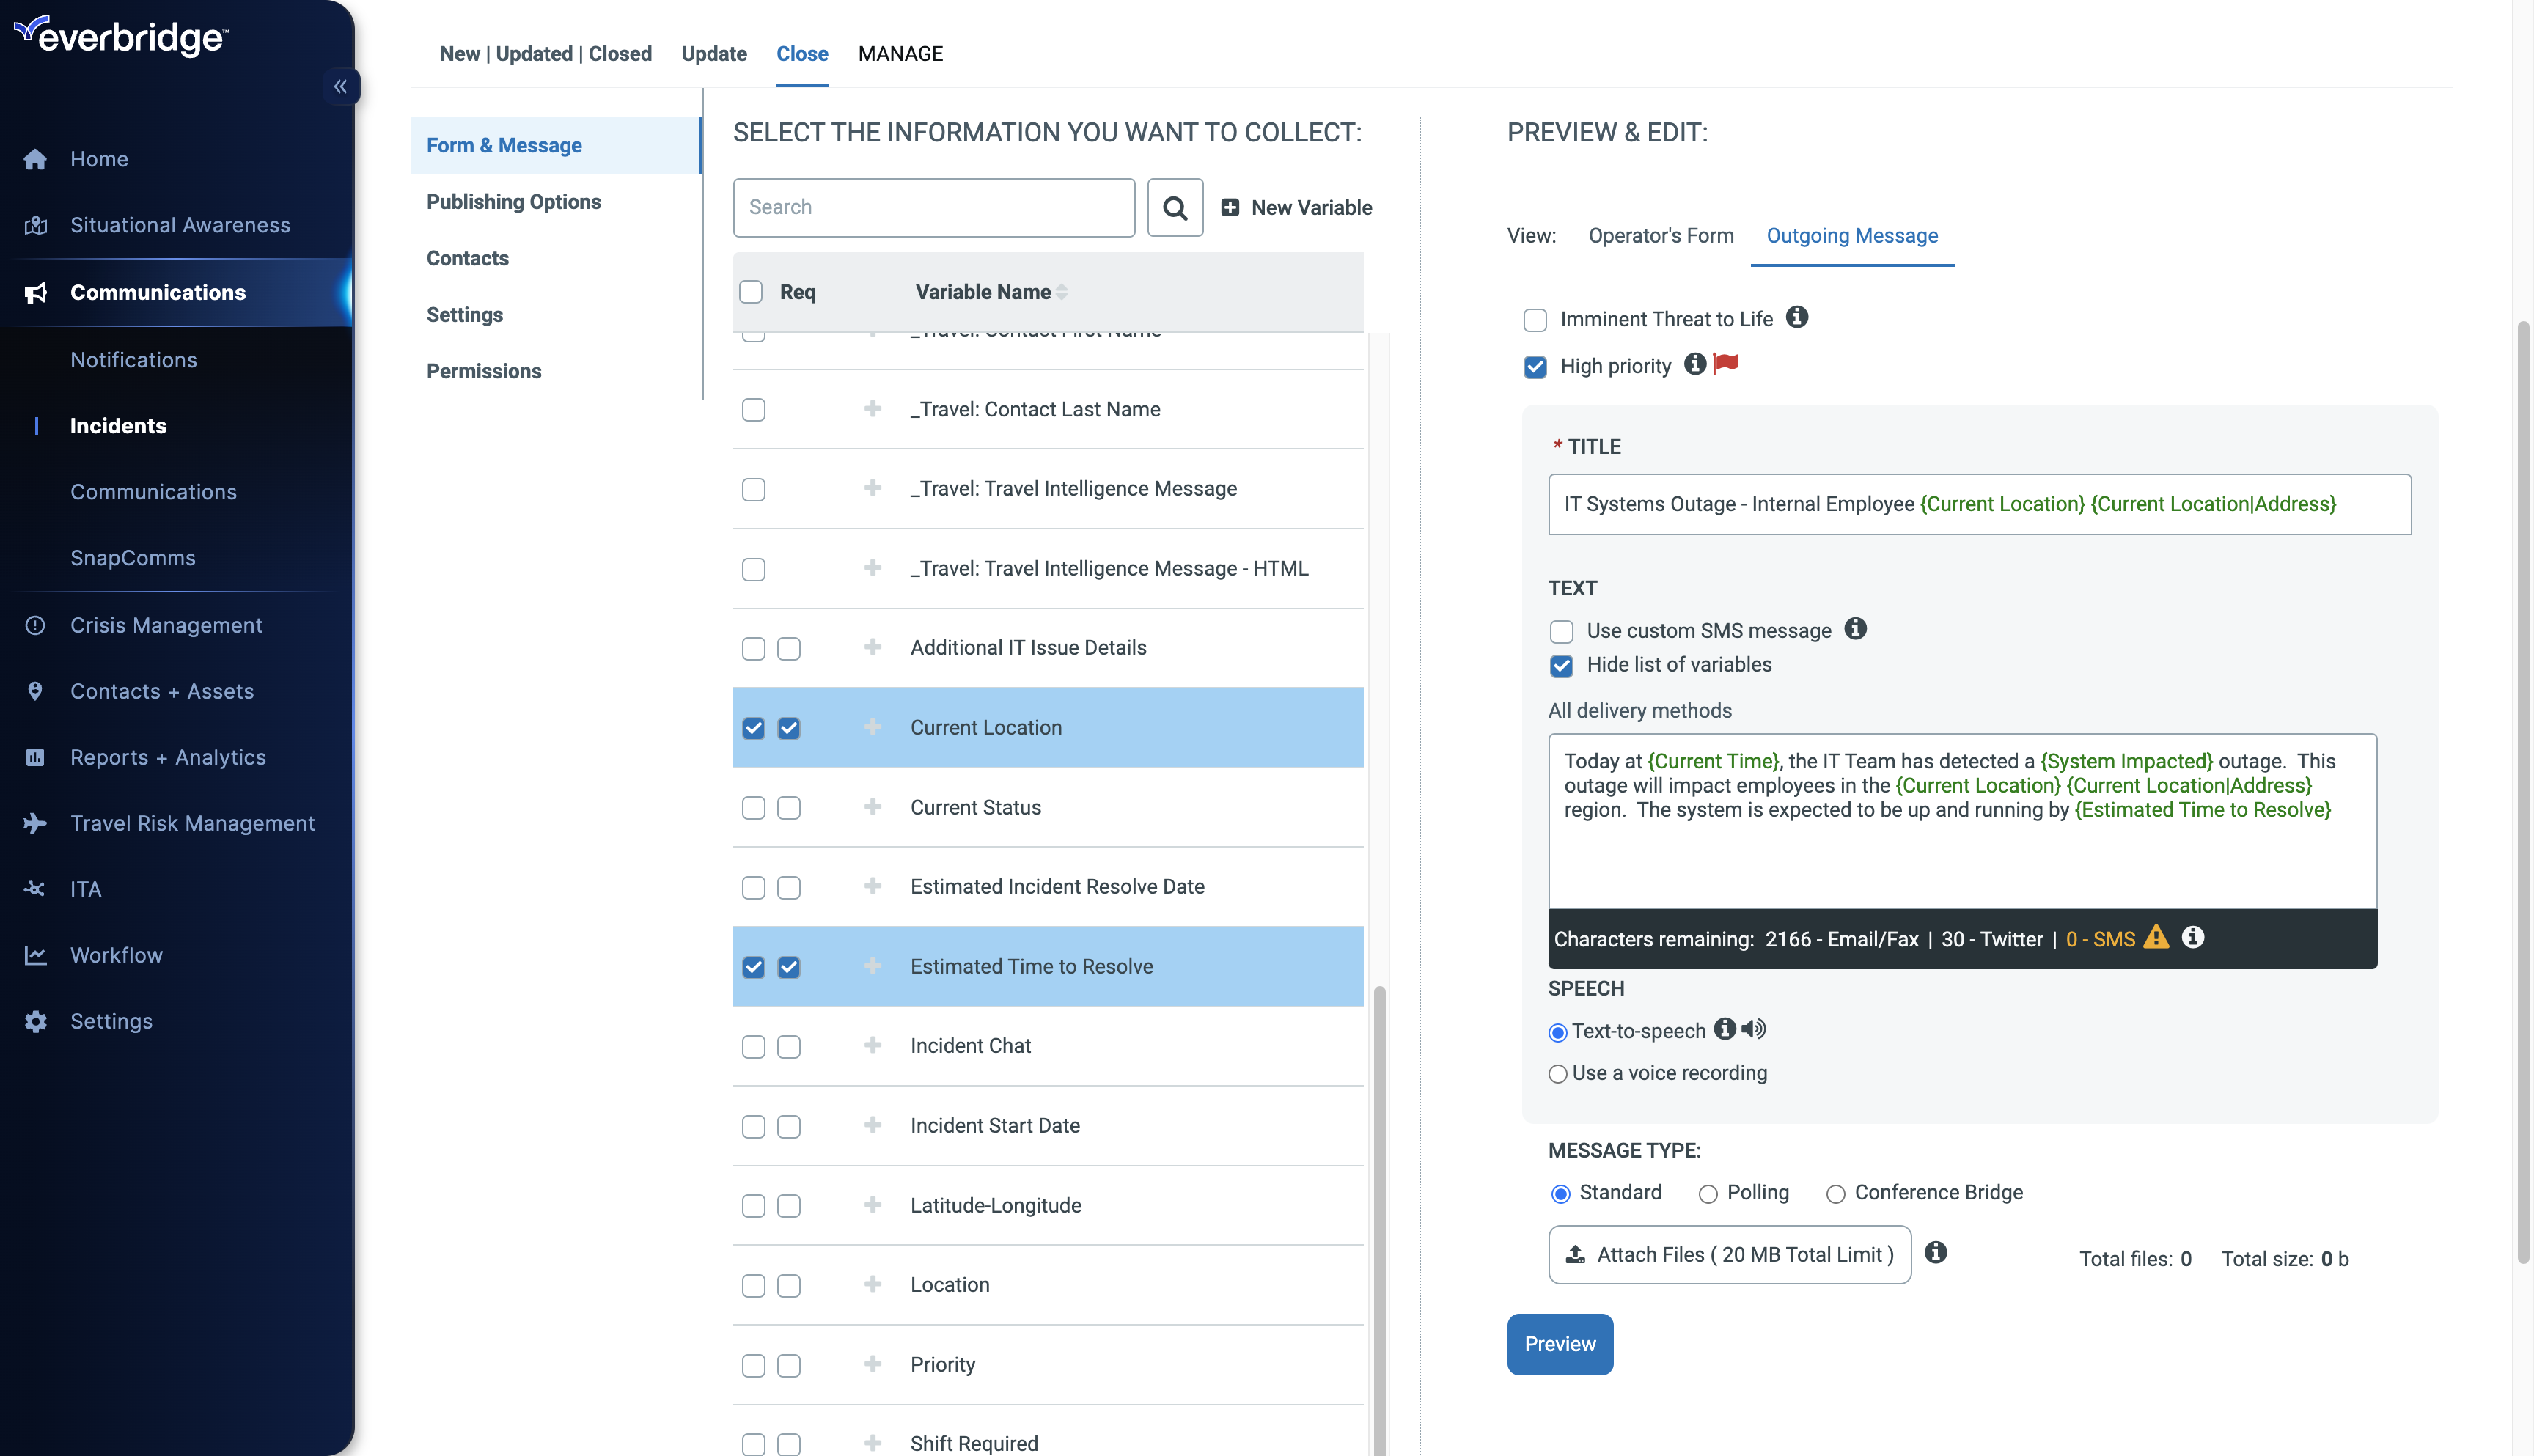
38. Outgoing Message
Click Outgoing Message in the Preview and Edit section.

39. Form & Message
Here you can review.
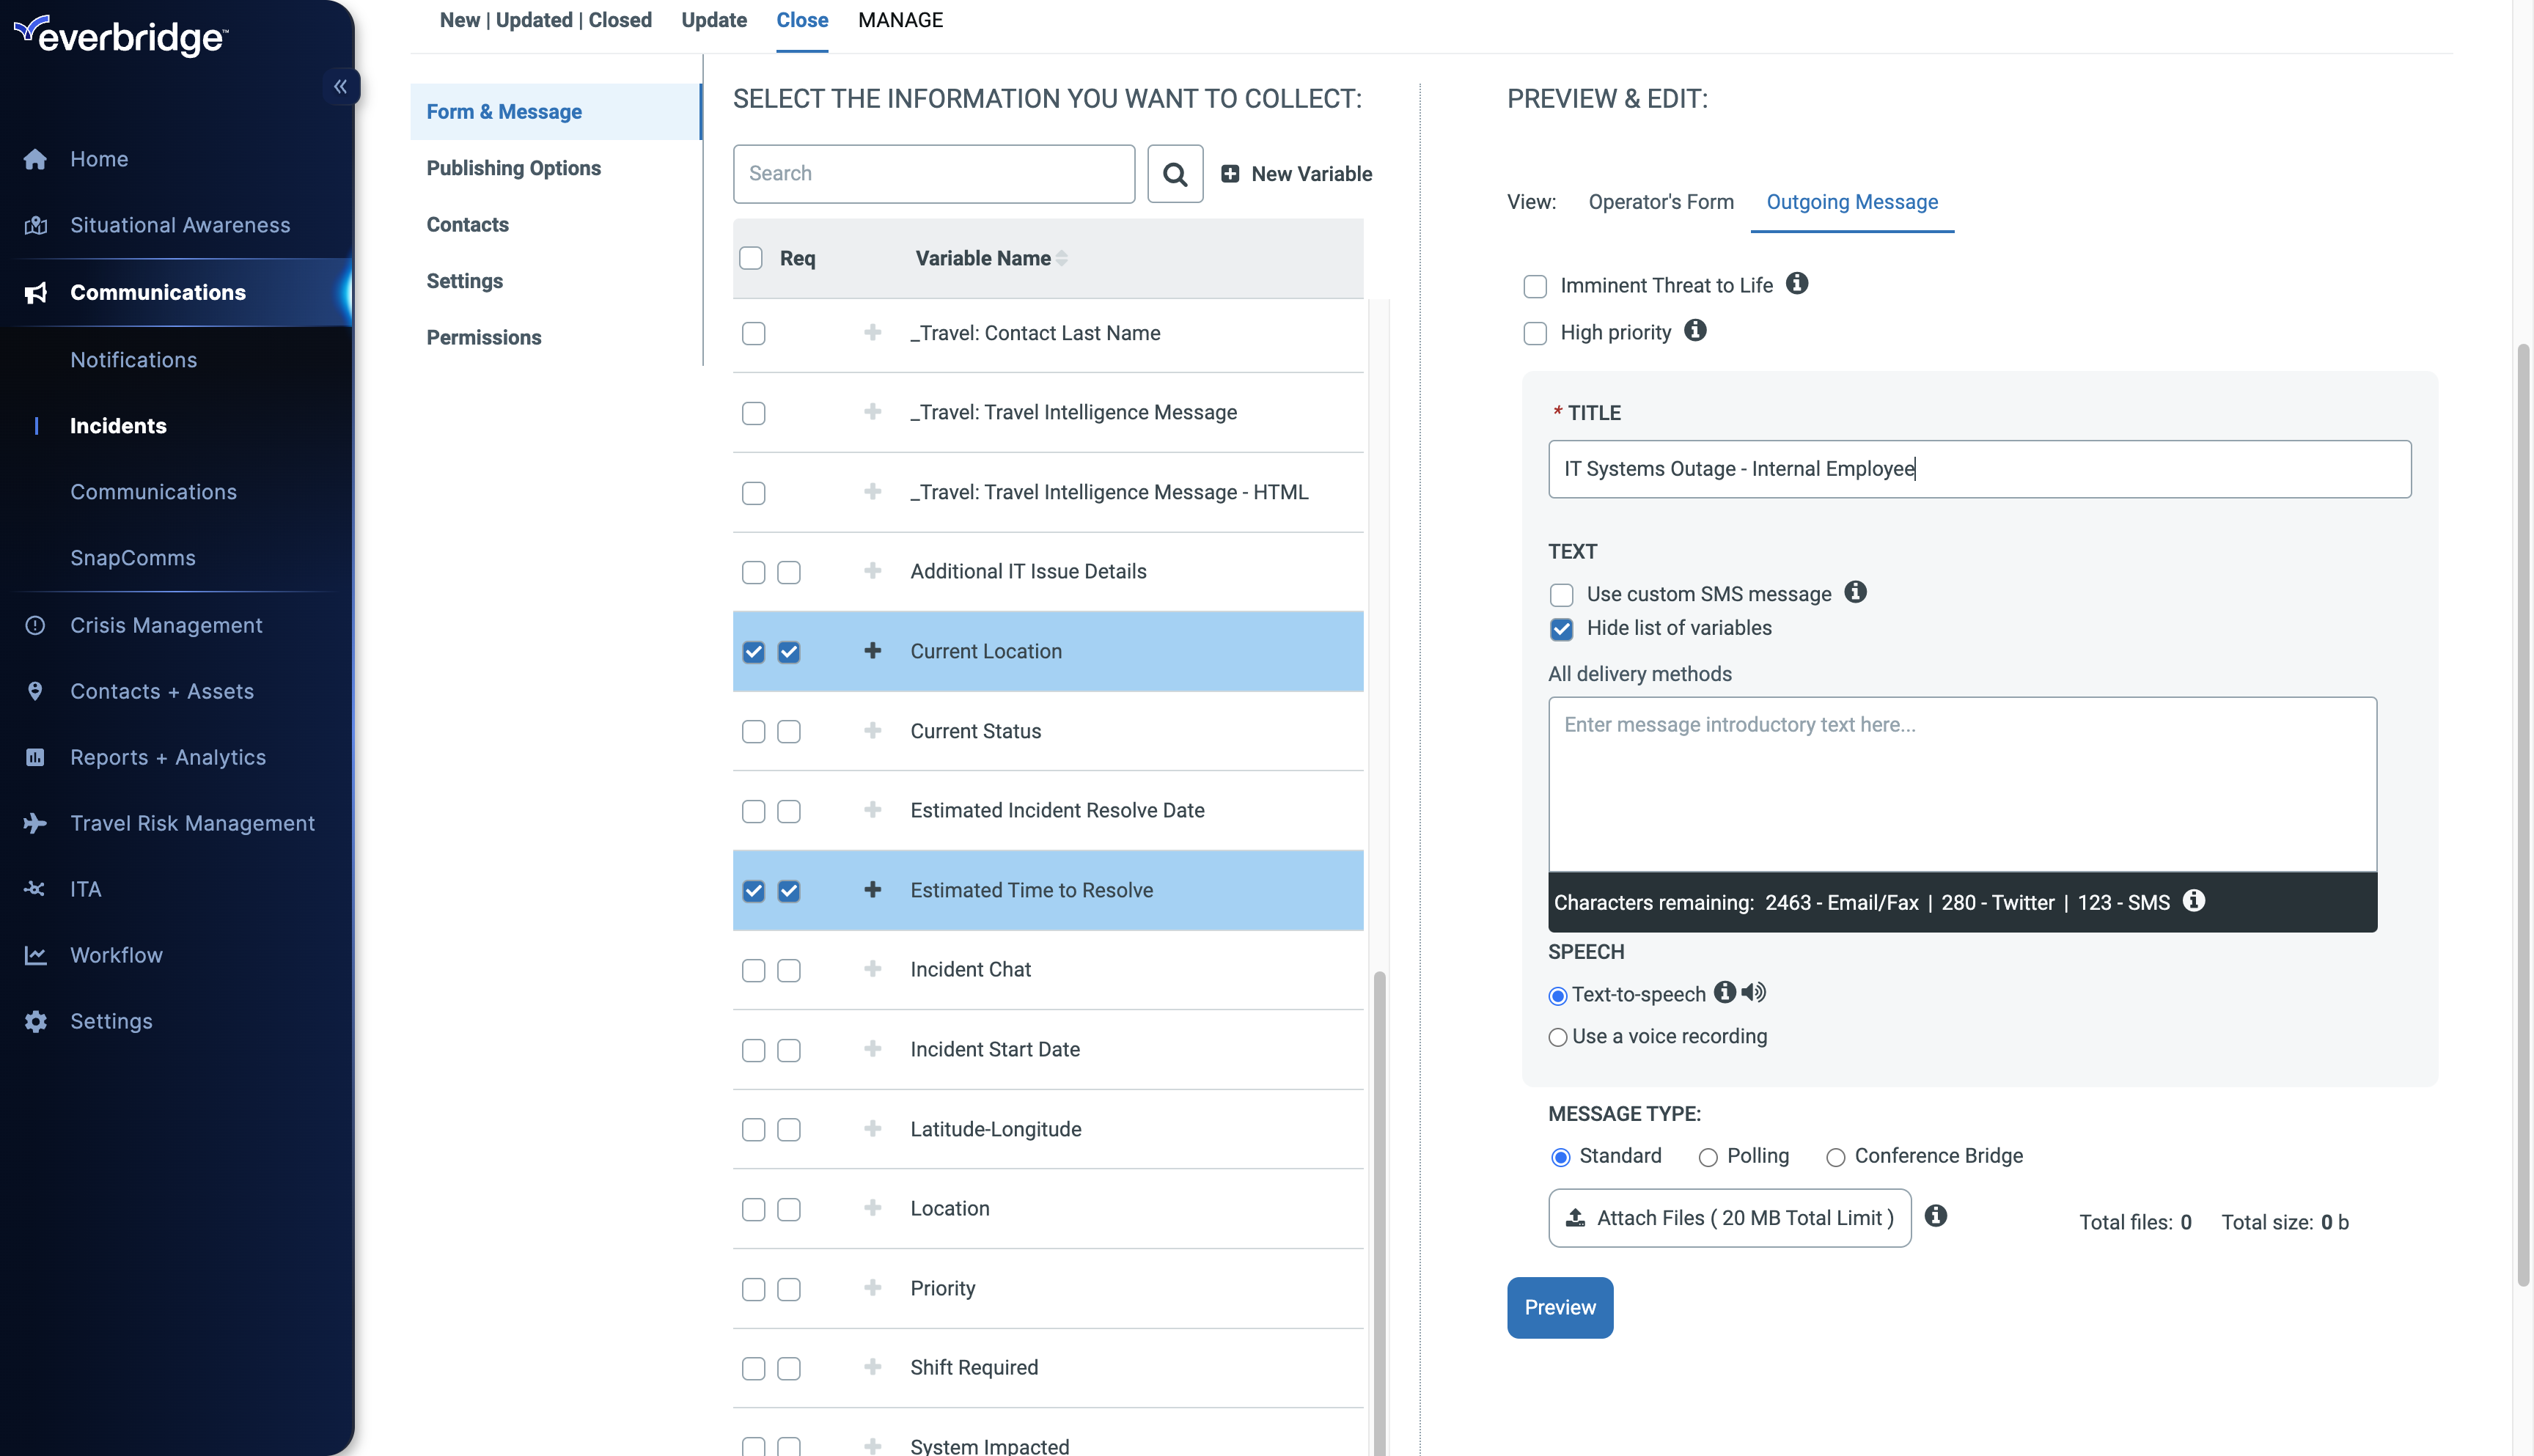
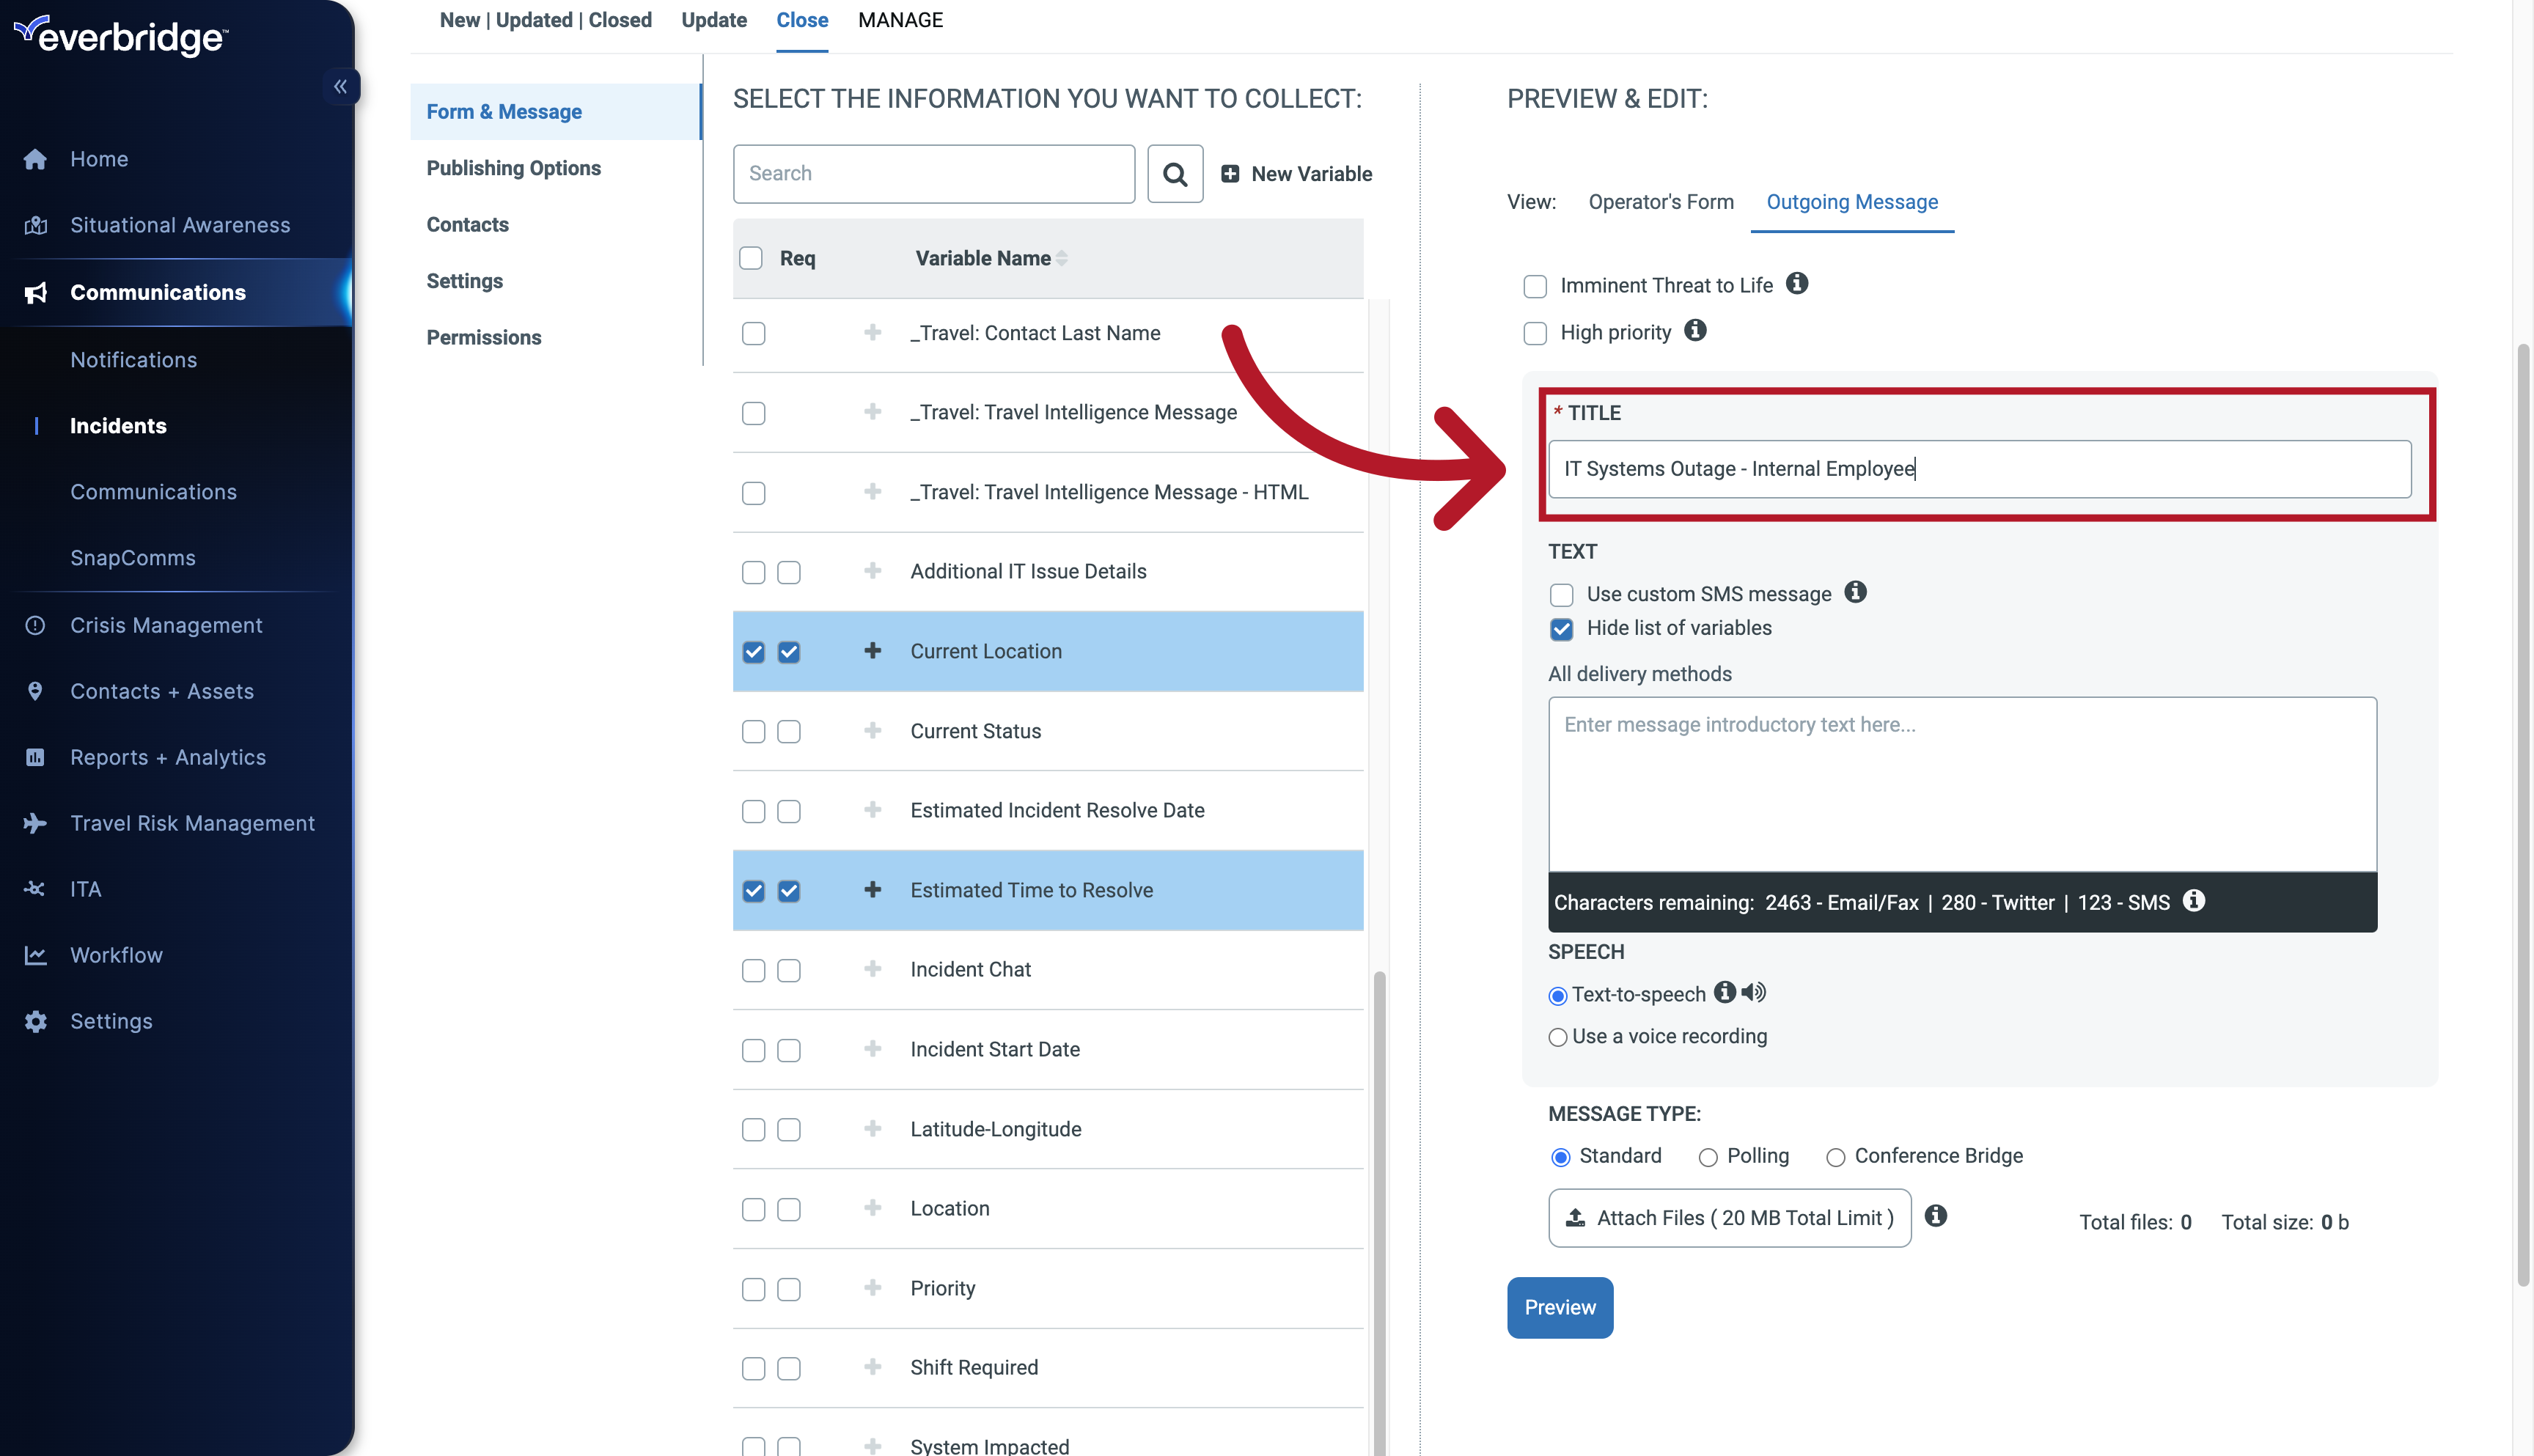
40. Title
The Title,
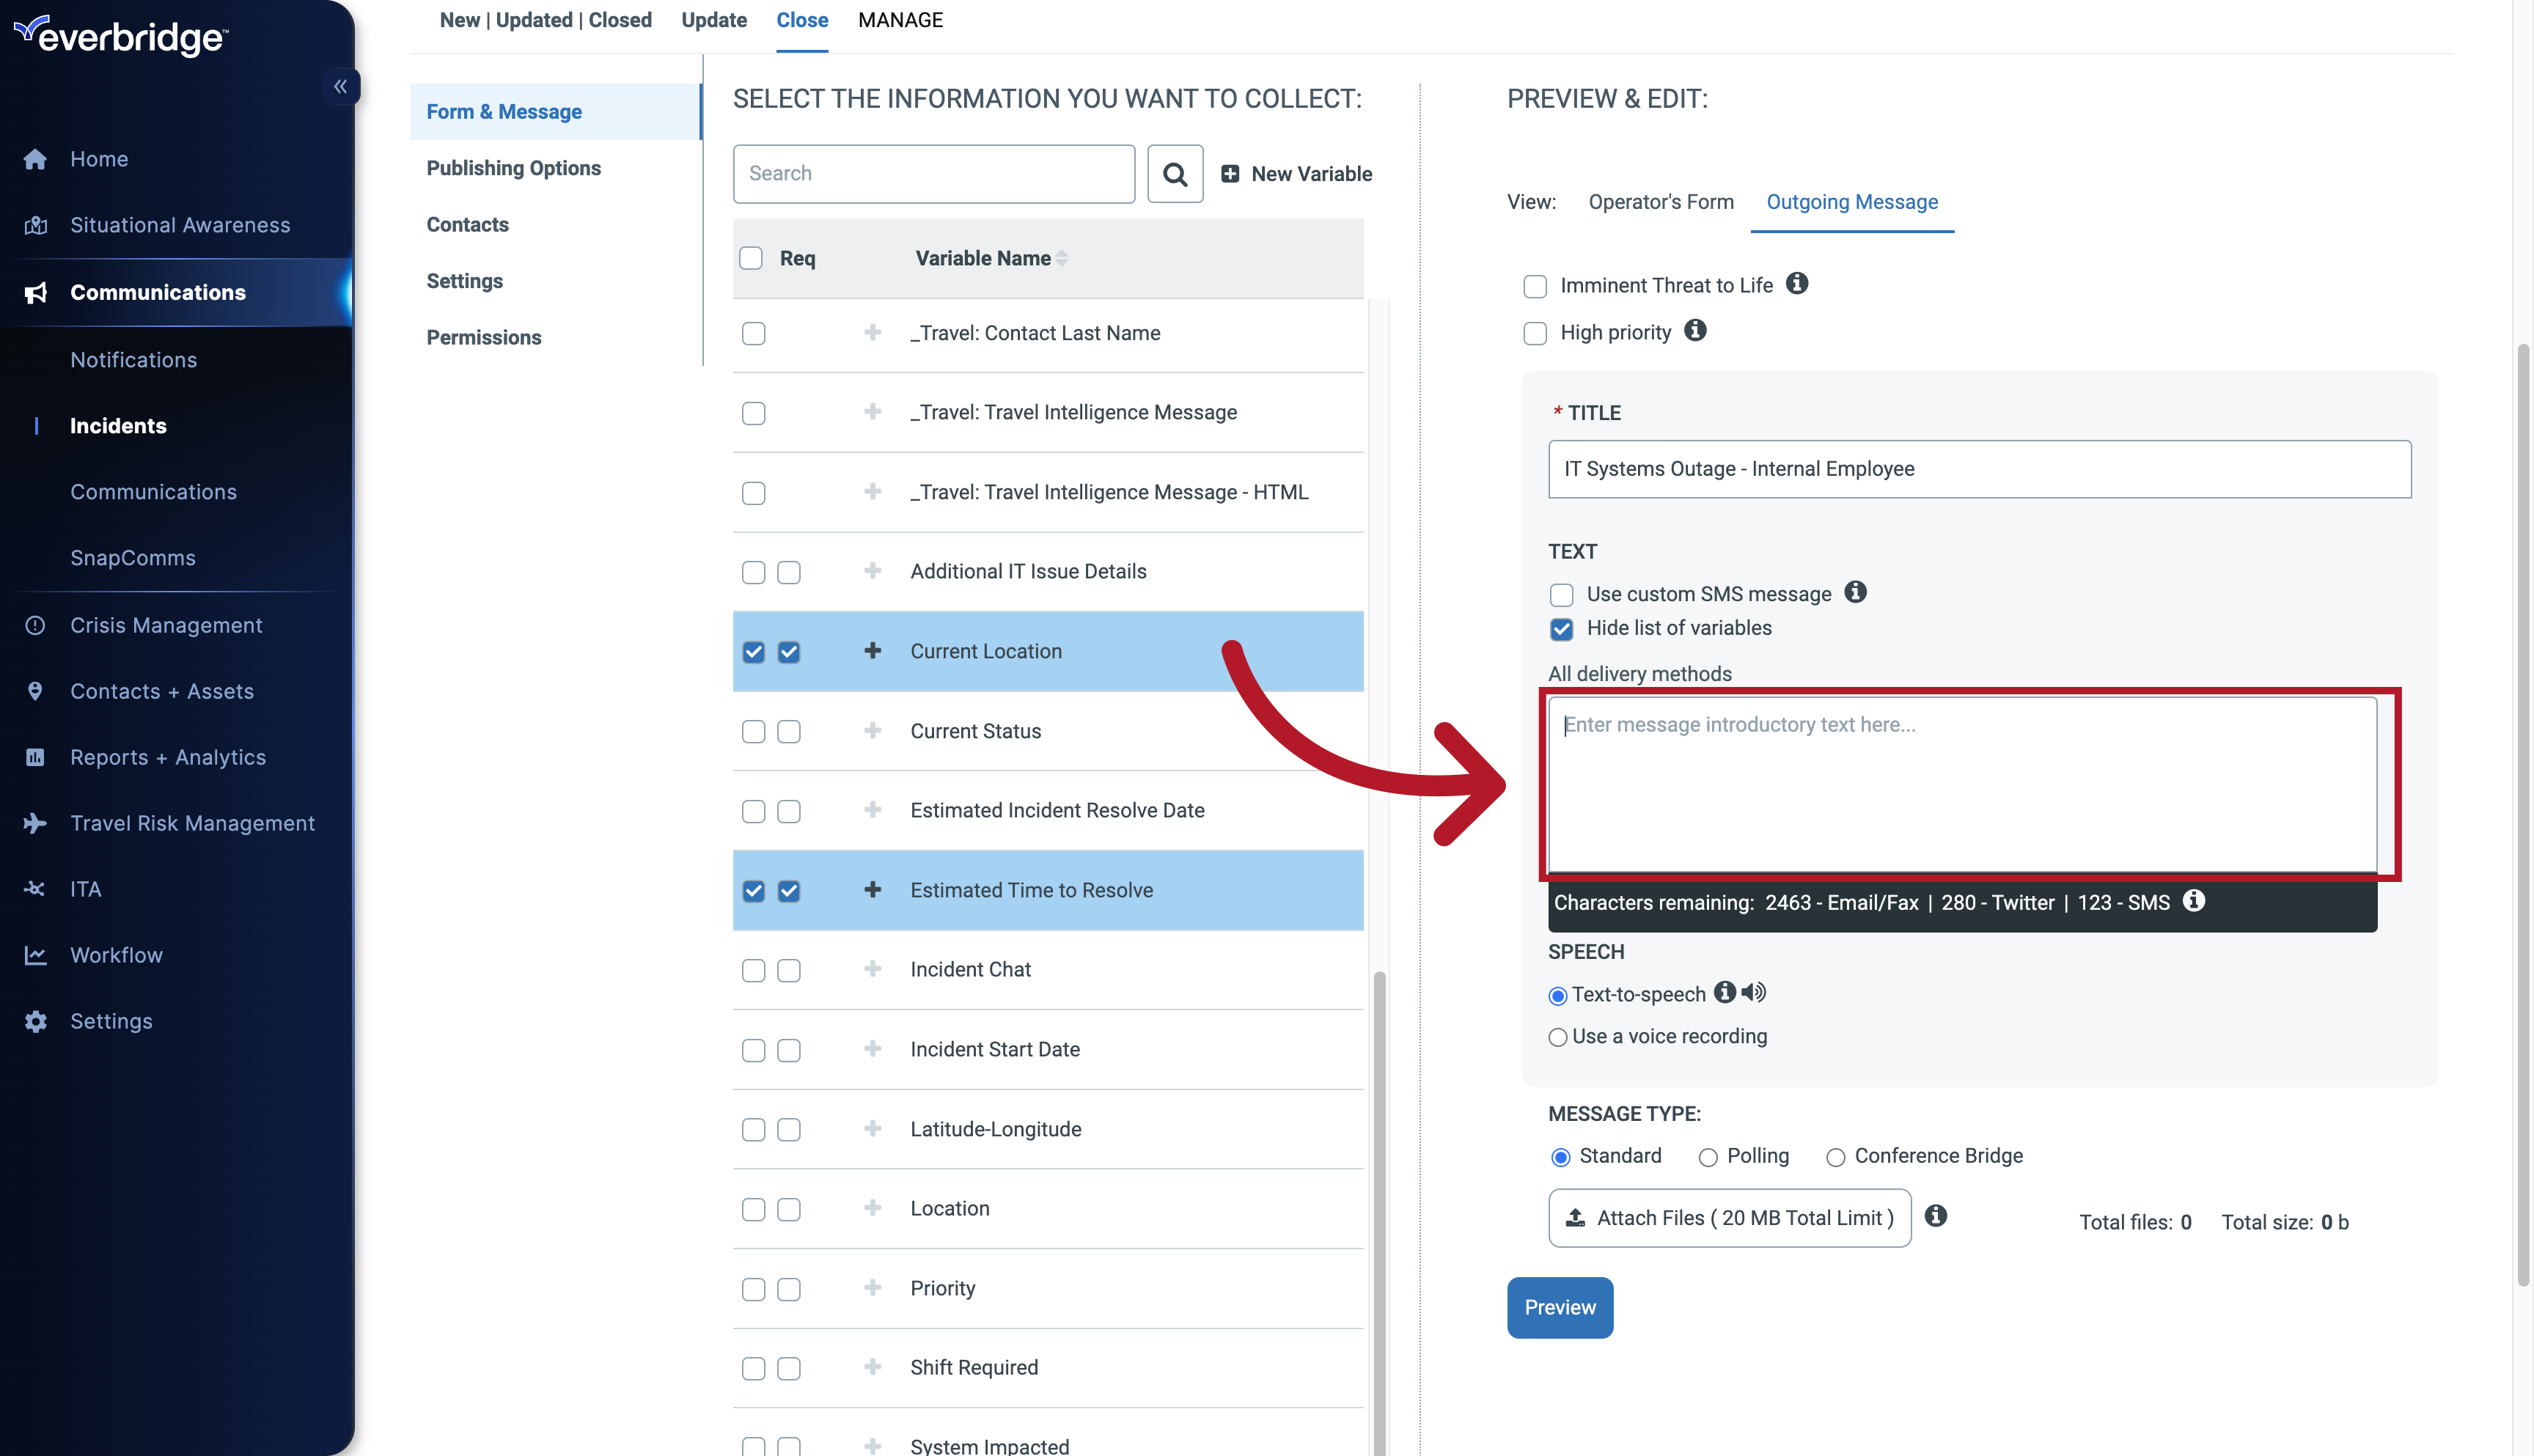
41. Message
Message,
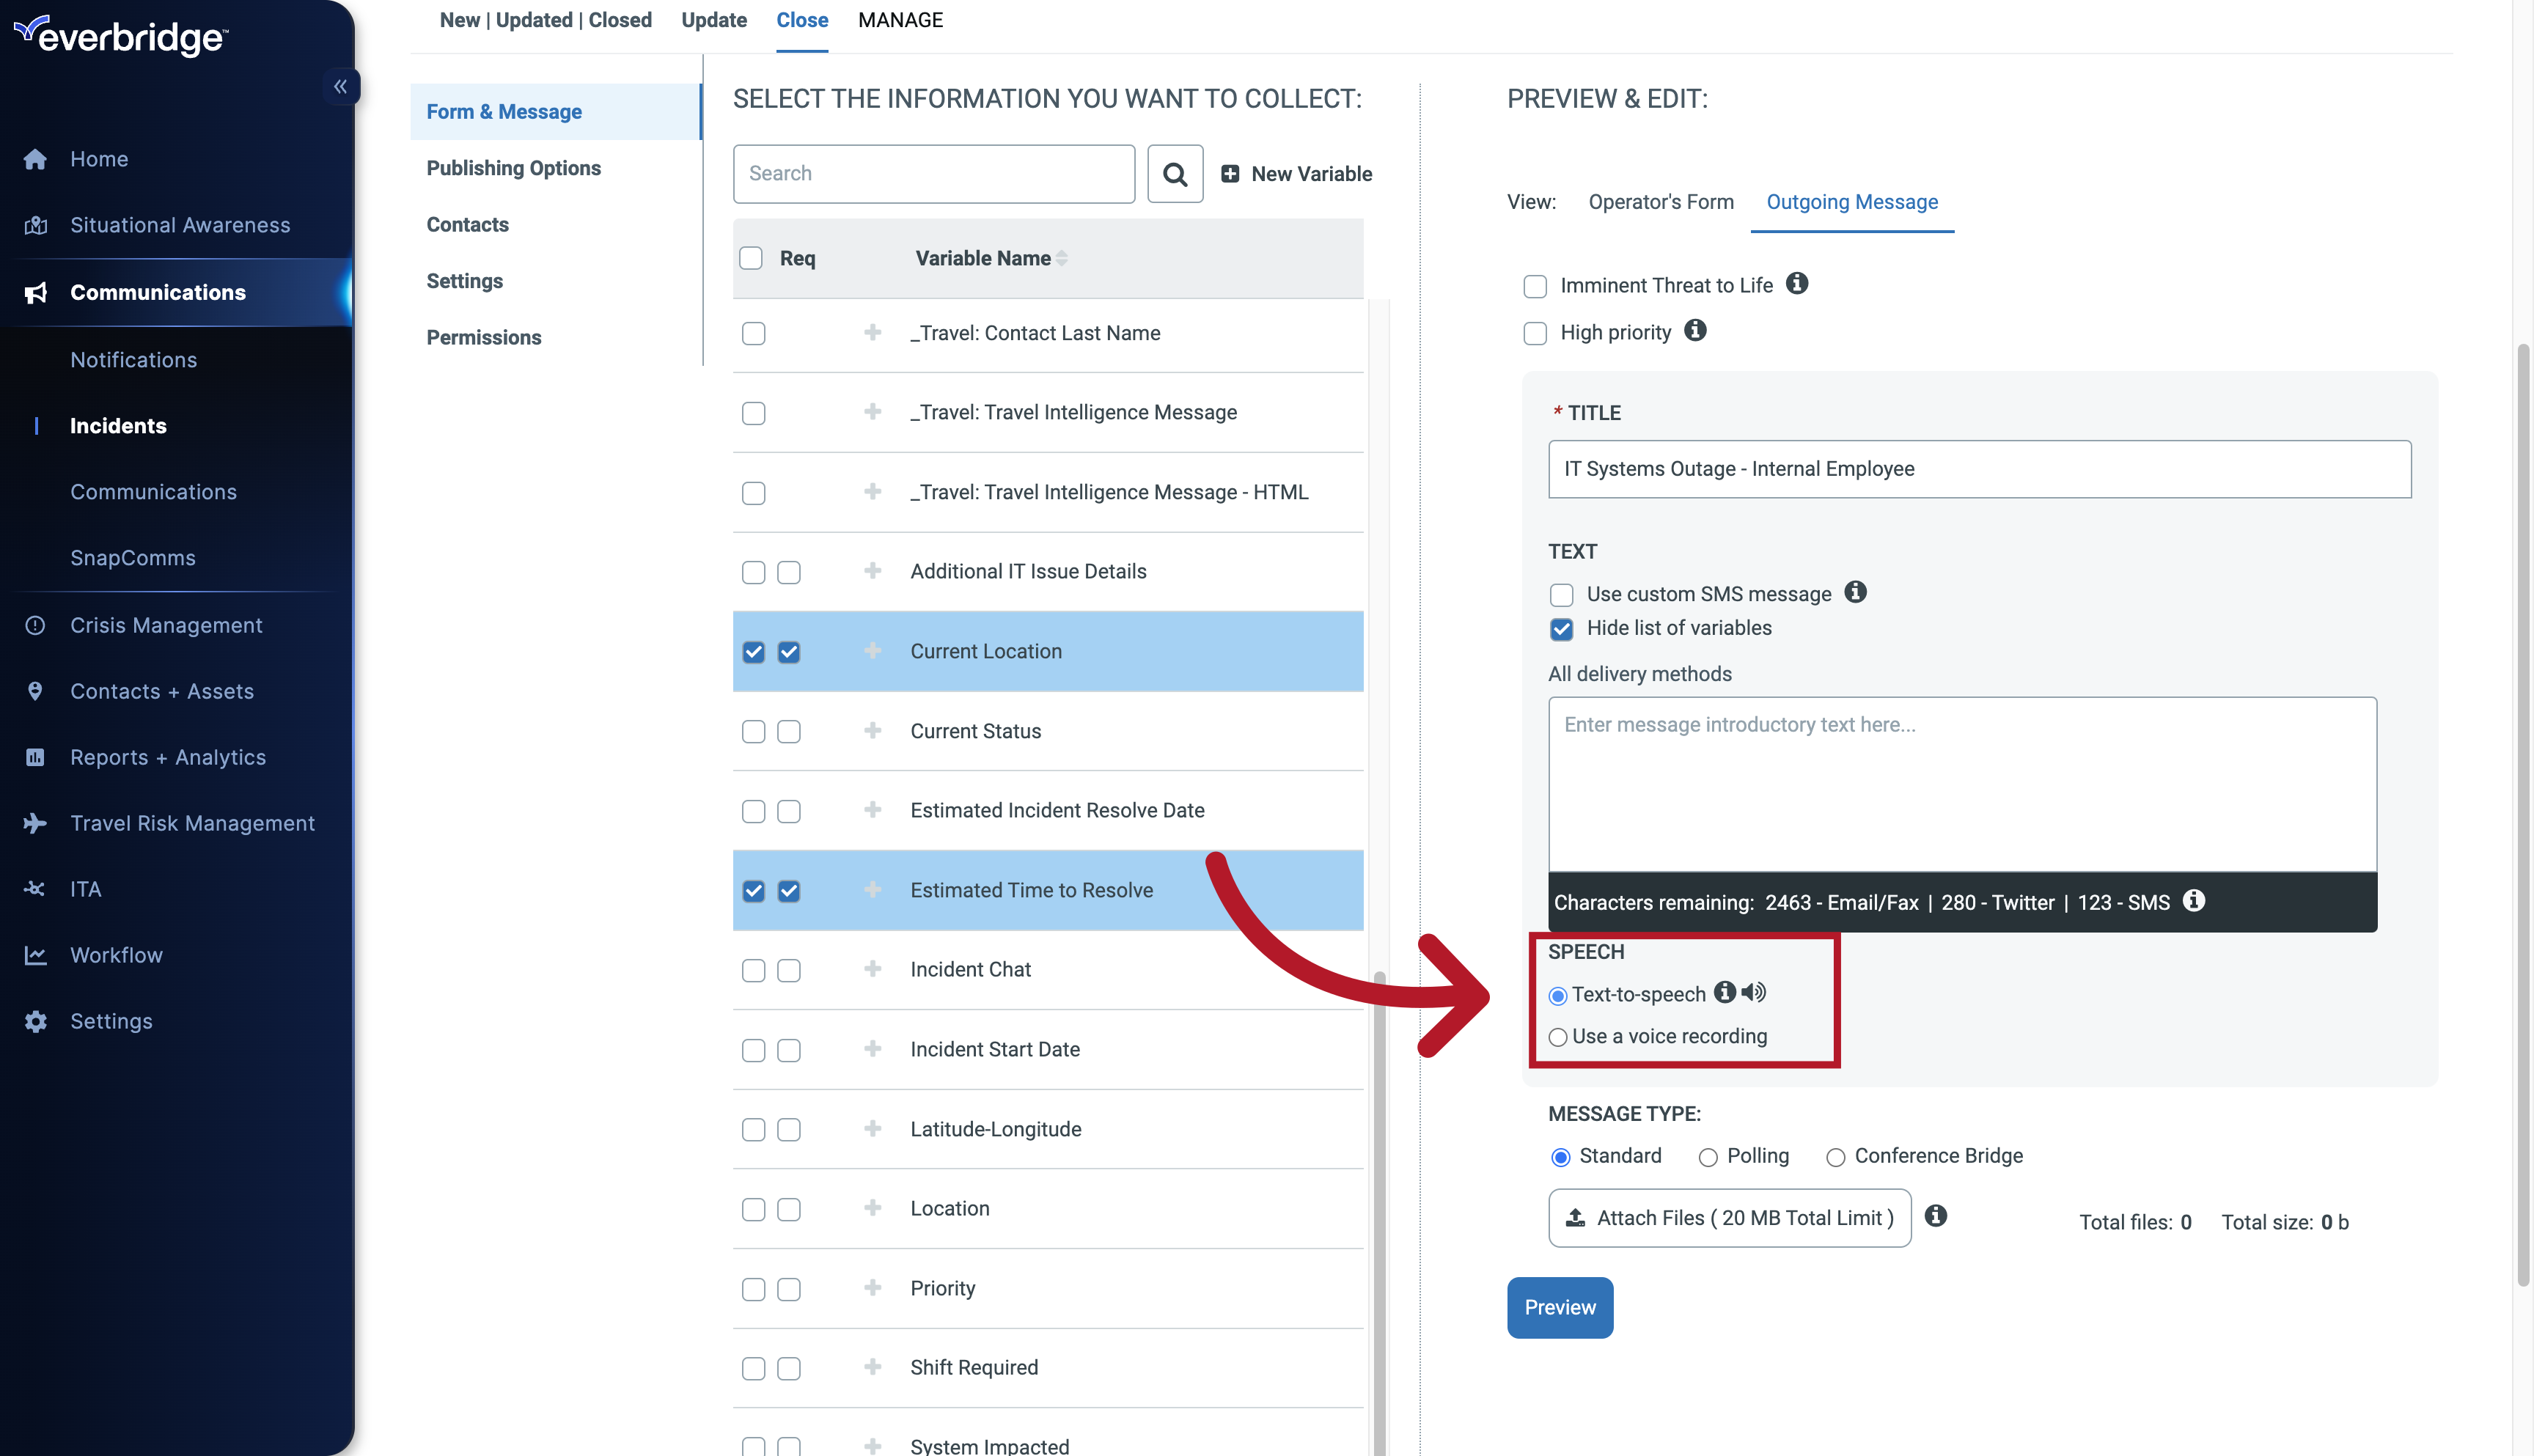
42. Speech
Speech,
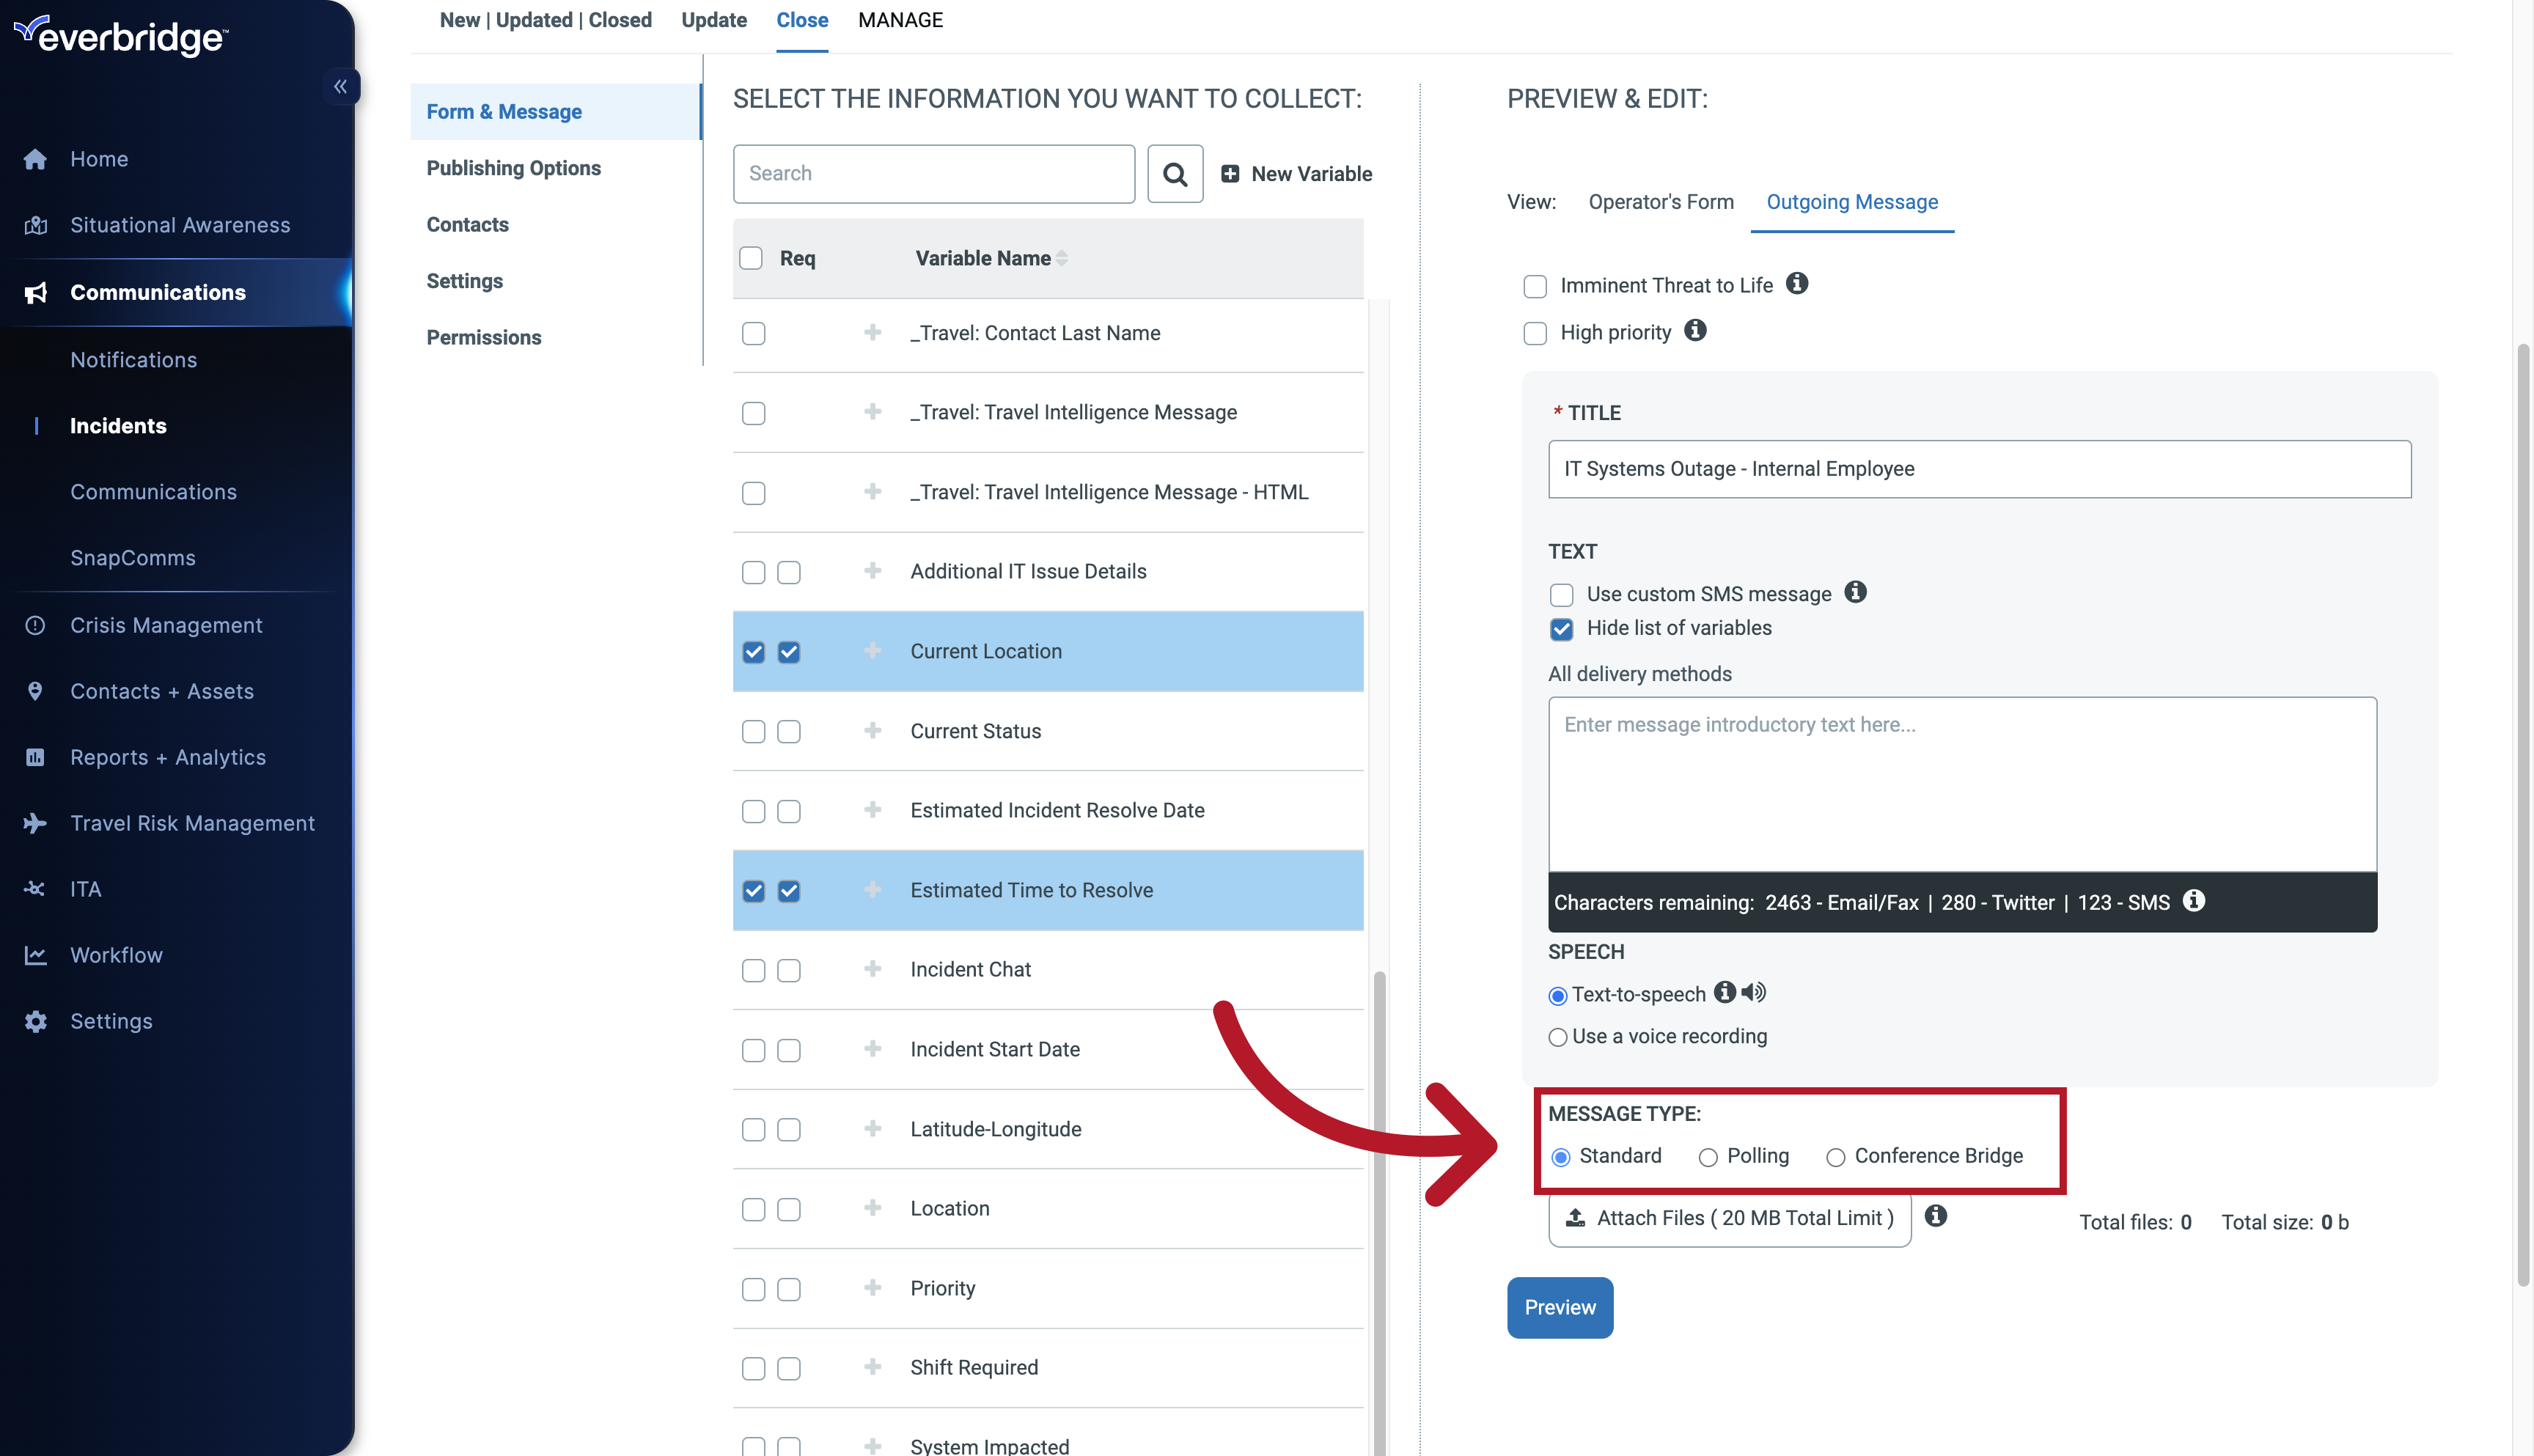
43. Message Type
and Message Type fields.
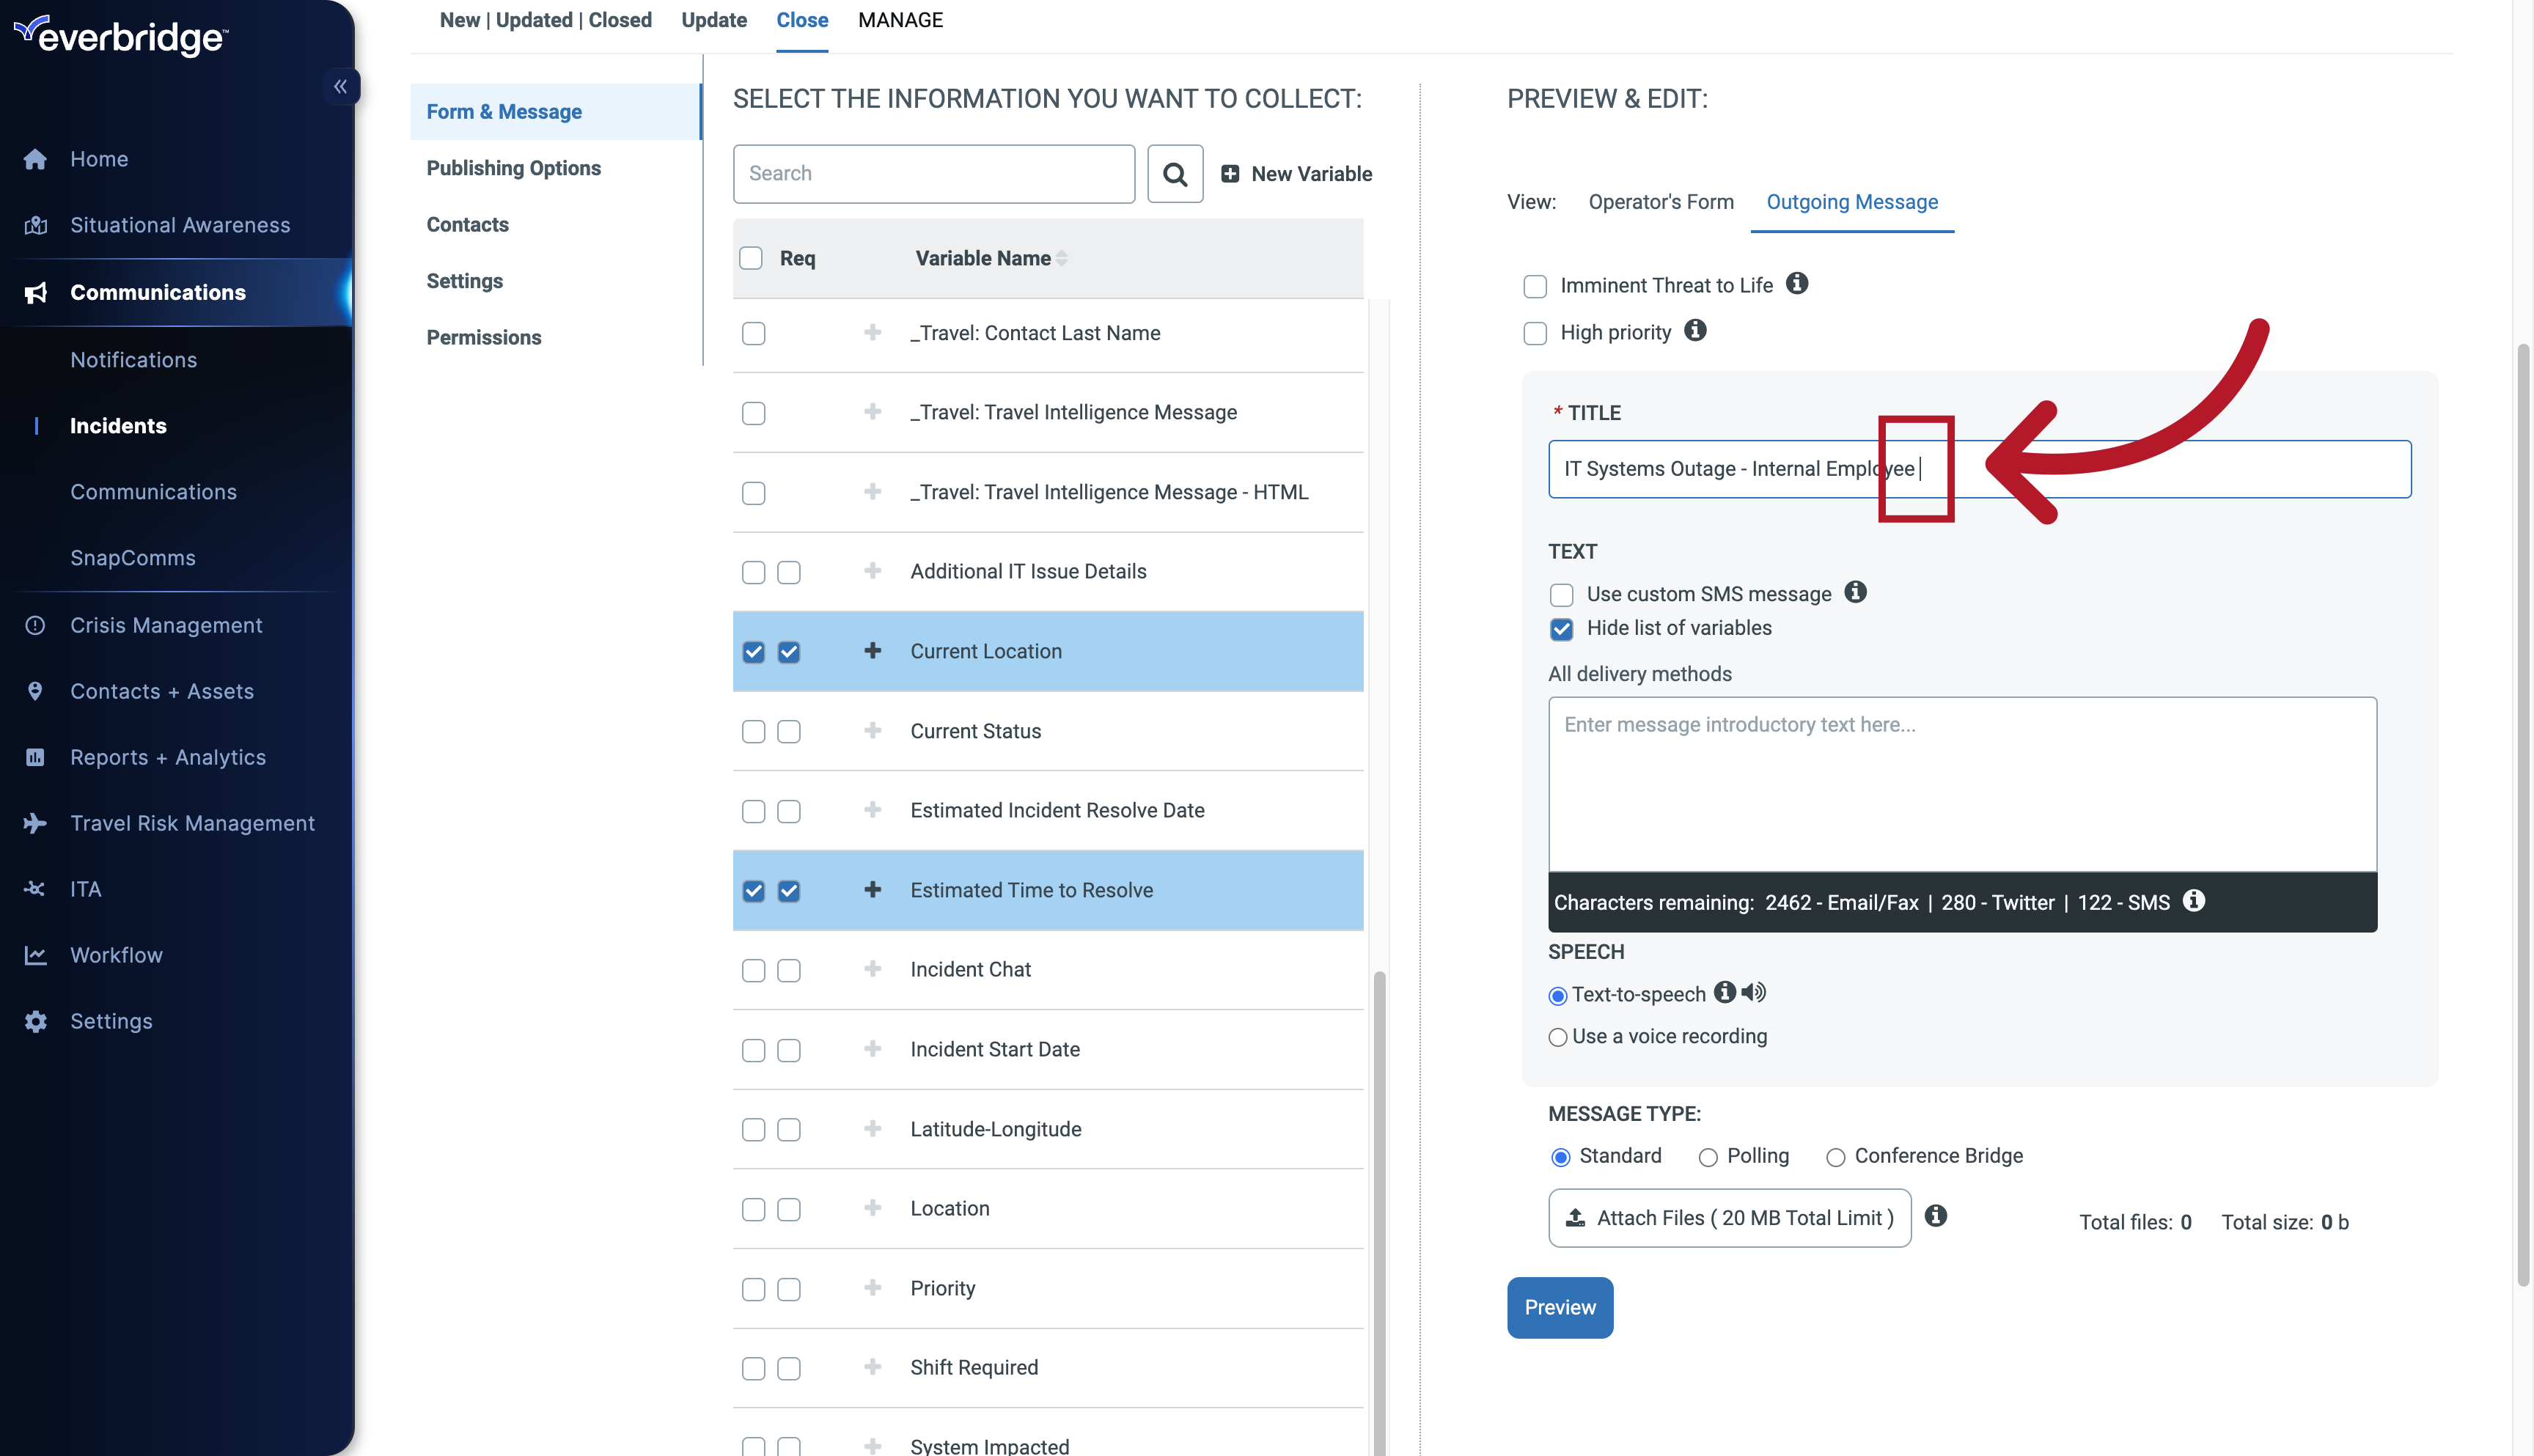
44. Form & Message
Click in any field to edit it,
45. Add Variable Token
Enter the incident details.
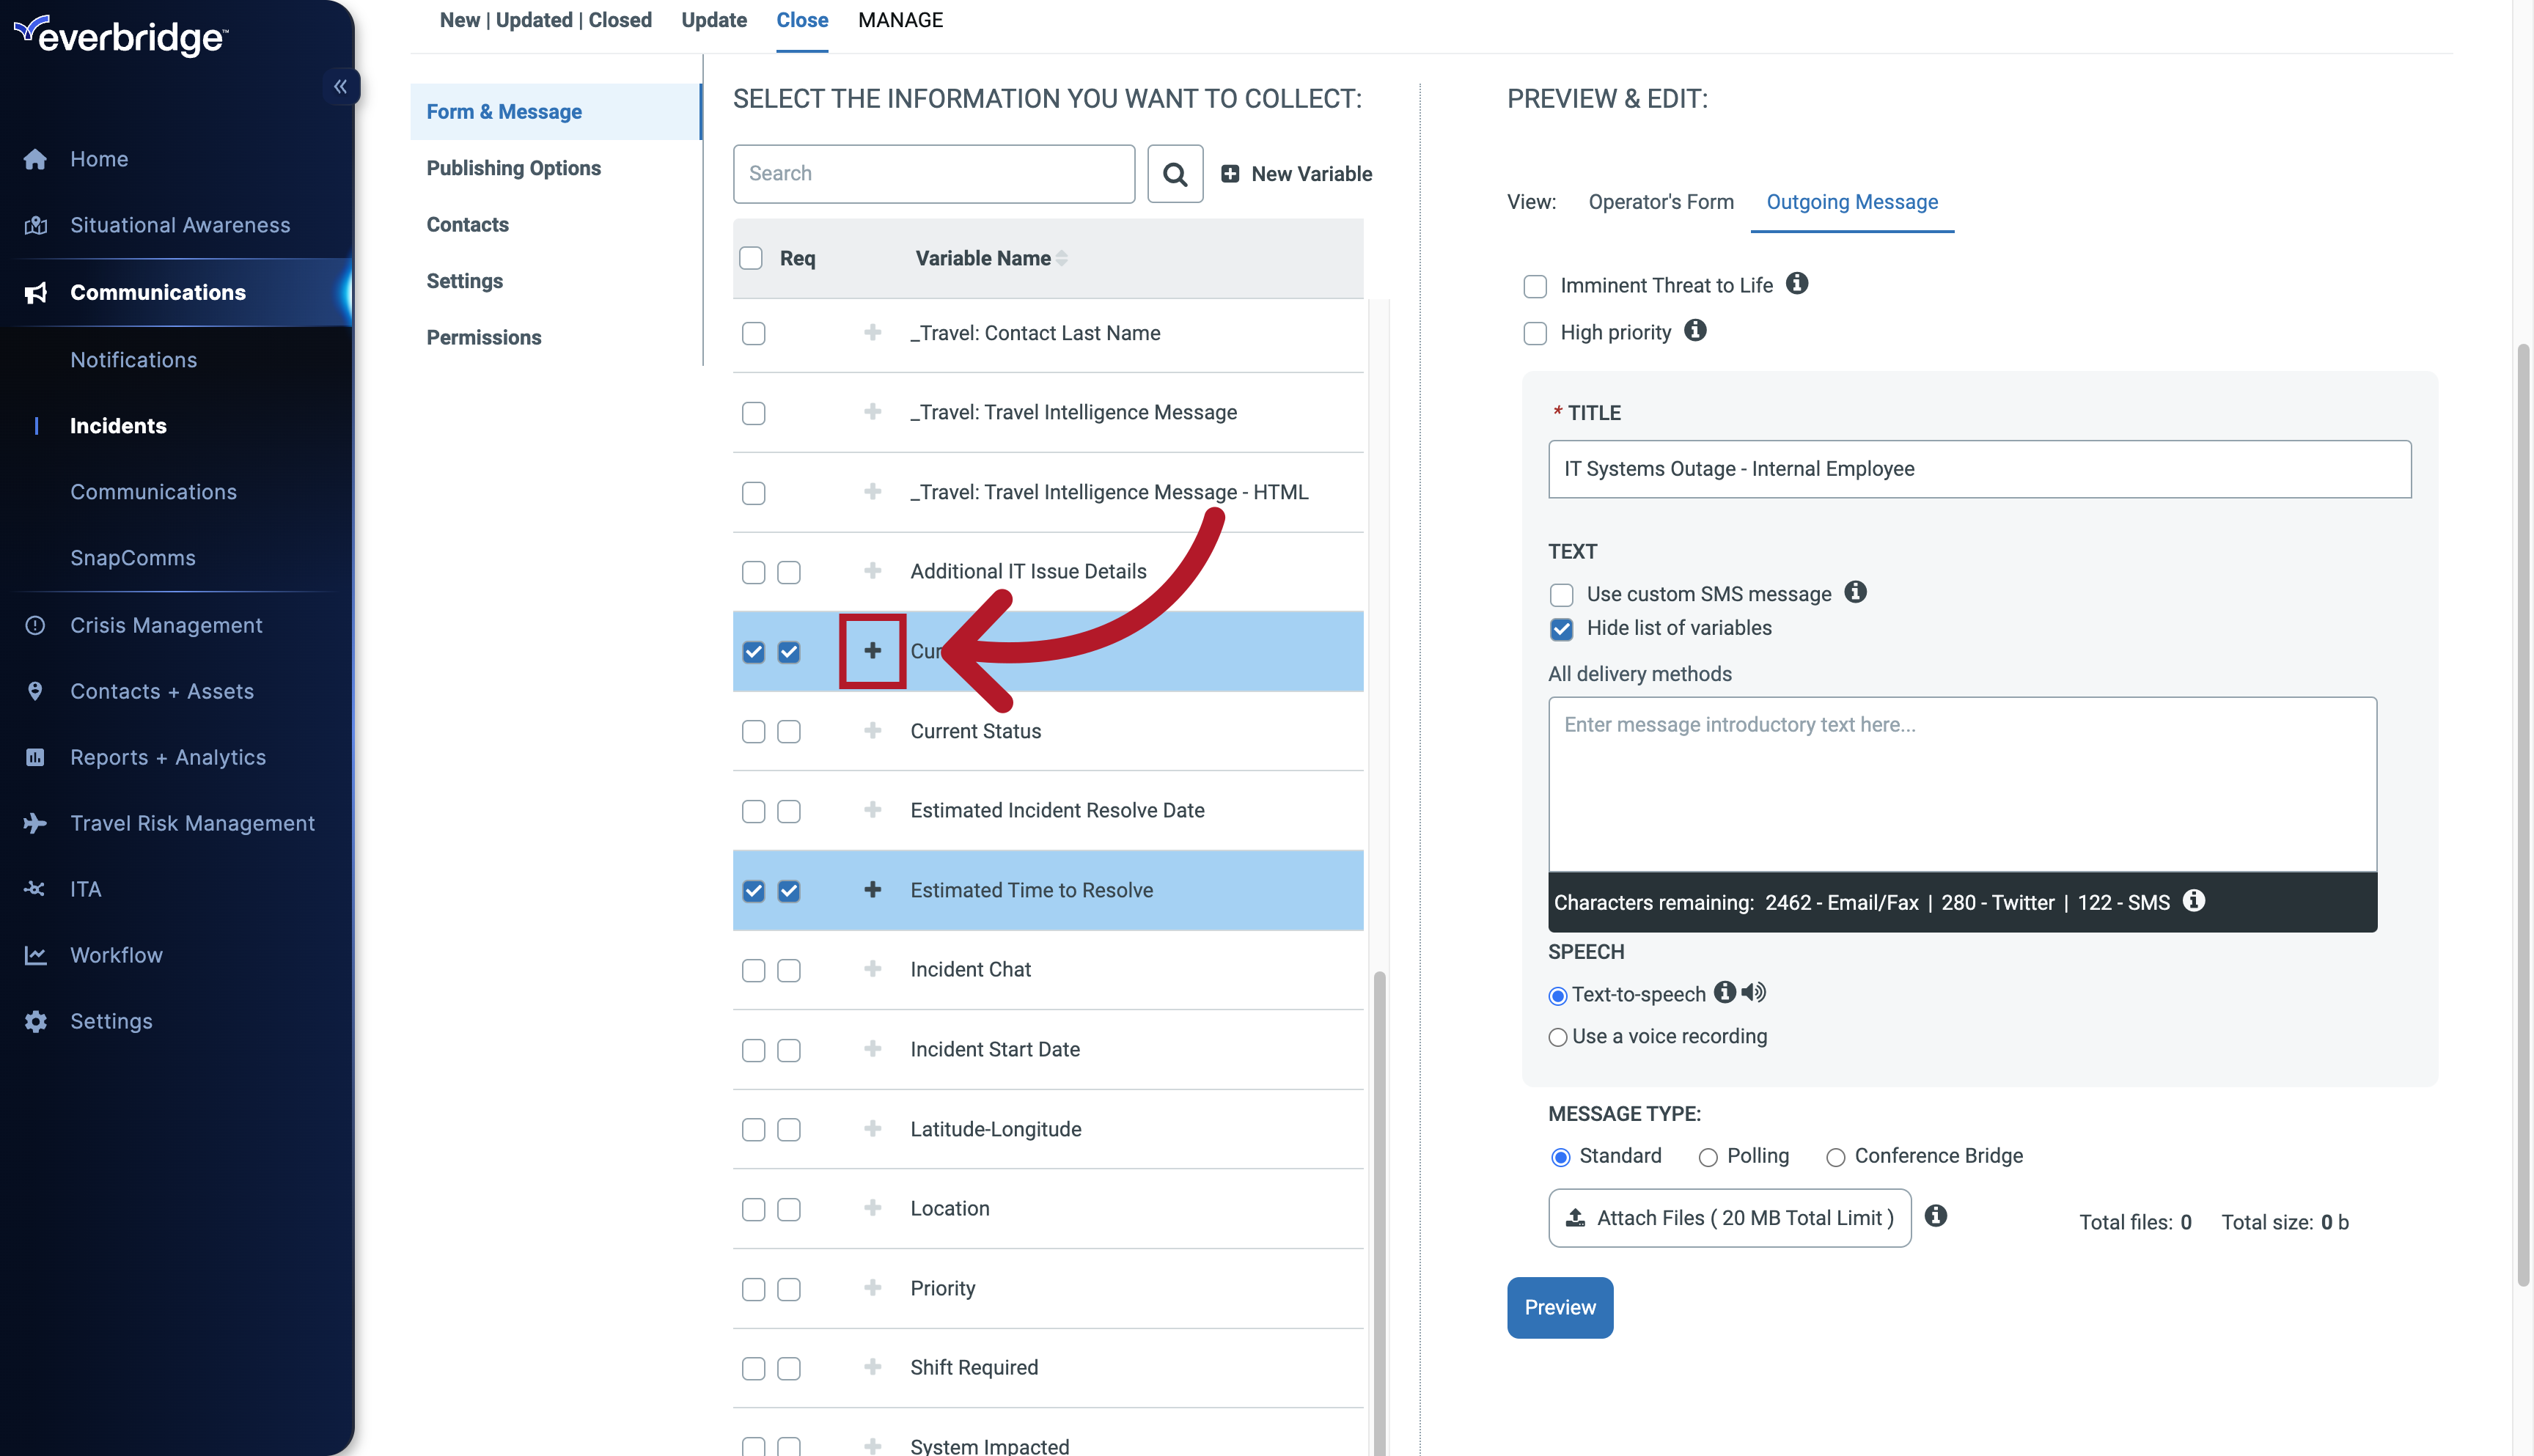
46. Add Variable Token
Add any appropriate Tokens to the Message boxes by clicking the black plus sign by the Variable.
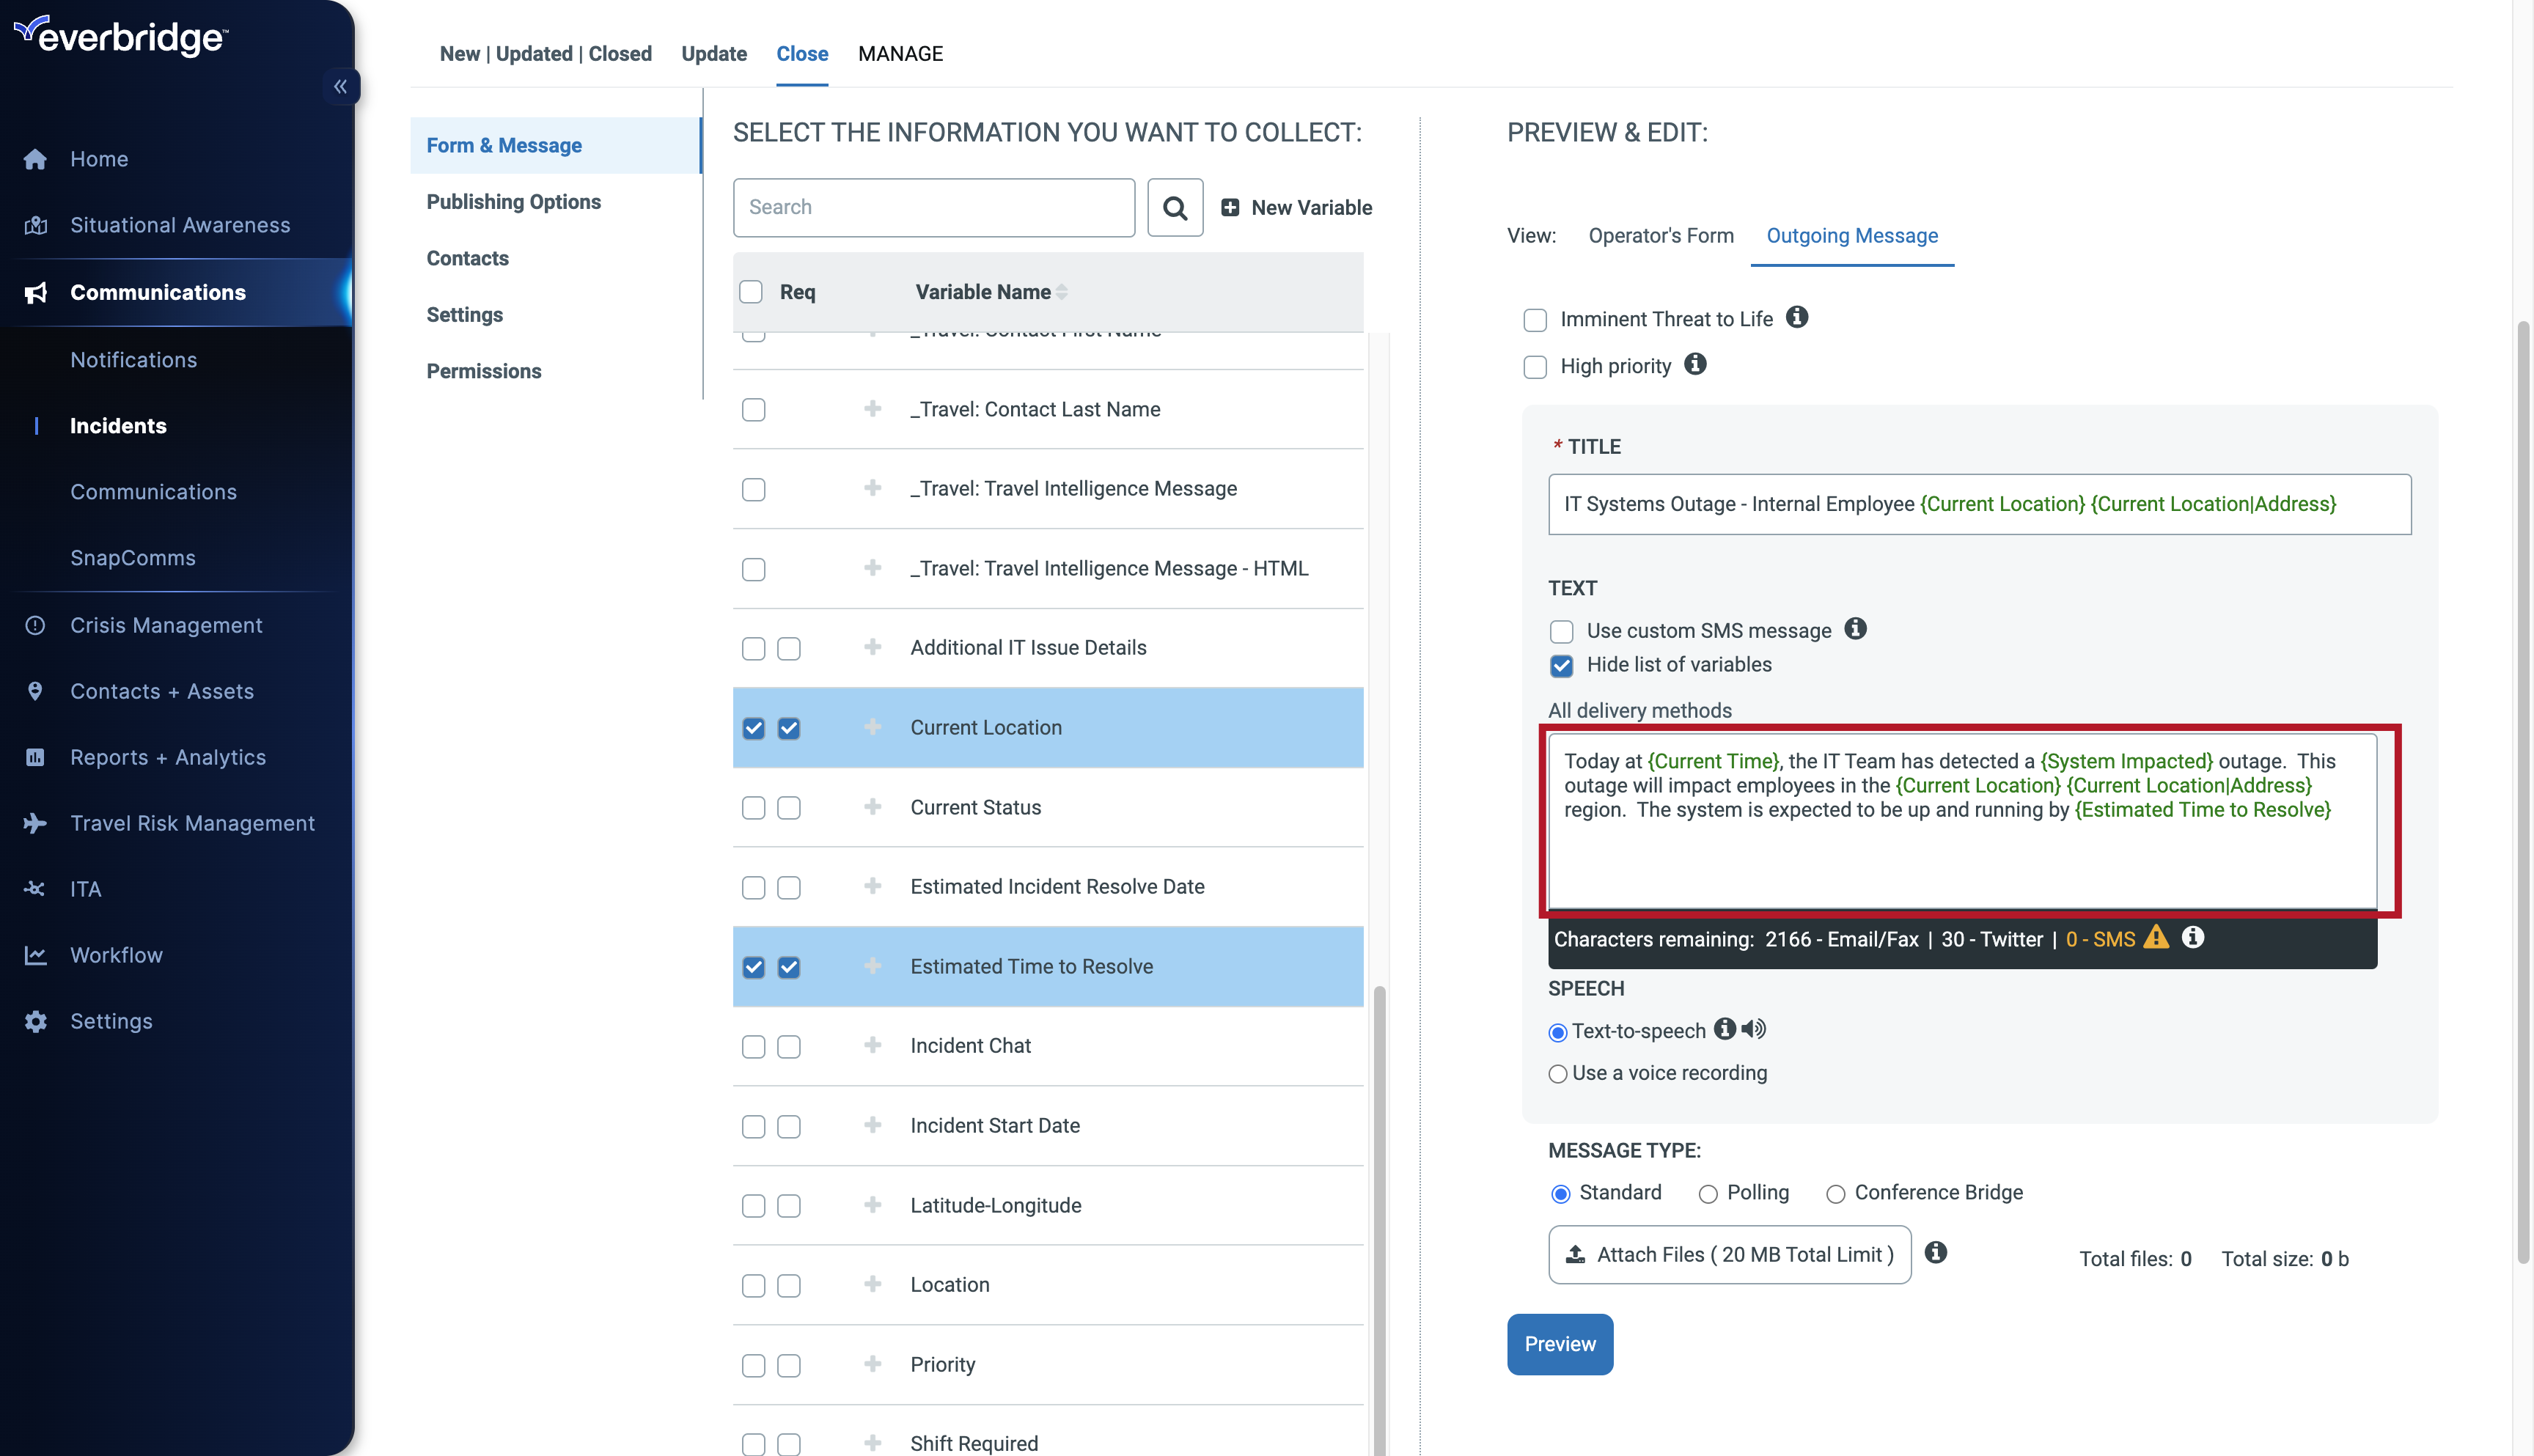
47. Add Variable Token
Add introductory text.

48. Add Variable Token
Enter the message details.
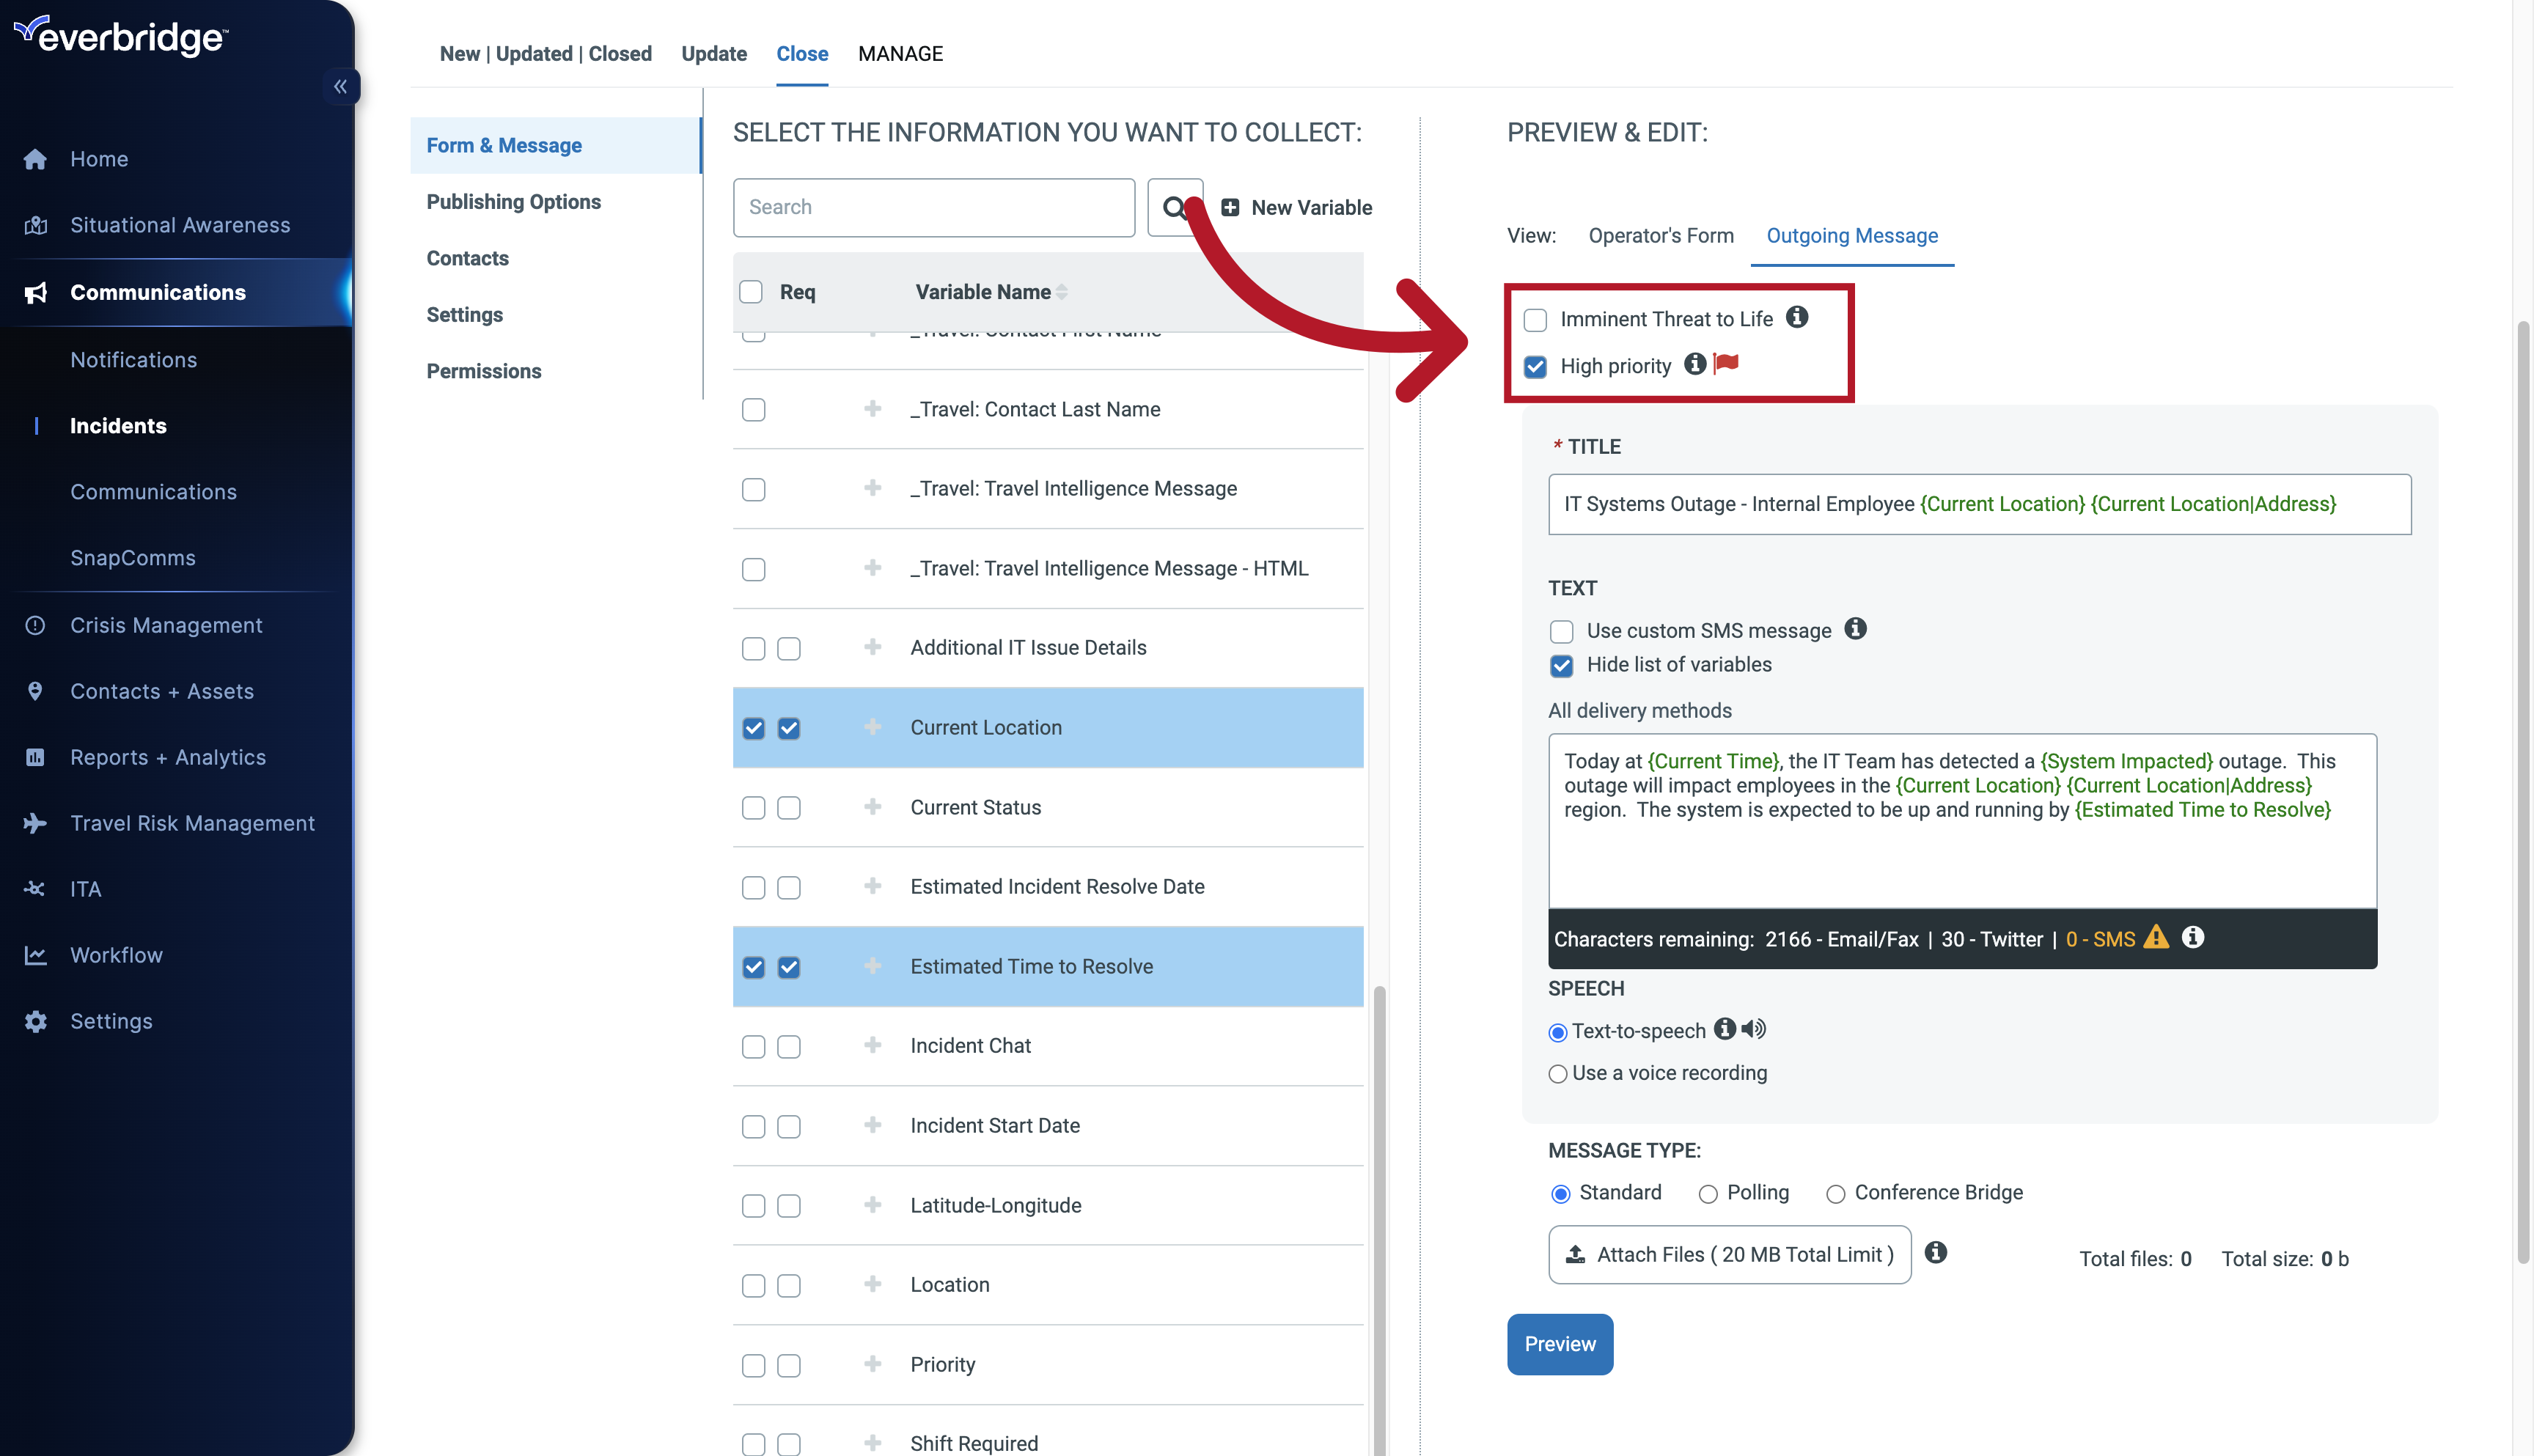
49. Priority
You have the option to mark the Message as Imminent Threat to Life or High Priority.
50. Form & Message
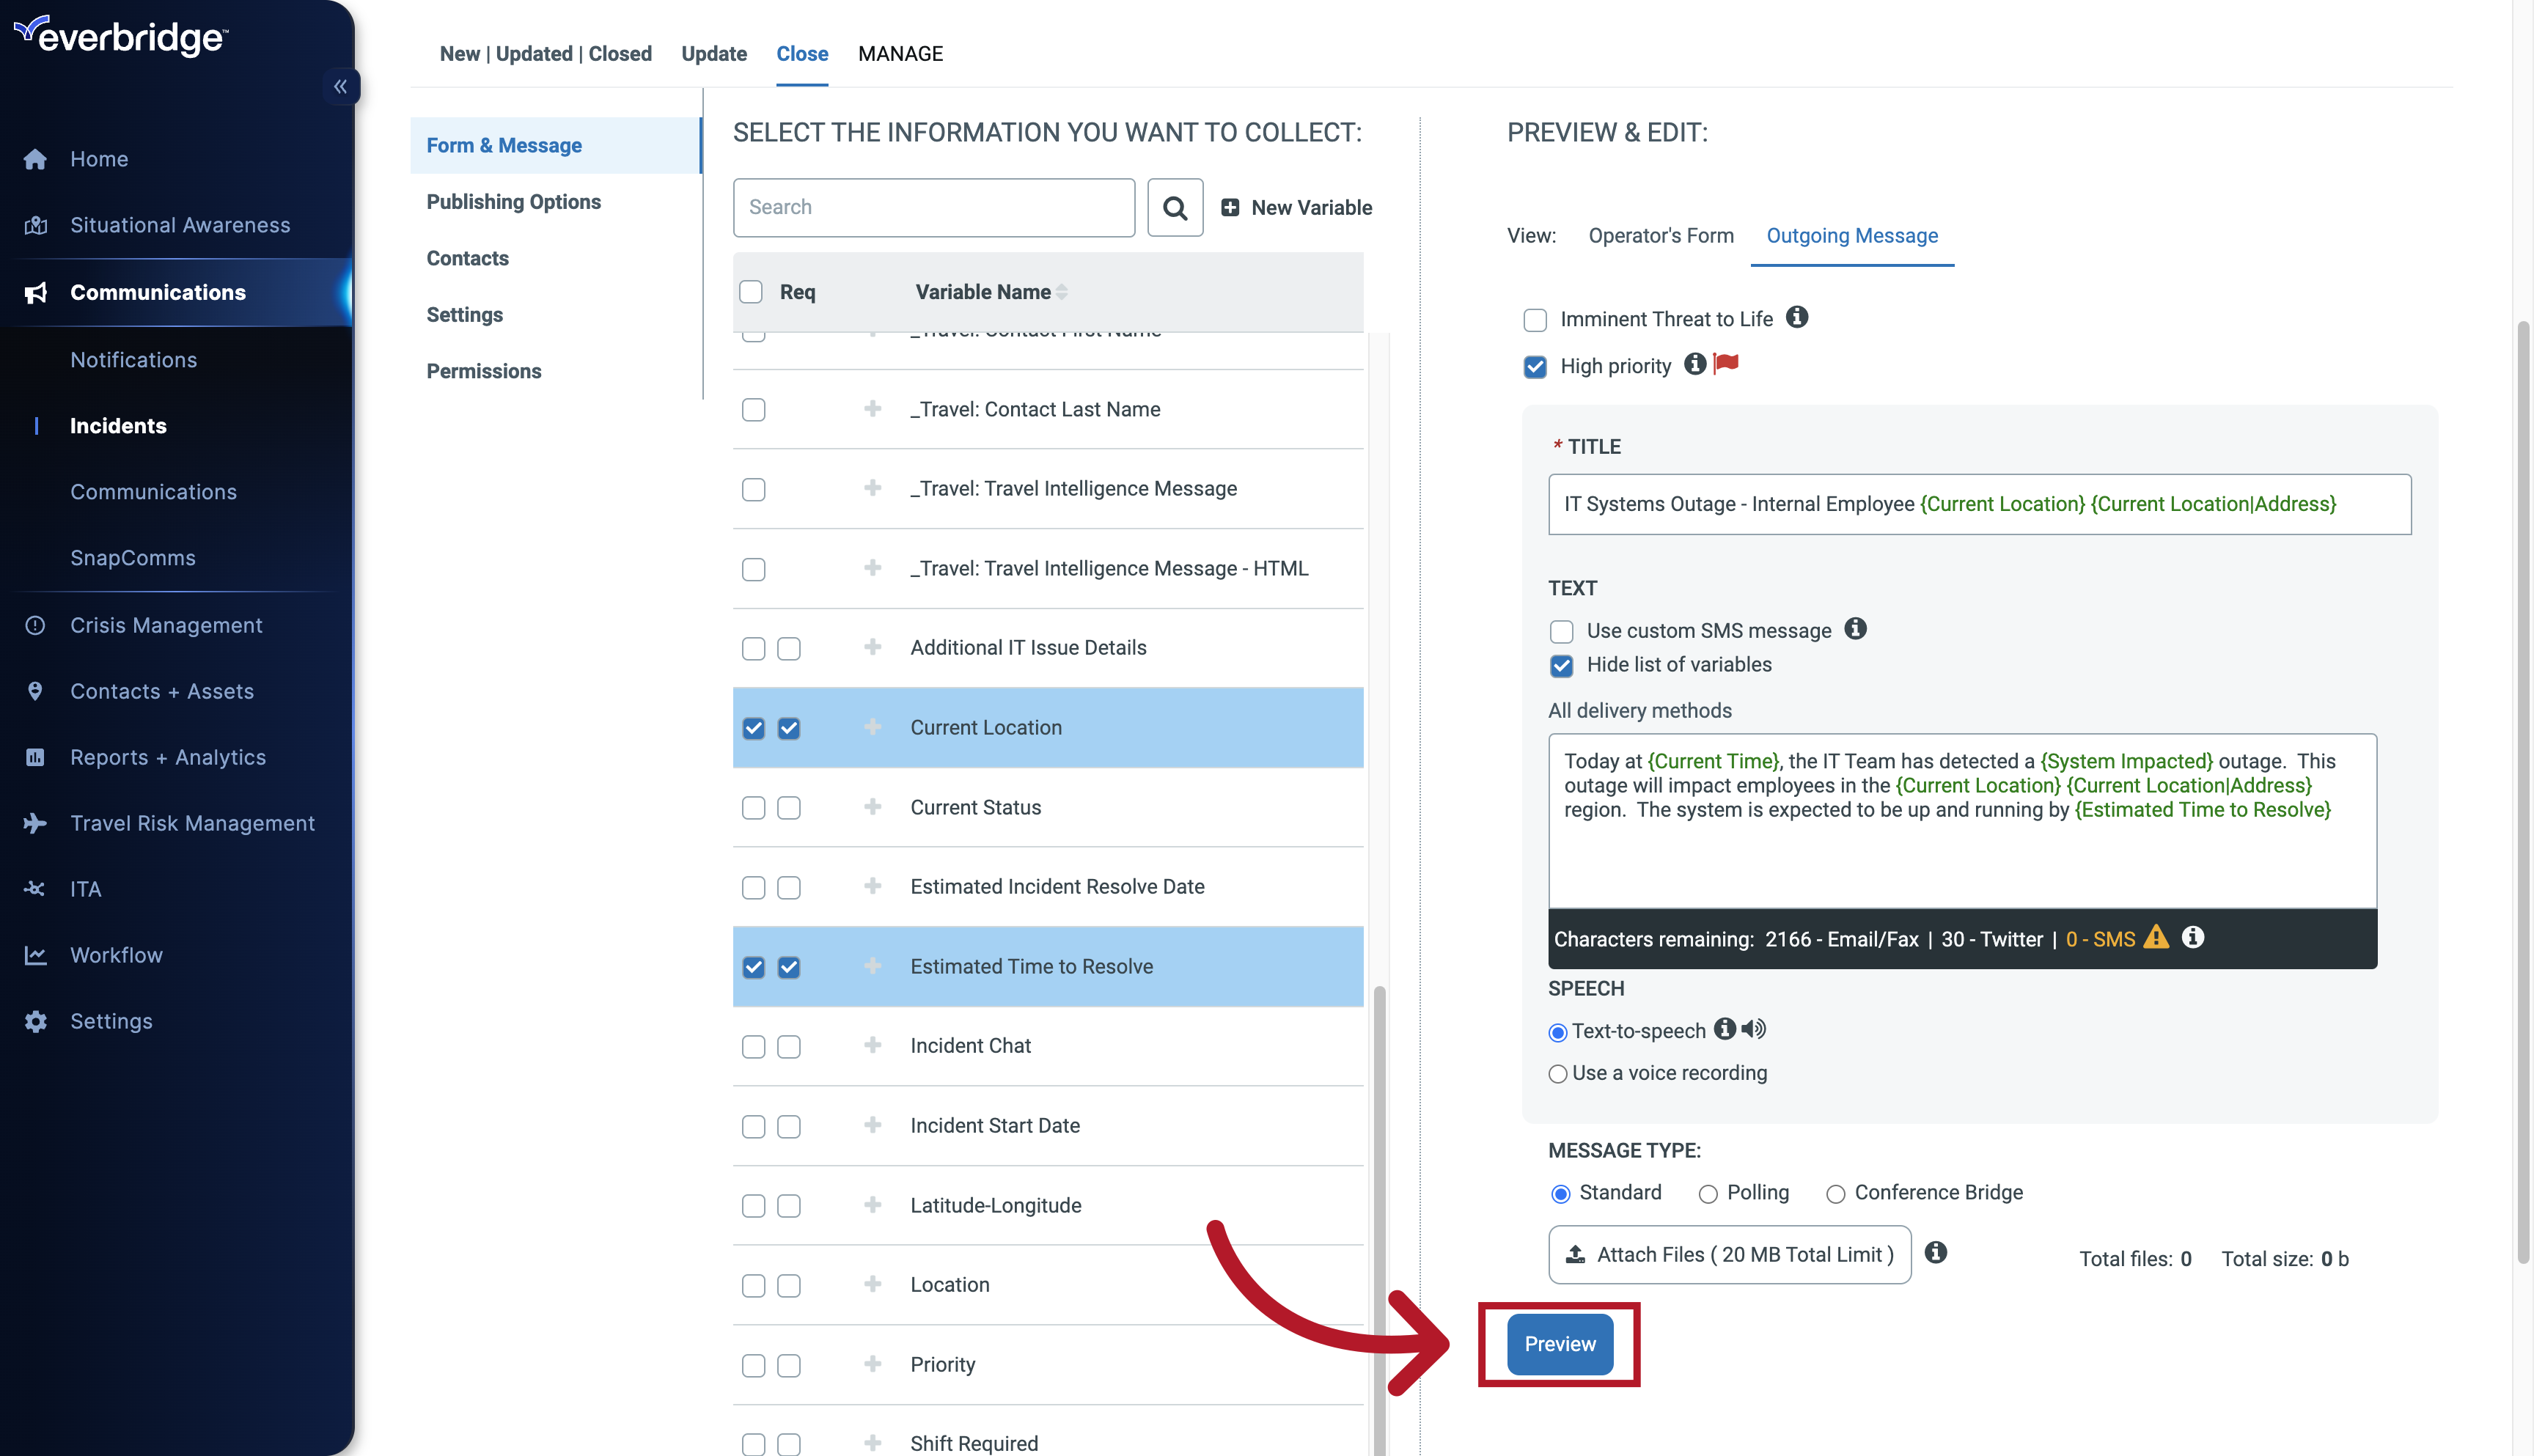
Once you're finished,
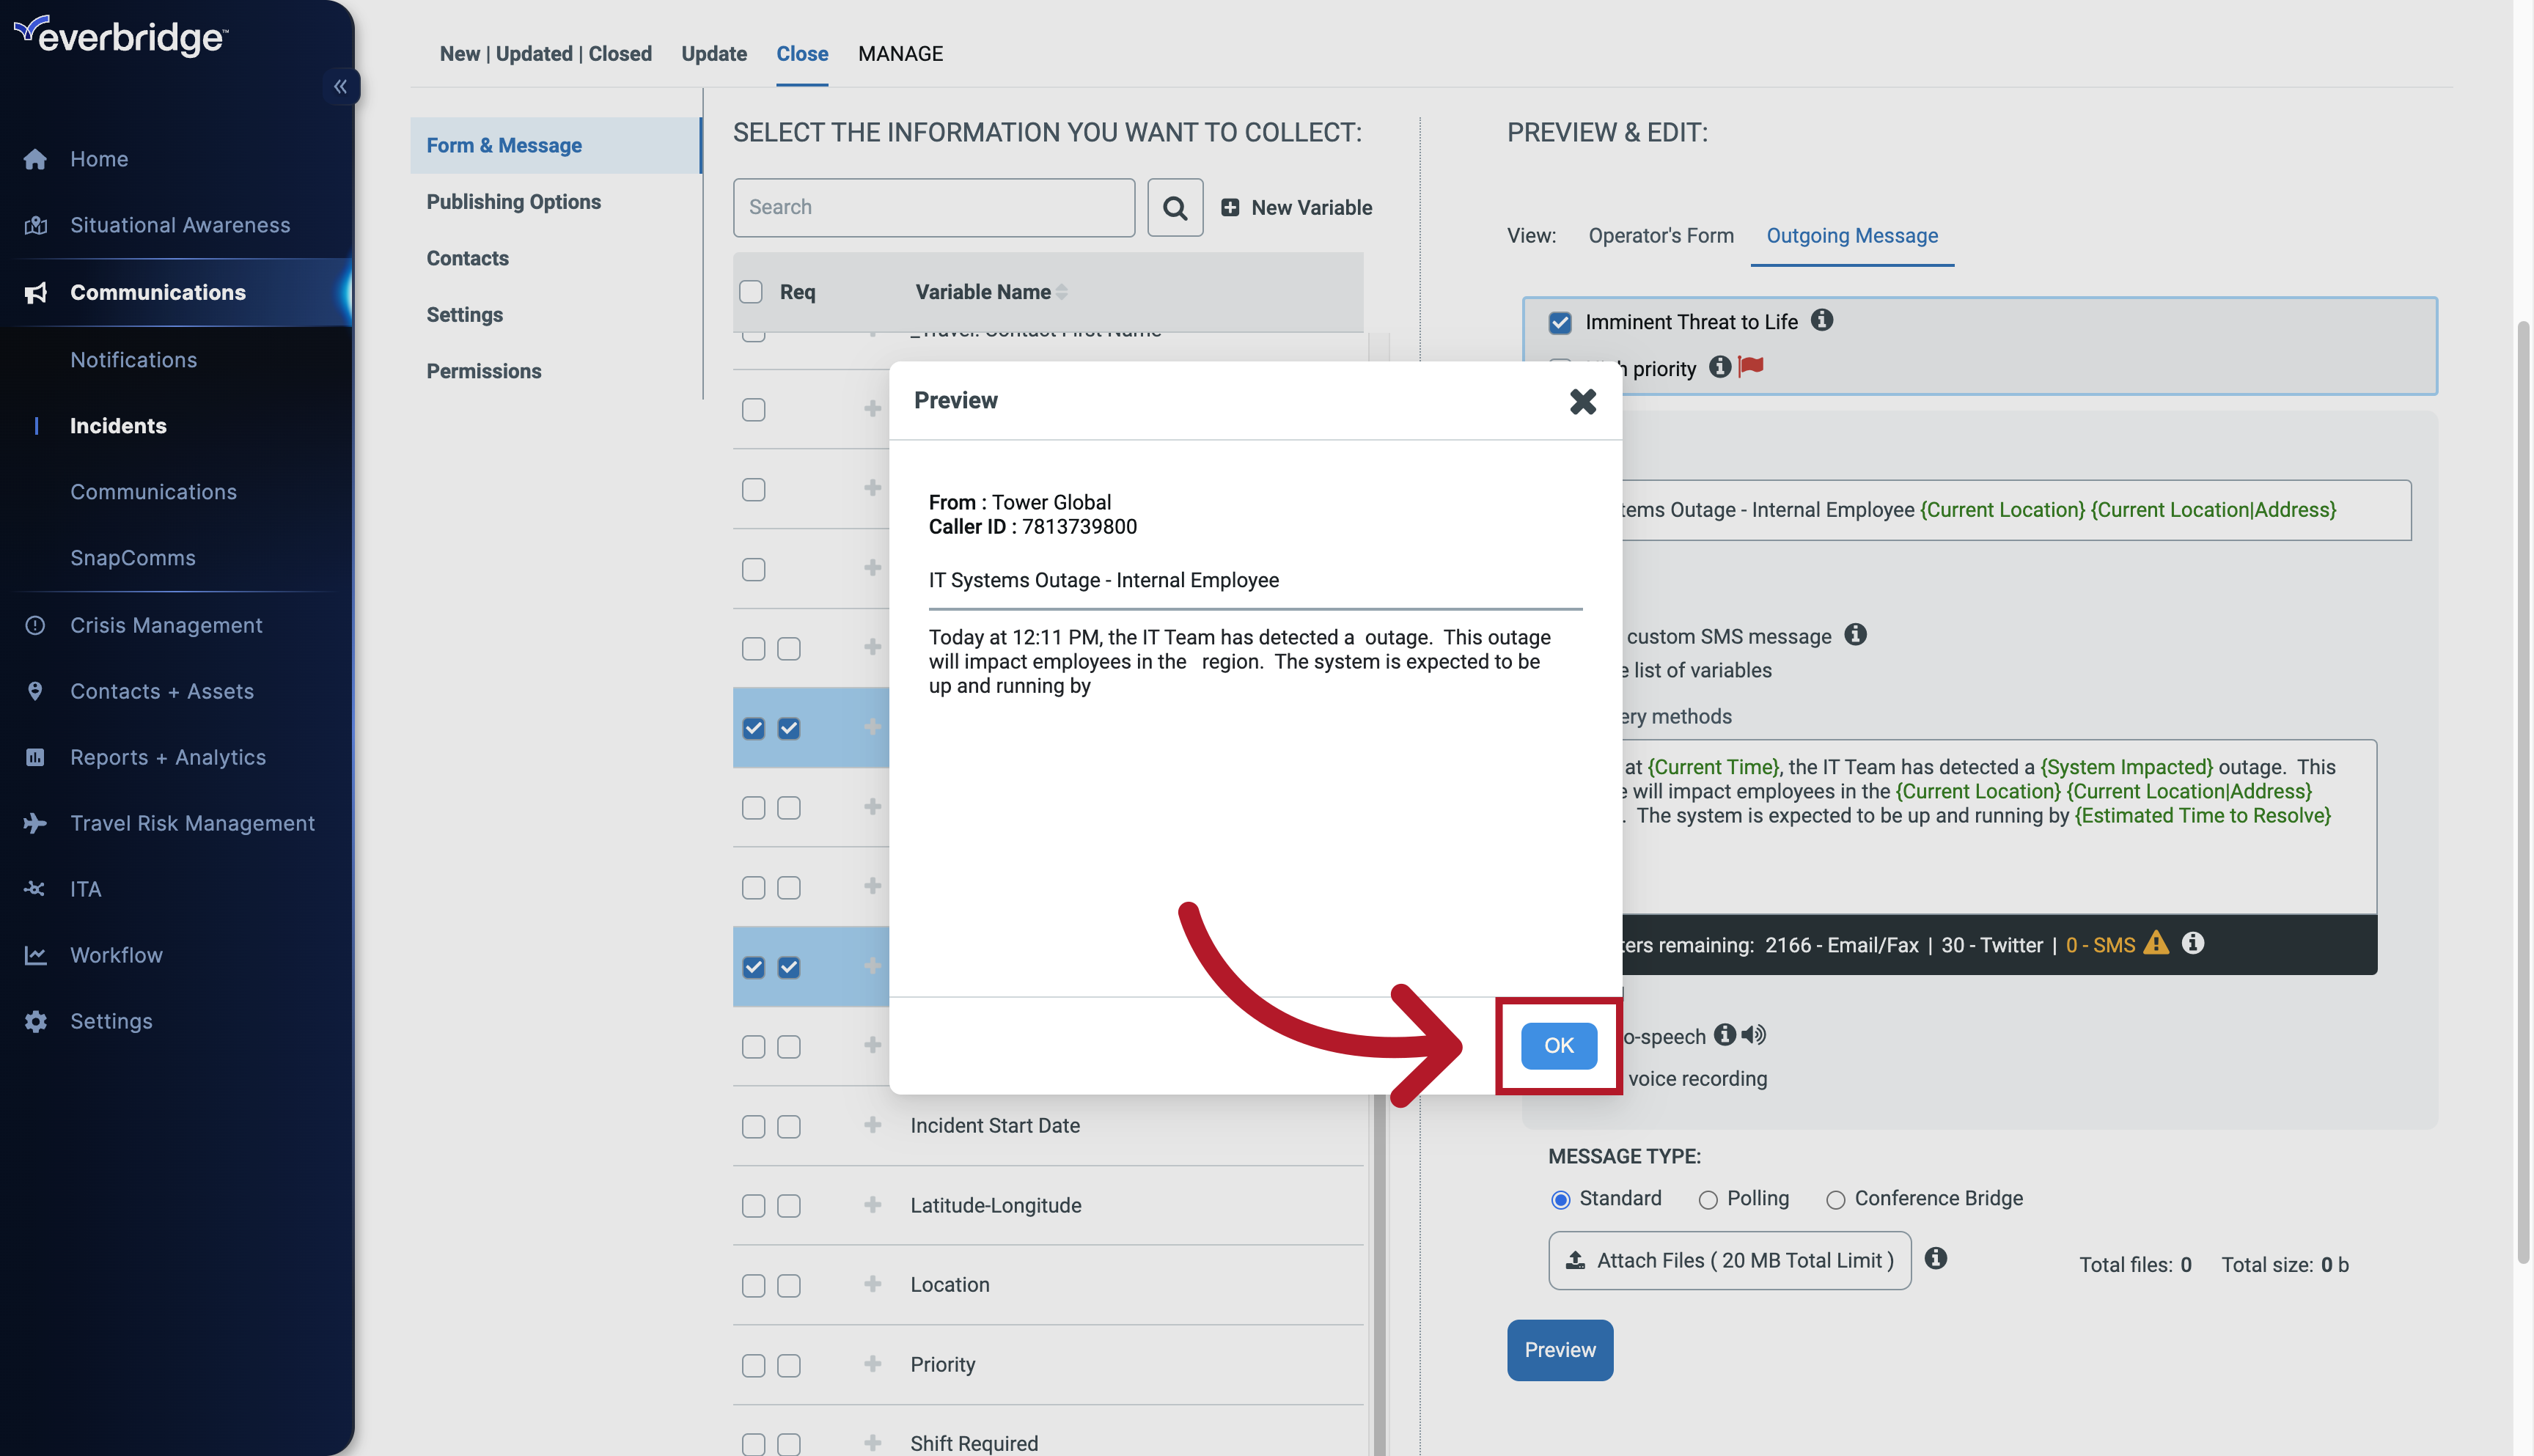
51. Preview
Click Preview to view the Form and make sure everything is correct.
52. Preview
Select the sender details.
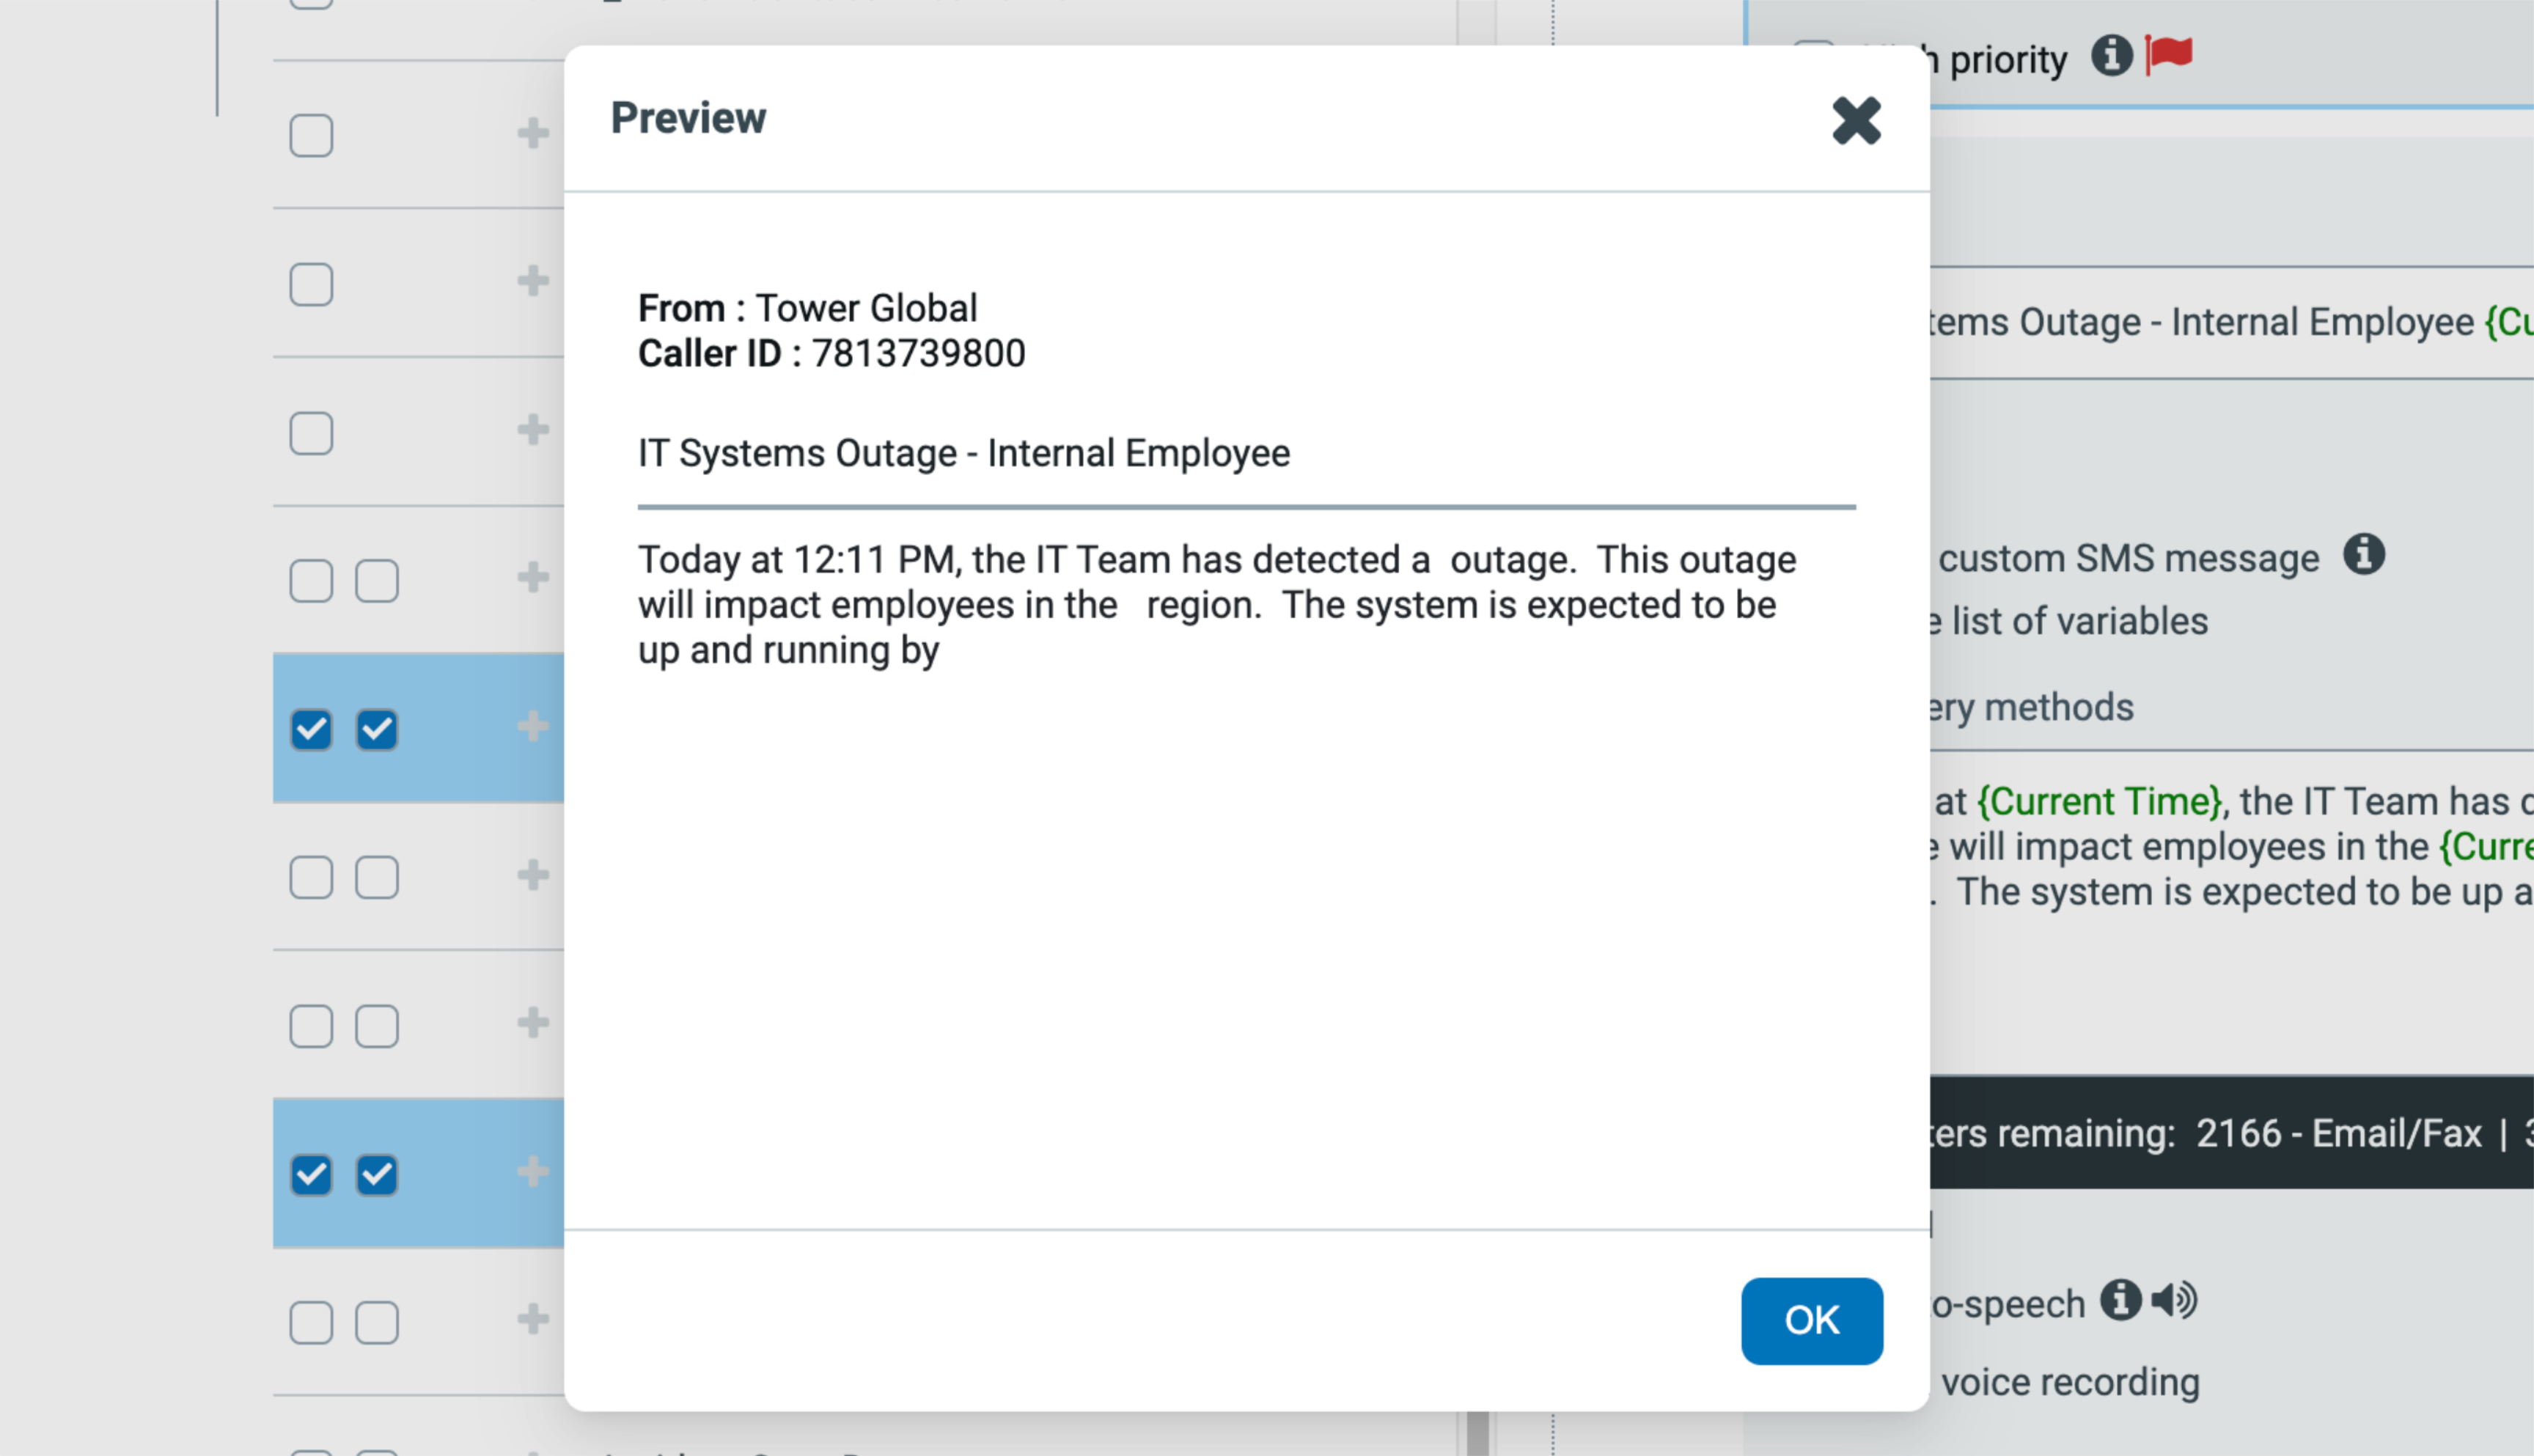
53. Preview
Click on "OK"
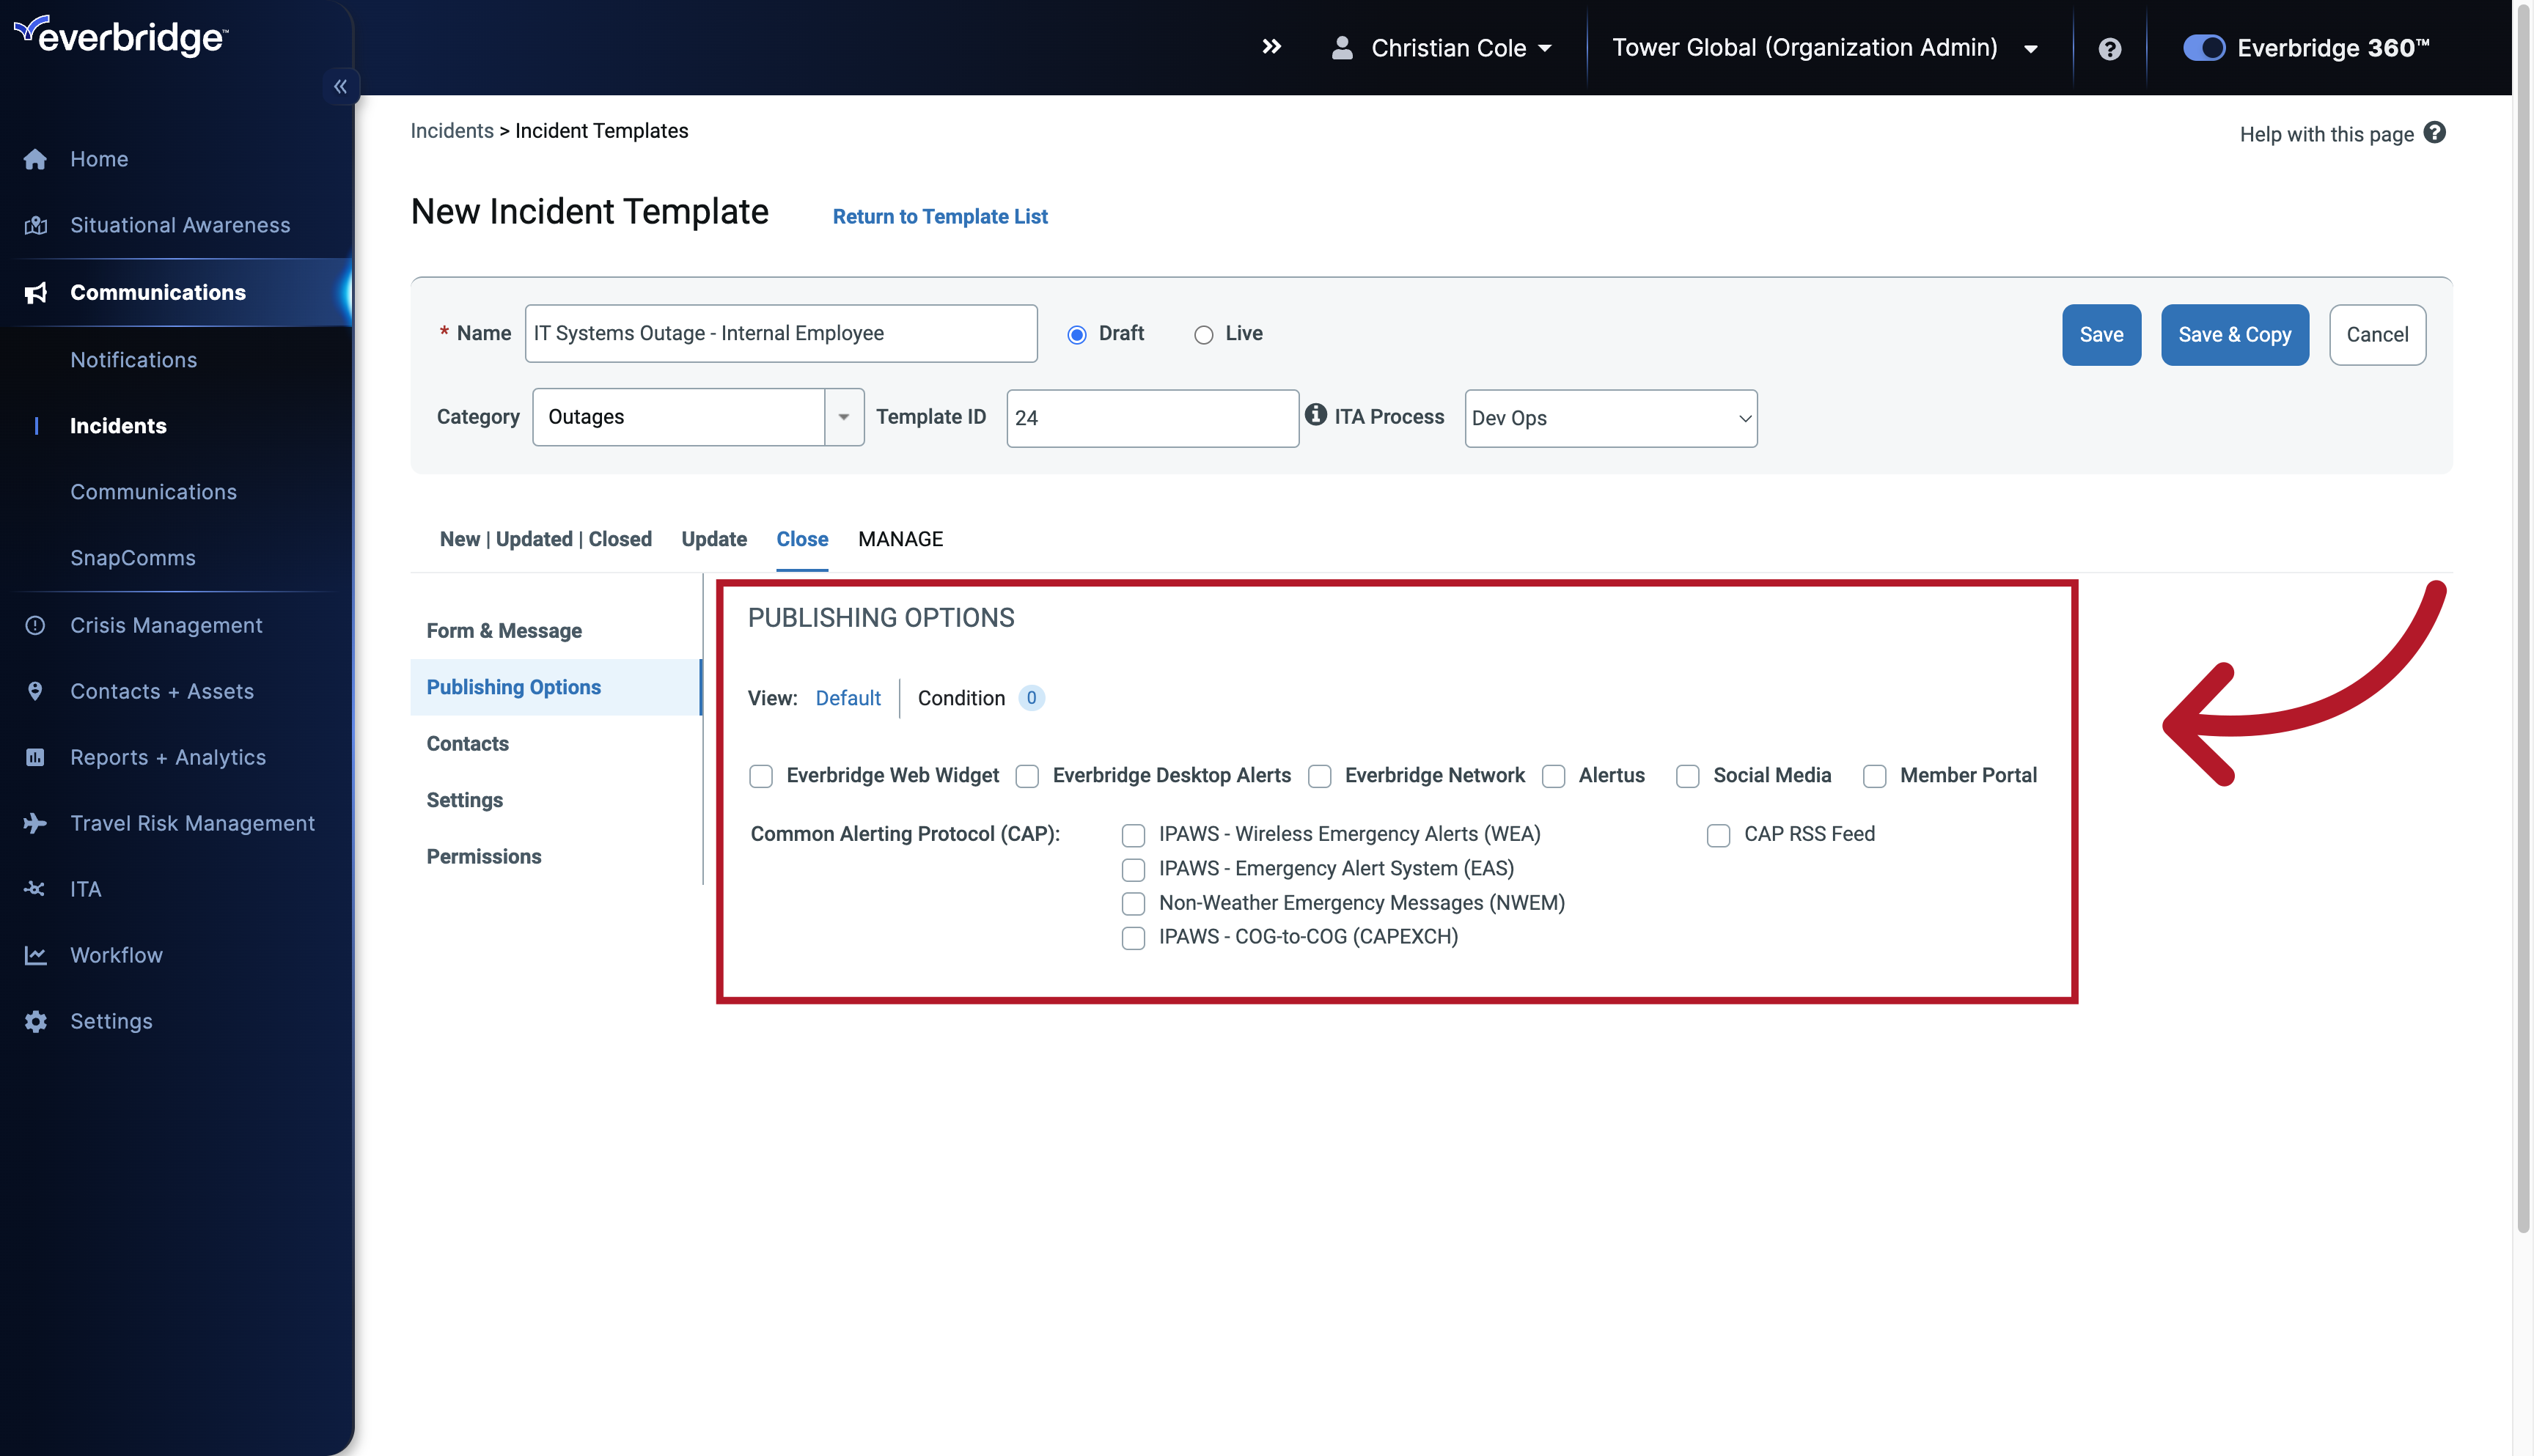
54. Publishing Options
There are several types of Publishing Options you can utilize for an Incident Message.
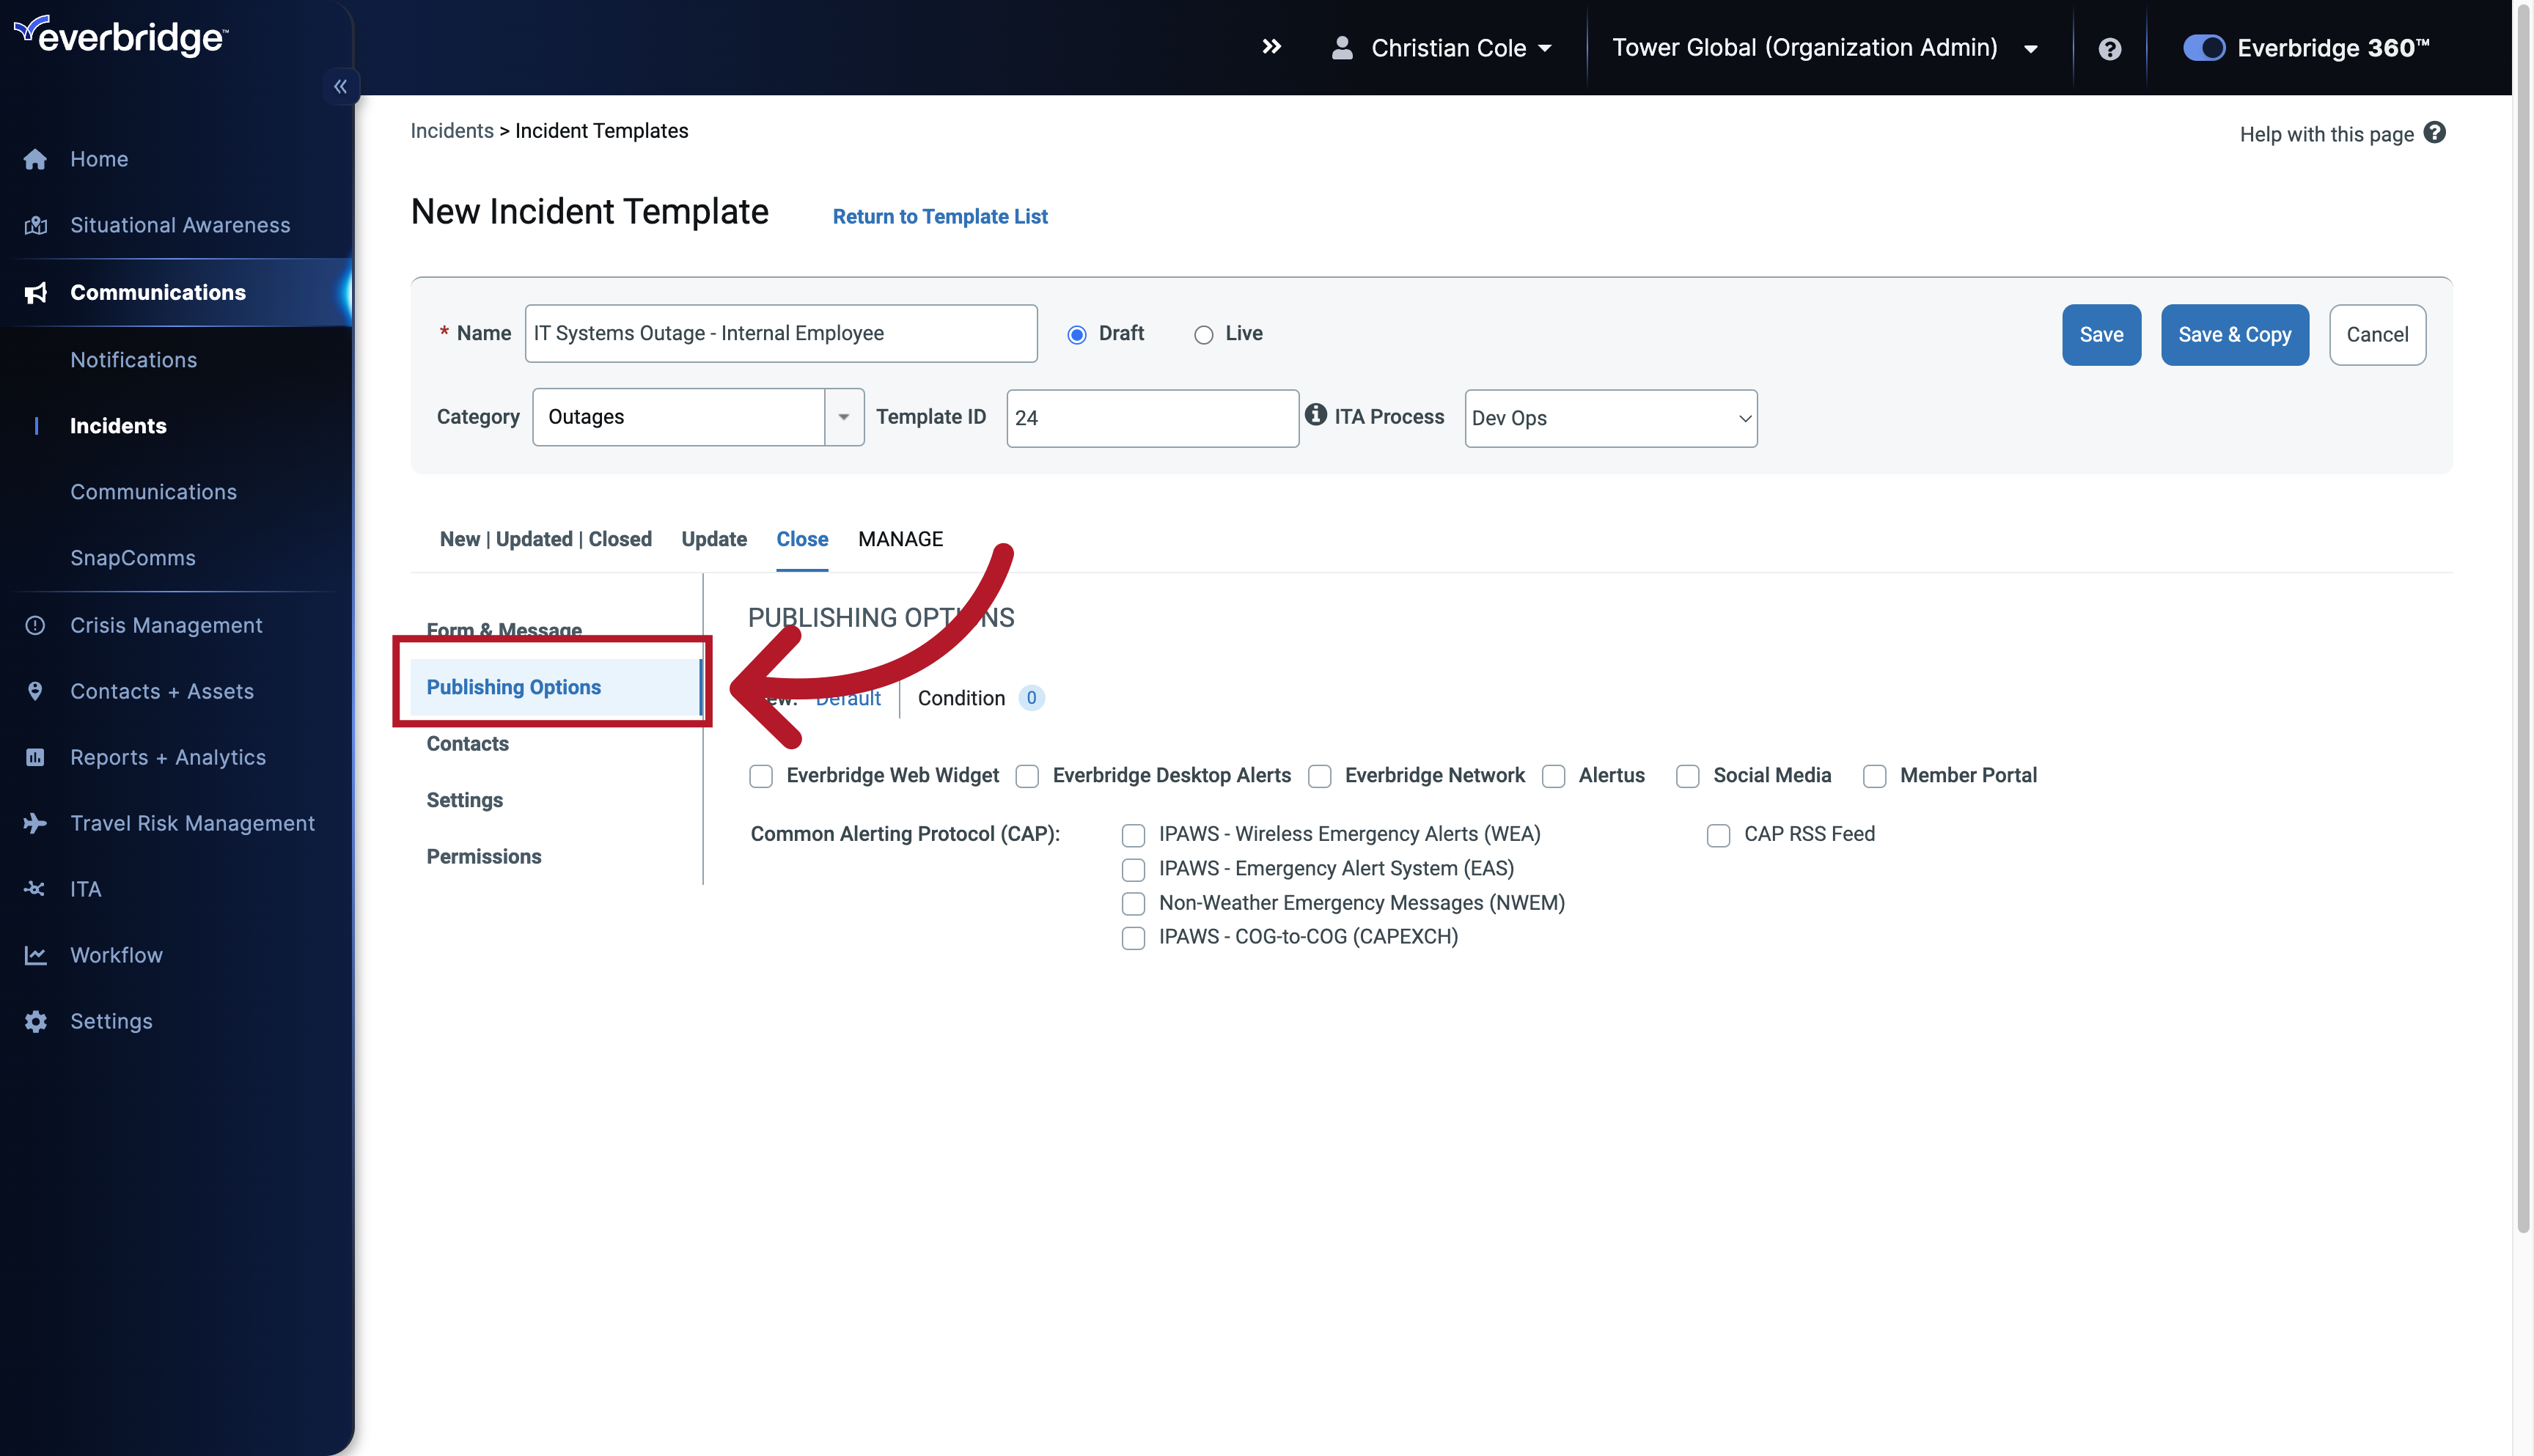
55. Publishing Options
However, the options you see in this section depend on what you've purchased, as well as what you've enabled in your organization settings, we recommend you check out our course "Creating an Incident Template" within Everbridge University for full details on each of these options.
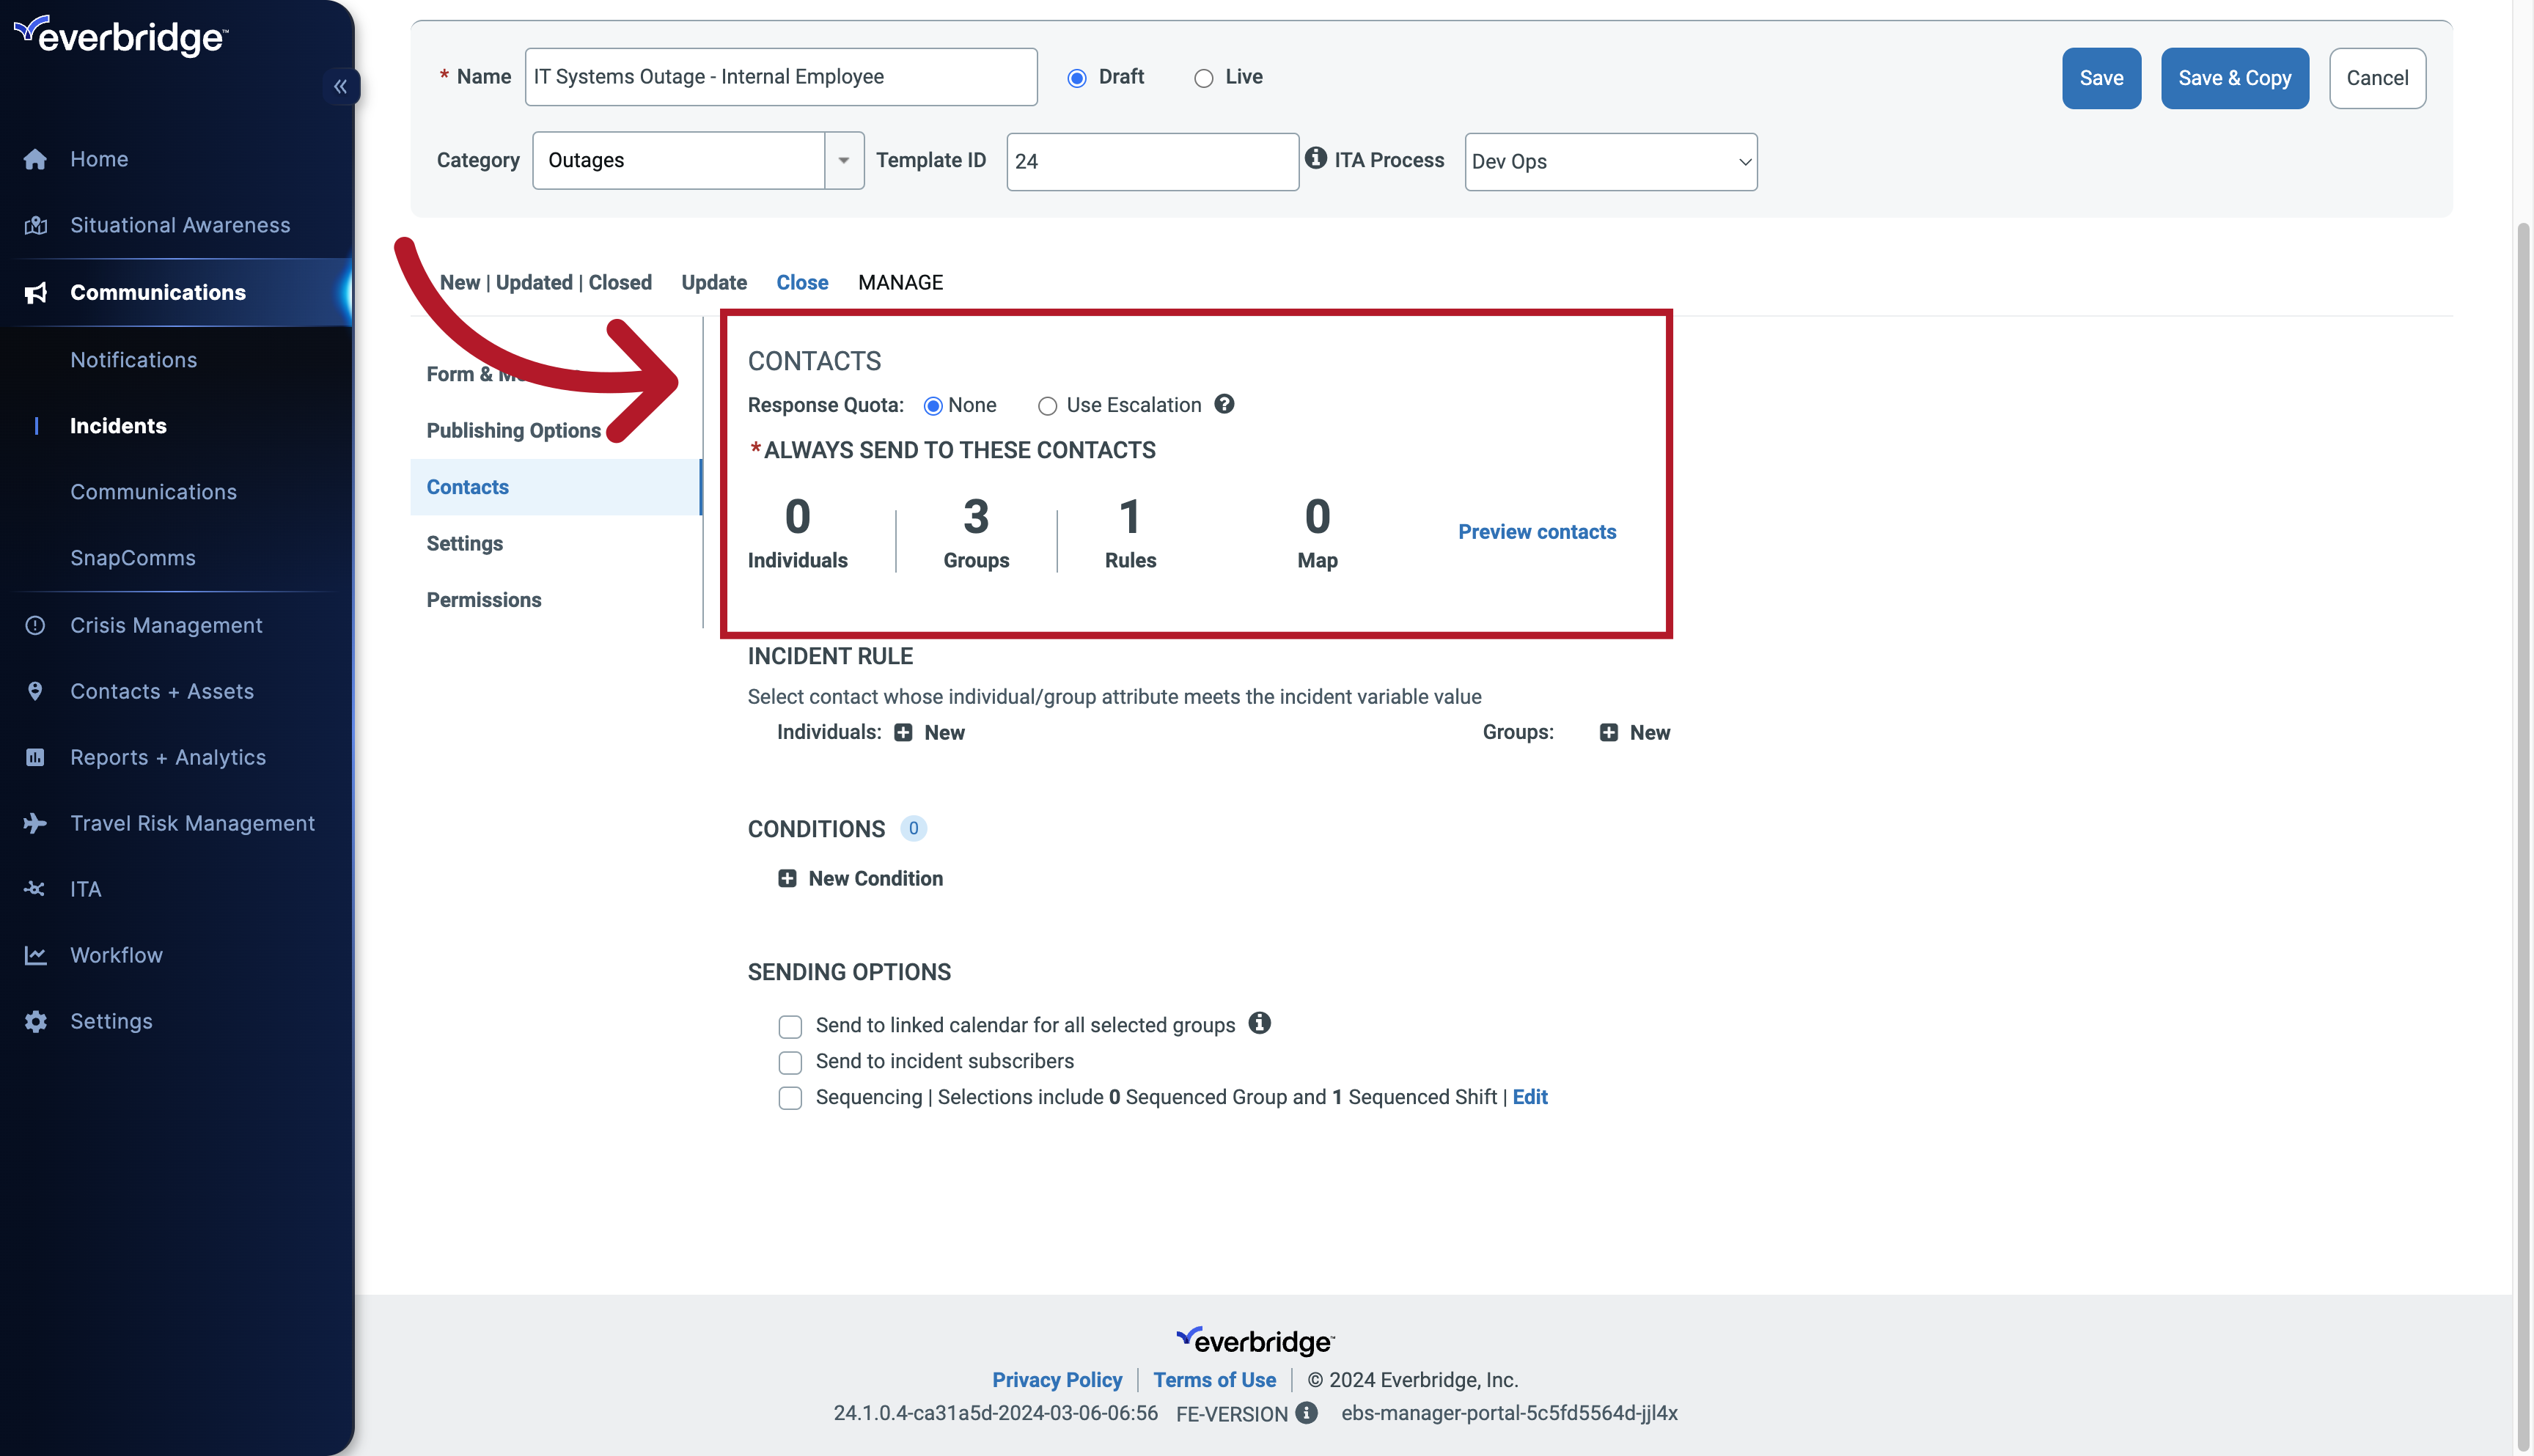
56. Contacts
When creating an Incident Template, Contacts can be chosen ahead of time through various means. Contacts can come from multiple places defined by the template and related incident configuration: default recipients (individuals and groups) selected directly on the template, and any rules or groups. 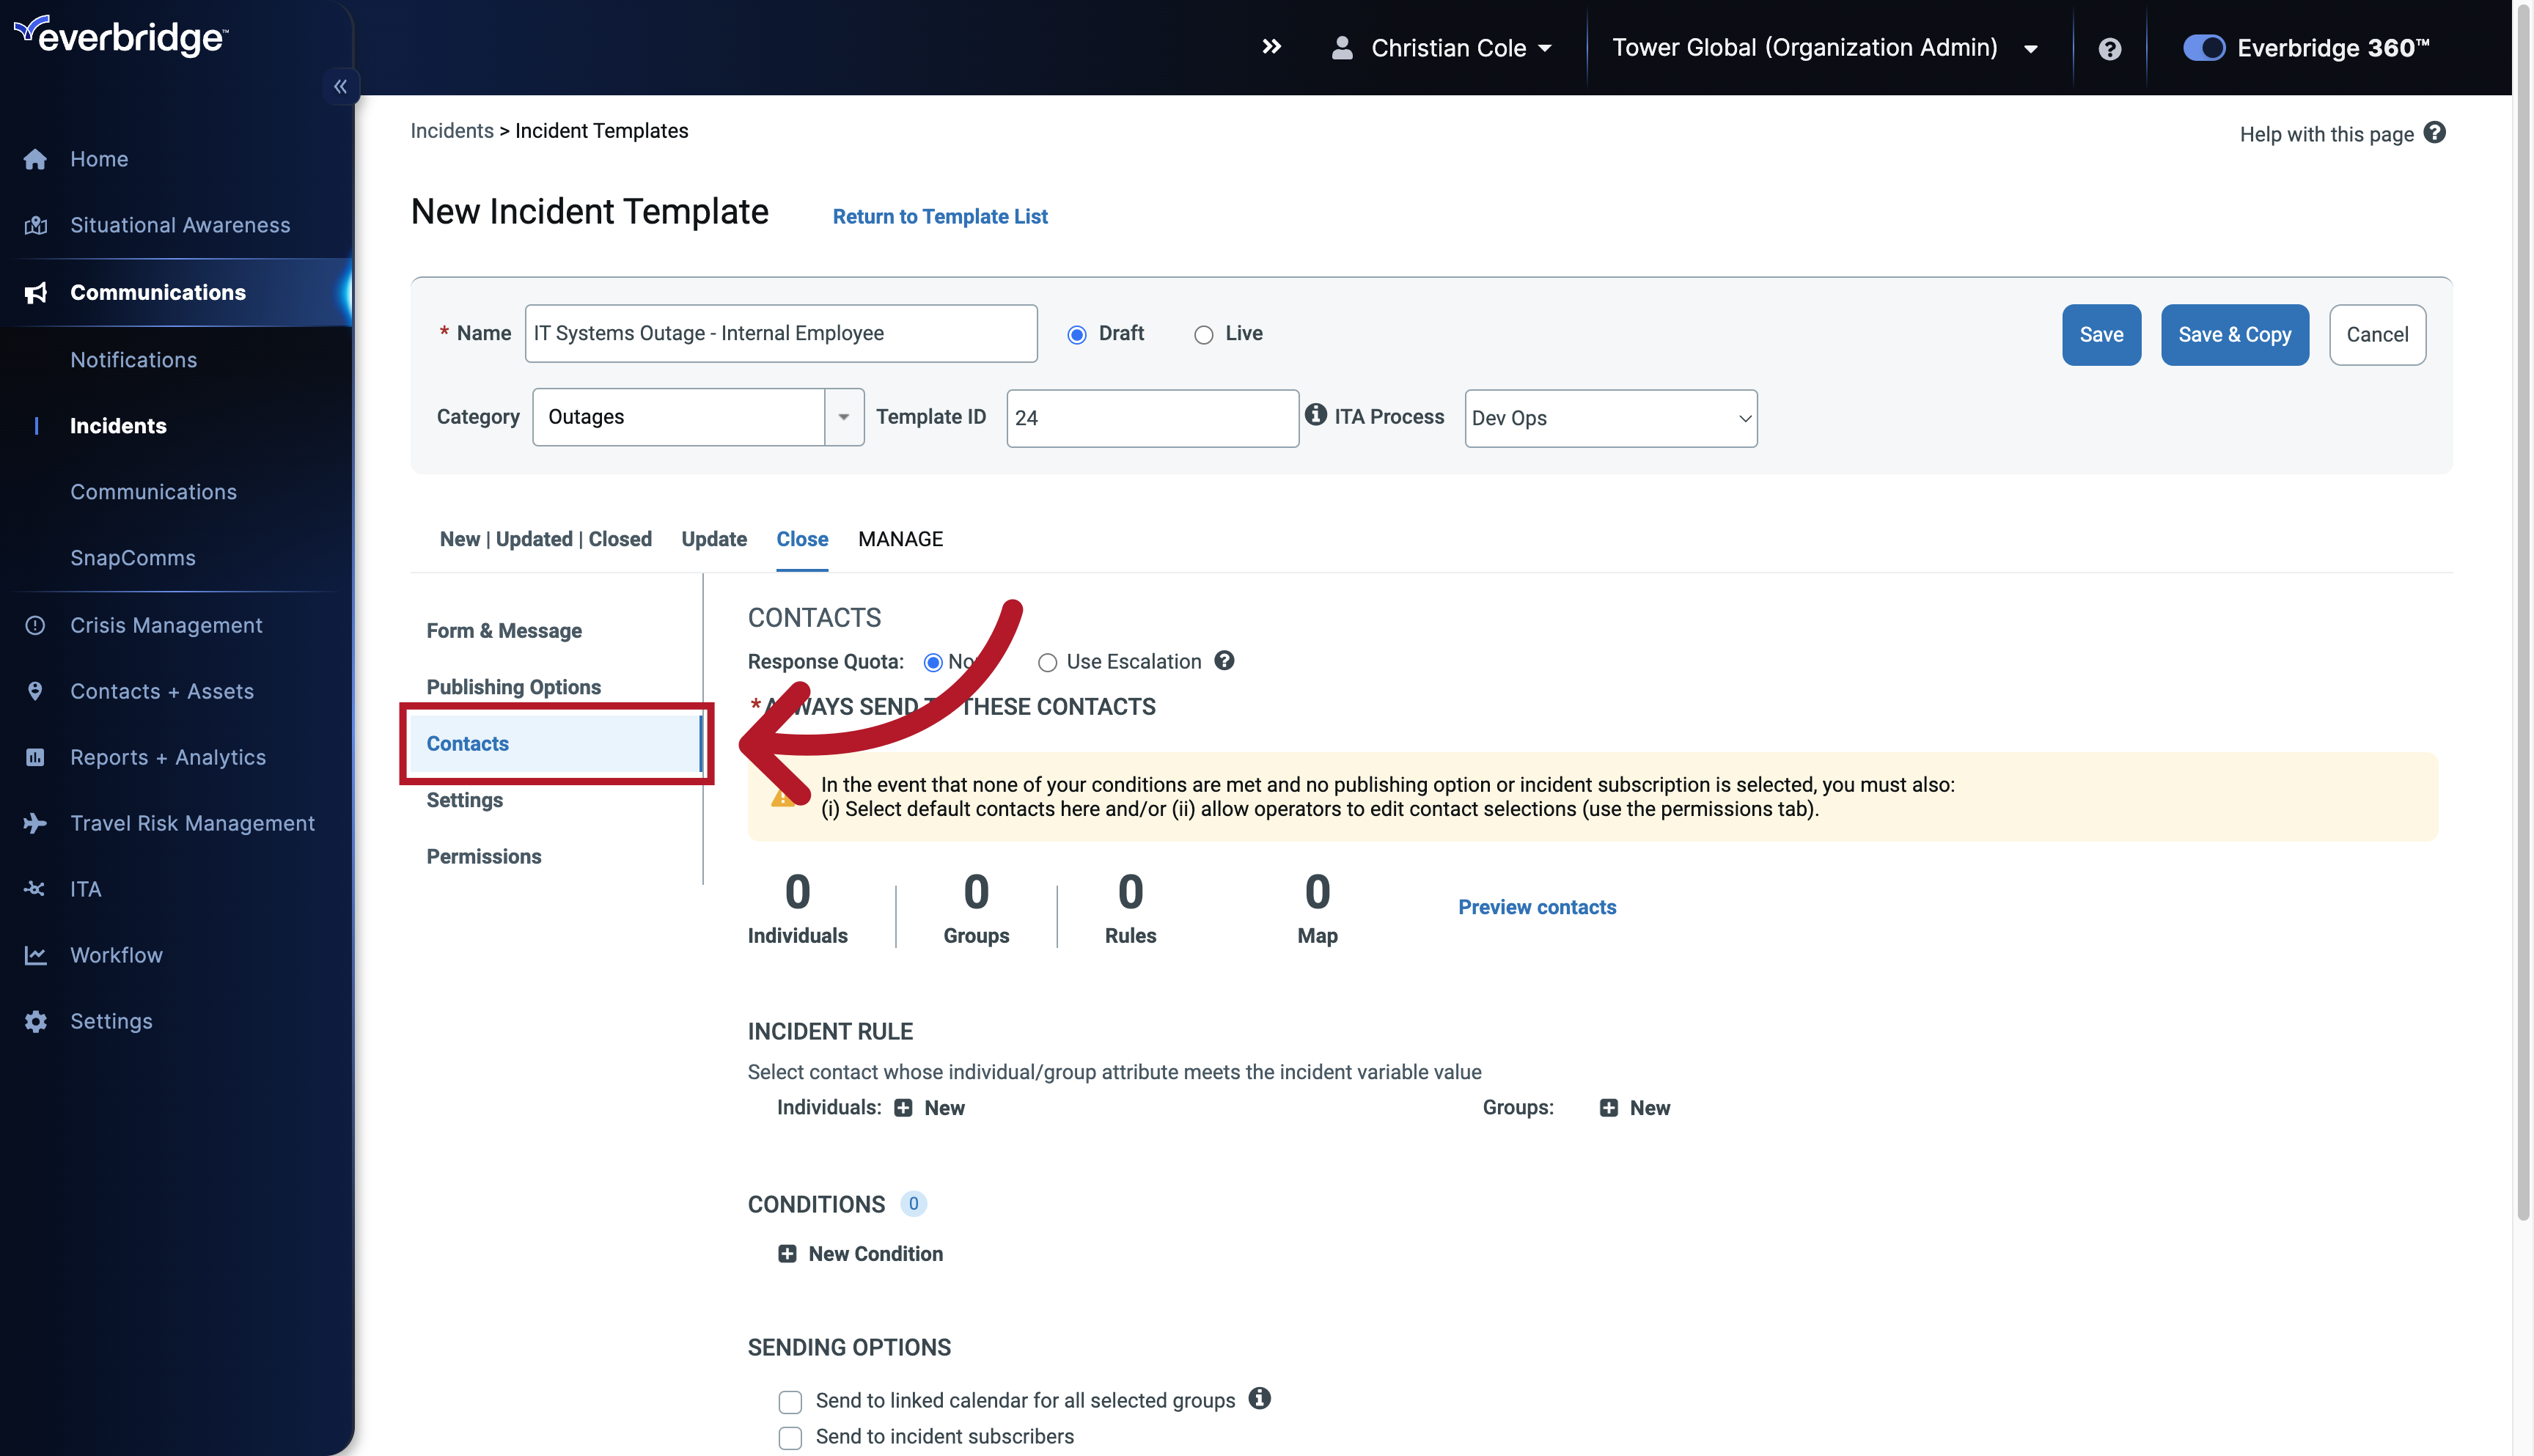
57. Contacts
You can quickly add relevant Contacts to the Template using the Individuals, Groups, Rules or the Map options for your Notifications.
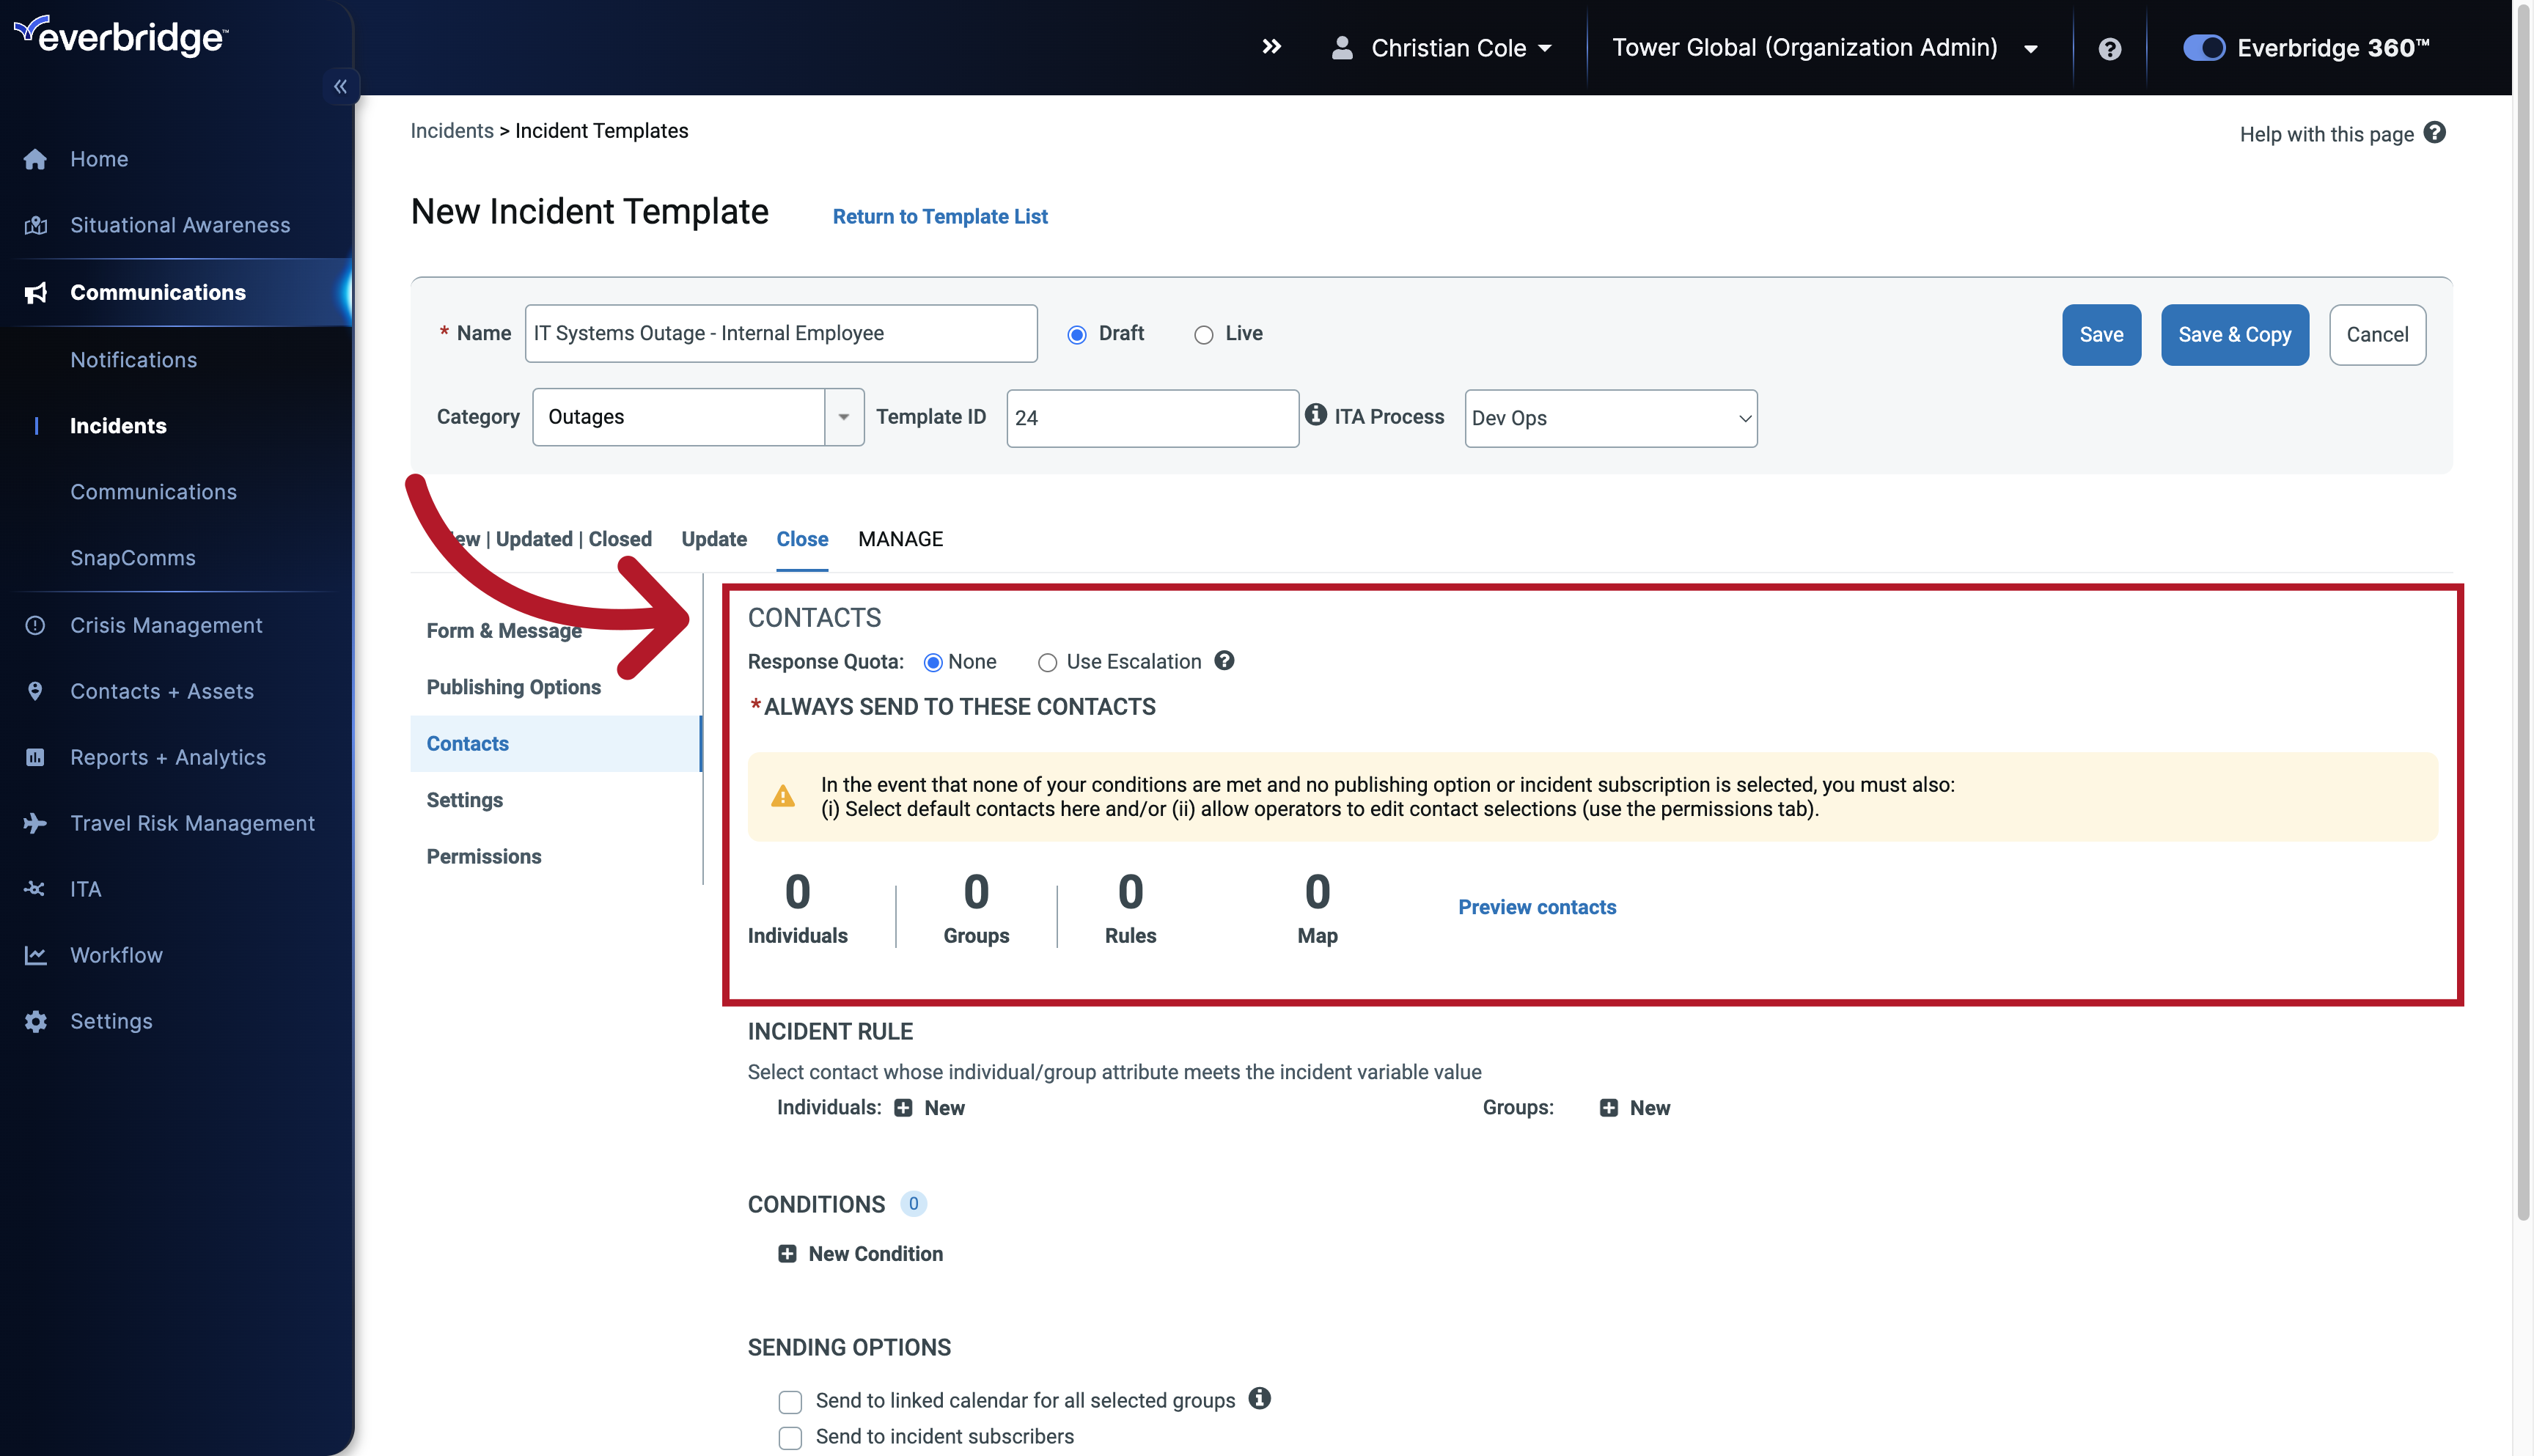
58. Contacts
If you want to learn how to create Groups, Rules, or Conditions, check out the link at the bottom right to review courses from our Everbridge University course catalog.
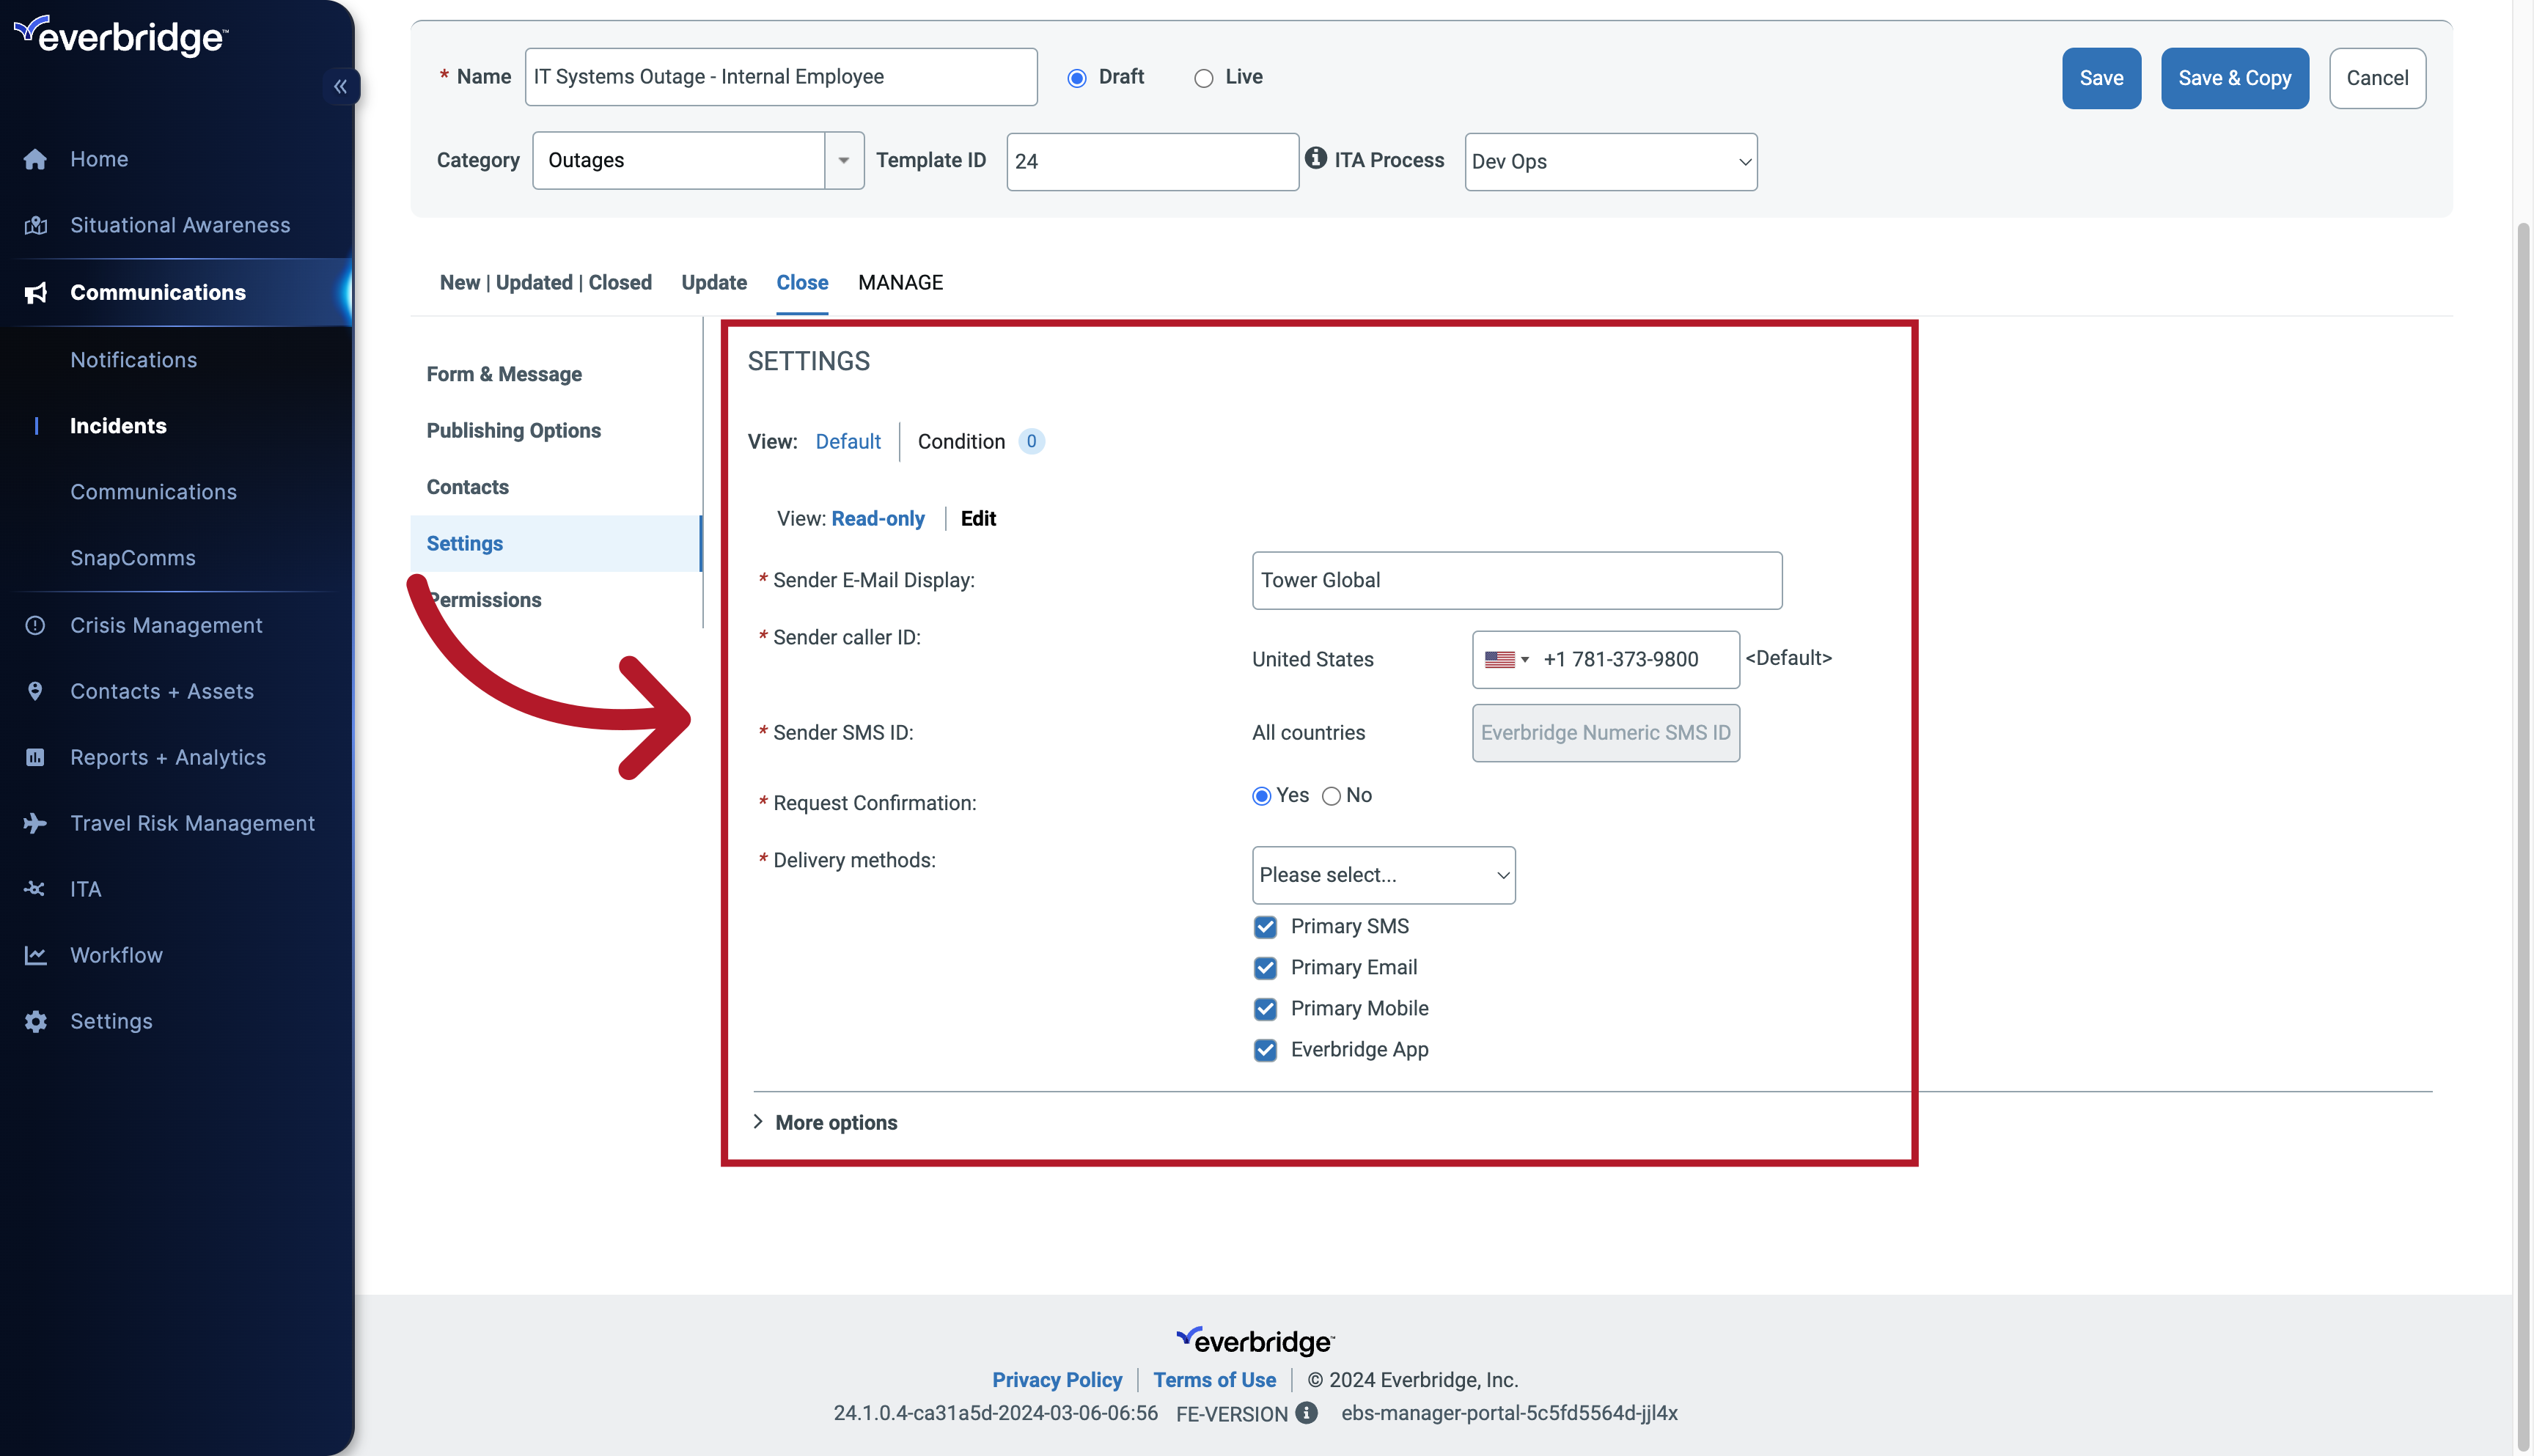
59. Settings
Template Settings control aspects of message delivery for your Incident Template. Delivery behavior for an Incident is driven by both the organization-level defaults and the settings configured directly on the template.
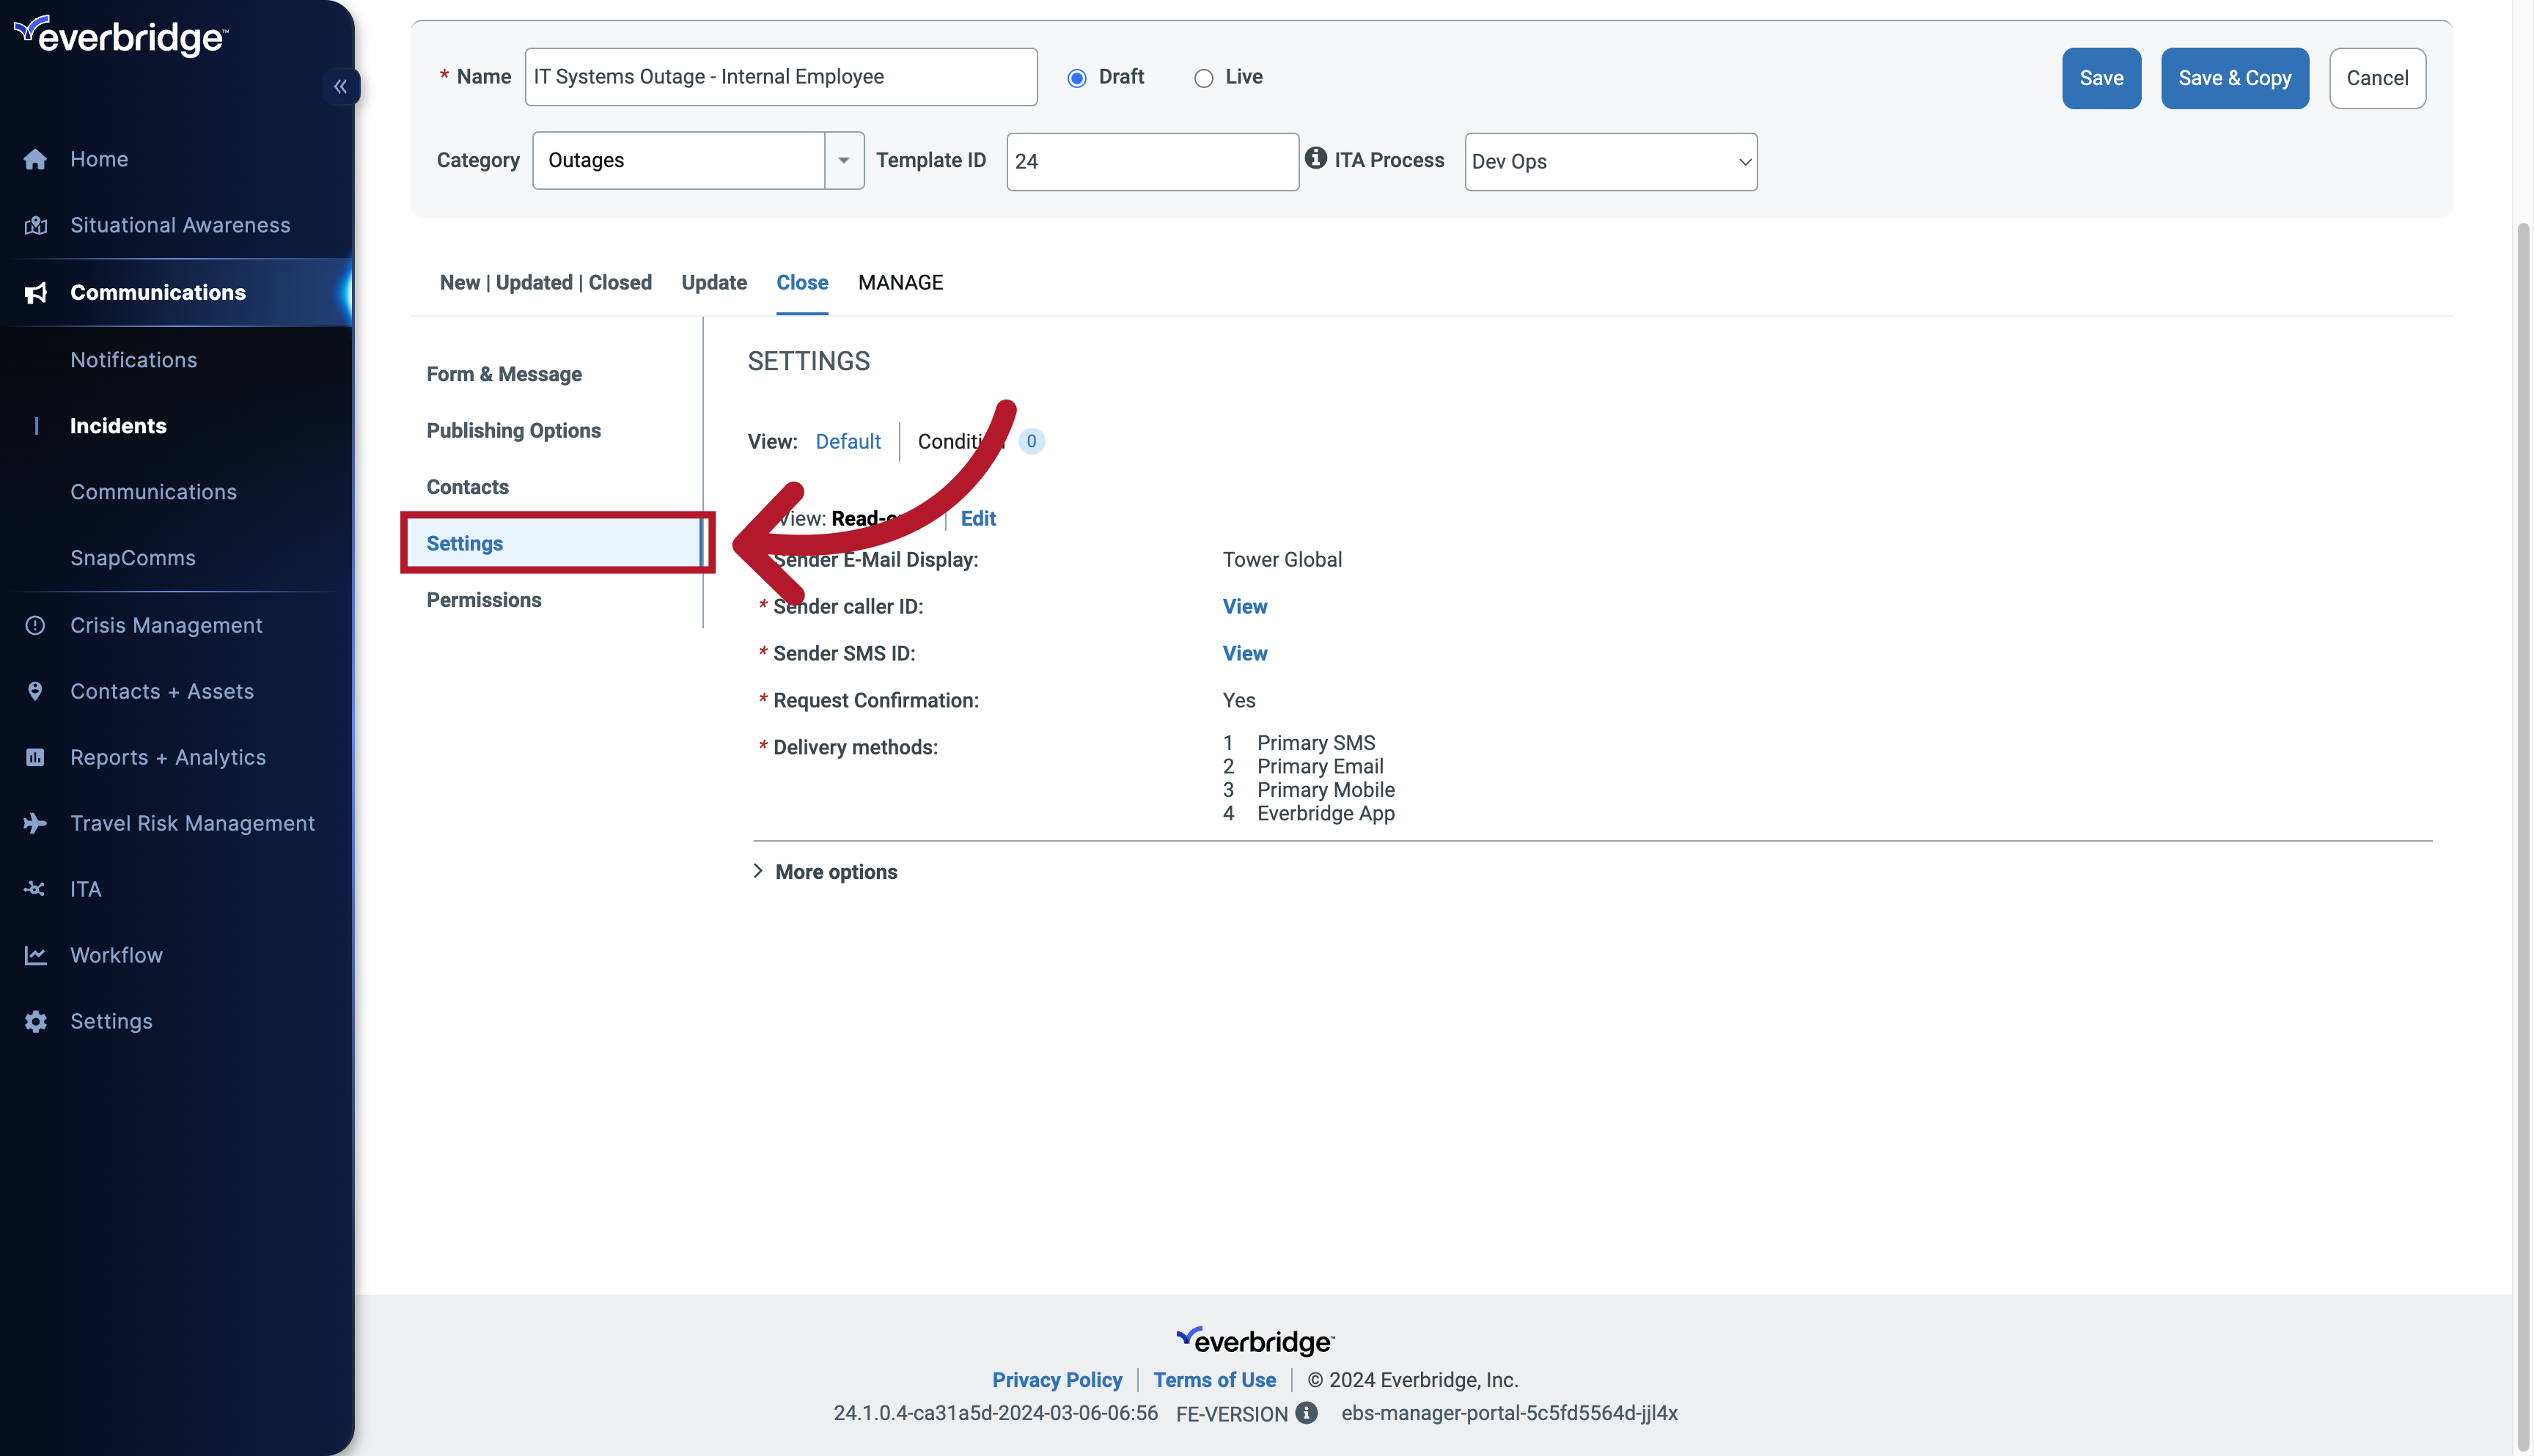
60. Edit Settings
You can make changes to the delivery rules by clicking the Edit button.
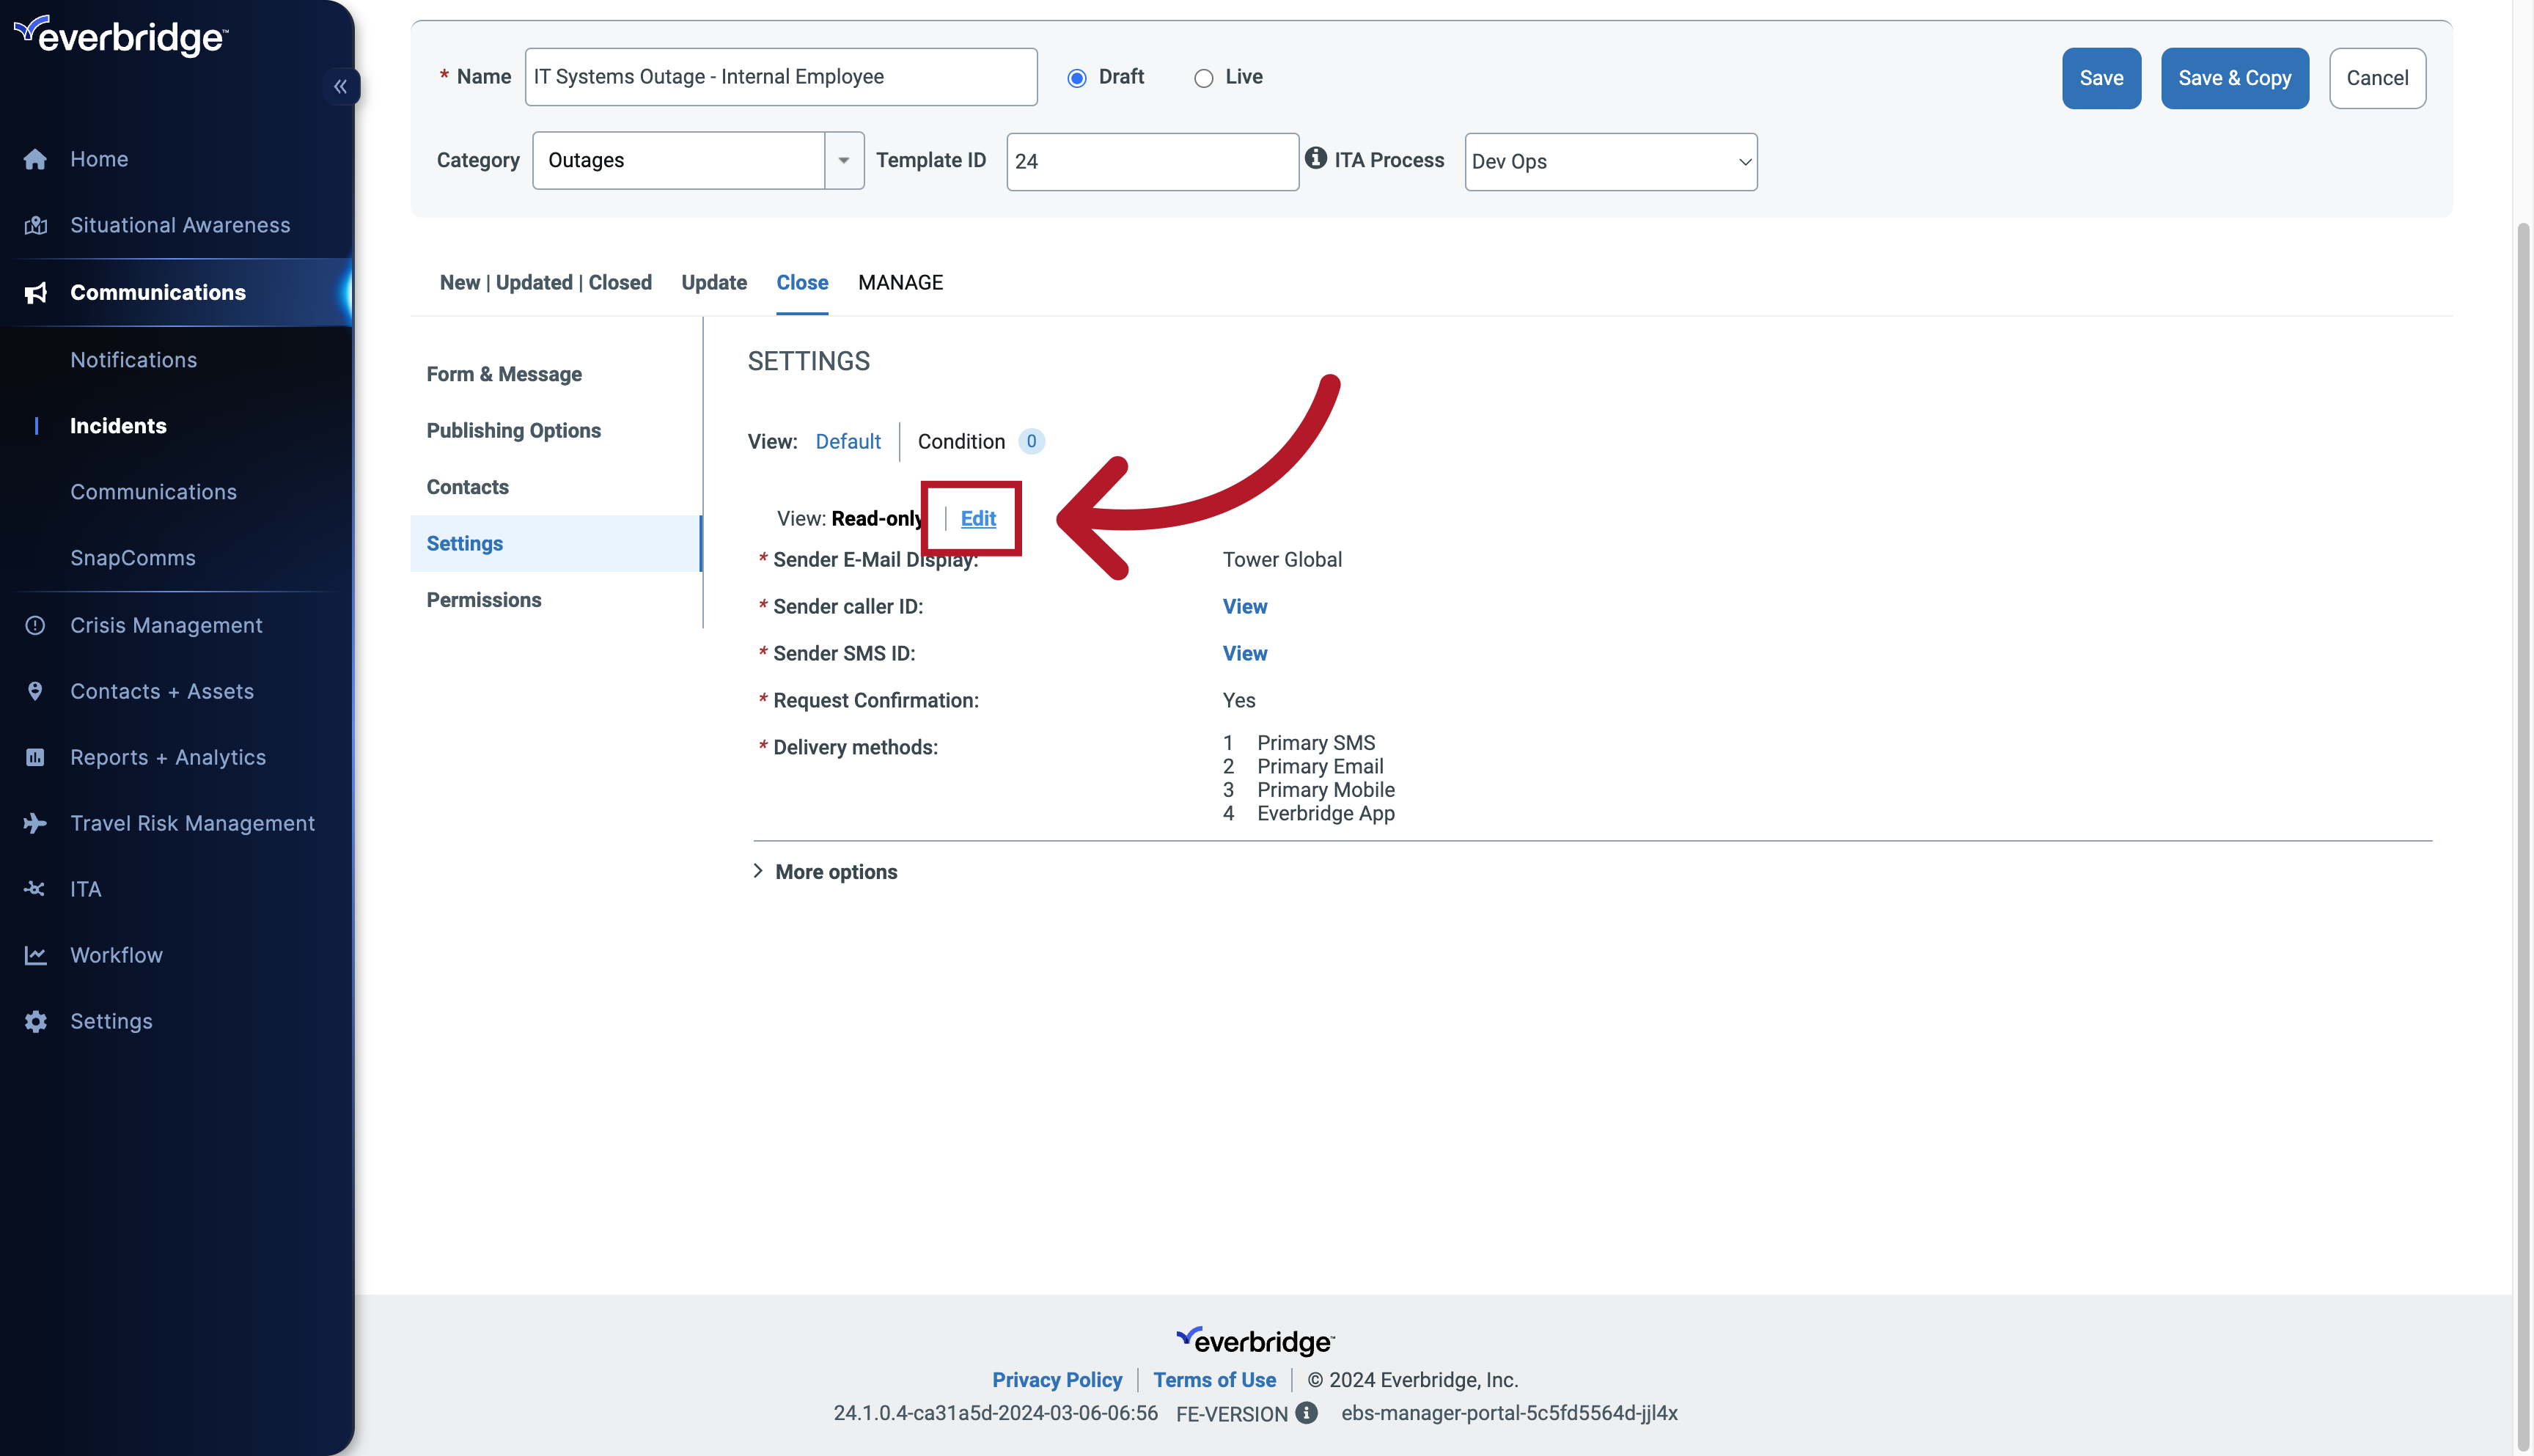
61. Settings
Make sure that these details are something recognizable for your contacts. This increases the chance of them trusting and opening your message.
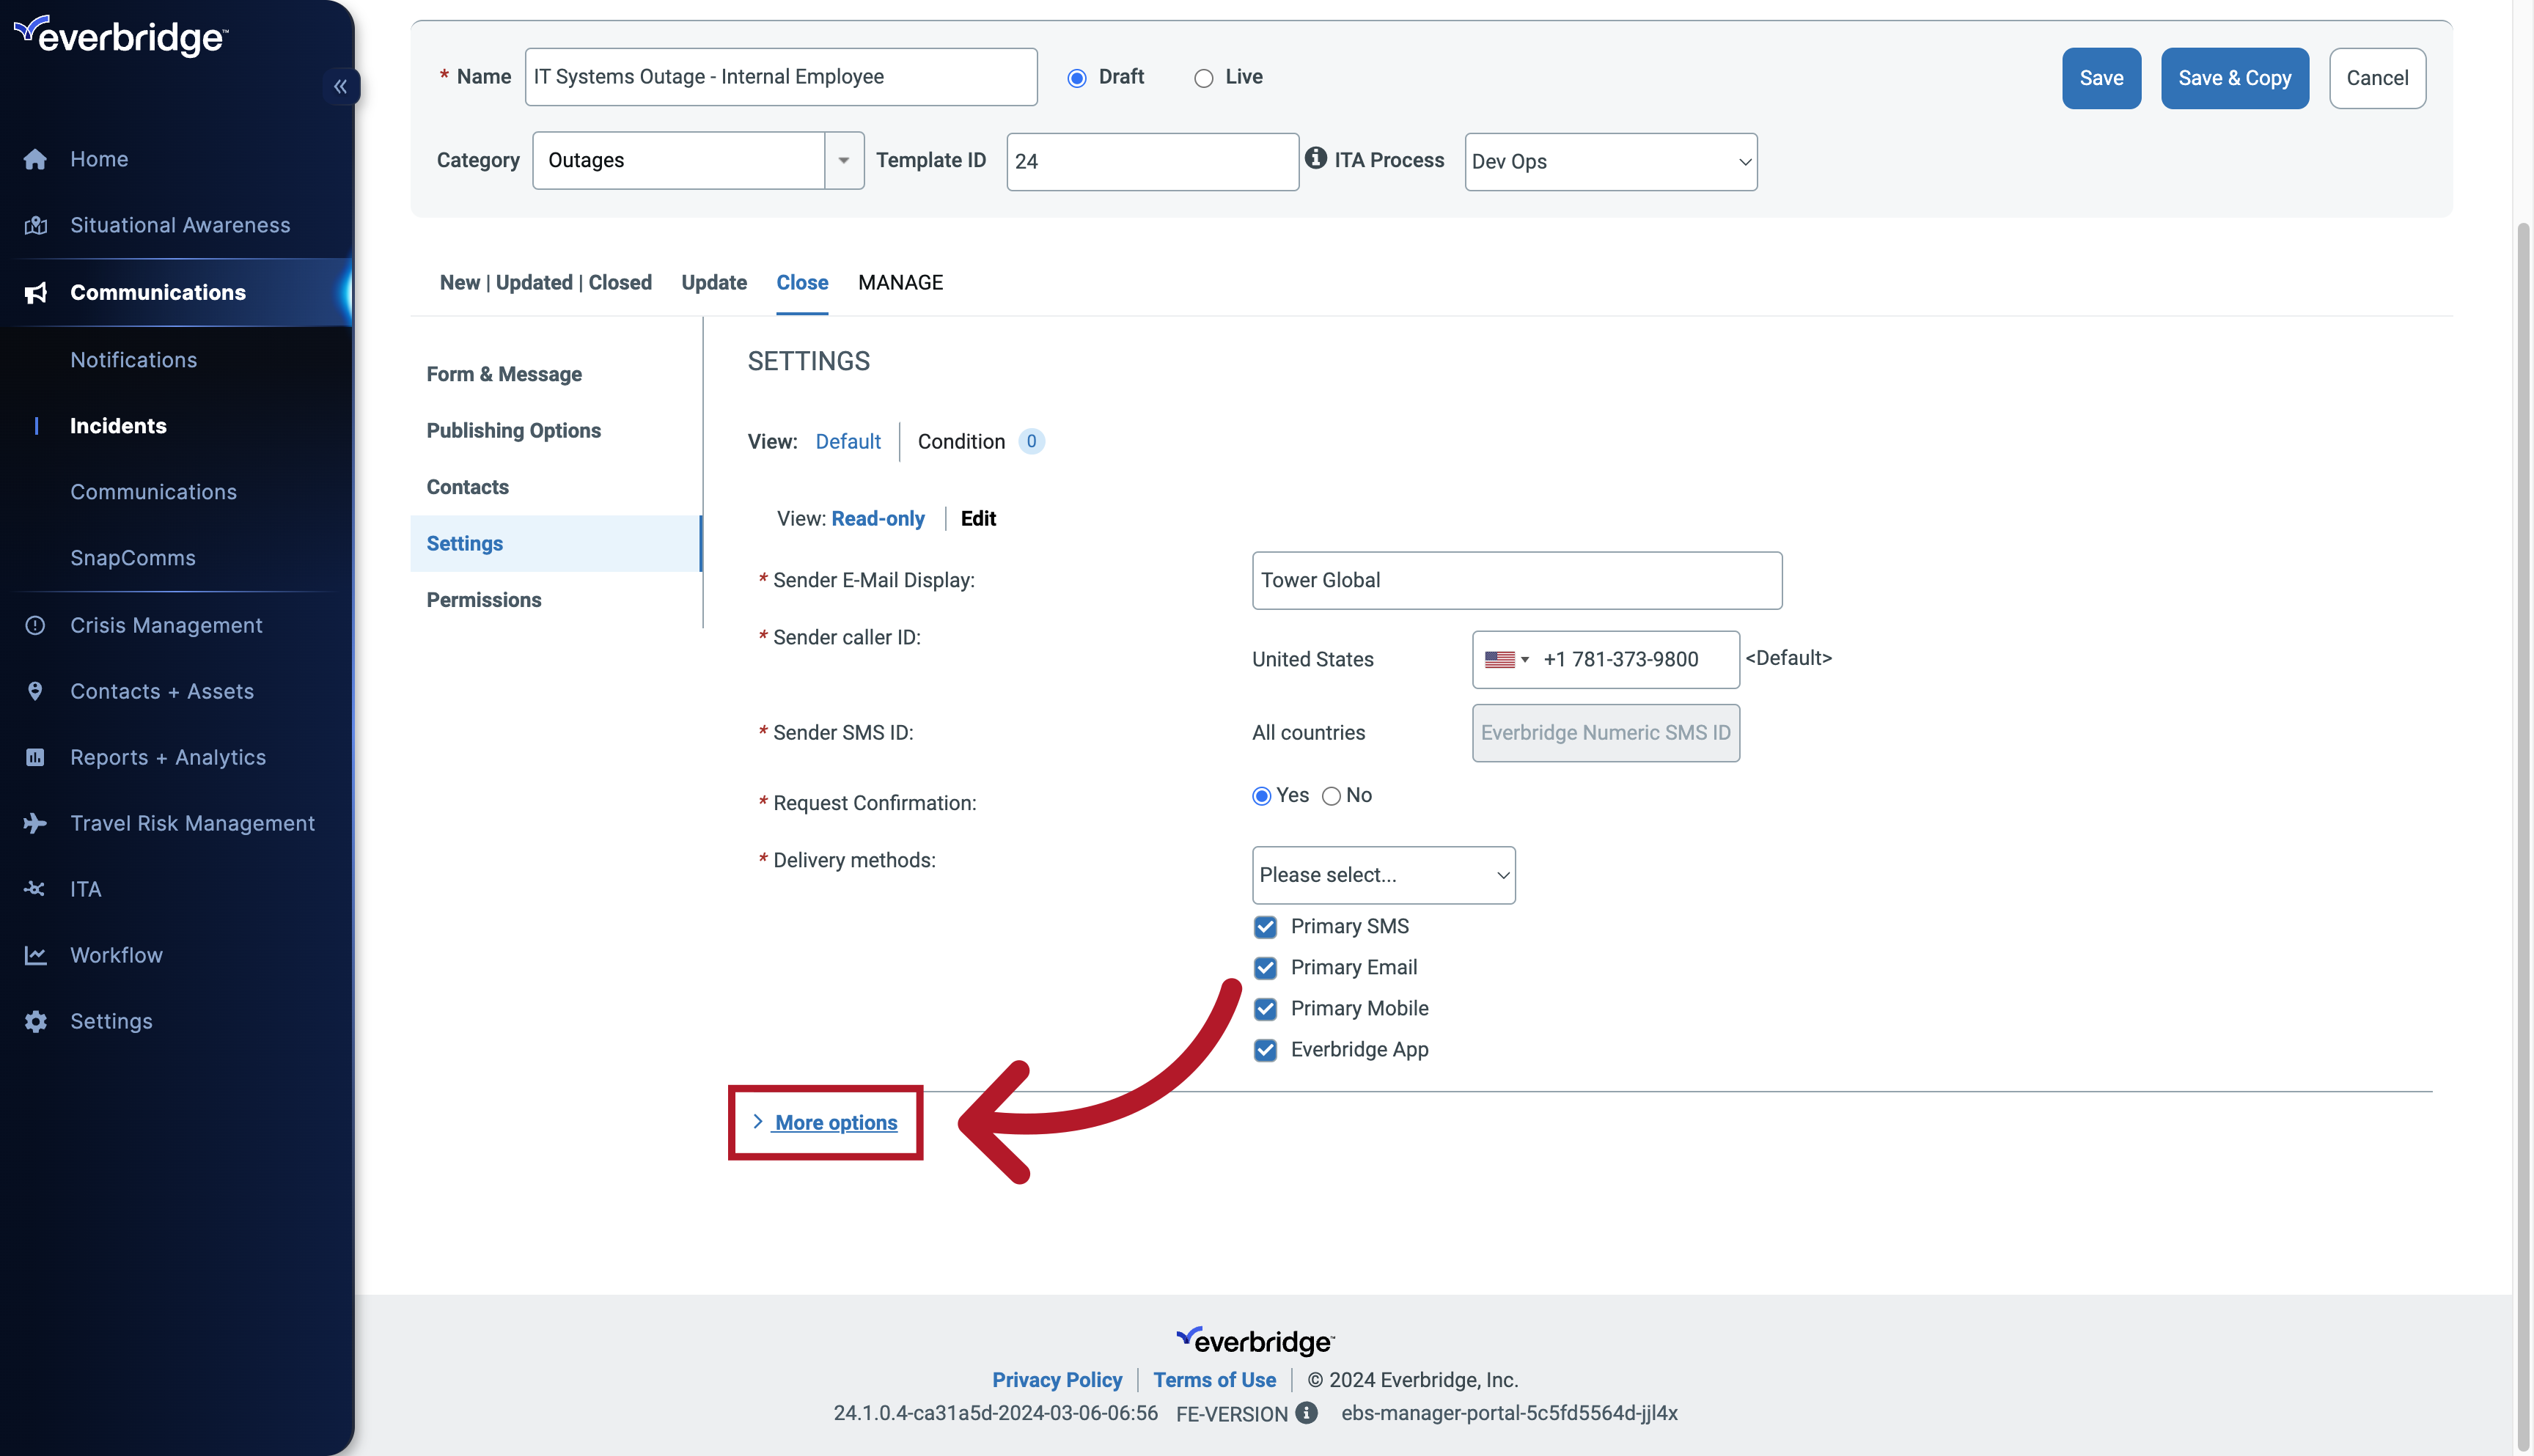
62. Settings: More Options
To edit your message settings further, click More Options.
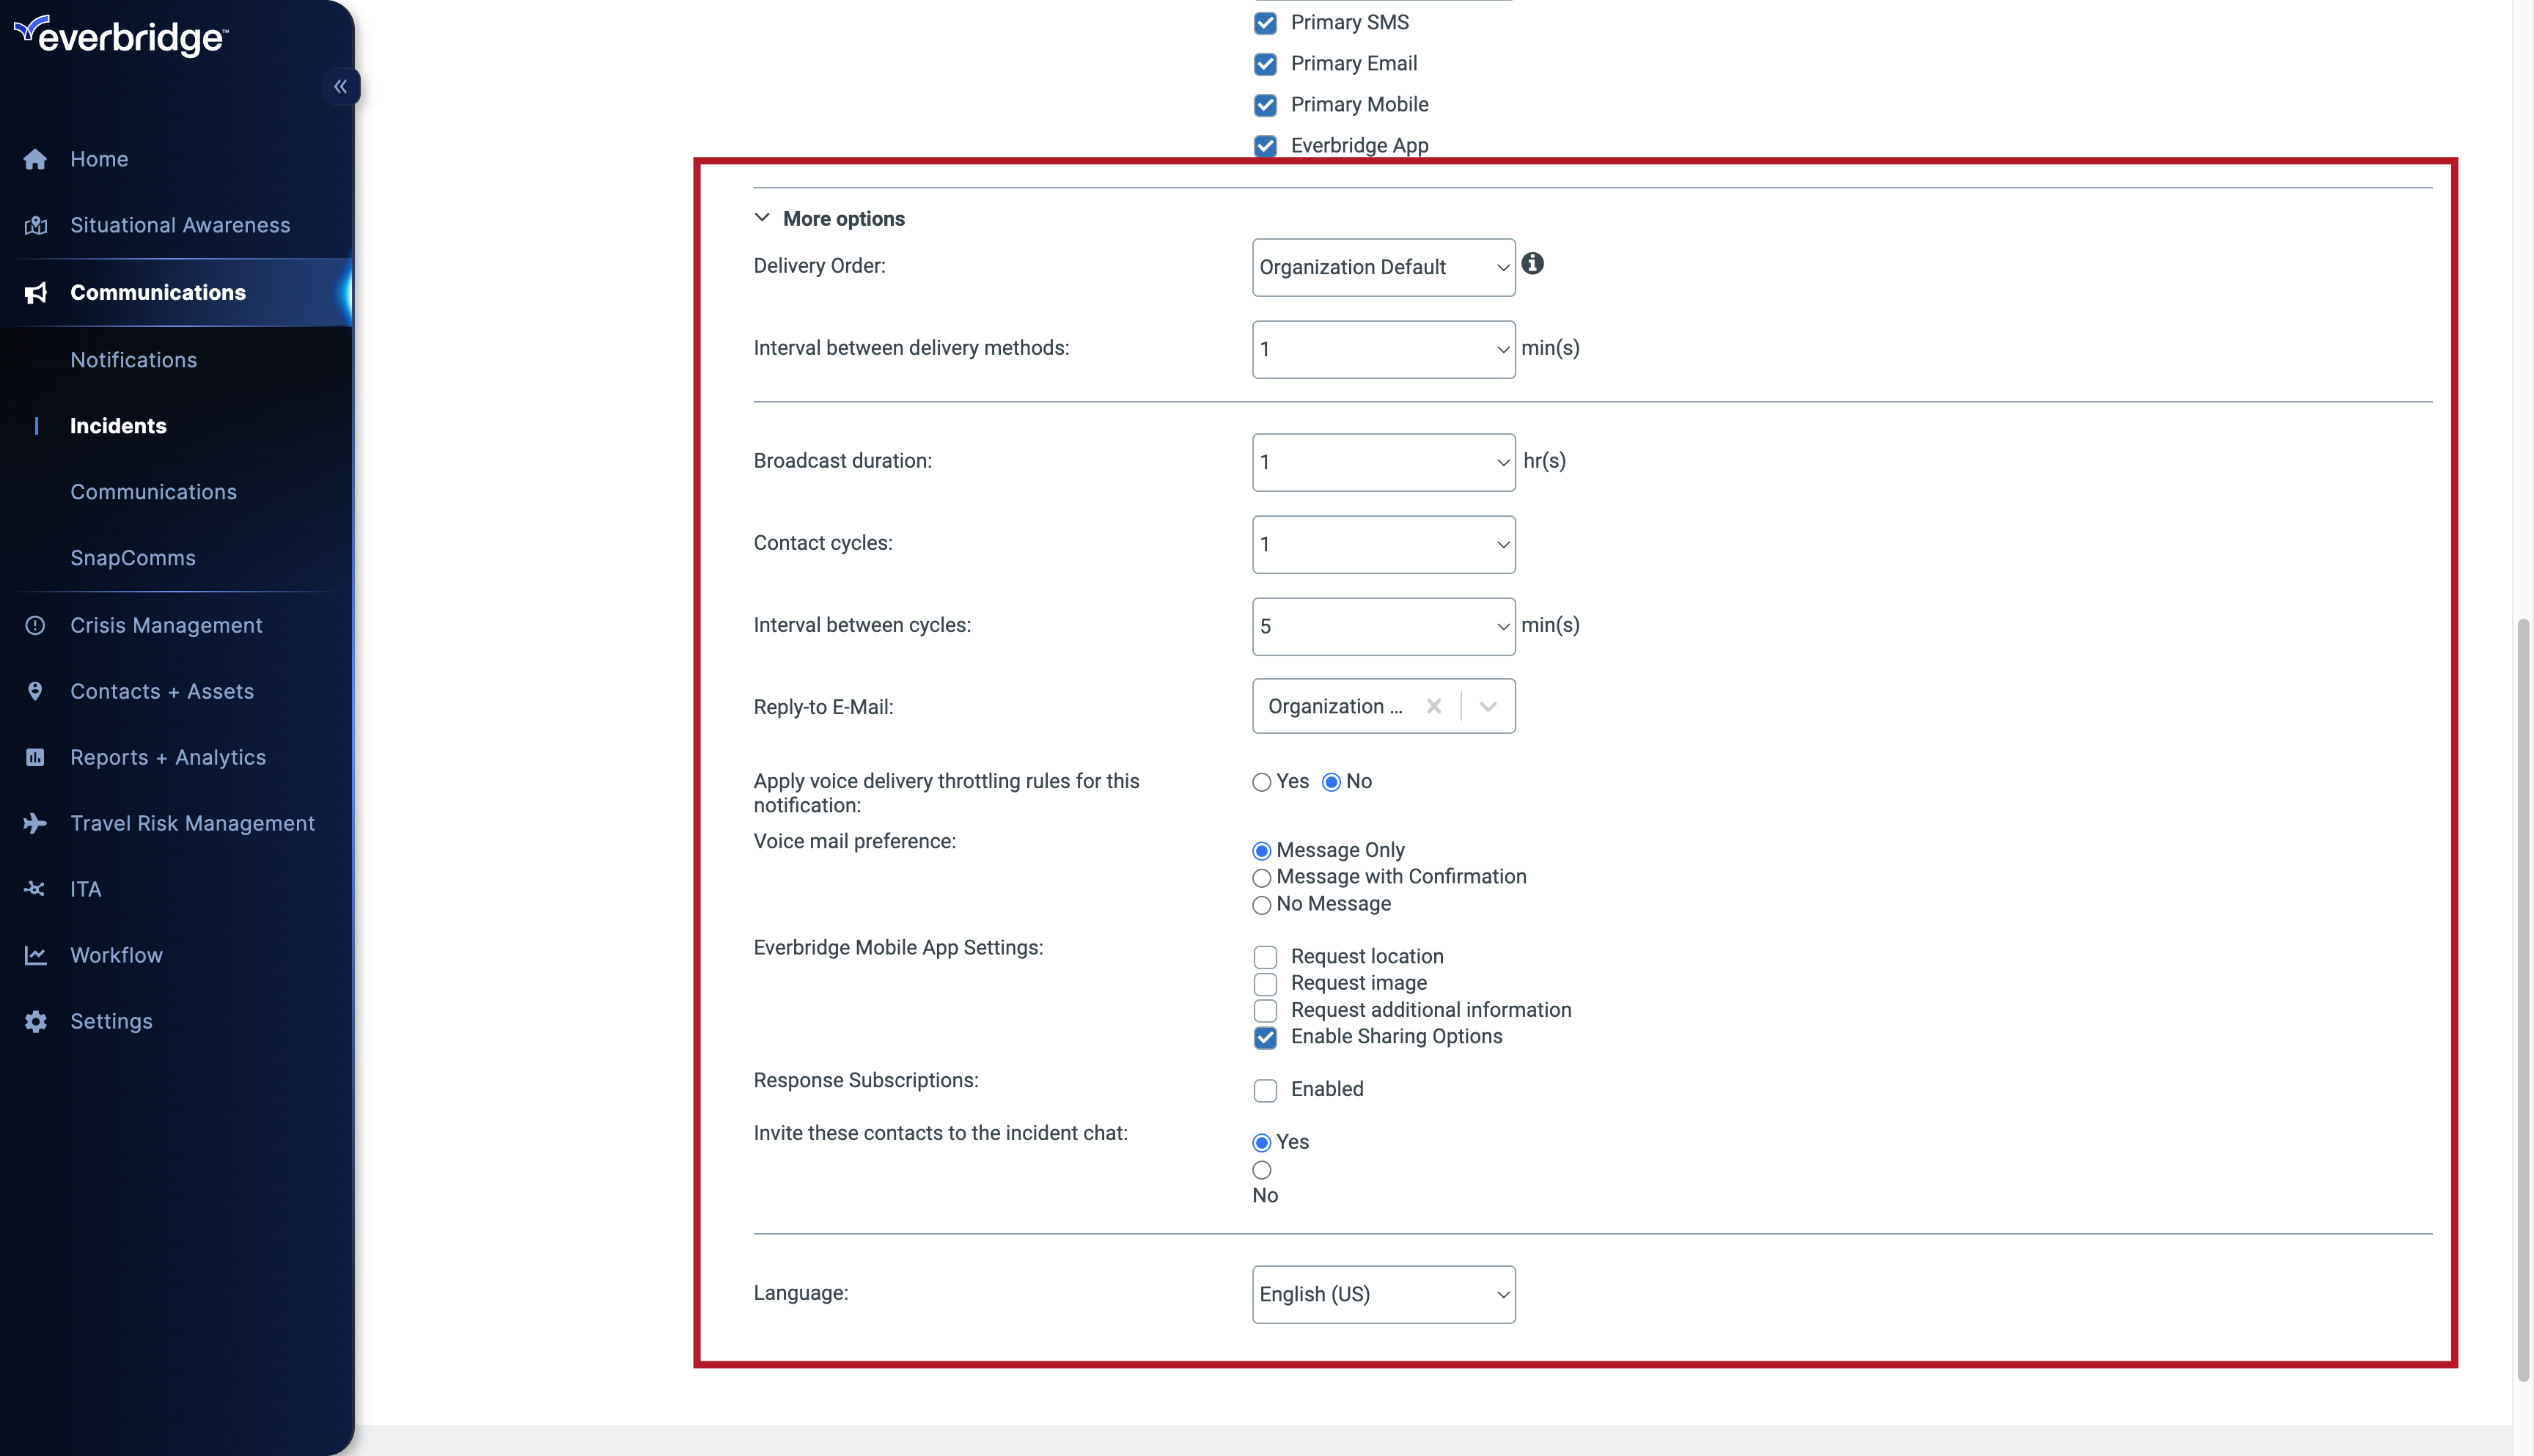
63. Settings: More Options
Choose the "Reply-to E-Mail: Organization default" option
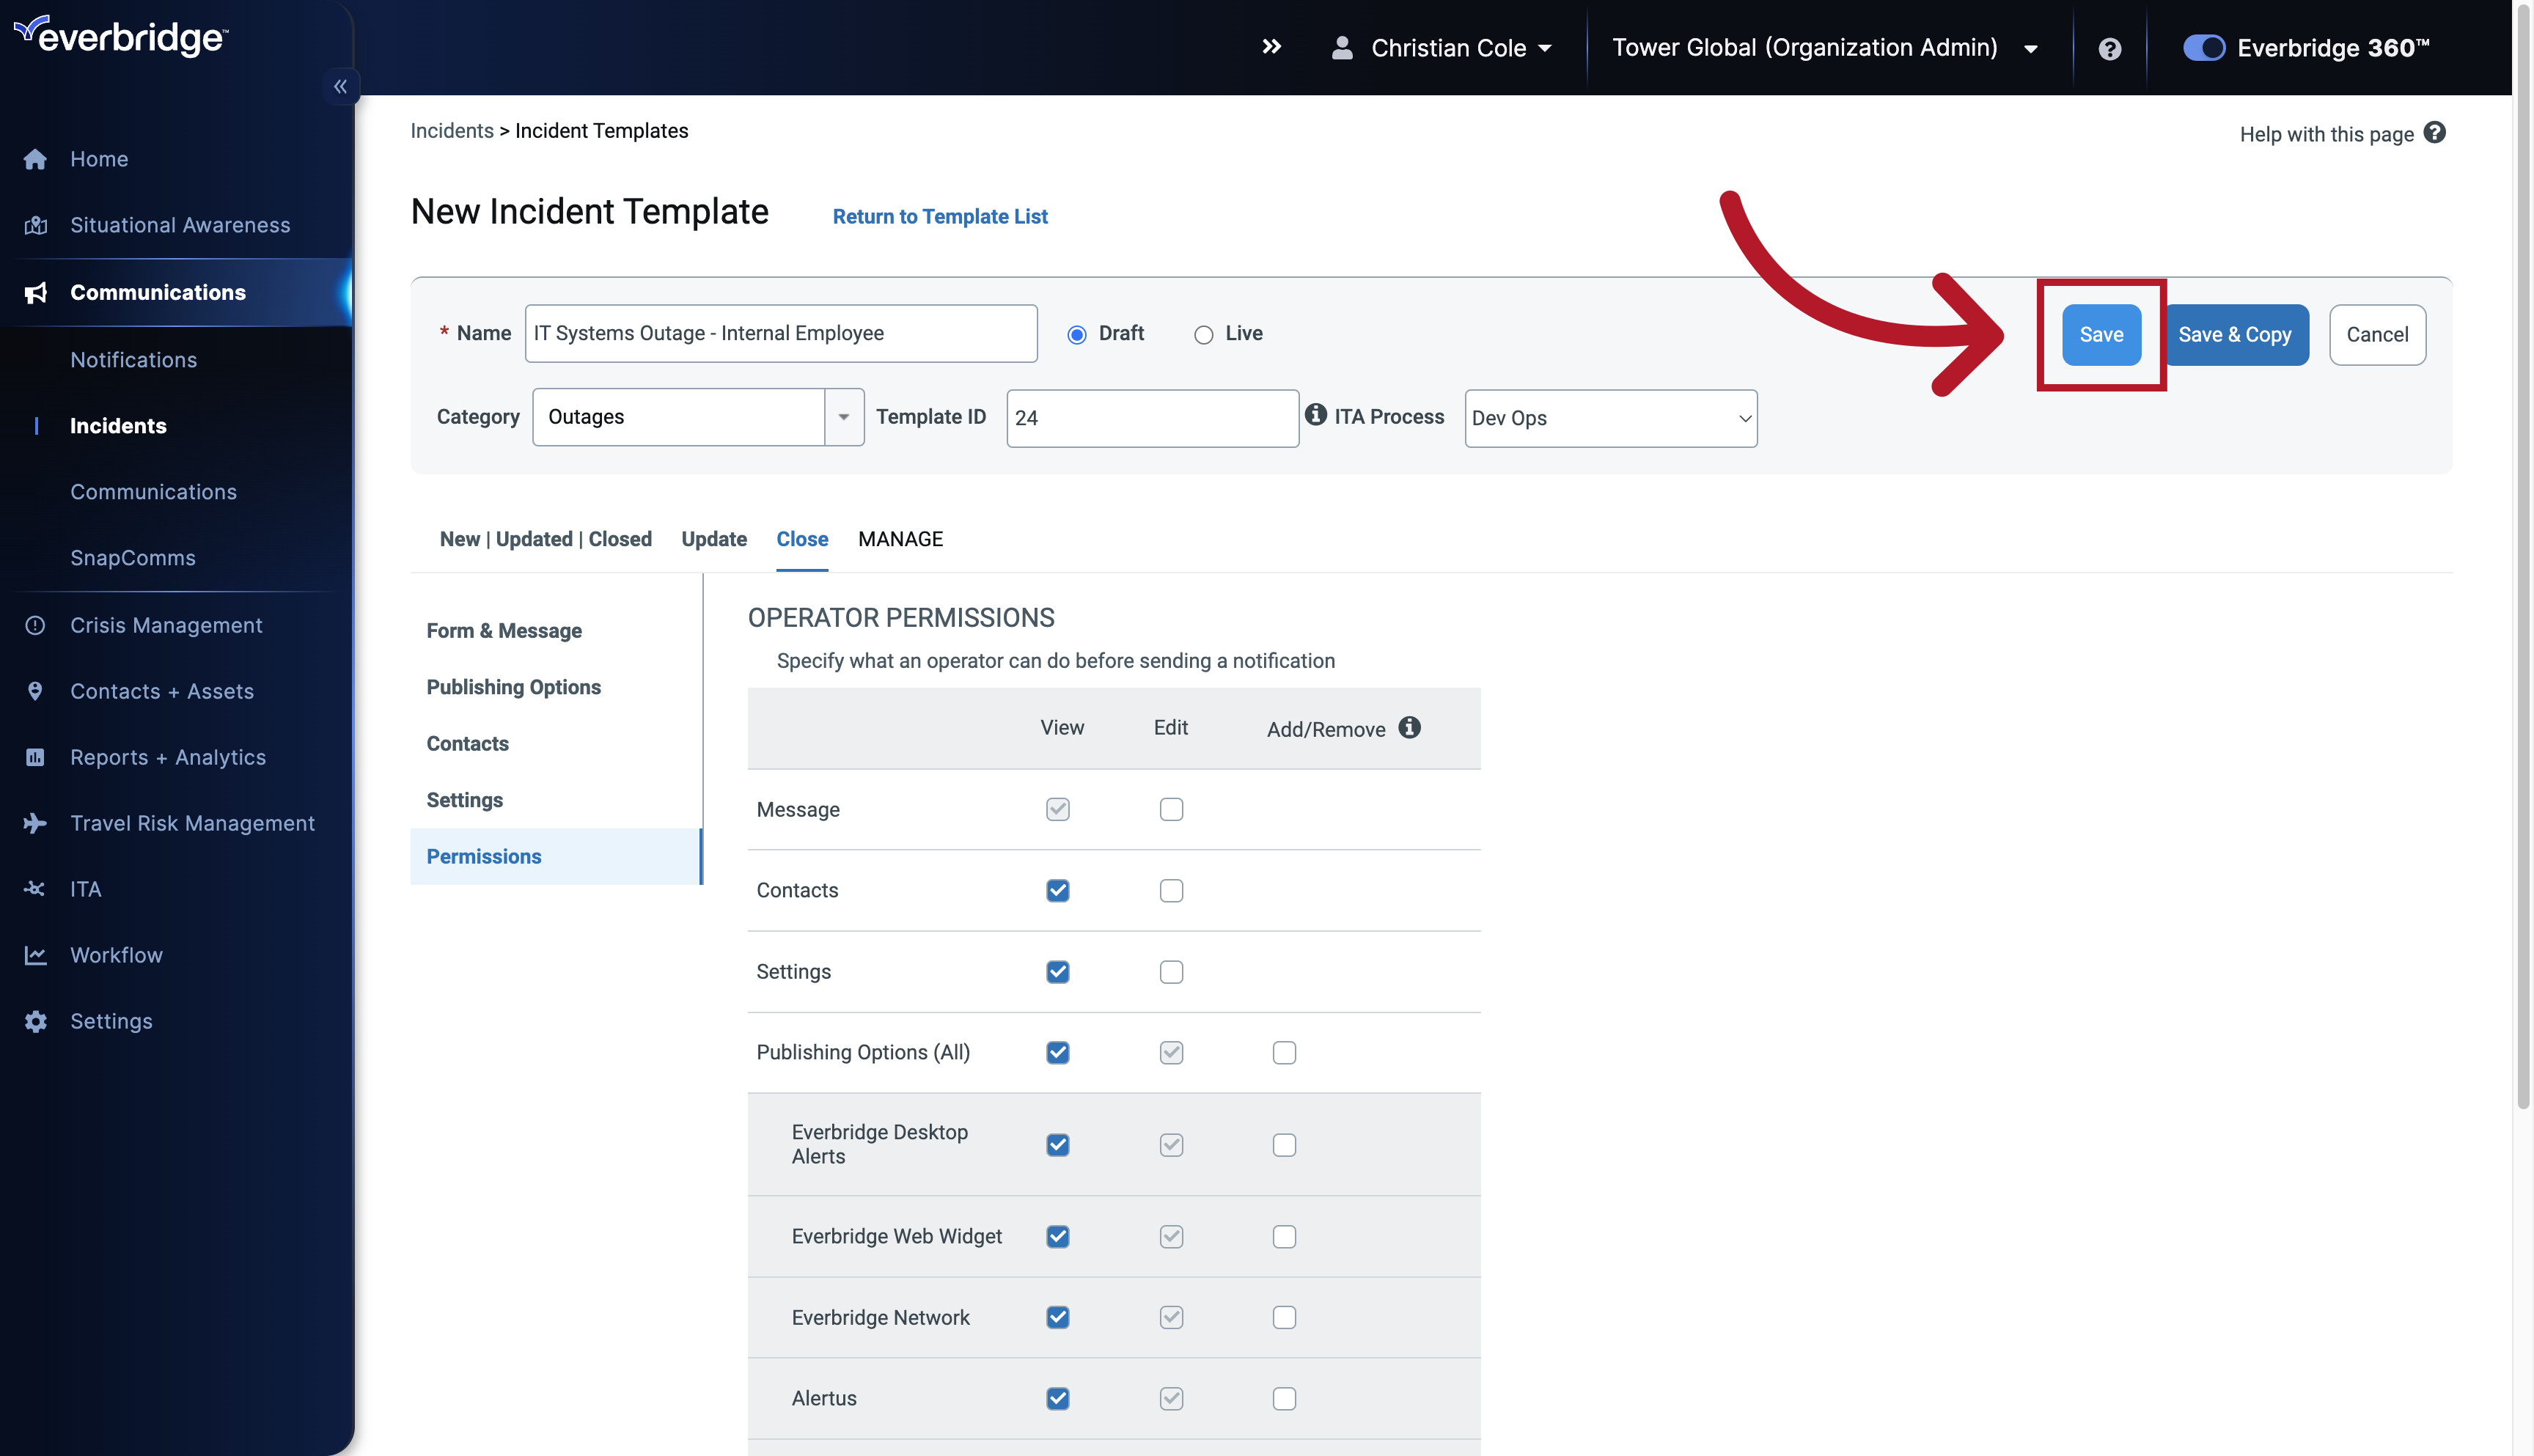
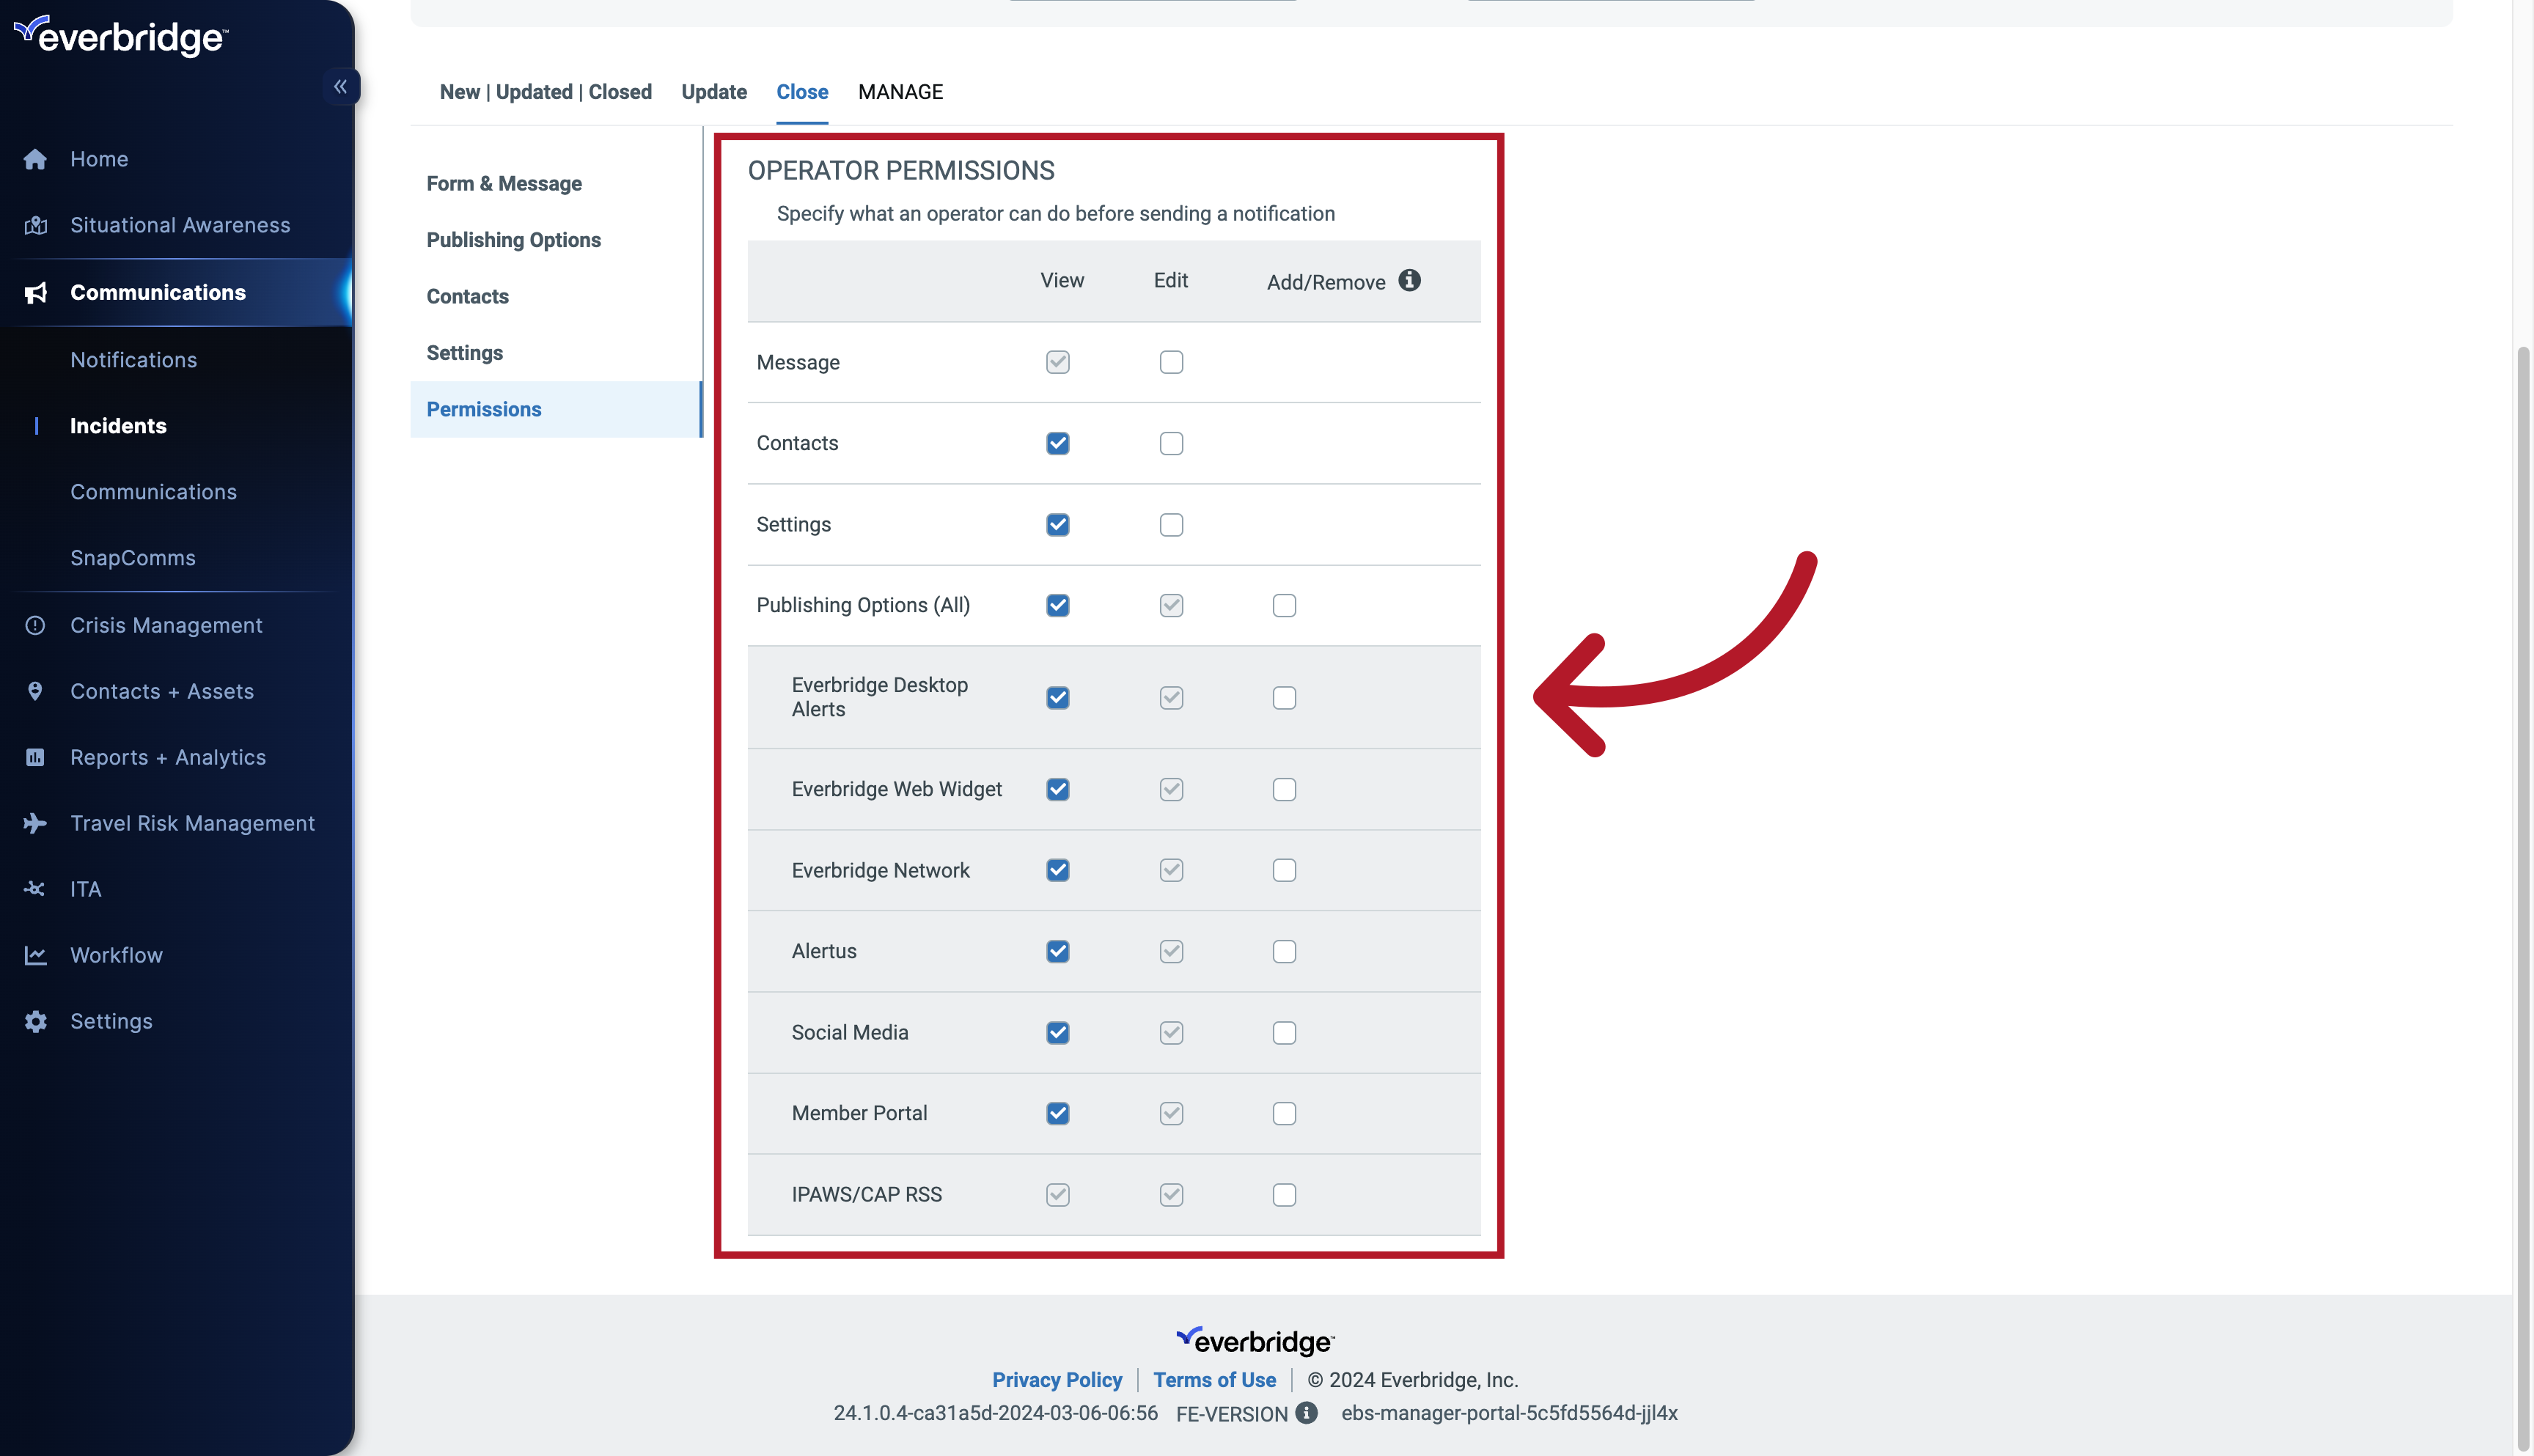
64. Permissions
Permissions are the ability granted to anyone who launches a Live Incident Template to make changes or modifications.
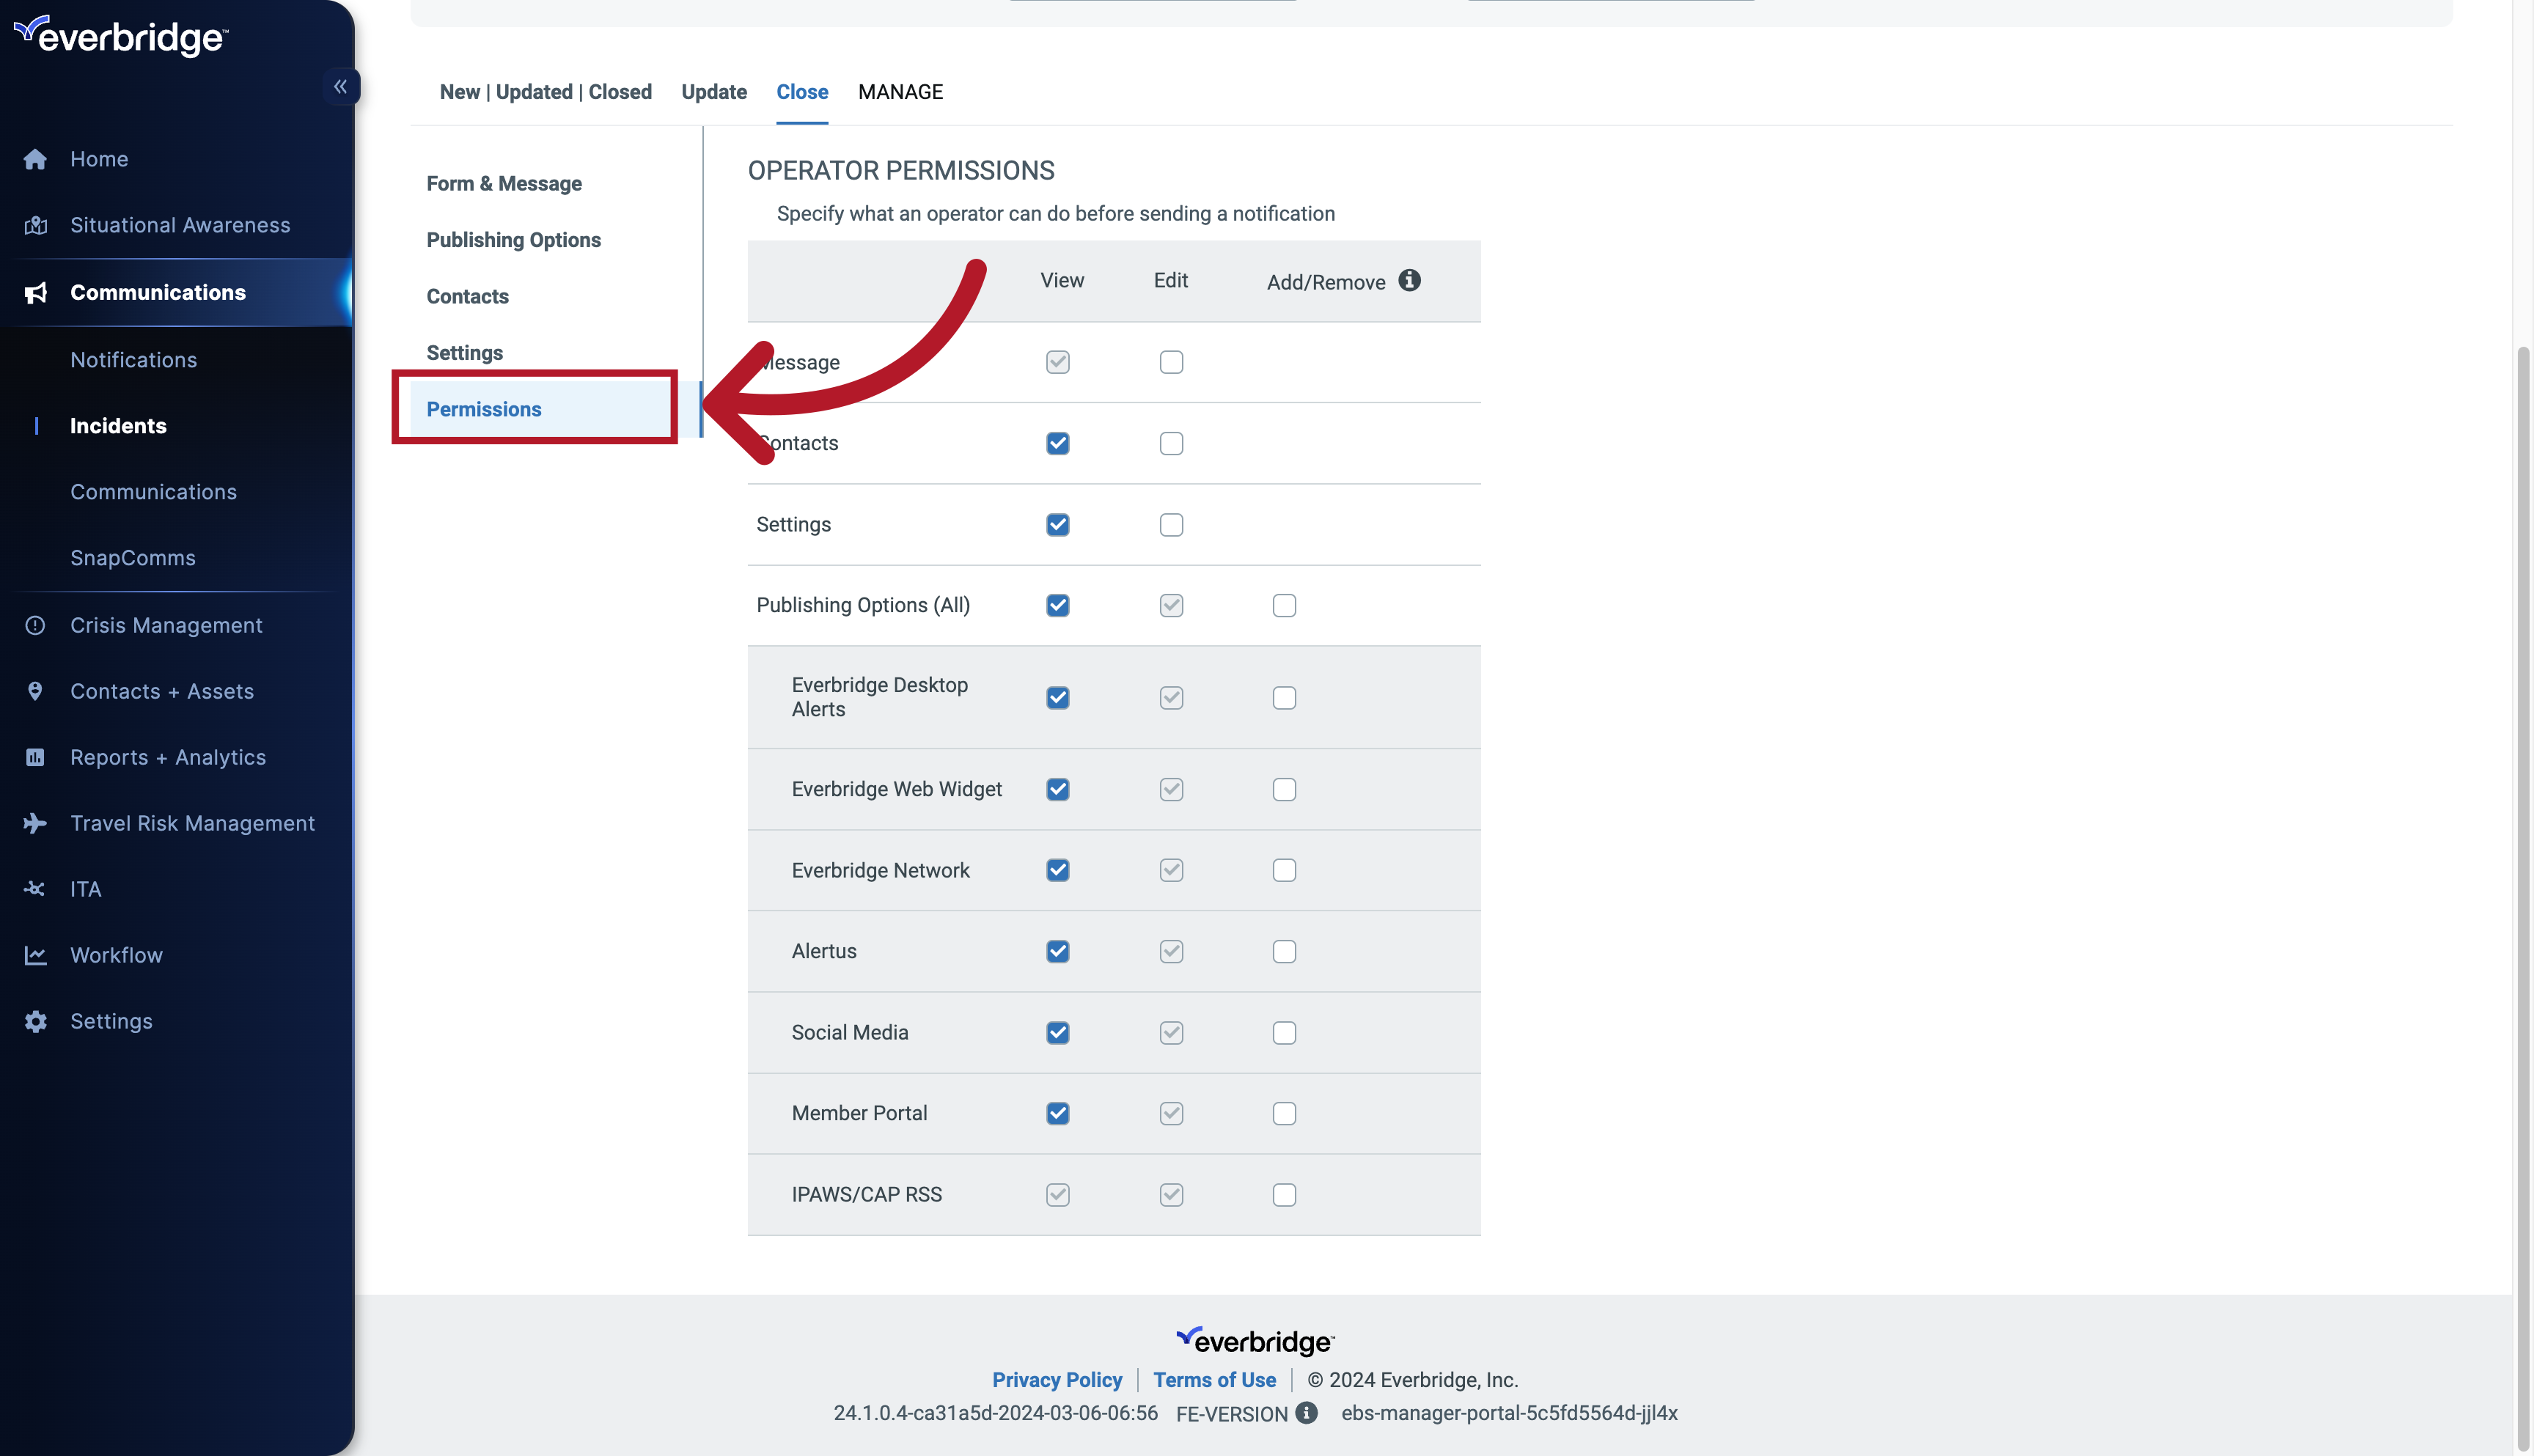
65. Permissions
Operators can be allowed to edit messages, contacts, settings, and publishing options in this section.
66. Save
Once you finish adding all the appropriate functions and configuring permissions for the Incident, click Save, or Save and Copy to make an instant copy of the Template that you can further adjust for similar use cases.