Topic
Updating the Default Sender Caller ID in Everbridge Suite.
Description
Any user with an Account Admin or Organizational Admin role can modify the organization's default Sender (Caller) IDs. In the Everbridge Manager Portal, go to Settings > Organization > Notifications > Sender Information. Under the Sender Caller ID section, select the Country from the drop-down, enter a valid phone number as the Caller ID, and then click Save.
In this guide, you will learn how to update the default sender caller ID in Everbridge. Follow the steps below to ensure your messages are properly identified. For additional step-by-step details, see also: EB360: Everbridge Caller ID Configuration.
Log in to the Everbridge Manager Portal and select your Organization
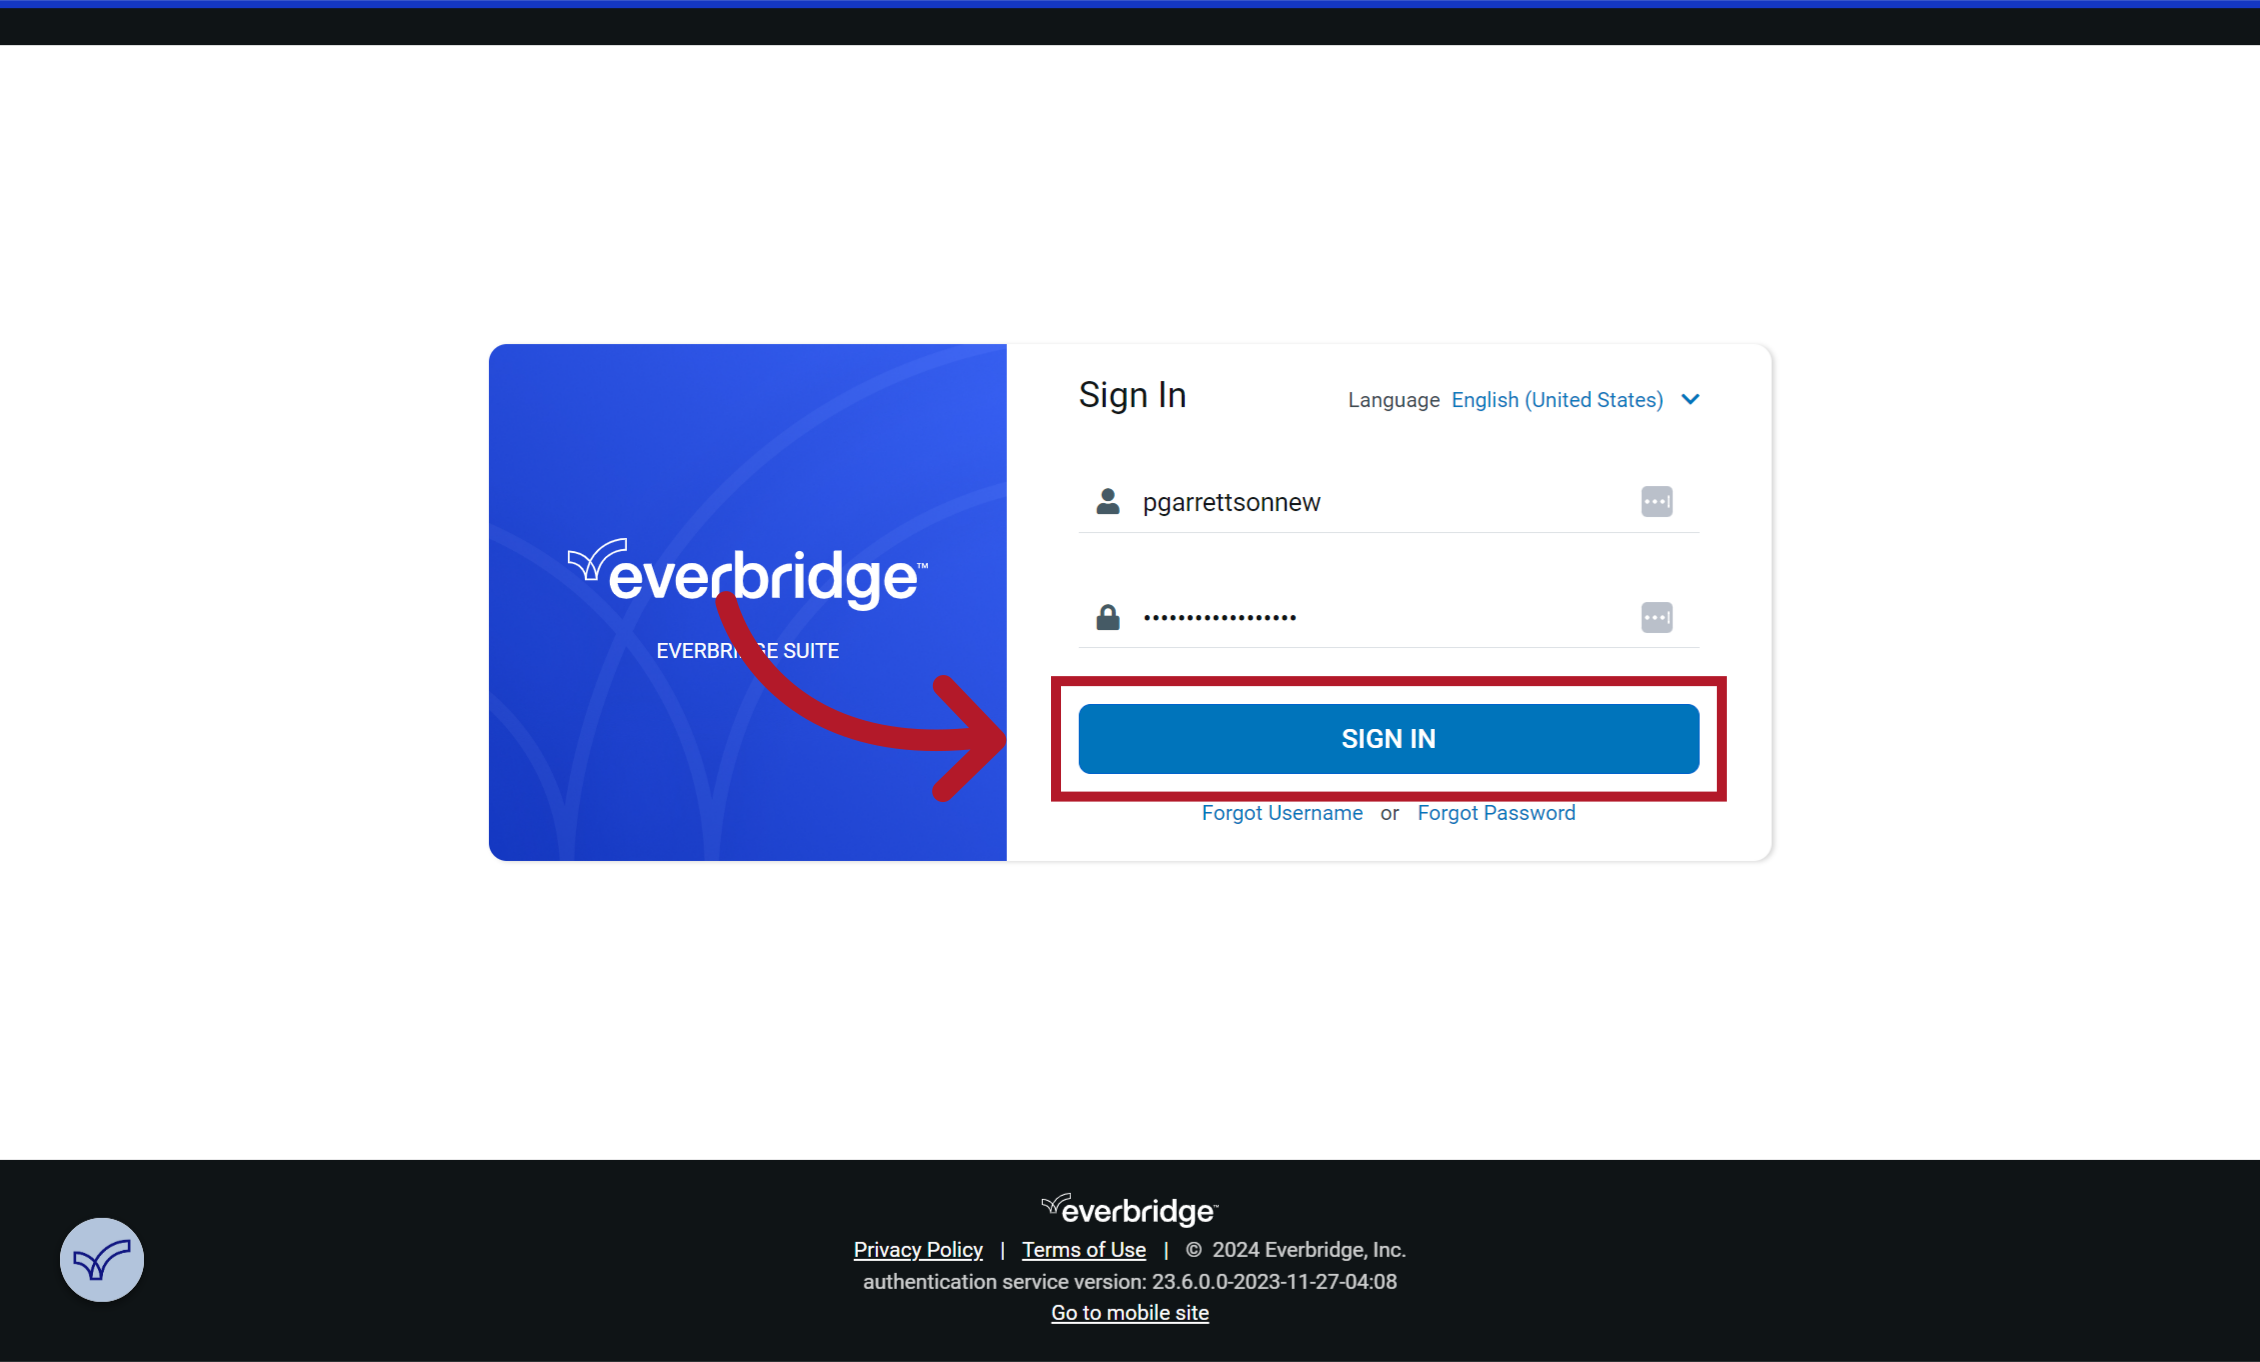
1. Sign In
Enter your credentials and then click on "Sign in"
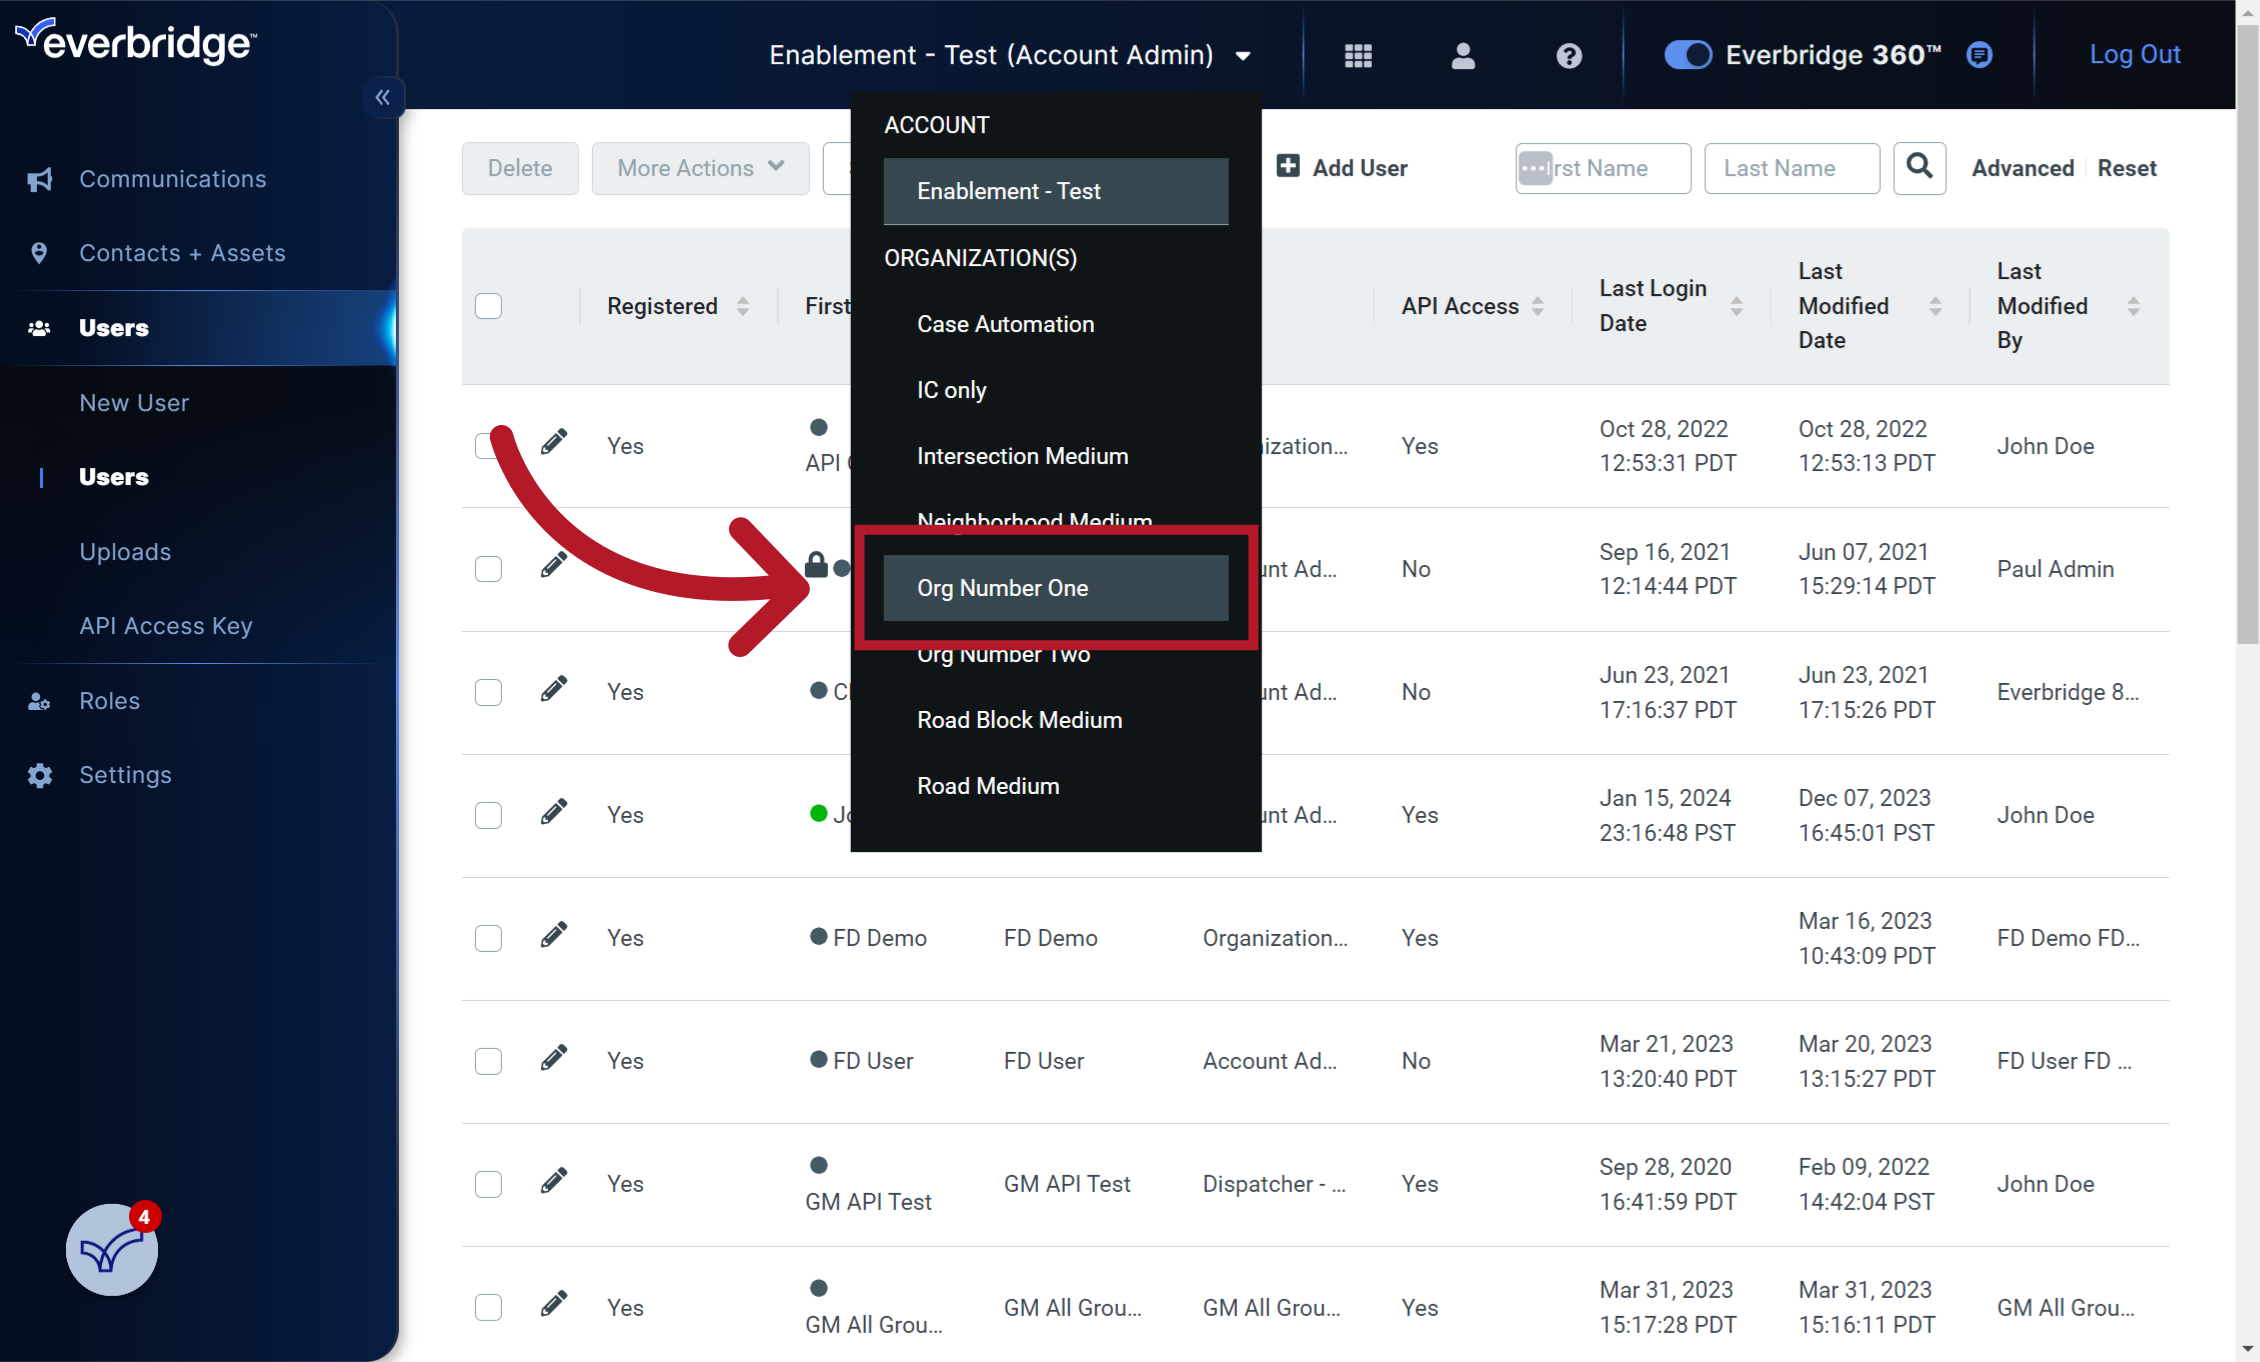
2. Select the Organization drop-down
Click the down arrow to bring up the organization selection list

3. Select Your Organization
Select the organization where you would like to make the change
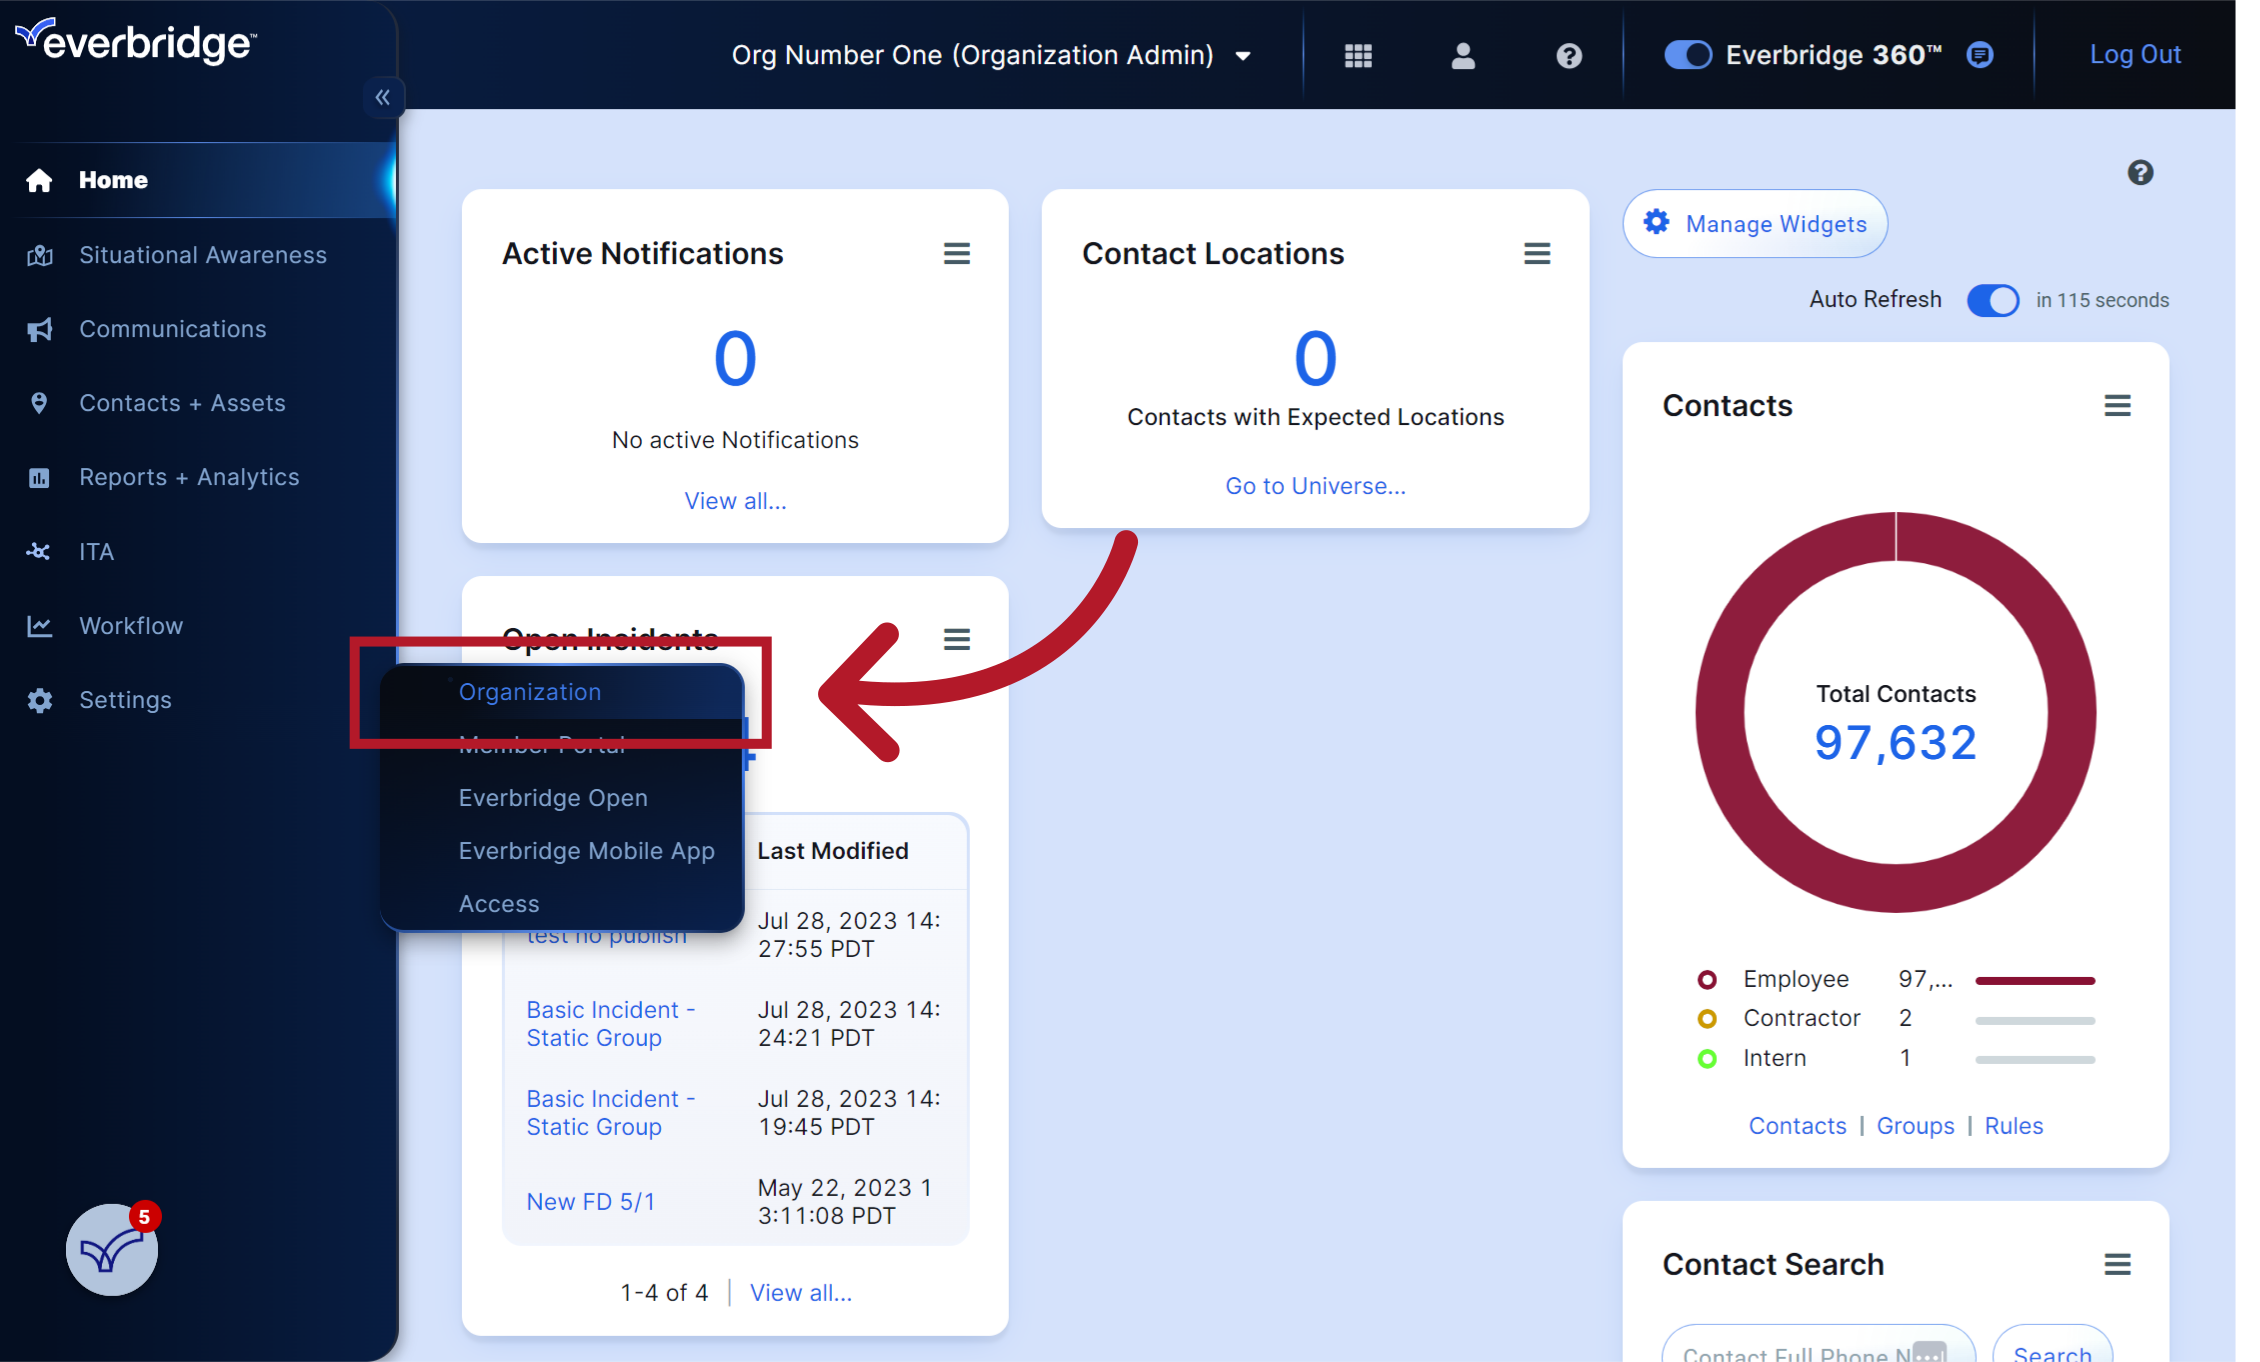
4. Click "Organization"
Choose "Organization"
5. Click "Notifications"
Select "Notifications"

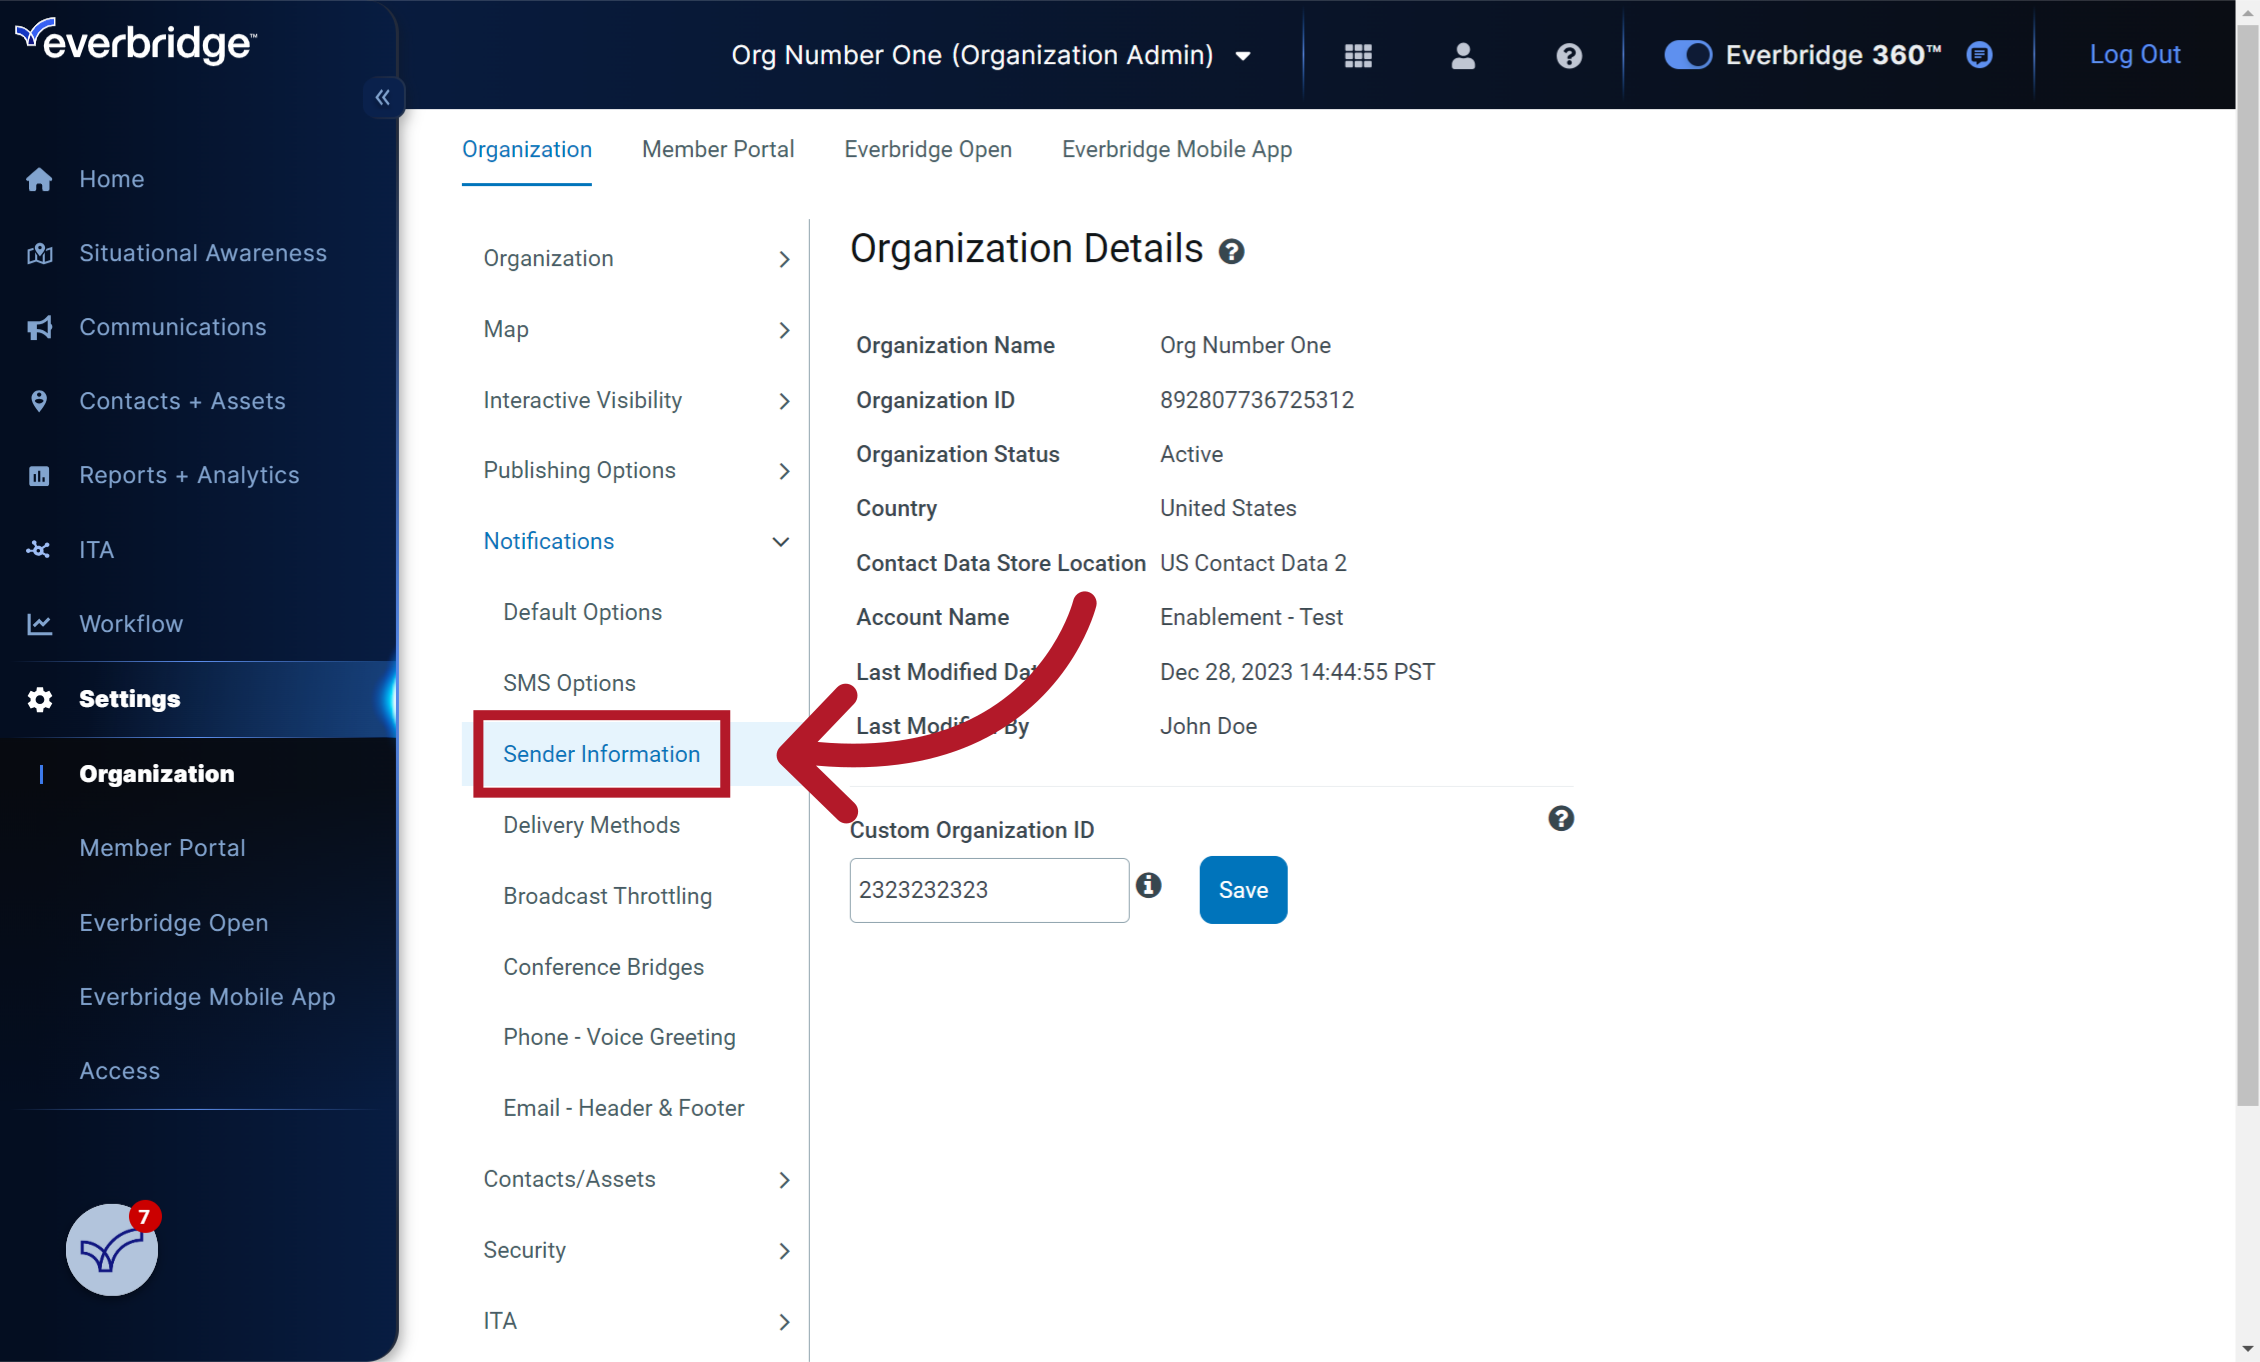
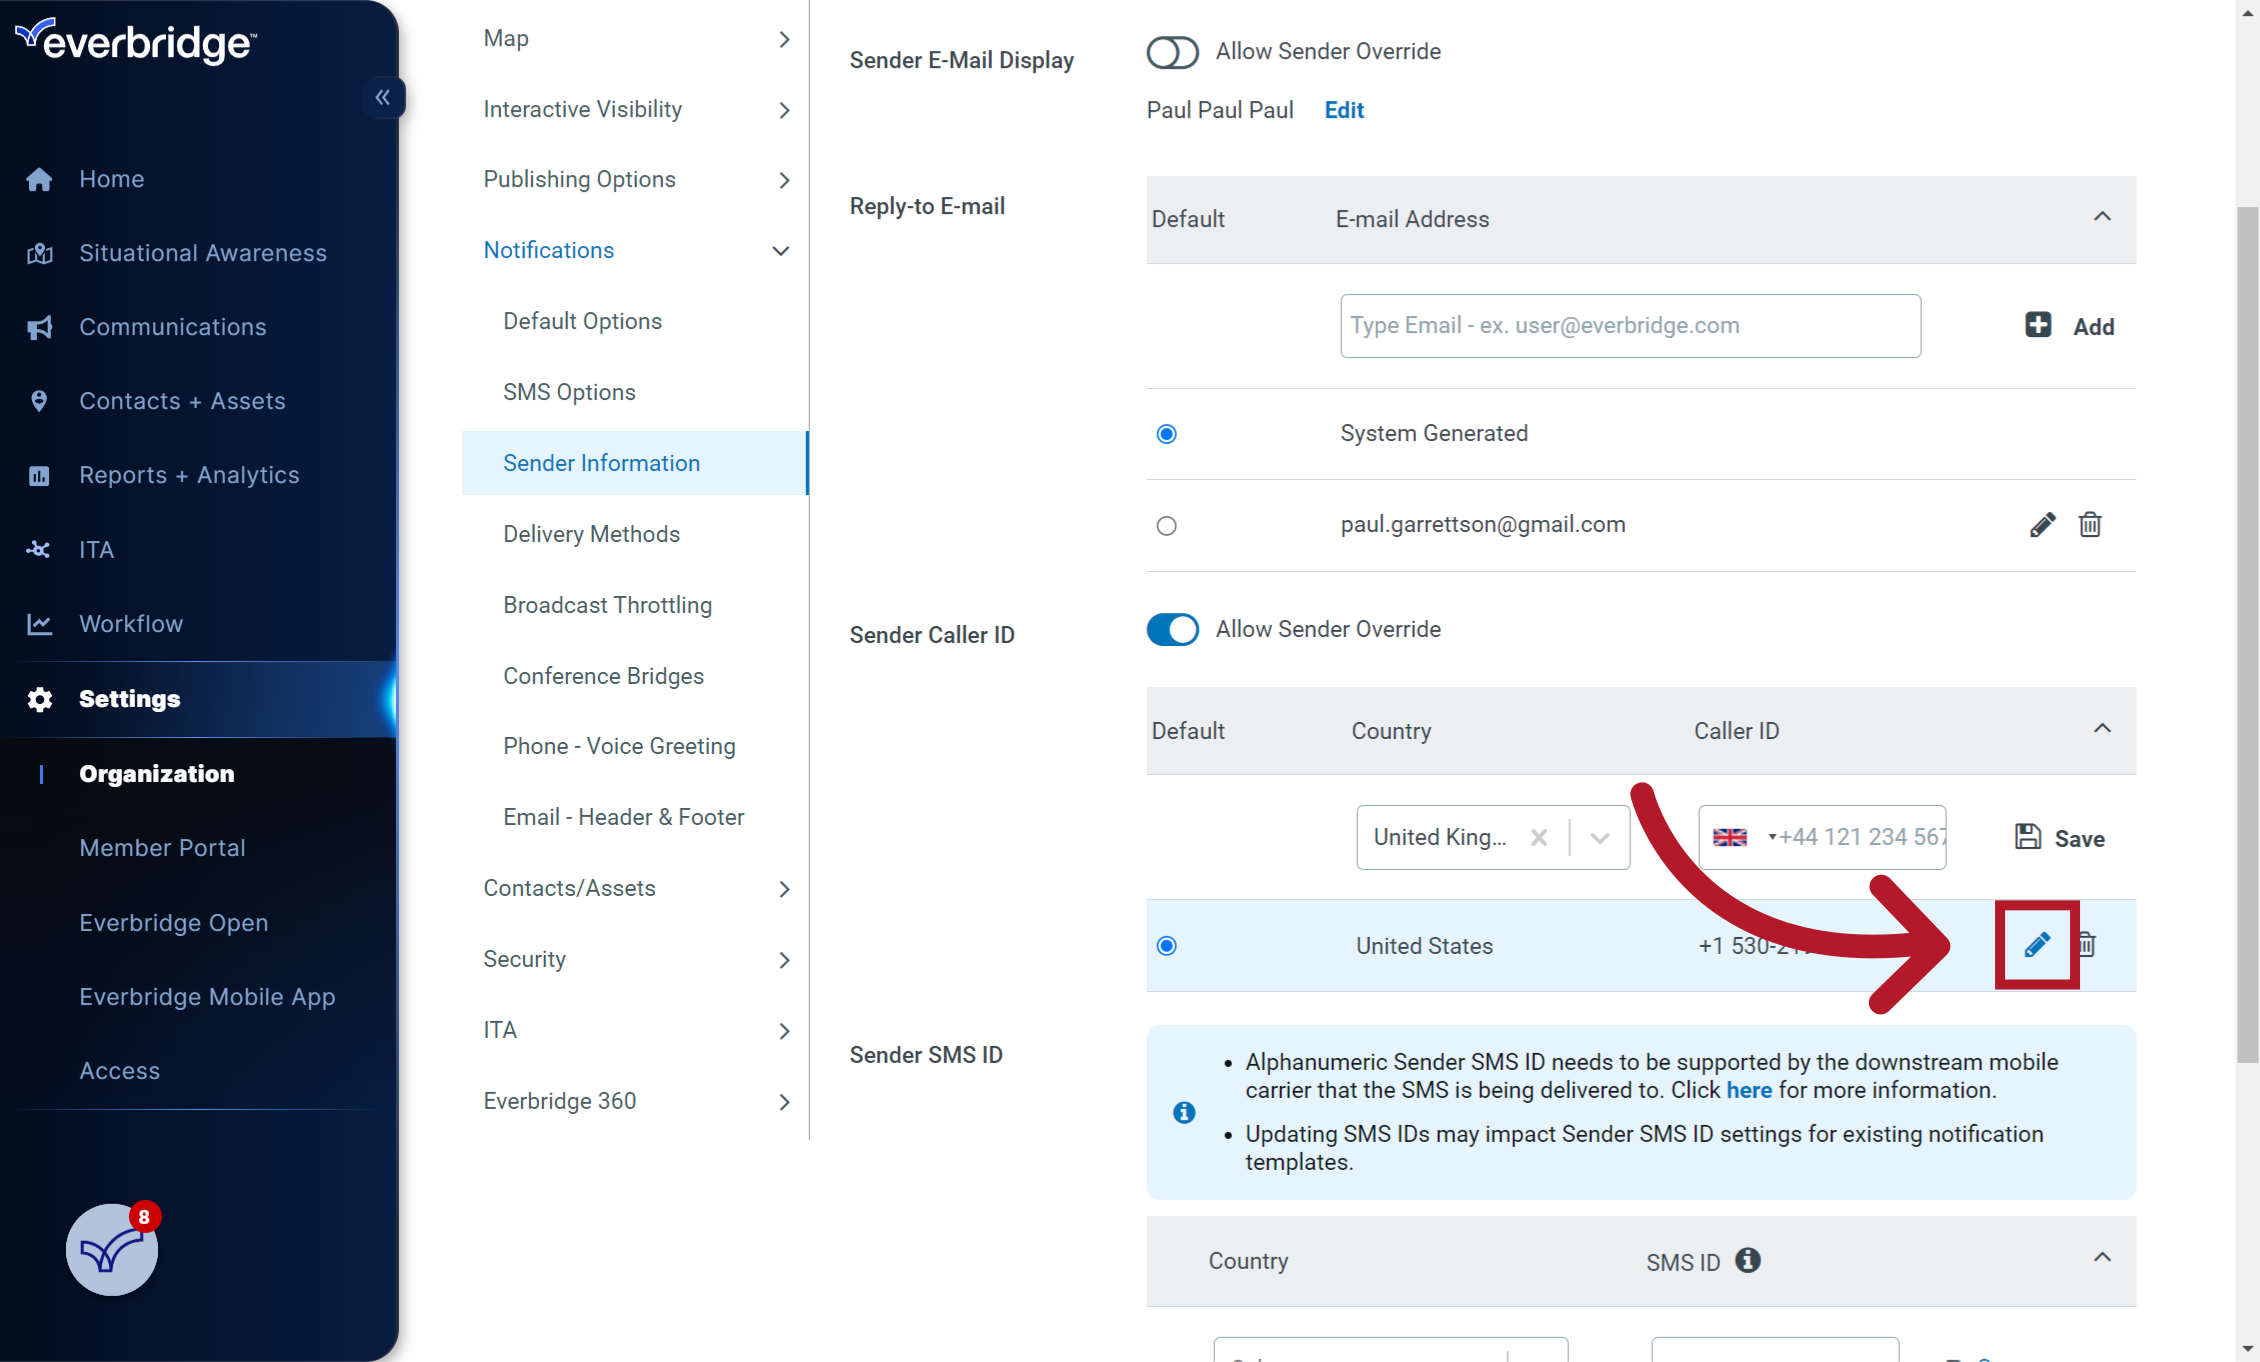
6. Click "Sender Information"
Go to "Sender Information"
7. Select the pencil icon
Click here to edit the default sender caller ID for the United States
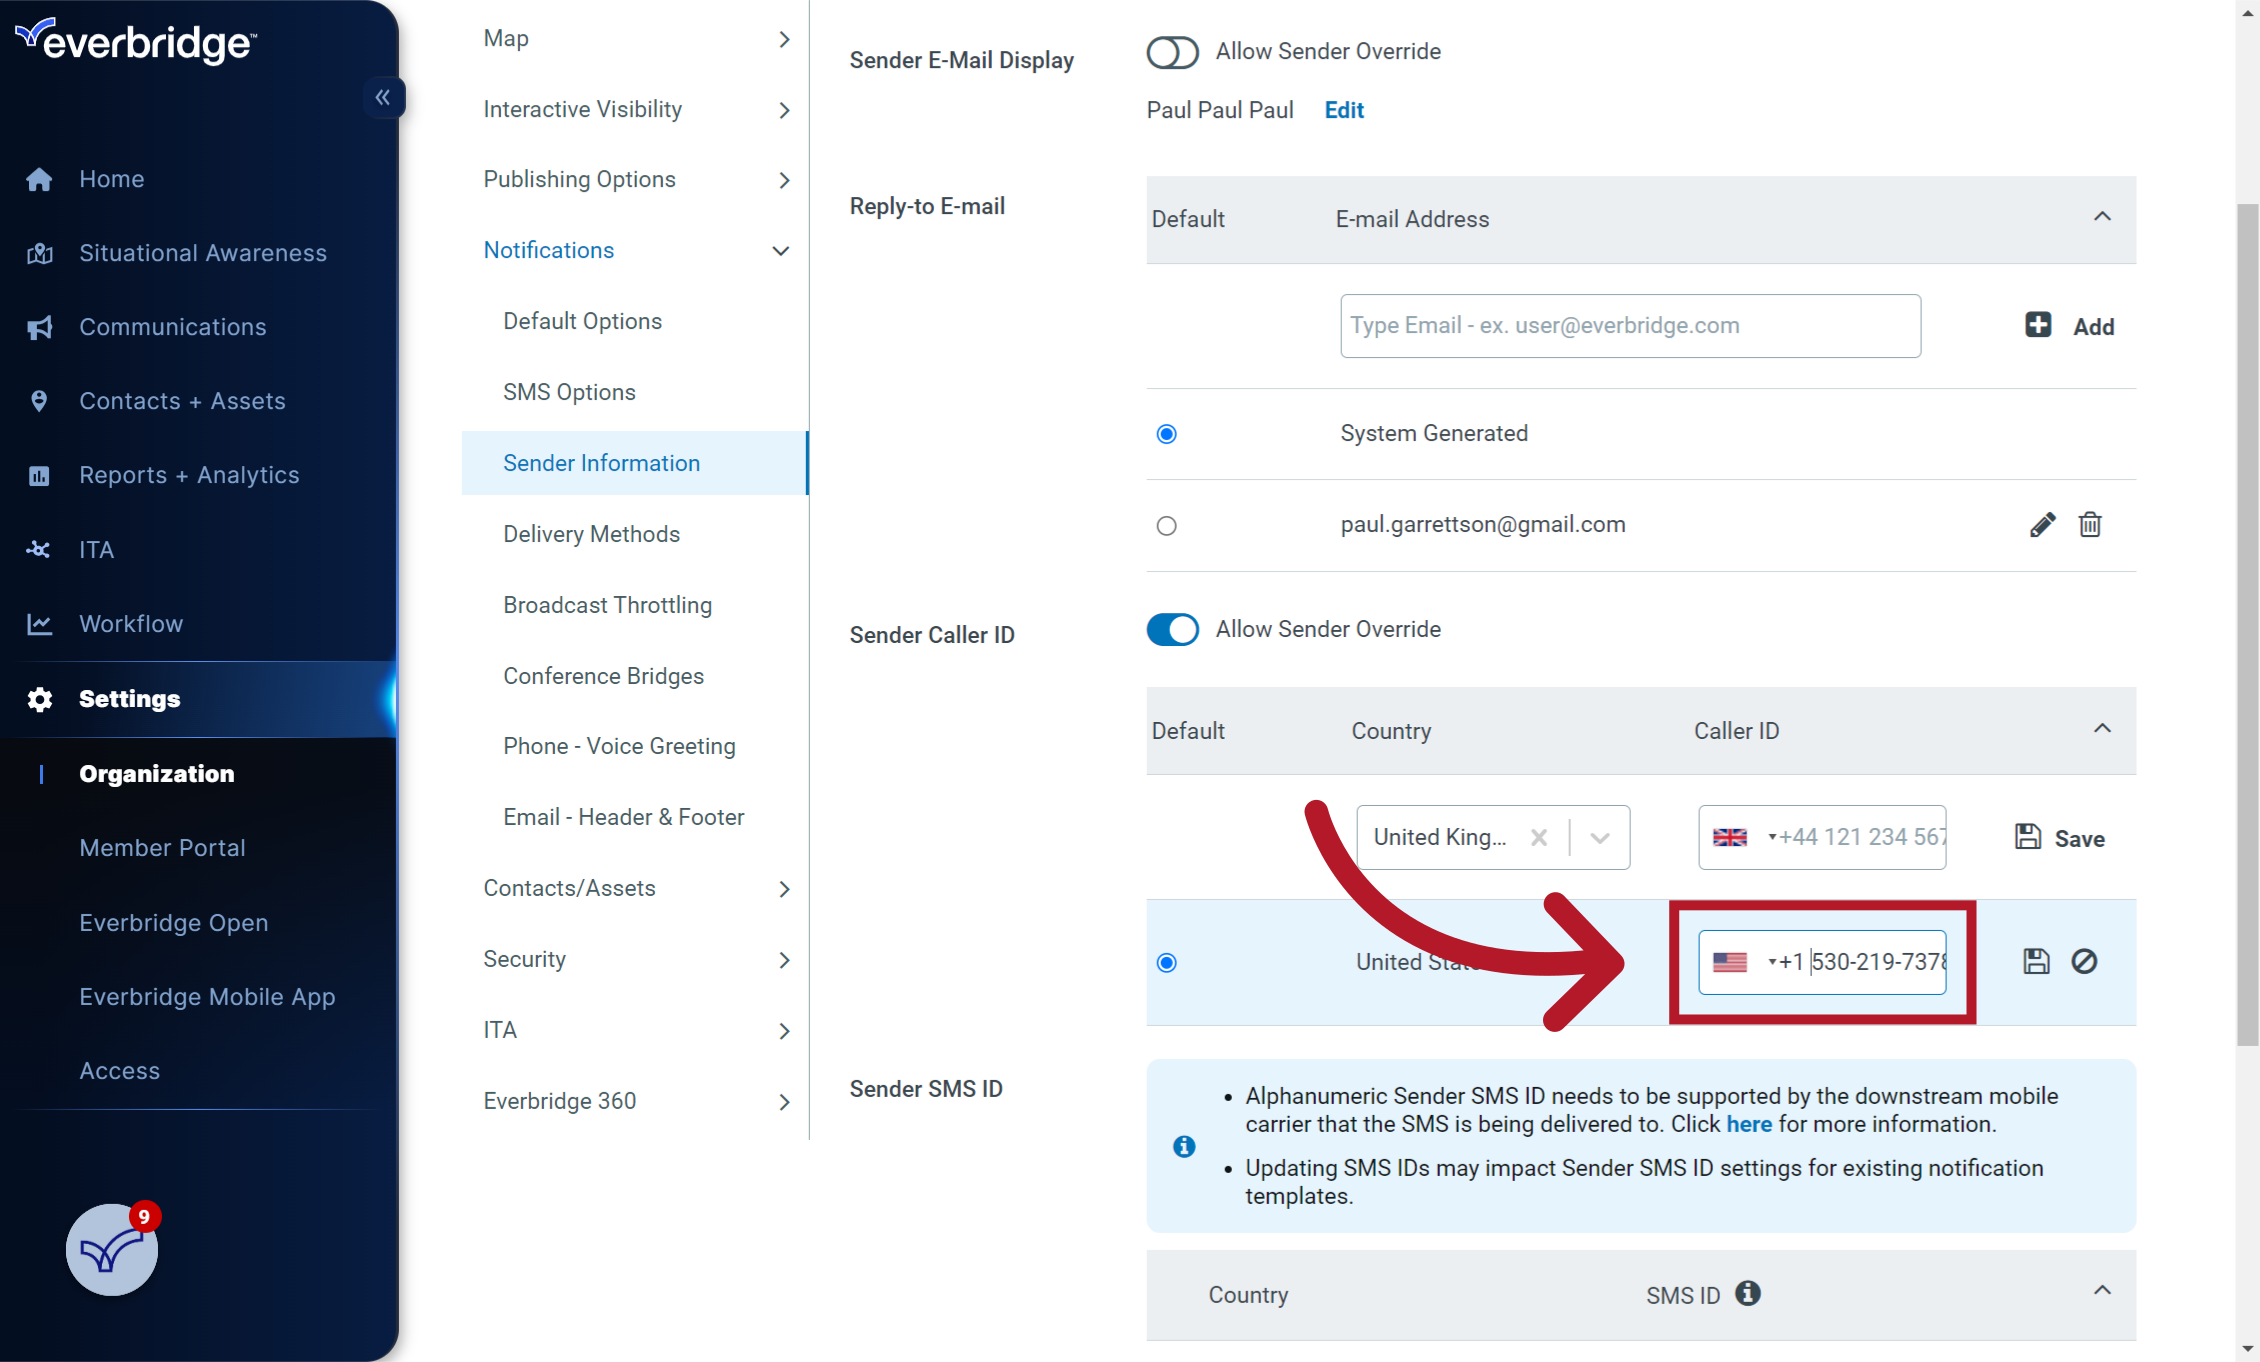
8. Enter the Caller ID
Enter the desired caller ID here. It must be a valid phone number
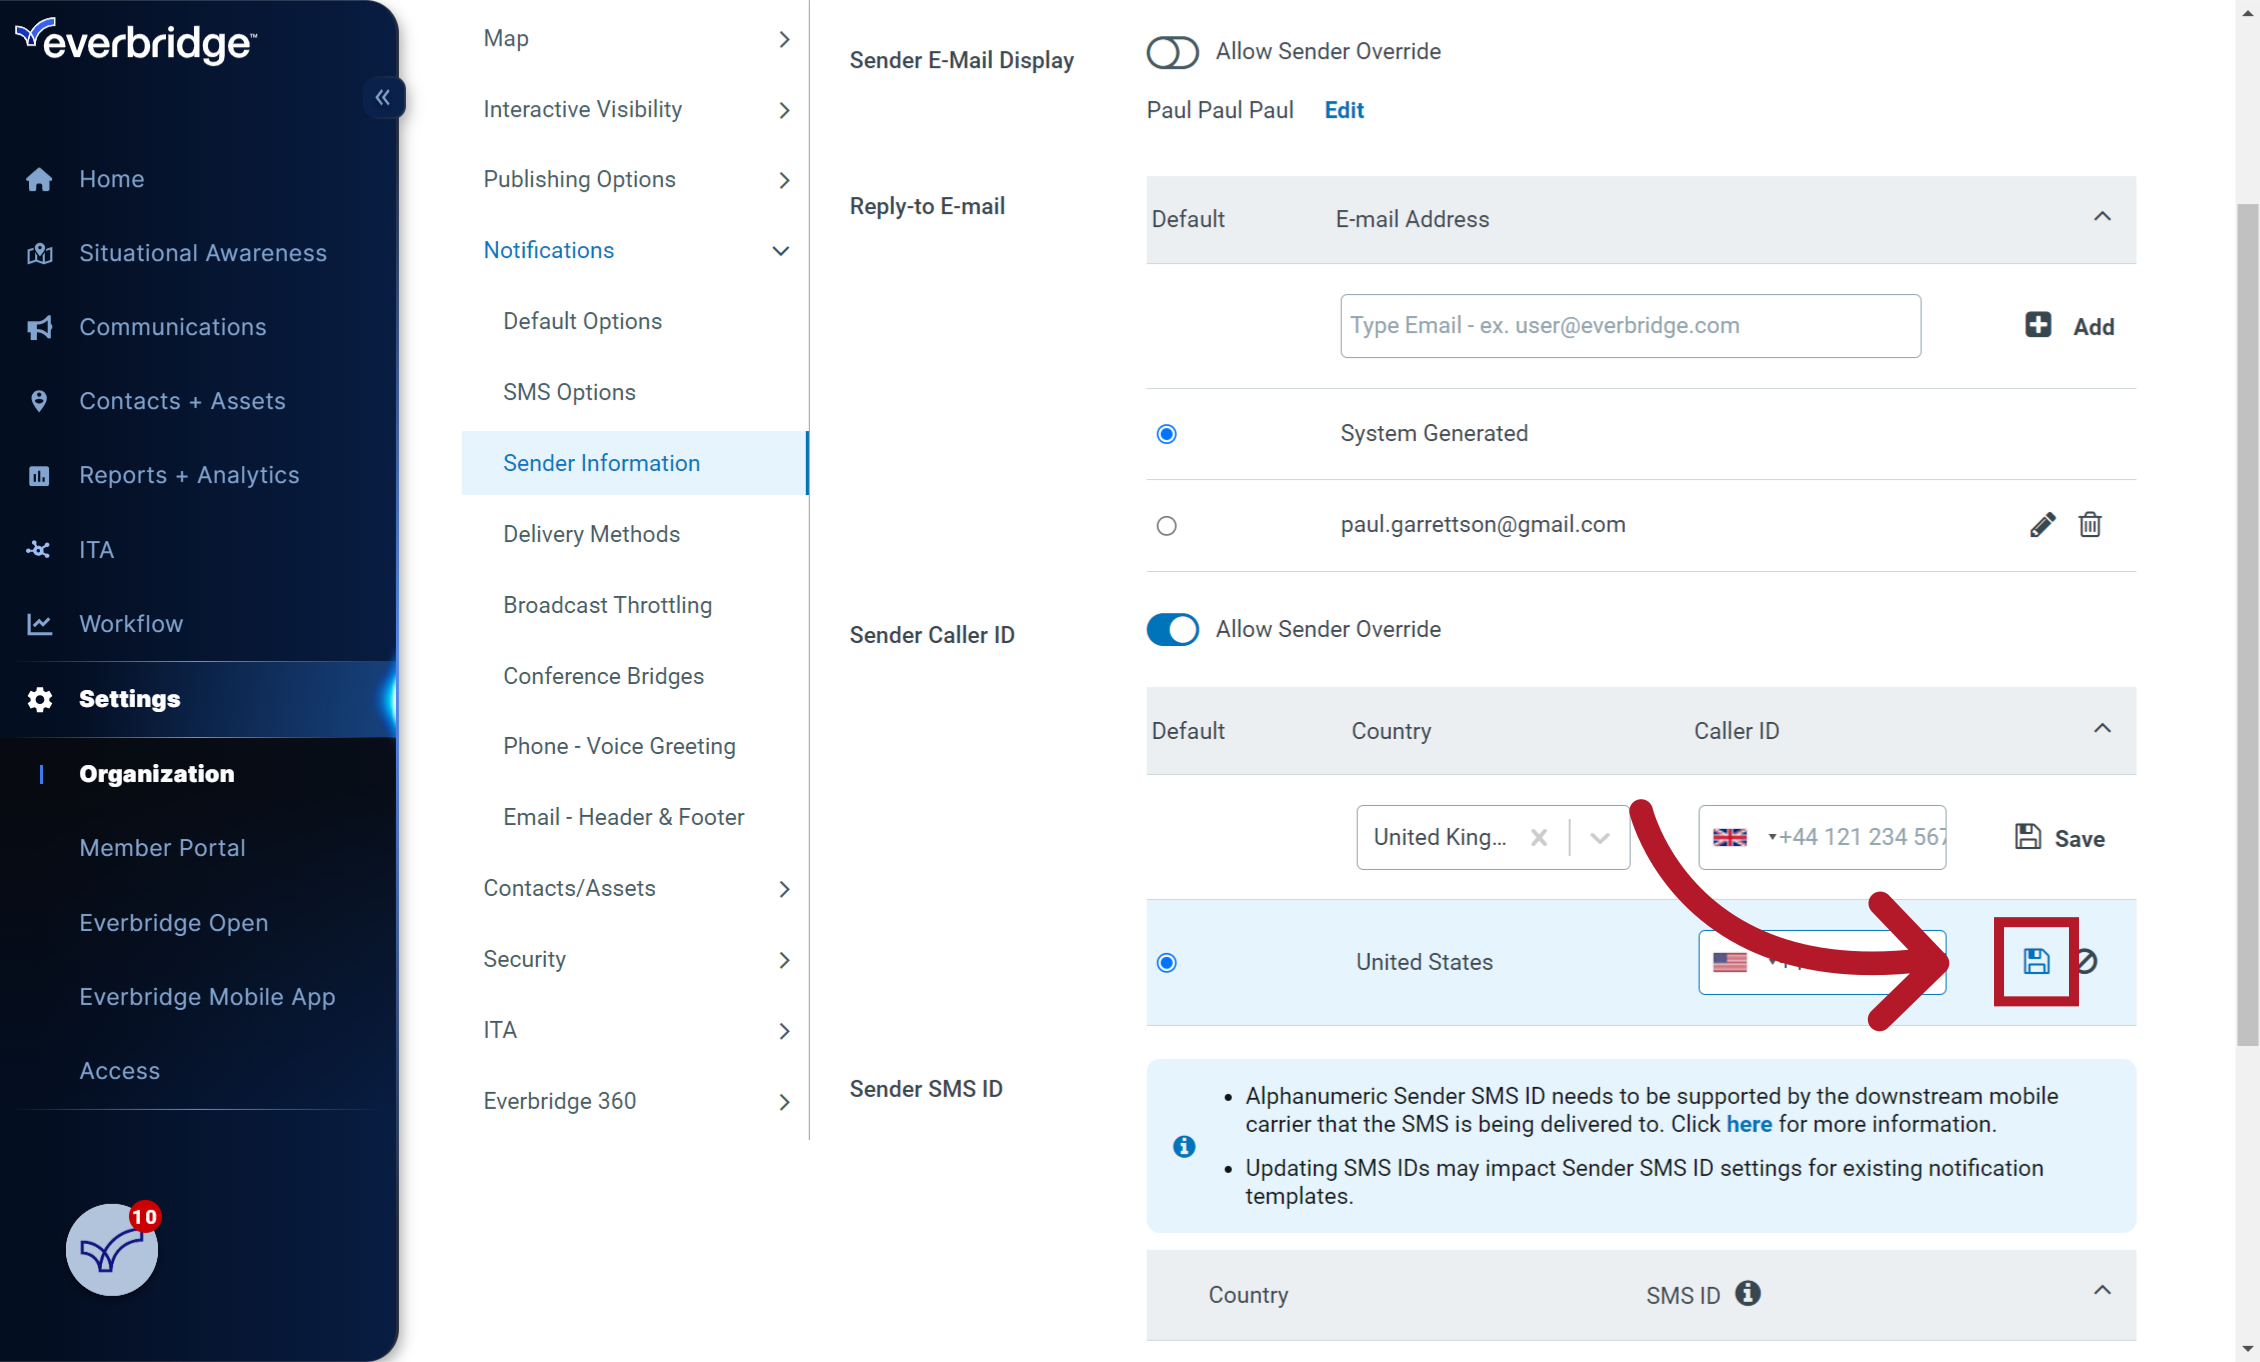
9. Select the save icon
Select the disk icon to save
This guide covered the steps to update the default sender caller ID in Everbridge. By following these instructions, you can ensure that your messages are properly identified when sent through the application.
Note: Updating the default Sender Caller ID does not automatically update existing notification or incident templates. Sender IDs cannot be changed in bulk or enforced globally; each existing template that references a specific sender must be edited and re-saved individually. If you need help identifying which templates are affected, contact Everbridge Support for assistance in locating or filtering the relevant templates before updating them manually.