Topic
Logging into the EB 360™ Desktop App
Description
The Everbridge 360 Desktop™ App offers the same functionality as the Everbridge 360™ Mobile App from the comfort of your desktop. In this tutorial, you will learn how to access the application and the steps required to log in manually.
NOTE: if your organization has used Mobile Device Management (MDM) to install the app on your device, some steps covered here may not apply.
1. Login Options
The app can be downloaded from the Microsoft Store and Apple App Store for Windows and iOS devices, respectively, and from the Everbridge website. Your organization can also install the app on your behalf using MDM.
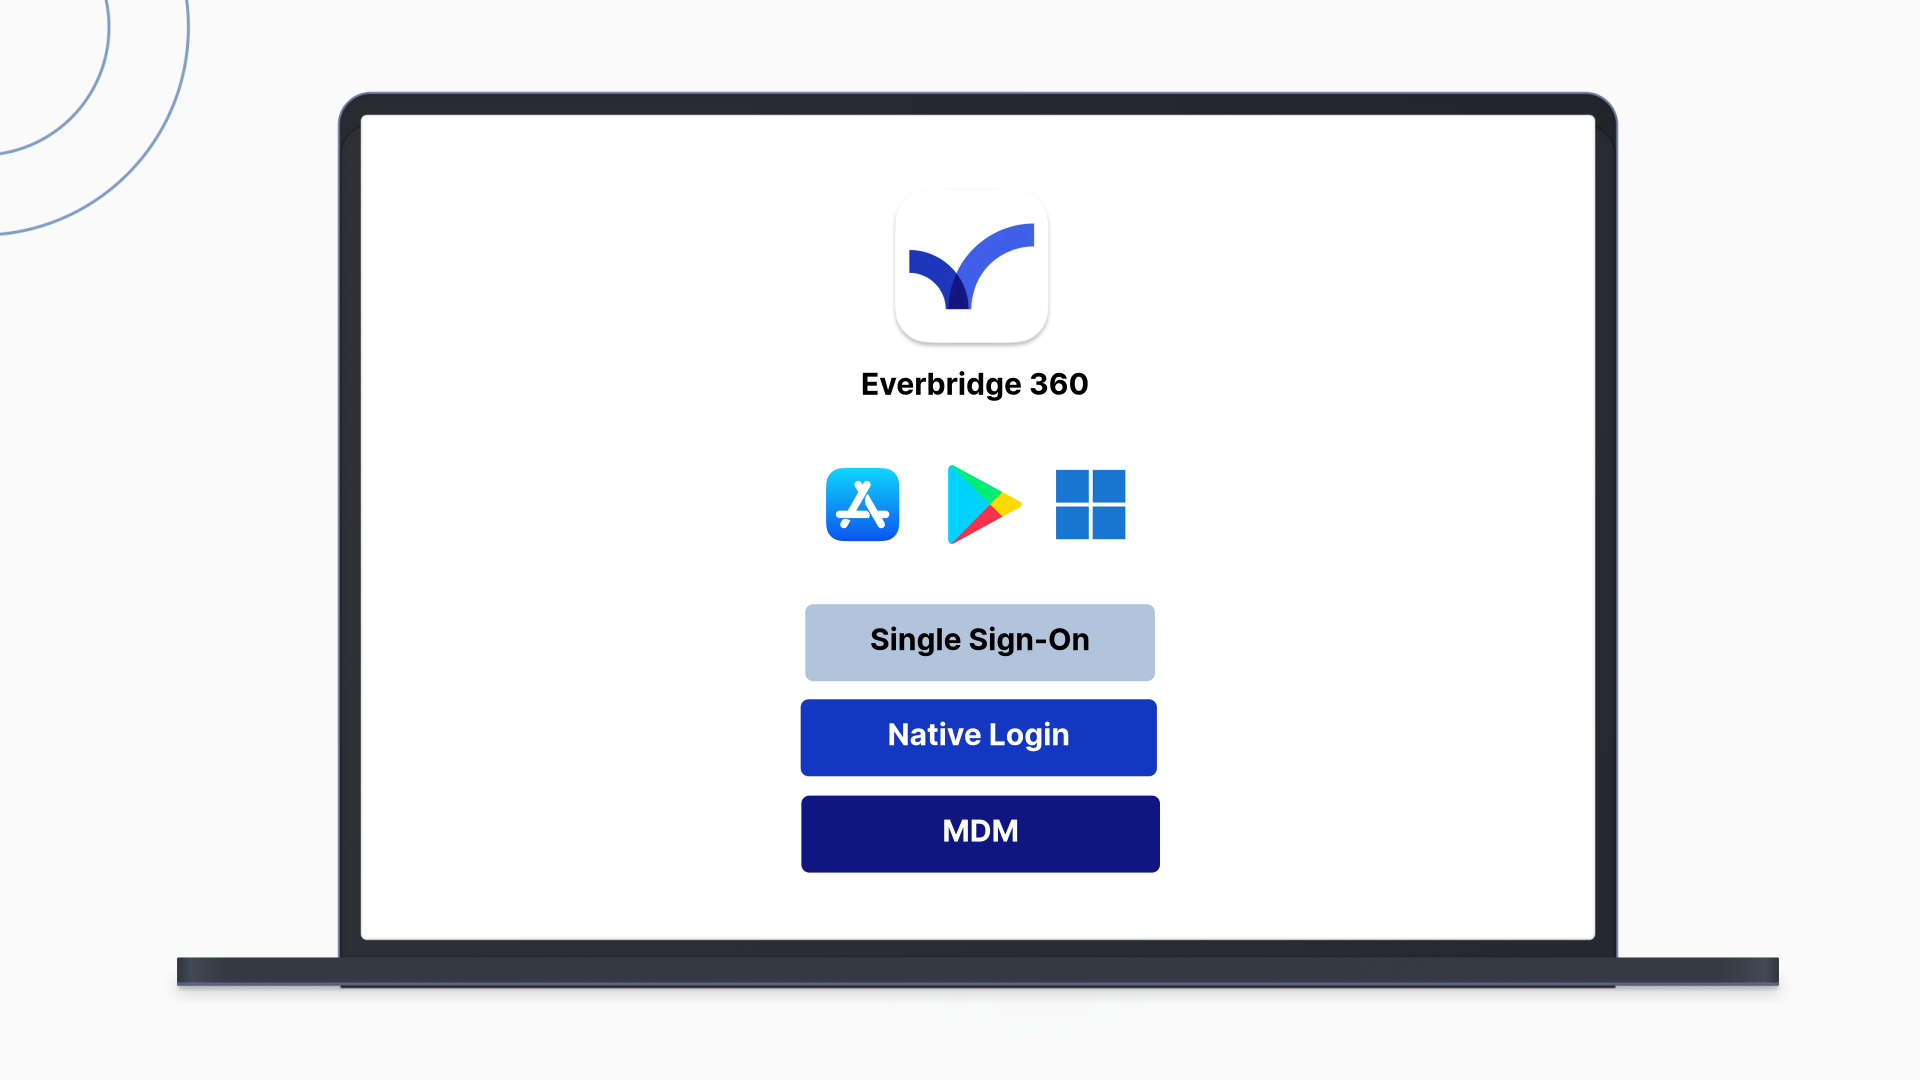
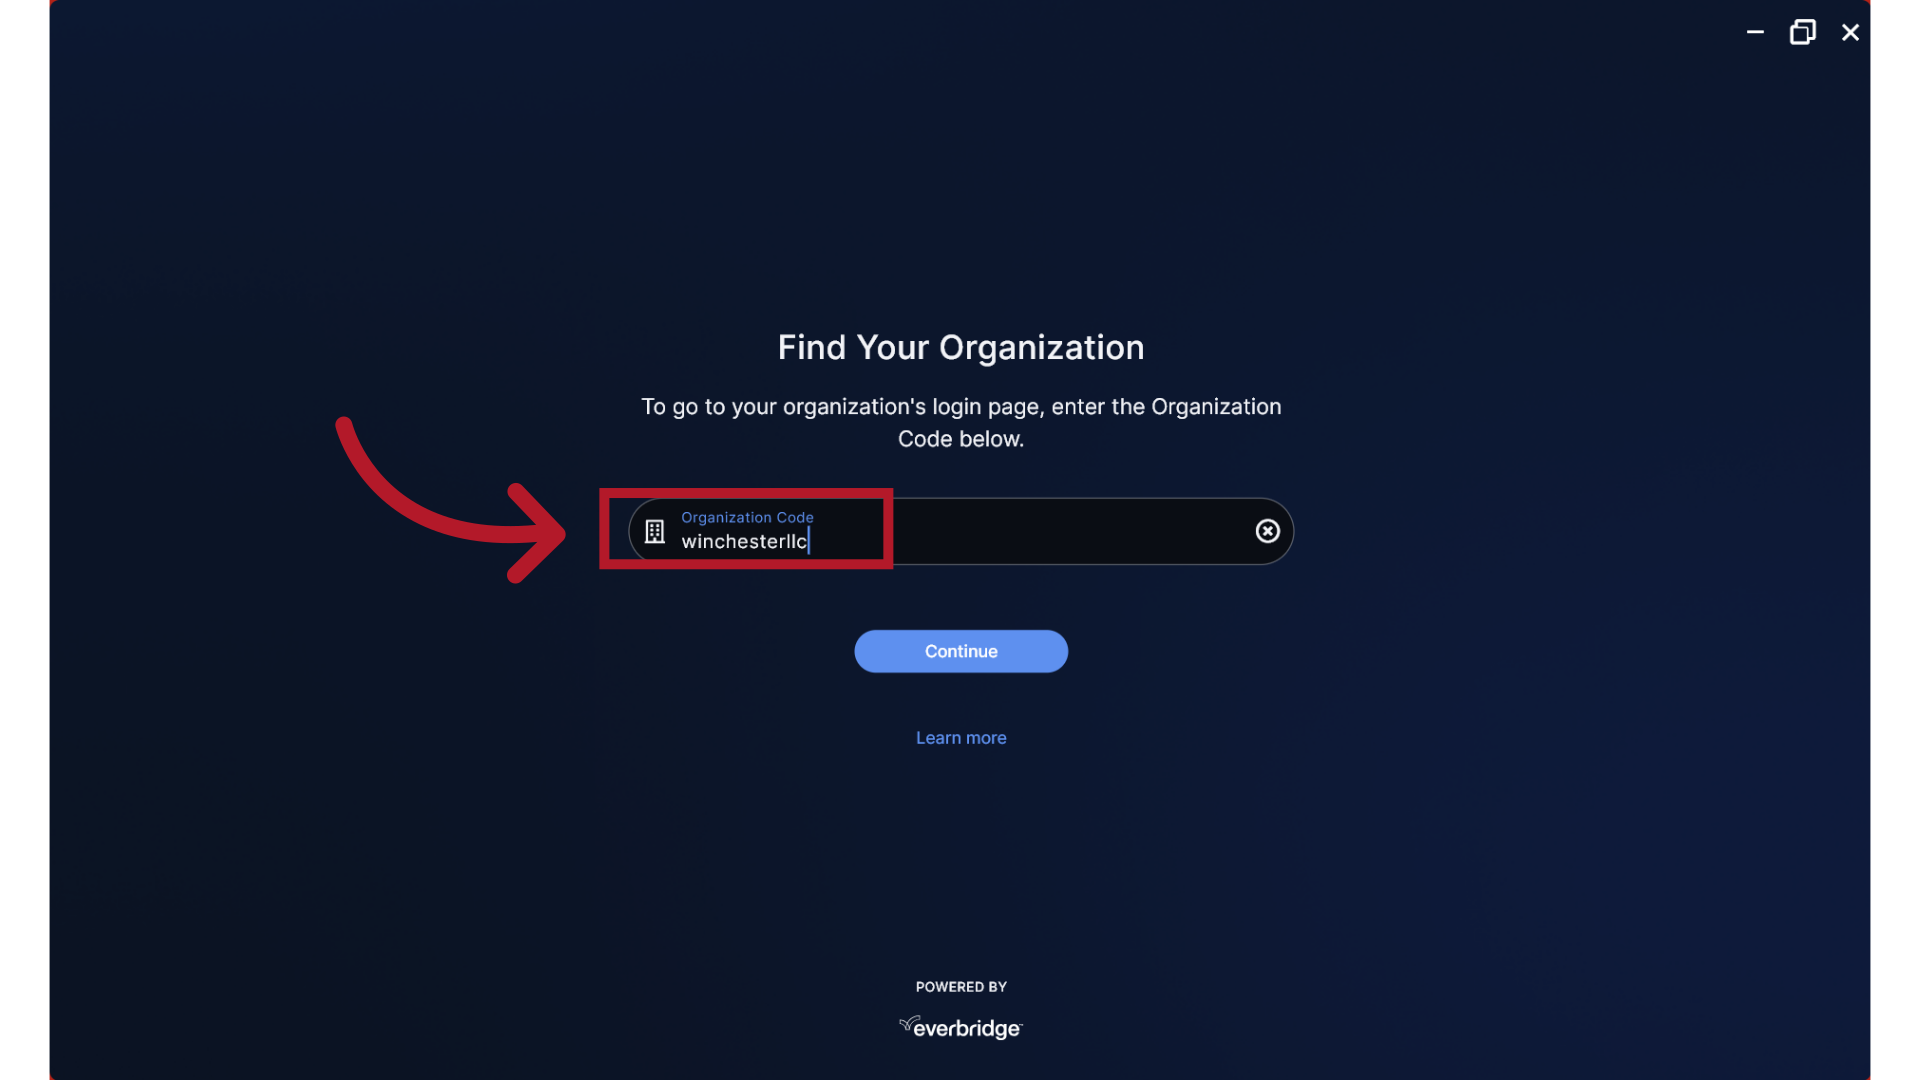
2. Organization Code
For native and Single Sign-On logins, you must first enter your Organization Code. If you do not know your code, contact your Everbridge administrator.
3. Single Sign-On
If your organization has configured Single Sign-On access, select the Single Sign-On button to log into the app using your network credentials.
NOTE: If you are already logged into your SSO application in the same browser, you may be automatically authenticated without needing to enter your SSO credentials again.

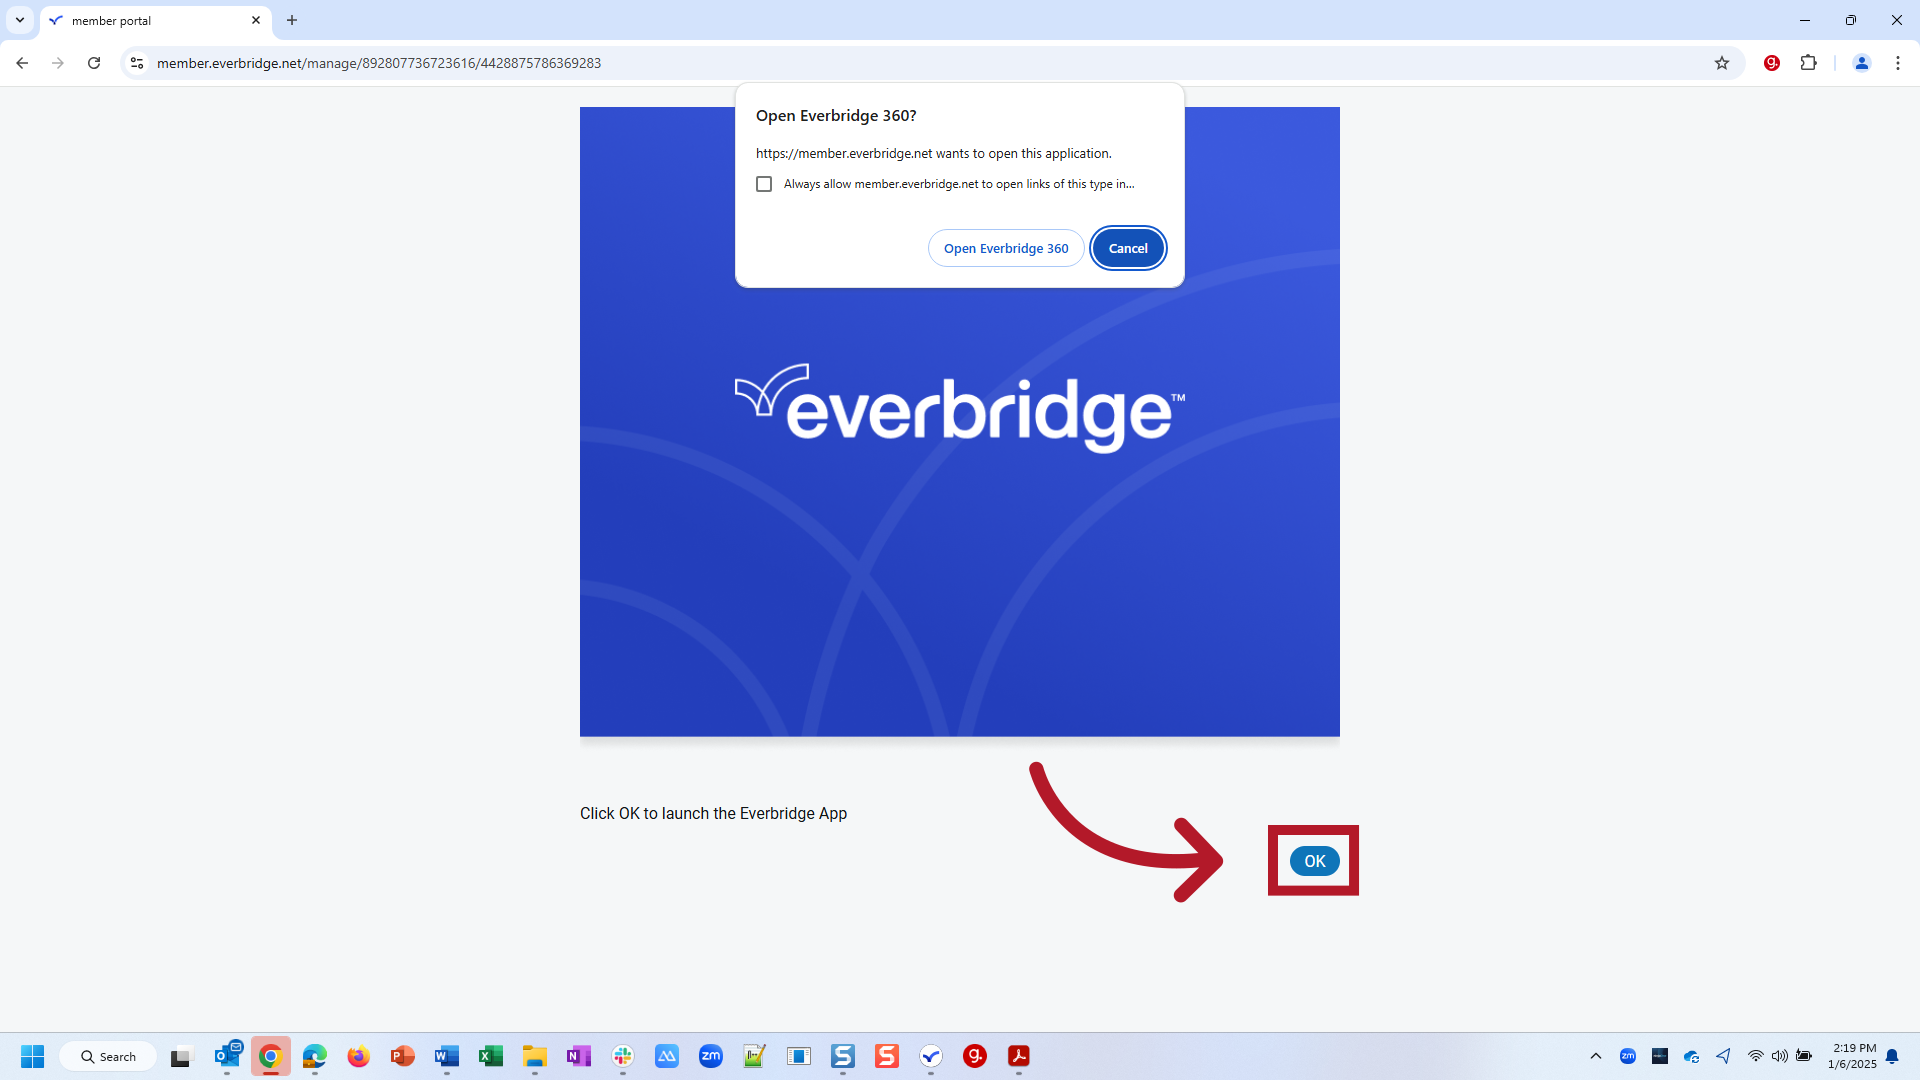
4. Launch
Depending on your organization's Single Sign-On settings, you may be prompted in a browser window to allow access to launch the Everbridge App. If so, click OK.
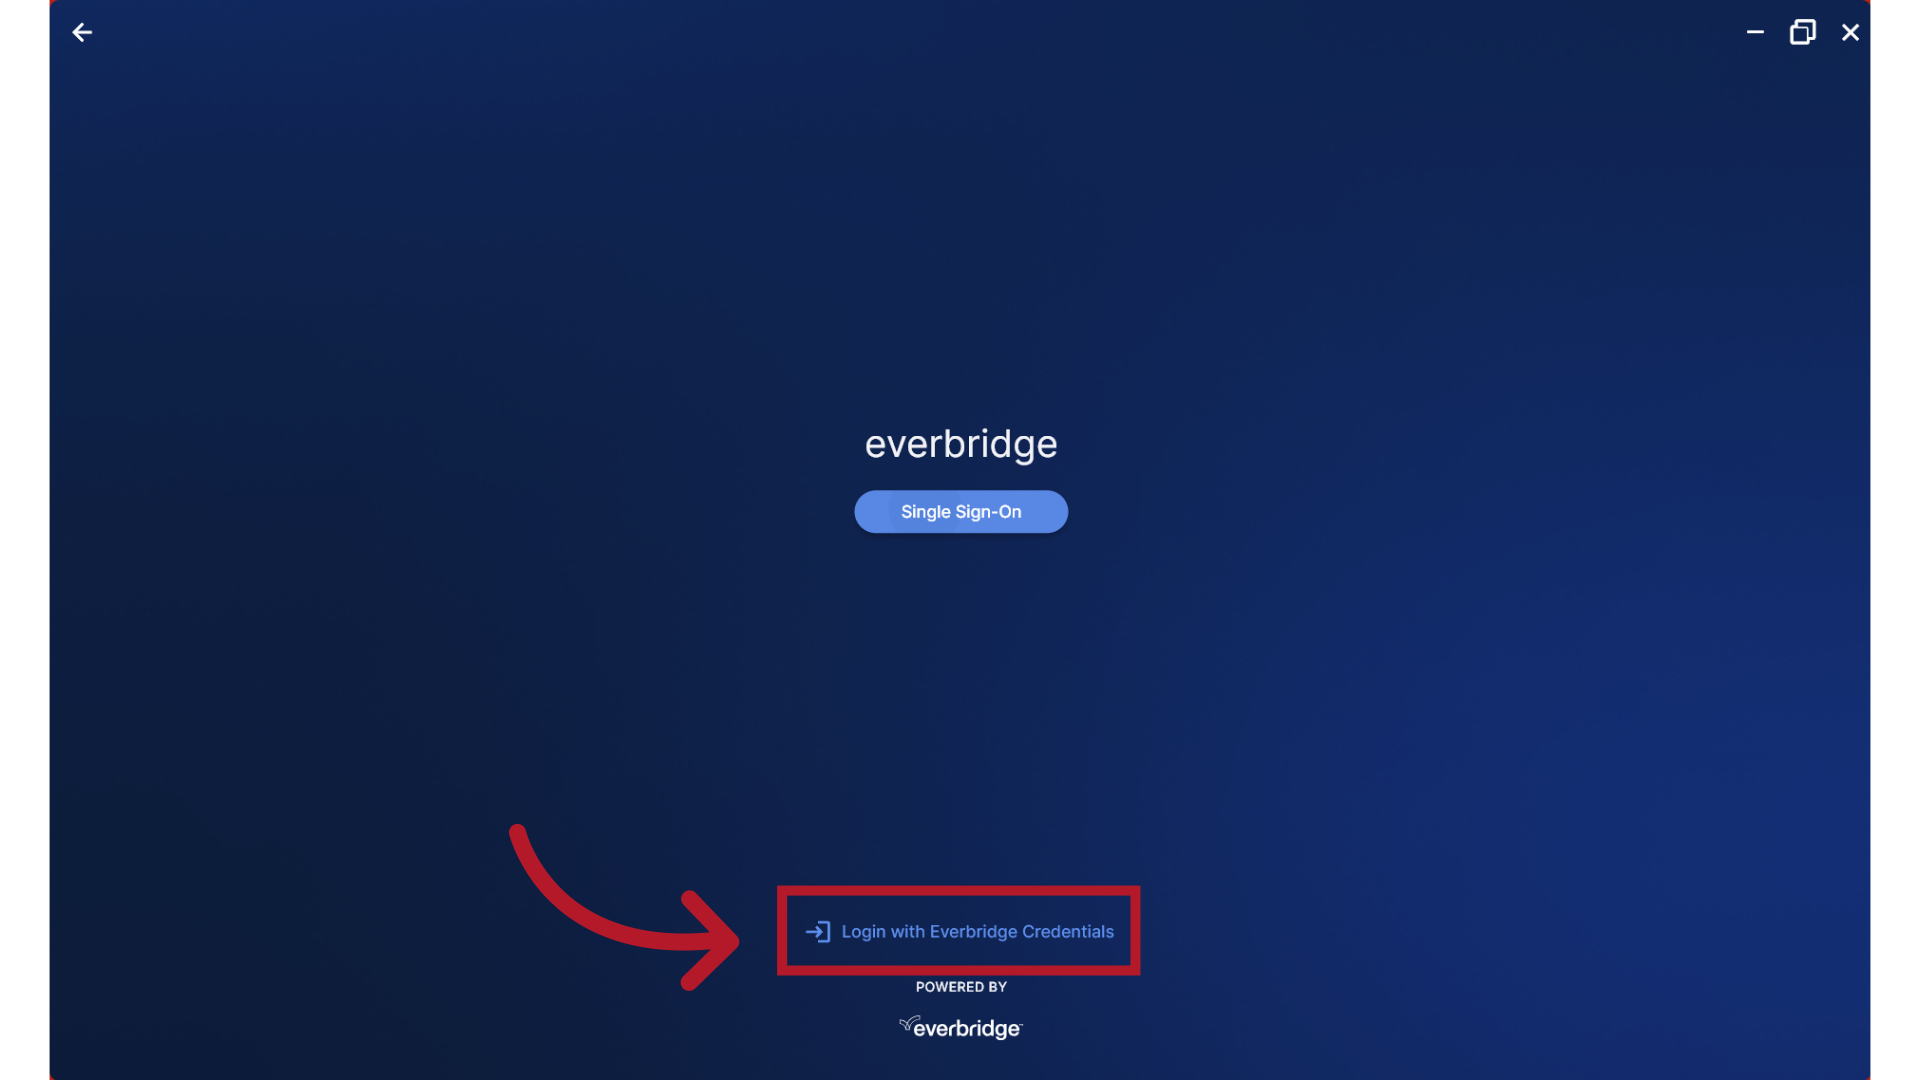
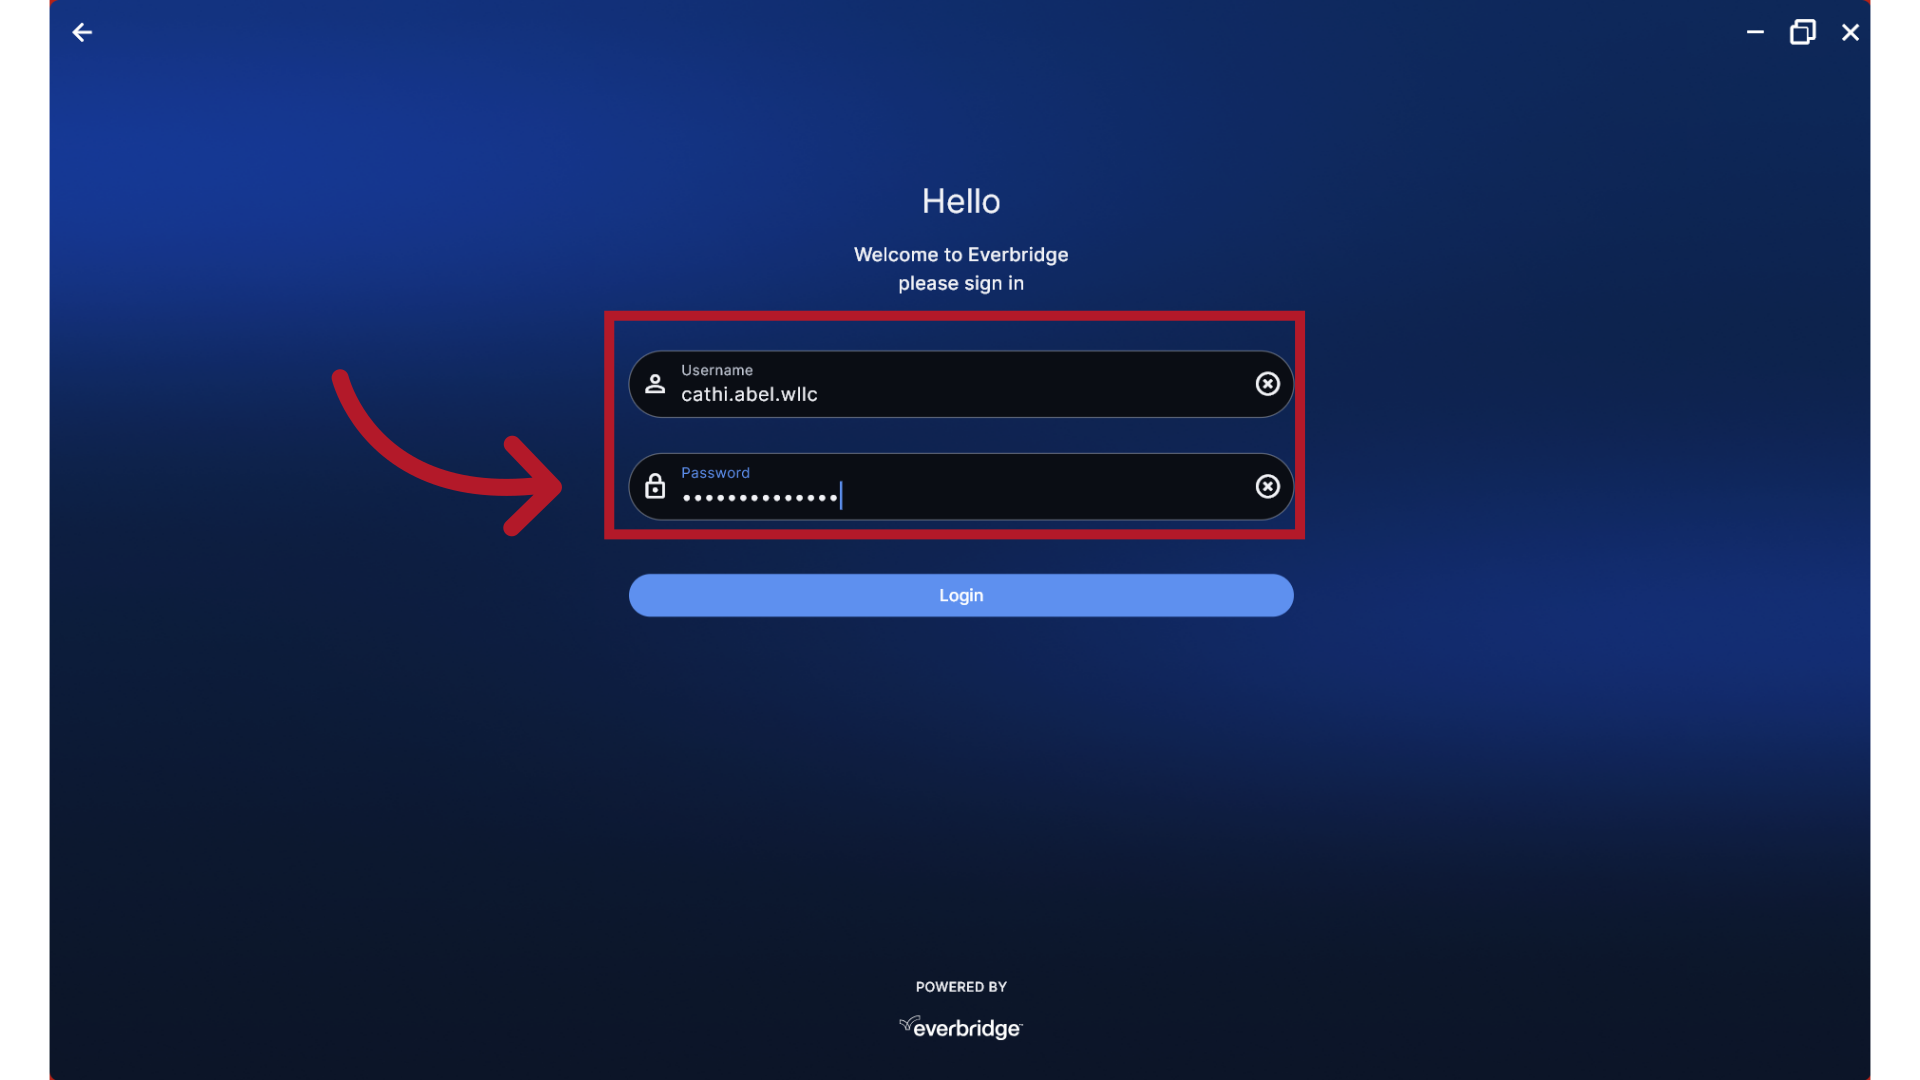
5. Native Login
If you have already registered a username and password for your organization's private Member Portal, you may use those credentials here by selecting "Login with Everbridge Credentials."
6. Credentials
Enter your registered username and password and click Login.
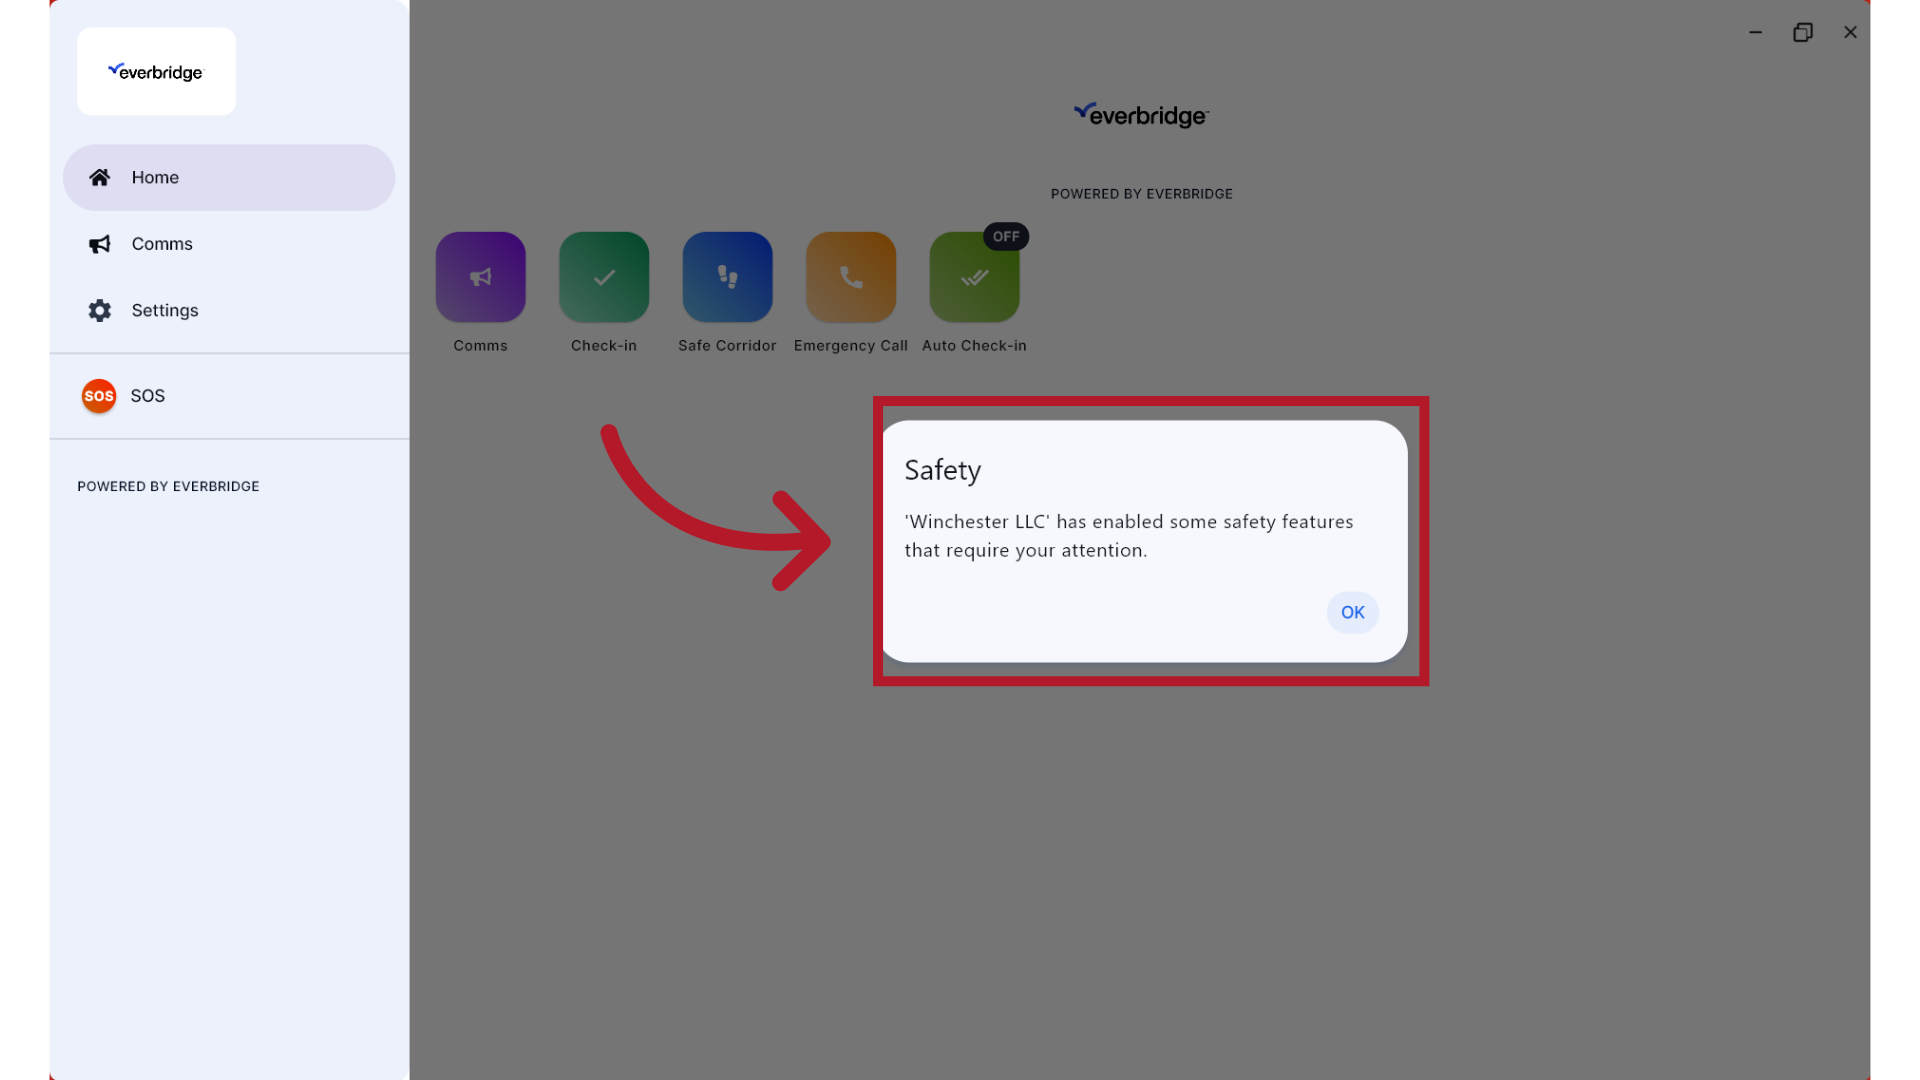
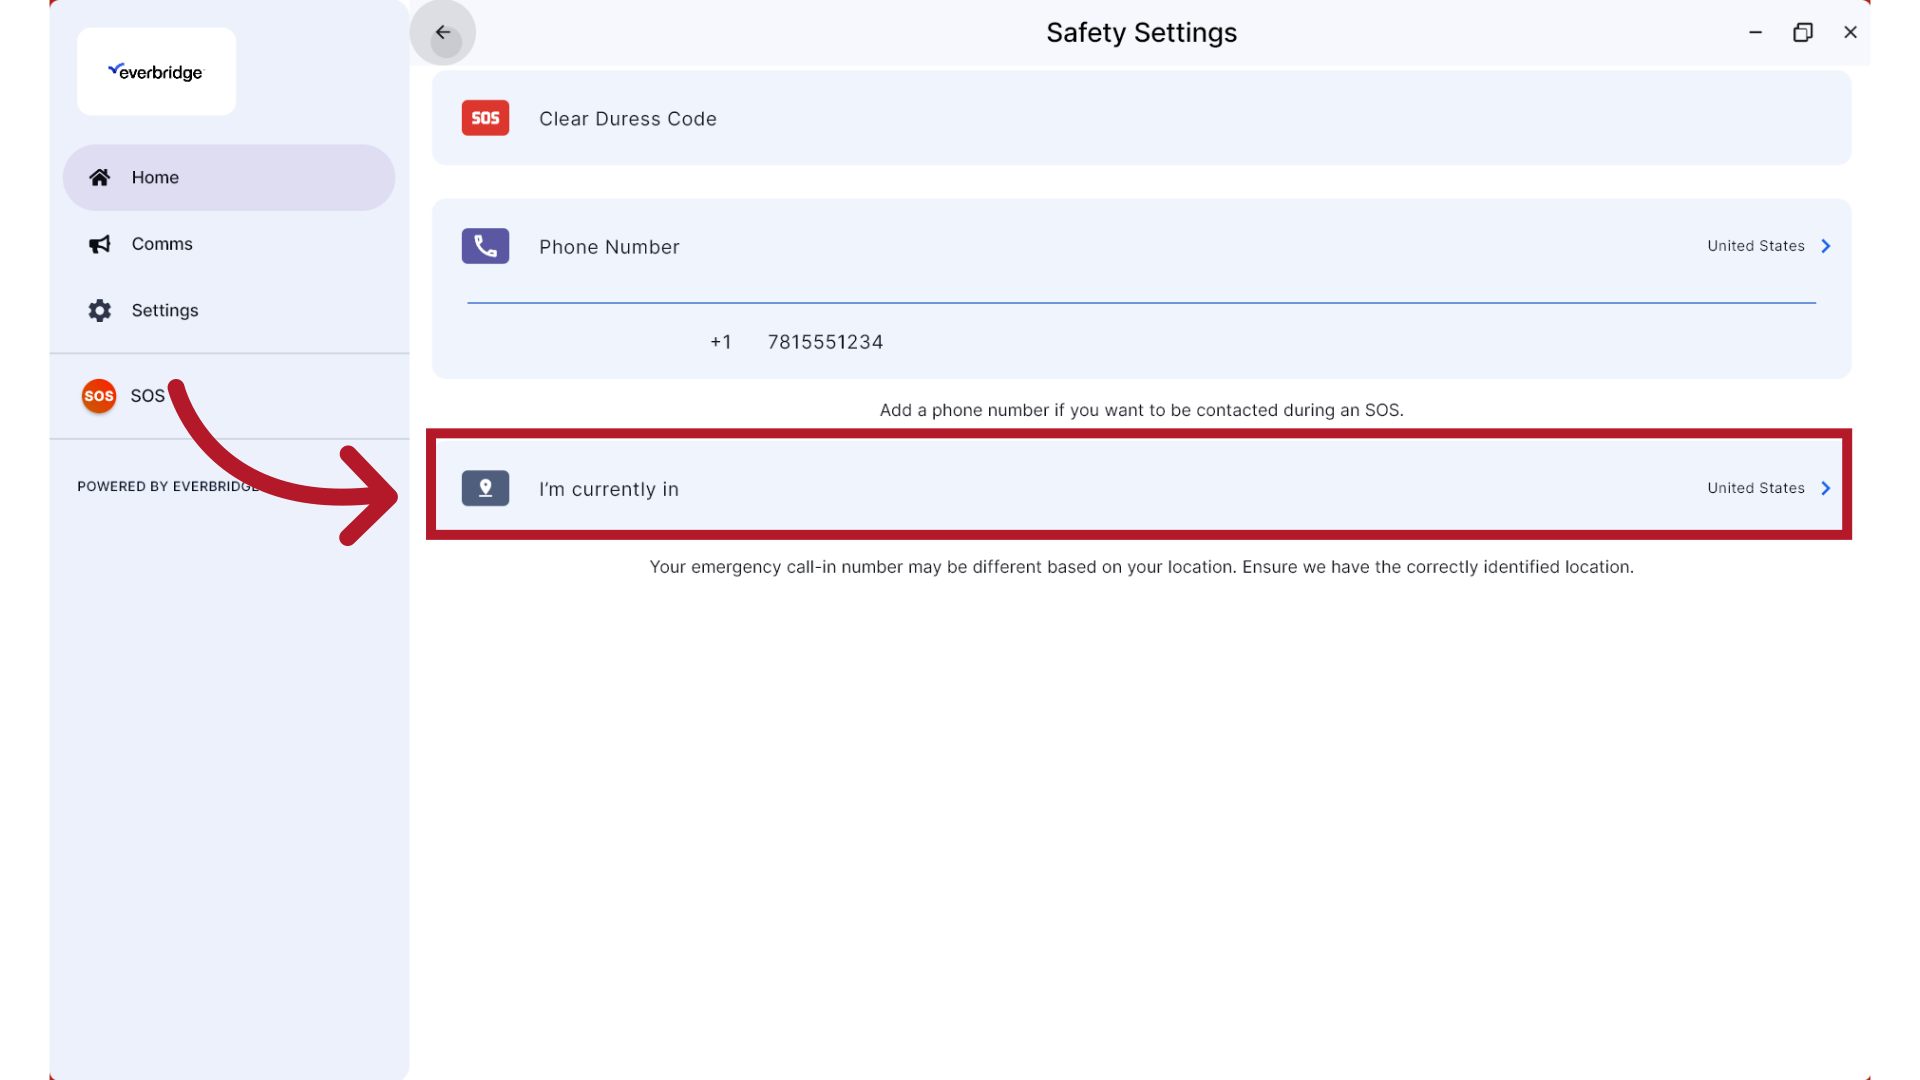
7. Safety Settings
The first time you log in, you may be prompted to enter Safety Button settings. If you do not see this prompt, you may not have access to any Safety Buttons, or settings may have been preset on your behalf through your organization's MDM configuration.
8. Safety Settings
Follow the prompts to enter a 4-digit SOS Duress Code.
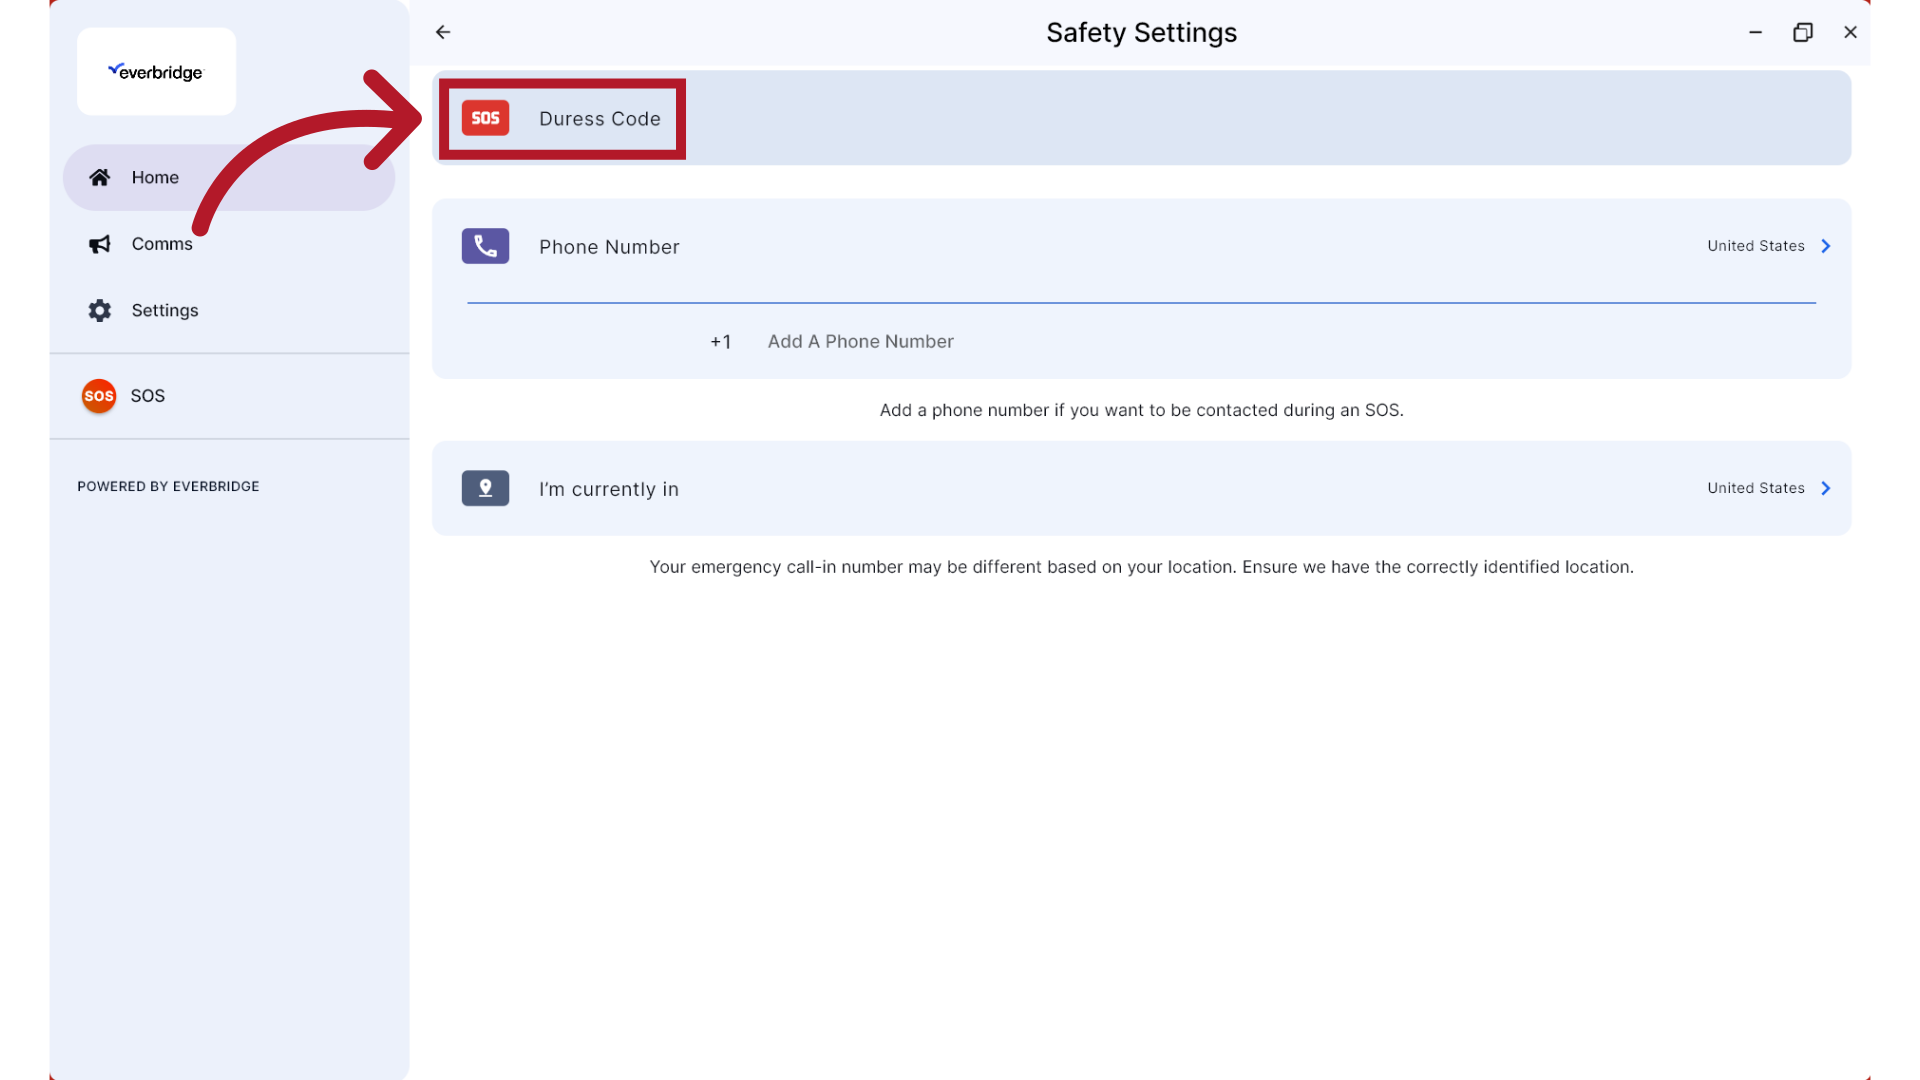
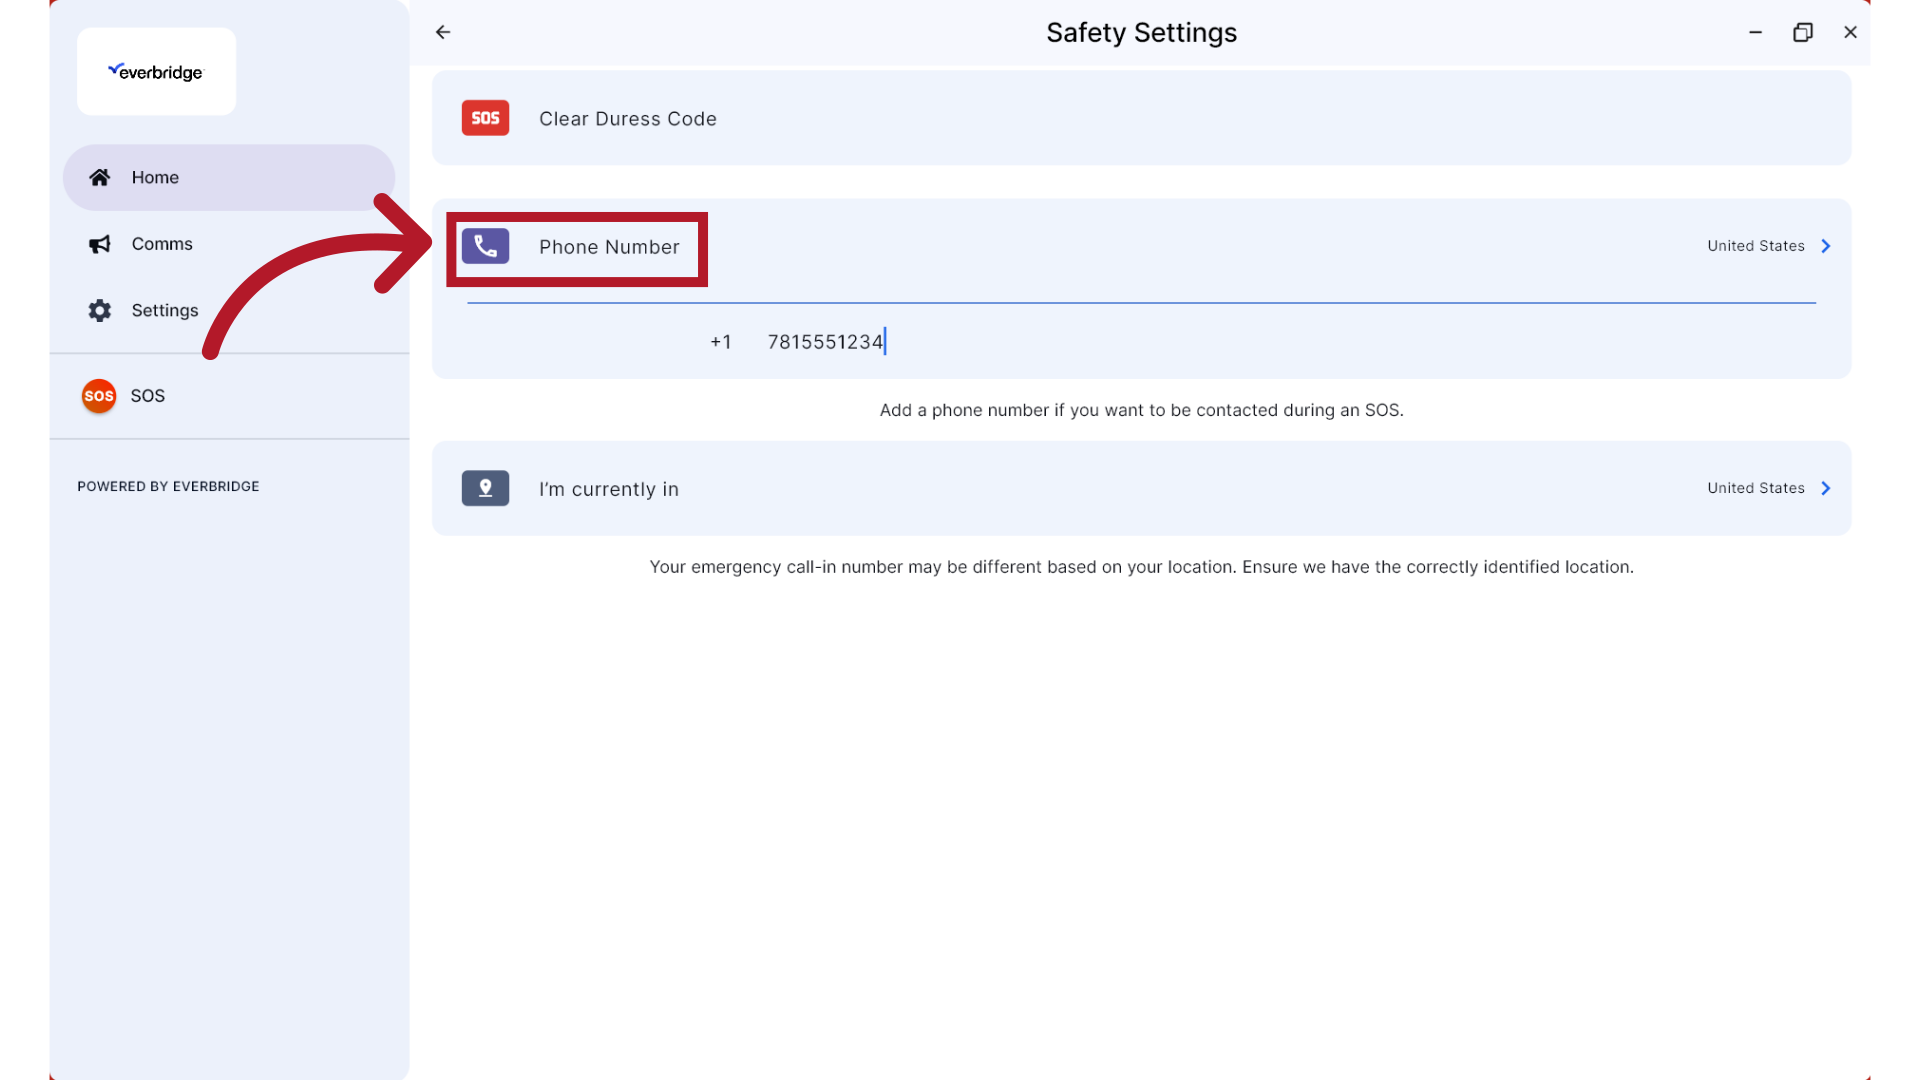
9. Phone Number
Add the phone number to use when activating Safety Buttons that capture a callback number.
10. Location
Verify your location.
NOTE: If the Location option doesn't appear, you may not have access to any Safety Buttons that capture your location. Or, you may need to contact your IT department since they may have locked the ability to edit location settings on your computer and will need to do it on your behalf.
11. Home Page
Once you have completed your login, the Home page will display, providing quick access to the Safety Buttons you have been granted permission to use and a navigation menu to other areas of the application.
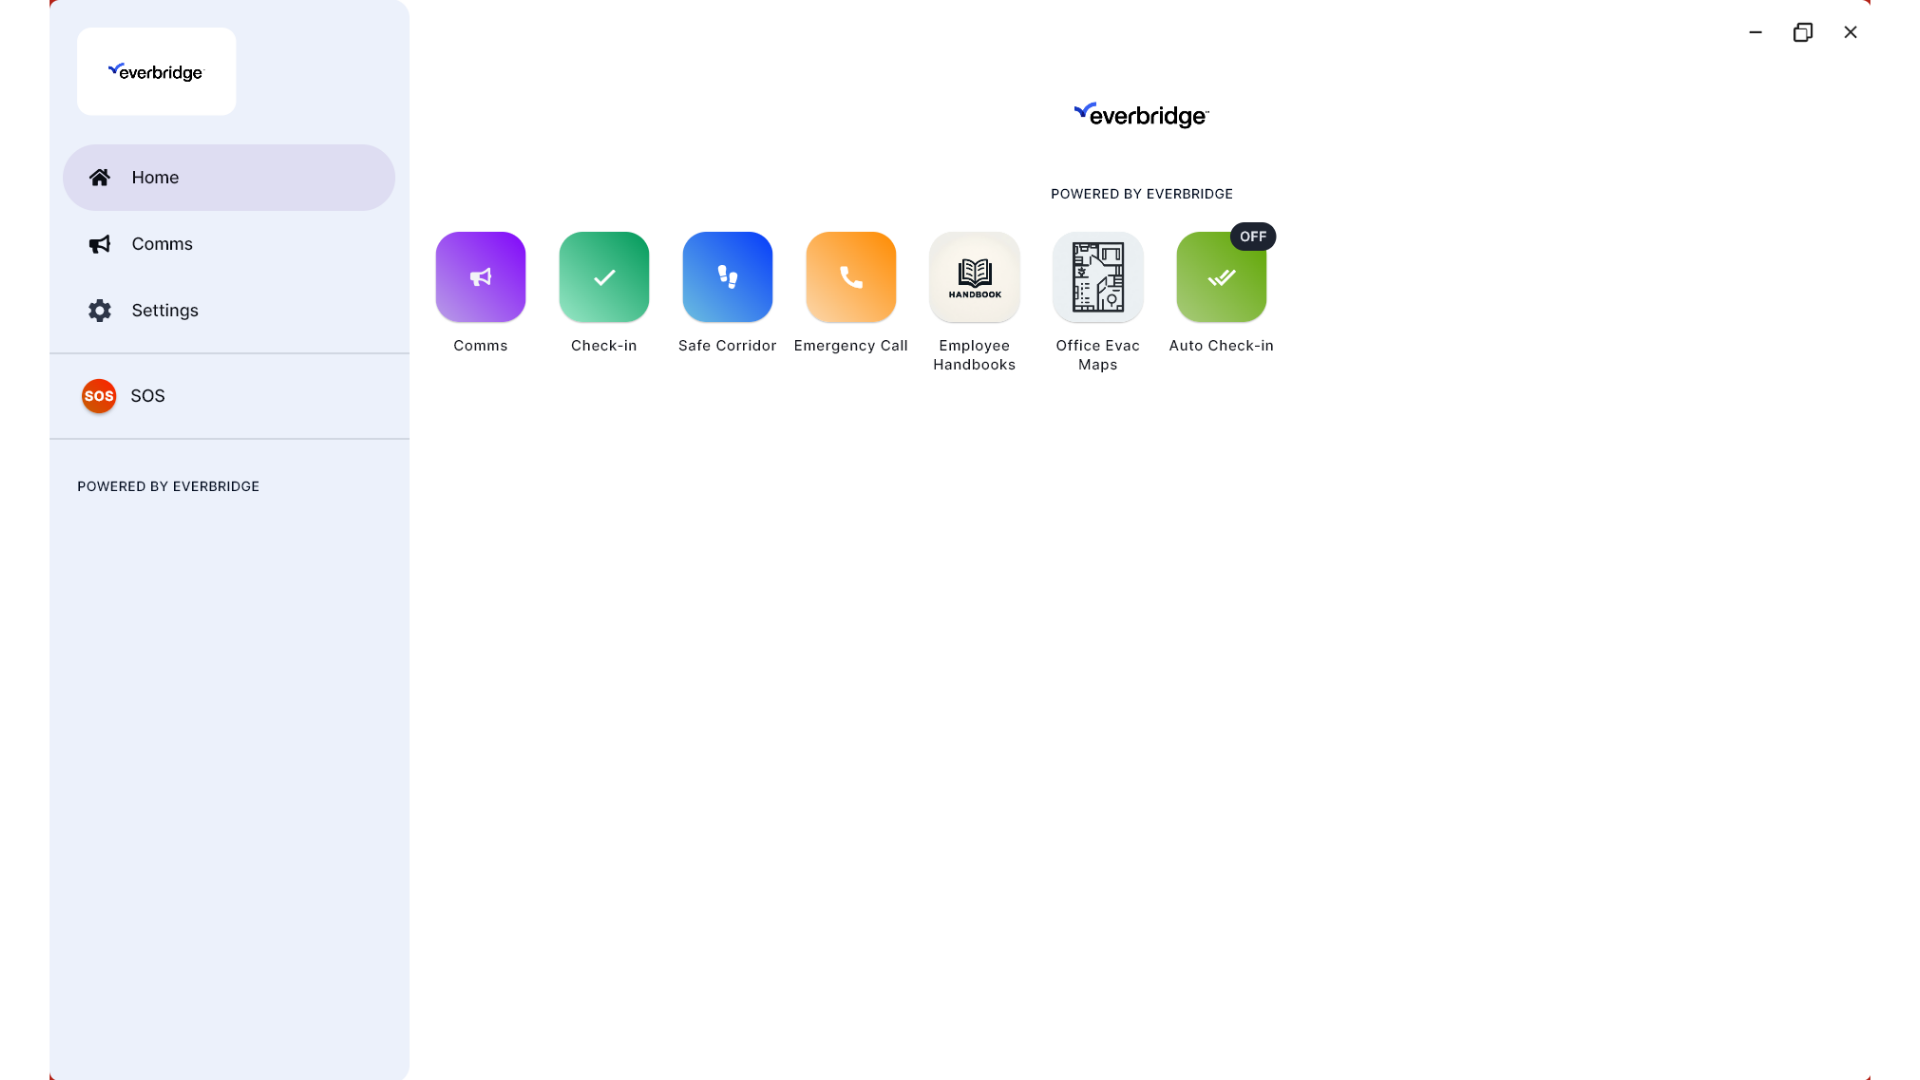
You are now ready to receive notifications, activate Safety Buttons, and use any additional features enabled by your organization.