Method 1: Individual Contact Updates
This tutorial explains how to update the SSO User ID for a contact record in Everbridge. You will learn the necessary steps to locate and modify the contact's SSO User ID securely.
Go to manager.everbridge.net
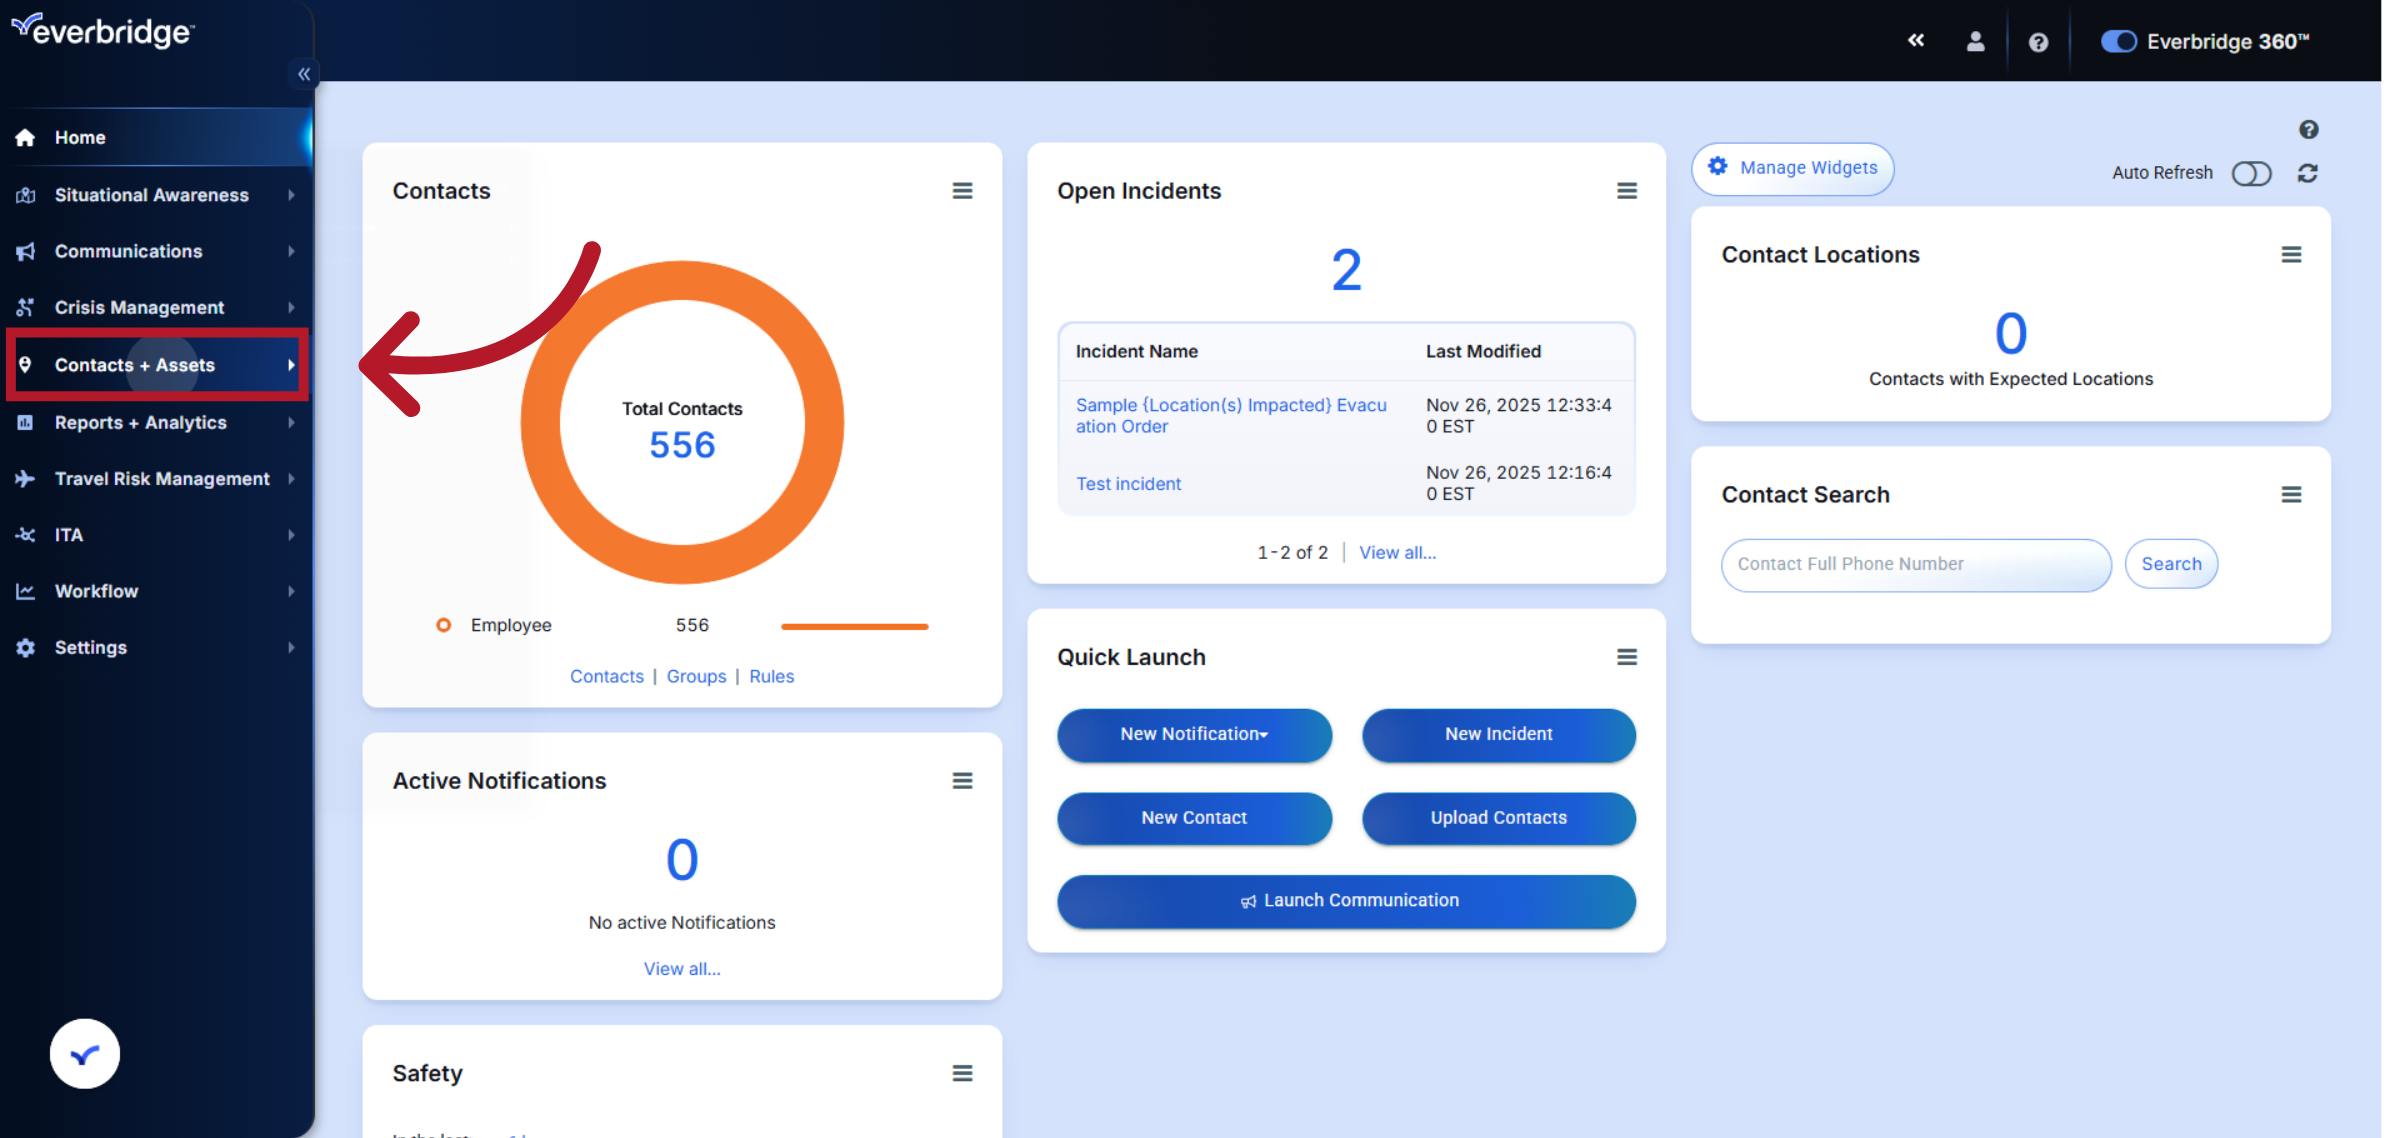
1. Navigate to Contacts + Assets
Click the Contacts + Assets section from the Everbridge dashboard to access the contact management features.
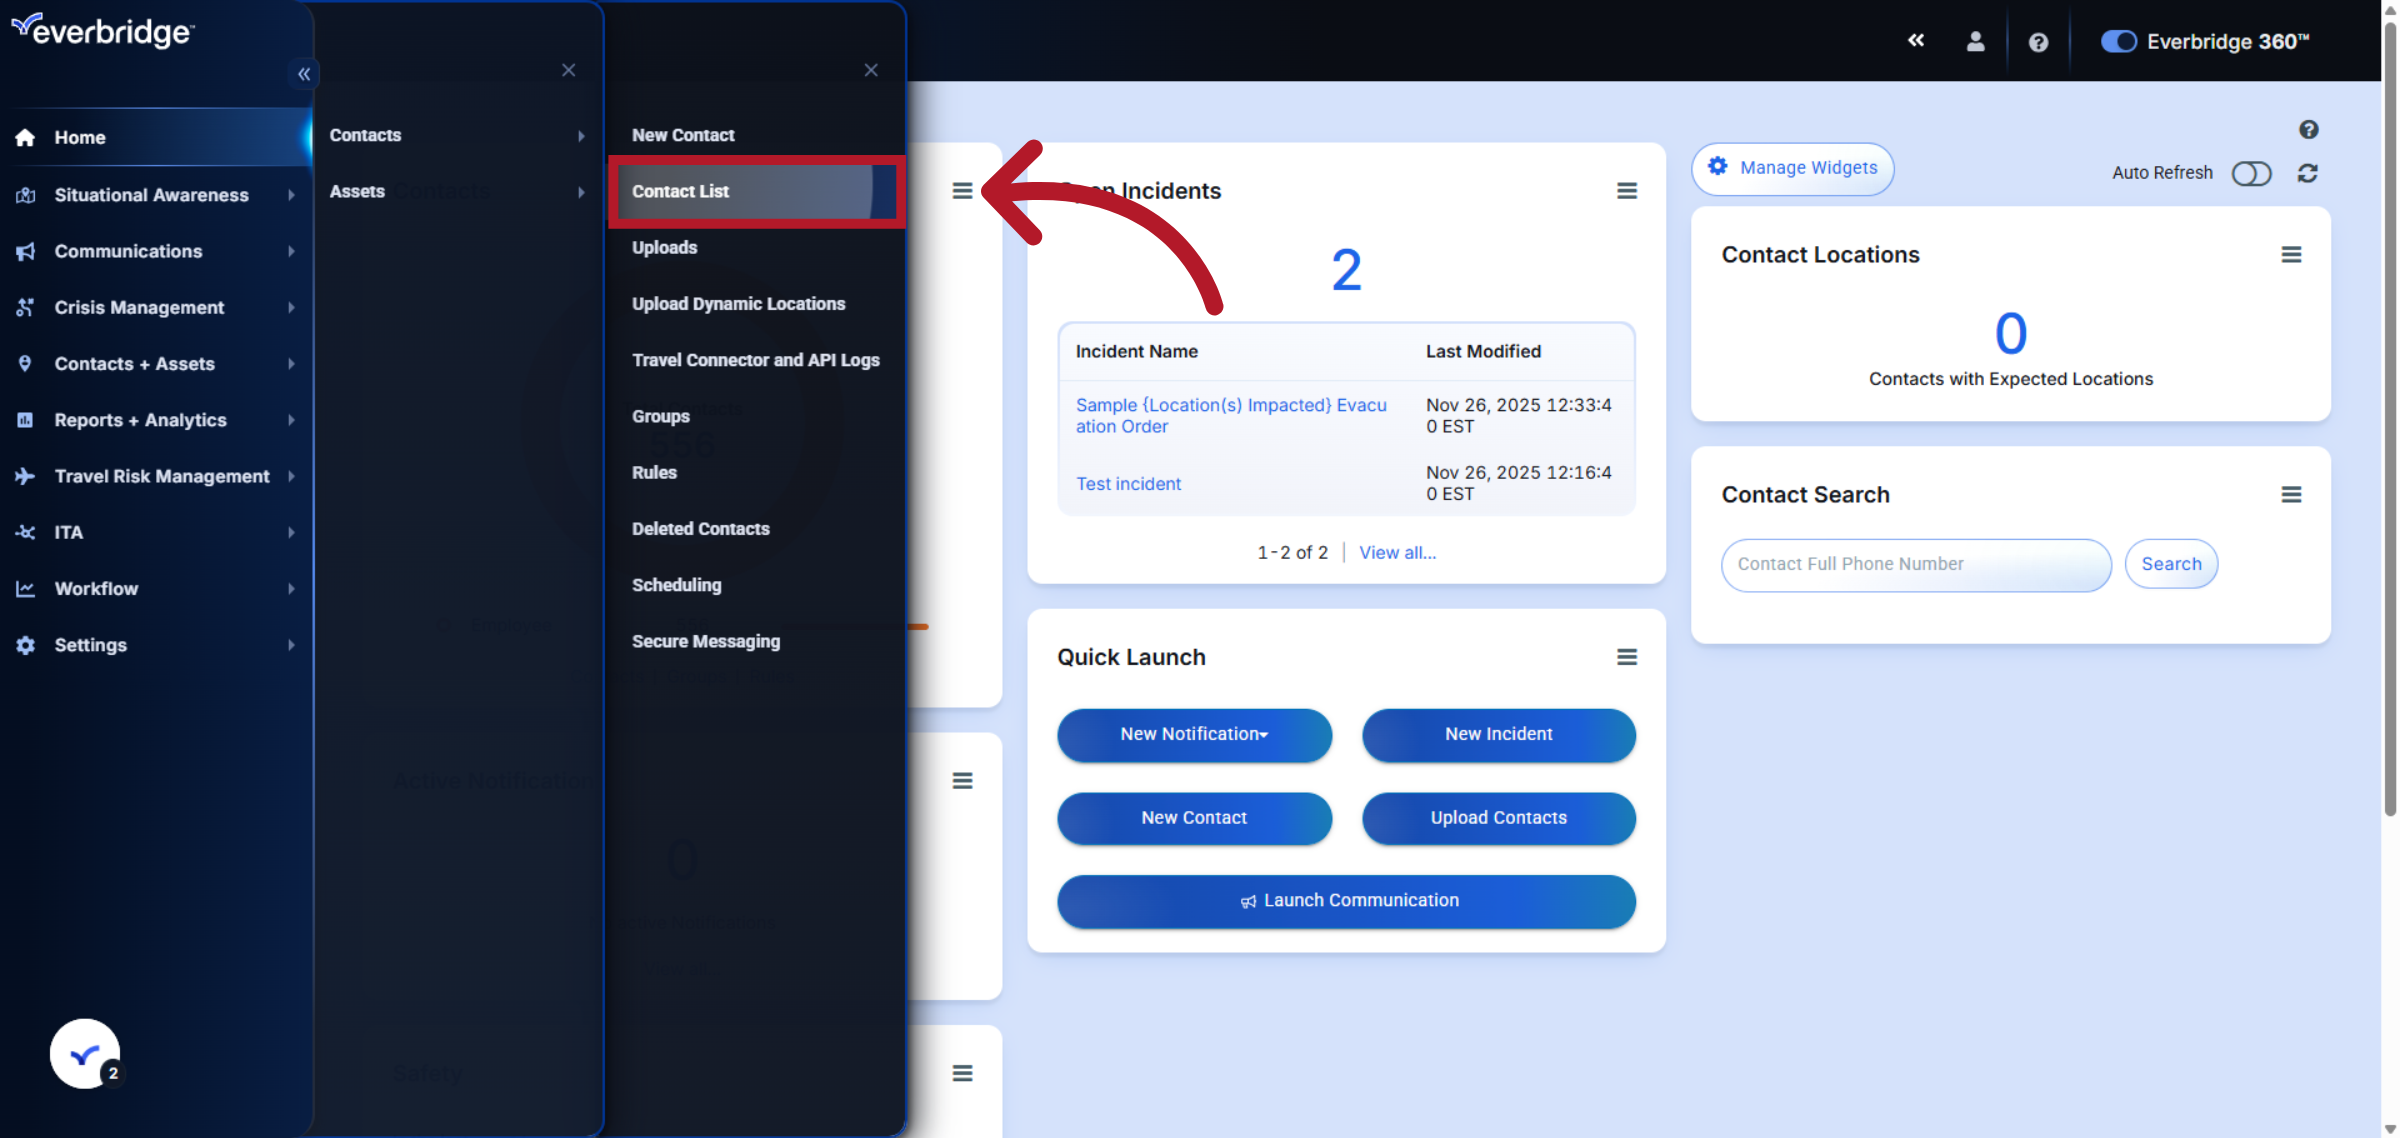
2. Open Contacts Section
Click Contacts to view the list of all contacts available in your Everbridge account.

3. Access Contact List
Click Contact List to display all existing contact records for review and editing.
4. Enter Contact's First and Last Name
To search for a specific contact, select the First Name field and then the Last Name field.
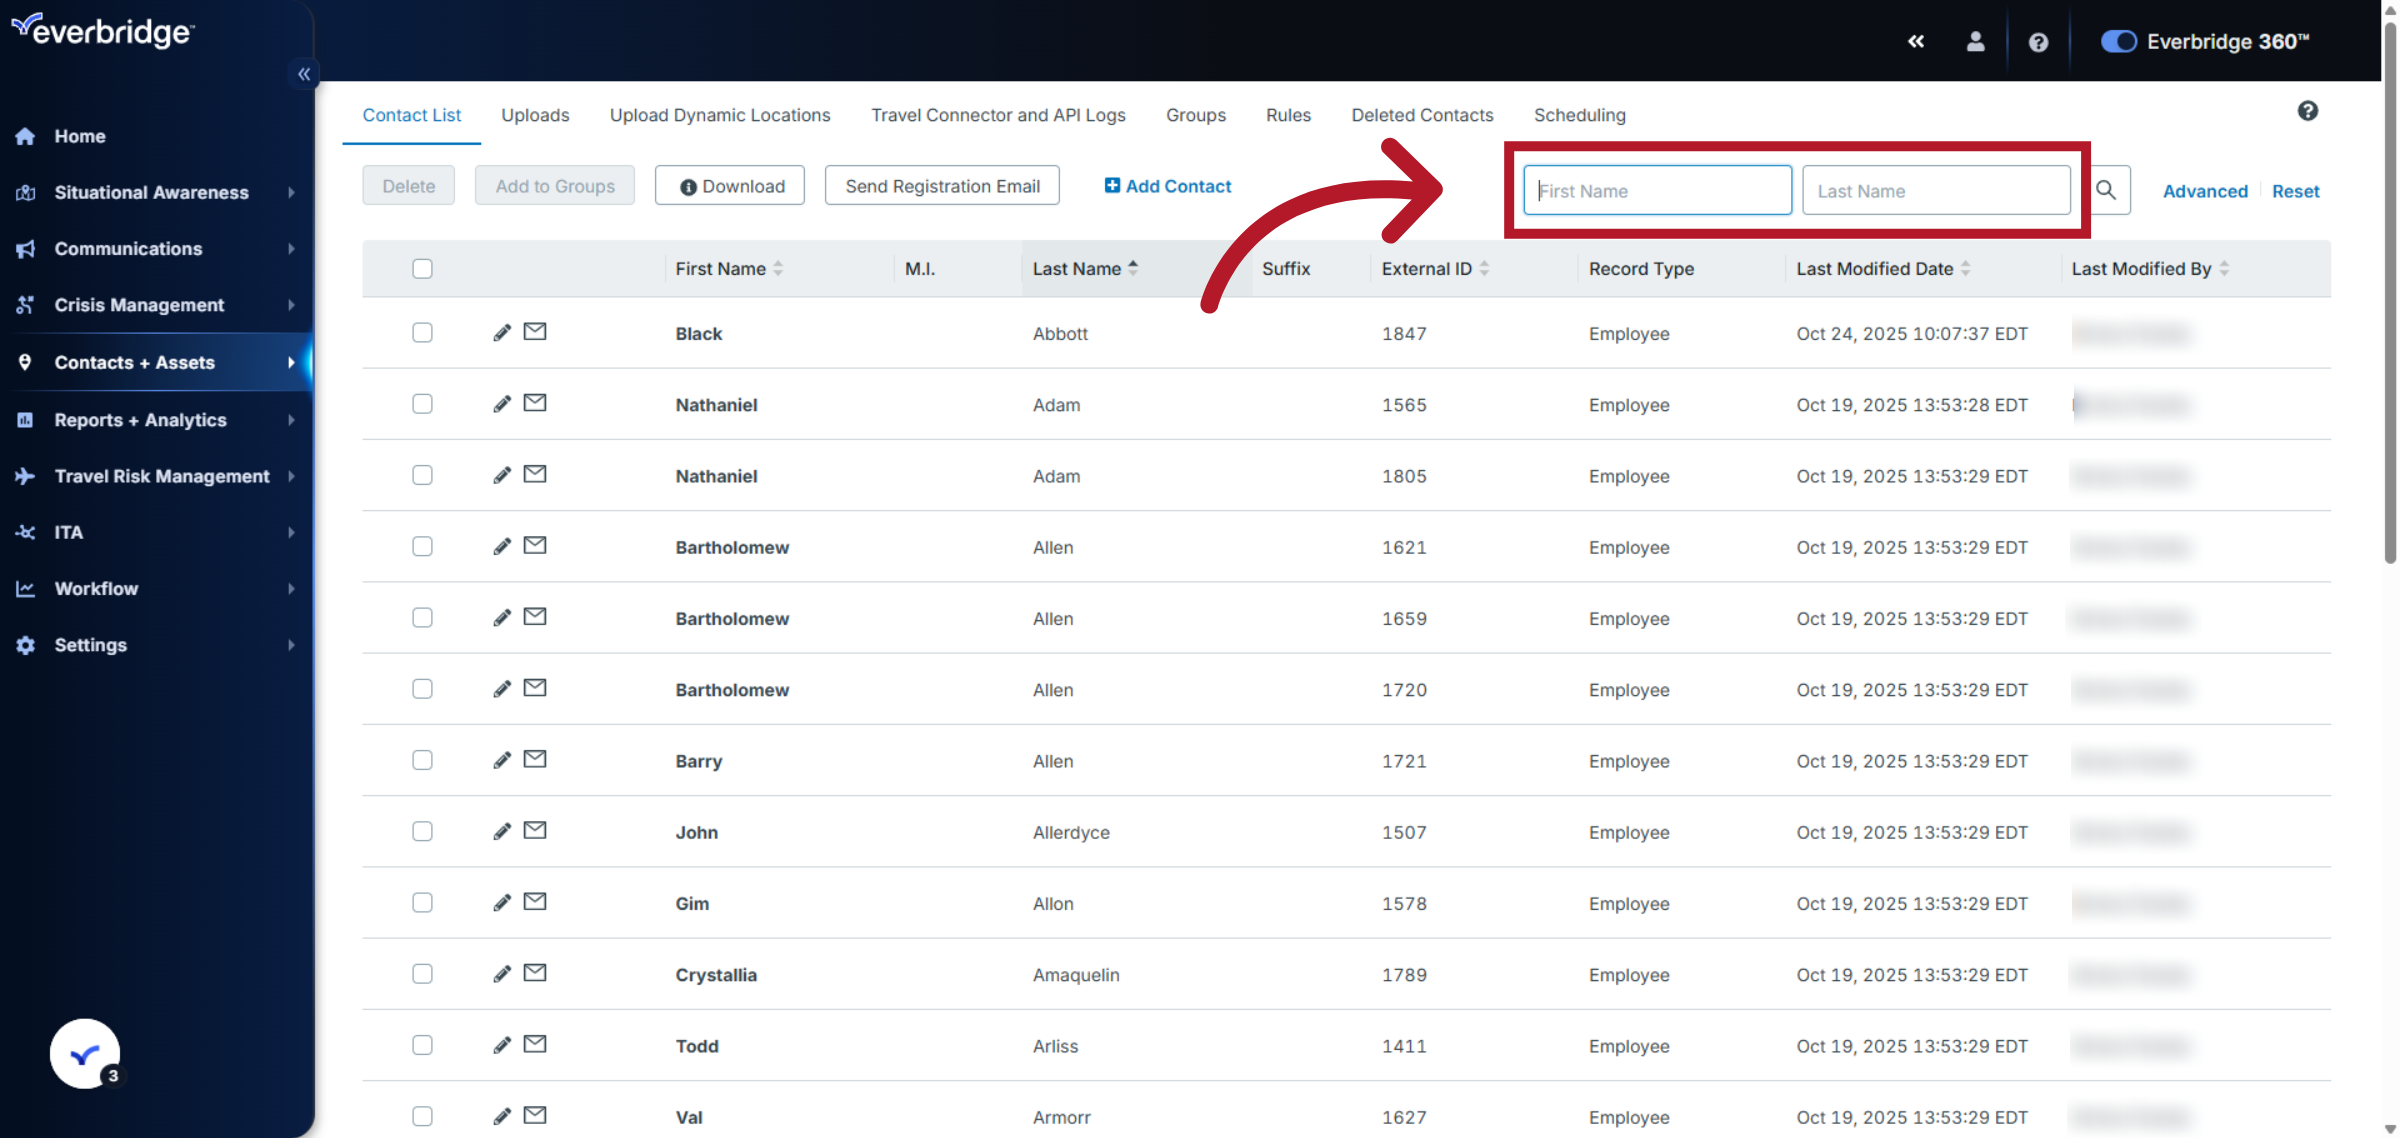
5. Search for the Contact
Type the first and last name of the specific contact you wish to update, and then click Search.
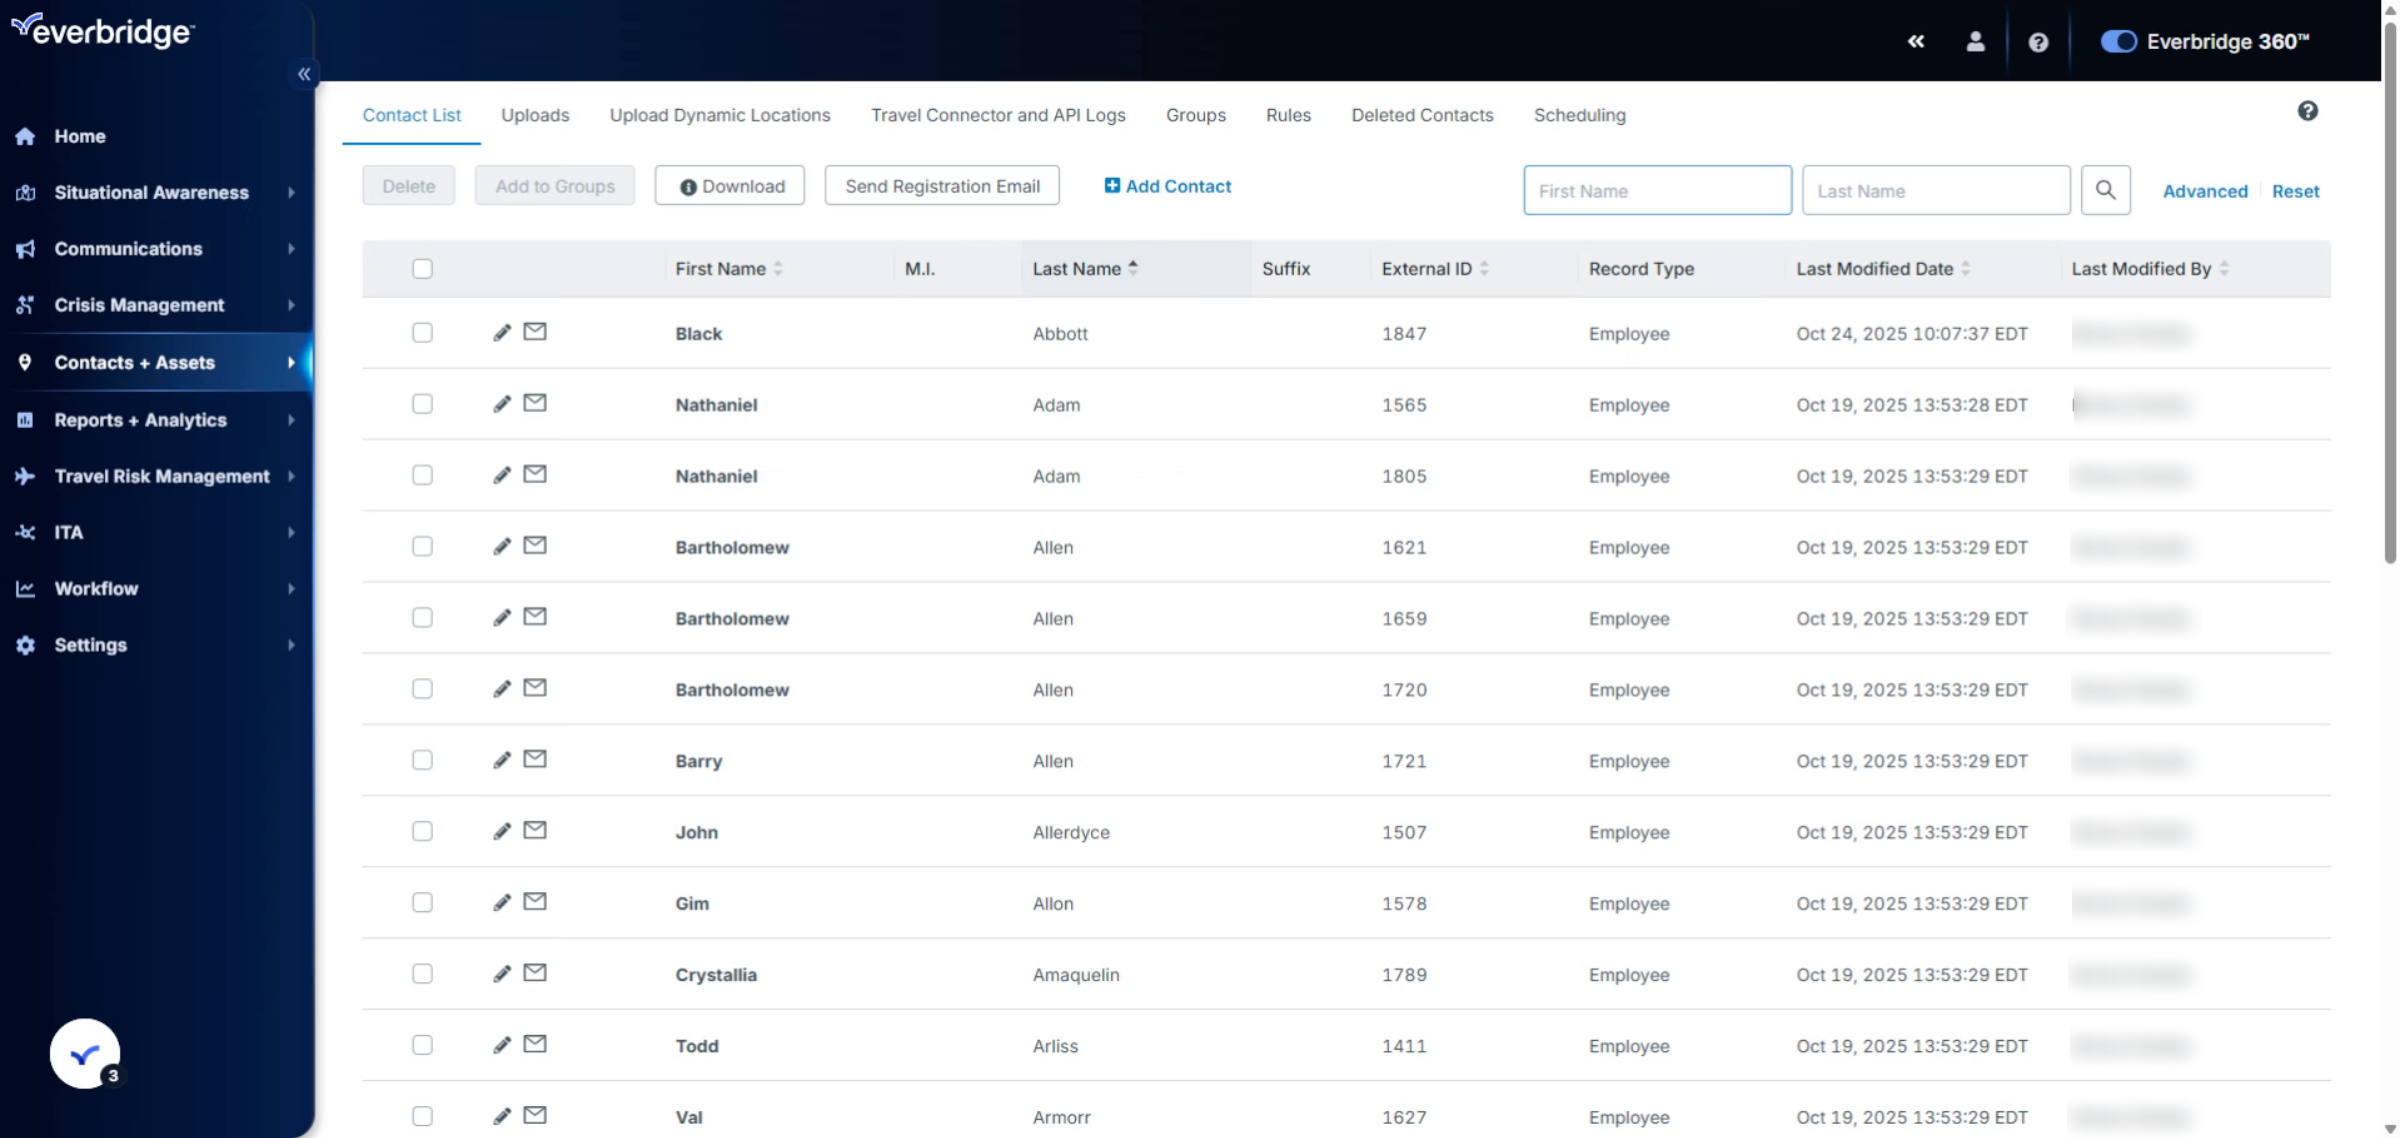
6. Select Contact Record
Review the search results area where the filtered contacts matching your criteria are displayed.
7. Open the Contact for Editing
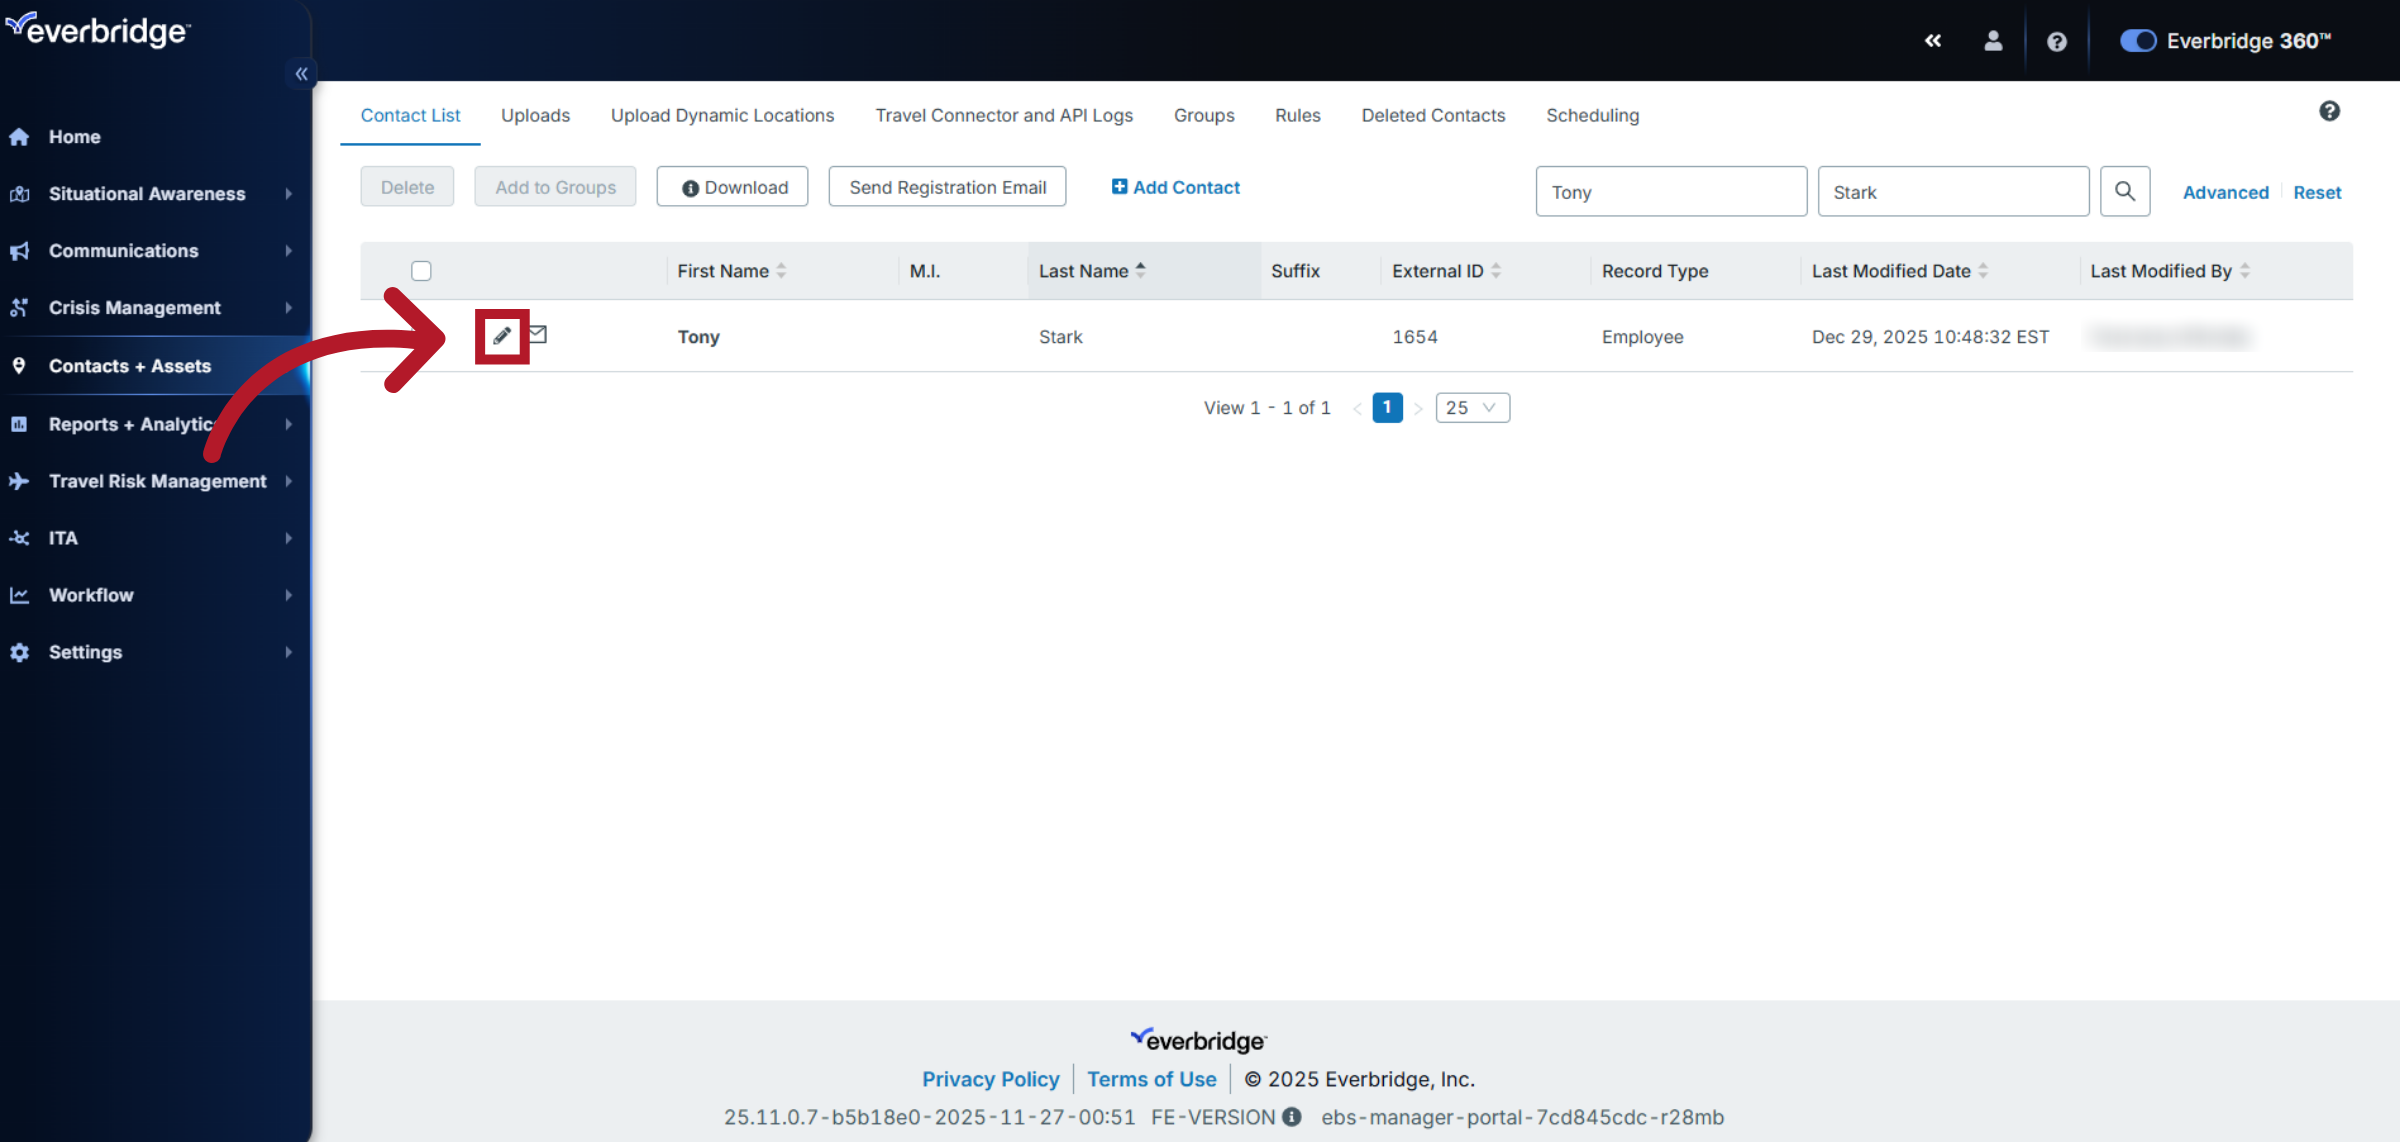
Click the pencil icon to the left of the contact record you want to update to open its detailed information page.
8. Open SSO User ID Field
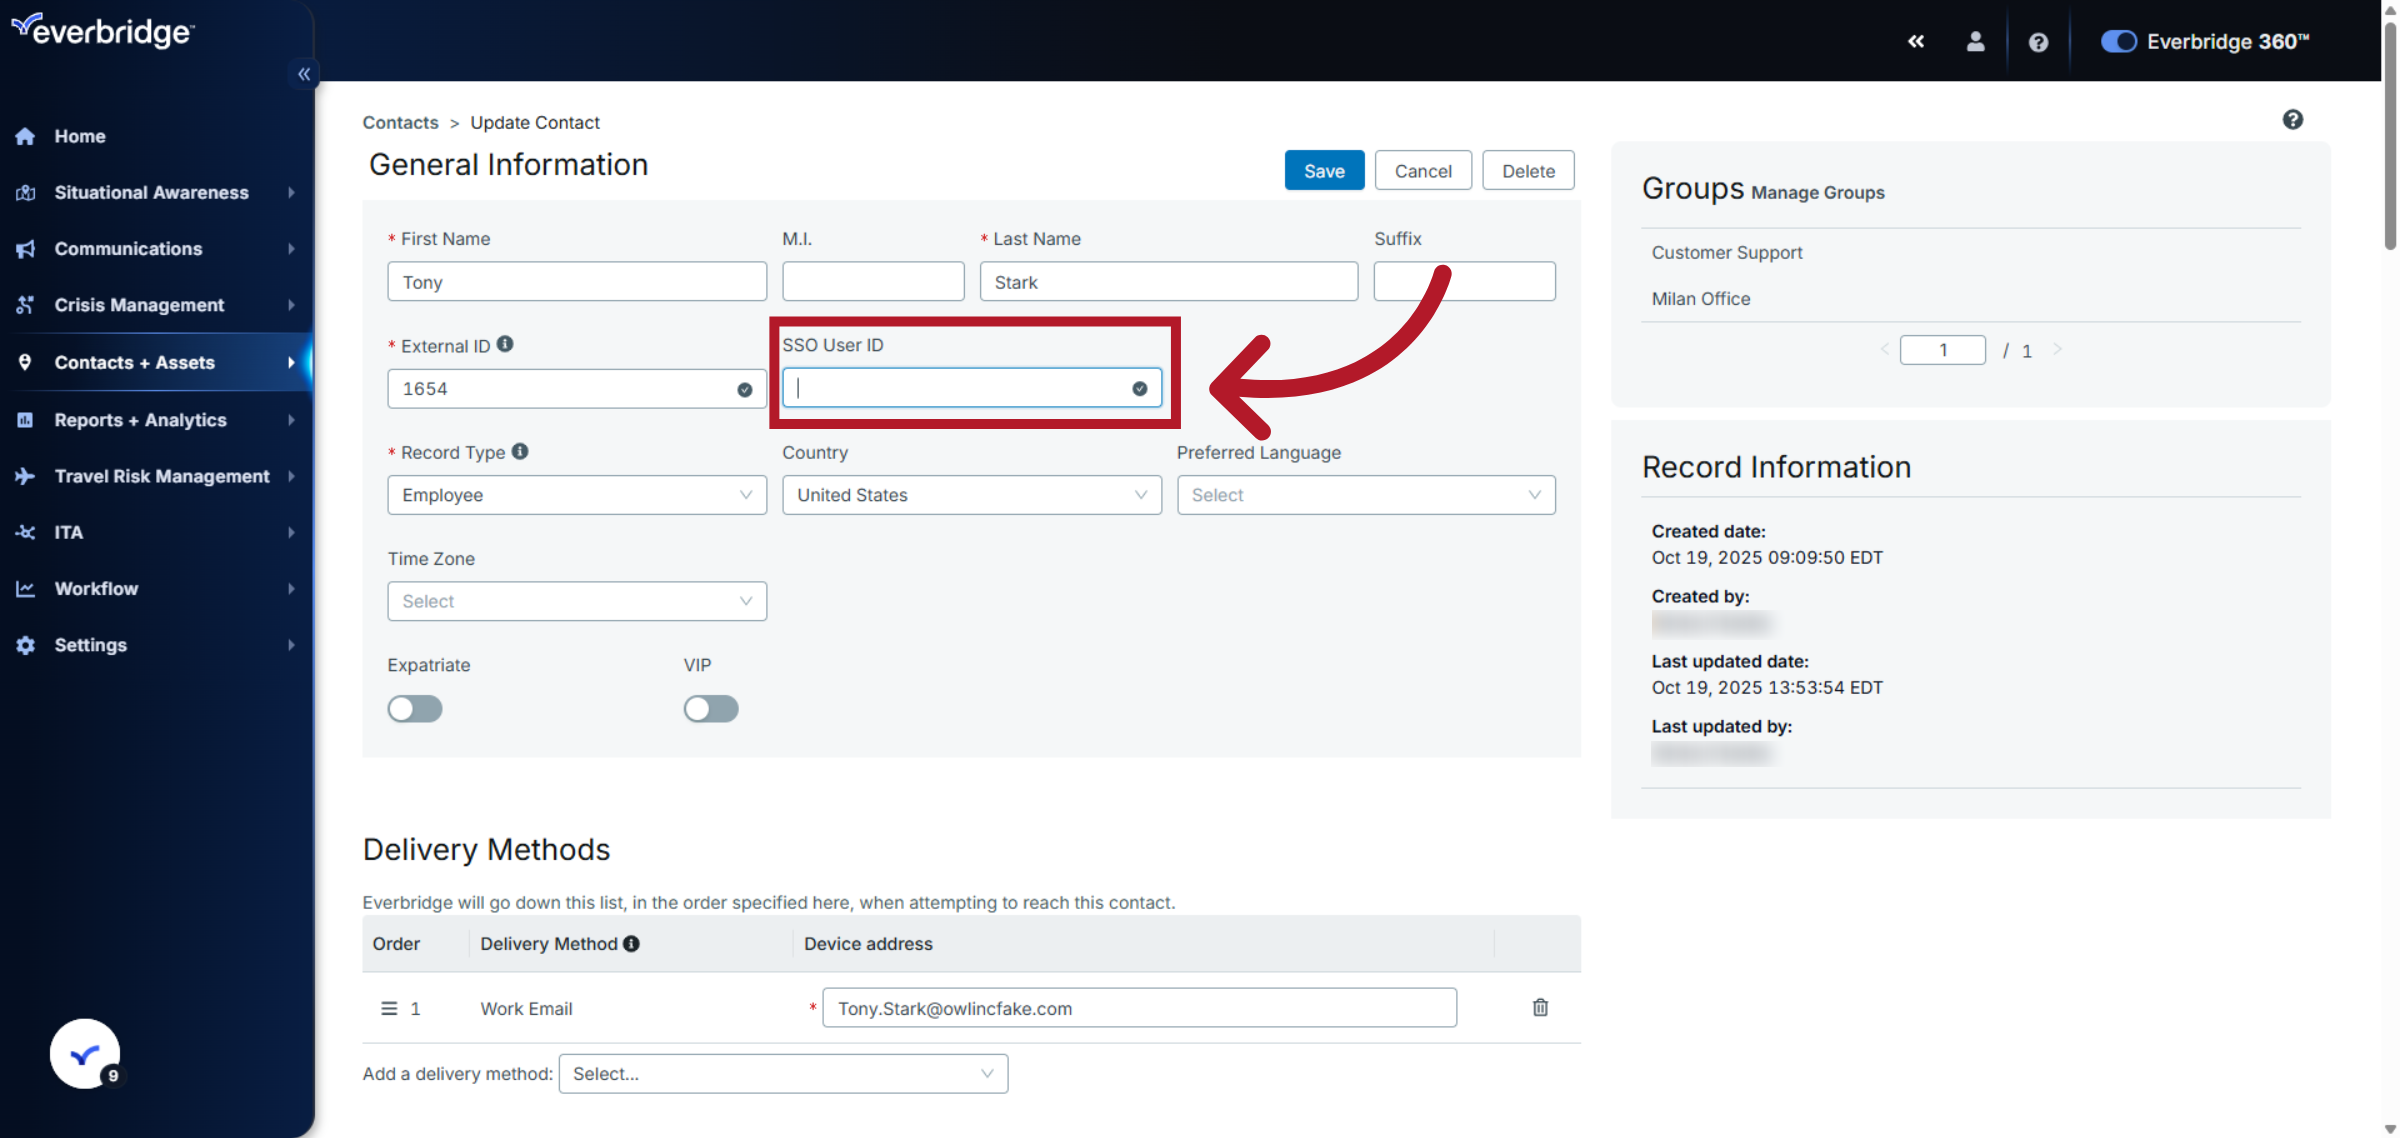
In the General Information section click the SSO User ID field to prepare for updating the contact's single sign-on attribute.
9. Enter New SSO User ID
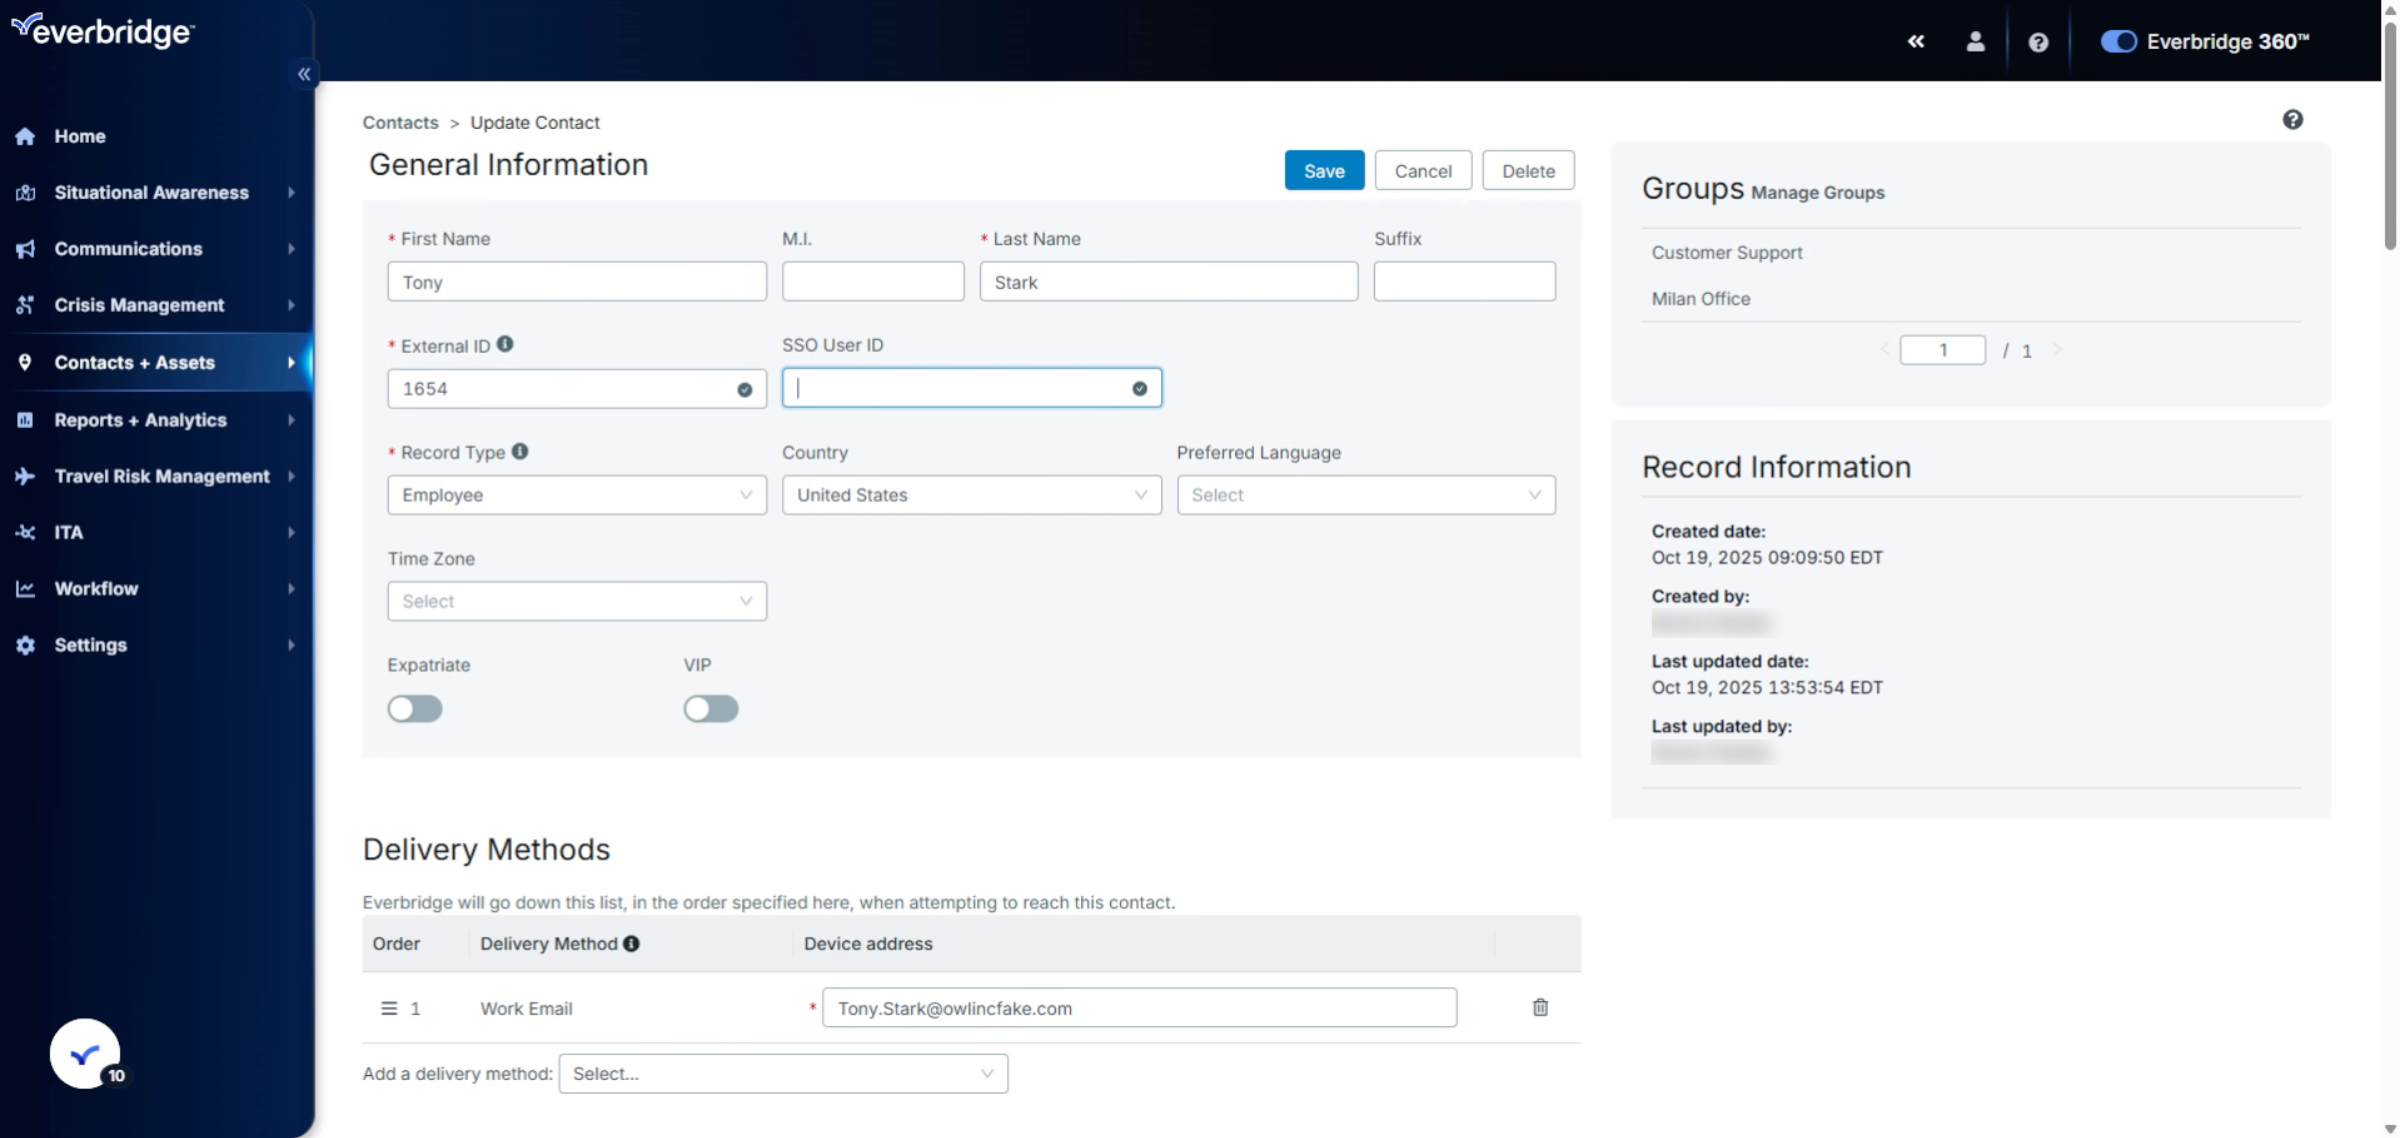
Enter the new SSO User ID for the contact to update their authentication credentials to the attribute being sent from their Identity Provider.
10. Save Contact Changes
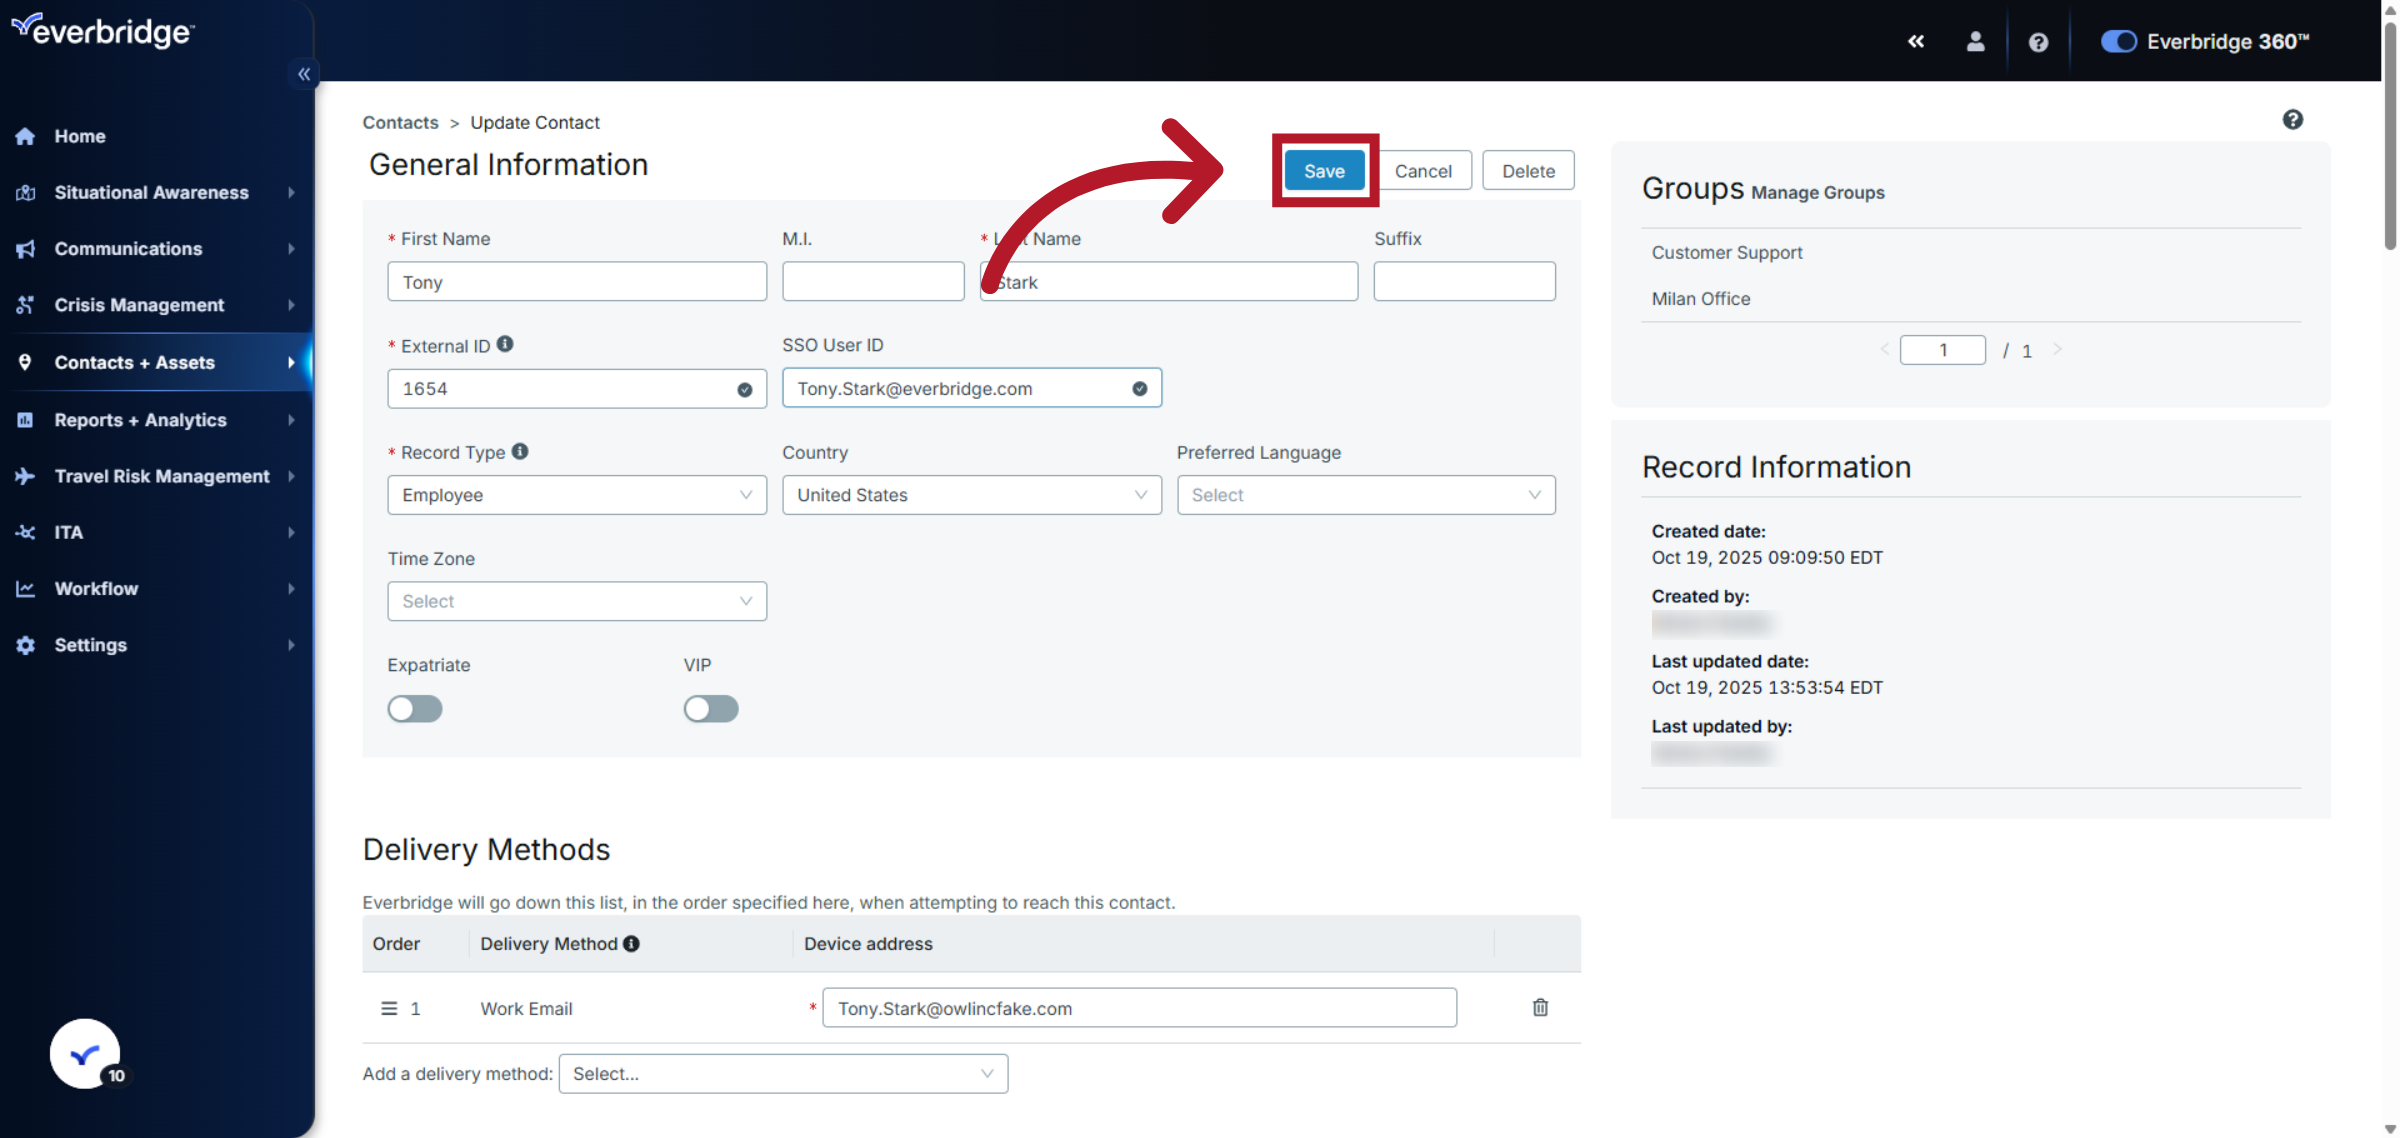
Click Save to apply the changes and update the contact's SSO User ID in the system.
You have successfully updated the SSO User ID for a contact record in Everbridge. Verify the changes by reviewing the contact details and, if you use automated uploads (for example, SFTP/CSV from HR or IT systems), confirm that the SSO User ID value and External ID are aligned with the source-of-record so future uploads do not create conflicts or overwrite your update.
Method 2: Bulk Contact Upload
SSO User ID information can also be configured through a contact upload by using the "SSO User ID" field. This method is more efficient for updating multiple contacts at once:
1. Prepare a contact file that includes the SSO User ID field for each contact. Ensure that each SSO User ID is unique within the organization.
2. Upload the file using the UPDATE upload option so existing contacts are updated rather than duplicated.