Topic
Digging Deeper with Communications (Message Options).
Description
With Everbridge 360™ Communications, you can quickly send messages to respond to events impacting your organization. In this tutorial we will provide an in-depth look at how to customize your message without using a preconfigured template.
Go to manager.everbridge.net
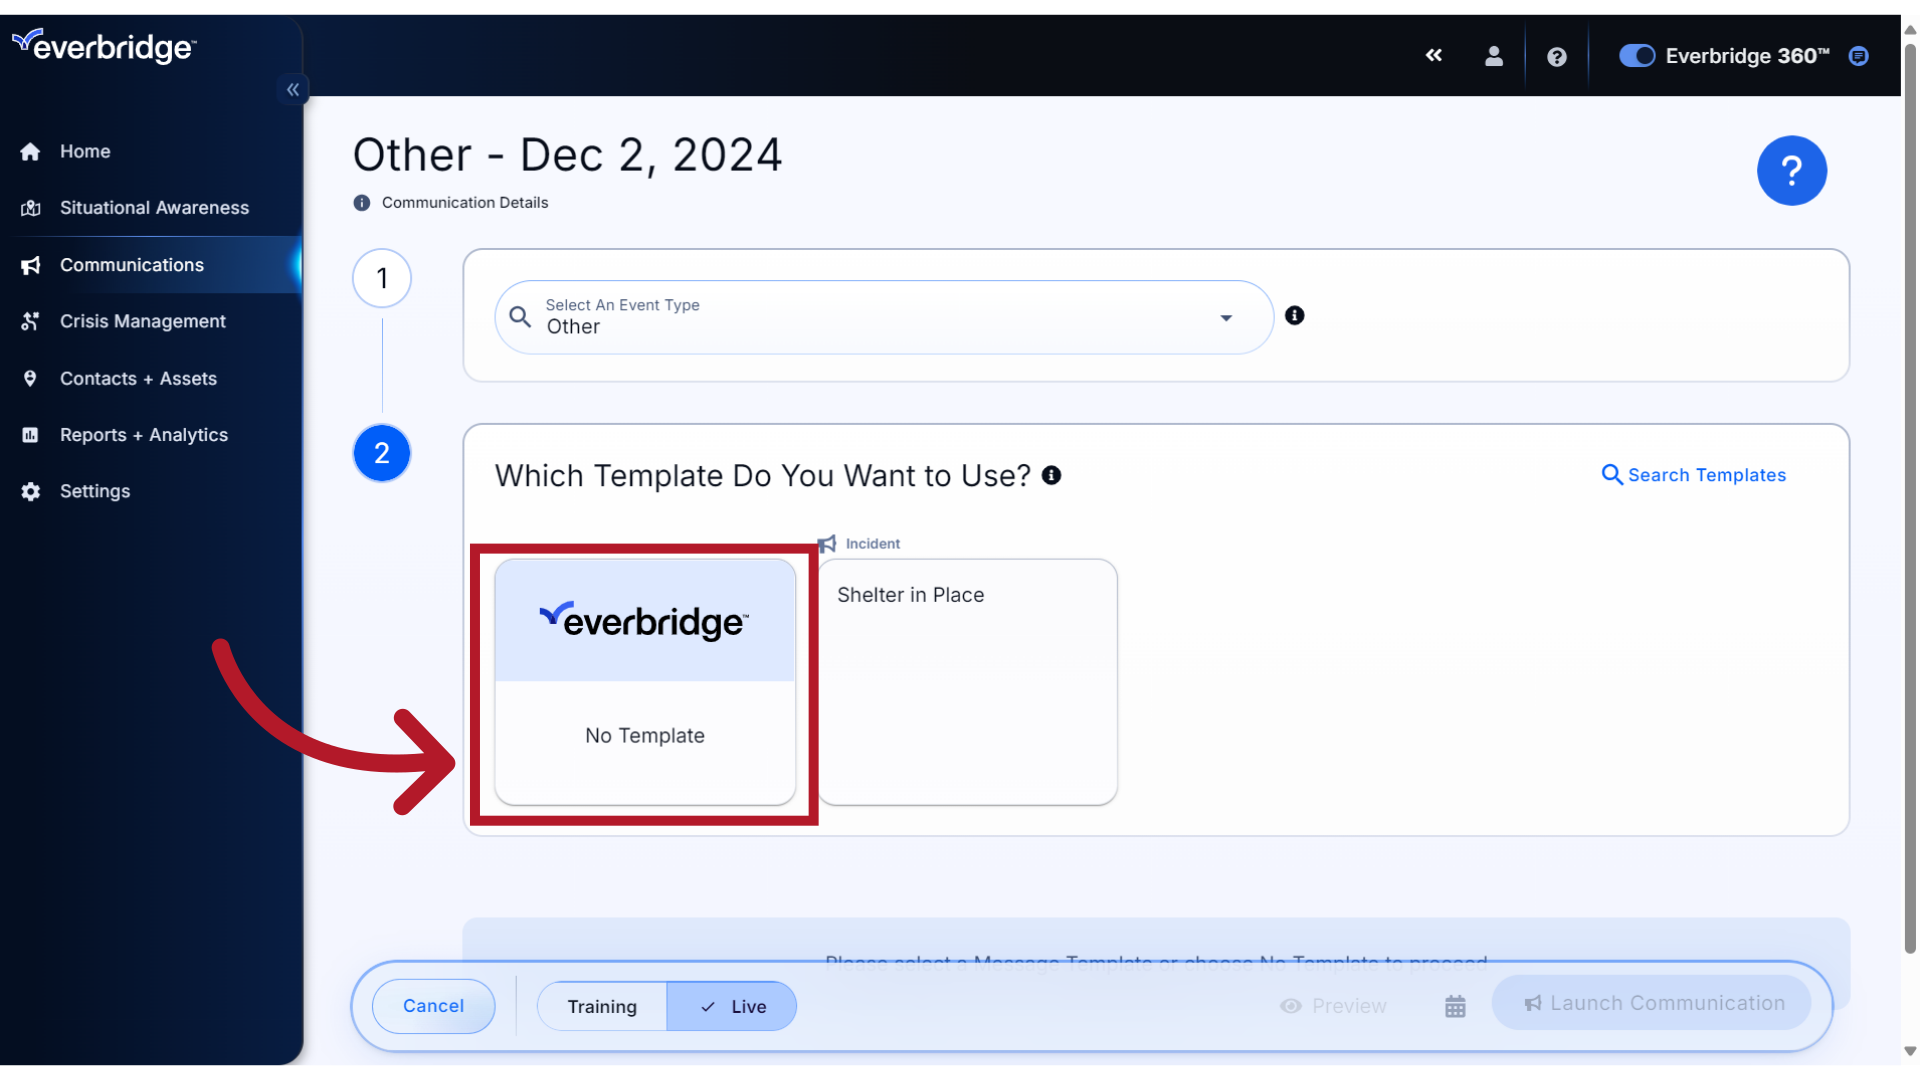
1. No Template
We have started our Communication by selecting an Event Type of "Other" and the No Template option. This option uses your organization’s default notification settings and permissions, and we will show you how to override them with settings that will apply to just this message.
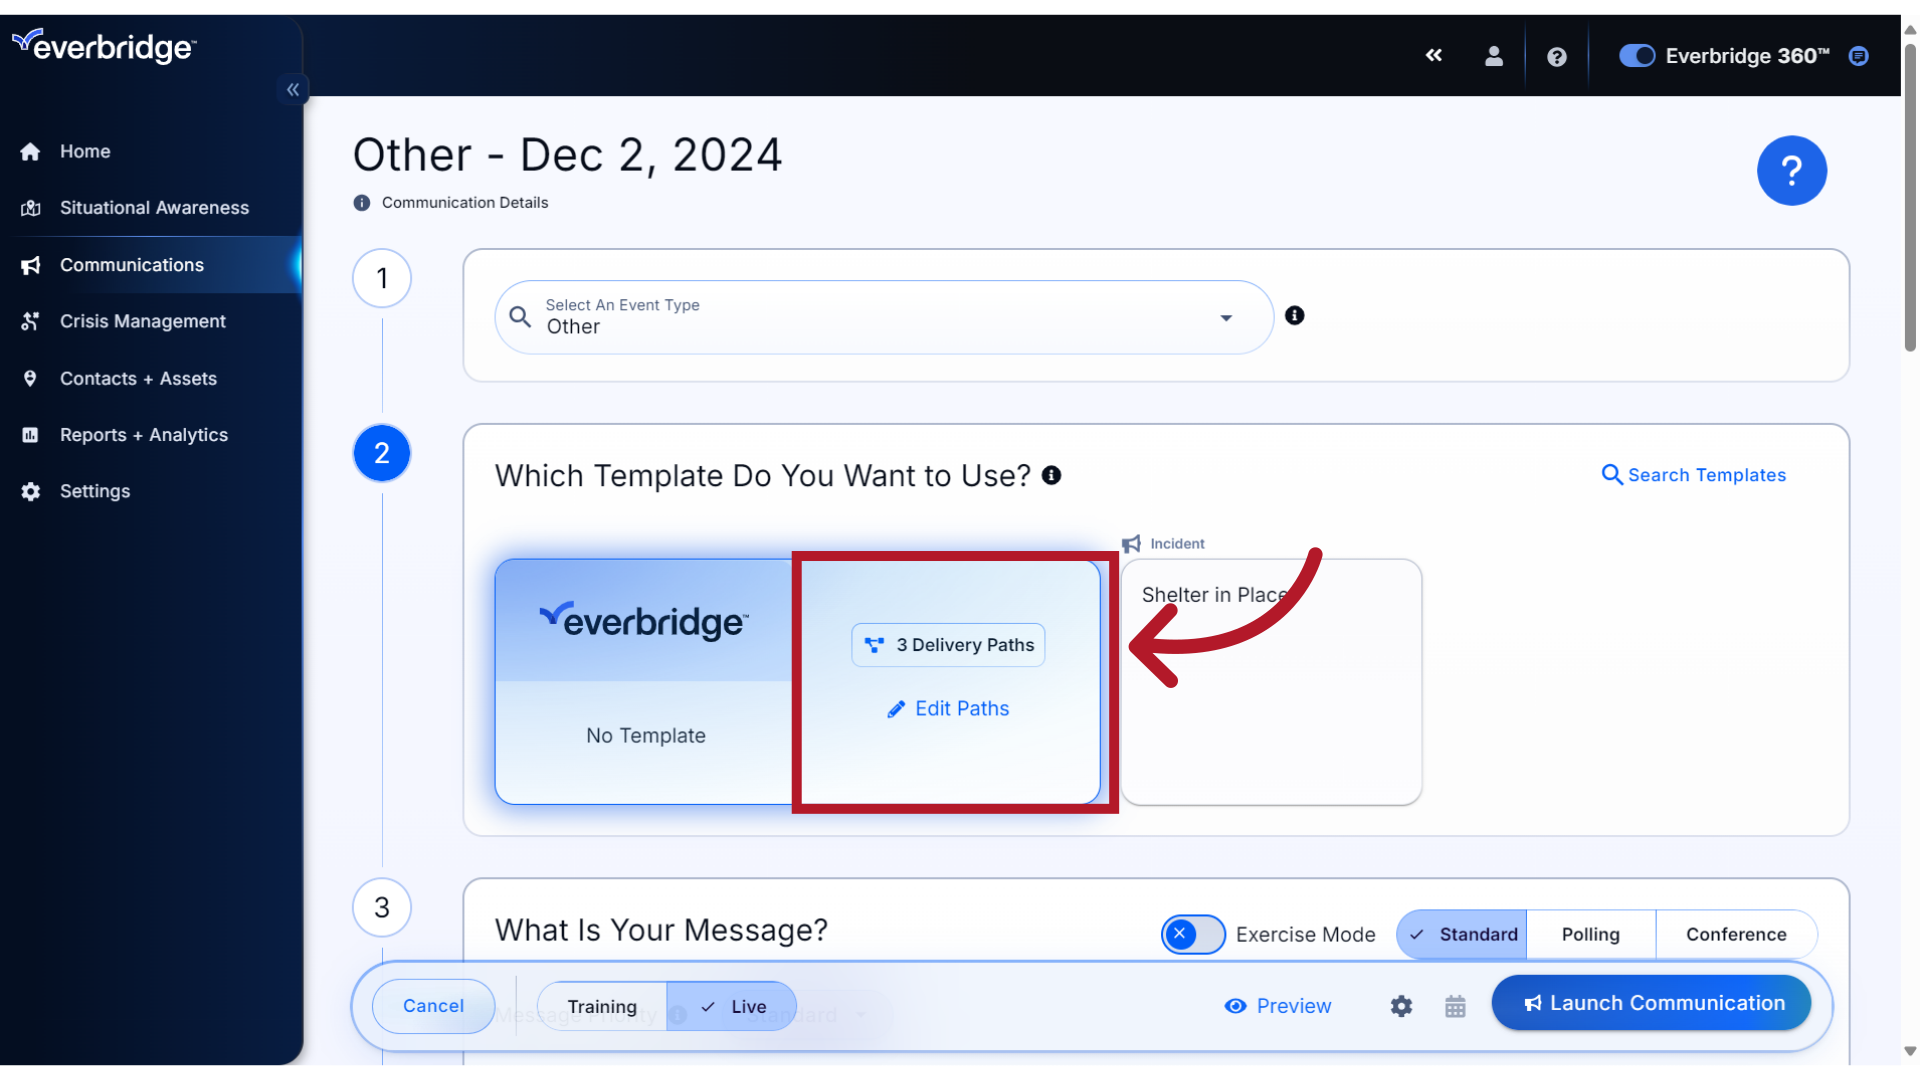
2. Delivery Paths
Once the template option is selected, the number of default Delivery Paths set by your organization will display.
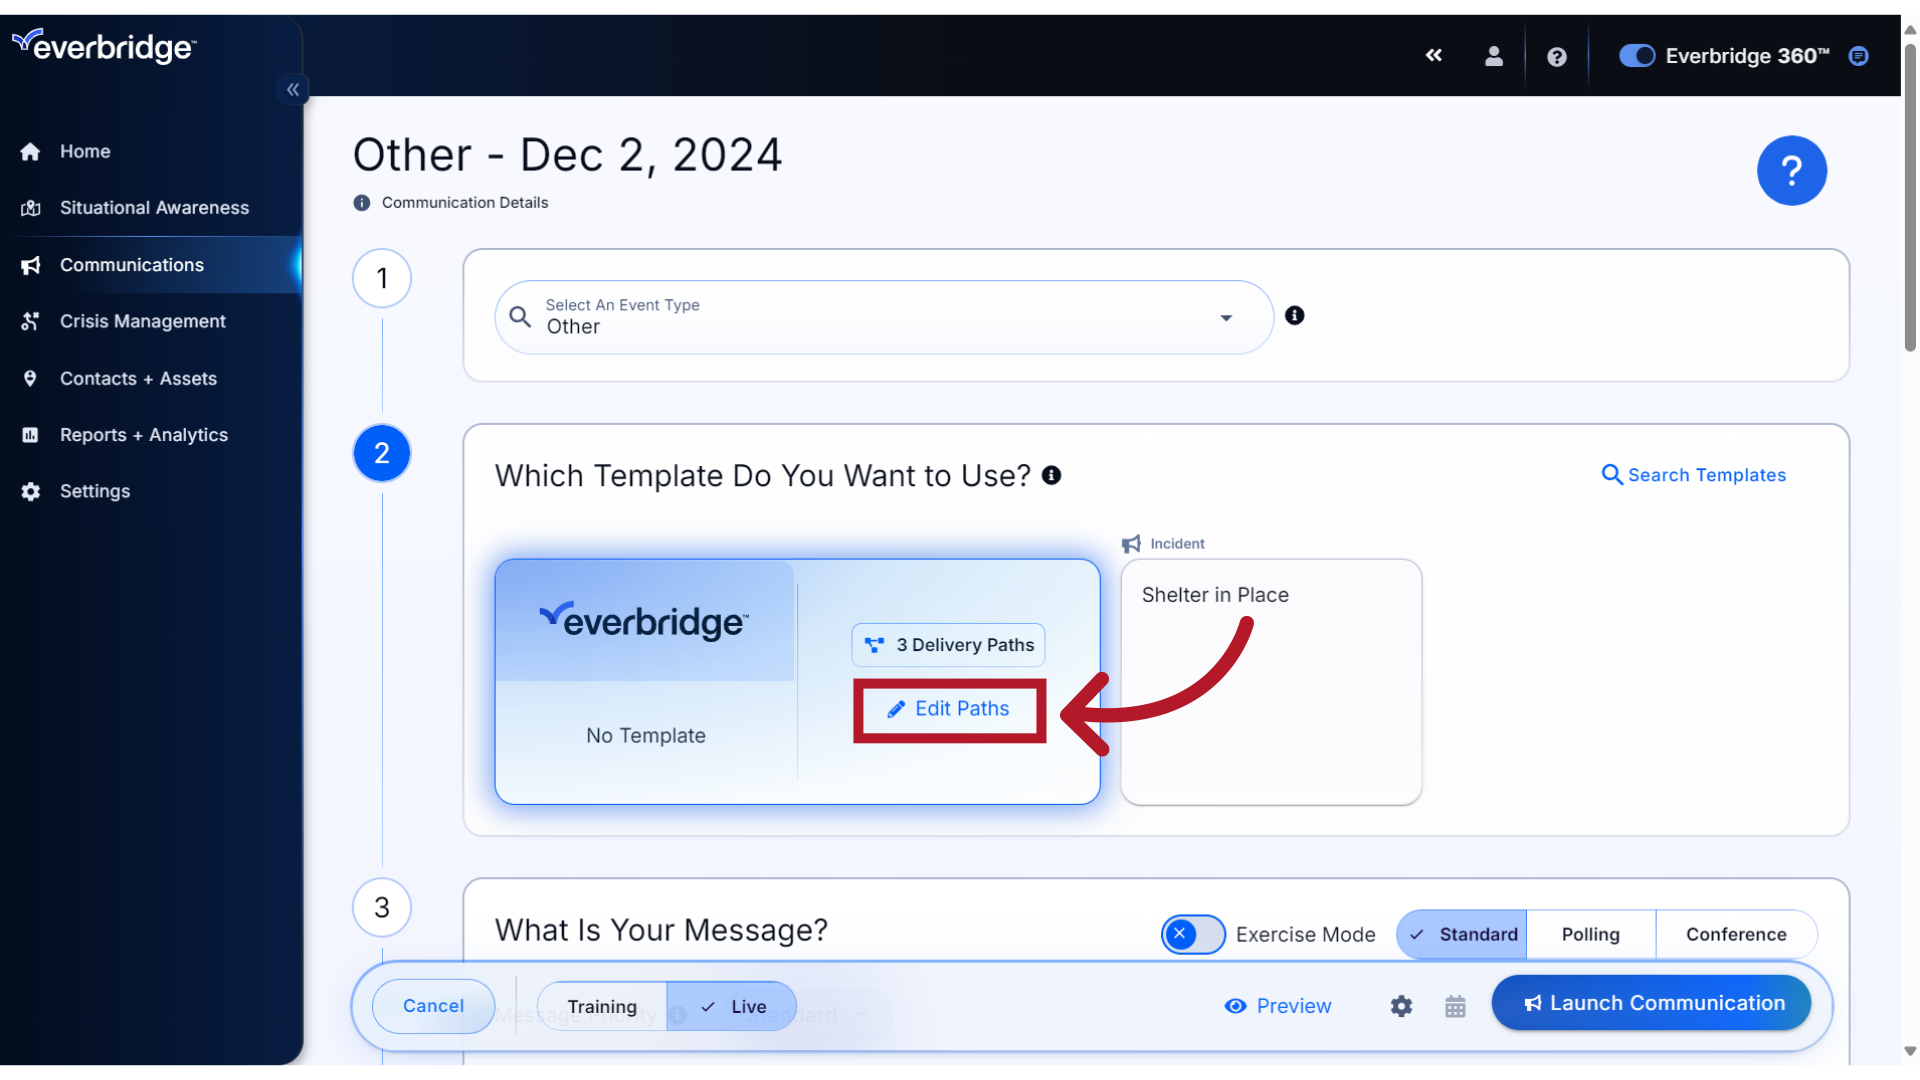
3. Edit Delivery Paths
To view or override the default paths, click Edit Paths.
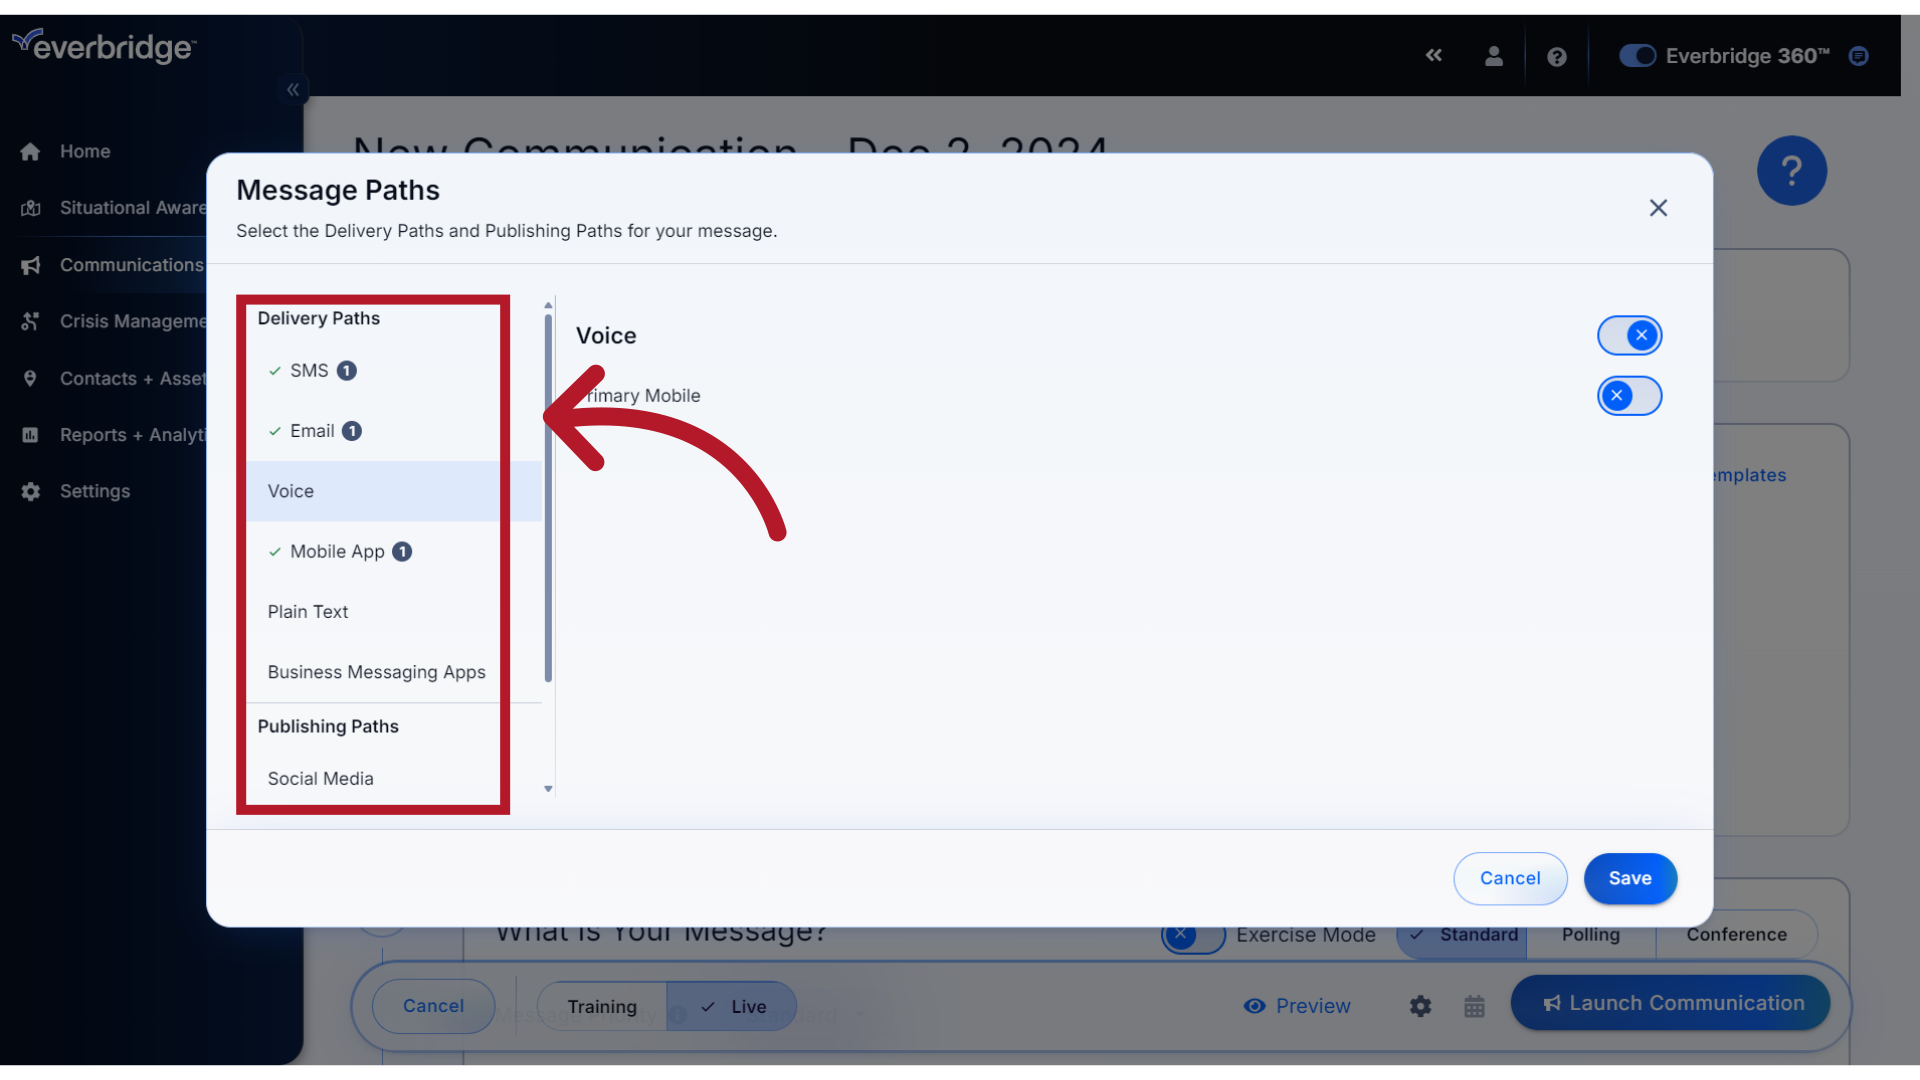
4. Organization Defaults
The organization's Delivery and Publishing Paths are noted in the left-hand menu. The default paths are noted with a green check mark, and the number indicates how many paths of that type are configured. To change any selections for this message, select the Path type to enable or disable them.
5. Change
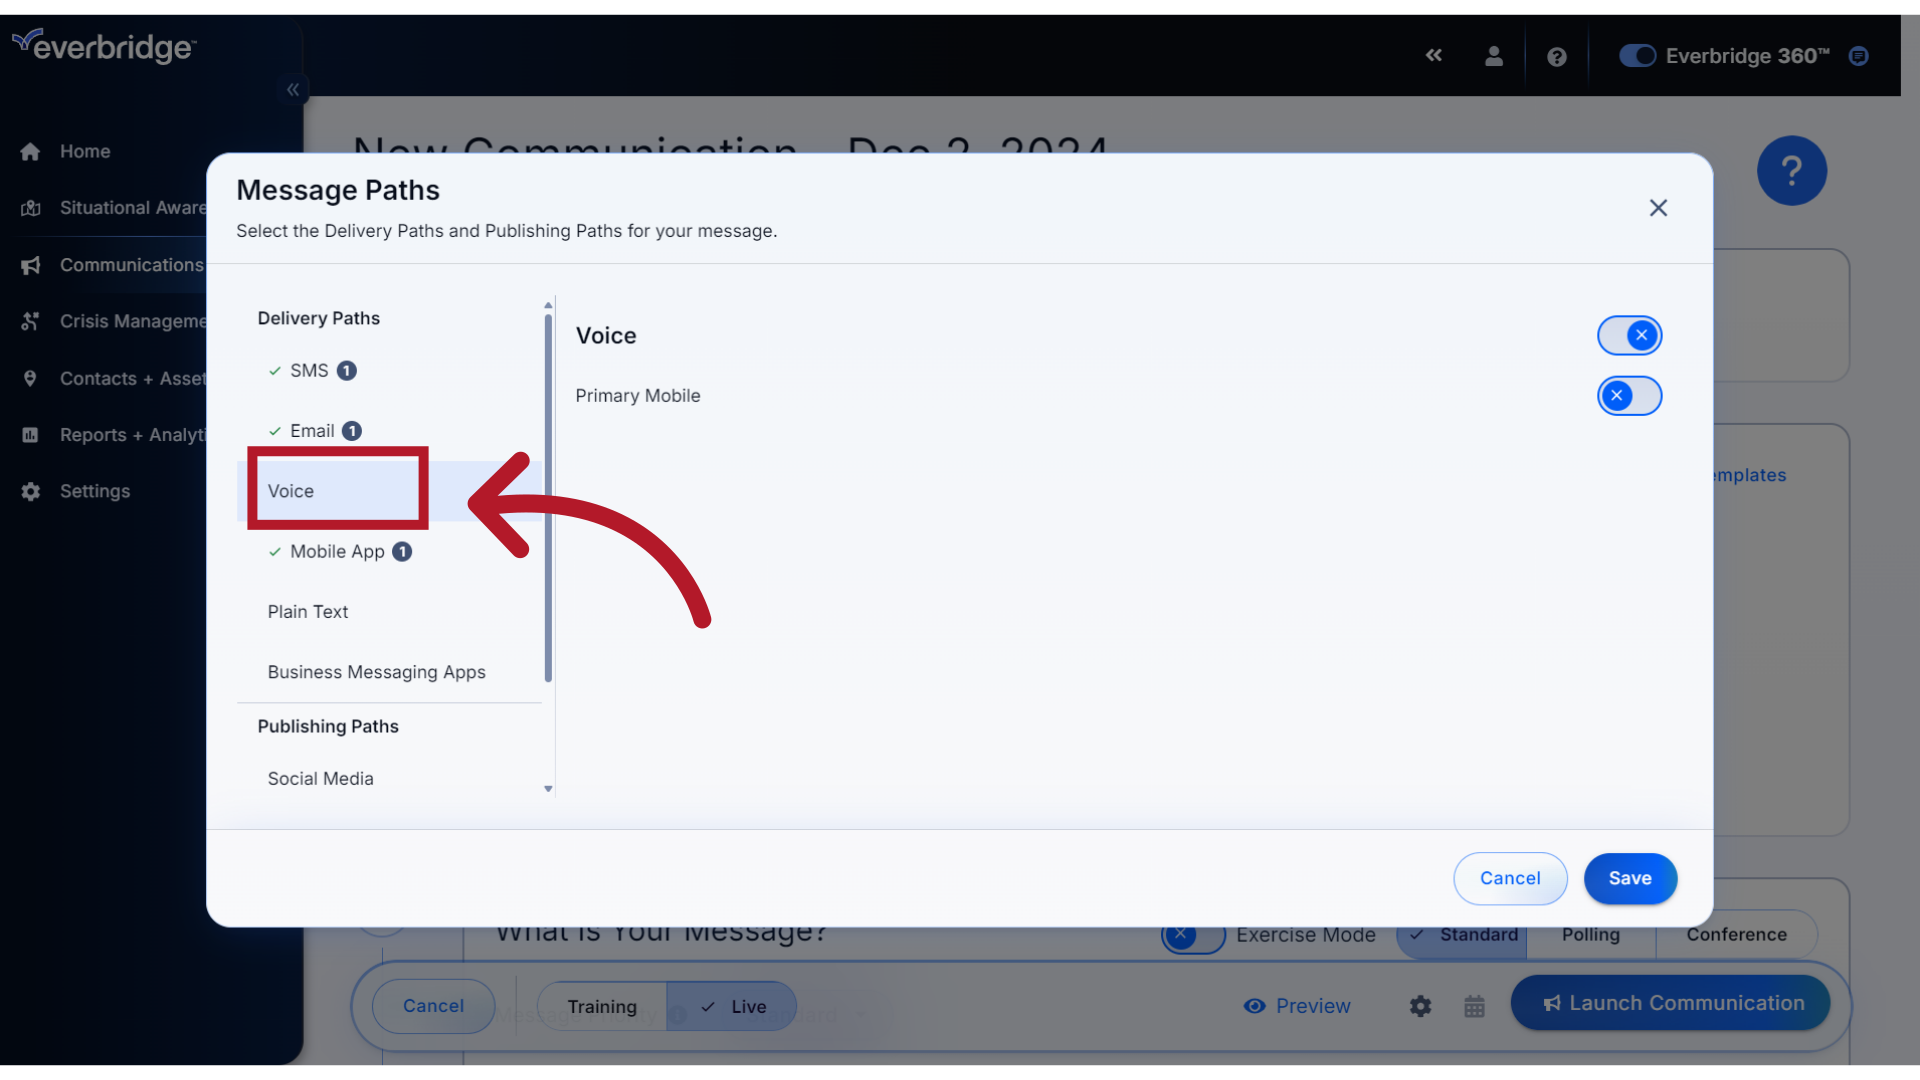
For example, let's select the Voice path so we can also reach our recipients with a phone call.
6. Turn On
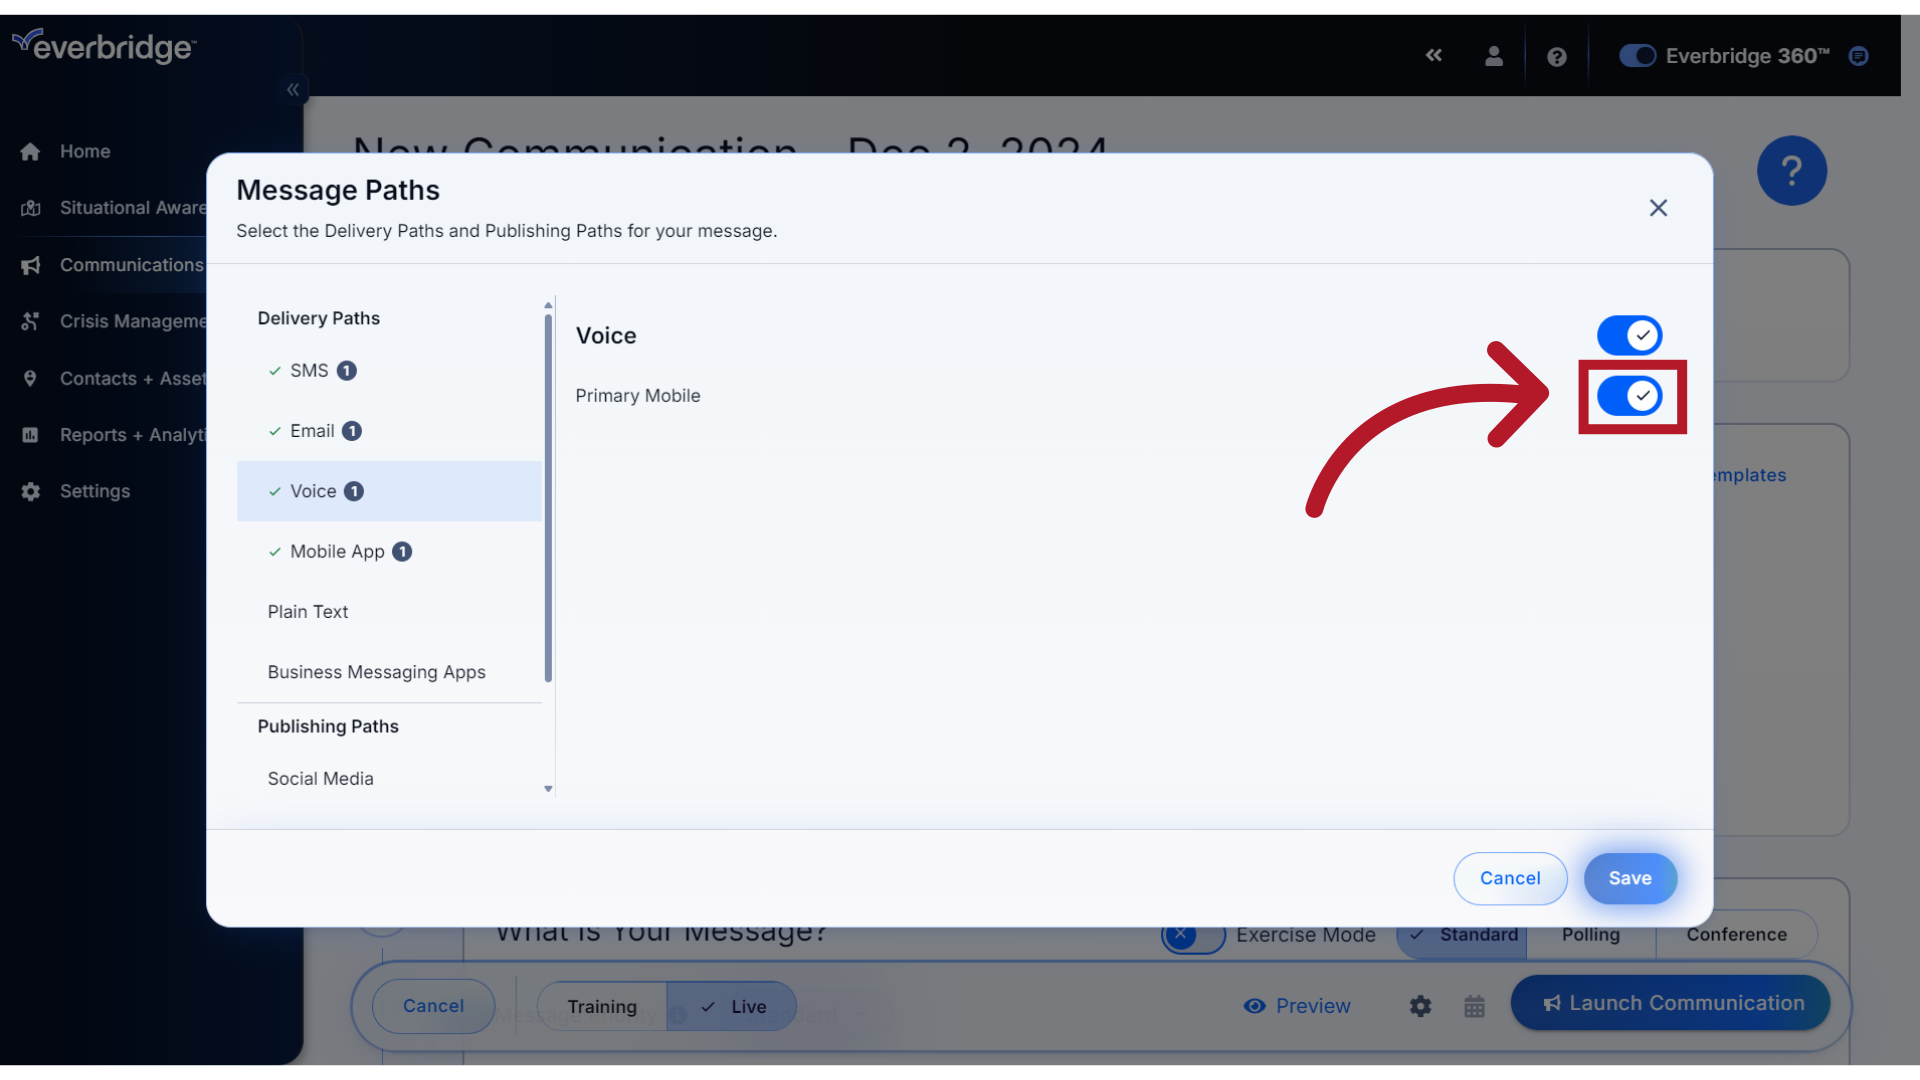
To enable the Delivery Path, slide the button to the On position.
7. Save
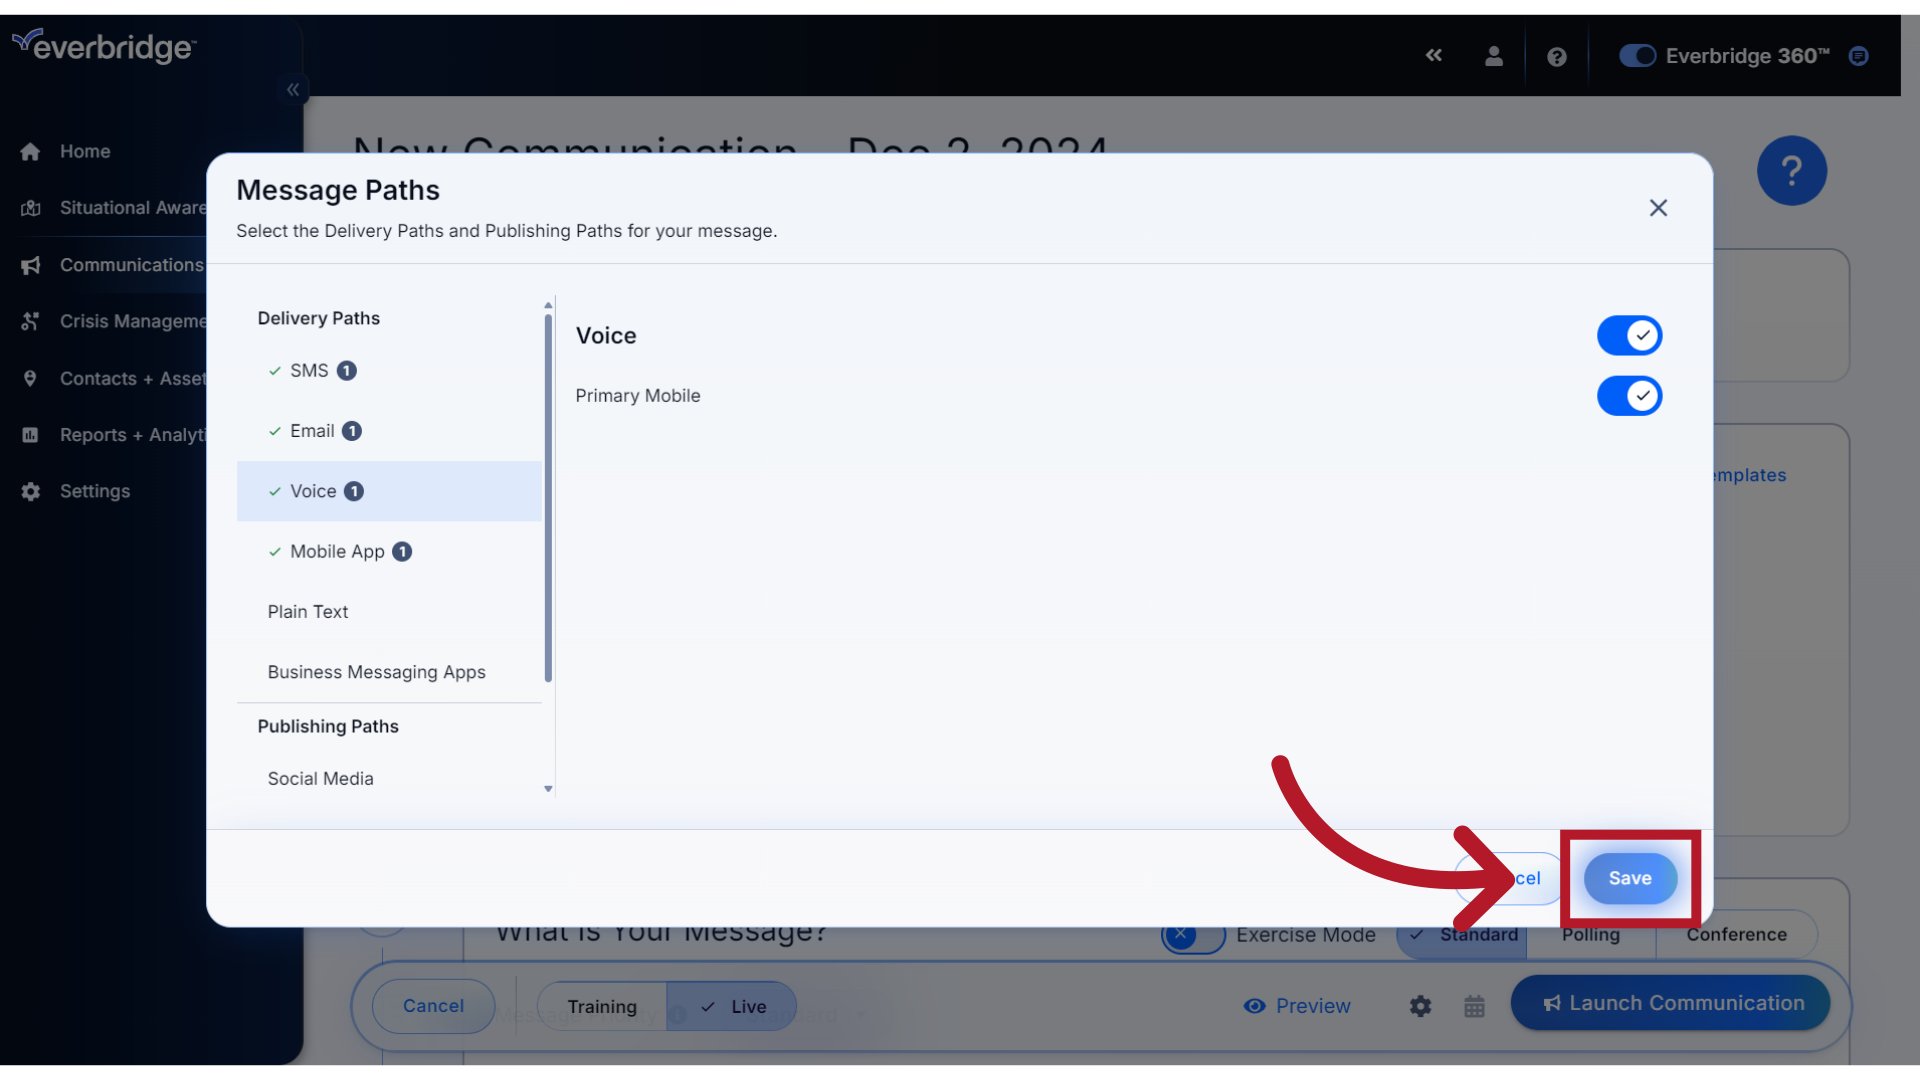
Click Save when any changes have been made.
8. Step 3
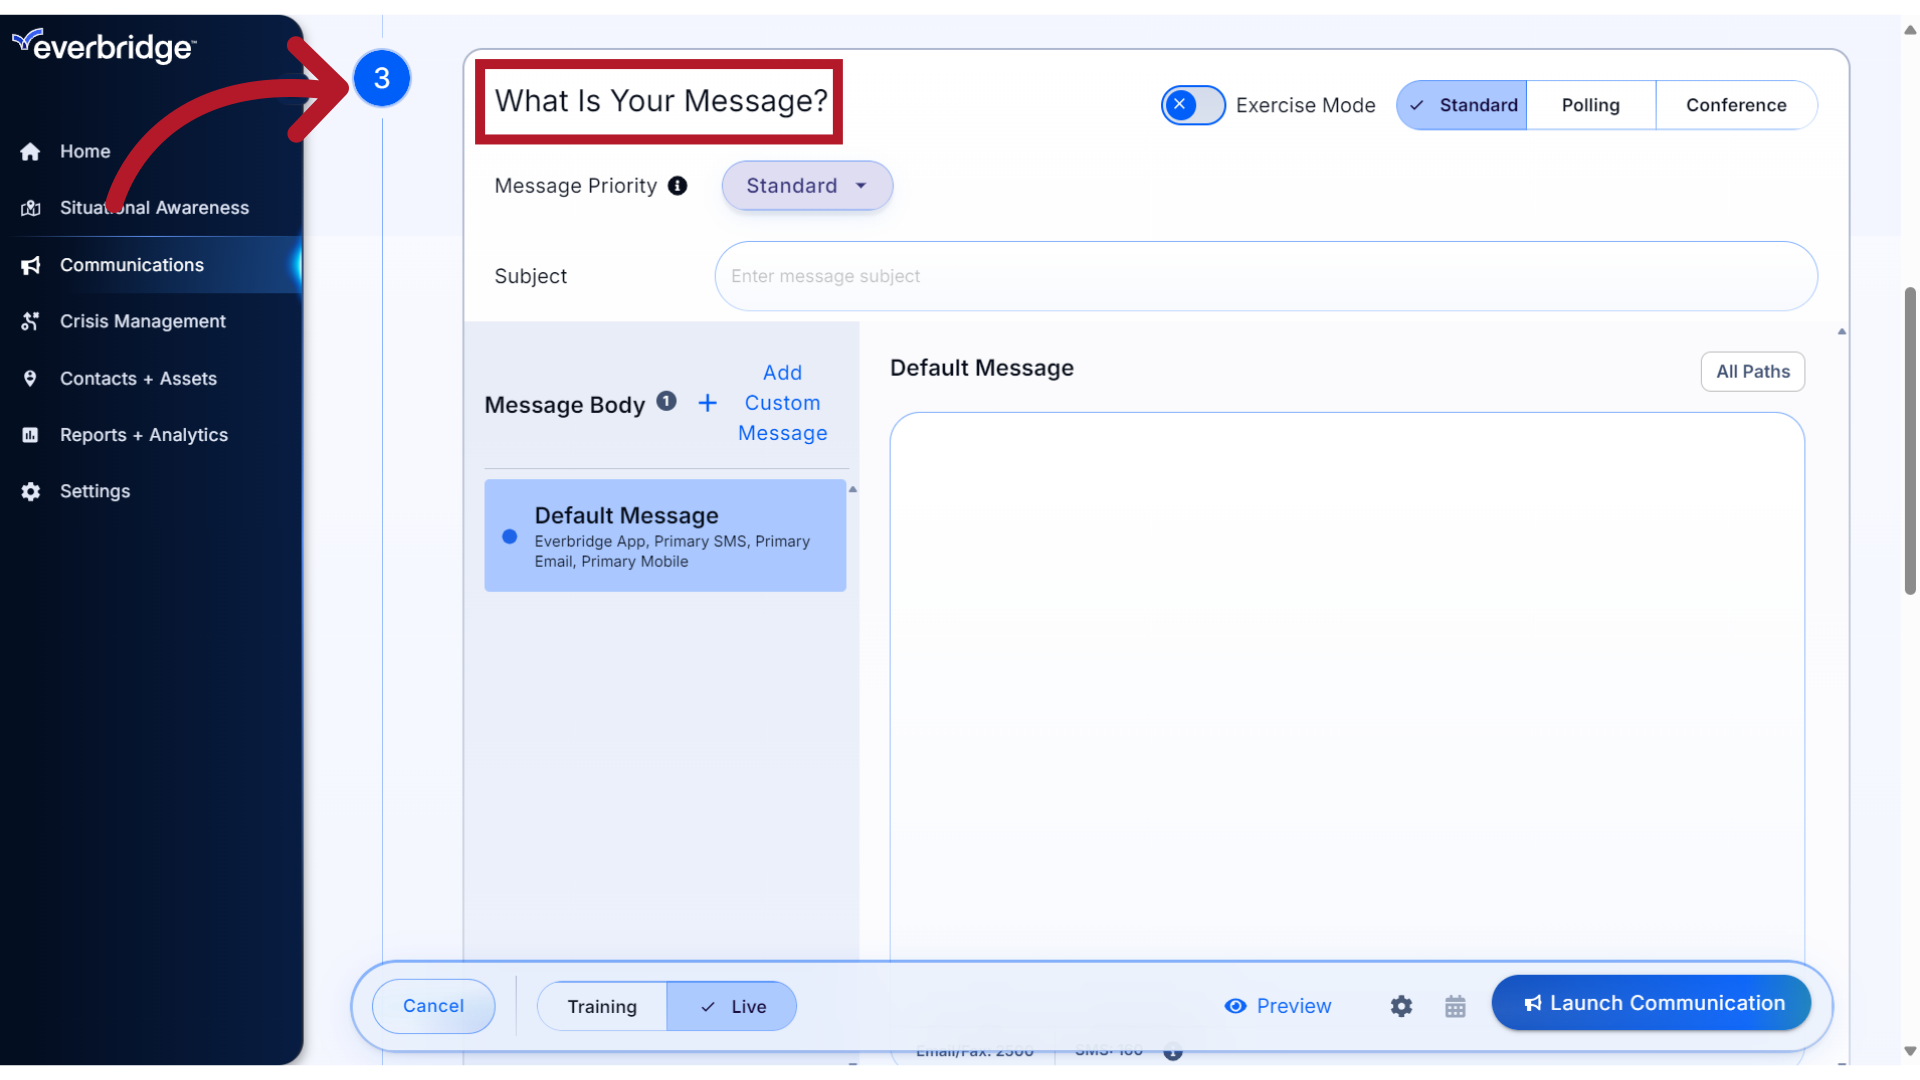
Now let's take a deeper dive into Step 3 of the Communication, where you will create your message.
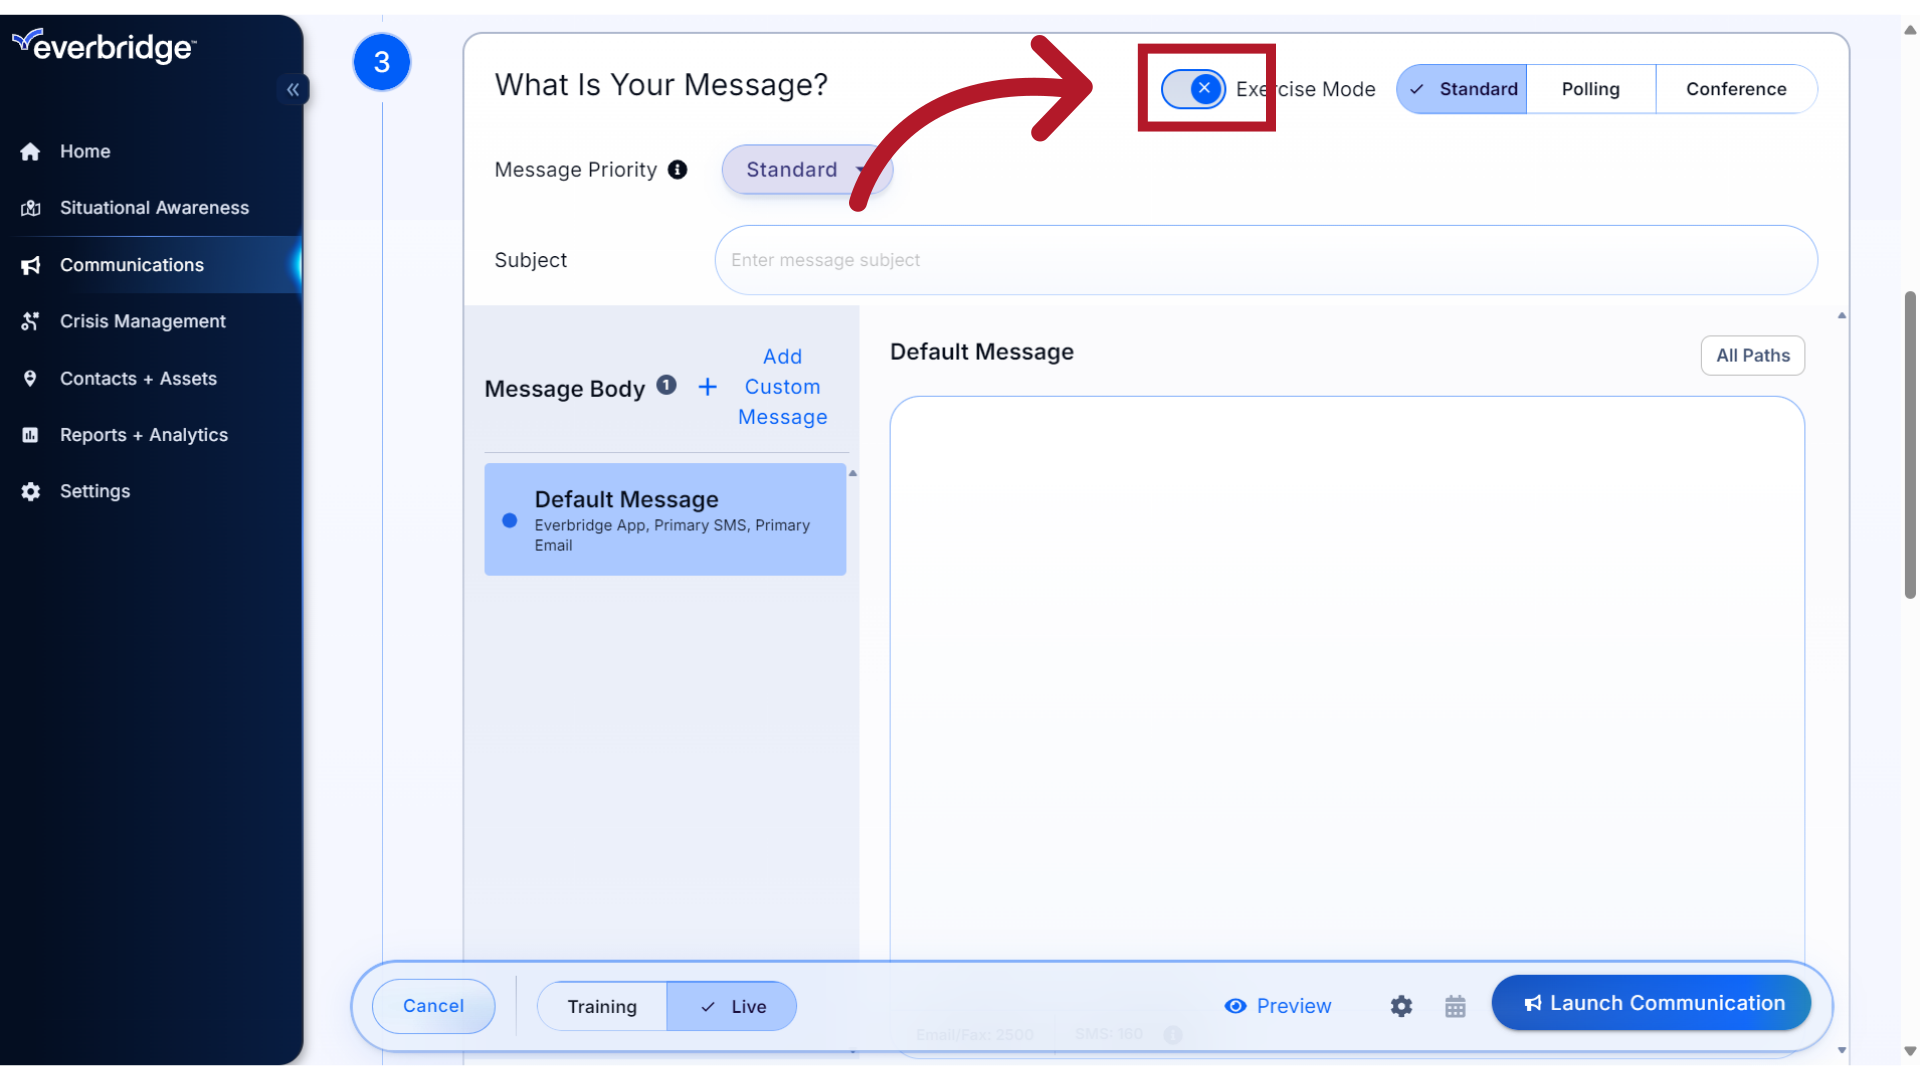
9. Exercise Mode
You have the option of sending the Communication as a test message using Exercise Mode.
10. Exercise Mode
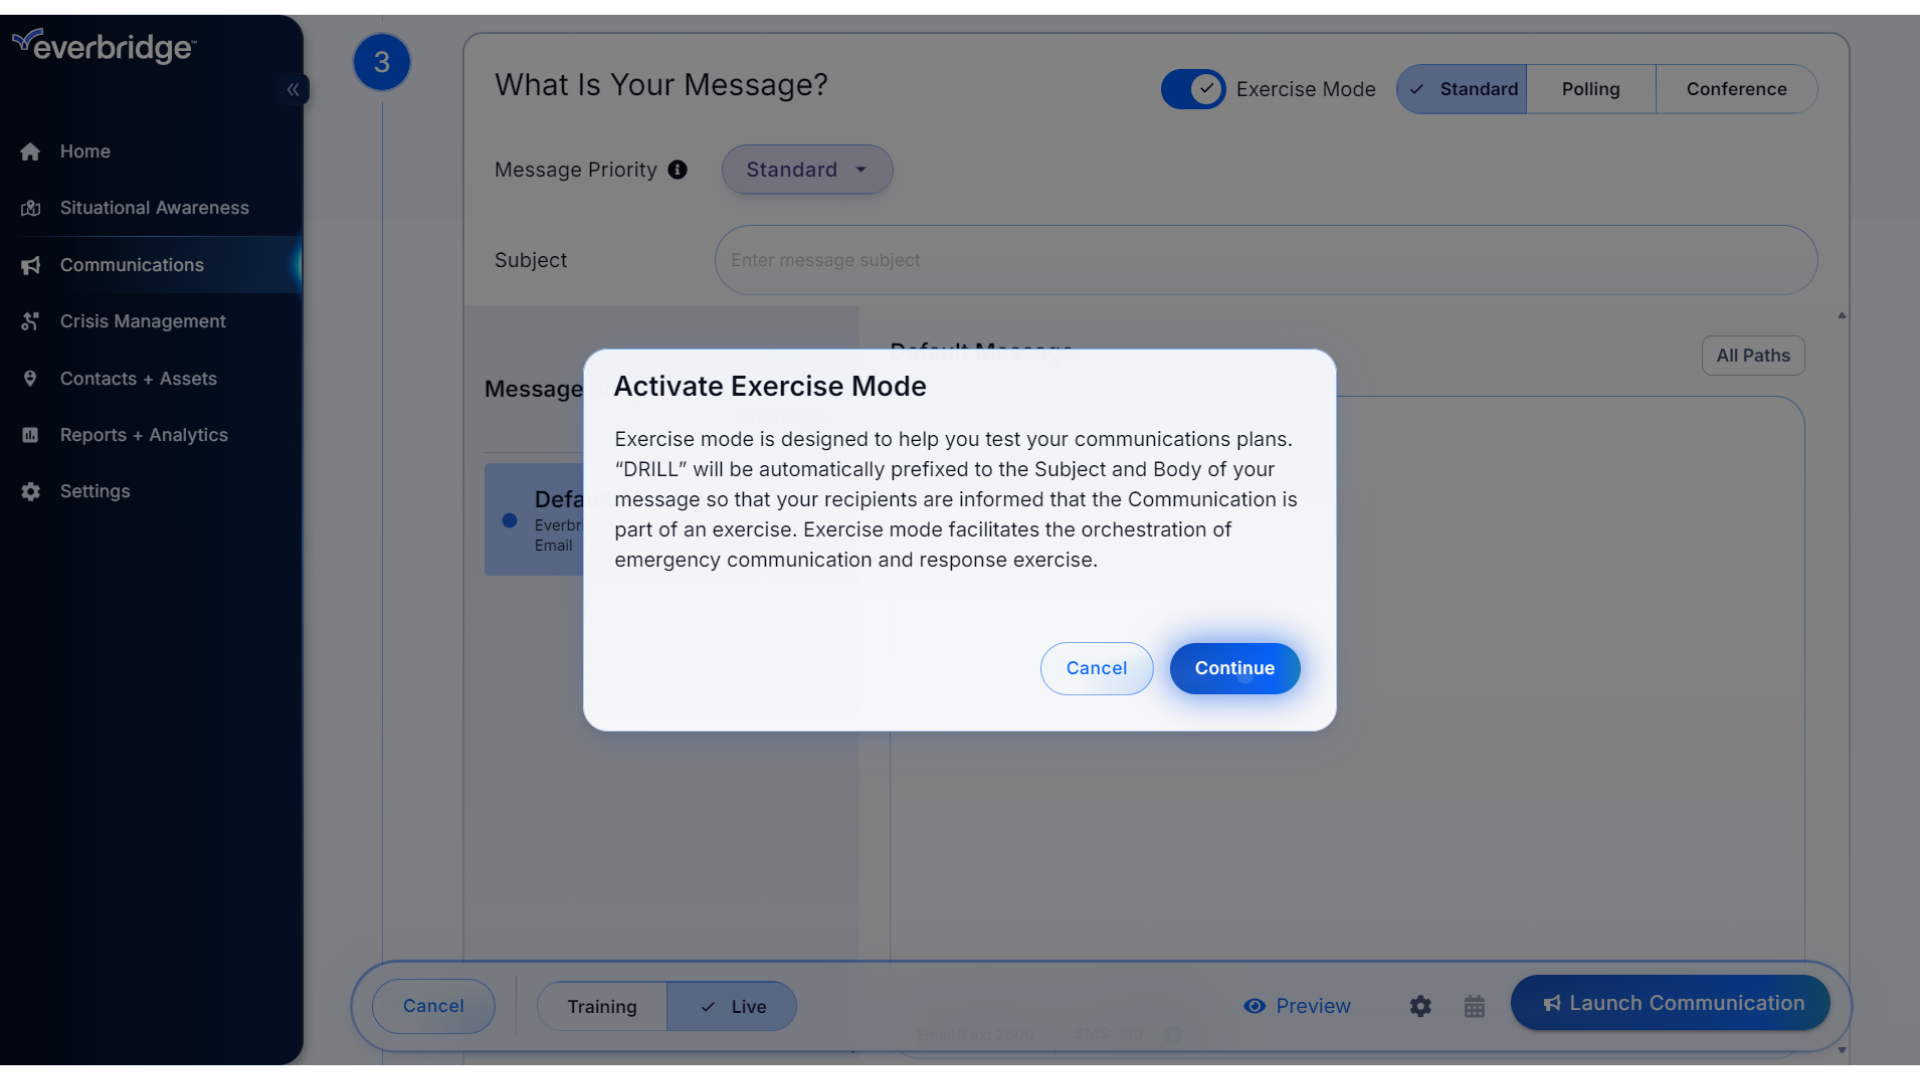
When this mode is activated, the word "DRILL" will be automatically prefixed to the Subject and Body of the message. Click Continue if you wish to activate.
11. Select
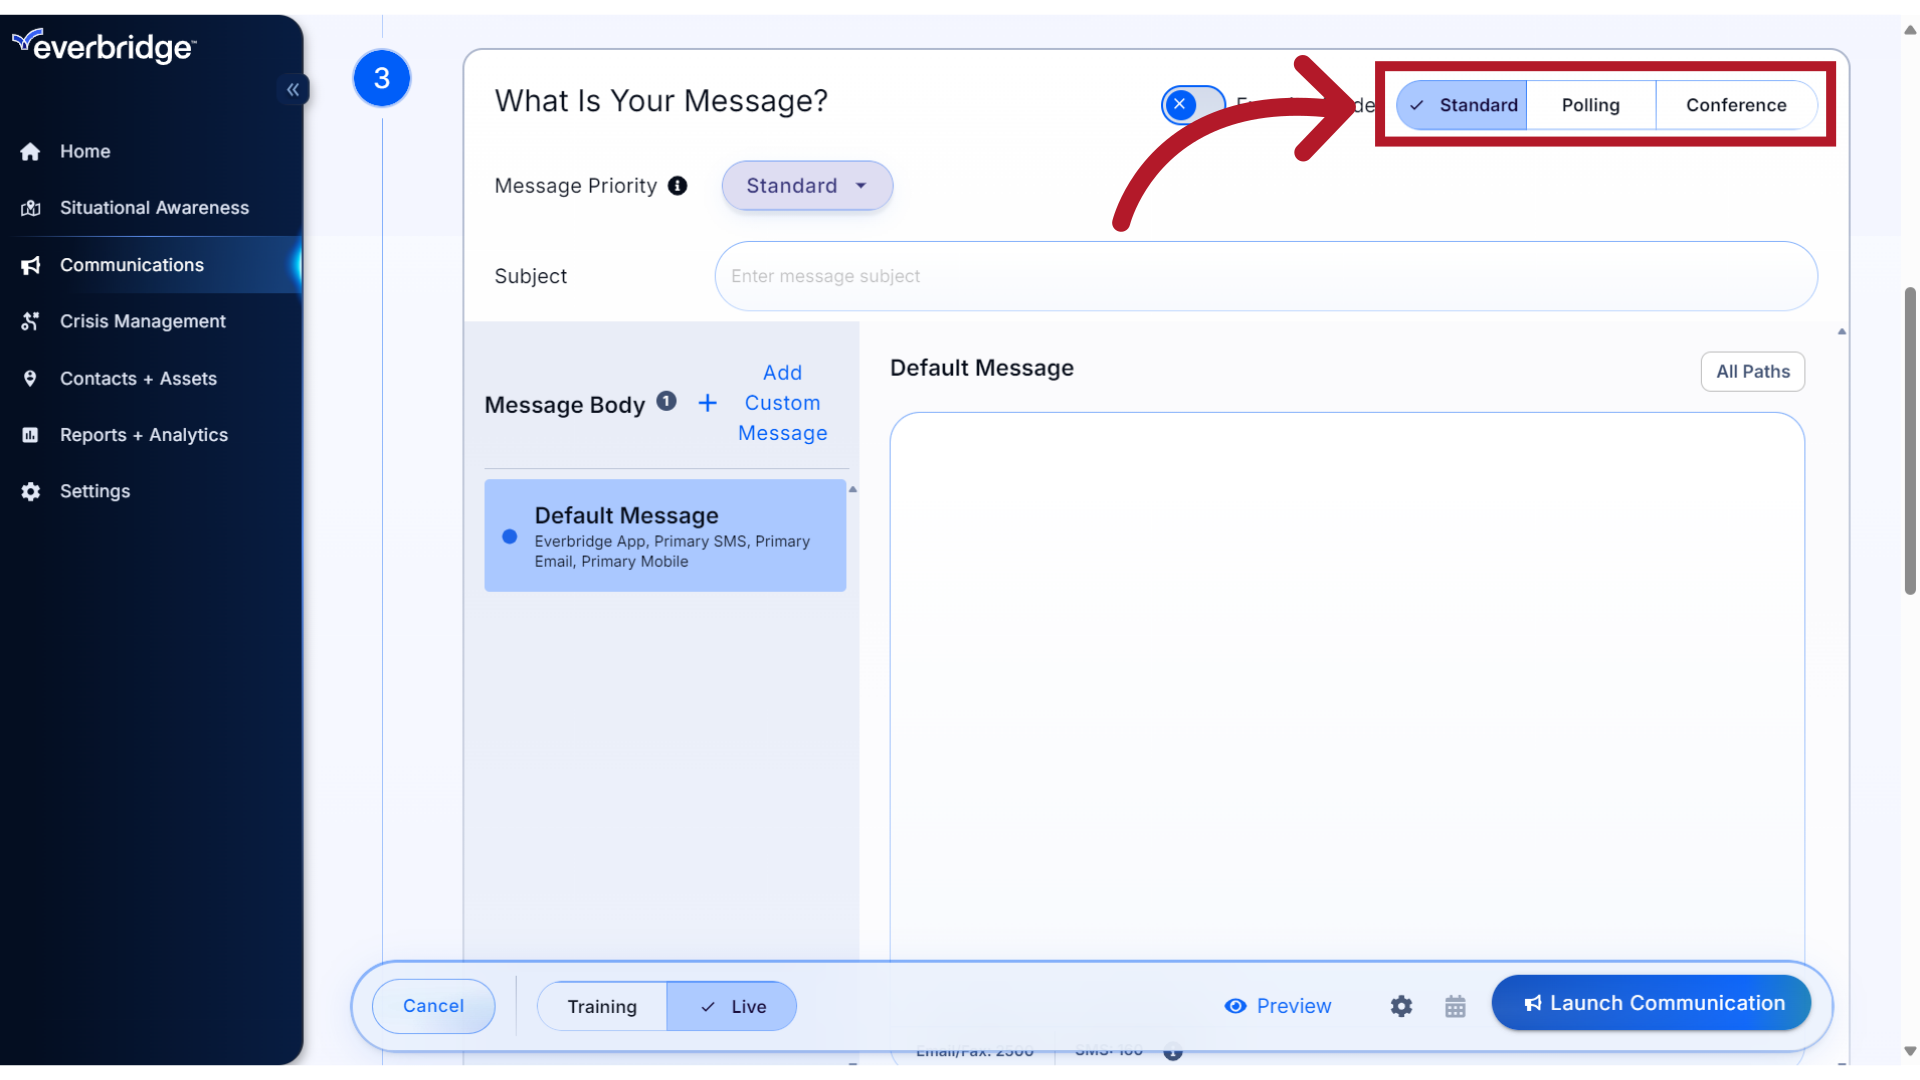
Next, confirm or update the Message Type. The default is Standard, which is the basic alert message.
12. Polling
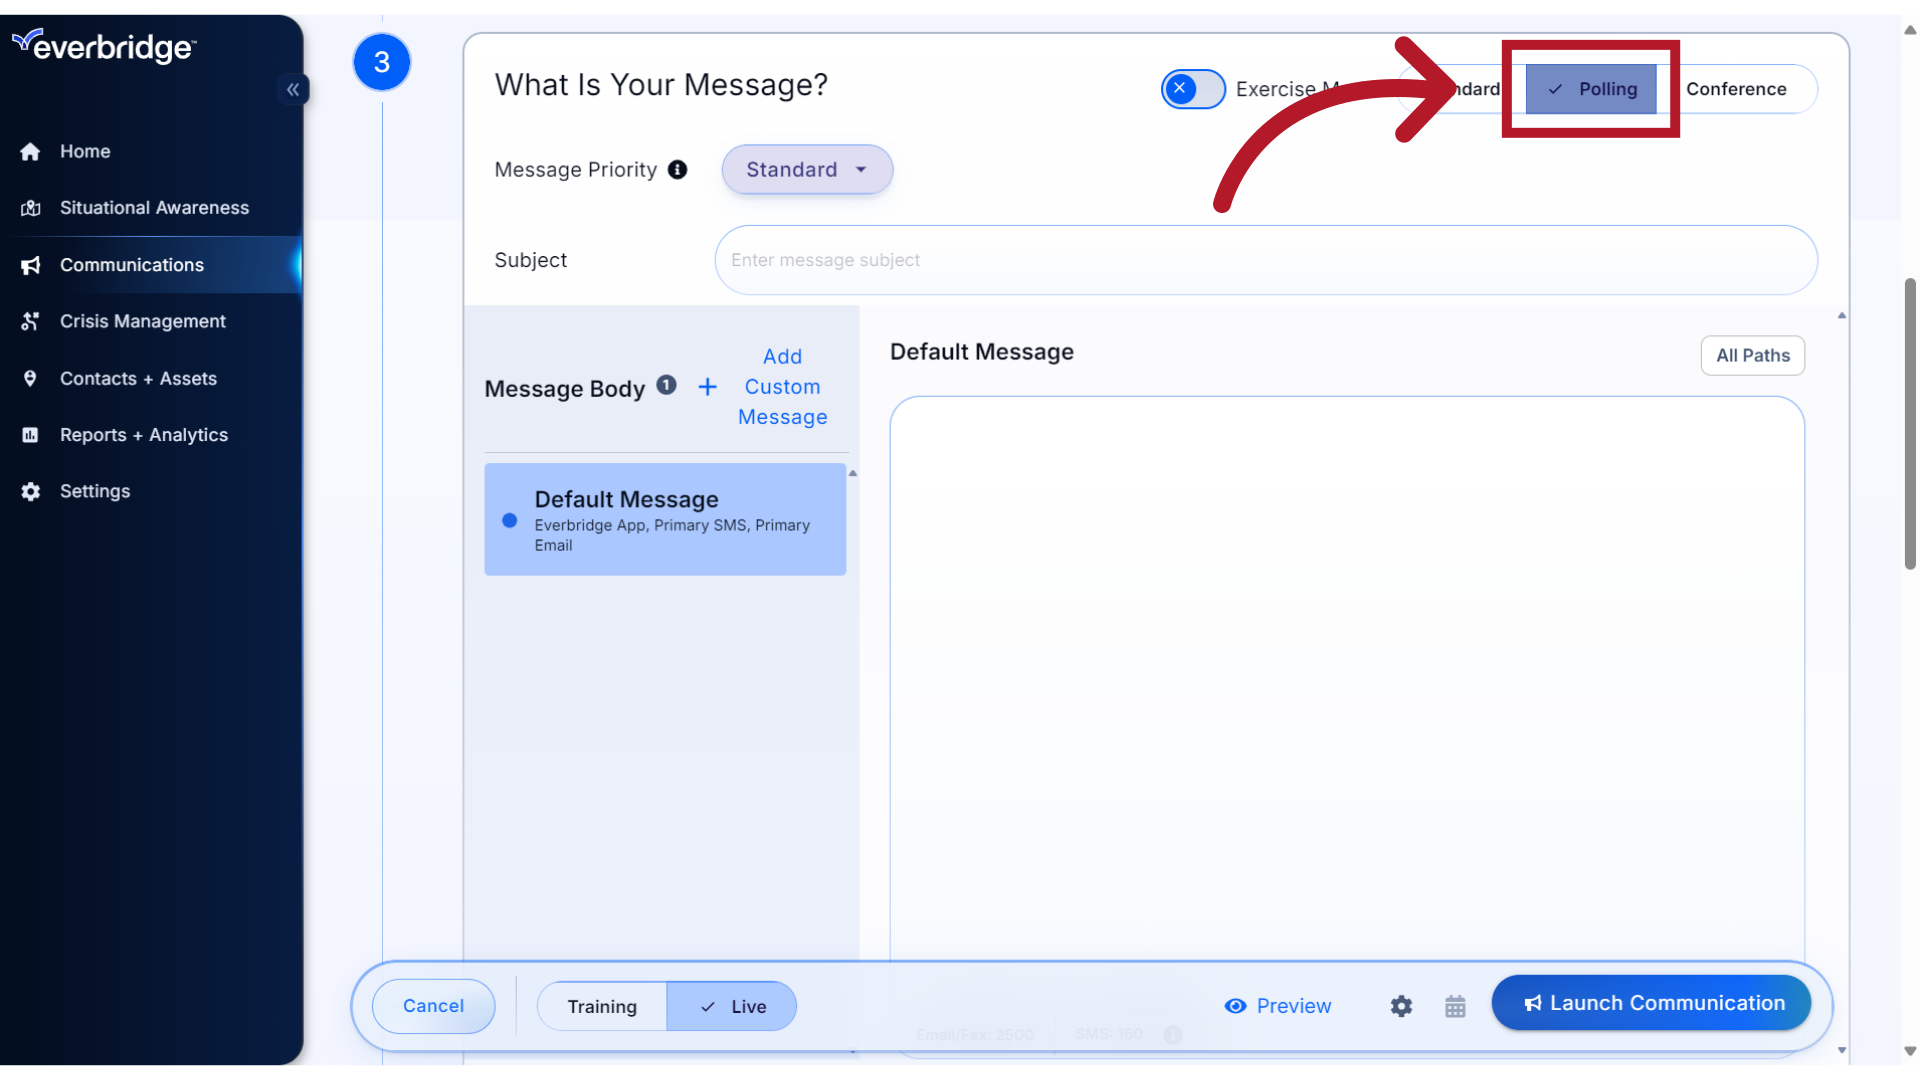
Polling prompts a response from the recipient.
13. Polling Responses
This type will allow you to add a short, multiple-choice questionnaire to your message. This can be used in situations where, for example, you need to assess a recipient's current situation or capture their availability.
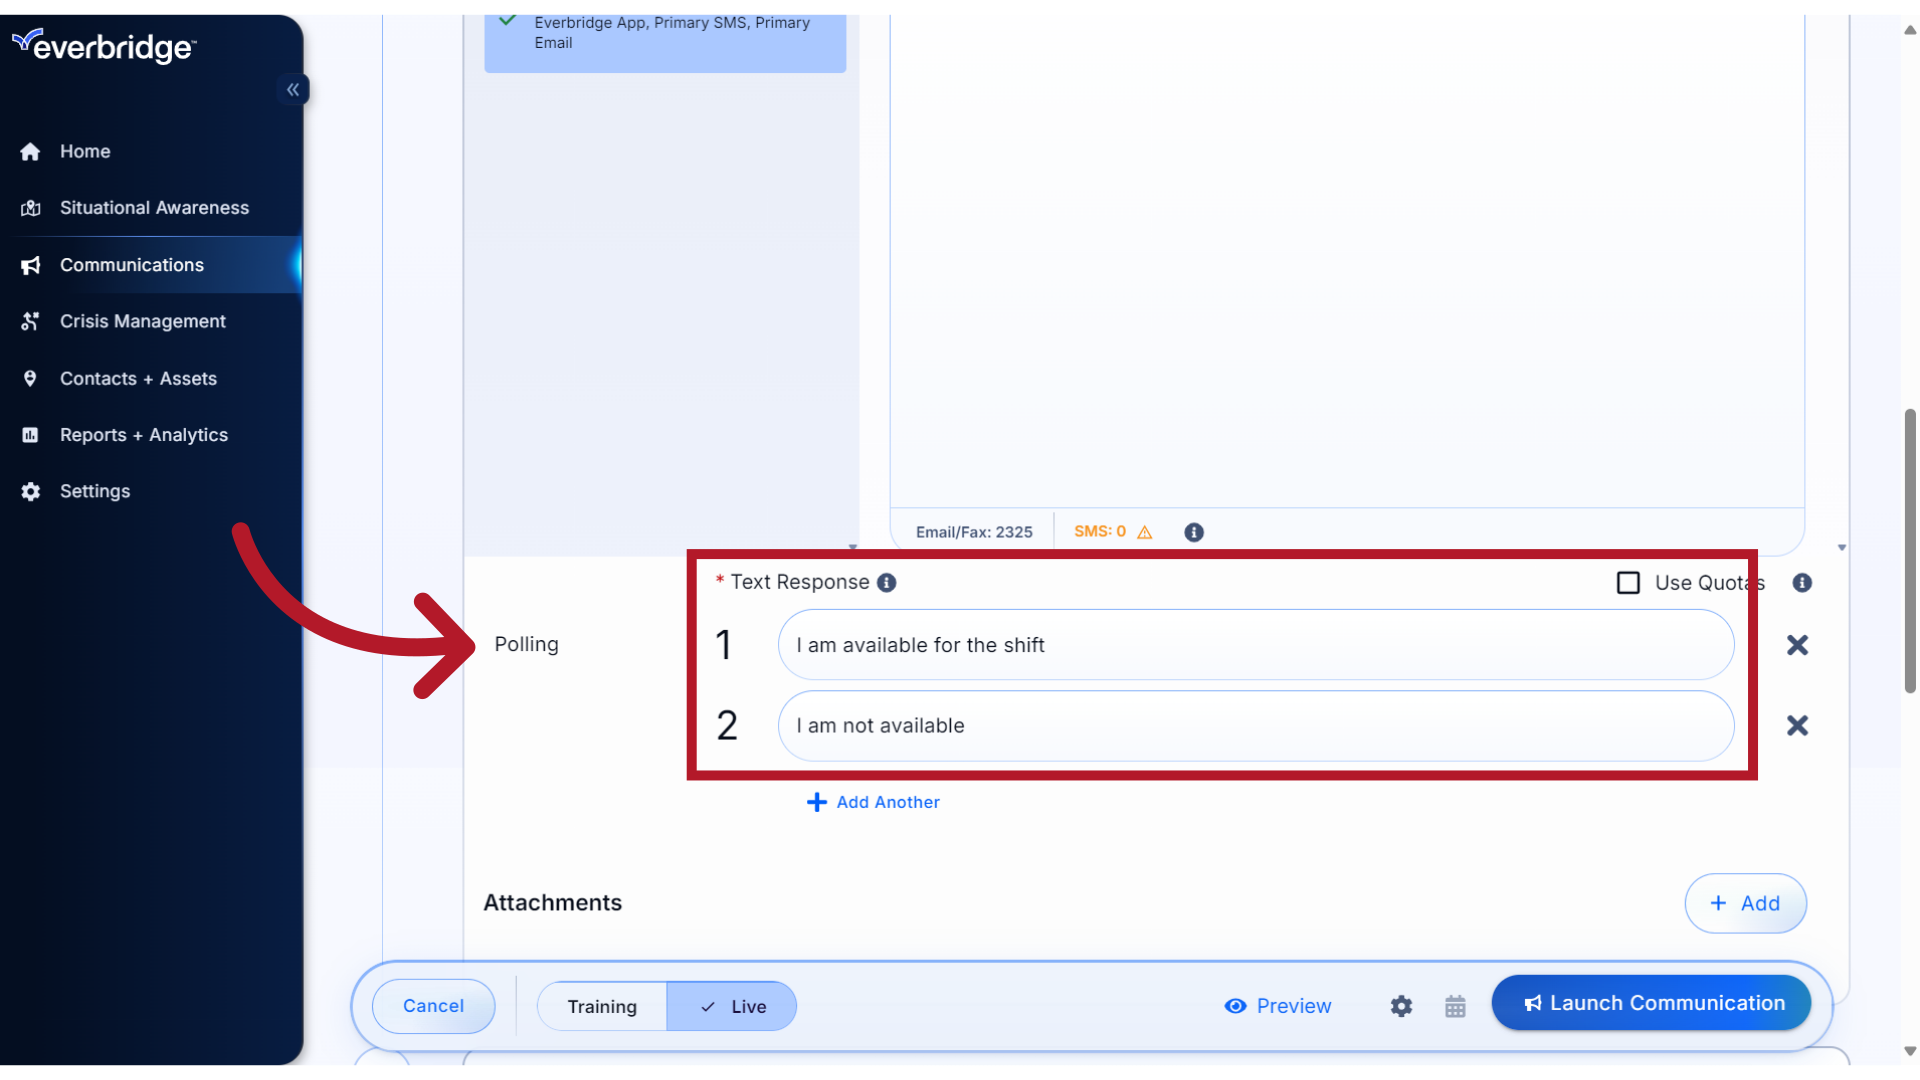
14. Conference
In a Conference Notification, the message prompts the recipients to join a conference call. This could be an emergency where contacts need to discuss the situation immediately. Or, it might be a convenient way to pull everyone together for the weekly status meeting.
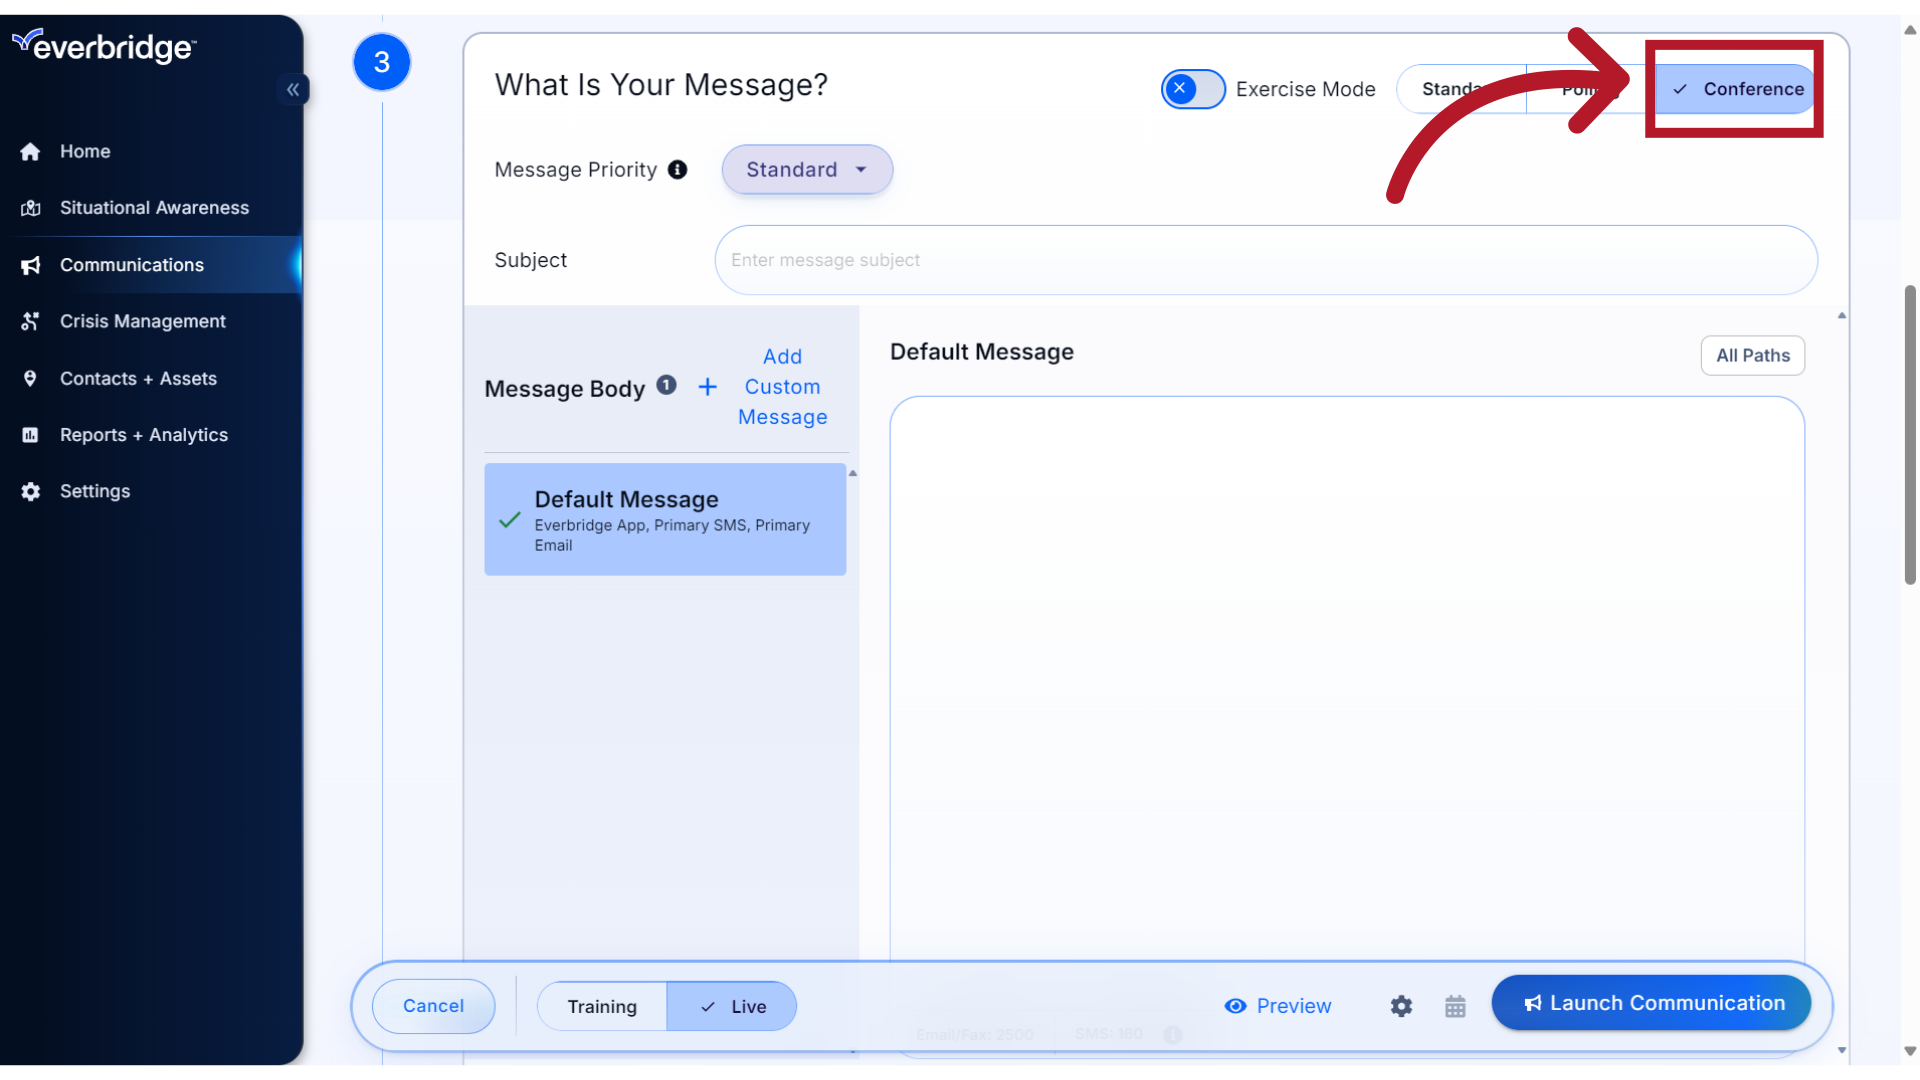
15. Conference Bridge
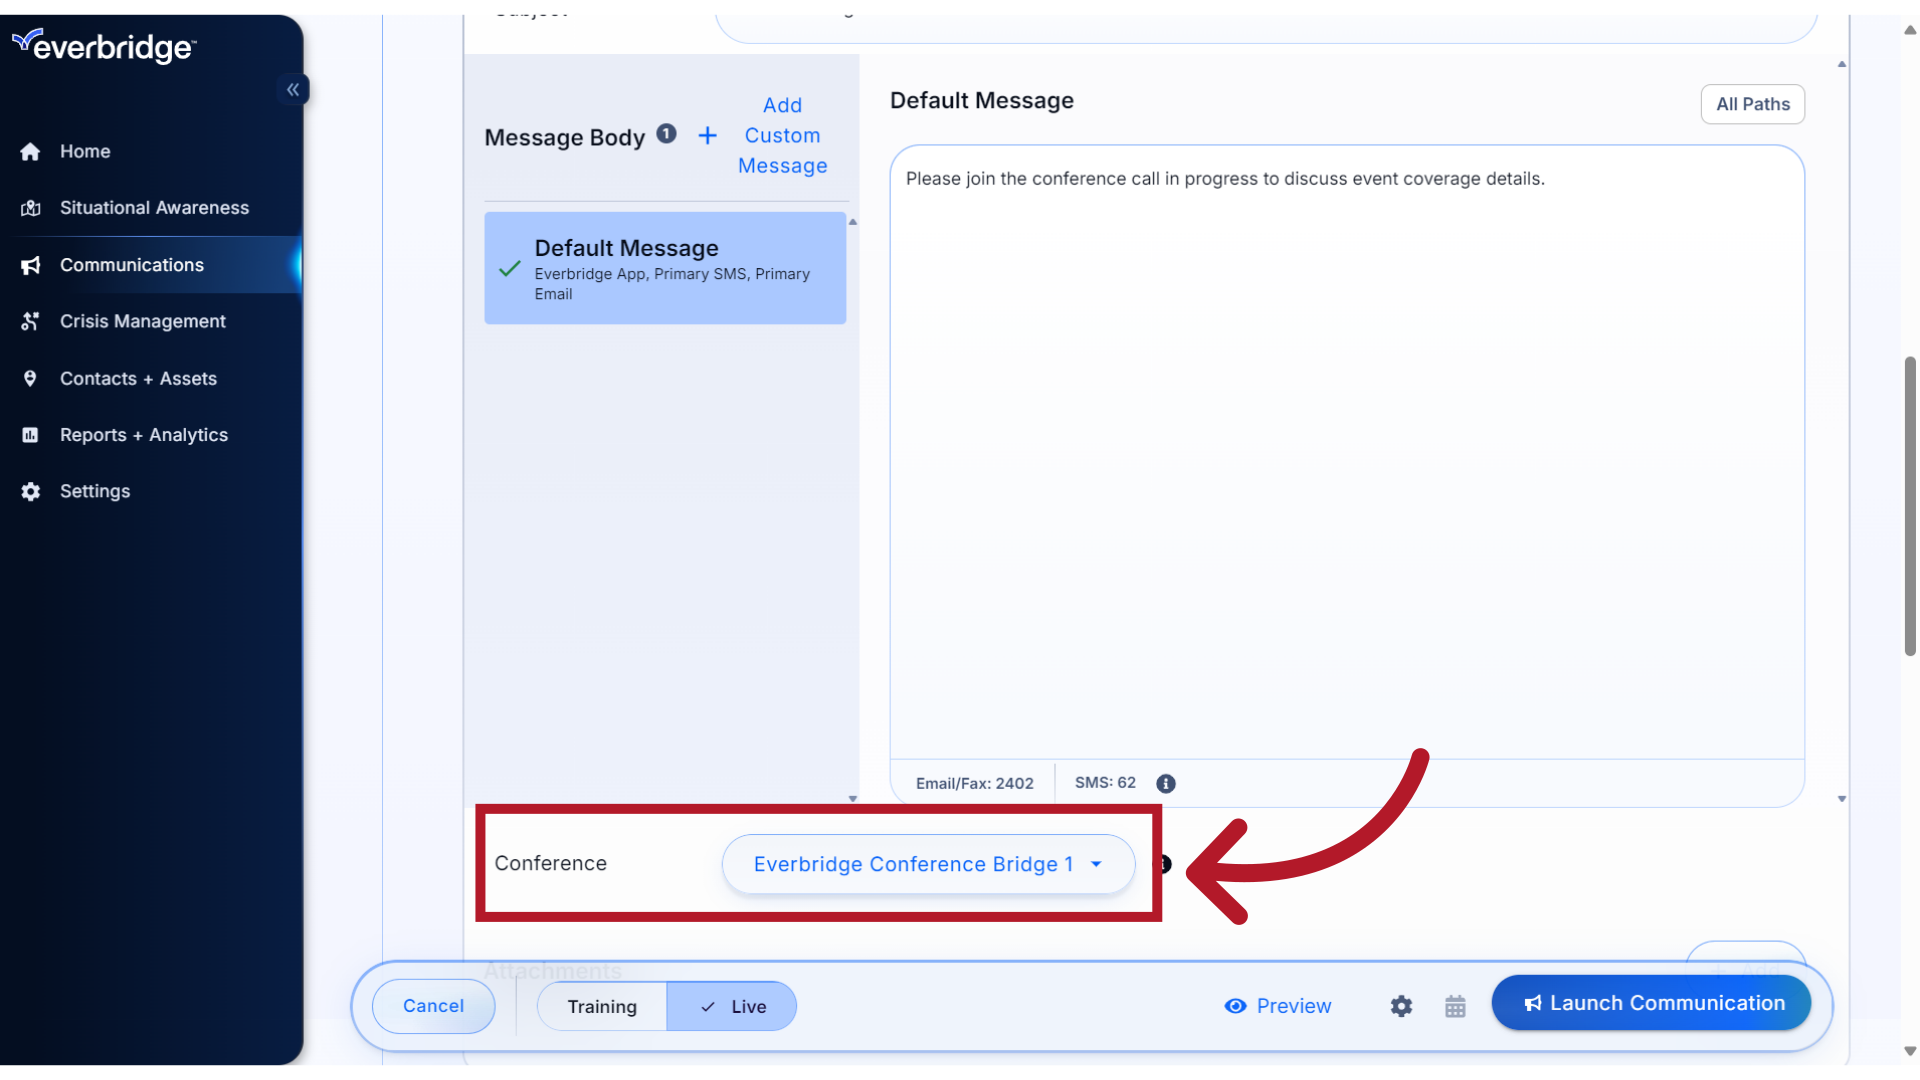
Selecting the Conference type will display the list of Conference Bridges configured for your organization. The phone number of the selection will automatically be included in your message so the recipients can connect to the bridge upon receiving the message.
16. Standard
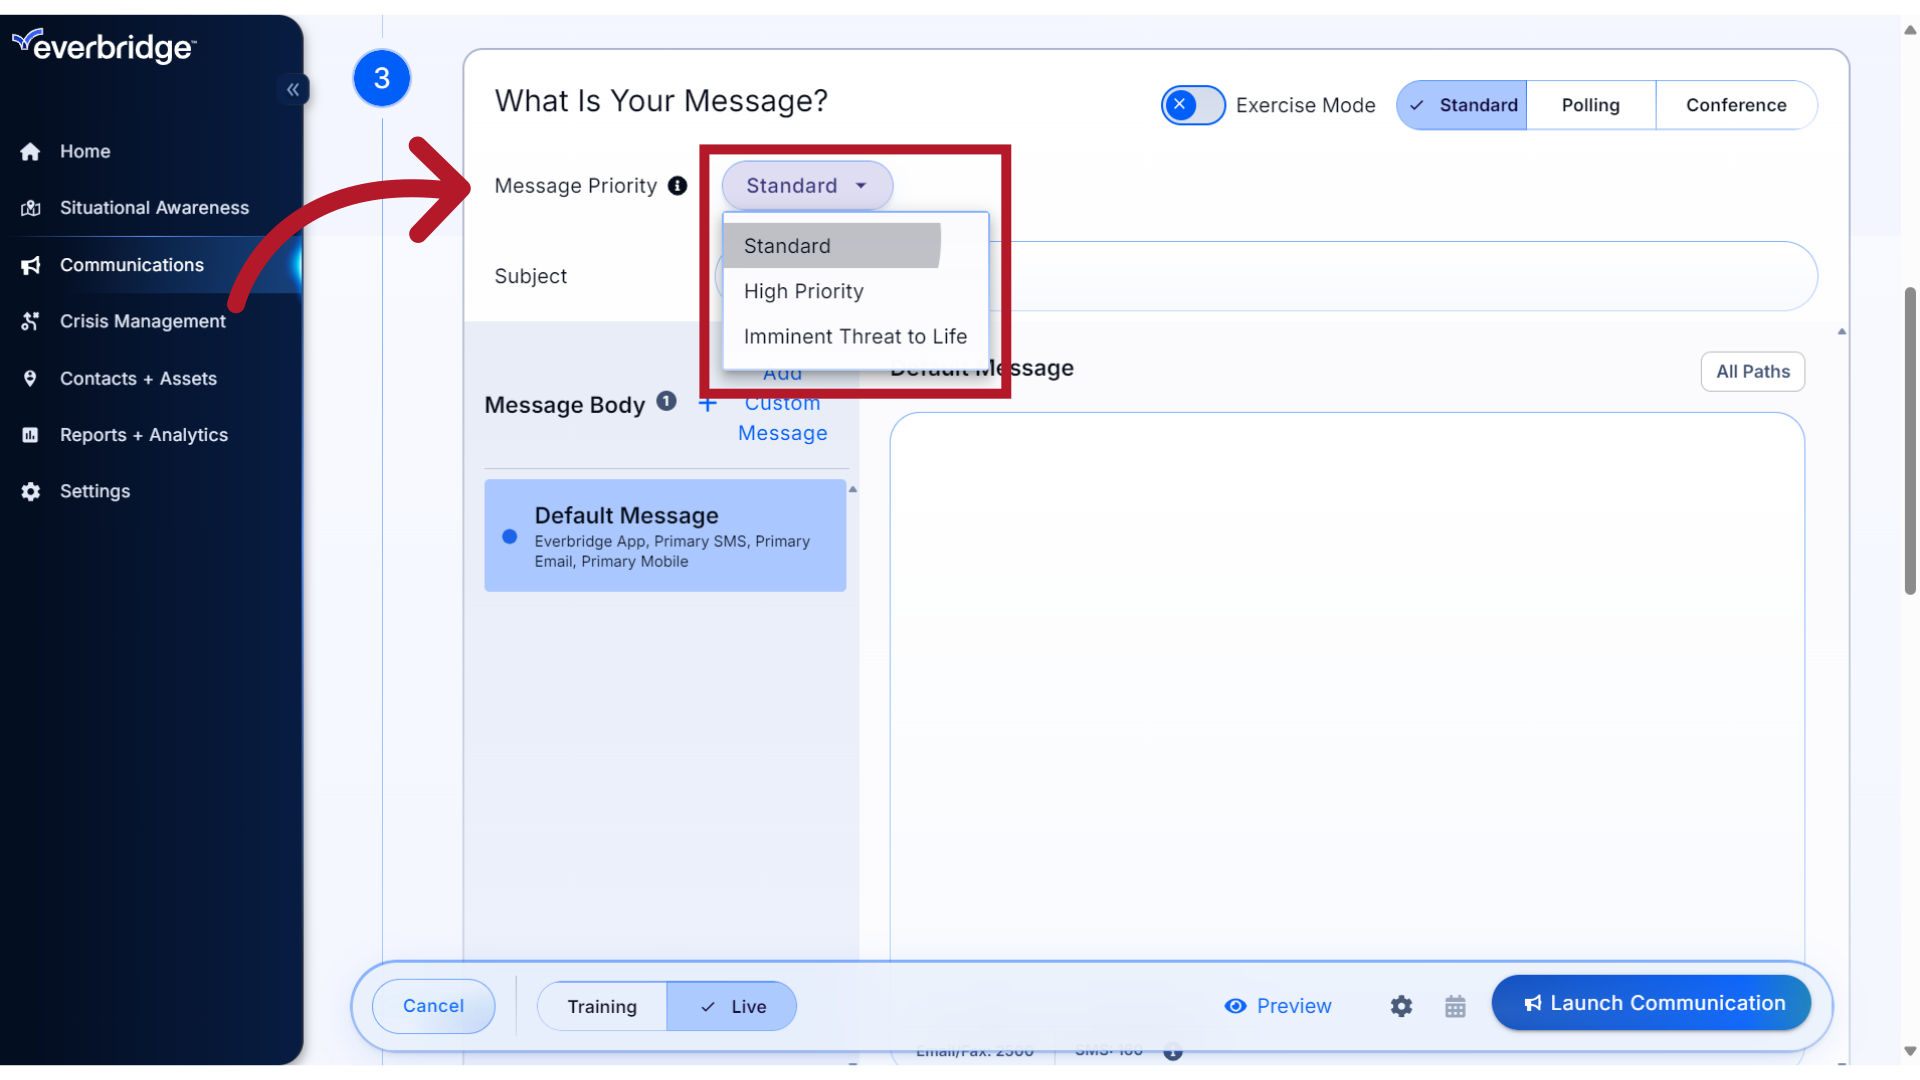
Then set the Message Priority. Use Standard for non-emergency messages.
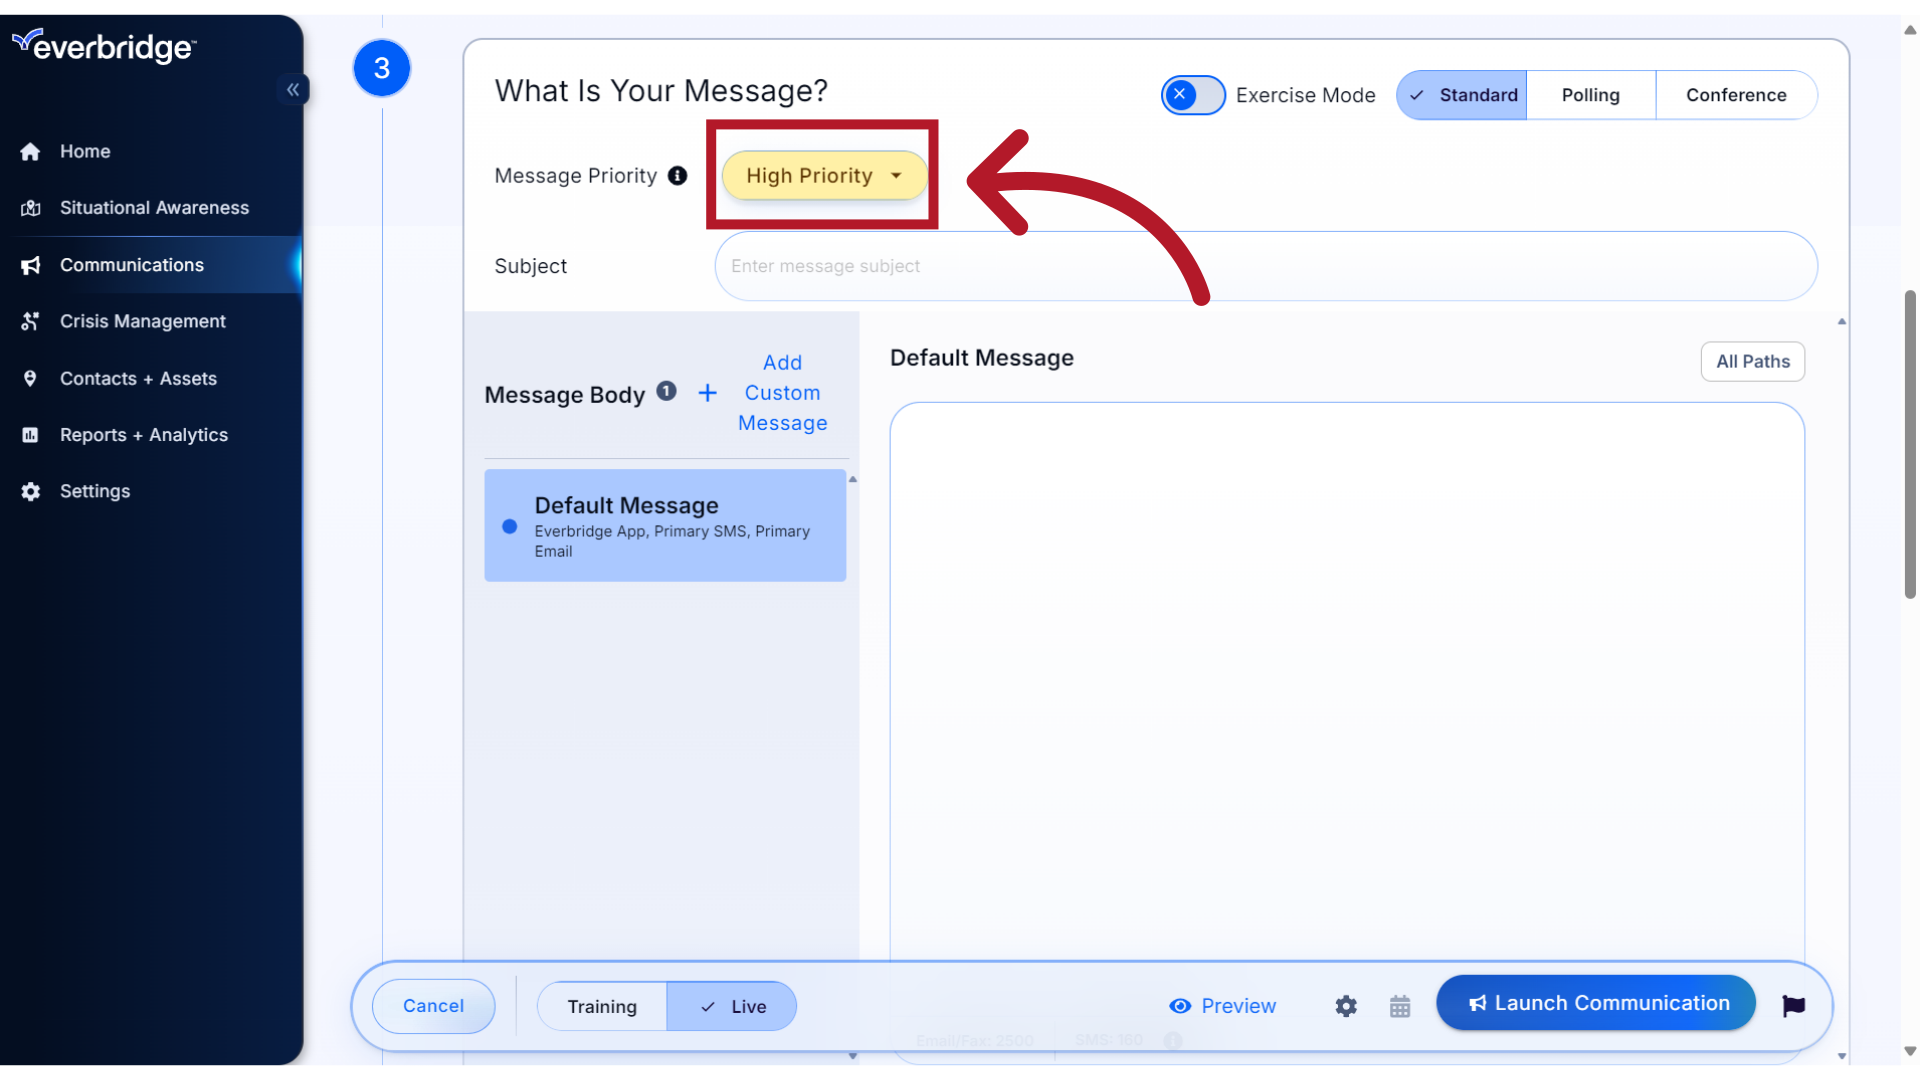
17. High Priority
Select High Priority if you want the message to be given priority in your delivery queue. This option will also use your Priority Phone Greeting recording when sending the message to Voice paths.
18. High Priority
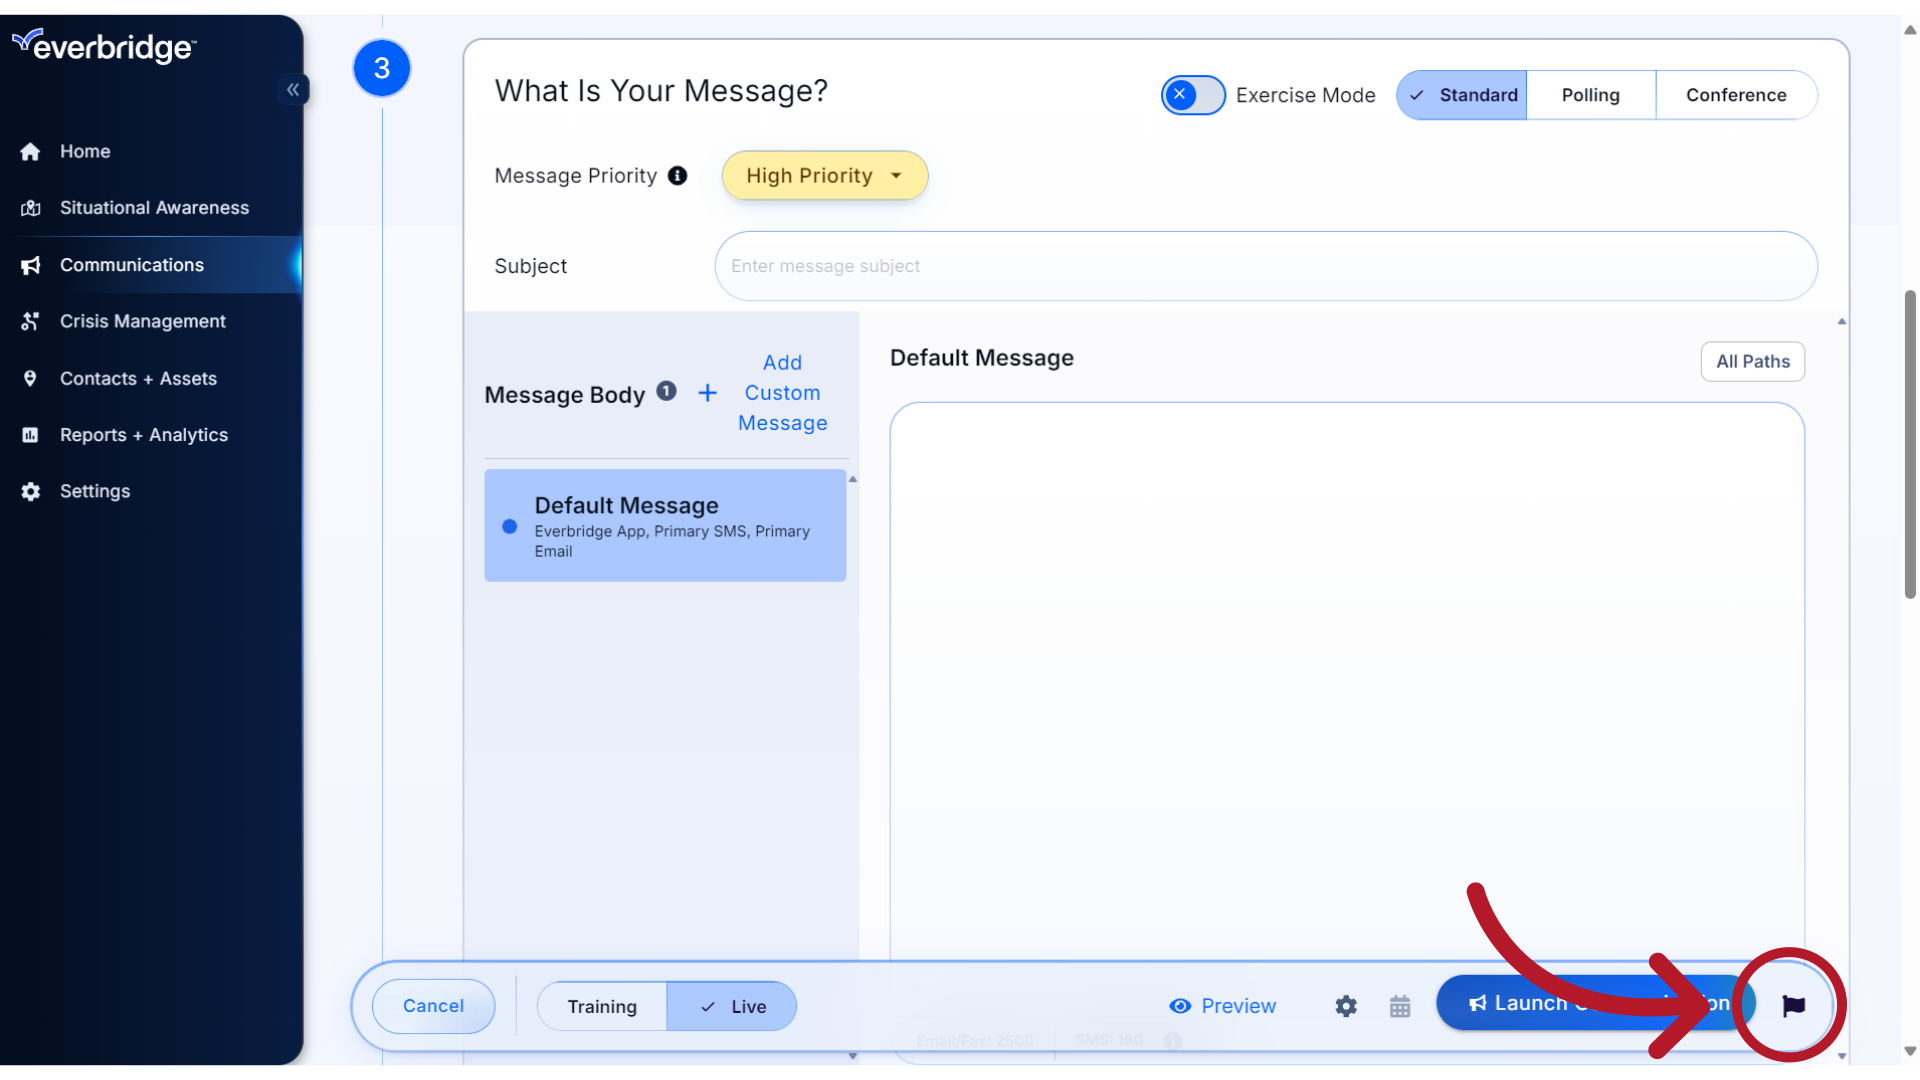
A flag icon will appear in the Communications Toolbar to indicate this priority has been selected.
19. Imminent Threat to Life
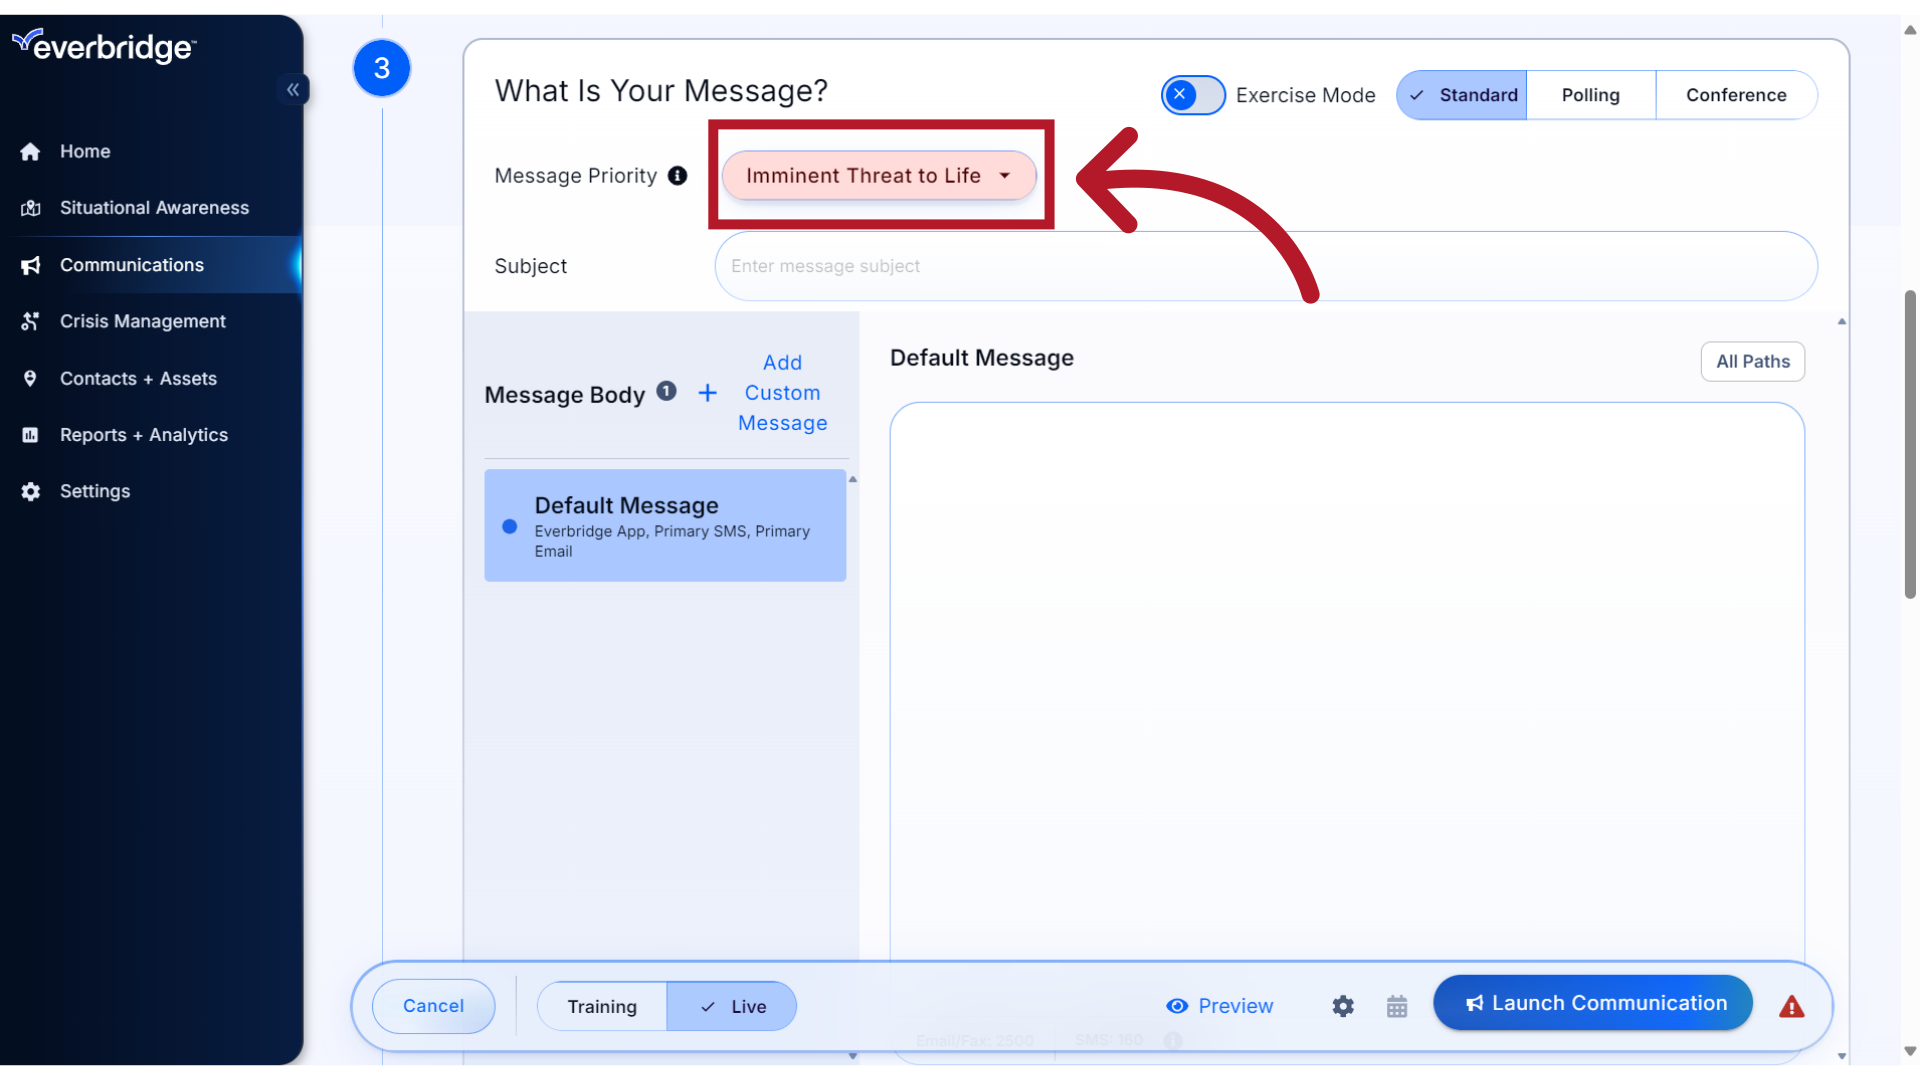
Select Imminent Threat to Life if the lives or safety of the message recipients is at immediate risk. These messages will trigger a desktop alert for those in your organization who have installed the Everbridge 360 Desktop app on their computer. Also, when the message is sent to the Everbridge Mobile App, this priority will override the recipient's silent switch on Apple devices.
20. Imminent Threat to Life
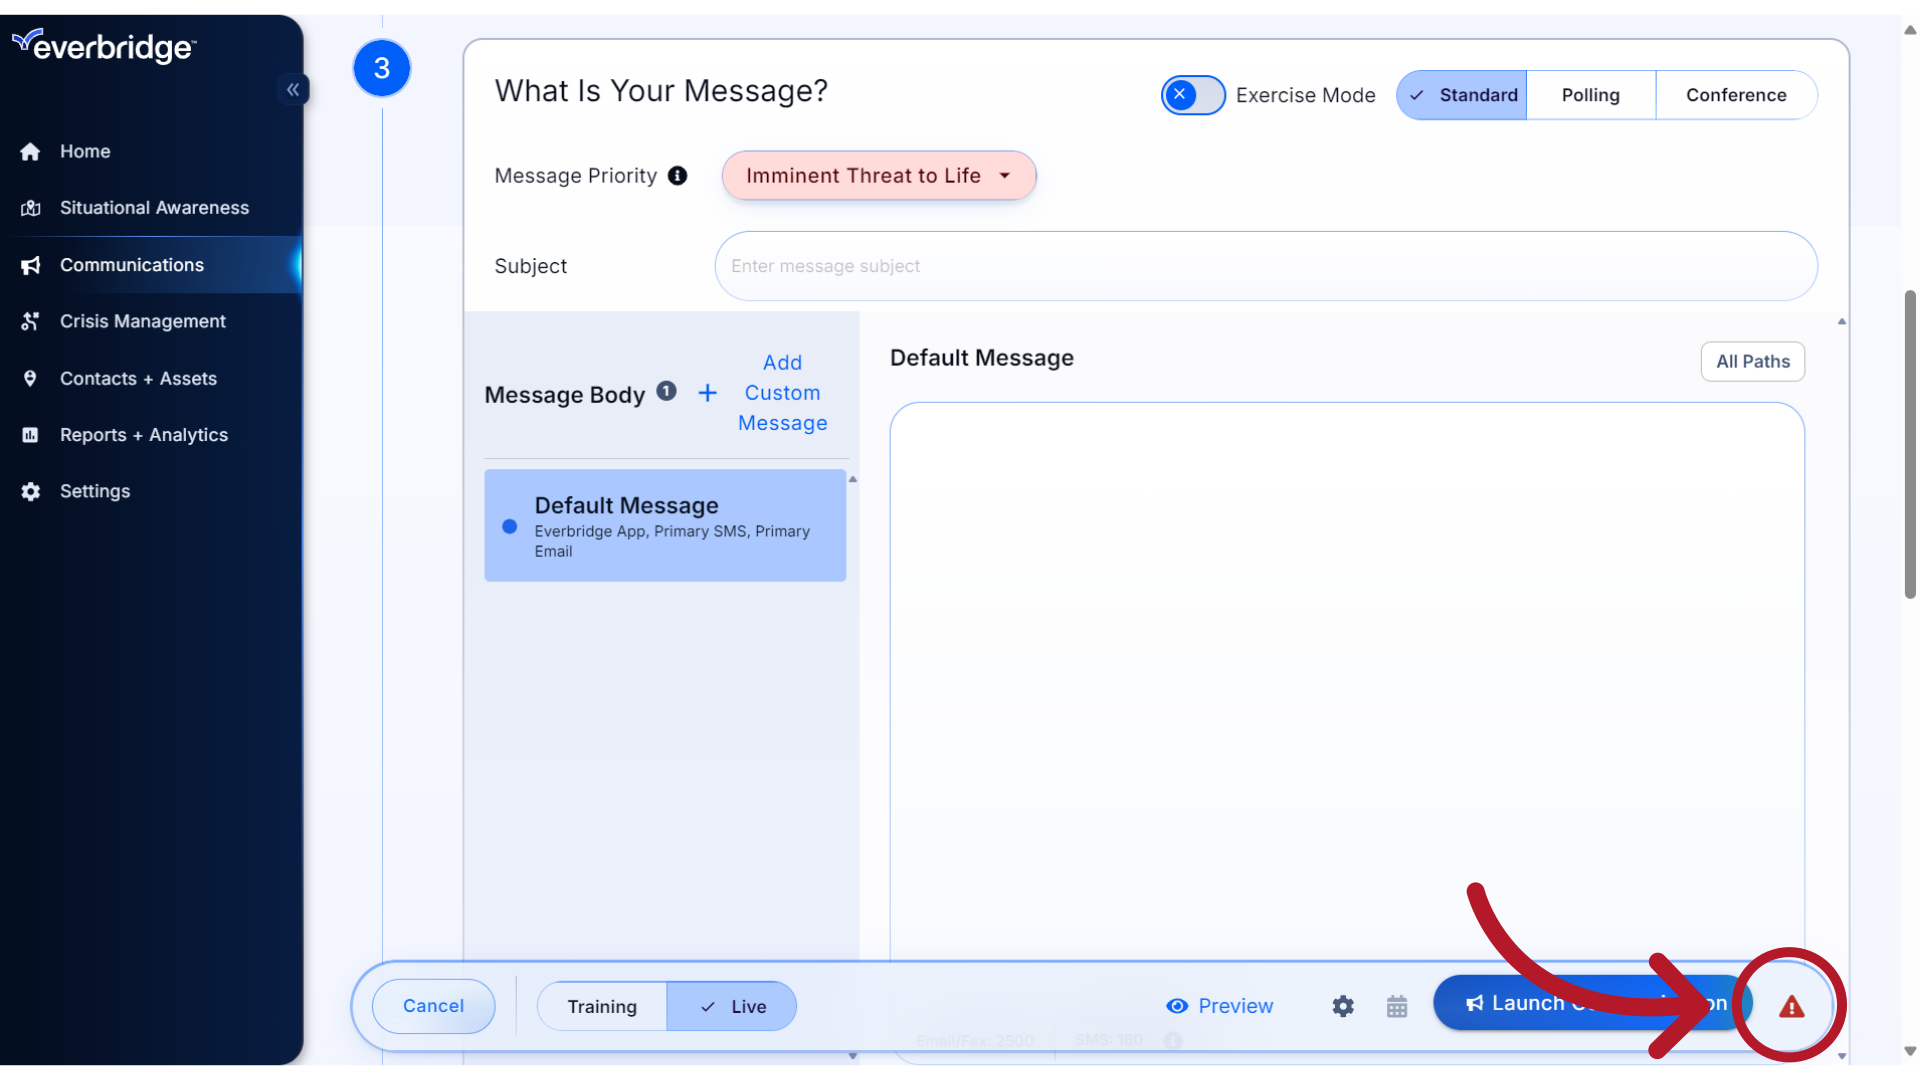
A red hazard icon will appear in the Communications Toolbar to indicate the priority has been selected.
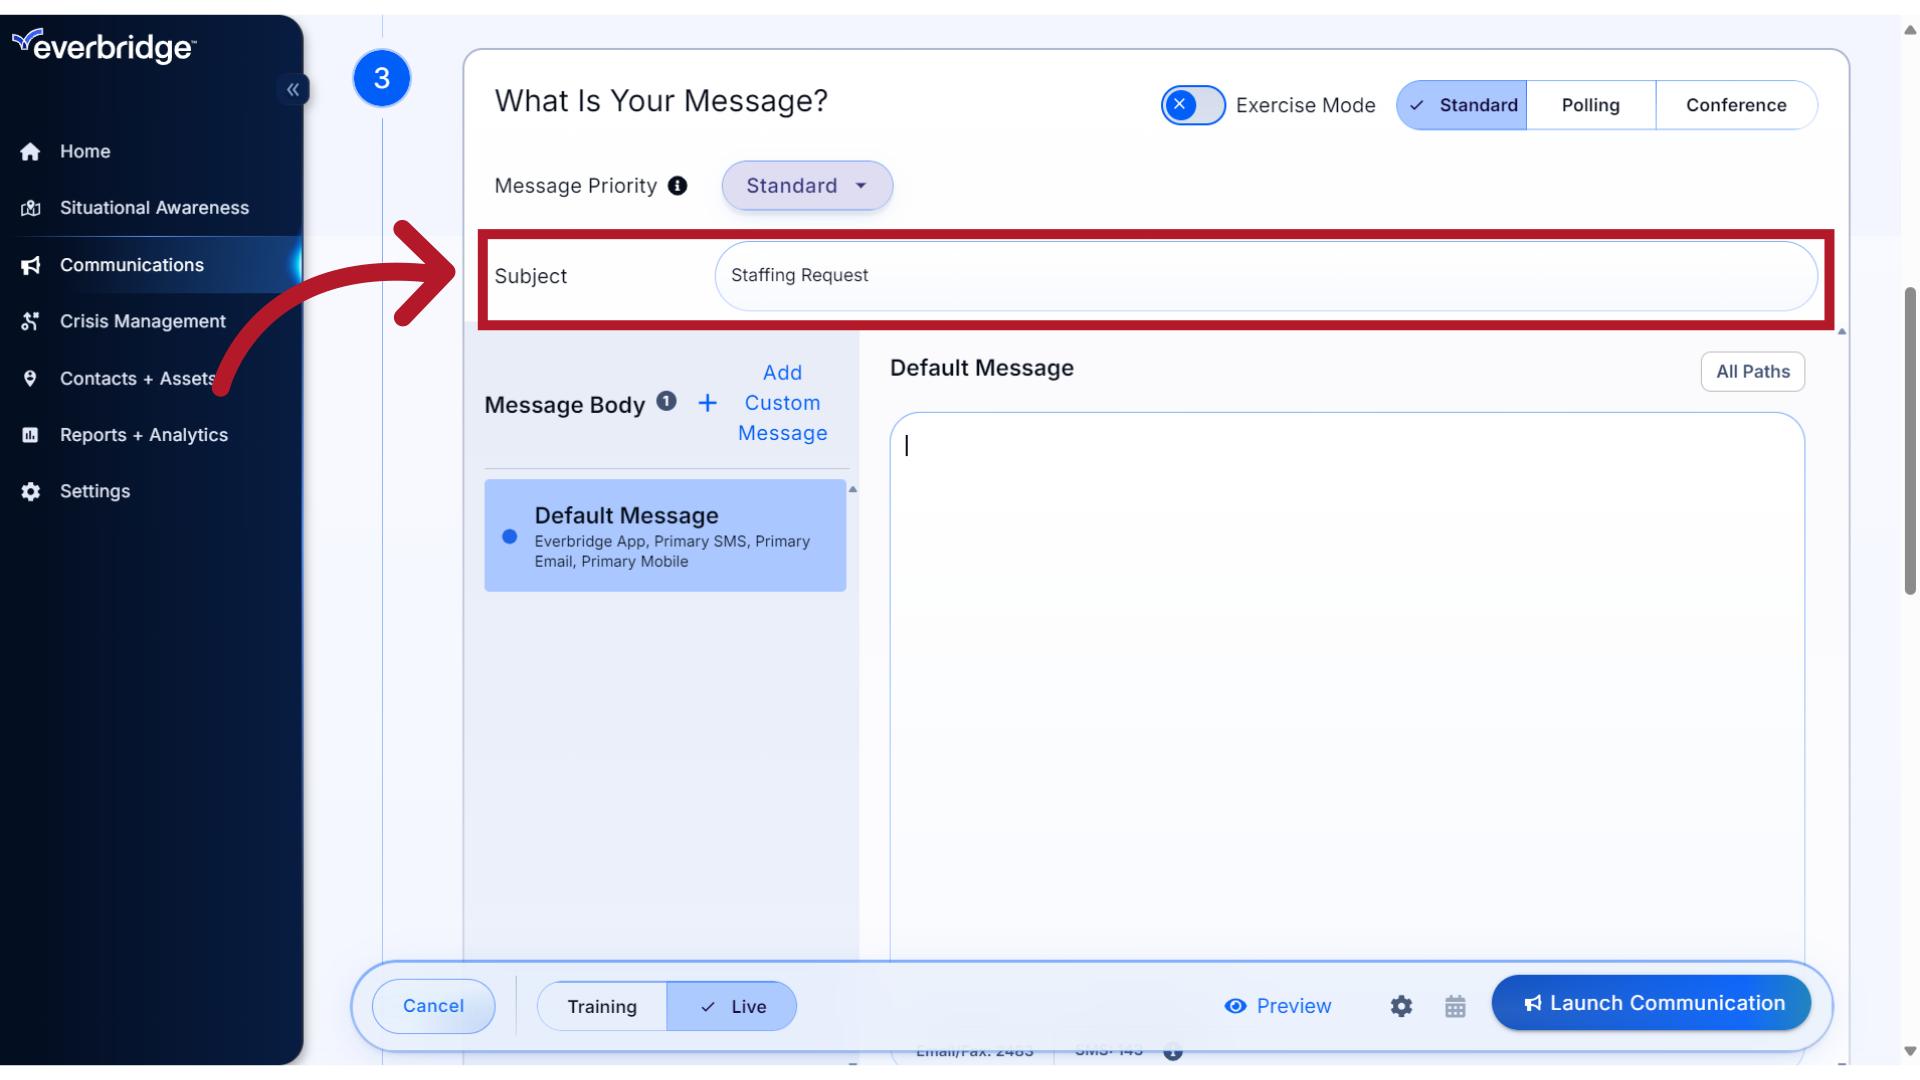
21. Subject
Next, add a subject line for your message
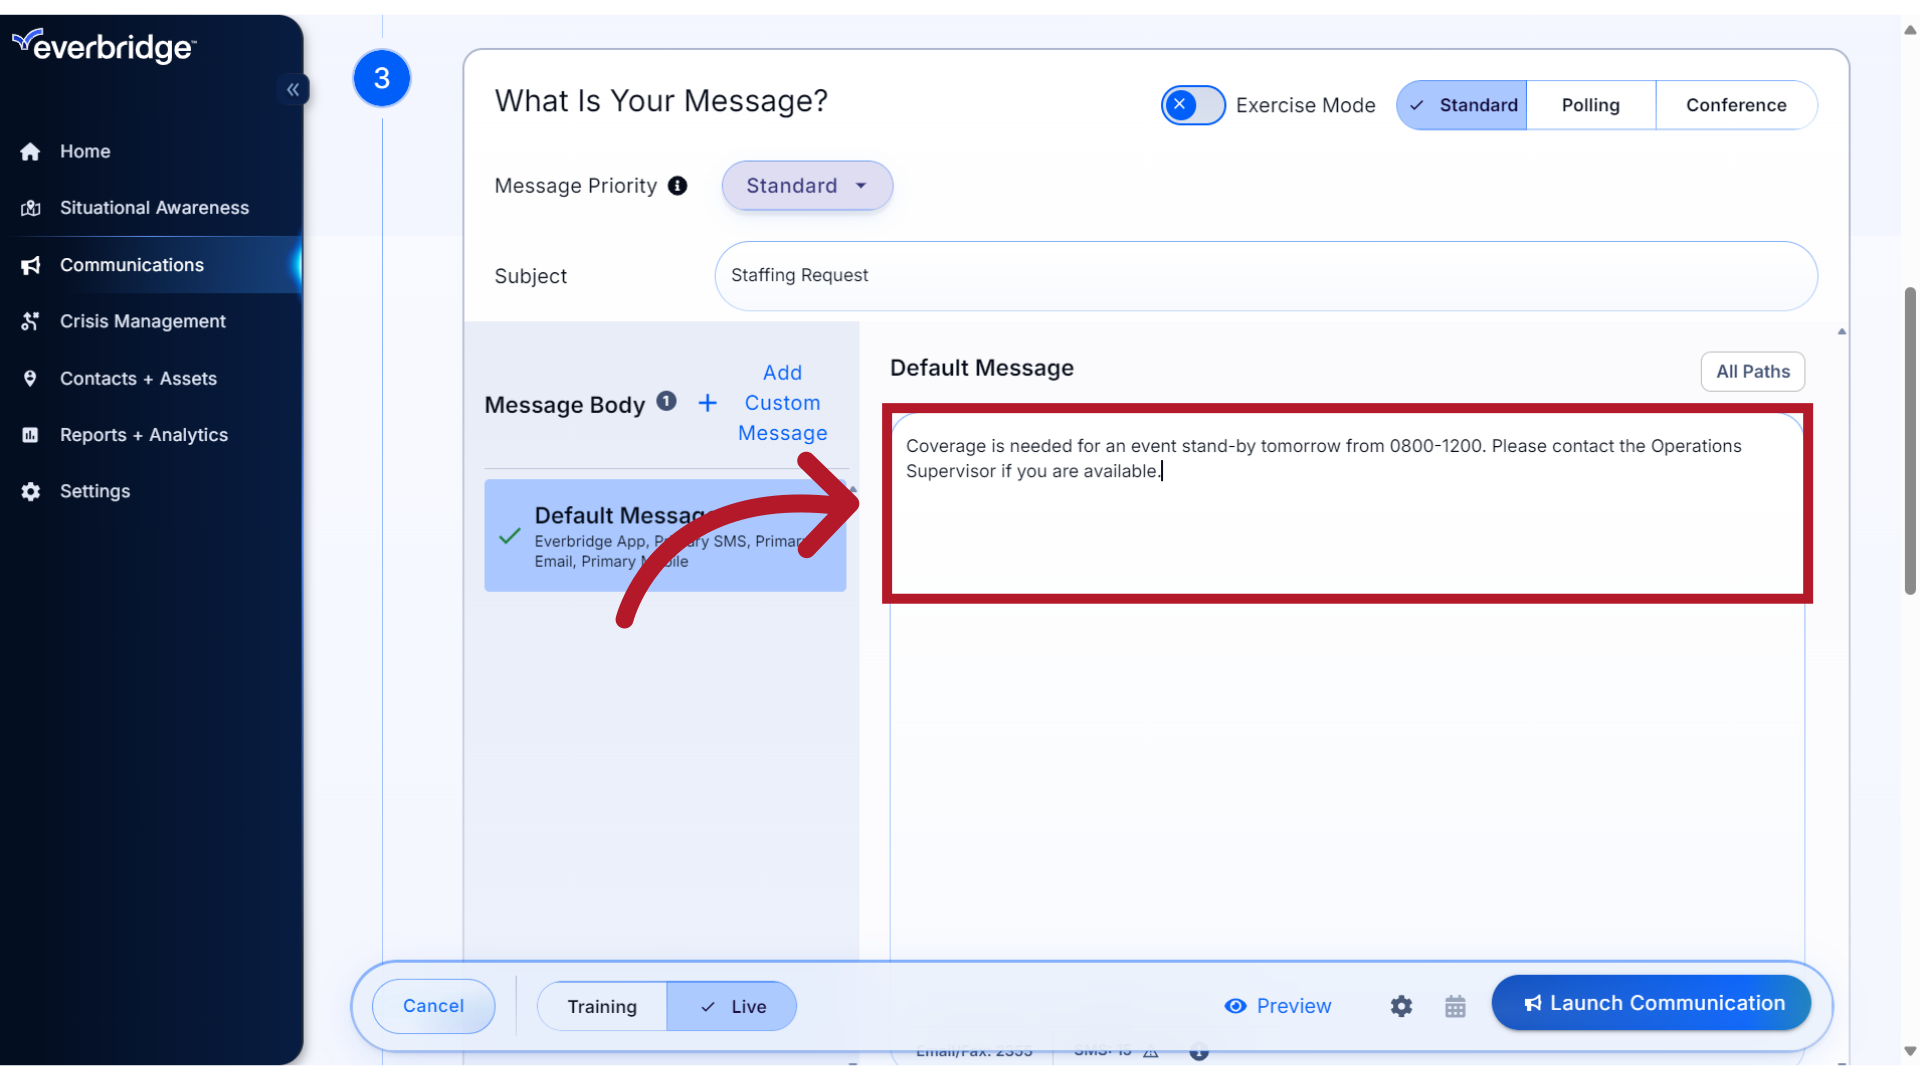
22. Message
and add your default message content that will be delivered to all paths.
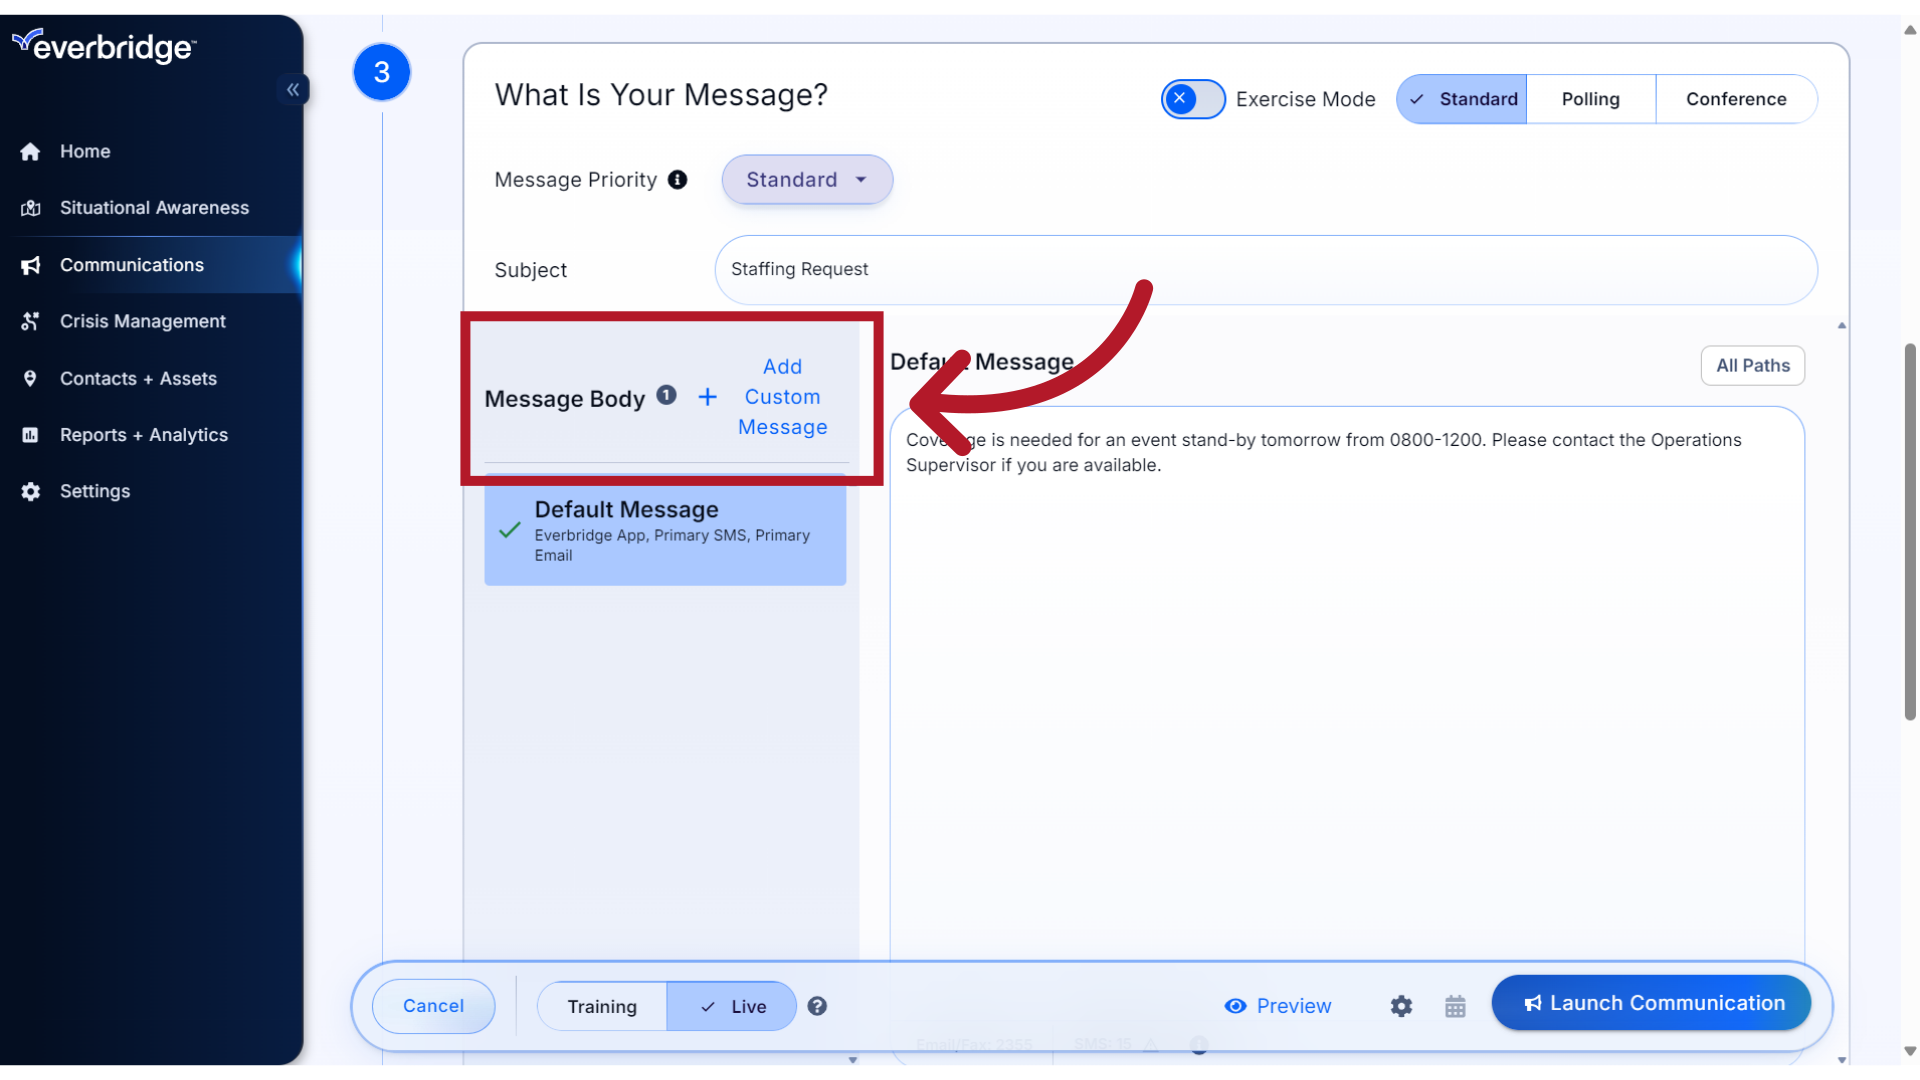
23. Custom Message
Optionally, you can enhance your message by creating custom content that is appropriate for a specific delivery path. For example, you may want to send a brief message that is appropriate for SMS and phone calls, but one that has additional content and formatting for email and mobile app paths. To add, Click Add Custom Message.
24. Select
Select the delivery path for which you would like to define customized content and click Save.
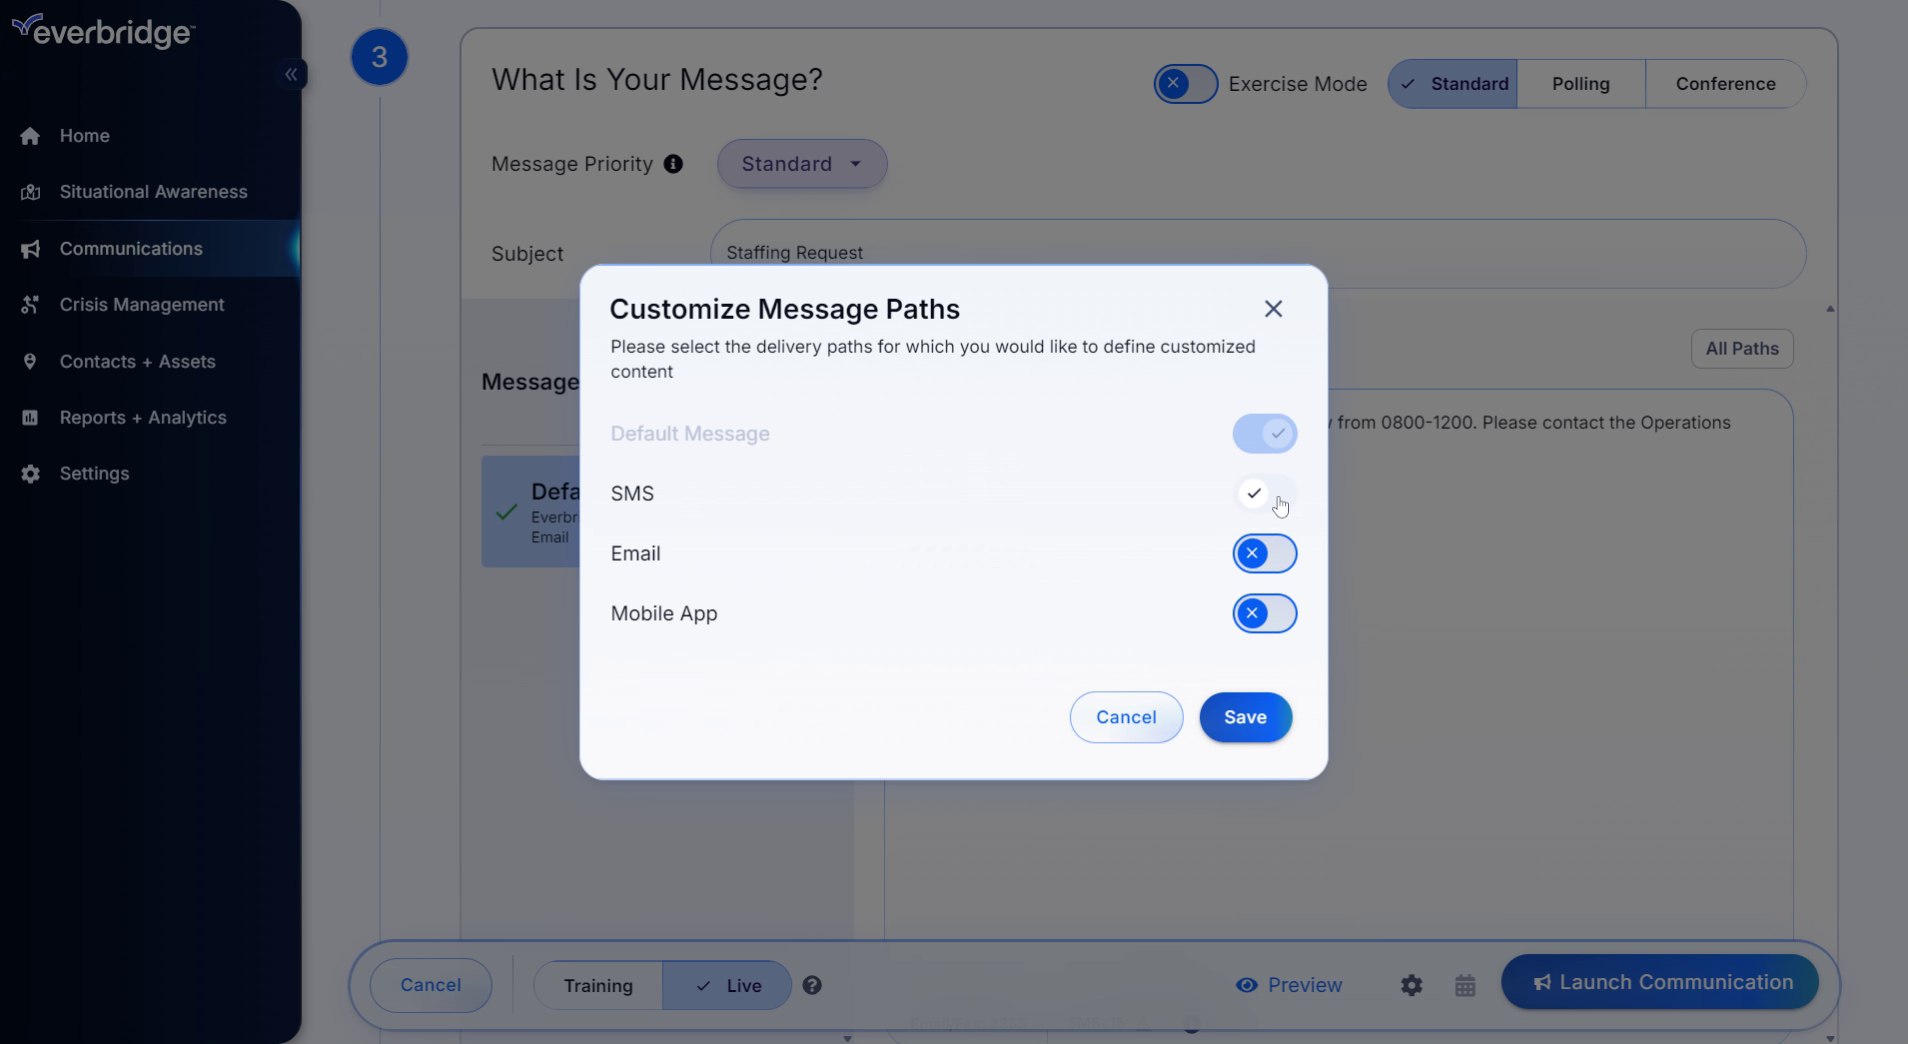
25. Custom Paths
The selected paths will display.
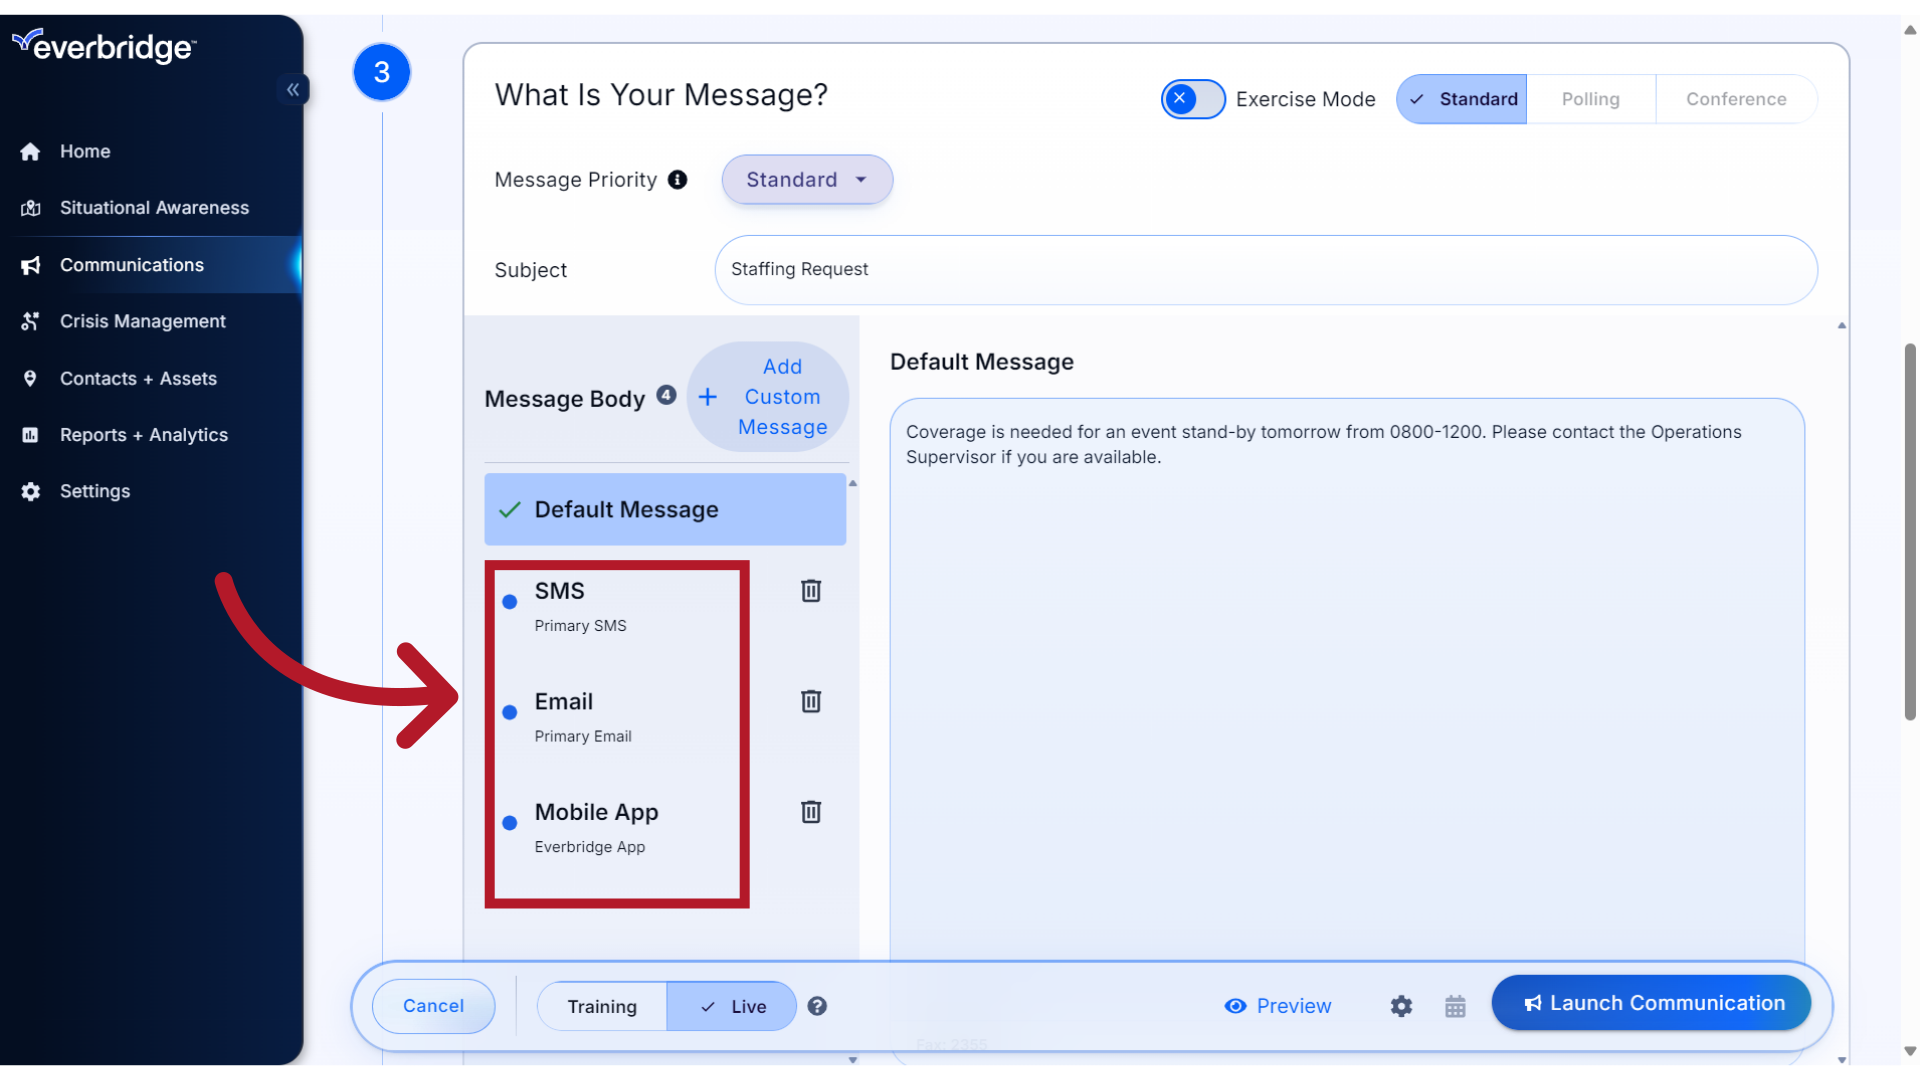
26. Select
Select the path to add your custom content.
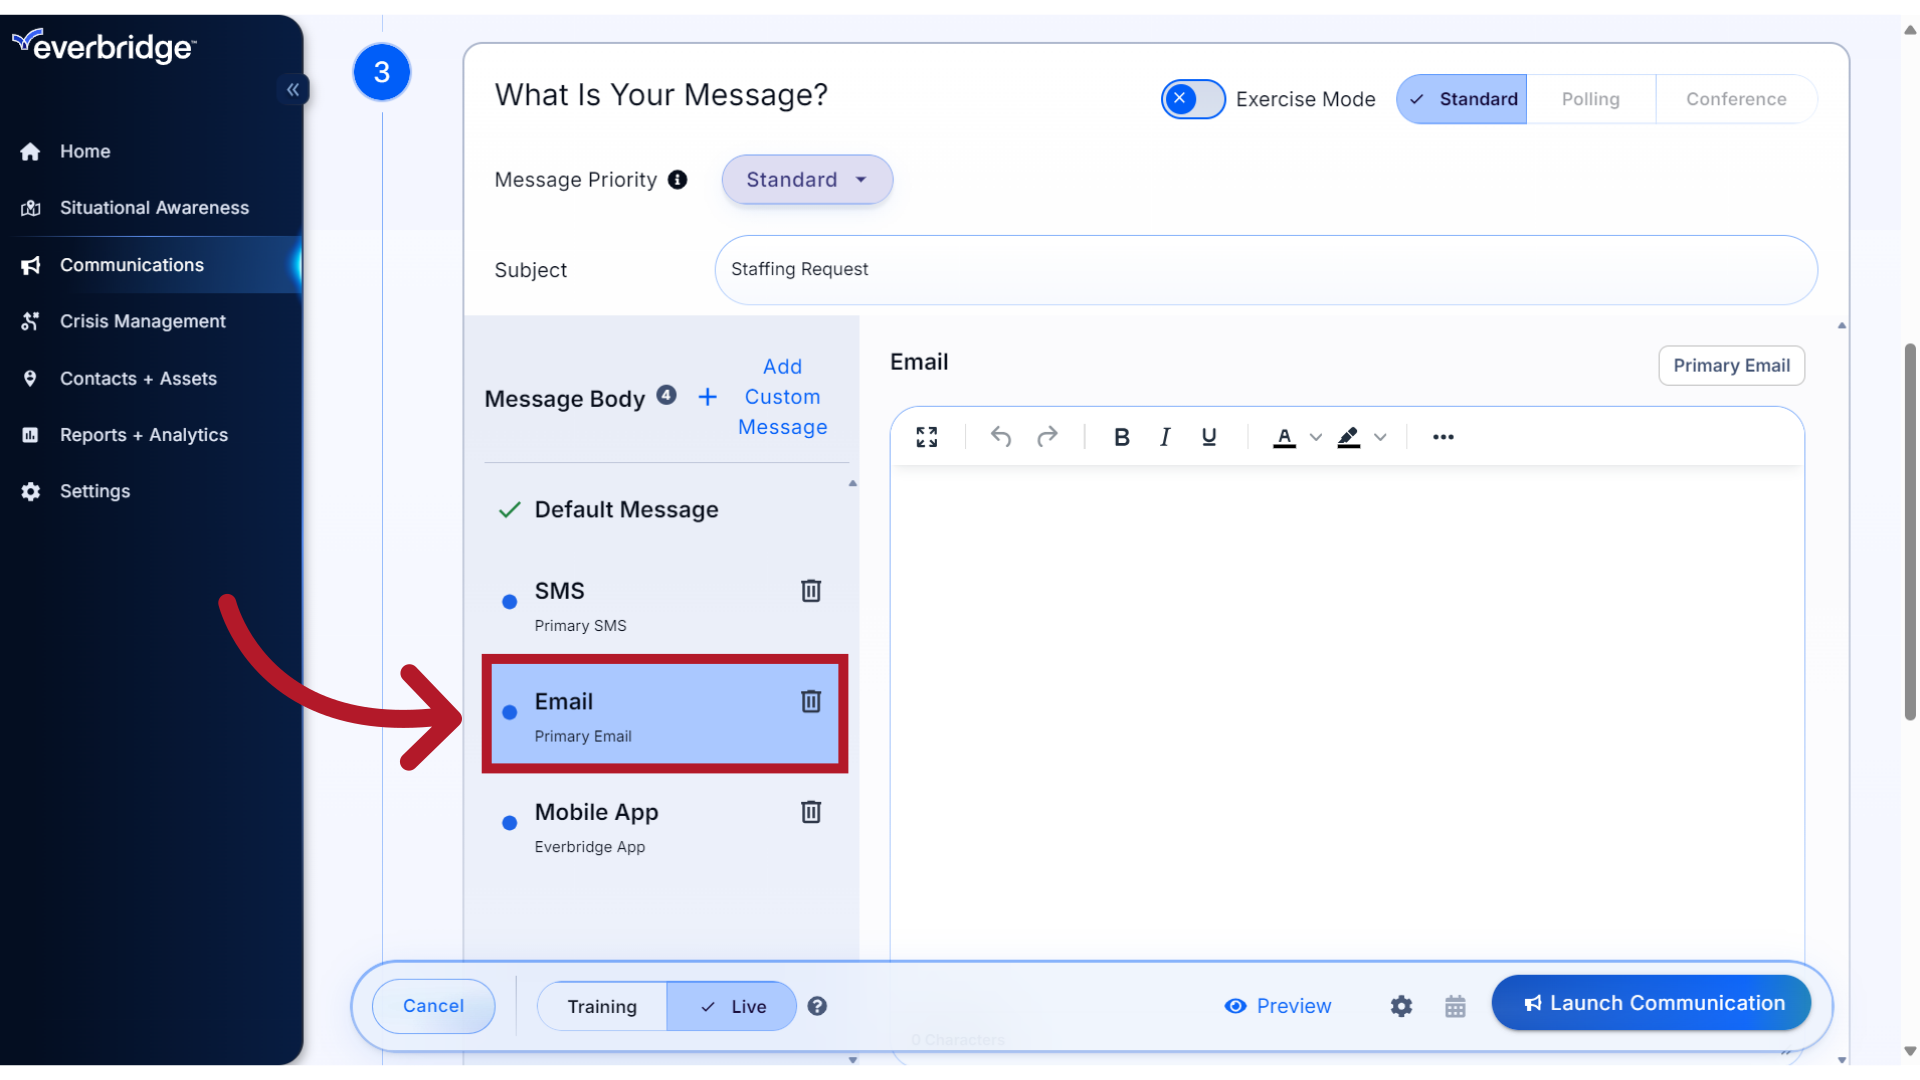
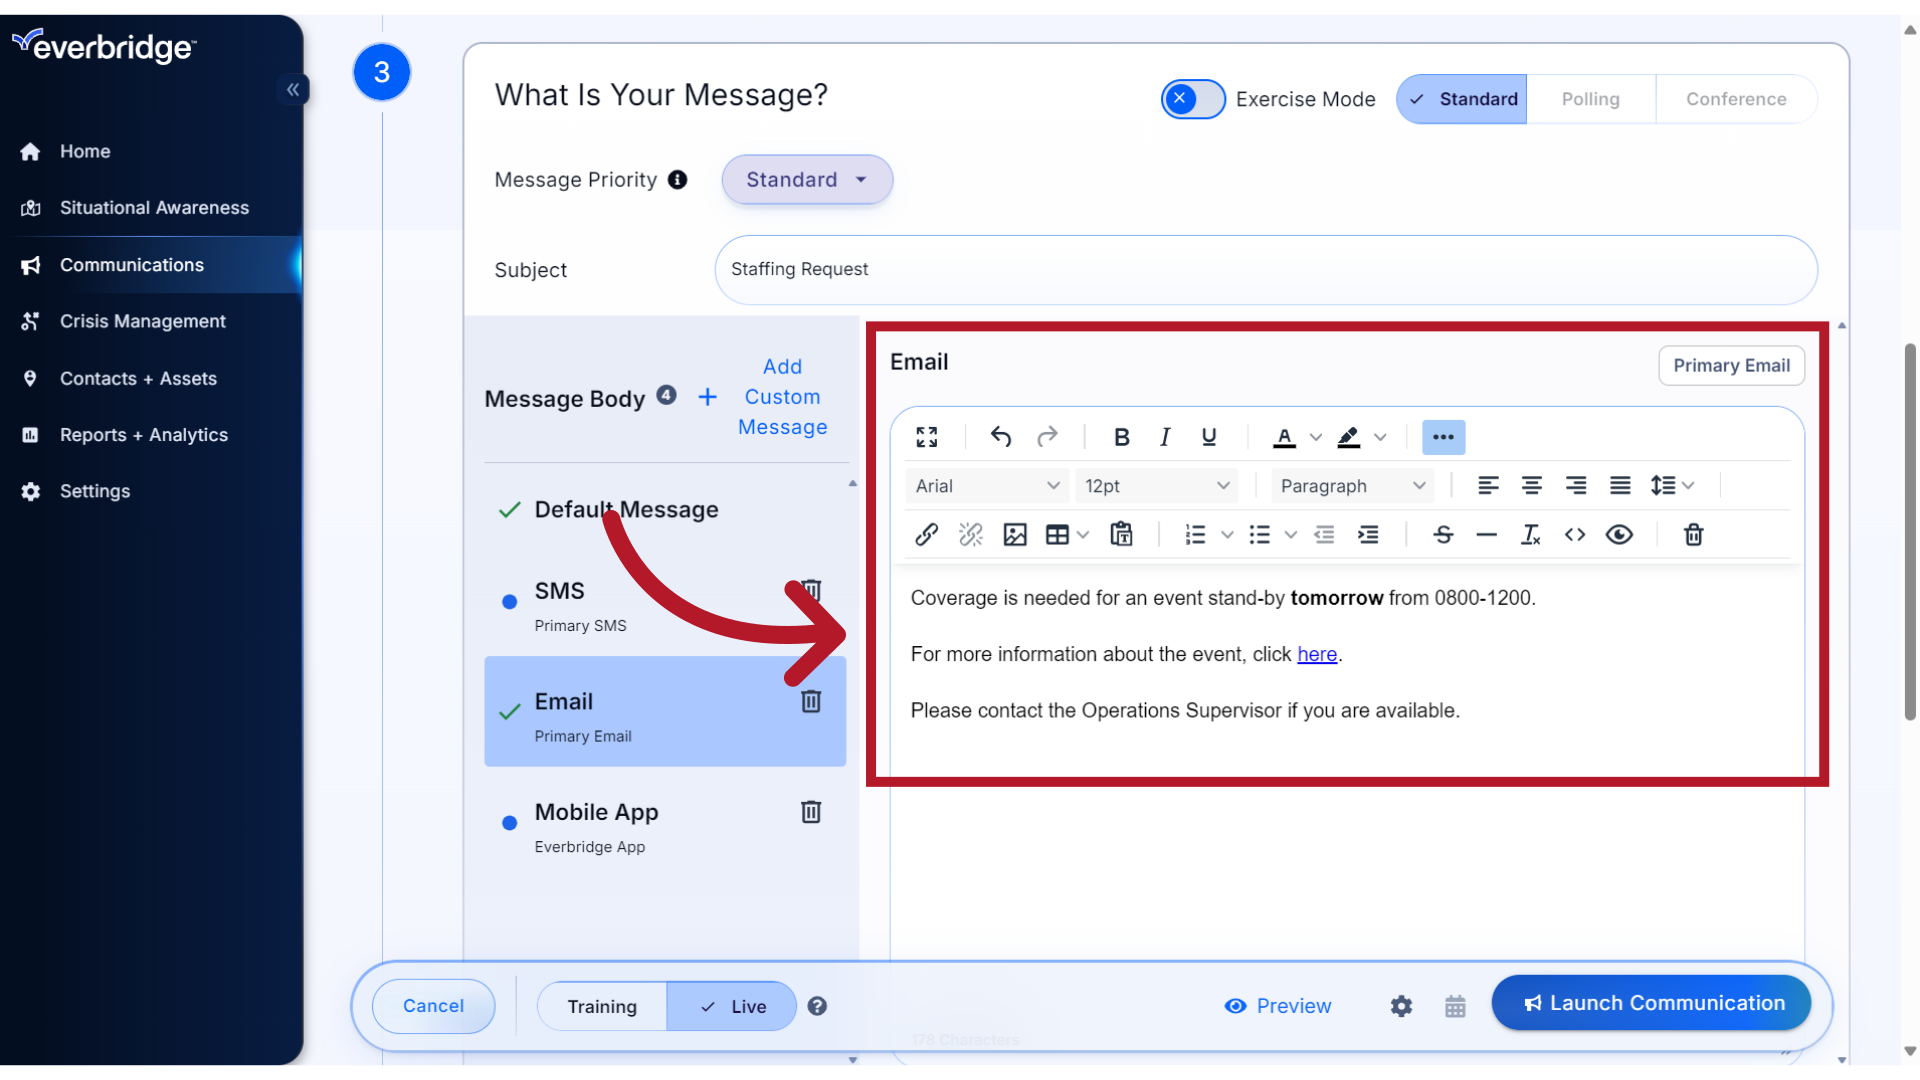
27. Email
In this example, we have added formatted content specifically for email recipients. Repeat the step for each path selected for customization.
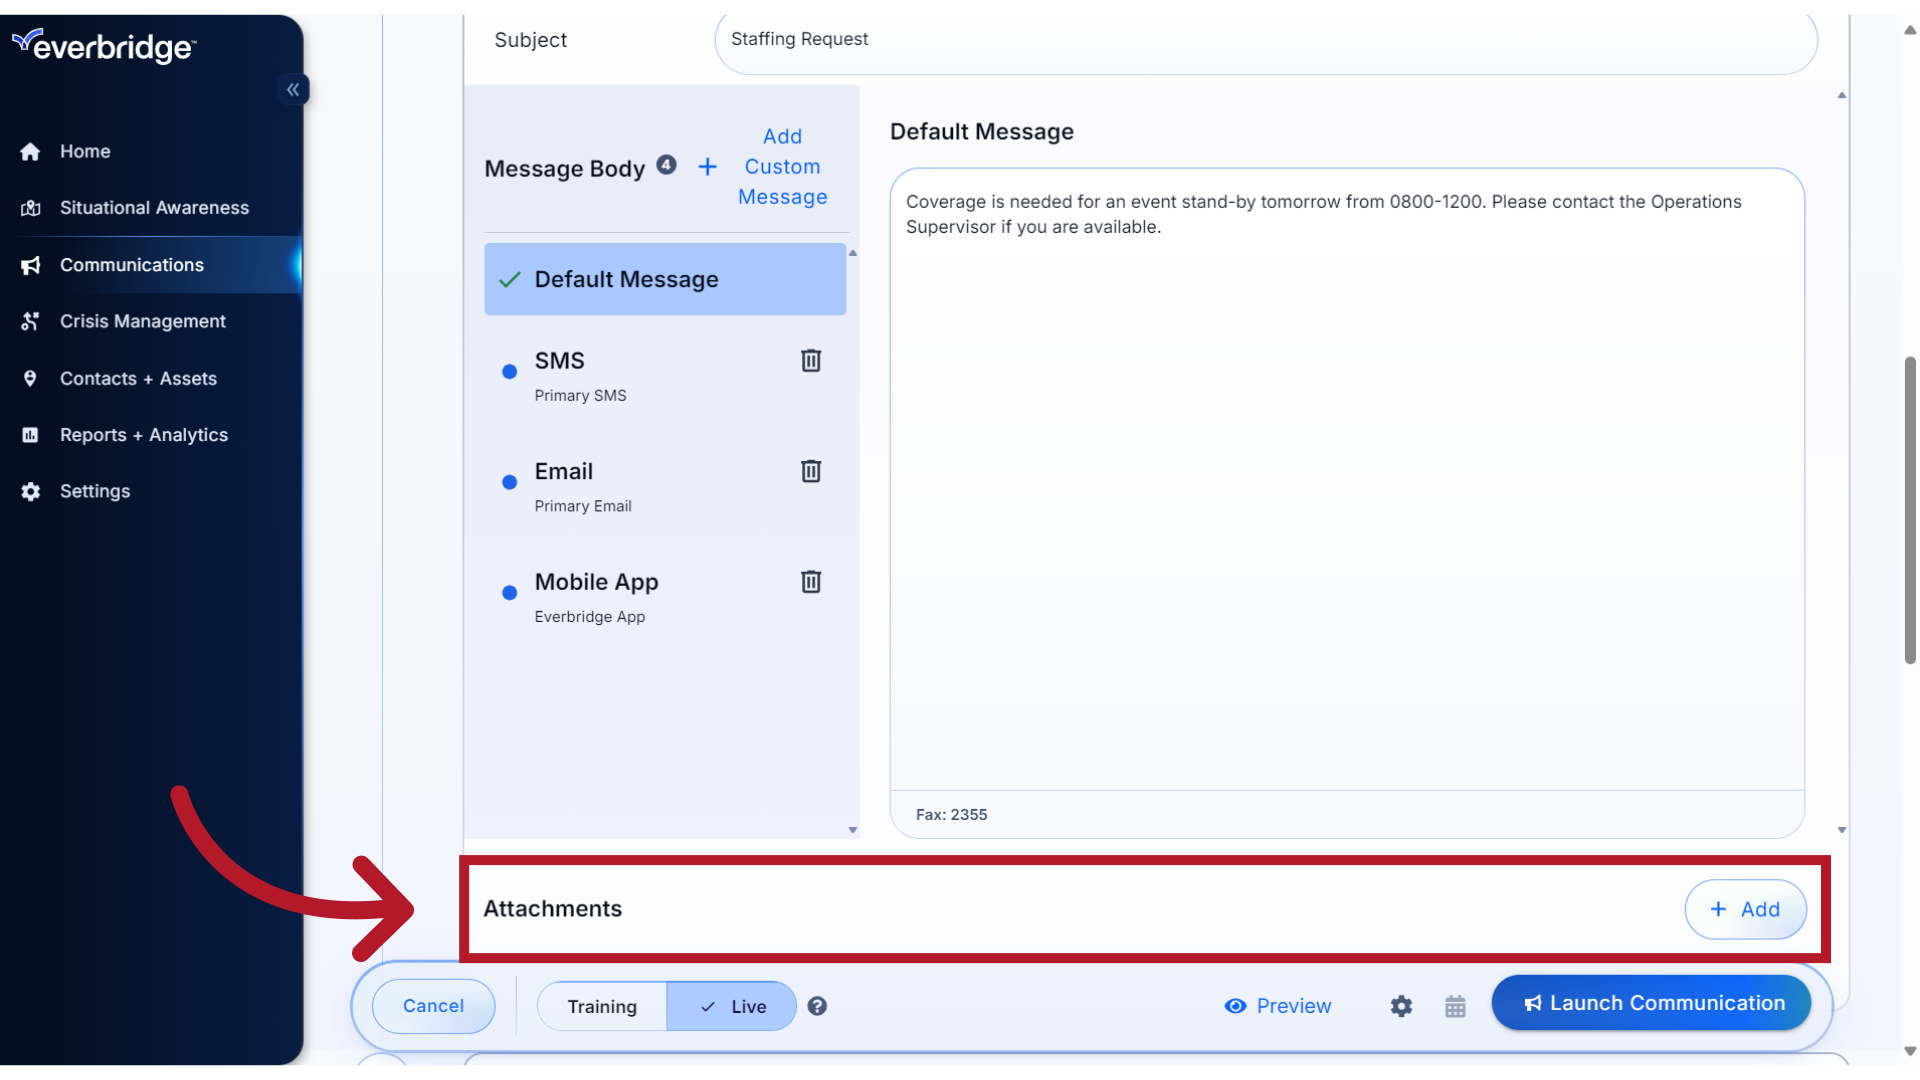
28. Attachments
You can include up to five attachments to your message. Email, Everbridge Mobile App and Fax delivery paths support attachments. If you would like to include, click "Add".
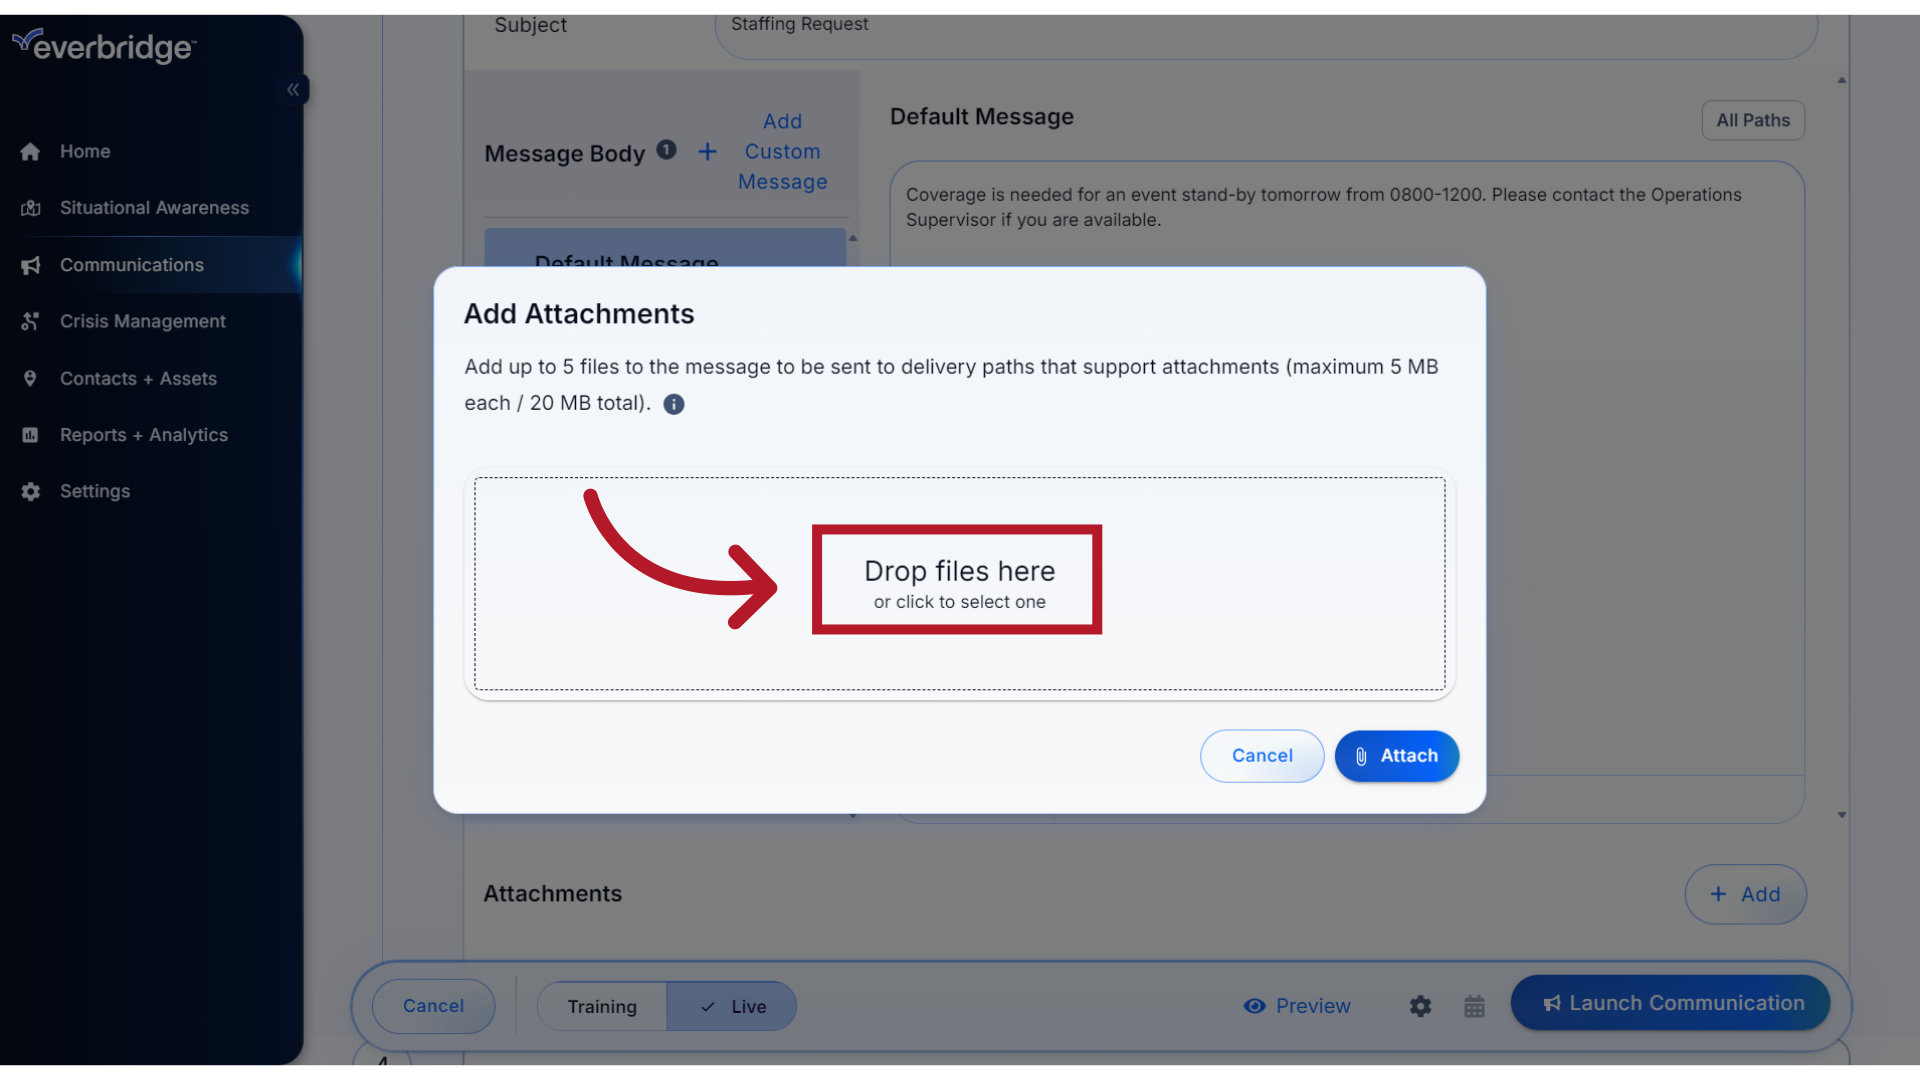
29. Attach
Drag and drop, or click to select, the file(s) you would like to add. If the size of all attachments is larger than 2 MB, they are sent as a link in the message.
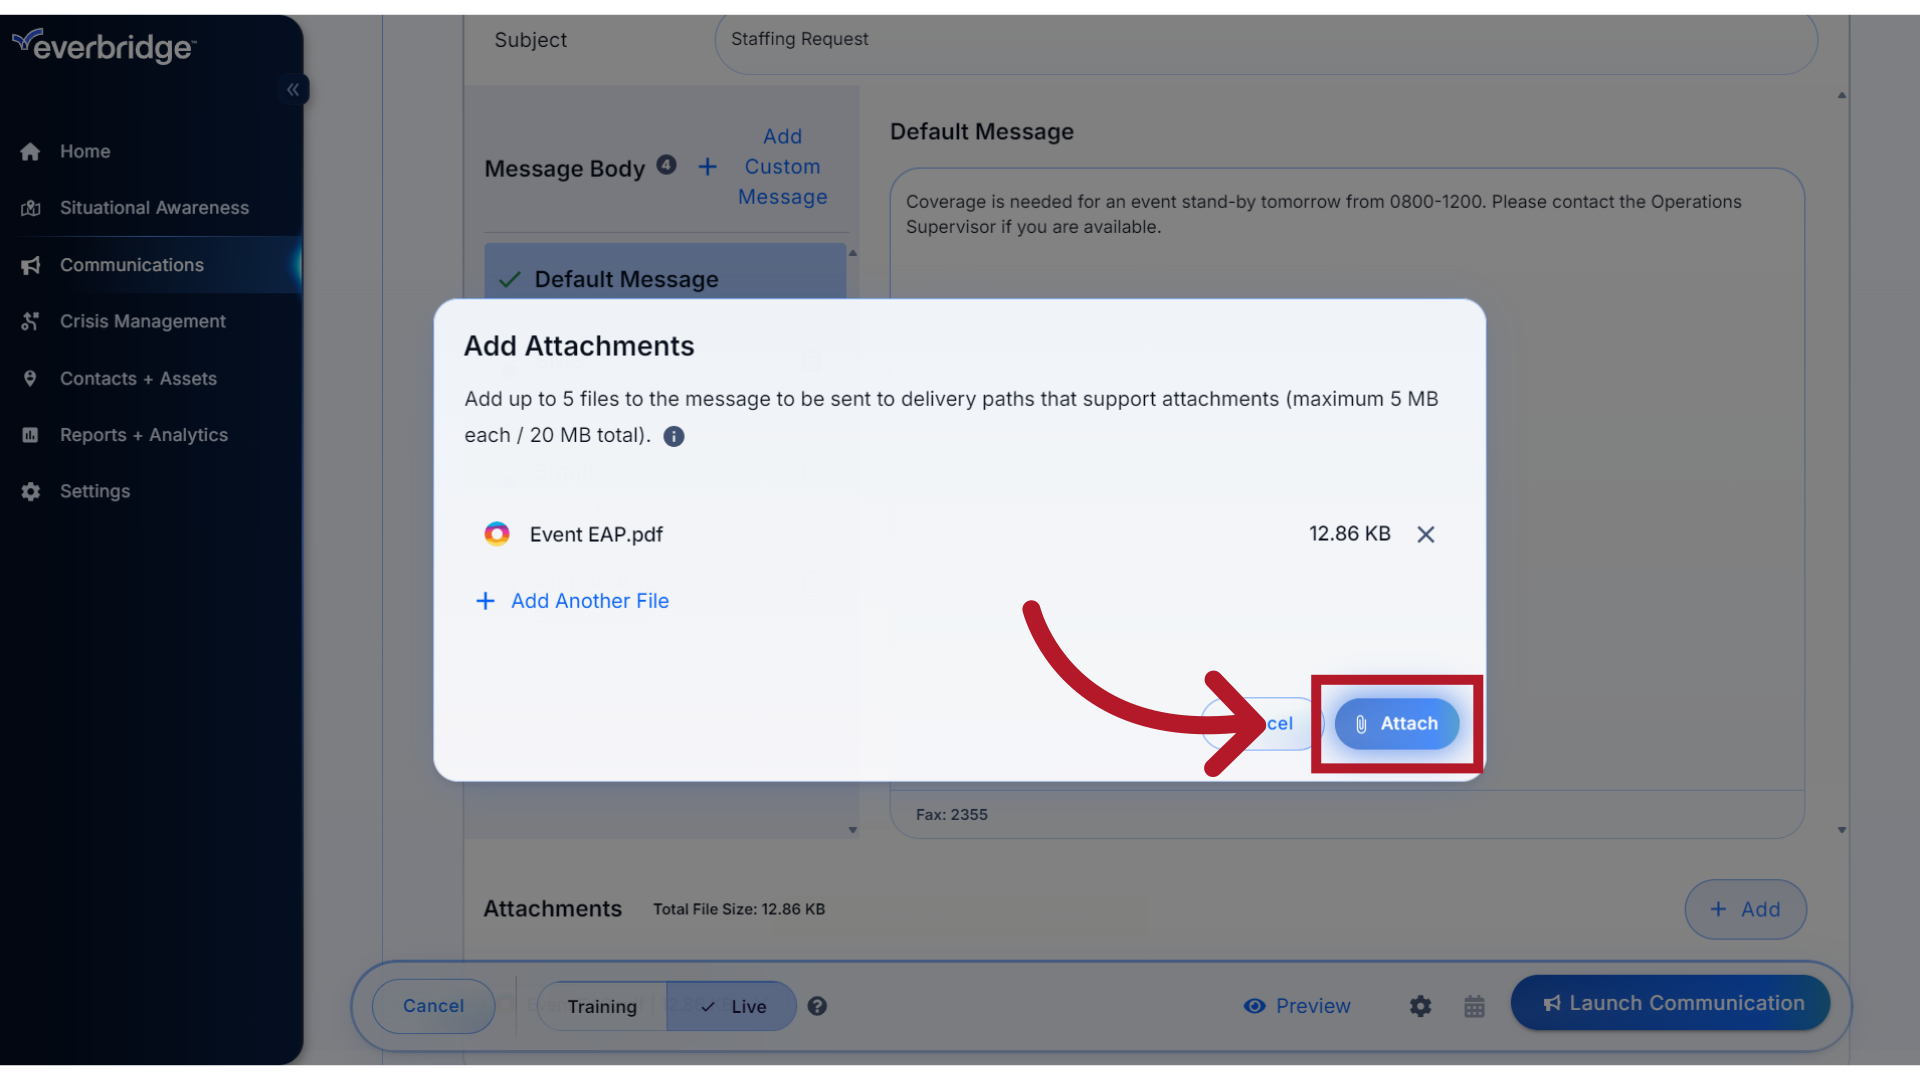
30. Attach
Click "Attach" to continue.
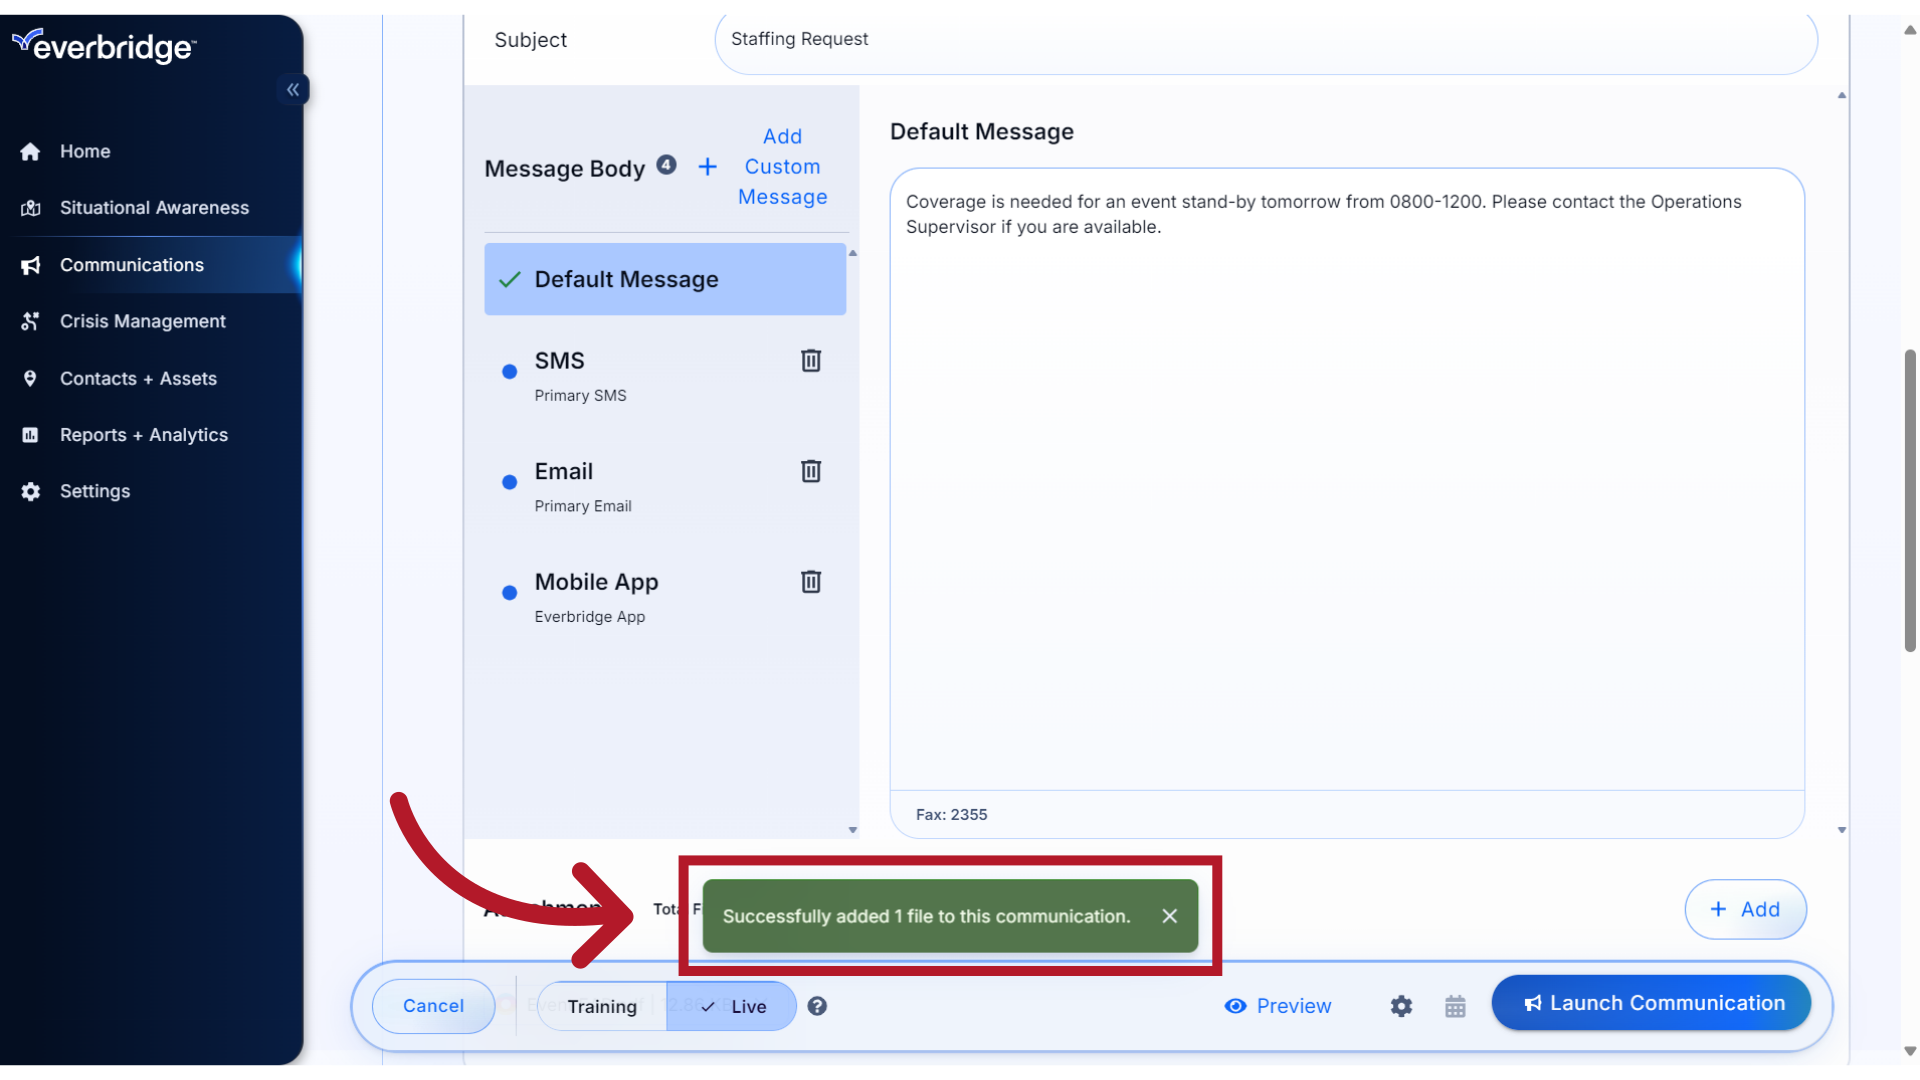
31. Success
A confirmation that the content has been successfully added will display.
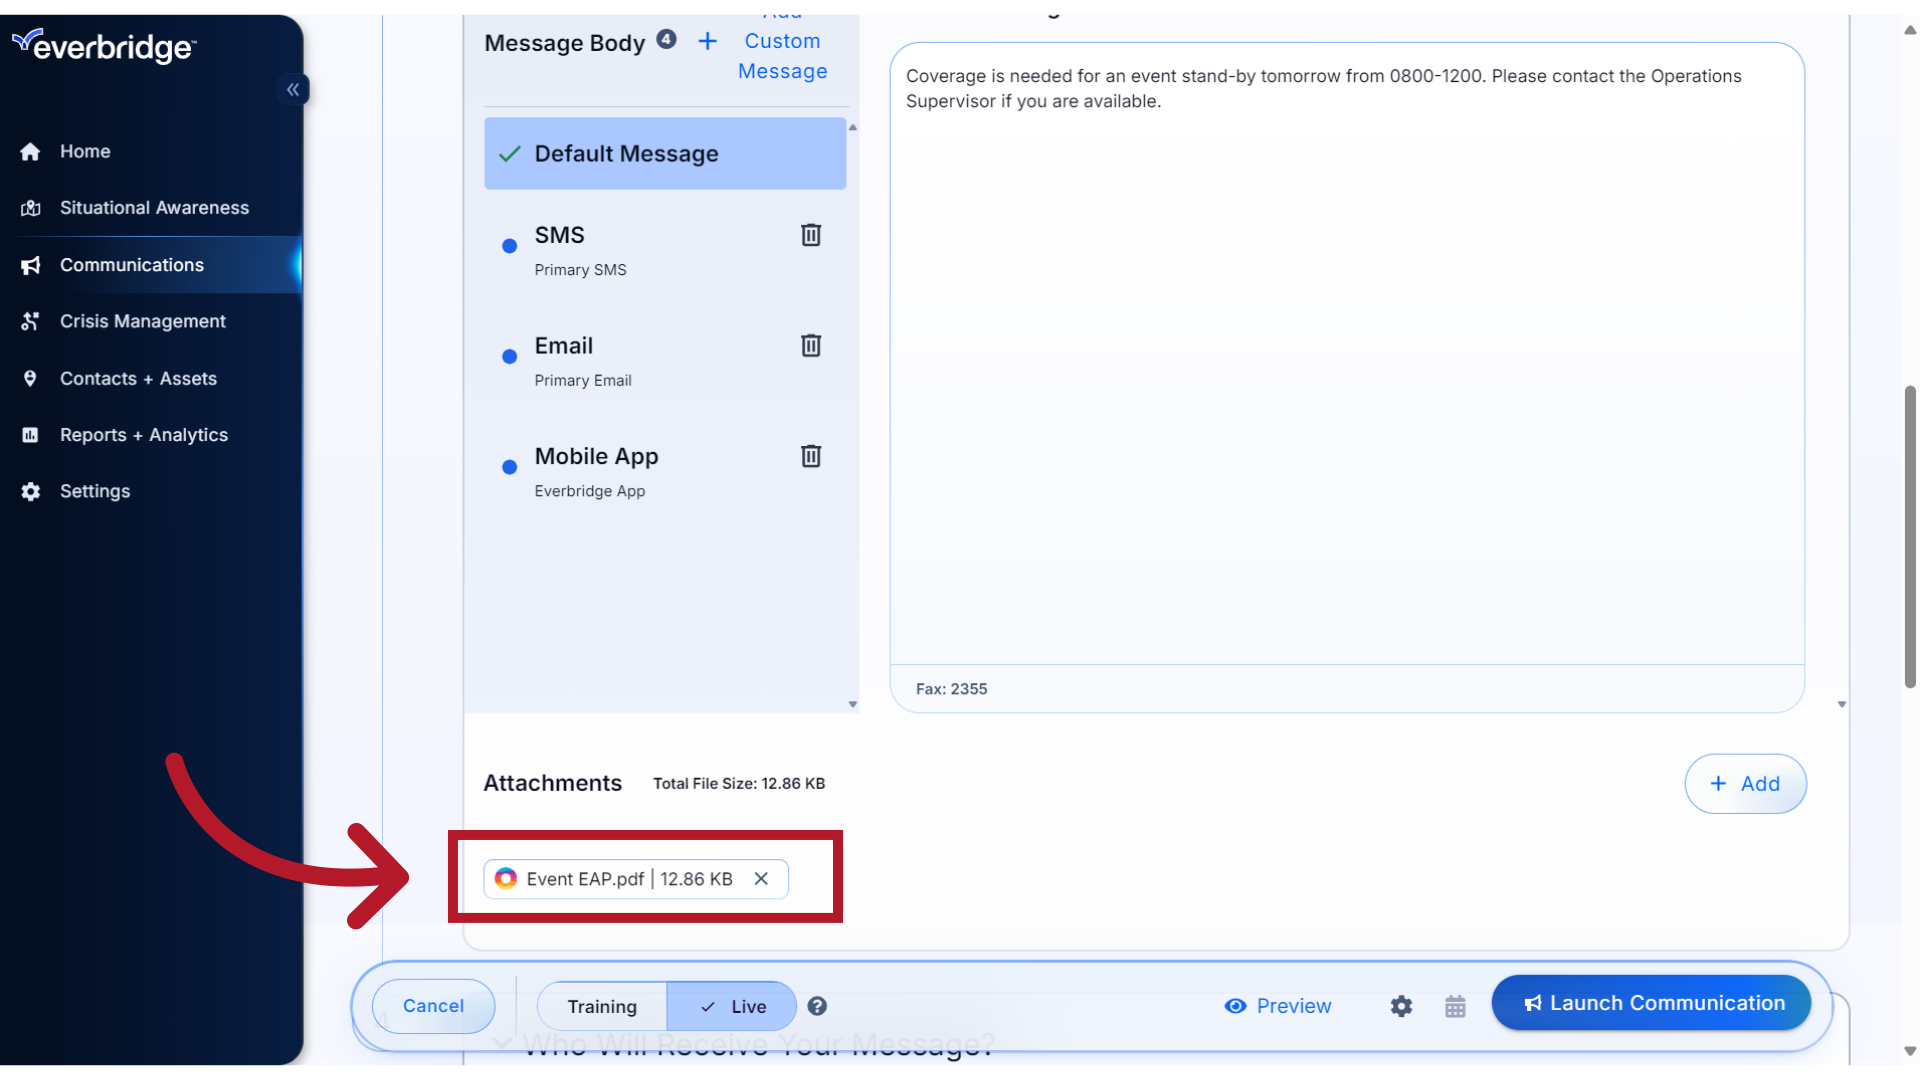
32. Attachments
And you can see any files that have been attached. You are now ready to continue with launching your Communication.
33. Help
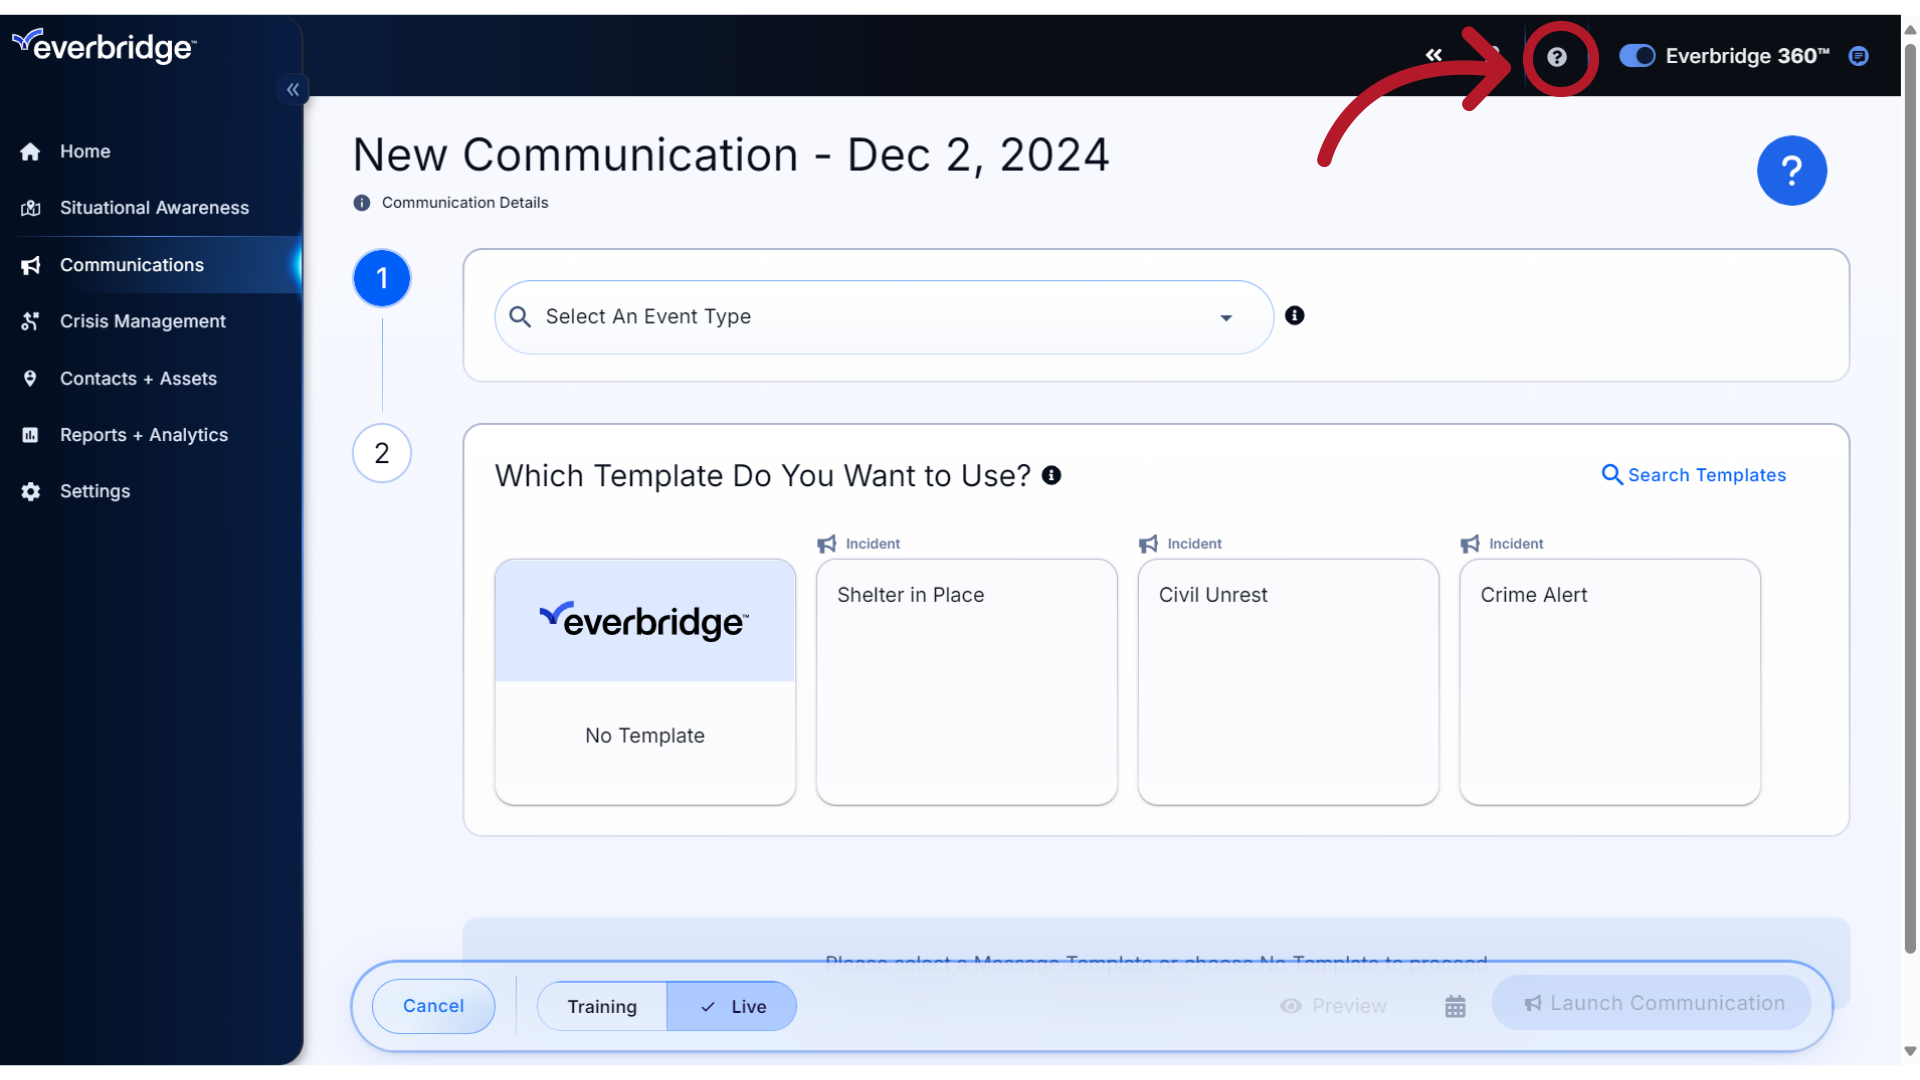
For more information about any of the fields or selections shown in the Communications form, click the icon to access Online Support.
Through this guide, you have learned how to incorporate the options that are available for customizing a Communication prior to launching your message. Thank you for watching!