Topic
How to Launch a Communication Using a Template.
Description
Everbridge 360™ Communications lets you send template-based or ad hoc messages to respond to events impacting your organization and its contacts. In this tutorial we will demonstrate how to launch a message using a preconfigured template configured by your organization for a specific purpose, with prefilled values, settings, and messages.
Go to manager.everbridge.net
1. Navigate
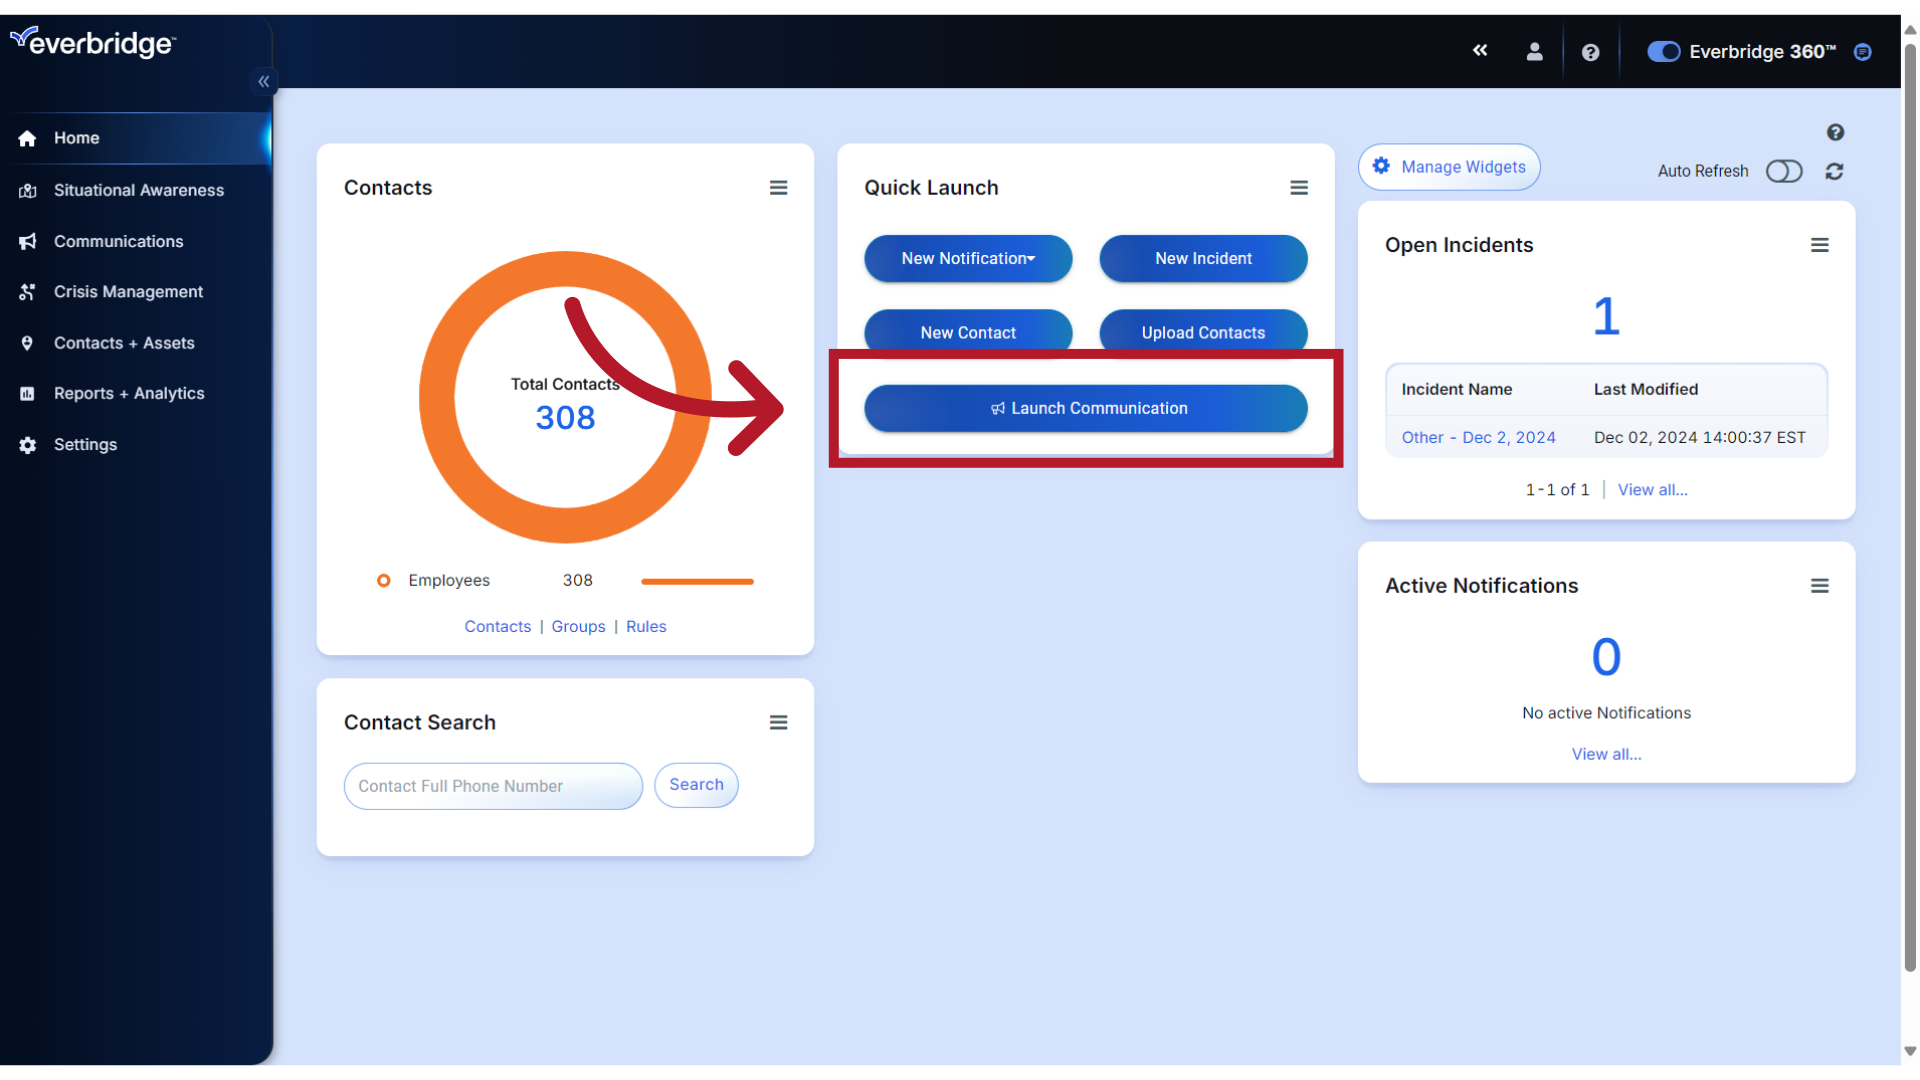
To initiate a message, select Launch Communication from your dashboard's Quick Launch widget
2. Navigate
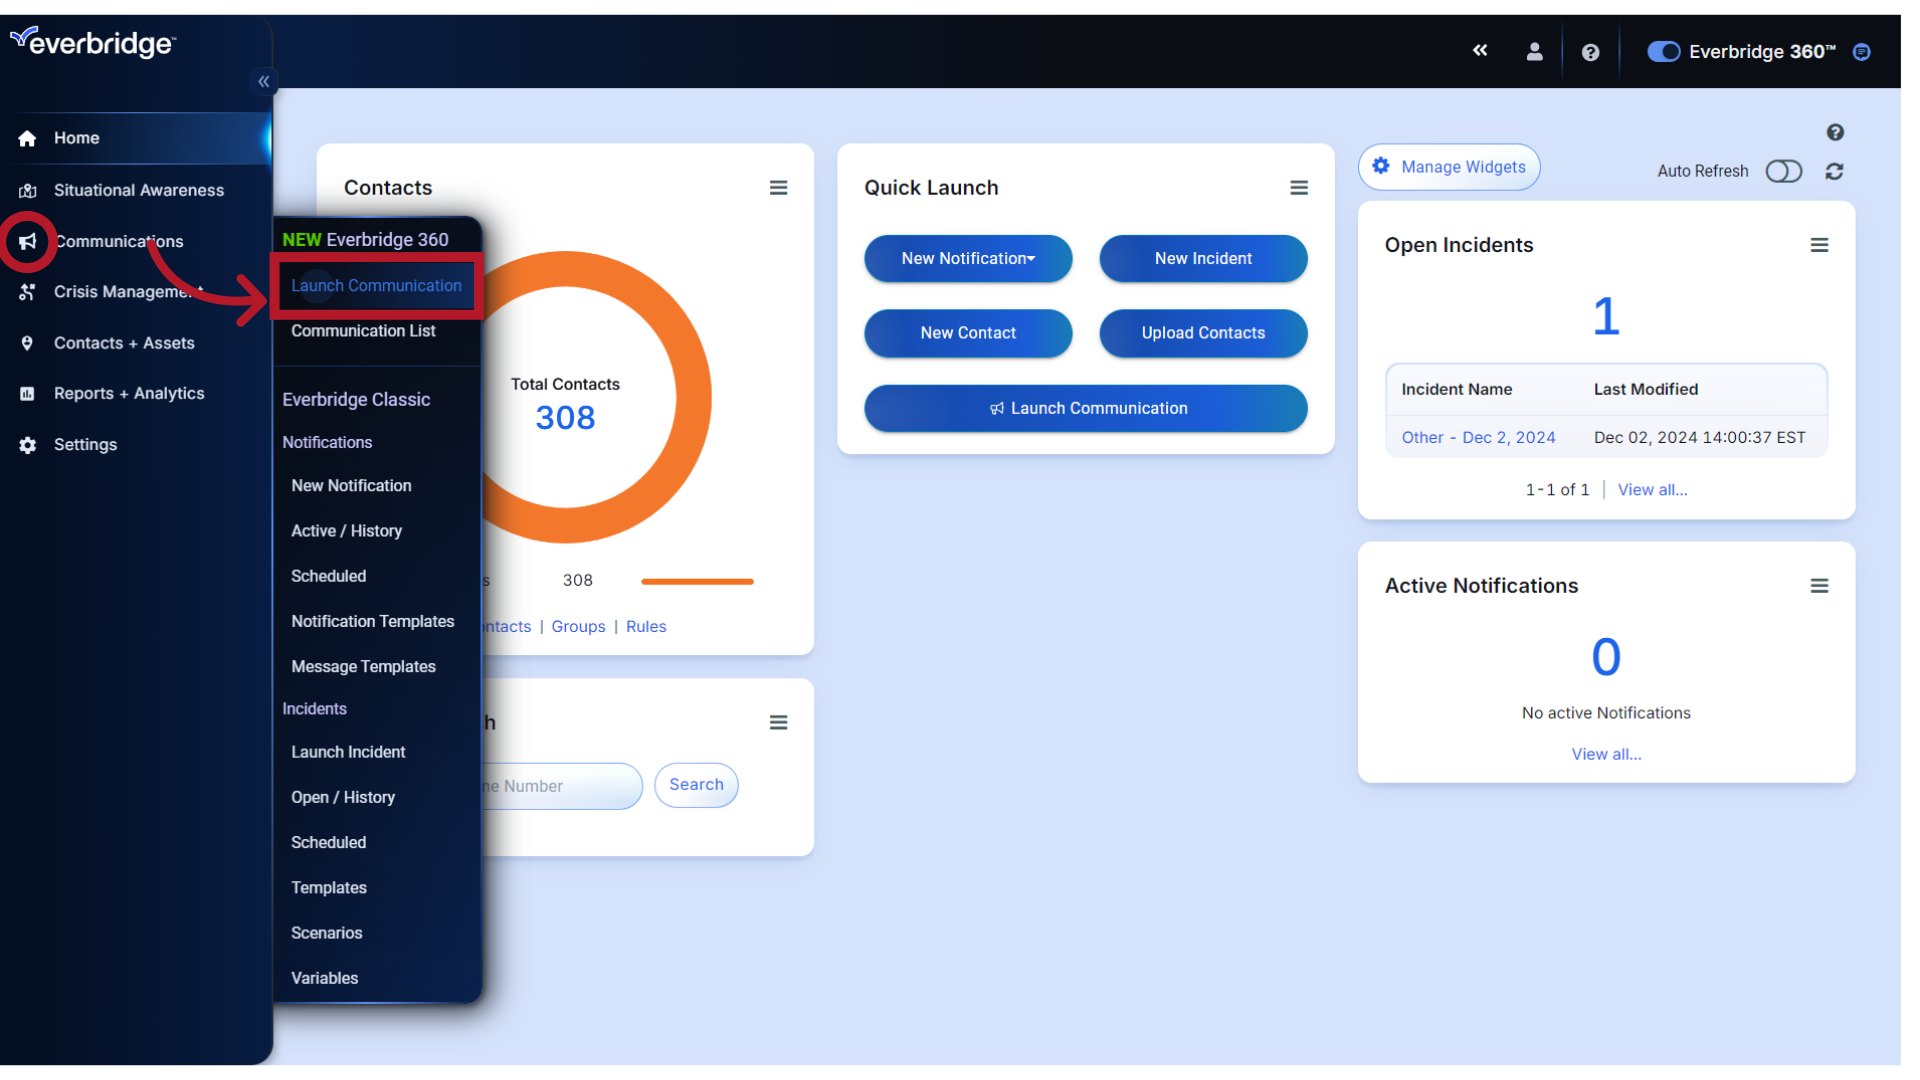
or select Launch Communication from the Communications menu.
3. Form
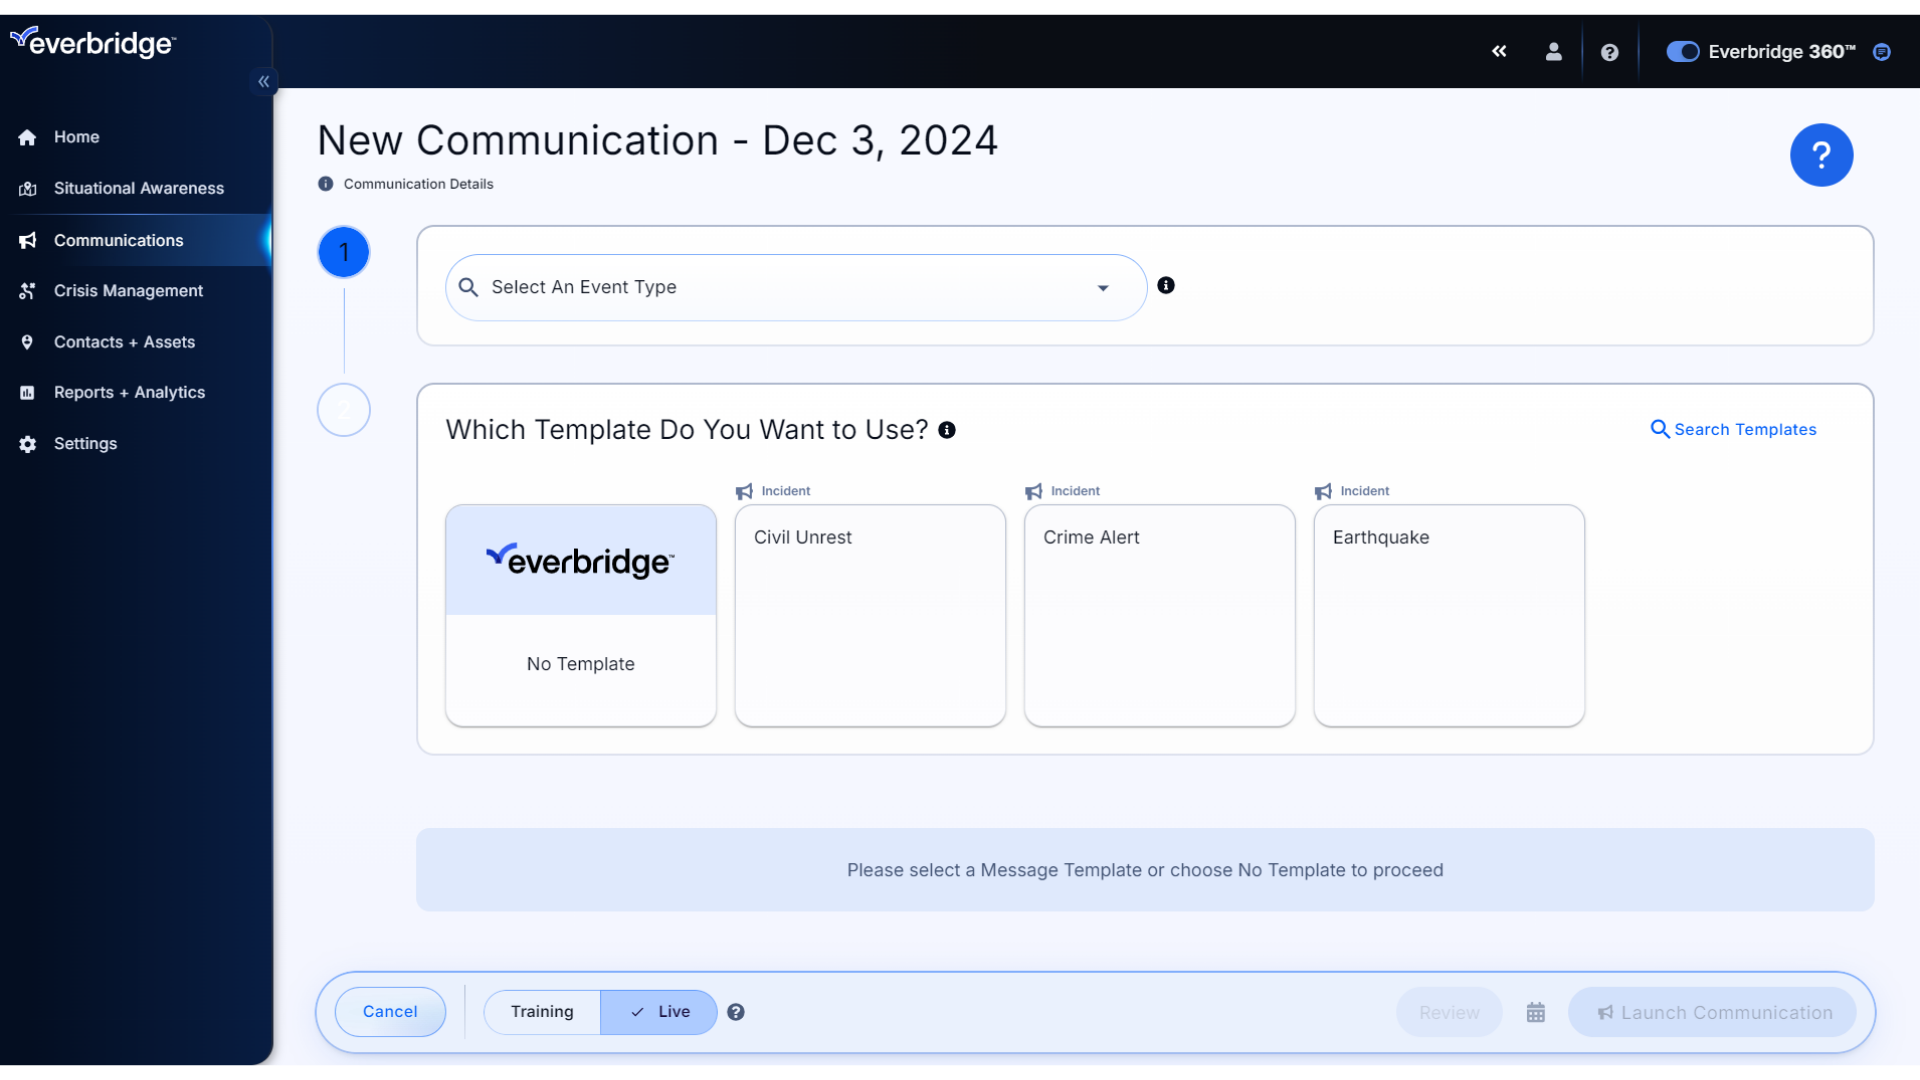
The Launch Communication form is now displayed.
4. Step 1
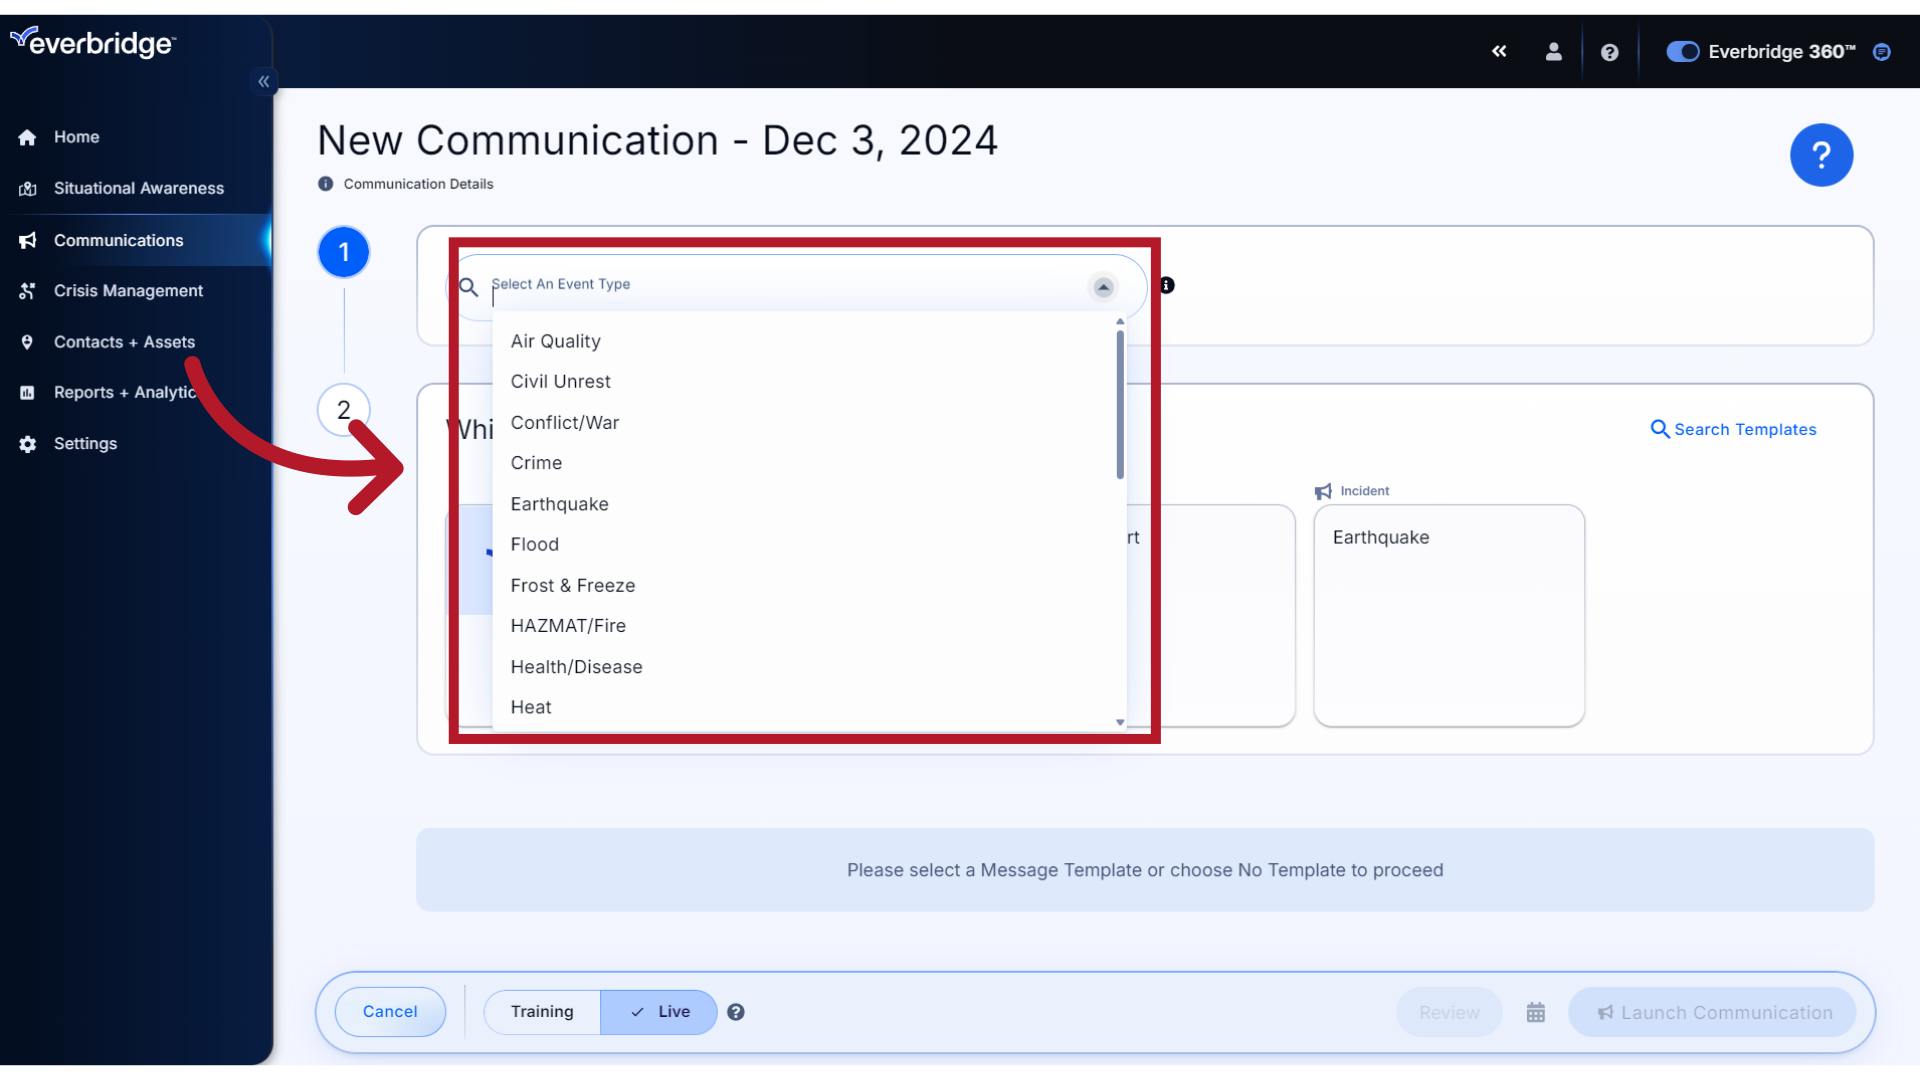
Step 1: Select an Event Type from the dropdown menu that best matches the Communication being sent. This is a preconfigured list that can be customized by your Everbridge administrator. The Event Type helps categorize similar events in your organization and lets us suggest related templates for selection.
5. Name
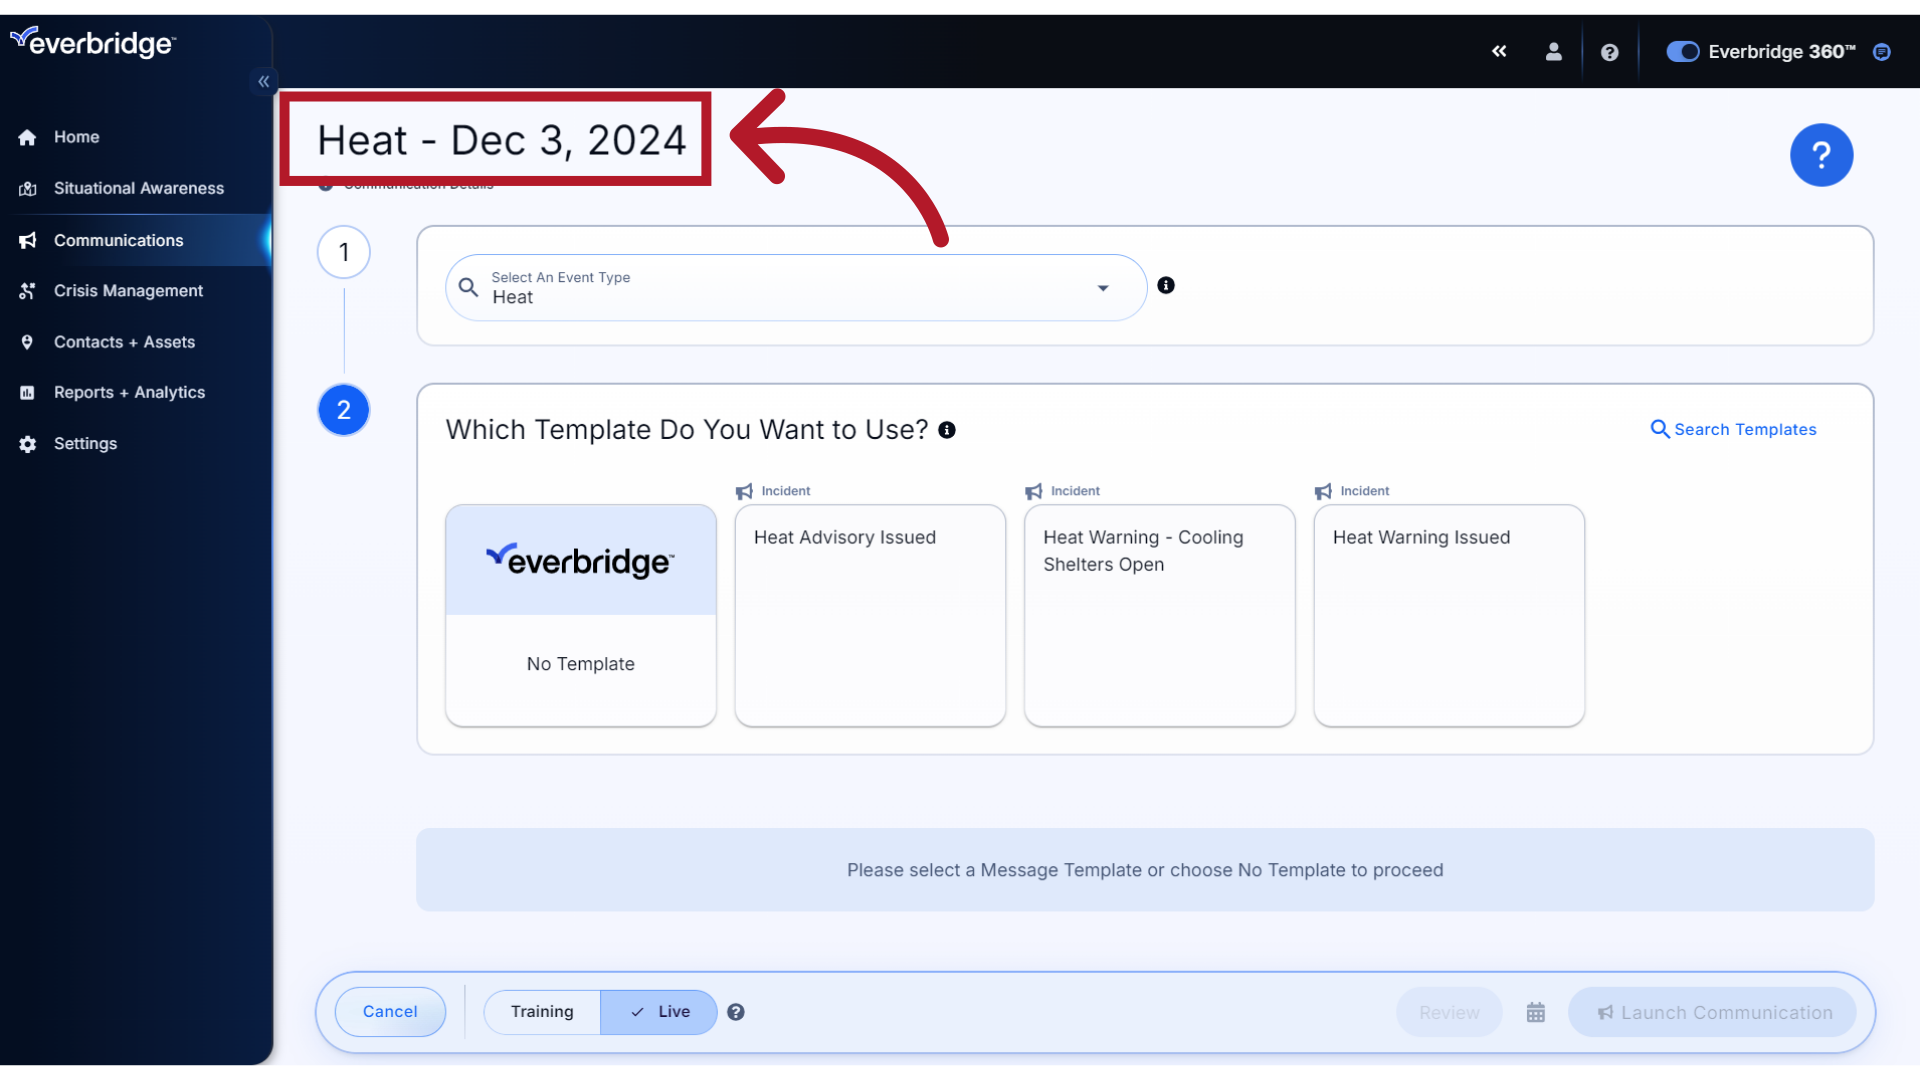
You will note that the Communication name automatically updates based on the selected Event Type and the date. If needed, you can edit it here to give the Communication a unique and descriptive name to make it easy to find and identify later. The name can also be updated on the Communication History page after the message has been sent.
6. Step 2
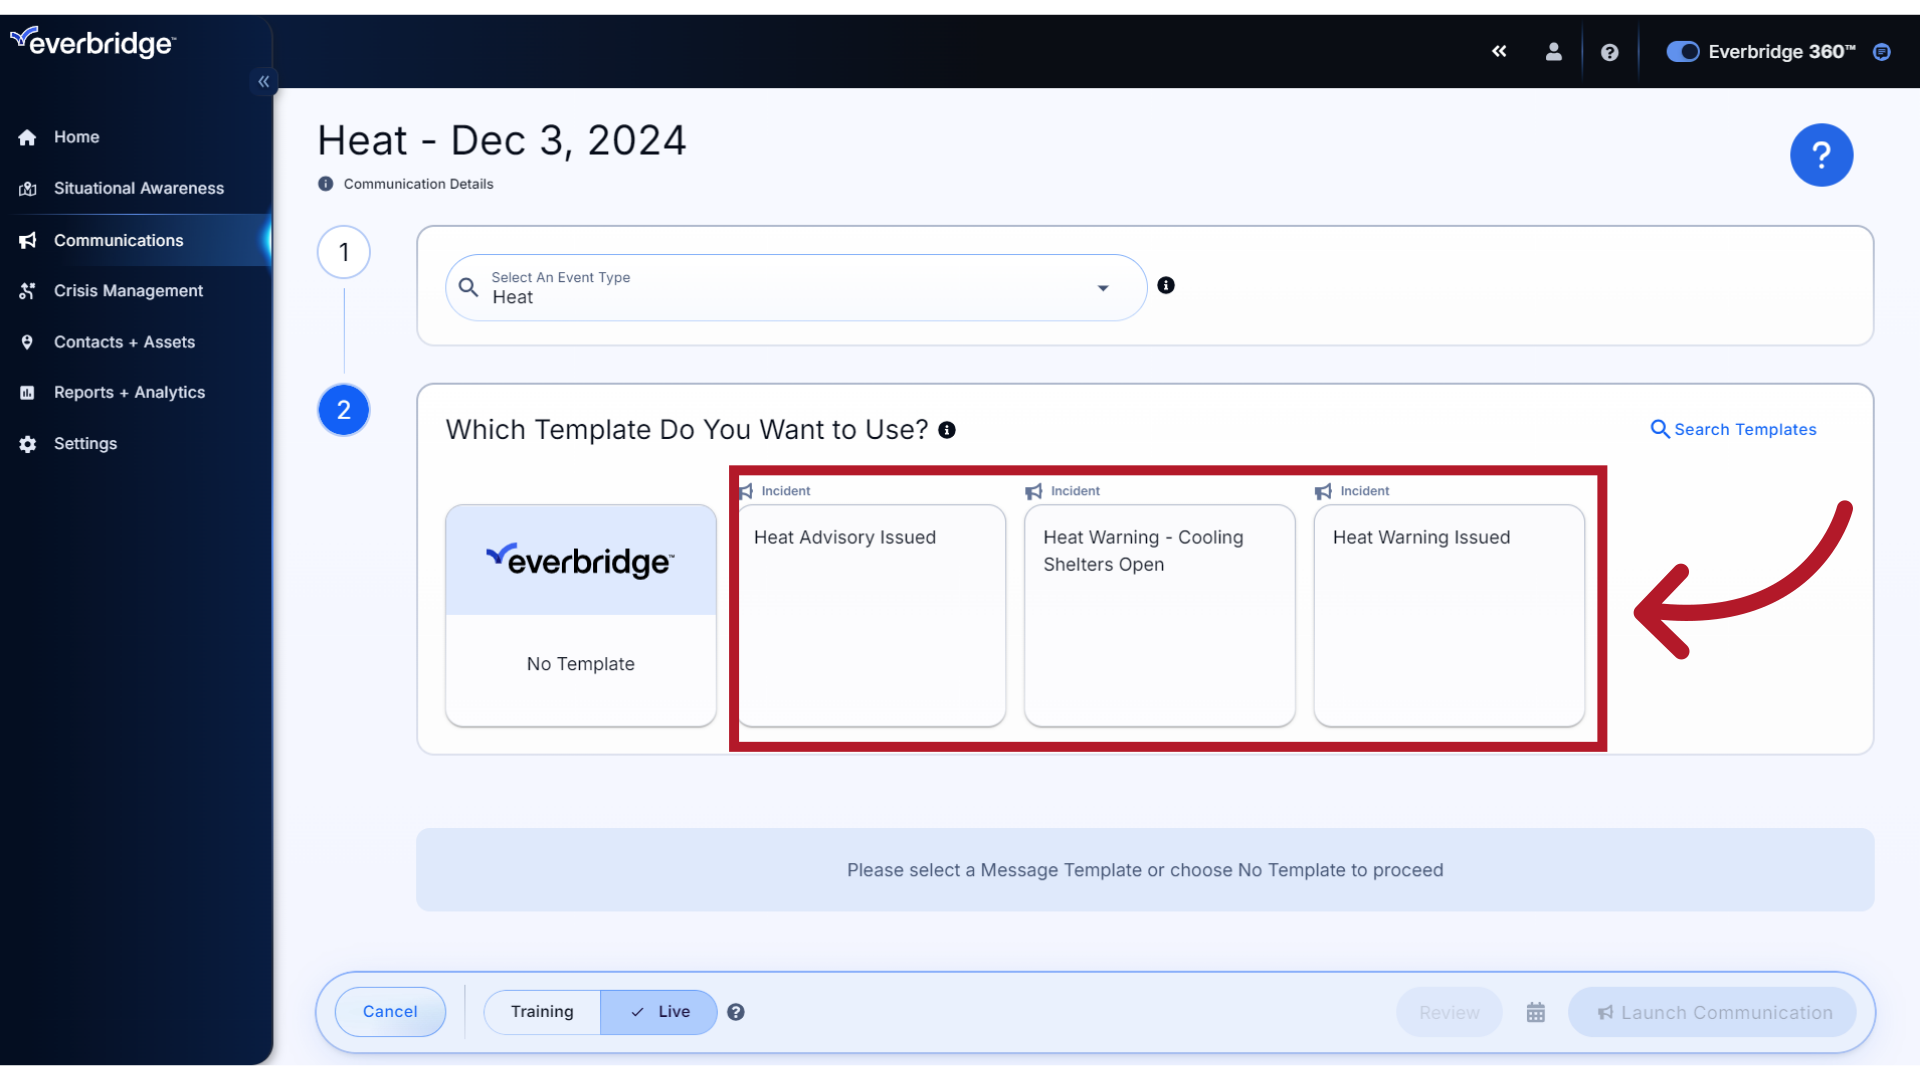
Step 2: Select the Template to Use. Based on the Event Type selected, you will note that a few suggested templates or scenarios appear. If the template you need appears, select it here.
7. Search
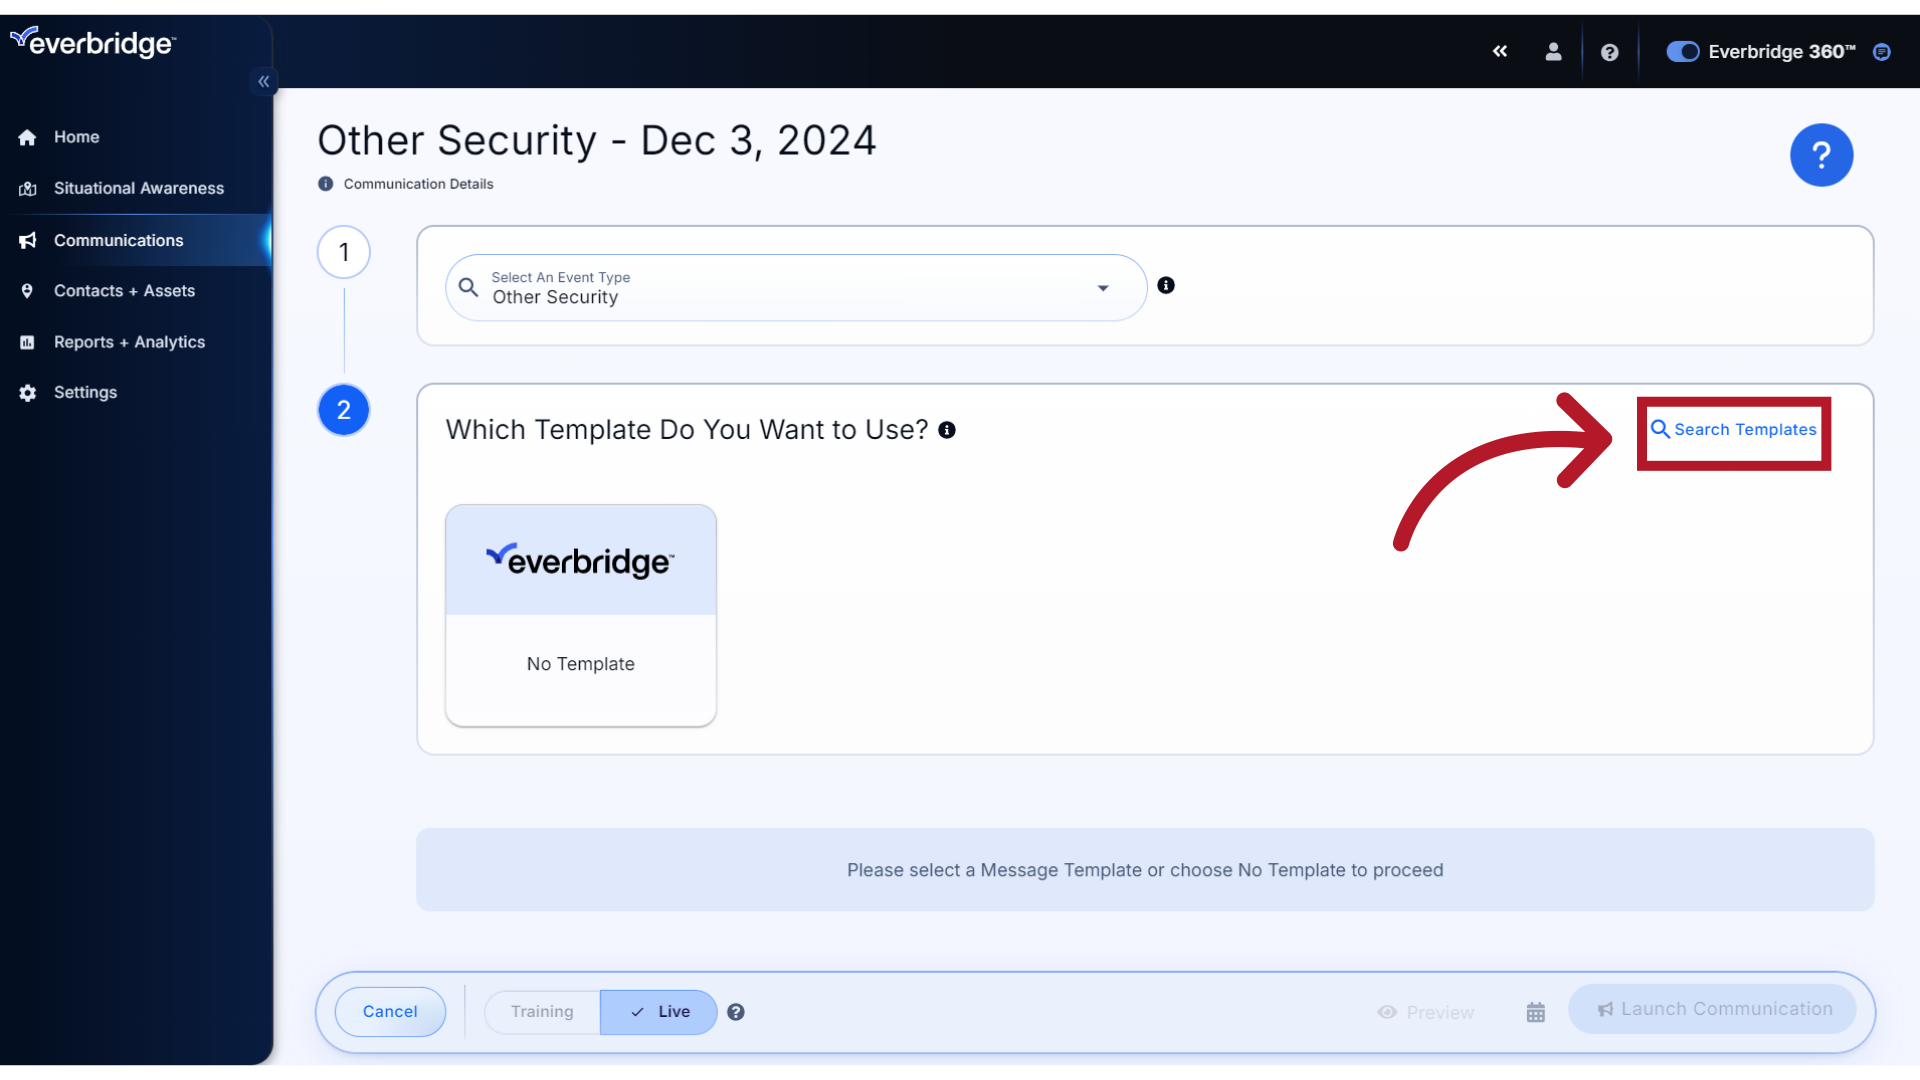
In this example, we have selected an Event Type that does not return any suggested templates, so we will use the Search Templates feature to find what we need.
8. View
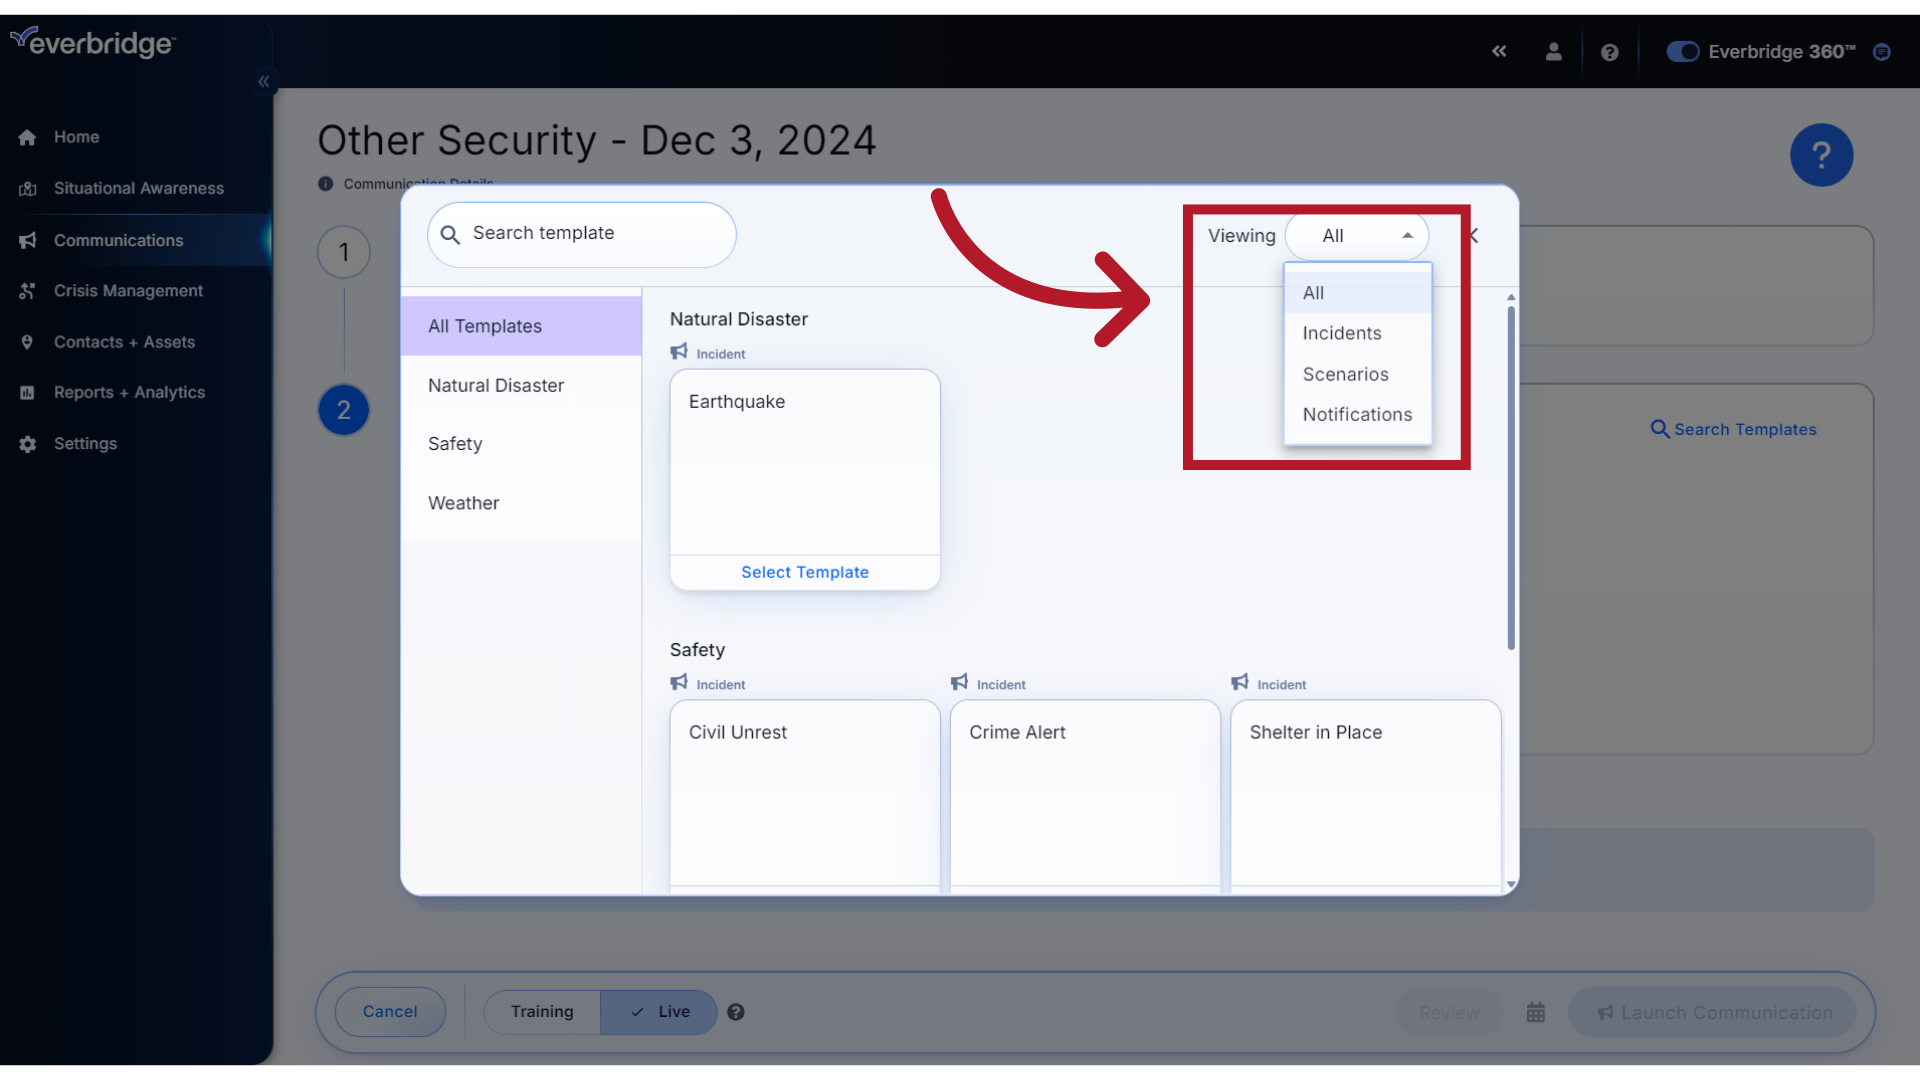
By default, all Incidents, Notifications, and Scenarios your role has permission to launch will appear. If needed, use the Viewing filter to refine your view.
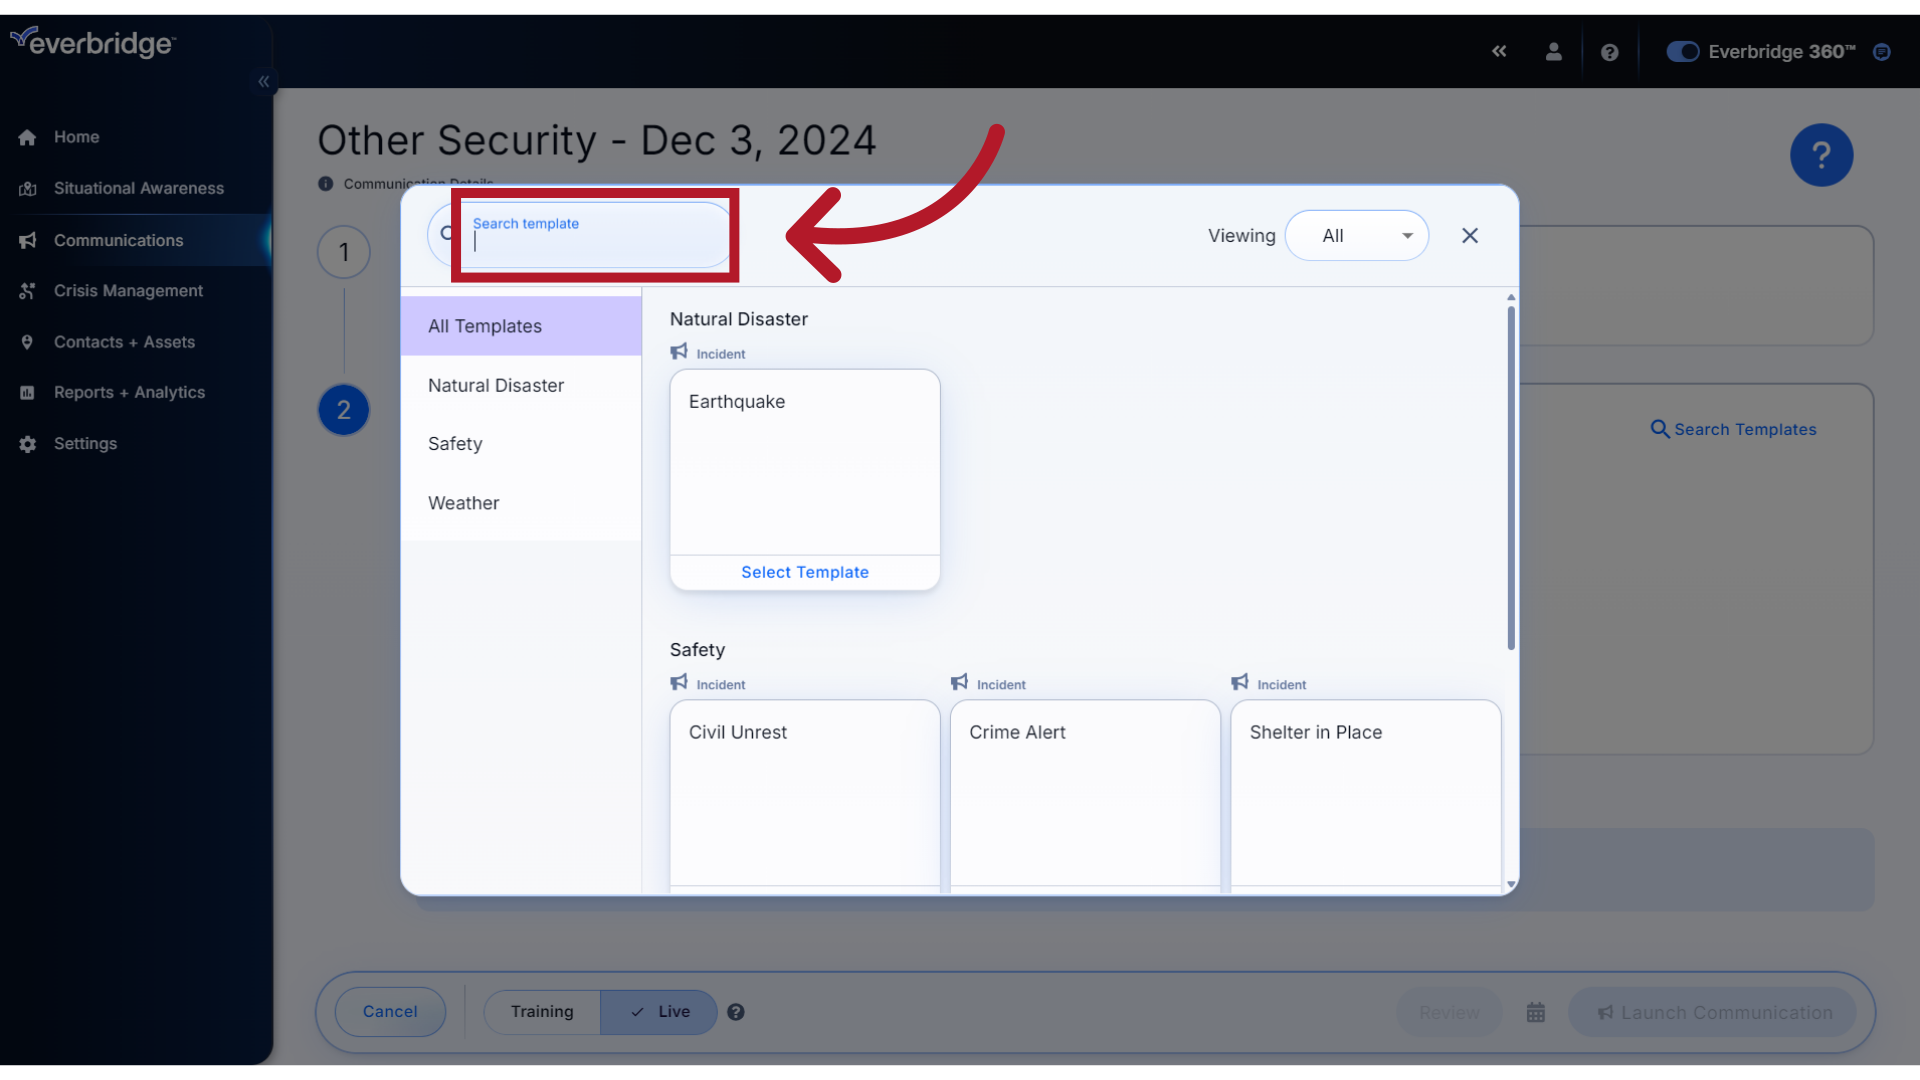
9. Search
You can also search for a specific template by name or key word.
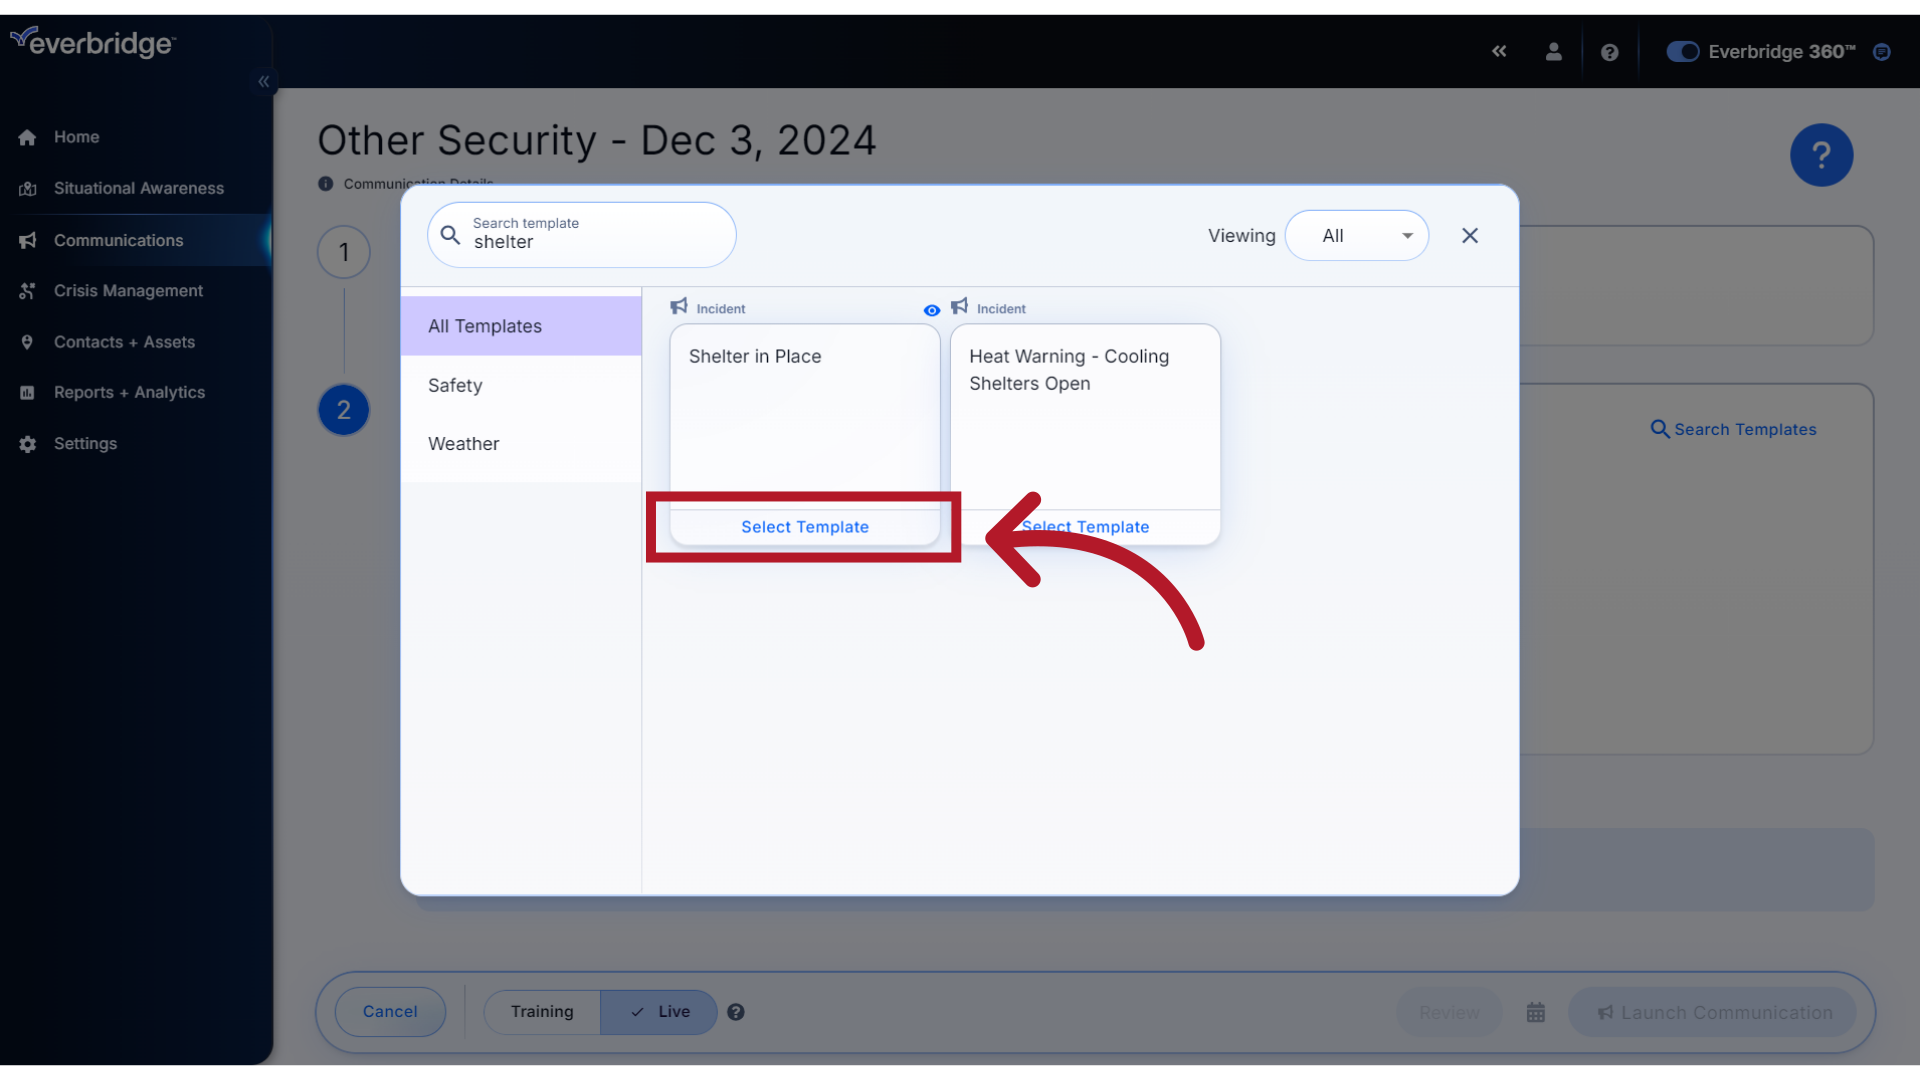
10. Select
When you see the template you want to launch, click Select Template.
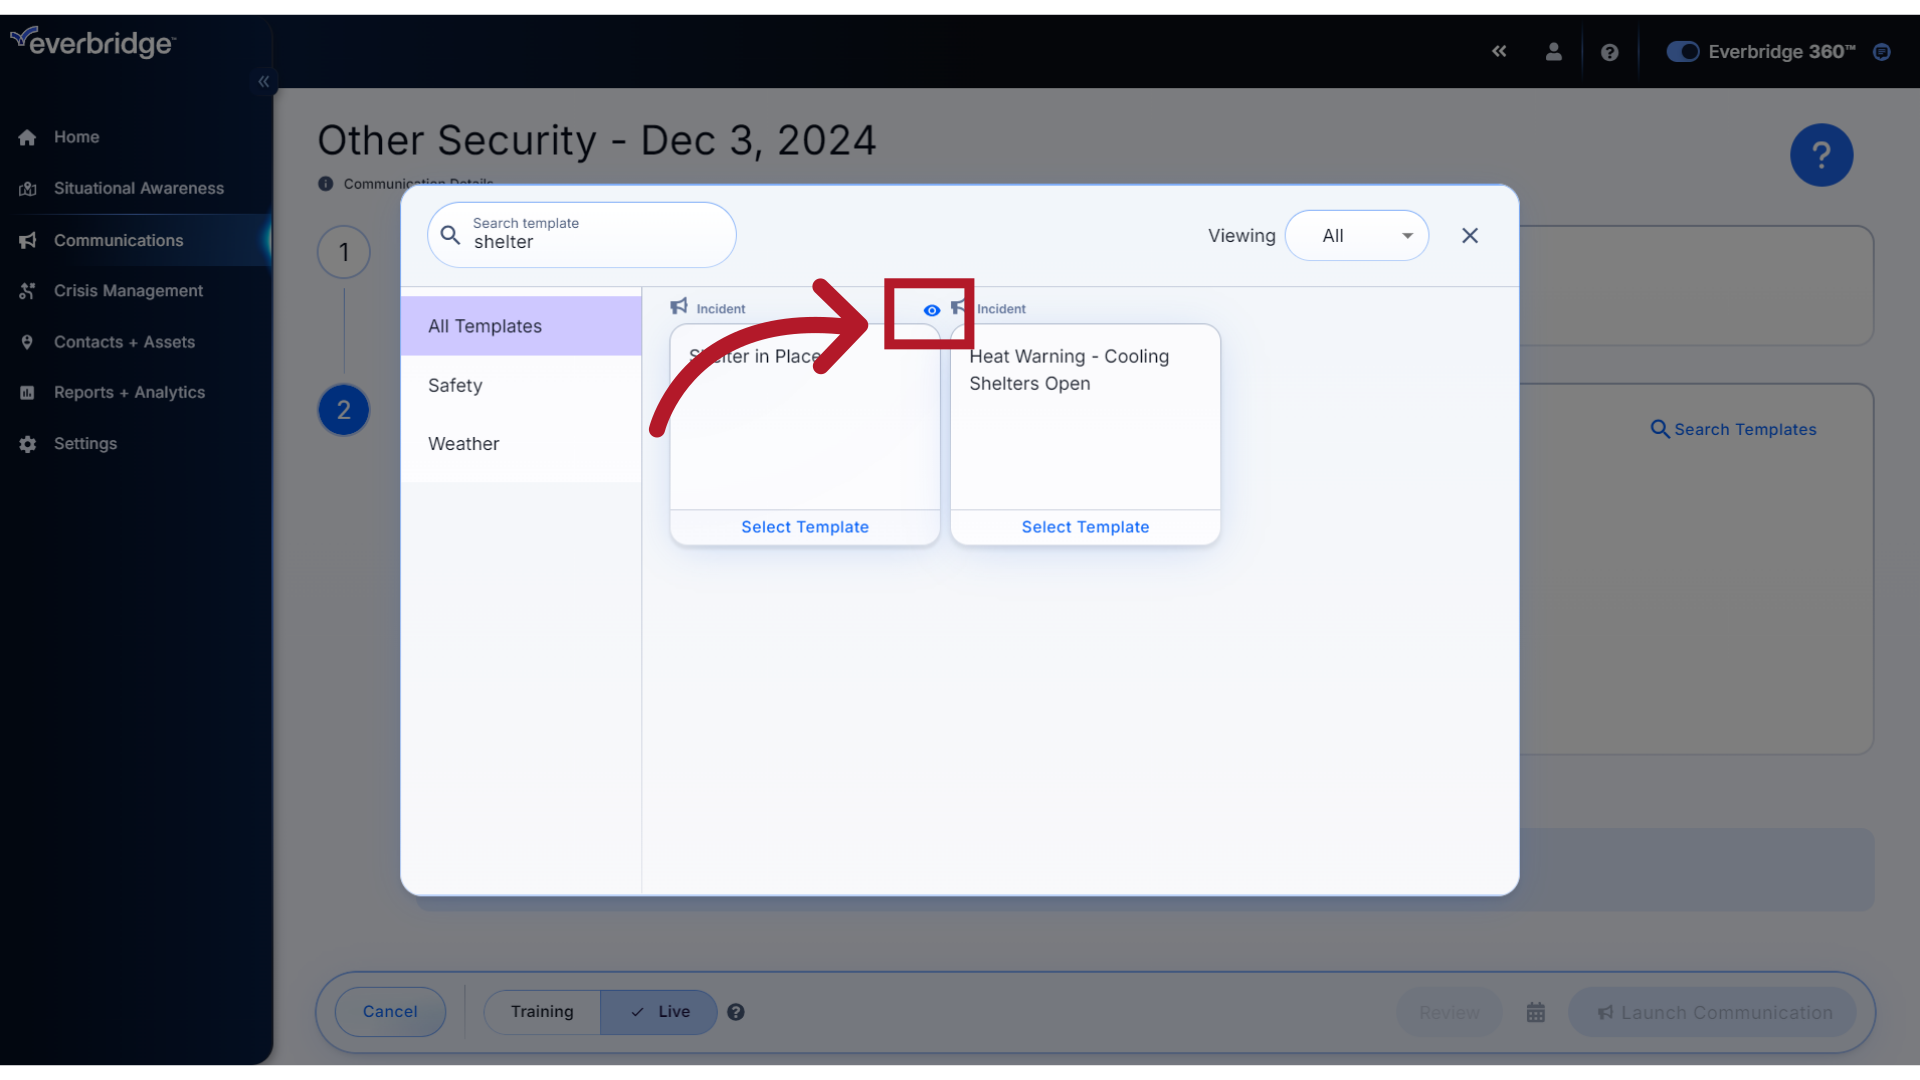
11. Preview
Or, if you are unsure this is the correct template to use, click the Preview icon to view its contents first.
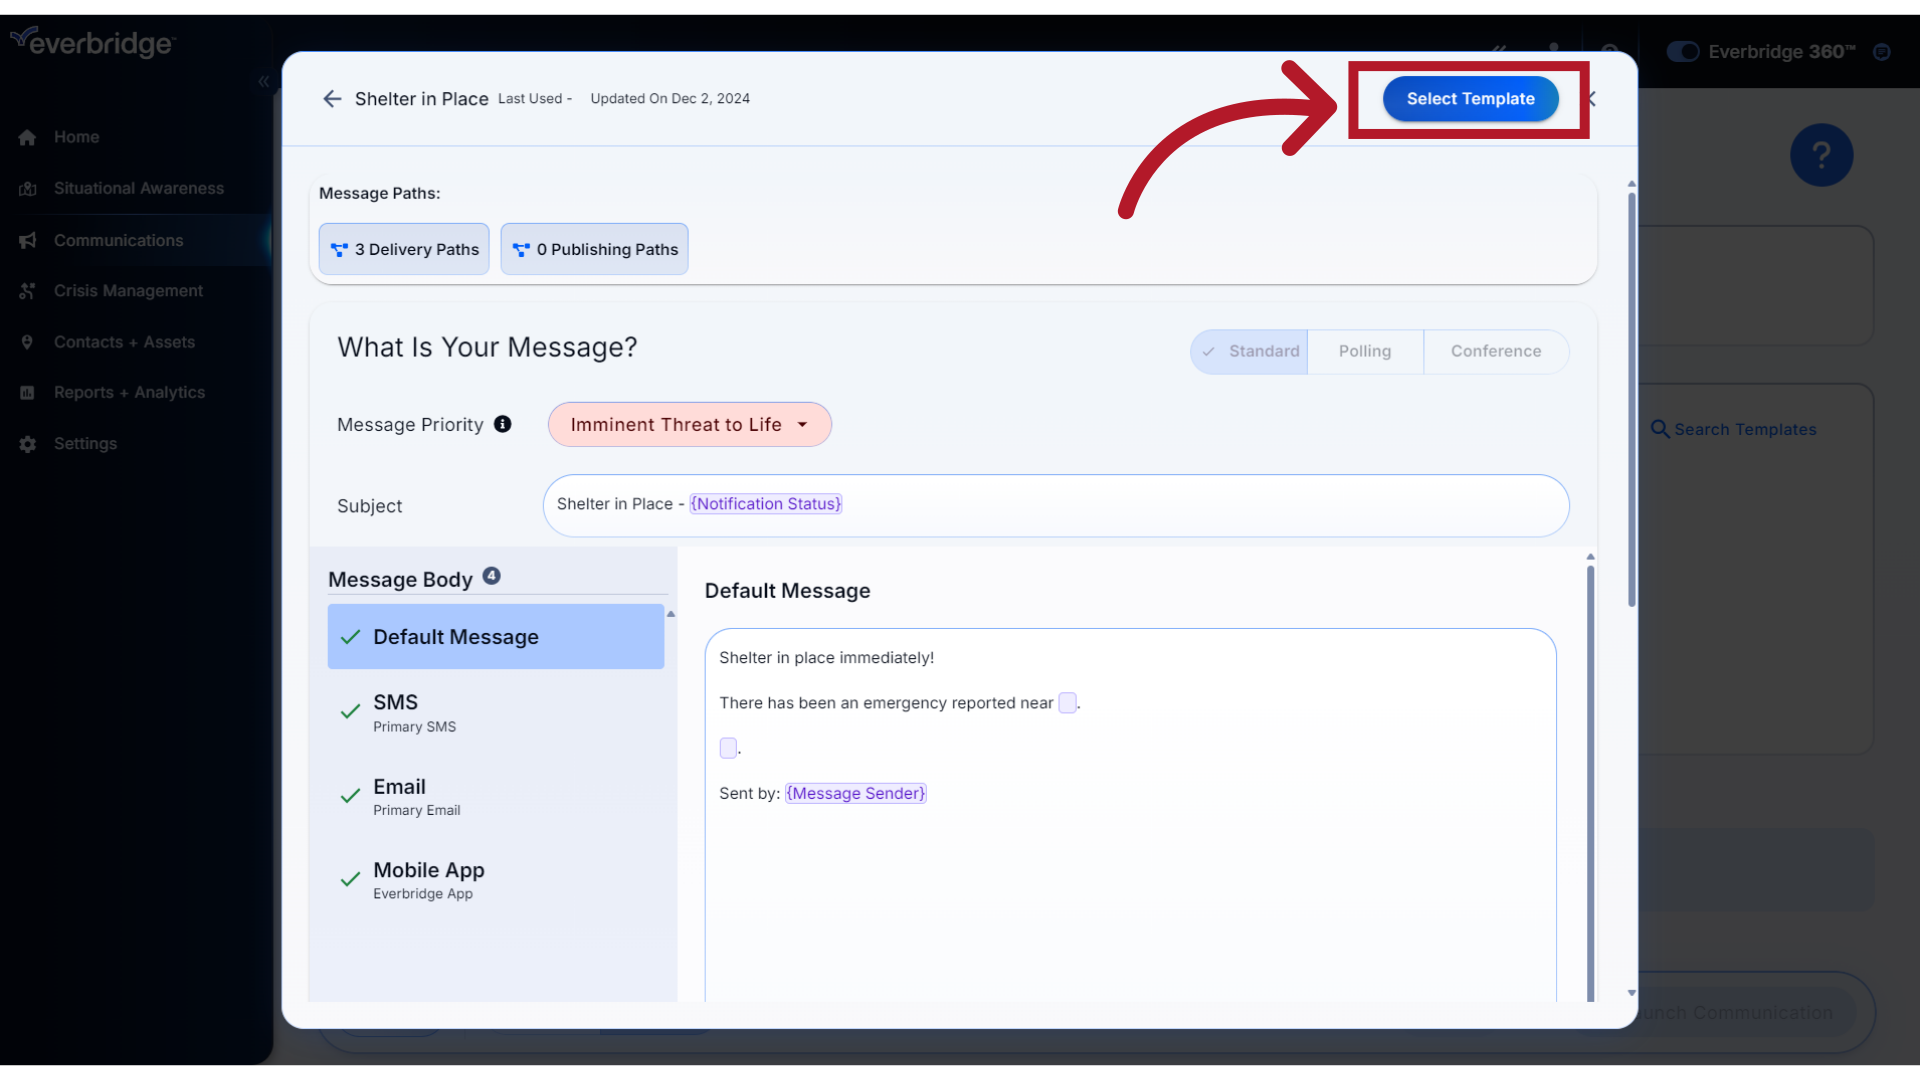
12. Select
The preview will display the basic content of the template. To use, click Select Template, or click the back arrow to select a different template.
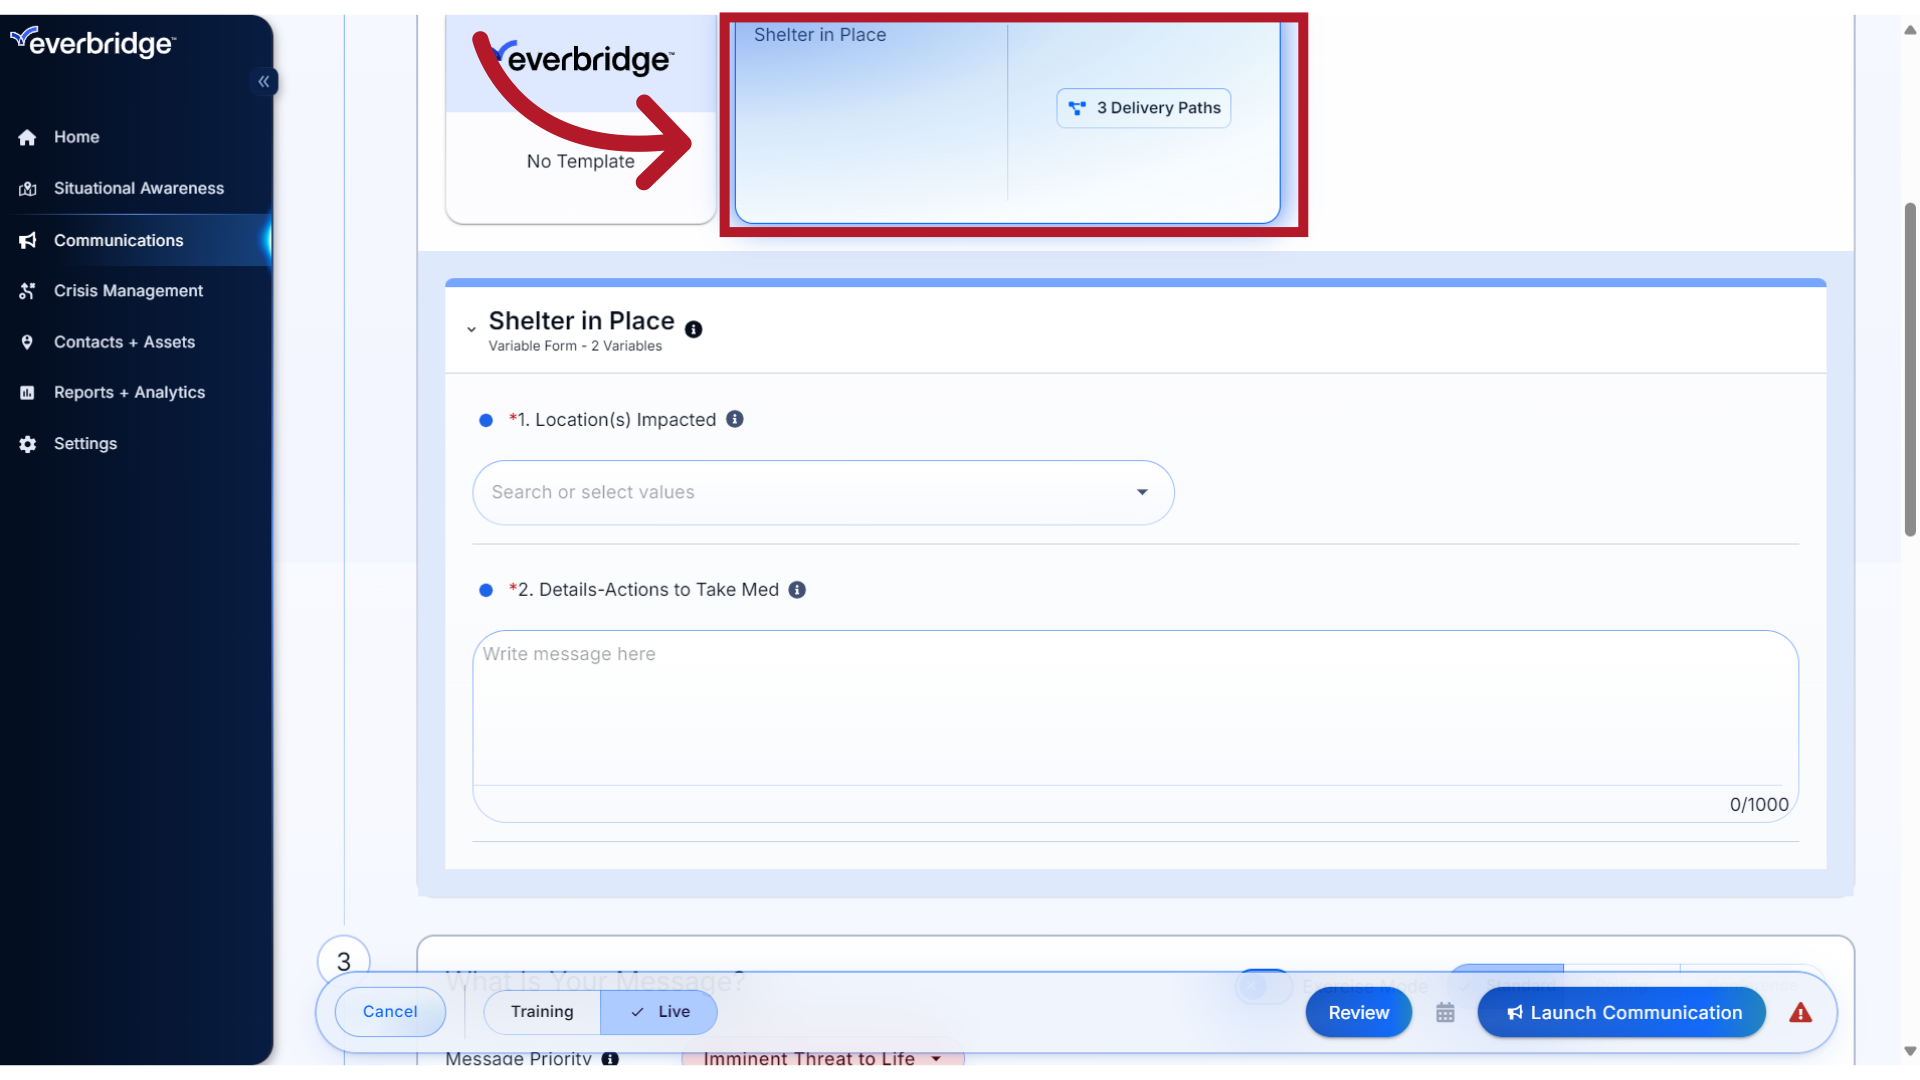
13. Delivery Paths
Once selected, the template name and its number of default Delivery Paths preset in the template will display.
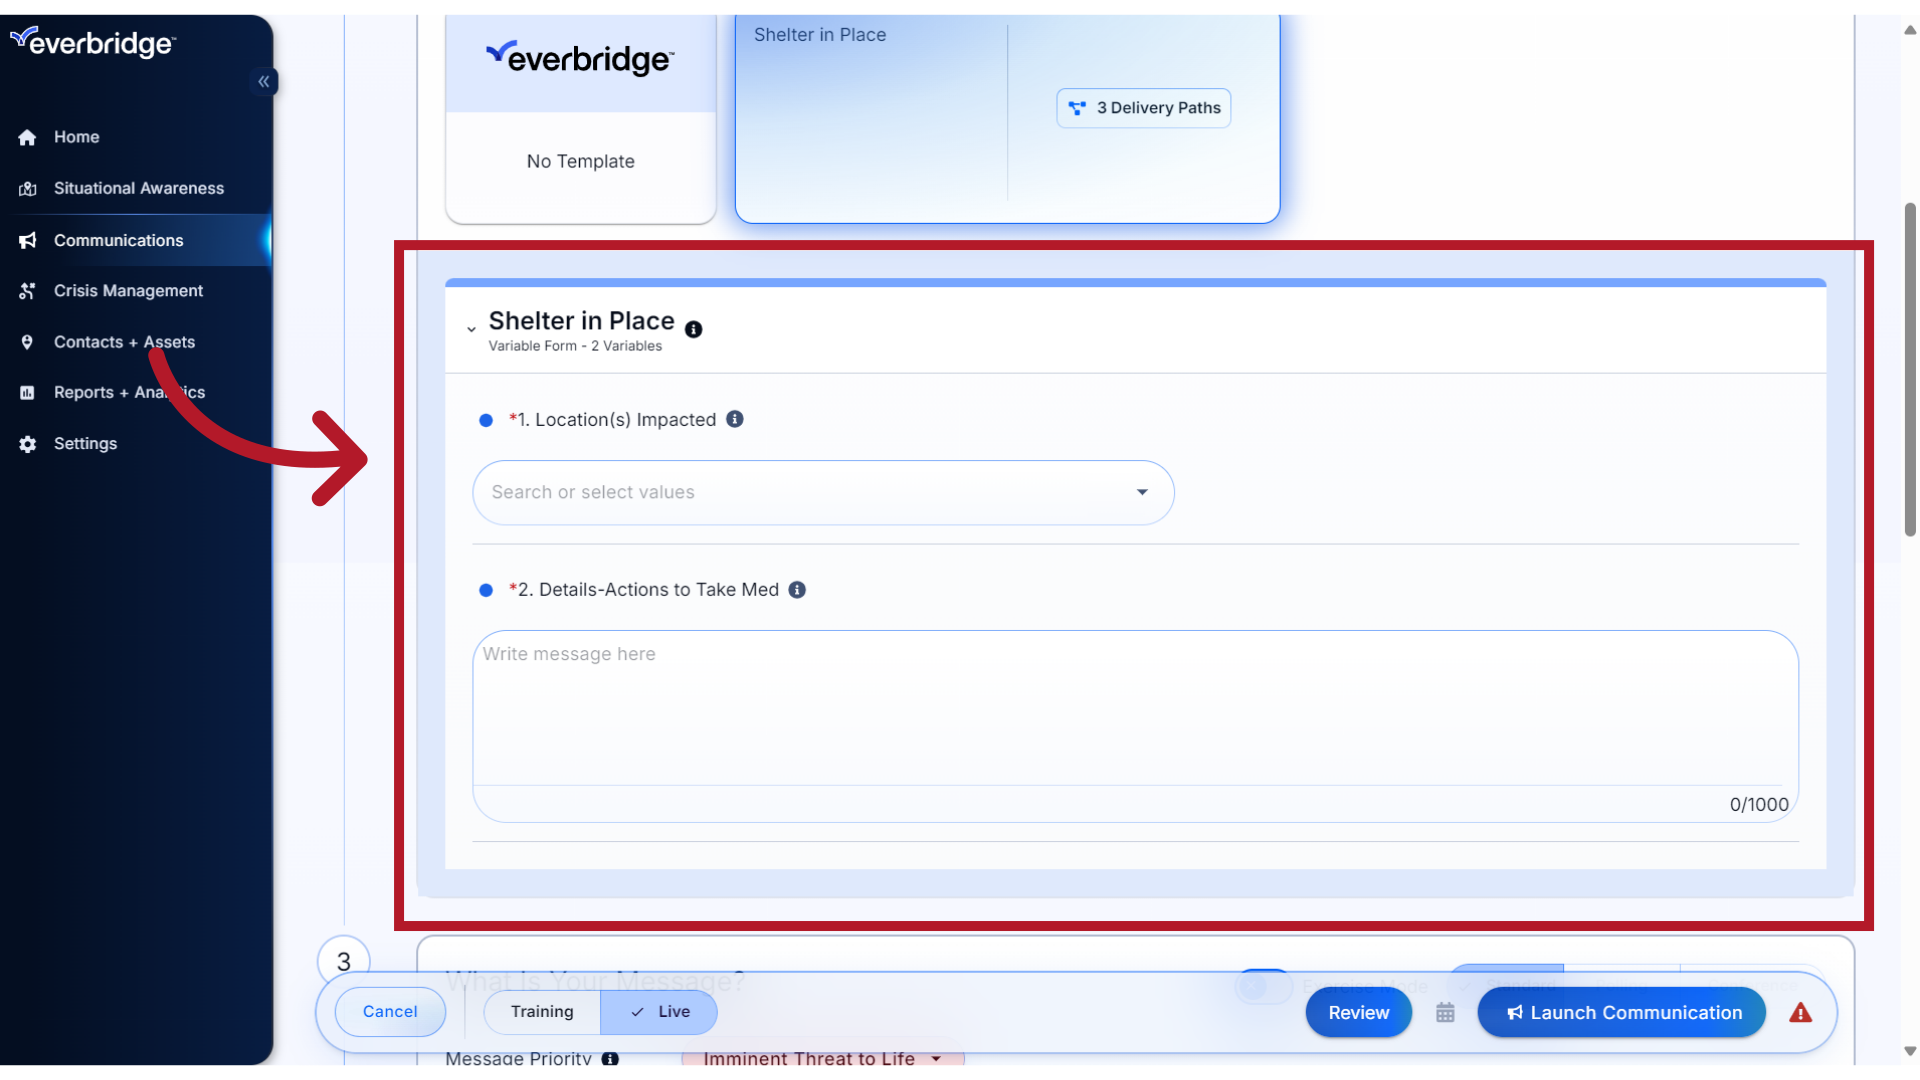
14. Variable Form
The Variable Form is where you will add content for the variables in the template or confirm any preconfigured values. Required variables are noted with a red asterisk.
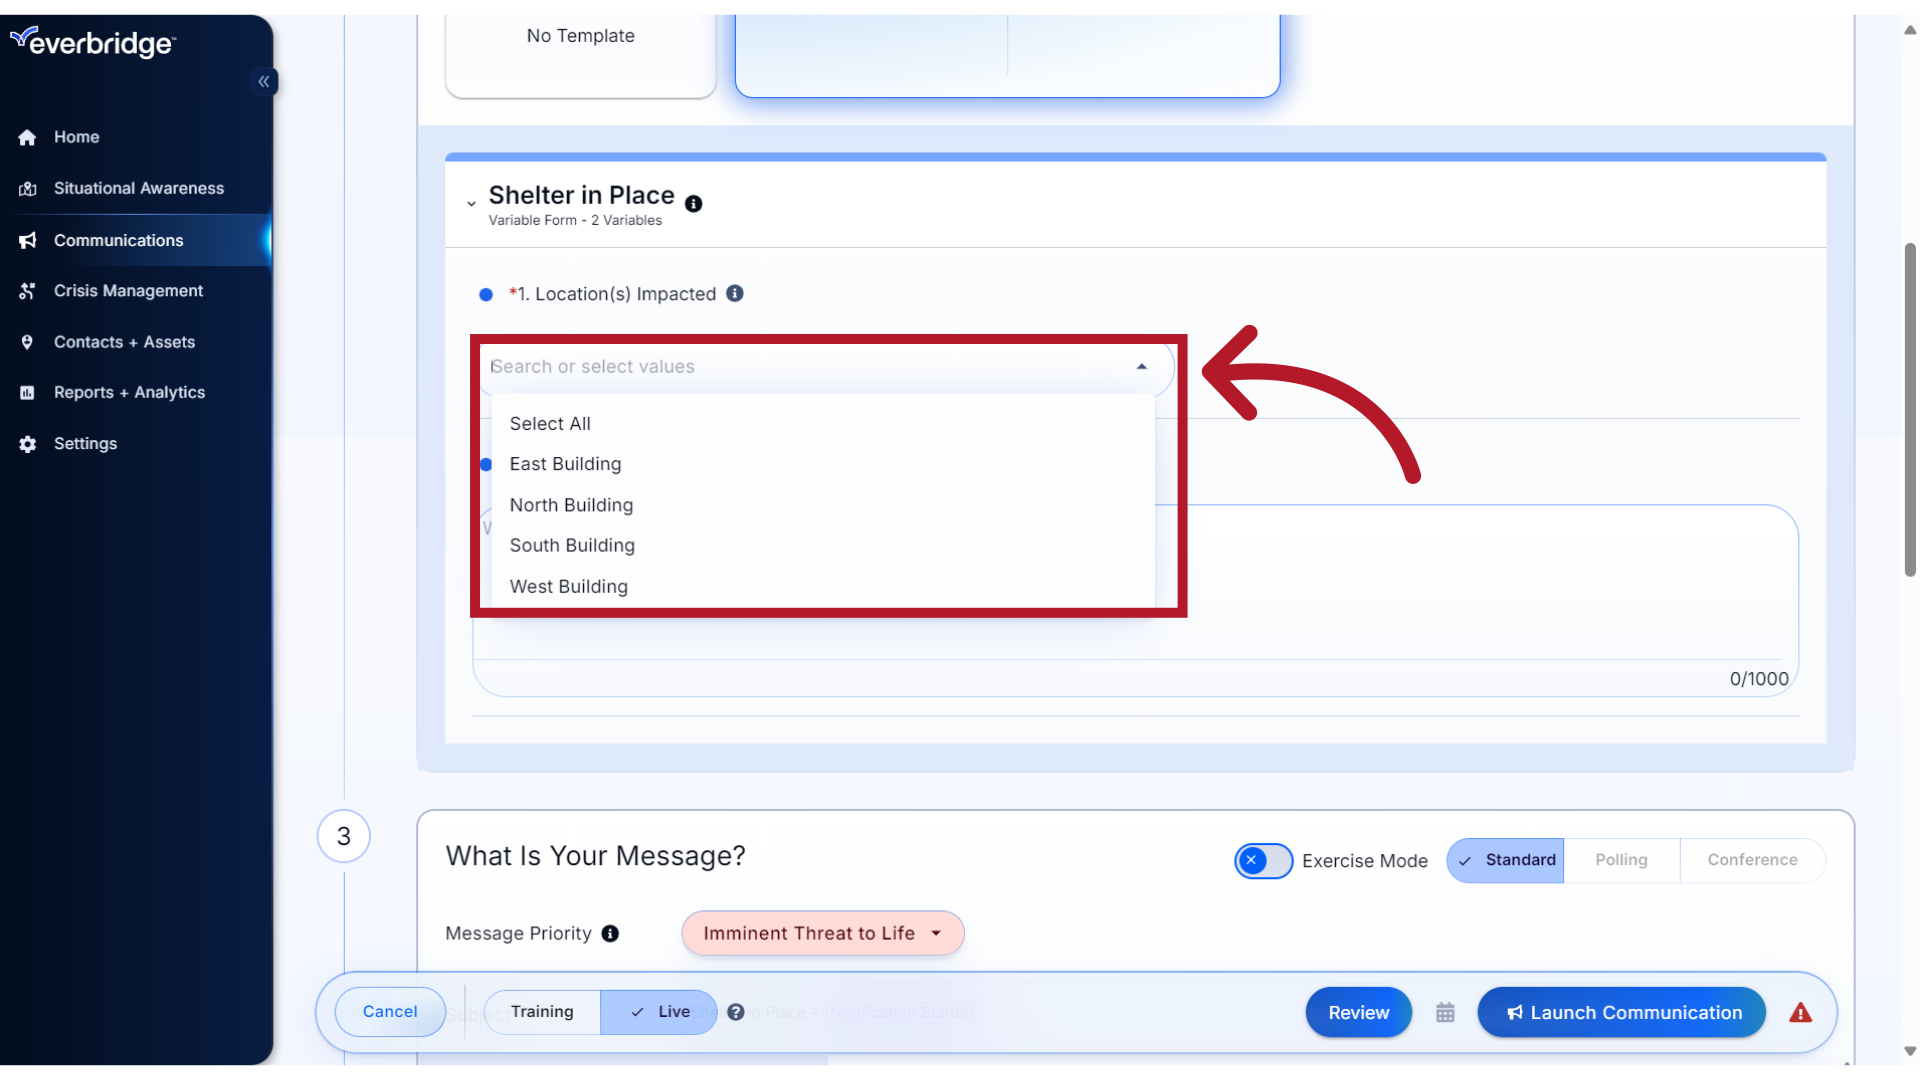
15. Variable
Here, we are selecting a value from a preconfigured dropdown list
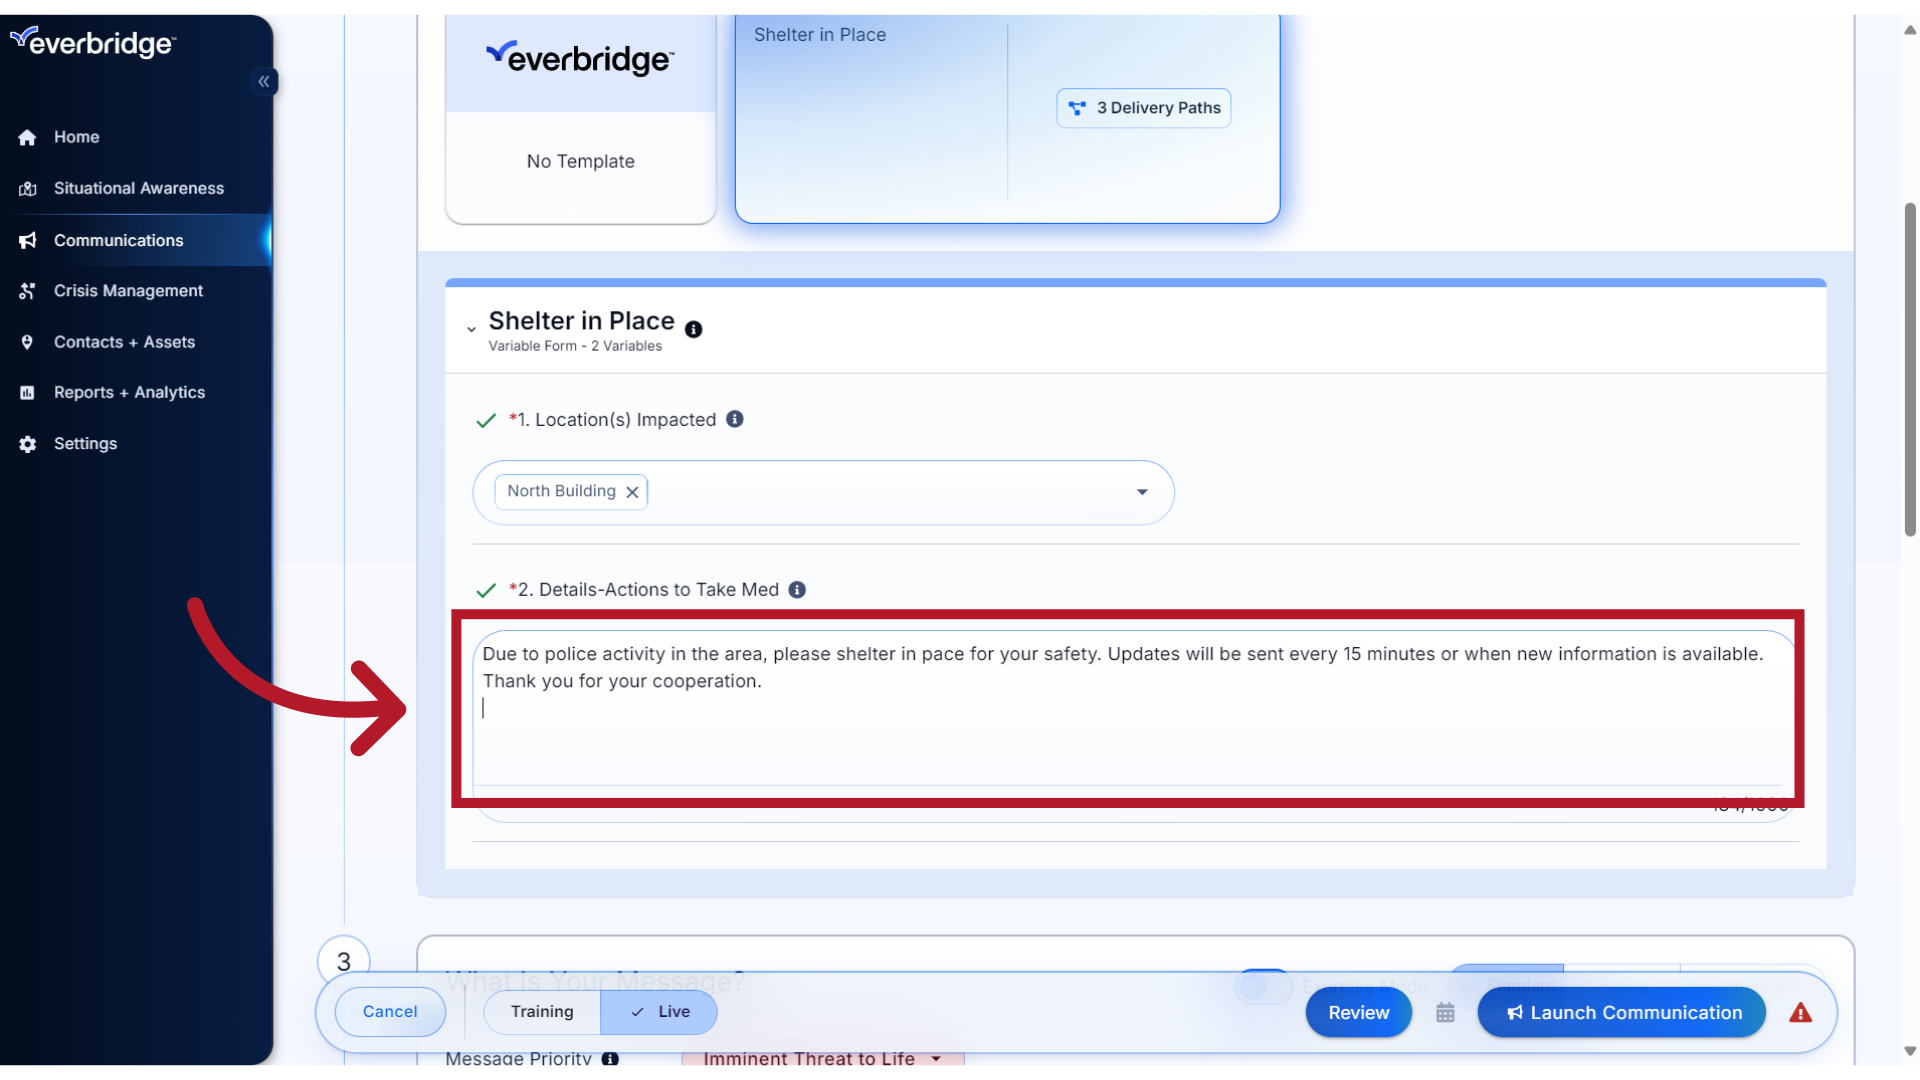
16. Variable
and adding the message details.
17. Step 3:
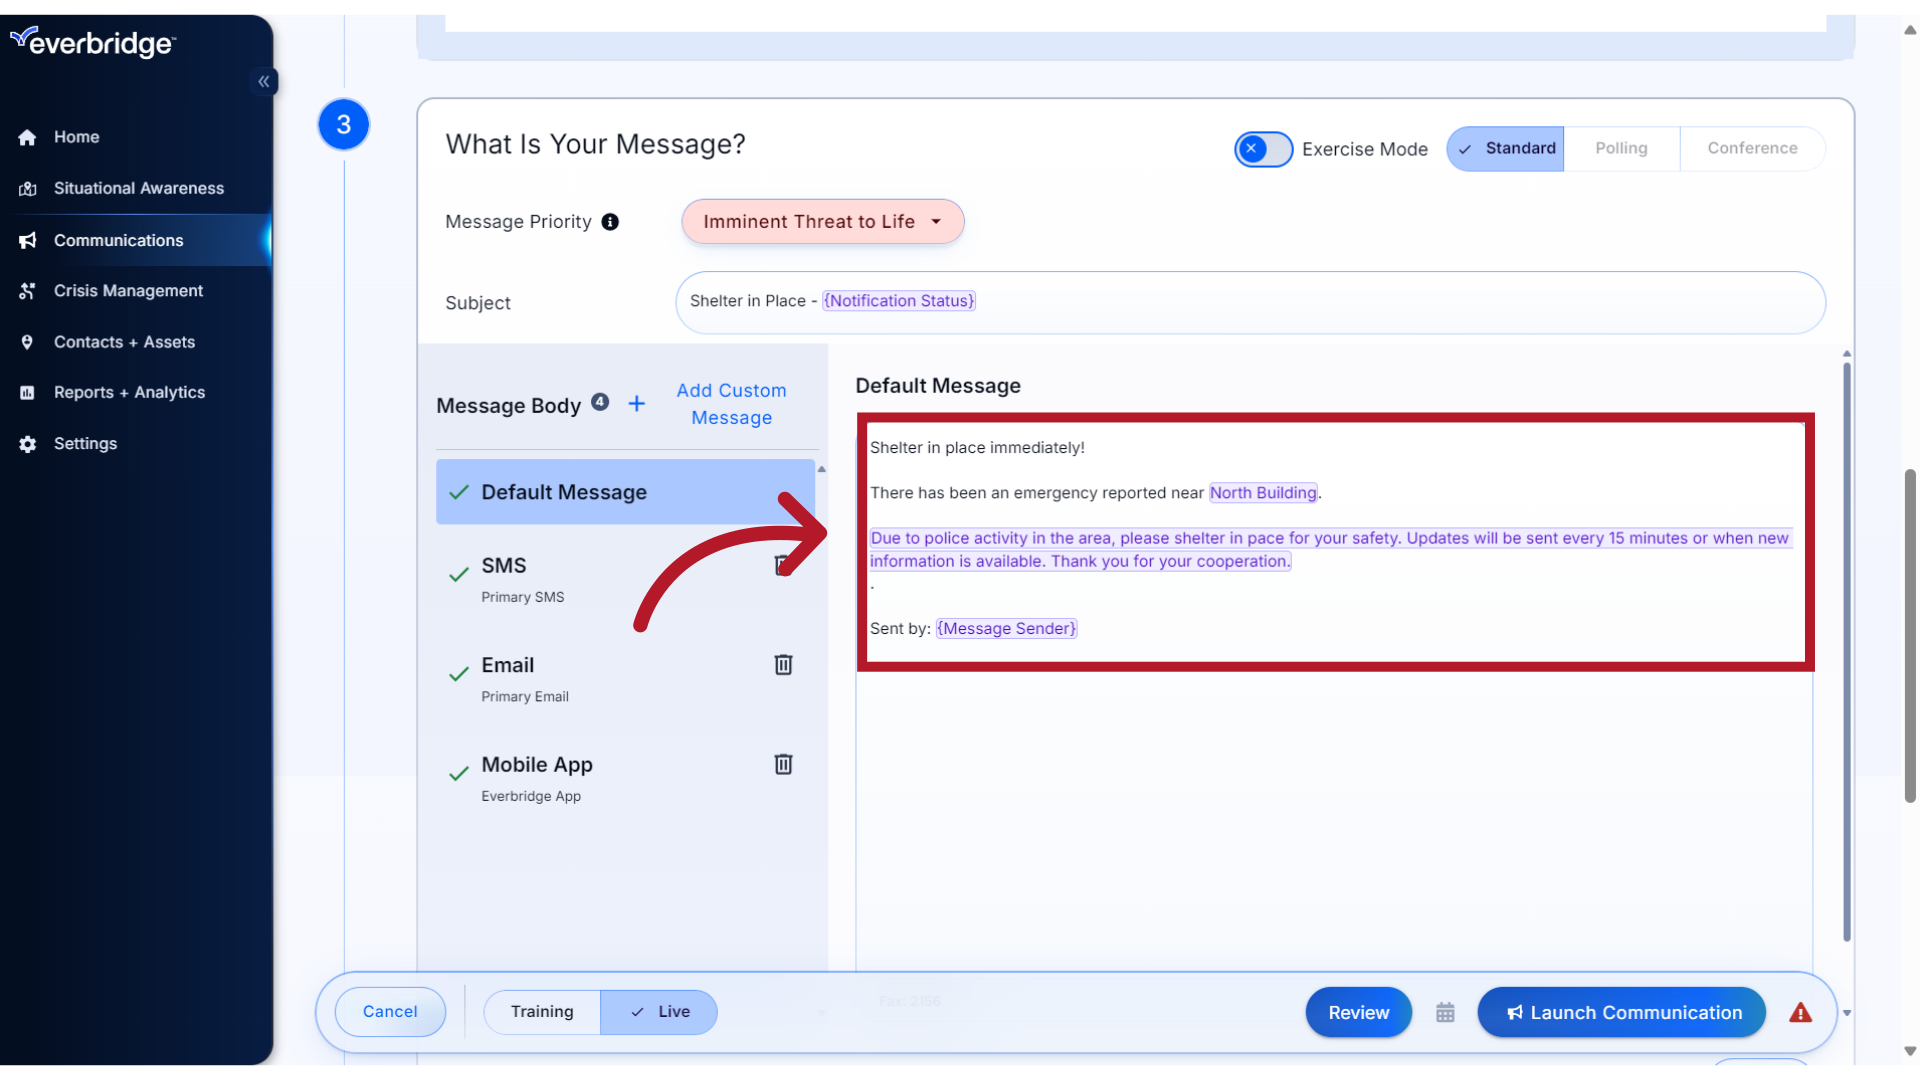
Step 3: What is your Message? Now that the Variable Form has been completed, you can review how the content will appear within the templated message.
18. Message
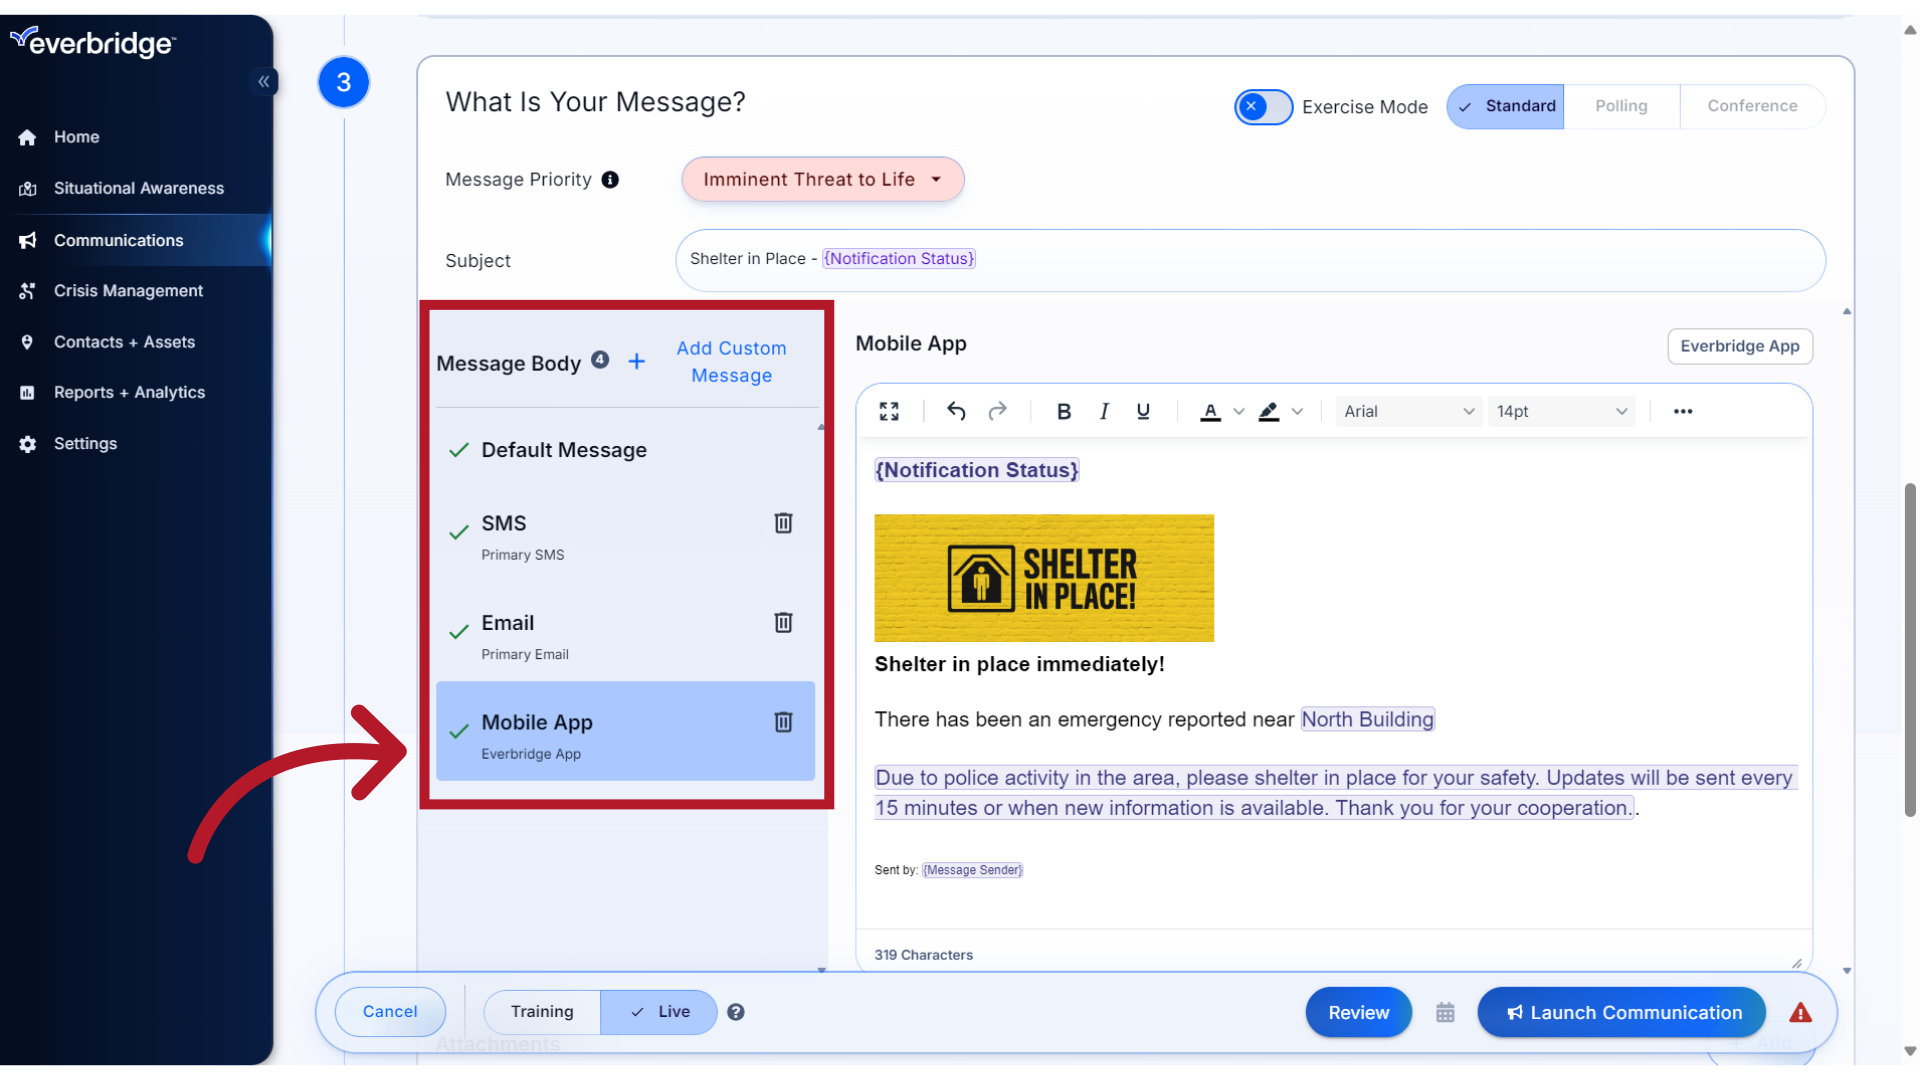
If the template contains custom content for other delivery paths, you can select the path name to preview the message.
19. Step 4
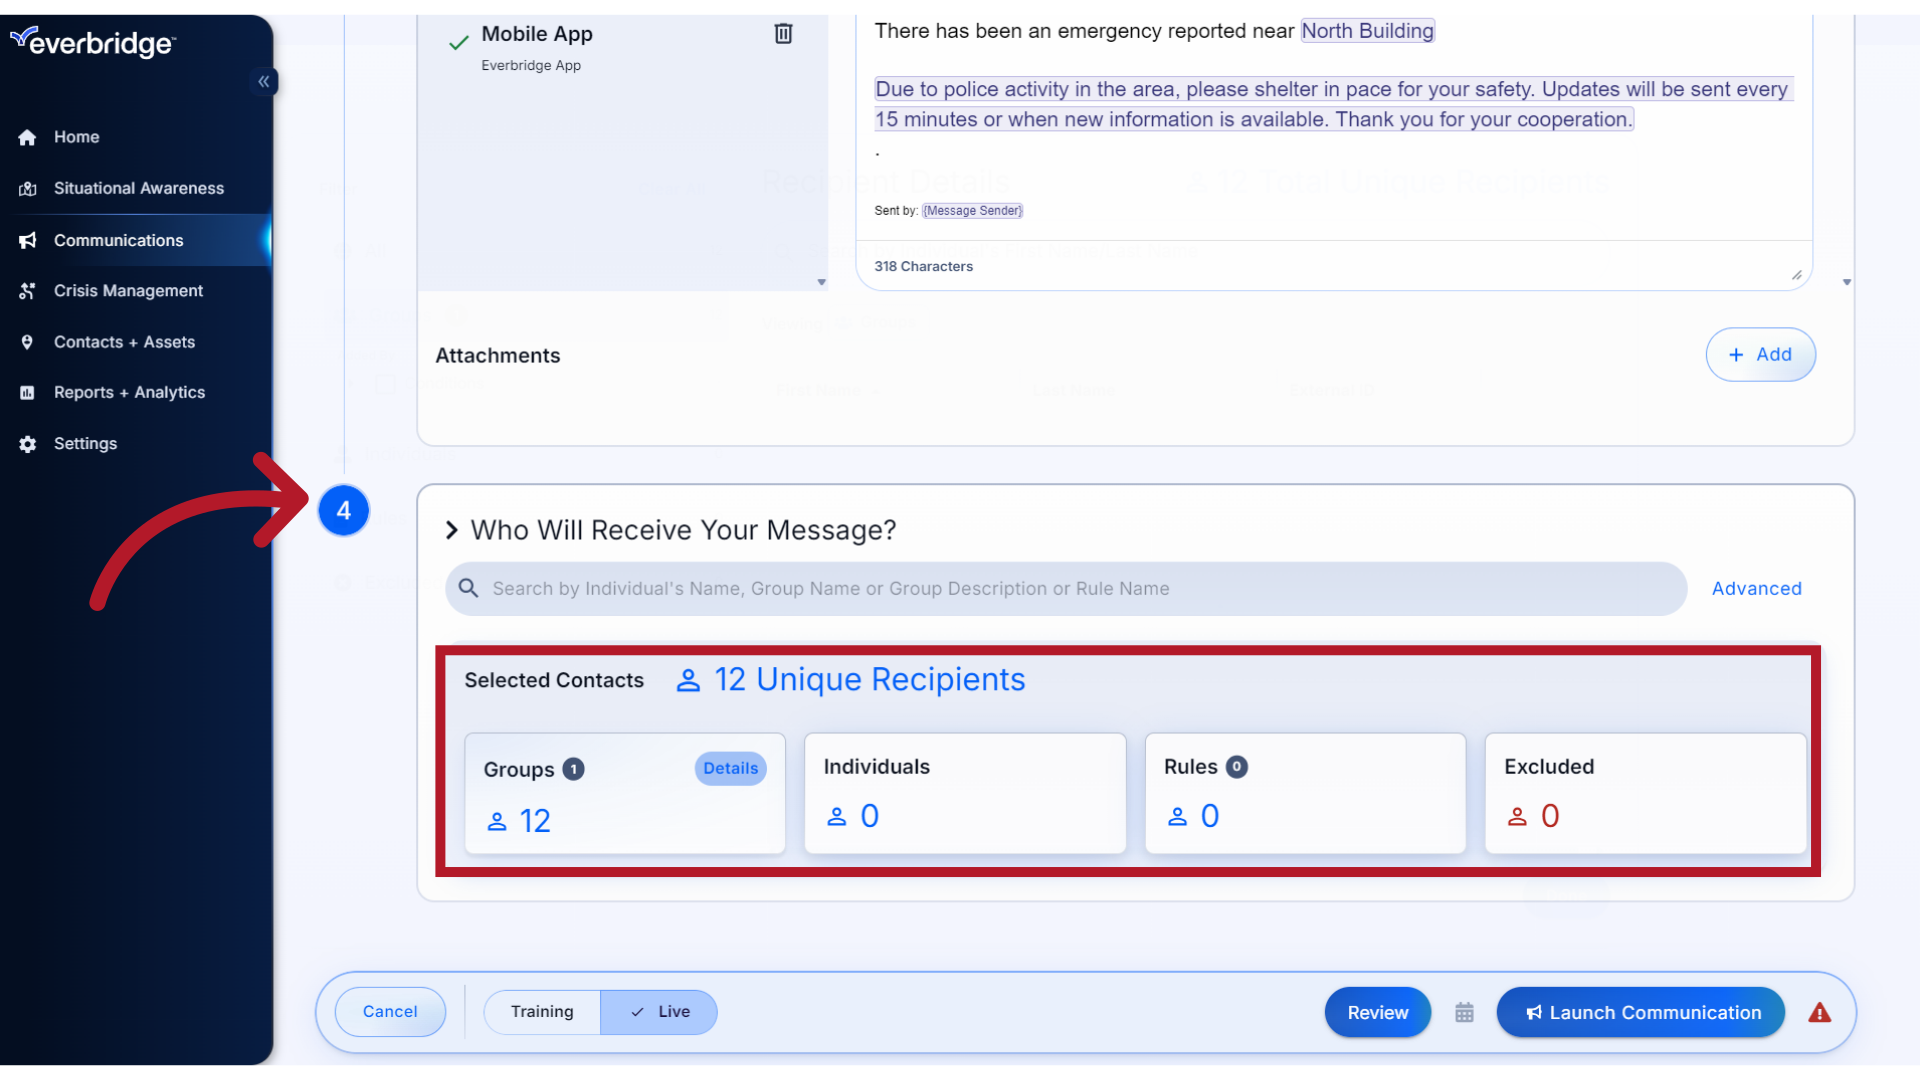
Step 4: Who Will Receive your Message? If the template includes preselected recipients, you can view them here. Depending on the template permissions, you may be able to edit the recipients if it is appropriate to do so.
20. Review
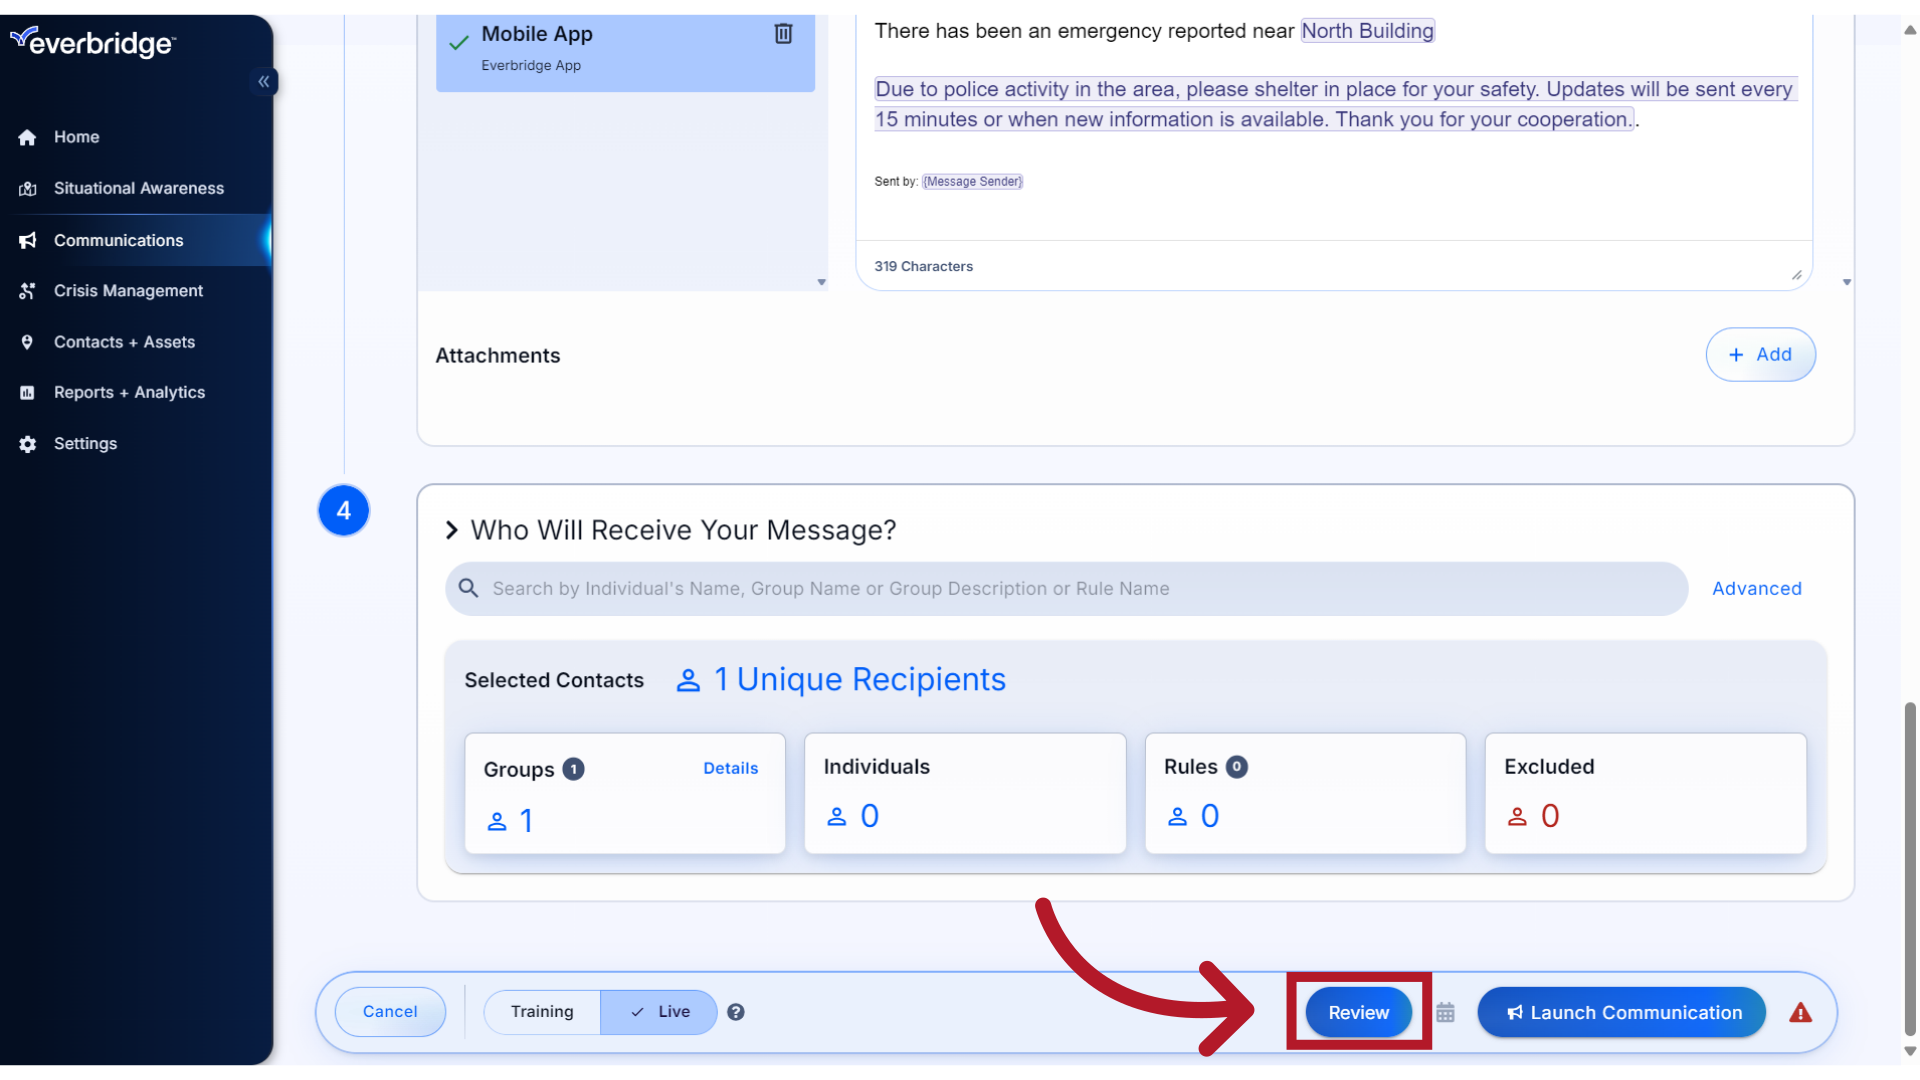
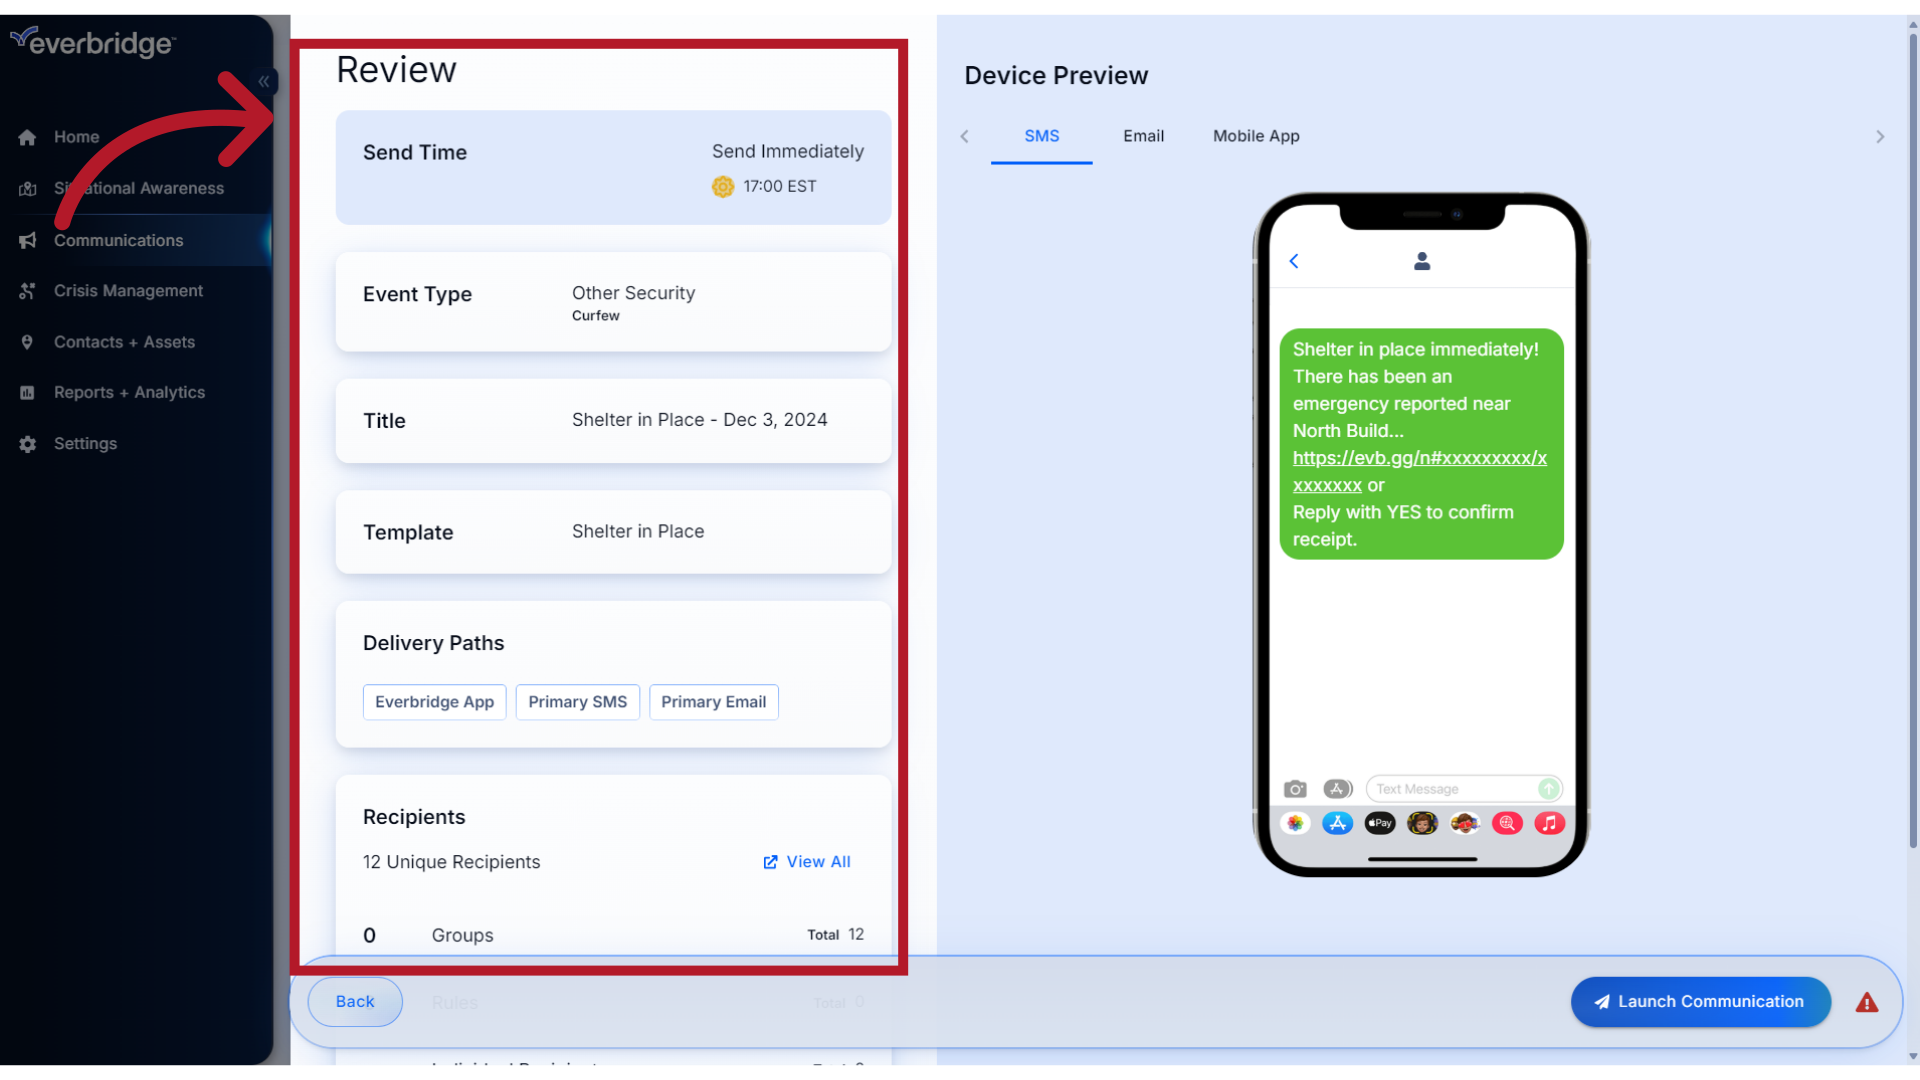
In this example, the Communication Review feature is enabled. This provides the option to review the Communication details prior to launching it. Click Review to continue.
21. Review
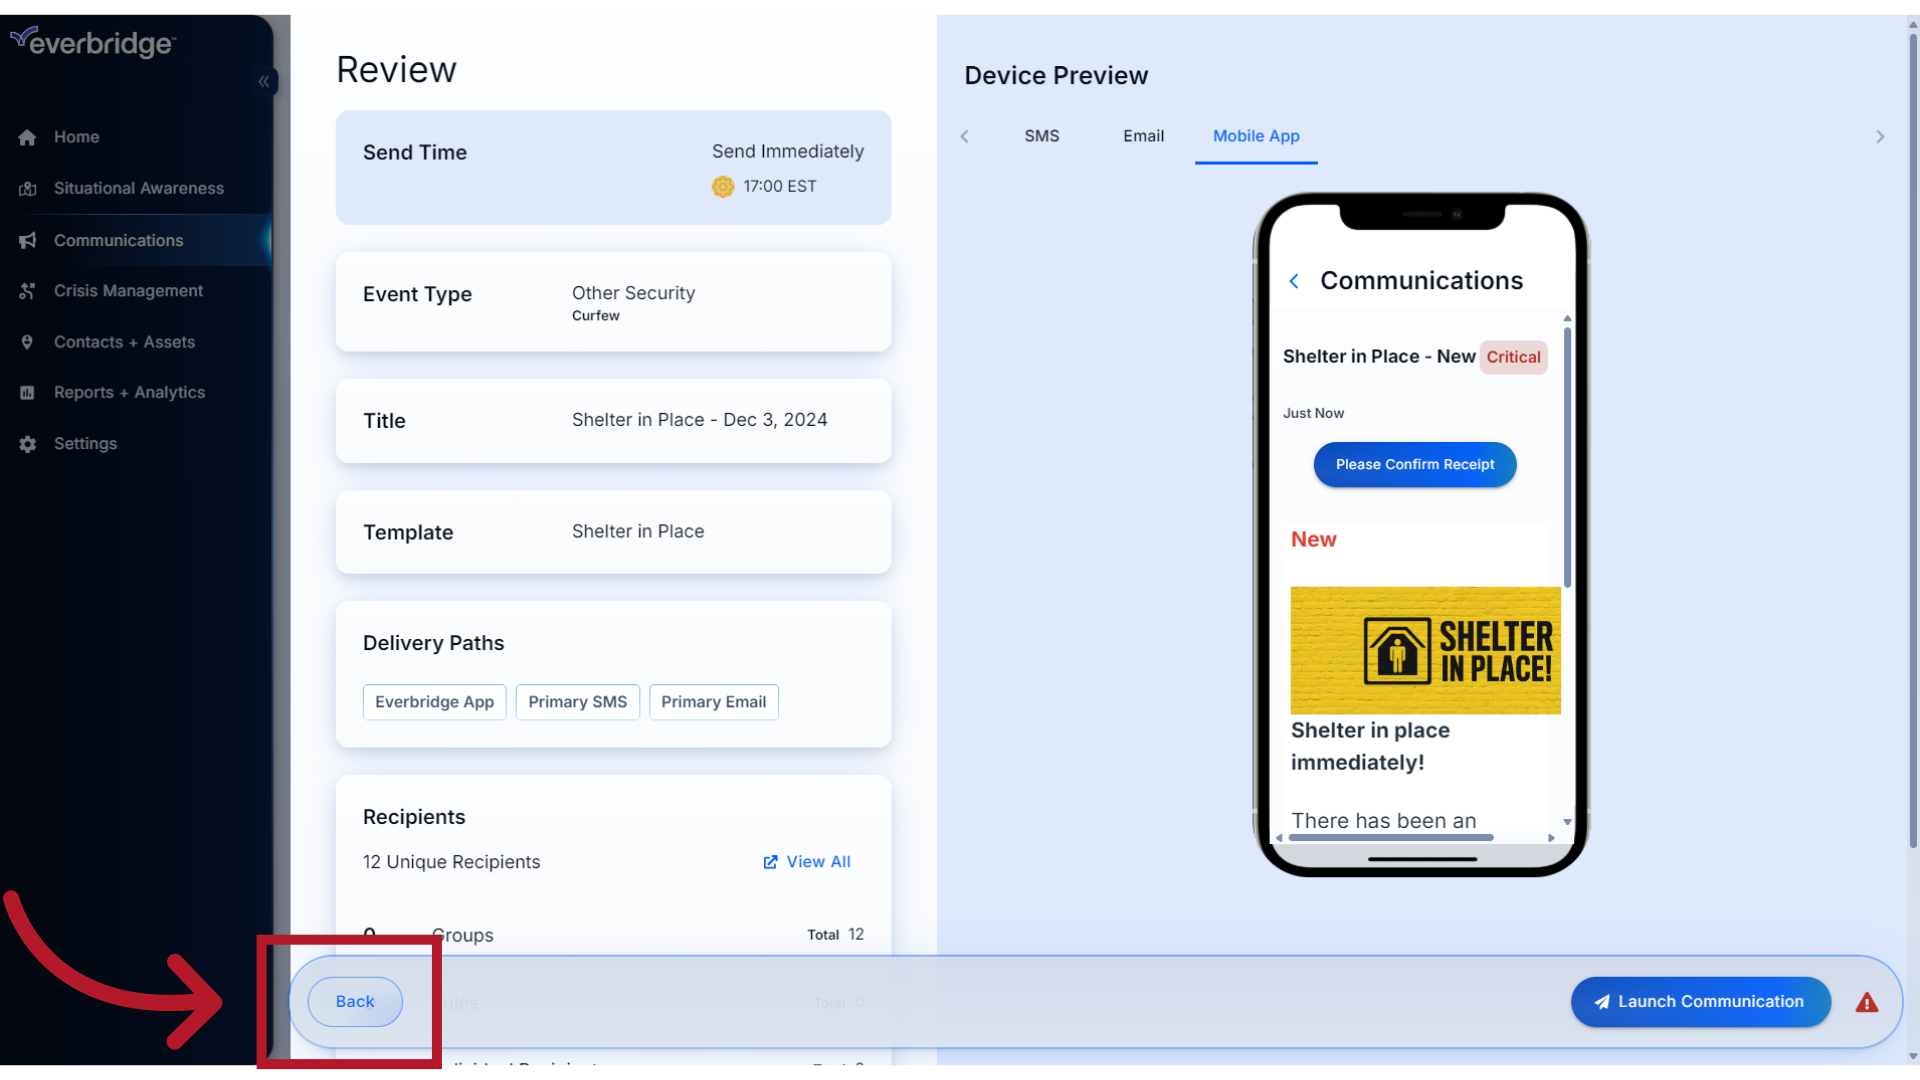
On the left side of the Review window, you will see a summary of the template information.
22. Review
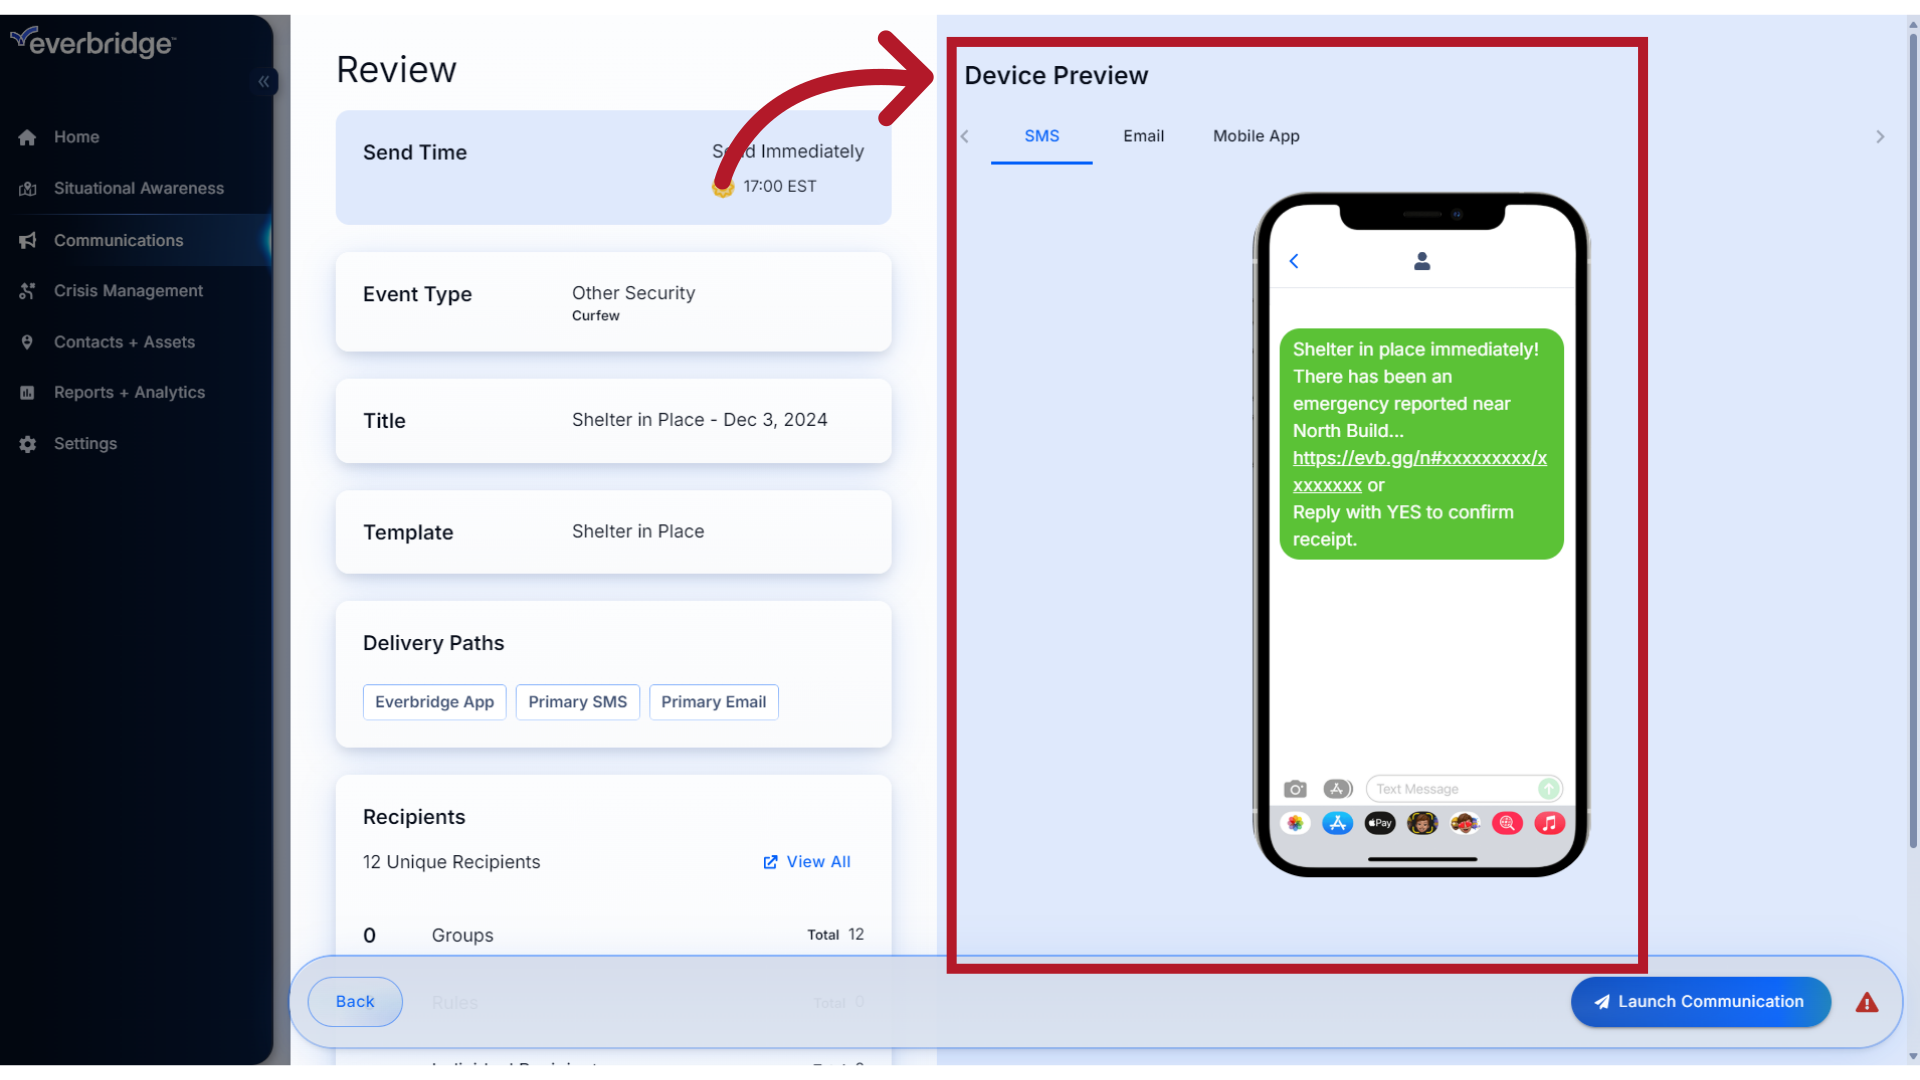
And on the right, you can select each device type to preview how the content will appear when received by your contacts. For this template, we can review the SMS text message,
23. Review
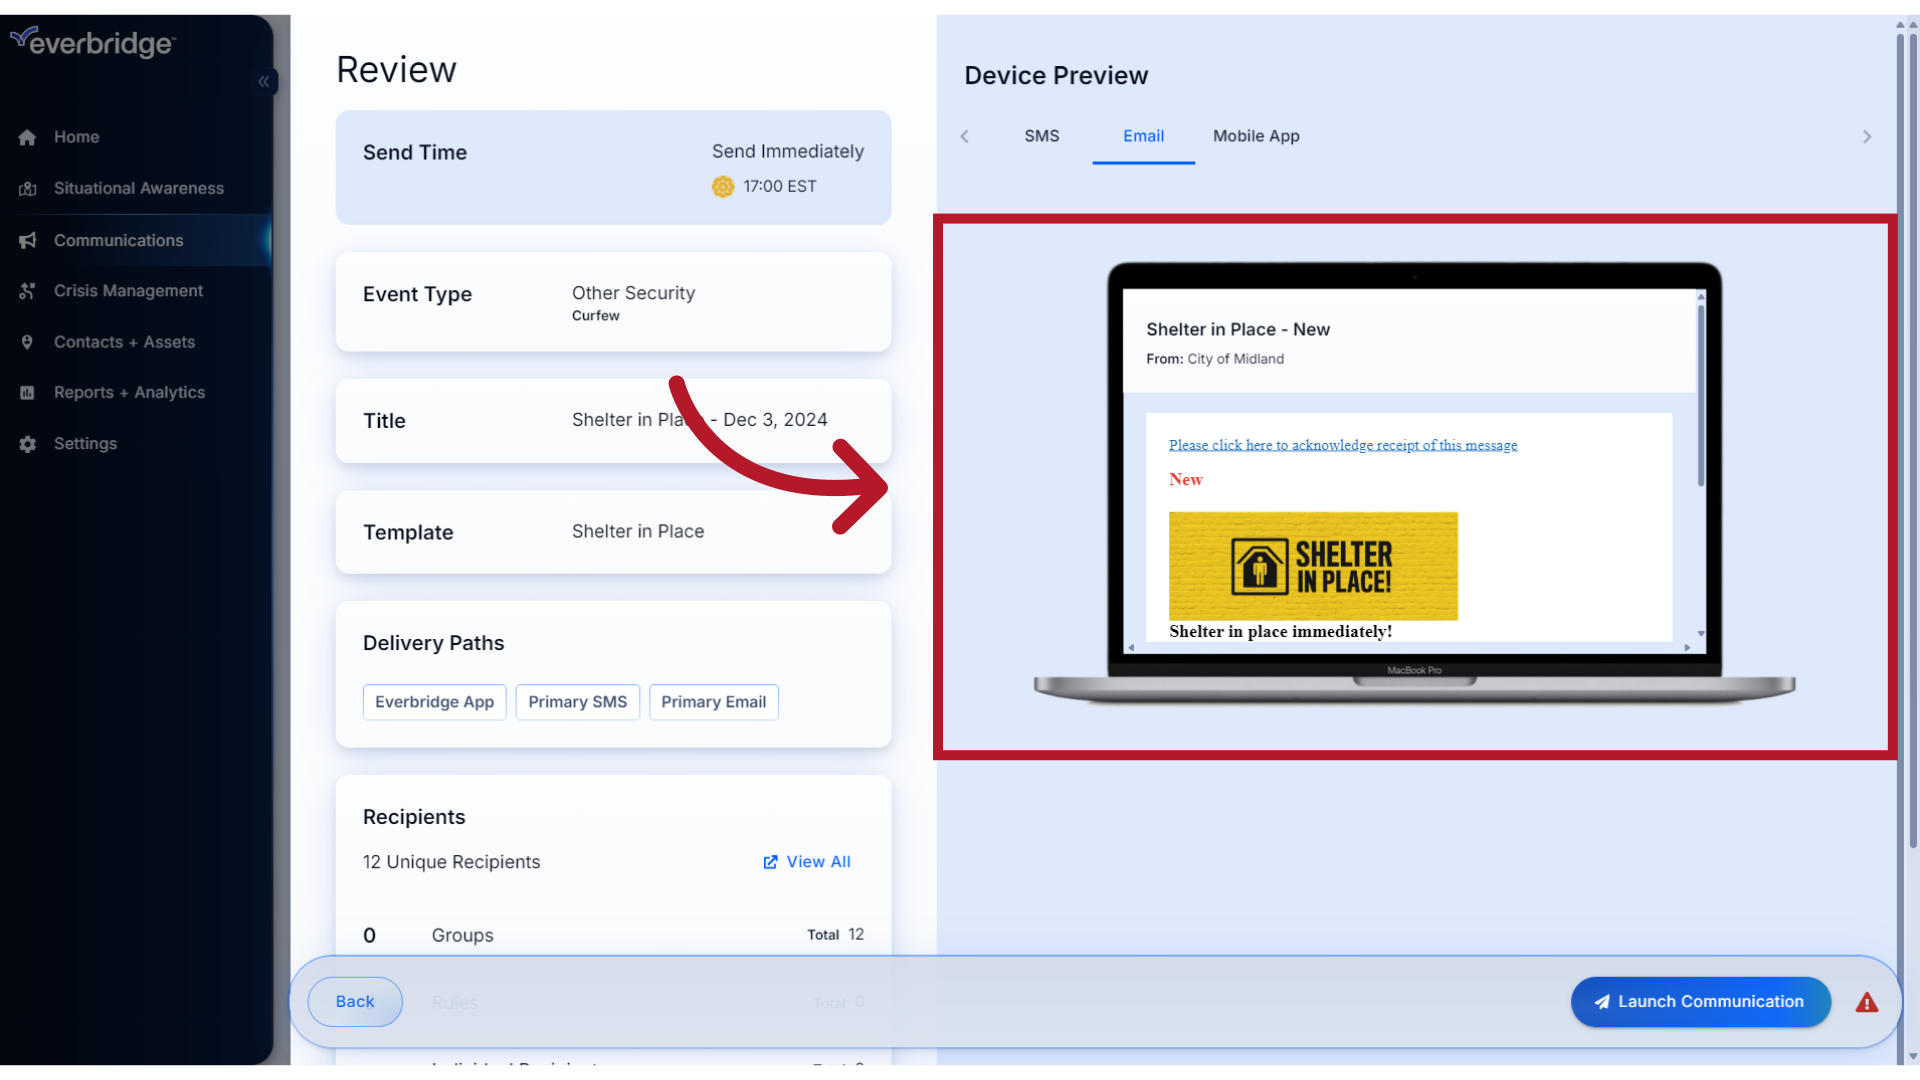
Email
24. Review
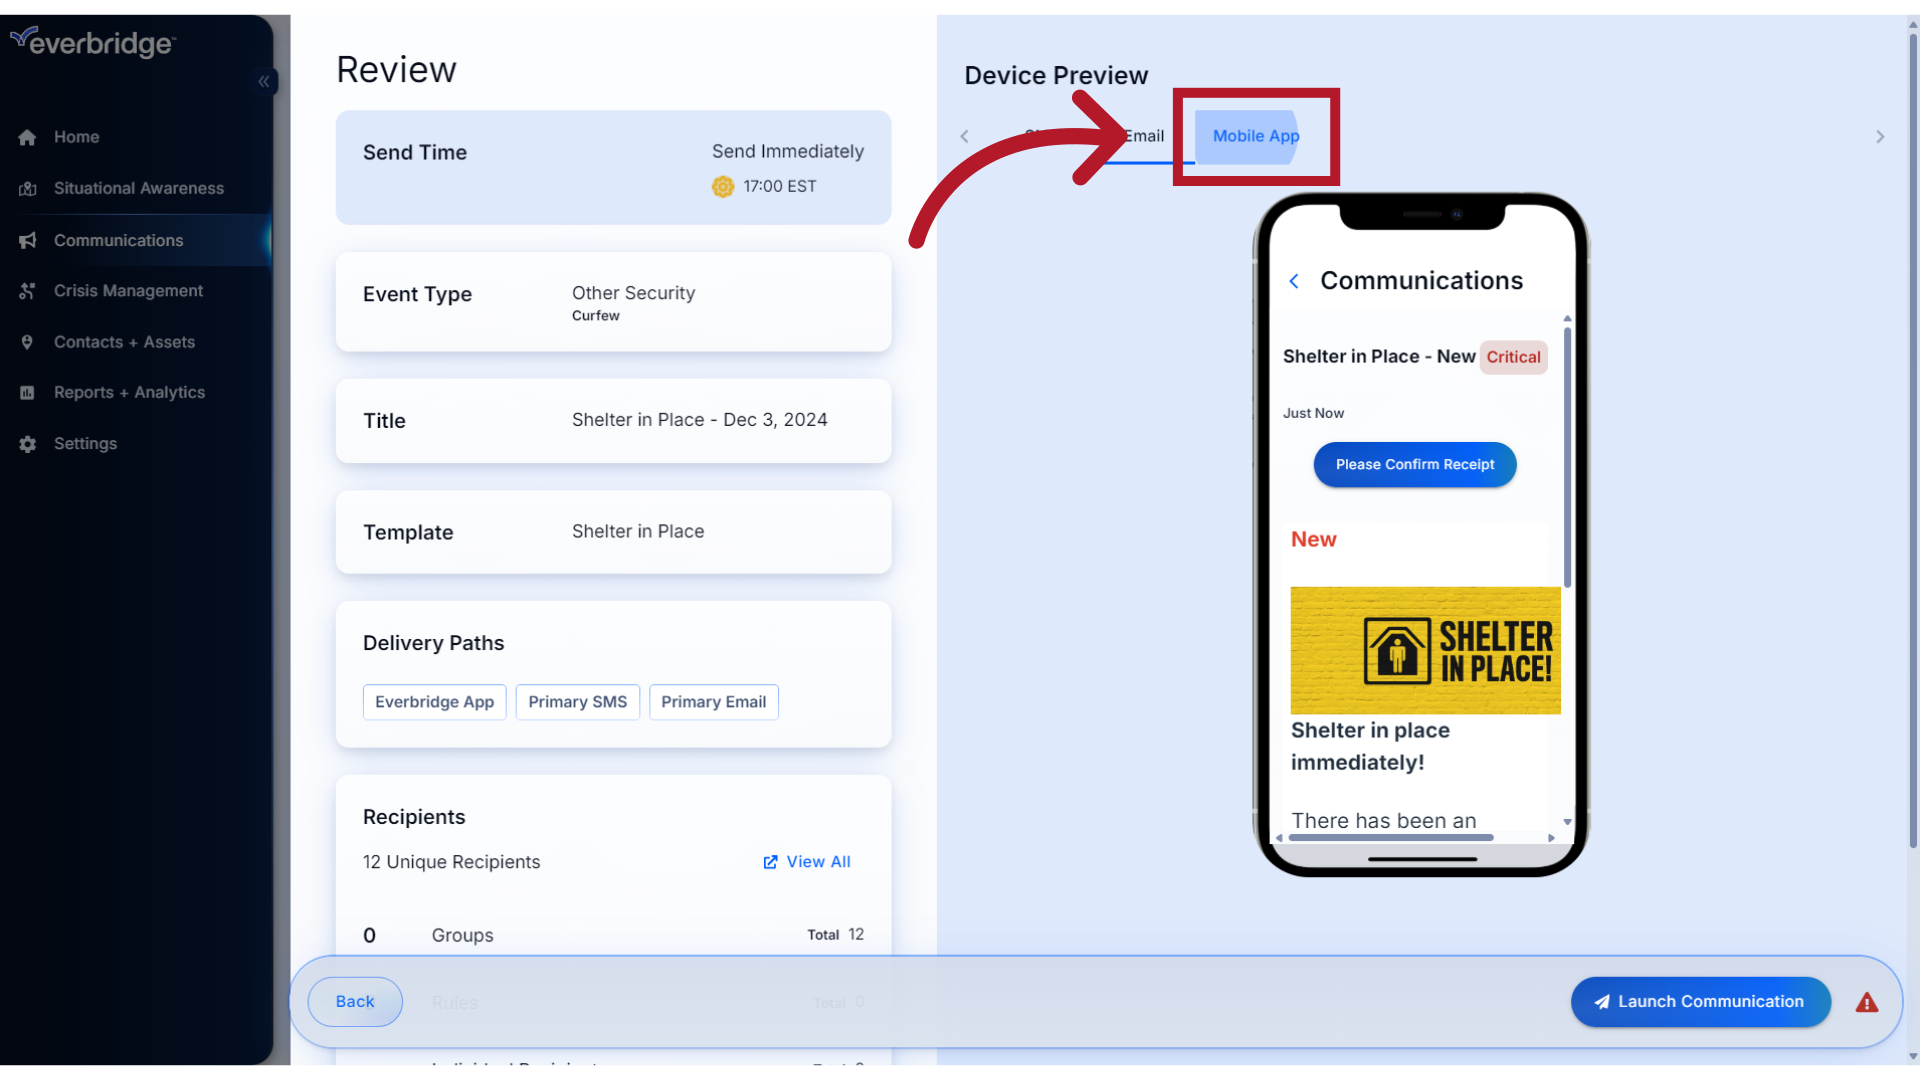
And the mobile app.
25. Back
If you need to make any changes, click the Back button to return to the form.
26. Launch
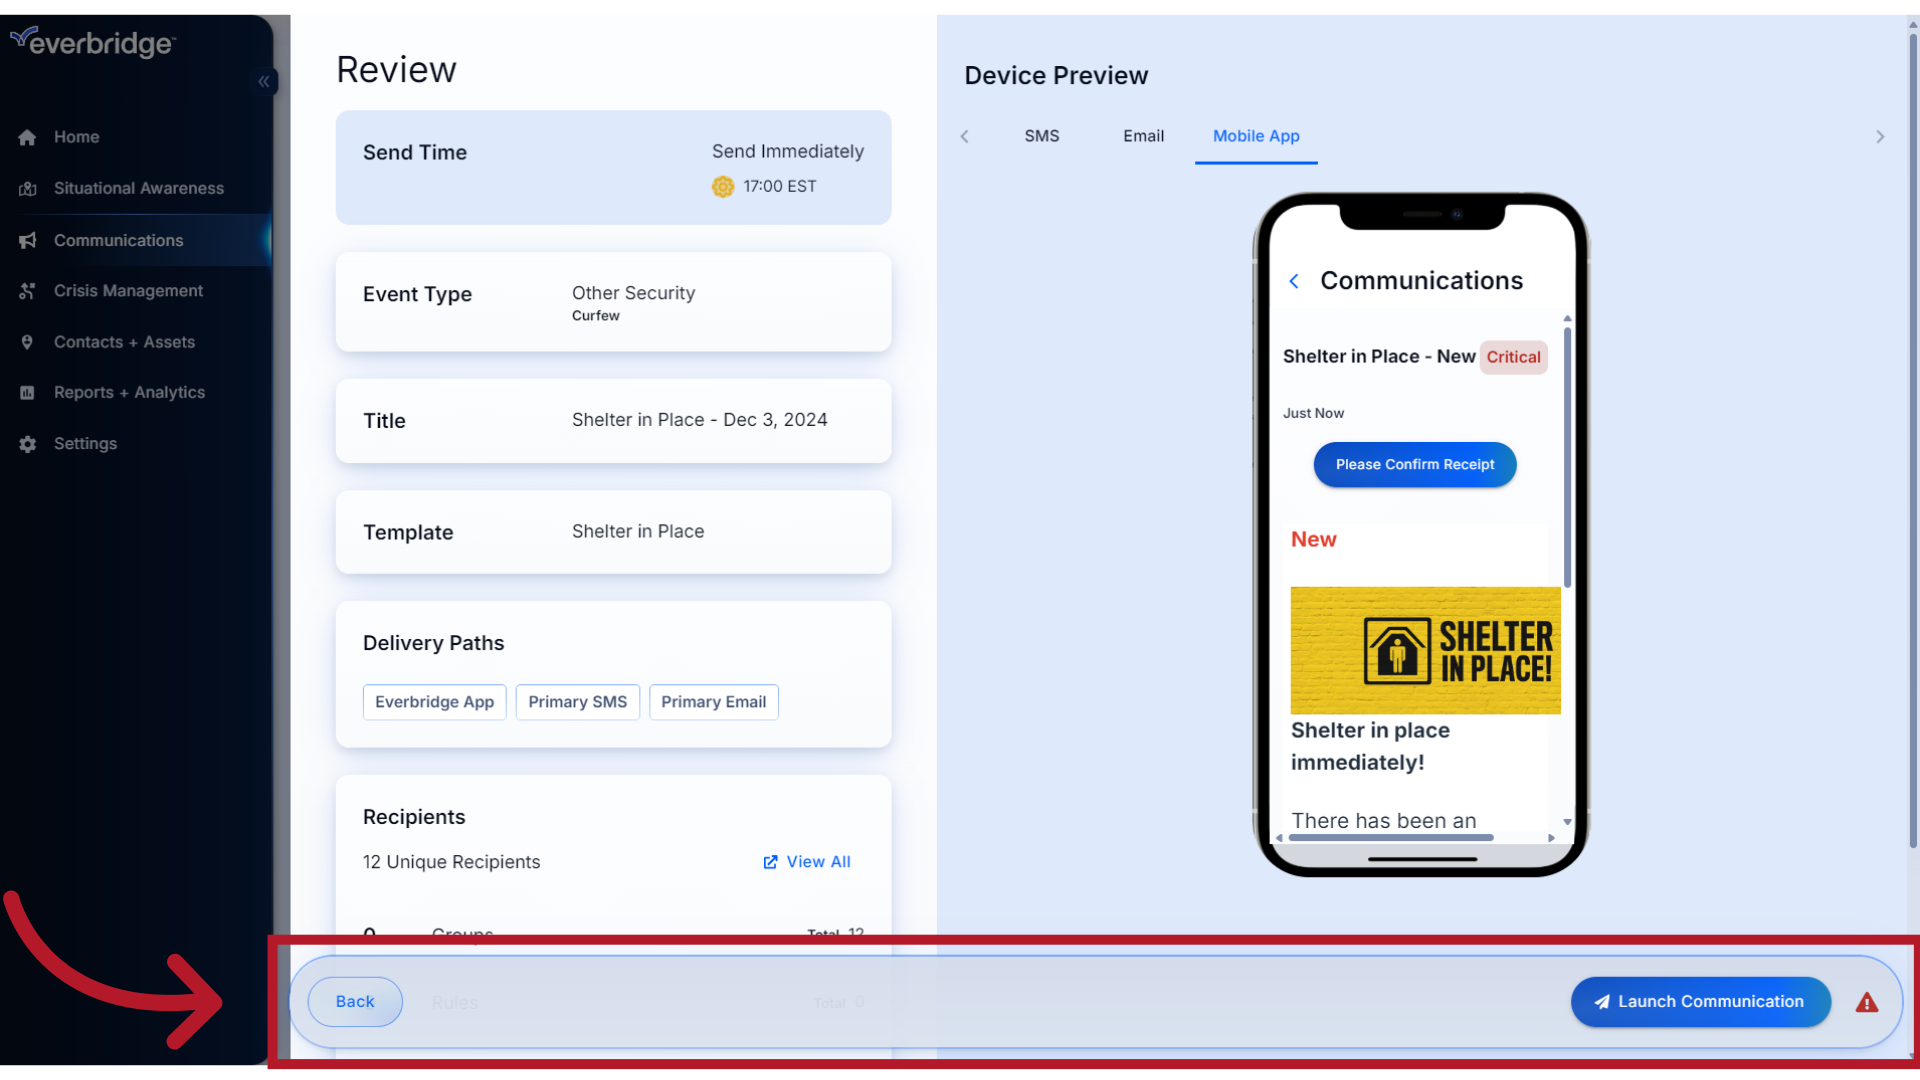
If you are satisfied with the content, click Launch Communication to send the message.
27. List
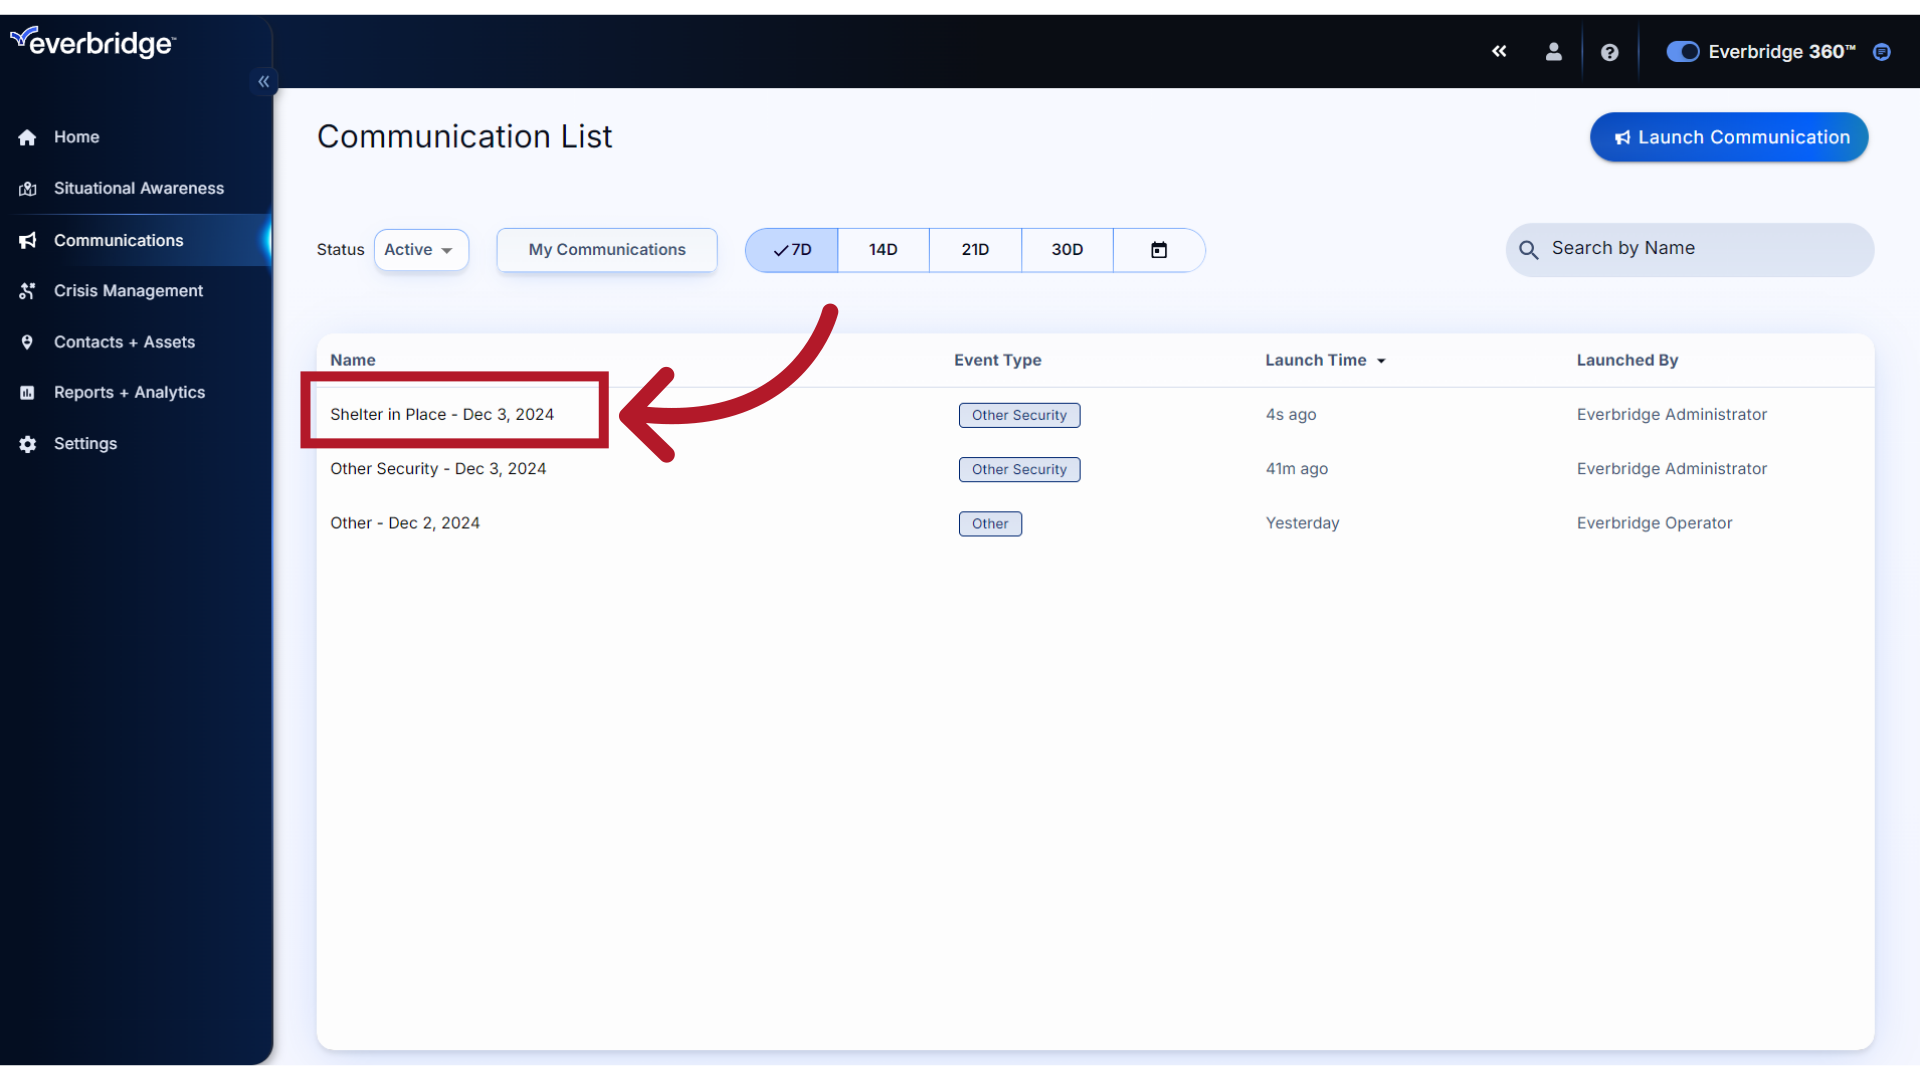
Once the message has been successfully sent, you will automatically be directed to the Communication List menu, where you can either view the Communication details by clicking on its title
28. Launch
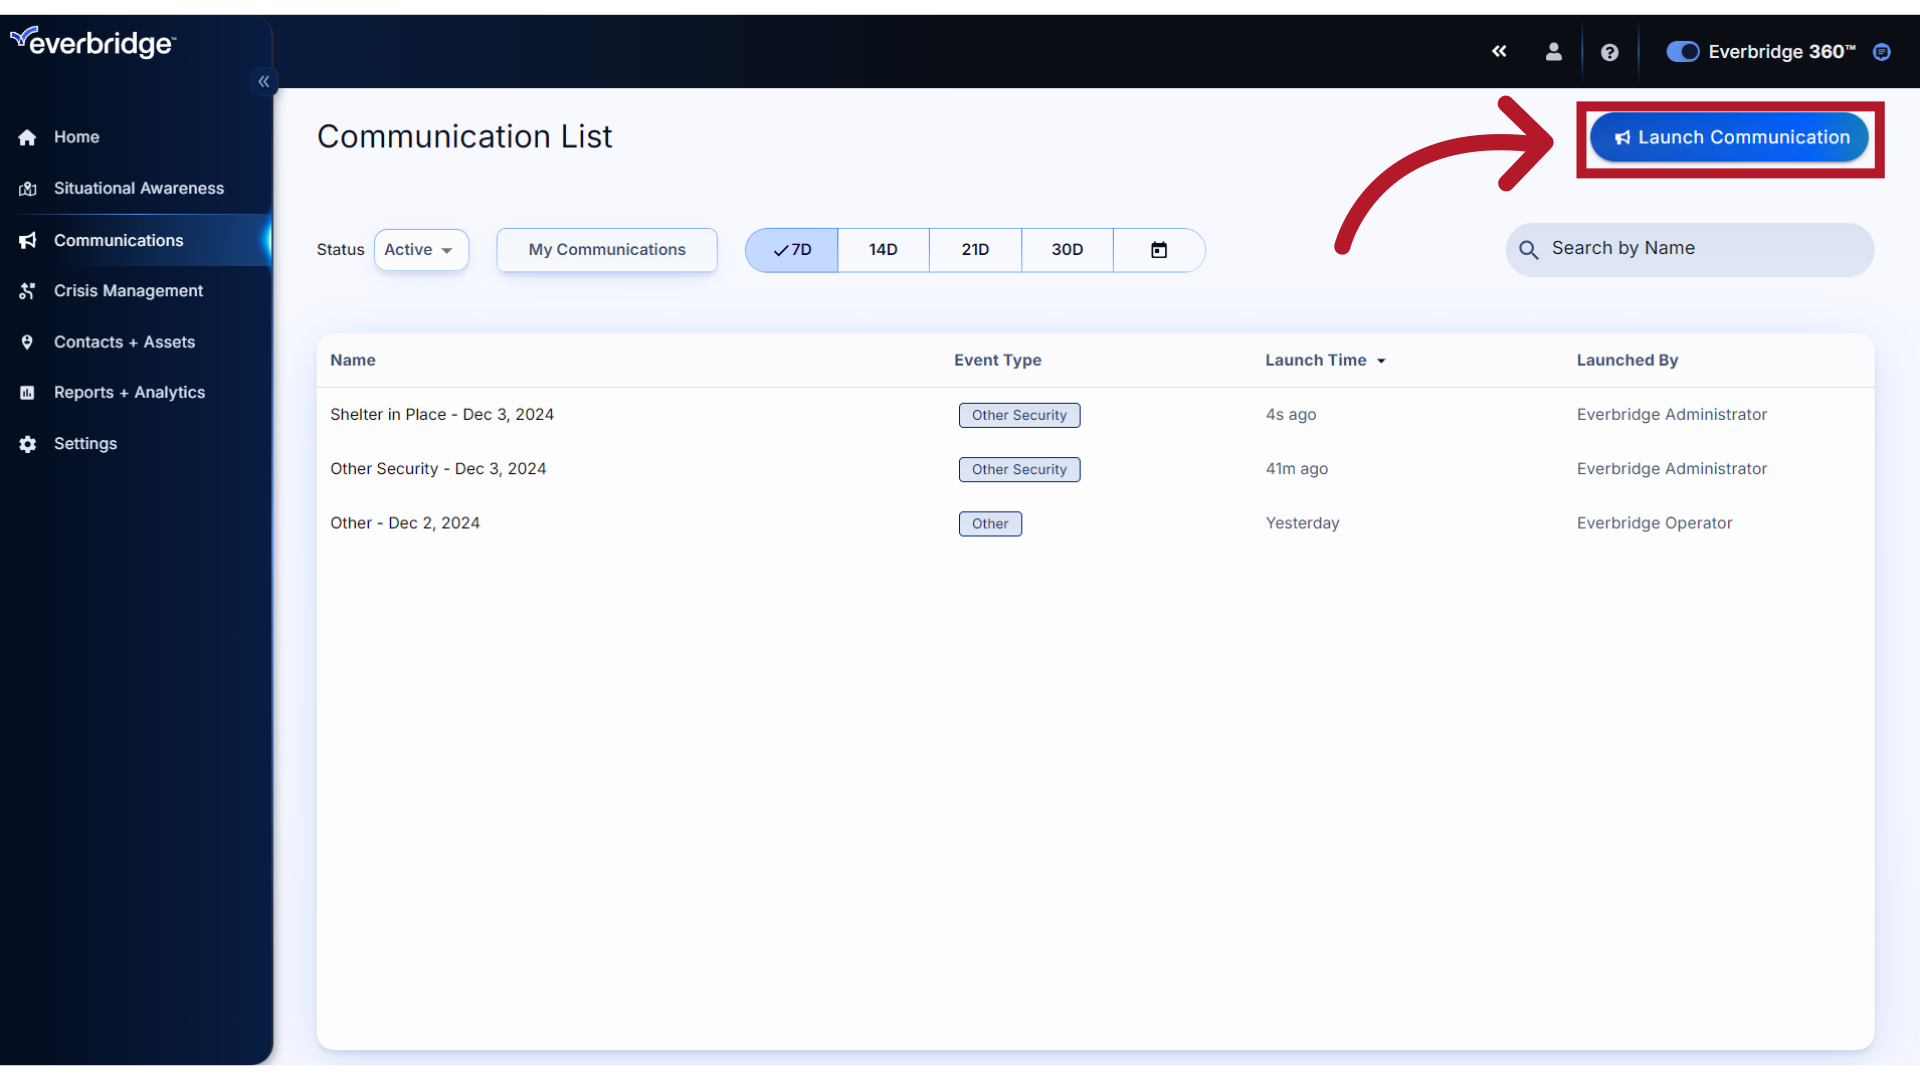
or launch another Communication.
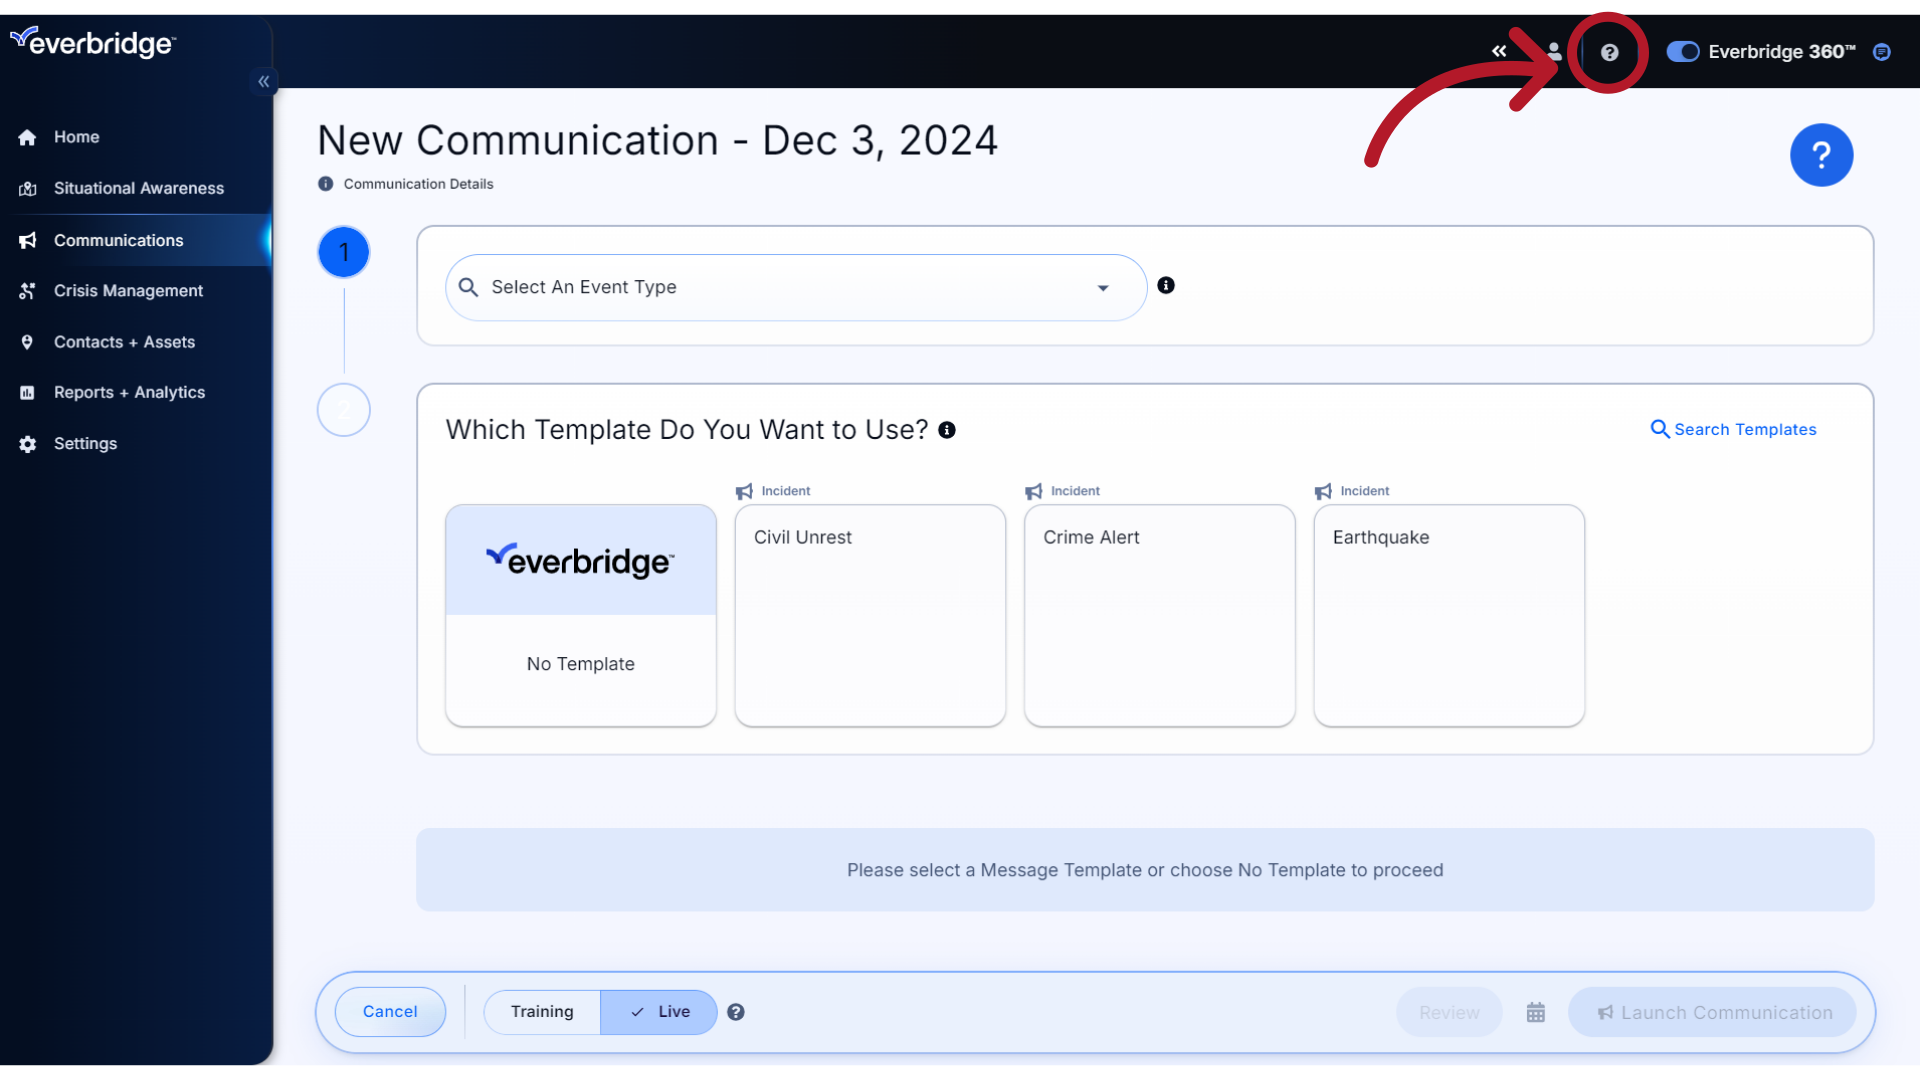
29. Help
For more information about any of the fields or selections shown in the Communications form, click the icon to access Online Support.
Through this guide, you have learned how to launch a Communication using a preconfigured template. Thank you for watching!