Topic
Configuring Safety Buttons for the Everbridge Mobile App via the Manager Portal.
Description
The Everbridge Mobile Application provides access to safety features which can be used by your organization's contacts to indicate their location, initiate one-tap phone calls, and trigger alerts if they have an emergency. As an administrator, you will need to ensure the system Safety Buttons are configured to your organization's specifications, and align with your organization's safety response procedures. This guide outlines the steps for managing these settings, ensuring quick access during critical situations.
Go to manager.everbridge.net
1. Navigate
To get started, navigate to the Everbridge Mobile App menu from your Organization's Settings.
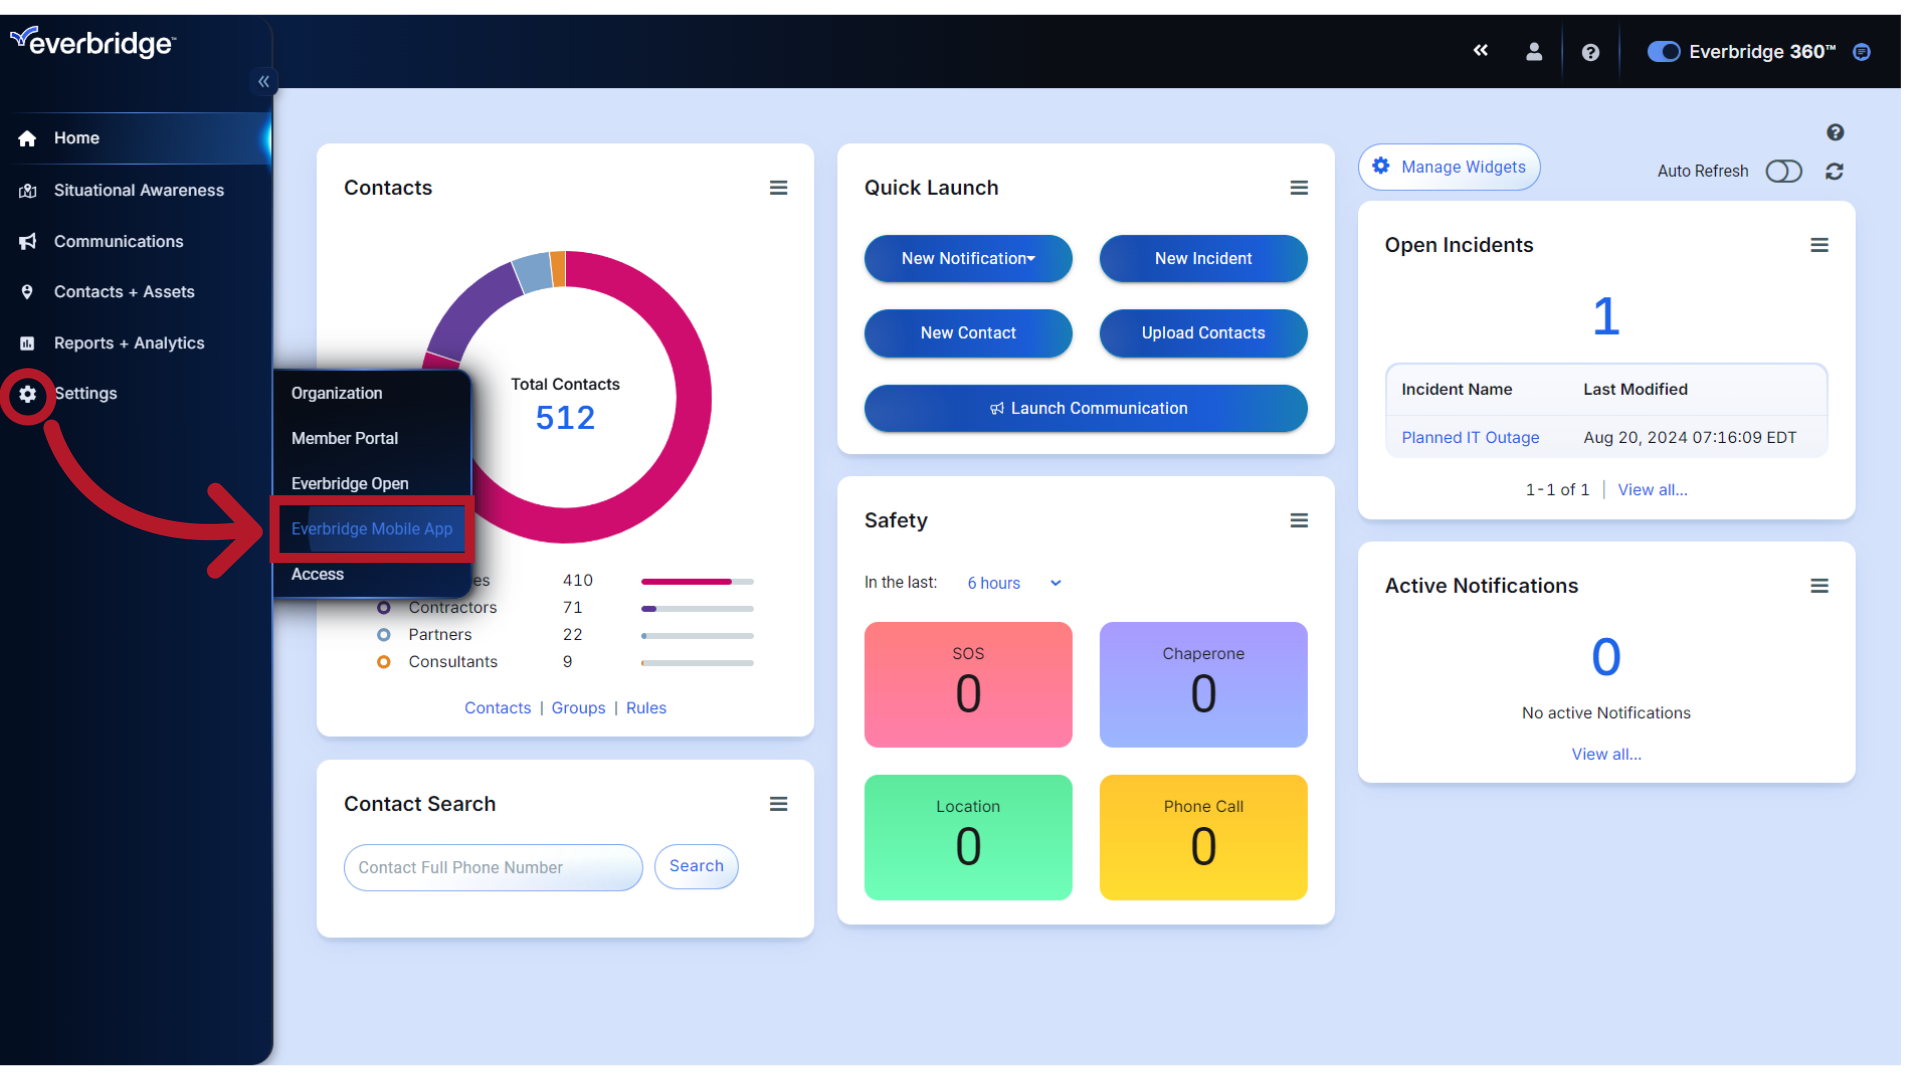
2. Select
and select Safety from the Application Options menu.
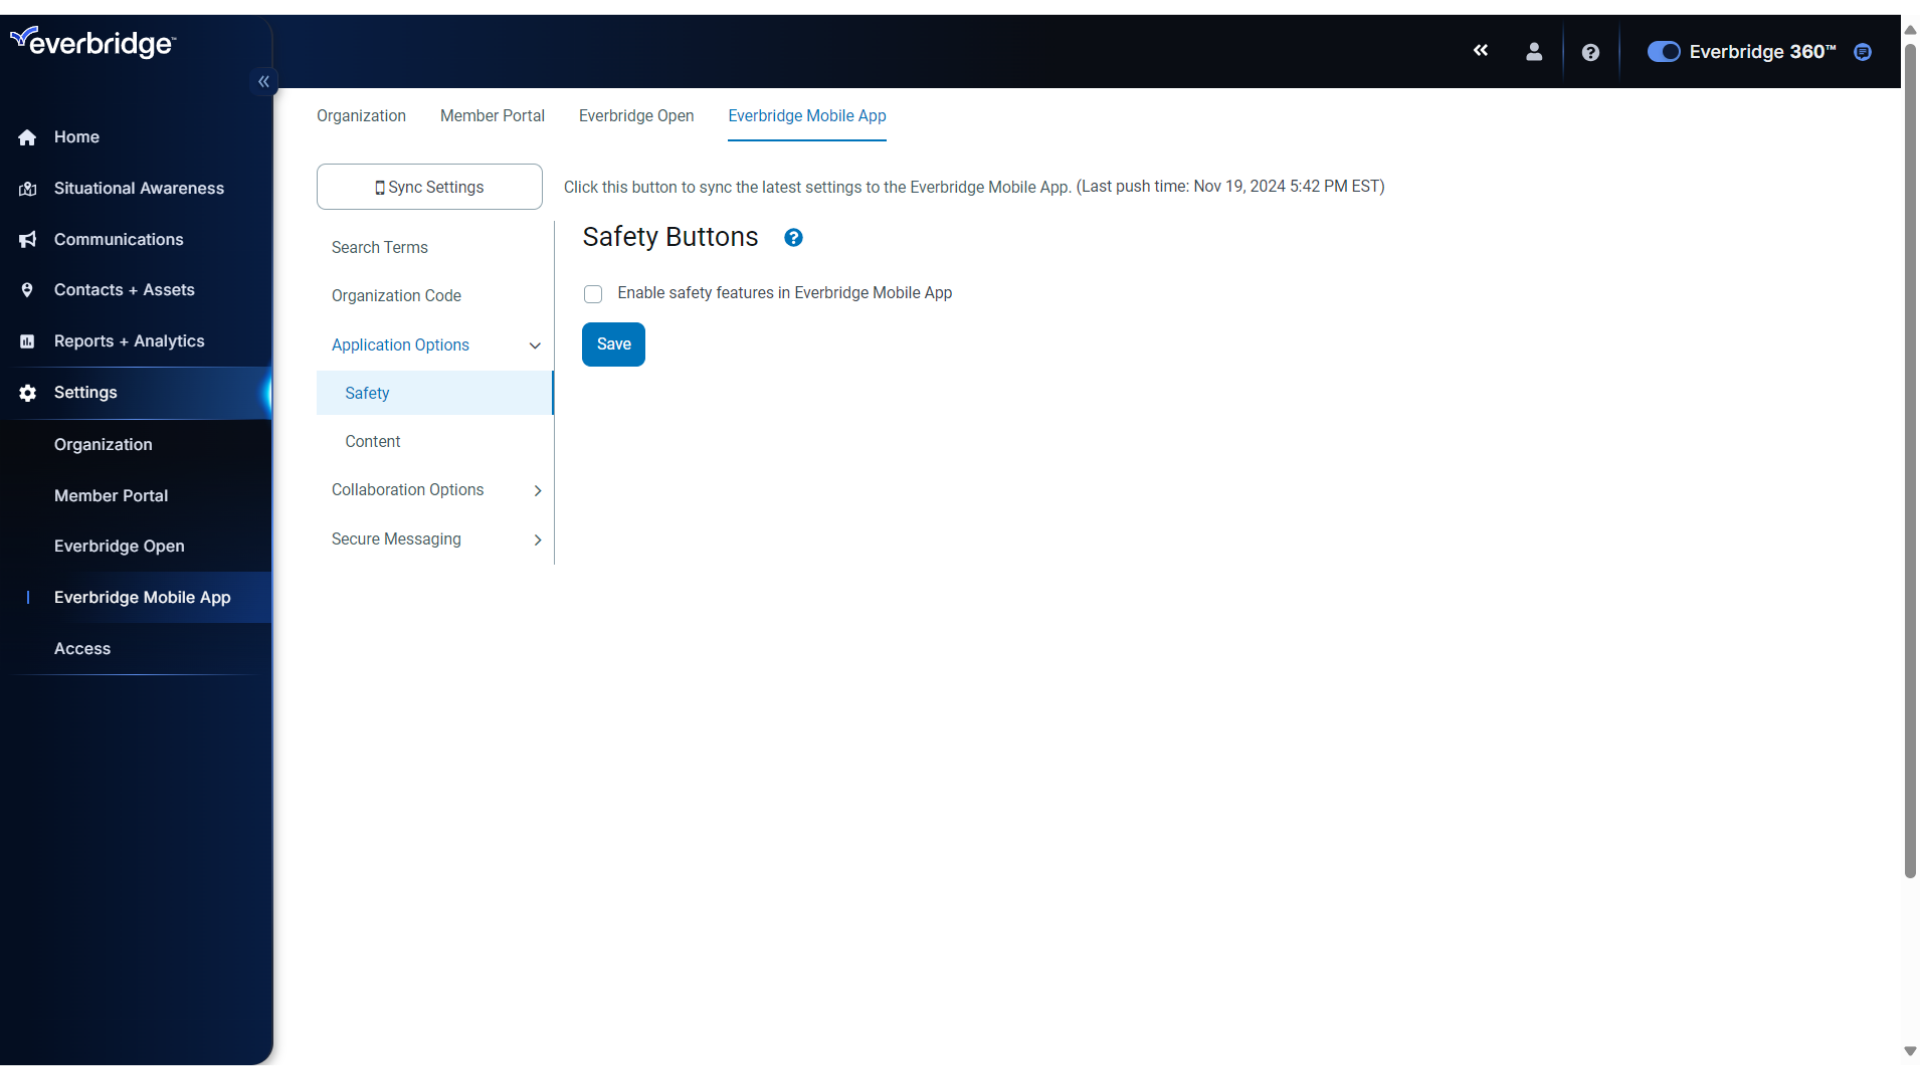
3. Enable
If not already enabled, click the box to Enable the Safety Buttons.
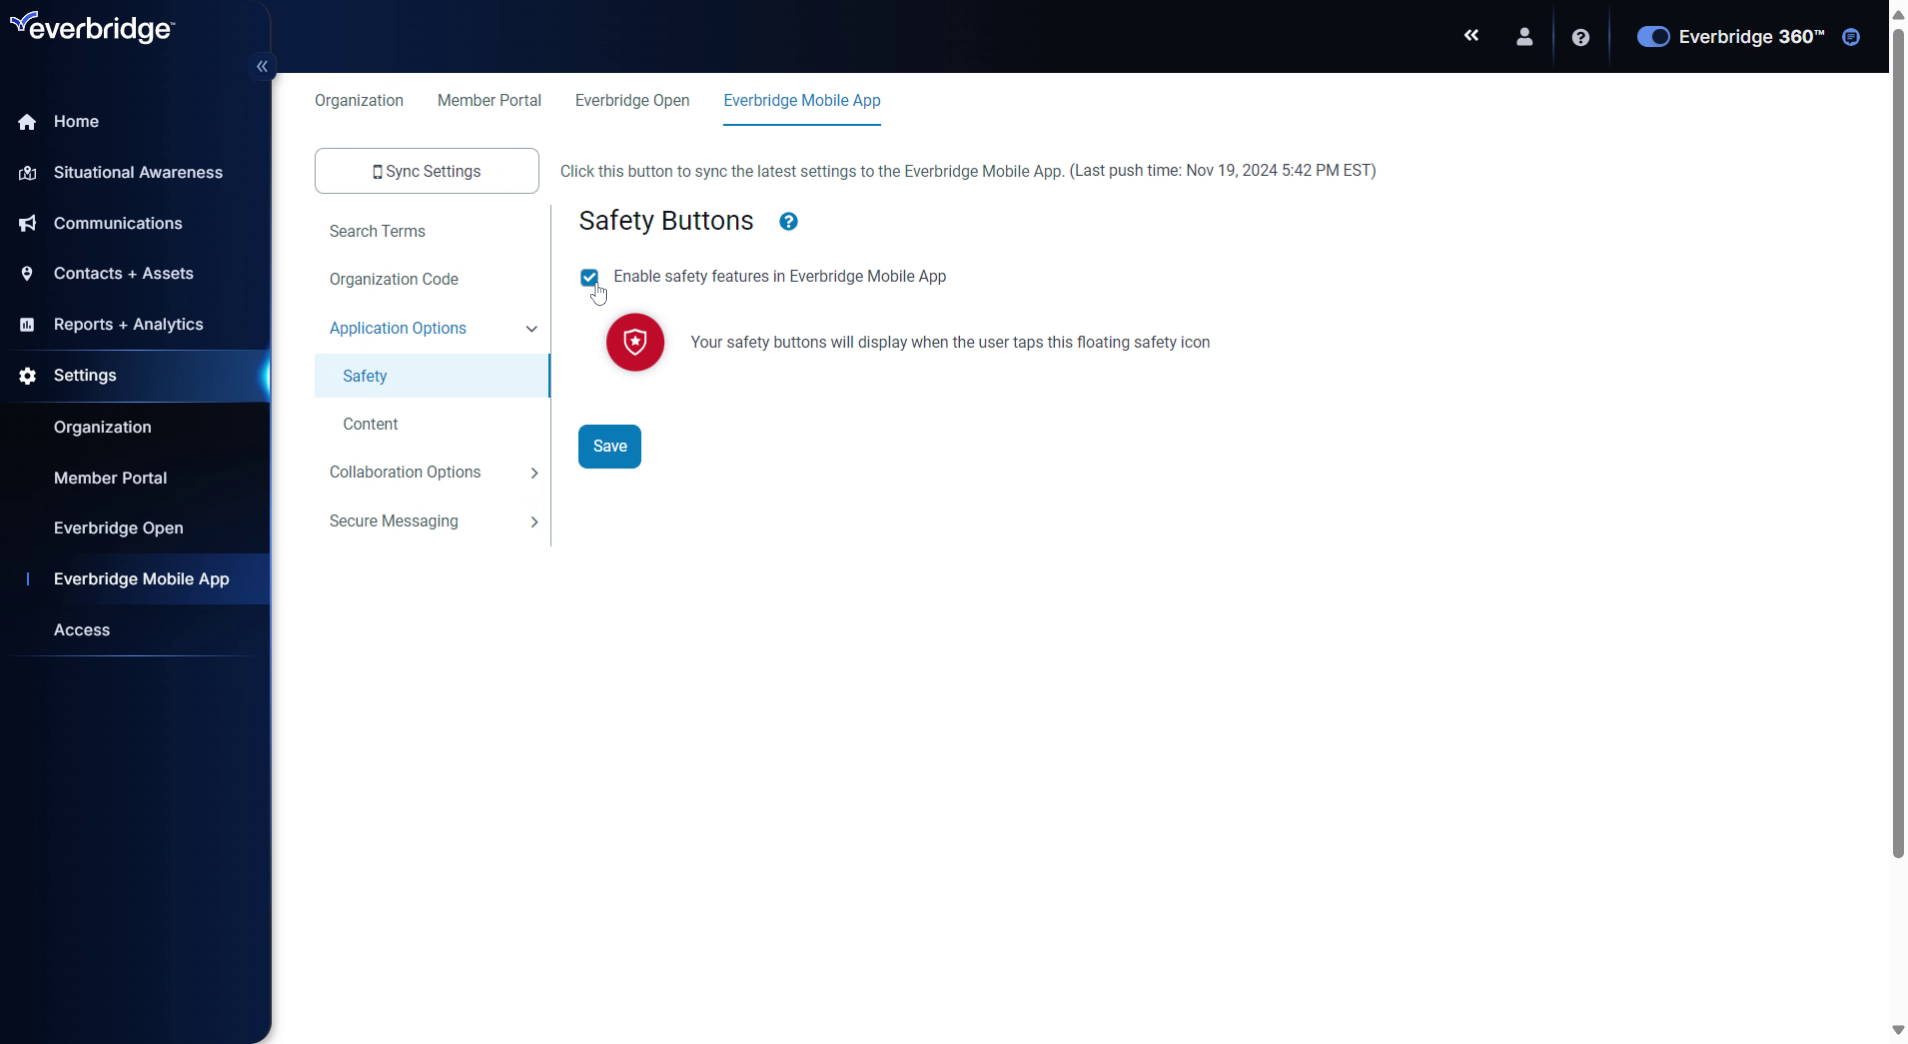
4. Buttons
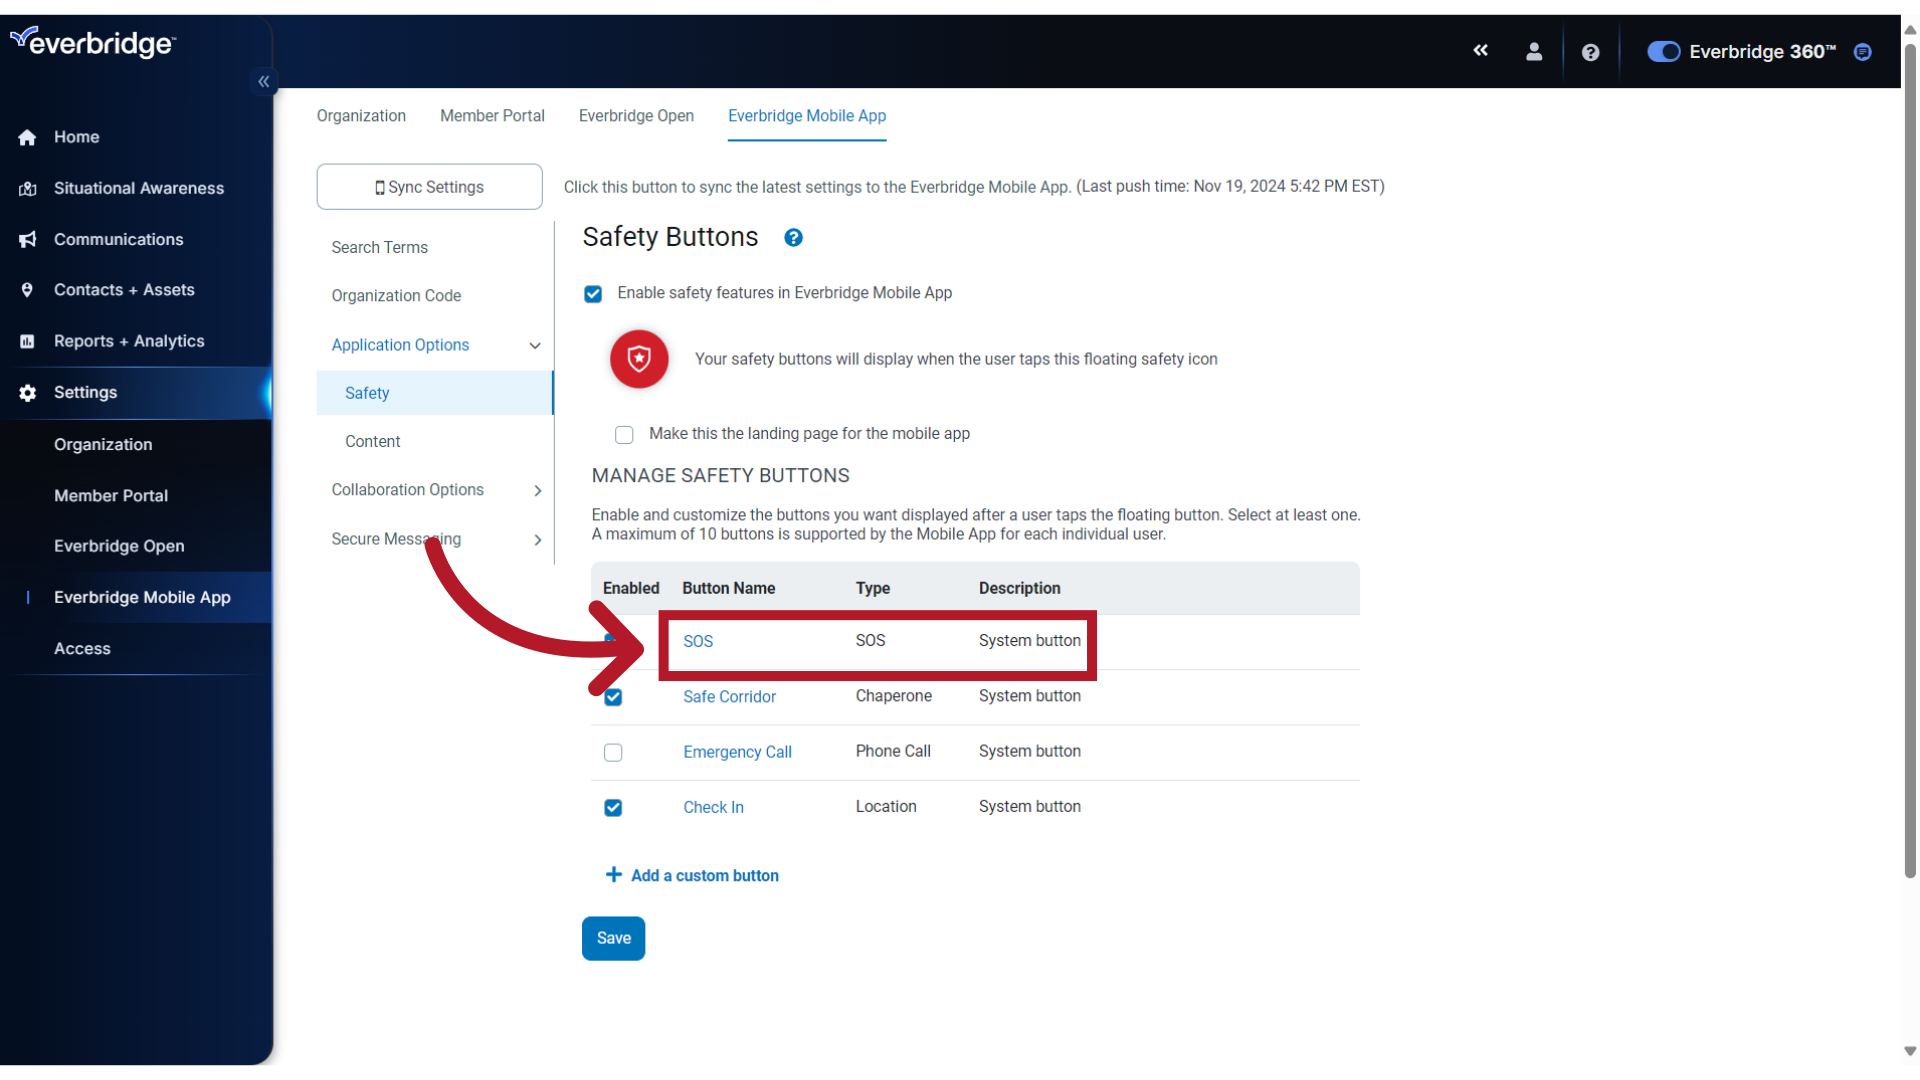
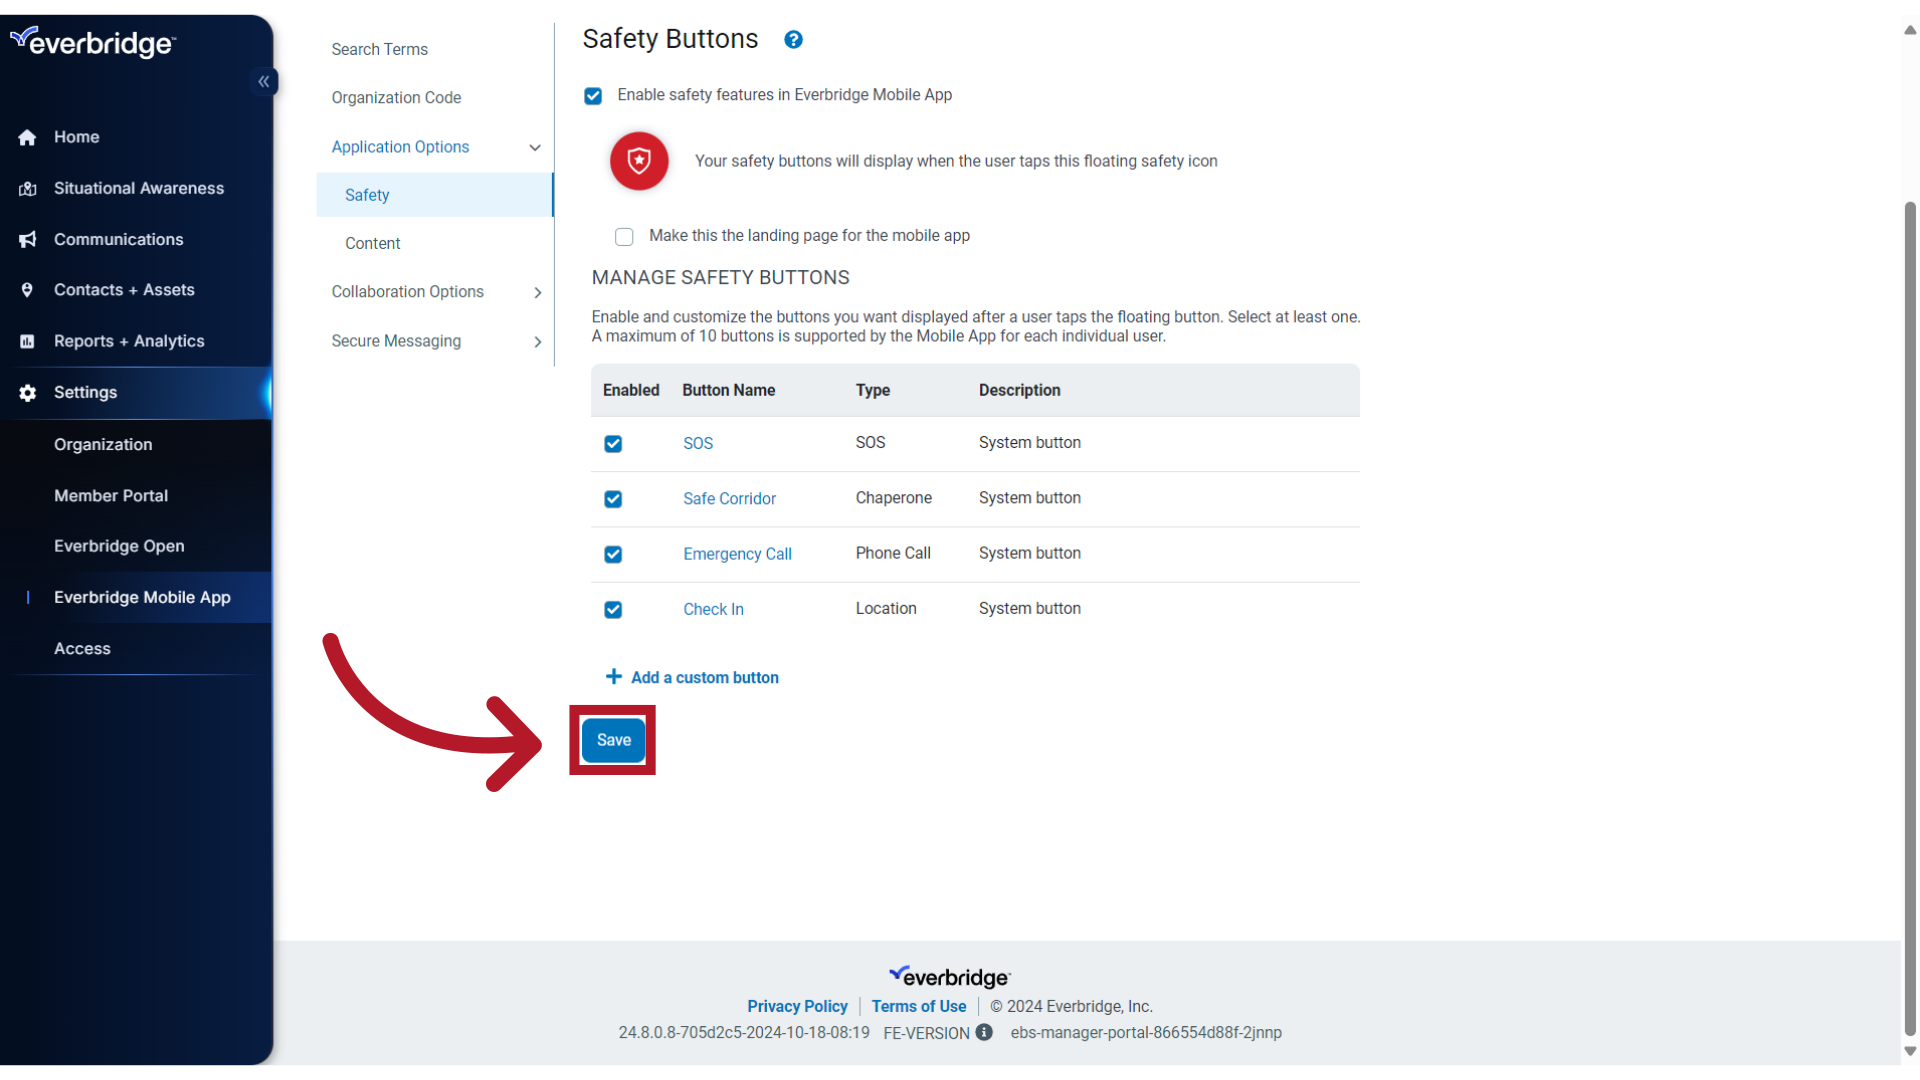
The four system buttons now appear. SOS, Safe Corridor, and Check-In will be enabled by default and, with no additional configuration, are accessible to all contacts in your organization who have signed into the mobile app. Emergency Call is not enabled by default as it requires the input of additional information.
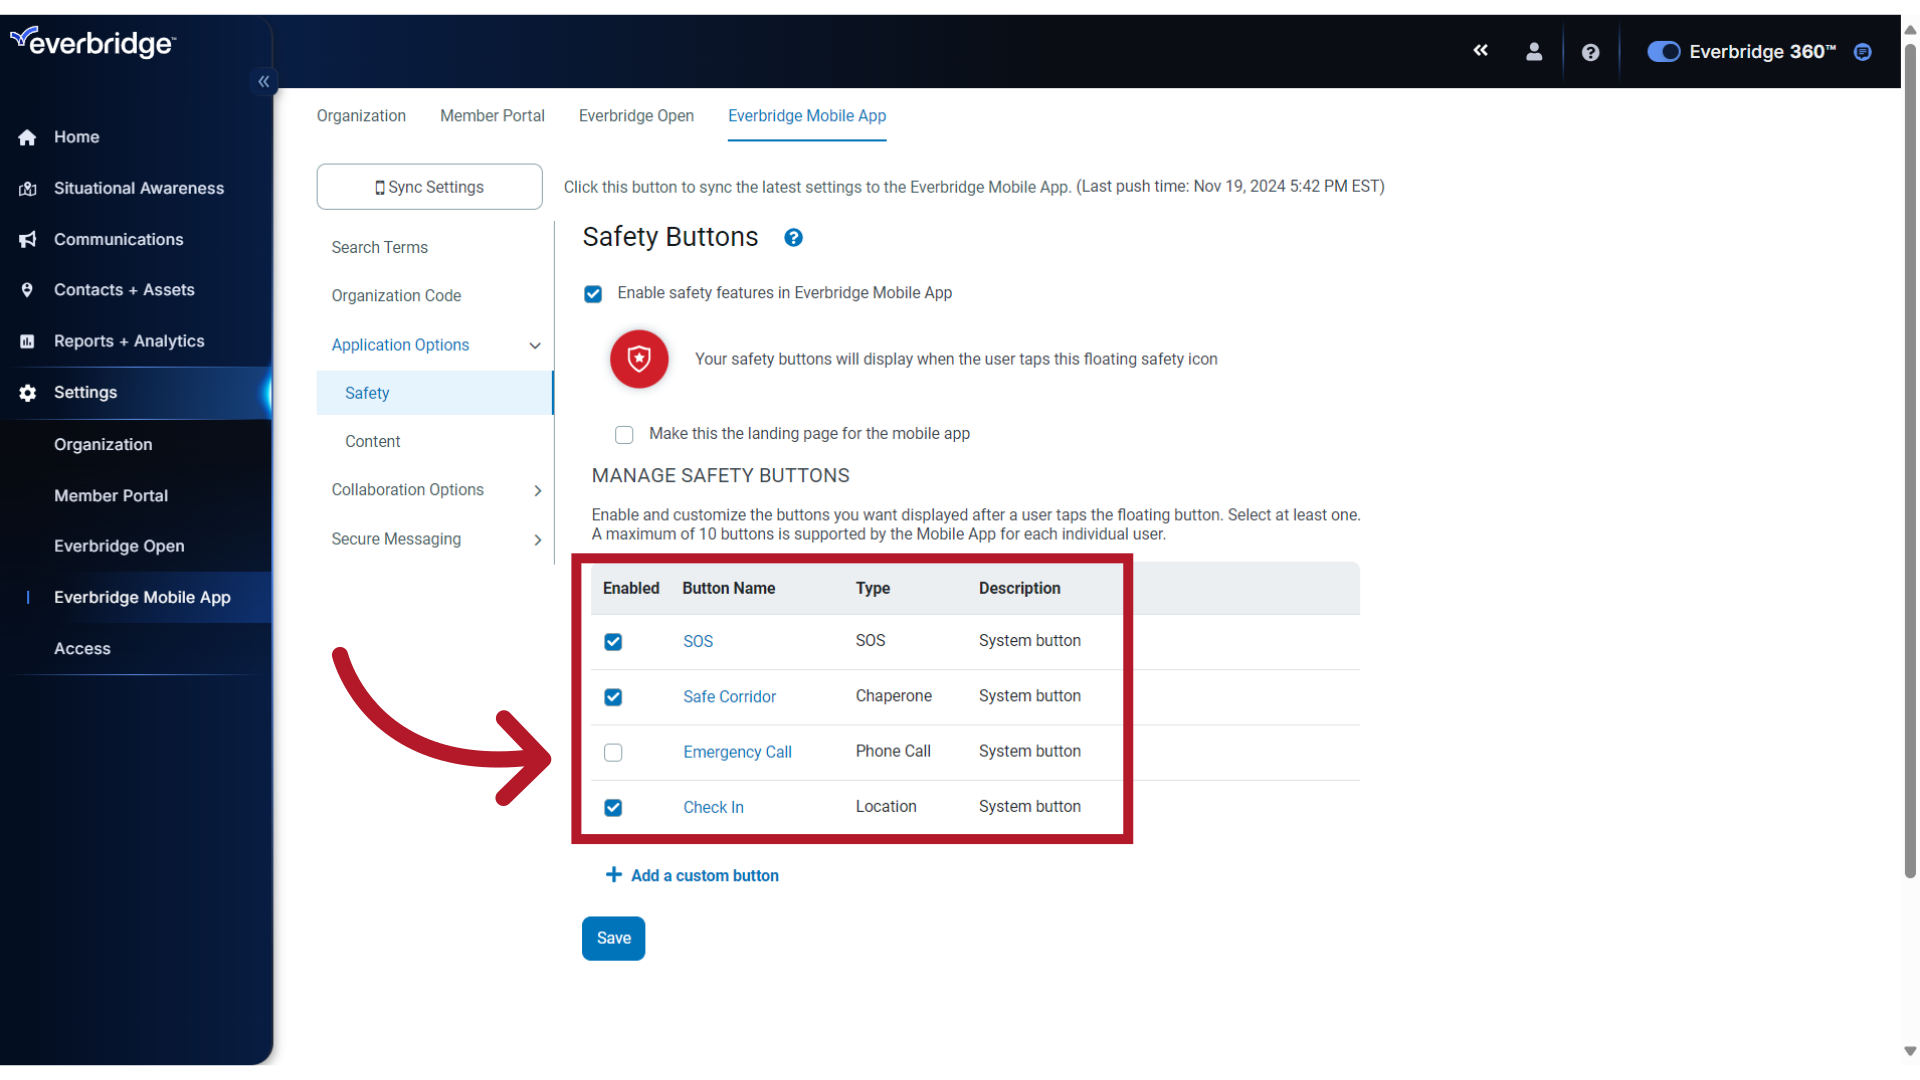
5. SOS
To access the detailed configuration page of a button, click the button name. Let's review the configuration options by looking at SOS.
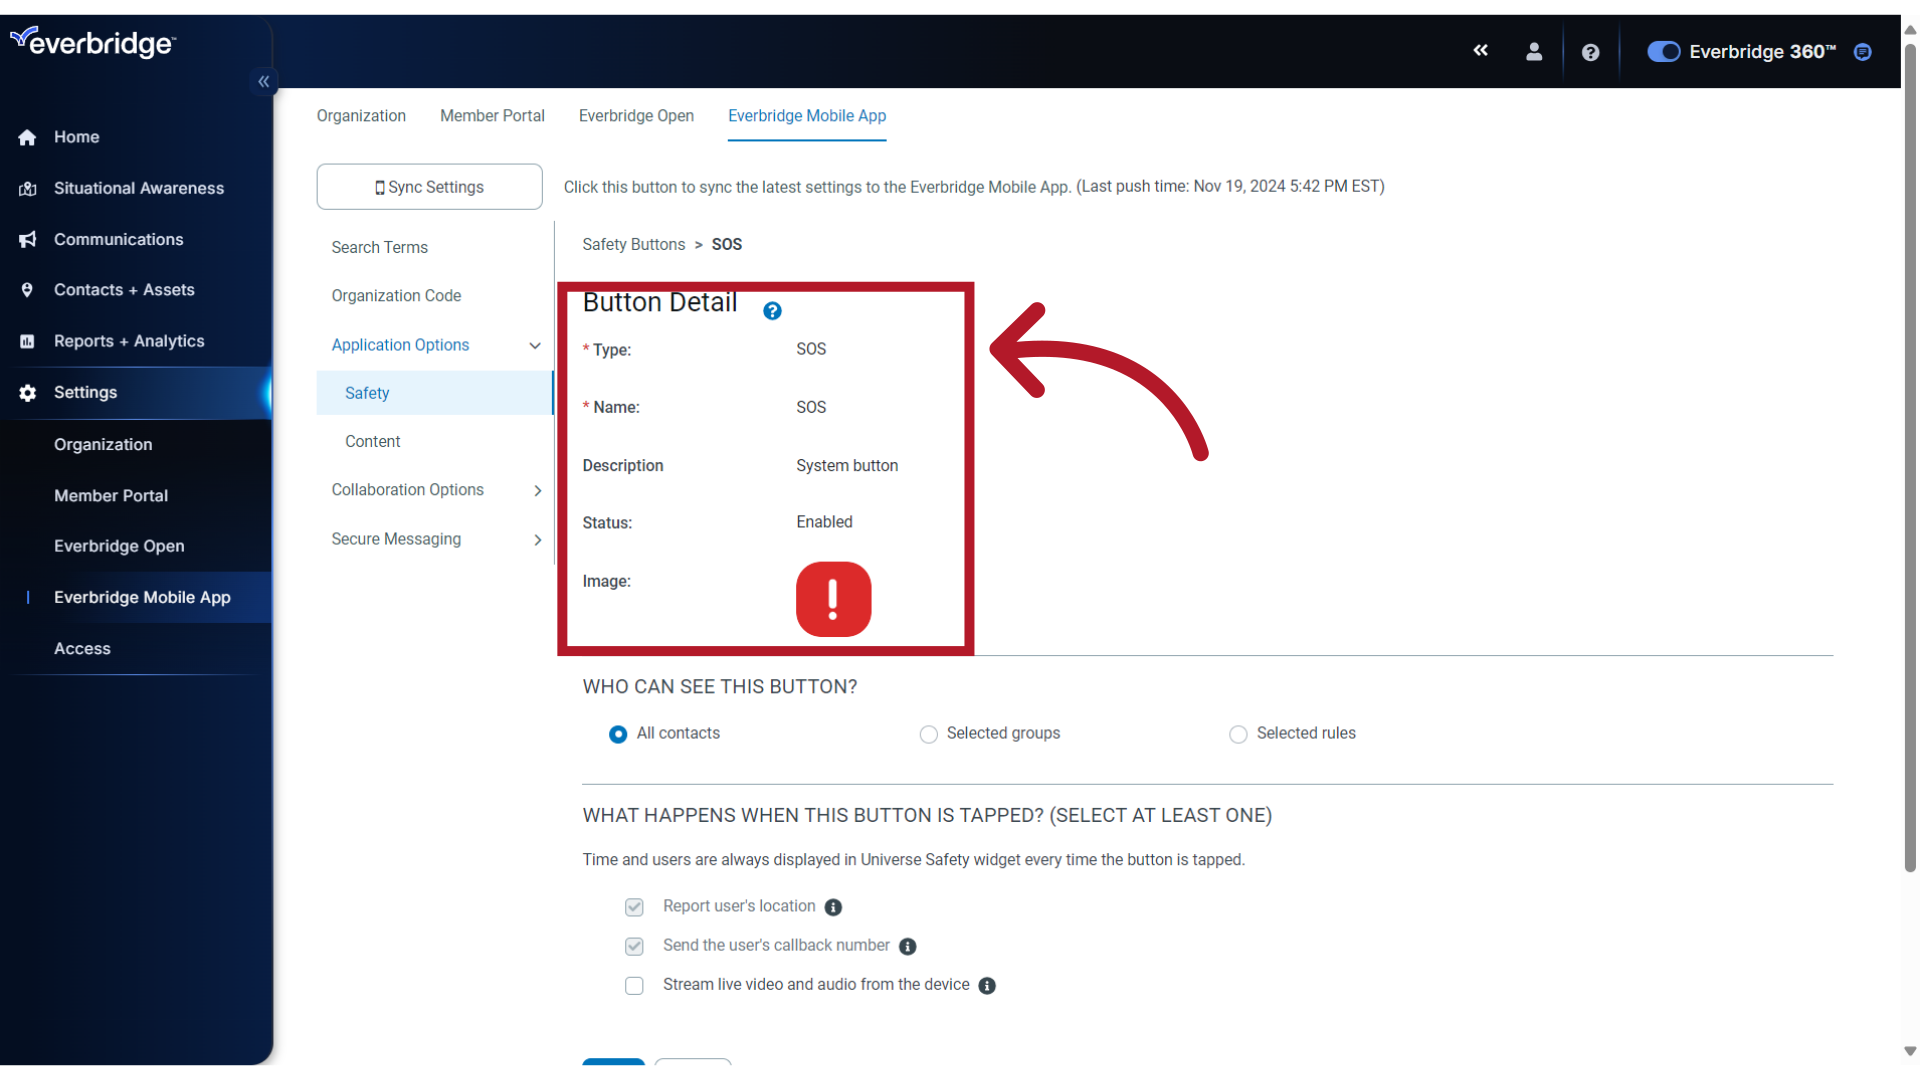
6. Button Detail
The Button Detail information shows the Type, Name, Description, Status and Image. These details cannot be changed for system buttons.
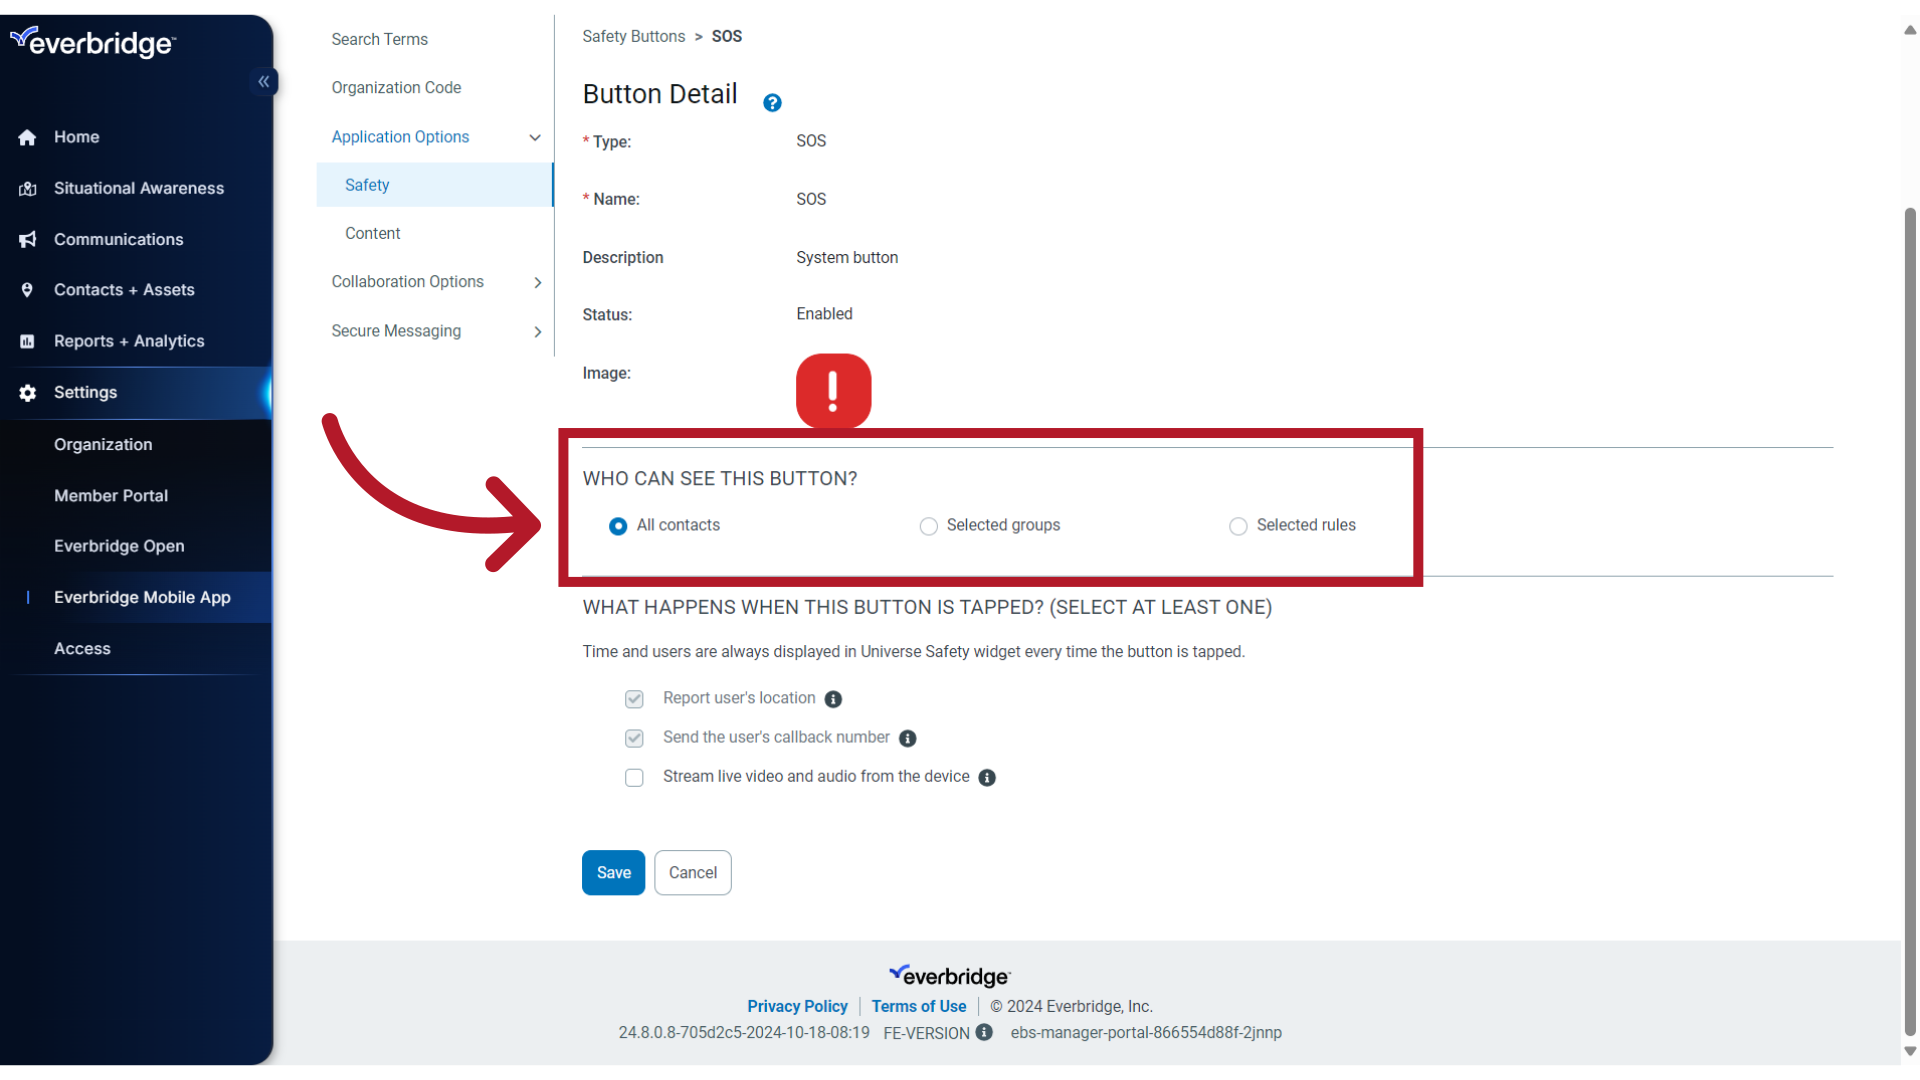
7. Contact Access
The contacts within your organization who can view and use the button in the mobile app is set here. There are three mutually exclusive possibilities, defaulting with the option to allow All Contacts access to the button.
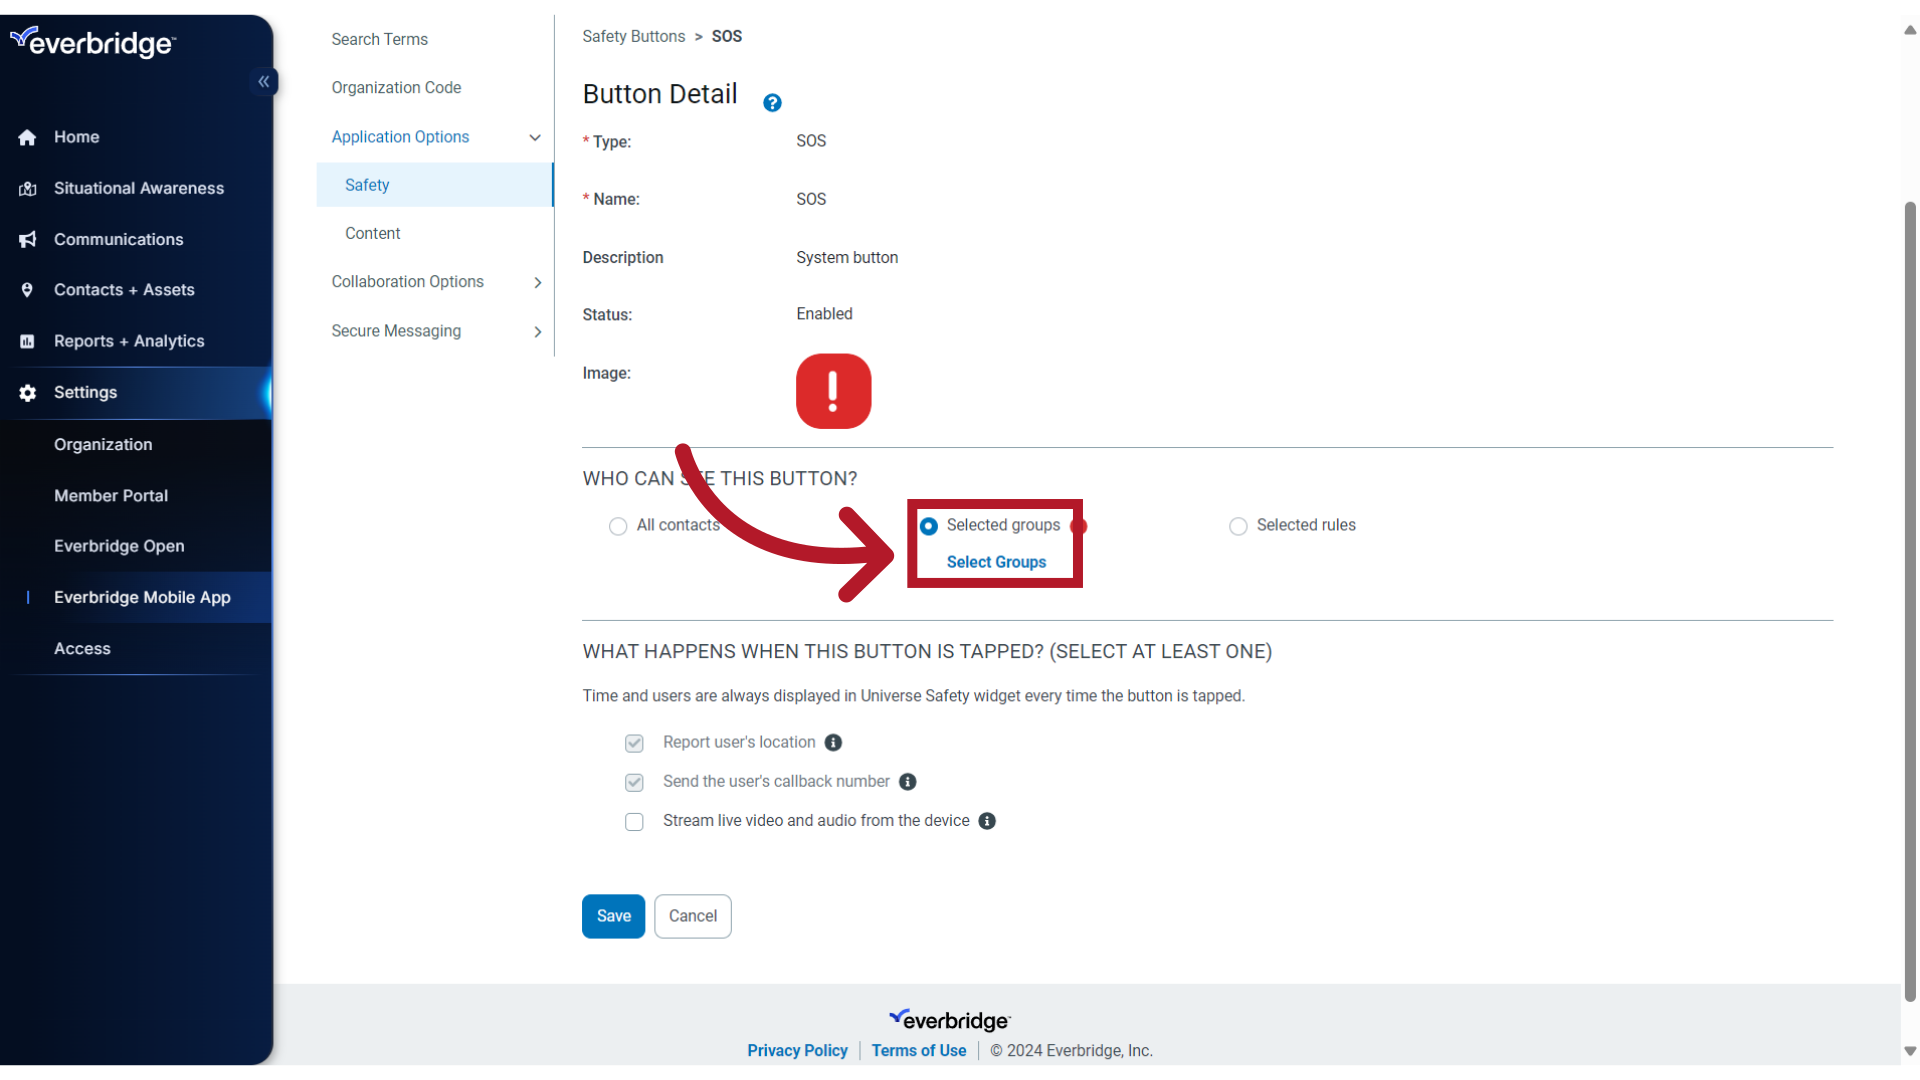
8. Groups
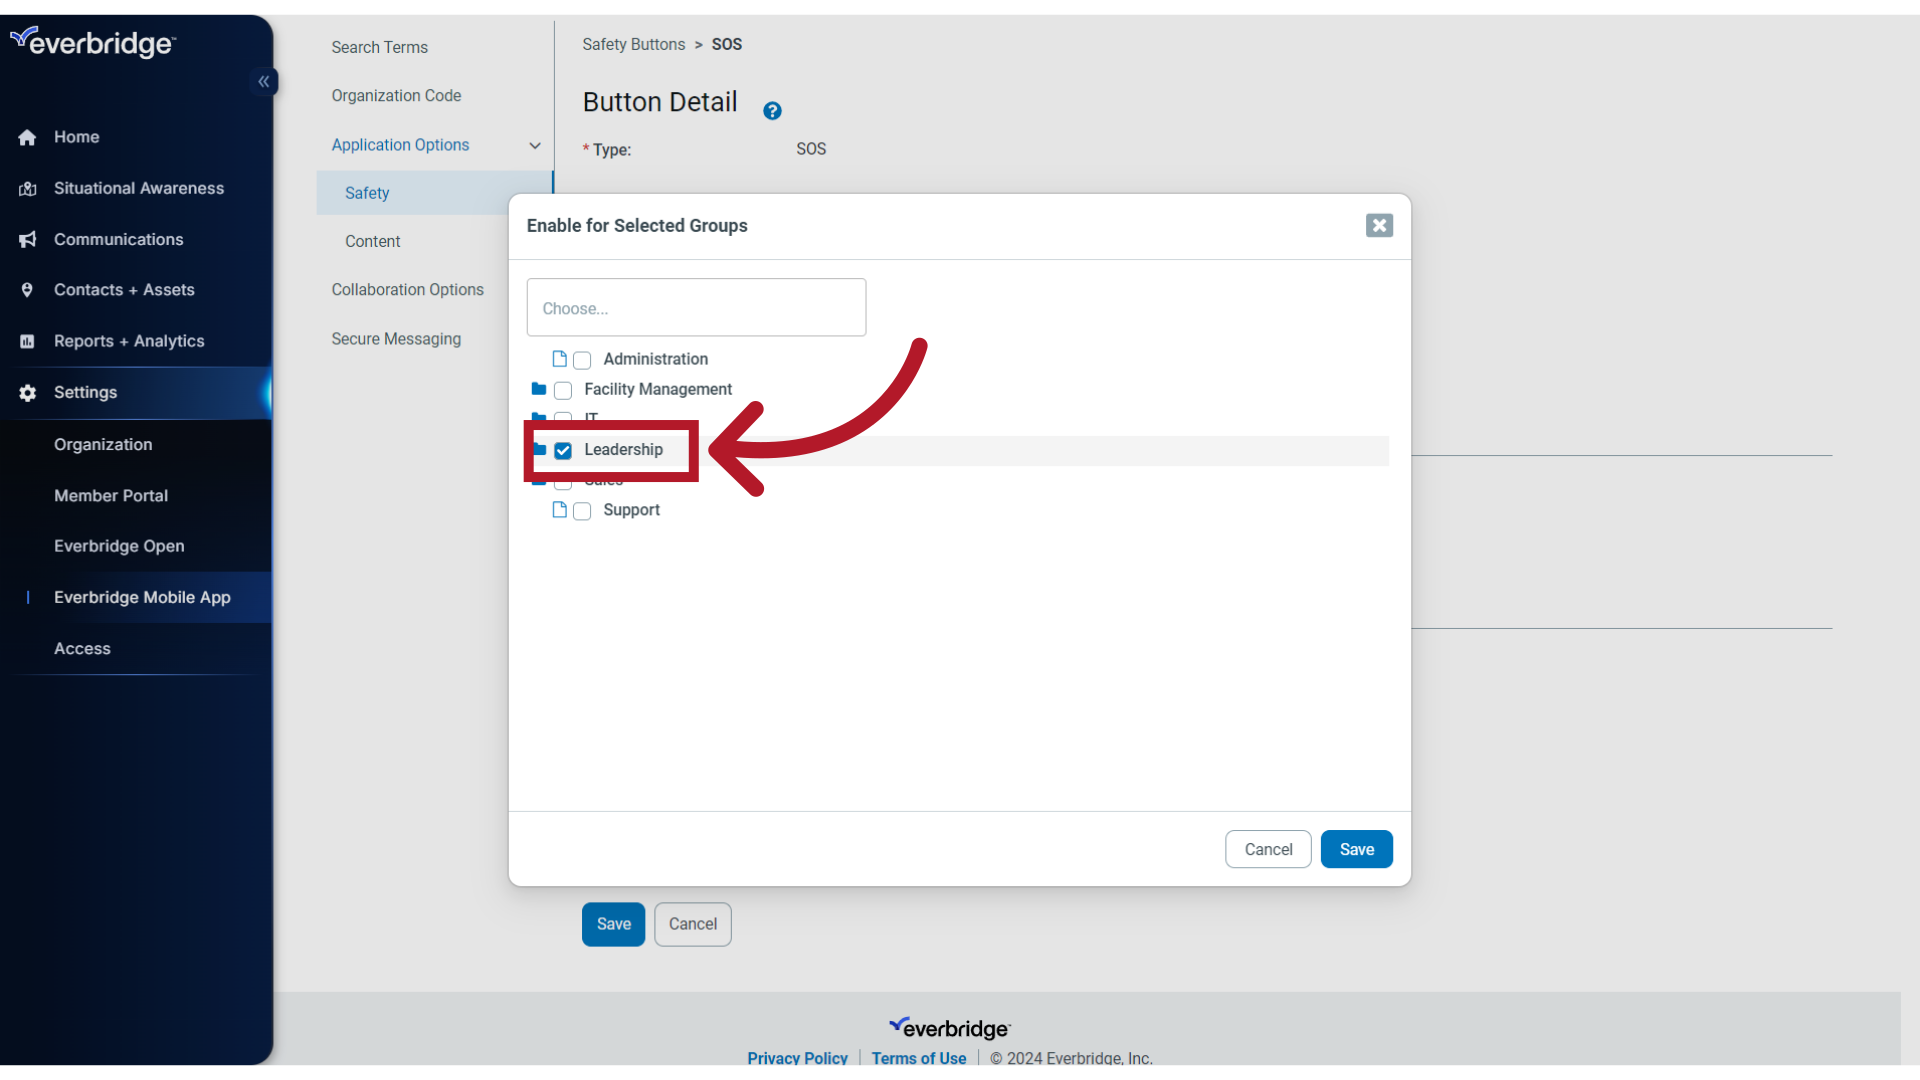
Access can be restricted by Groups. Click Selected Groups to display your preconfigured list.
9. Select
If selected, only the contacts who are members of the group(s) will be able to see the button. Click Save to confirm your selection or click Cancel to return to the Contact options.
10. Rules
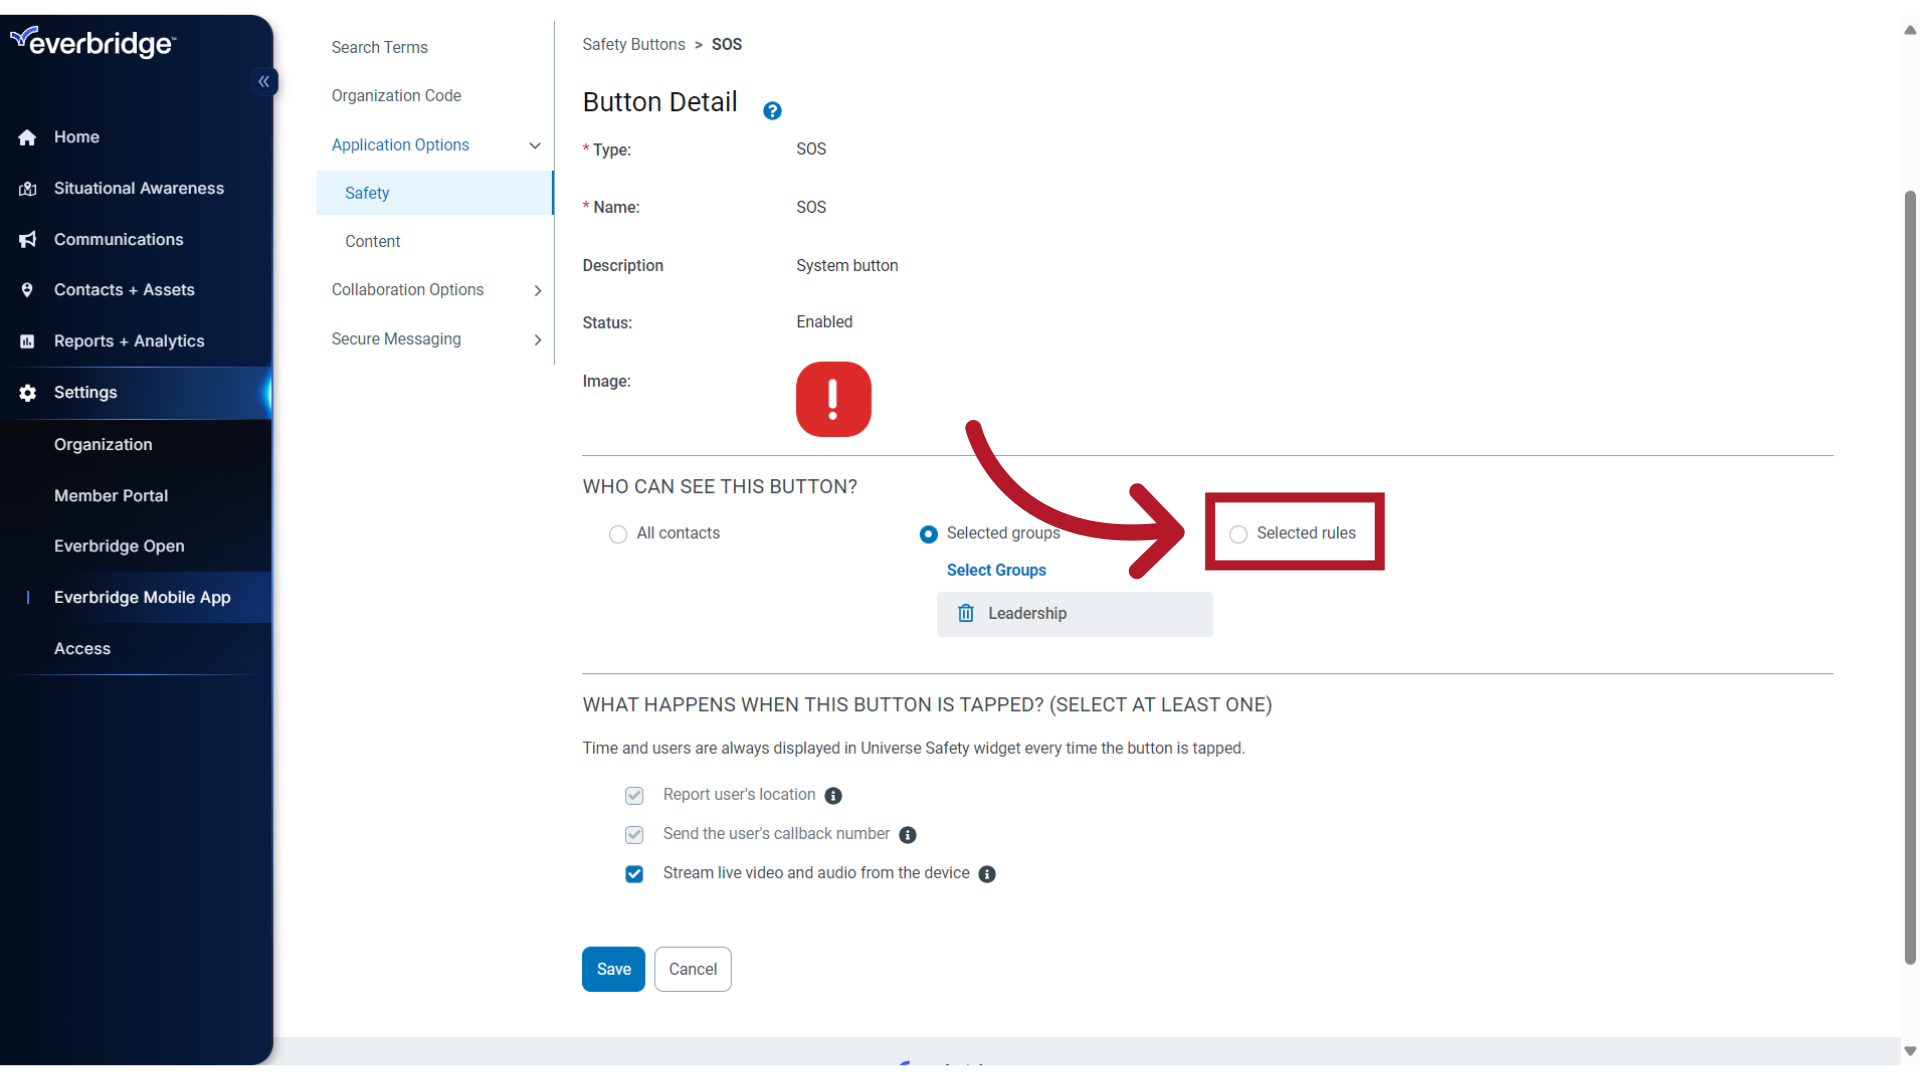
Alternately, you can restrict access by contact Rules. Click Selected Rules to display your preconfigured list.
11. Select
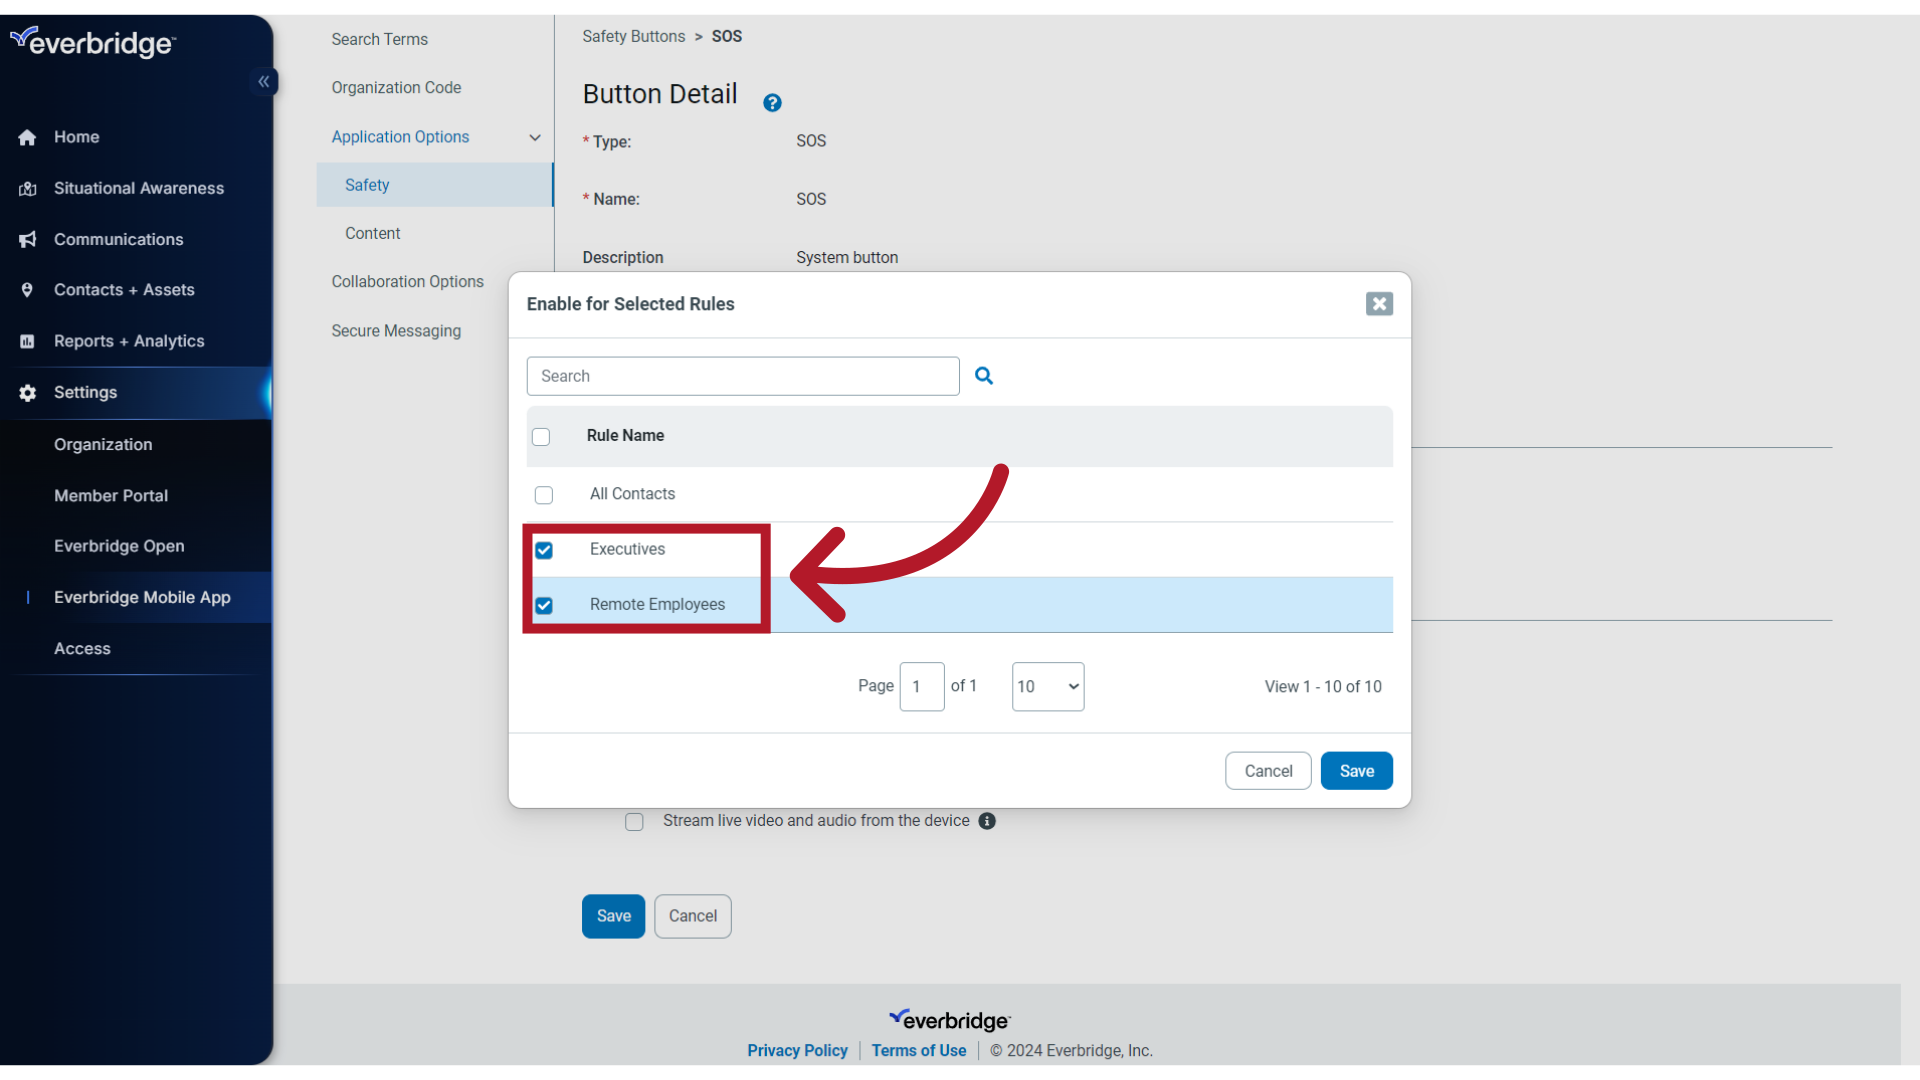
If selected, only contacts who match the Rule(s) definitions will be able to use the button. Click Save to confirm your selection or click Cancel to exit and return to the Contact options.
12. Actions
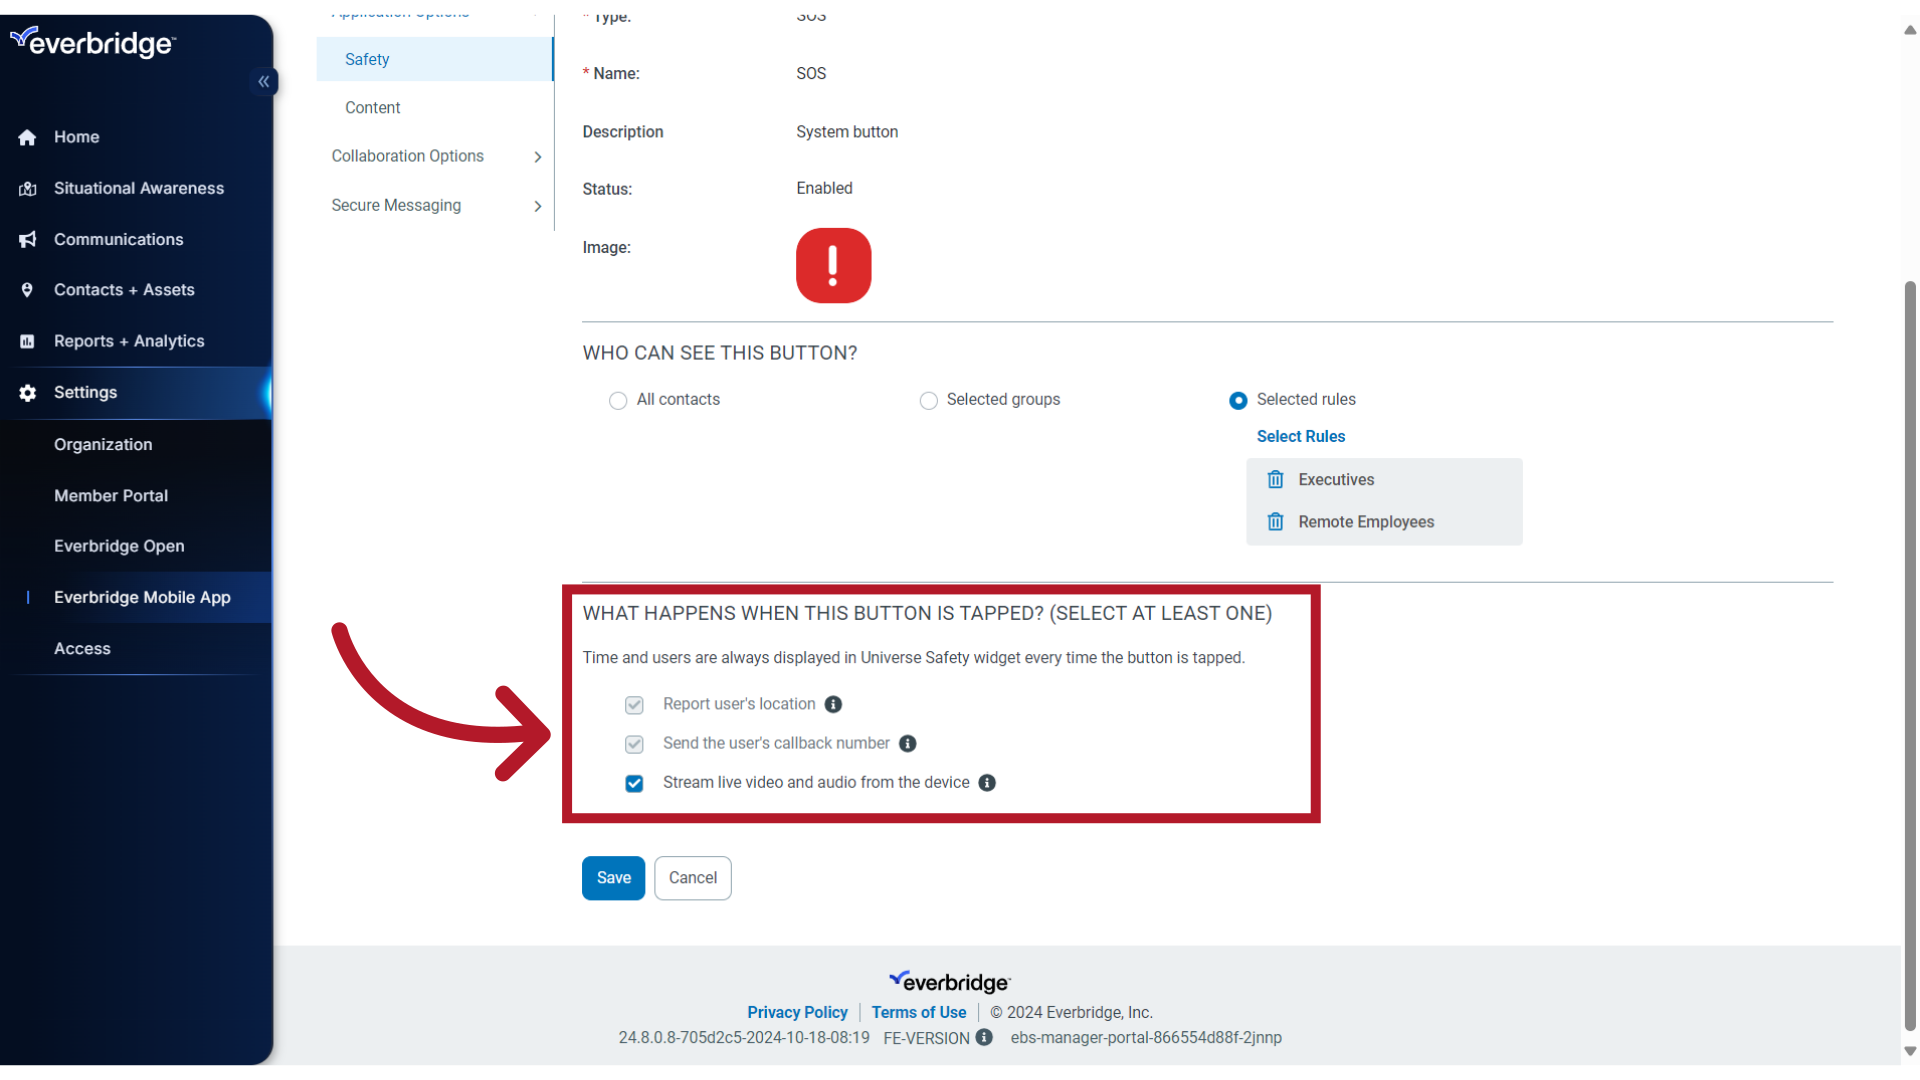
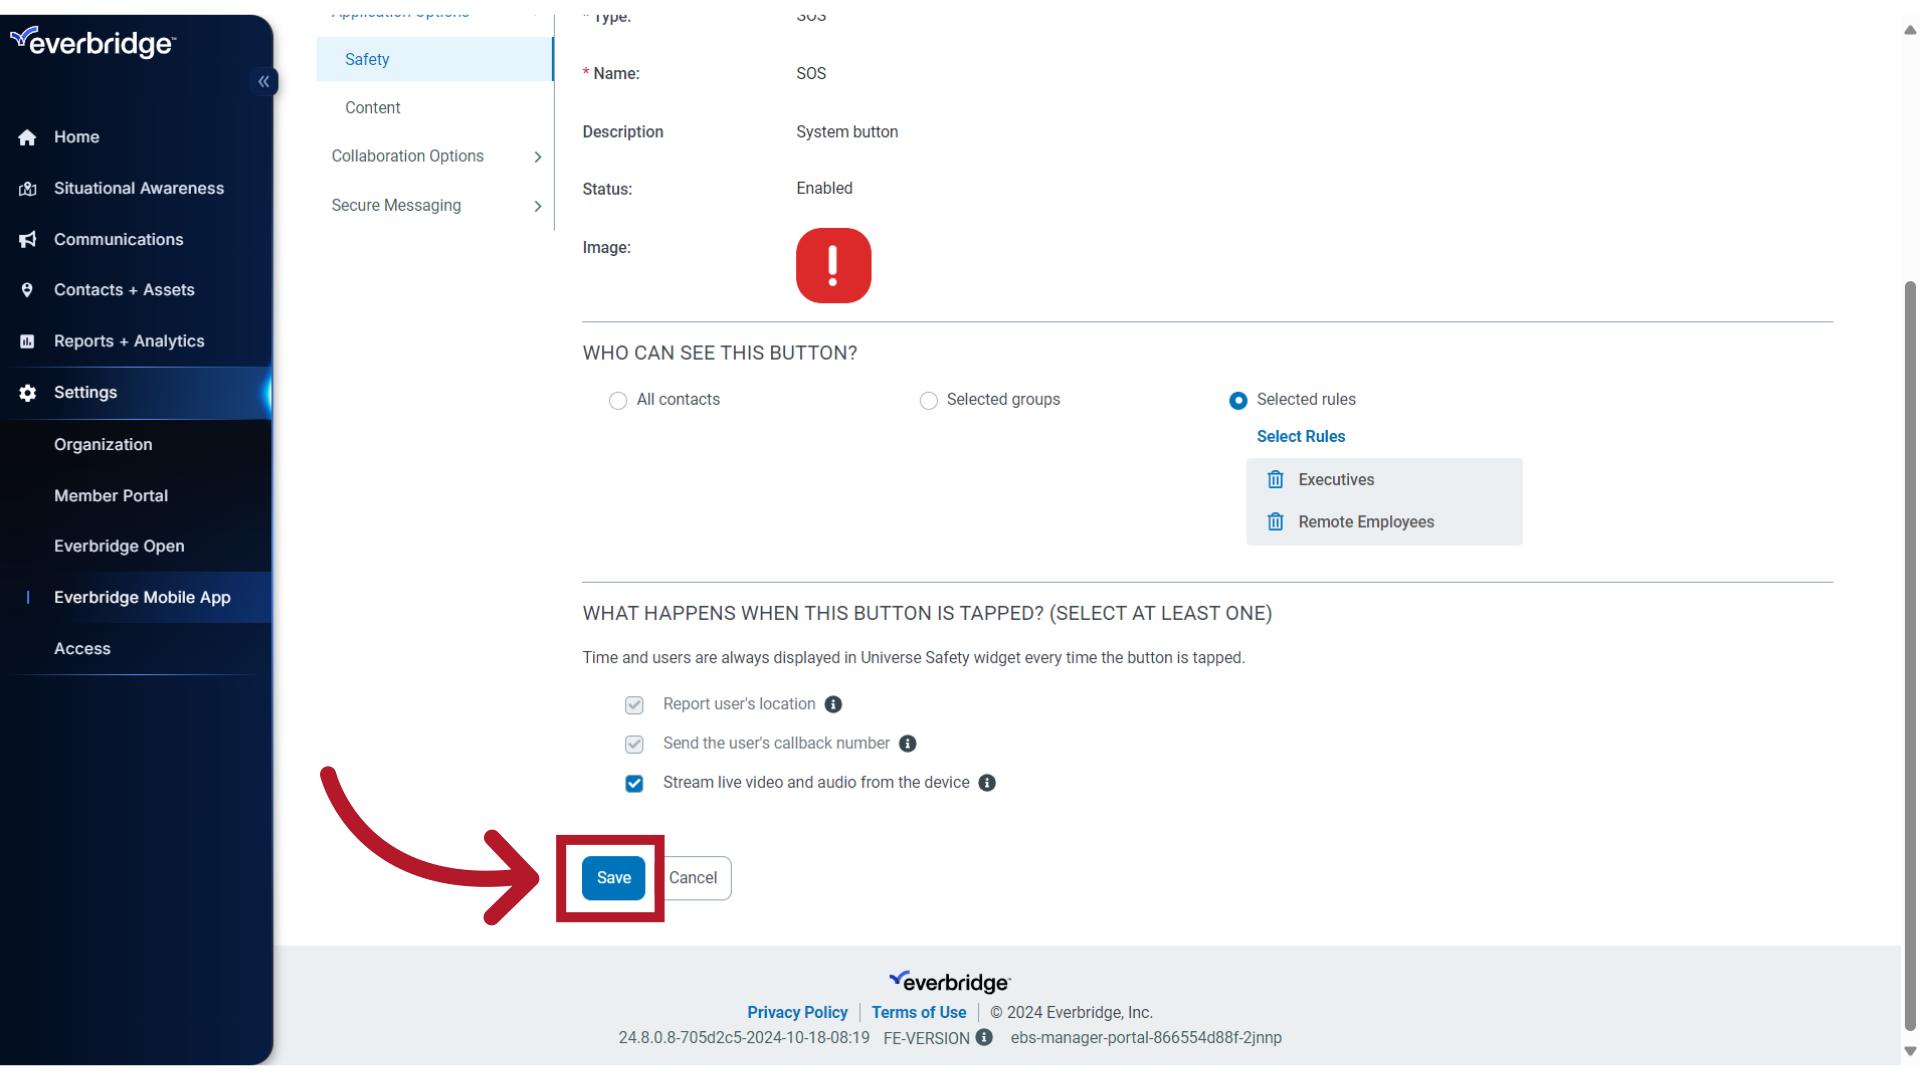
The last section displays the actions that occur when the button is activated on the mobile app. For the SOS system button, the end user's location and callback number will always be captured and cannot be disabled. The option to stream two minutes of live video and audio is optional and may be disabled if you do not wish to capture this information, or if it is not permissible due to your organization's privacy policies.
13. Save
If any changes have been made, click Save. Else, click Cancel to return to the Safety Button menu.
14. Safe Corridor
Next, let's review the options for Safe Corridor.
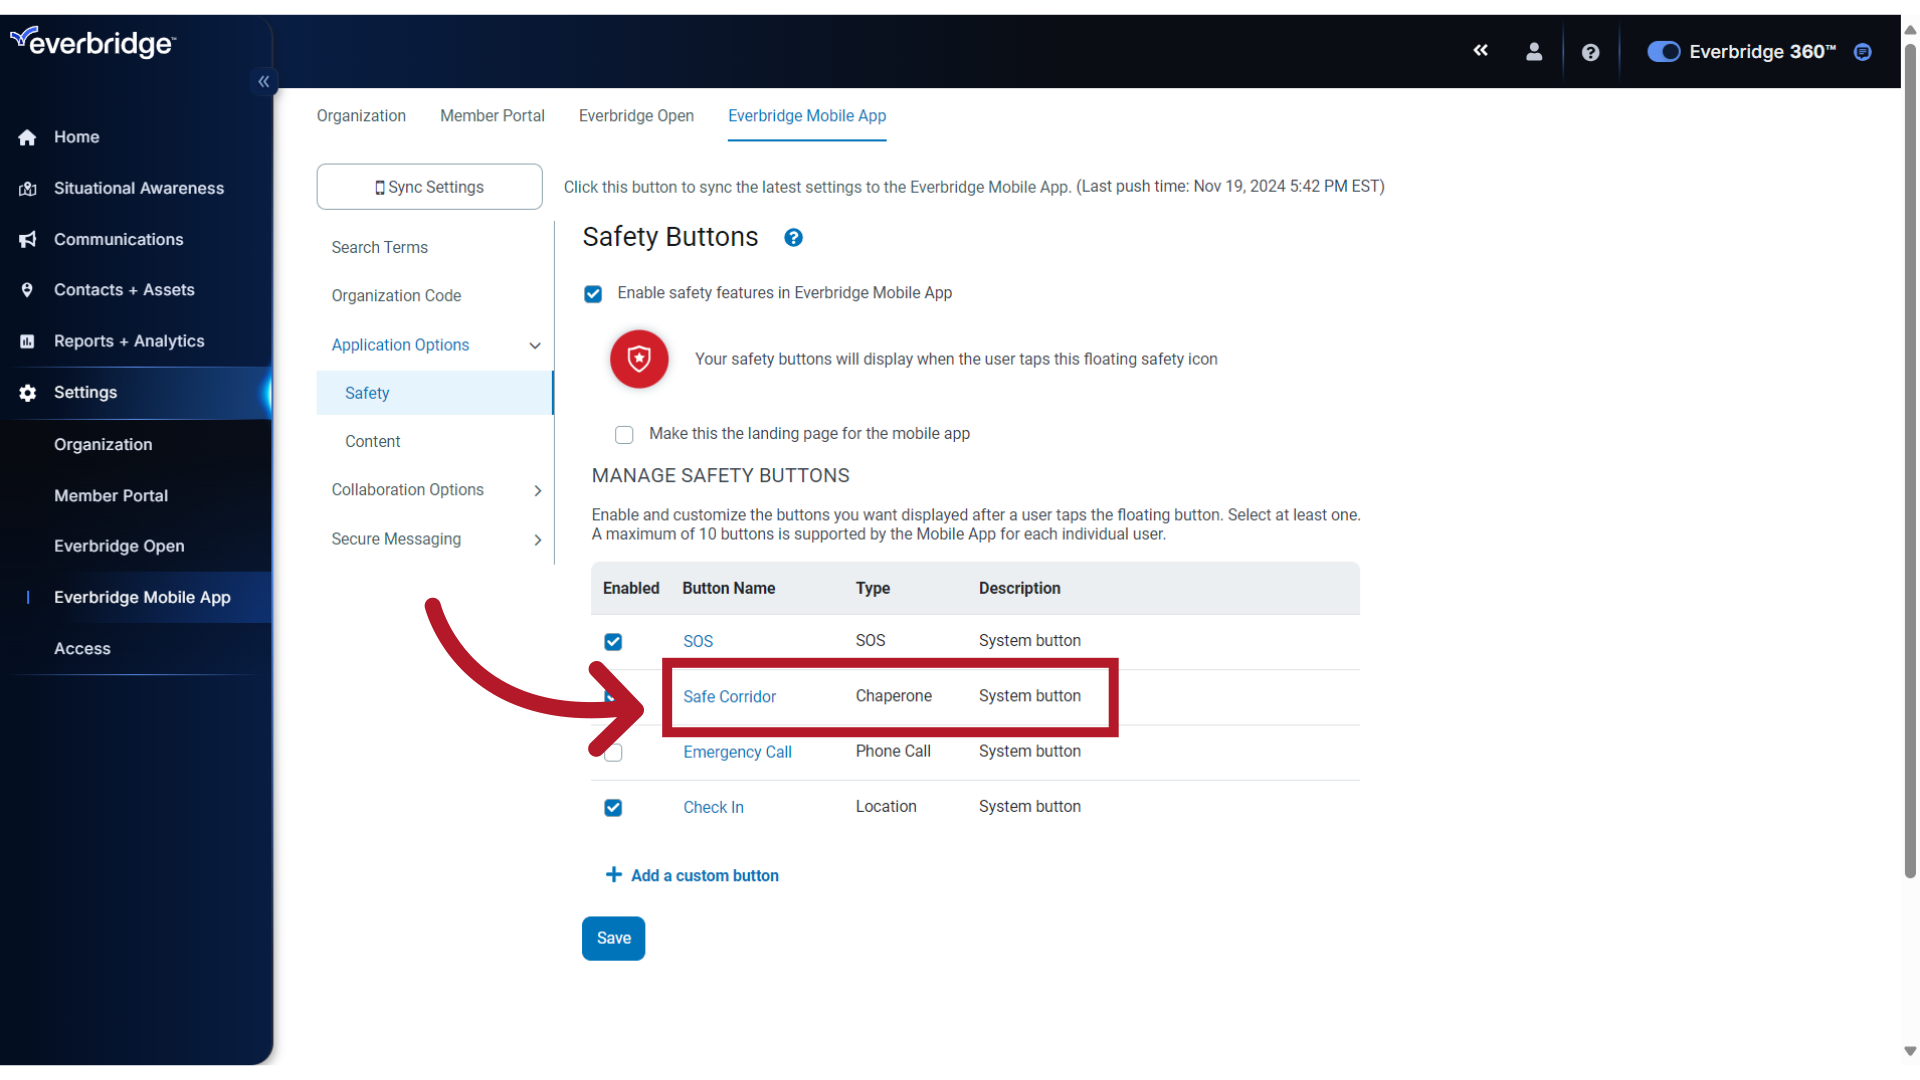
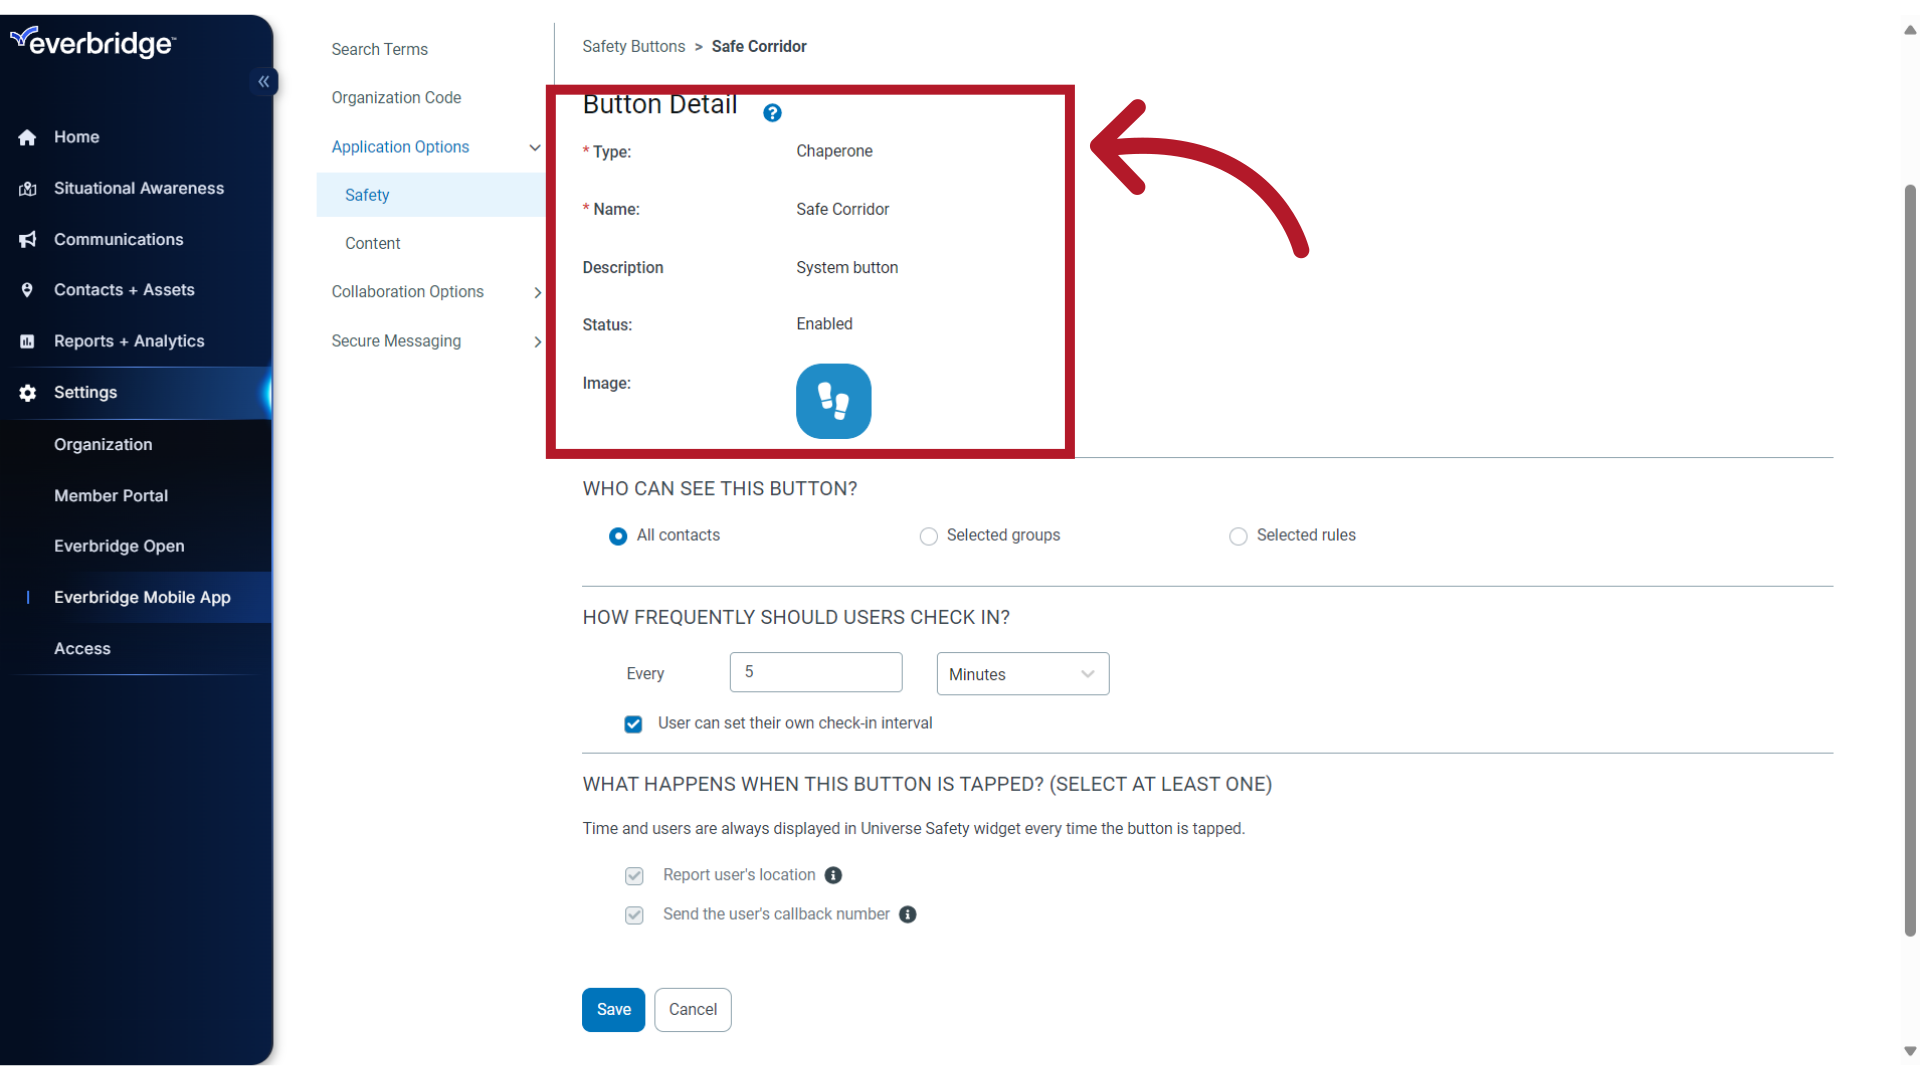
15. Button Detail
With the Chaperone type button, mobile app users are prompted at regular time intervals to check in with their location. A missed check-in triggers an SOS alert.
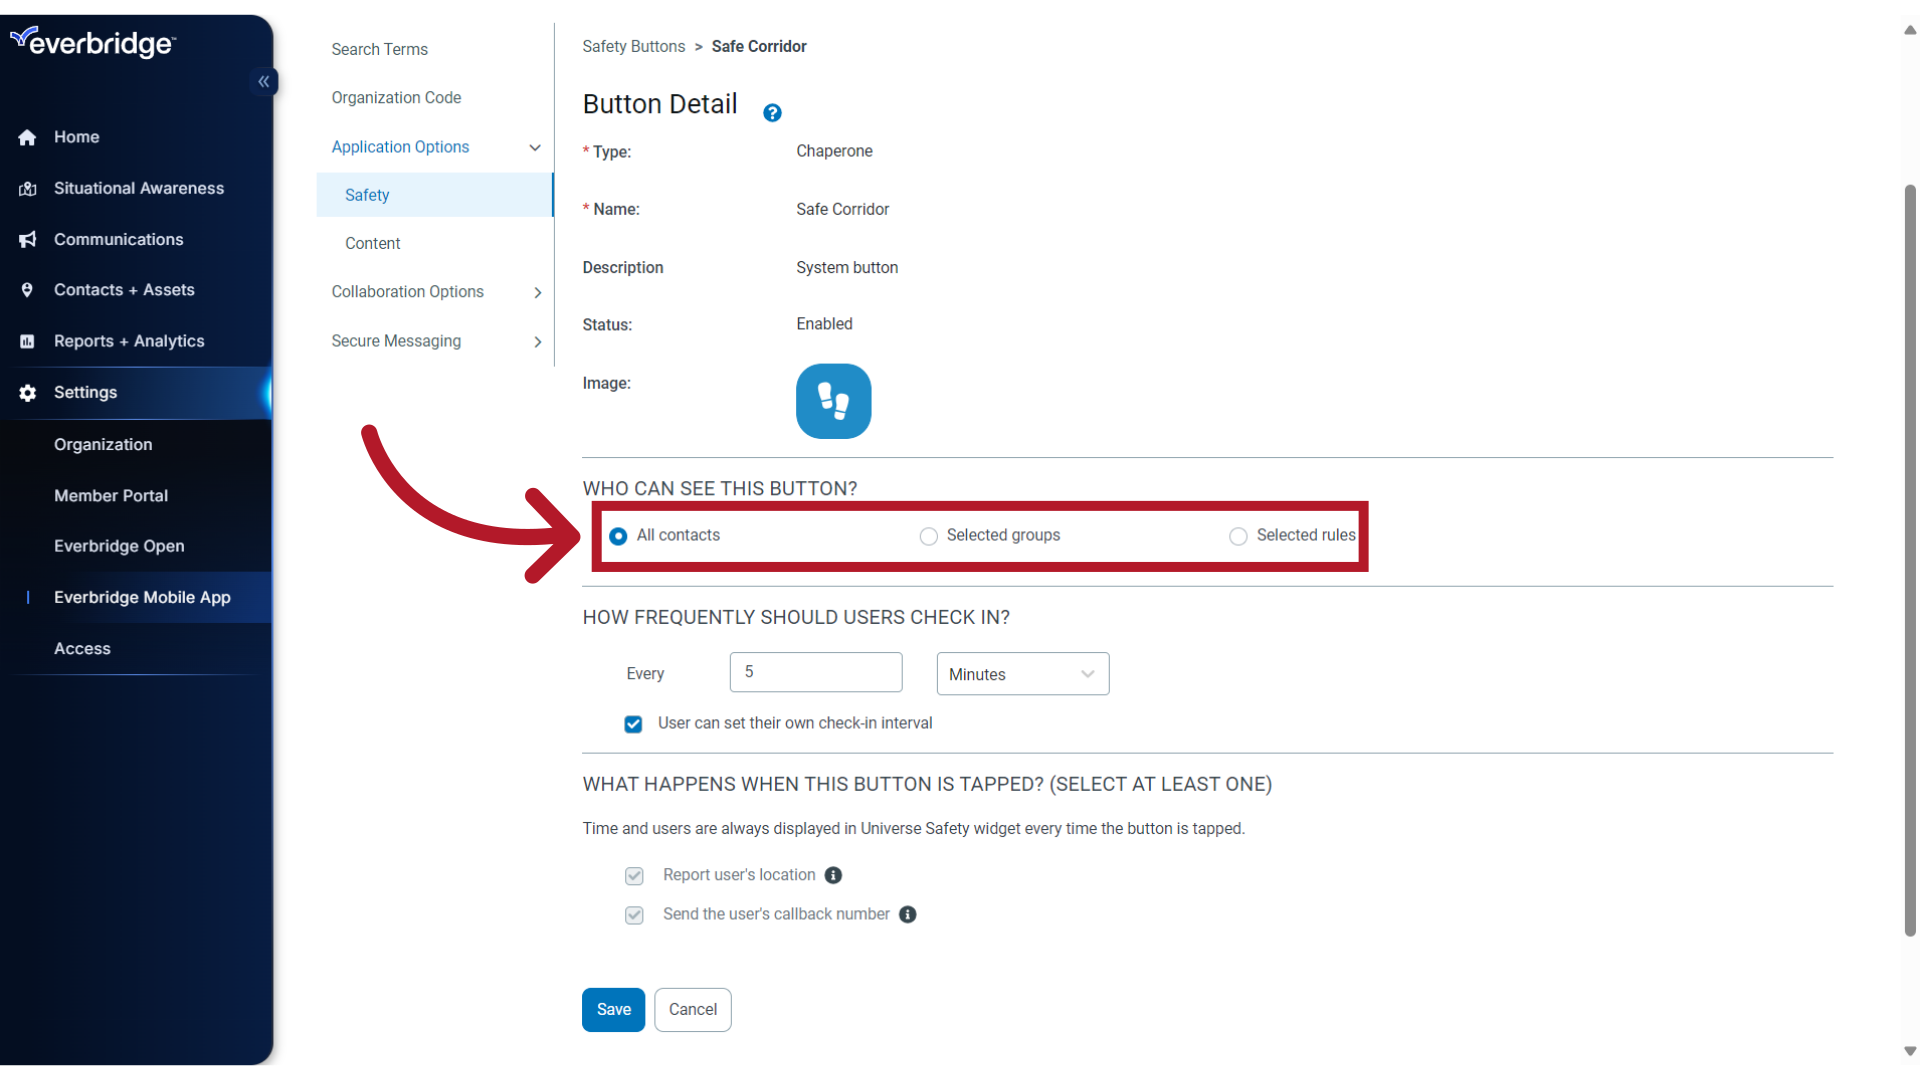
16. Contact Access
All contacts will see this button by default. If you need to restrict access, follow the previously defined steps to select Groups or Rules.
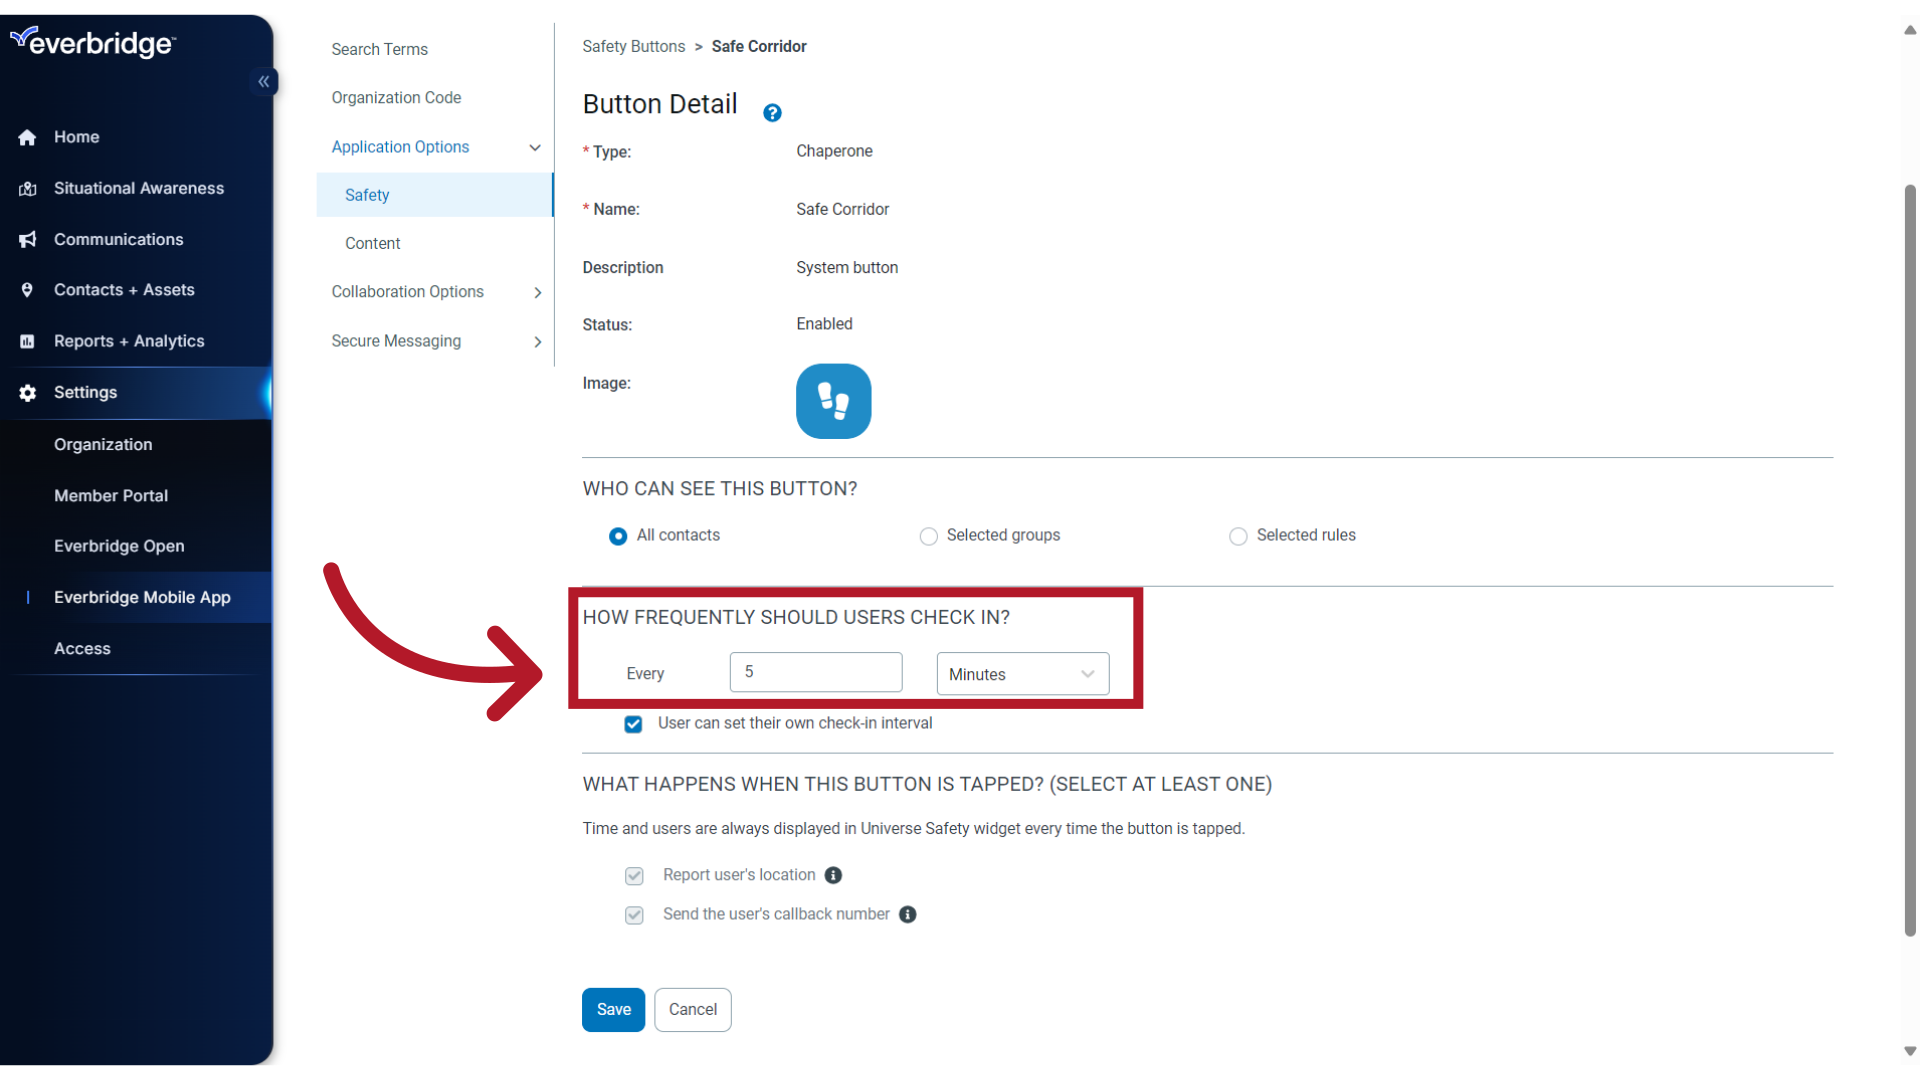
17. Frequency
The default value for the check-in interval is 5 minutes and can be set to a maximum of 1440 minutes, which is the equivalent of 24 hours. This interval is the maximum time allowed for the end user to enter their next check-in, once they have activated the button on their device. You may want to change the frequency if, for example, the button is to be used to capture when a contact arrives at, then departs from, an appointment. For that use, it may be appropriate to set the interval to a higher value.
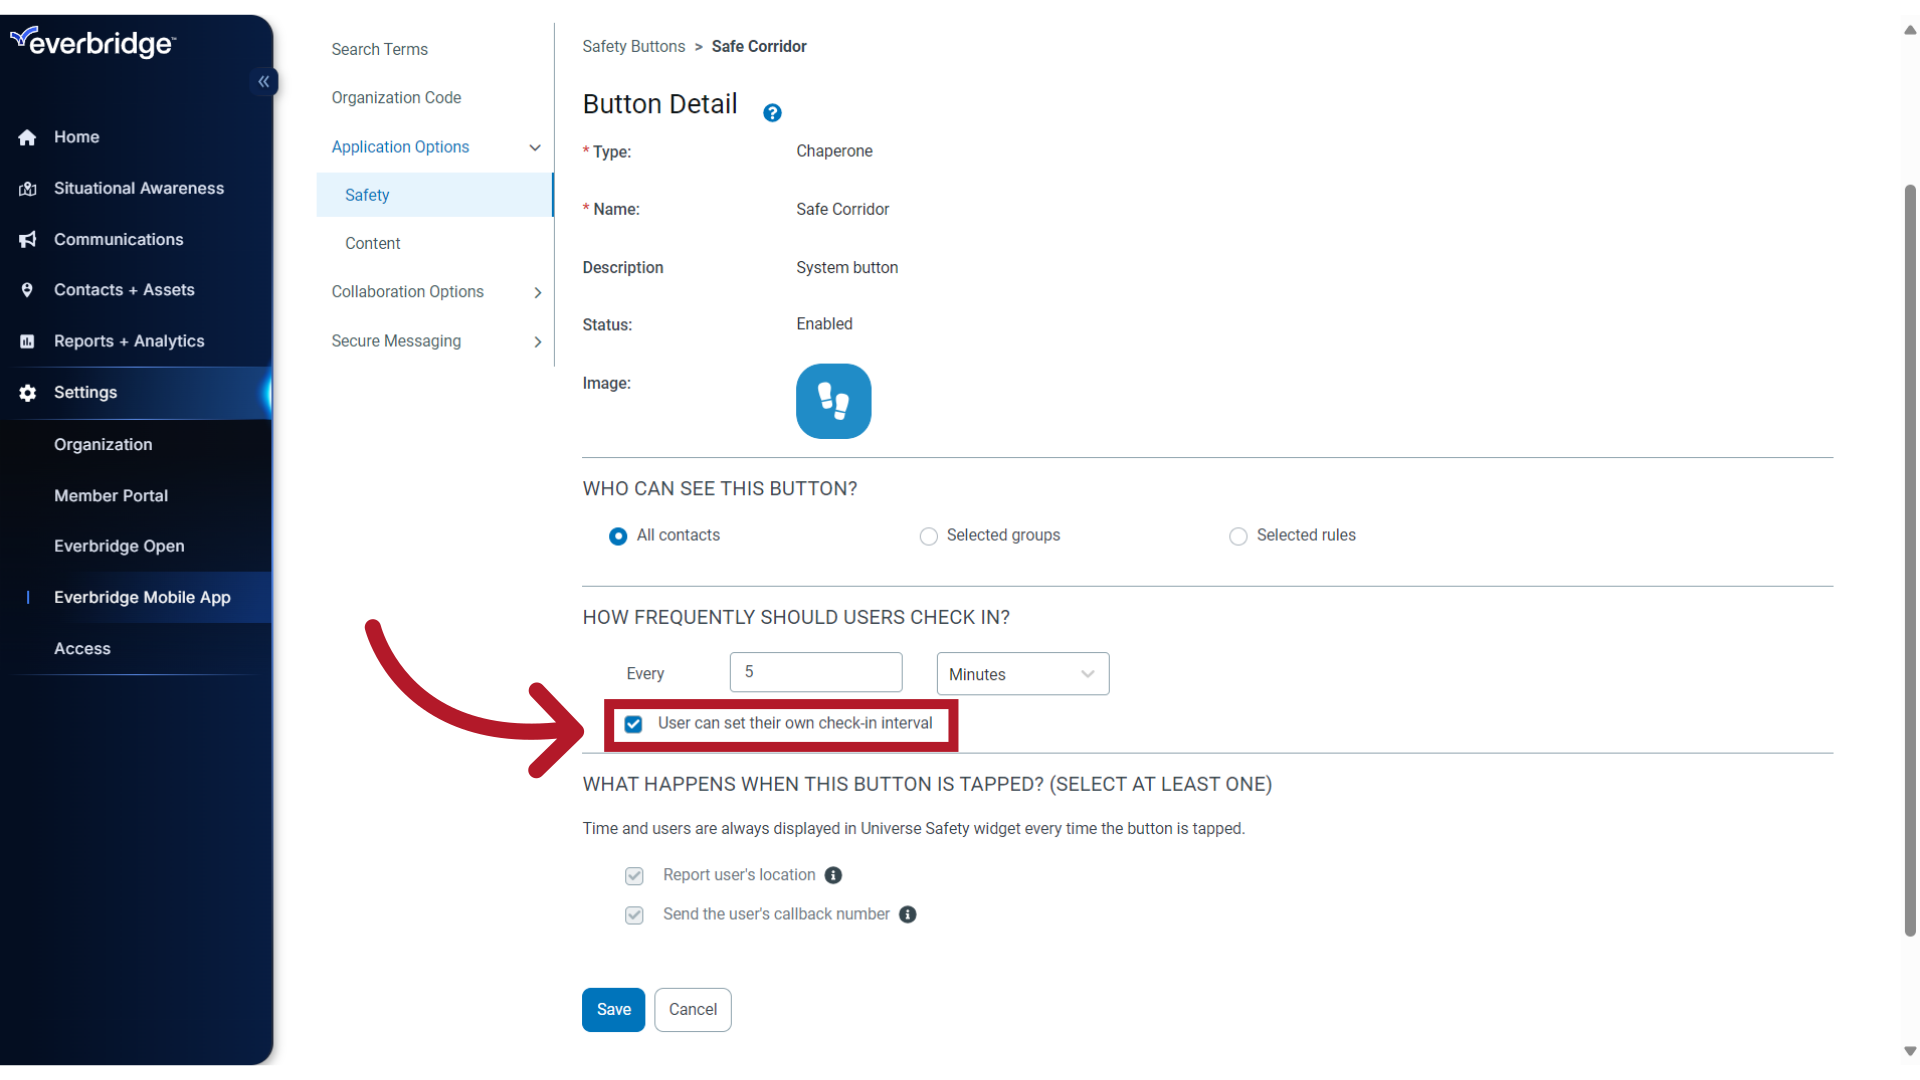
18. Frequency
Optionally, you can allow the end user to set their own check-in interval when the system frequency is set to 60 minutes or less.
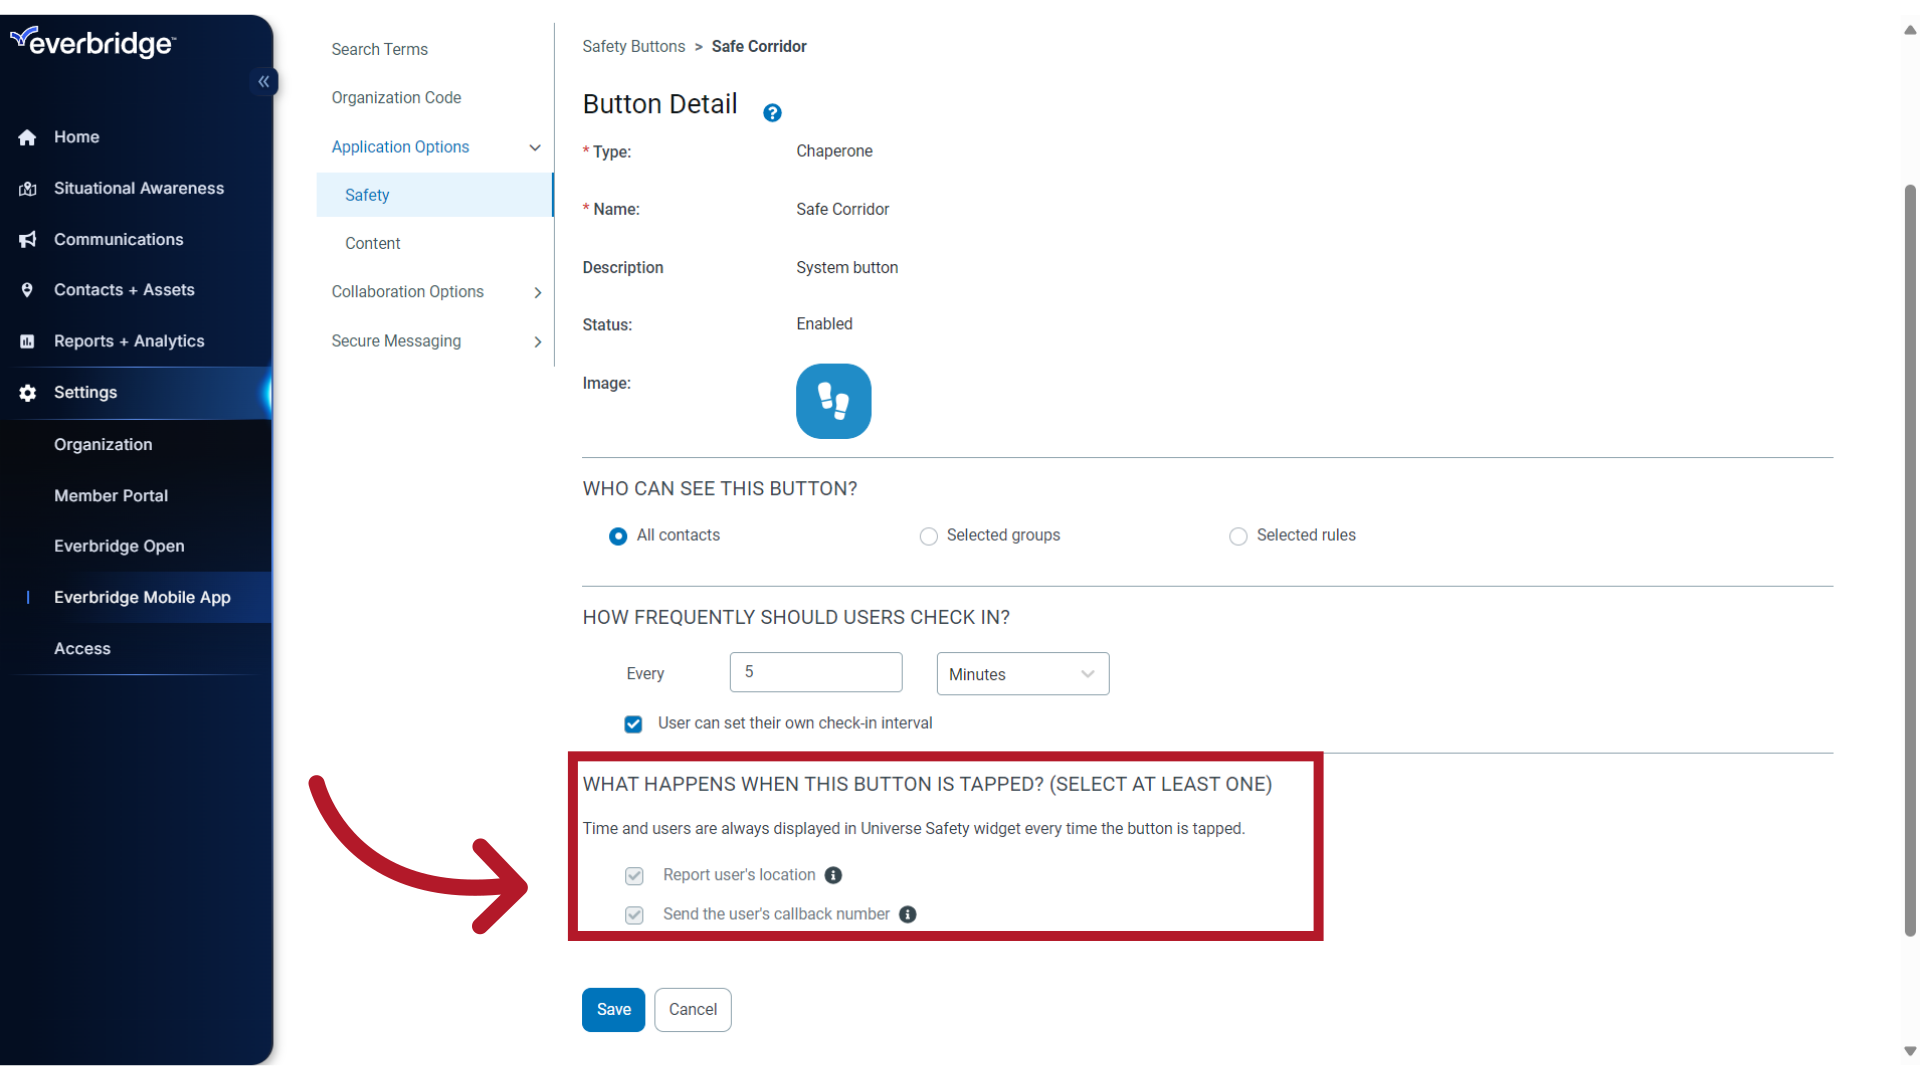
19. Actions
Their location and callback number will always be captured when using the system button.
20. Check In
Next, let's review the Check In button configuration options.
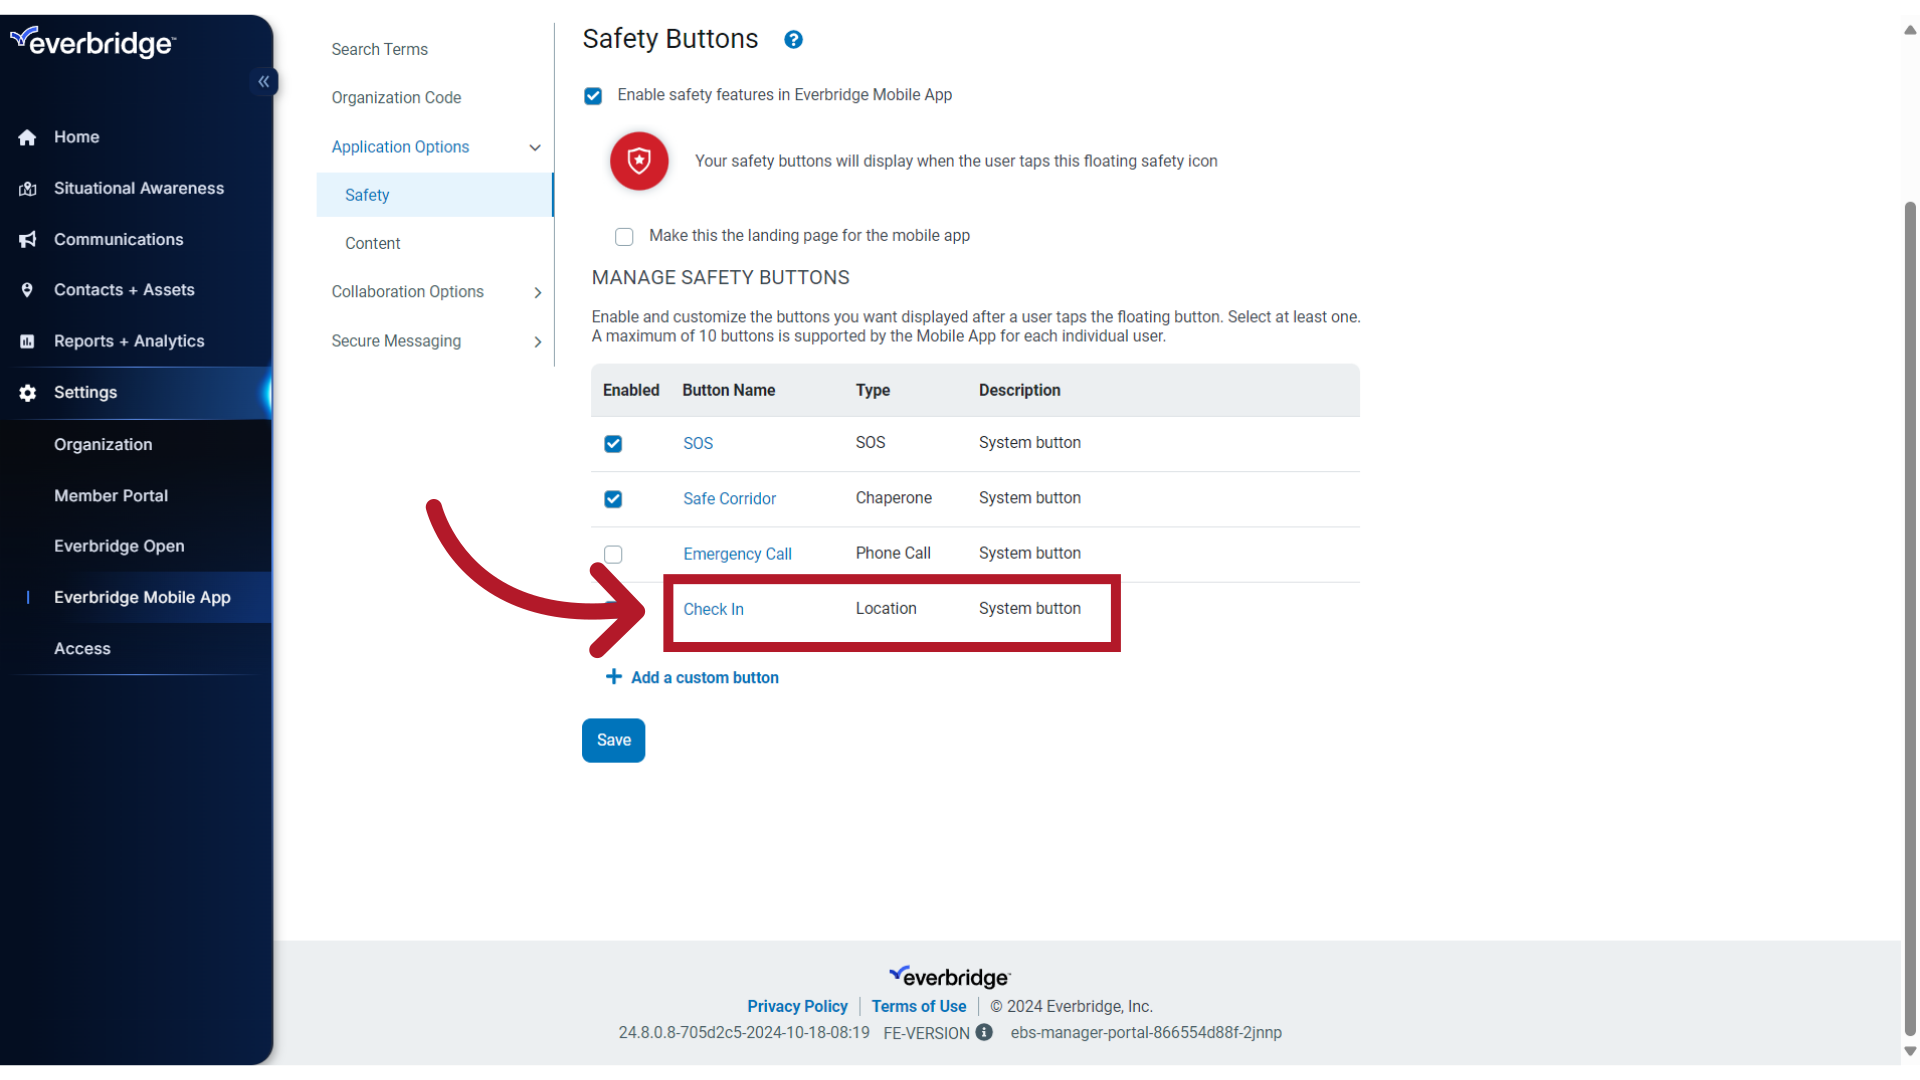
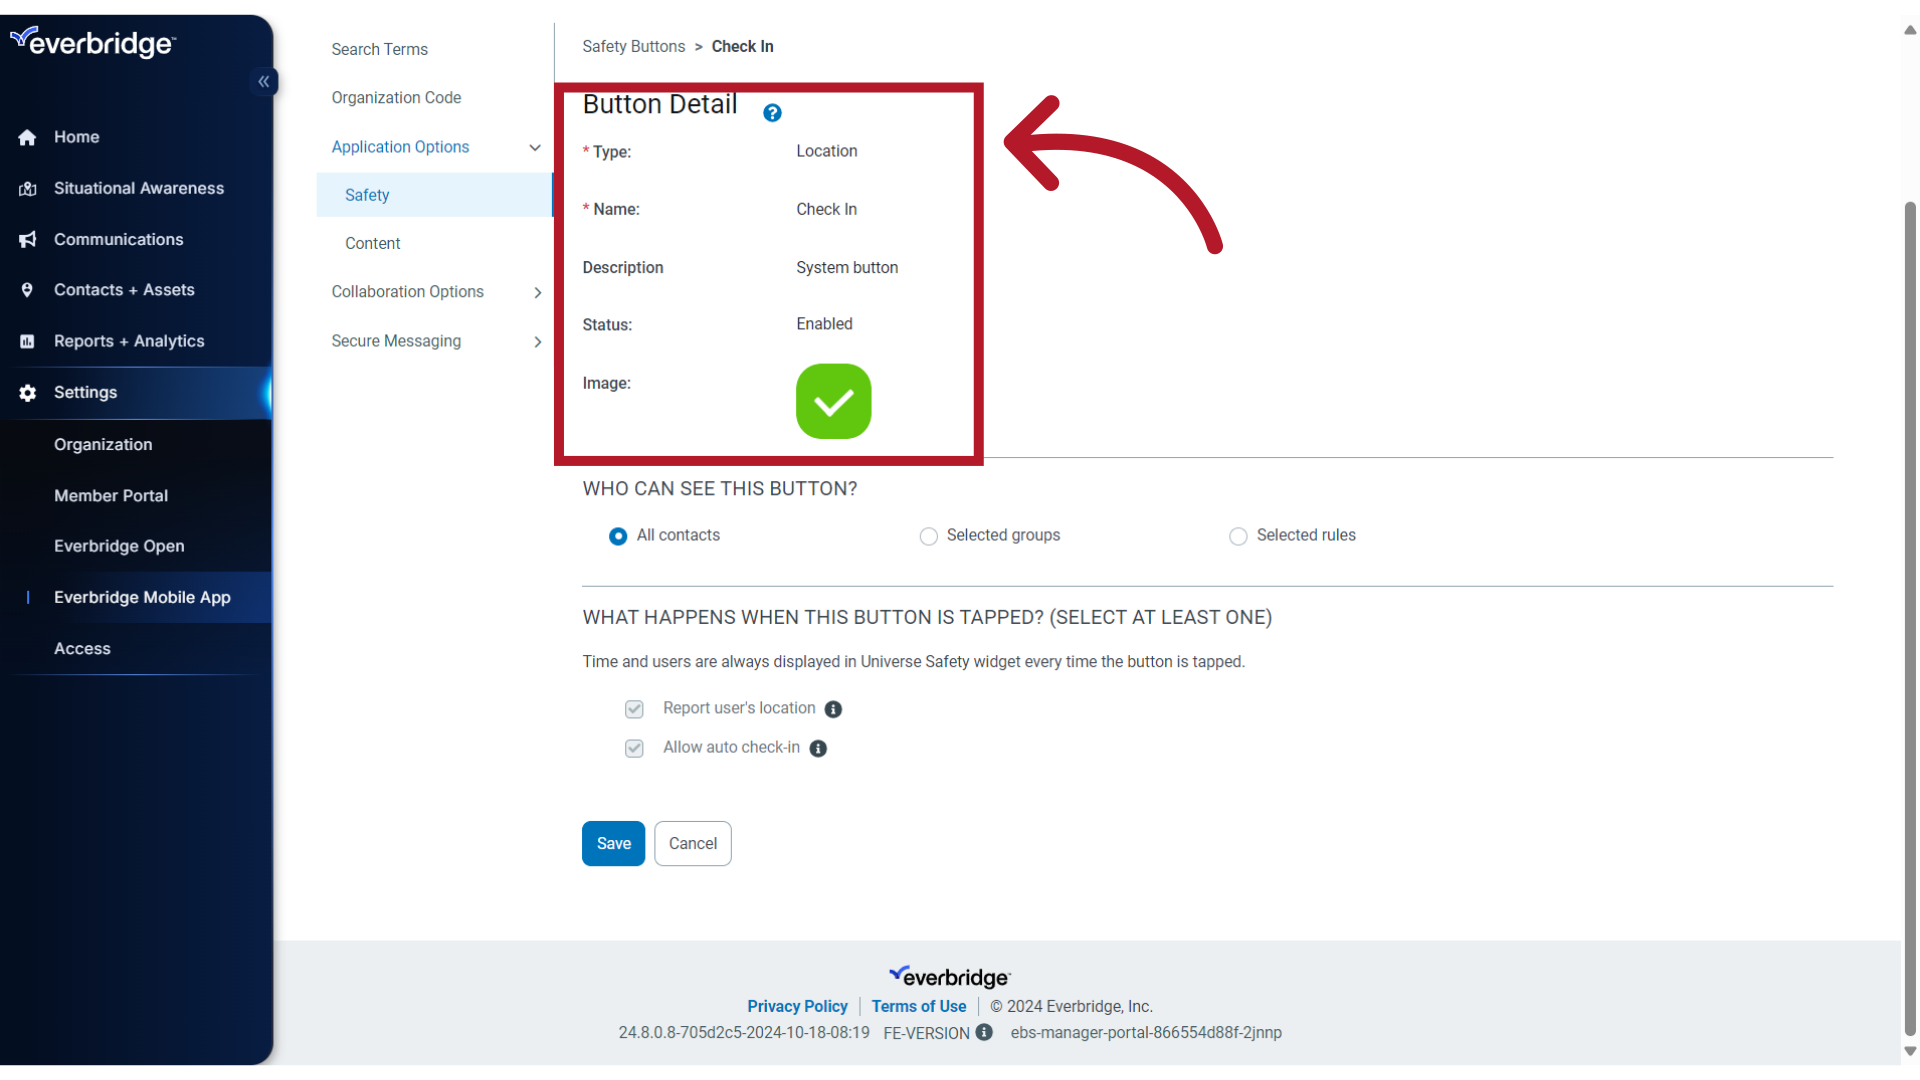
21. Button Detail
With the Location type button, end users can voluntarily check in and report their location.
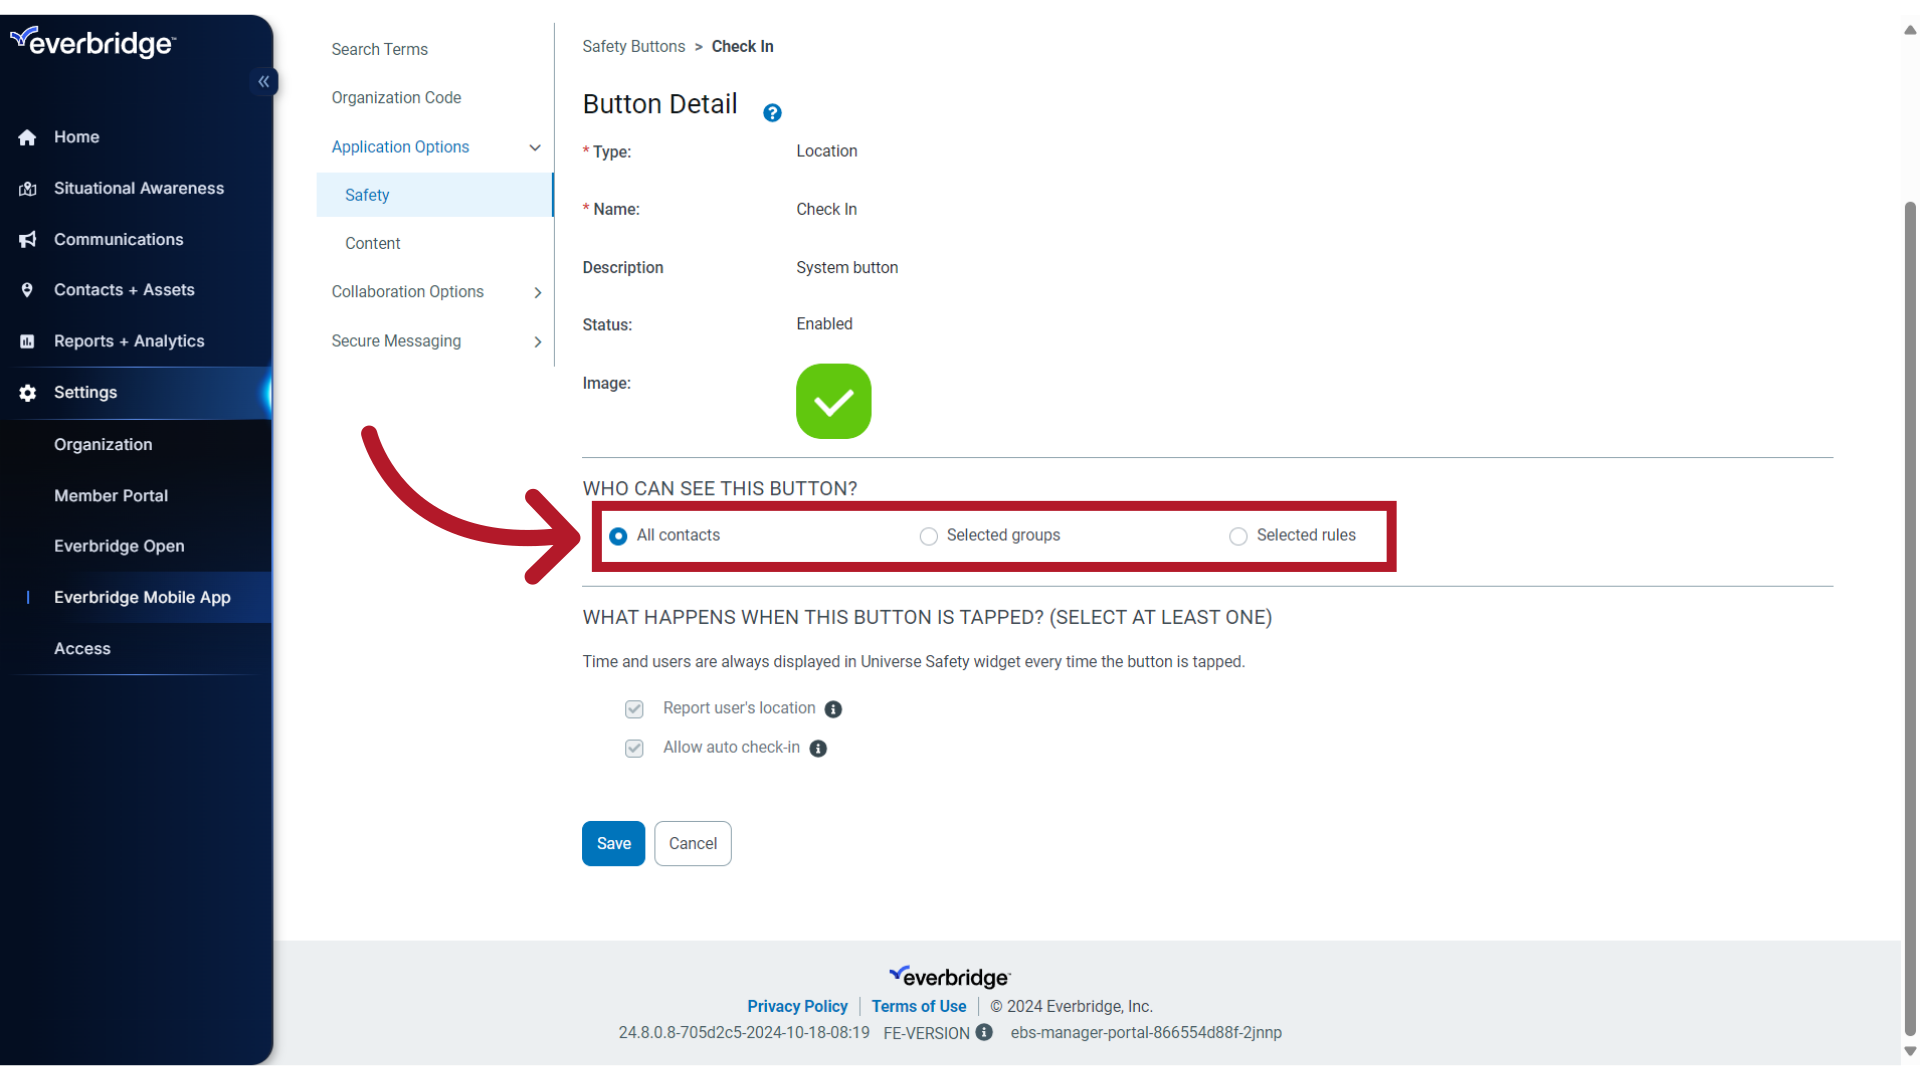
22. Contact Access
All contacts can see this button by default. If you need to restrict access, follow the previously defined steps to select Groups or Rules.
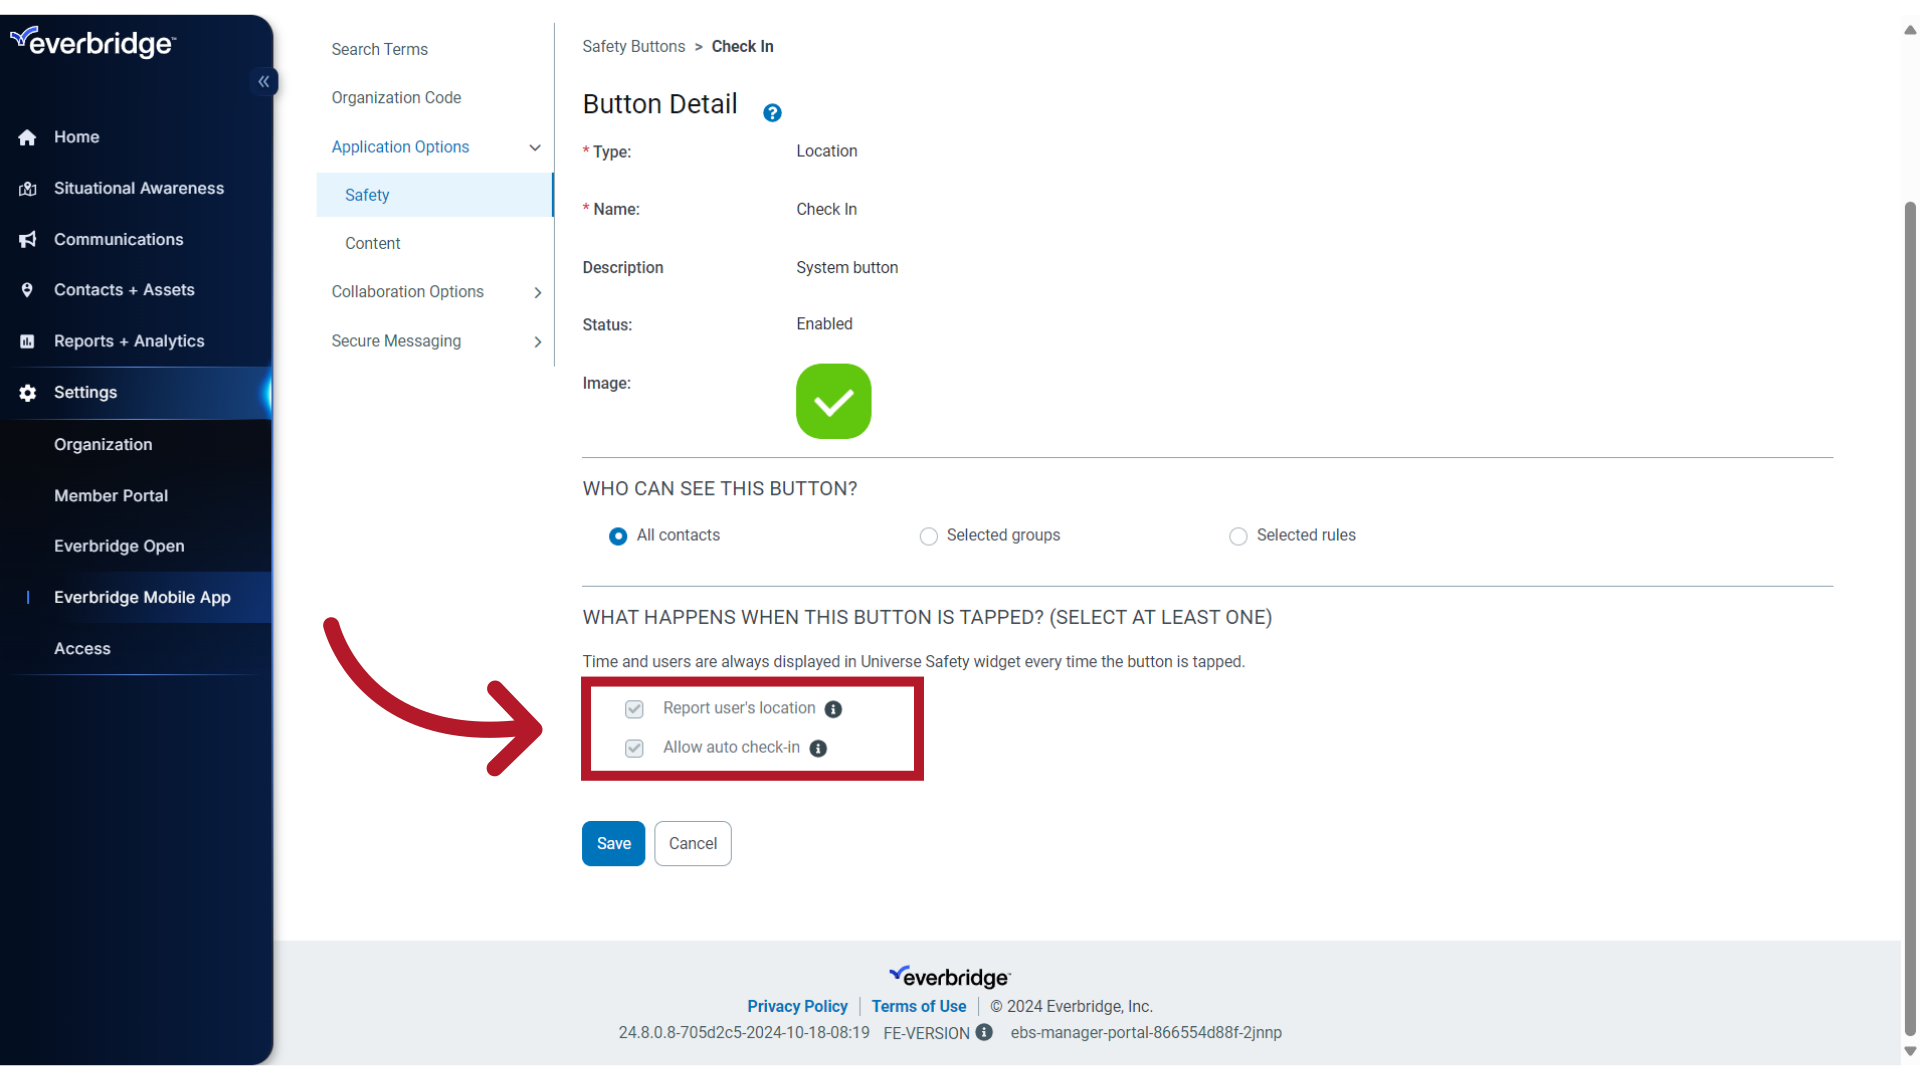
23. Actions
The end user's location will be reported and Auto Check-in will be allowed. For the system button, these options cannot be disabled. It is important to note that Auto Check-in is an explicit action enabled by the end user if they want their location to be continuously captured while they are signed into the app. This feature will never activate automatically and the end user can disable it at any time after they have chosen to activate it.
24. Emergency Call
Lastly, let's review the Emergency Call button configuration.
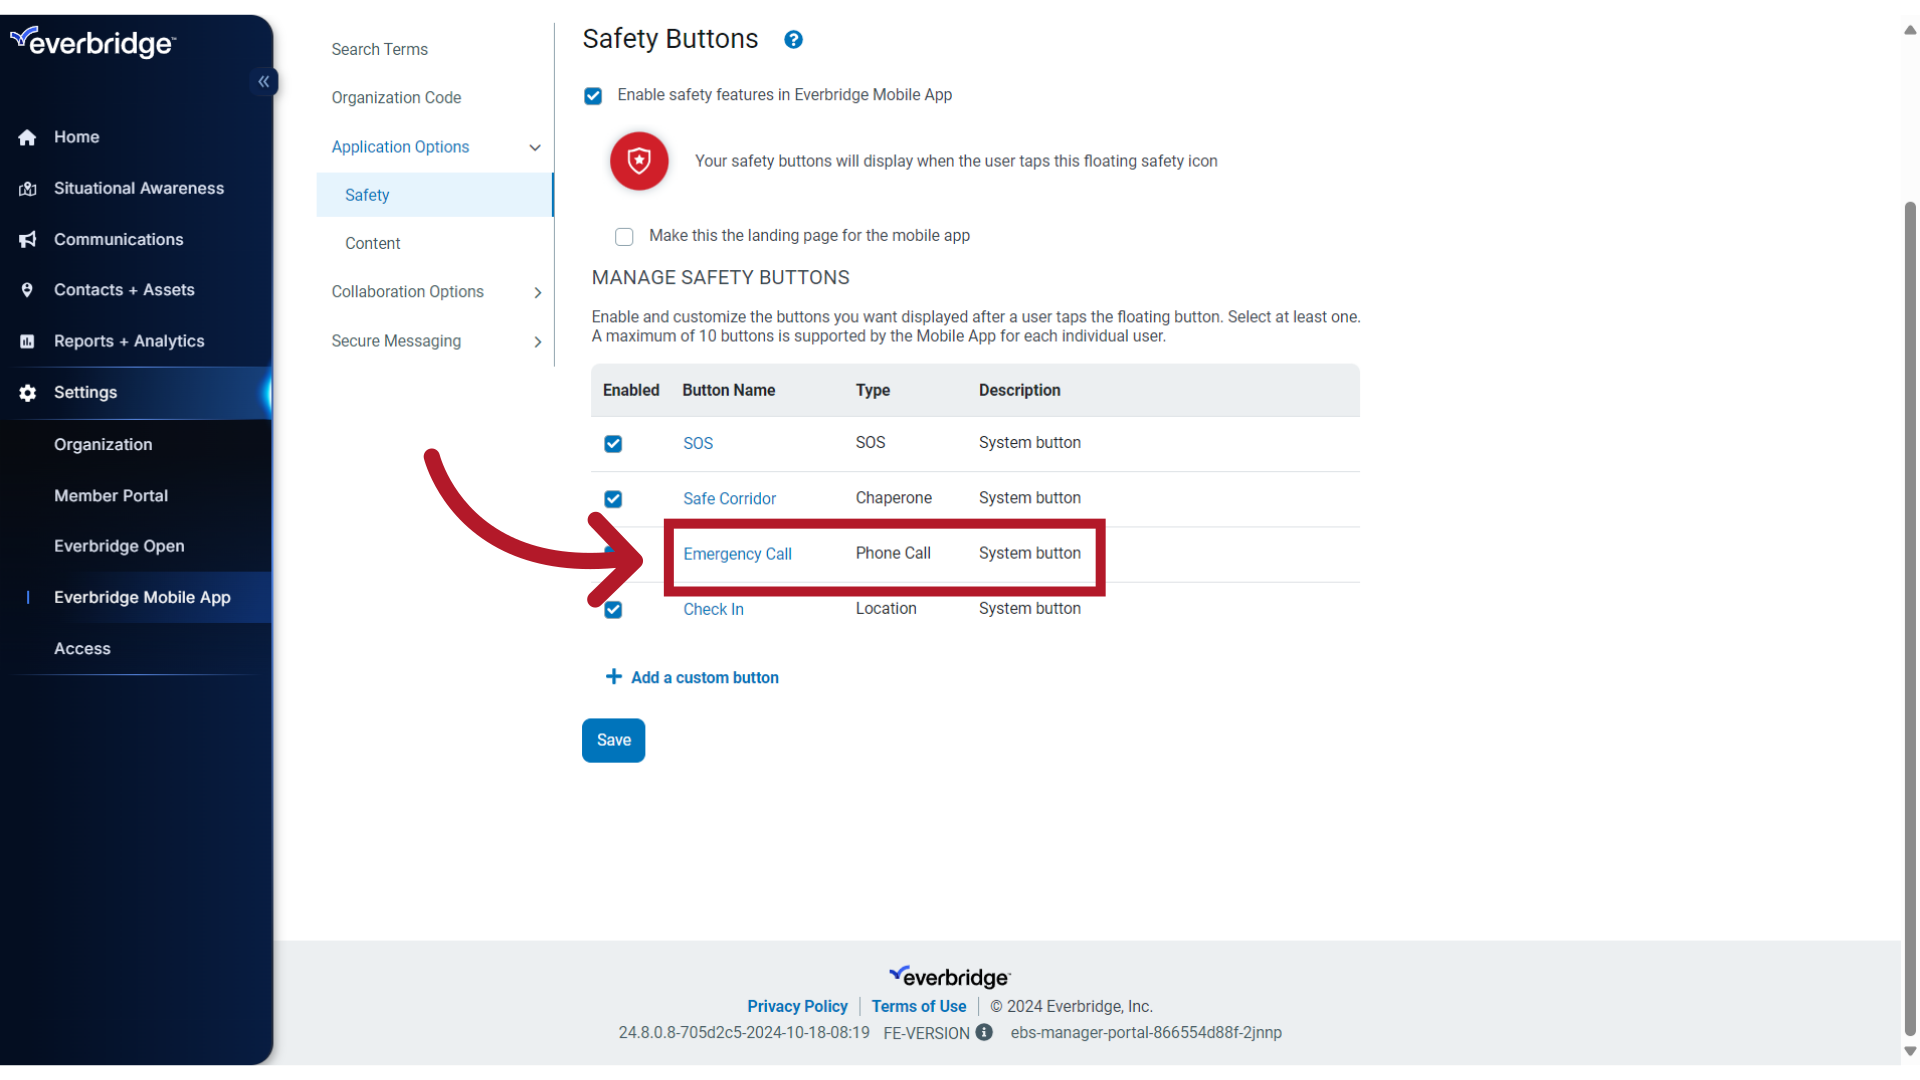
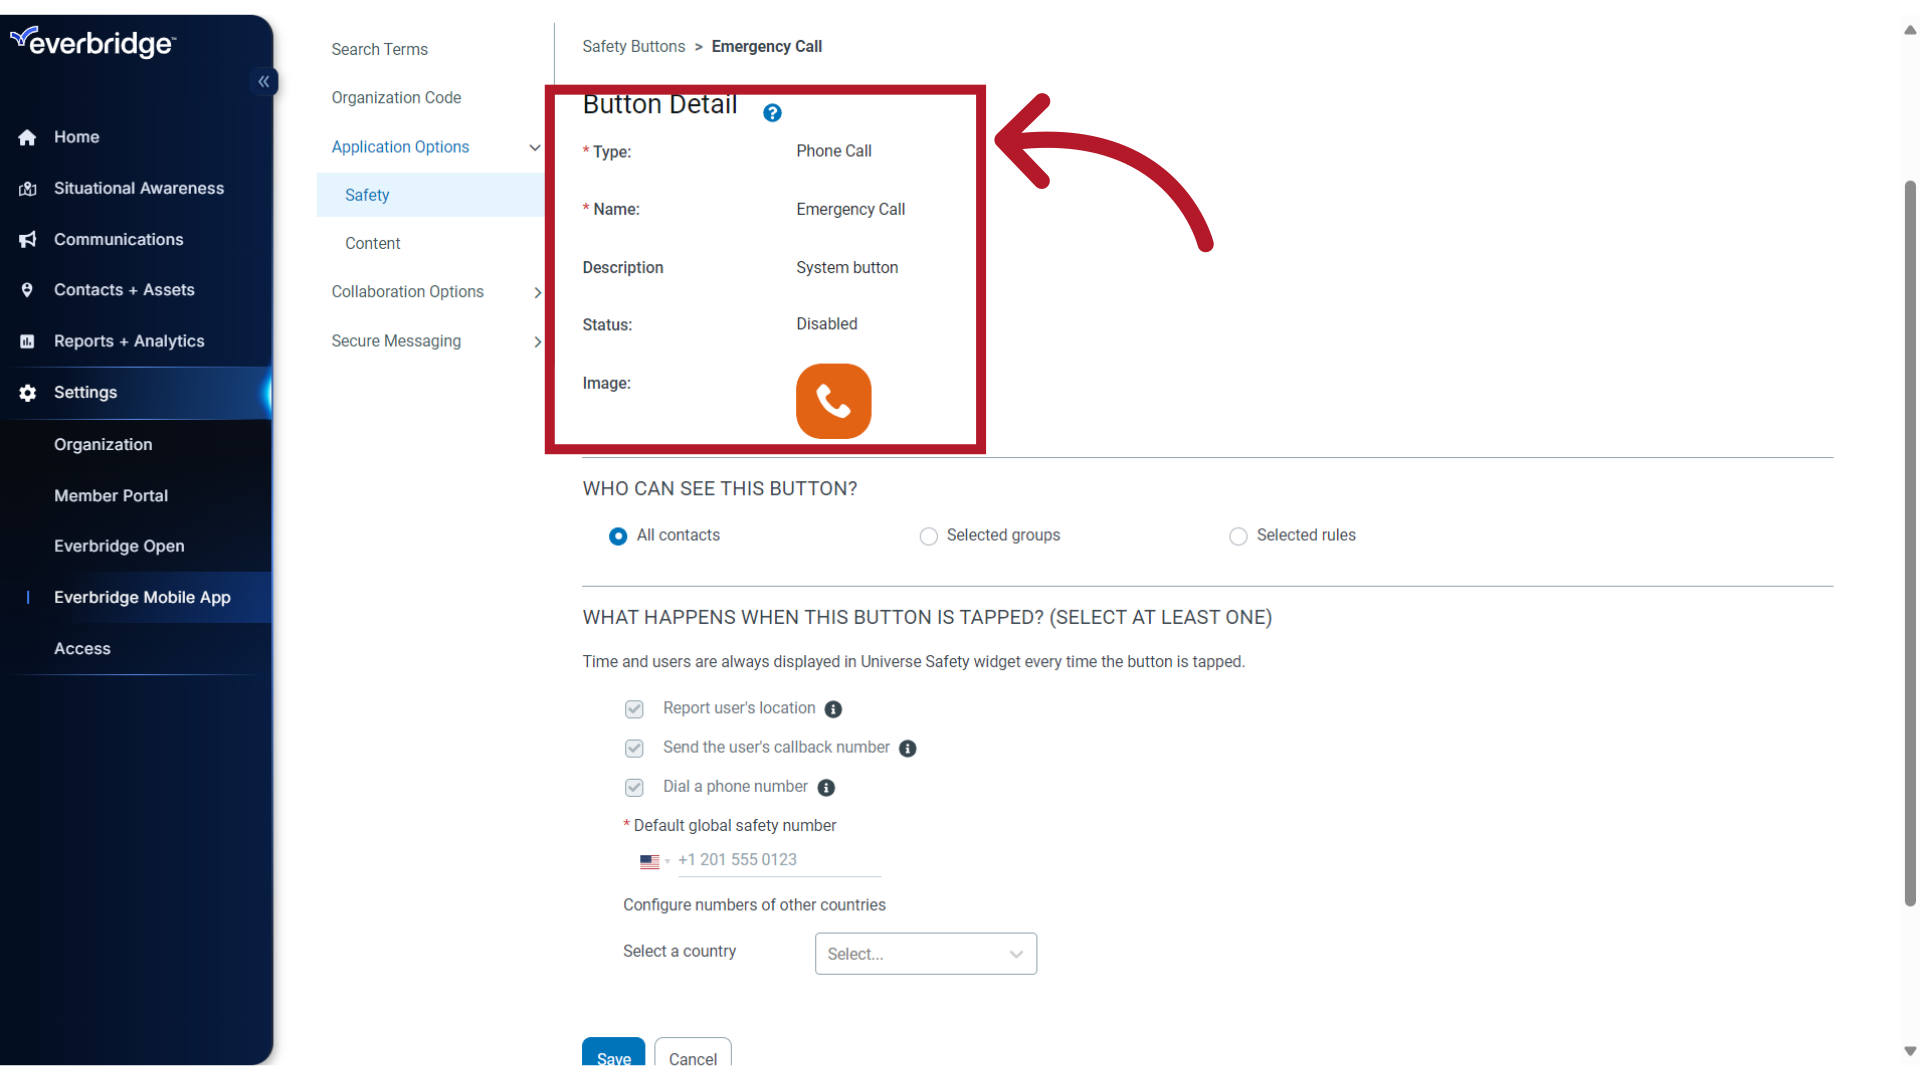
25. Button Detail
The Phone Call type button will use the mobile device's phone application to call a pre-set number.
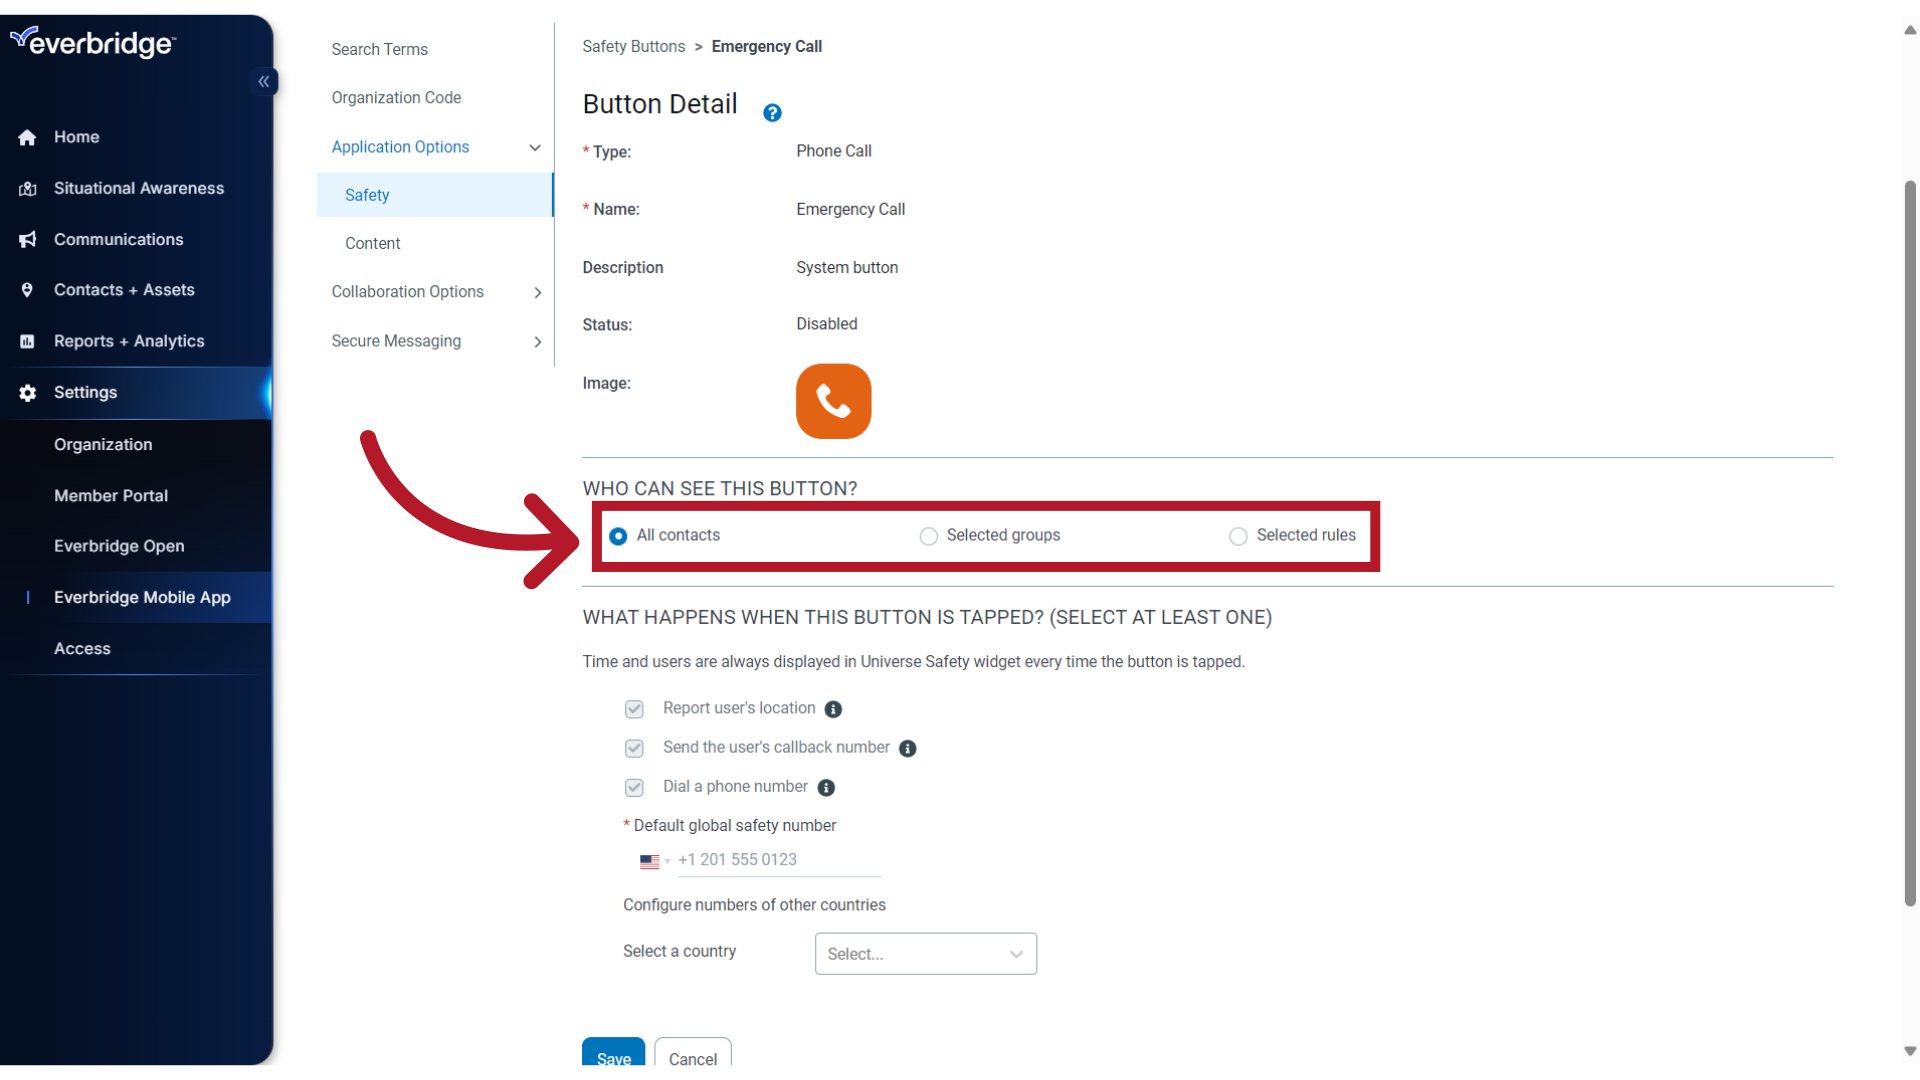
26. Contact Access
When the button is enabled, all contacts will see it by default. If you need to restrict access, follow the previously defined steps to select Groups or Rules.
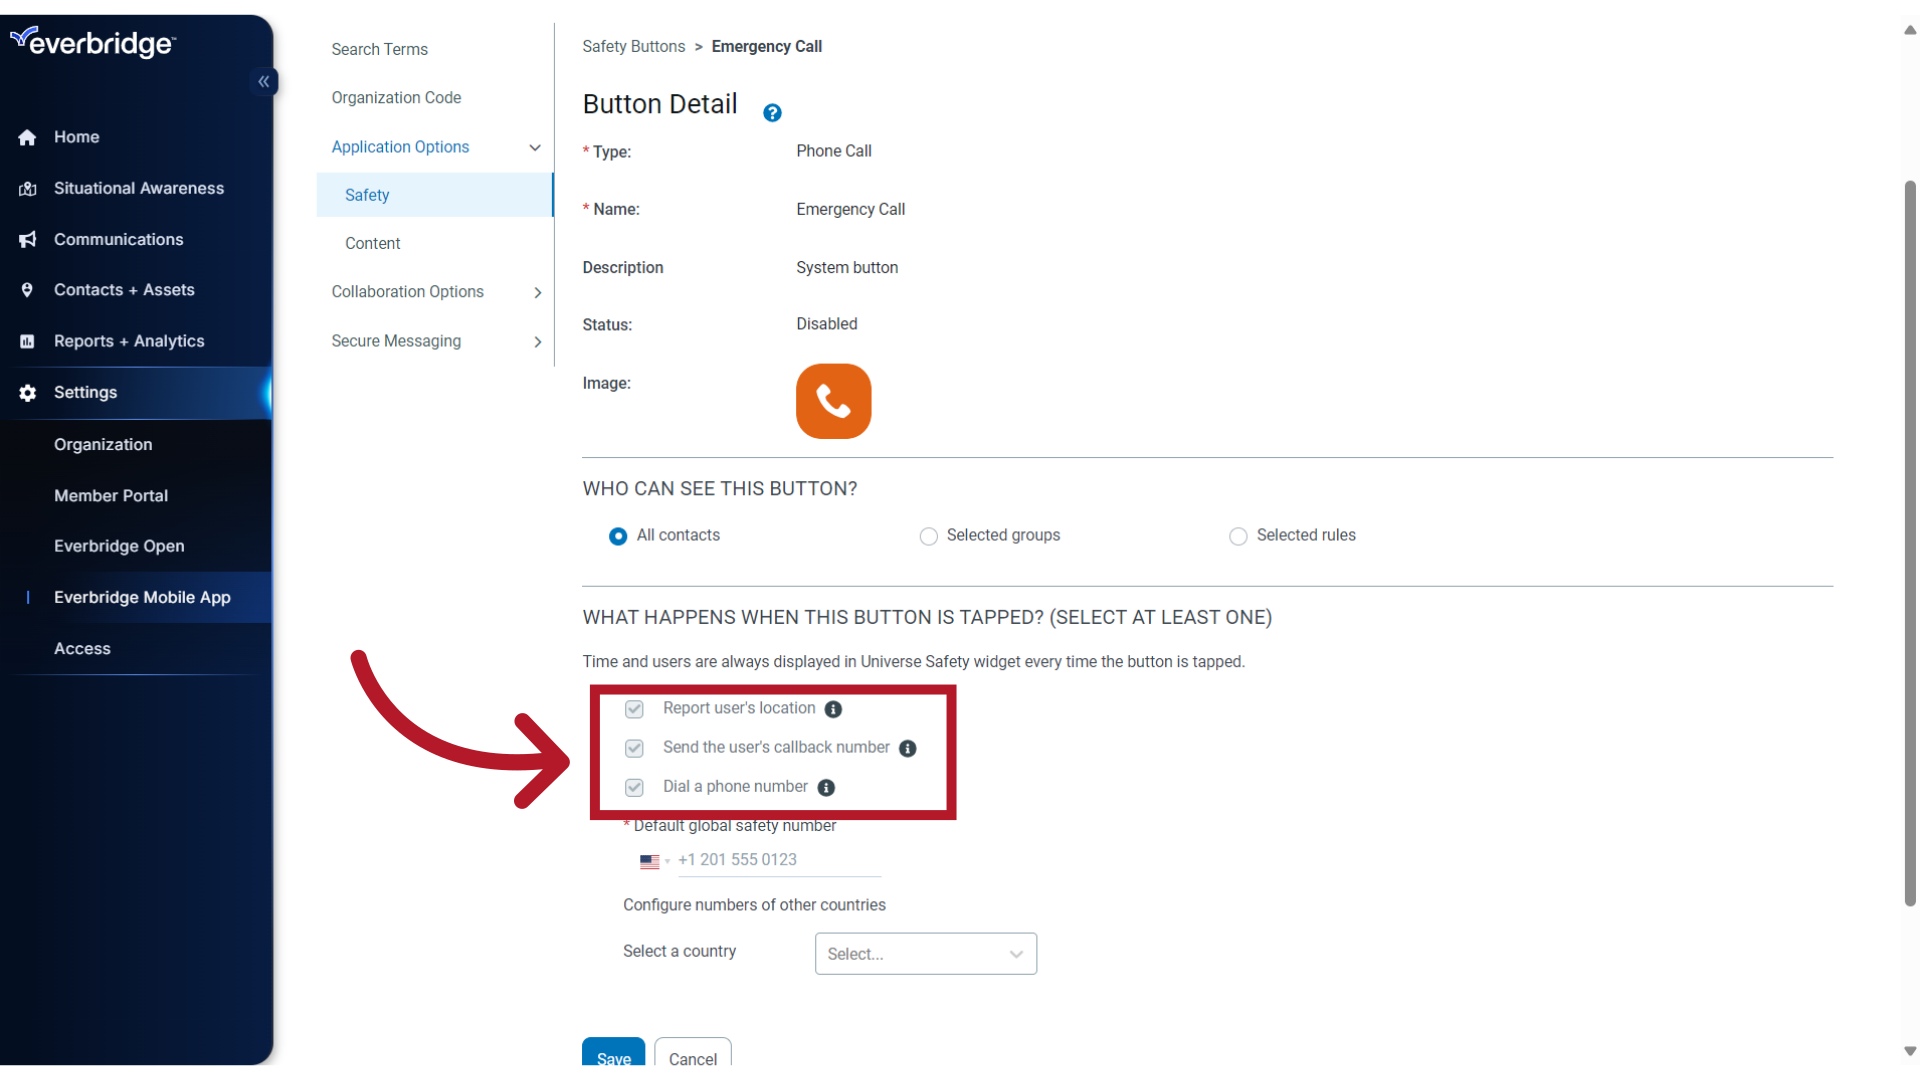
27. Actions
Their location and callback number will always be captured, and a phone call will be triggered.
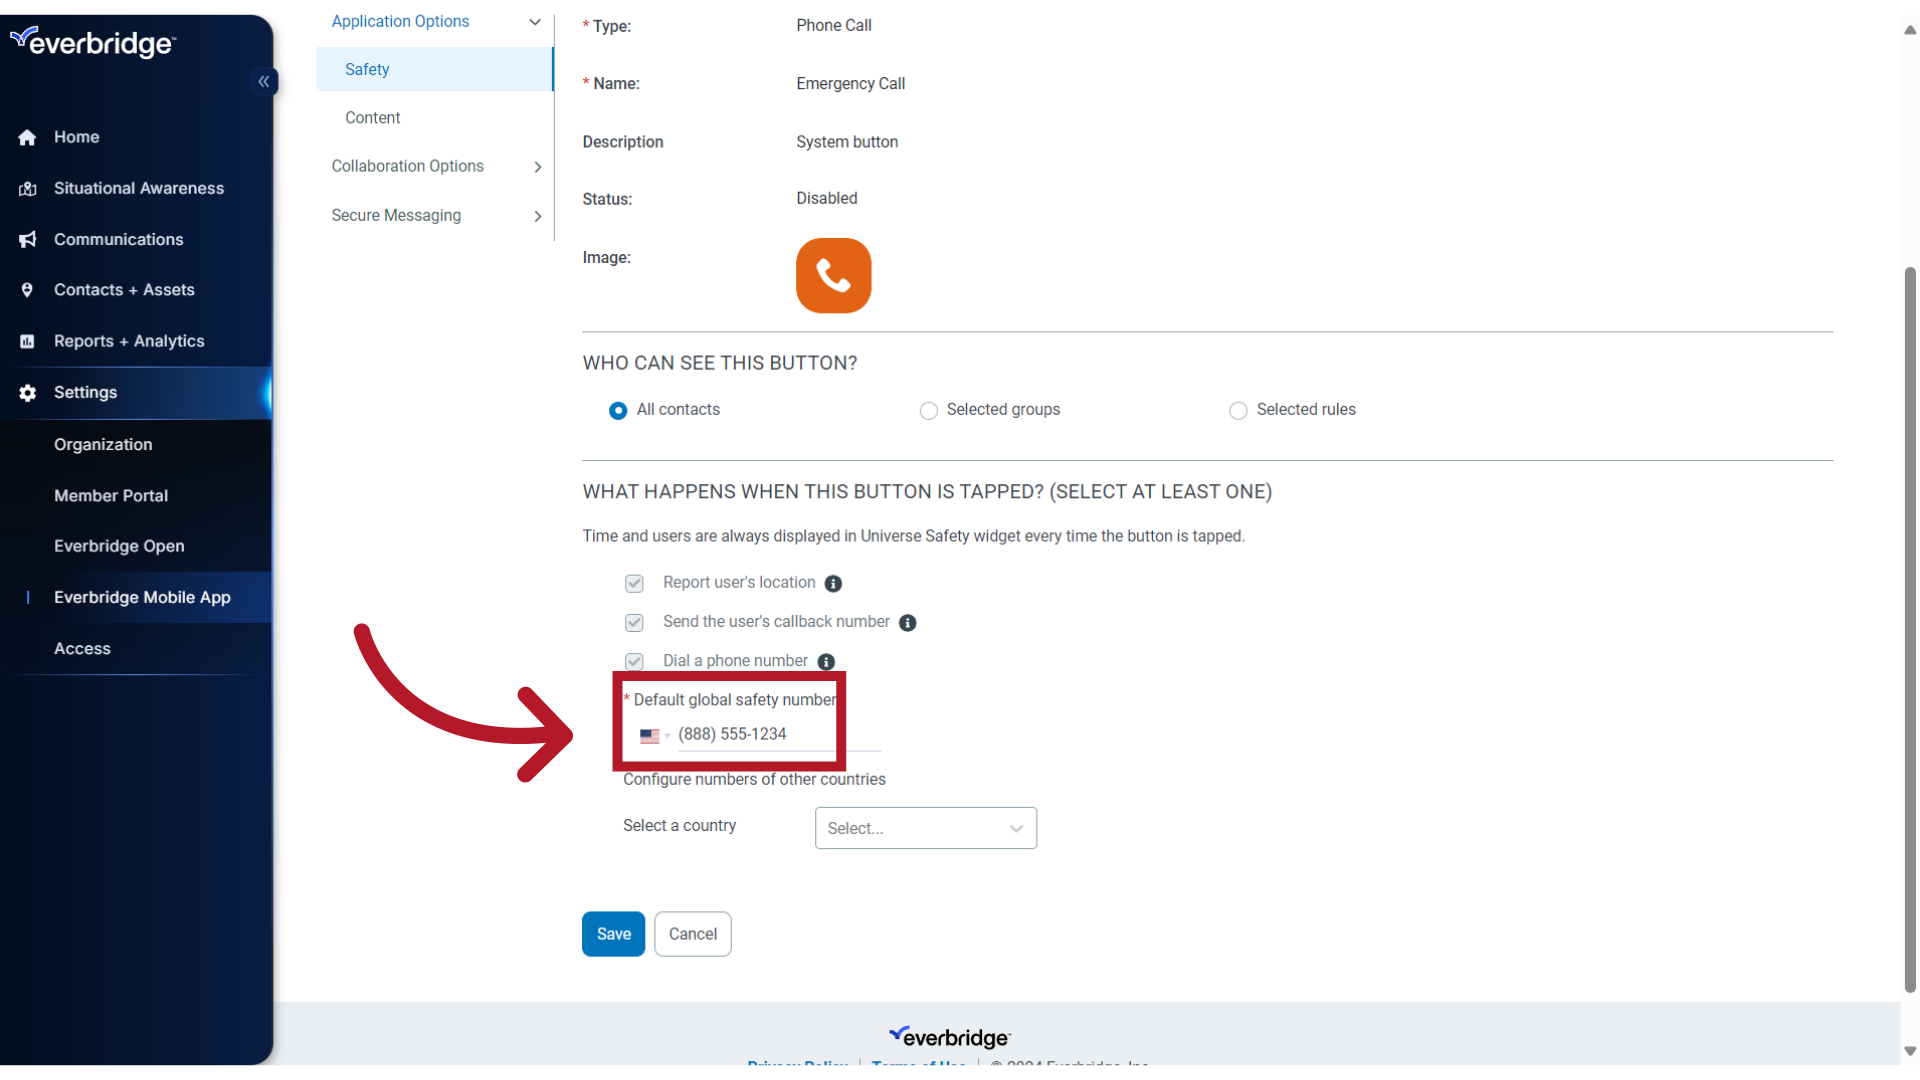
28. Default Number
To make that call, a default global safety number must be entered. It is recommended that you use a number which will be actively monitored and answered, and not a recorded line, since it is being used for emergency purposes.
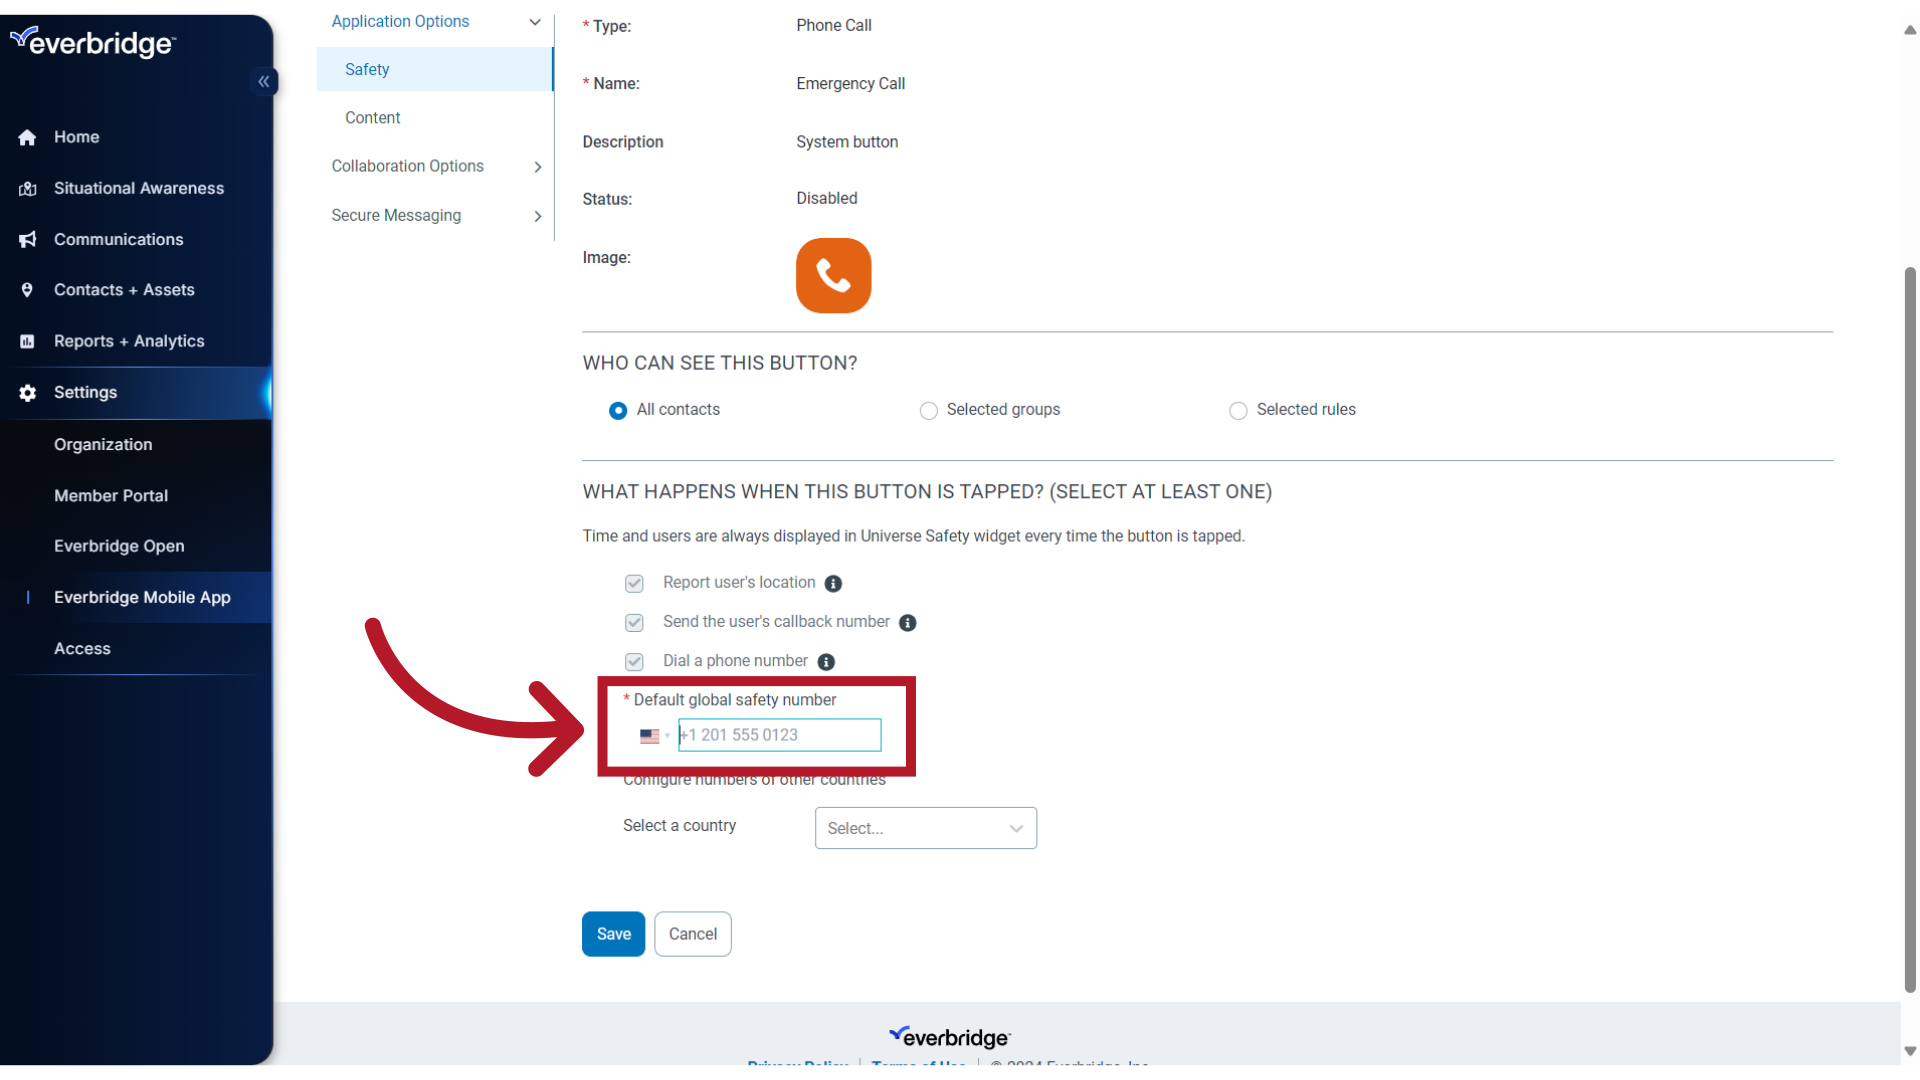
29. Add
To add, select the country where the number is based and then enter the phone number.
30. Country Specific
If needed, you can set additional numbers on a country-by-country basis. If the mobile device's location has been detected in a country for which a specific number has been set, this number will be dialed instead of the global safety number.
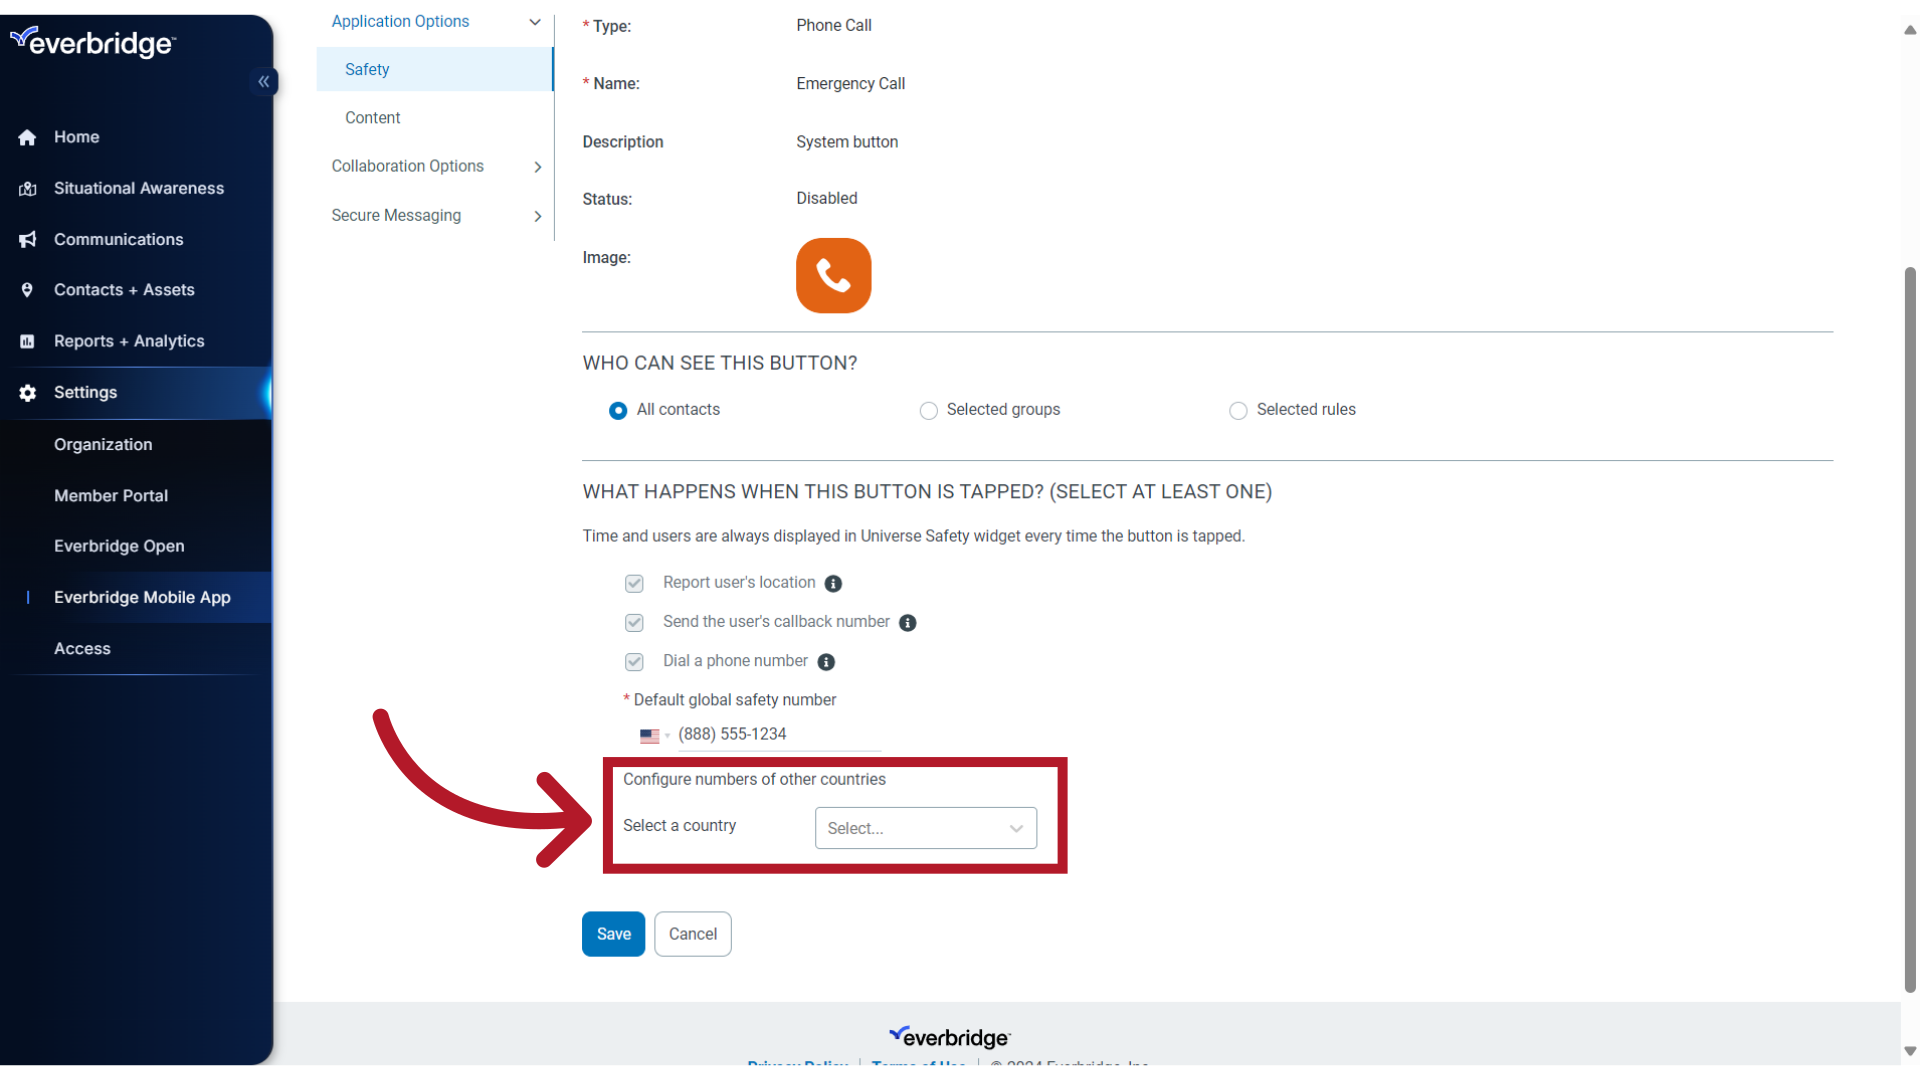
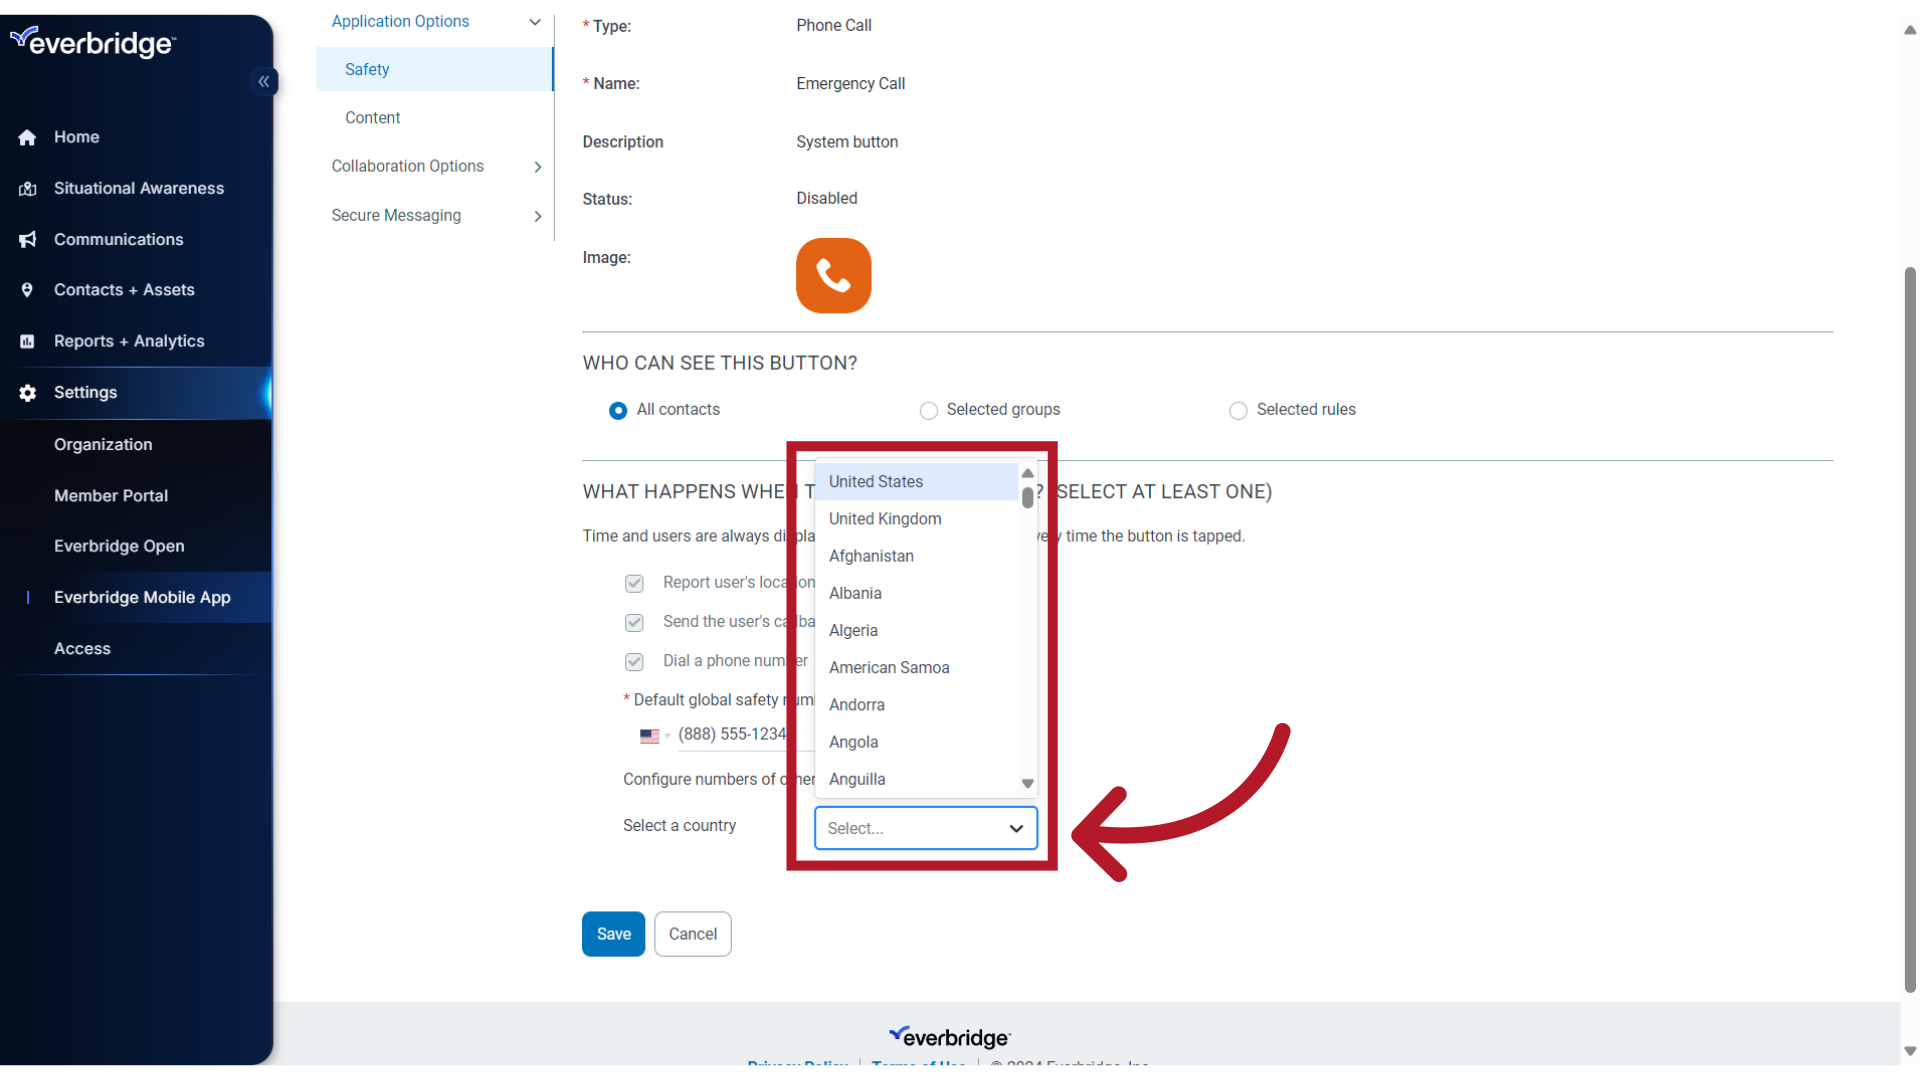
31. Country Specific
Select the country where you want to designate a specific phone number from the list.
32. Emergency Service
You can either select that country's public emergency service number
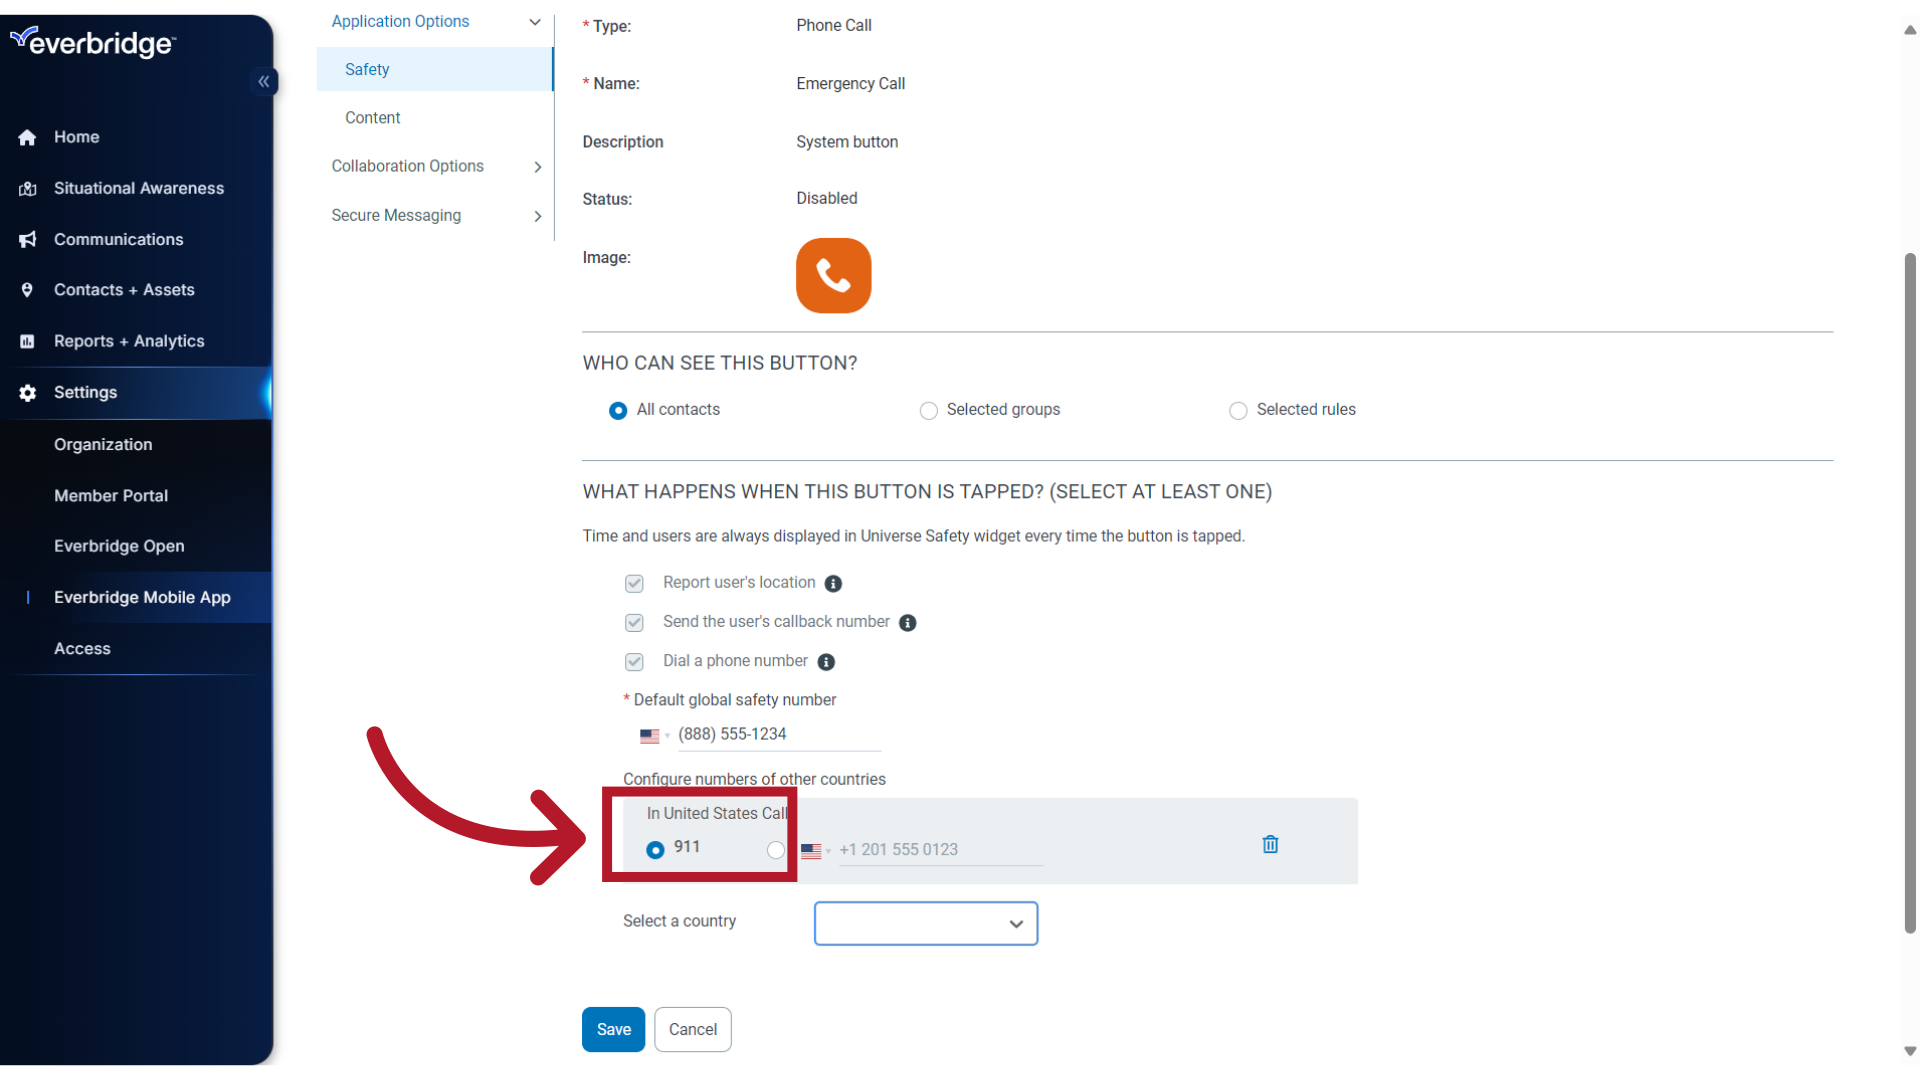
33. Local Number
or enter a specific number. For example, if you have a local employee safety hotline or security center.
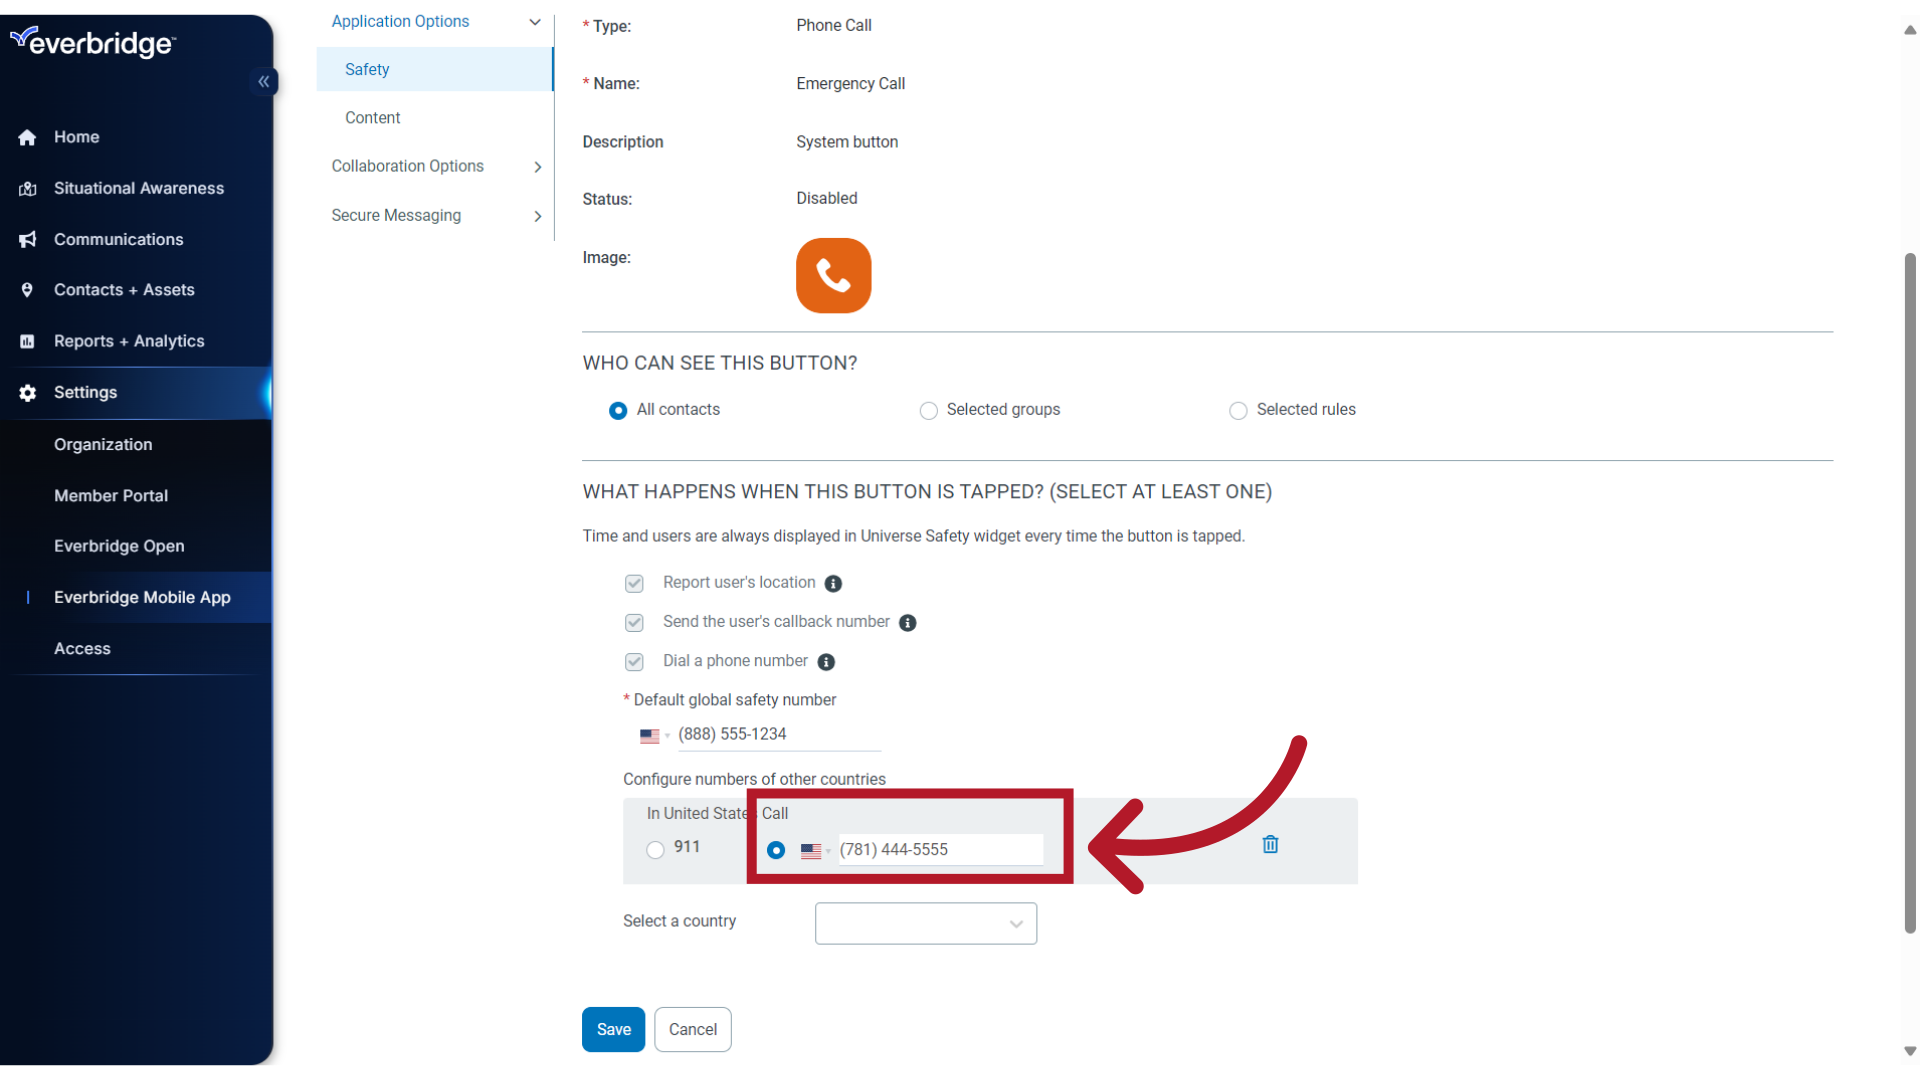
34. Additional Countries
Repeat the step for any additional countries you wish to add.
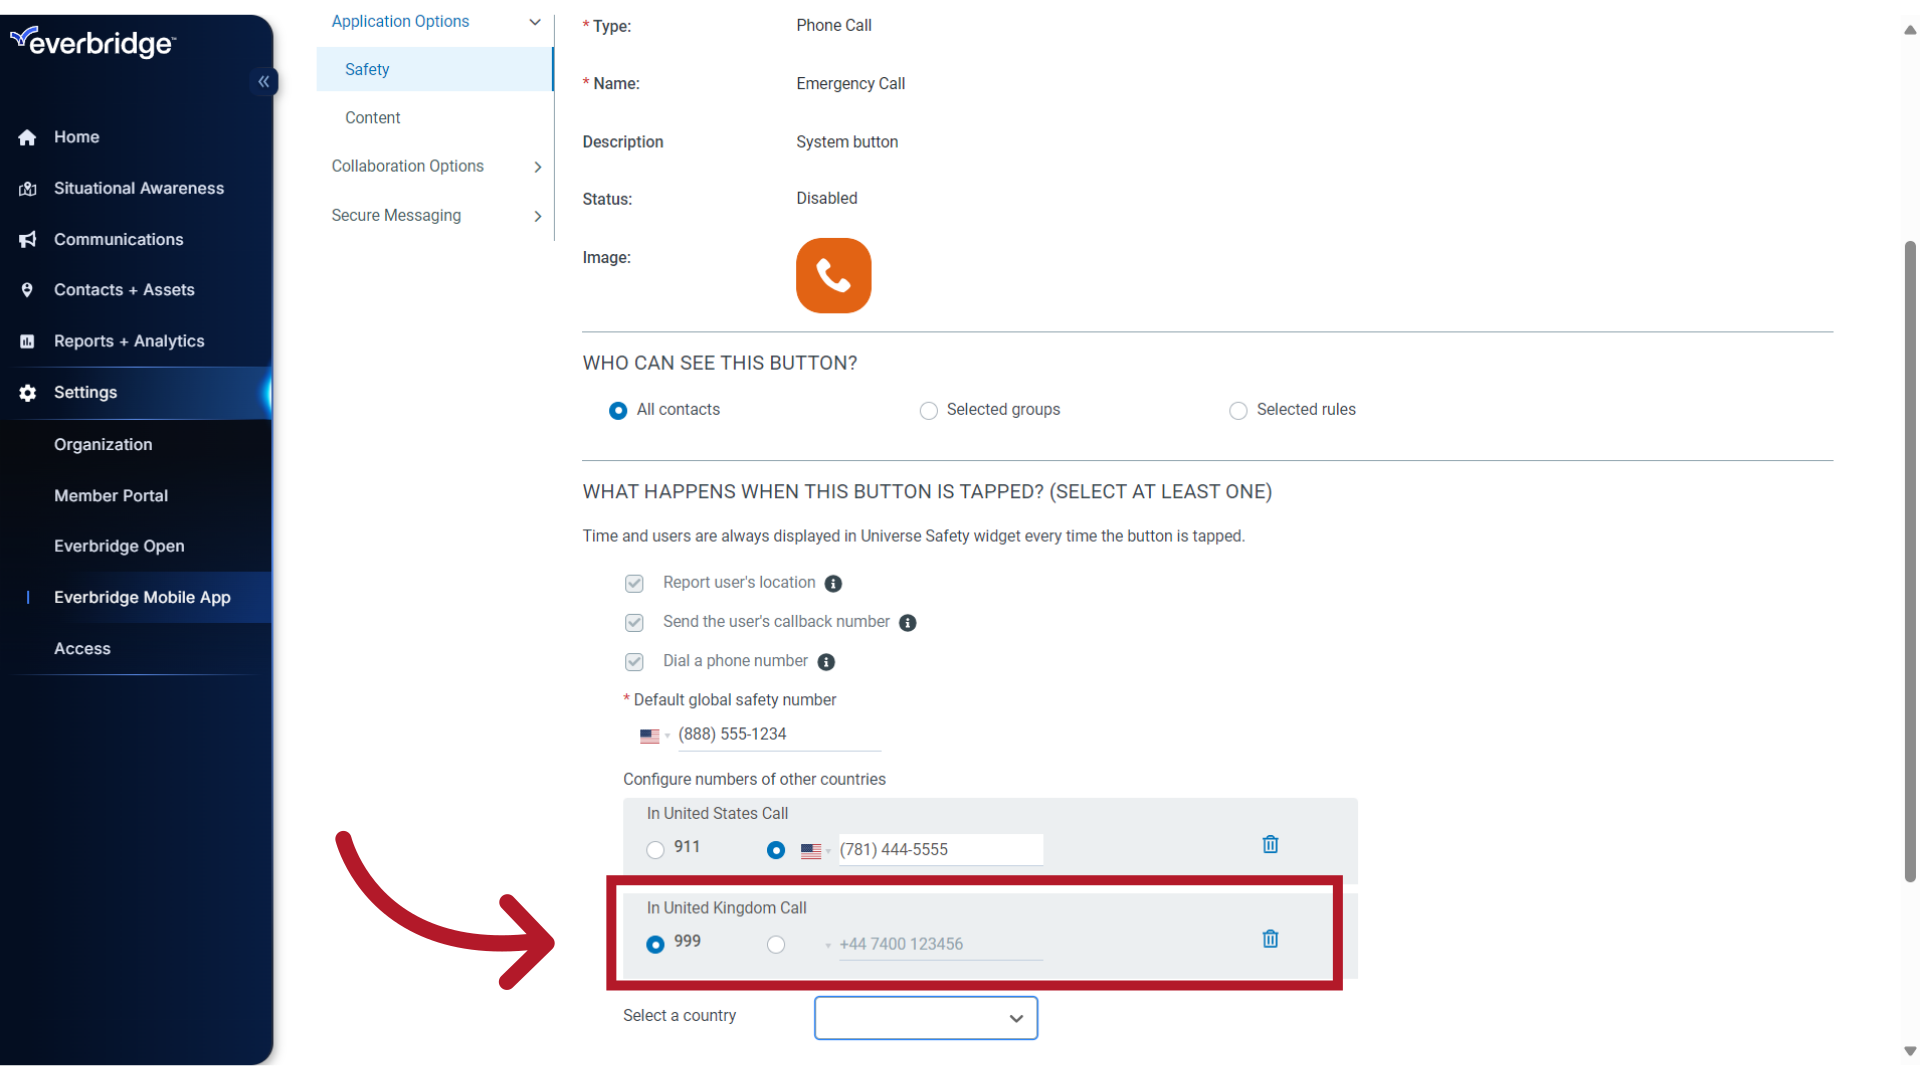
35. Save
When you have finished configuring the button settings, click Save.
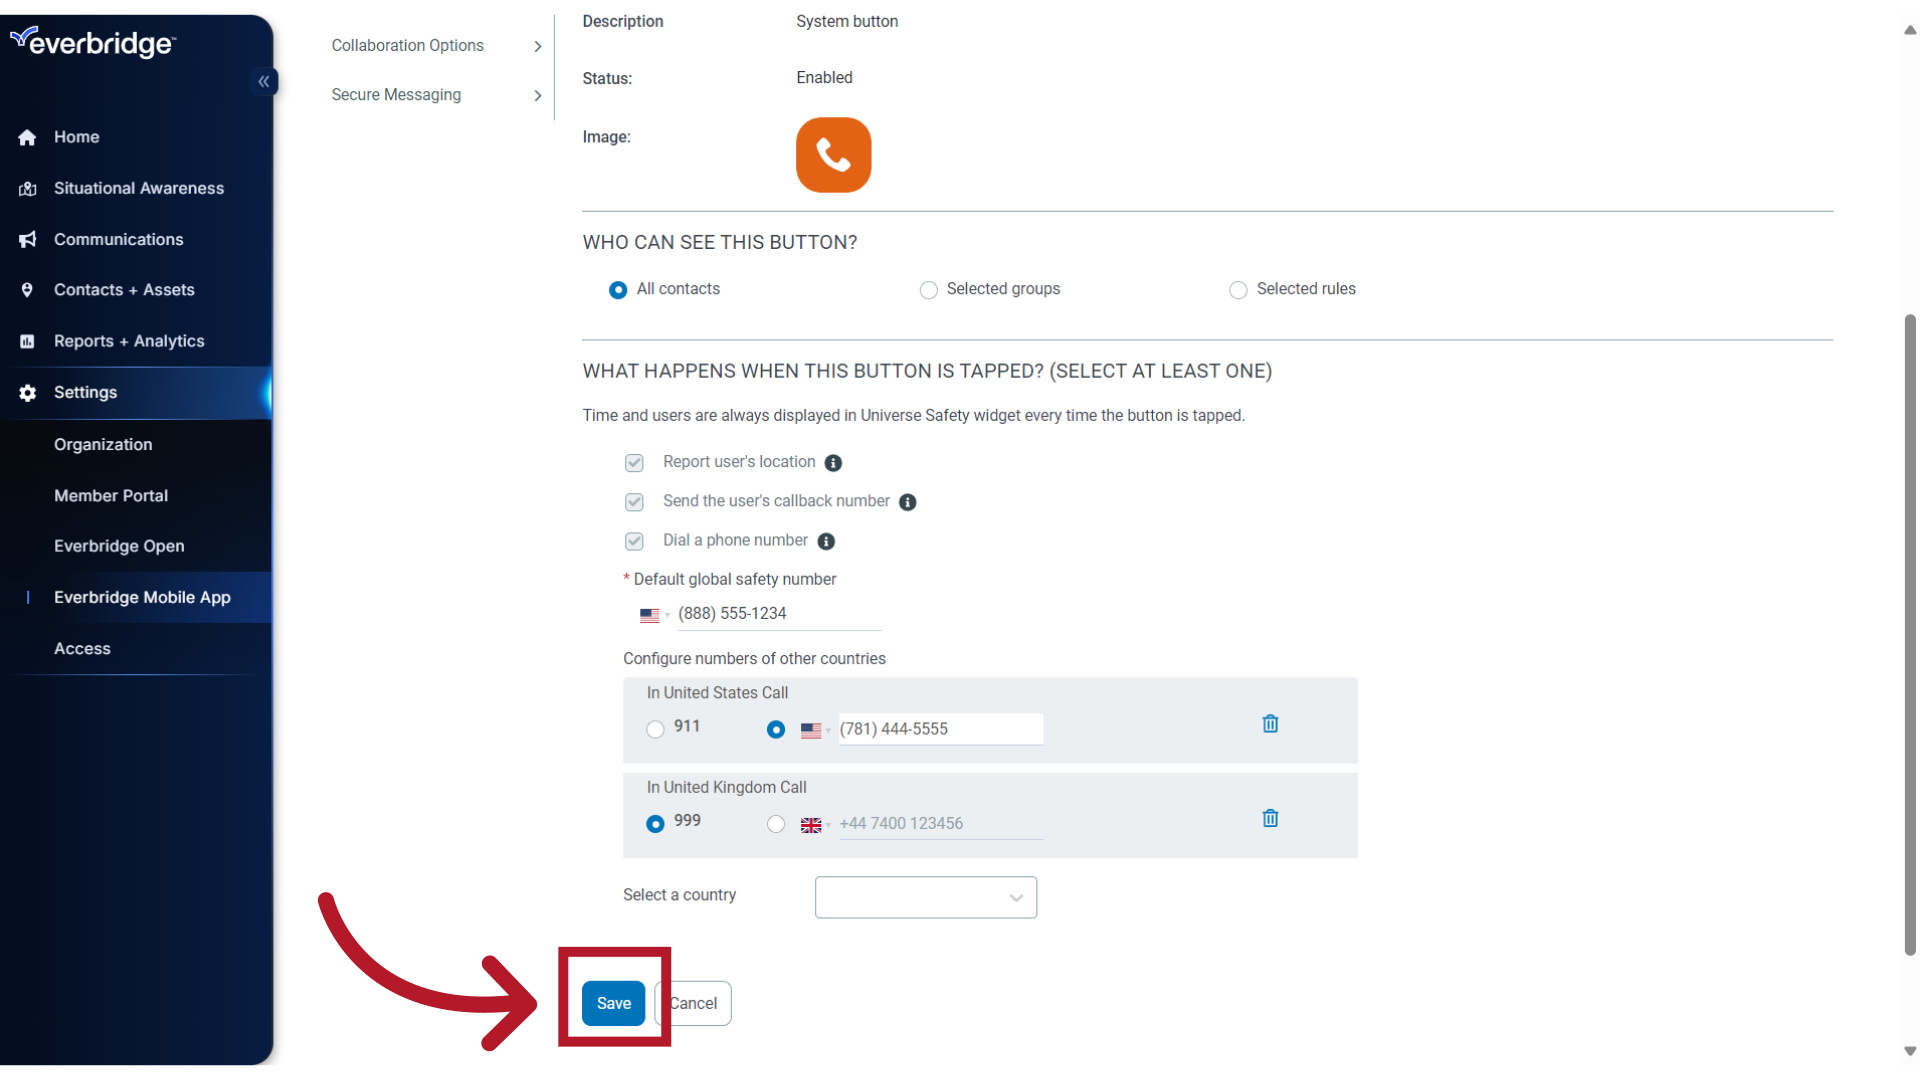
36. Enable
This will return you to the main button menu where you can now you can enable the Emergency Call button
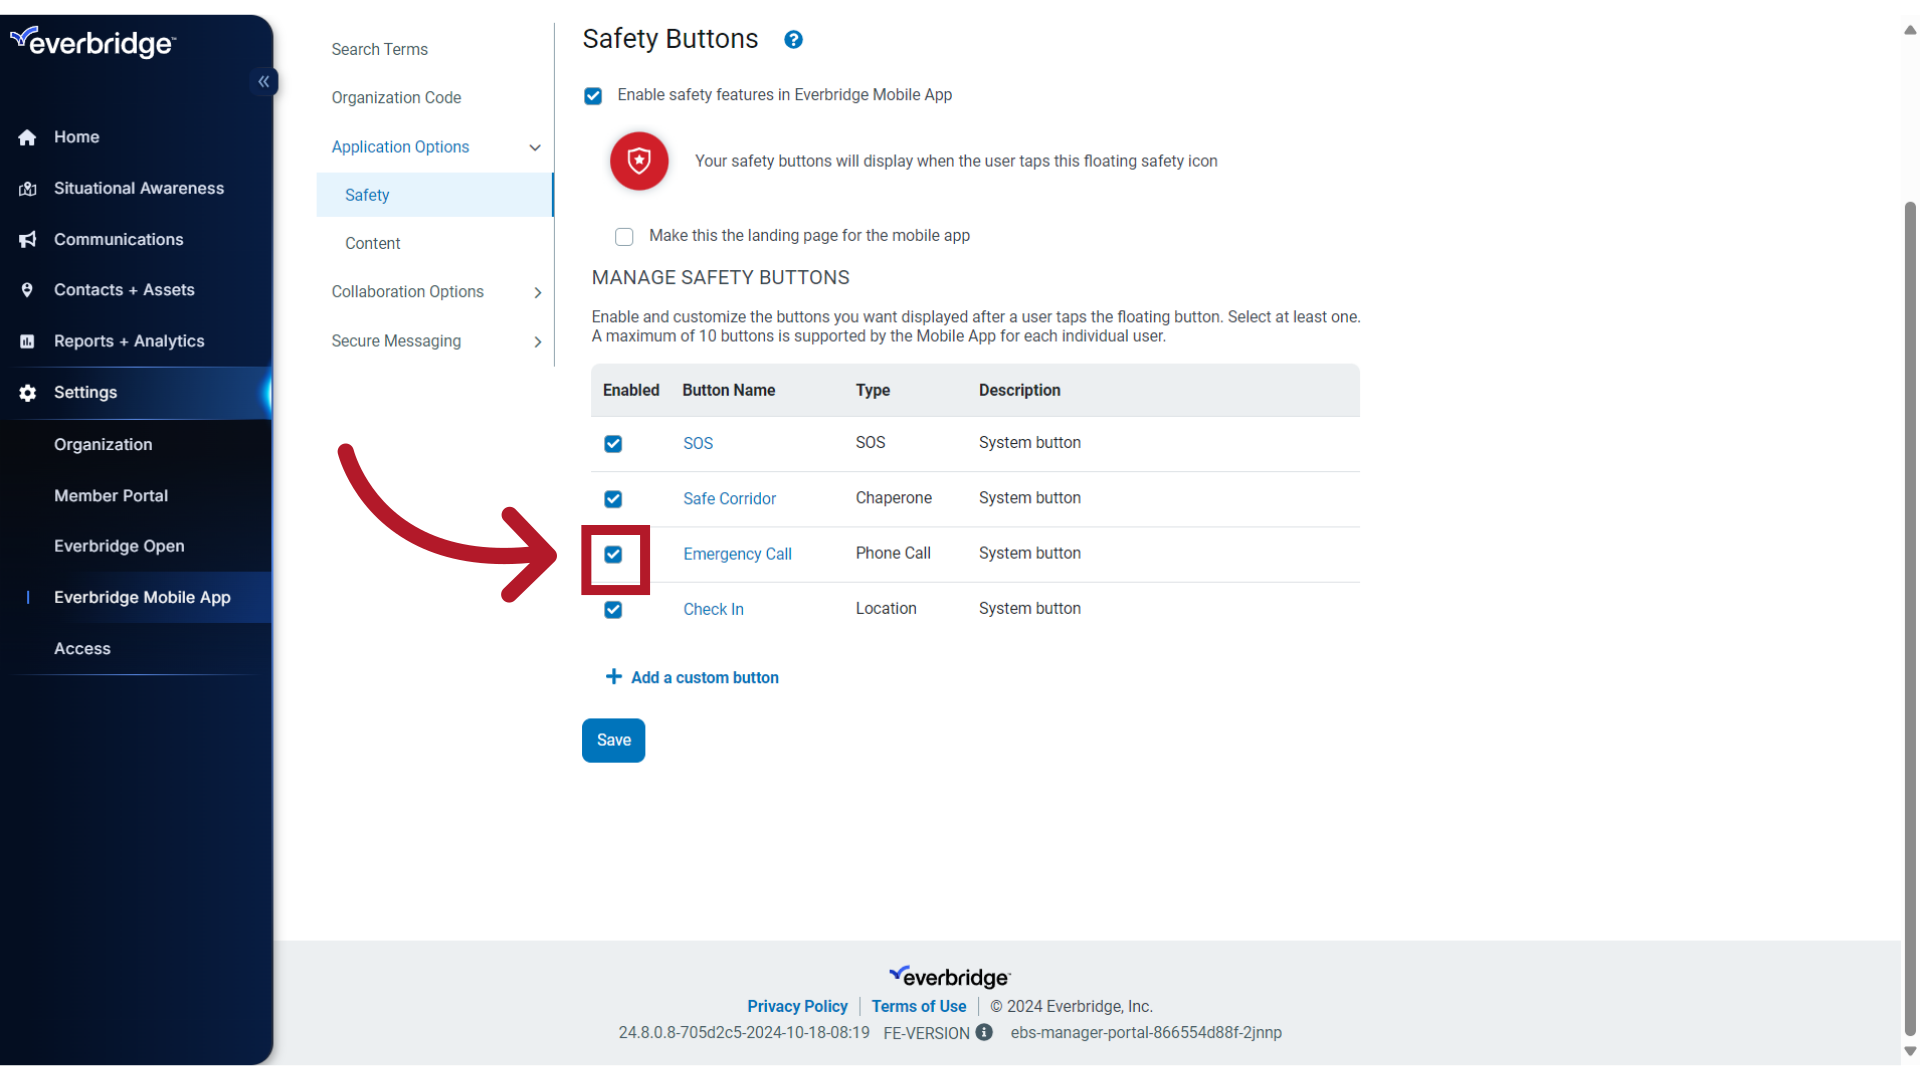
37. Save
and click Save.
Thank you for watching!
Article Feedback
While we can’t respond to you directly, we’d love to know how we can improve the article.
Please sign in to leave a comment.