Topic
How to Use Safety Buttons in Everbridge 360 App.
Description
This tutorial will guide you through how to use the default Safety Buttons within the Everbridge 360™ Mobile App, including the SOS, Check-In, Safe Corridor, and Emergency Call buttons. Depending on which features have been enabled for you by your organization, or which permissions you may have already enabled on your device, you may not see all the steps or buttons reviewed here.
1. Safety Features
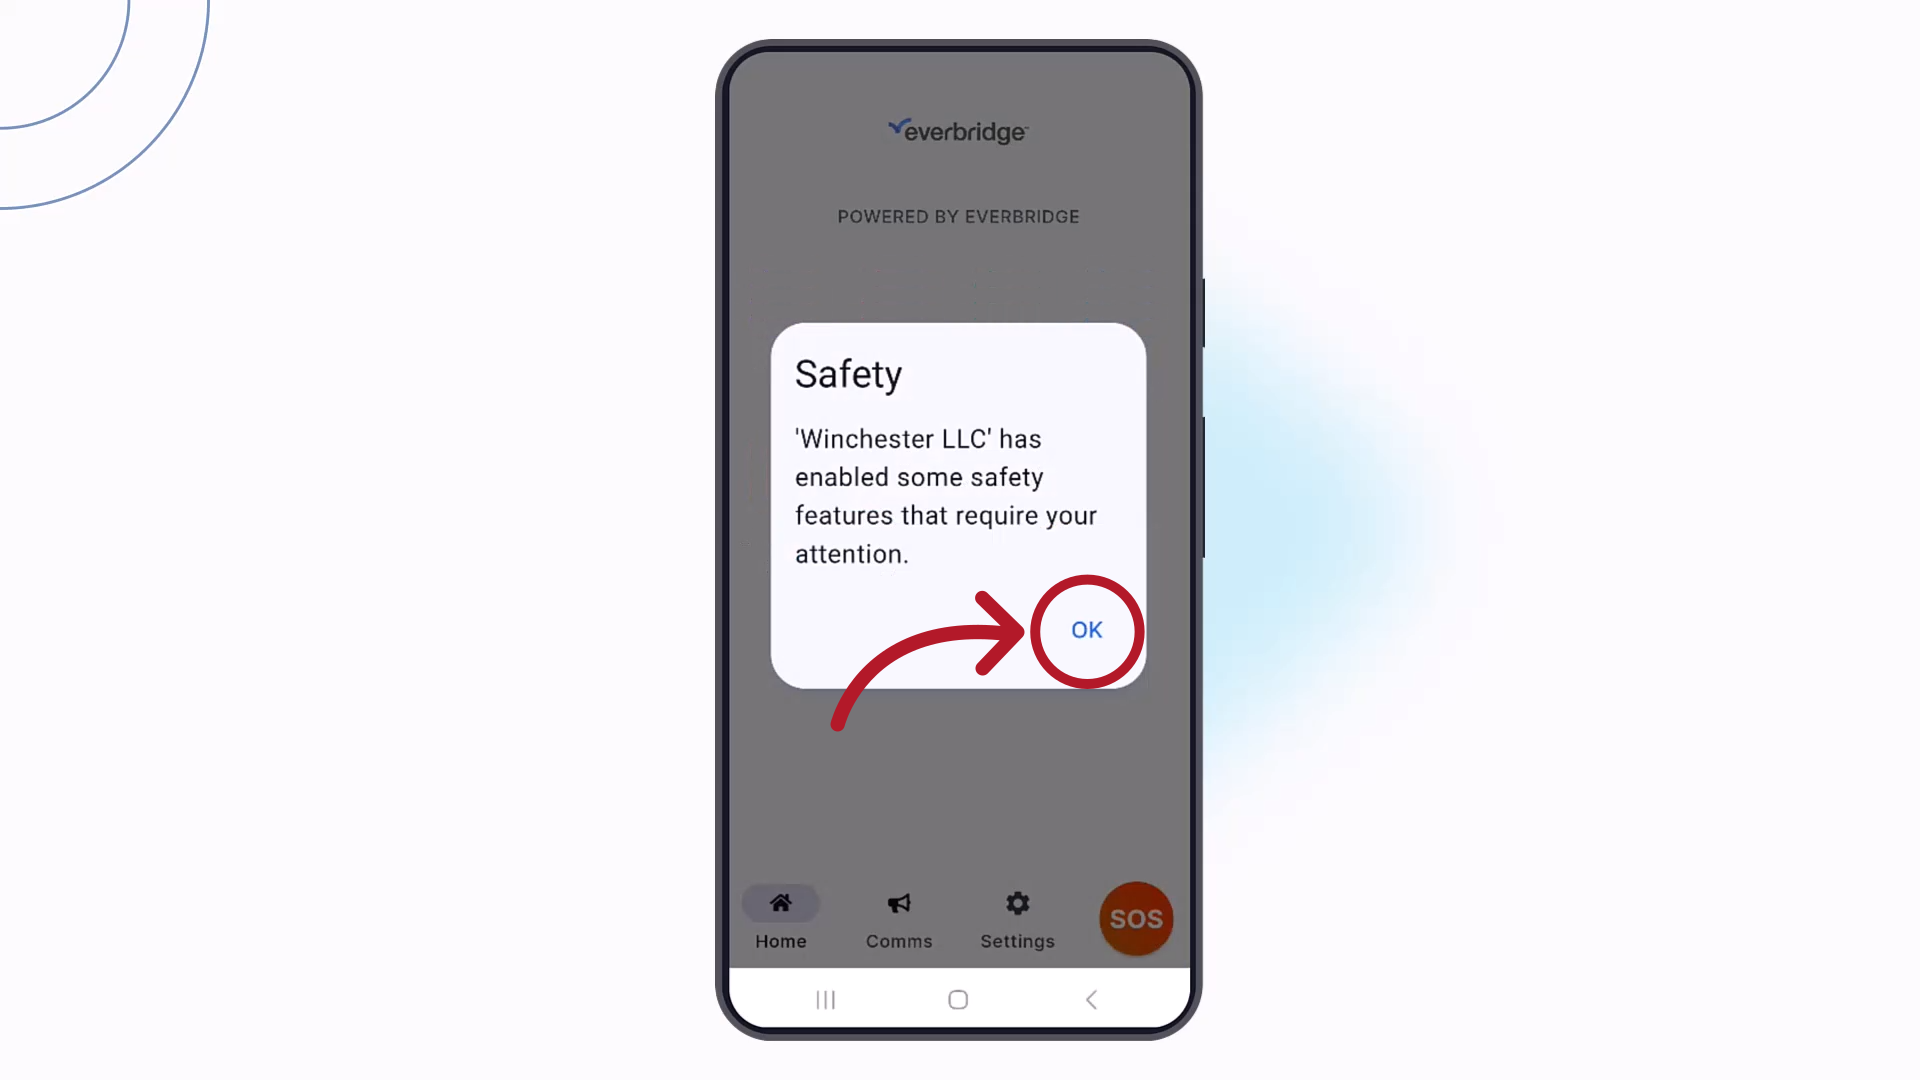
The first time you log into the app when any safety features are enabled, you will be prompted to configure a few permissions and settings. Tap OK to continue.
2. Permissions
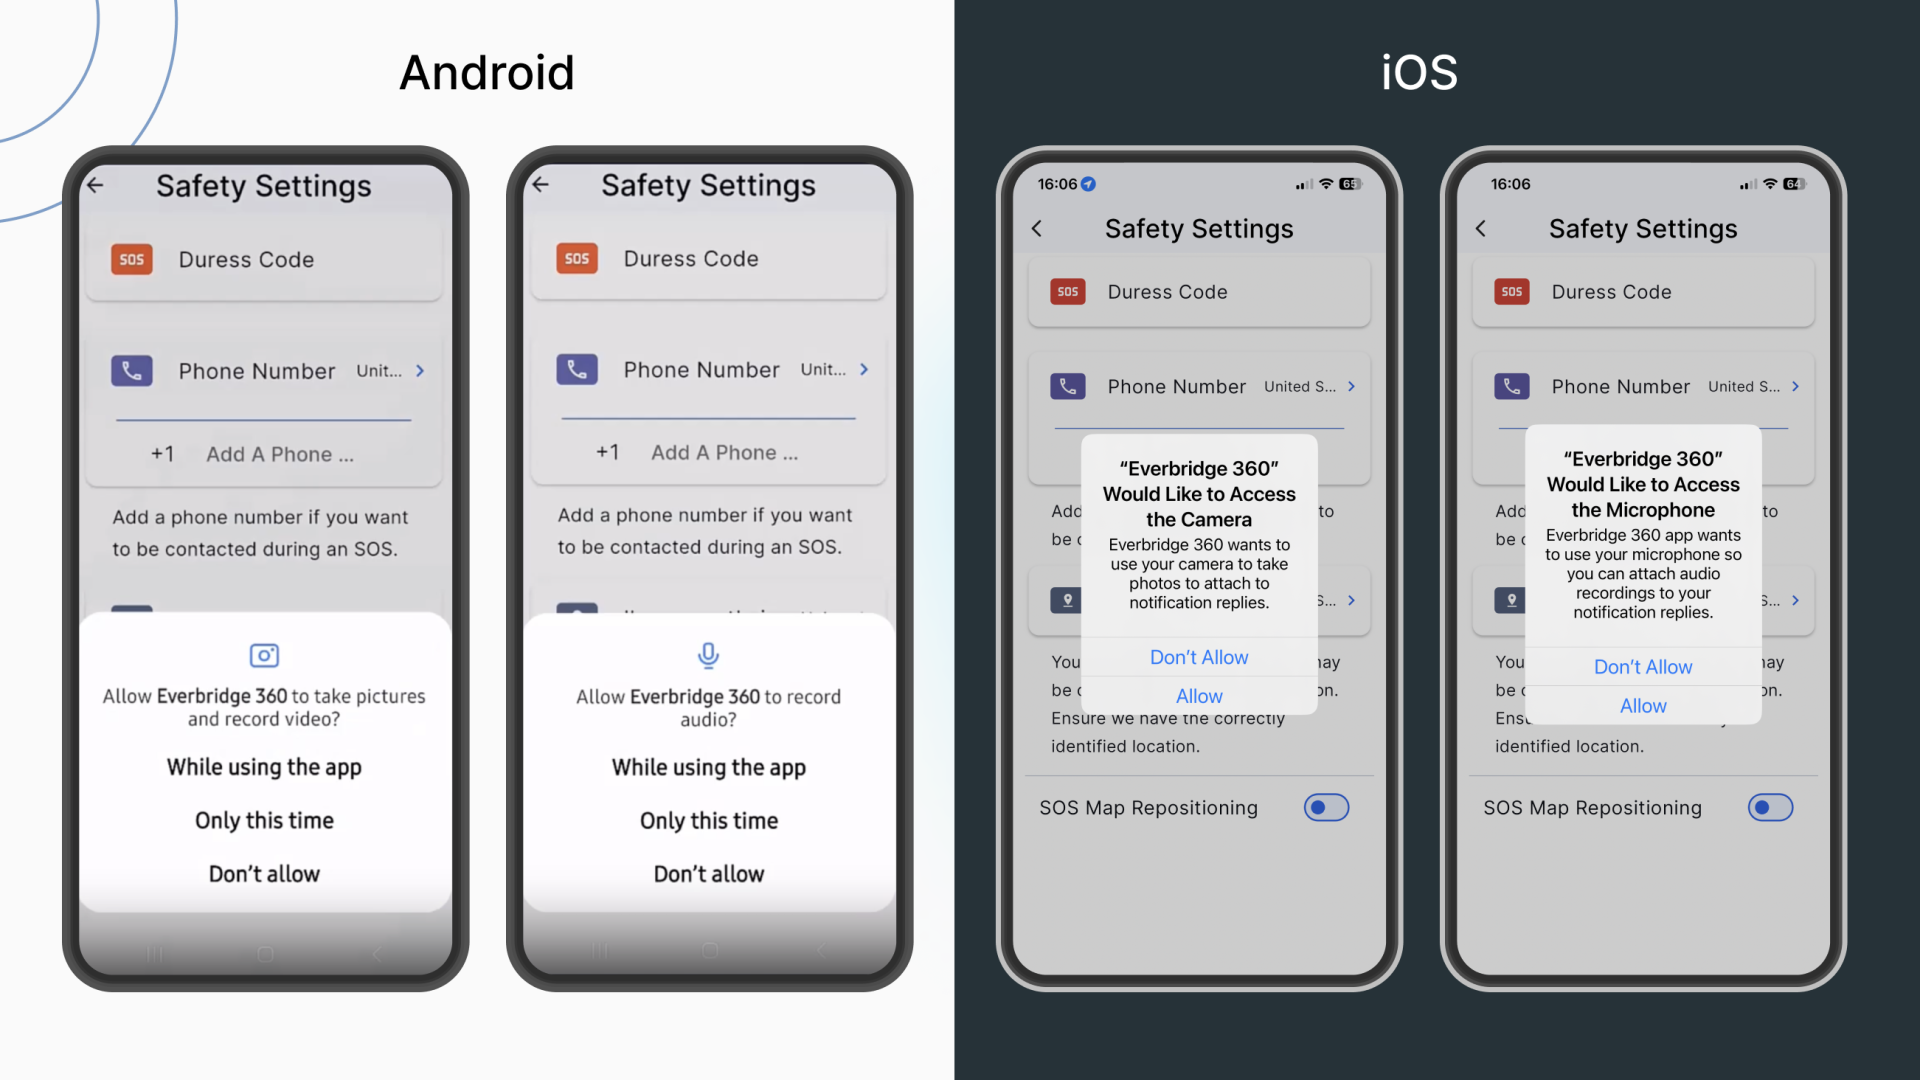
Depending on your device's operating system, allow the app to access your camera and microphone for the purpose of capturing video and recording audio. These will be needed for the SOS feature.
3. Duress Code
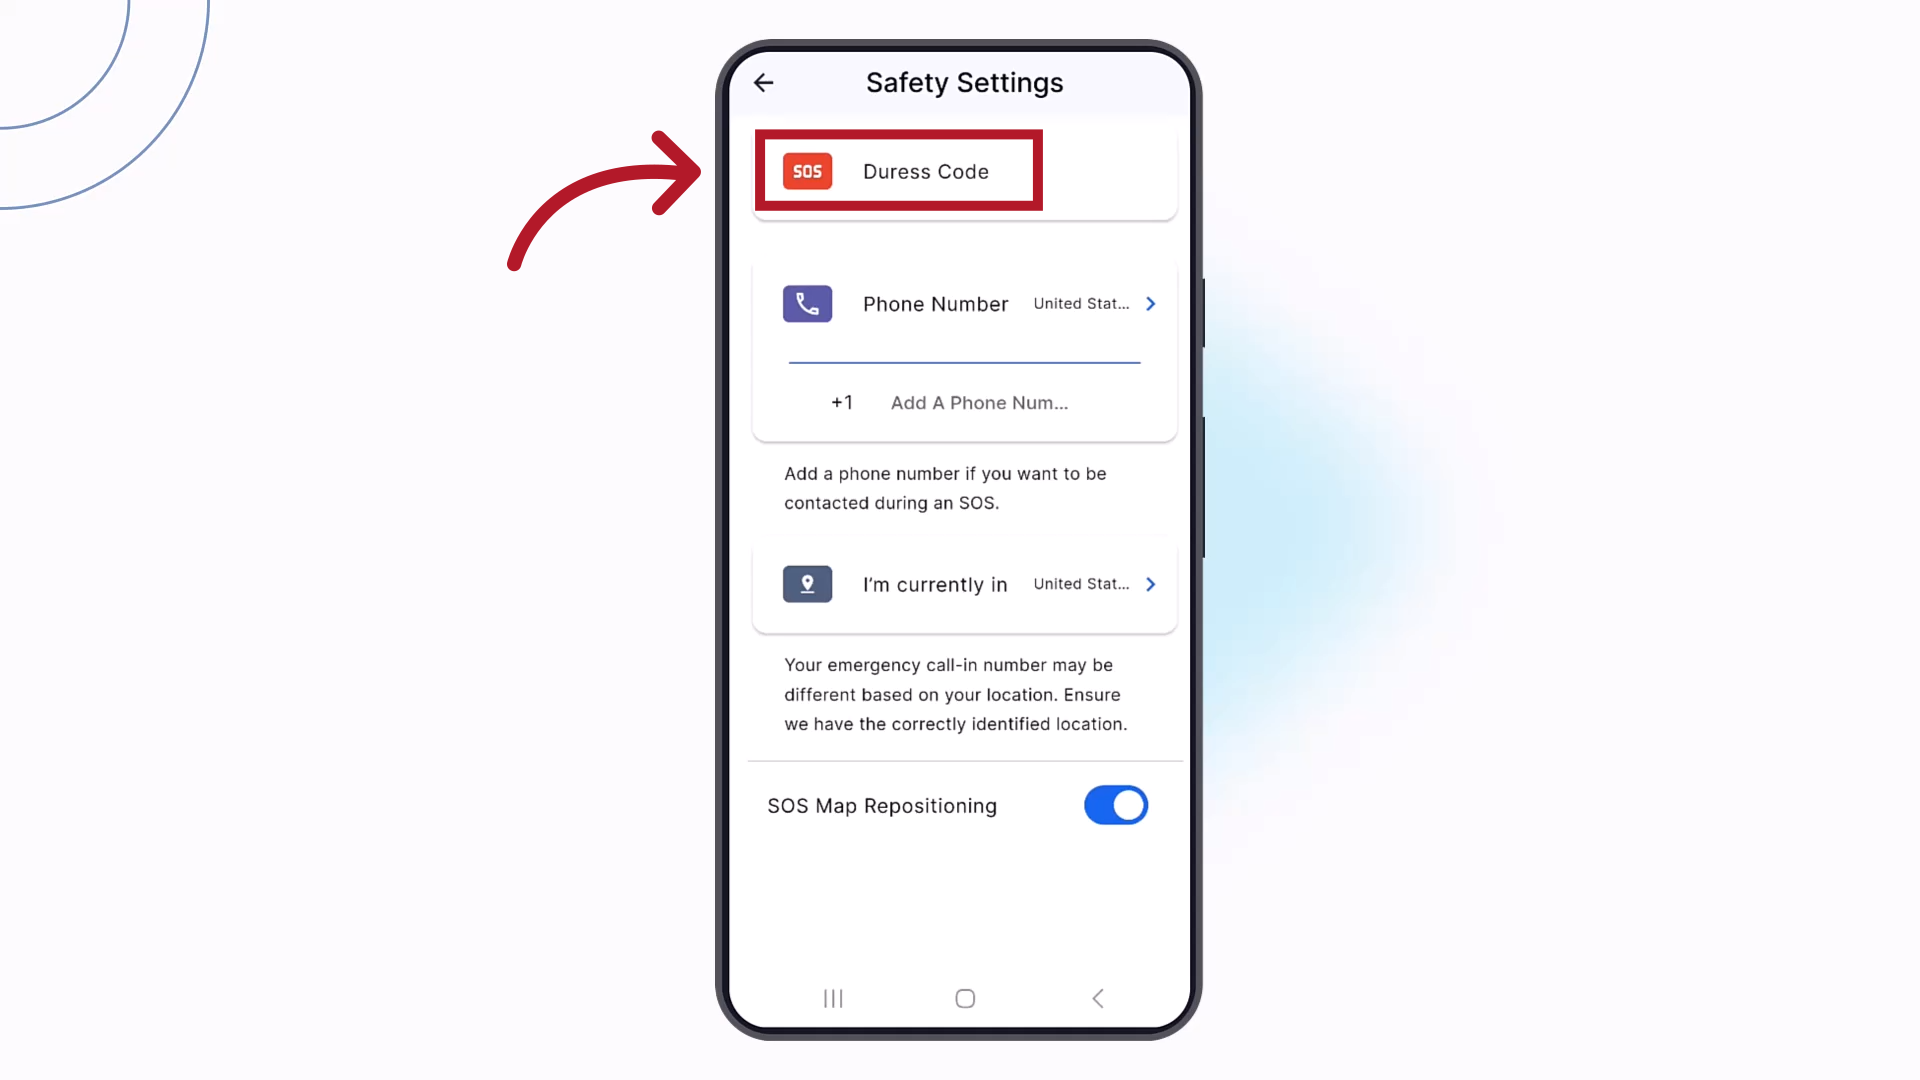
Next, select "SOS Duress Code" from the Safety Settings screen.
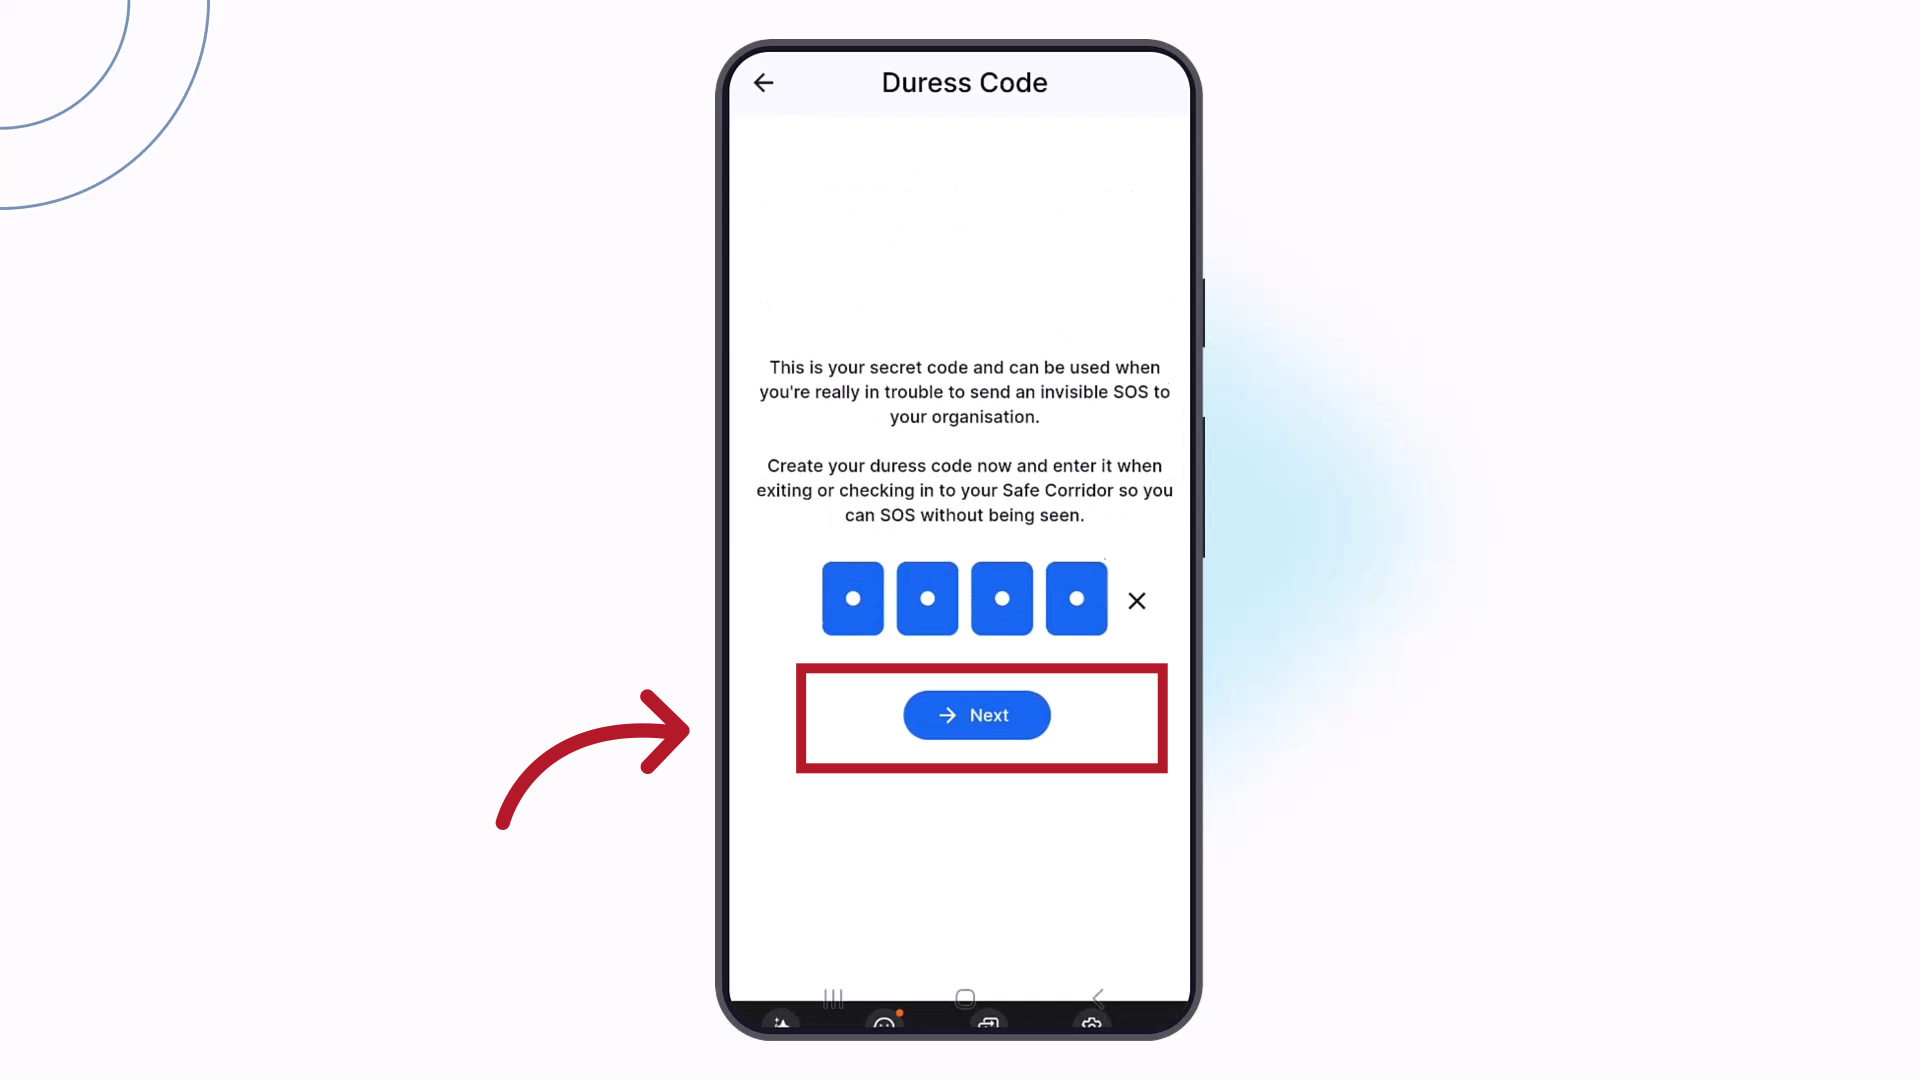
4. Enter
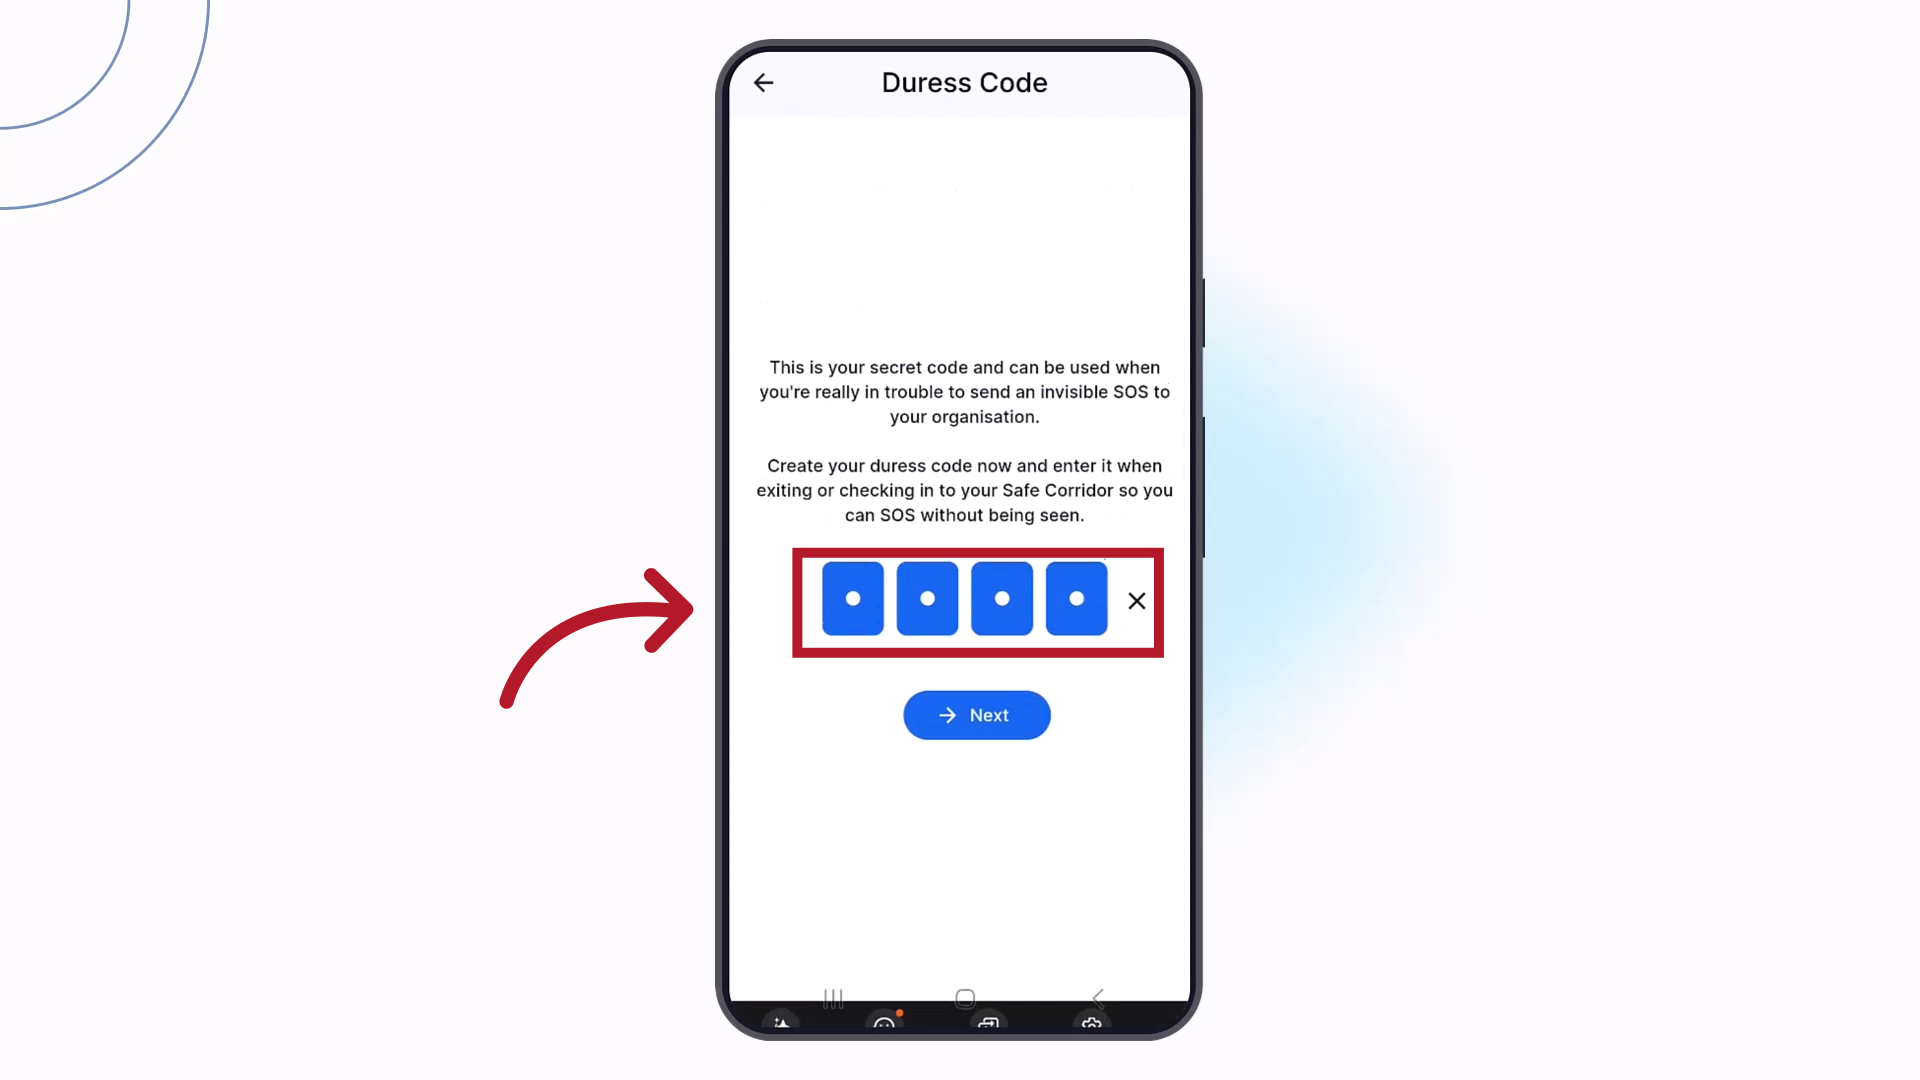
Enter an easy to remember four-digit code,
5. Next
then tap "Next".
6. Confirm
Re-enter your code to confirm
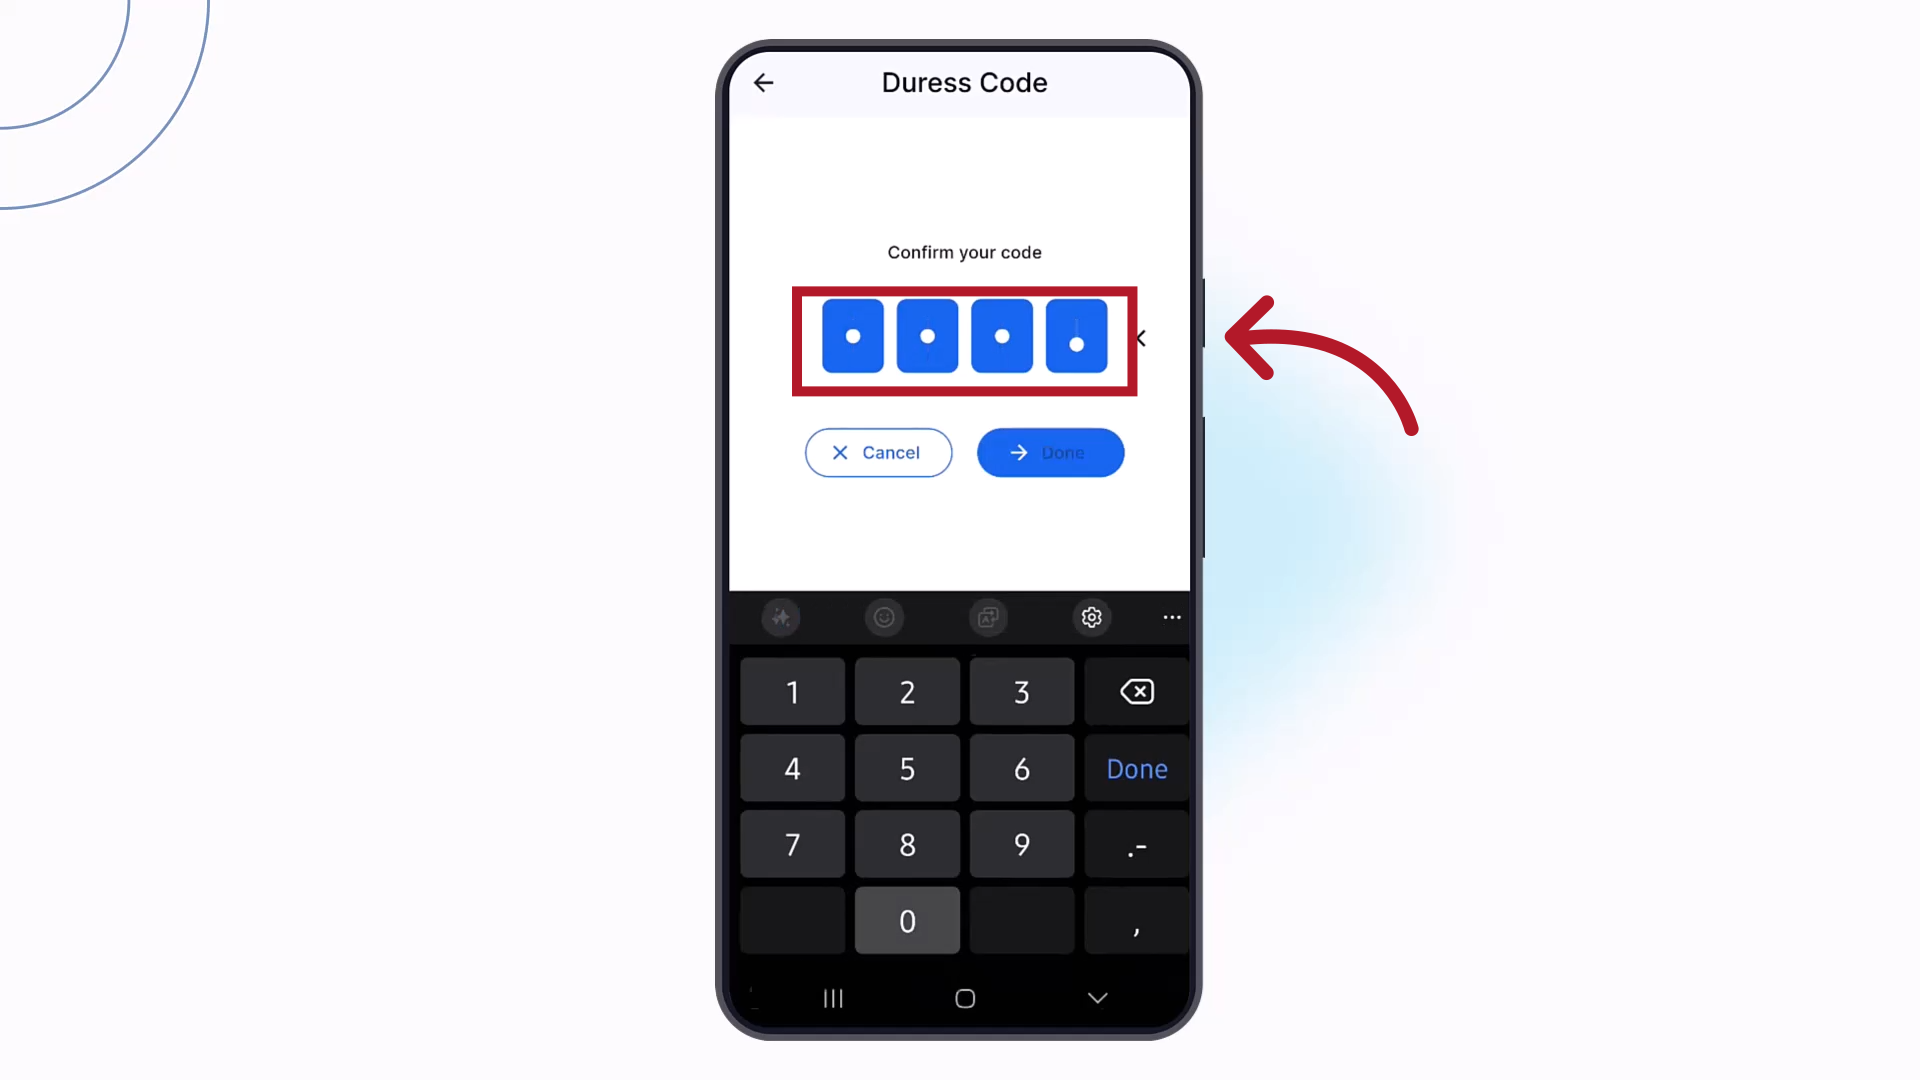
7. Confirm
then tap "Done" to continue.

8. Add
Add your device's phone number.
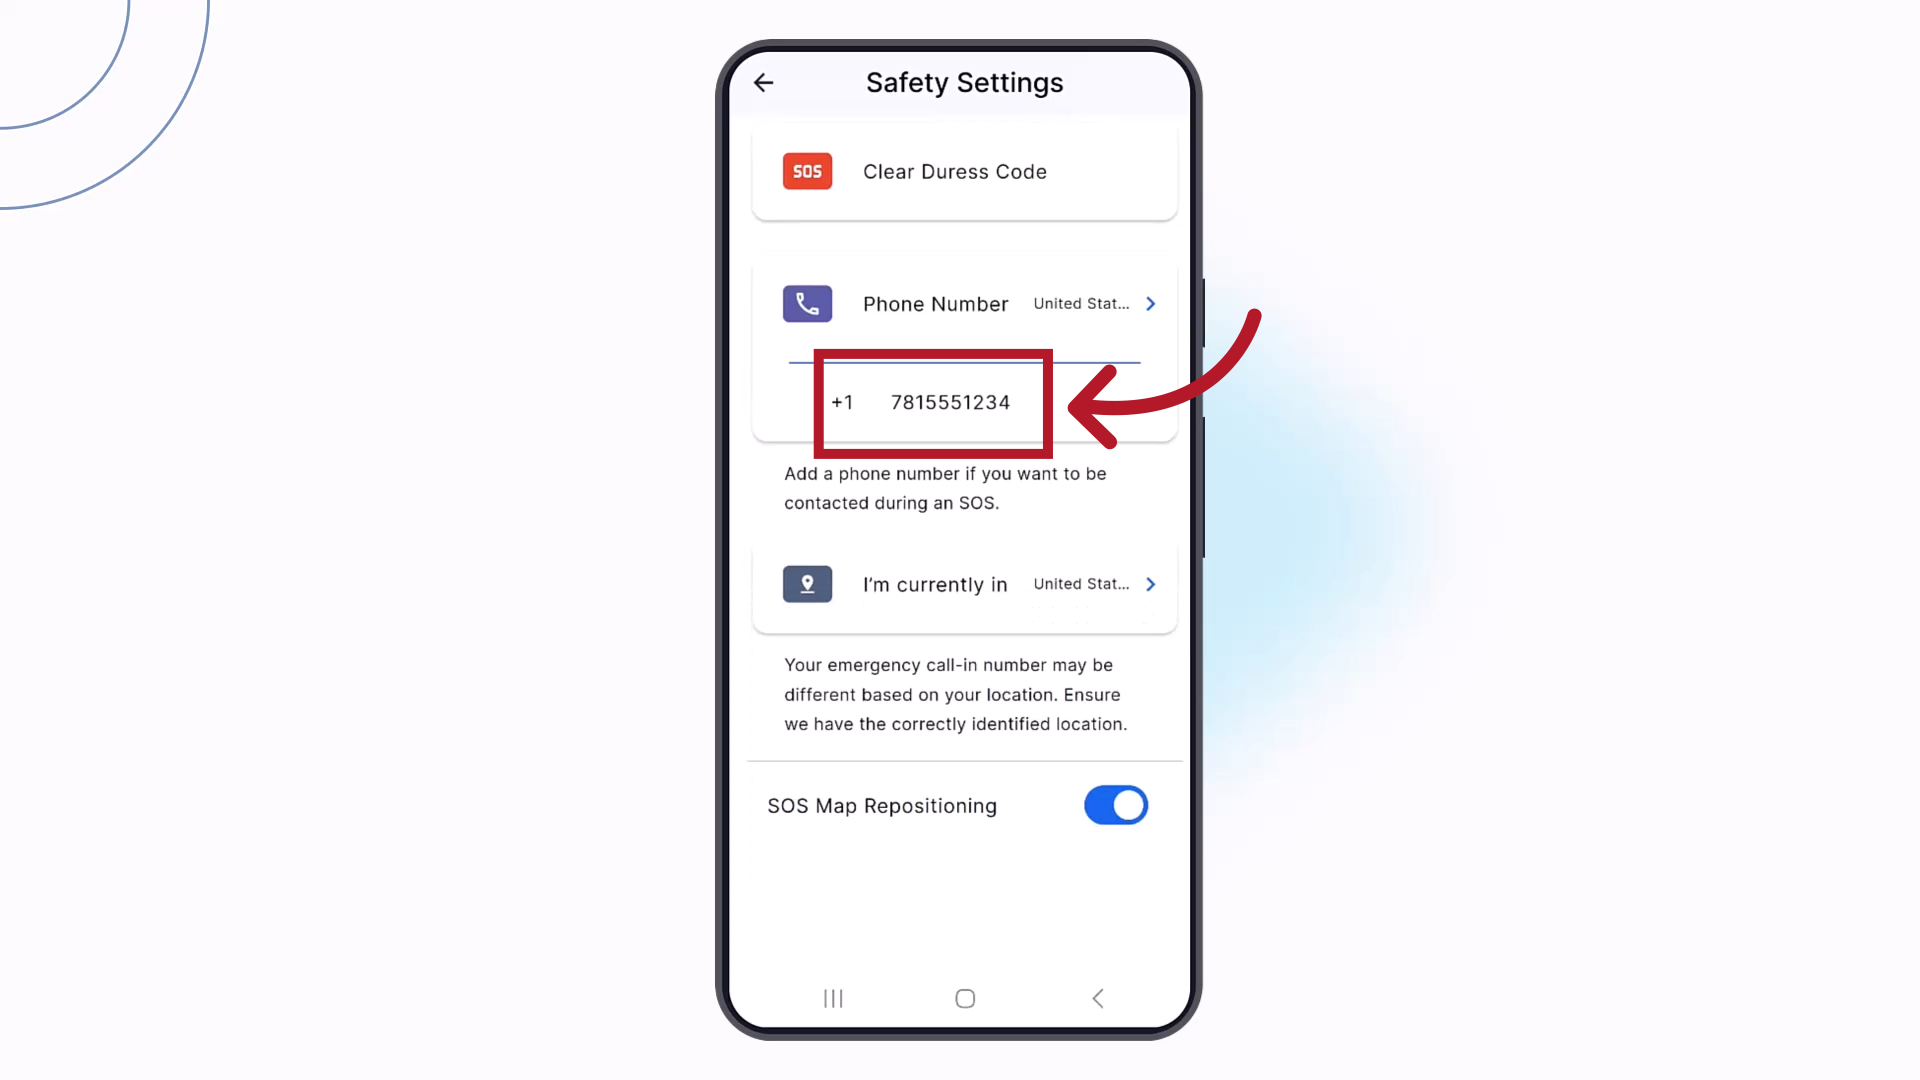
9. Verify
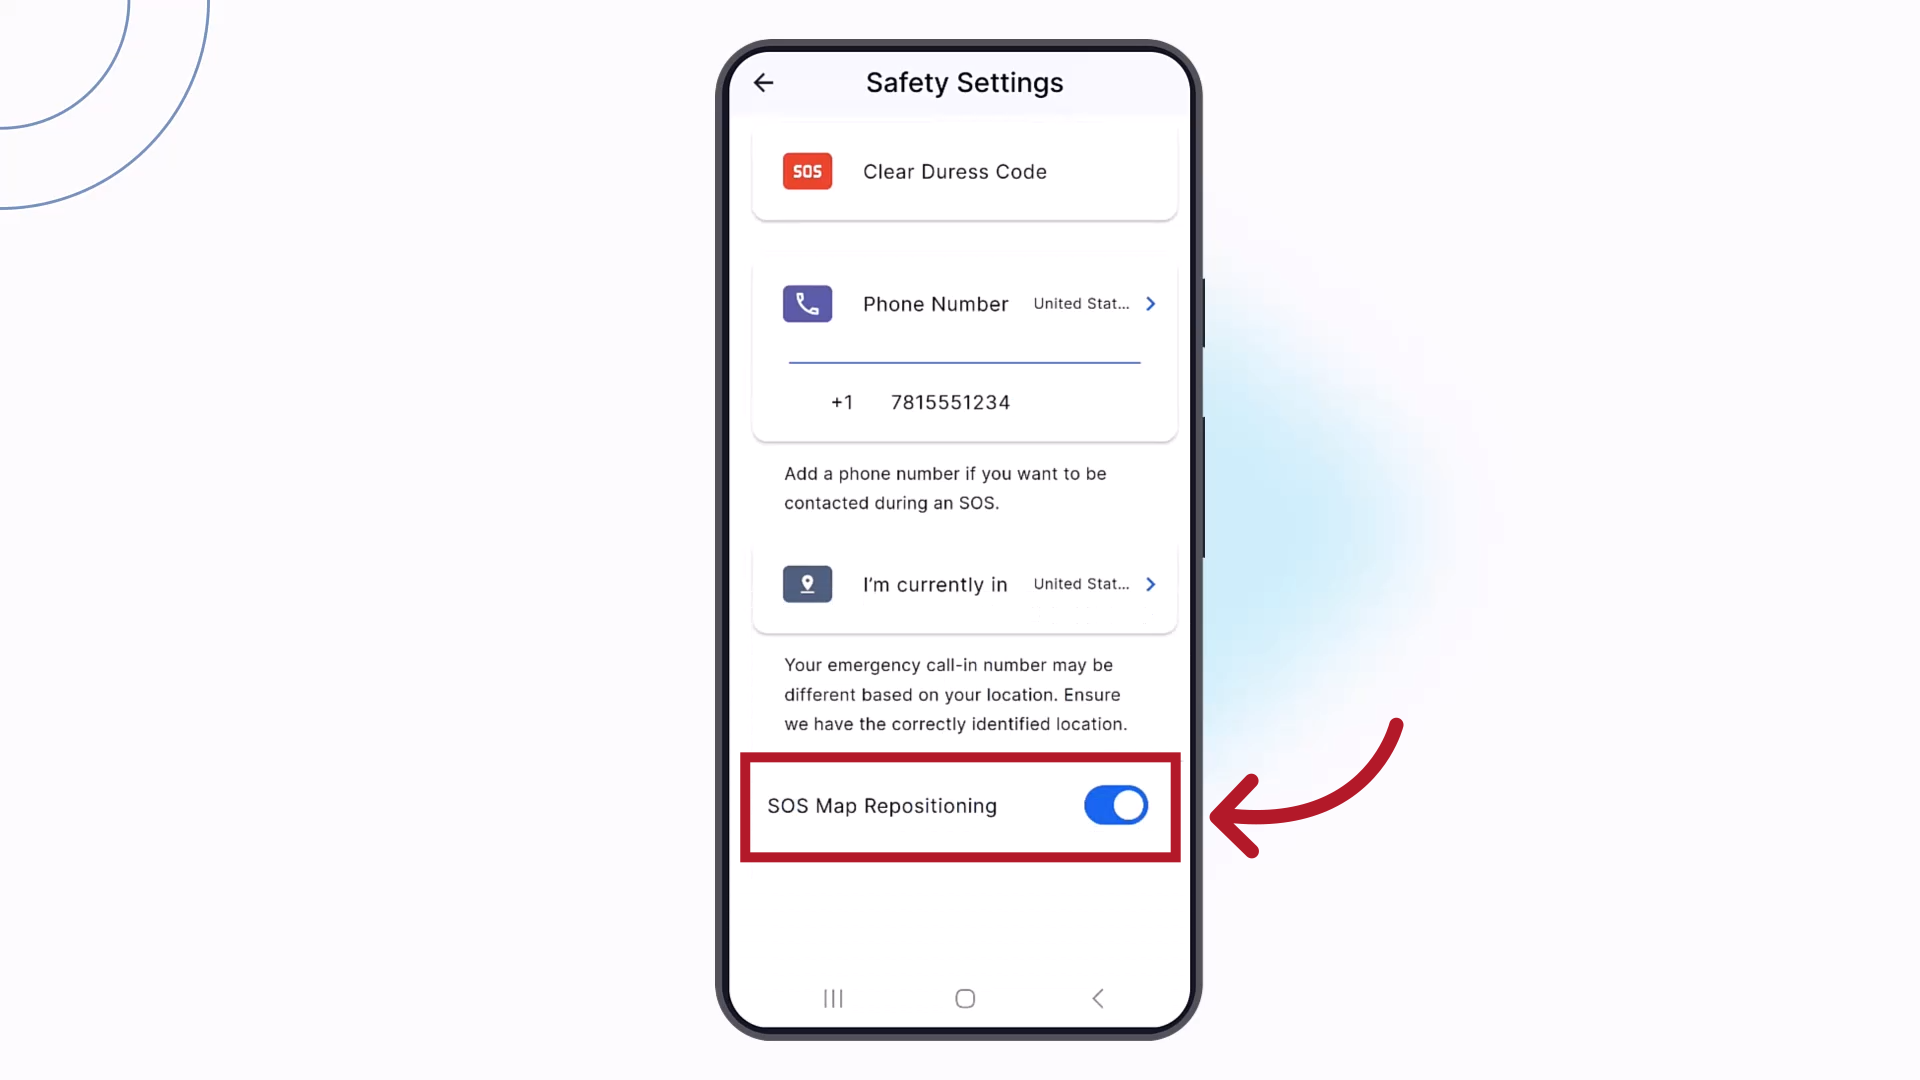
Verify the app has correctly identified the country where you are currently located. If it is incorrect, tap the Country menu to update it.
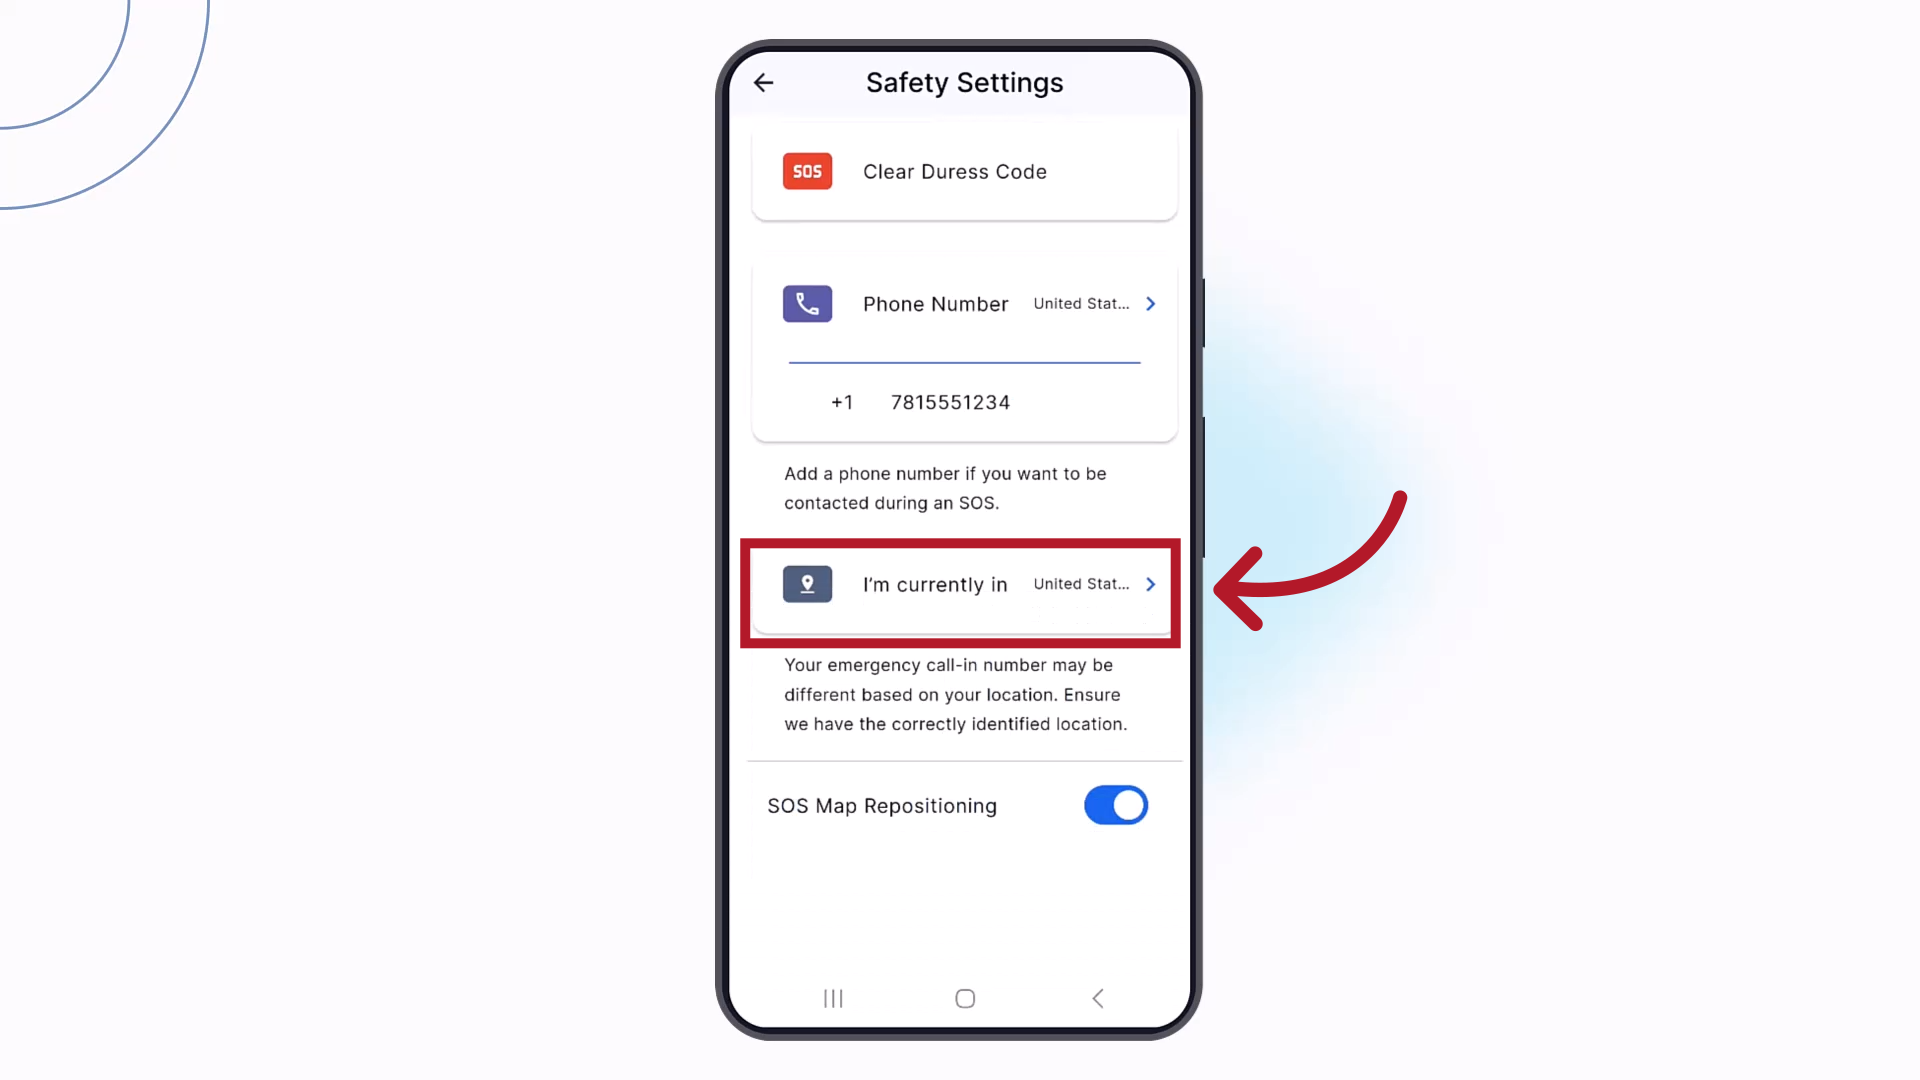
10. SOS Map
The SOS Map Repositioning feature allows you to confirm or update your exact location when triggering an SOS. If you do not wish to use this feature, toggle it to the off position.
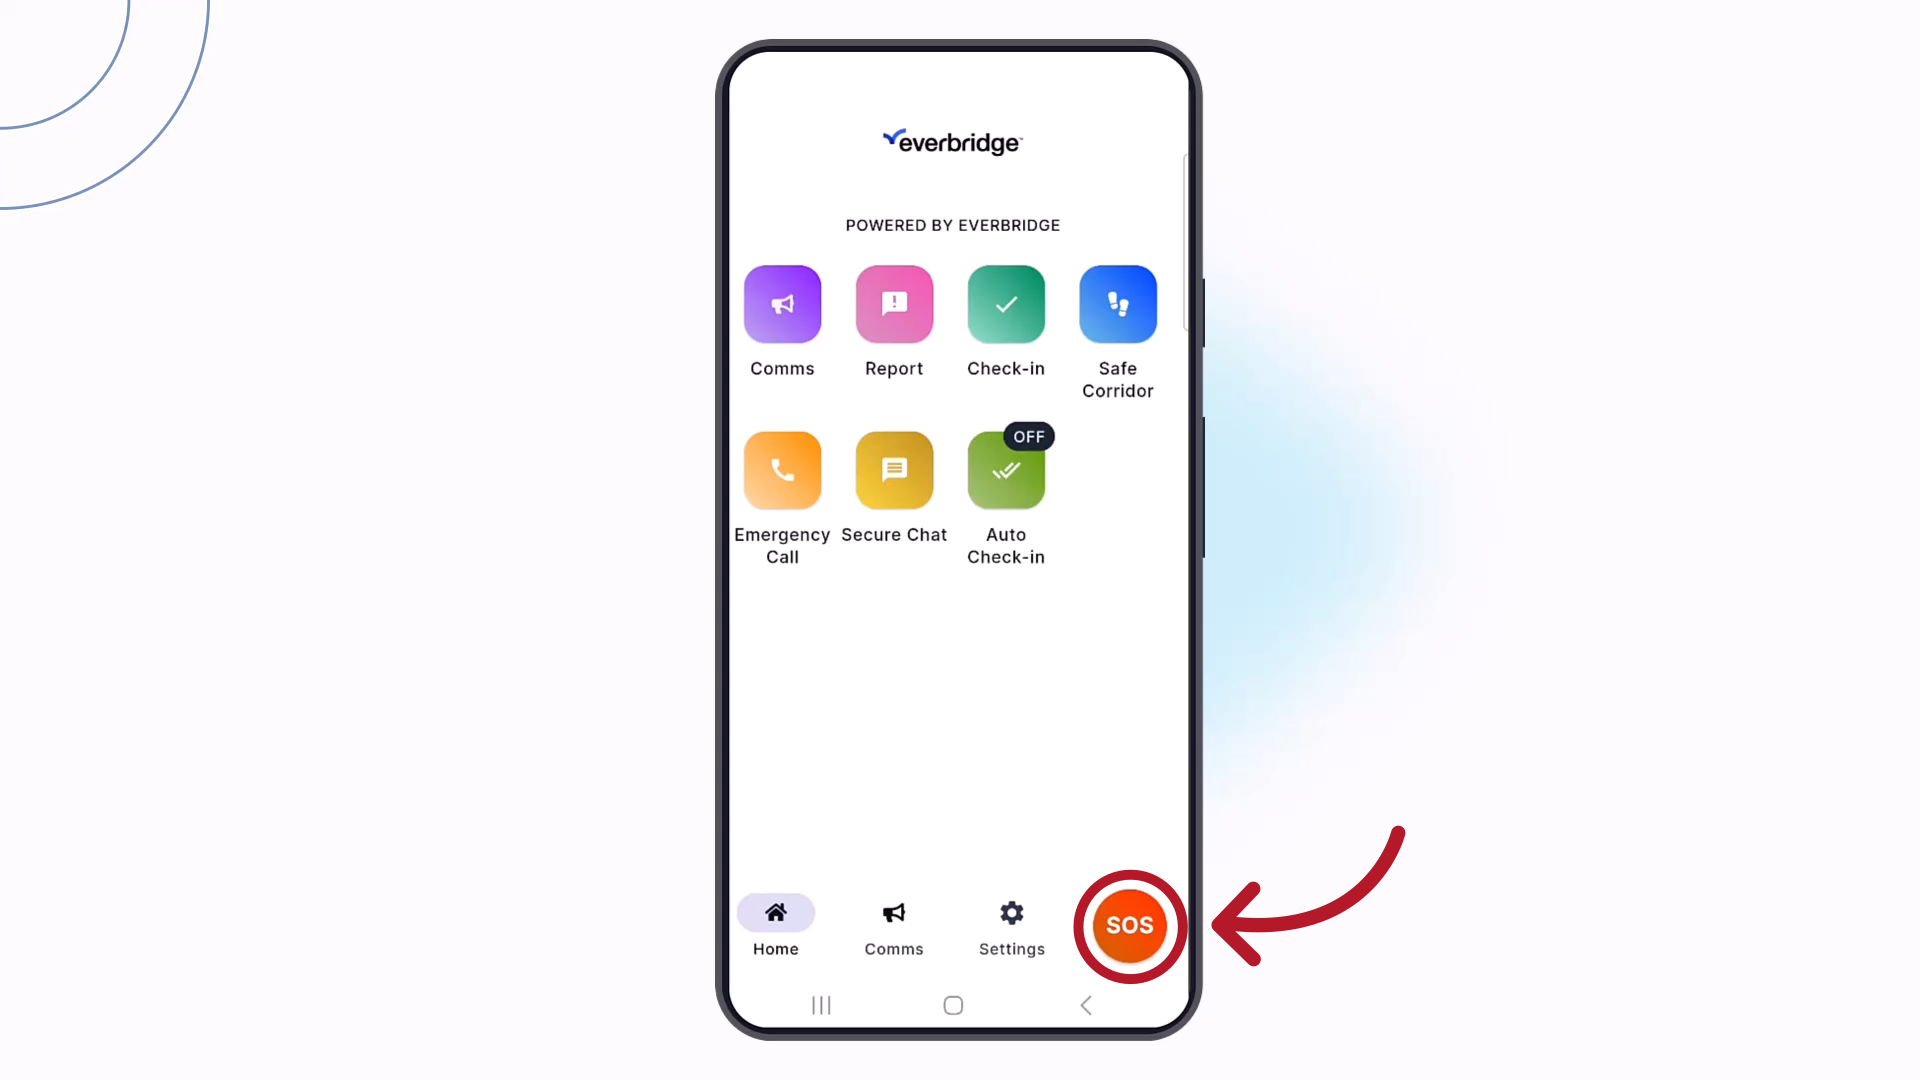
11. Safety Buttons
Your device is now ready to use each of the default Safety Buttons. Let's review how.

12. SOS
The SOS button appears prominently in the app's system tray. When activated, it will trigger an alert that automatically sends your device's location and streams a two-minute selfie-facing video and audio recording to your organization. To activate, tap "SOS."
13. Timer
Once the button is tapped, a 10 second timer will begin. If no action is taken, the SOS will automatically activate when the countdown ends.
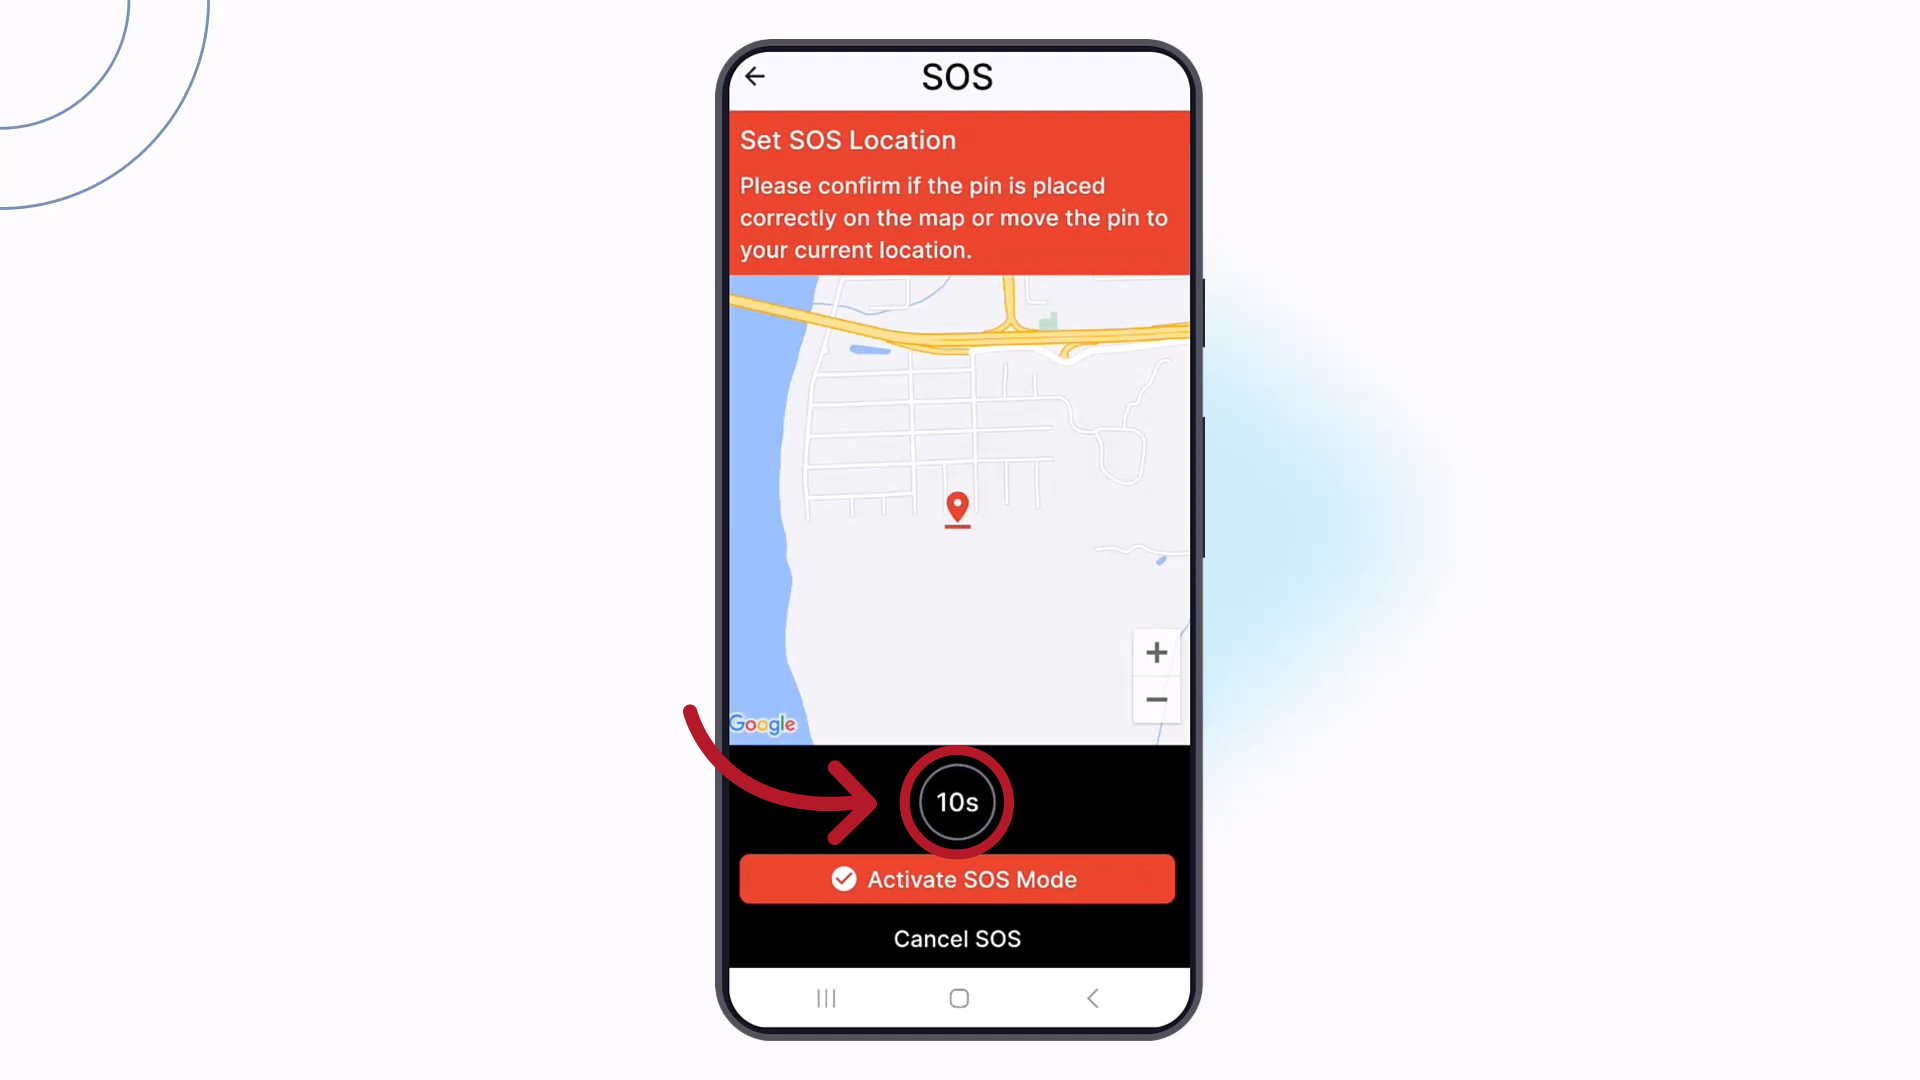
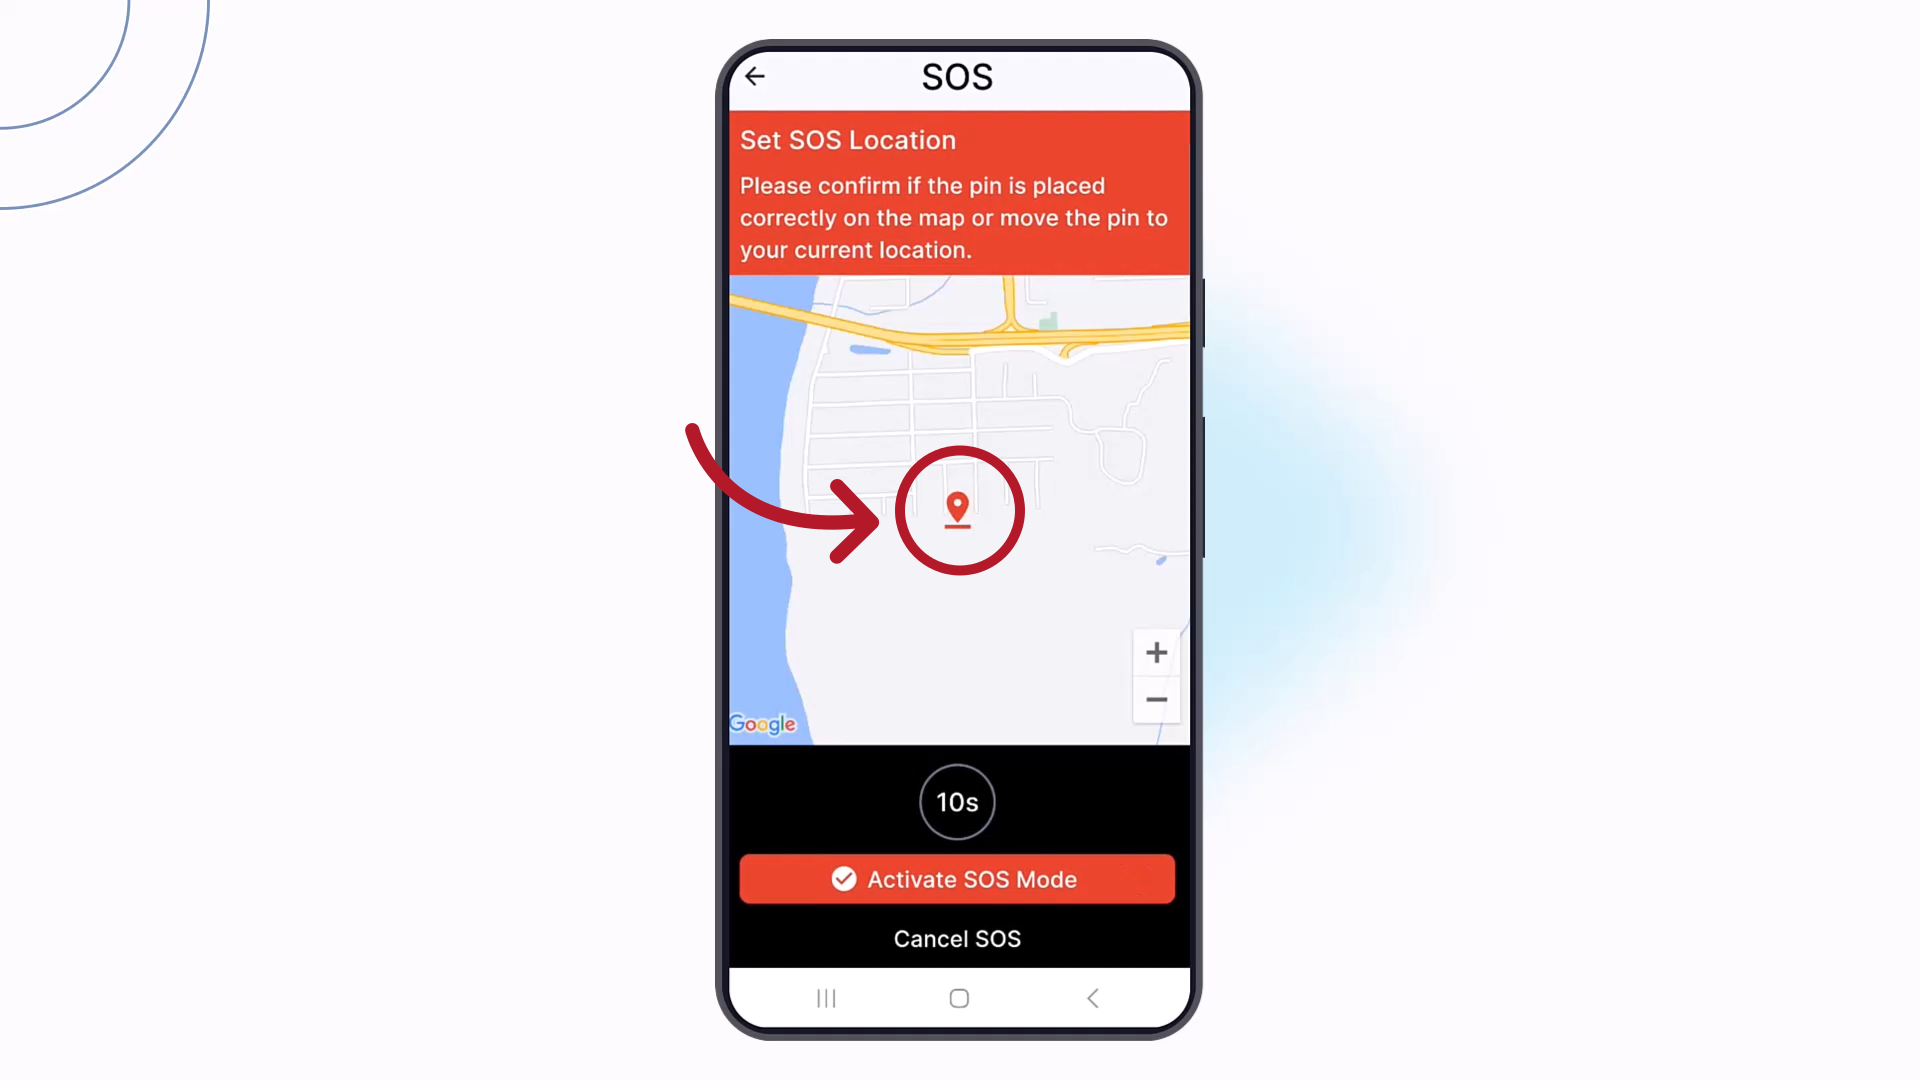
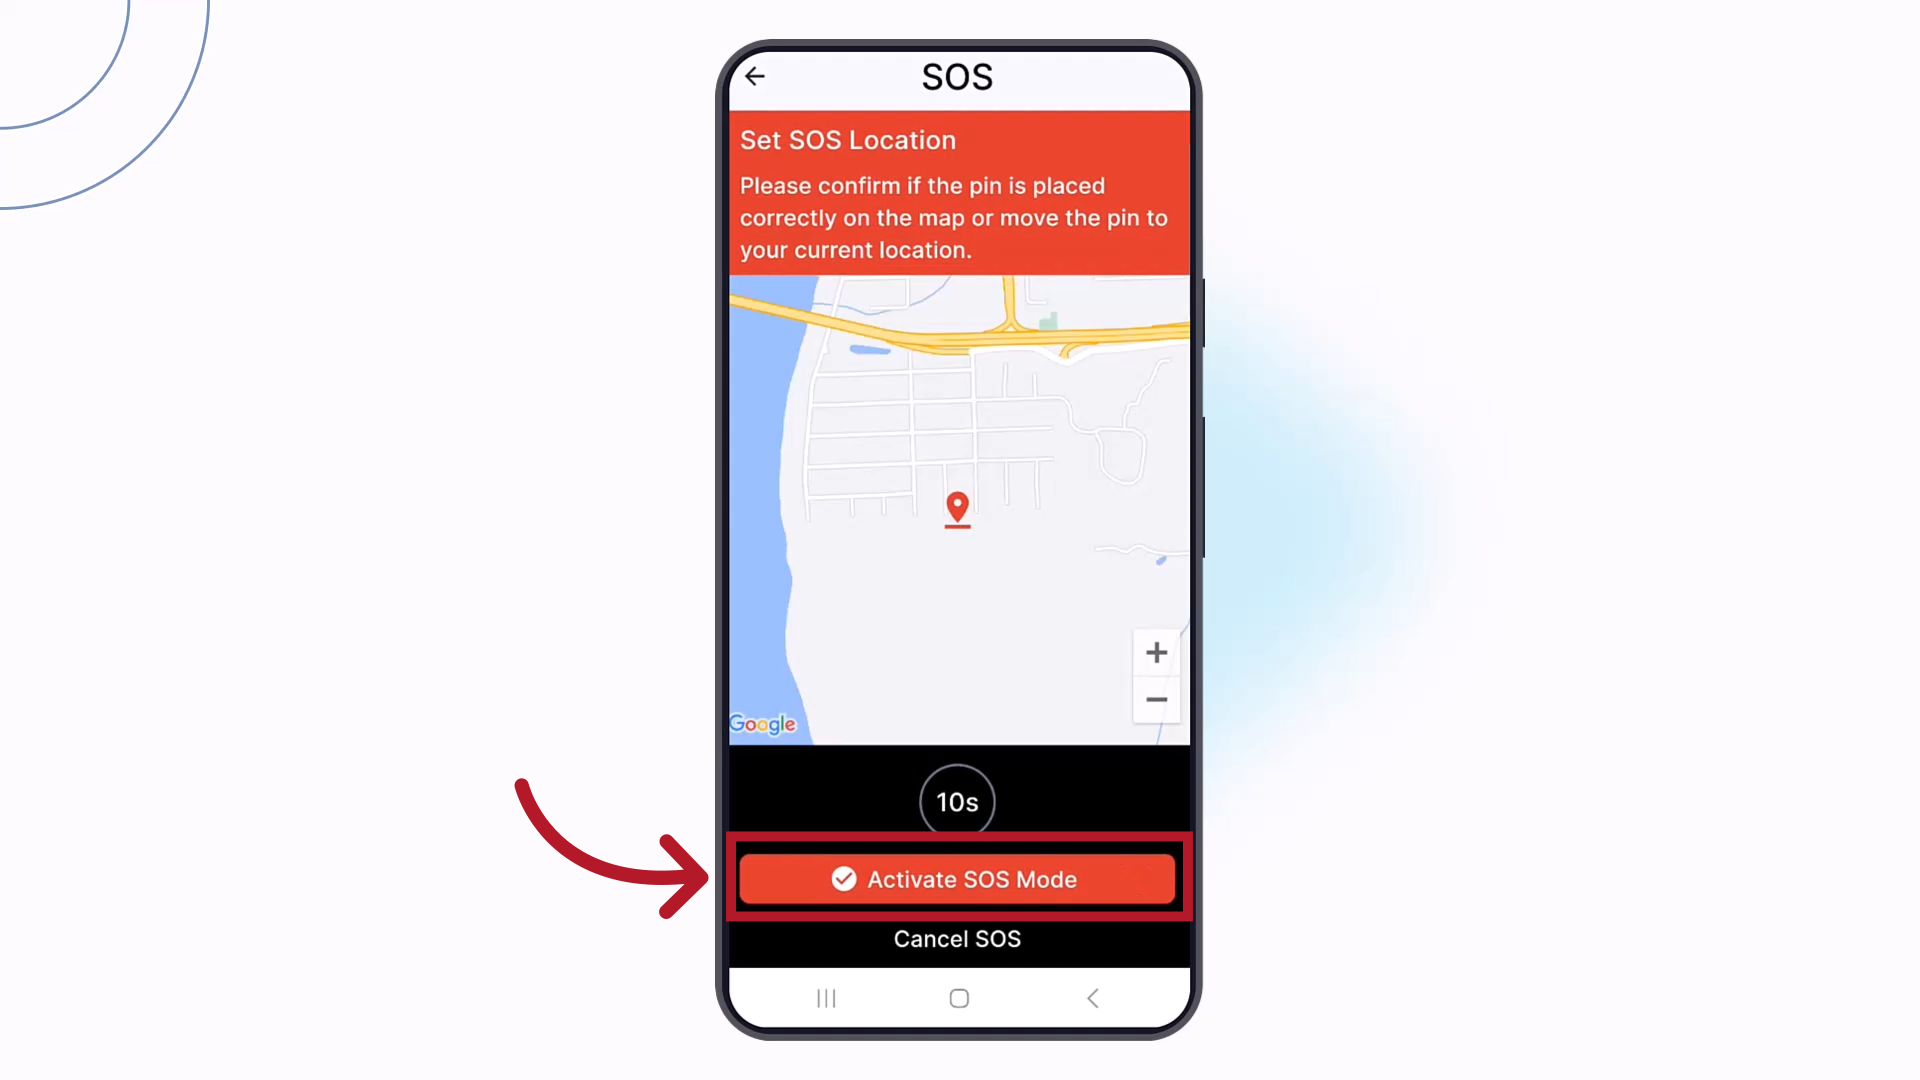
14. Reposition
While the countdown is still in progress, and if the SOS Map Repositioning setting is on, you may reposition the pin on the map if your location did not get captured accurately,
15. Activate
To skip the countdown and send the SOS immediately, simply tap "Activate SOS Mode". The video recording will begin; it will be invisible and not appear on your screen.
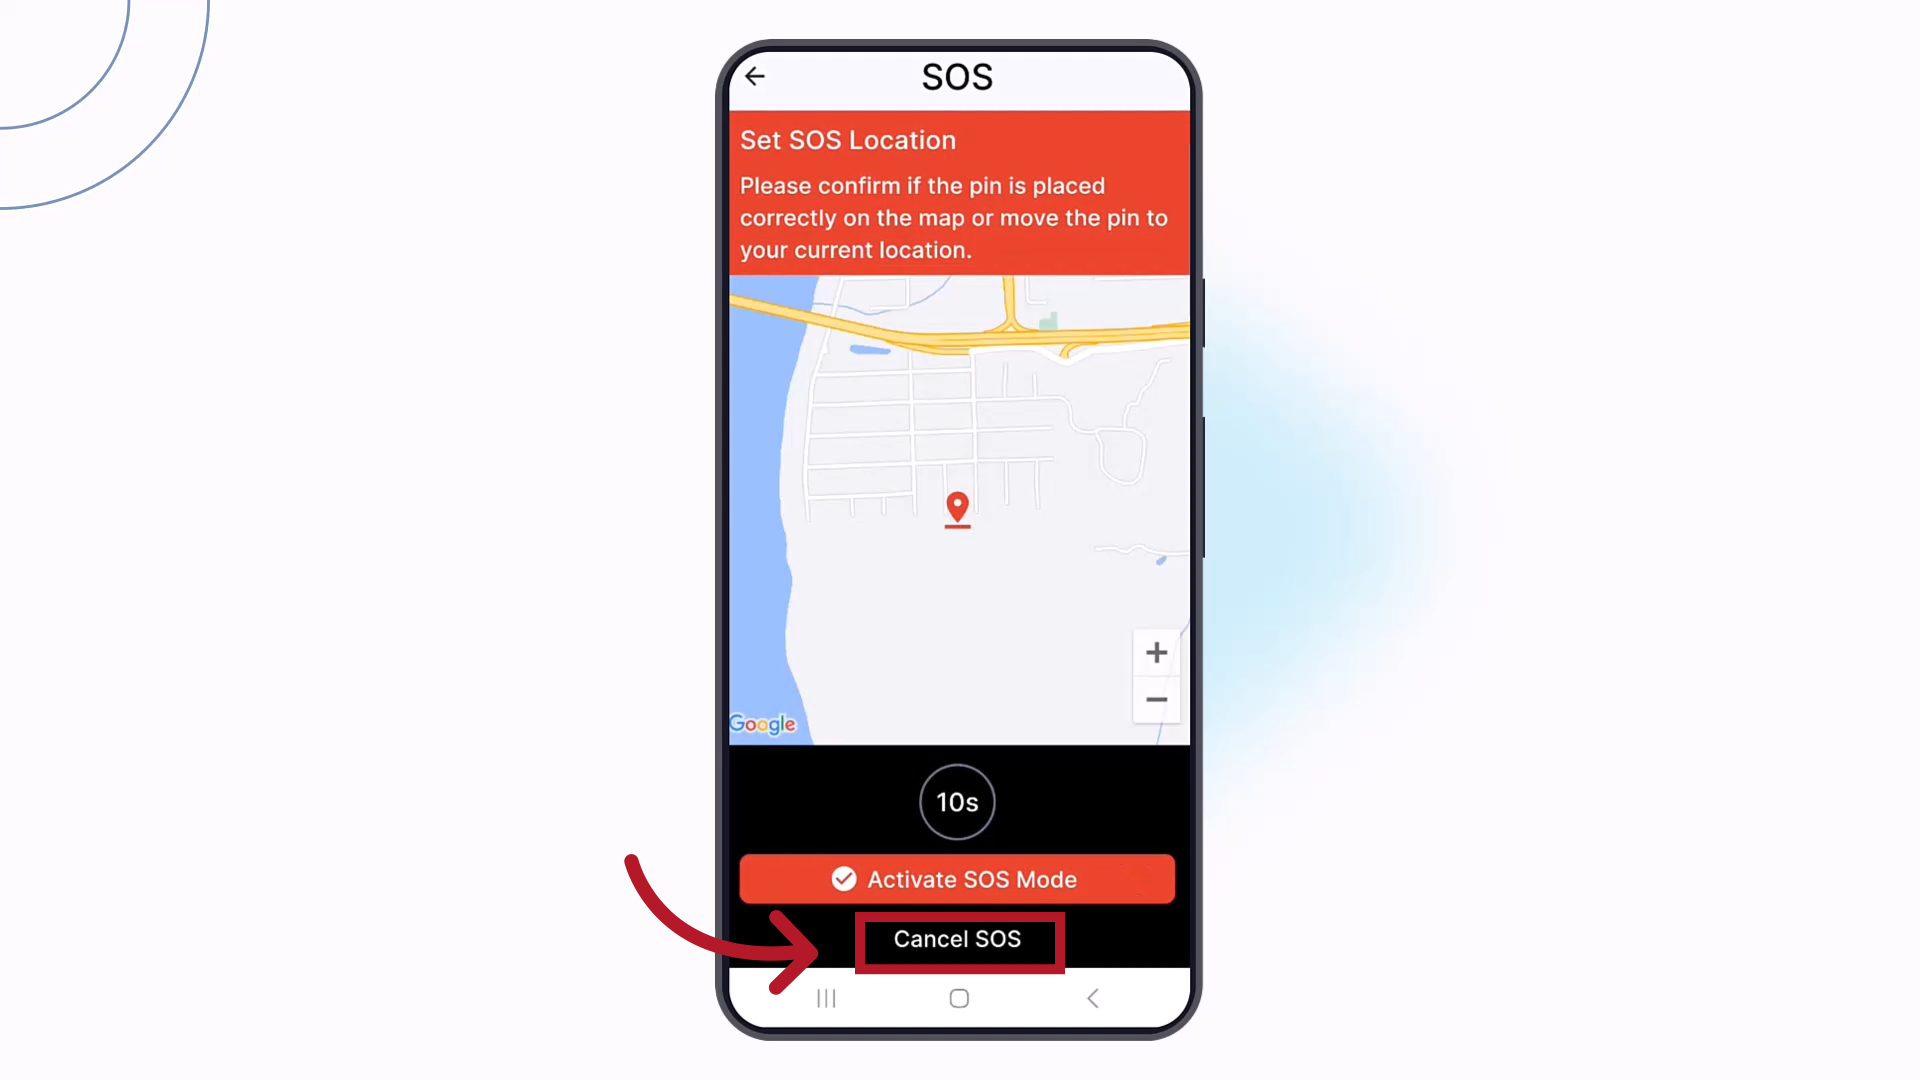
16. Cancel
Or, if you no longer wish to send the SOS, tap "Cancel SOS".
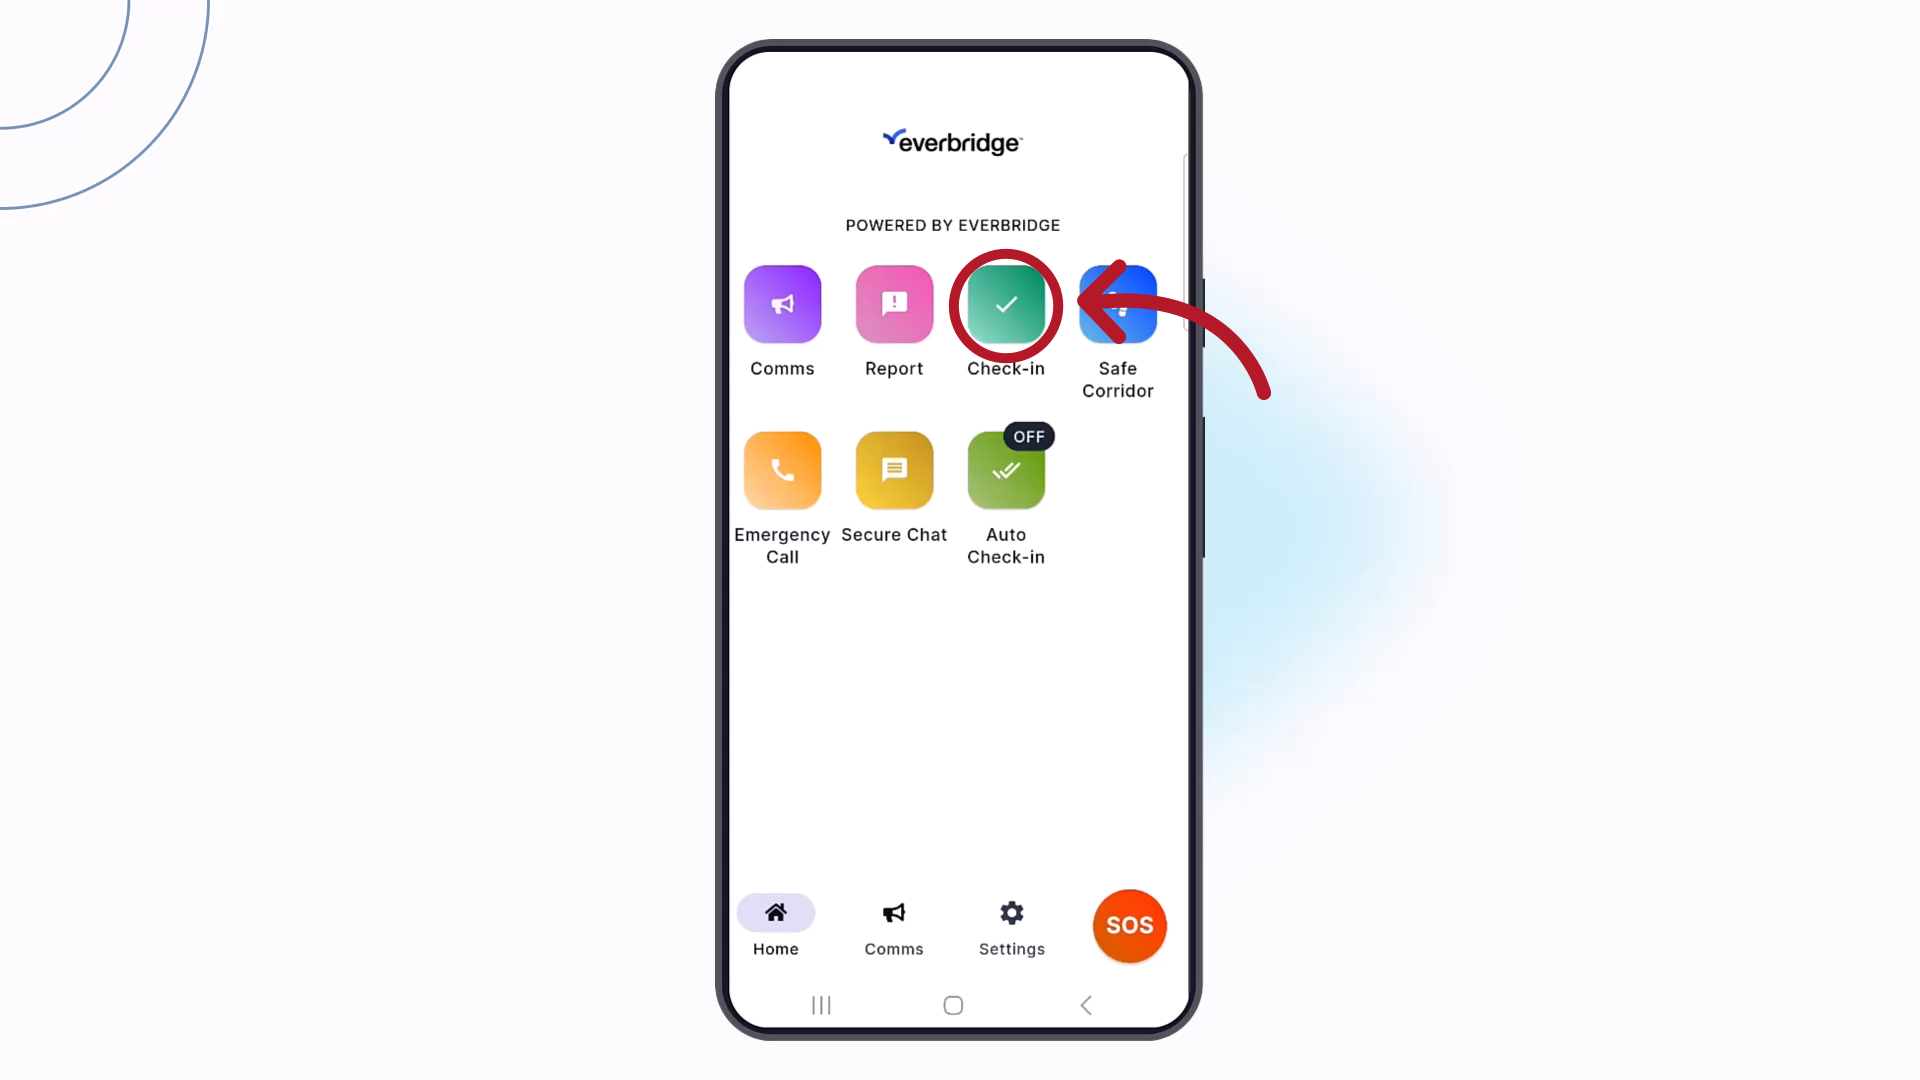
17. Check-In
Now let's look at the Check-in options. You can send your current location to your organization by tapping the Check-in button.
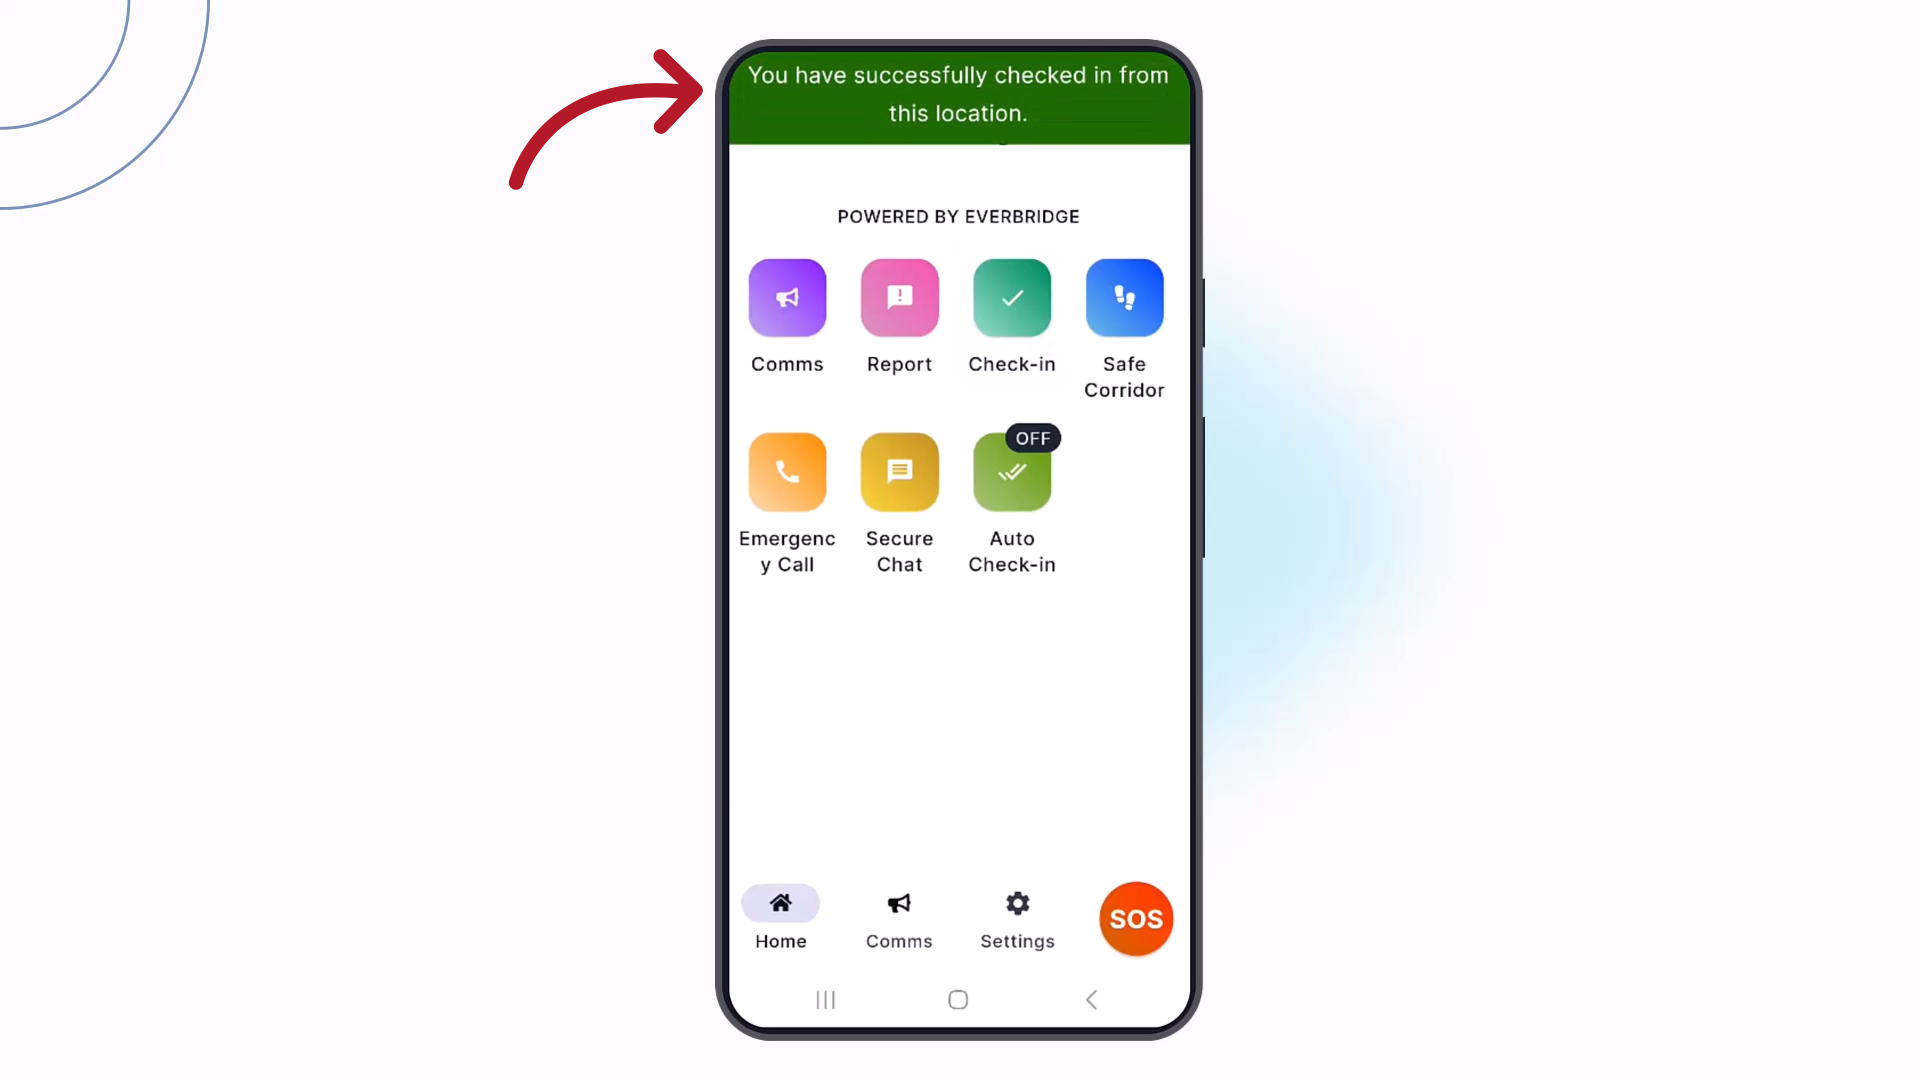
18. Success
A green banner will appear at the top of the screen indicating that you have successfully checked in from your current location.
19. Auto Check-In
To enable continuous check-ins, tap the Auto Check-in button. You may want to enable this feature if you are operating in an area where you want your organization to always have your most recent location. This feature can only be activated by you. It is an explicit action and cannot be activated or forced on by your organization.
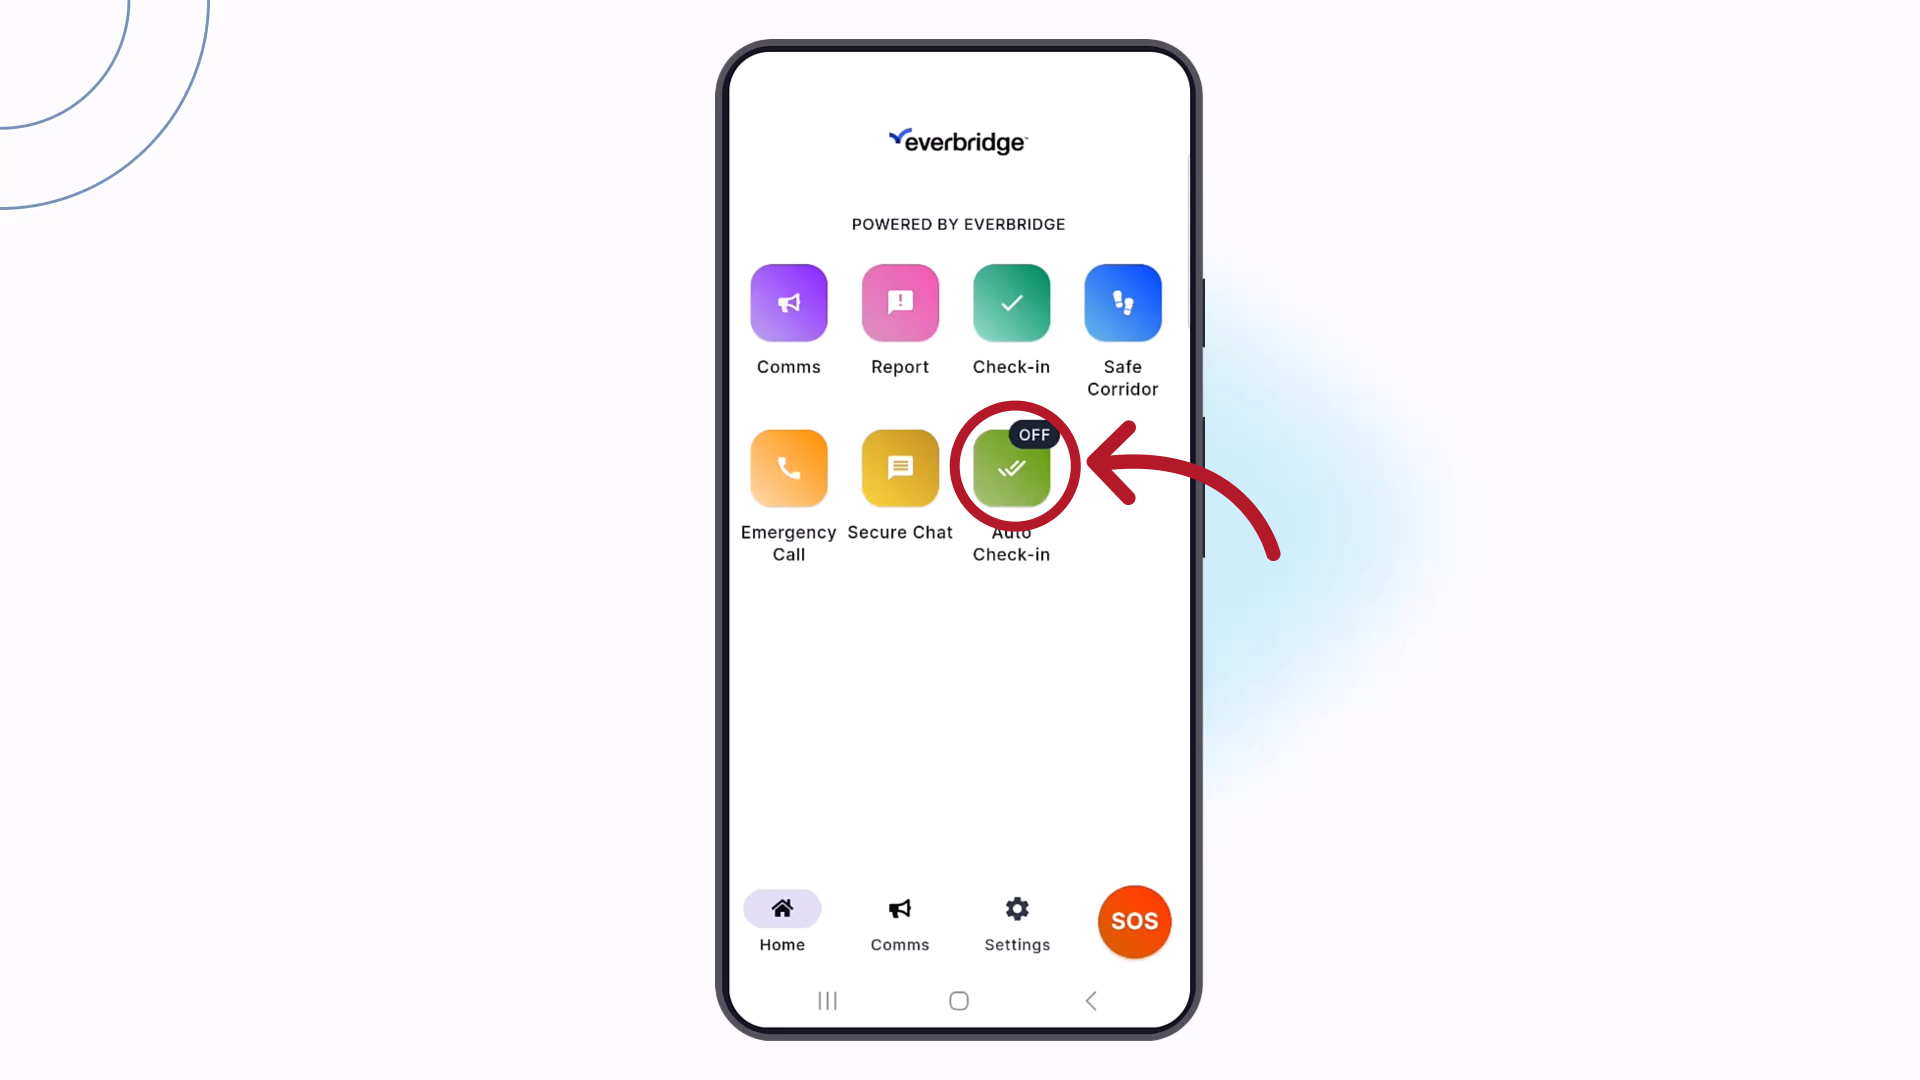
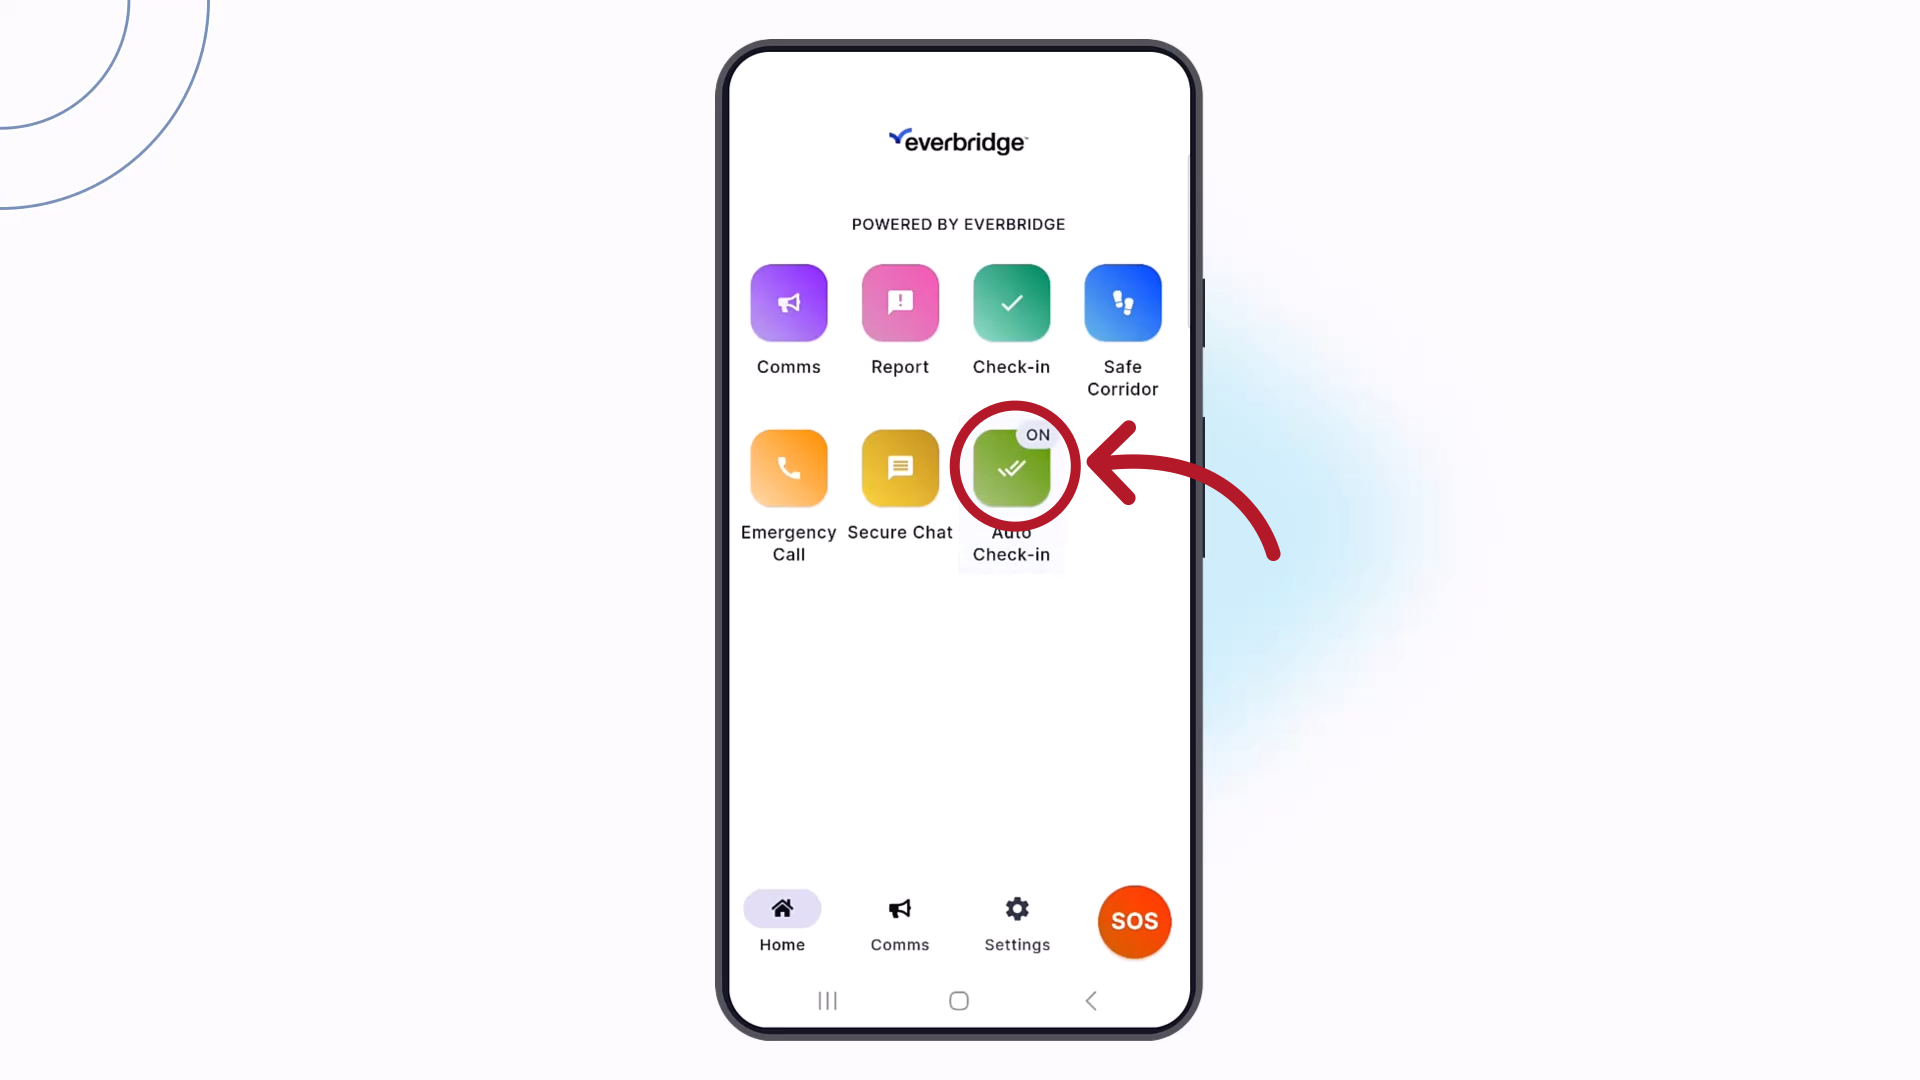
20. Turn On
You will know Auto Check-In is active when the icon label changes from "OFF" to "ON." An iOS device will report an updated location whenever you move more than 100 meters, or 330 feet. An Android device will send an updated location every 15 minutes, regardless of movement.
21. Always Allow
If an exclamation mark appears instead of "ON", you will need to adjust your device's location permission to "Always Allow."

22. Turn Off
To turn Auto Check-in "OFF", simply tap the button again.

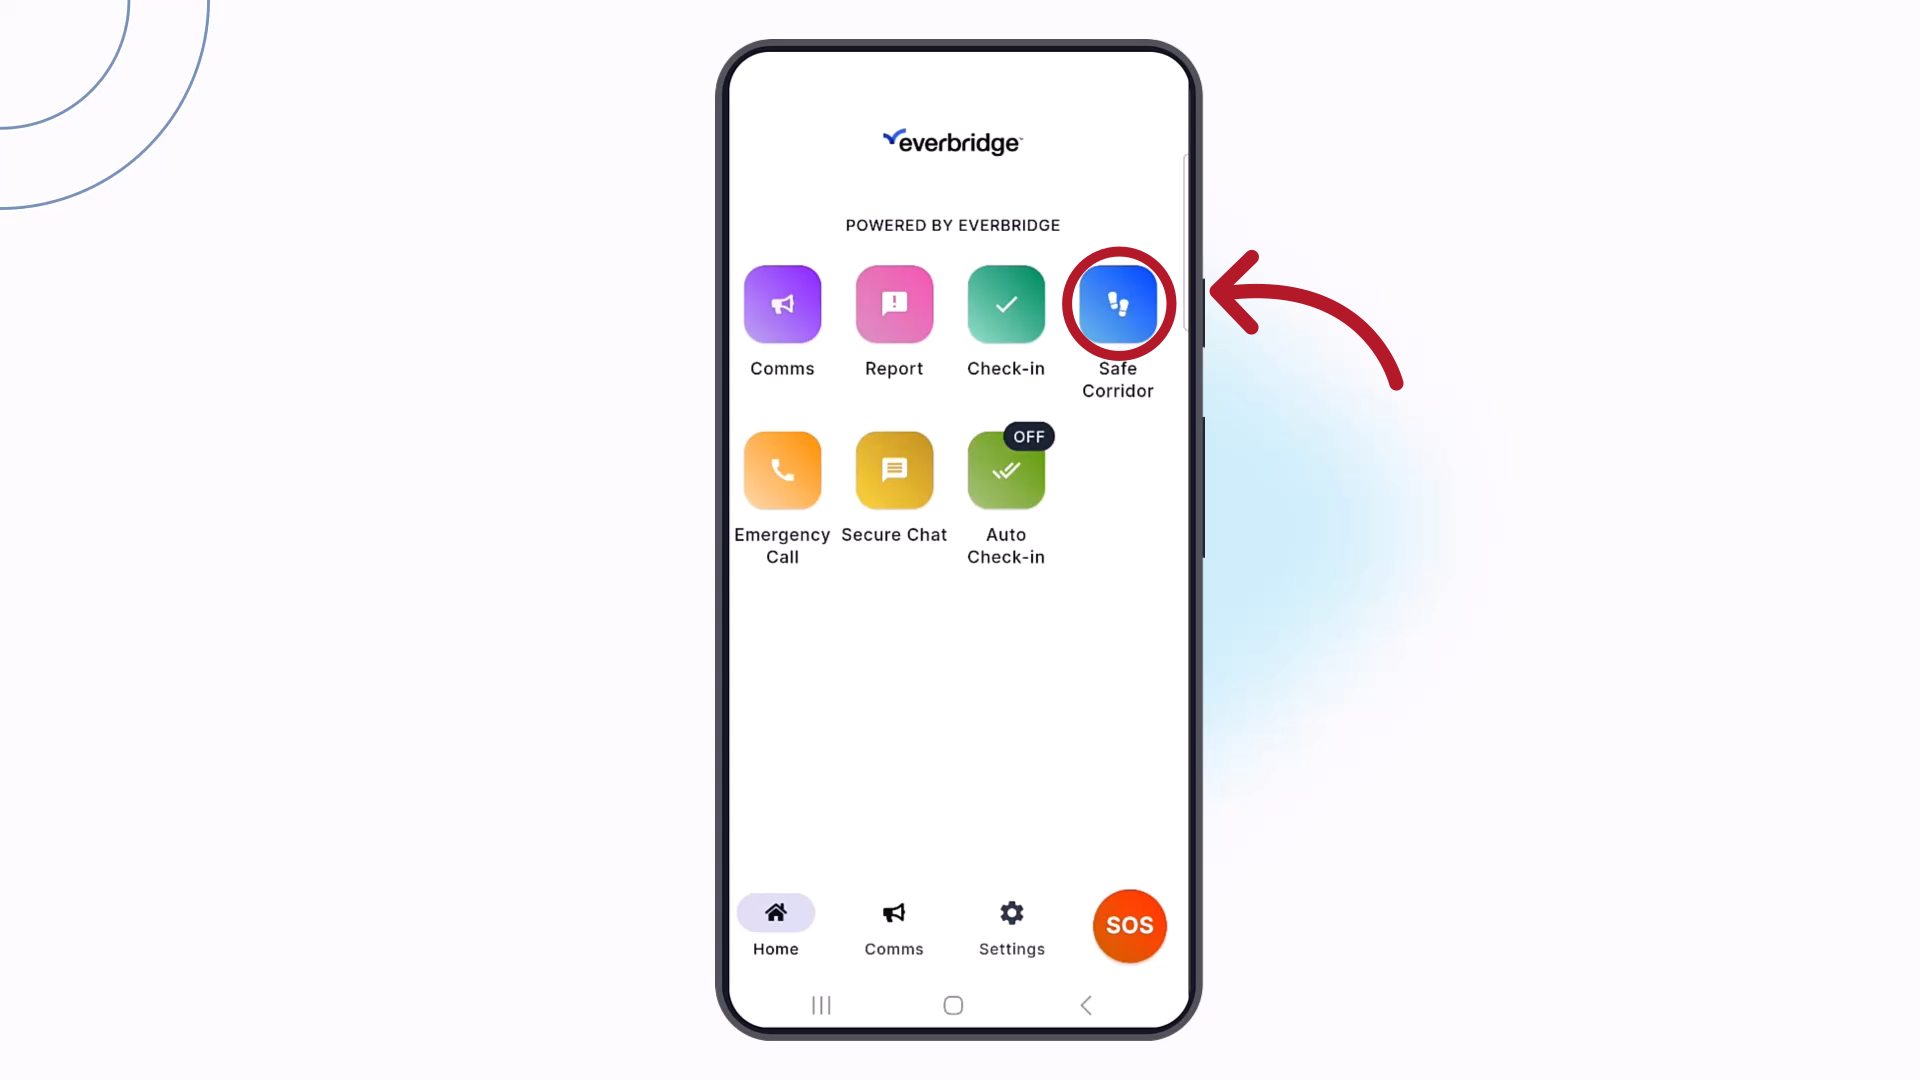
23. Safe Corridor
Next, let's review Safe Corridor. This feature enables you to periodically check in, with reminders, when moving between locations in a potentially unsafe area. Each check-in location will be sent to your organization.
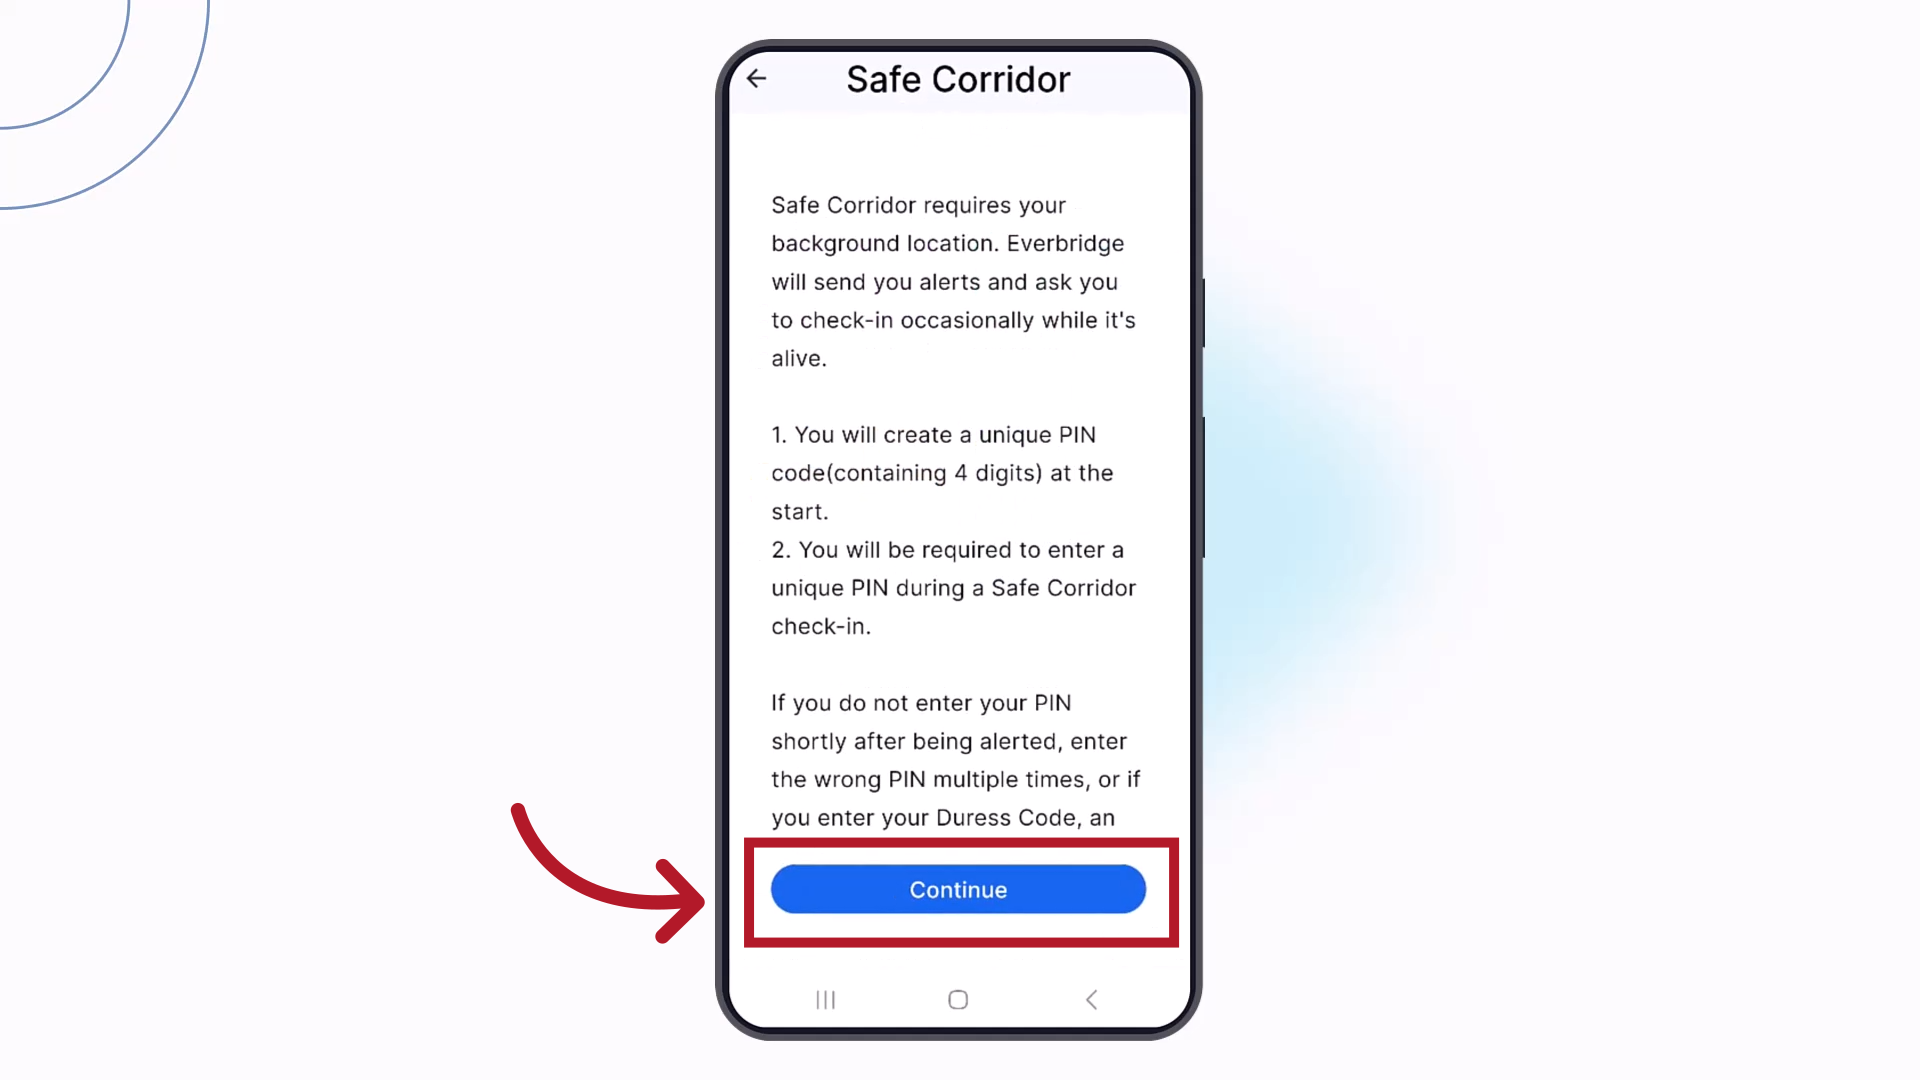
24. Review
When a Safe Corridor is activated, you will be prompted to create a PIN code. Review the requirements and tap Continue.
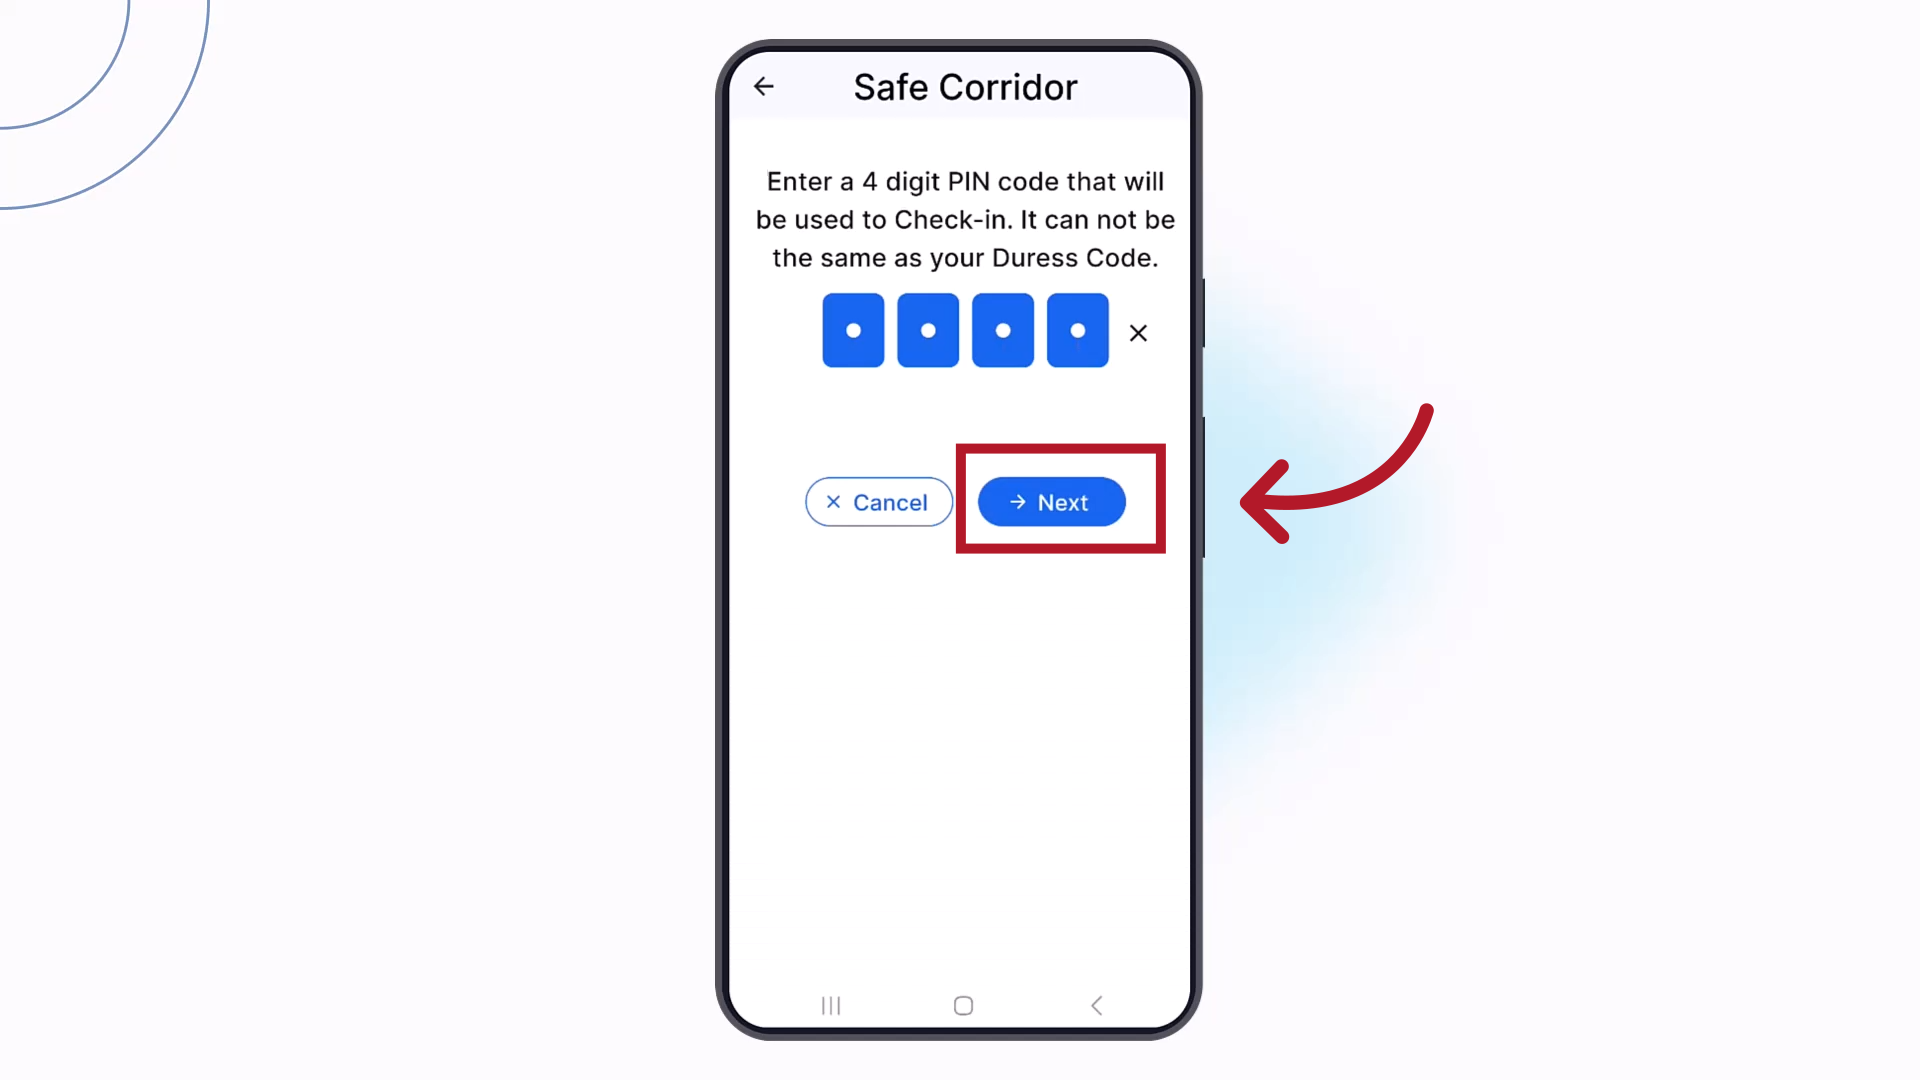
25. PIN
Enter an easy to remember 4-digit PIN
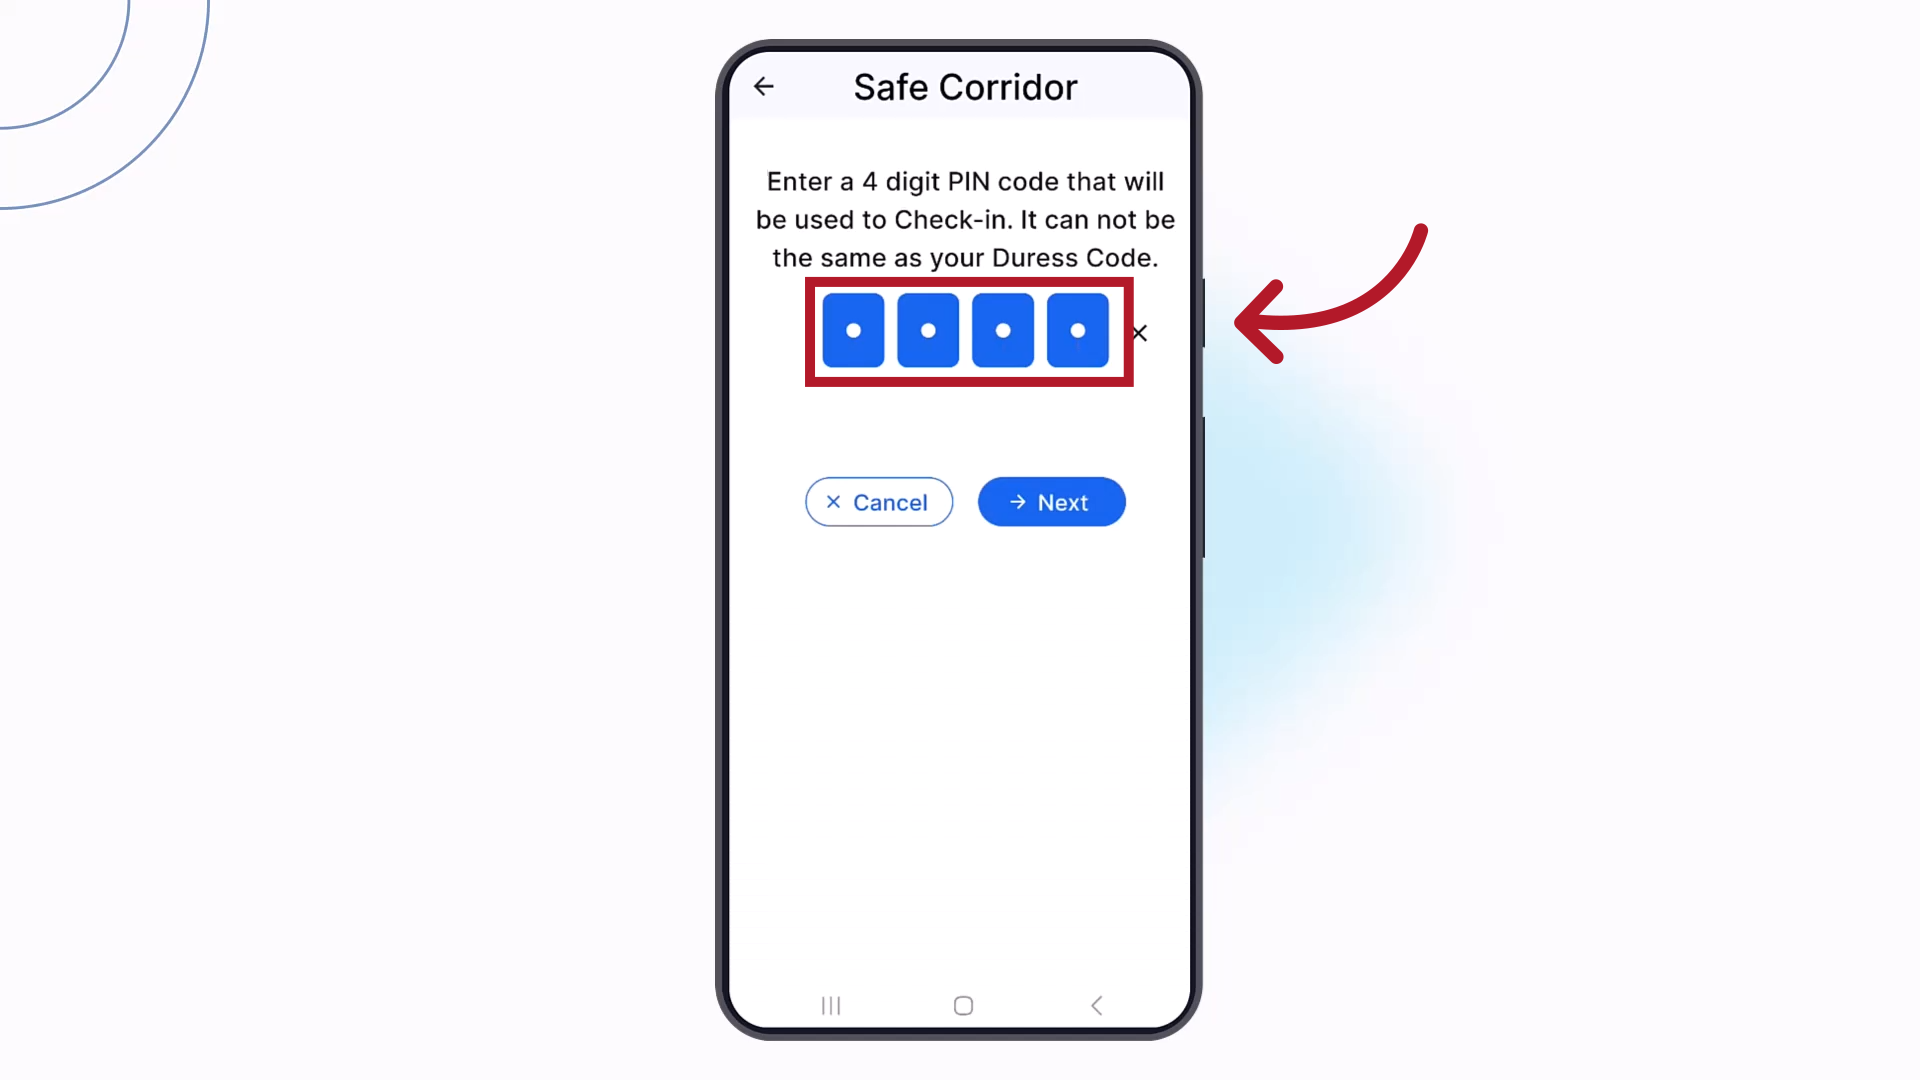
26. PIN
and tap Next.
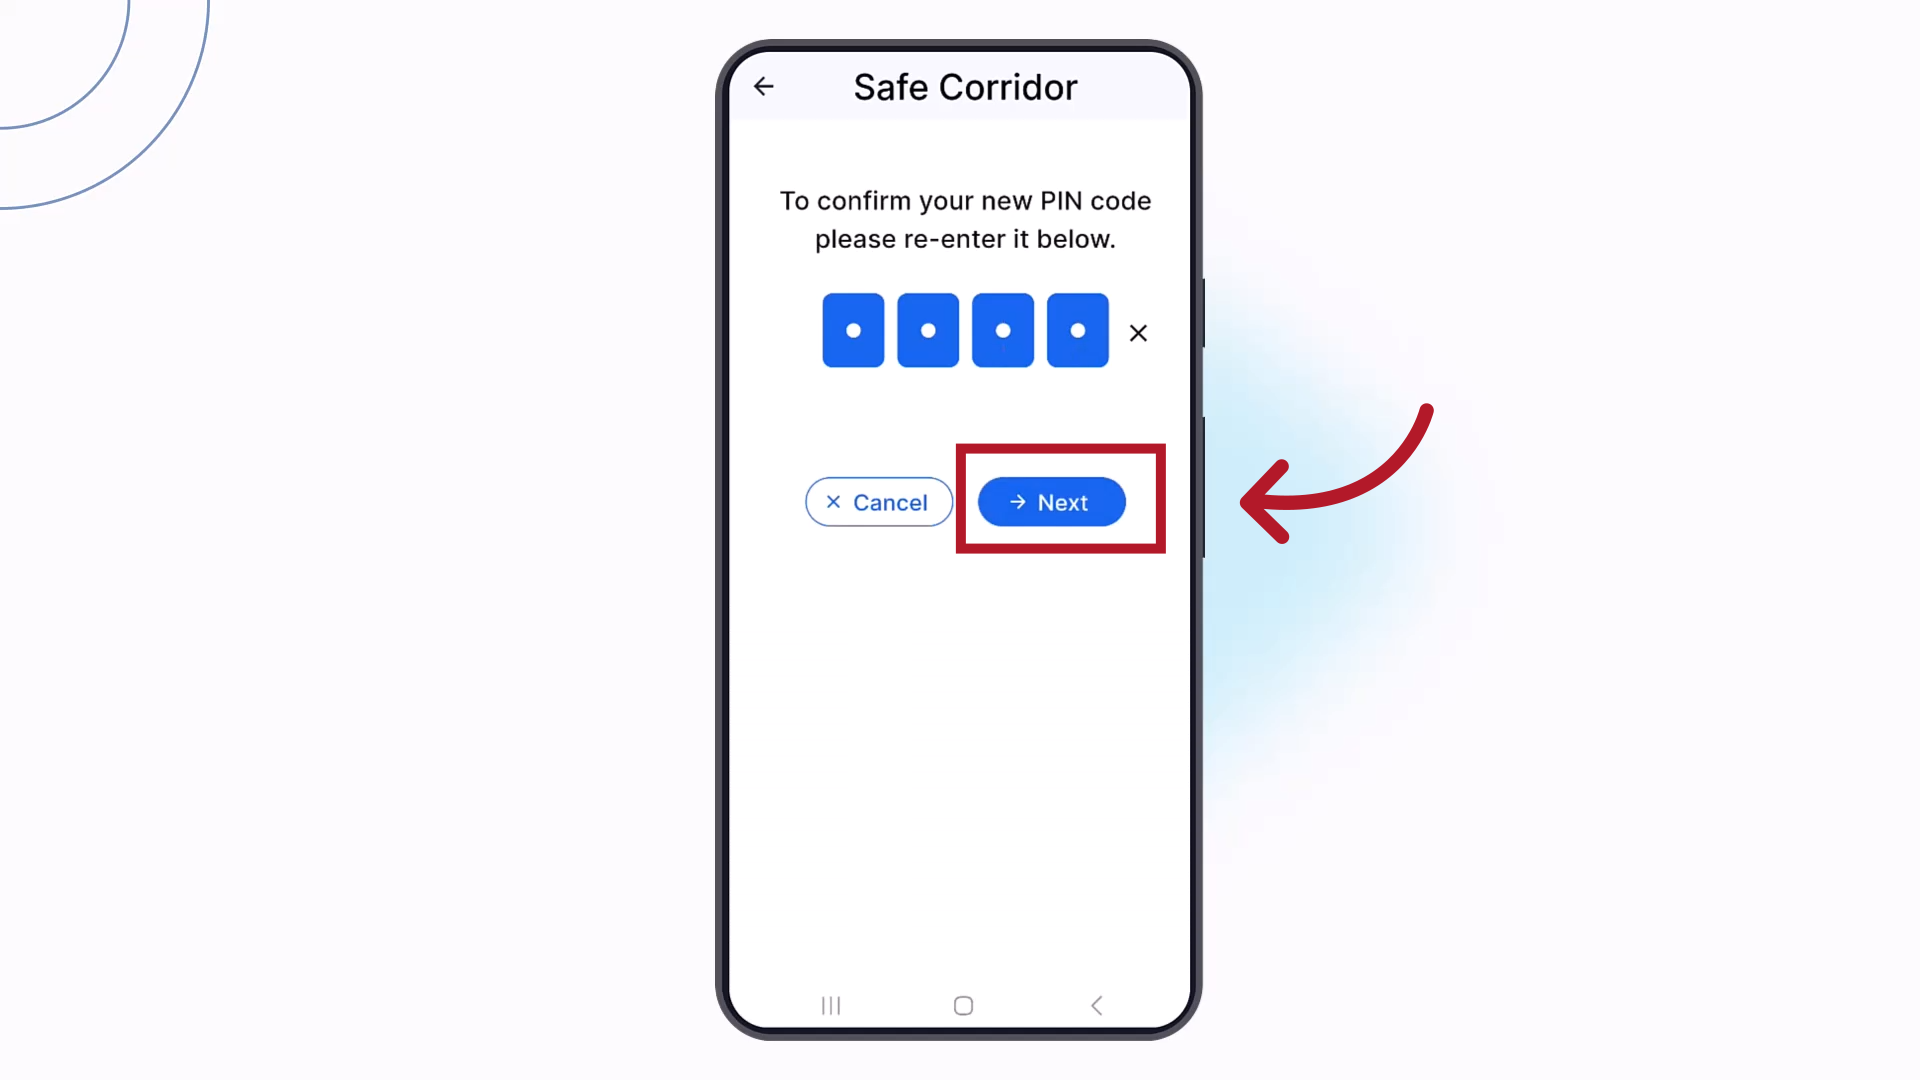
27. Confirm
Re-enter your PIN to confirm
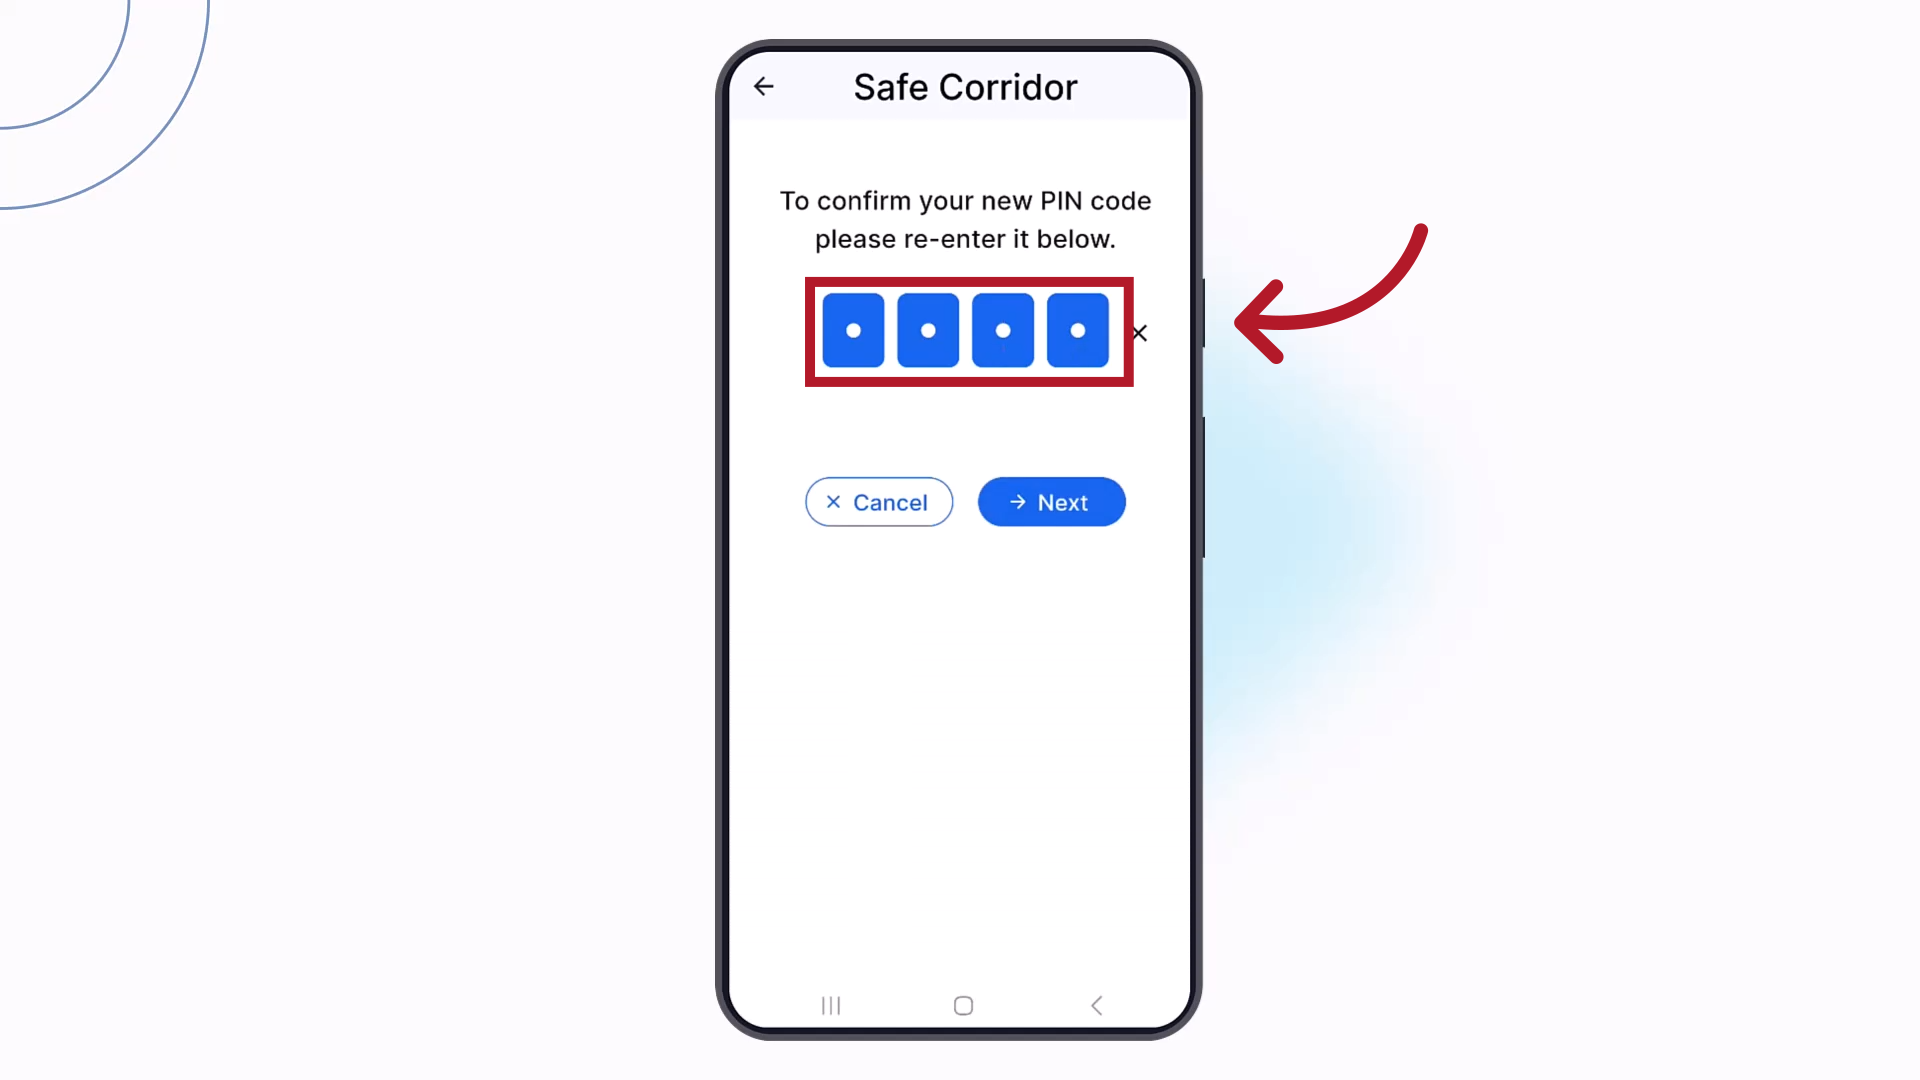
28. Confirm
and tap Next again.
29. Interval
Your check-in interval will display. If permitted by your organization, you can adjust the interval.
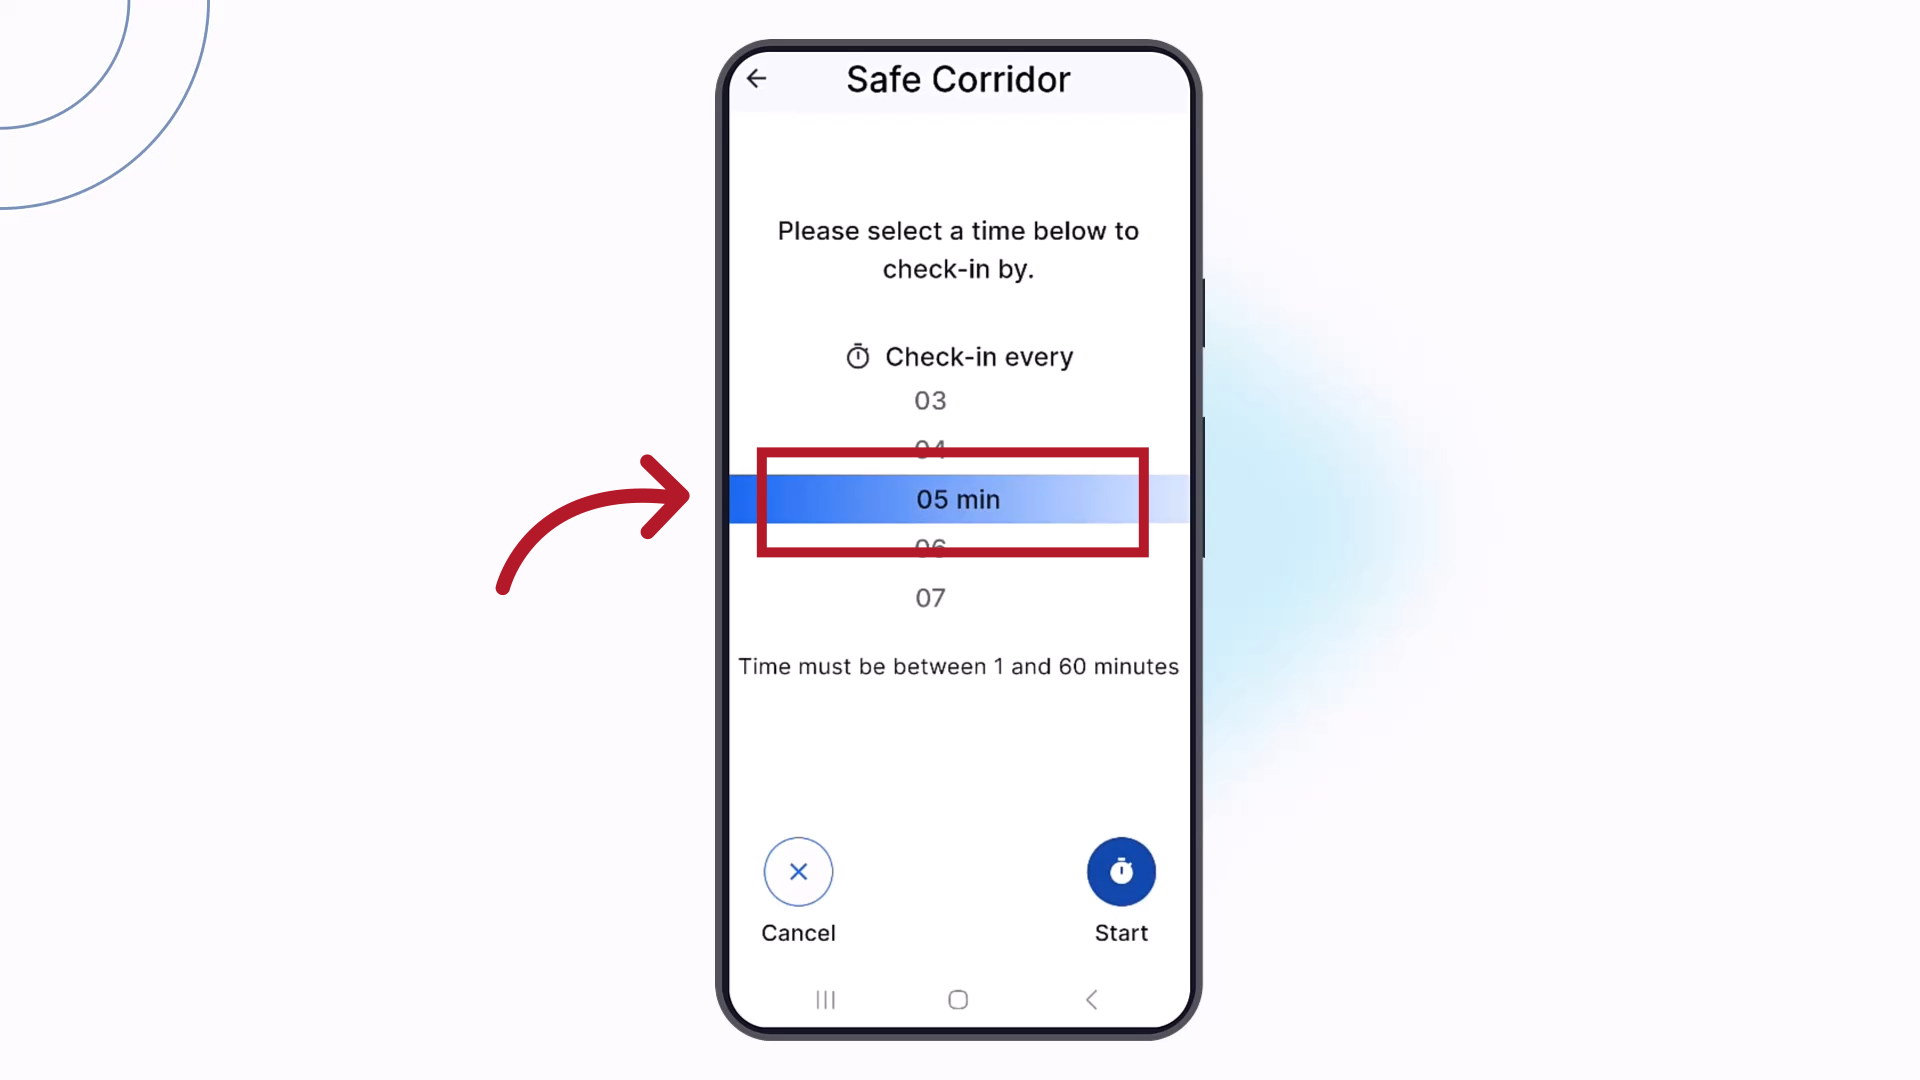
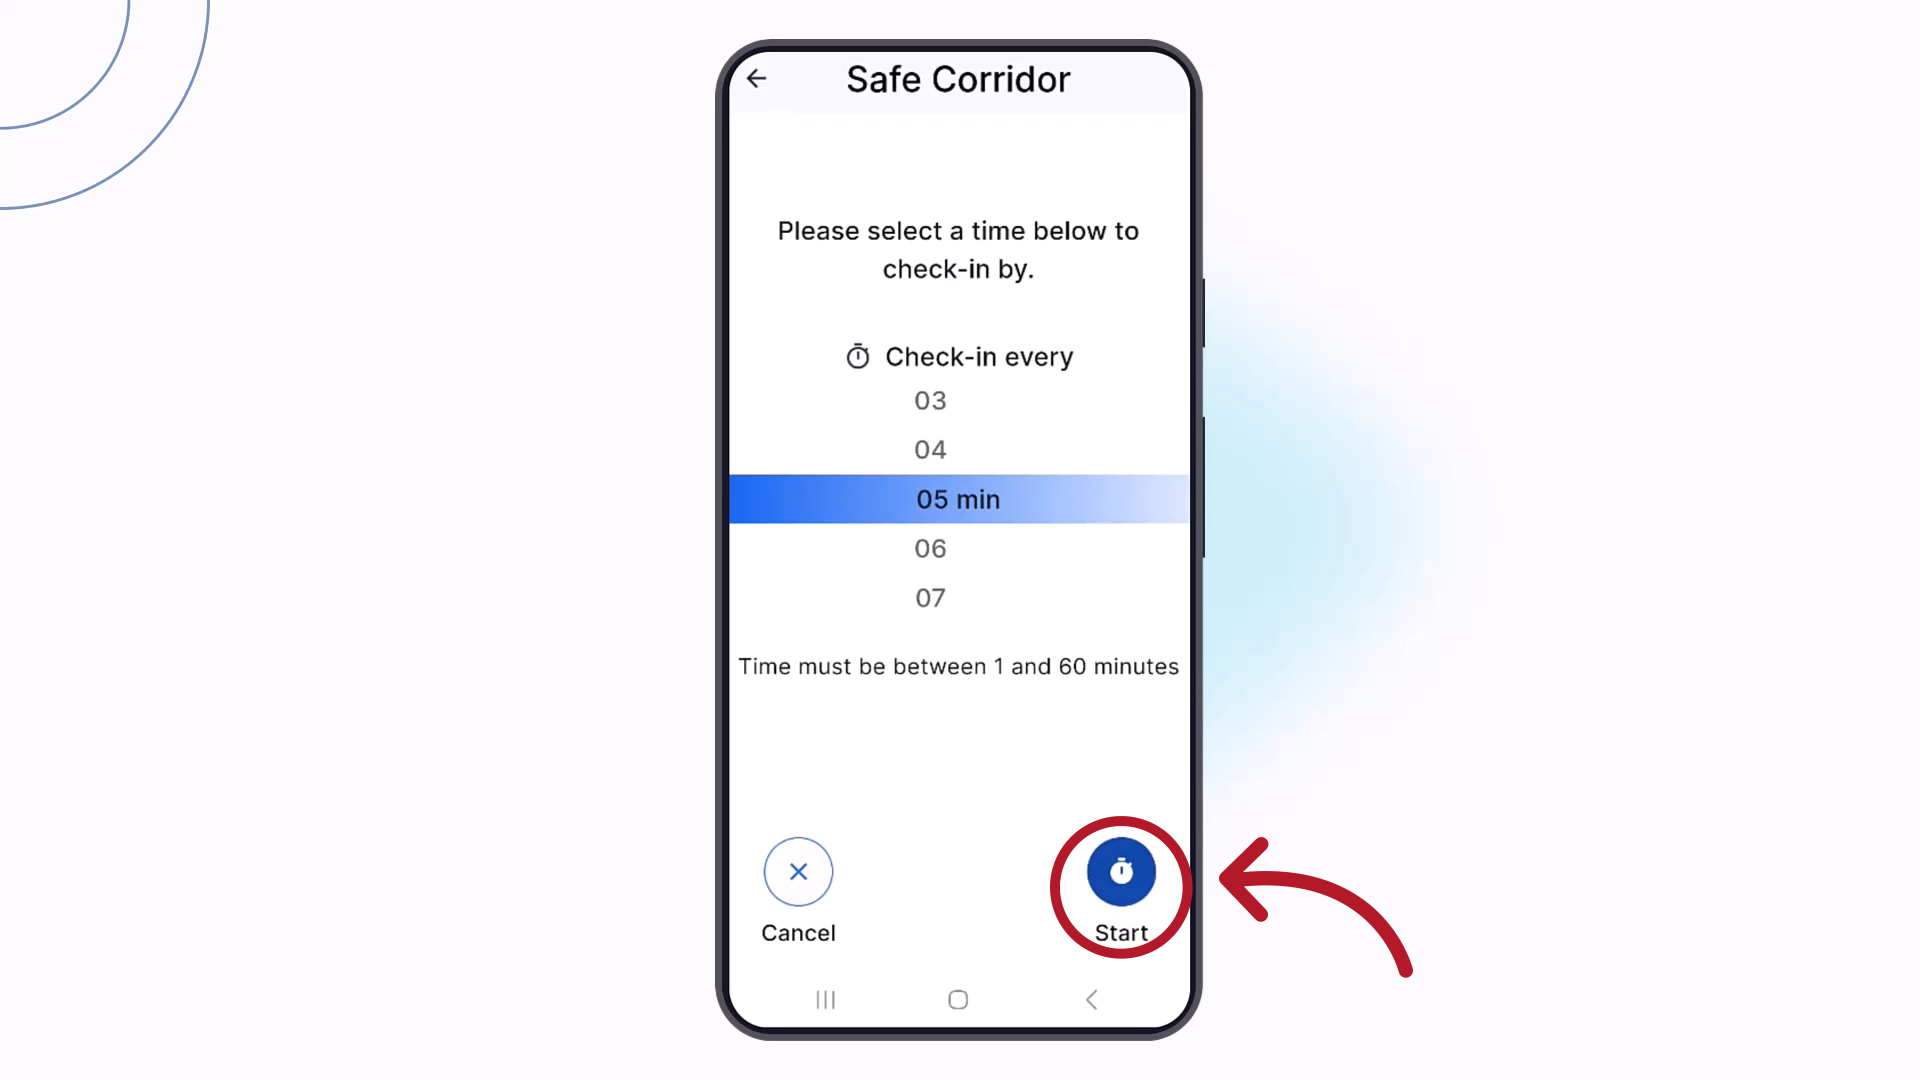
30. Start
Then tap the Start button to begin.
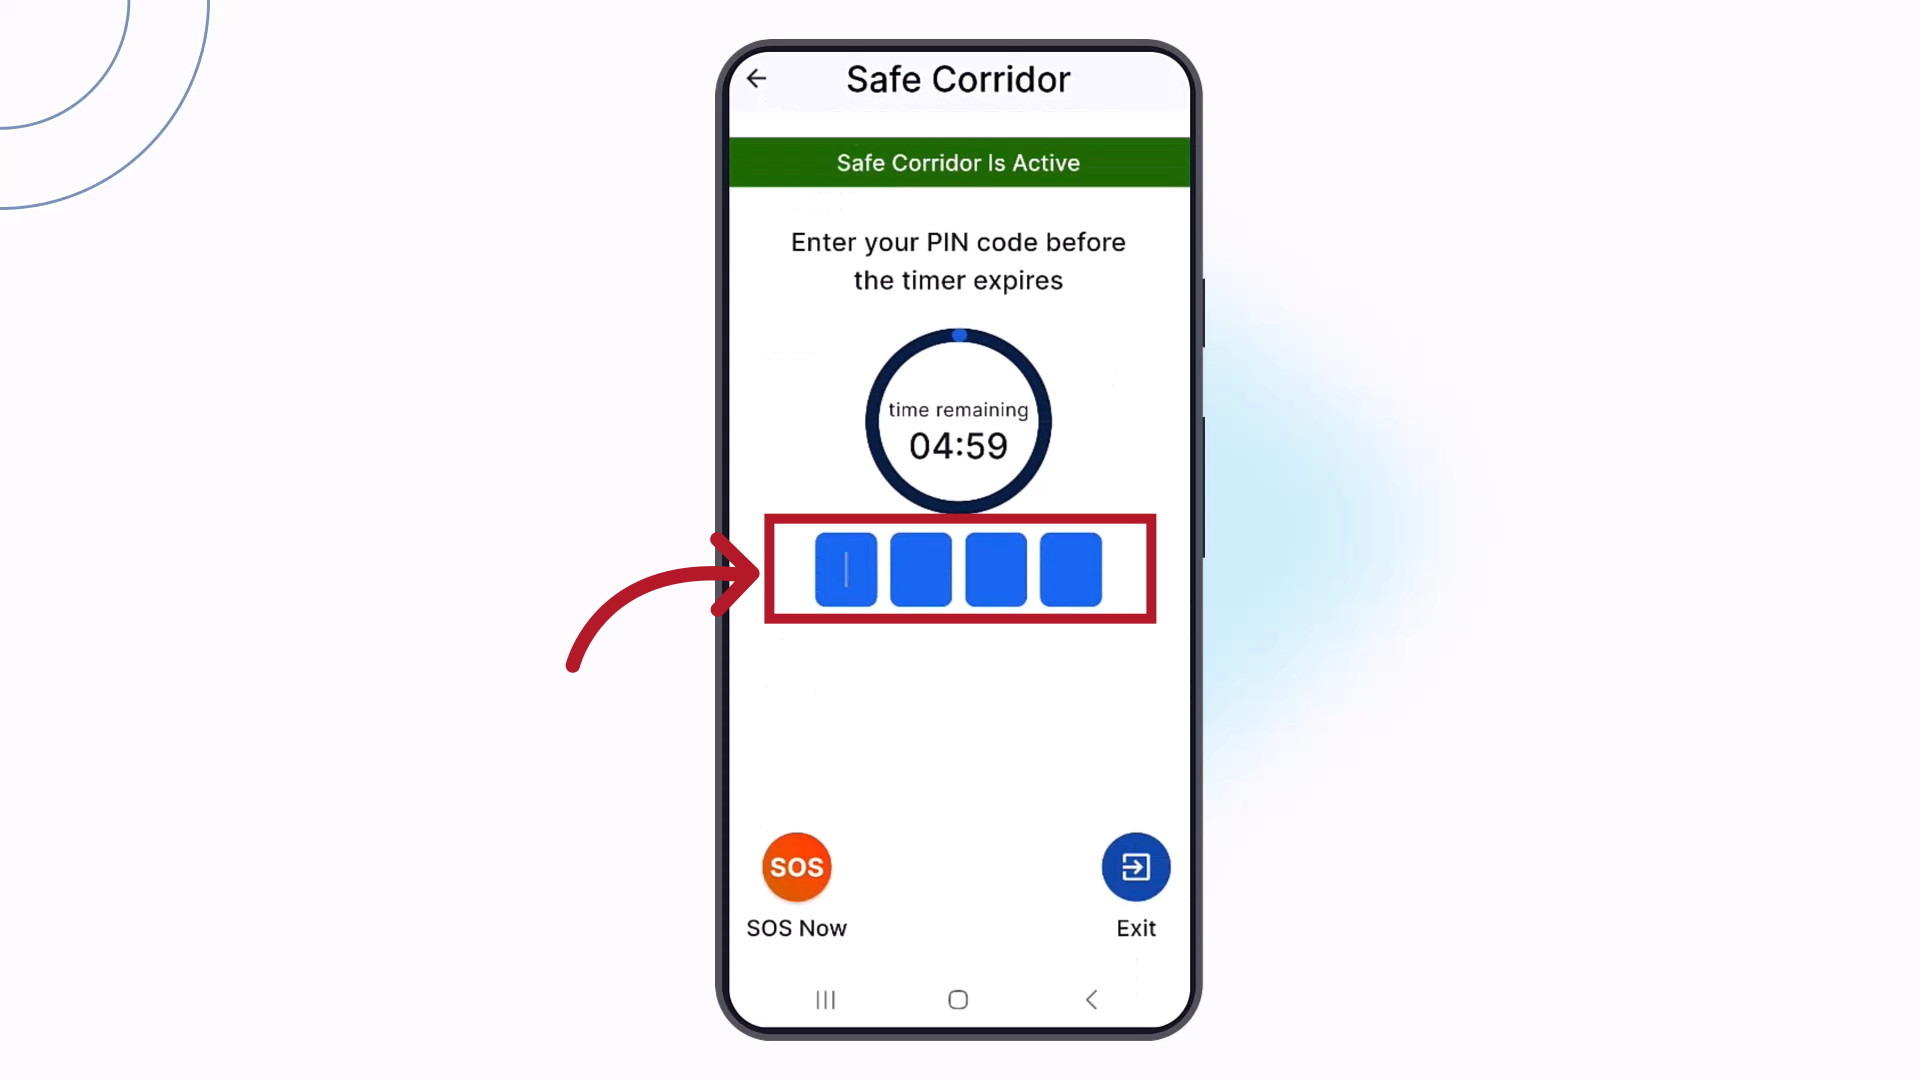
31. Check In
Your device will vibrate with 15 seconds remaining on the timer to remind you to enter your PIN code before the timer expires. If you do not enter the code before the interval ends, an SOS will automatically be triggered.
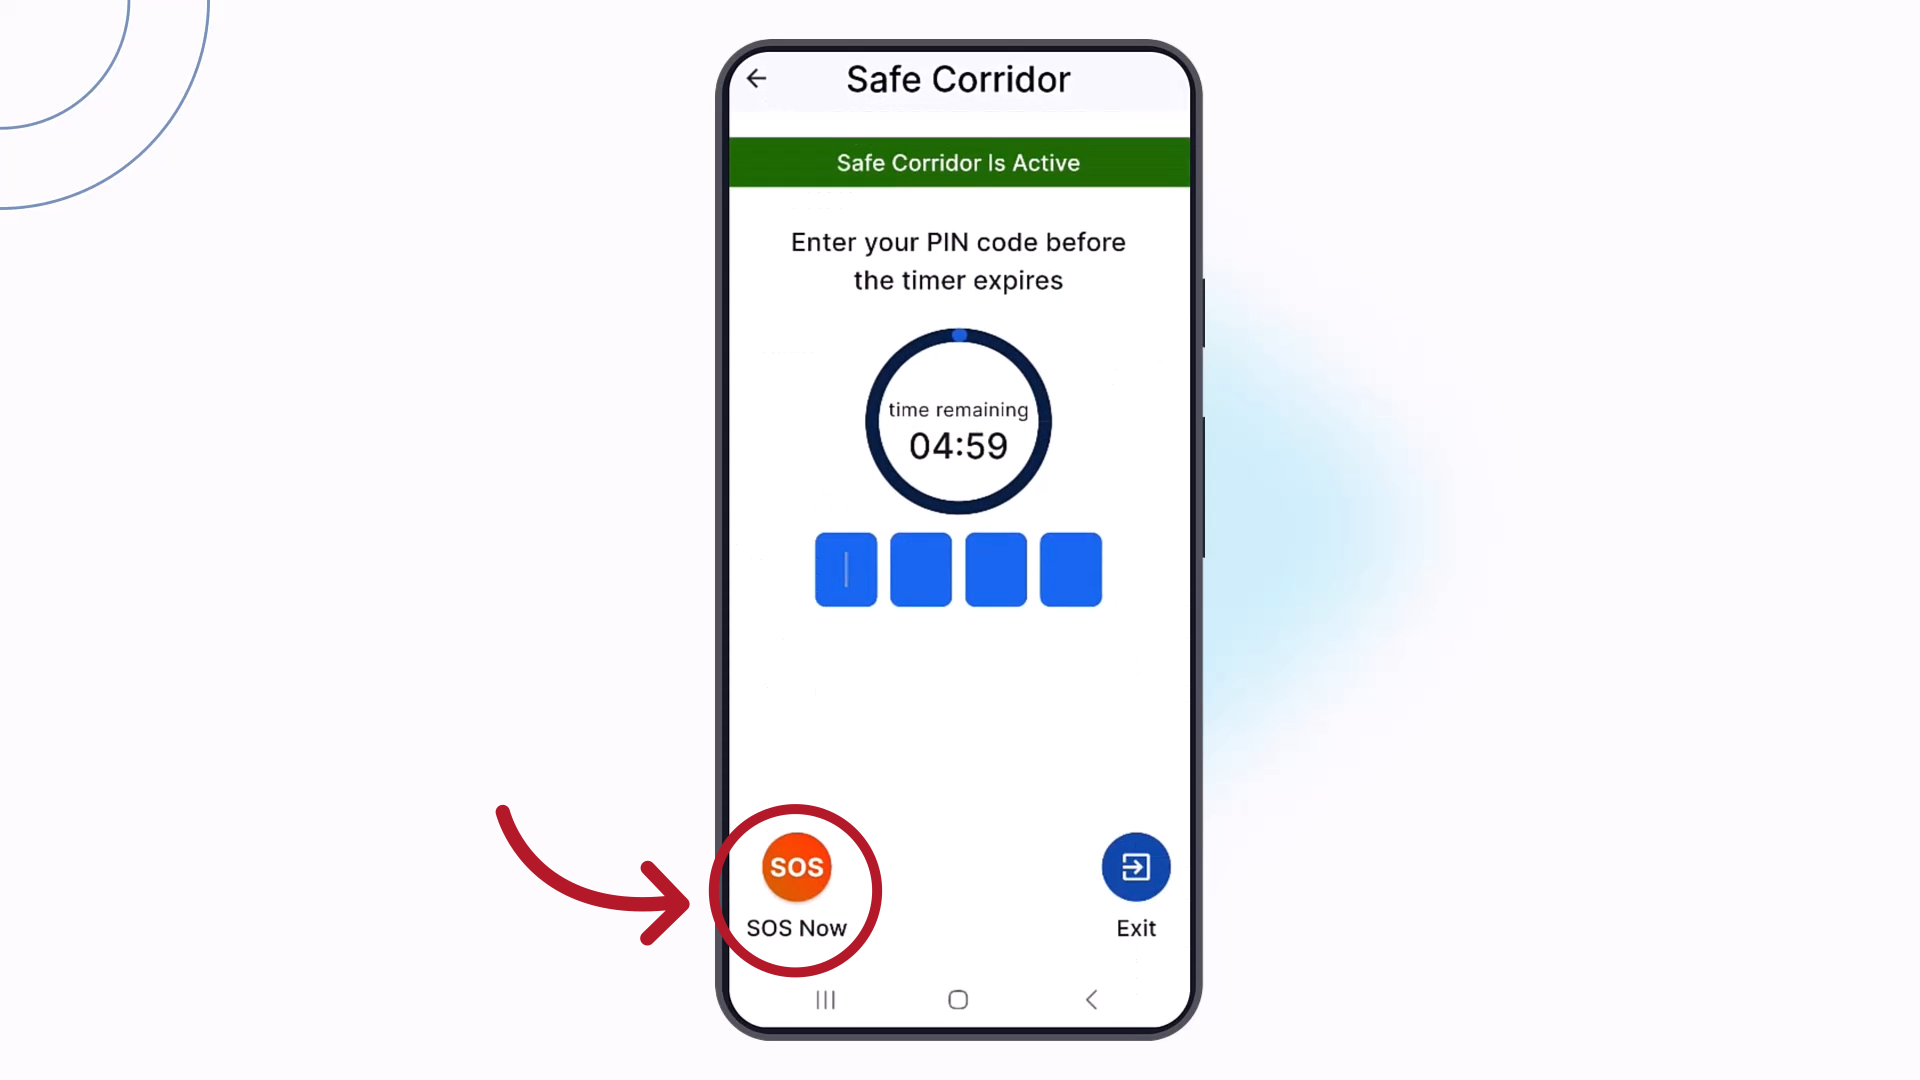
32. SOS
If you find yourself in an unsafe situation at any time before the timer expires. you can trigger an SOS by tapping "SOS Now" and entering your SOS Duress Code.
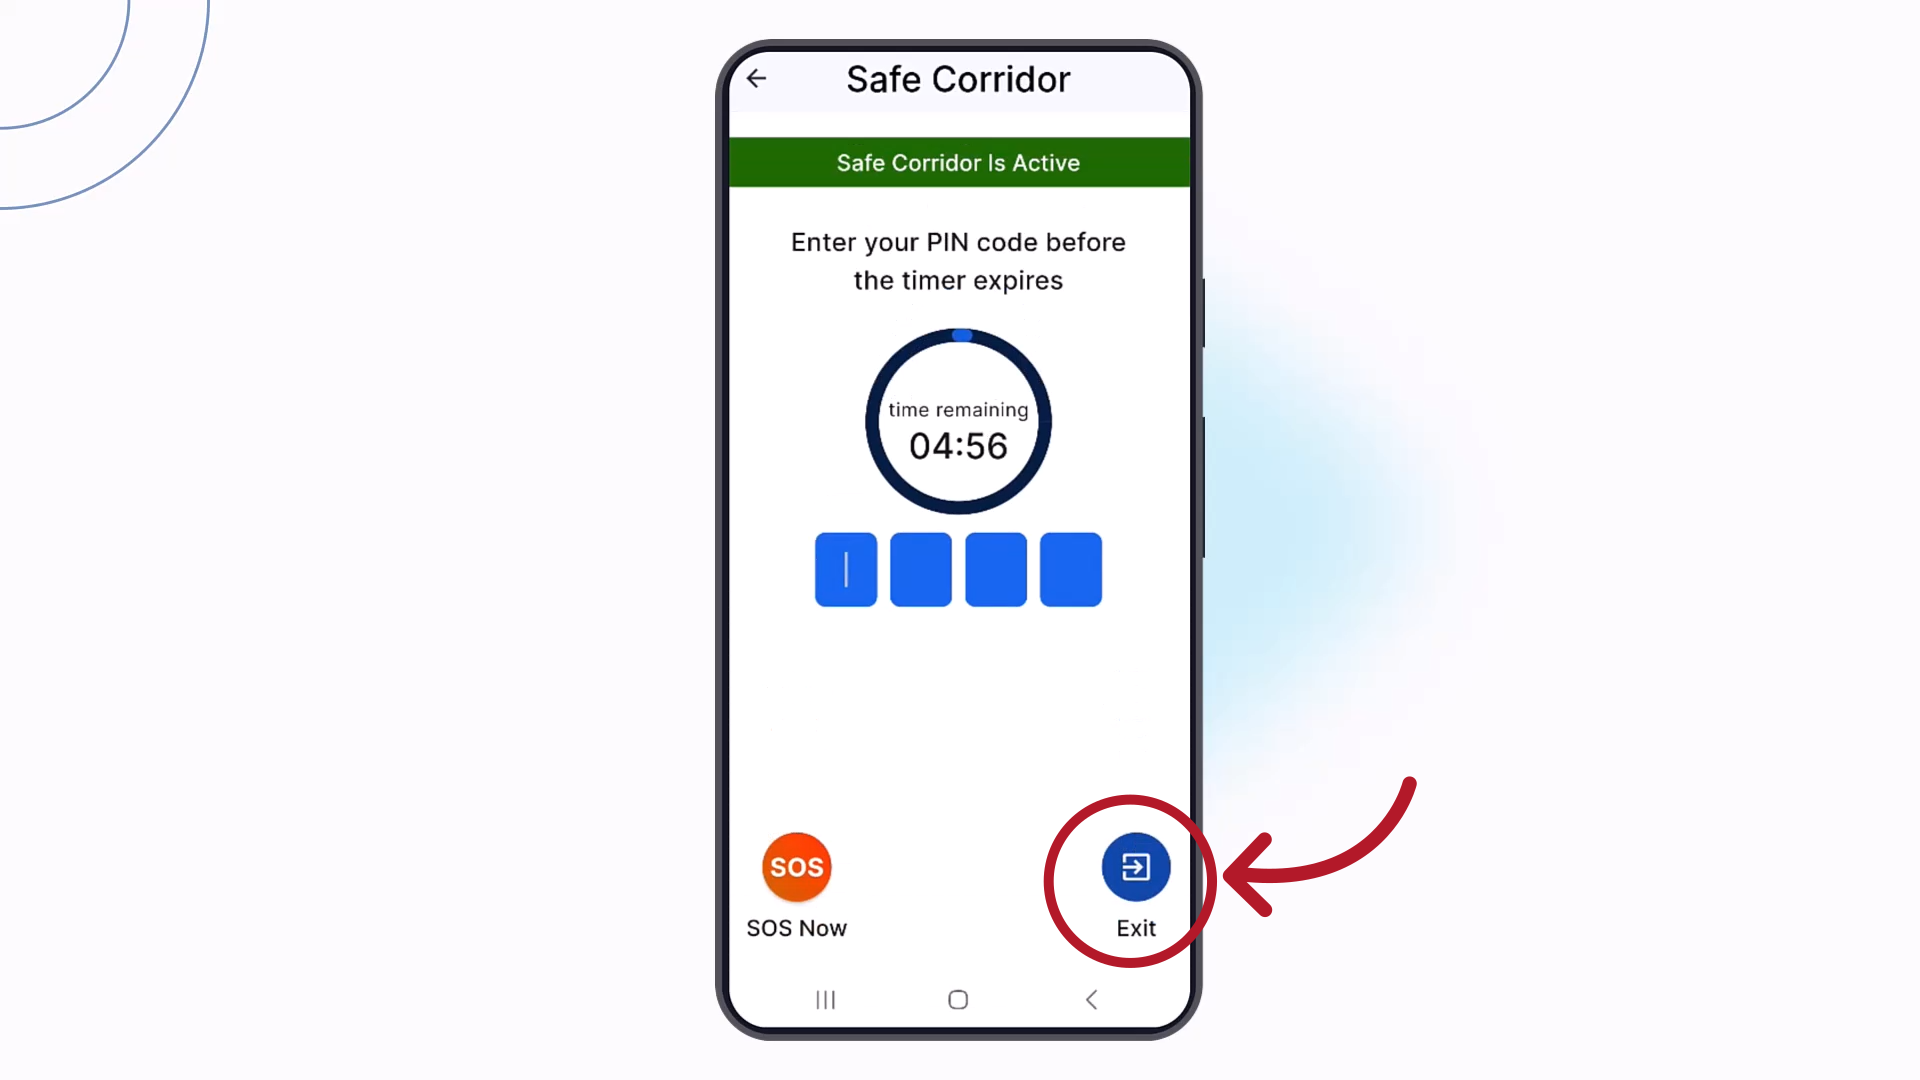
33. Exit
Once you have completed your Safe Corridor, tap Exit.
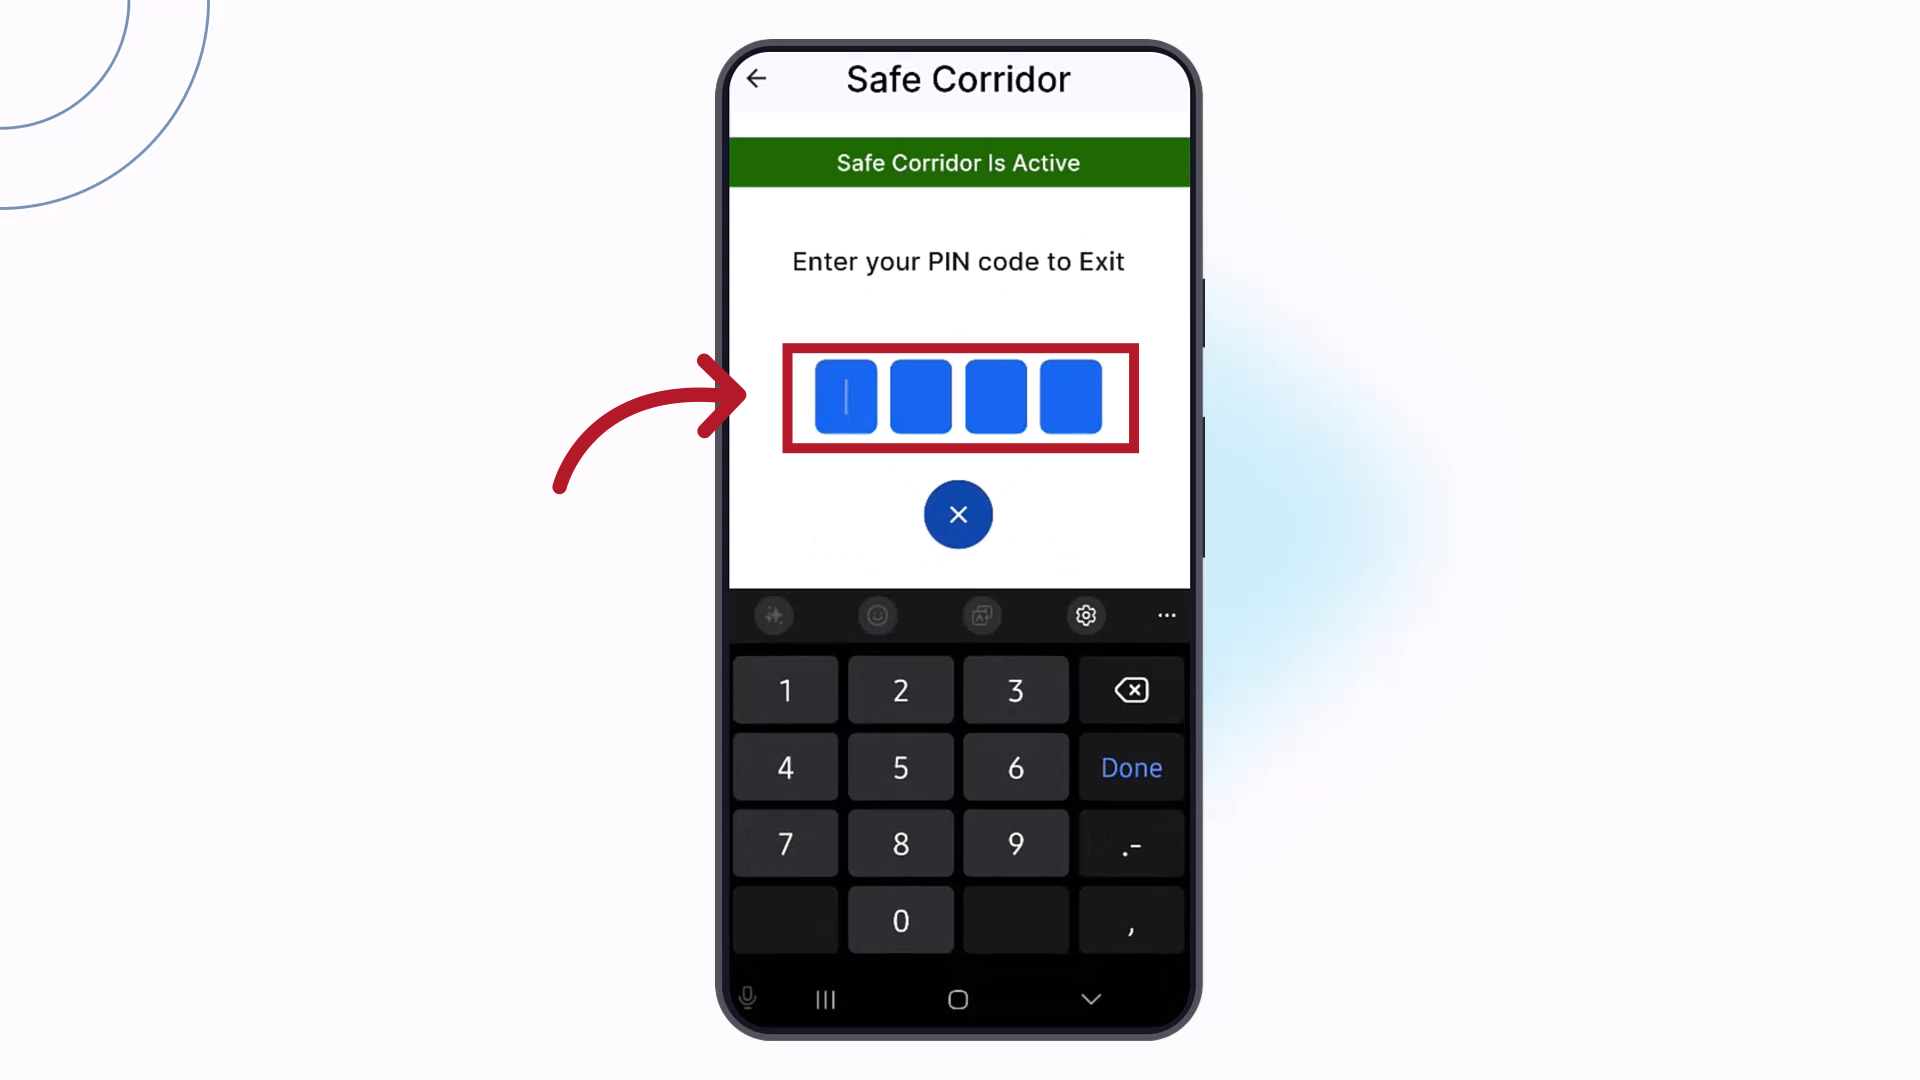
34. PIN
You will need to enter your PIN a final time to complete the Exit process.
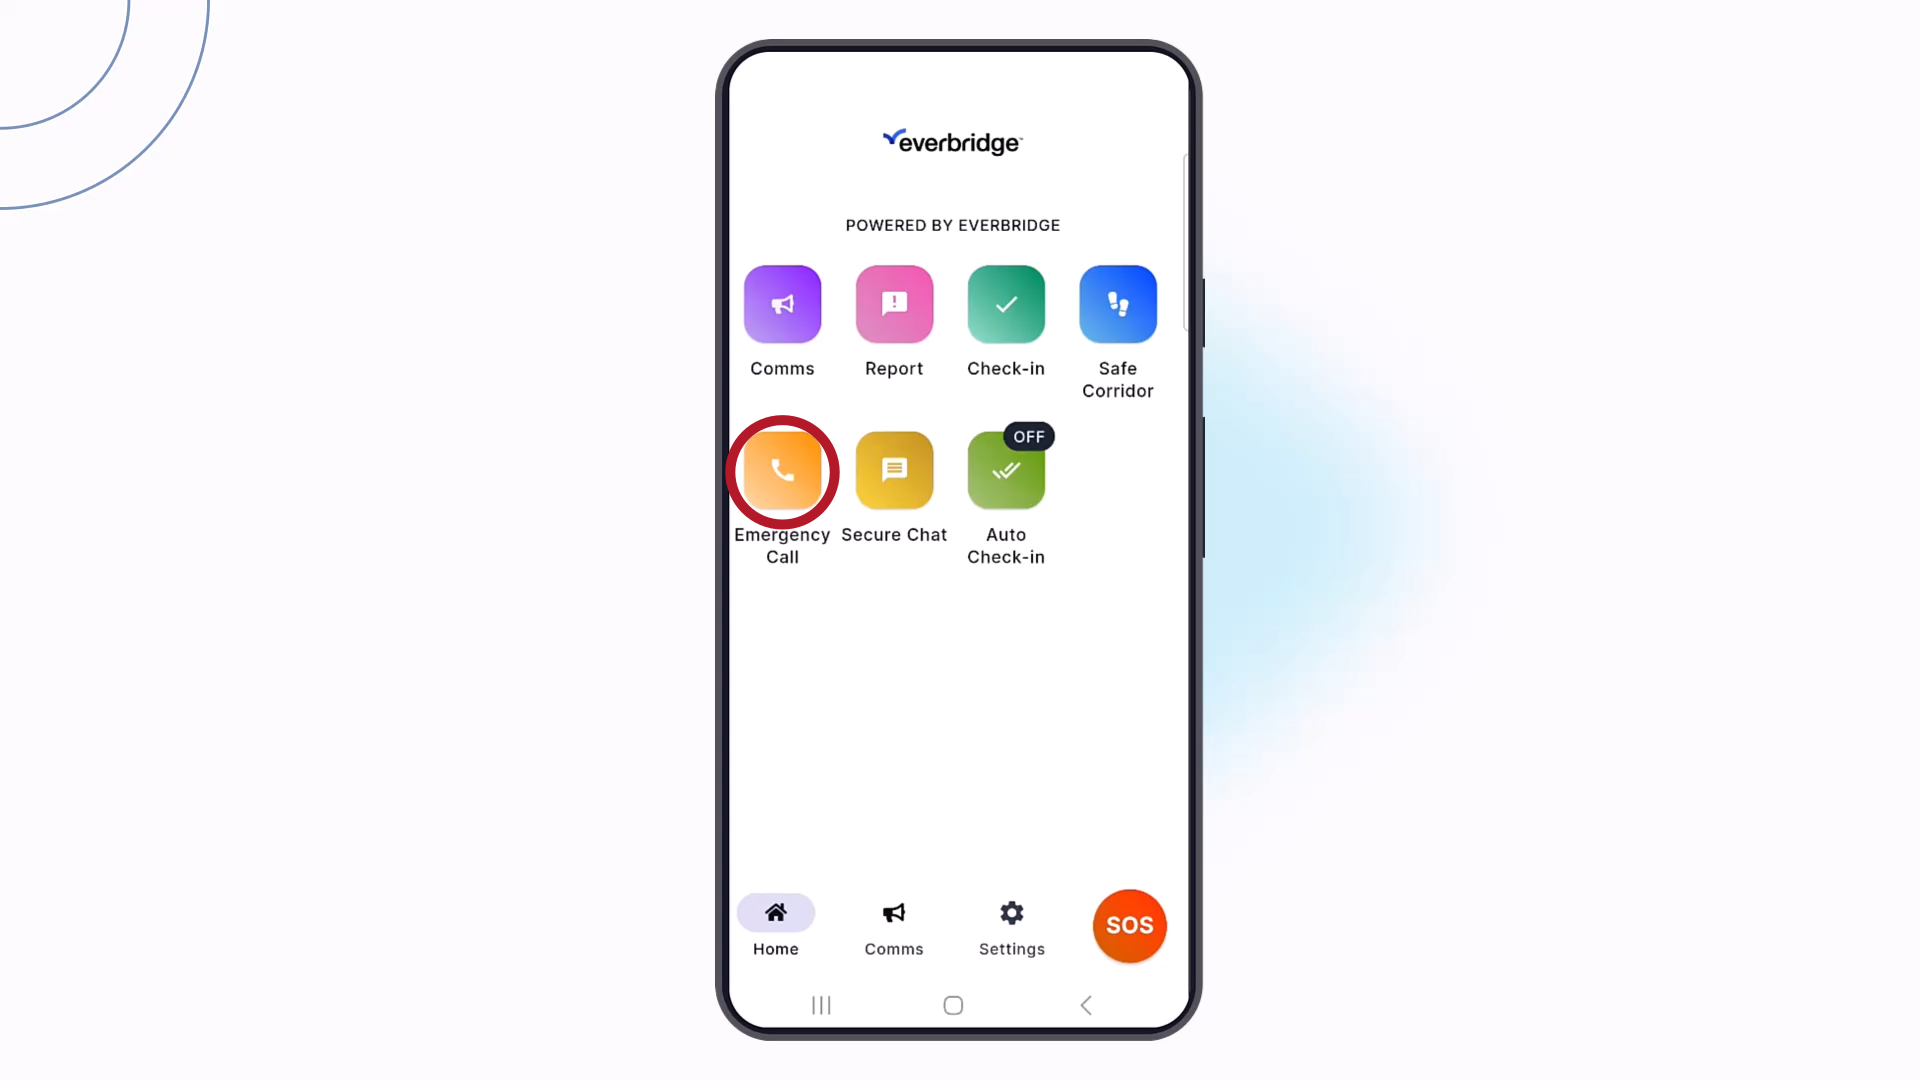
35. Emergency Call
Lastly, let's review Emergency Call. To activate, tap the Emergency Call button.
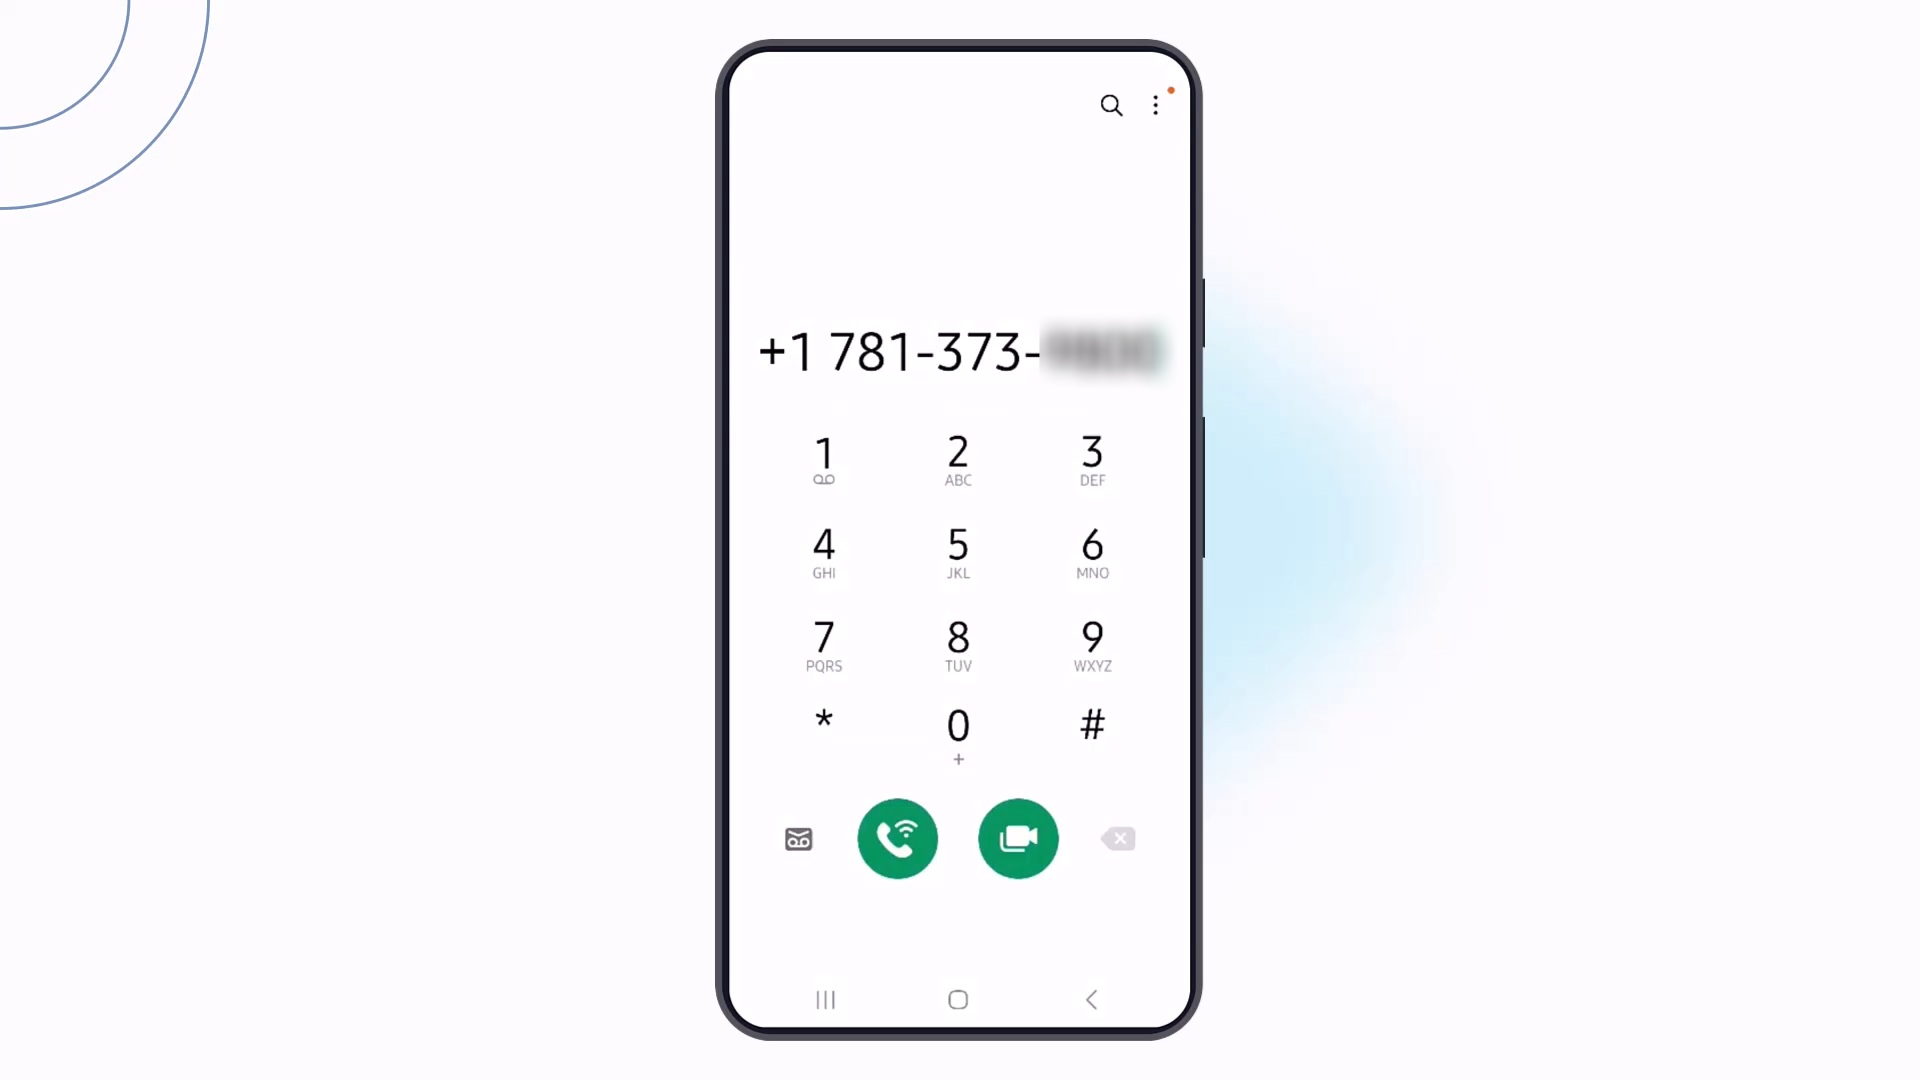
36. Phone Number
This will dial an emergency number that your organization has preconfigured. It may be a number specific to the country recognized by your device, and may be either that country's public emergency service number or a number local to your organization.
37. Settings
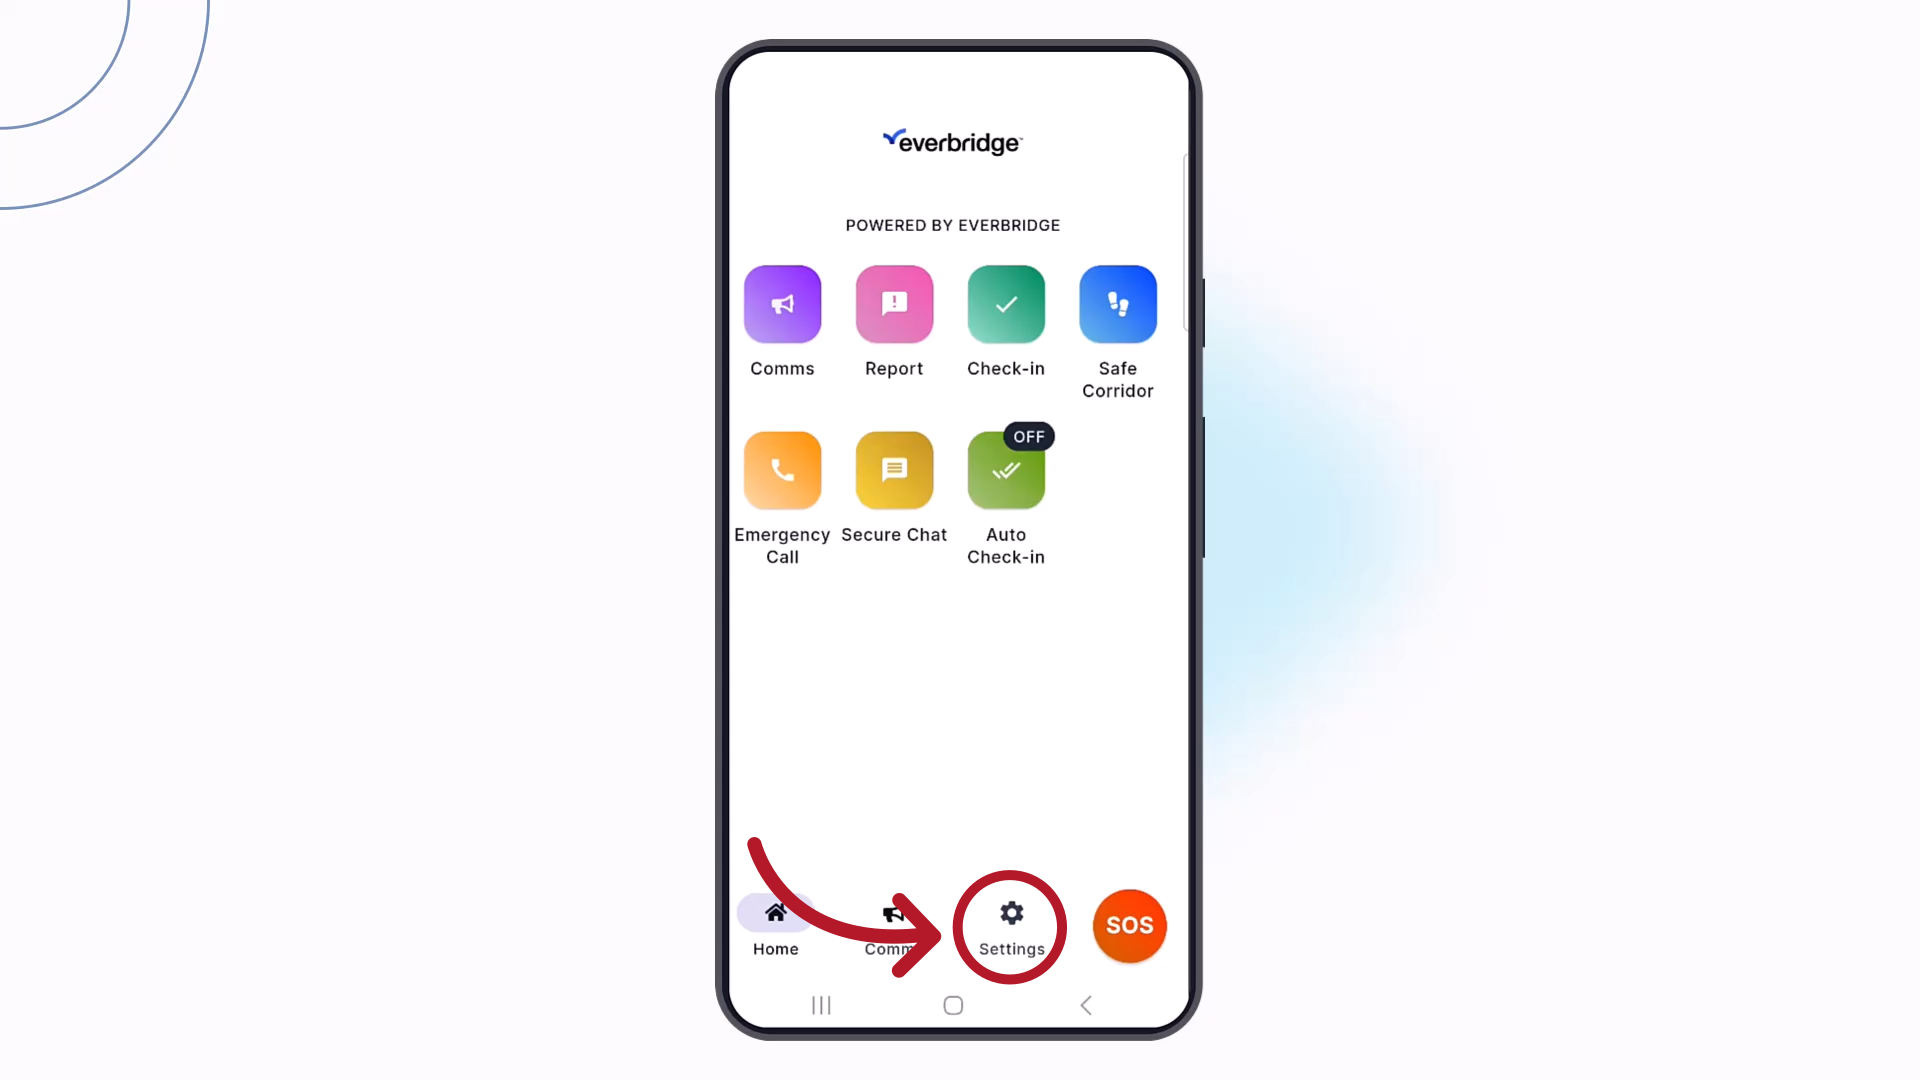
To modify any of the configuration options or permissions reviewed in this tutorial, tap the Settings button to return to the application main menu.
Through this tutorial, you have learned how to accurately set your mobile device's permissions and use the default Mobile Safety buttons. Thank you for watching!