Topic
Manually uploading an Asset.
Description
This guide will walk you through the process of manually uploading assets using a CSV template in your Everbridge organization. Even if the intent is to automate your asset uploads, understanding how to manually load a file can provide valuable information on data formatting and validation.
Go to manager.everbridge.net
1. Navigate
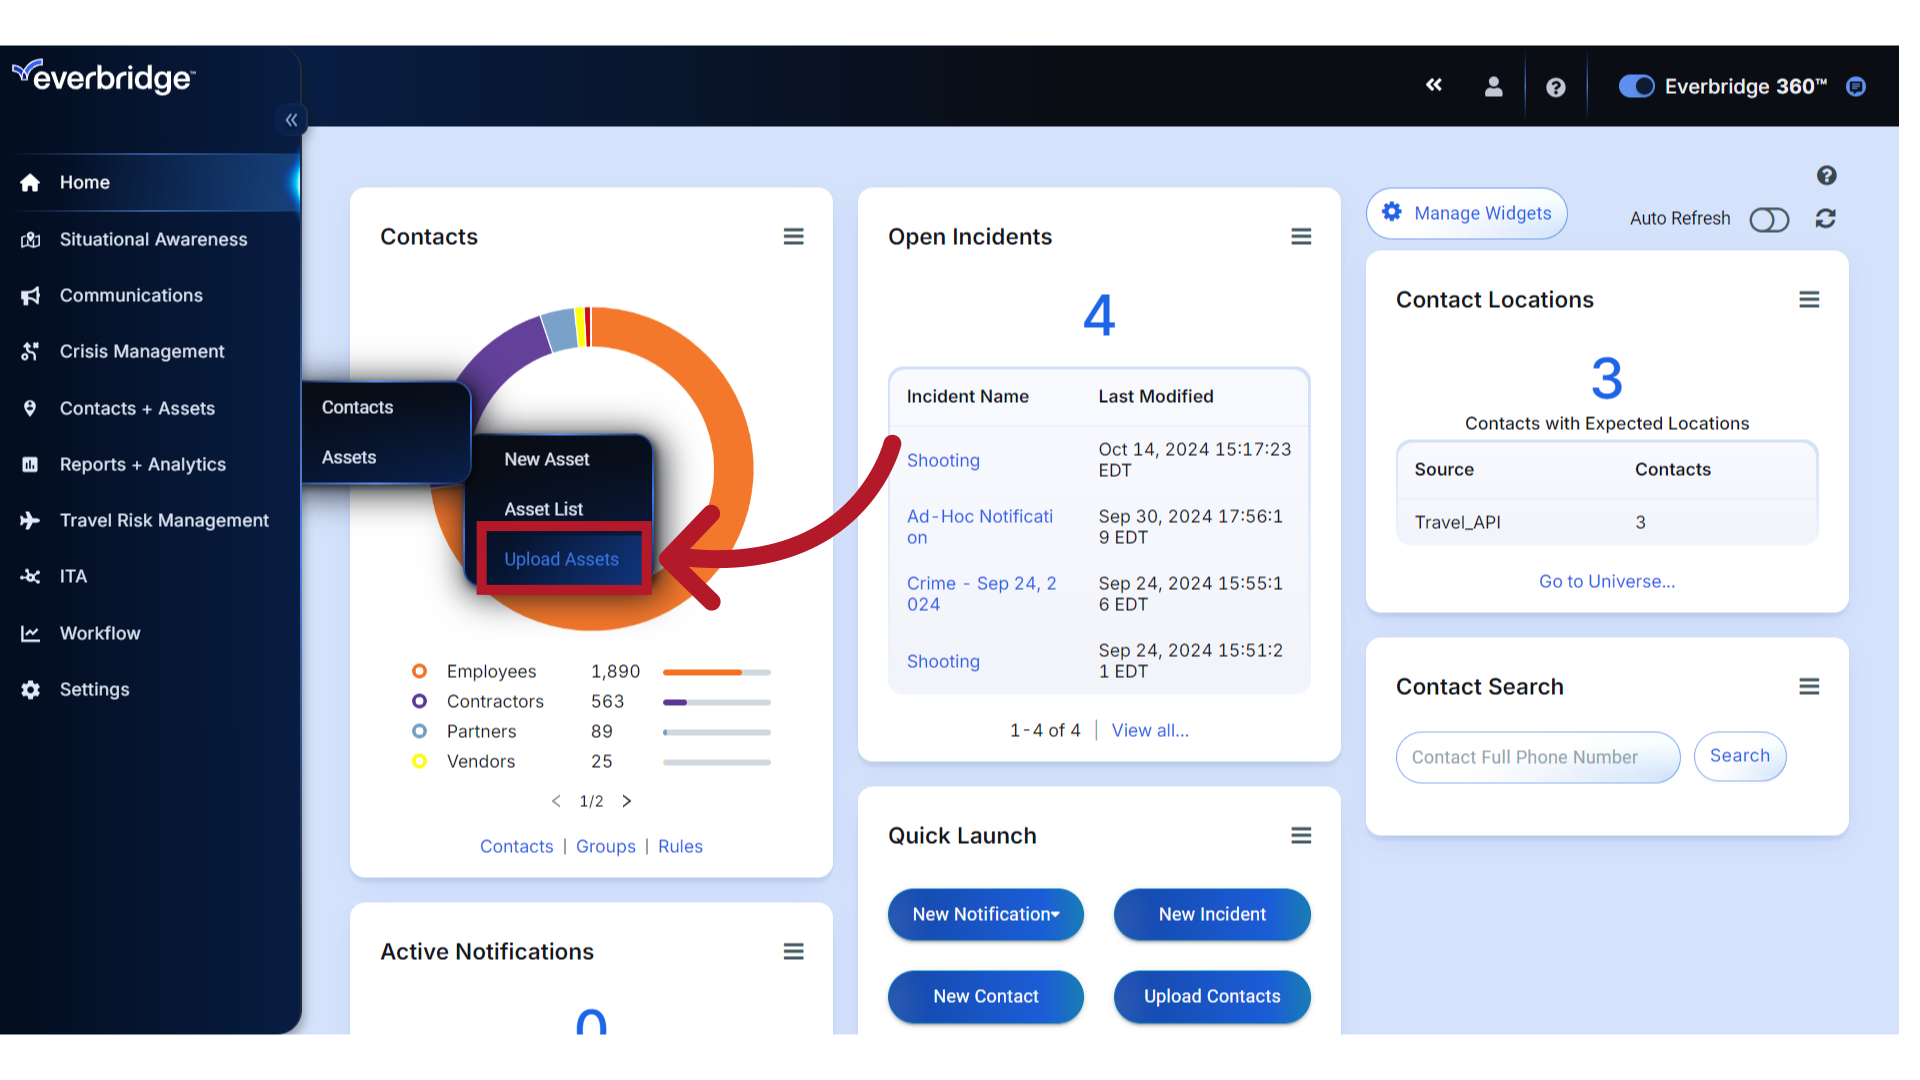
To prepare a new file for upload, start by navigating to the "Upload Assets" option from the organization's "Contacts + Assets" menu.
2. Access
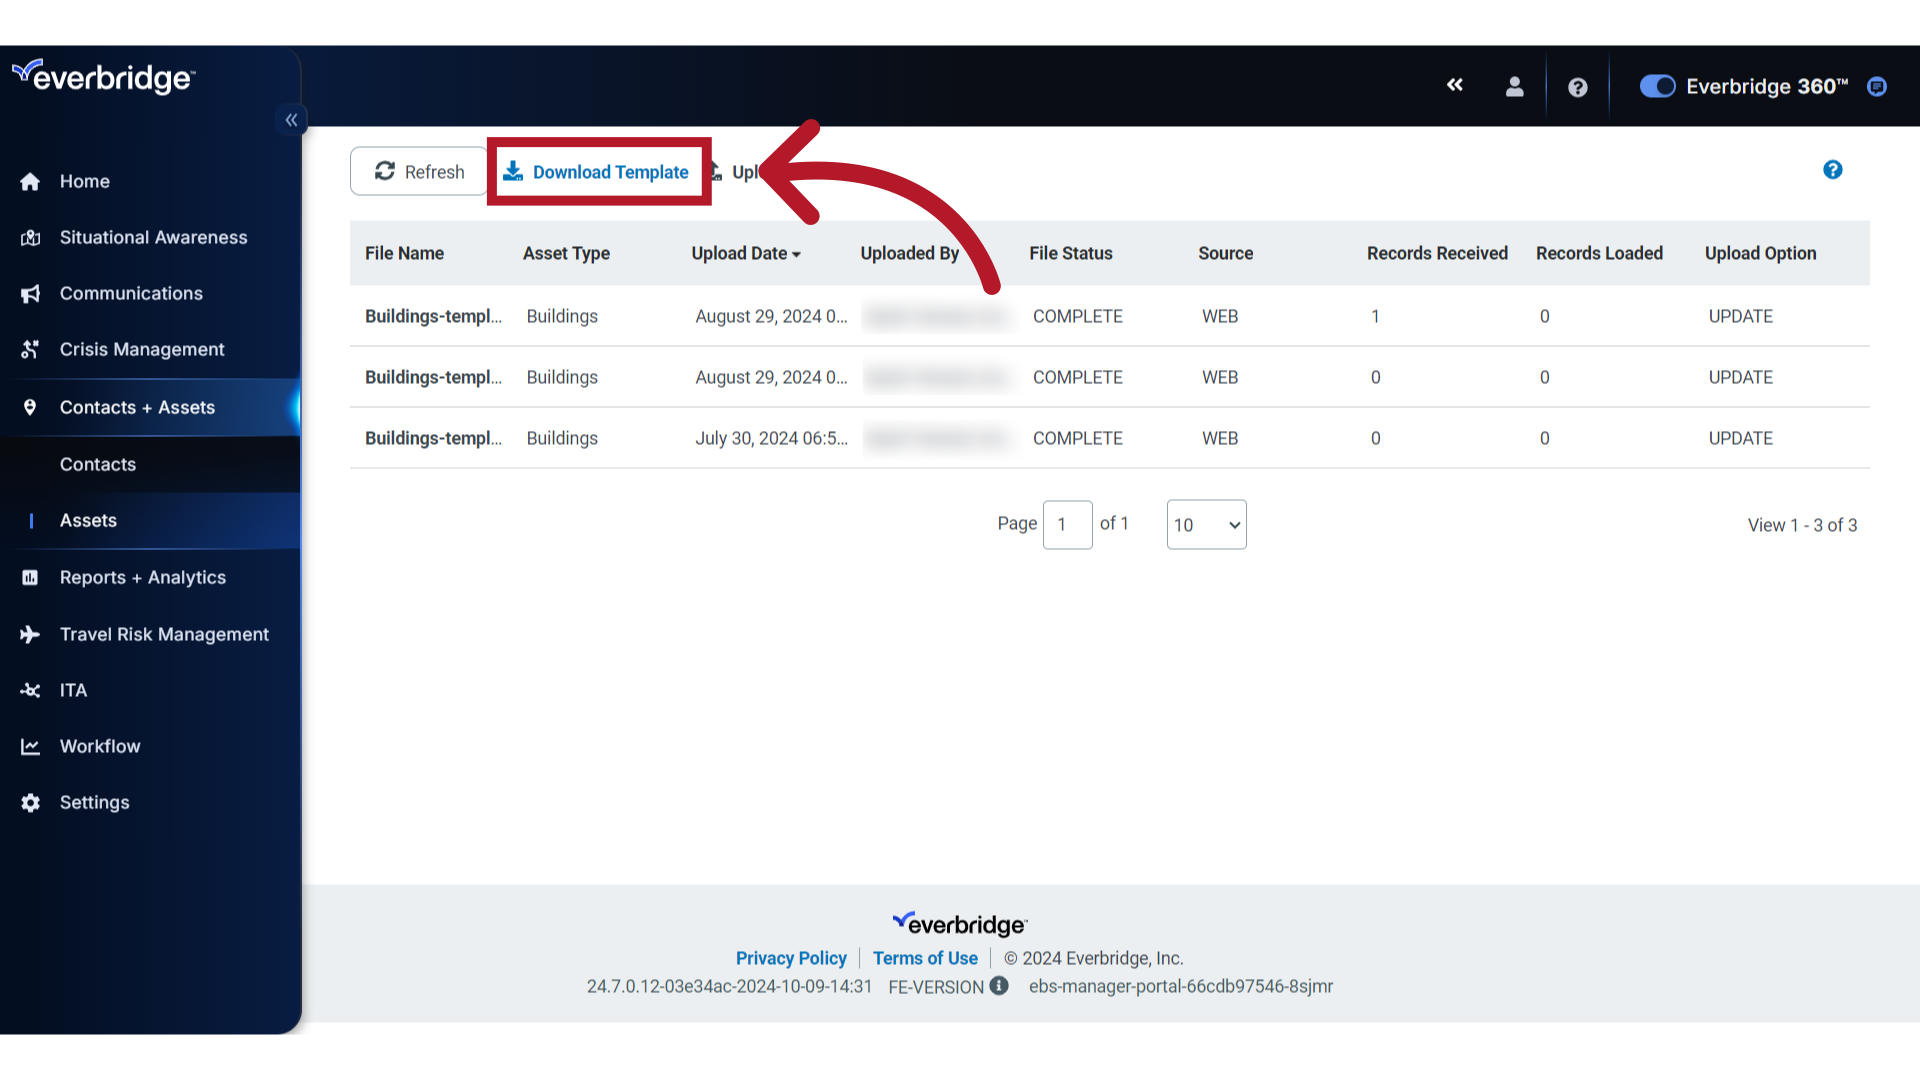
Then click Download Template
3. Select
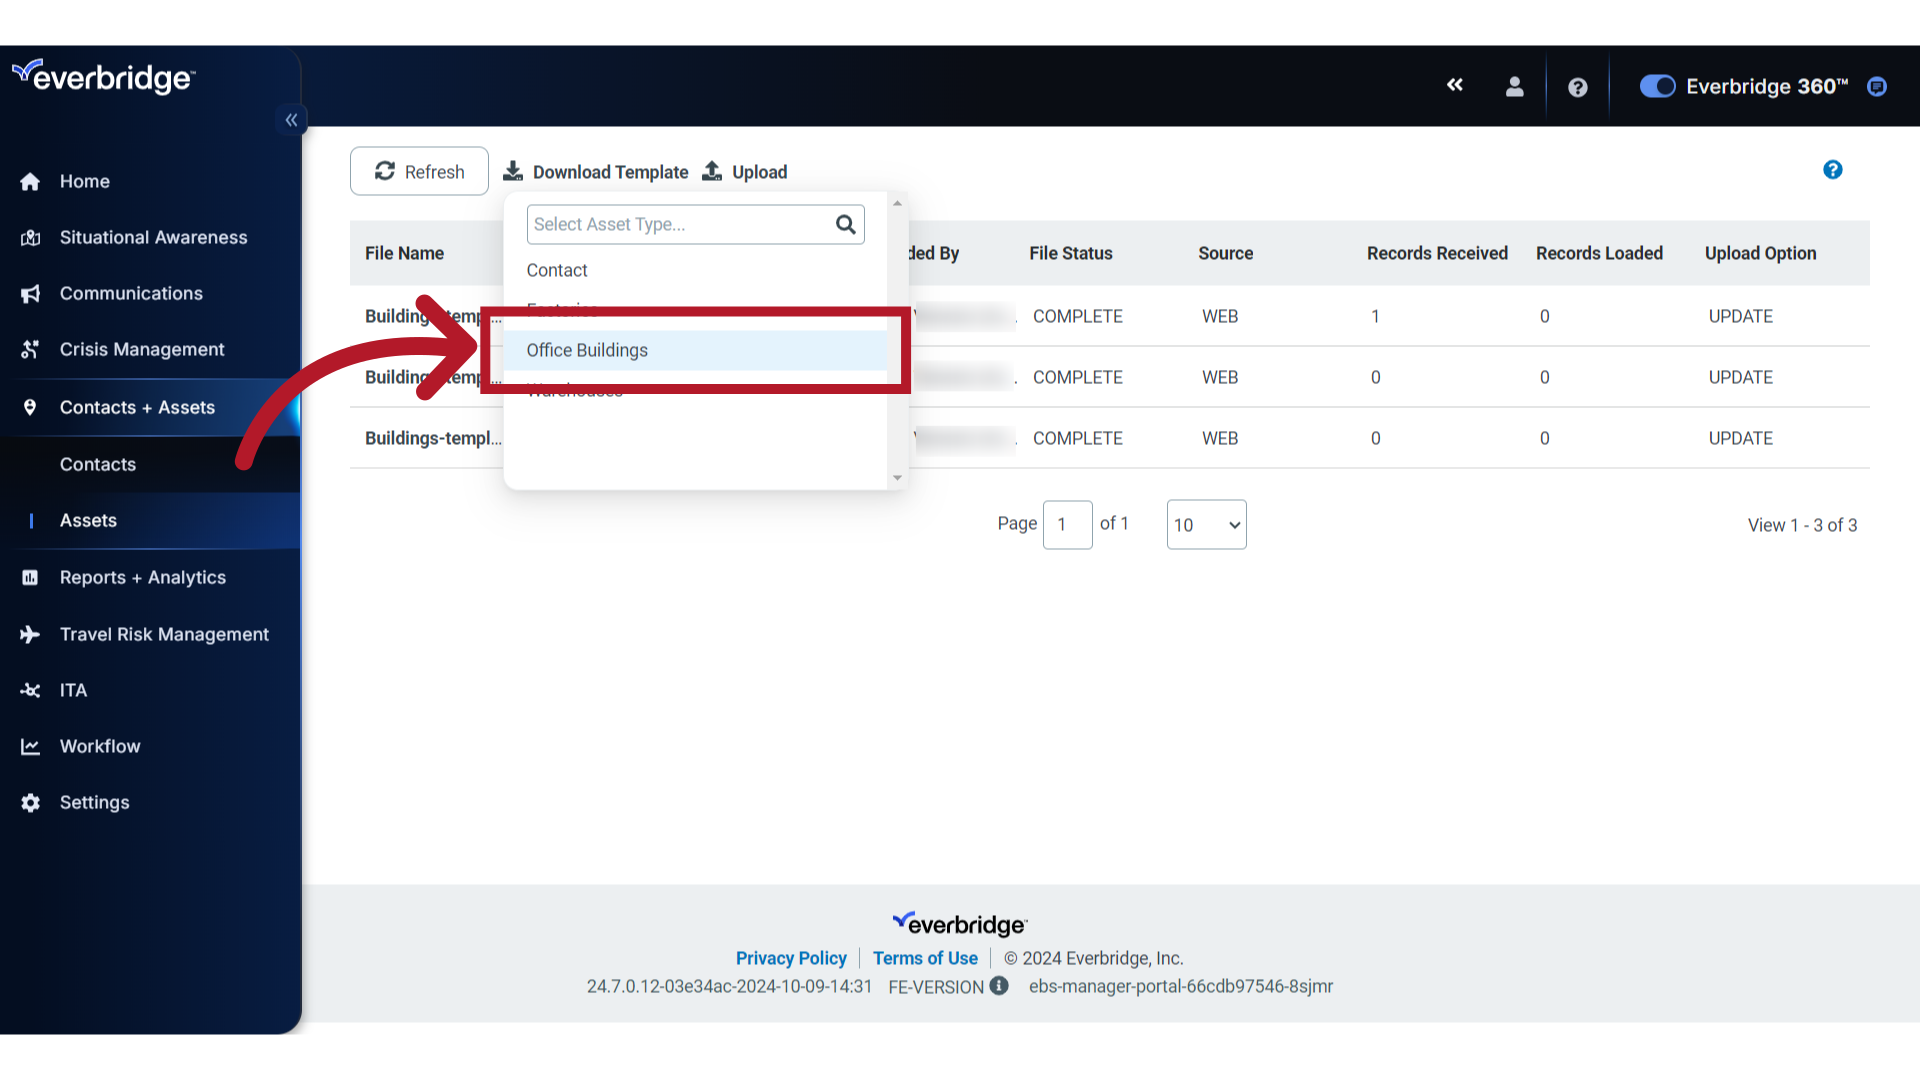
and select the specific template from the preconfigured Asset Type options for the assets you are going to upload.
4. Template
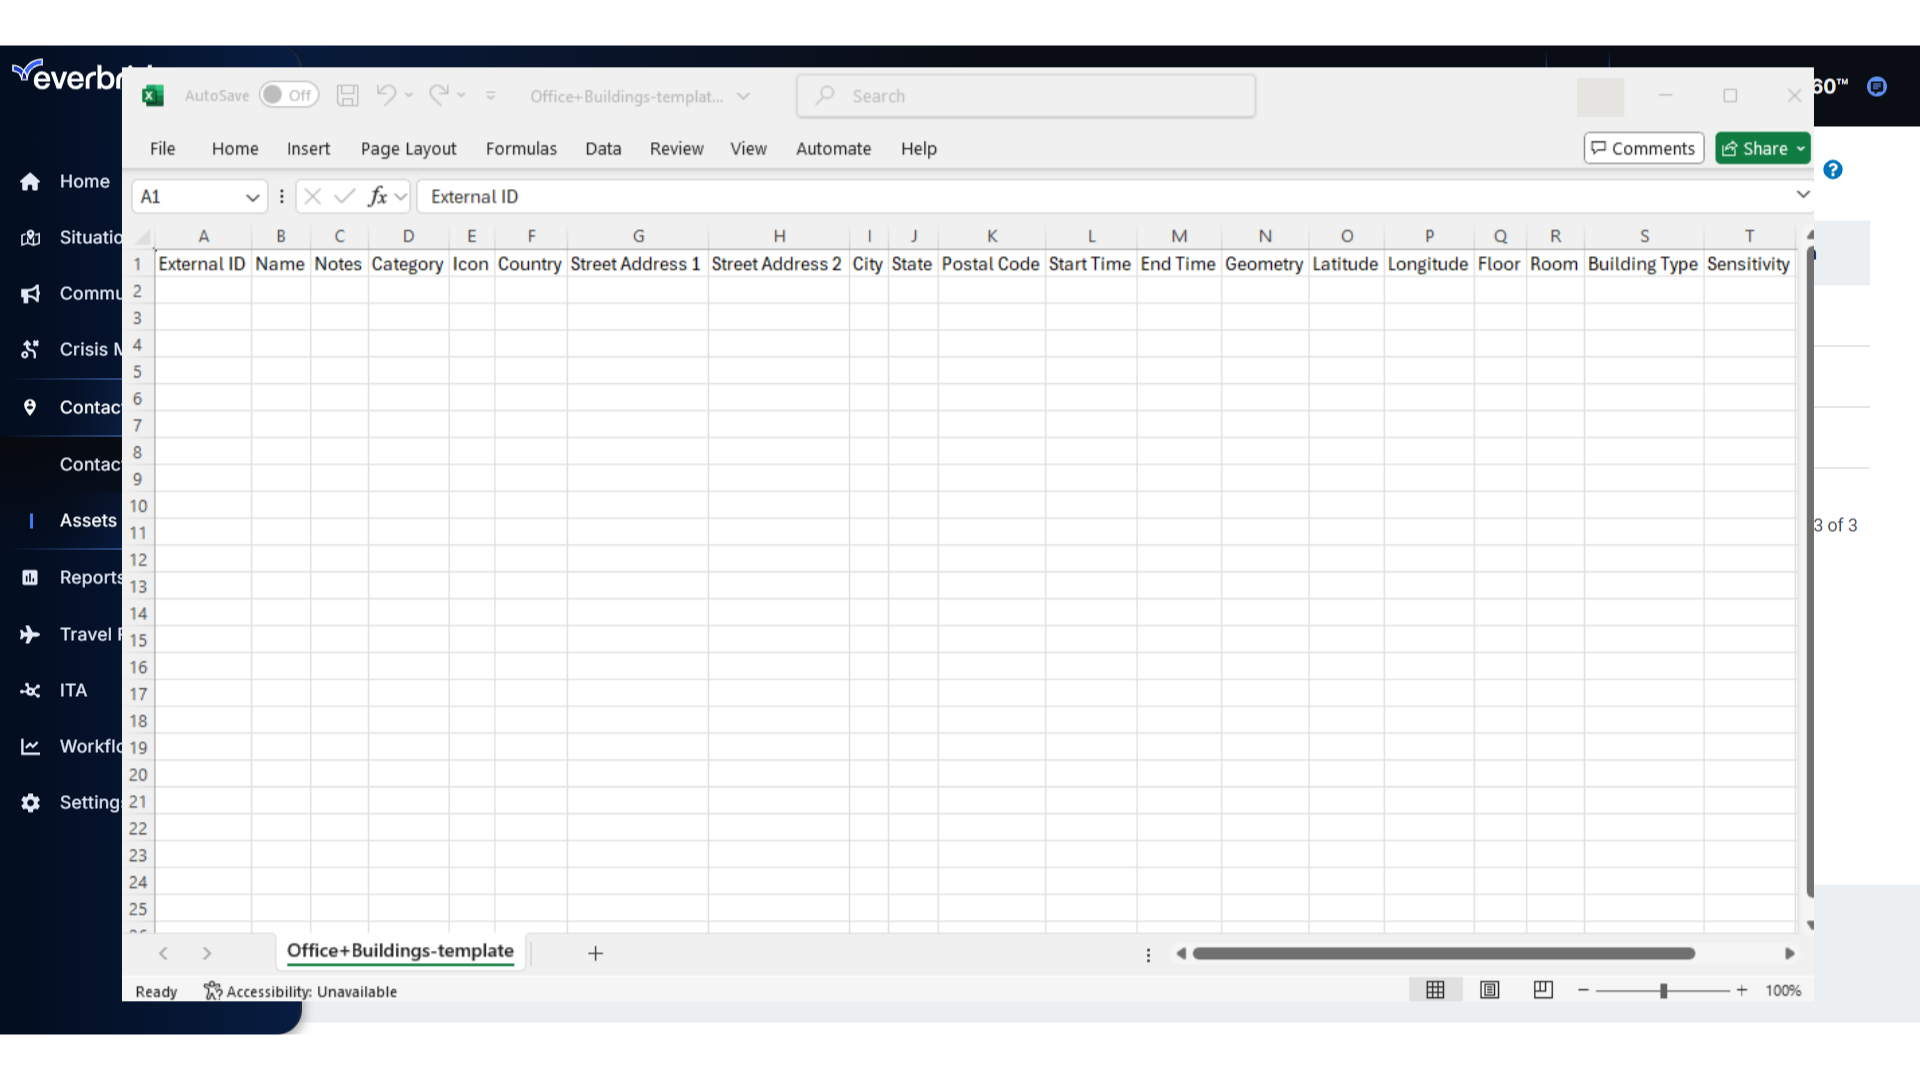
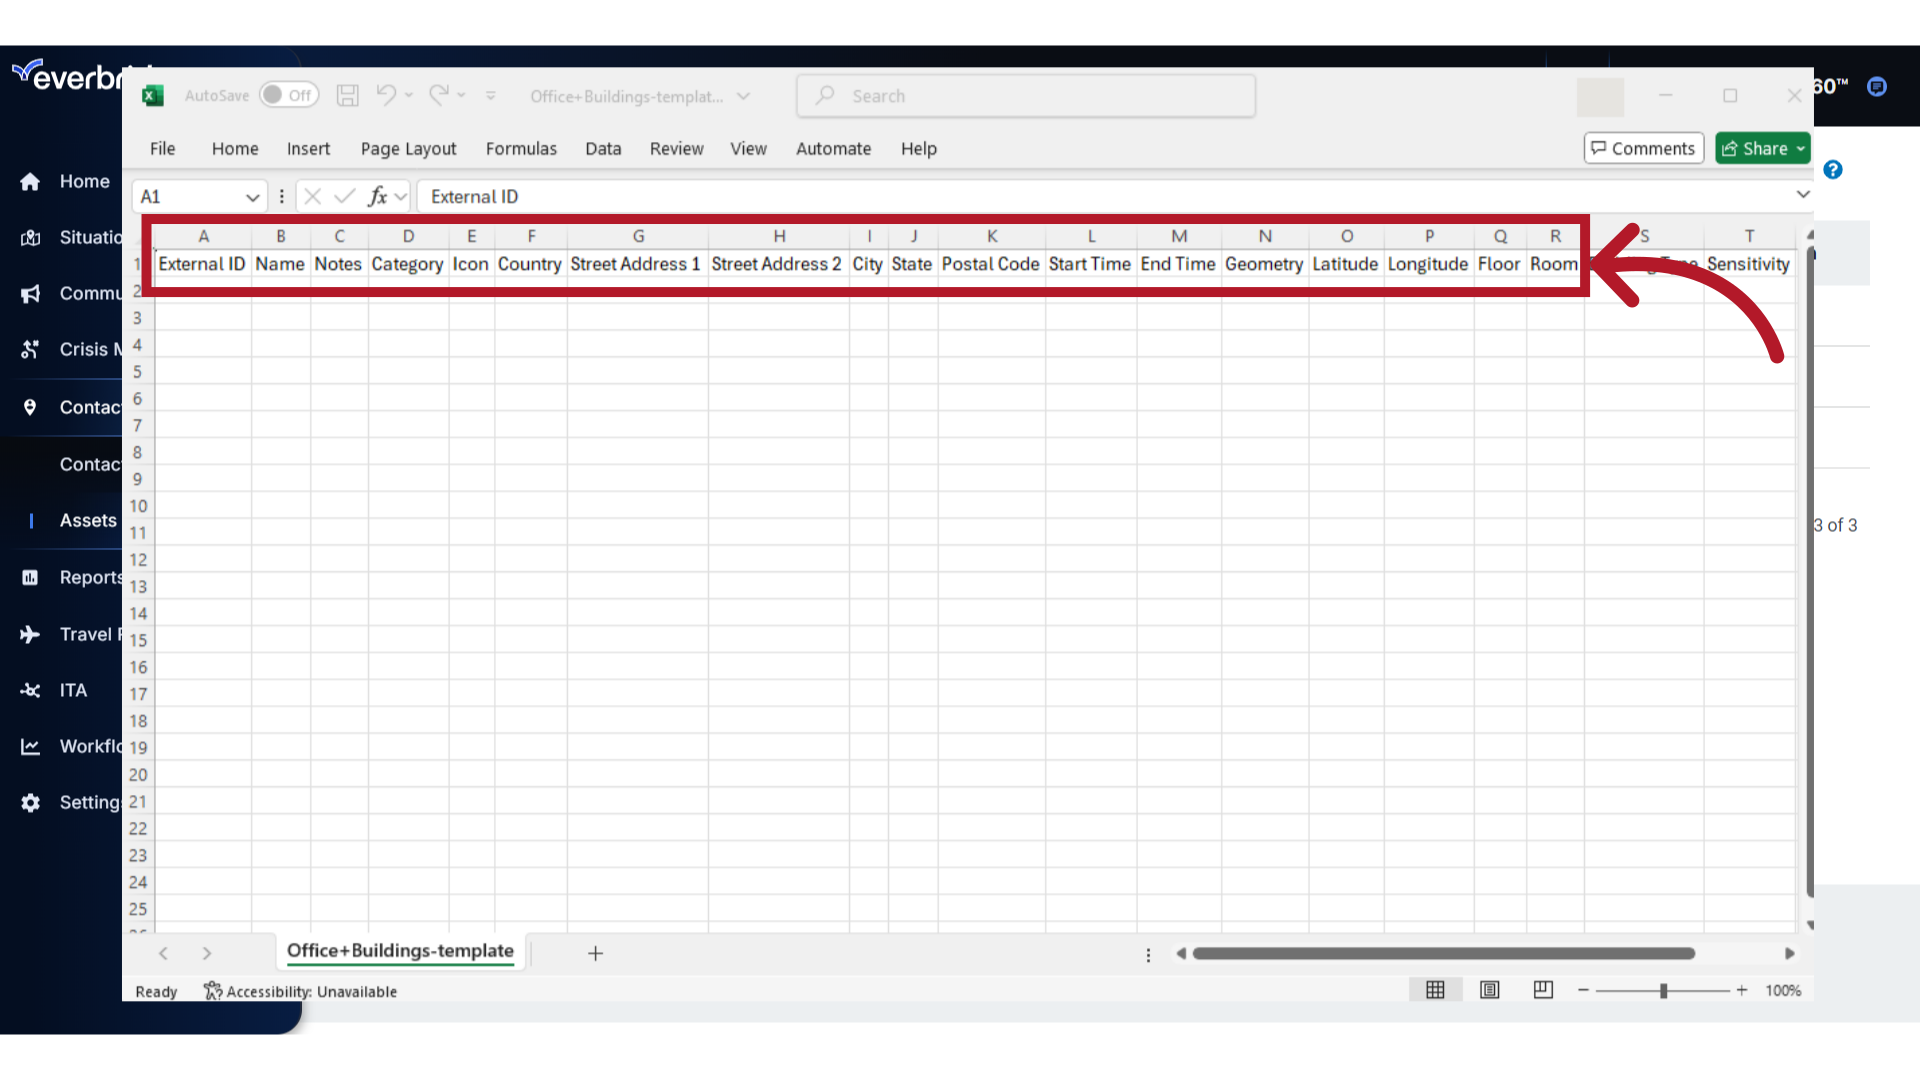
The template will contain a series of column headings. These must not be changed, as doing so will result in errors during the upload process.
5. Template
The headings include the Standard Attributes for the selected Asset Type
6. Template
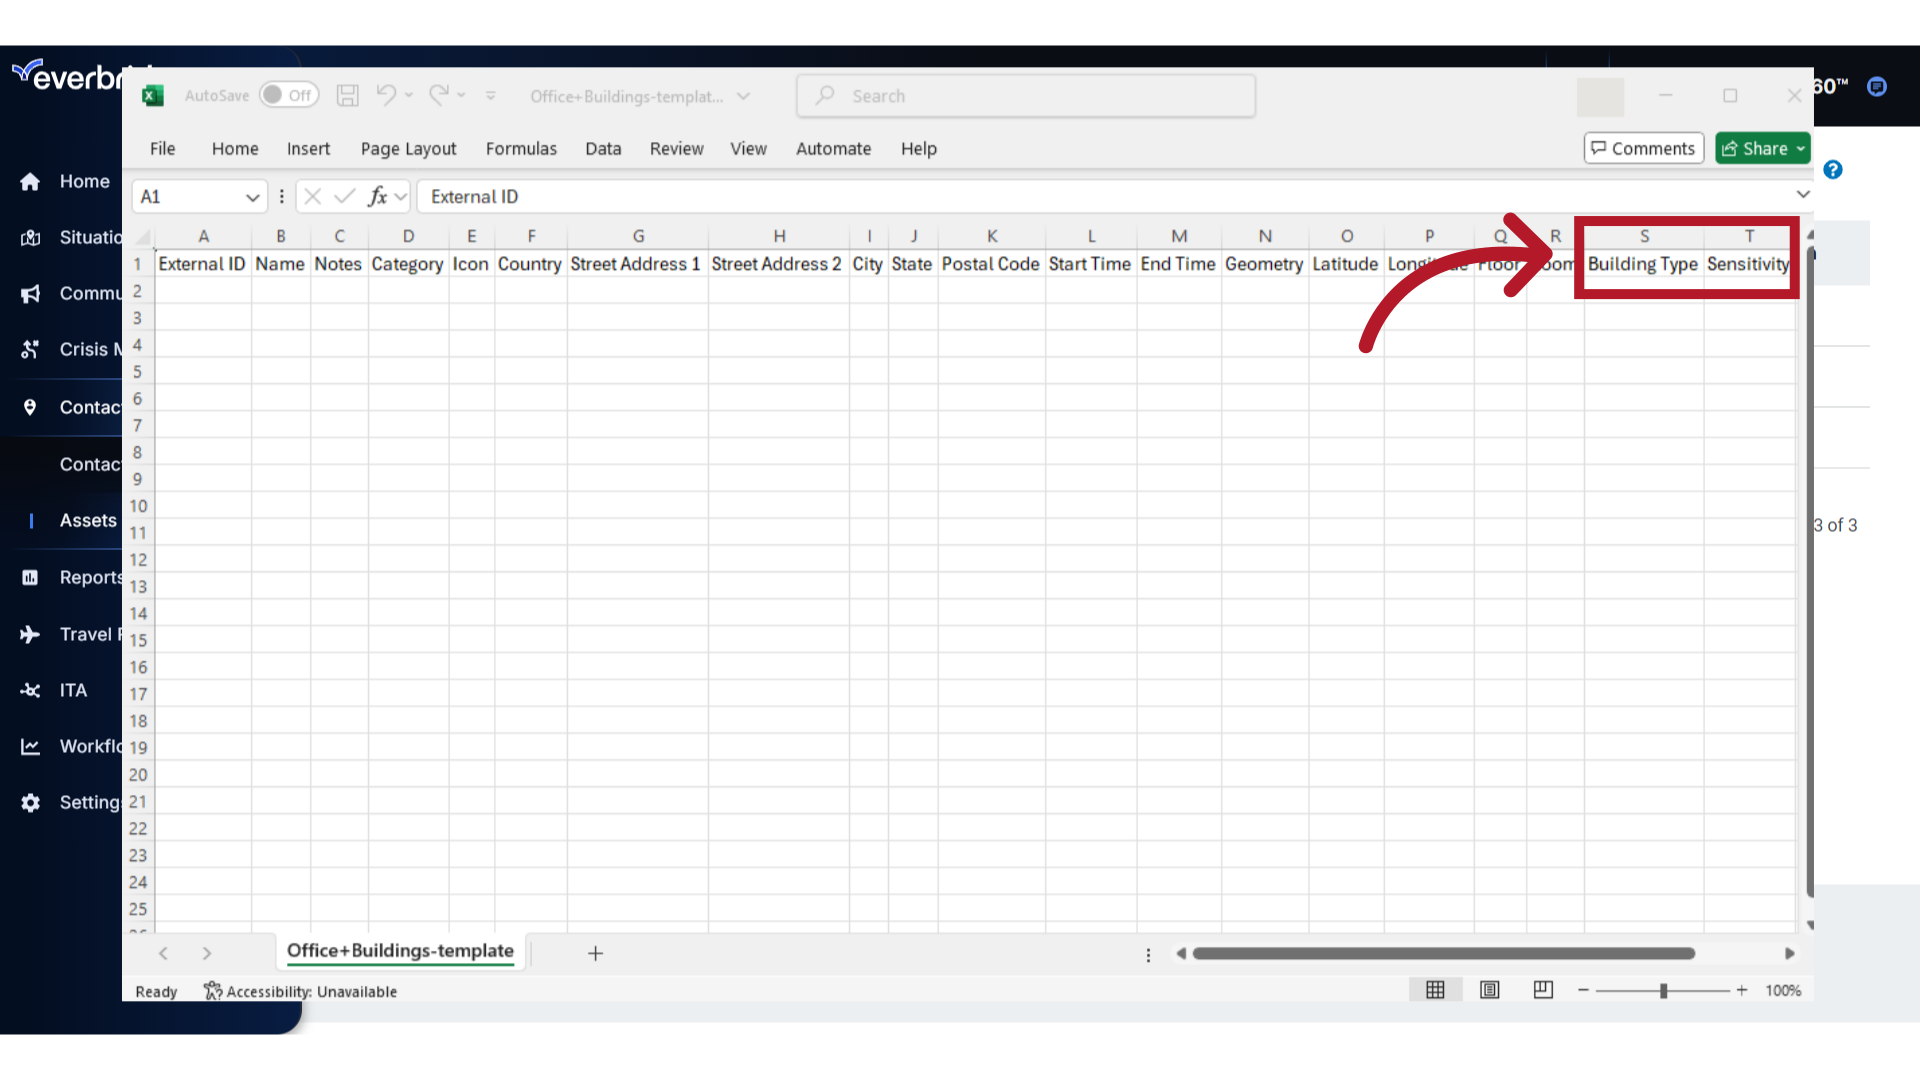
As well as any Custom Attributes configured for it.
7. Populate
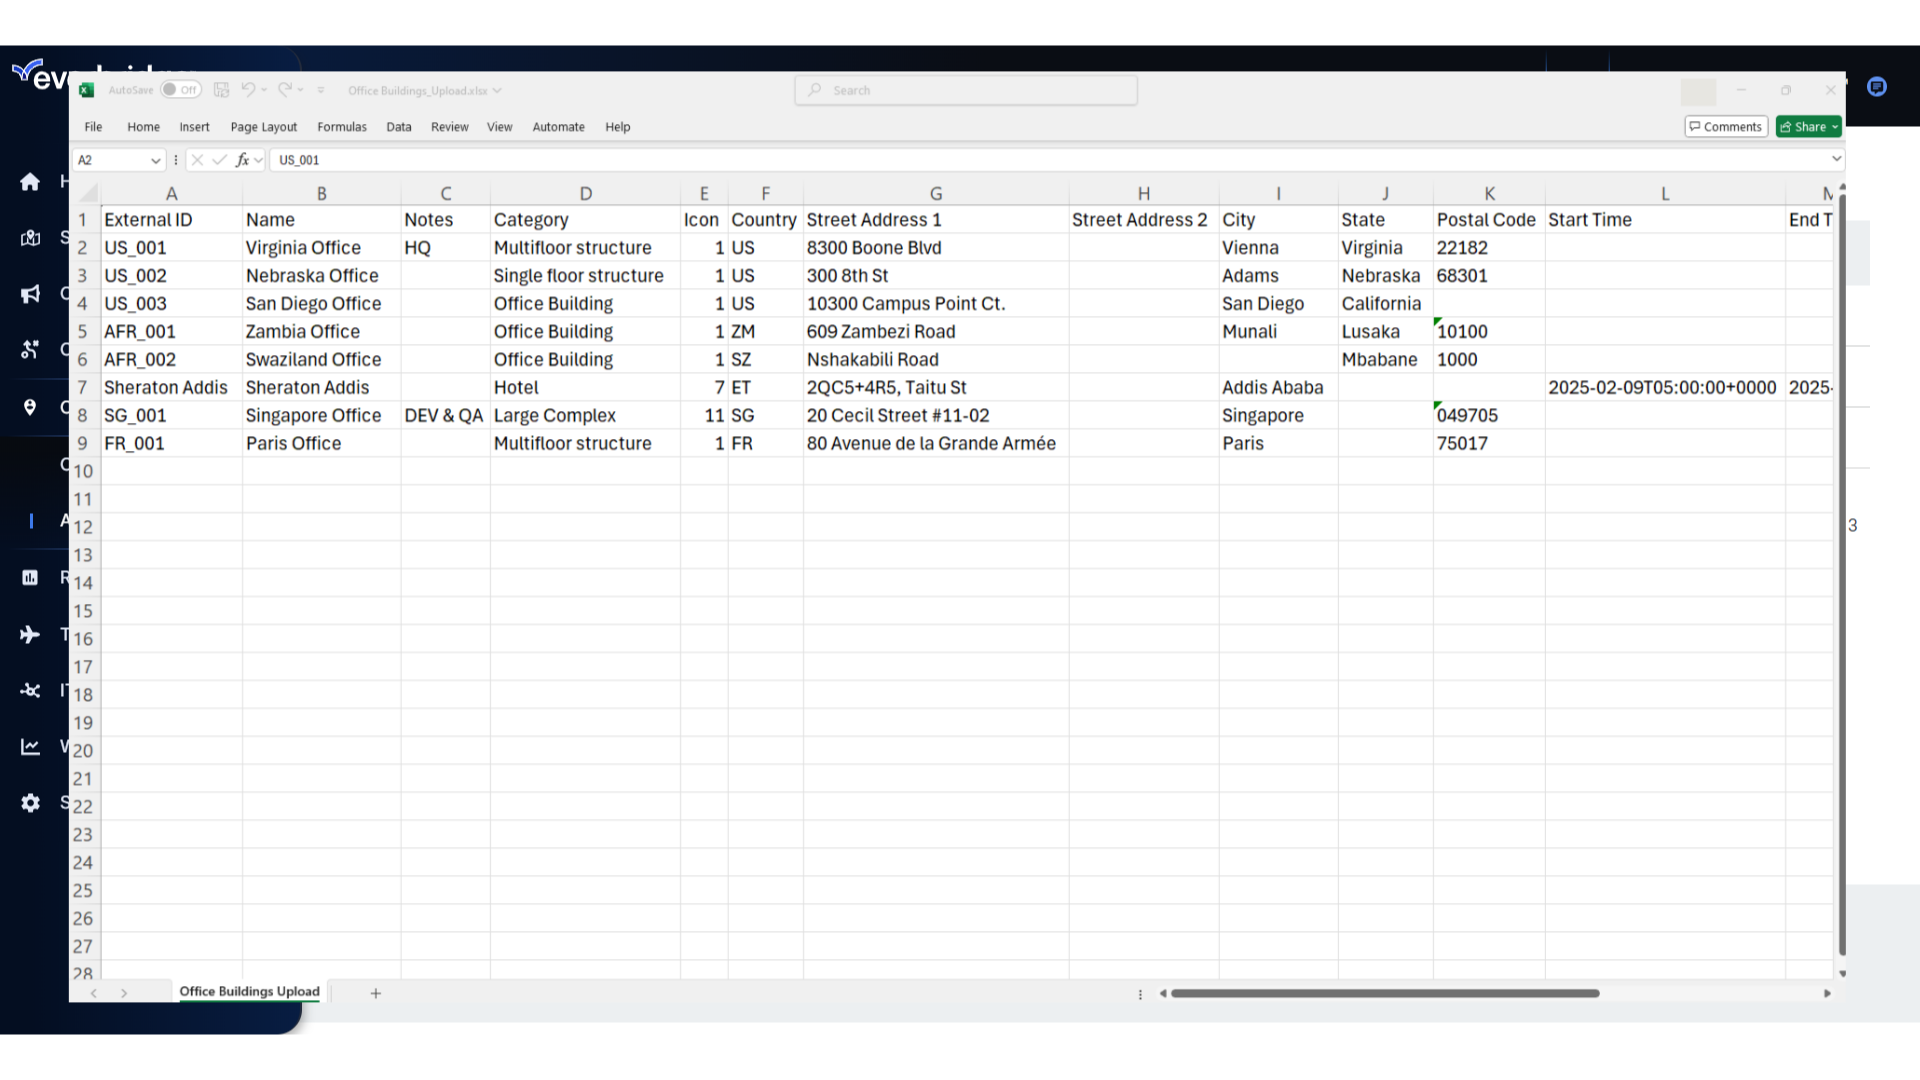
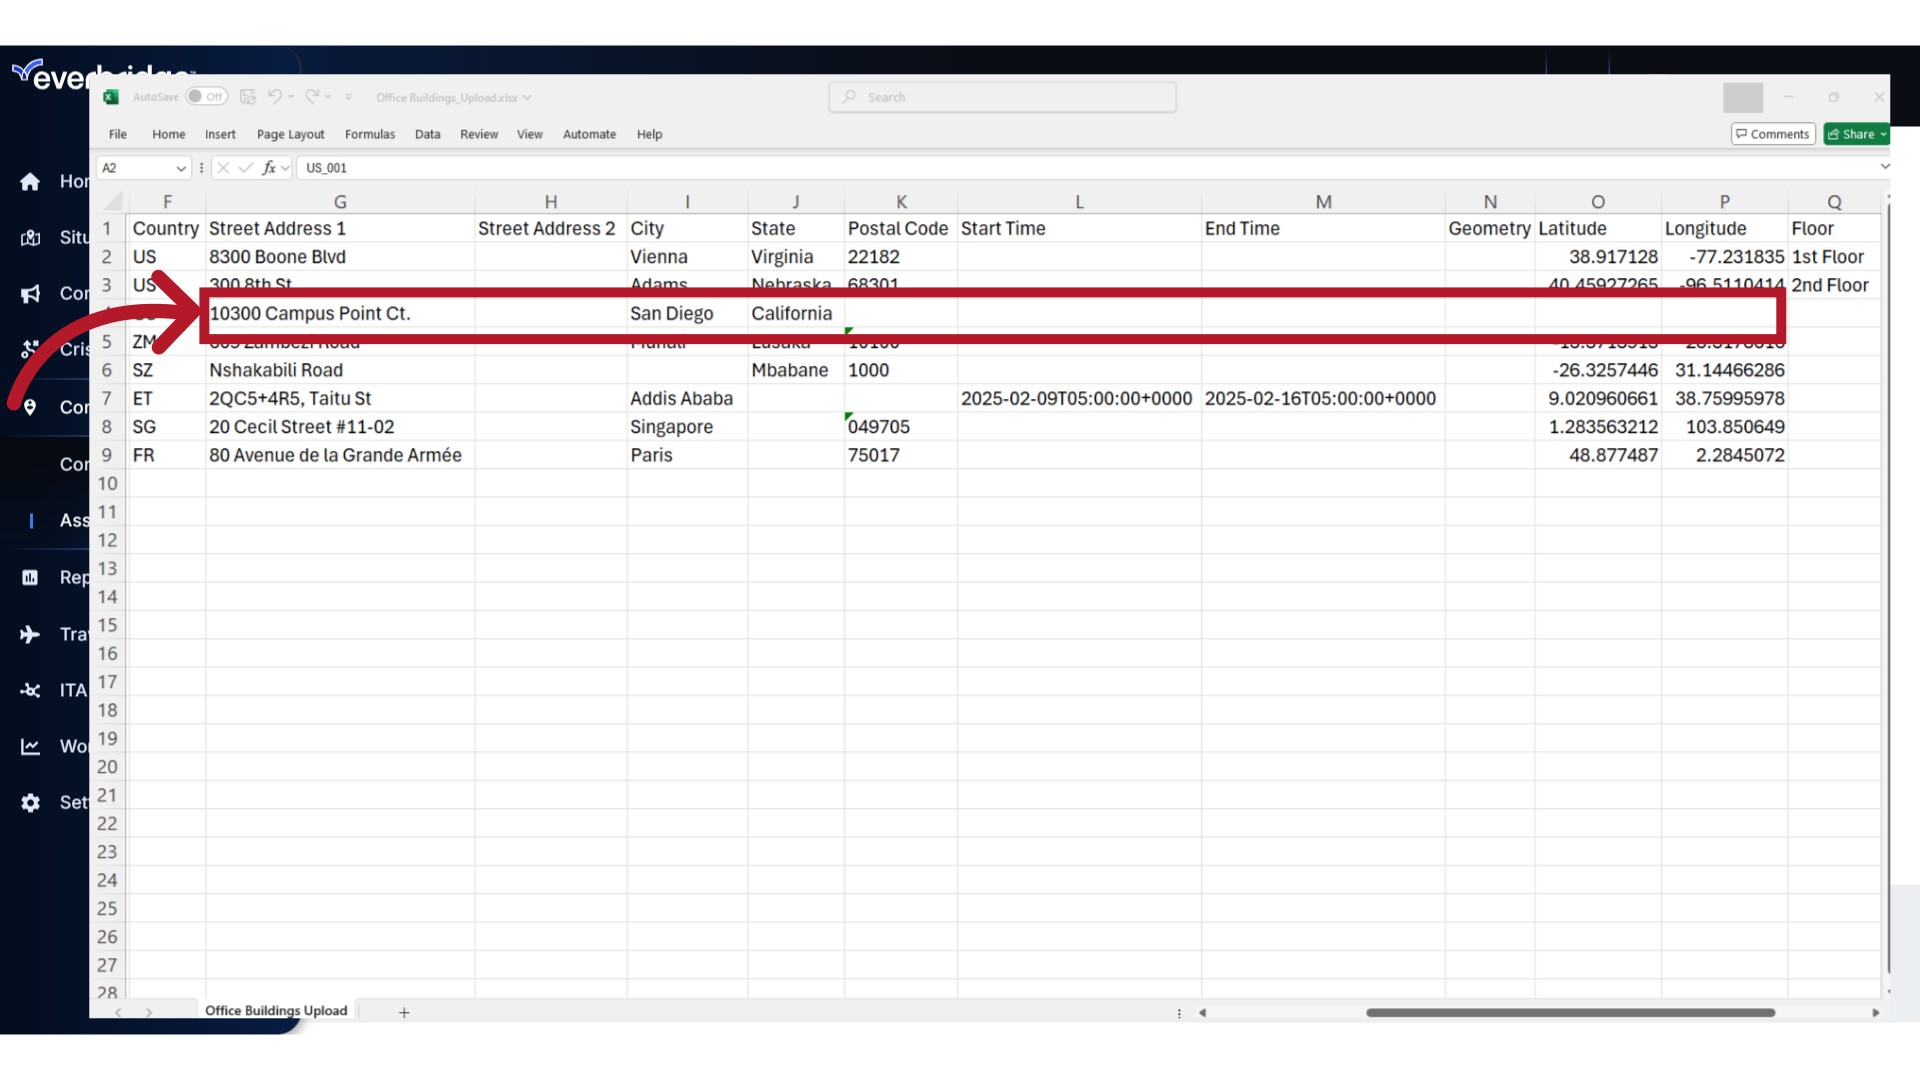
Now, add your asset details to the template. Each record should be populated in a single row.
8. Required Fields
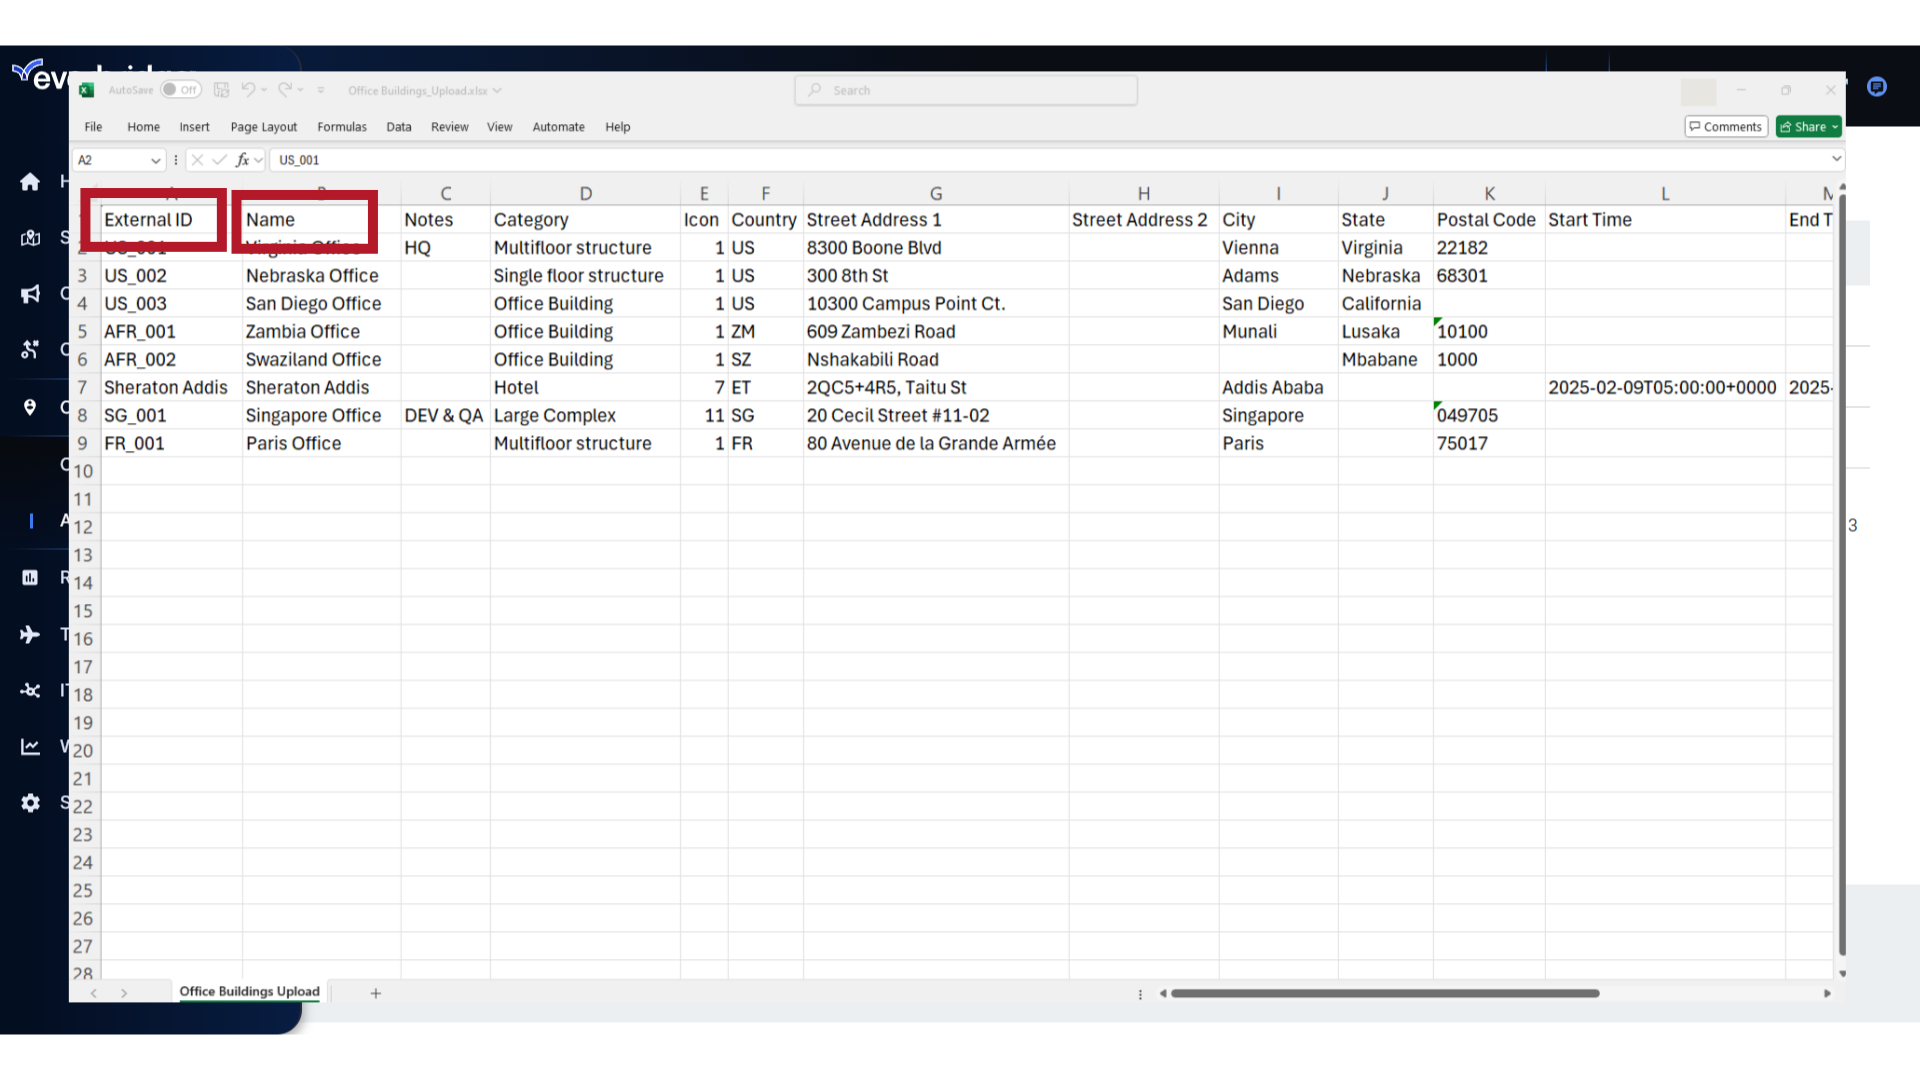
Required fields are External ID and Name.
9. Geocoding
Valid geometry is required for the asset to appear on the Universe or Visual Command Center maps. If latitude and longitude values cannot be provided for point-based assets, or geometry coordinates for polygon-based assets, the system will attempt to geocode the location during upload, based on the other address details provided for the record.
10. Access
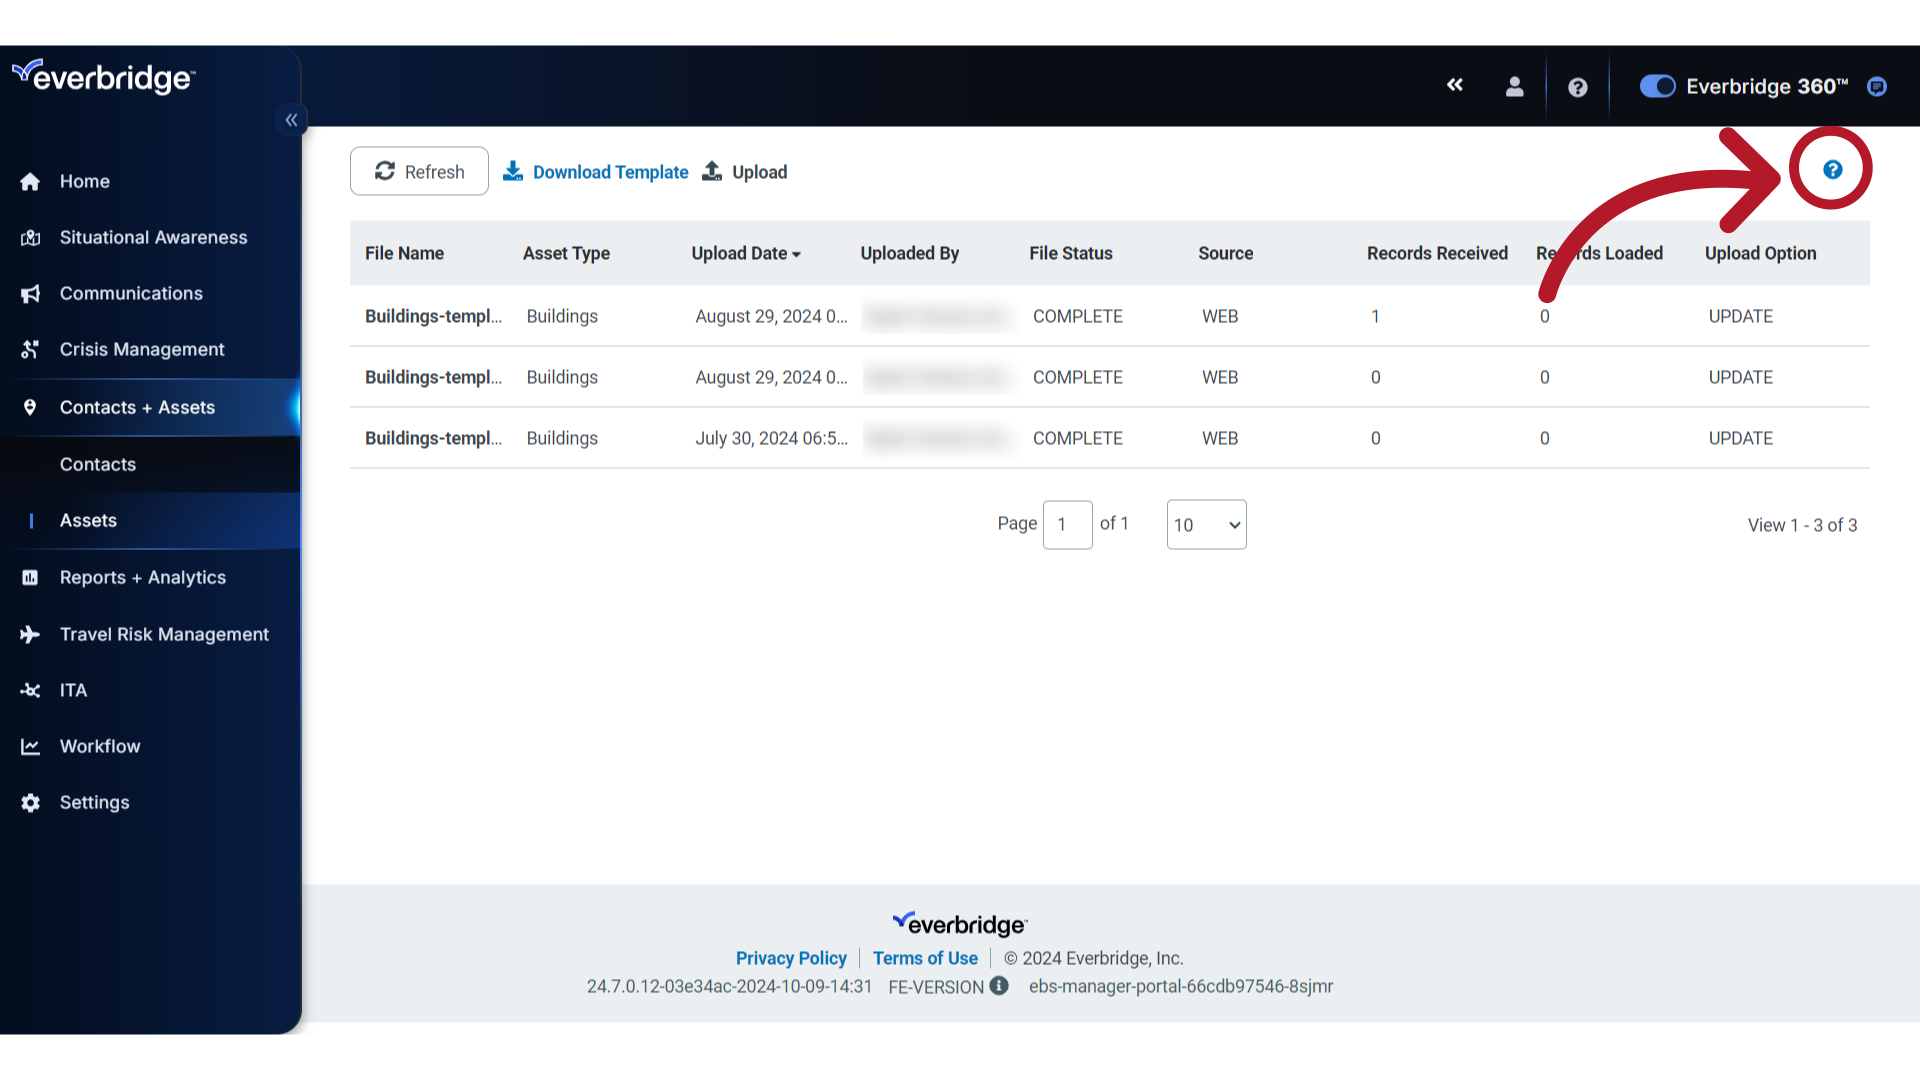
If you need additional guidance on formatting the template, click the Help icon,
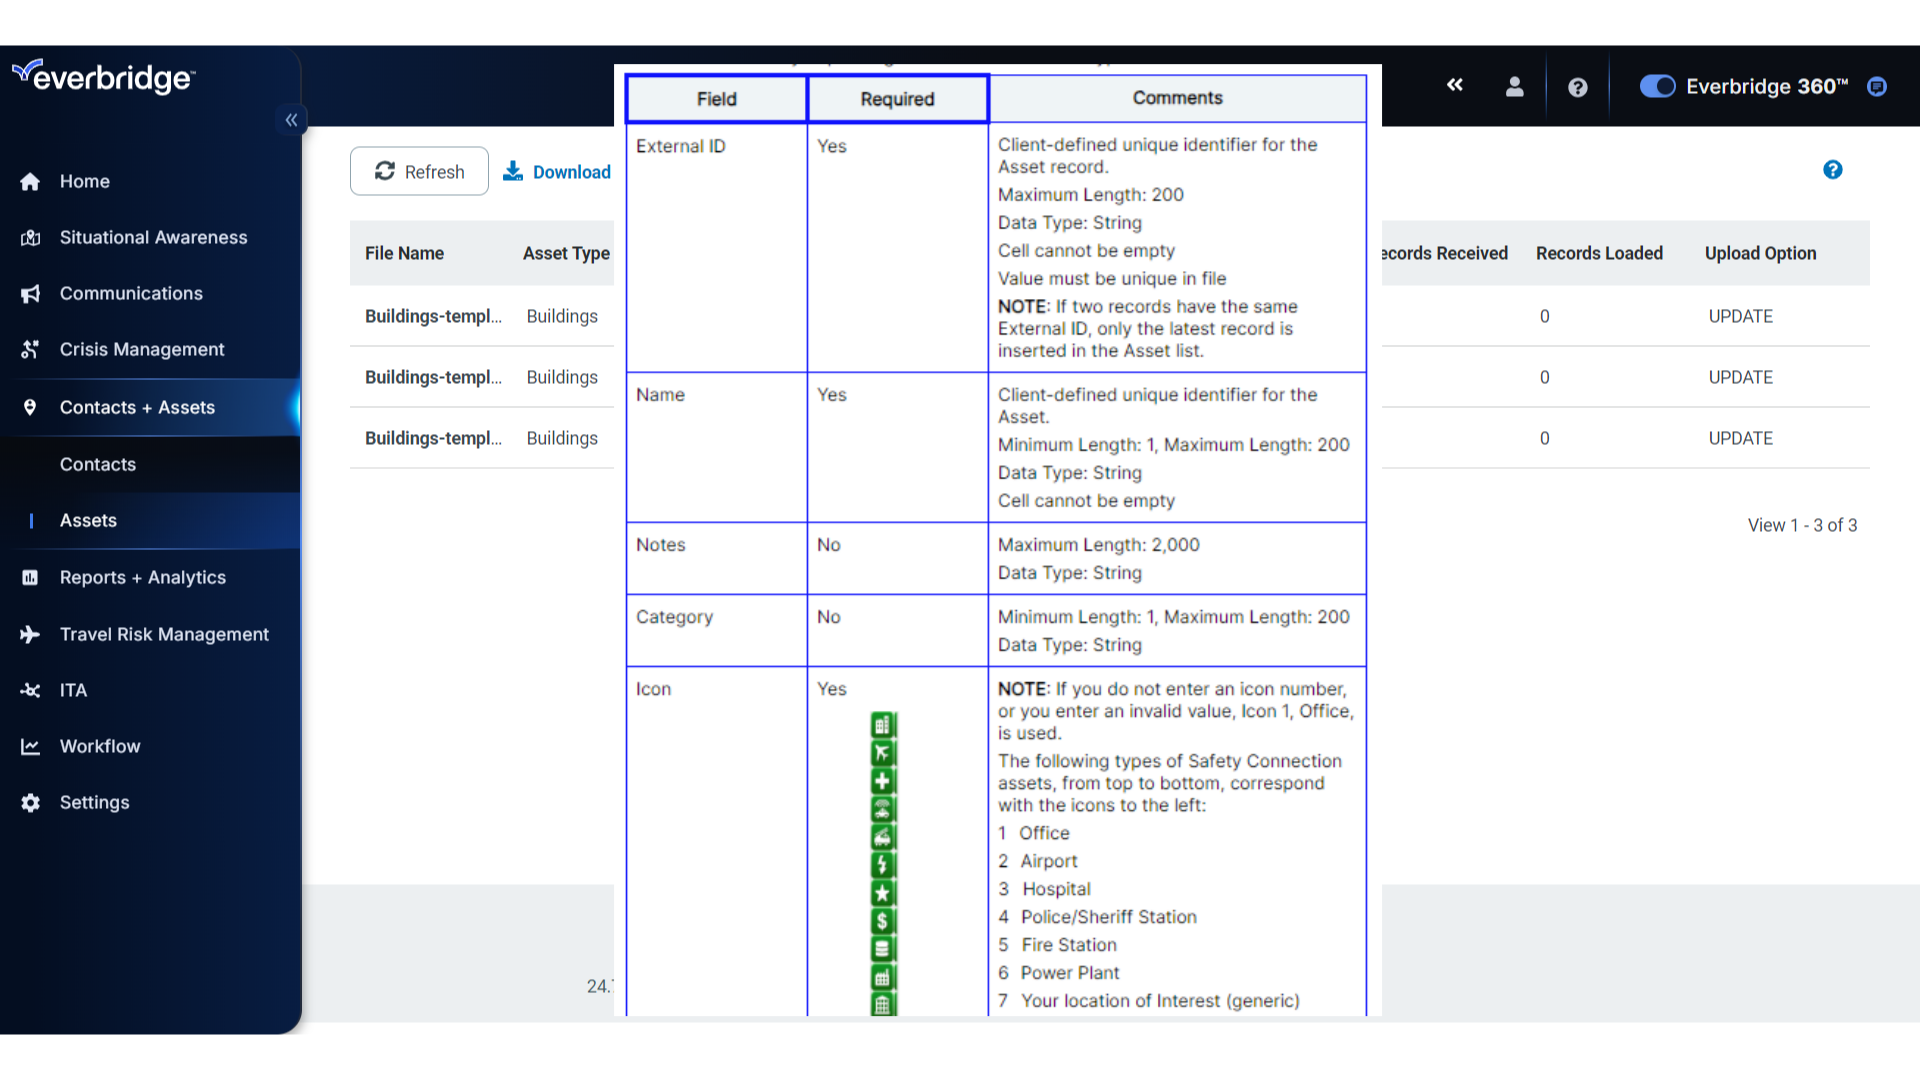
11. Data Table
which will direct you to a data table that details the requirements formatting details.
12. Upload
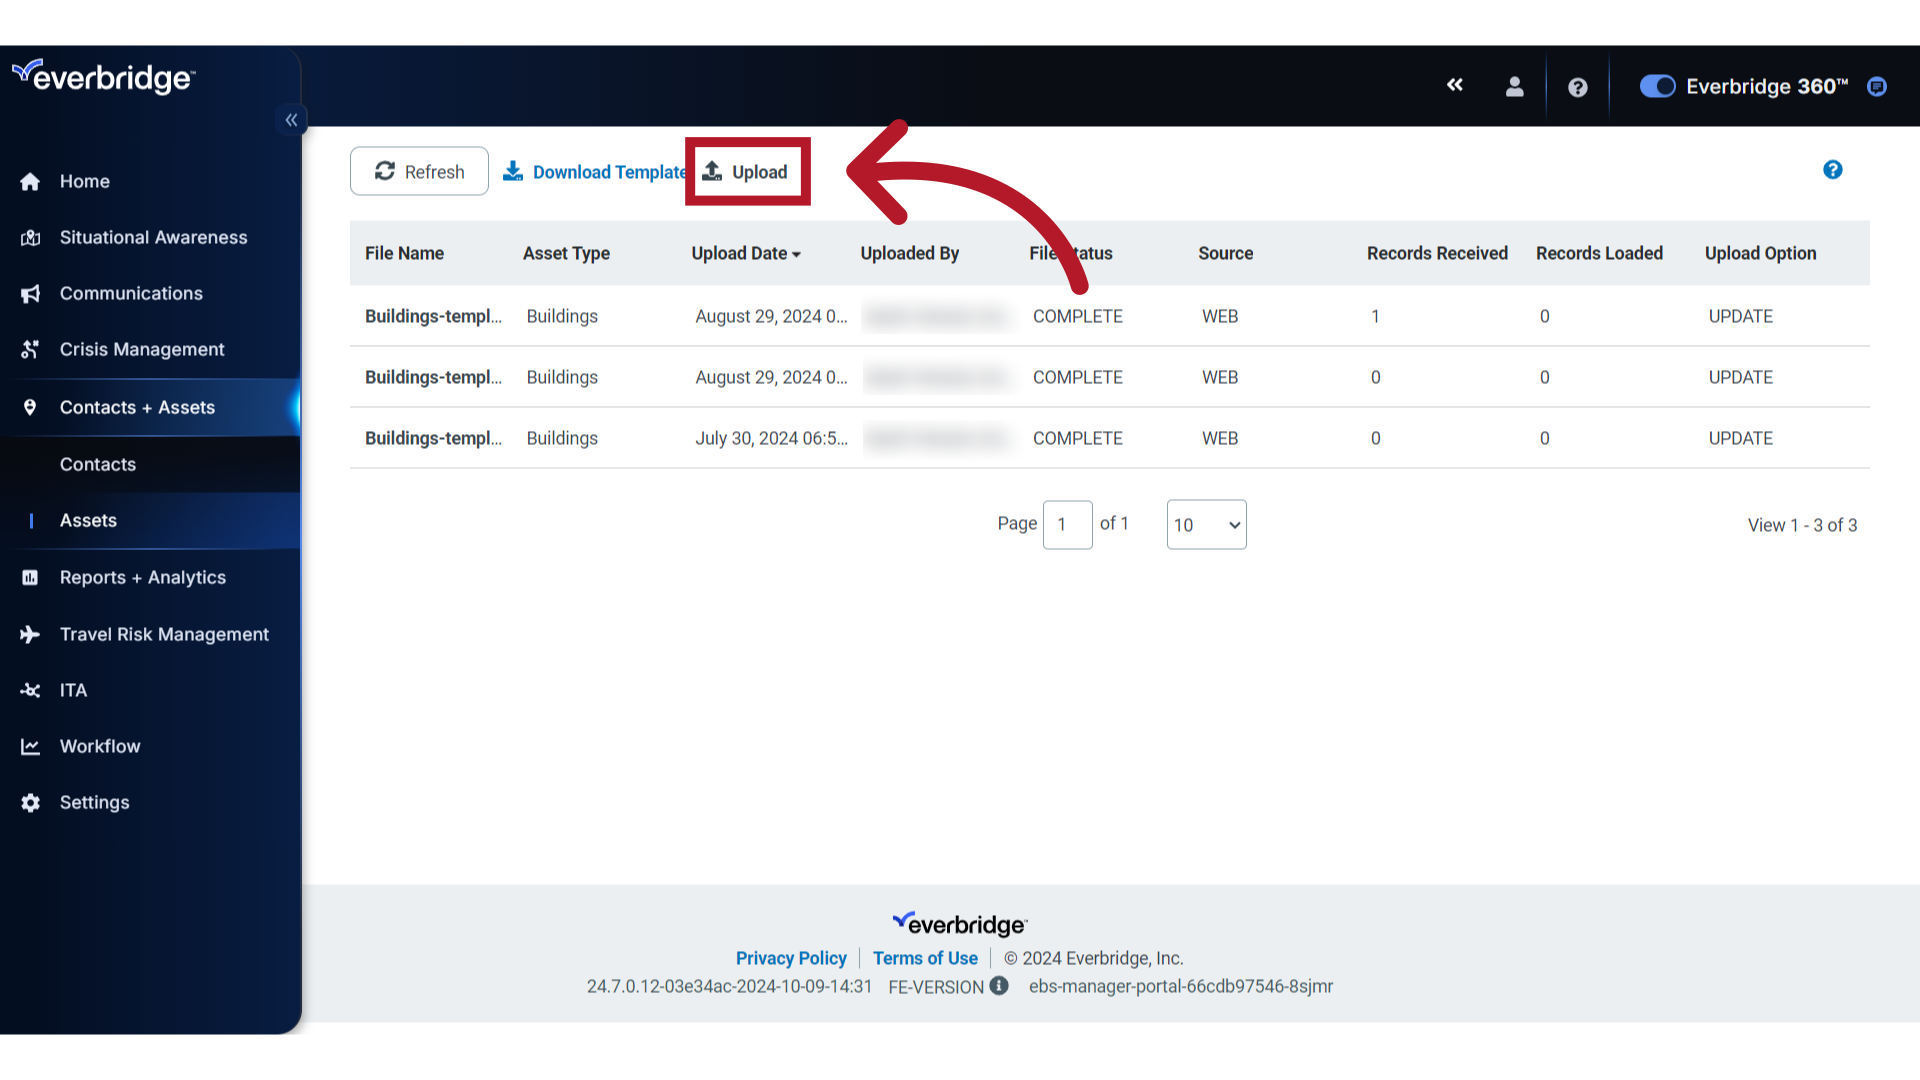
Once your CSV file has been prepared and saved, click Upload.
13. Select
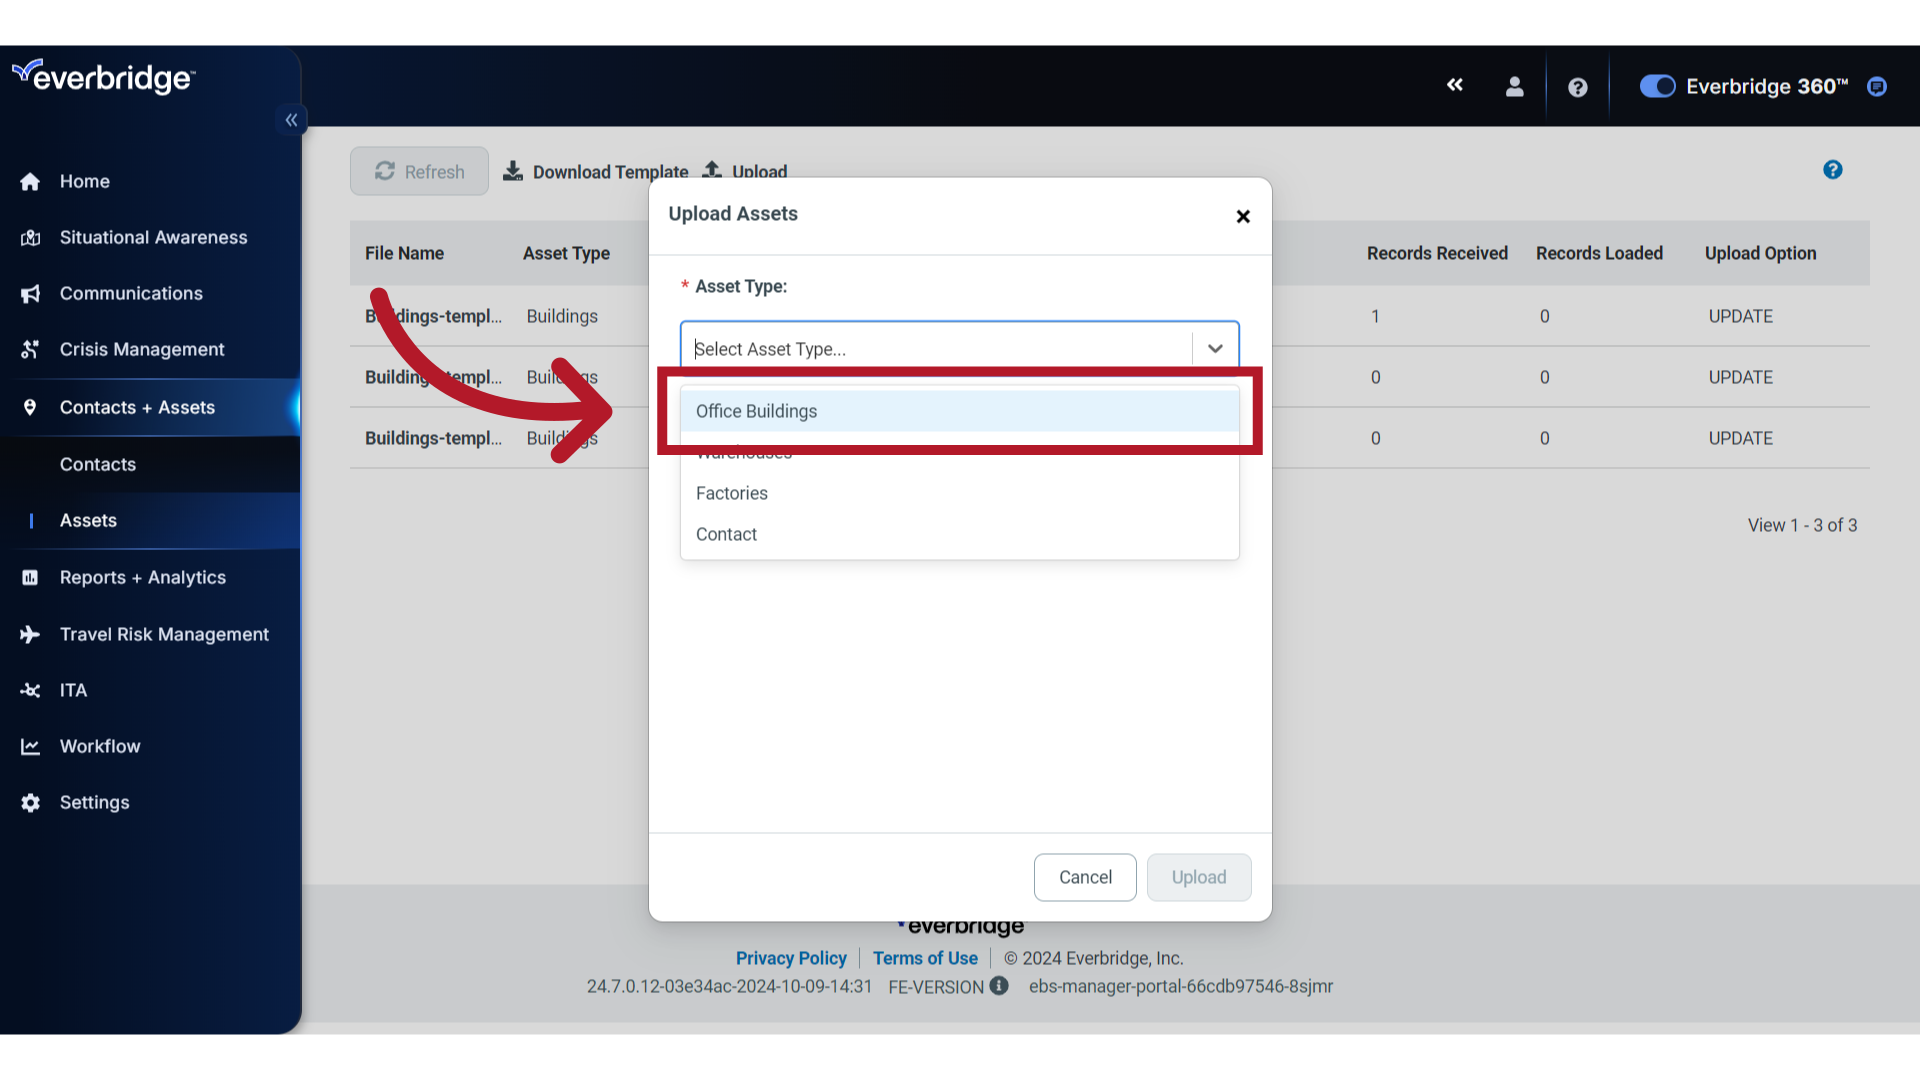
Choose the corresponding Asset Type from the selection list.
14. Select
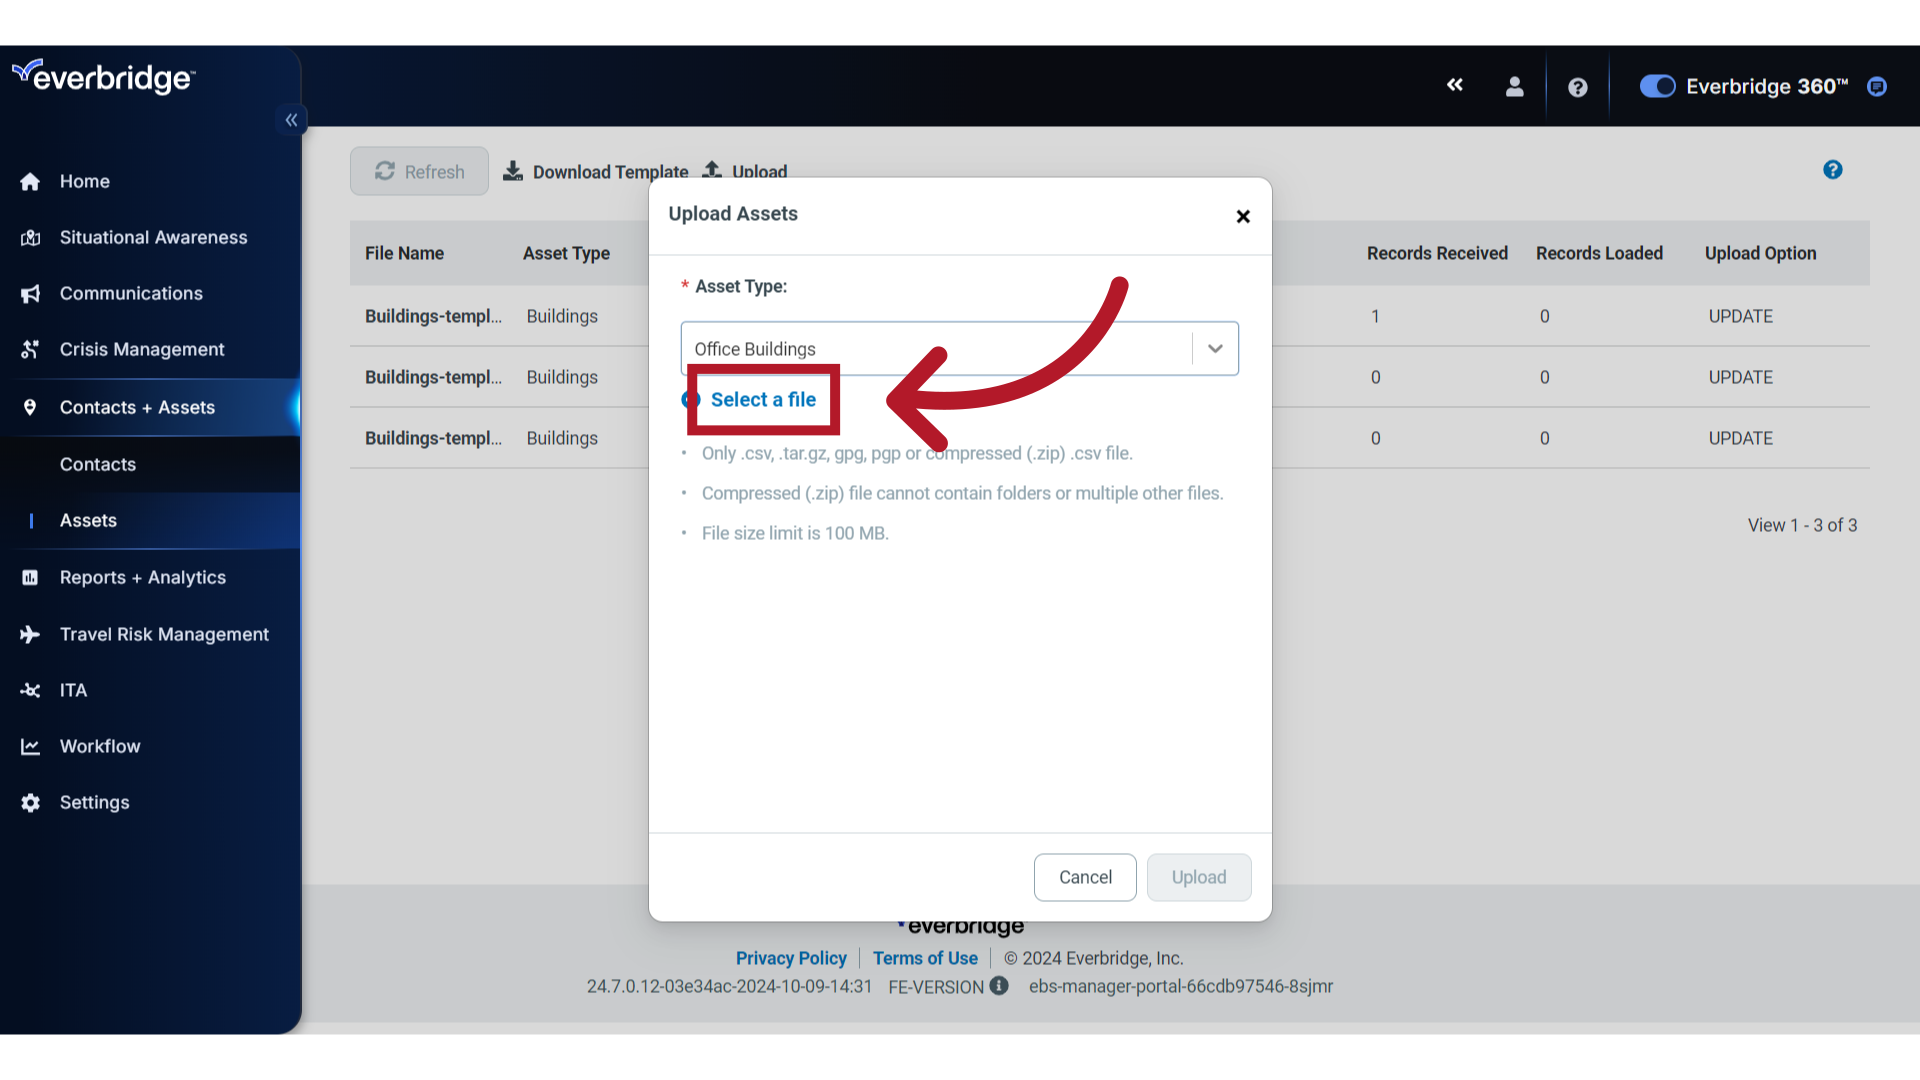
and select the file you saved to be uploaded.
15. Remove
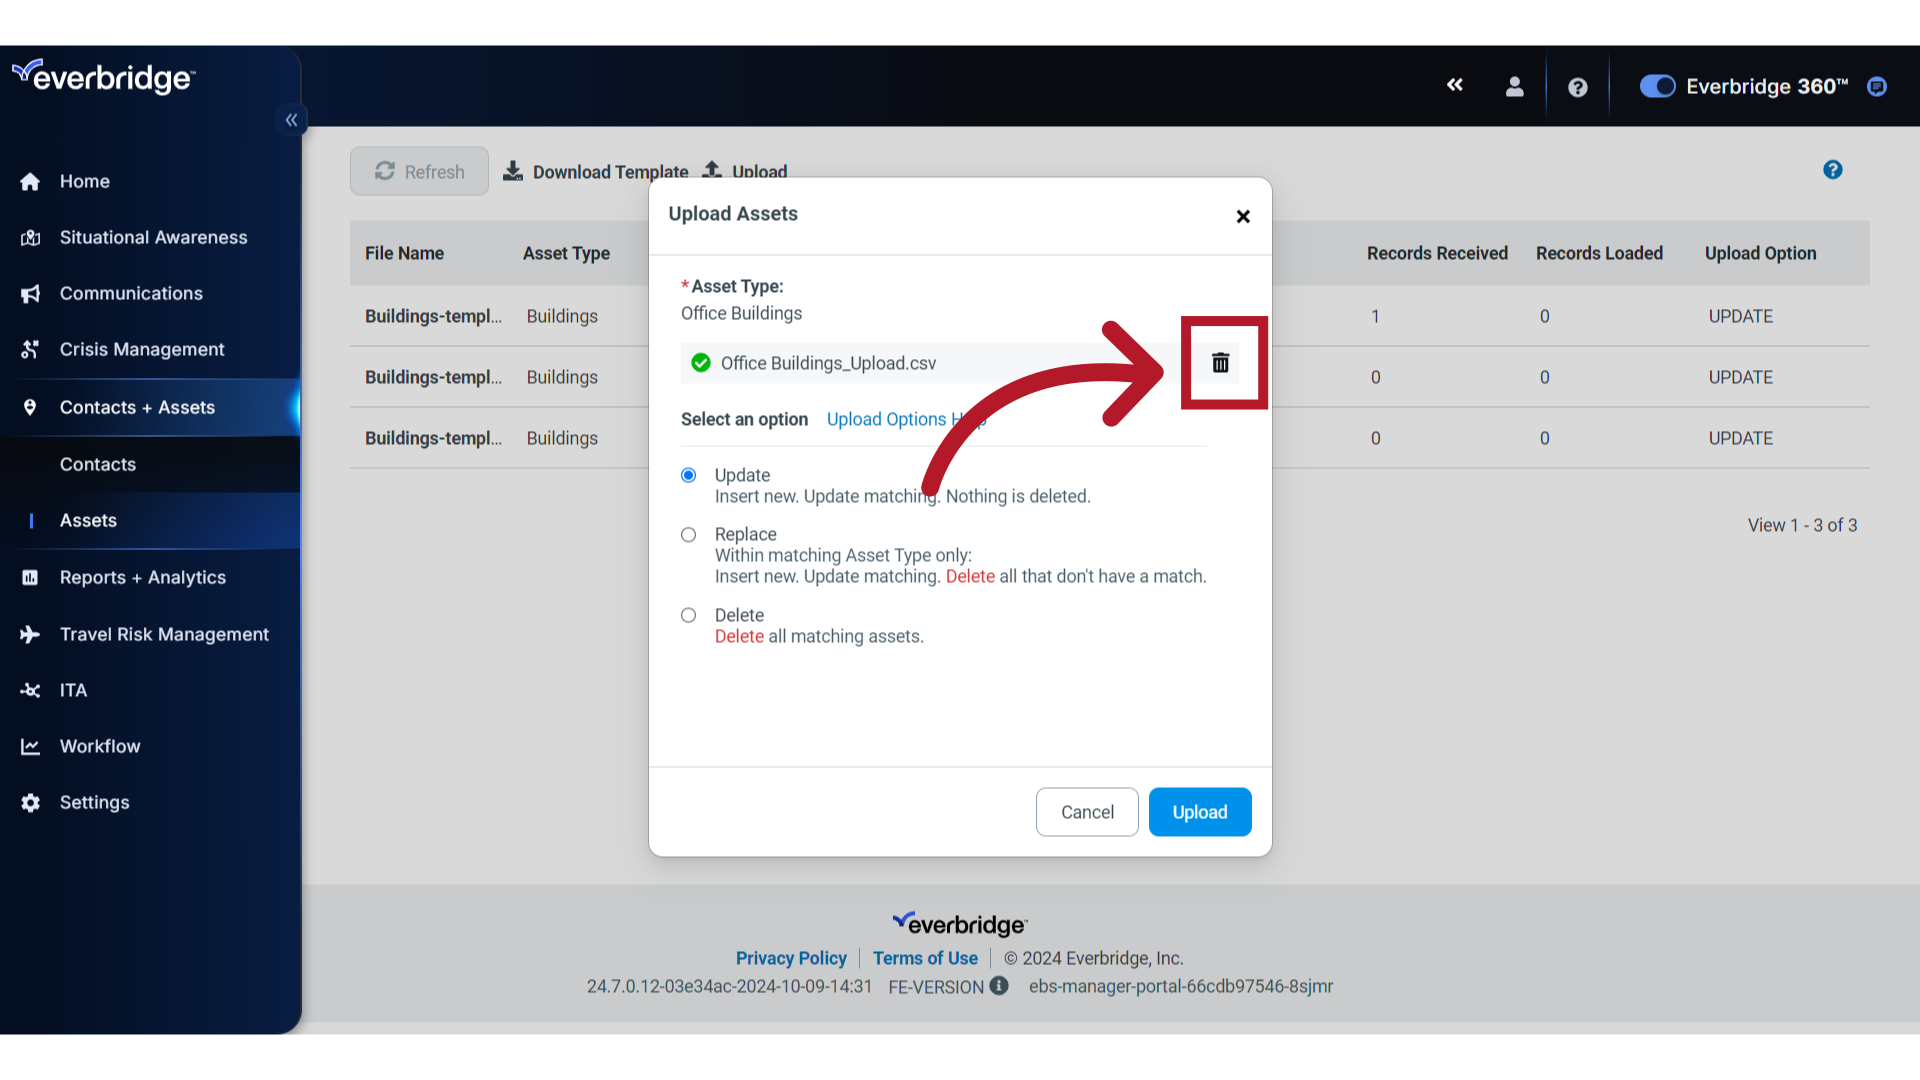
If you selected an incorrect file, you can click the Trash icon to remove it and reselect.
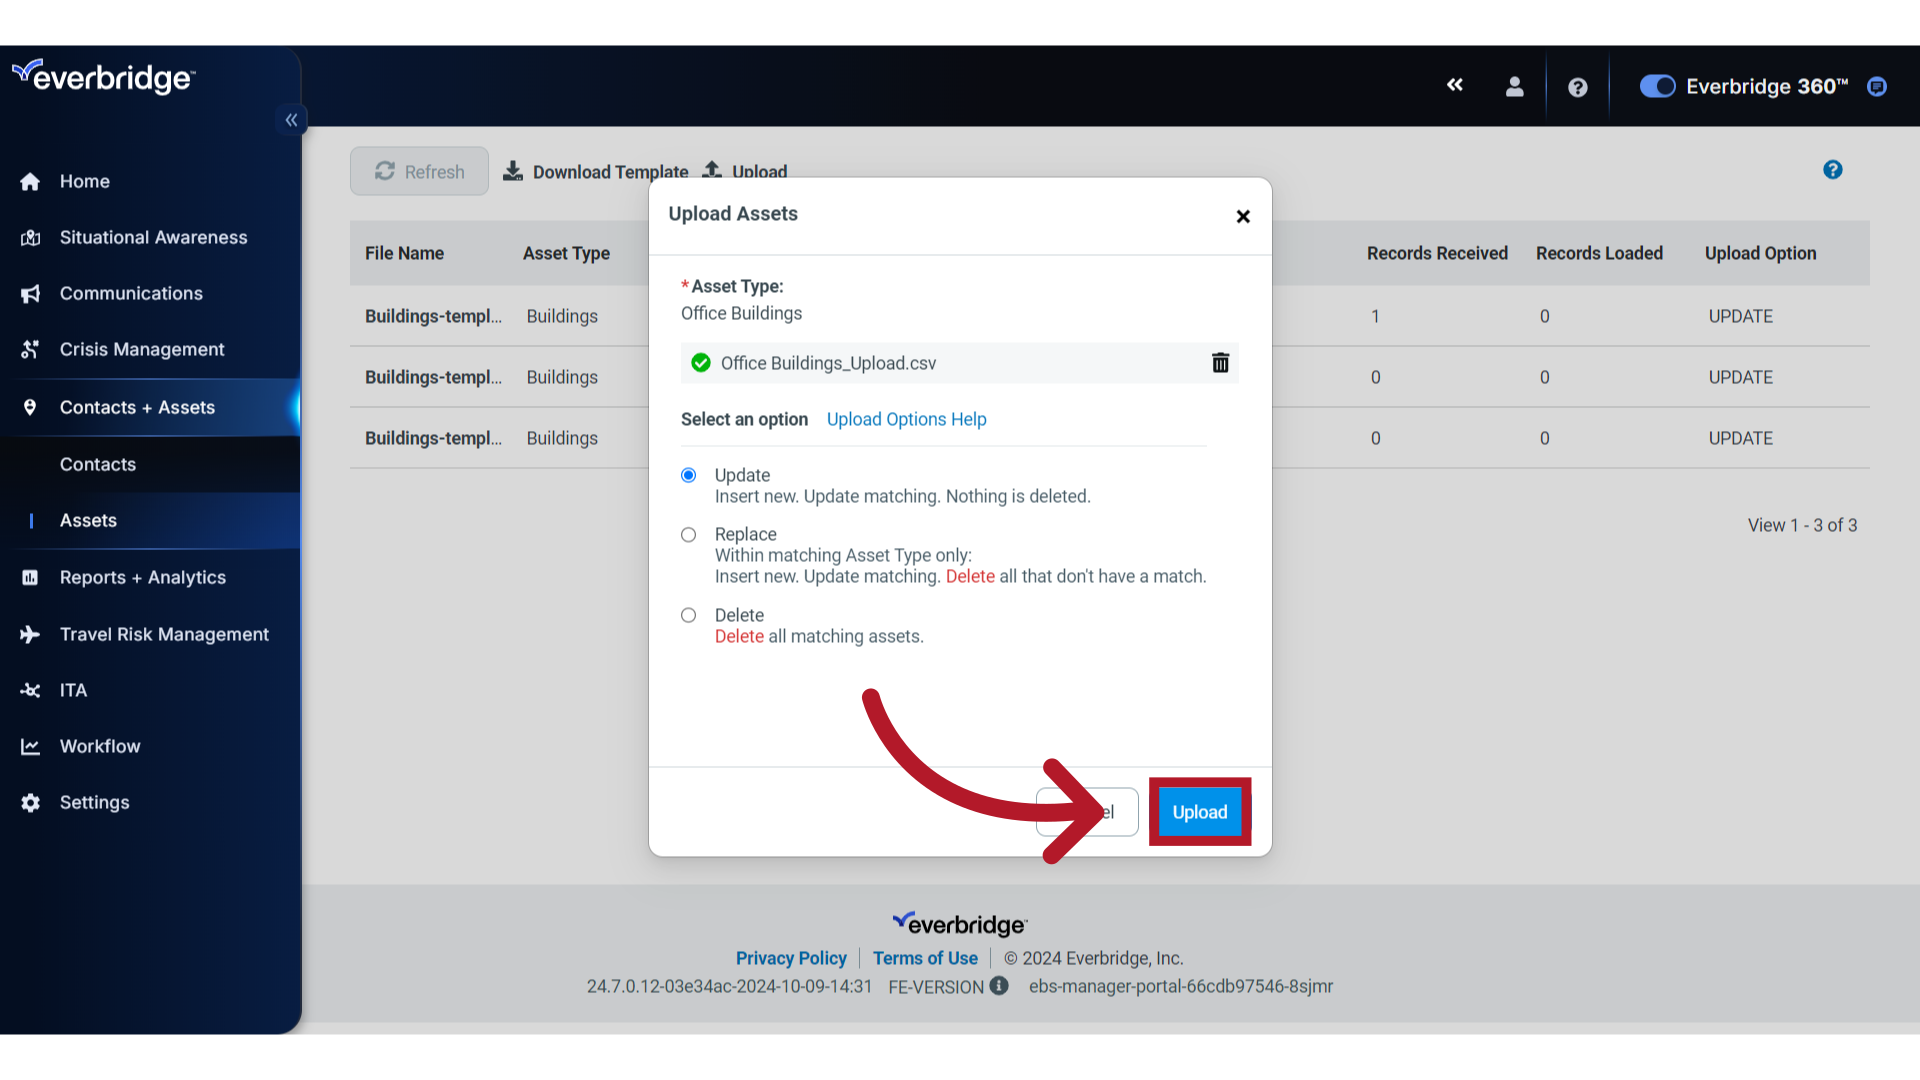
16. Upload Options
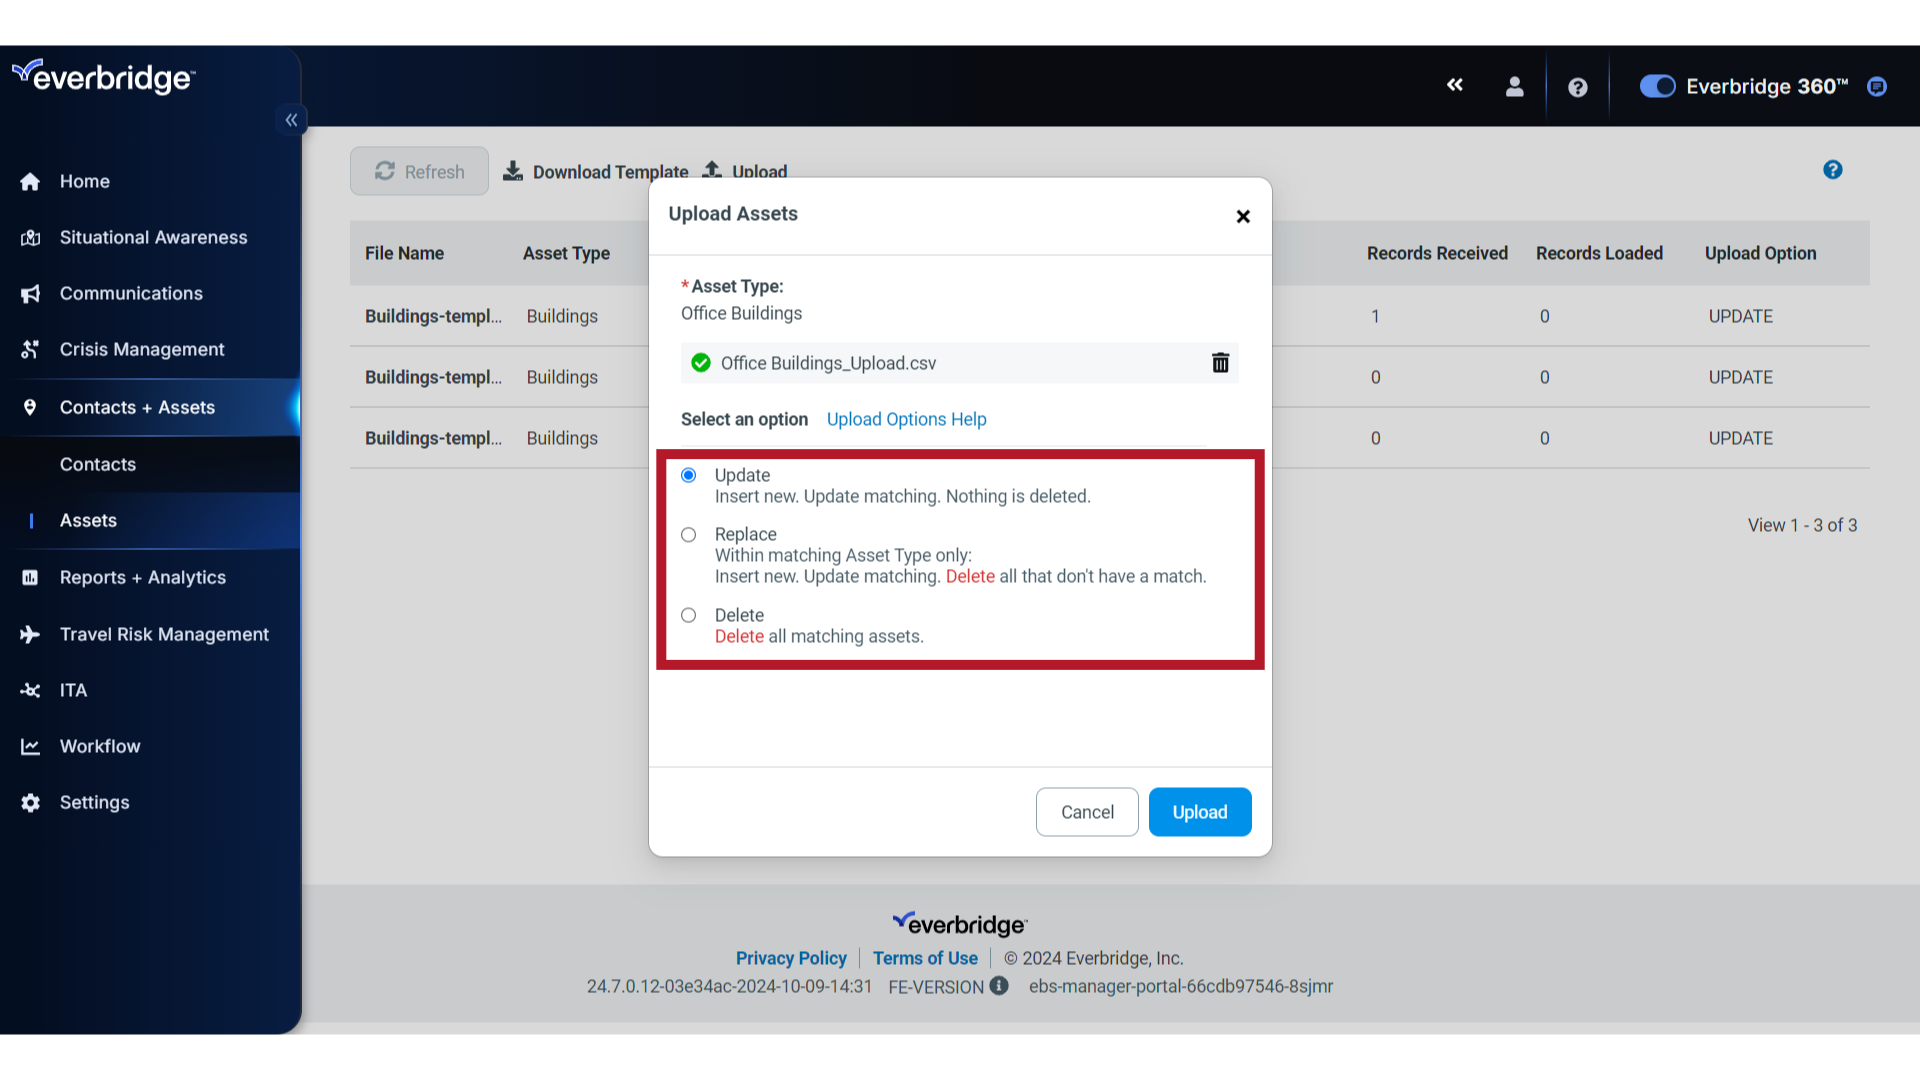
Below the selected file, there are three upload options, each with an explanation of its functionality below it.
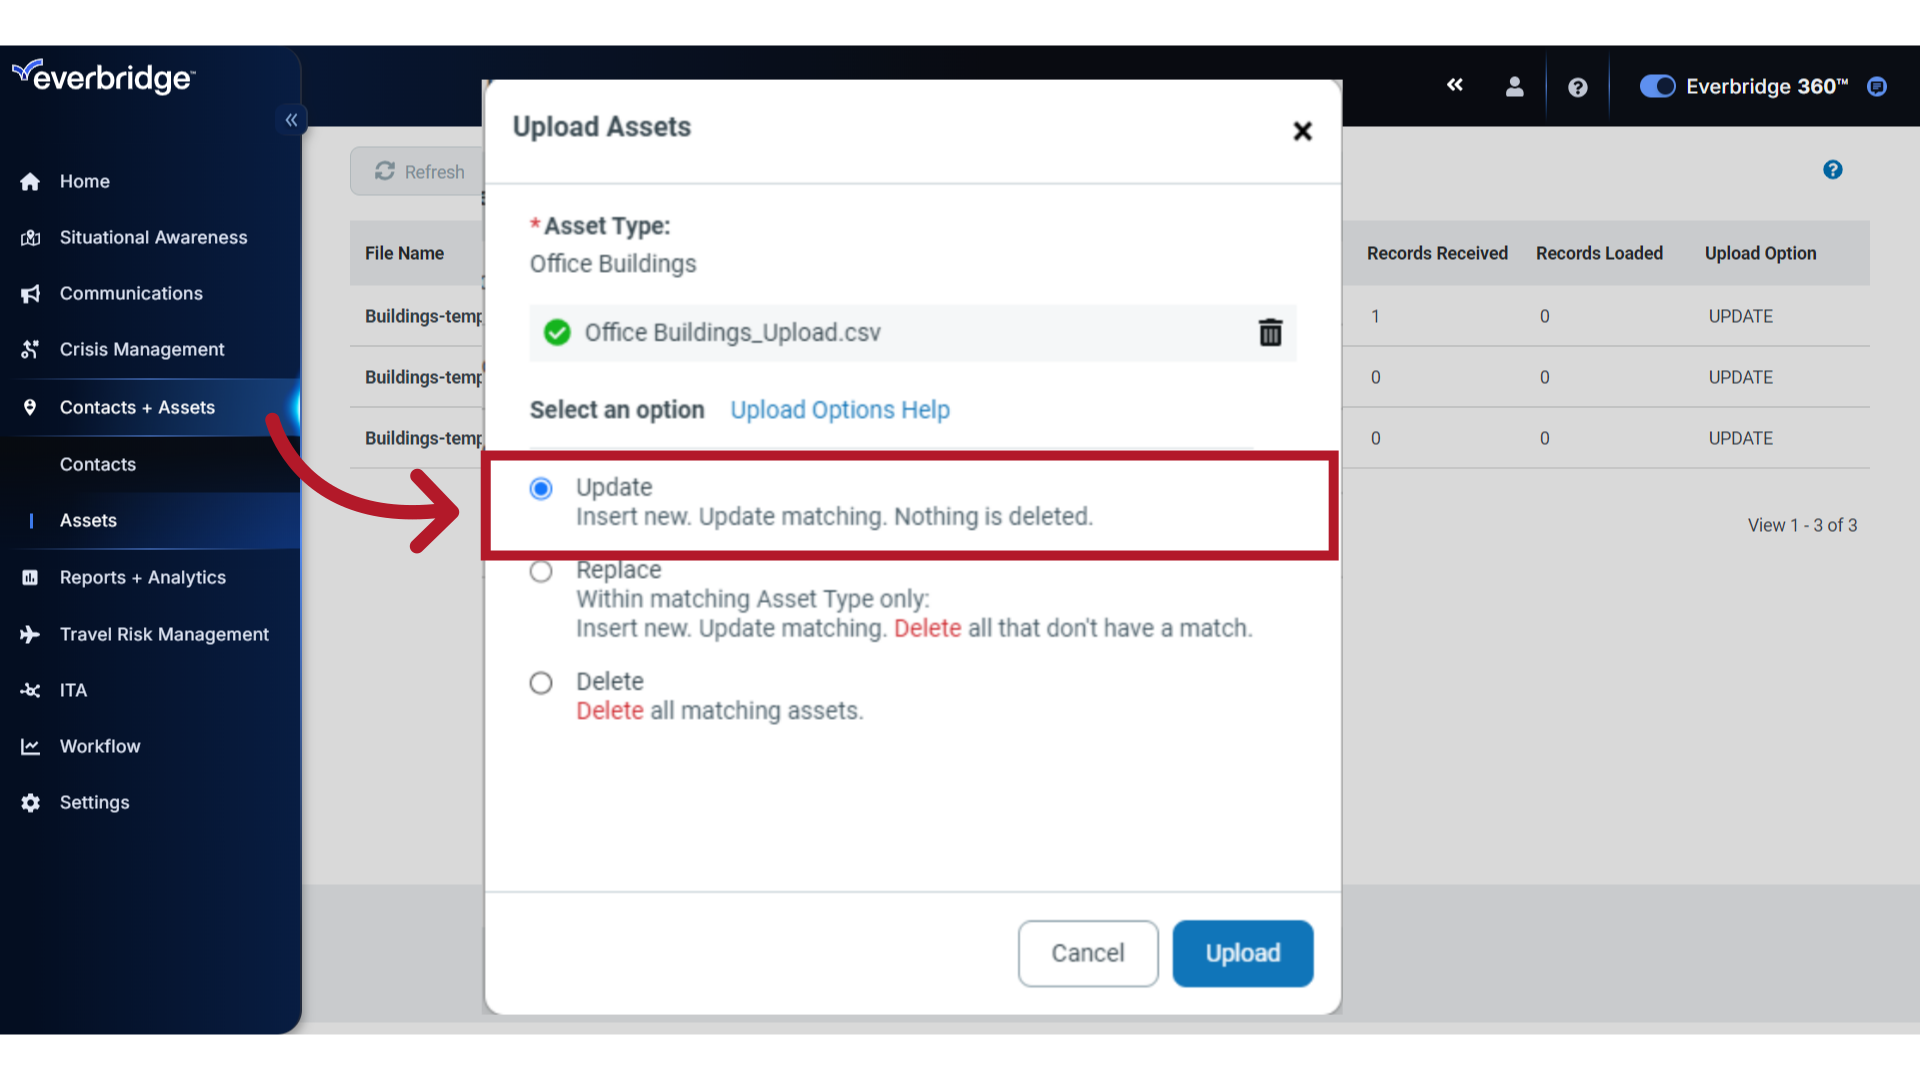
17. Update
The Update option only inserts new asset records and updates existing asset records. The Update option will not delete any assets from your organization.
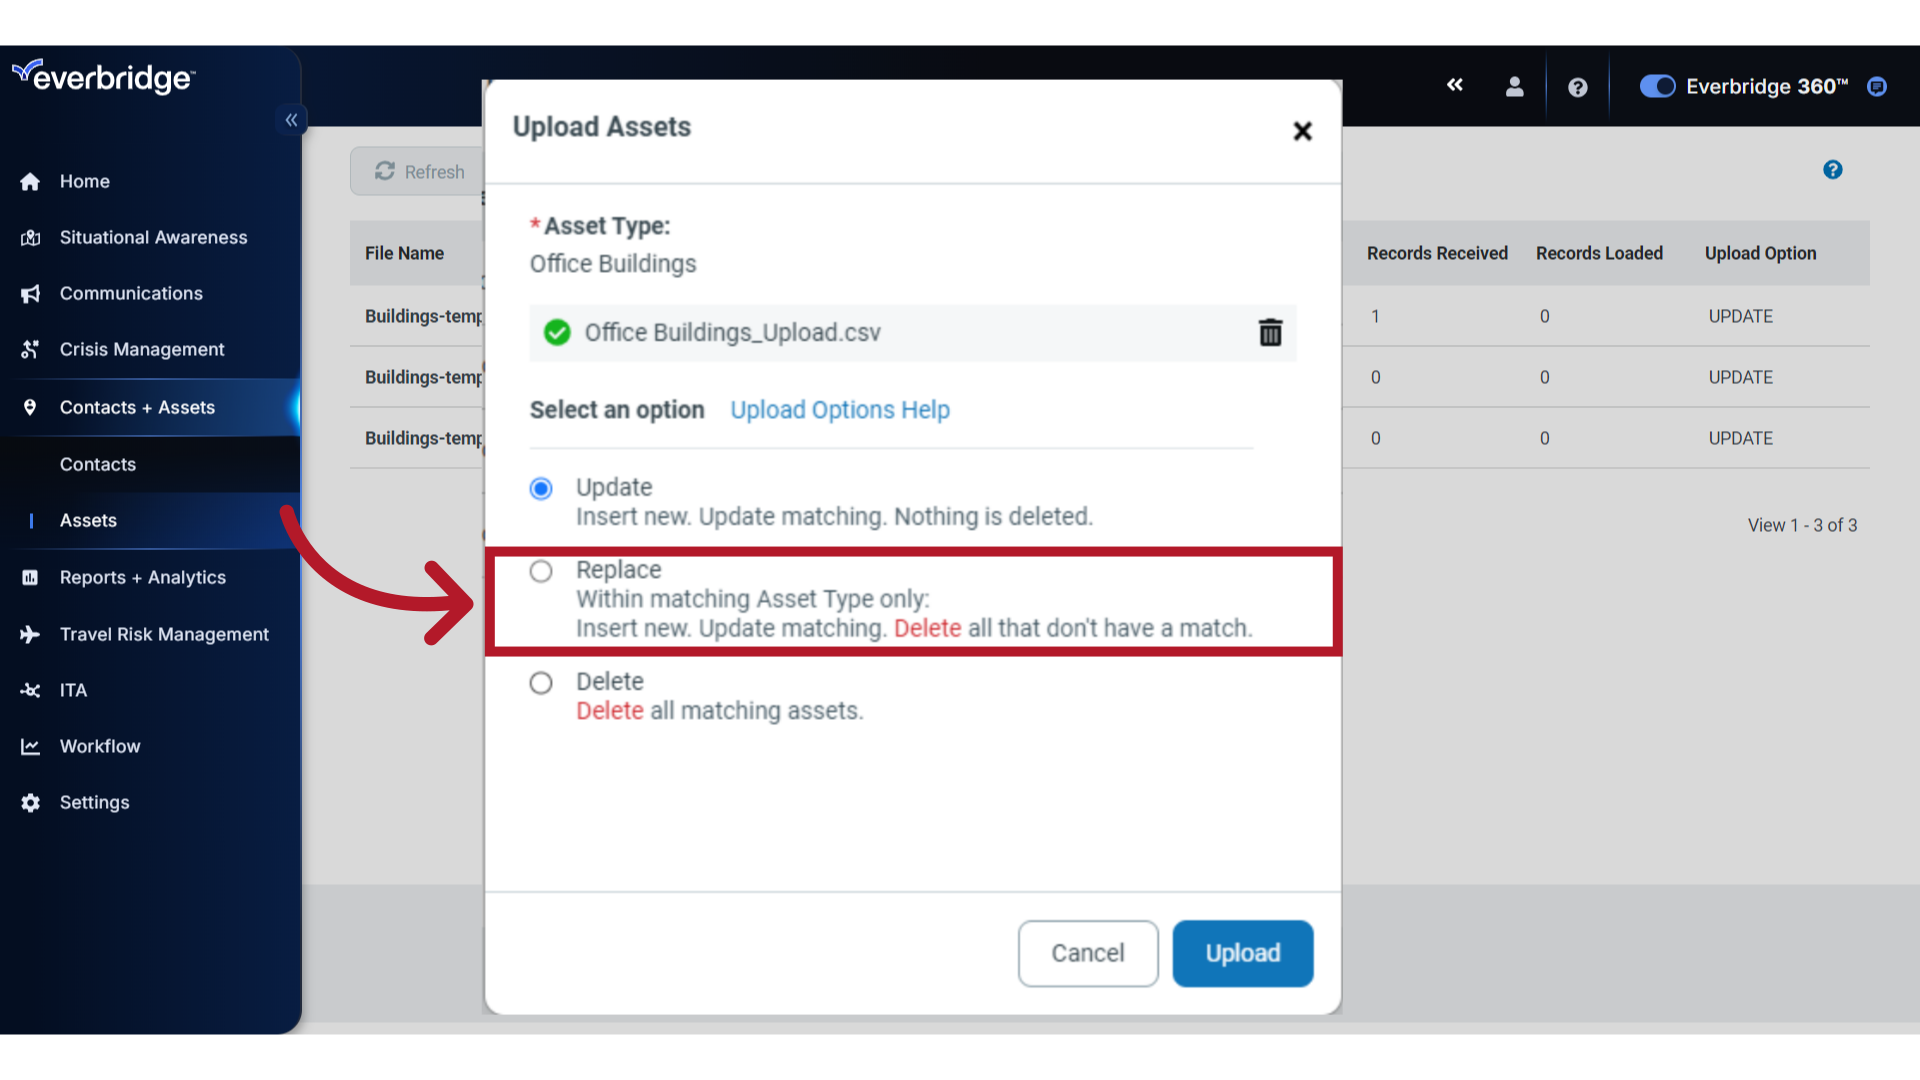
18. Replace
The Replace option replaces all asset records which have the same Asset Type of your CSV file. It will add new records, update matched records, and then delete all other records in your organization for that same Asset Type which do not have a match within your uploaded file.
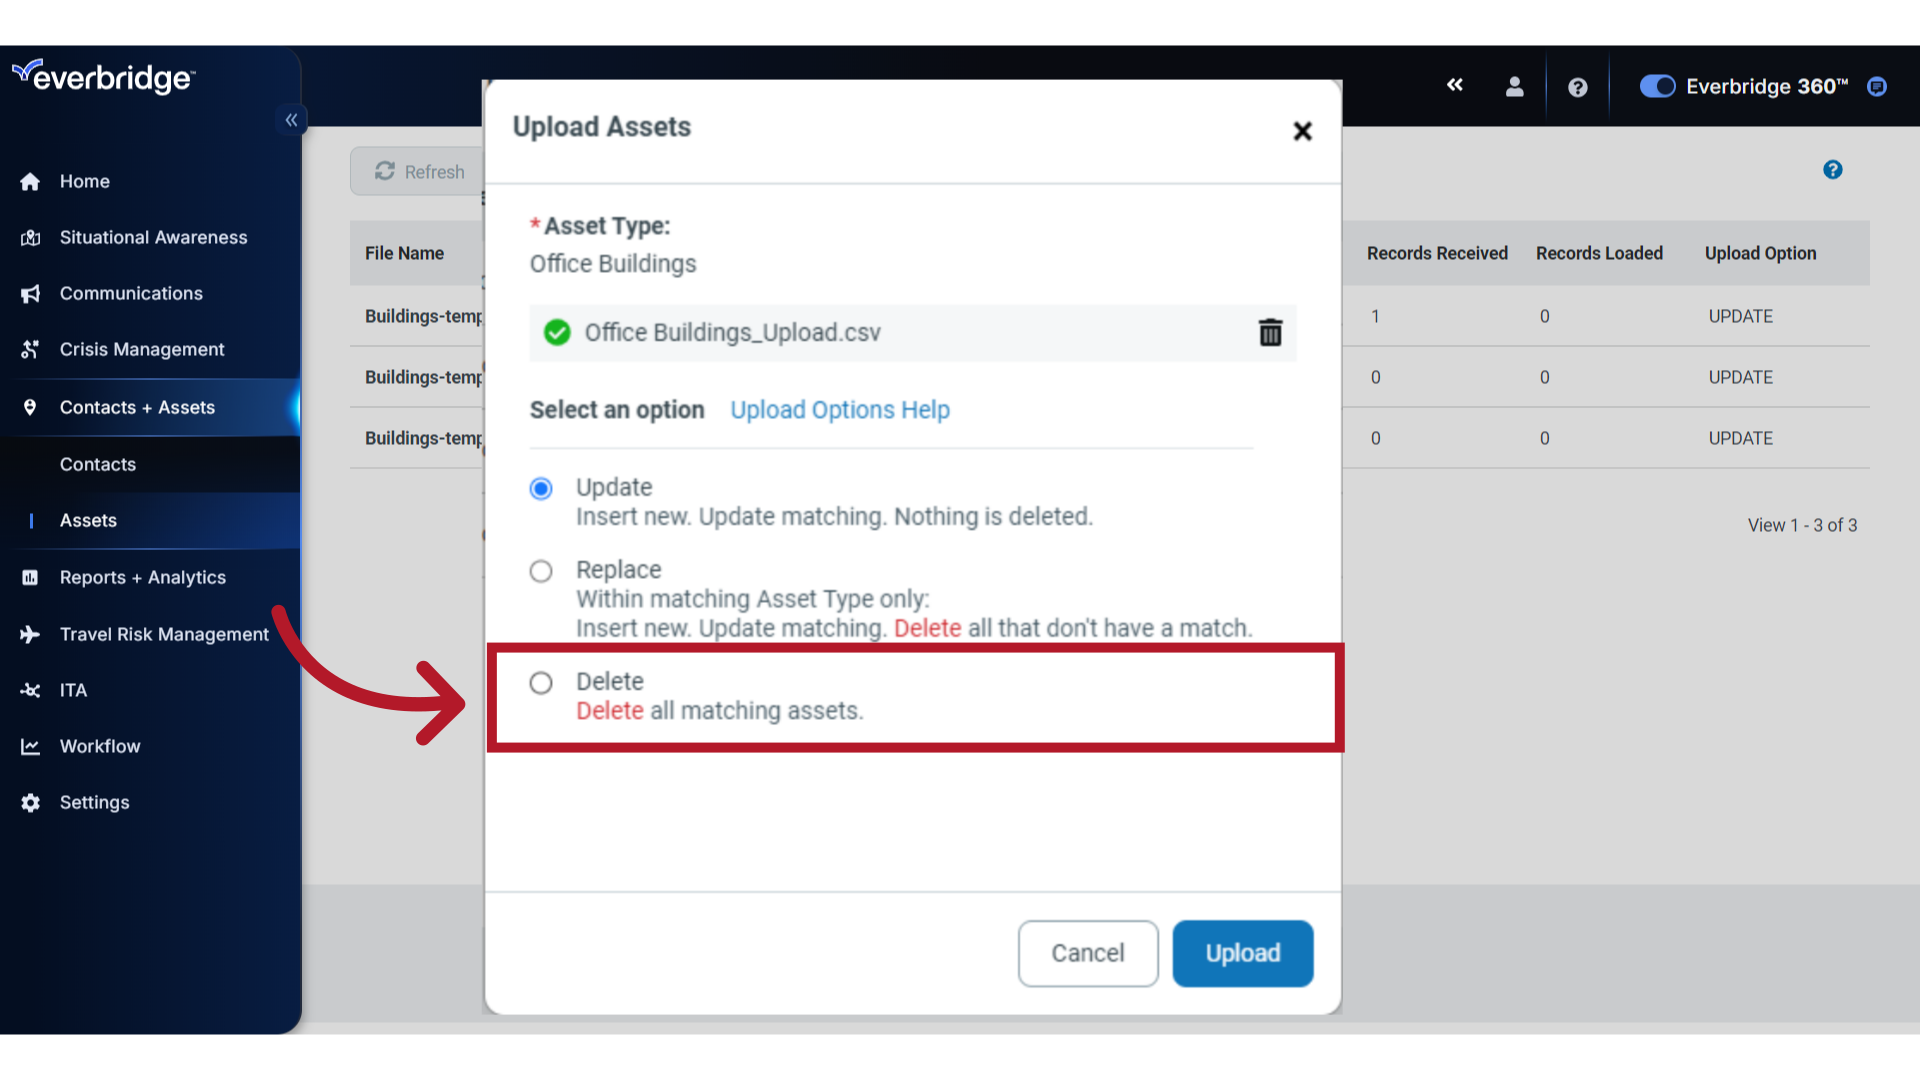
19. Delete
Lastly, the Delete option will do just that. It deletes all the asset records that match the records within your CSV file.
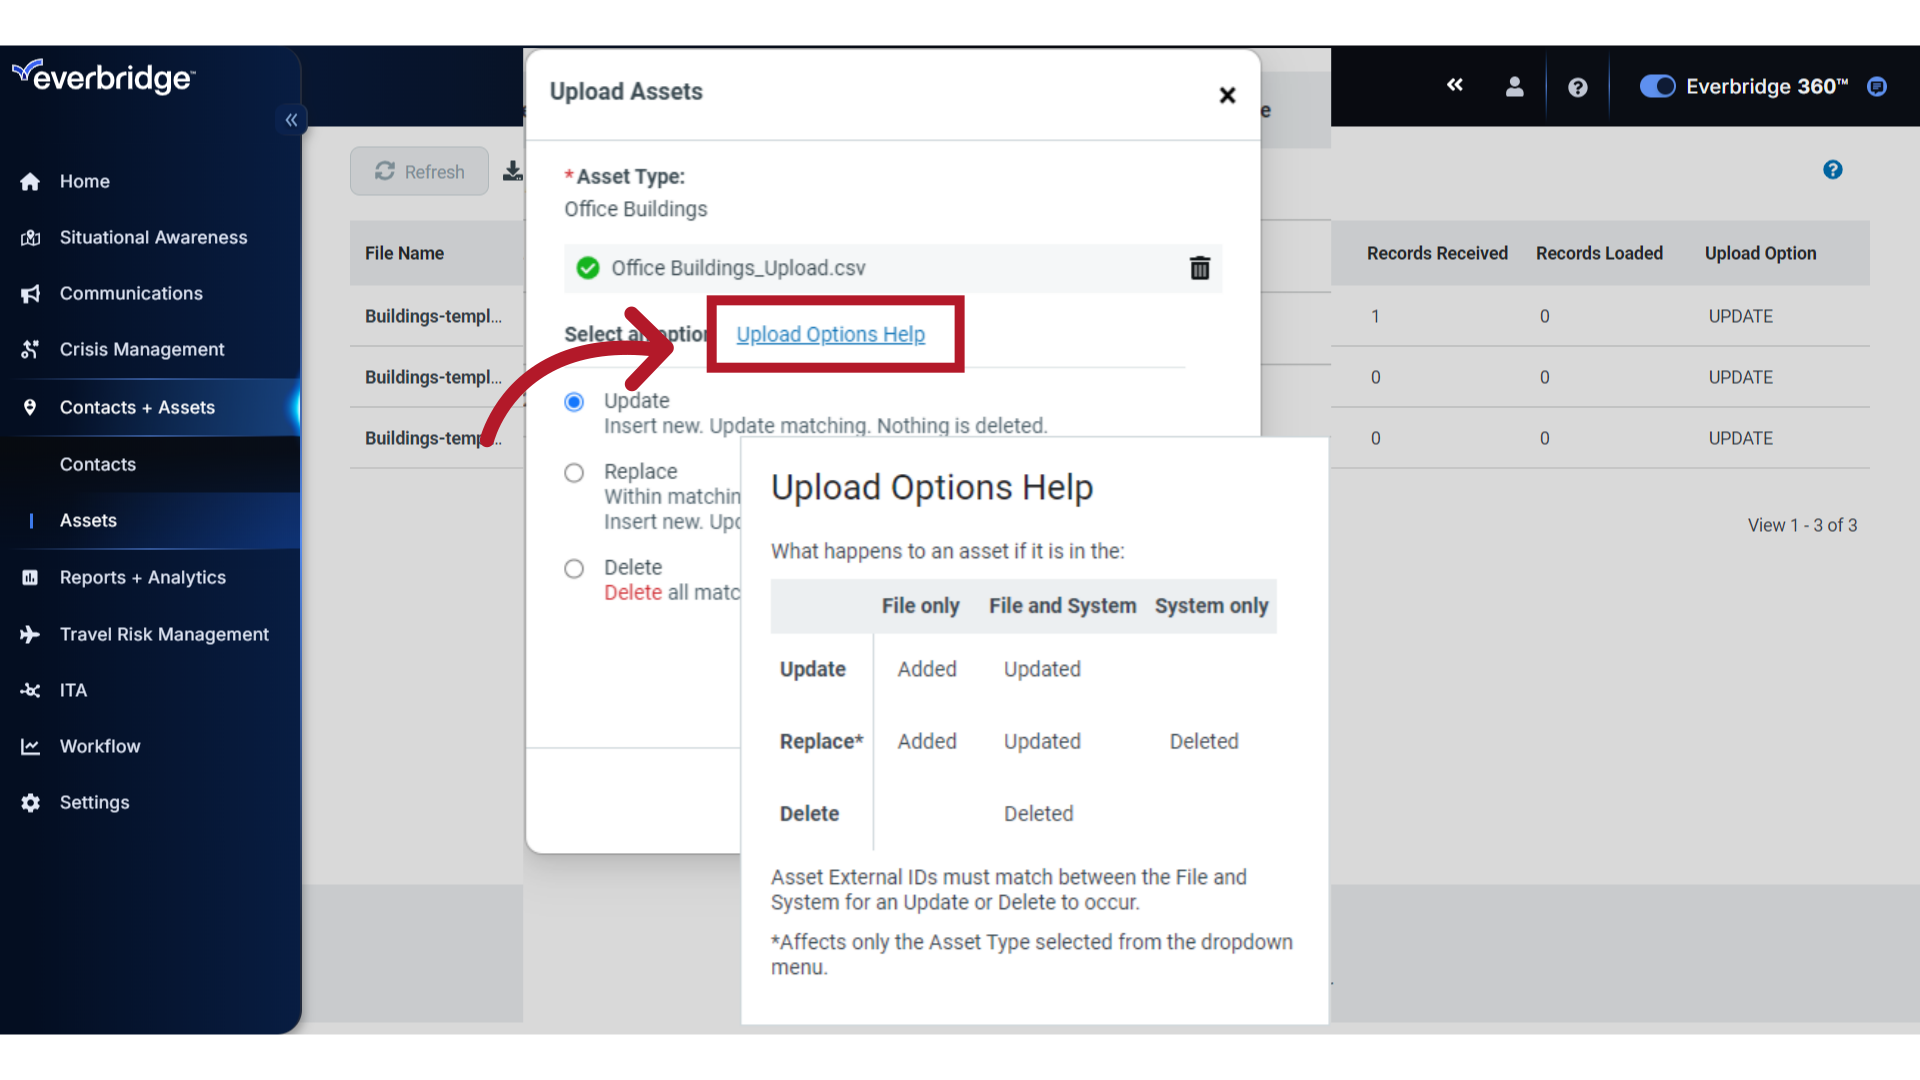
20. Help
If you are unsure which functionality fits best for your upload, hover over the "Upload Options Help" link to view more tips.
21. Upload
Once you have made your selection, click "Upload".
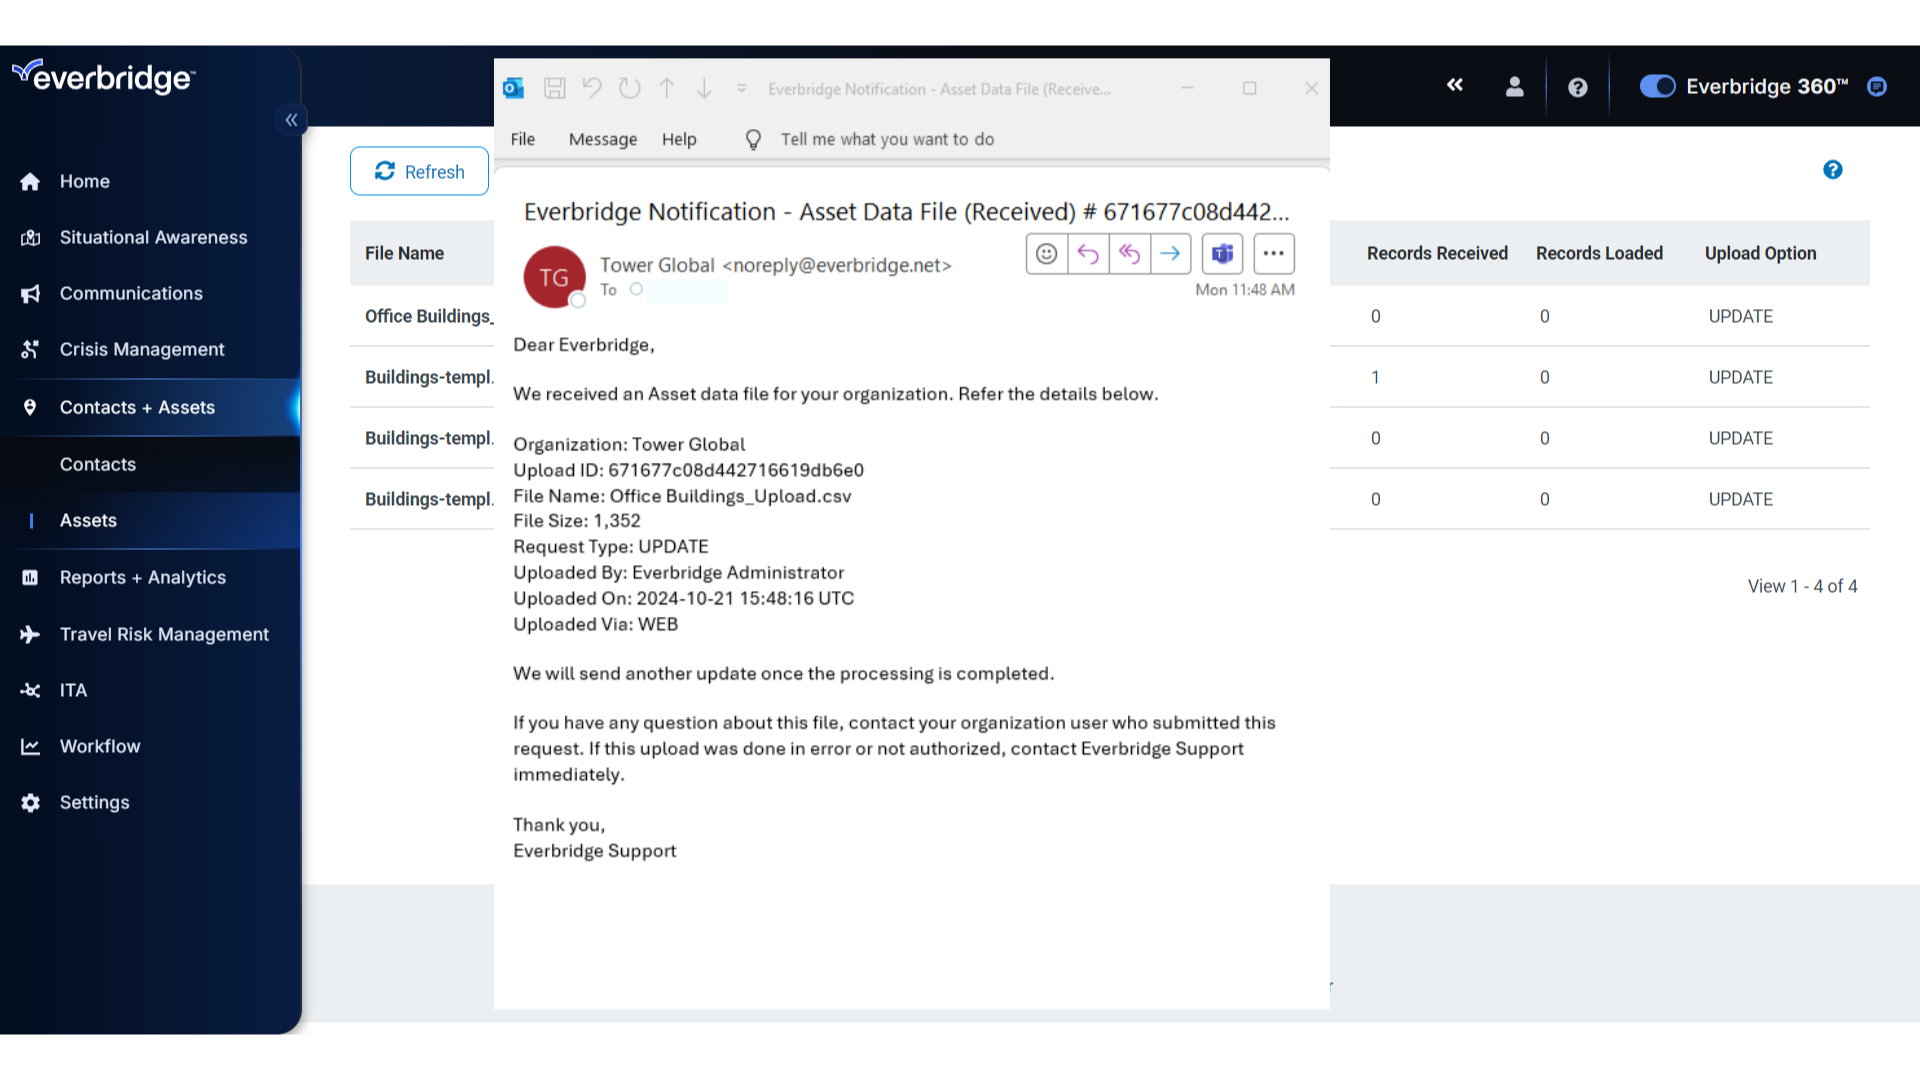
22. File Received
You will receive two automated emails for this upload. The first confirms that the data file was received.
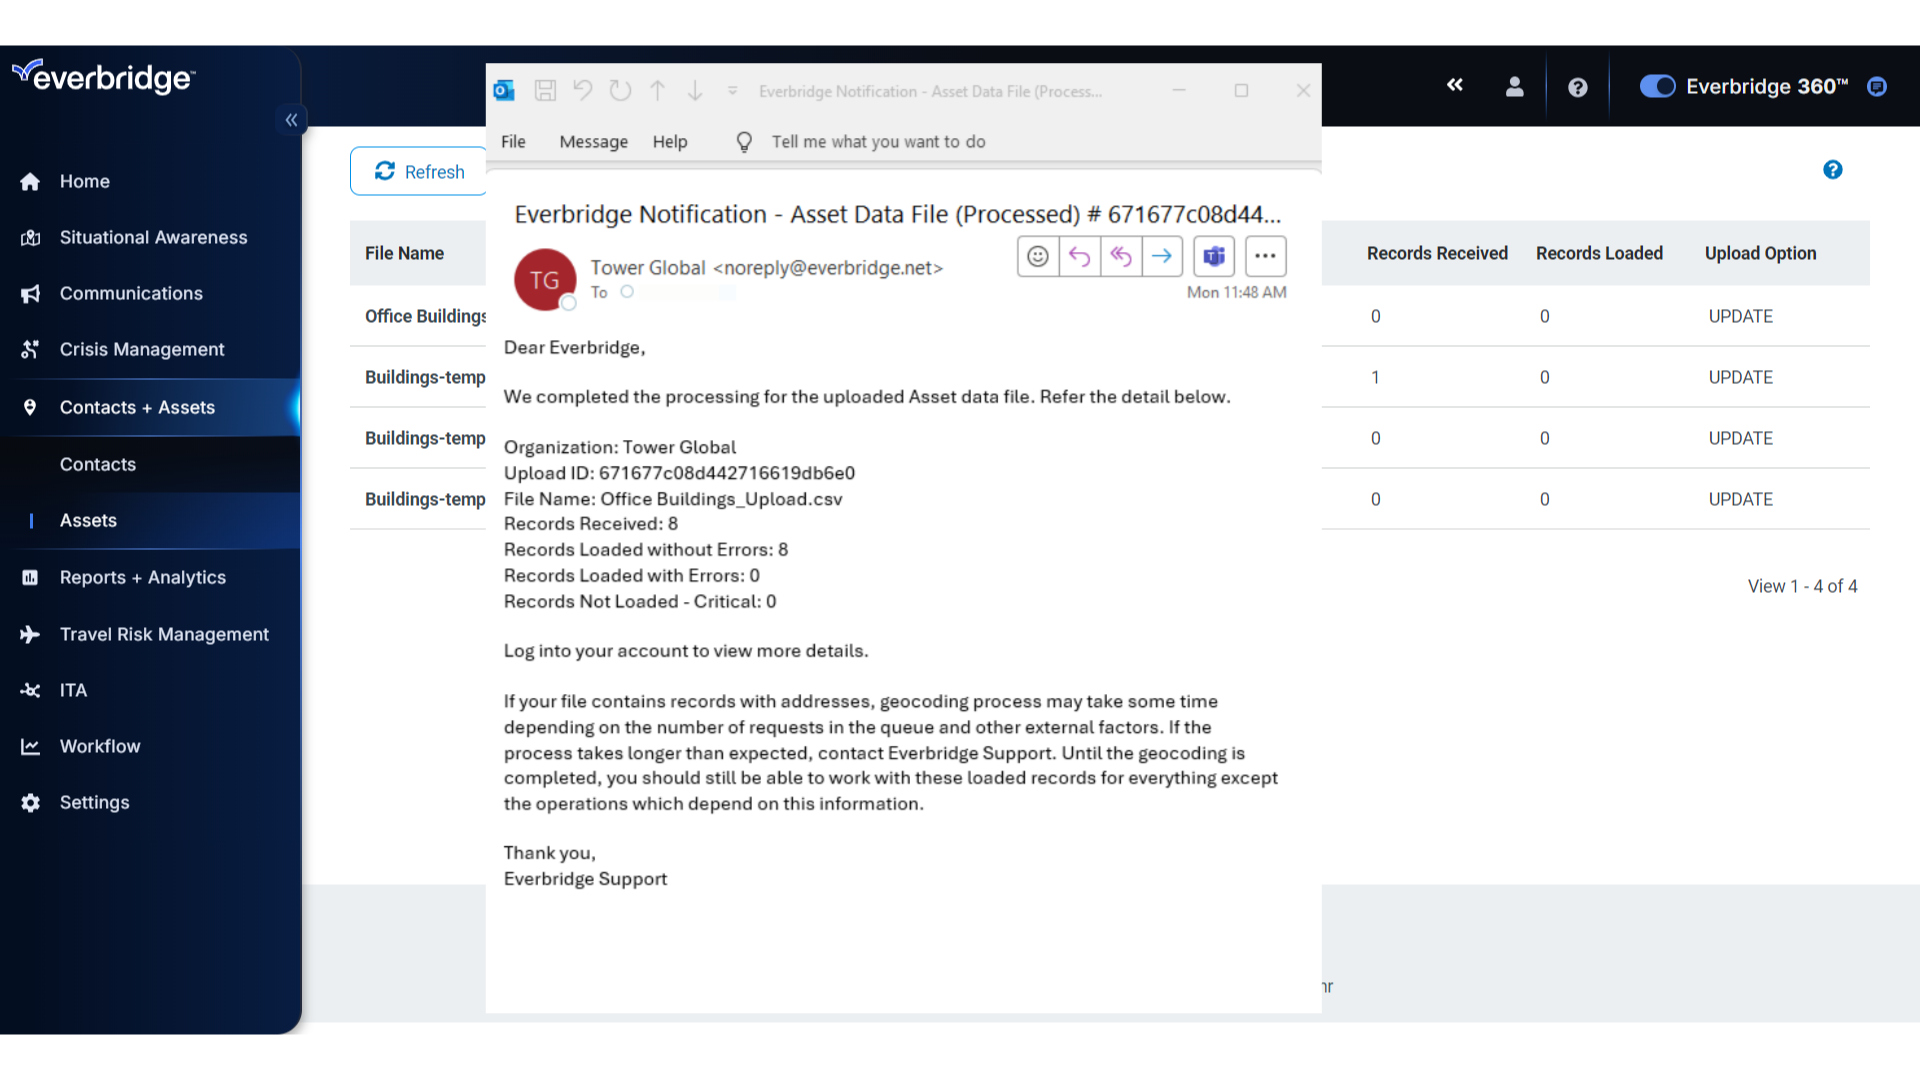
23. File Processed
The second is sent once the file has been processed, and contains status information about the records.
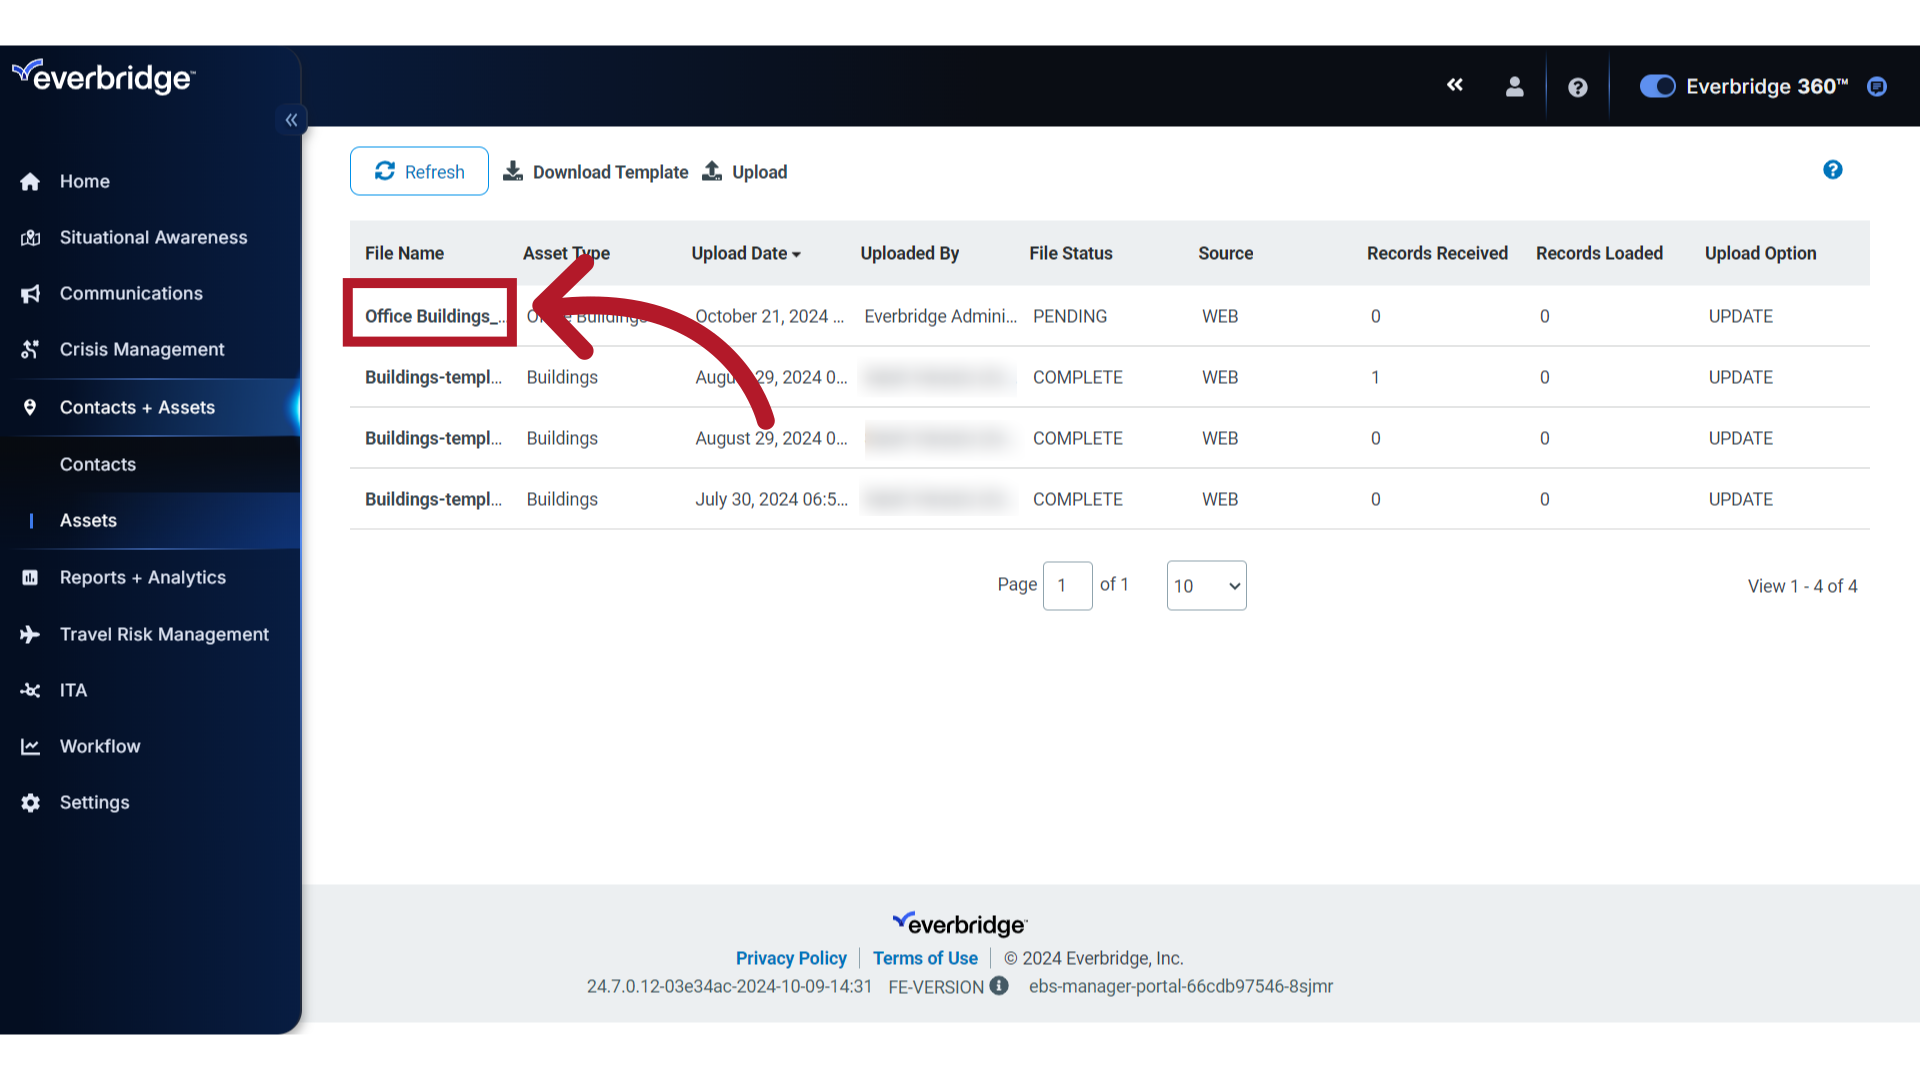
24. Review Upload
To access full details and review errors for the records processed, return to the Upload page and click the File Name to view the logs for that upload.
25. Logs
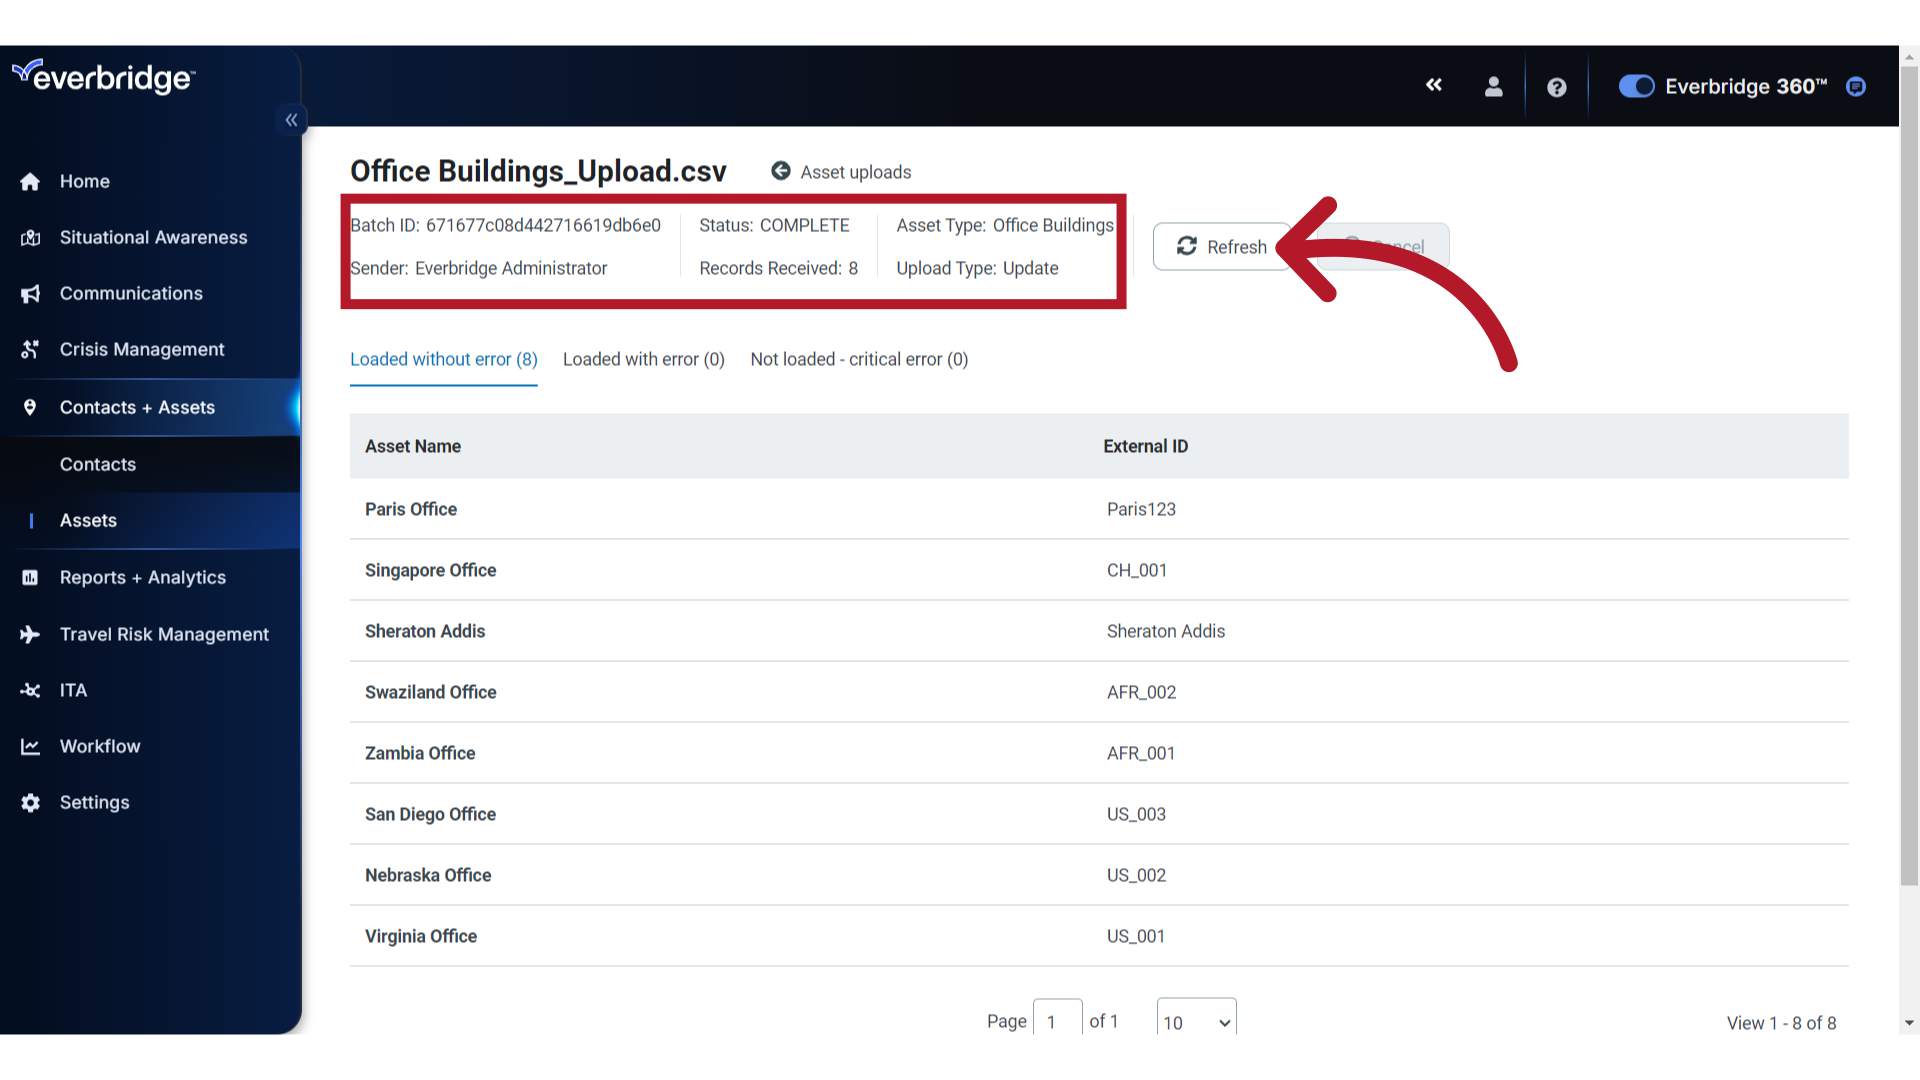
The logs will display the upload information, including any header errors from the template. If the file upload is still in progress, you can click the Refresh button to see the most recent results.
26. Review Success
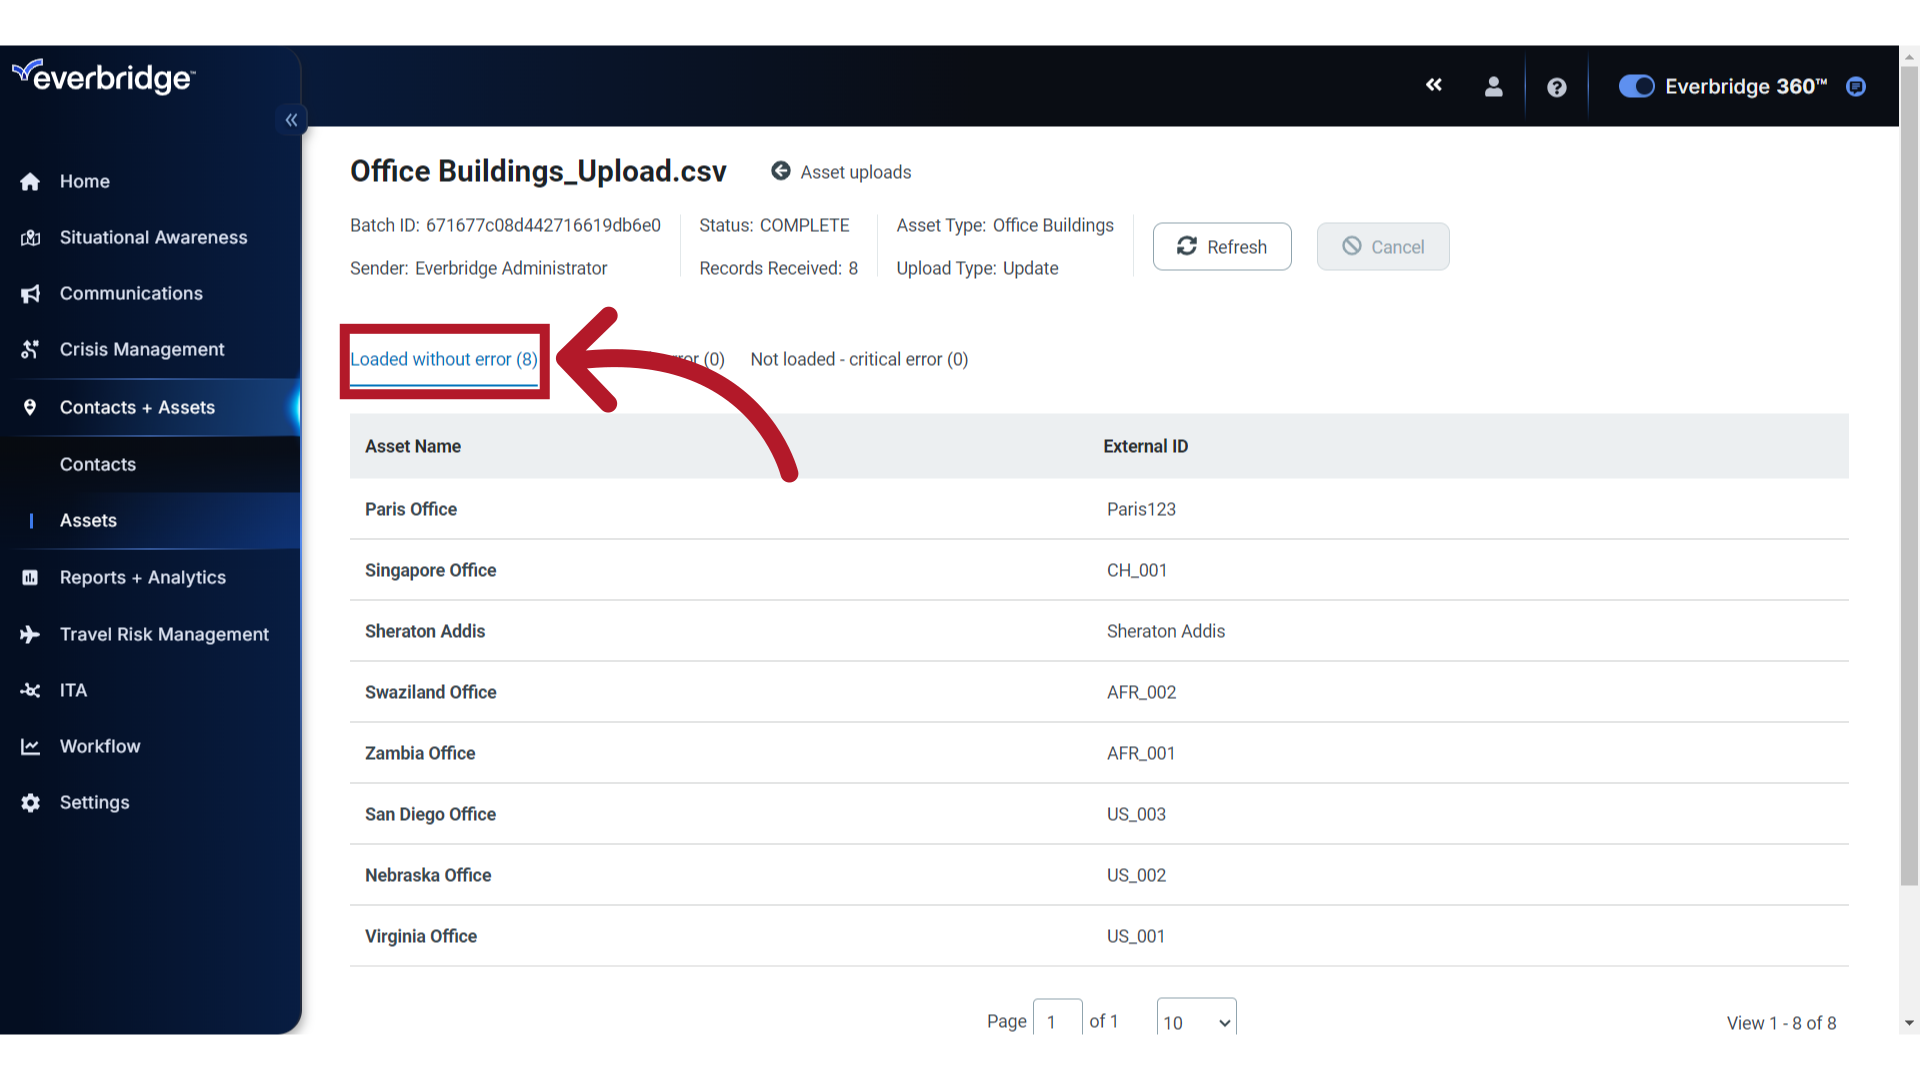
The "Loaded without error" tab shows the records which loaded normally.
27. Review Errors
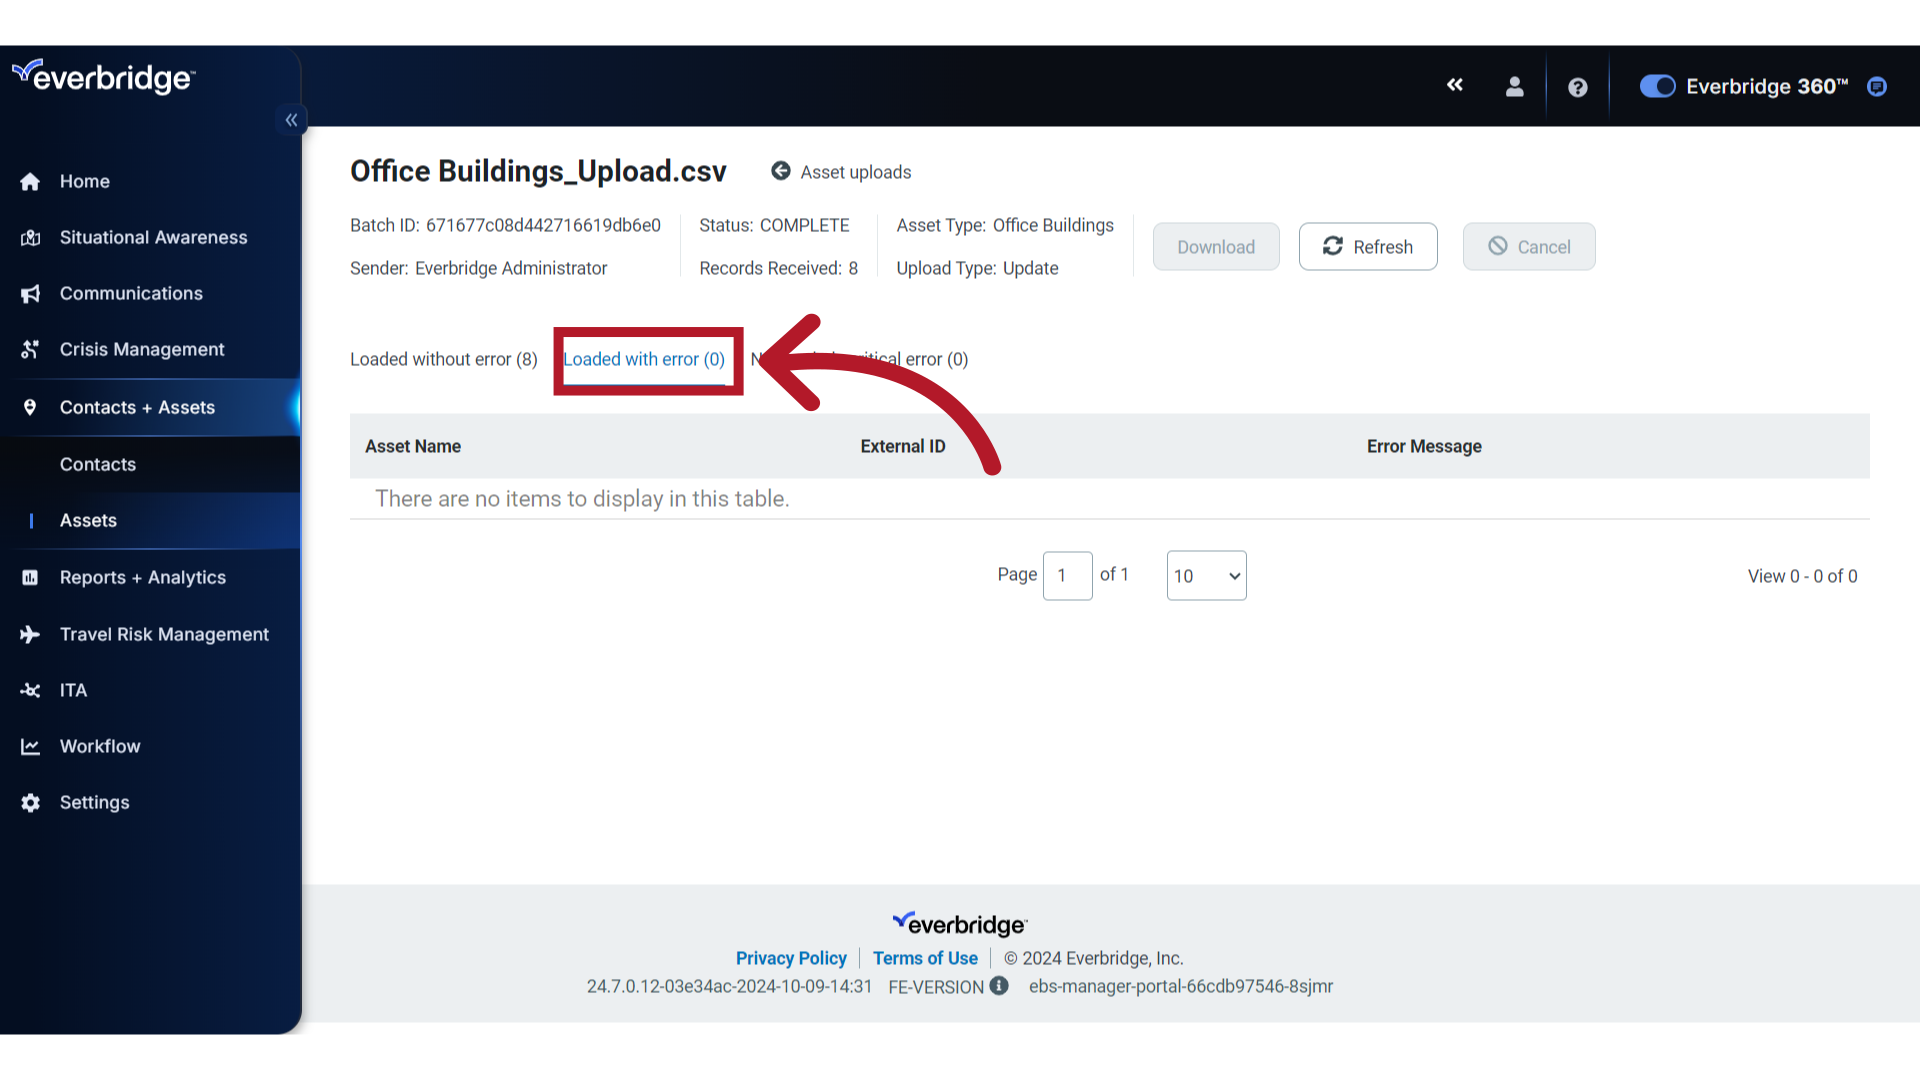
The "Loaded with error" tab displays any records where non-required field(s) had something defined incorrectly, but there was enough good information in the record to load successfully. For example, a record that had an invalid country code or exceeded a field's max length would still load, but without those data fields. If needed, return to the CSV file and fix the noted error(s) before uploading again.
28. Review Errors
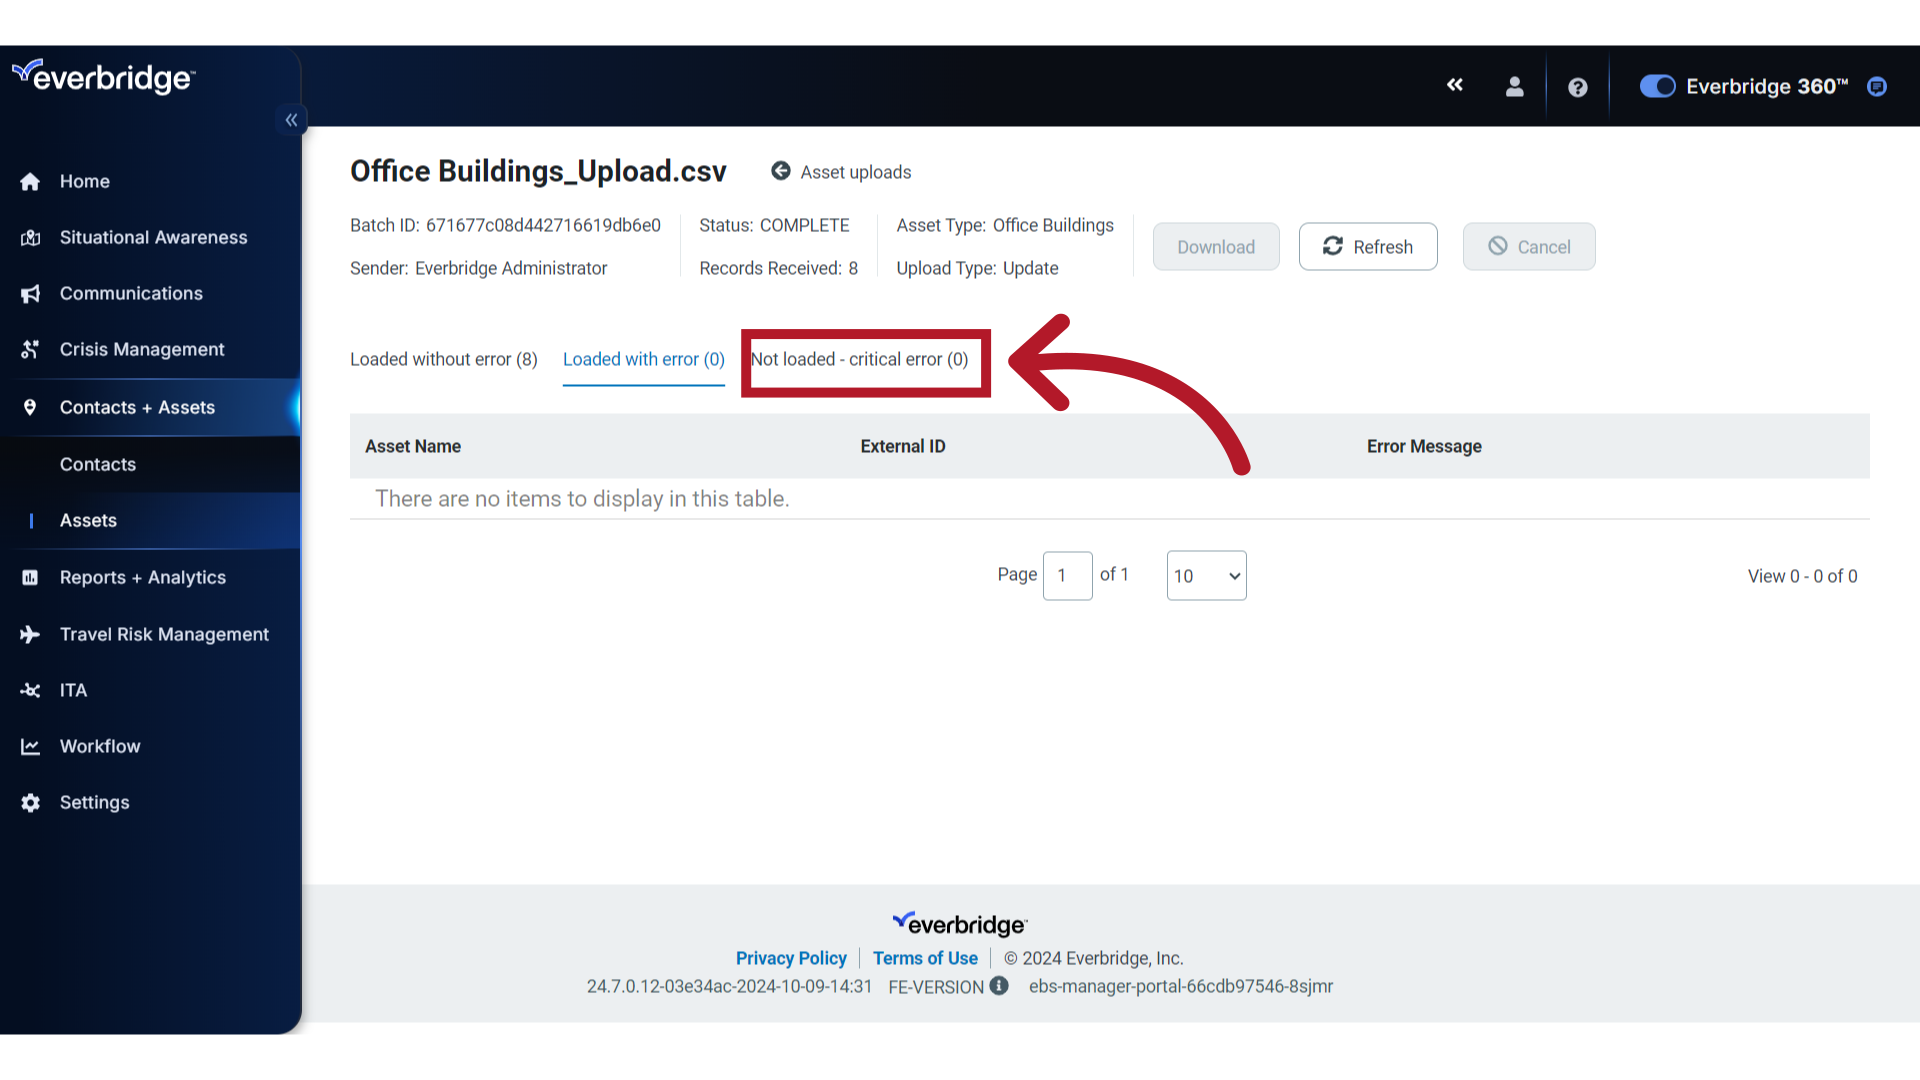
The "Not loaded-critical error" tab displays records that had errors so severe that they were not loaded. For example, the required External ID field or column was missing from your CSV file. Note the error(s) and return to the file to fix them before uploading again. For more information on how to remedy asset upload errors, check out the knowledgebase article for "Troubleshooting Asset Upload Error Messages" in the Everbridge Support Center.
Thank you for watching this tutorial on how to manually upload assets in Everbridge.
Article Feedback
While we can’t respond to you directly, we’d love to know how we can improve the article.
Please sign in to leave a comment.