Topic
Adding a single Asset.
Description
Assets in Everbridge can be added individually or through an upload process. Even if you plan to automate your asset uploads, it is helpful to understand the steps for manually adding a single asset, as demonstrated in this tutorial.
Go to manager.everbridge.net
1. Navigate
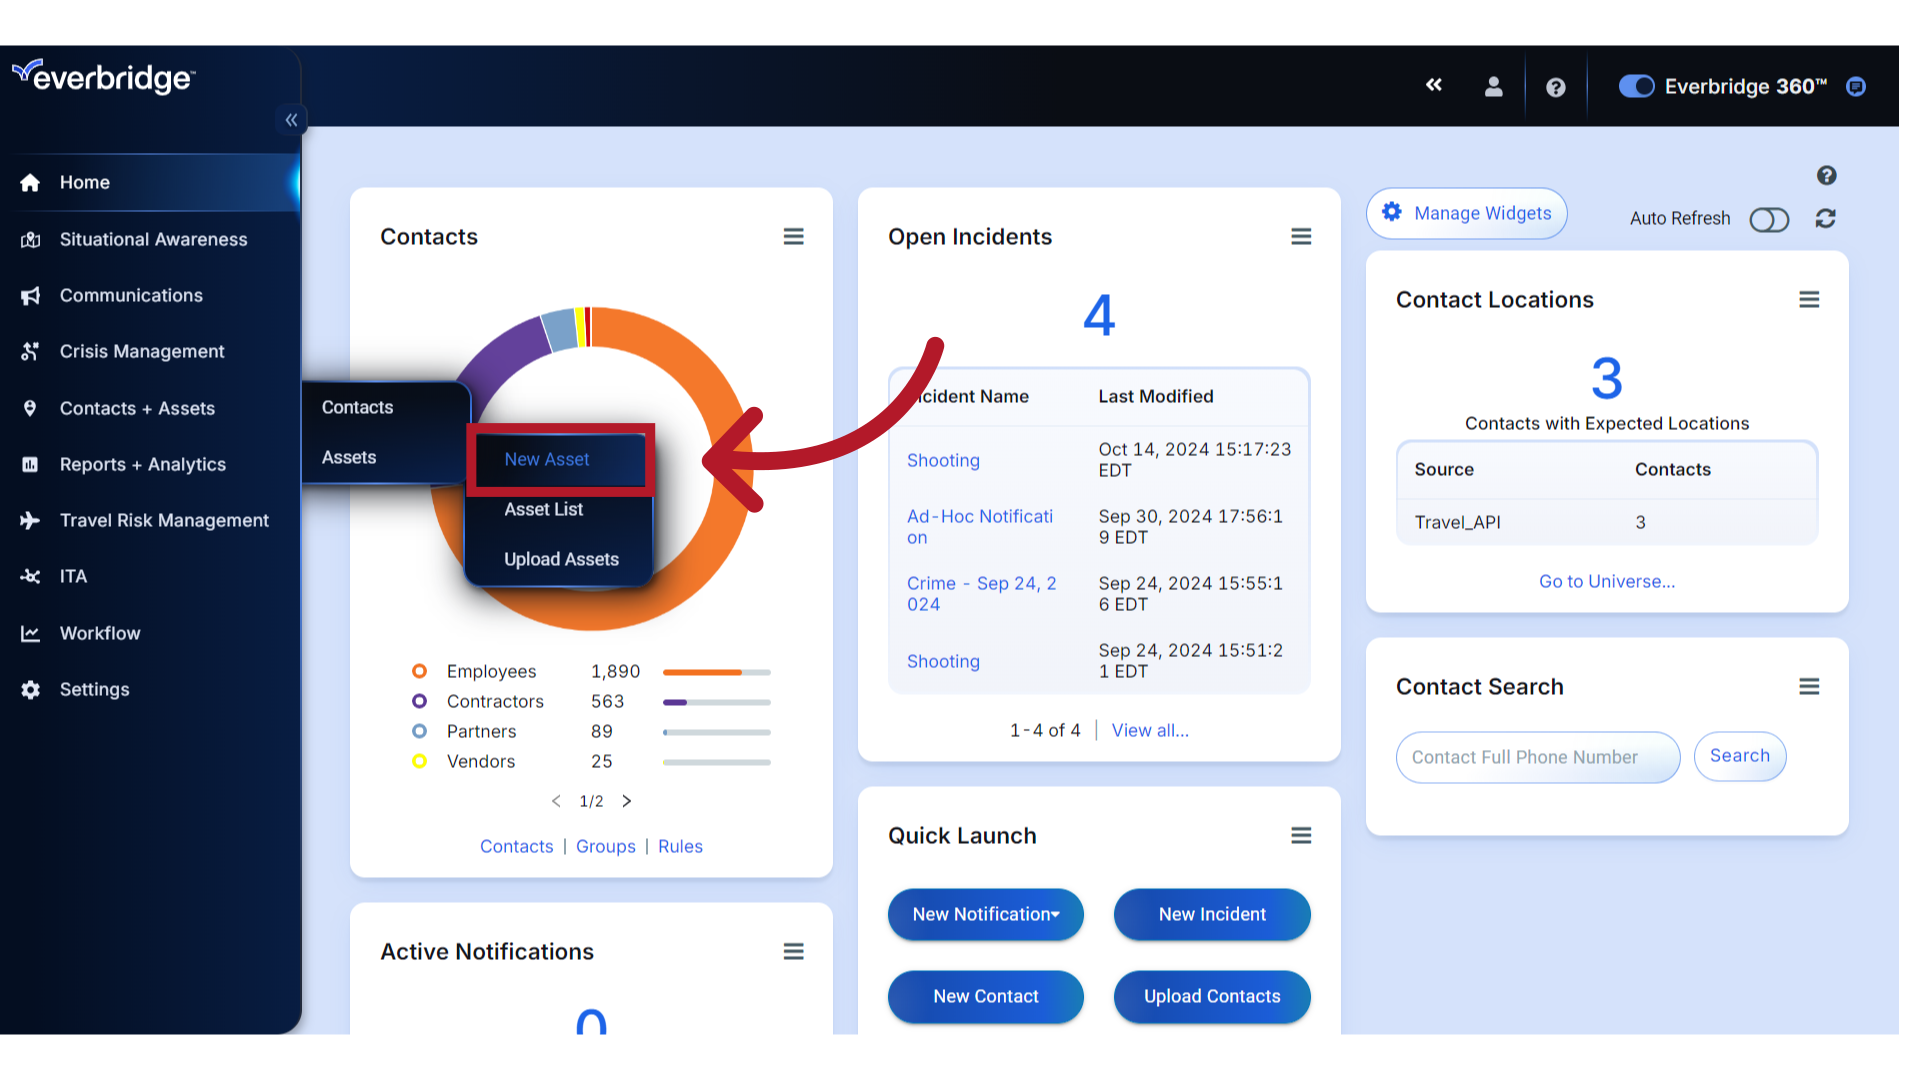
To get started, navigate to "New Asset" from the organization's "Contacts + Assets" menu
2. Asset Fields
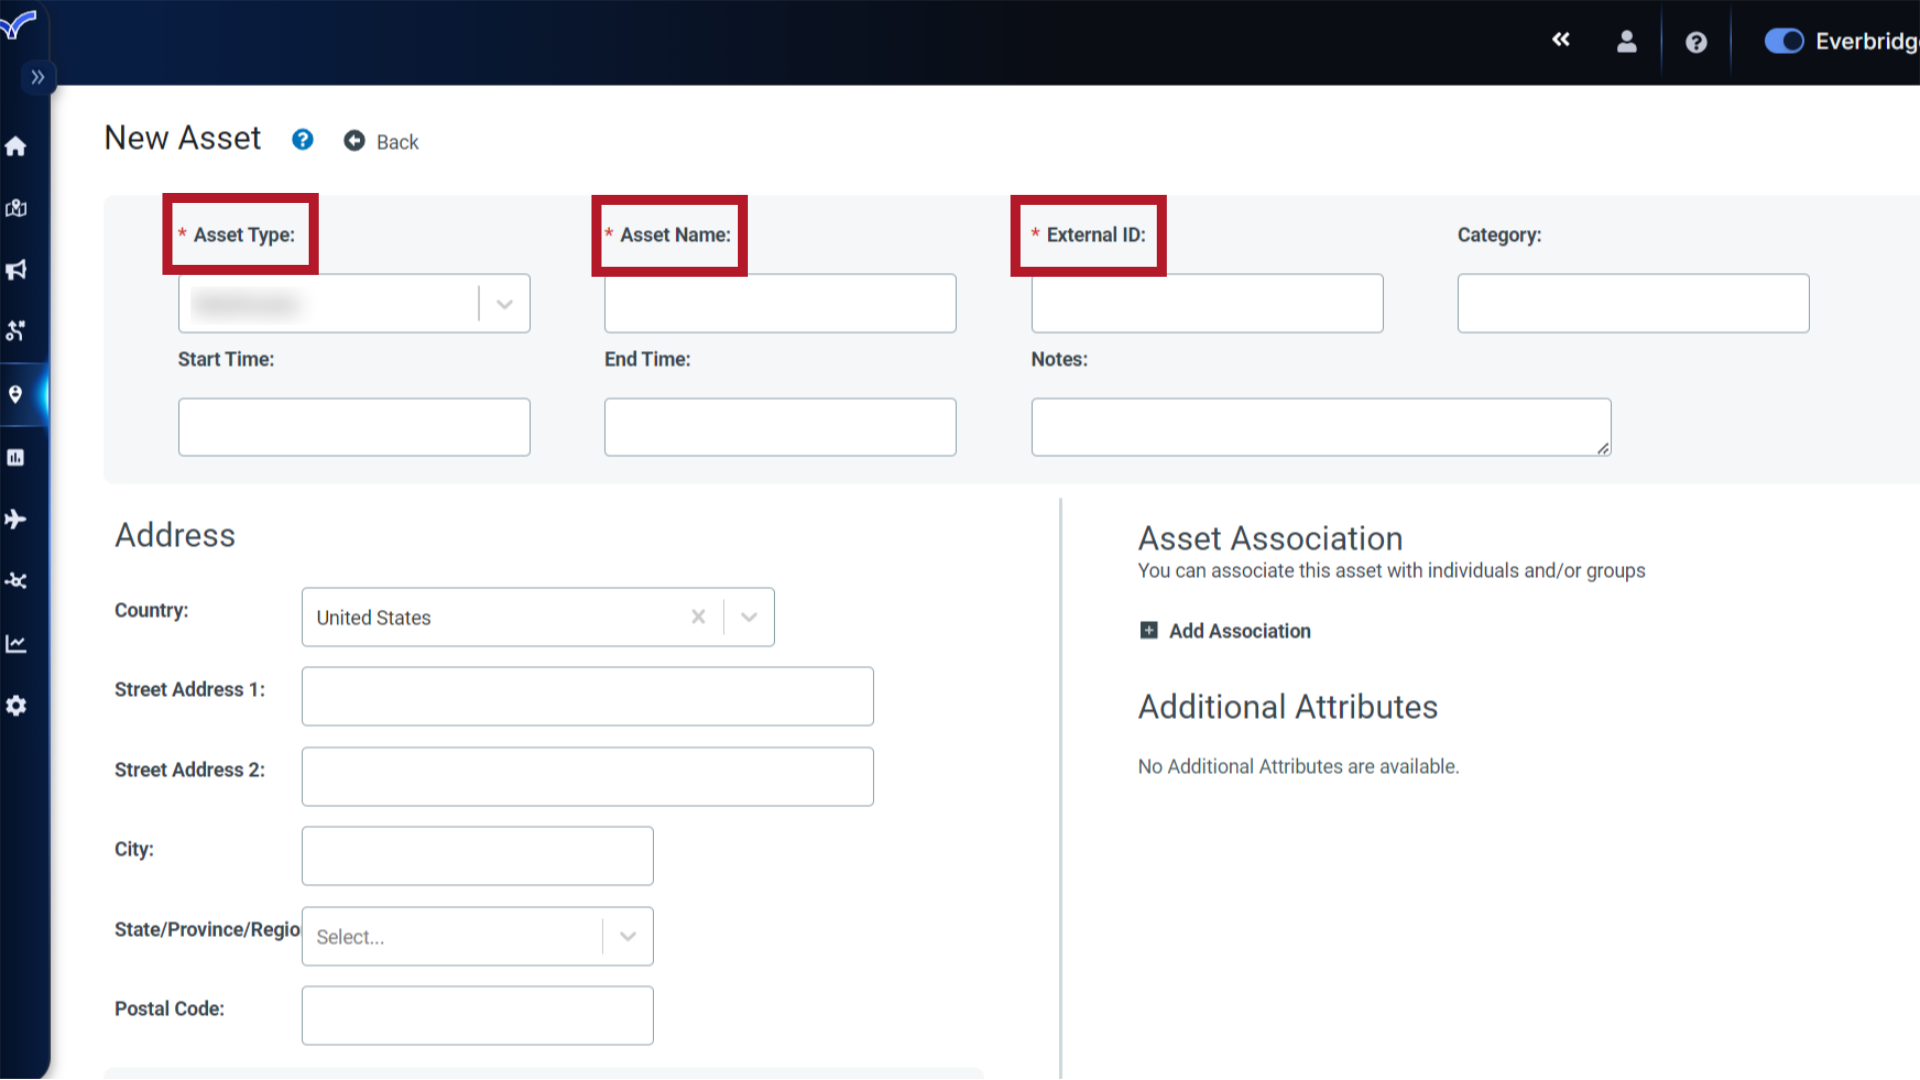
Required fields are indicated with an asterisk.
3. VCC Fields
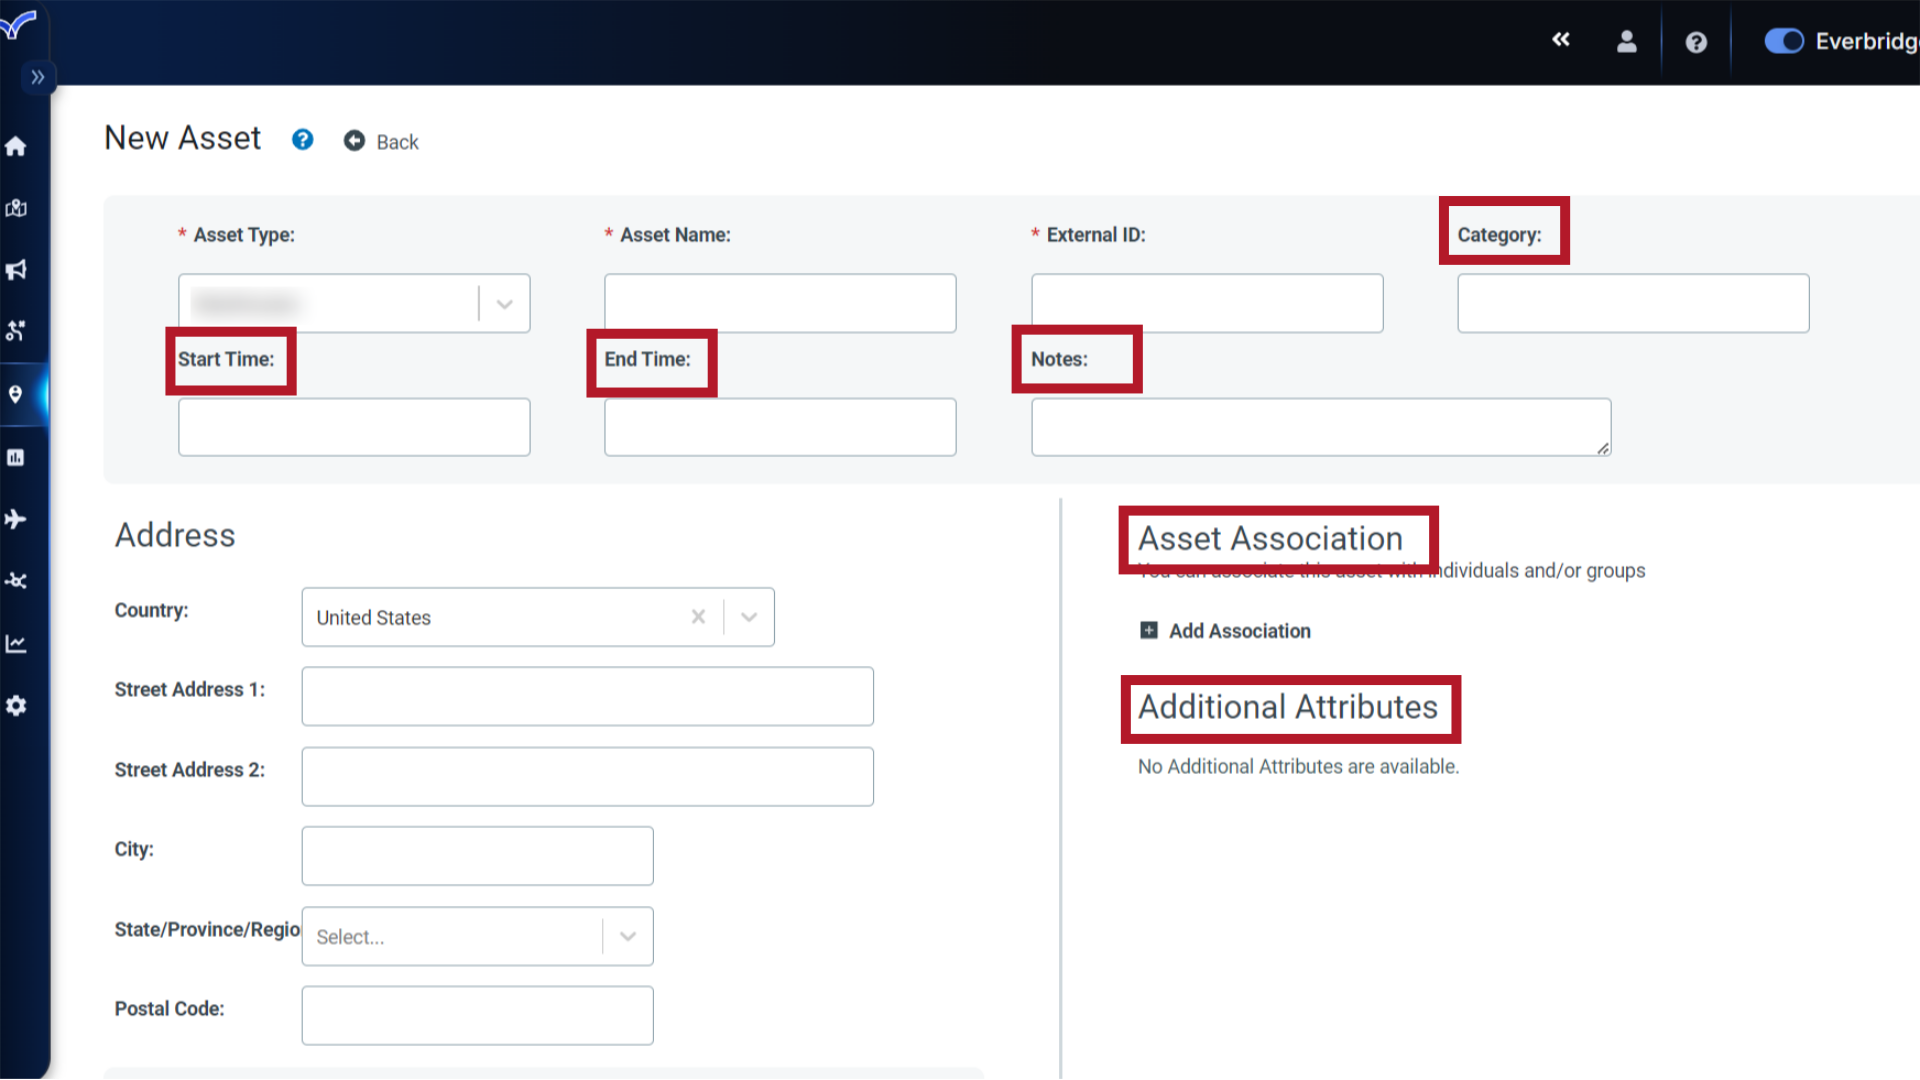
The indicated fields may be relevant if your Everbridge solution includes Visual Command Center, and are not required.
4. Select
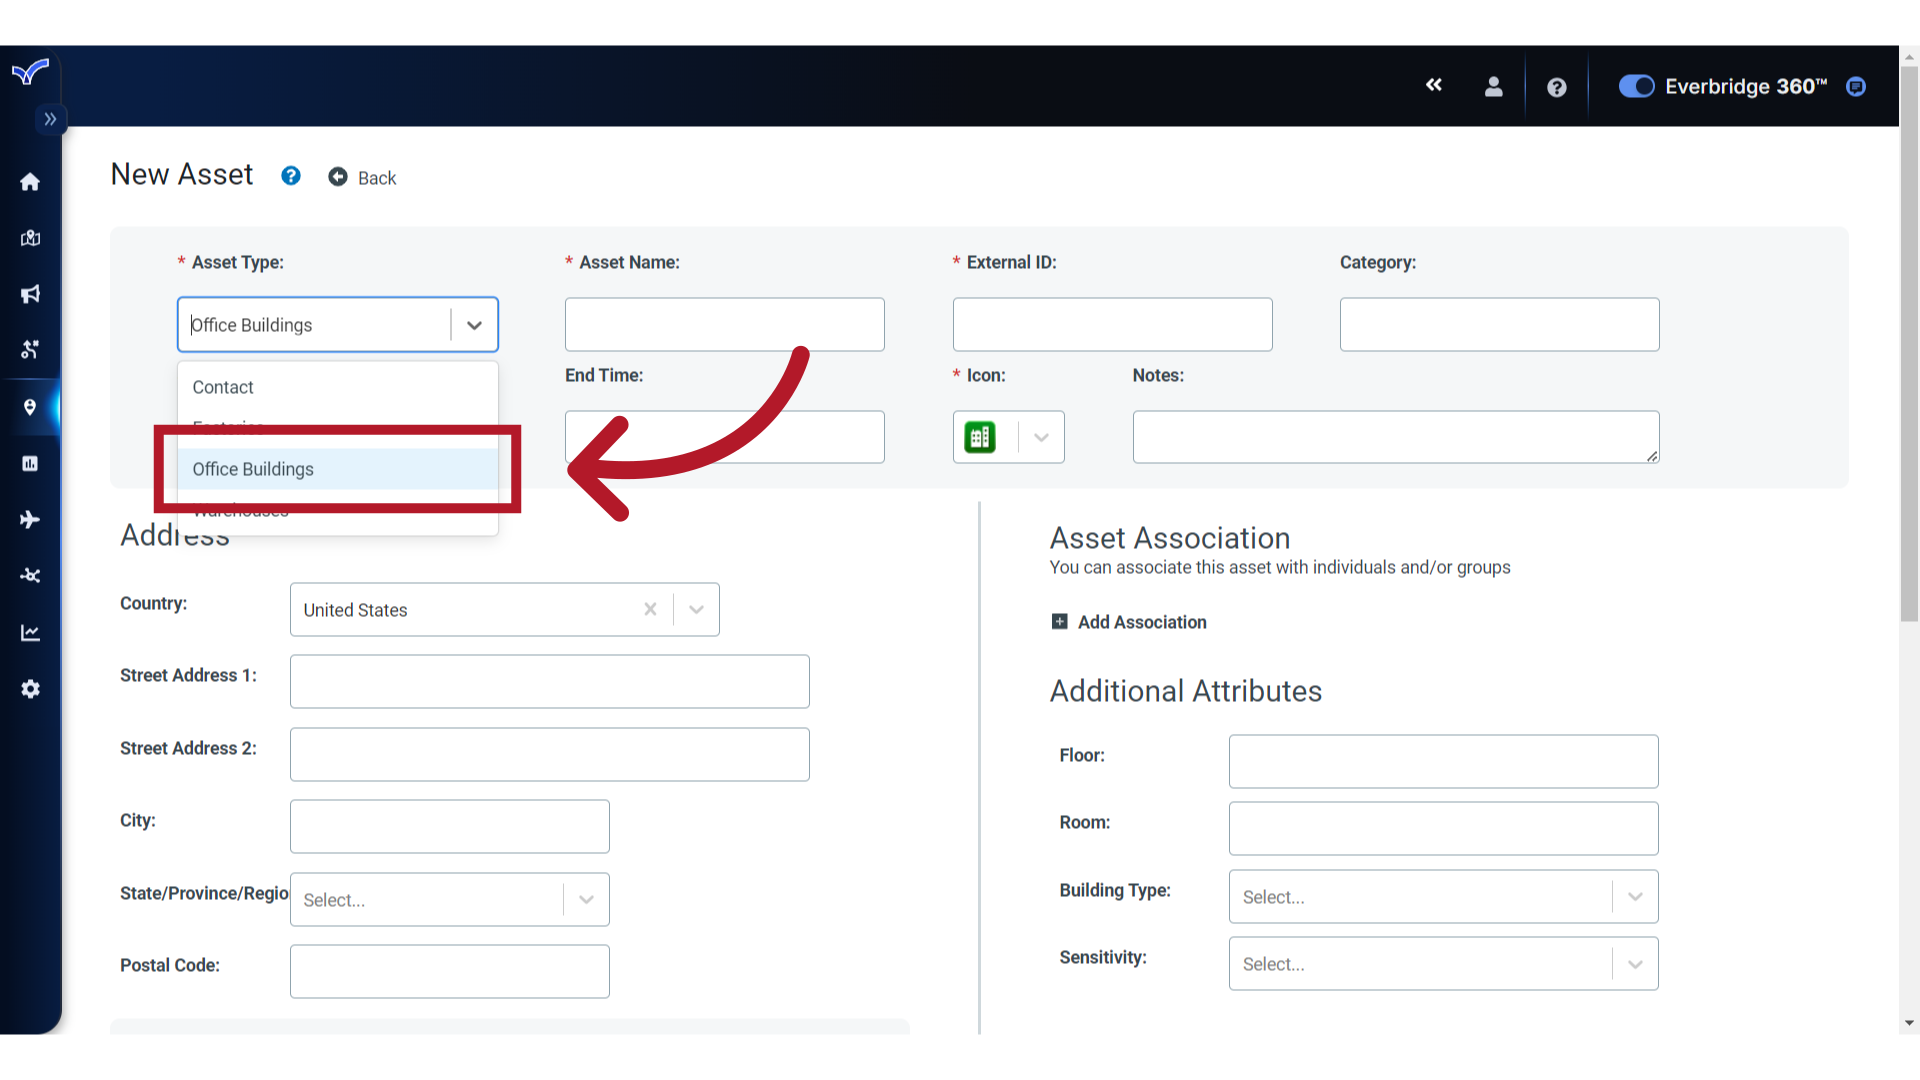
Start by selecting an Asset Type from the preconfigured options.
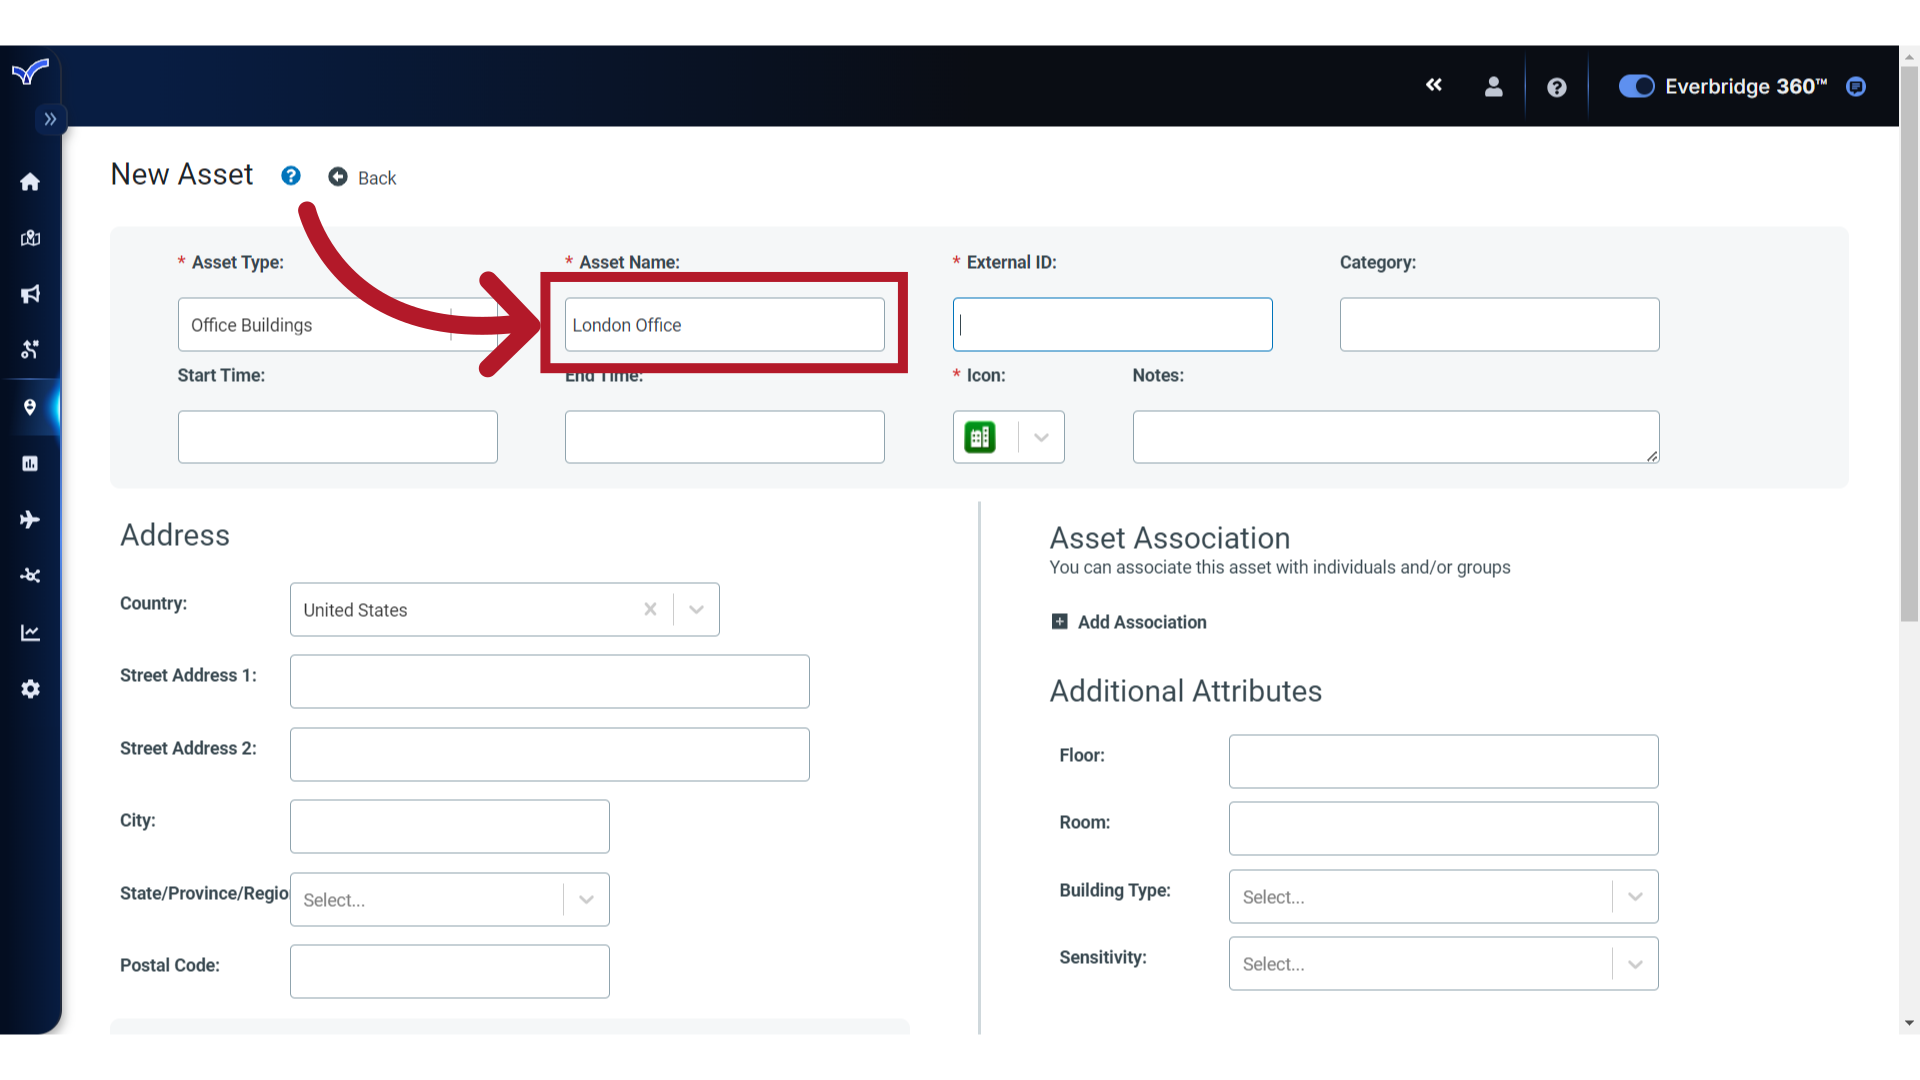
5. Asset Name
Next, enter the Asset Name.
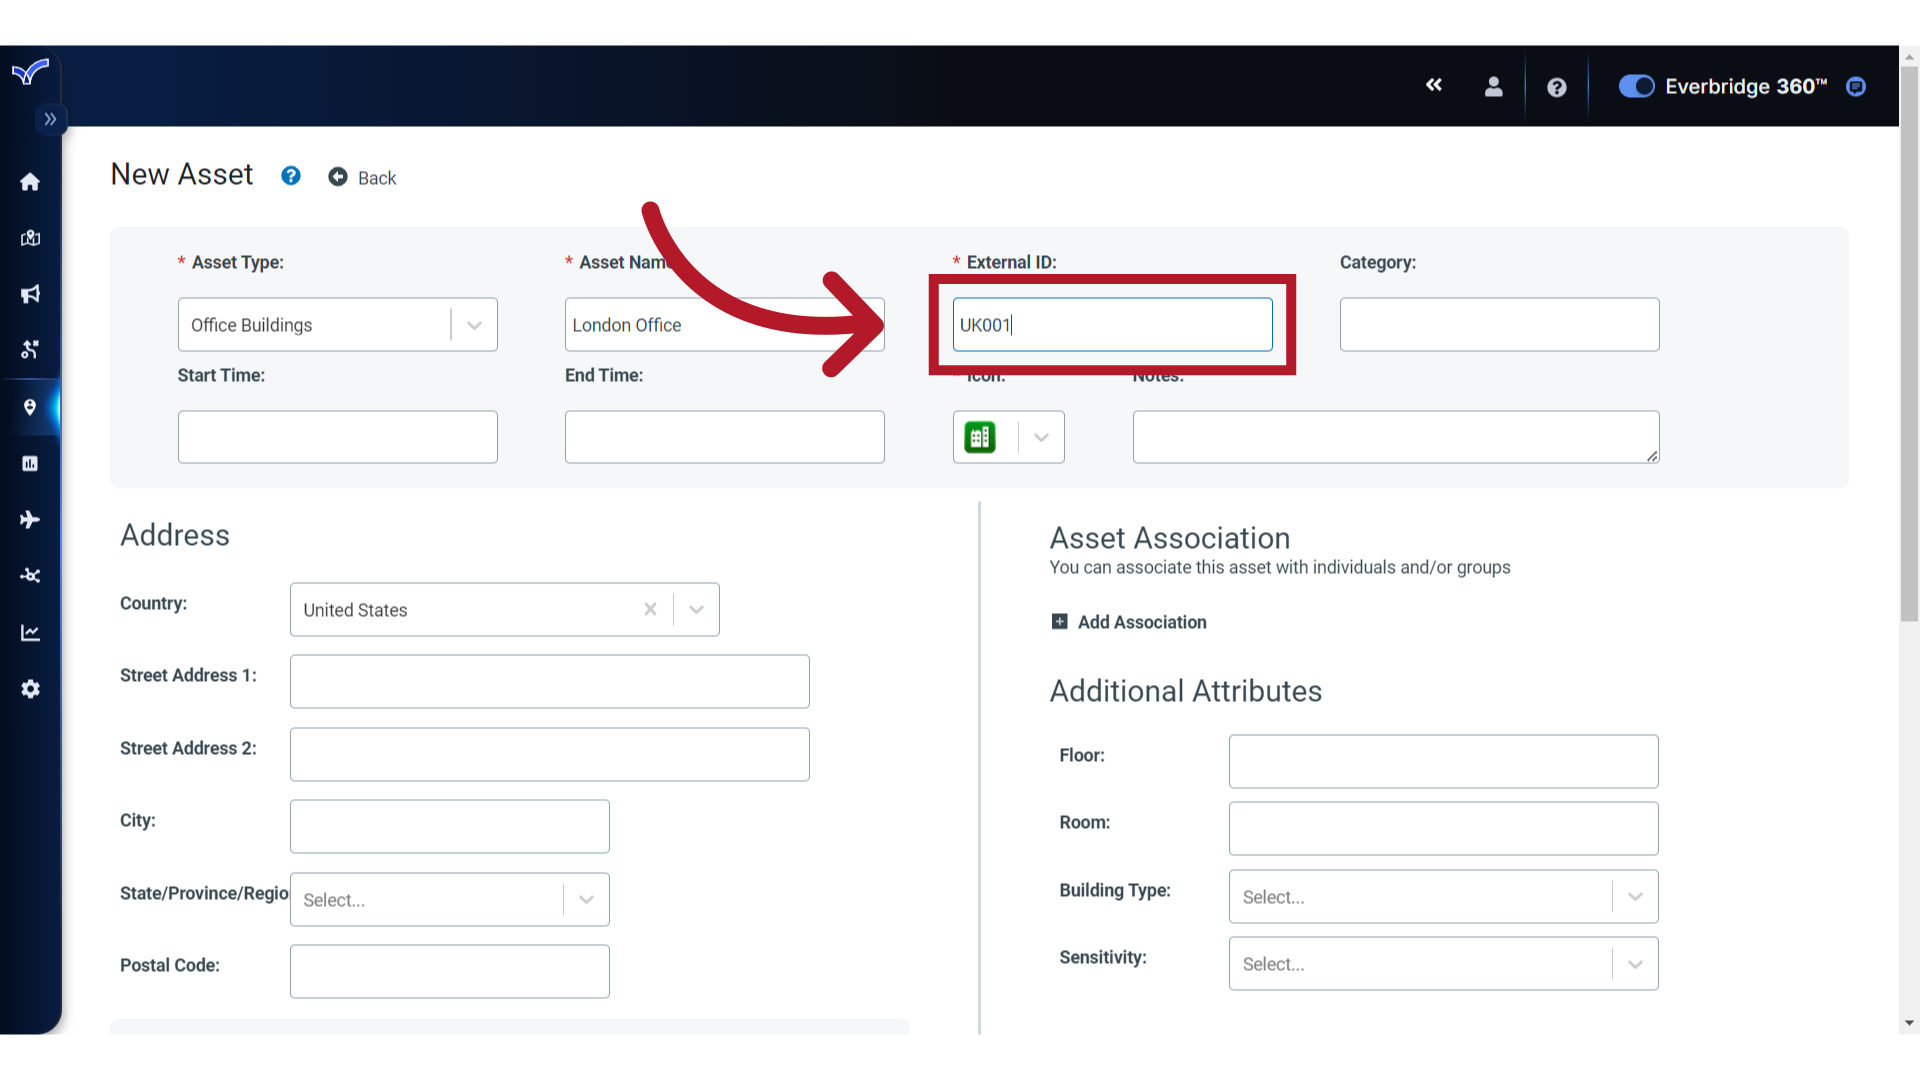
6. External ID
Then, add an External ID value. This is the record's unique identifier and should not be used by any other asset.
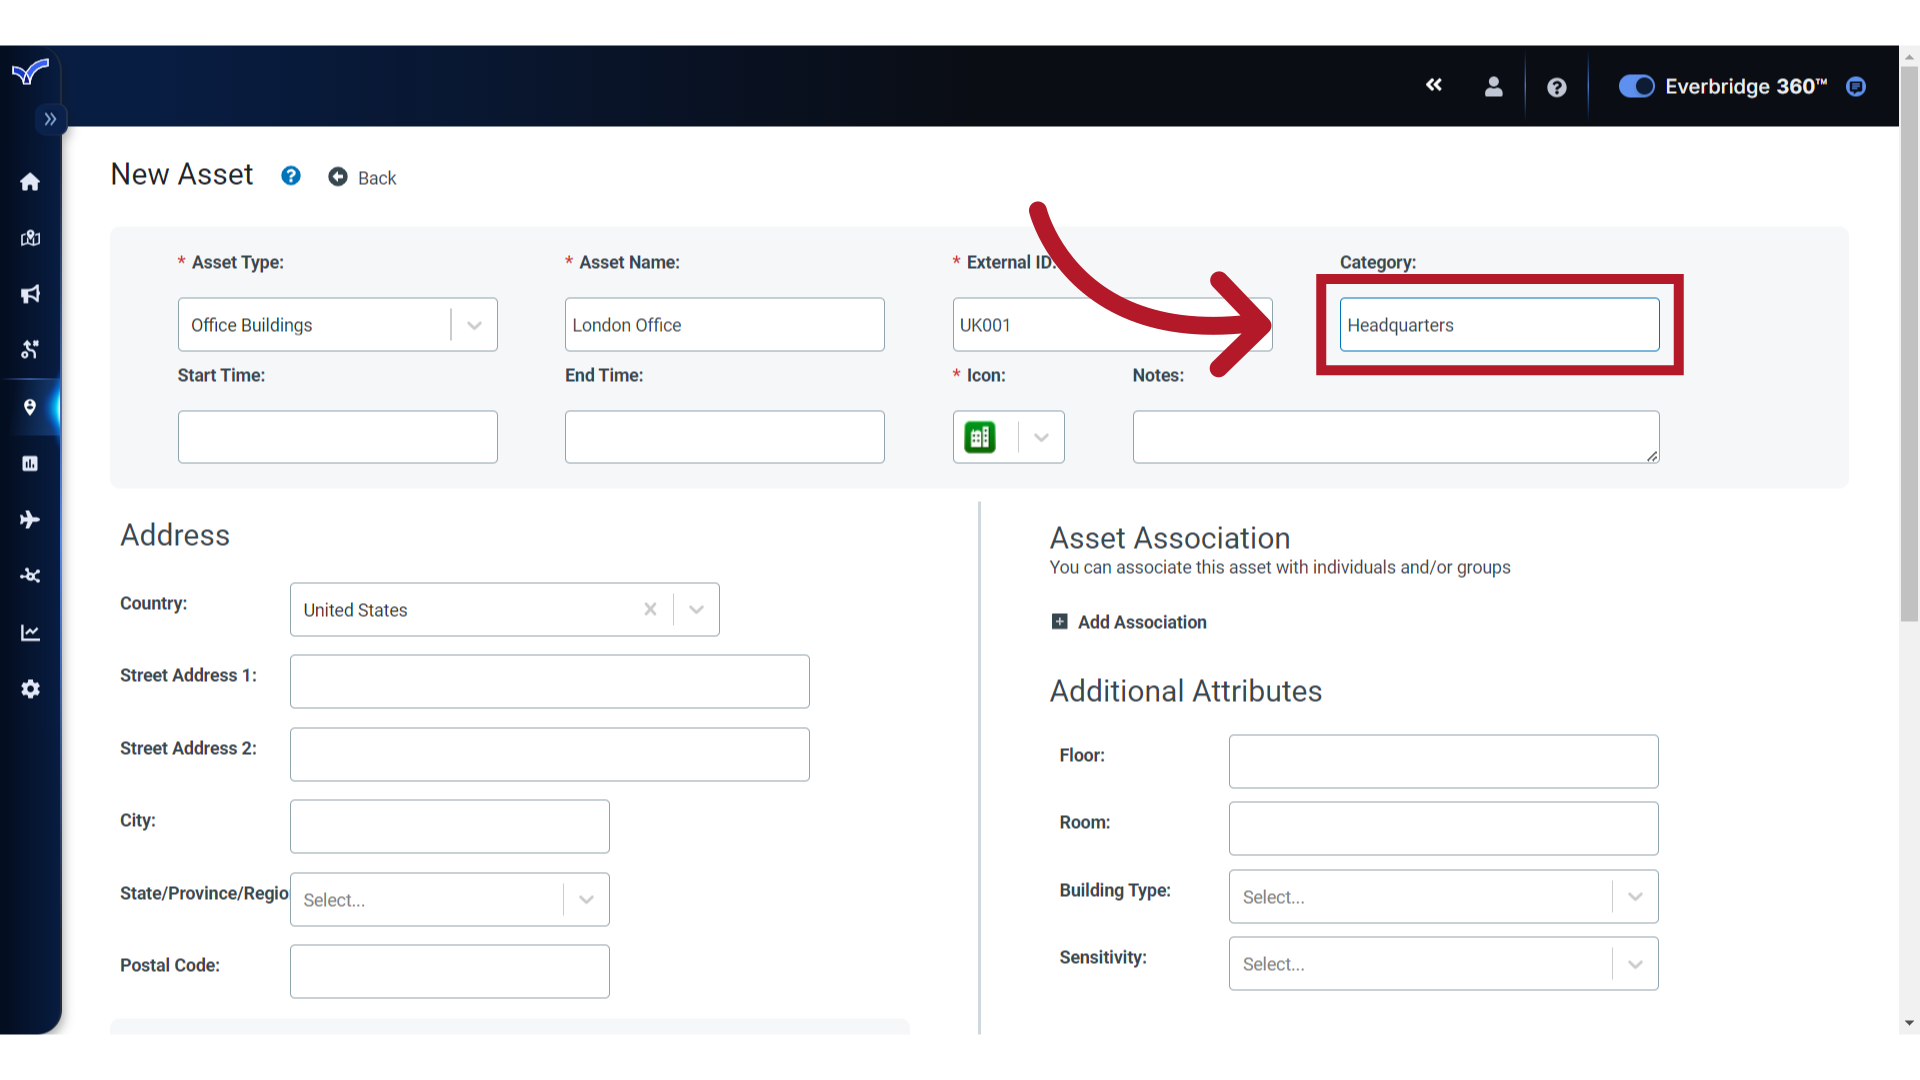
7. Category
Specify a Category, if needed. This can be used by an operator in Visual Command Center to filter their map view to display assets with this label.
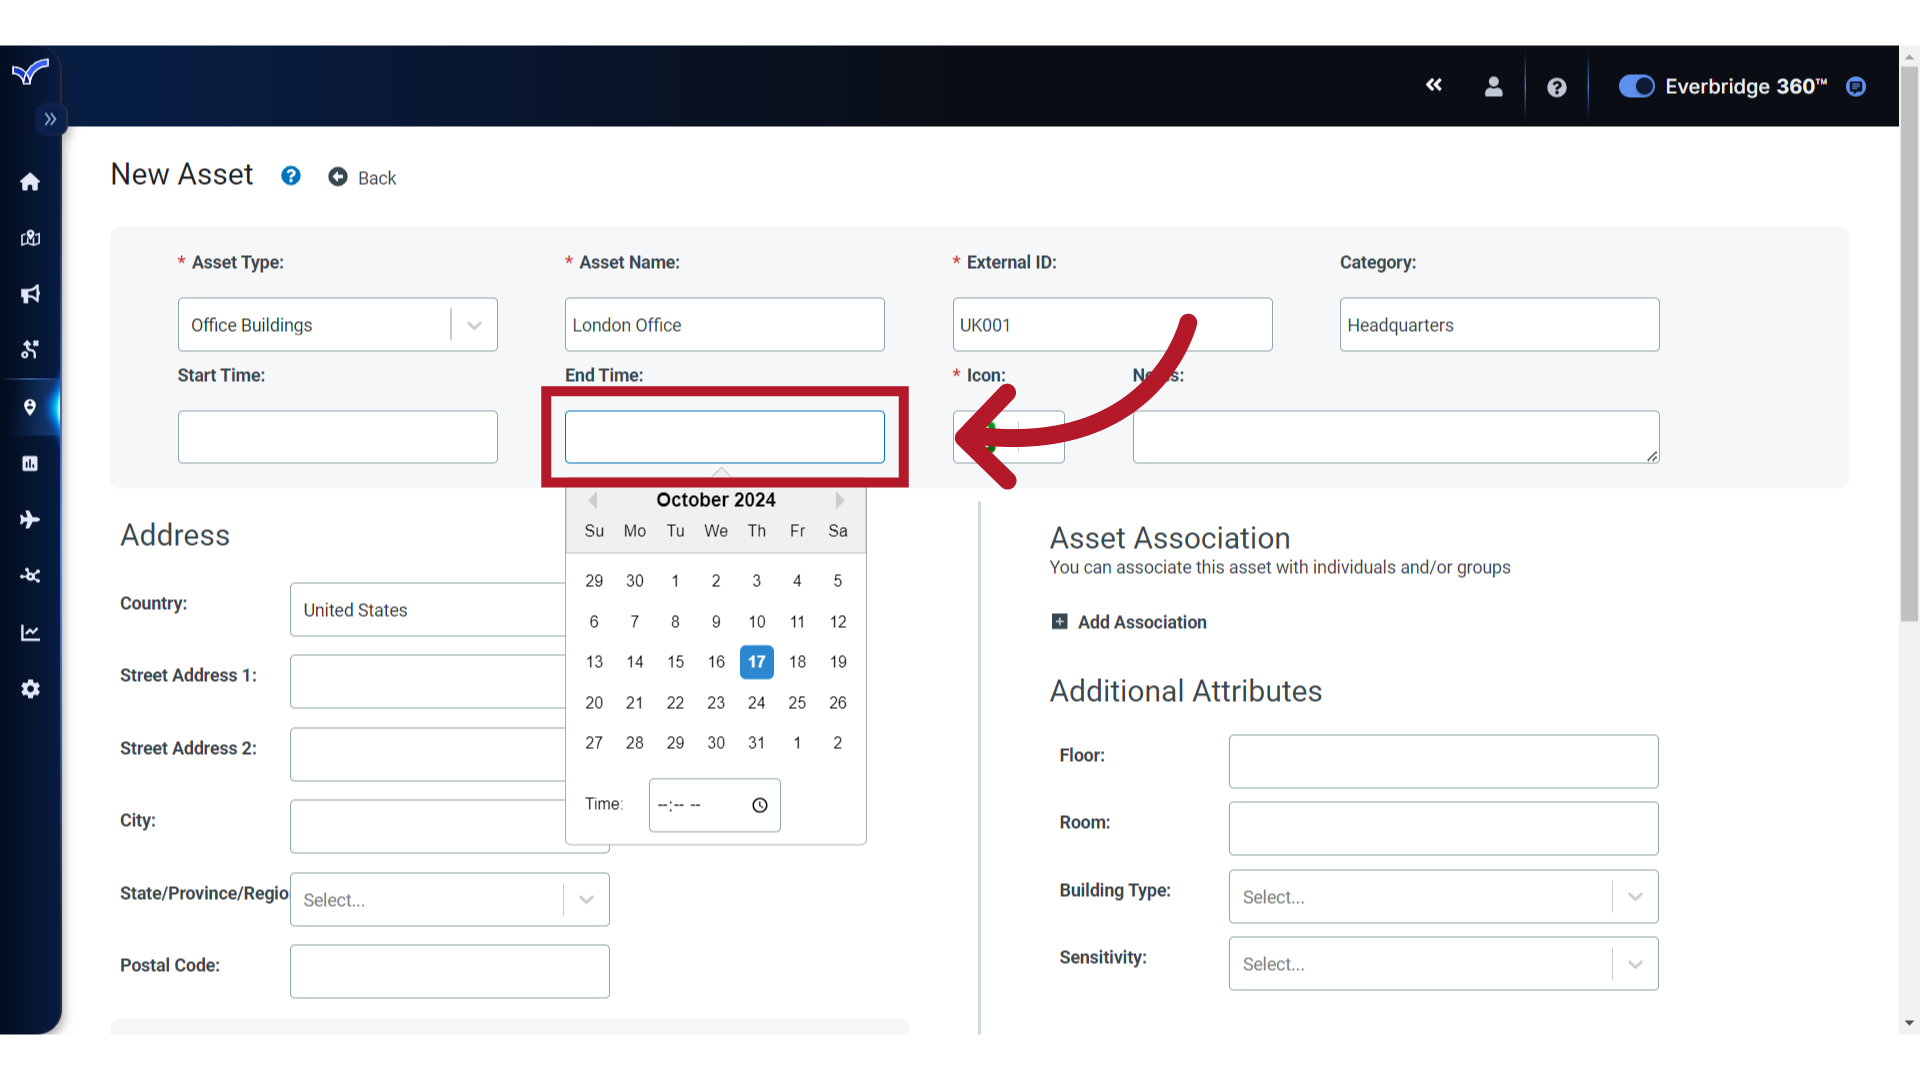
8. Start Time
For temporary assets, apply Start and End Times.
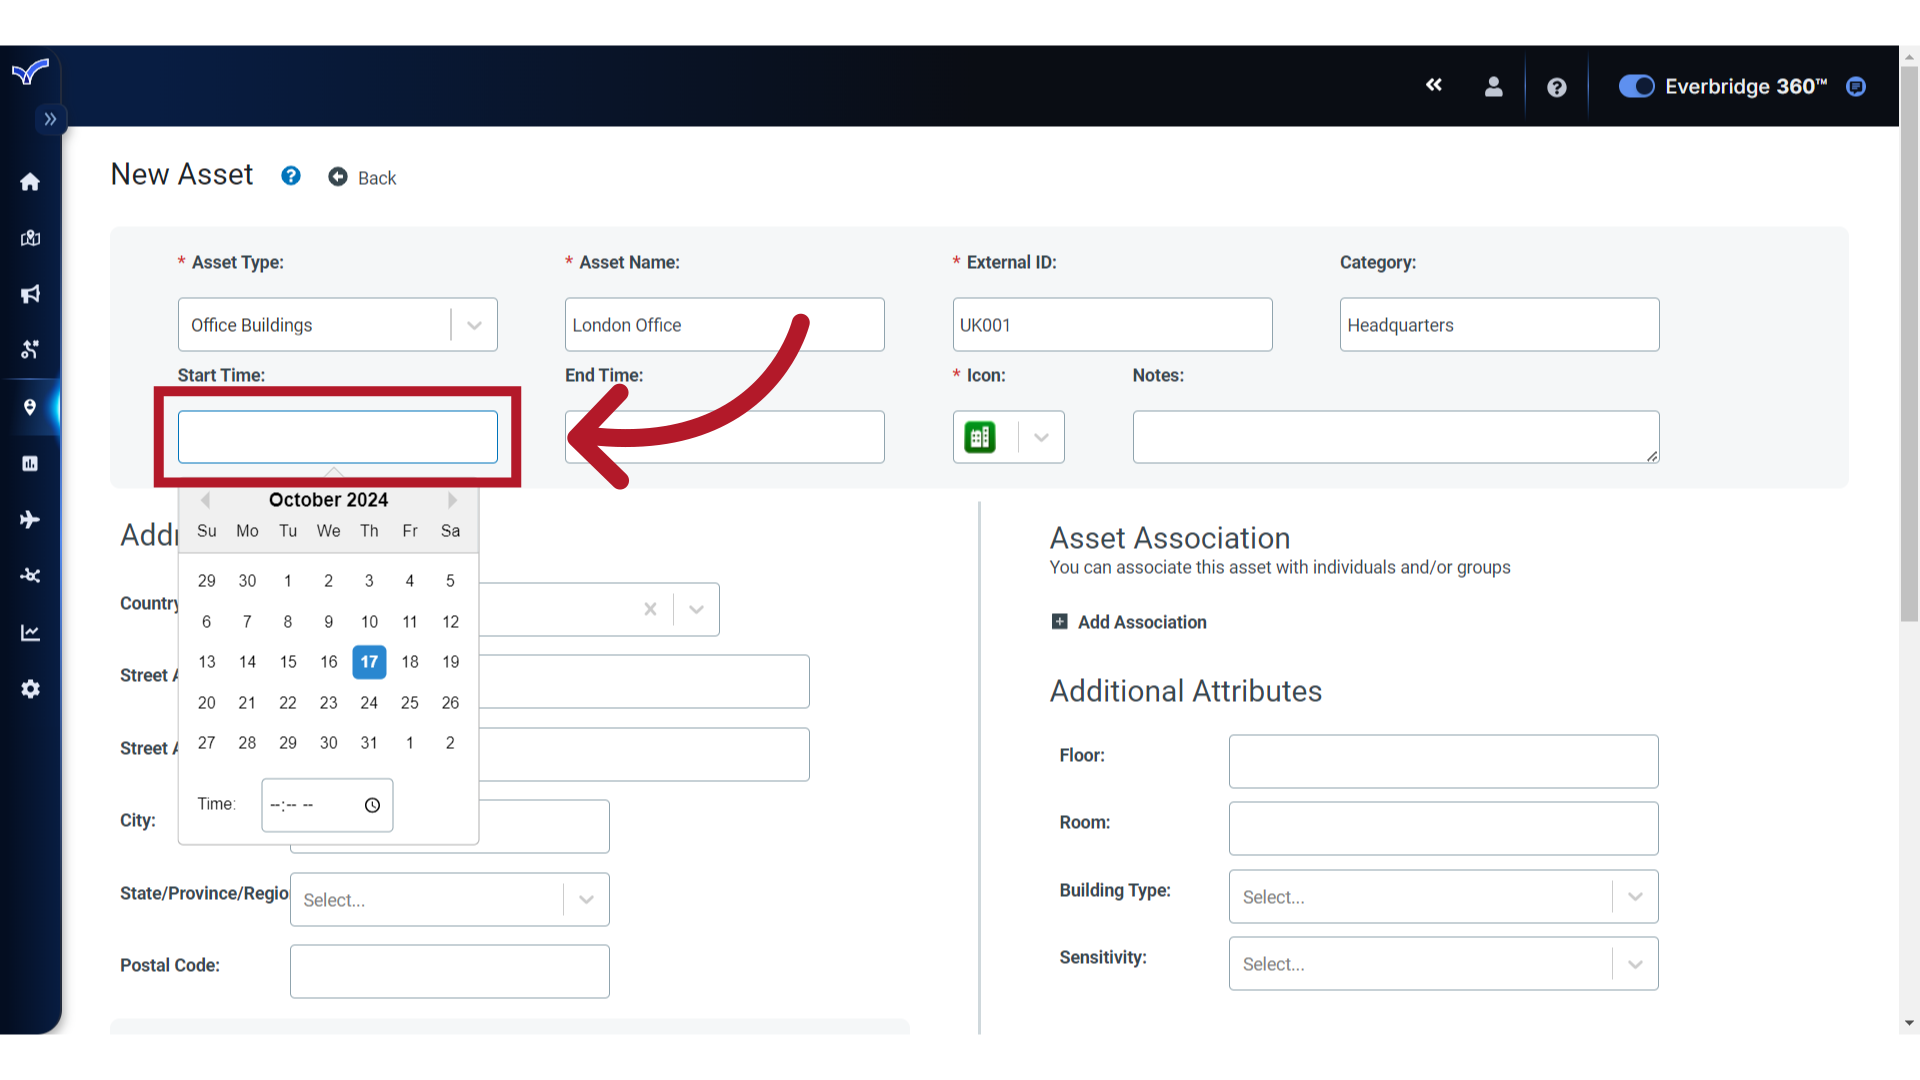
9. End Time
For example, you may have employees attending a week-long event at an off-site location, so the asset only needs to be alertable for the specified duration.
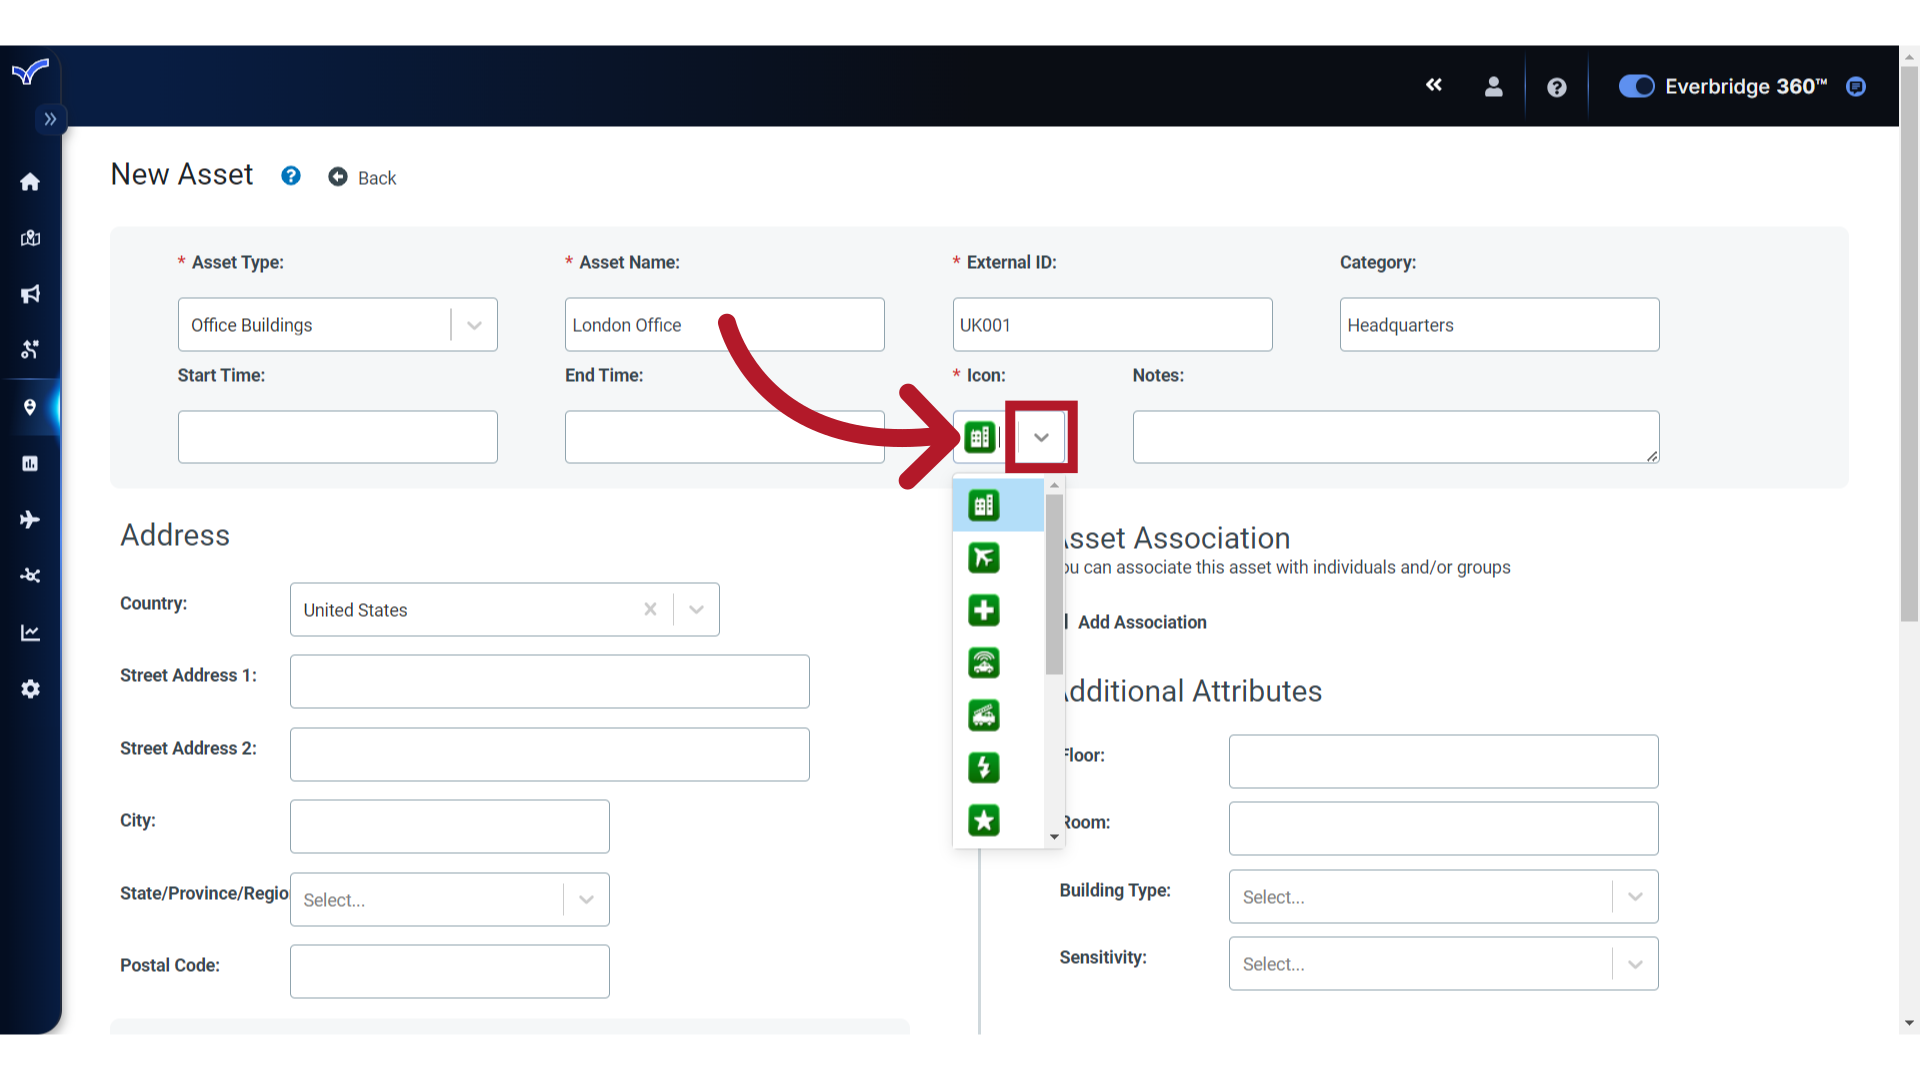
10. Icon
For Safety Connection Buildings, the default icon for this asset can be changed, if needed.
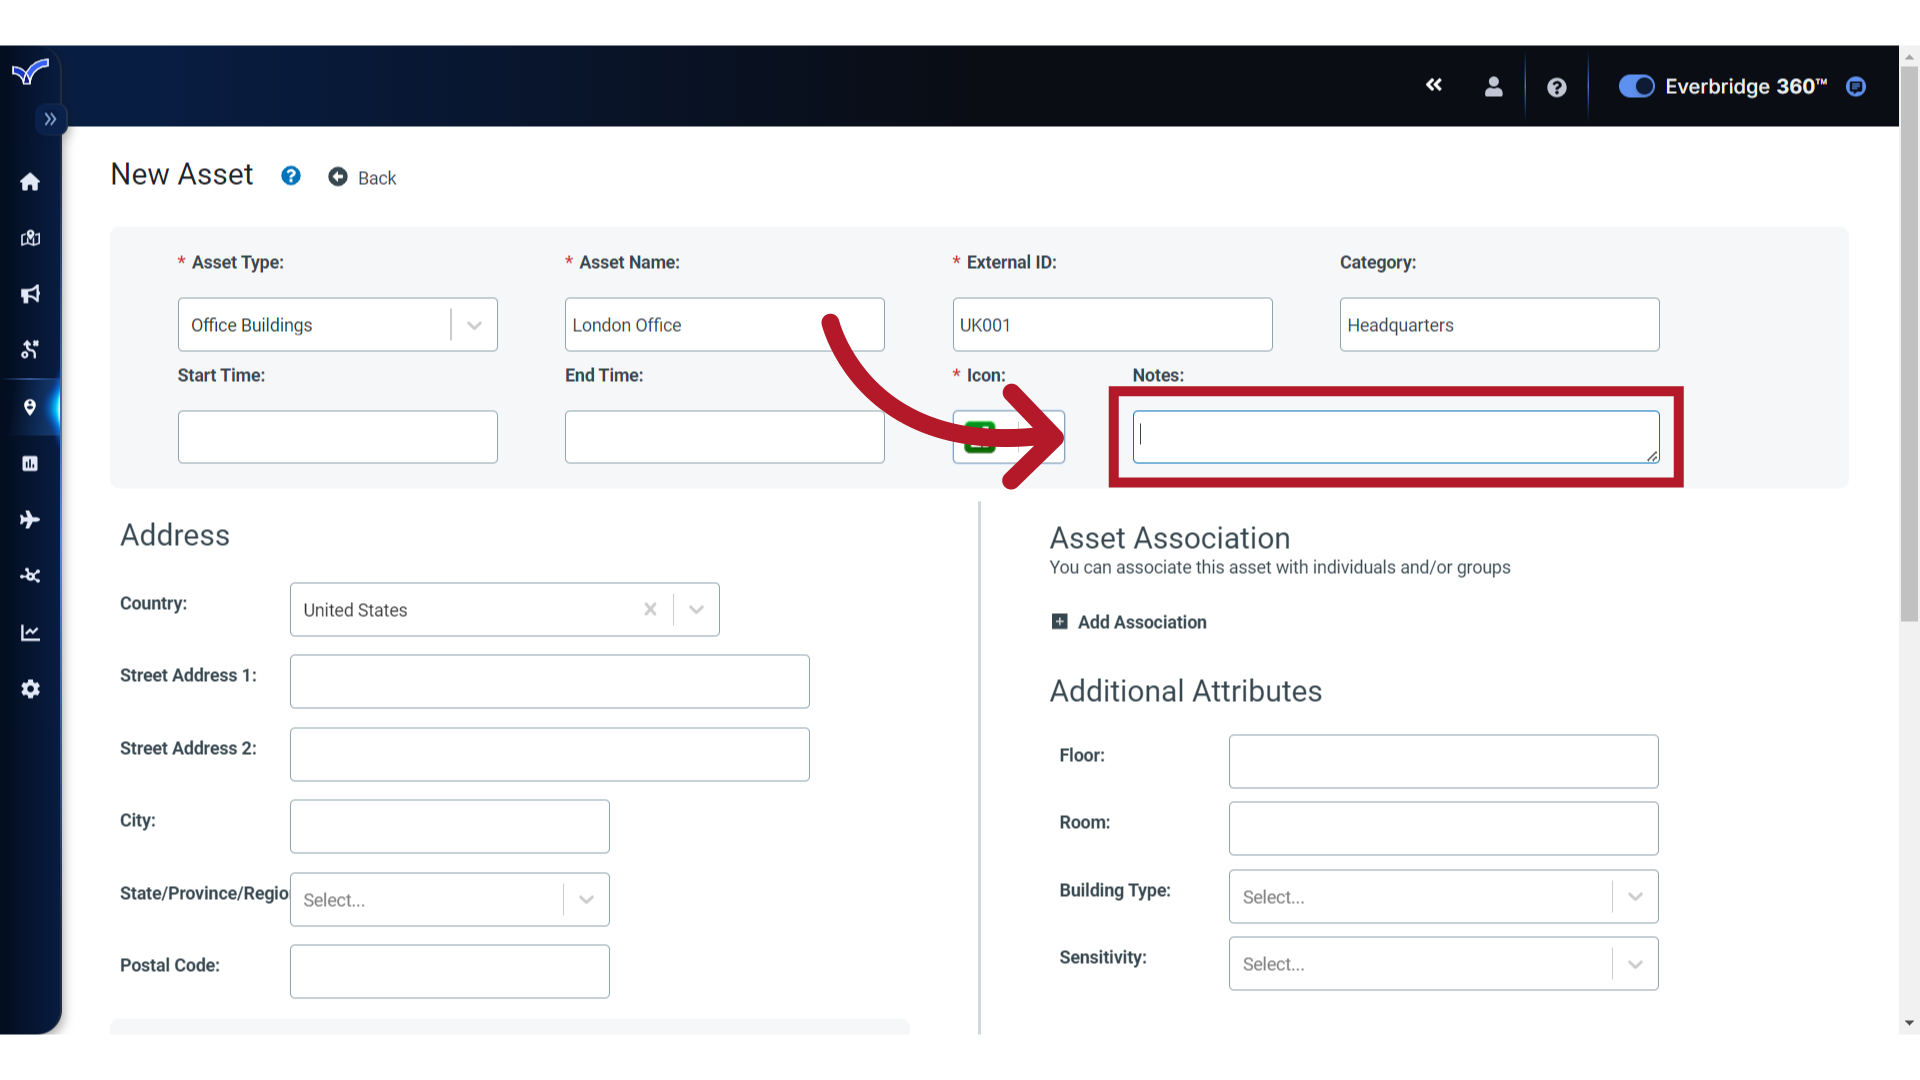
11. Notes
Optionally, add a note for the asset.
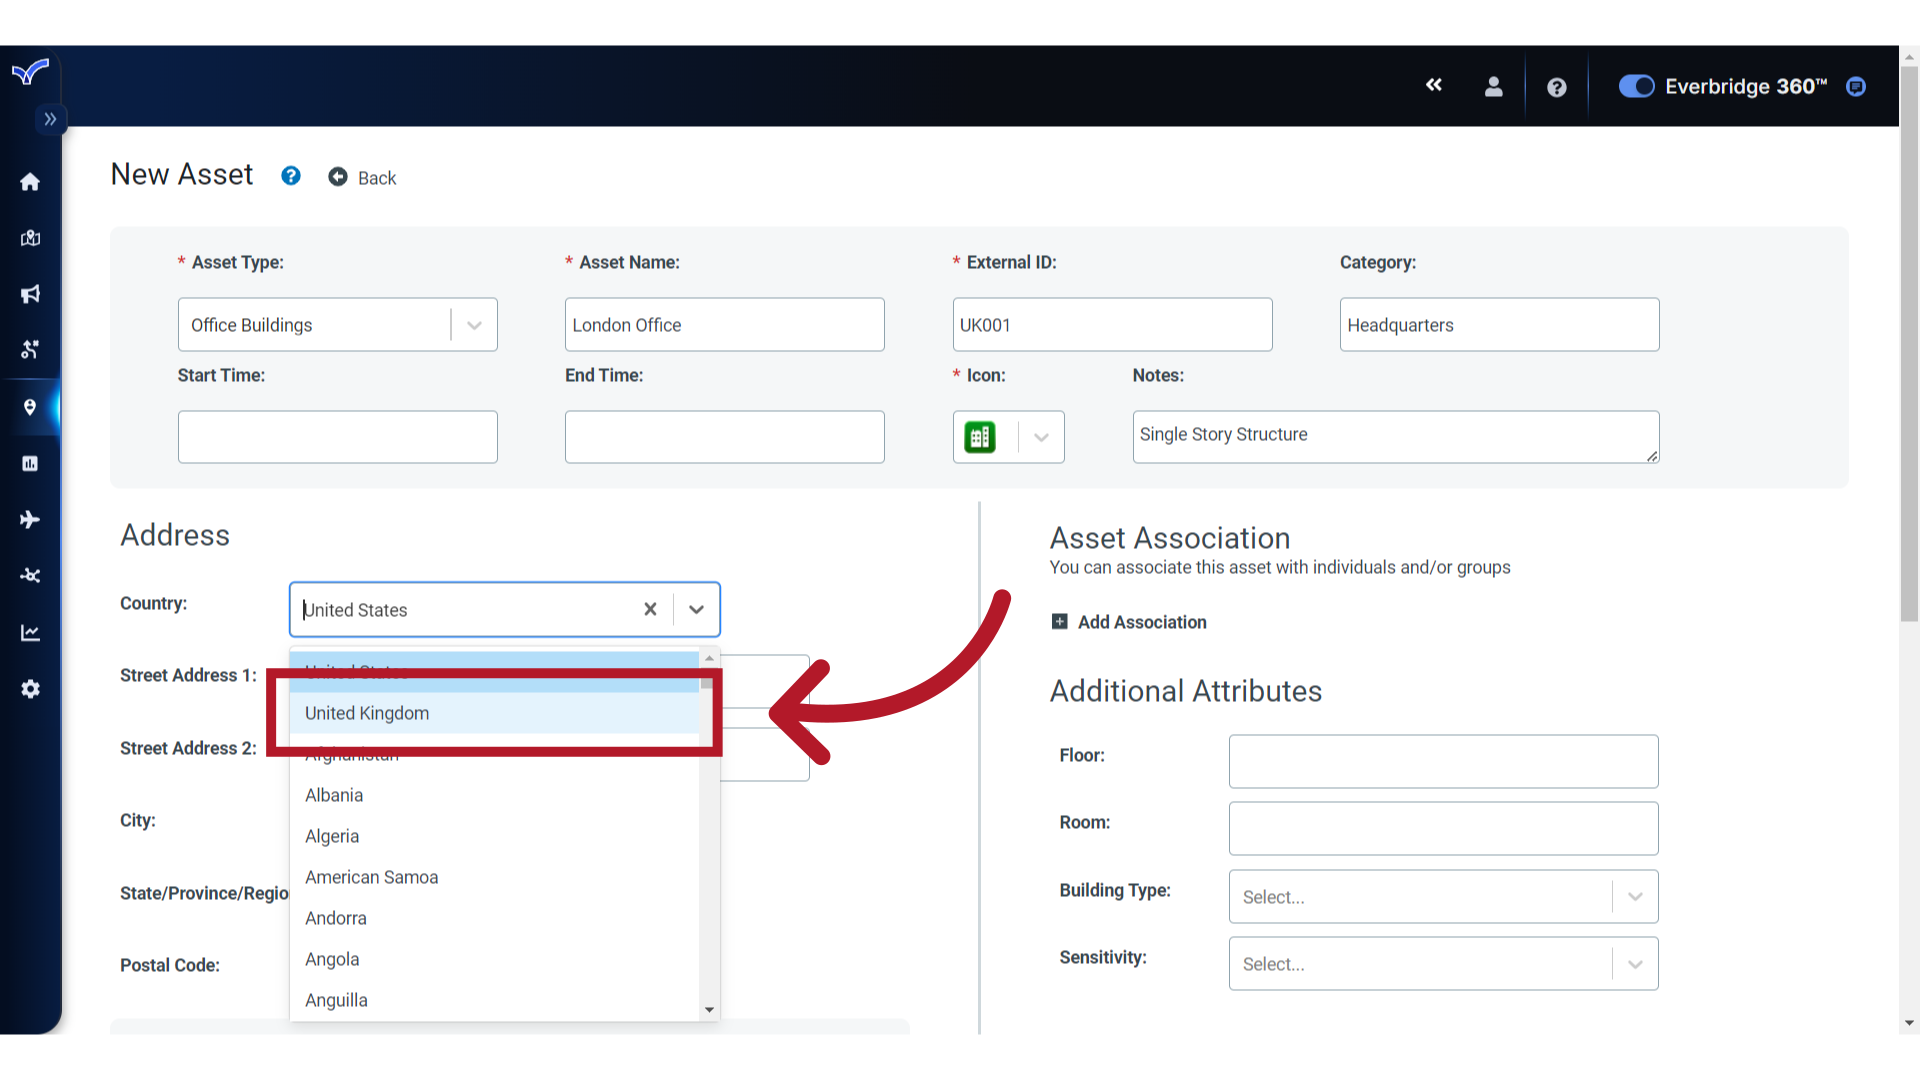
12. Address
For point based locations, enter the Address. Start by selecting a Country from the list.
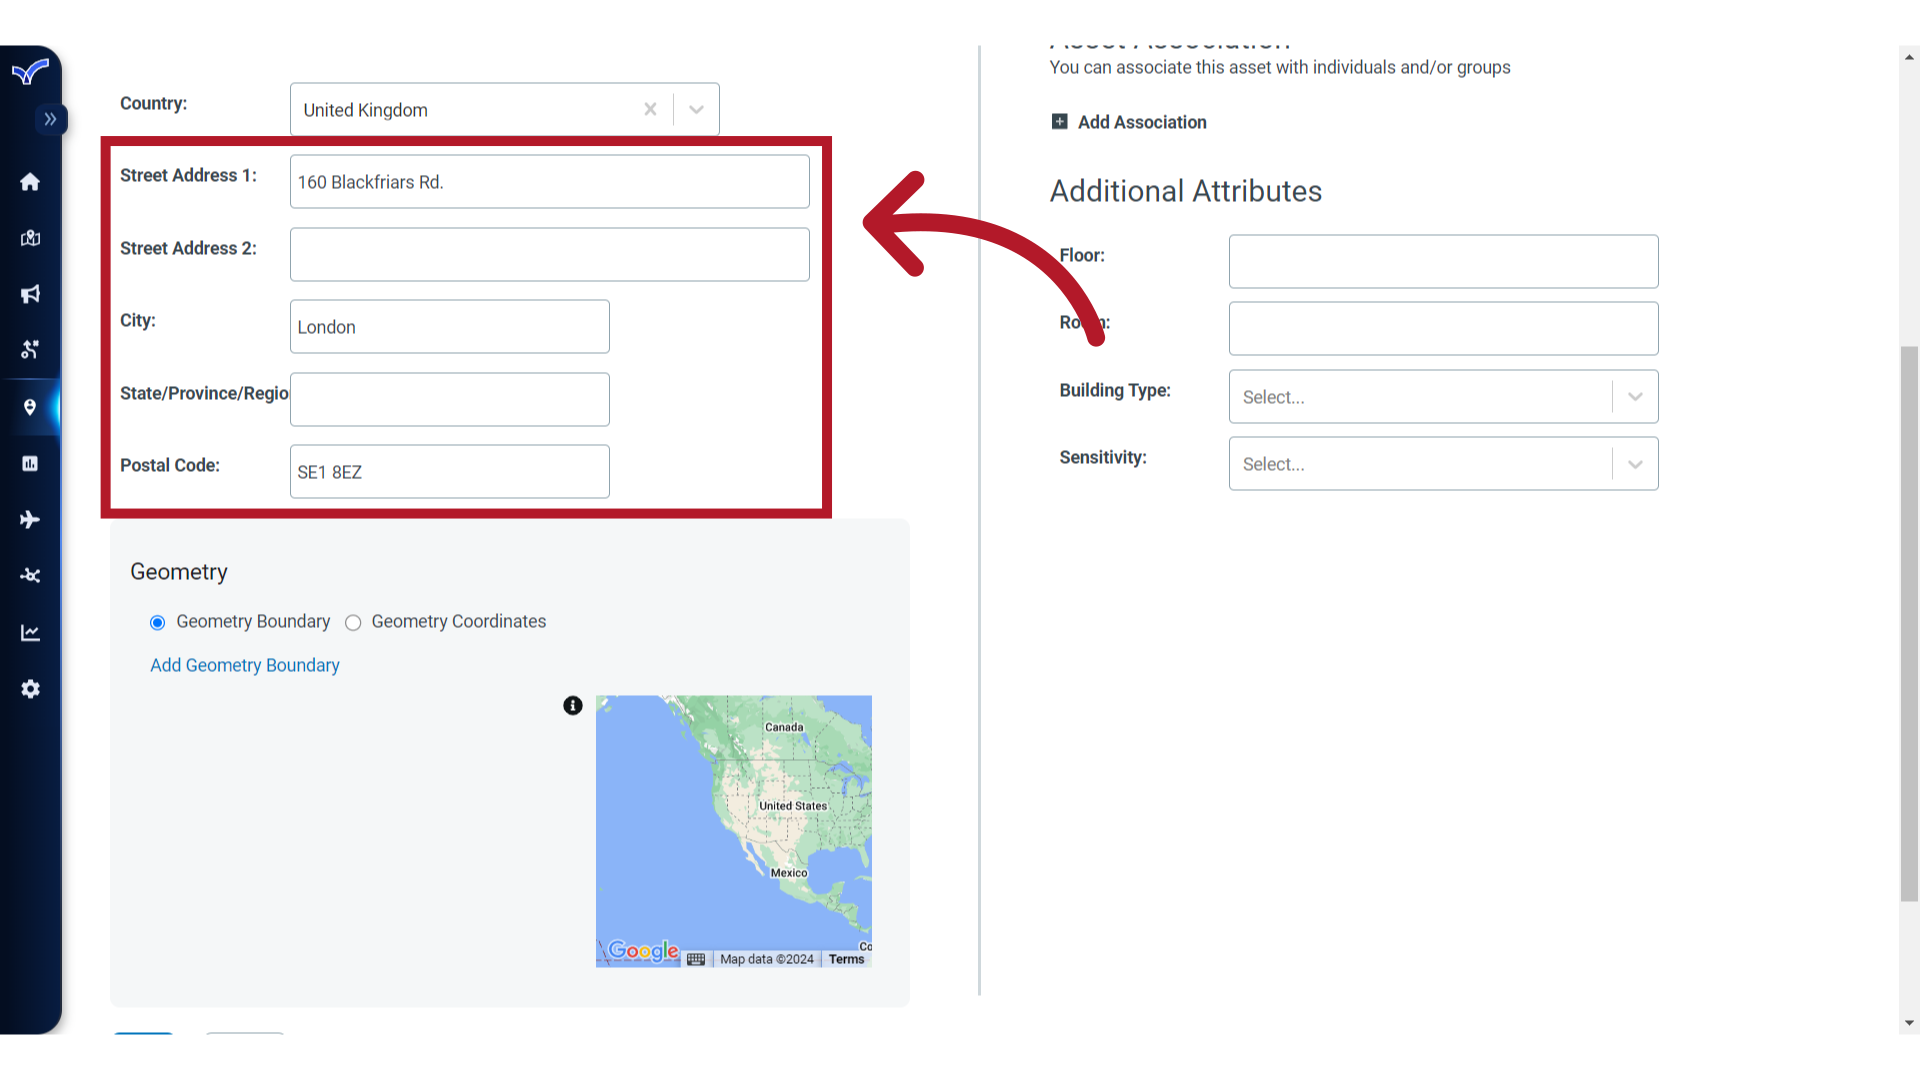
13. Details
Then, complete the address details.
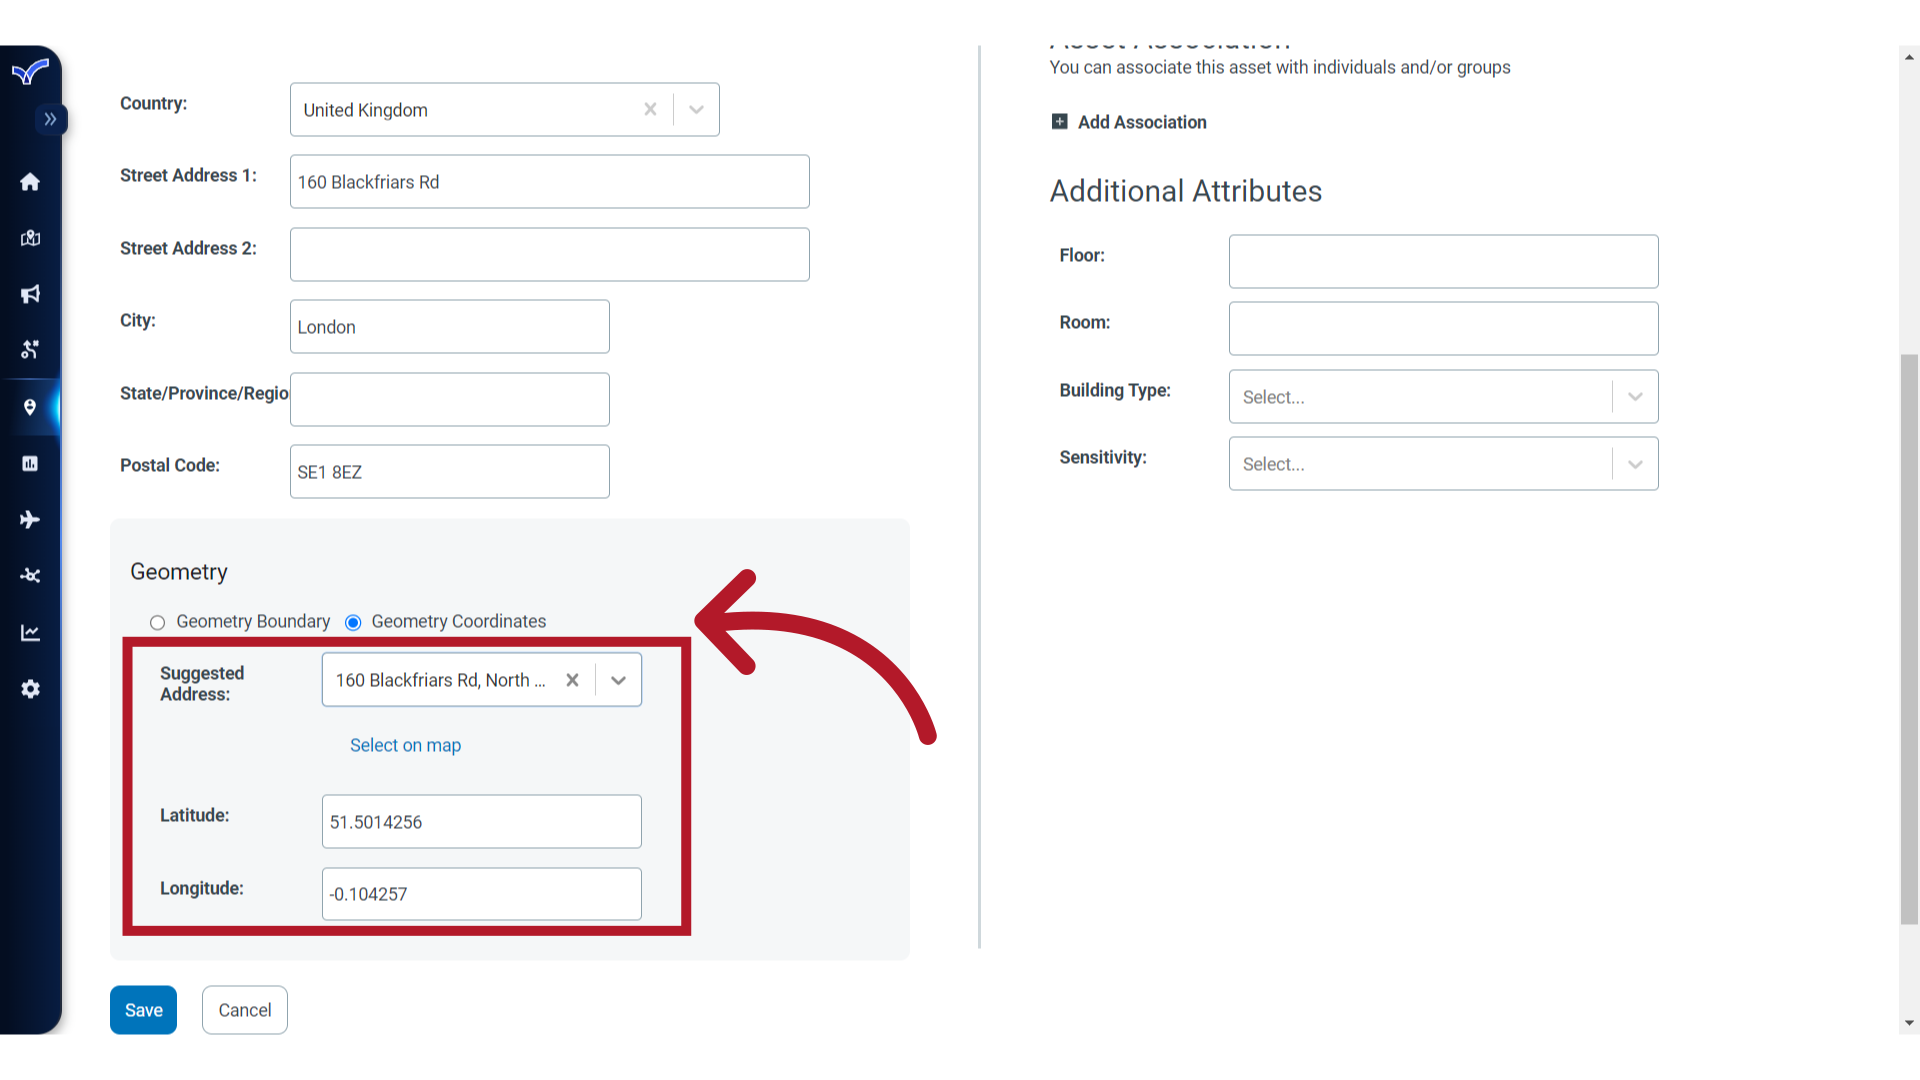
14. Lat/Long
To populate the Latitude and Longitude values for the location, select the "Geometry Coordinates" option. The values will automatically populate after choosing a Suggested Address.
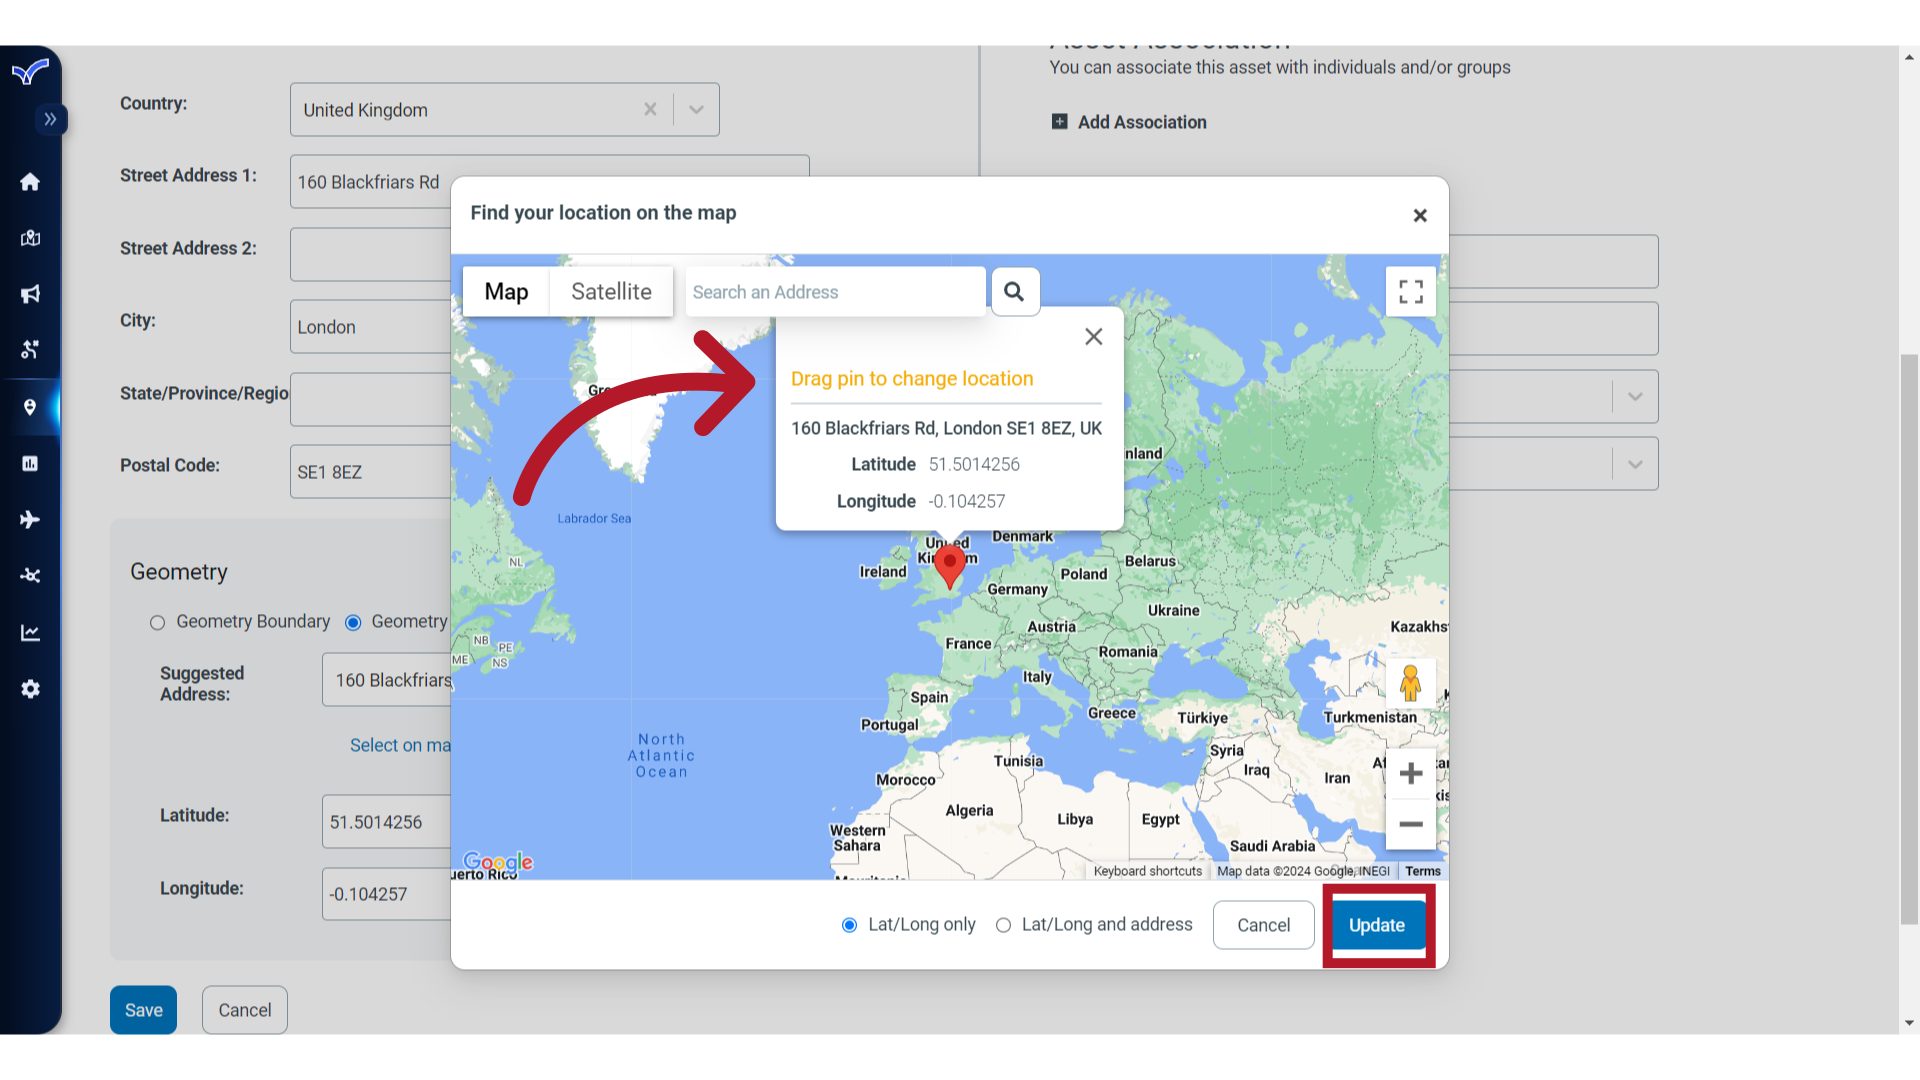
15. Map View
If needed, use the "Select on Map" option. When selected, the Map View displays. Drag the pin to a precise location and select Update to save.
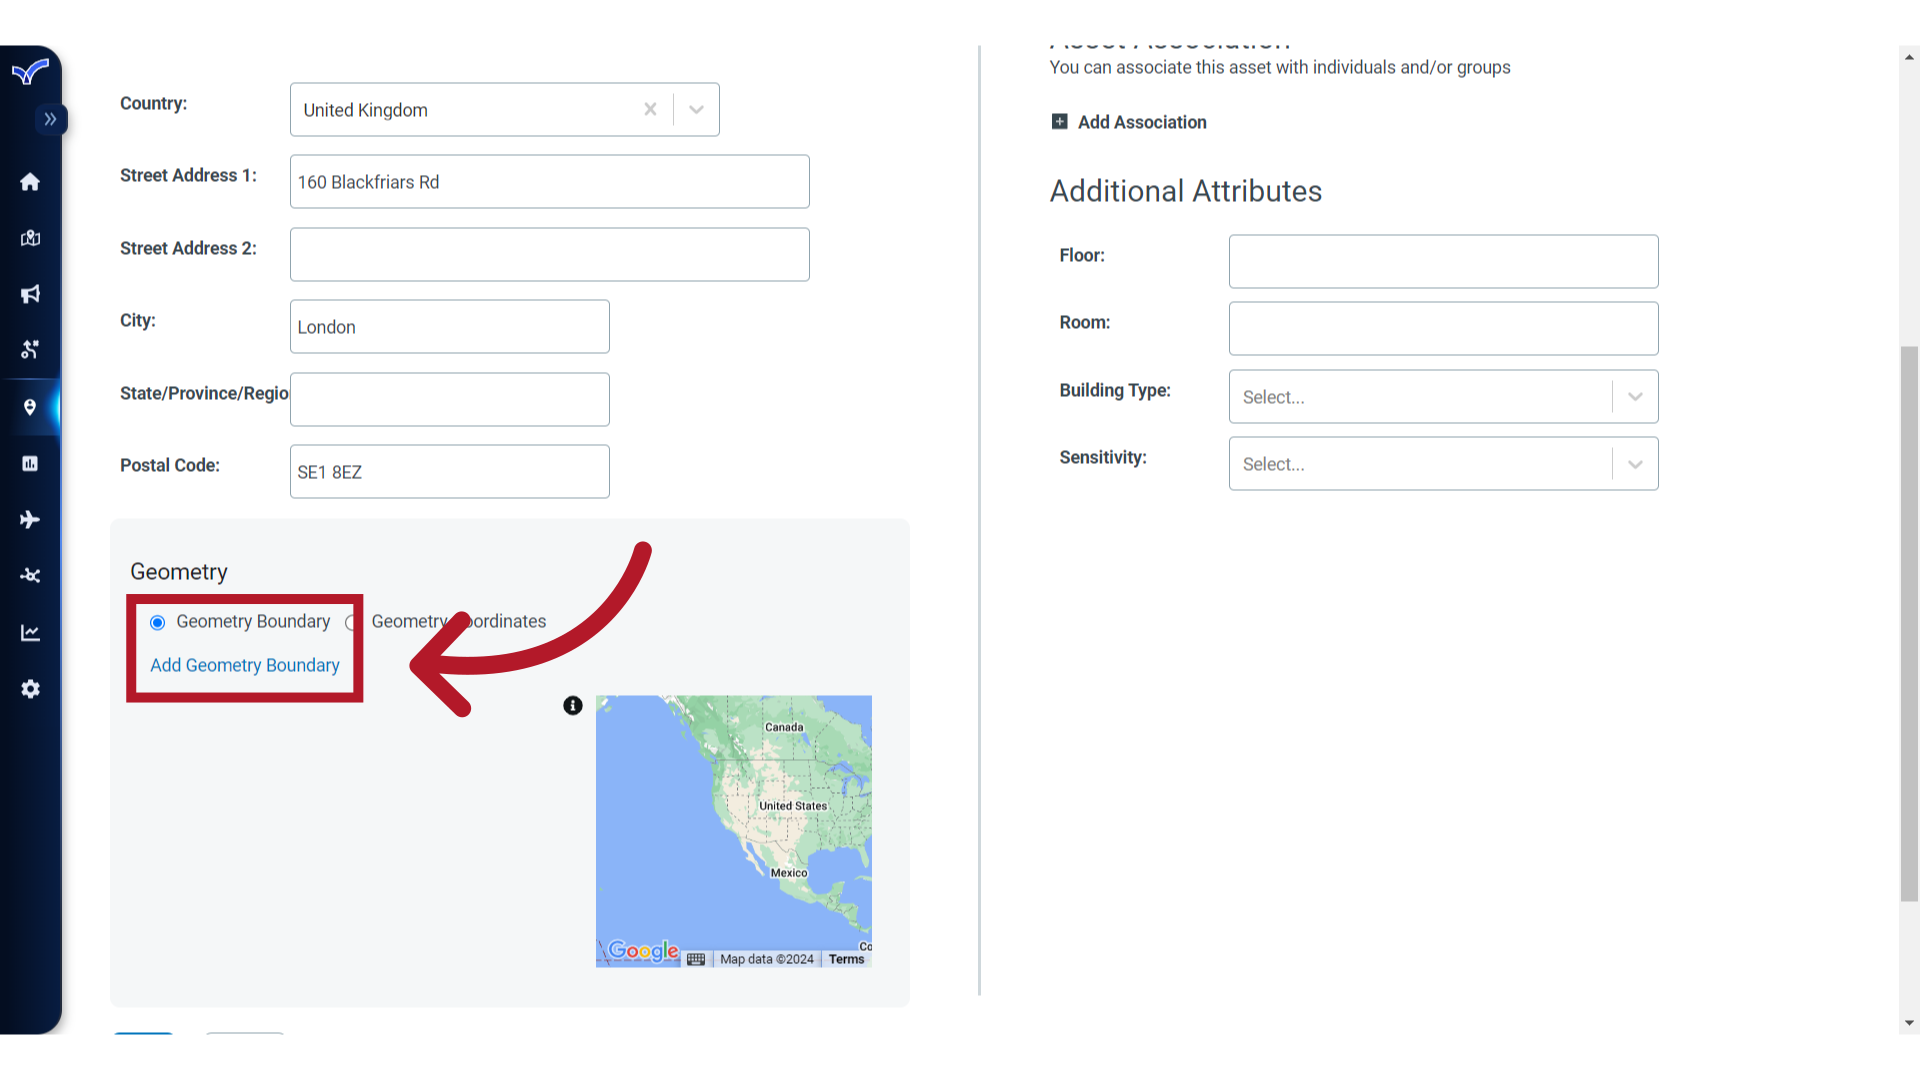
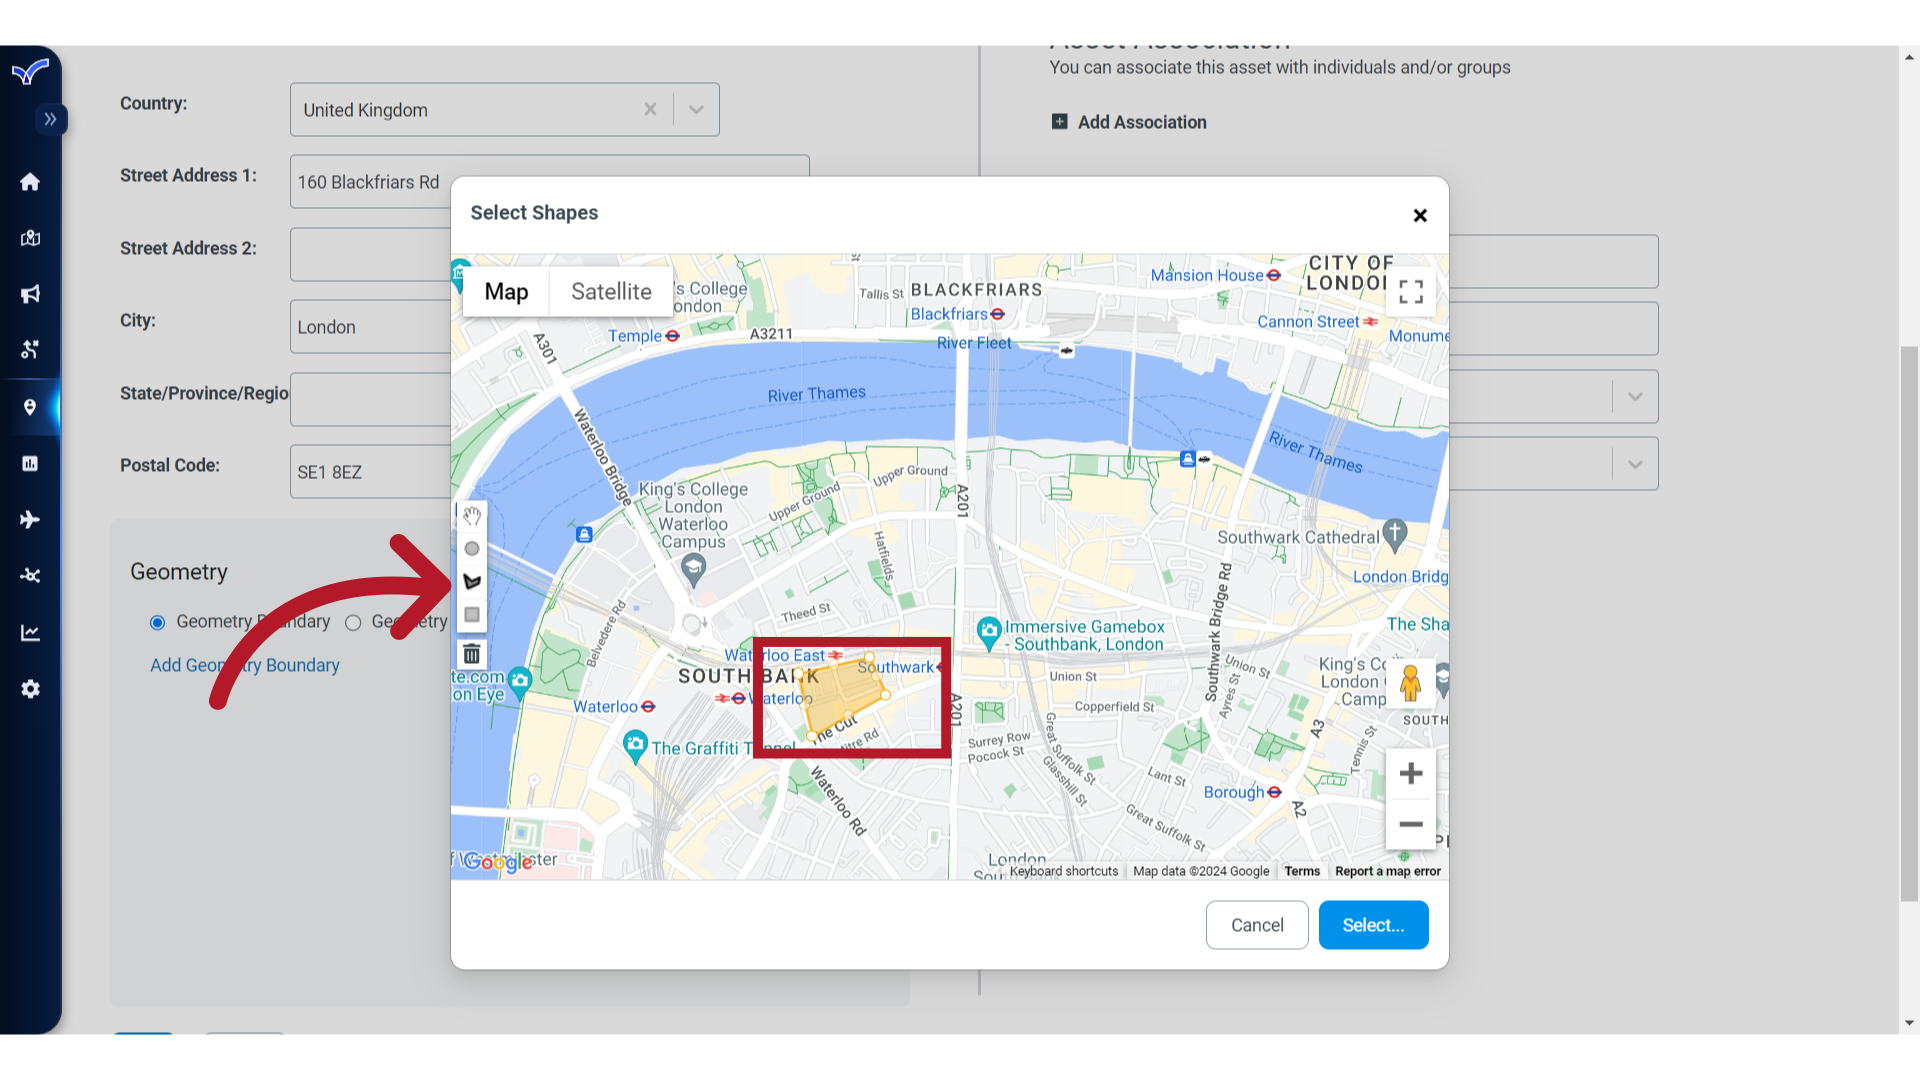
16. Geometry Boundary
For assets that represent a regional area and are not point-based, you can create a Geometry Boundary. Note, this option does not apply to Safety Connection Building type assets.
17. Polygon
When this option is selected, the Map View displays. Navigate to the desired area on the map, use one of the shape drawing options to create the polygon, then click Select to save. When using the Geometry Boundary option, no street address is required.
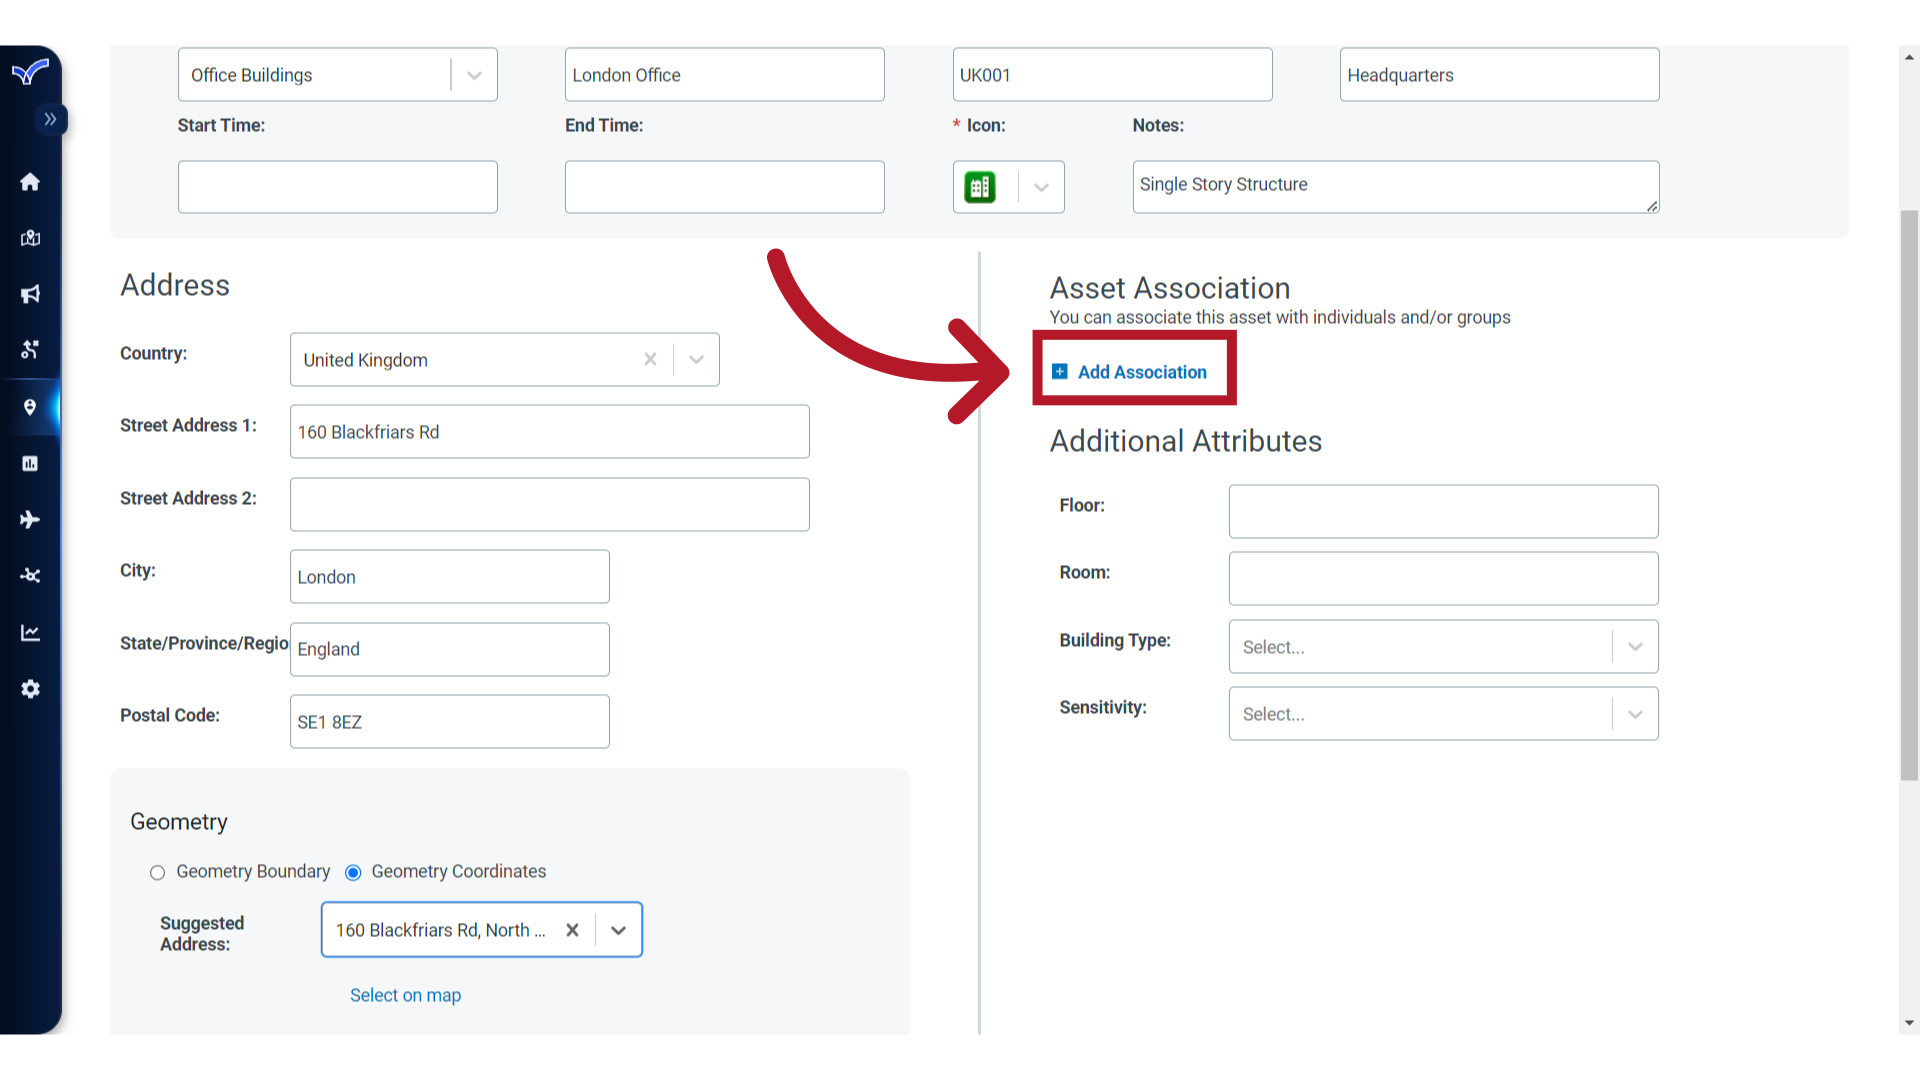
18. Asset Association
If this Asset is associated with specific individuals or groups for facility contact alerting in Visual Command Center, you can configure them here by clicking "Add Association."
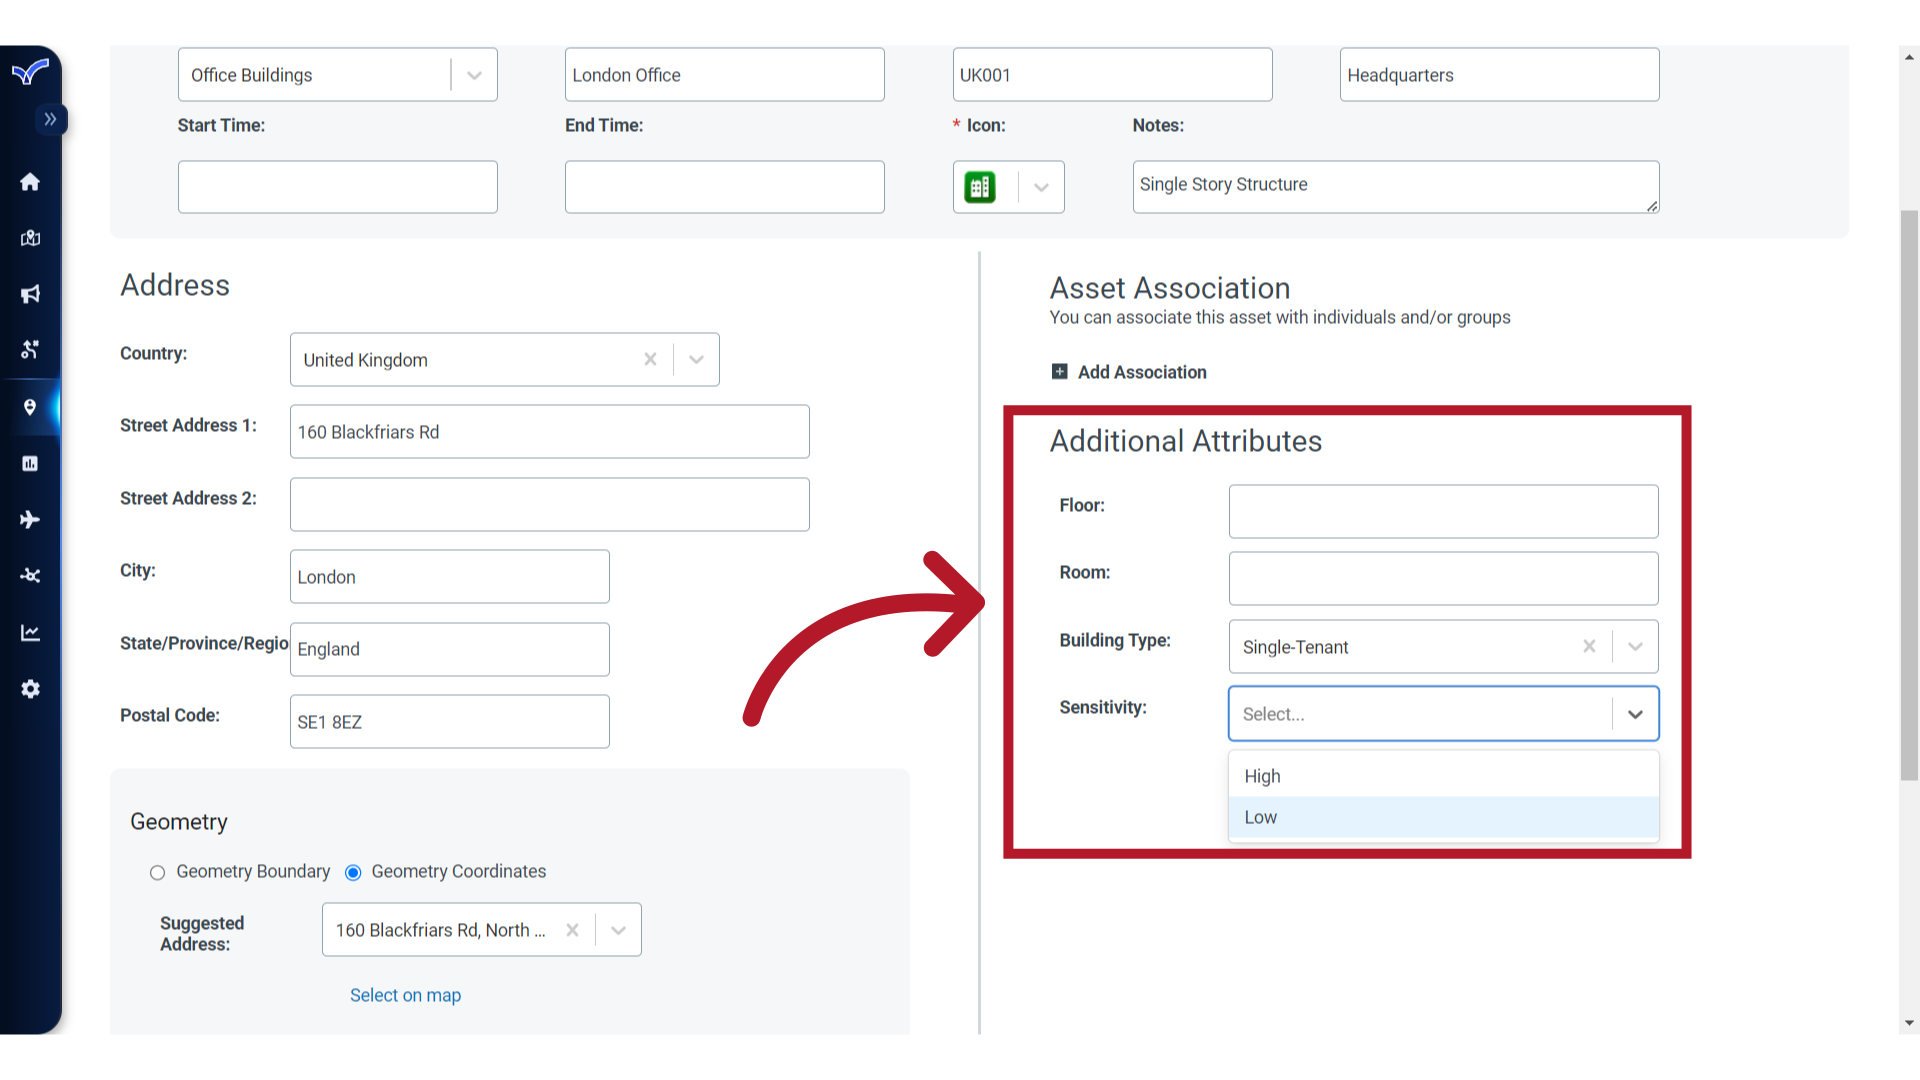
19. Attributes
If needed, fill in the Additional Attributes fields that have been defined for the Asset Type.
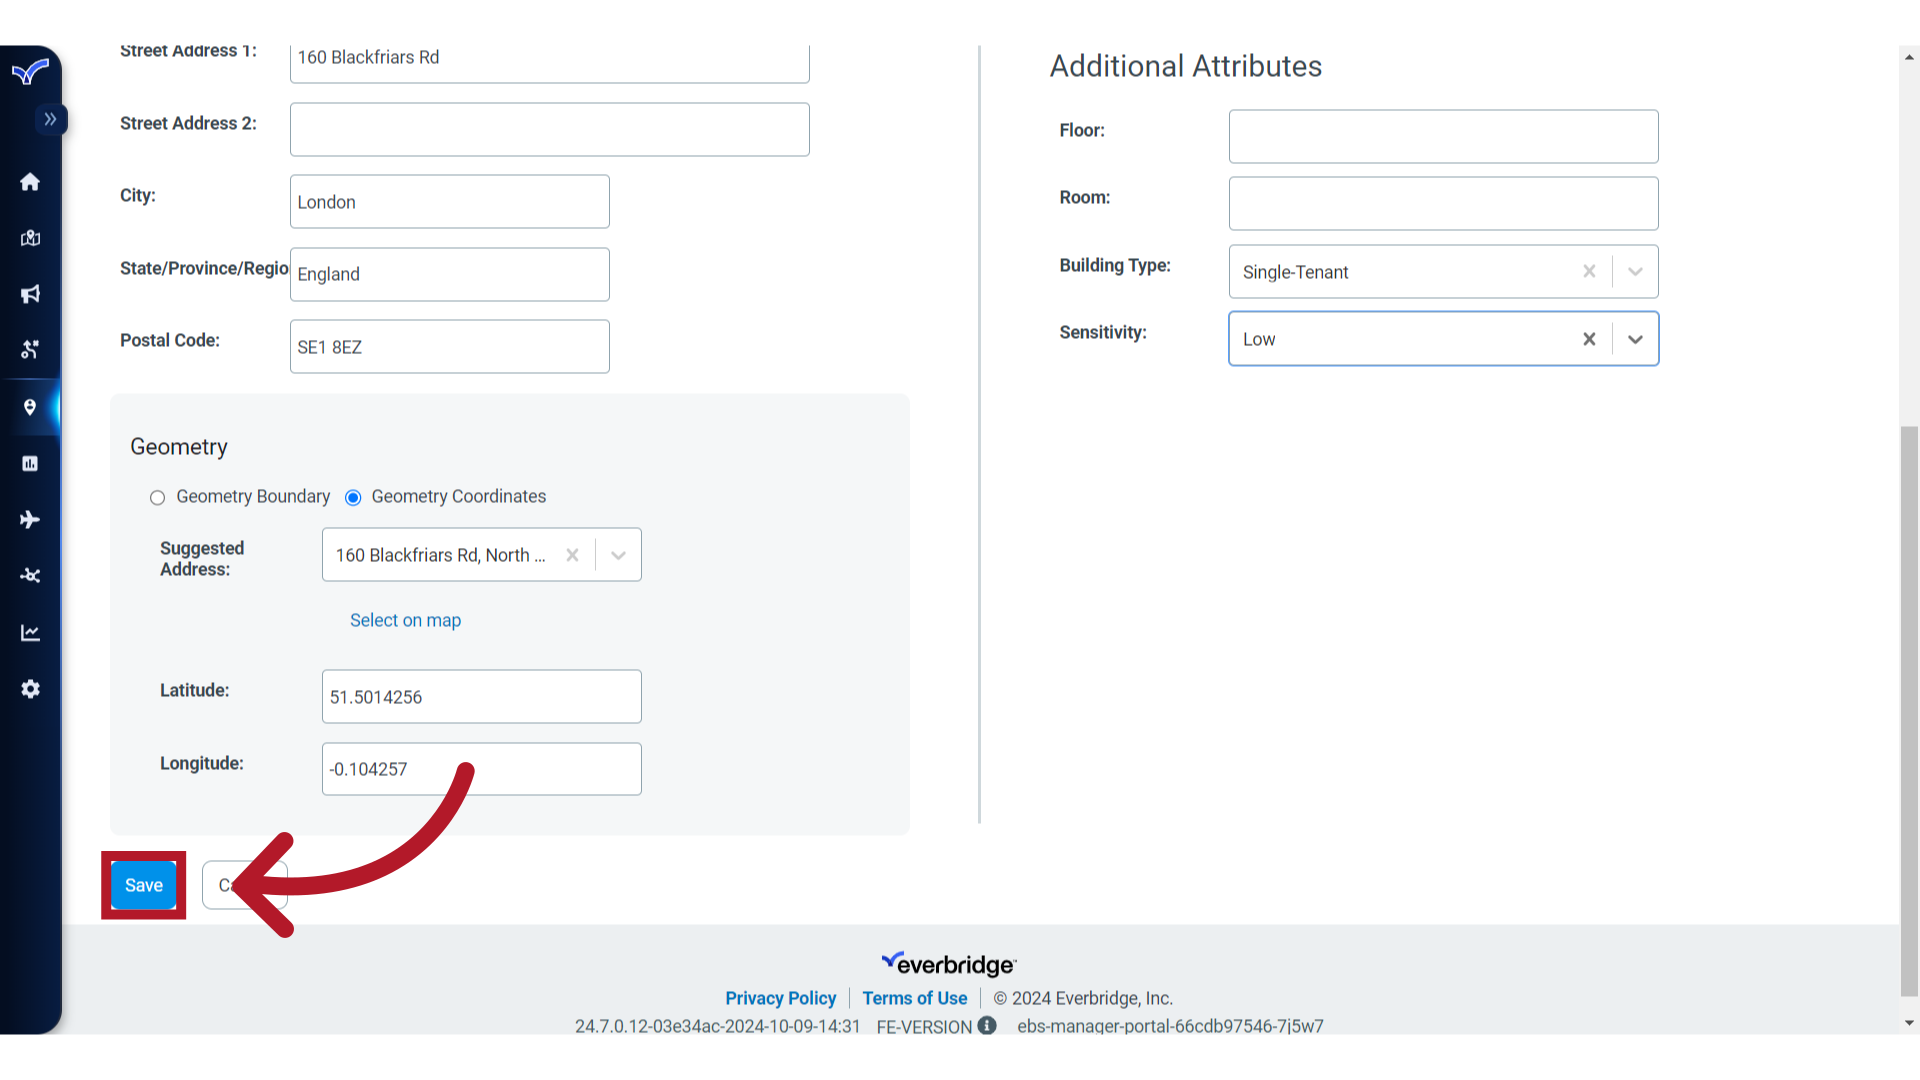
20. Save
Click "Save" to finalize the configuration of the asset. If the intent is to manage data for this Asset Type via an upload process, consider using this asset as a template for formatting additional records.
Thank you for watching this tutorial on adding a single asset in Everbridge.
Troubleshooting: Asset Limits
What should I do if I cannot add more assets to my Everbridge account?
If you're unable to add new assets due to reaching your limit, follow these steps:
Remove outdated assets that are no longer needed
If additional assets are required, contact your Everbridge account manager to discuss increasing your asset allocation
Your organization's licensed asset limit will determine the available options.
What should I do if an address is placed in the wrong location (for example, in the ocean) after saving an asset?
If an asset appears in the wrong place on the map after you save it, try the following:
Edit the asset, re-enter the address, and be sure to select one of the suggested addresses from the dropdown before saving. This often corrects the placement.
If the placement is still wrong, manually add the exact latitude and longitude to the asset so the icon appears in the correct location.
If the issue is caused by an incorrect entry in the mapping provider’s database, contact Everbridge Support to request an update to the mapping solution. Use manually entered coordinates as a temporary approach until the map data is corrected.
How can I prevent or remove duplicate map pins when viewing assets and performing searches in the map UI?
Duplicate pins usually occur when the map is showing both checked assets and search results at the same time. To avoid this, use only one display source at a time:
Uncheck any selected assets so the map displays only the search results, or
Clear or close the active search (for example, by selecting the X next to the search) so the map displays only the checked assets.
Doing one or the other ensures the map does not render both sets of markers and removes duplicate pins.