Topic
Creating a custom Asset Attribute.
Description
In this guide, you will learn how to create a Custom Asset Attribute for an Asset Type in Everbridge. These attributes can provide additional information about an asset, which can be helpful when viewing the asset in Visual Command Center and when filtering or selecting assets in dropdowns.
You can manage Asset Additional Attributes (add, delete, or rename attribute field labels) by going to Settings > Organization > Contacts and Assets > Asset Types. Edit the Asset Type you want to change, and use the Additional Information (Additional Attributes) section to configure the labels and values that will appear on asset records and in asset selection lists.
Go to manager.everbridge.net
1. Naviagate
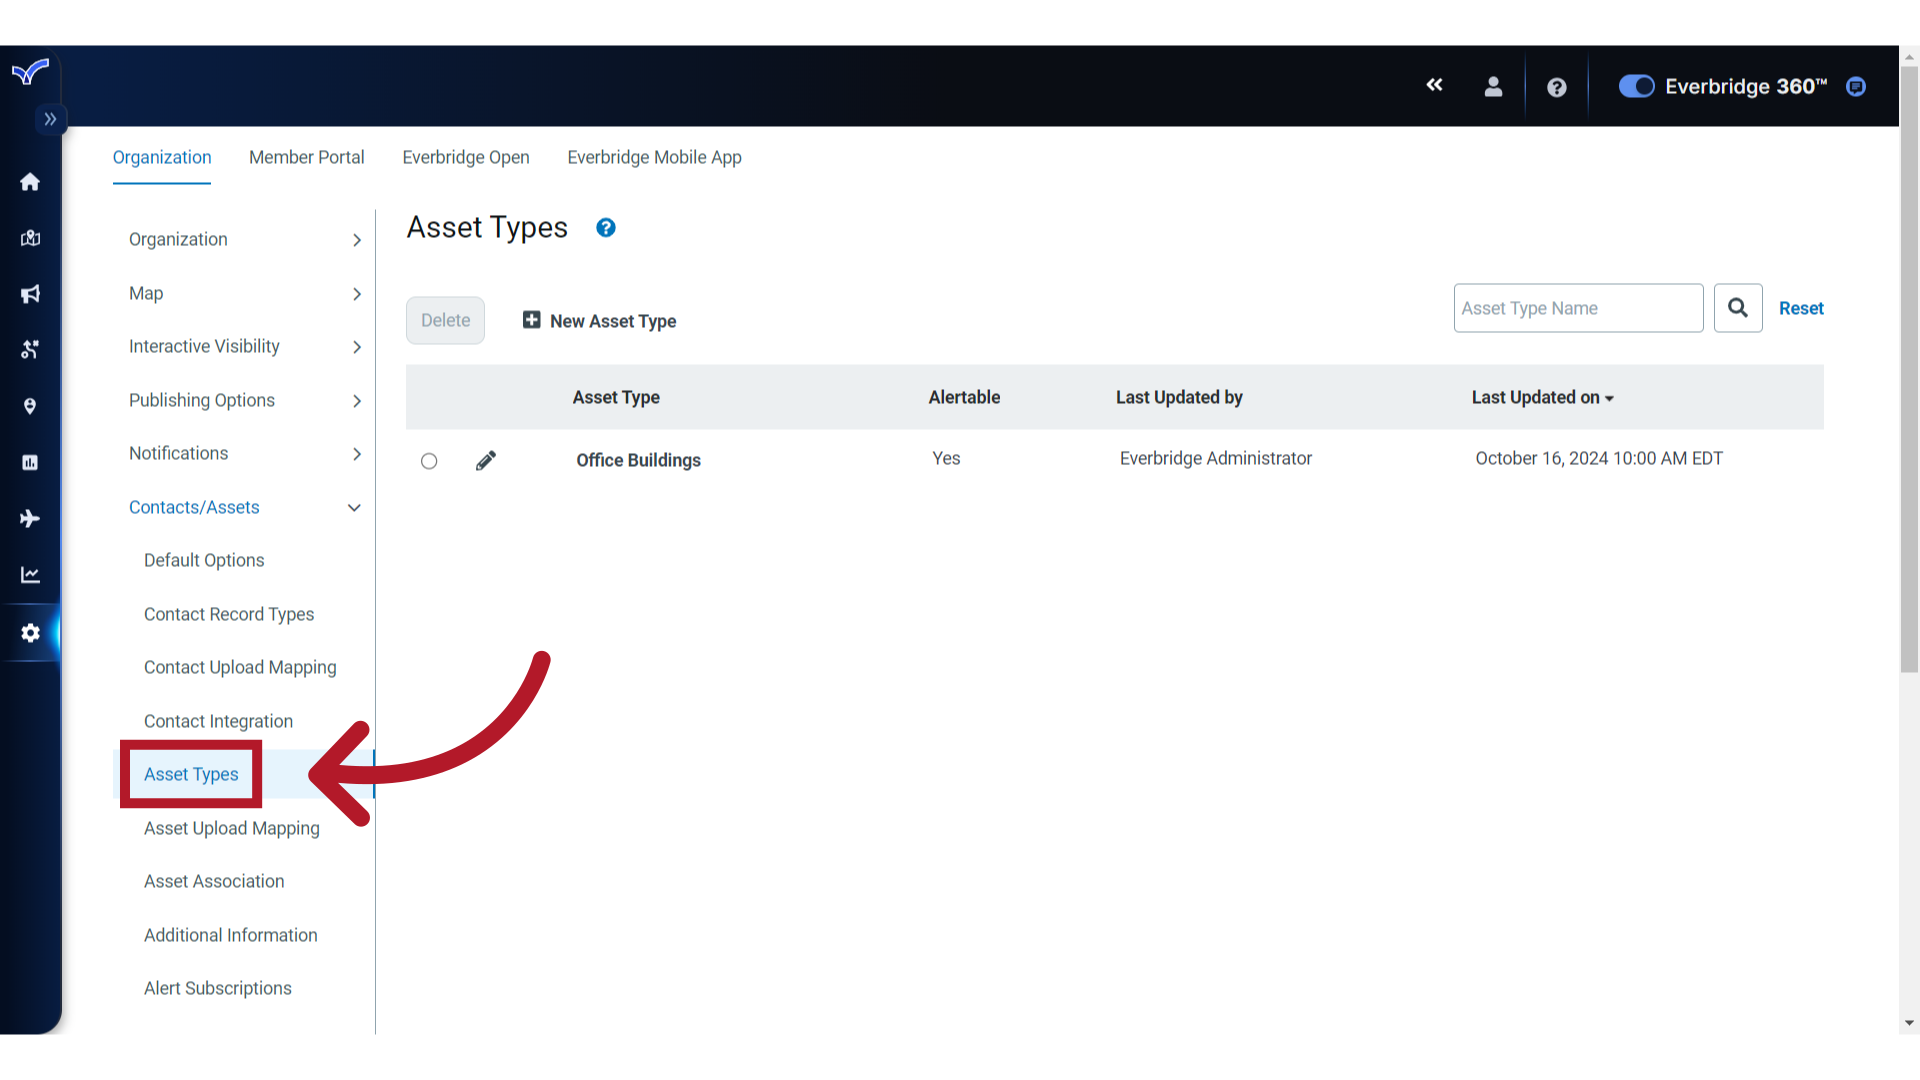
Start by navigating to the "Asset Types" section of the "Contacts/Assets" menu in your Organization Settings.
2. Edit
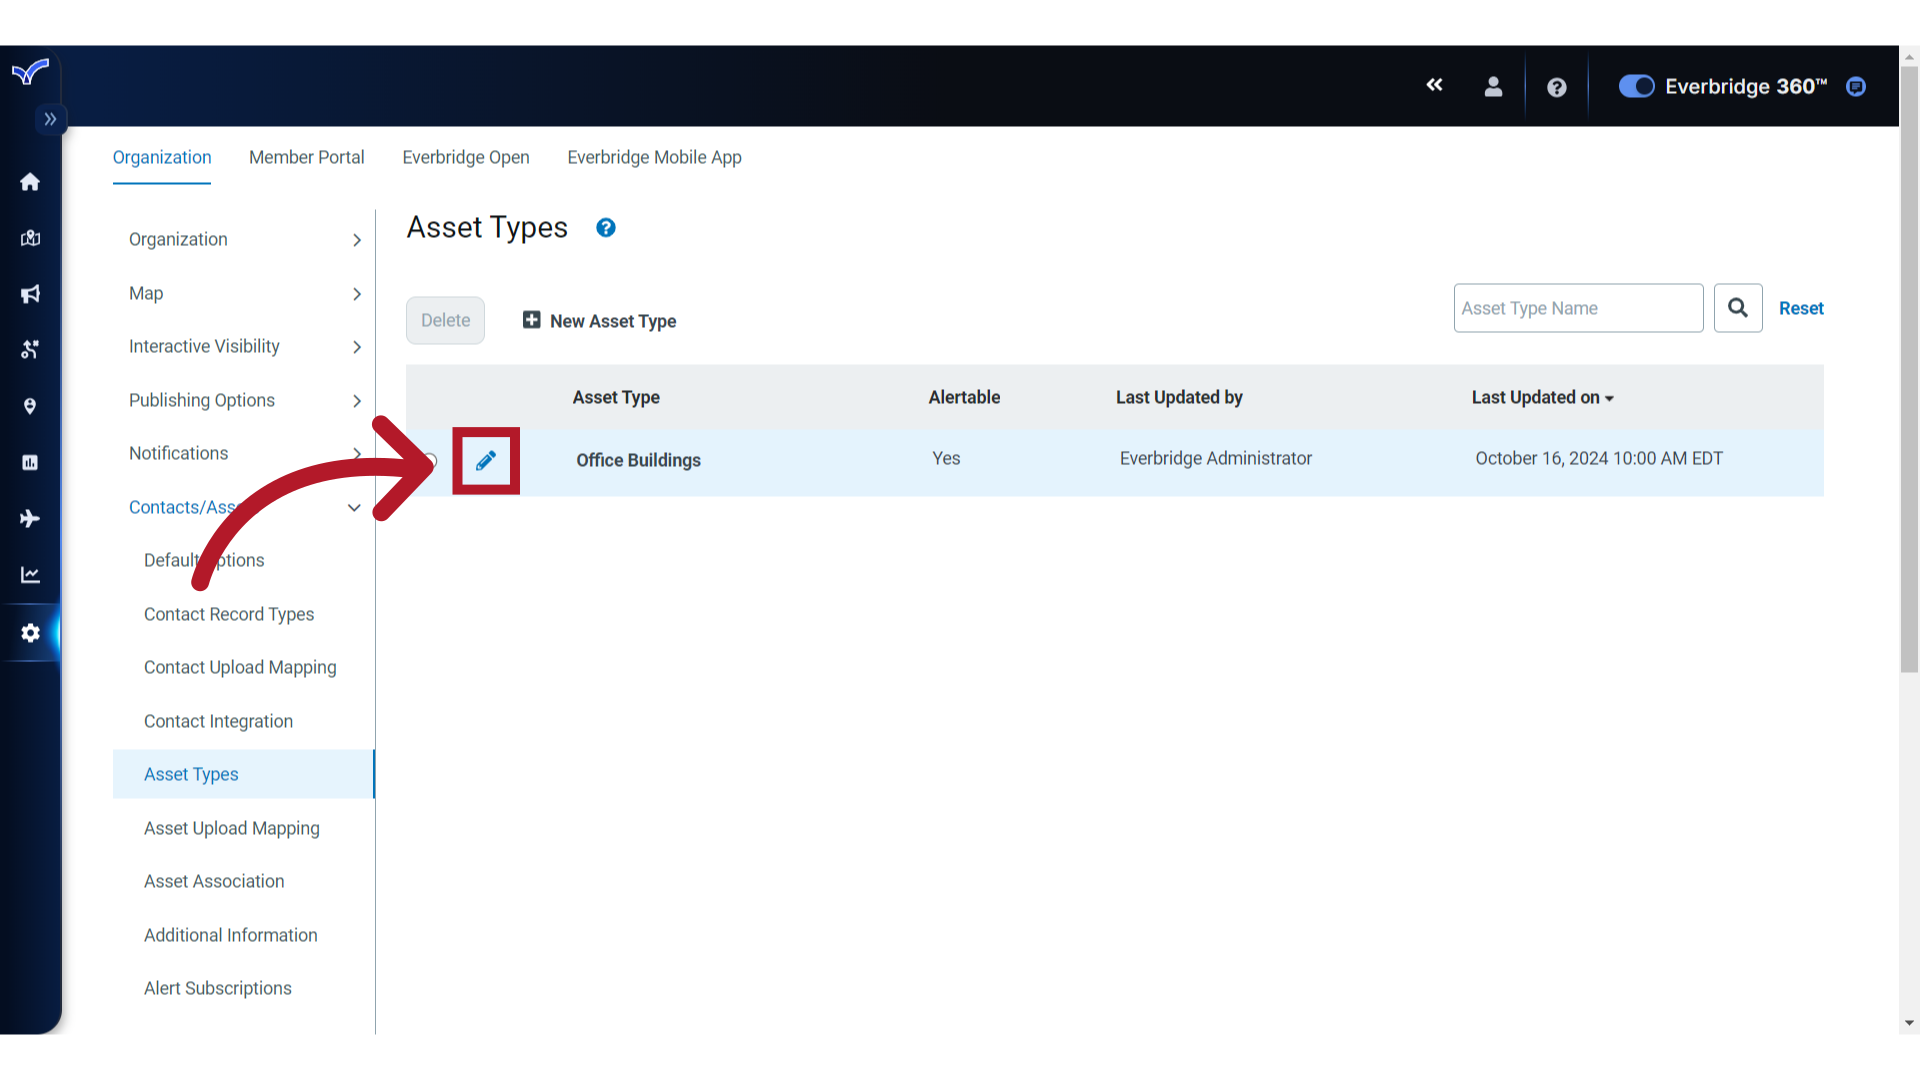
Click the pencil icon of the Asset Type for which you want to add a custom attribute or update existing Additional Attributes.
3. Verify
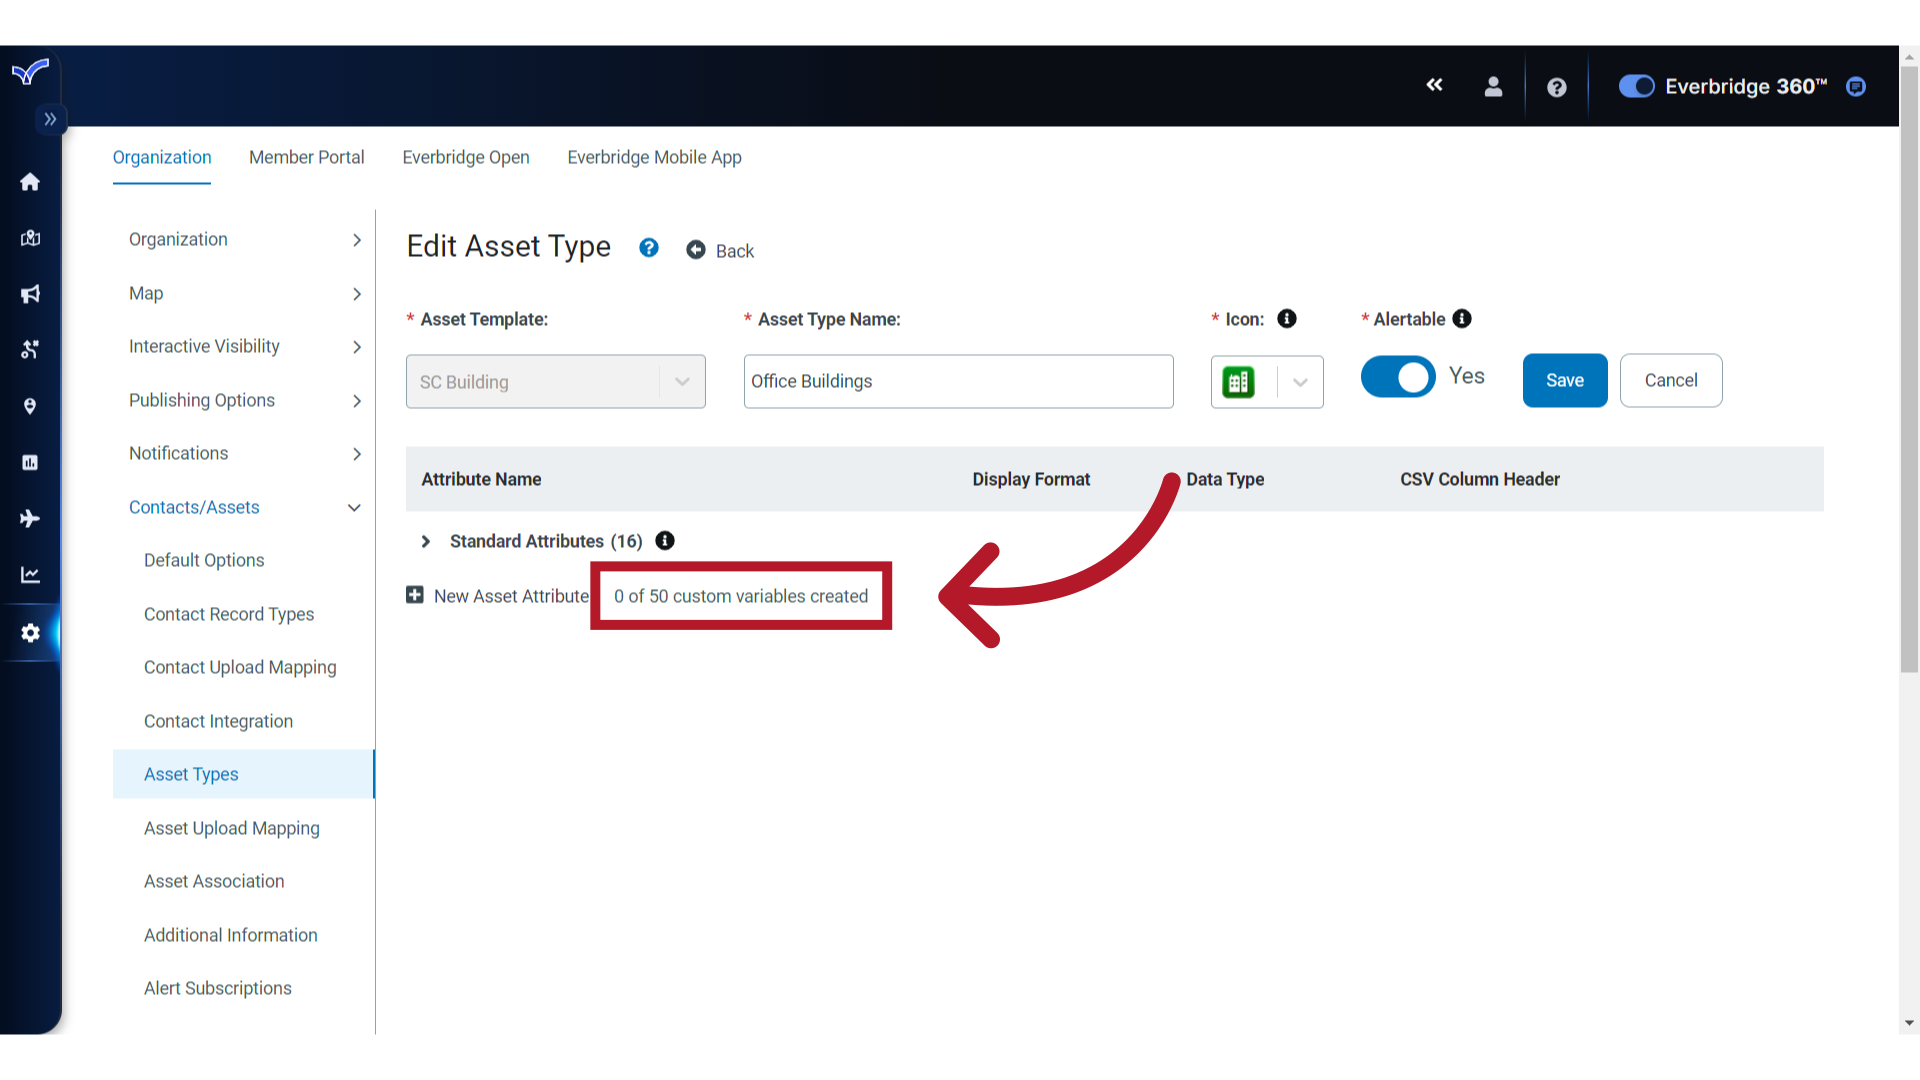
The number of custom attributes will vary depending on what has been provisioned for your Organization.
4. Add
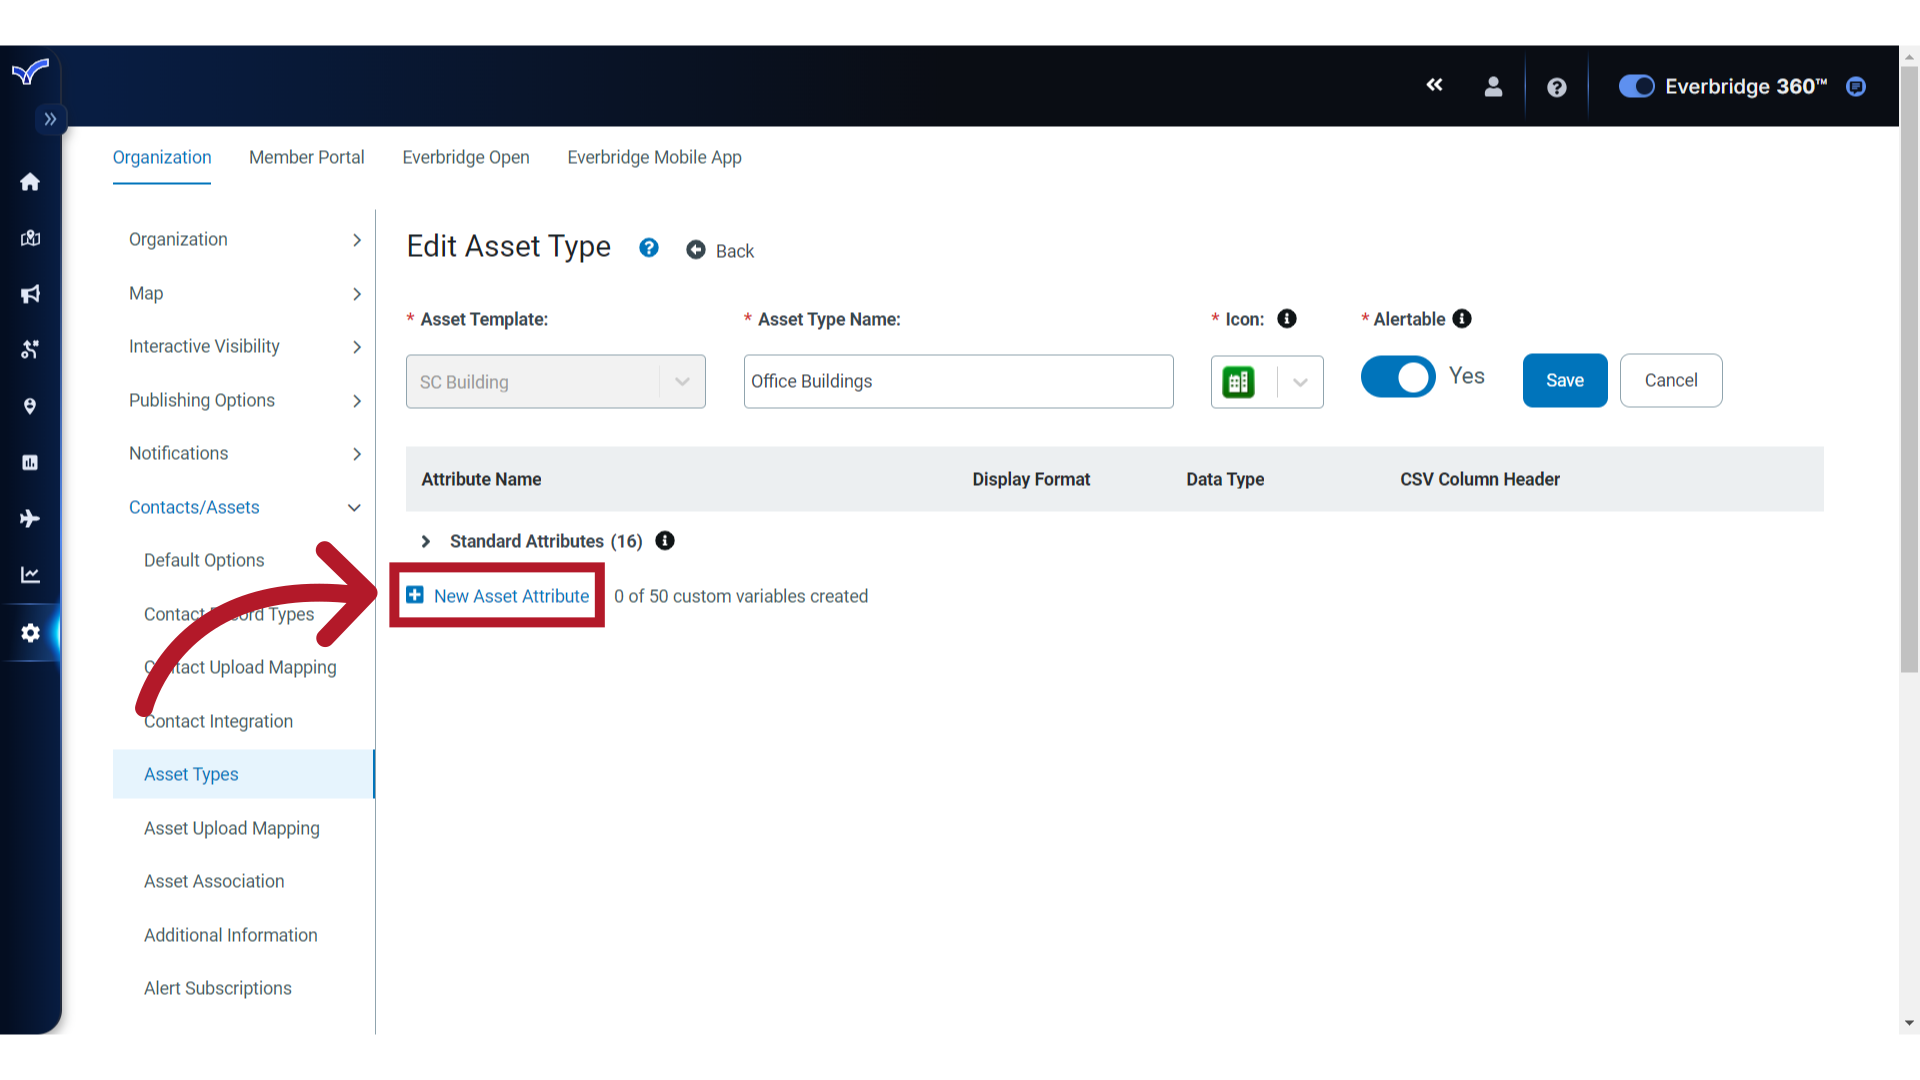
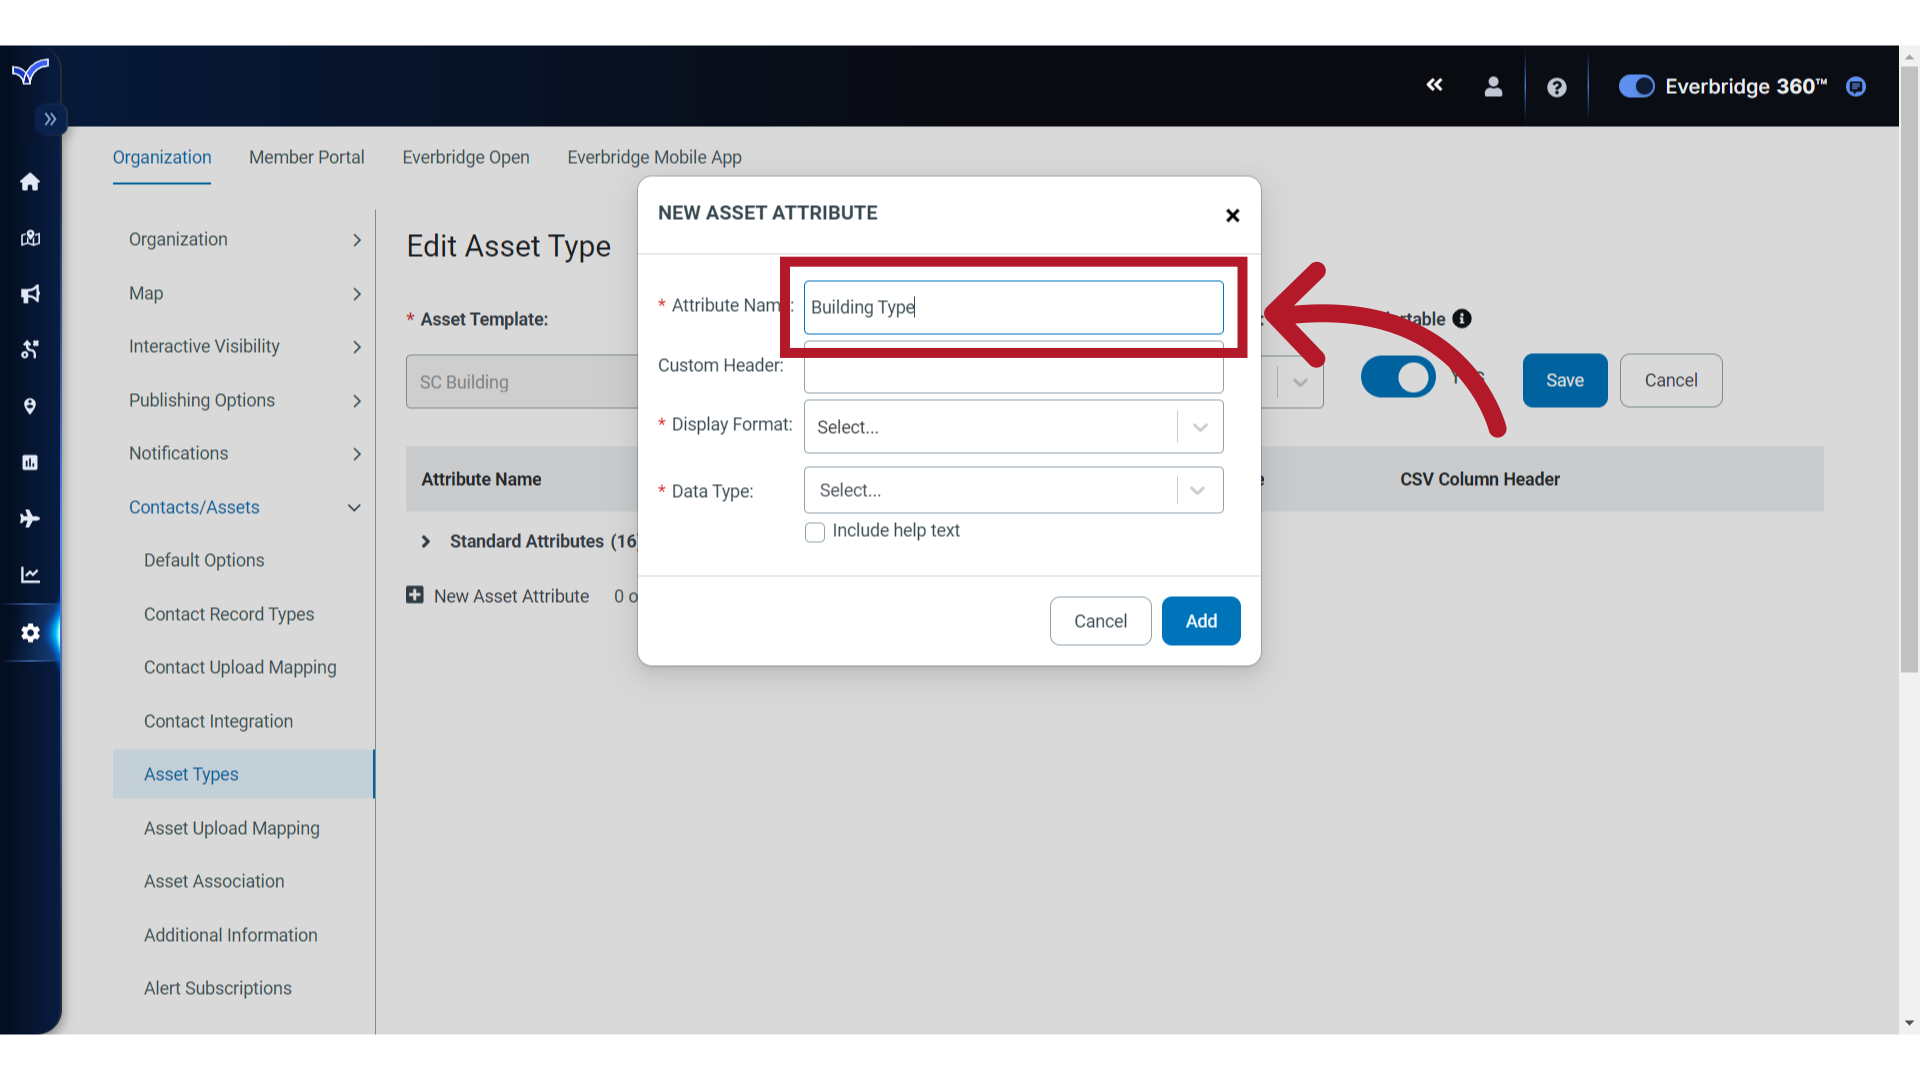
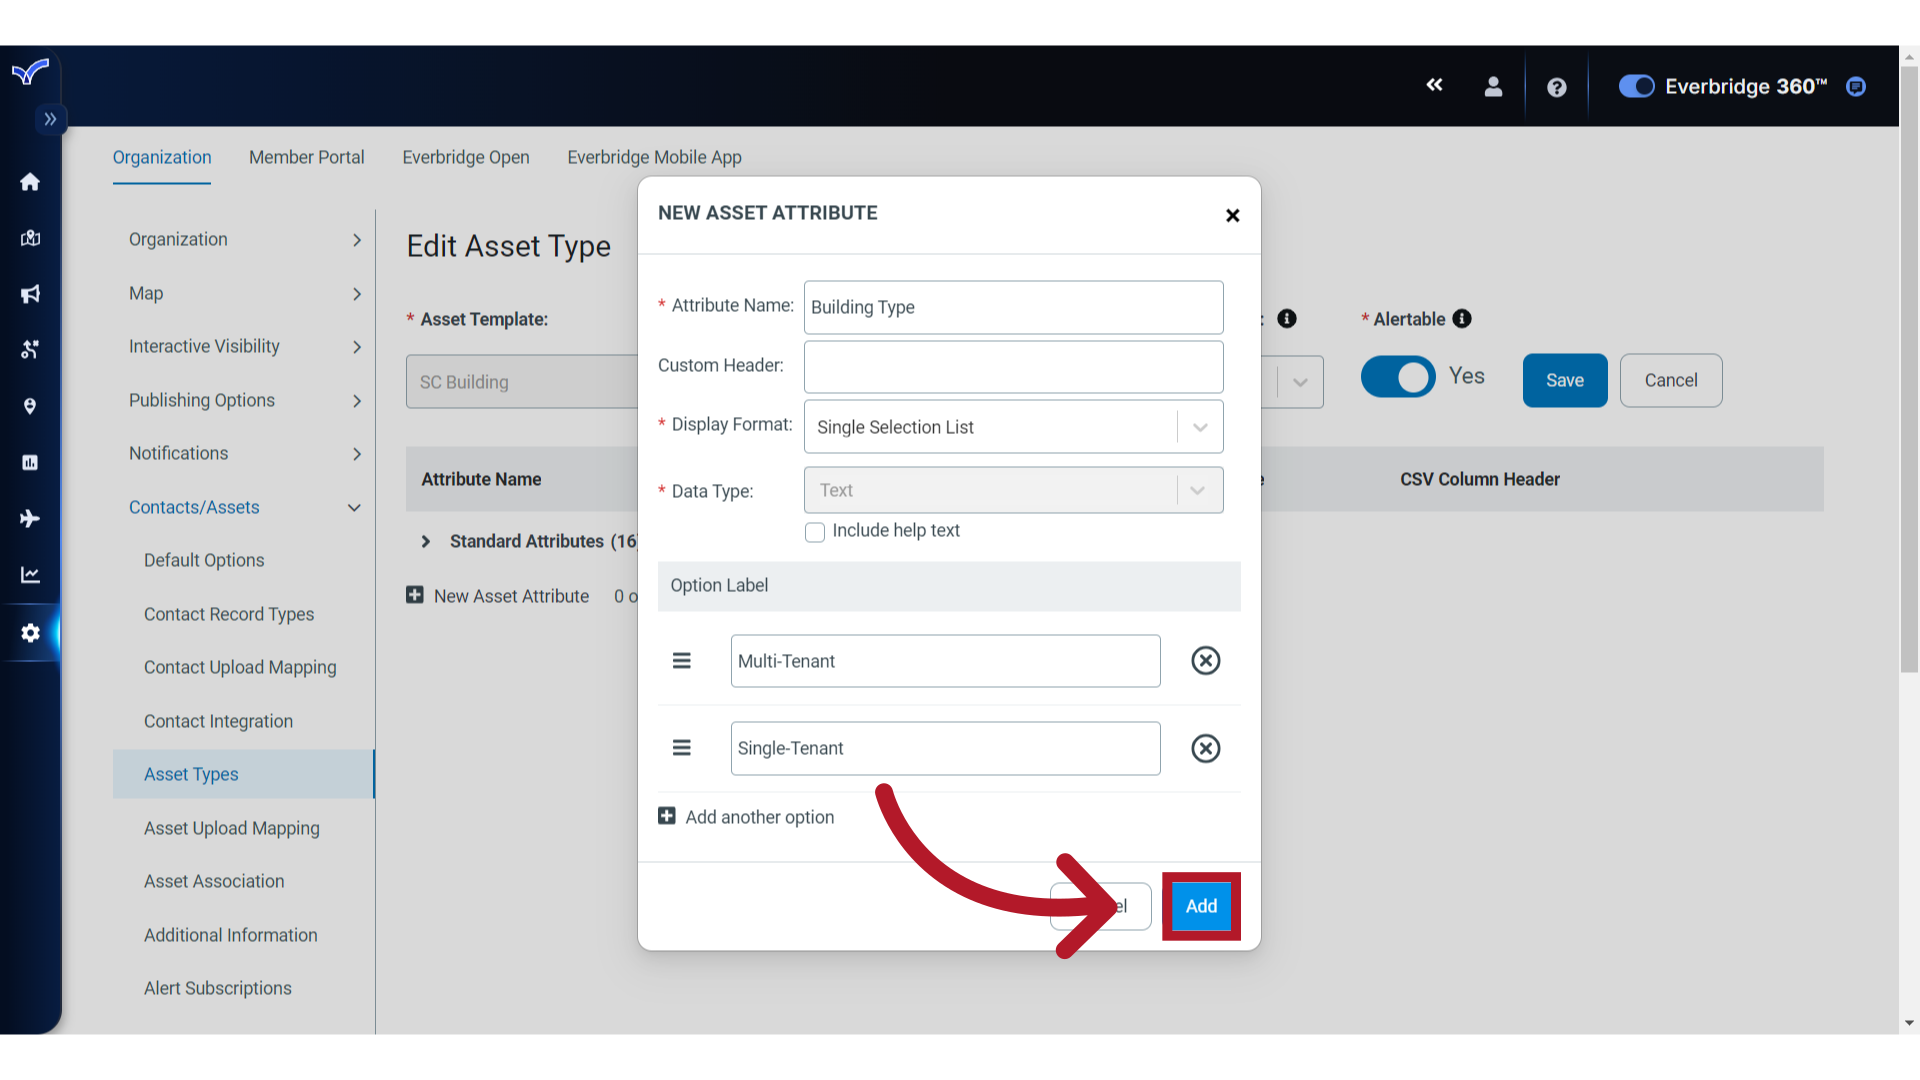
To get started, click "New Asset Attribute".
5. Name
In the attribute form, required fields are noted with an asterisk. Start by naming the attribute.
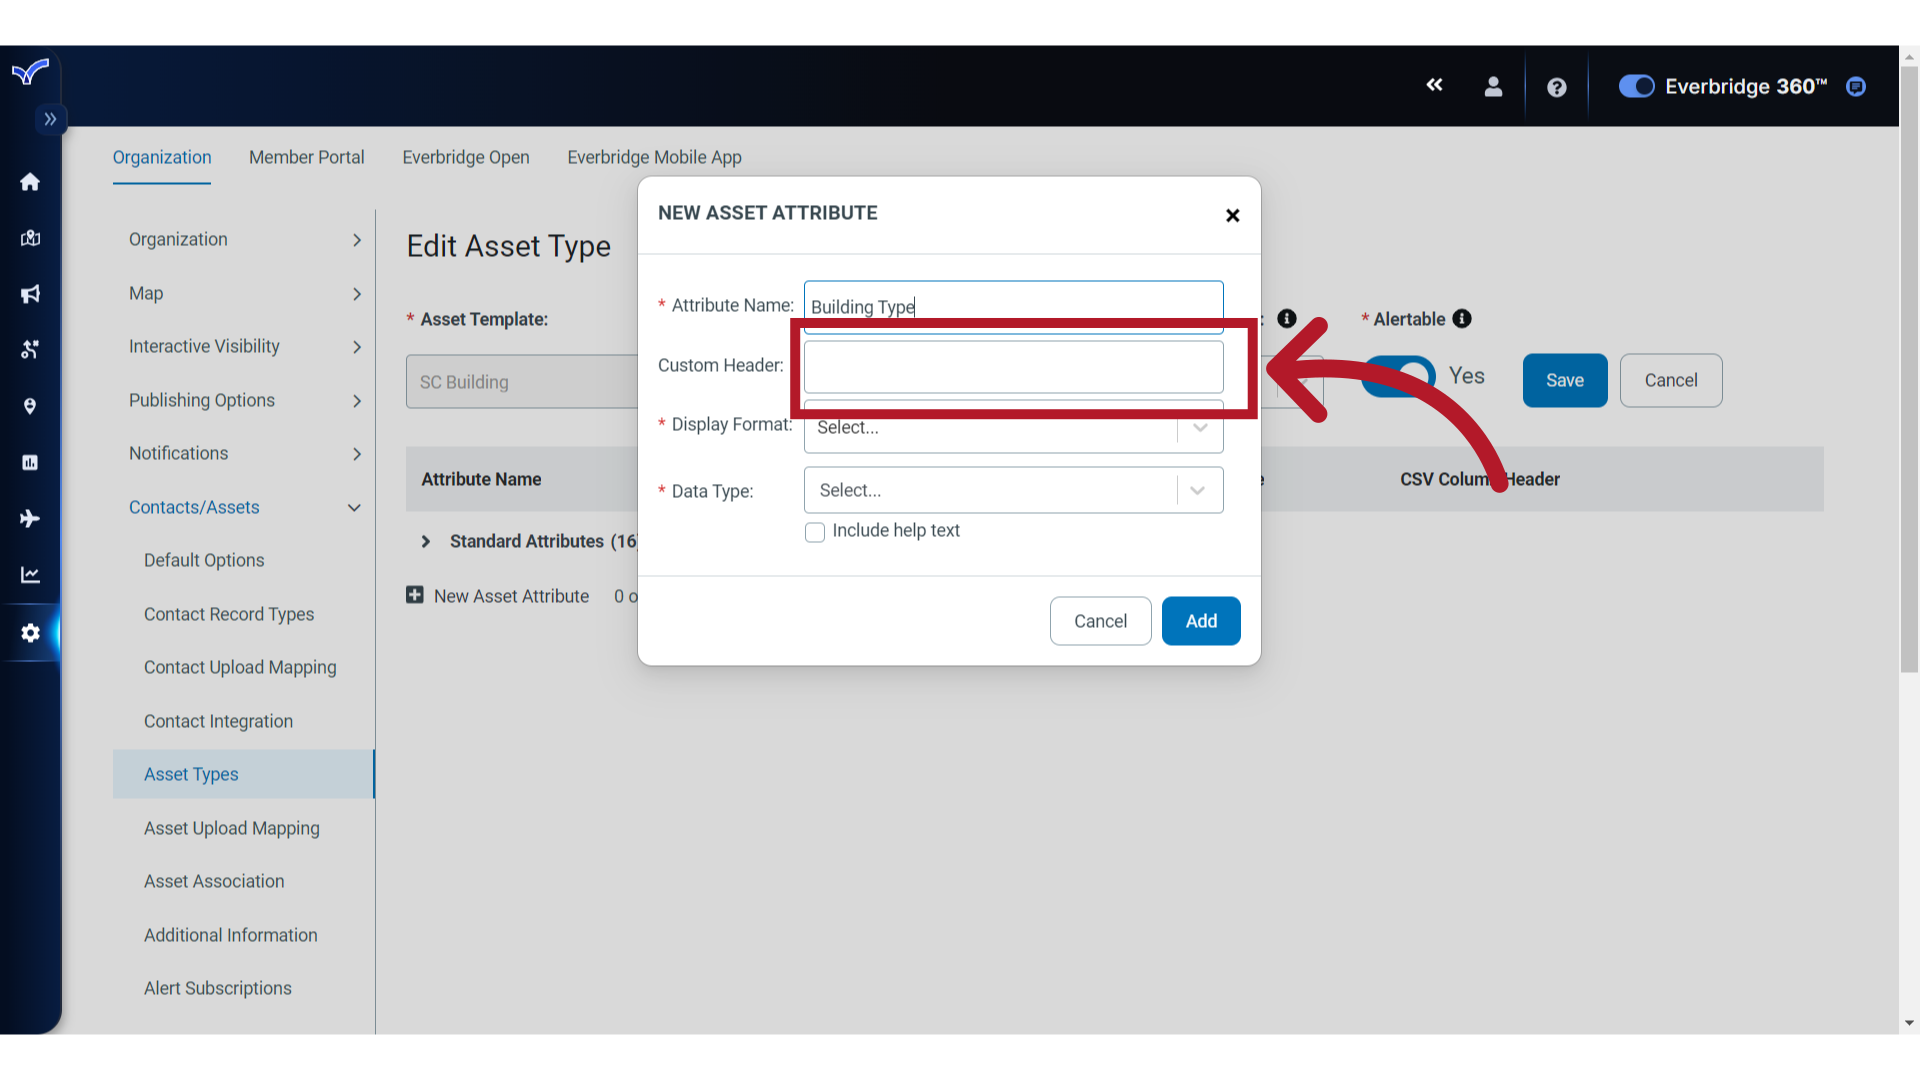
6. Customize
The Custom Header provides the option to specify a CSV Column Header name for the attribute, to be used in file upload mappings. When you upload or update assets via CSV, this header lets you map a specific column in your file directly to this custom attribute.
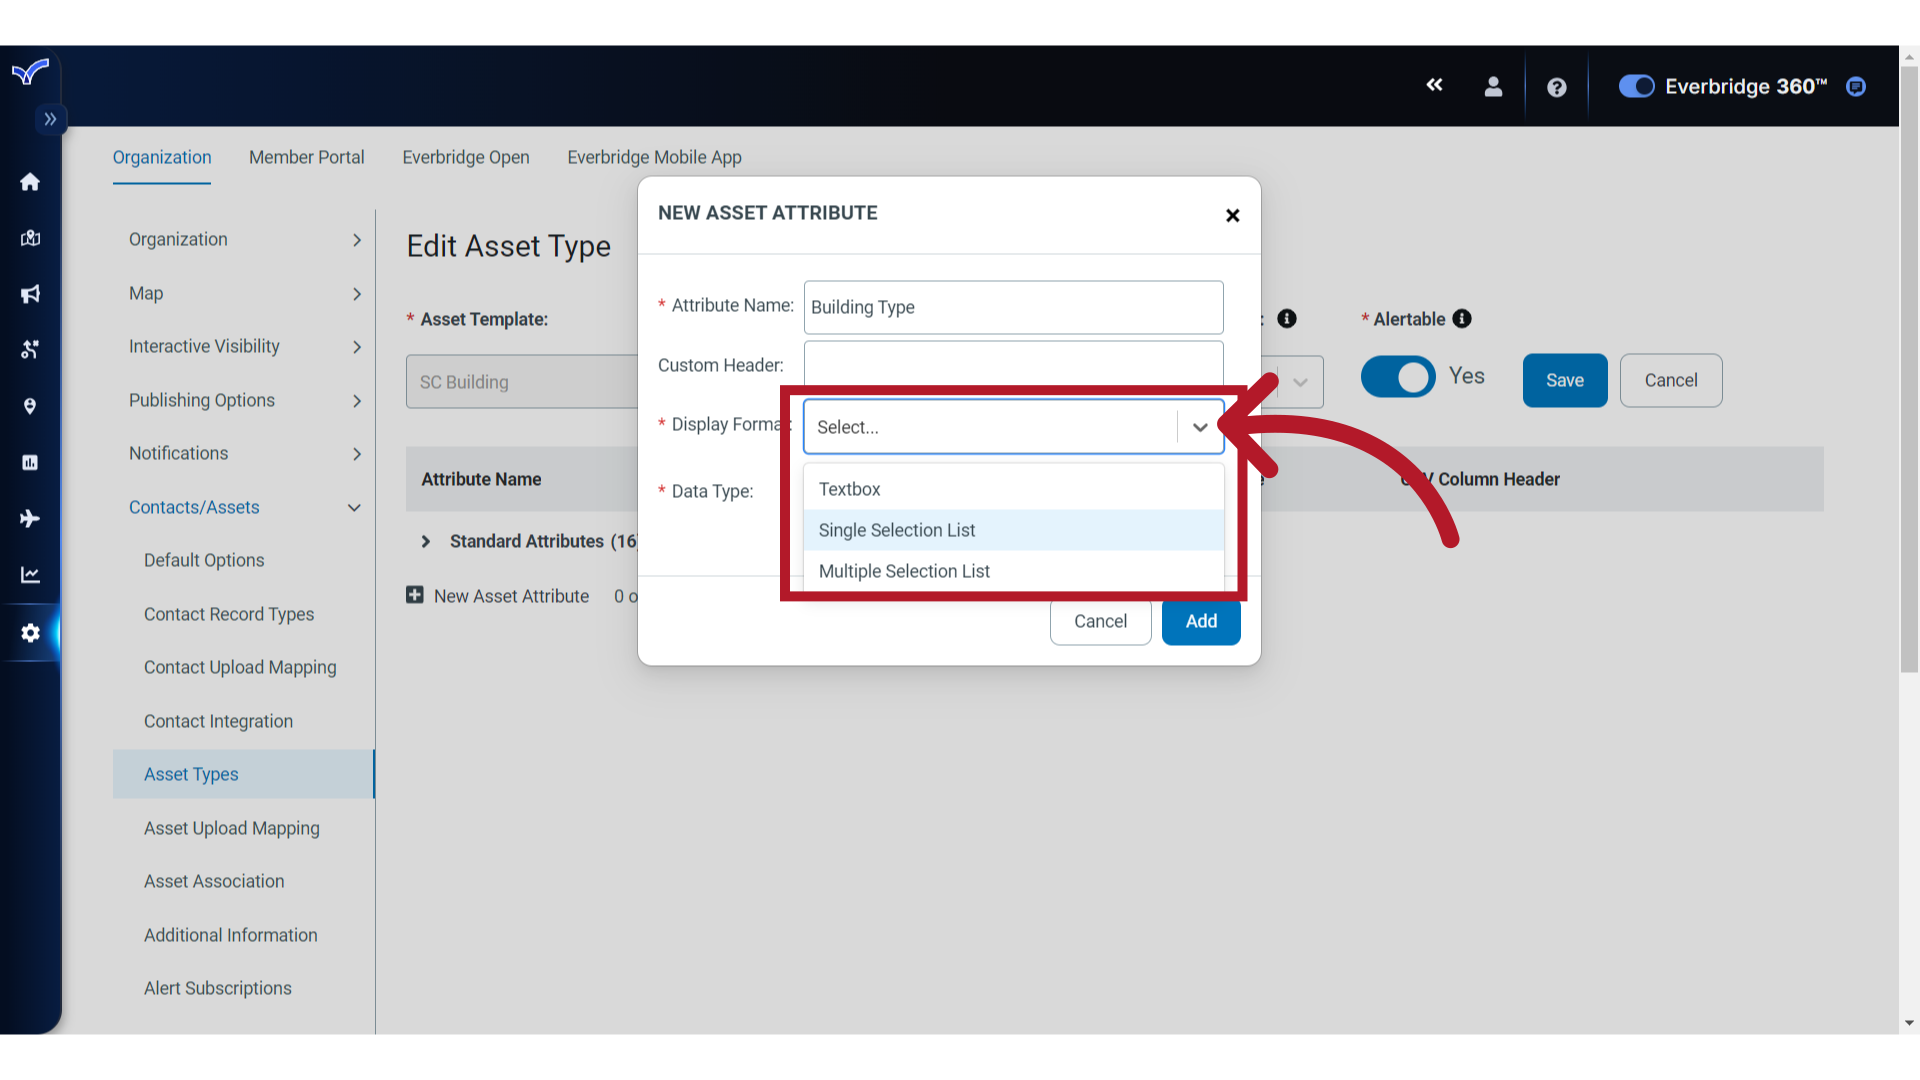
7. Display Format
Click to expose and select the desired Display Format for the attribute. Choices are Textbox, Single Selection List and Multiple Selection List. Here, we will choose "Single Selection List".
If you are creating an attribute that will be used in asset filters or dropdown, make sure that a Single Selection List includes all required values. If the list only contains a subset of values, users will only see those values in asset dropdowns, even if other assets are tied to additional values that are not listed.
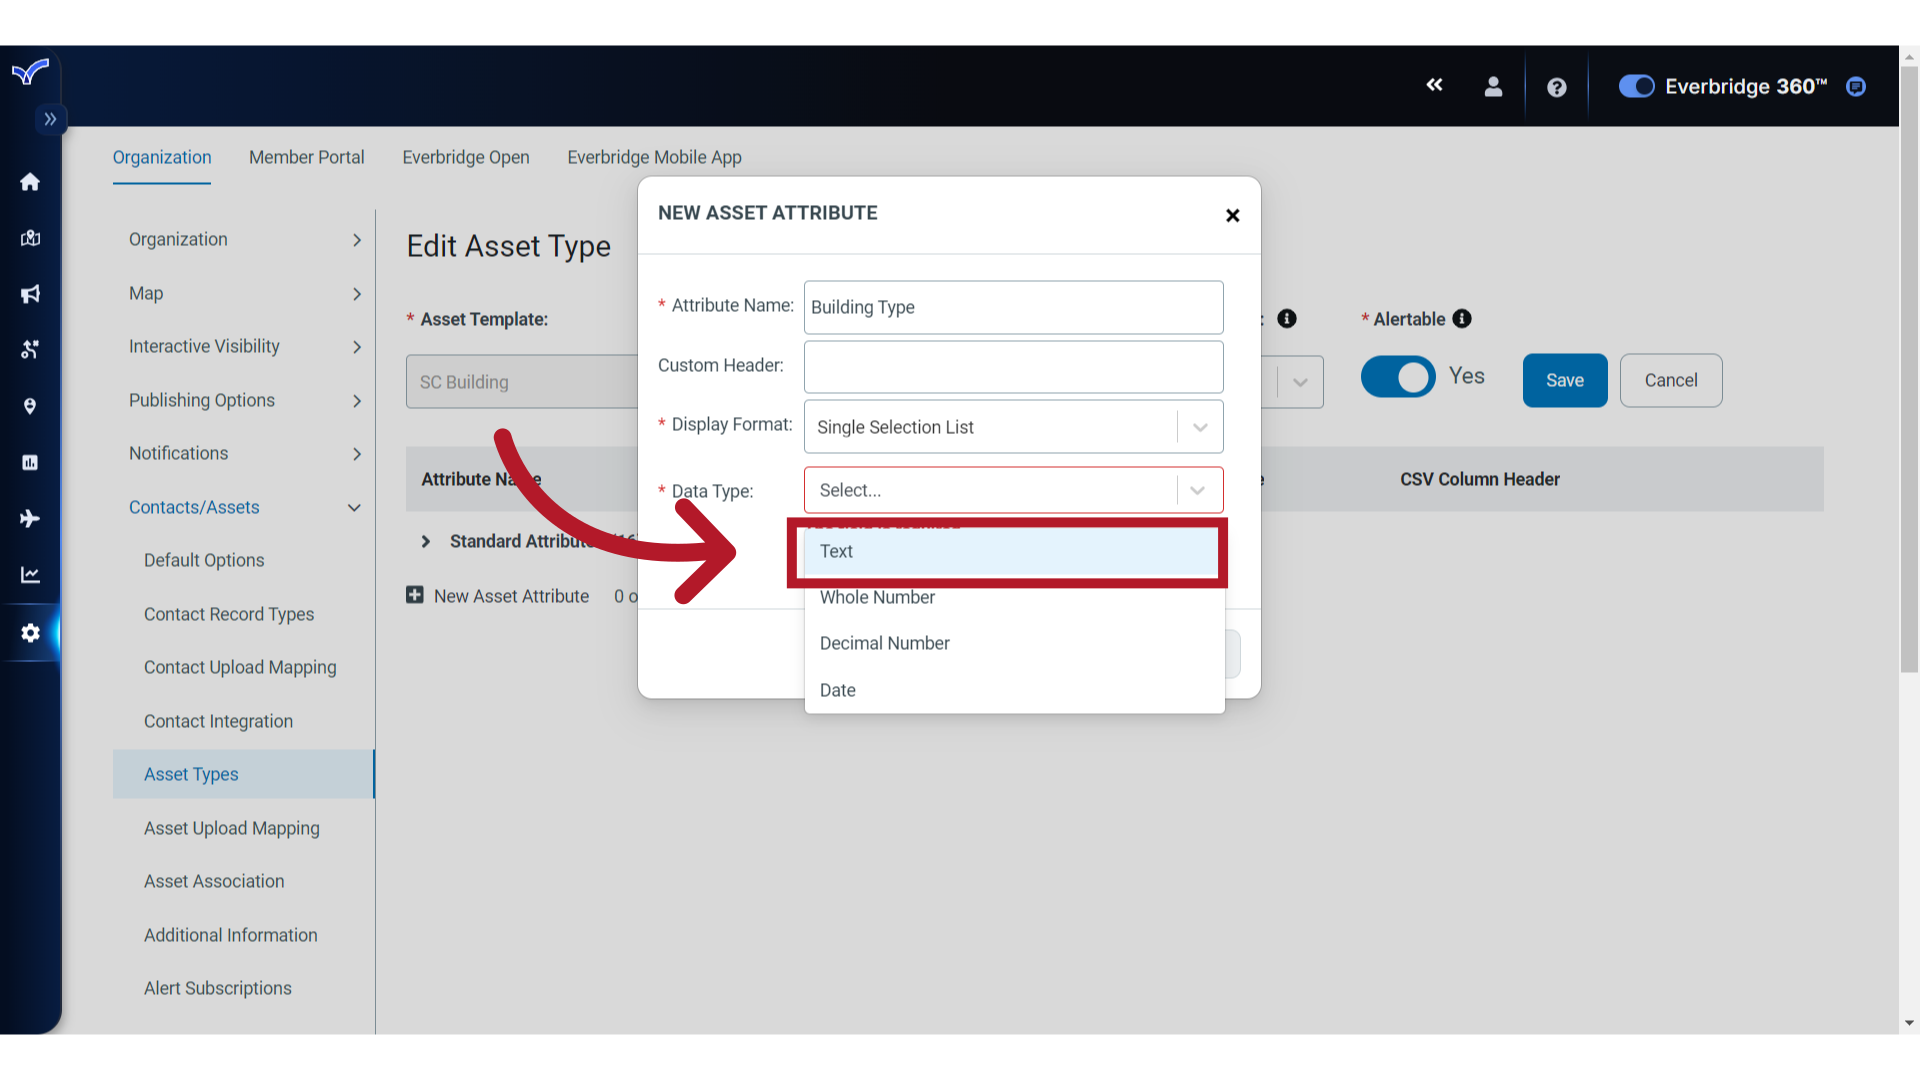
8. Data Type
Next, select the Data Type for the Display Format chosen. Choices are Text, Whole Number, Decimal Number or Date. We will select "Text" for this example.
9. Help Text
If needed, select the checkbox to include Help Text, then enter the content. Currently, the Help Text only displays here, in the Edit Custom Attribute dialog.
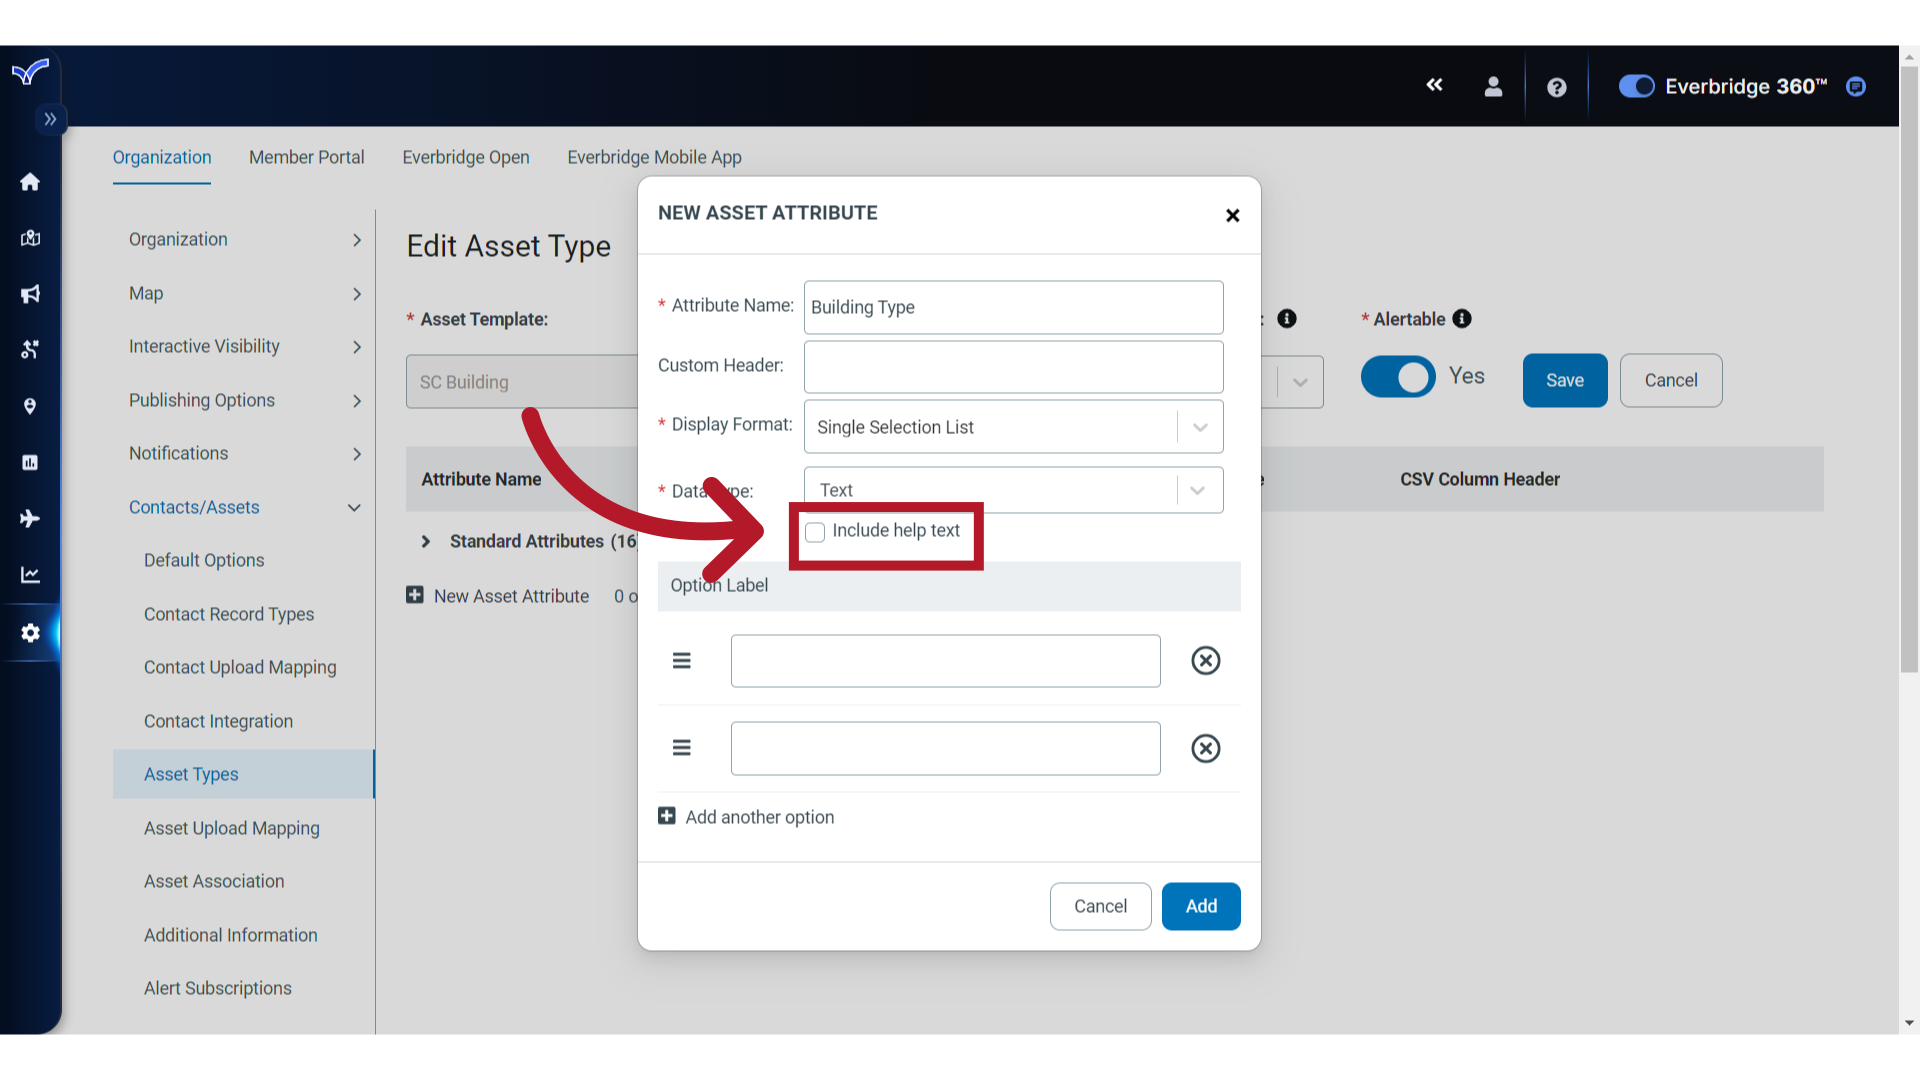
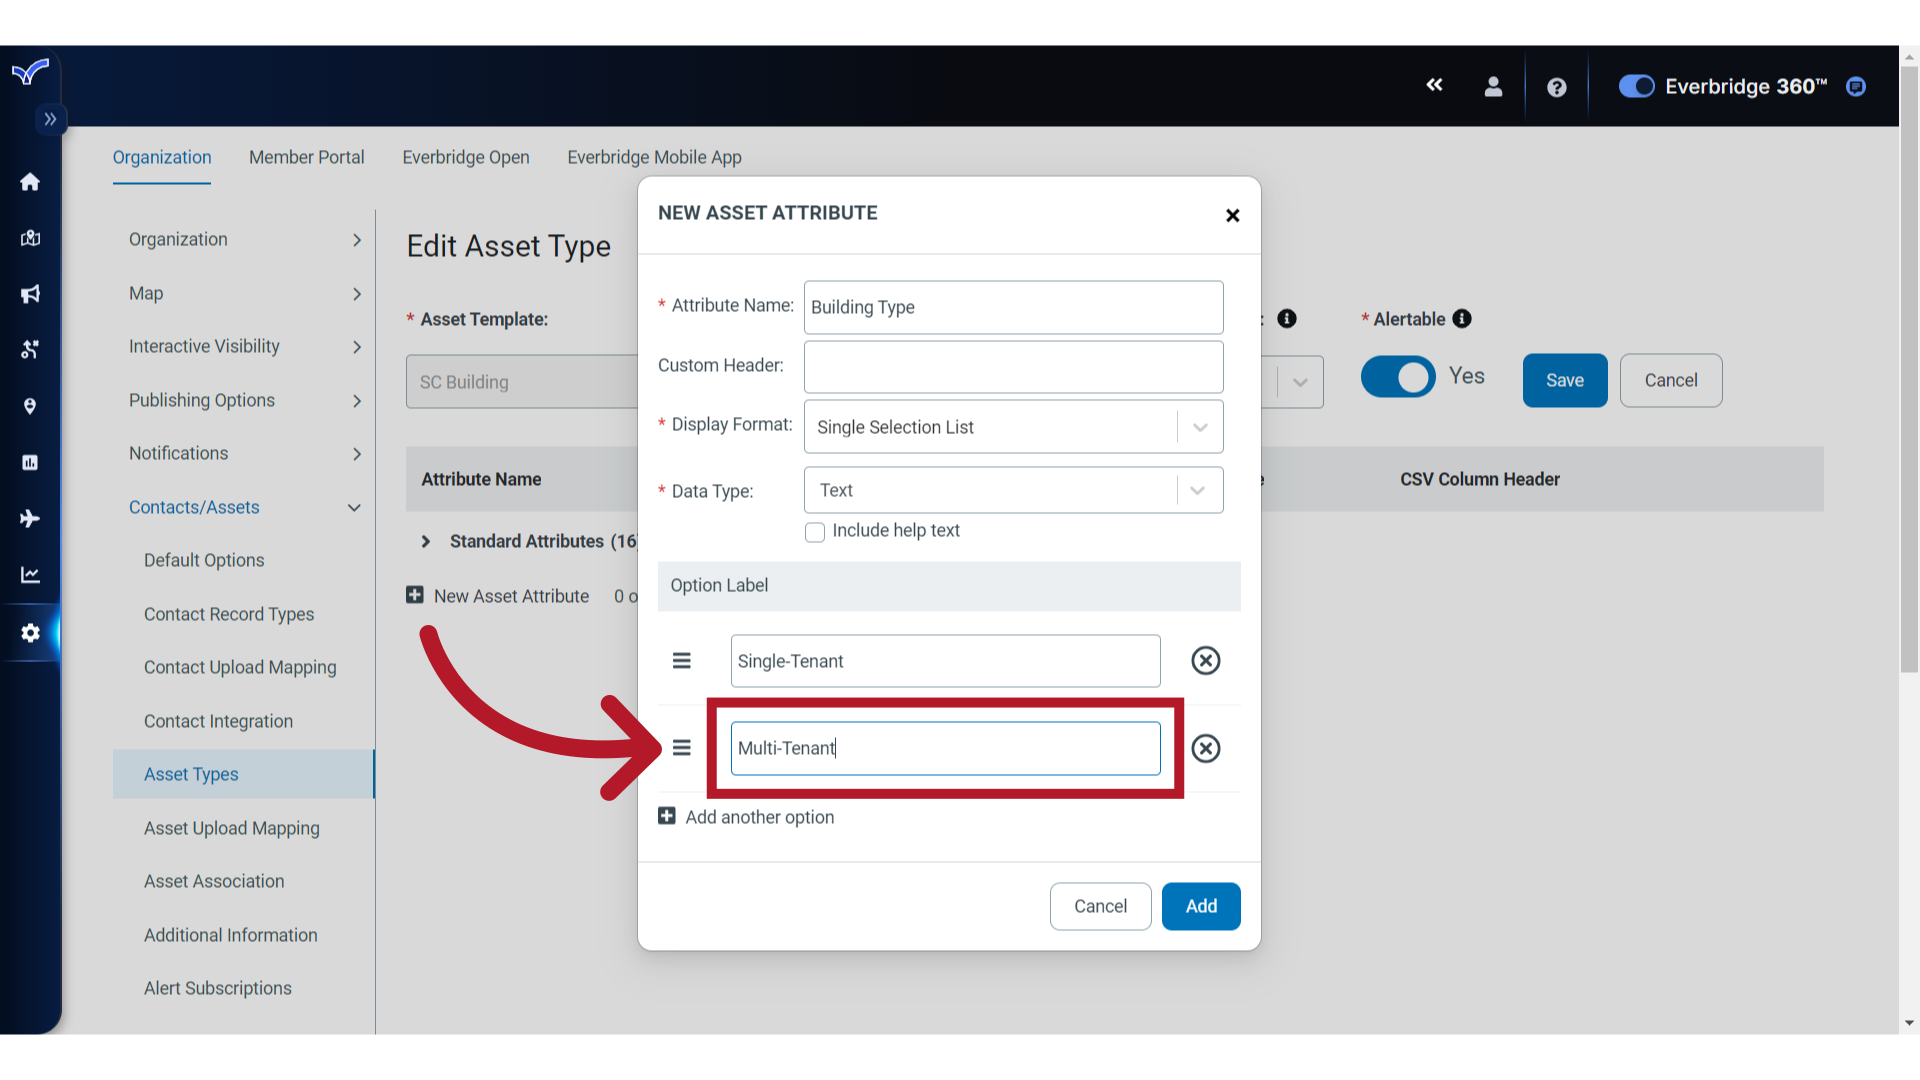
10. Option Label
For a Selection List format, enter the Option Labels for each selection.
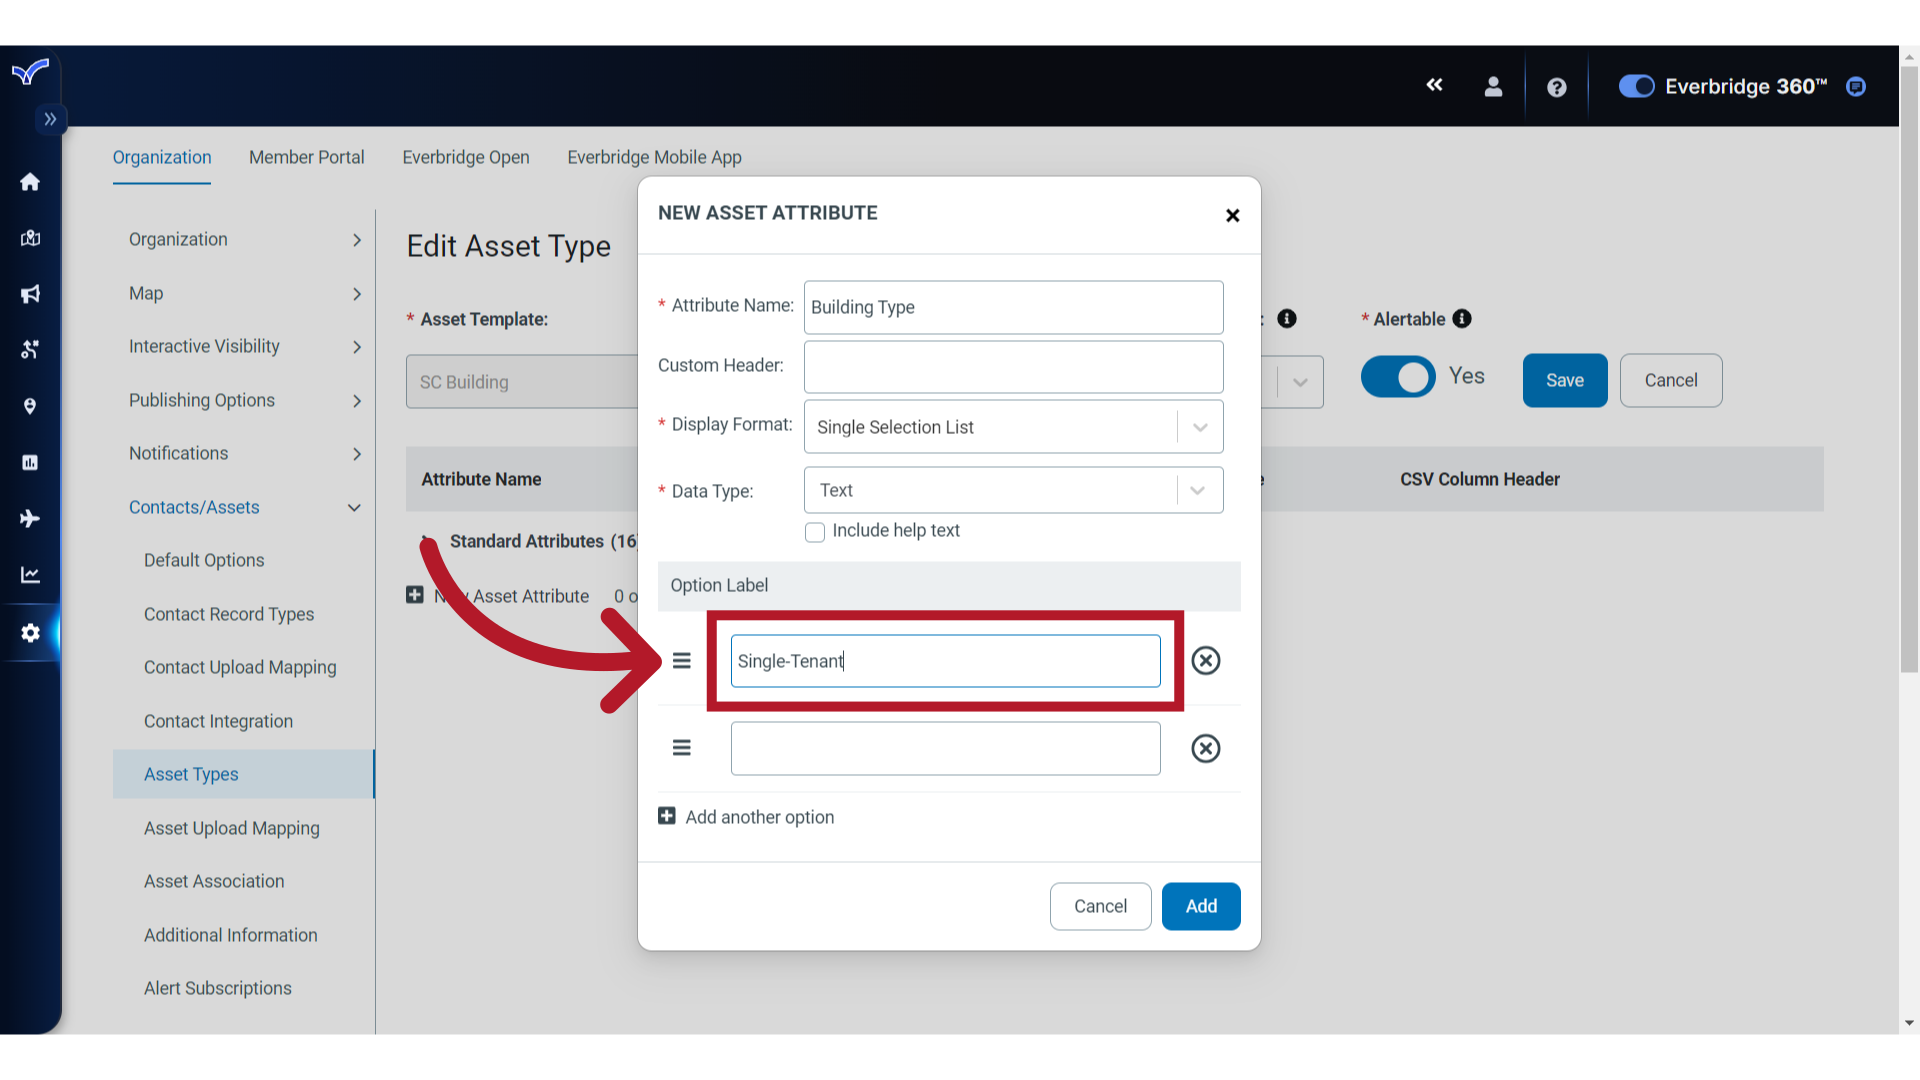
11. Option Label
12. Display Order
If needed, you can change the order of the options in a selection list by clicking and dragging the label's handle.
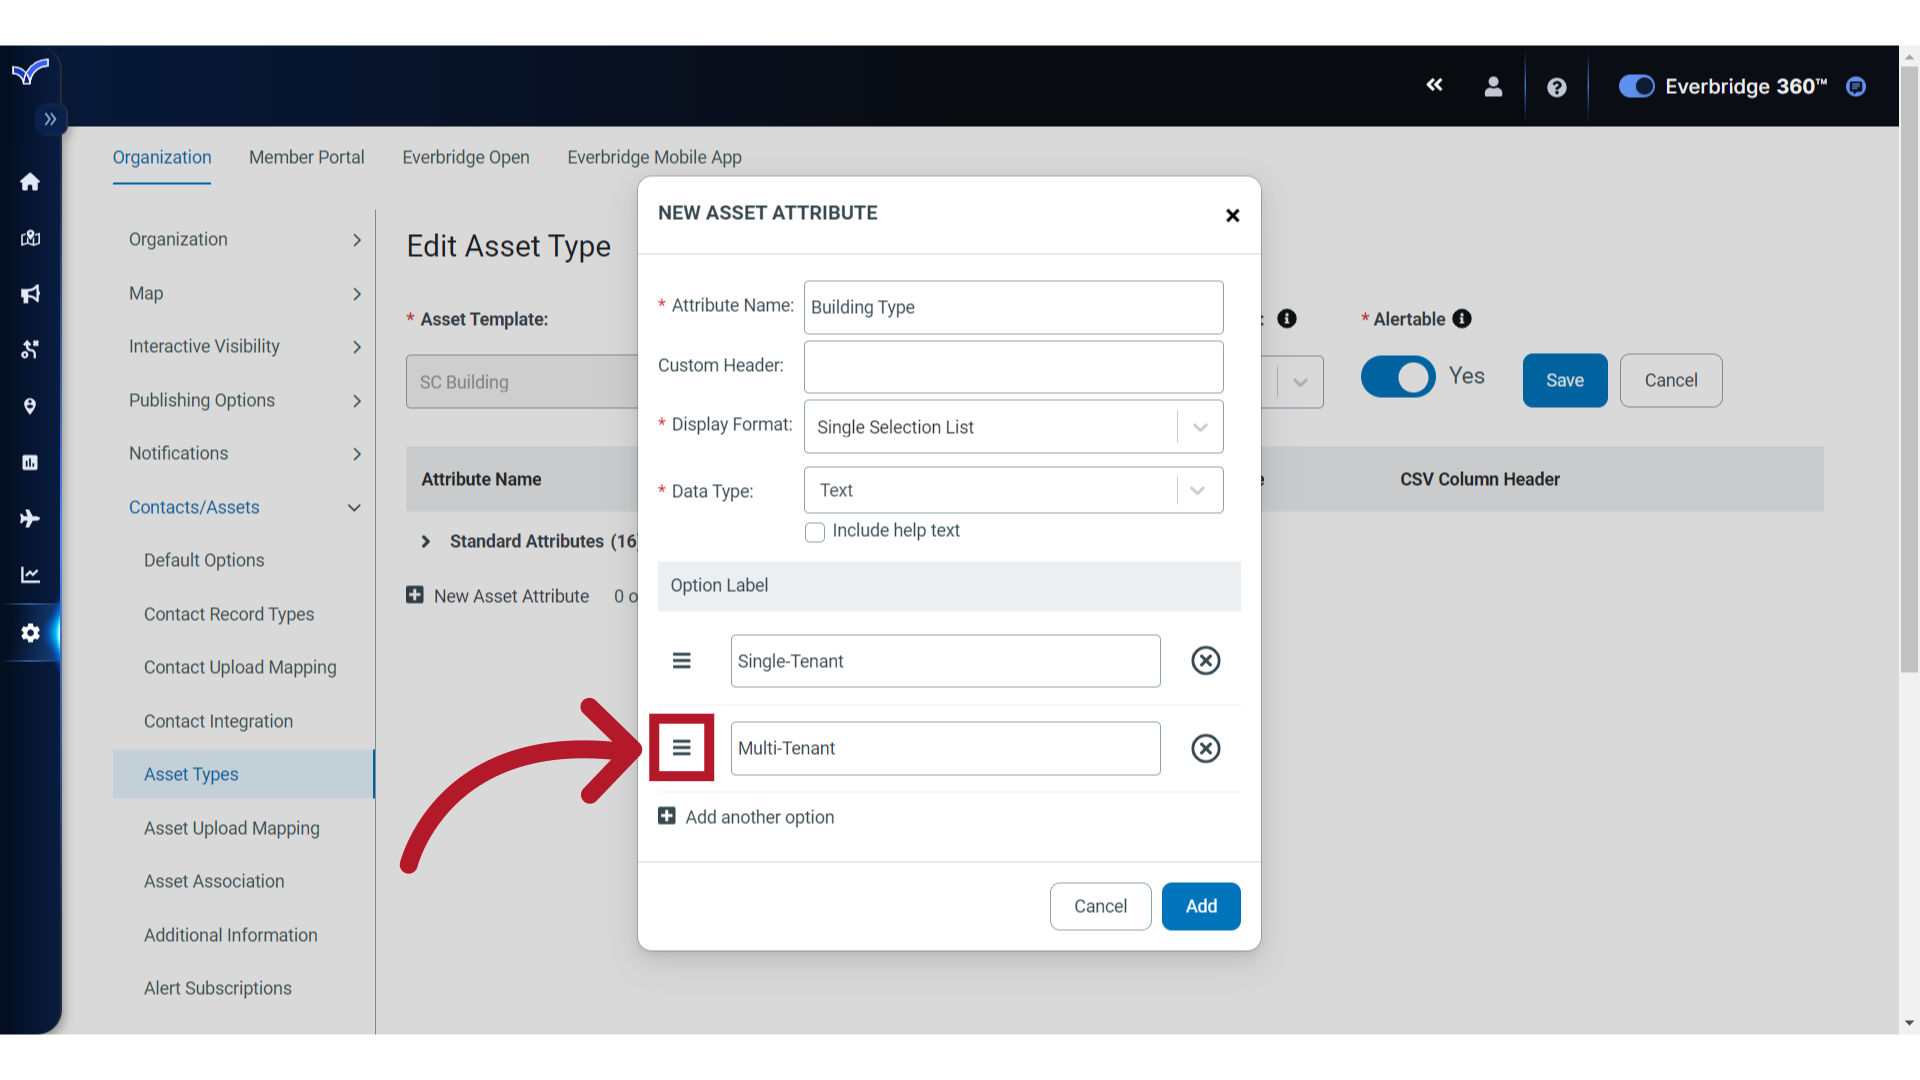
13. Display Order
Move to the desired position.

14. Add
To finish creating this attribute, click "Add".
15. Save
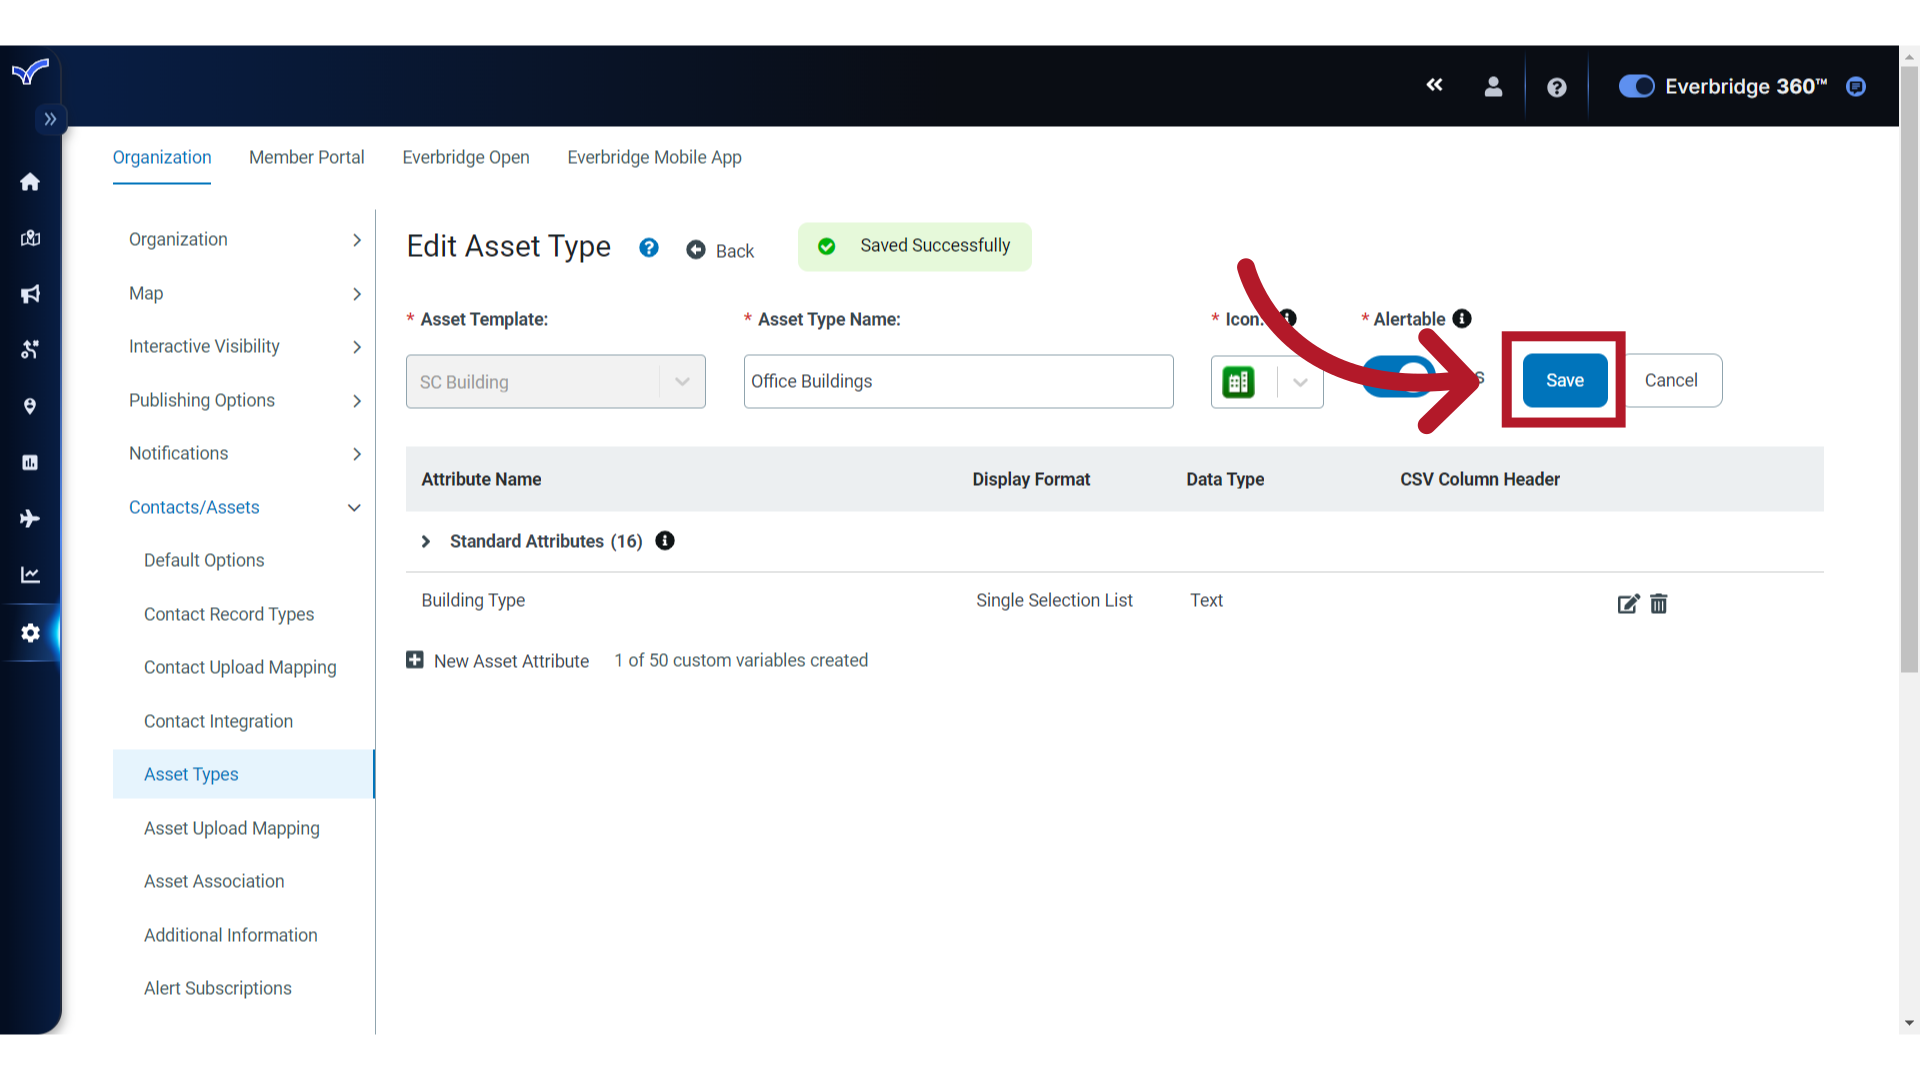
Repeat these steps to add any additional Attributes. When you are finished, click "Save".
Thank you for watching this guide creating Custom Asset Attributes in Everbridge.