Topic
How to close a single or multiple Incidents with or without sending a communication.
Description
1. Closing Incidents Intro
After an event or situation has ended or been resolved, you need to close the messages you have sent to your contacts. Closing an Incident can be done with or without a final notification to your recipients. For example, if a hurricane was going to make landfall in your region, but has since definitively changed its course, you may want to send a final notification to contacts to inform them that the storm threat is gone, or that it is at least safe to return to their homes. It's important to note that once an Incident is closed, you can not reopen it.

2. Dashboard
To close an Incident.

3. Dashboard
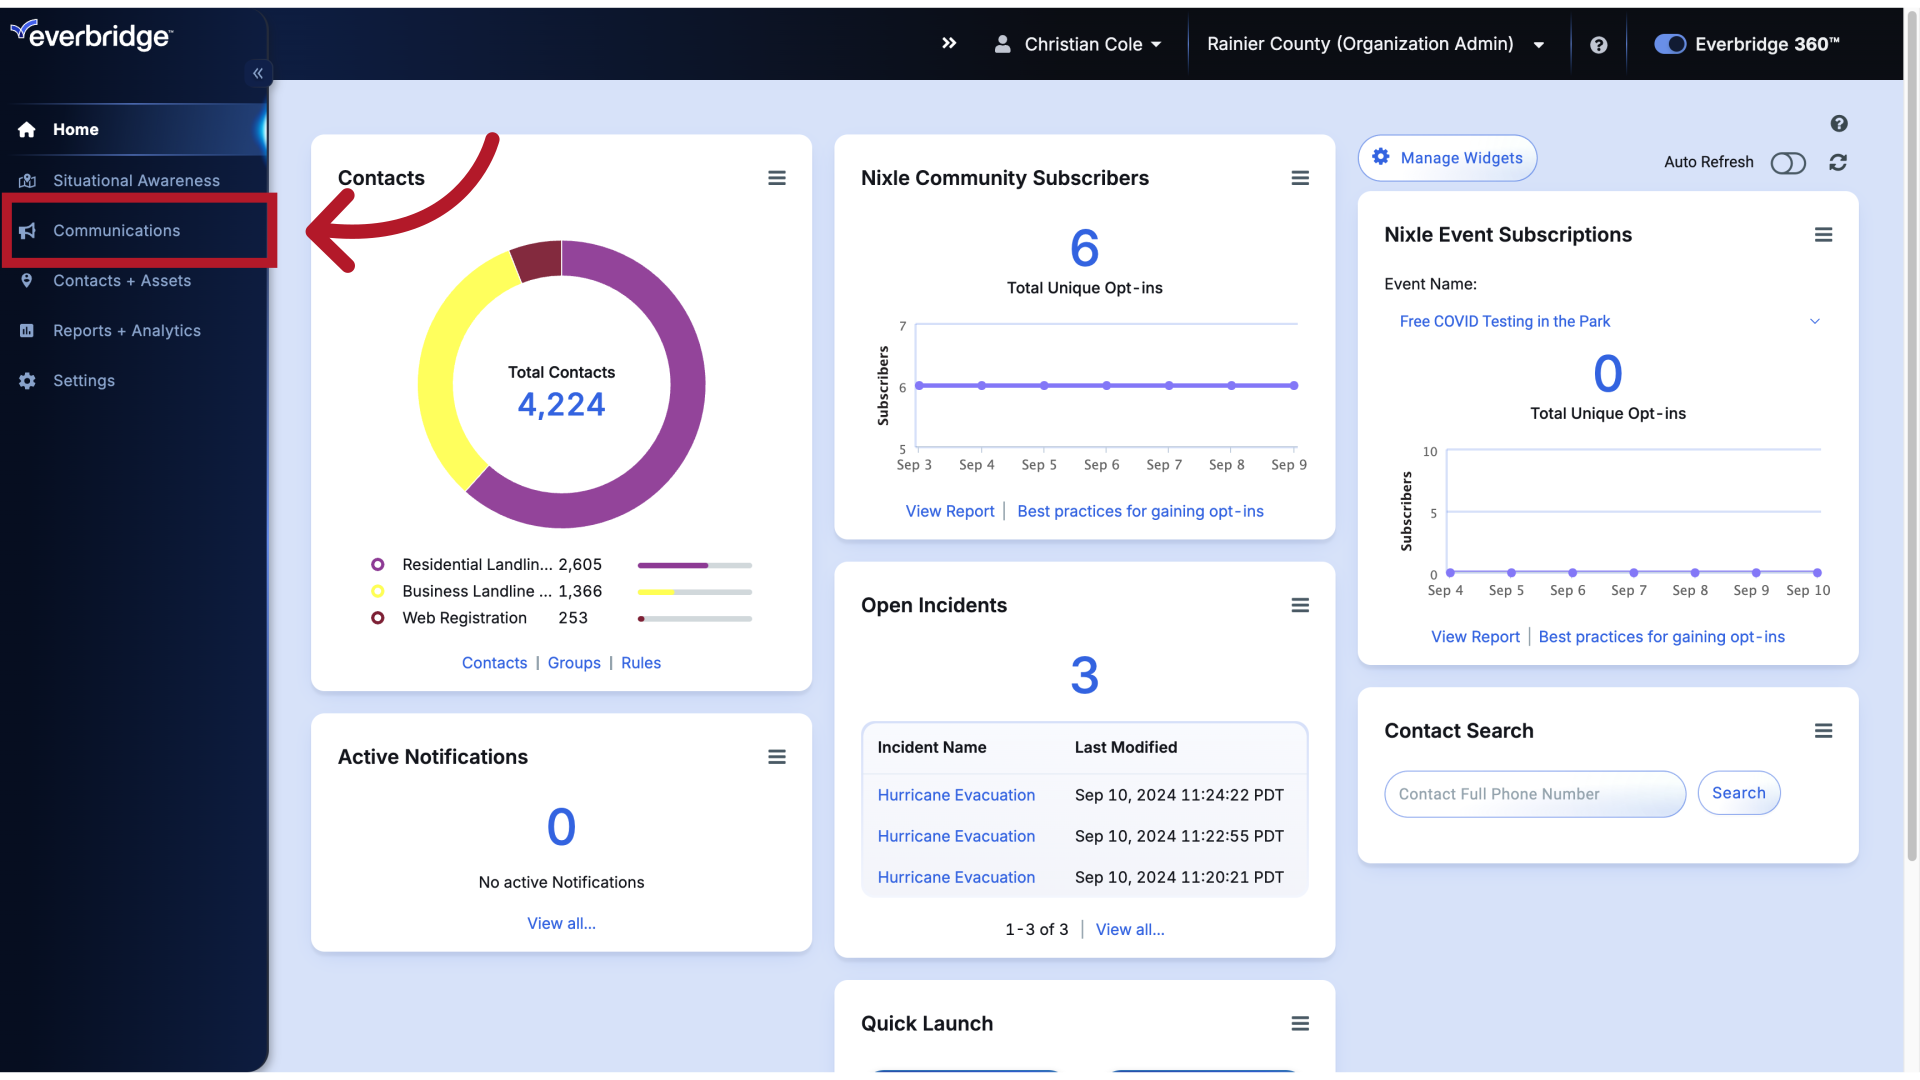
Start by hovering over the Communications tab.
4. Dashboard
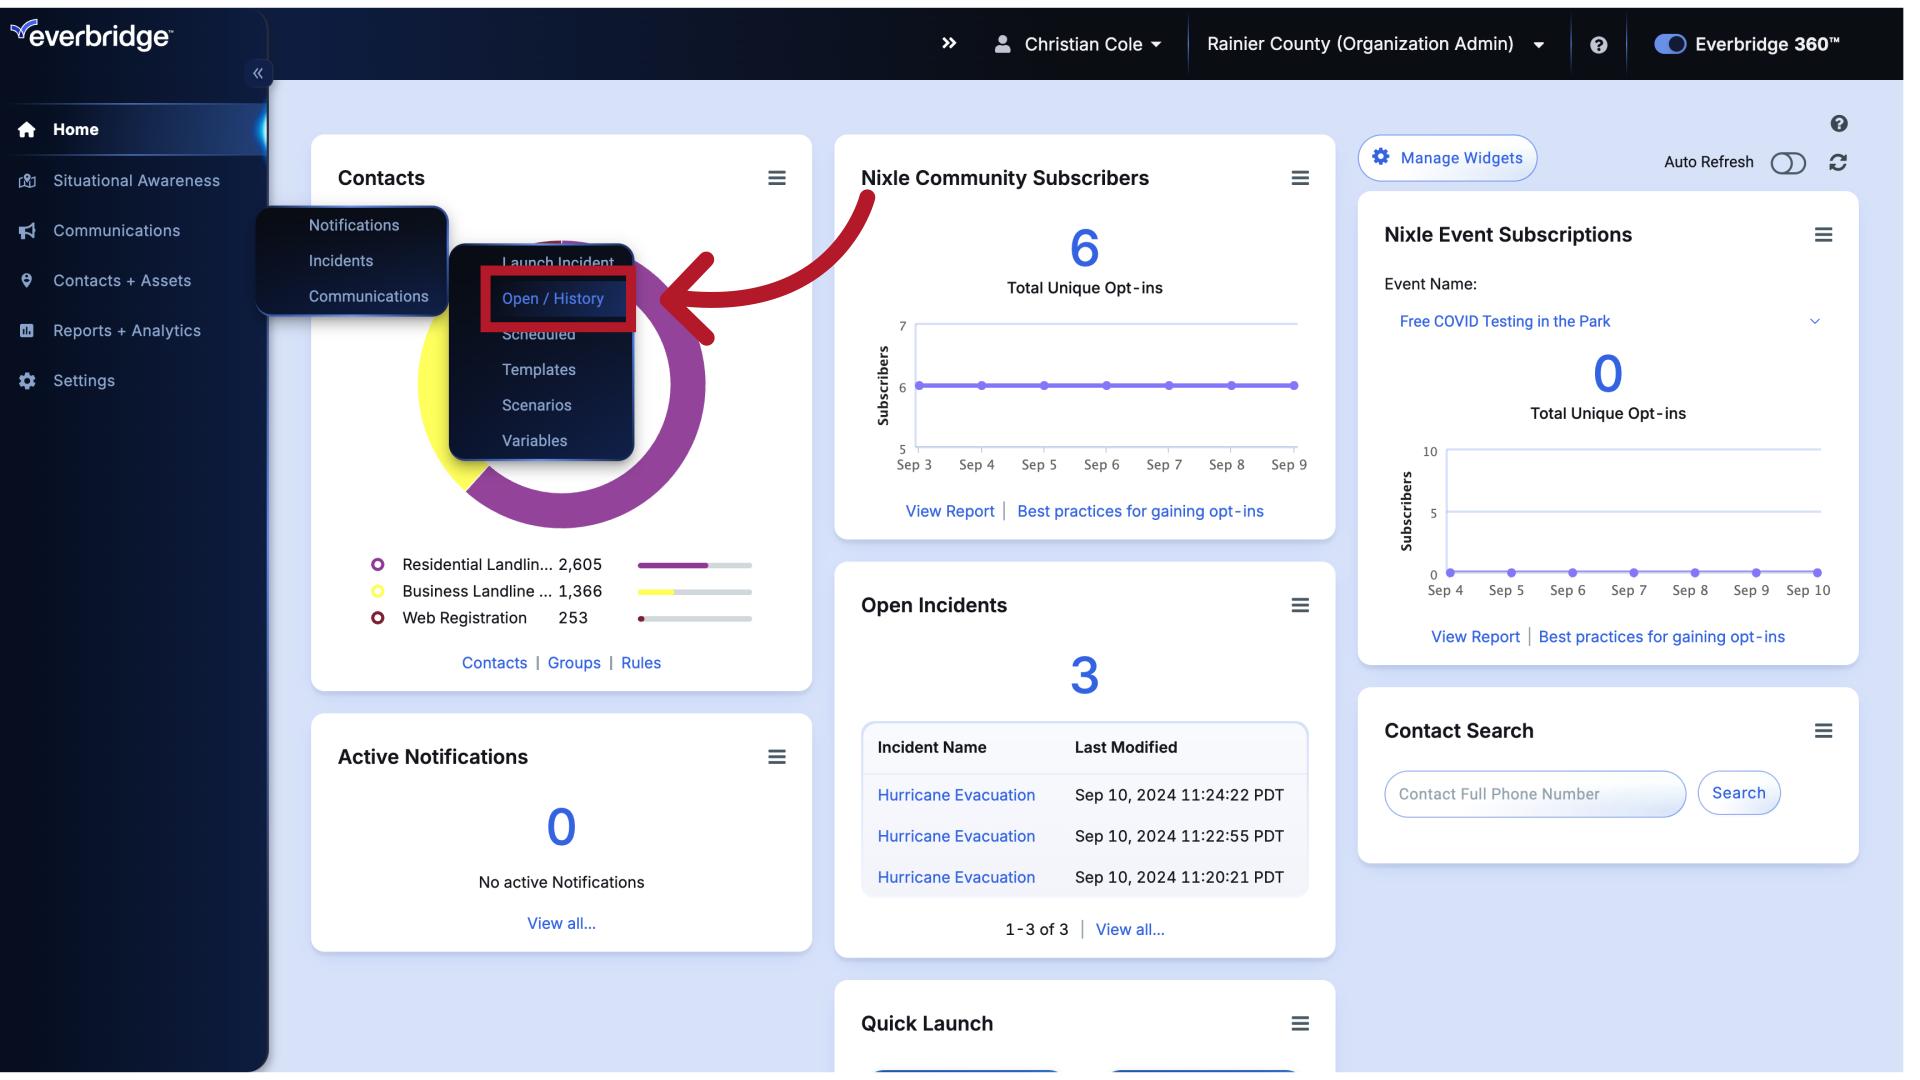
Hover over Incidents.

5. Dashboard
Then click Open / History.
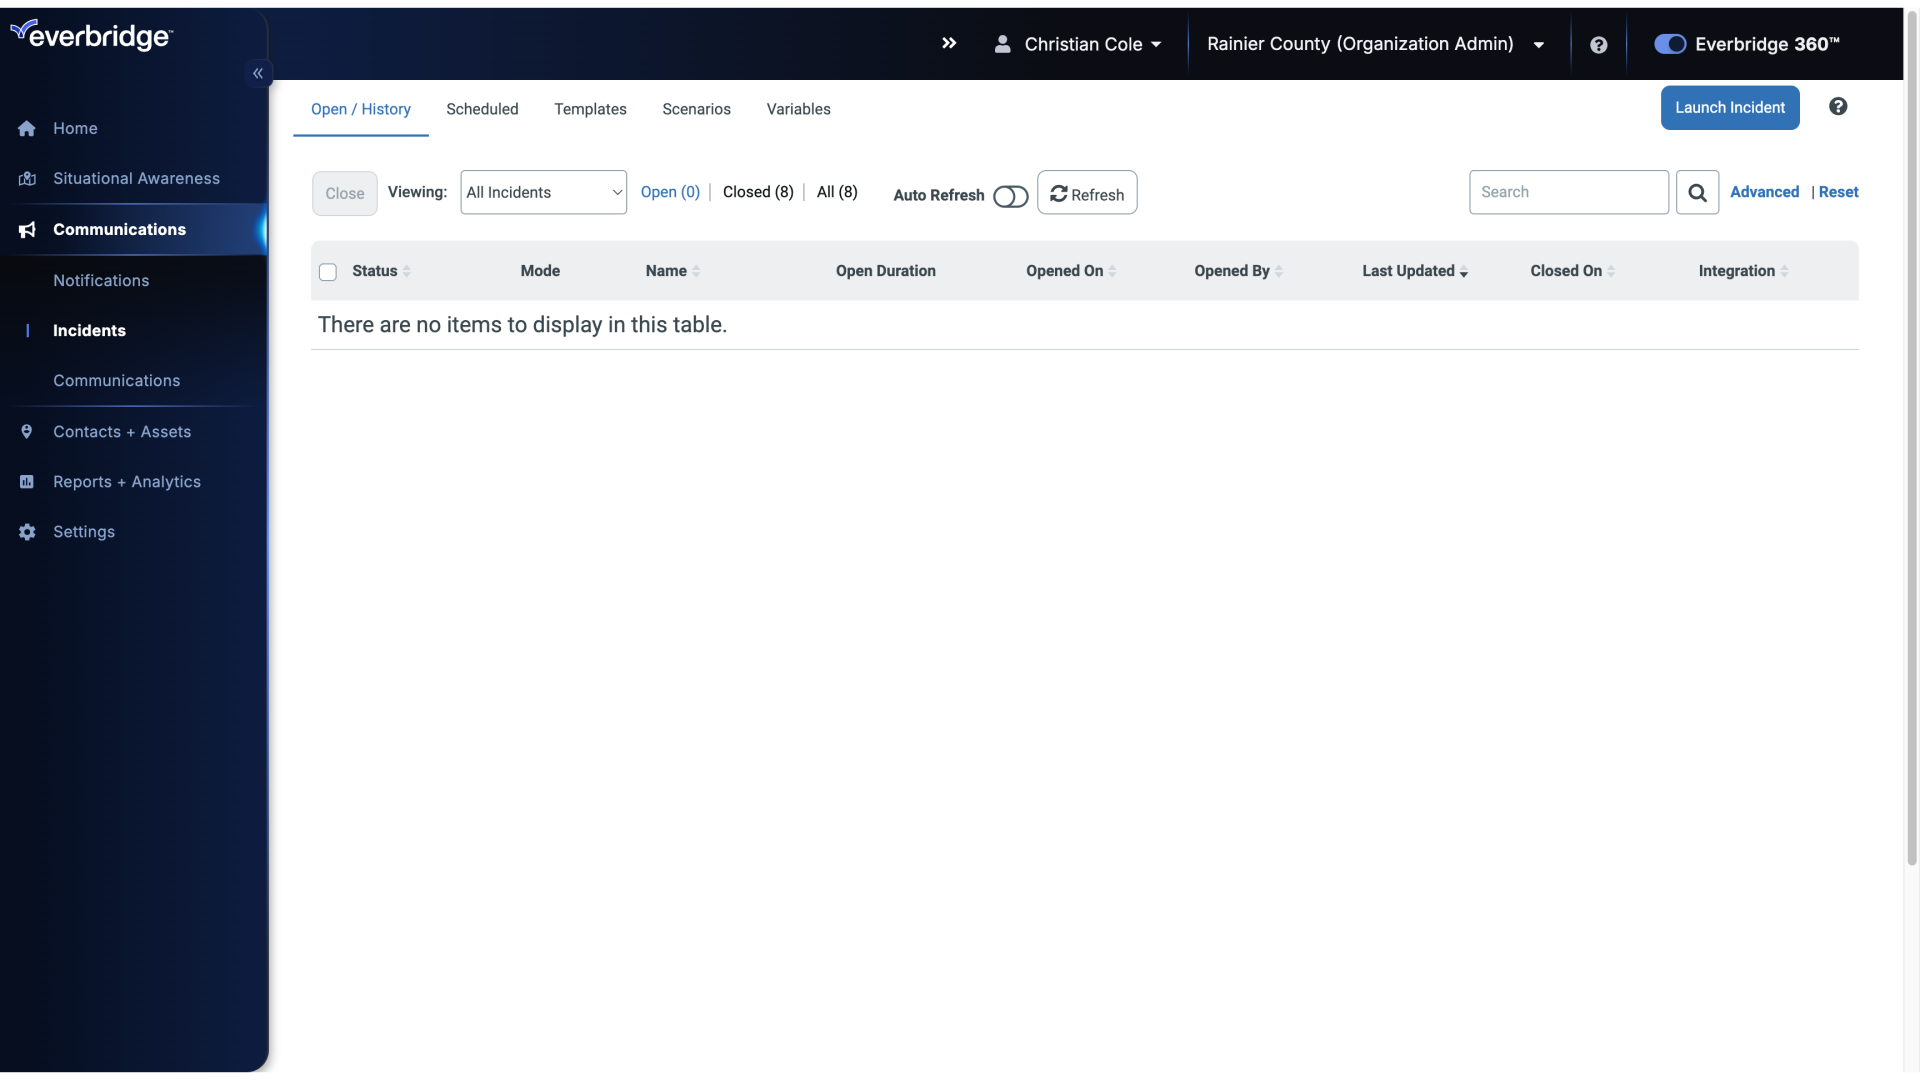
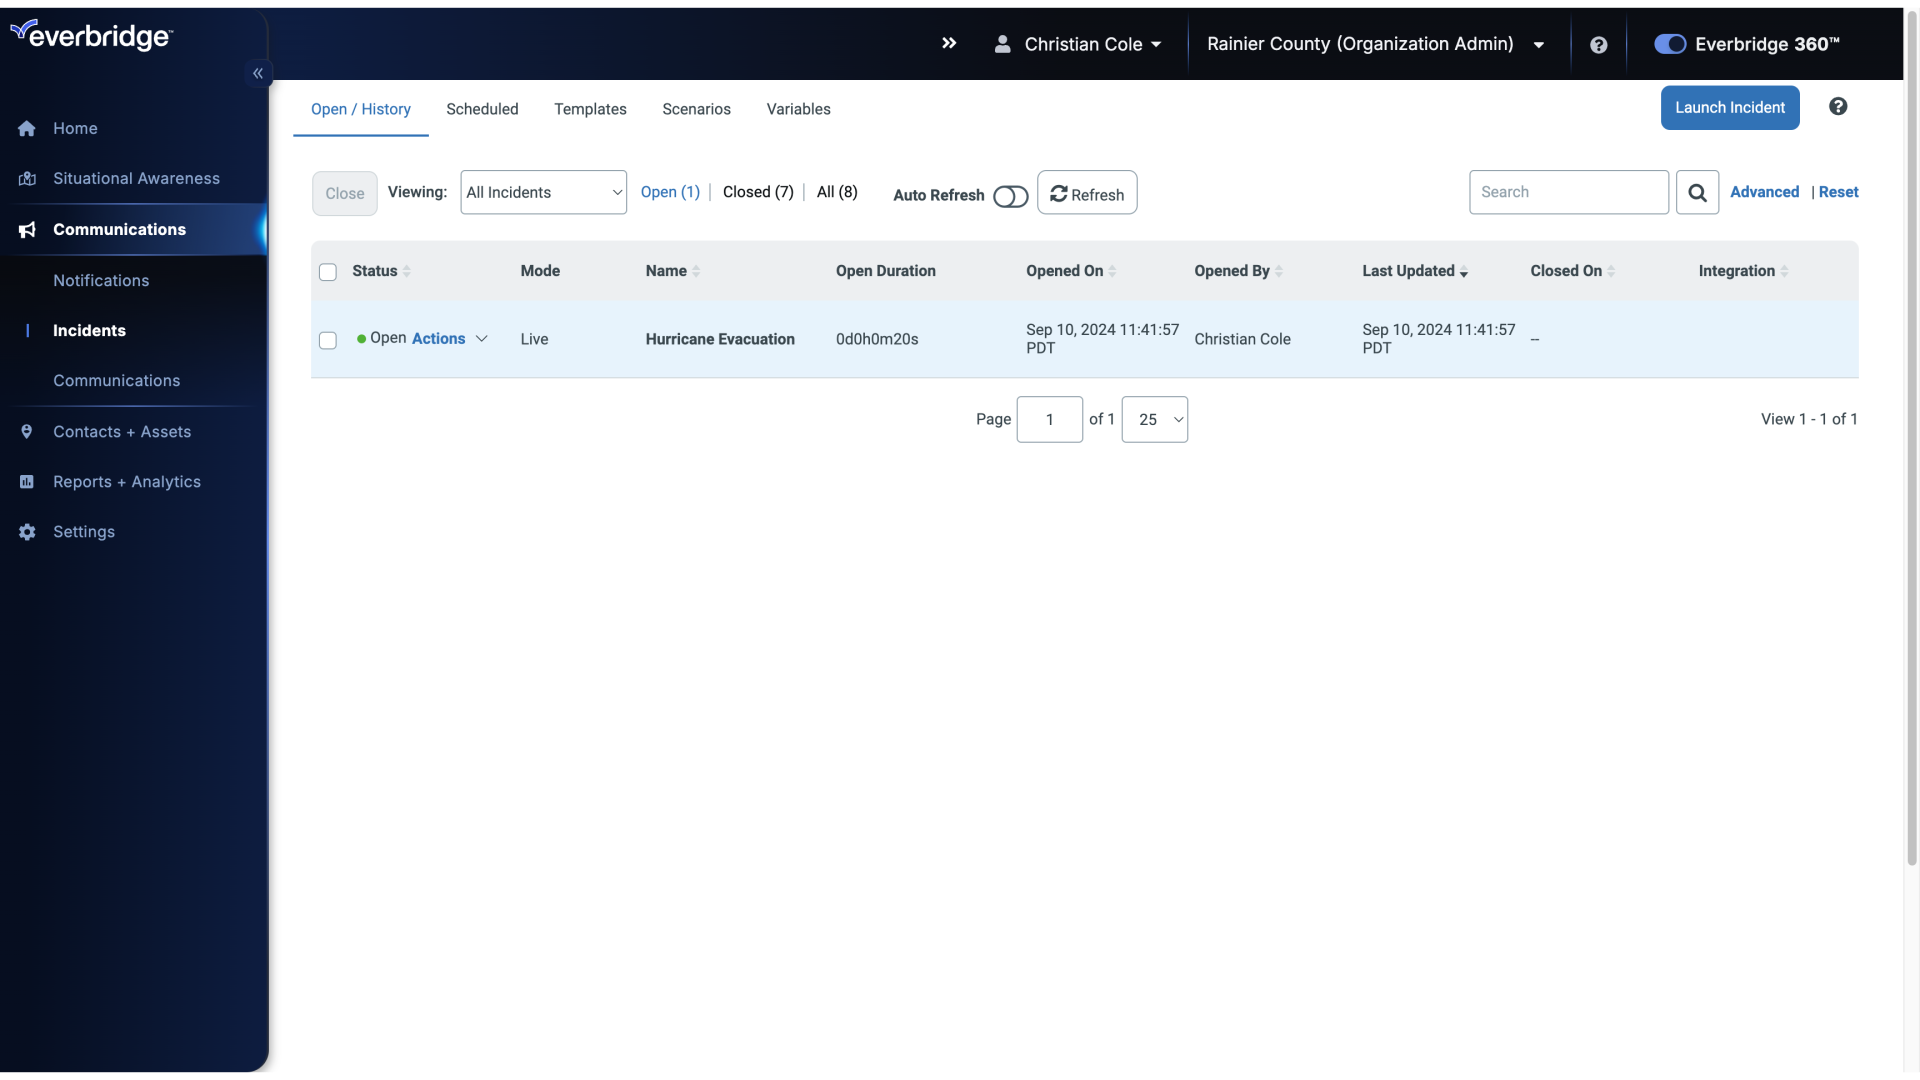
6. Open / History
Locate the Incident you're looking to close. By default, your Incidents are organized in chronological order, the top being the most recent Incident launched.

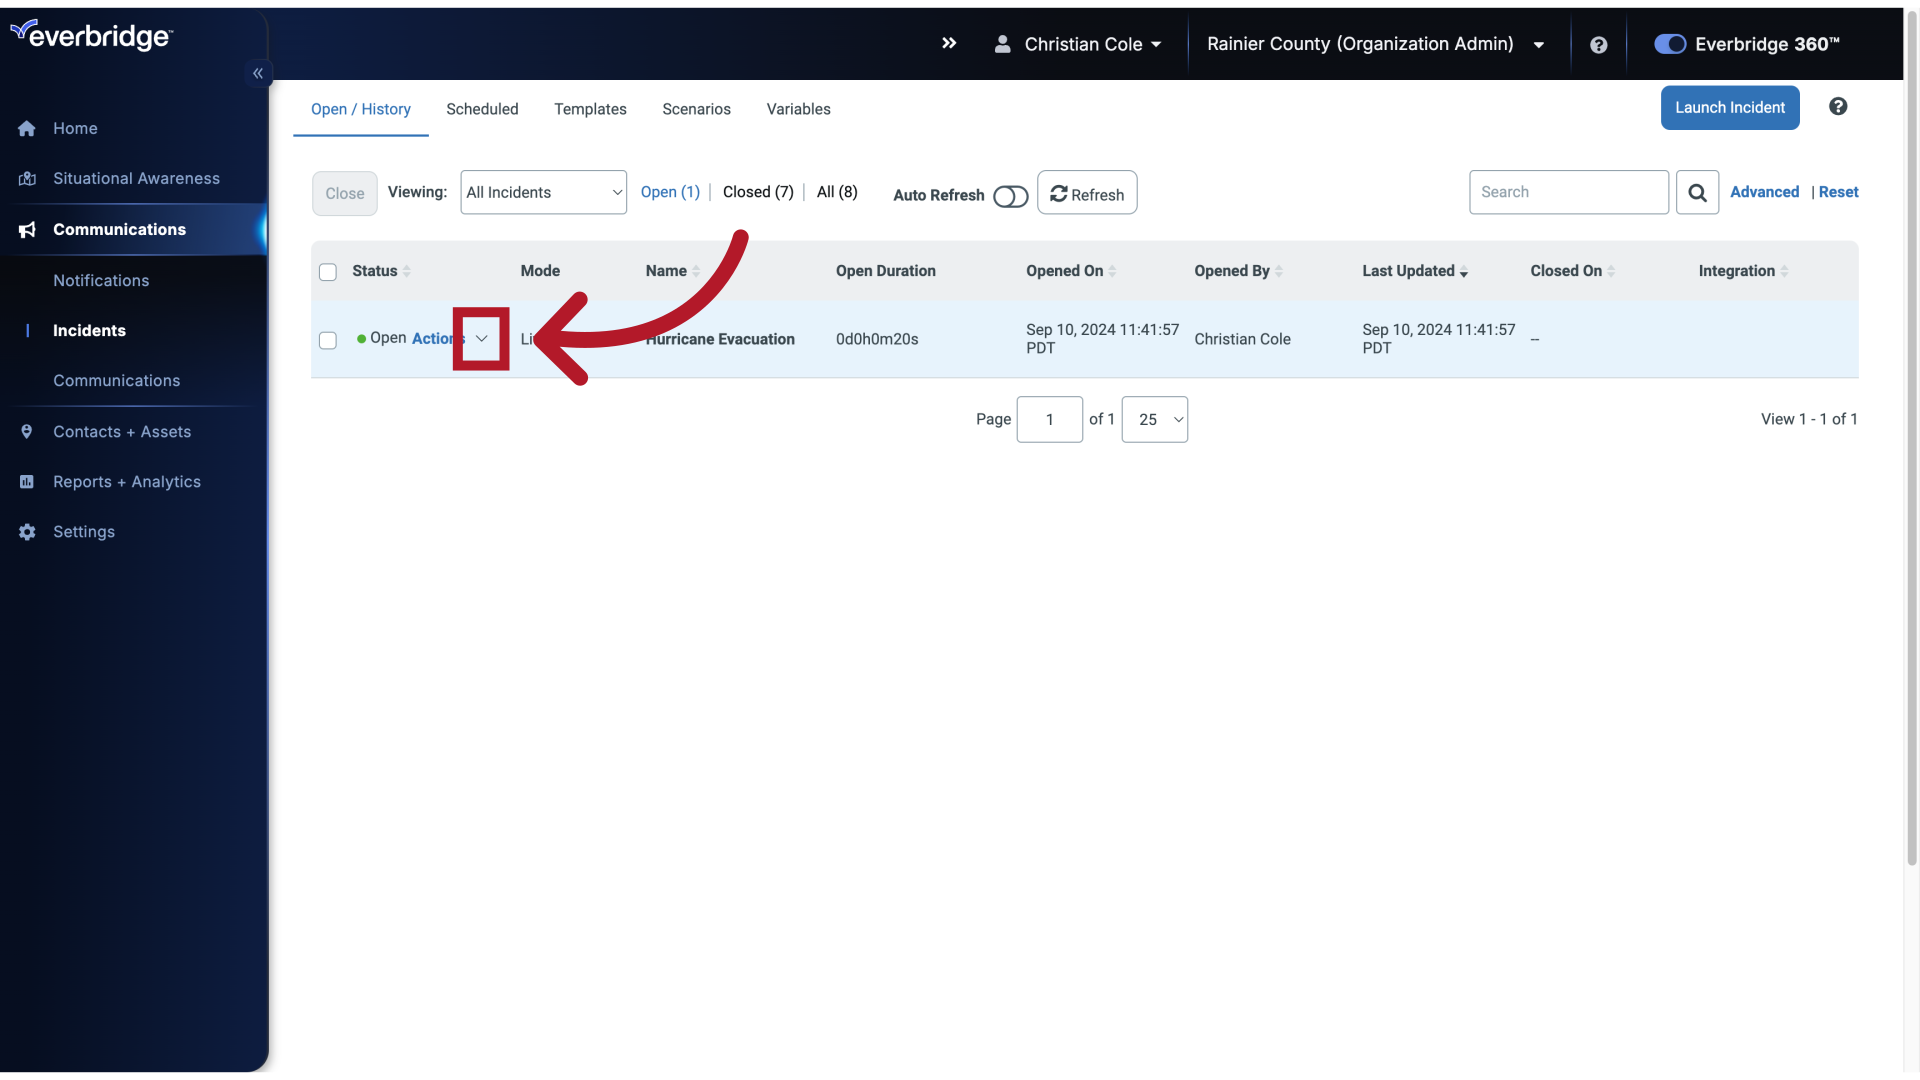
7. Open / History
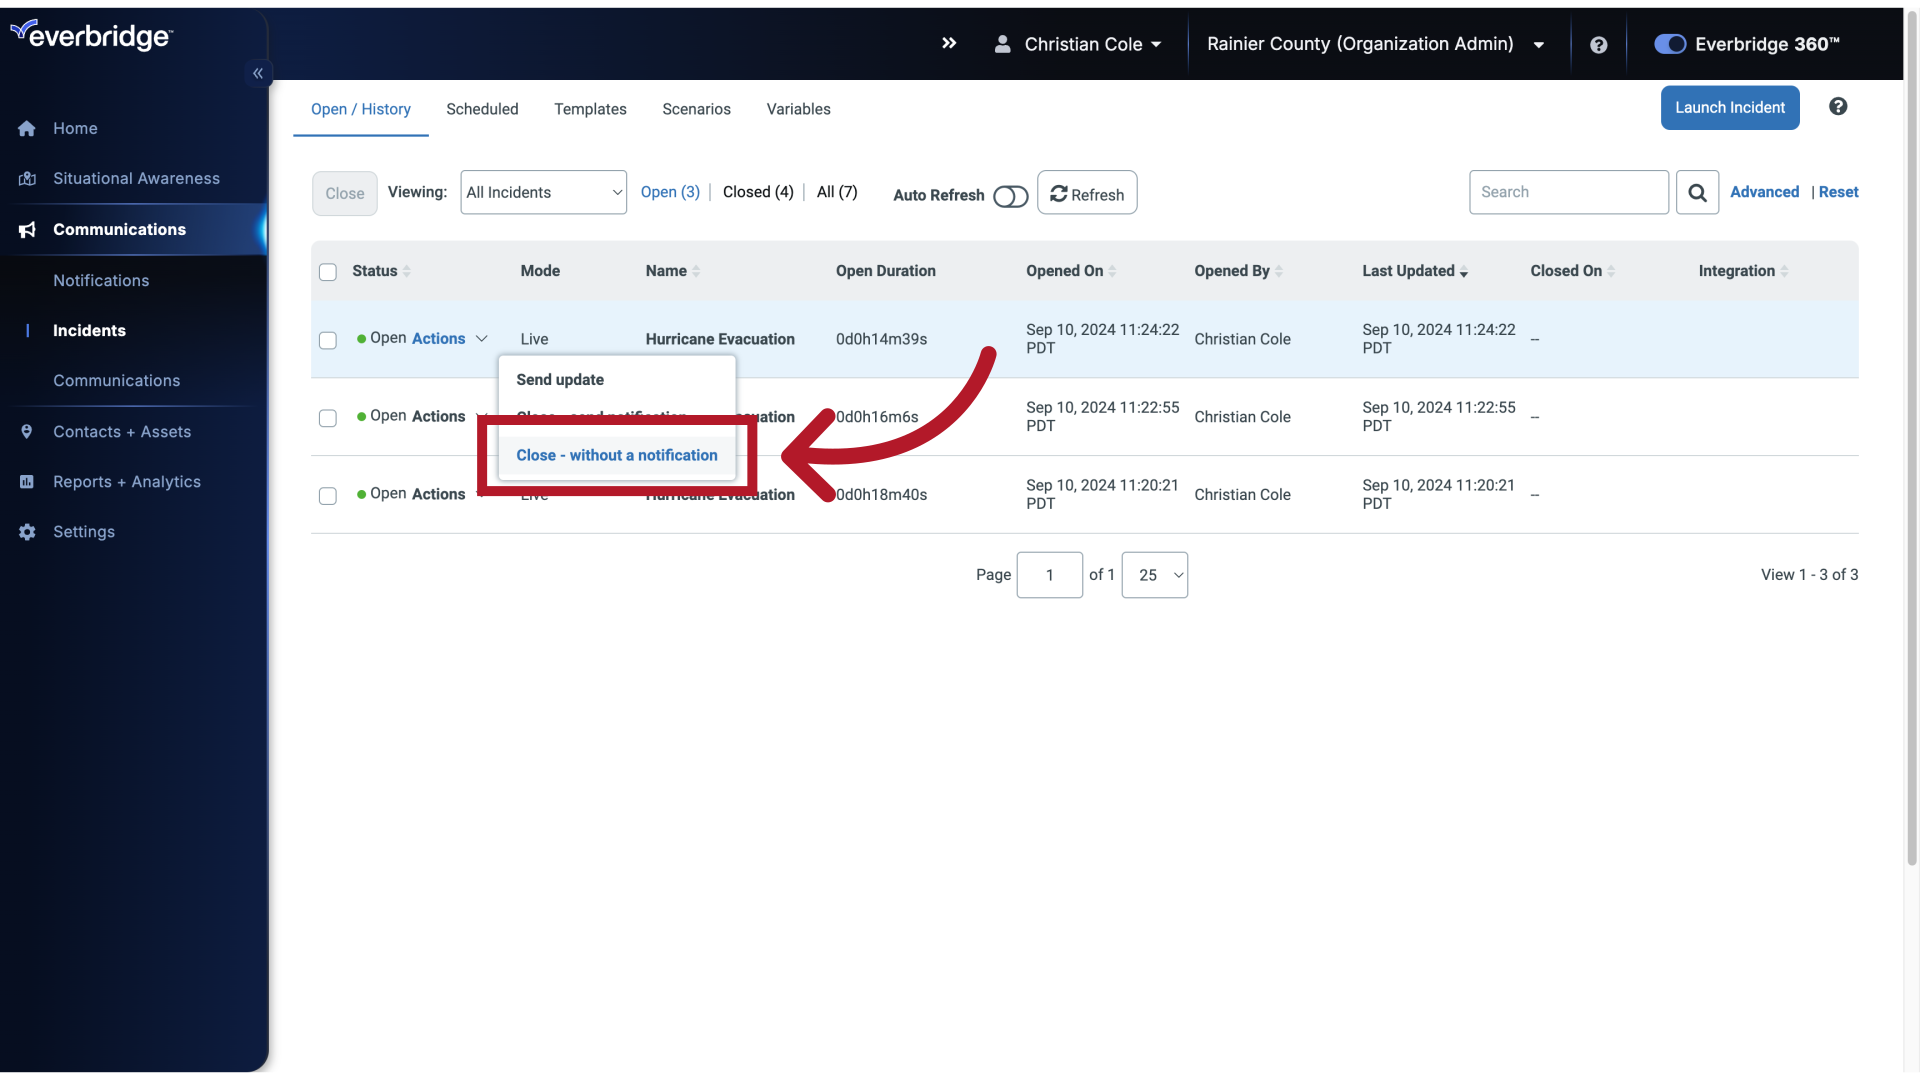
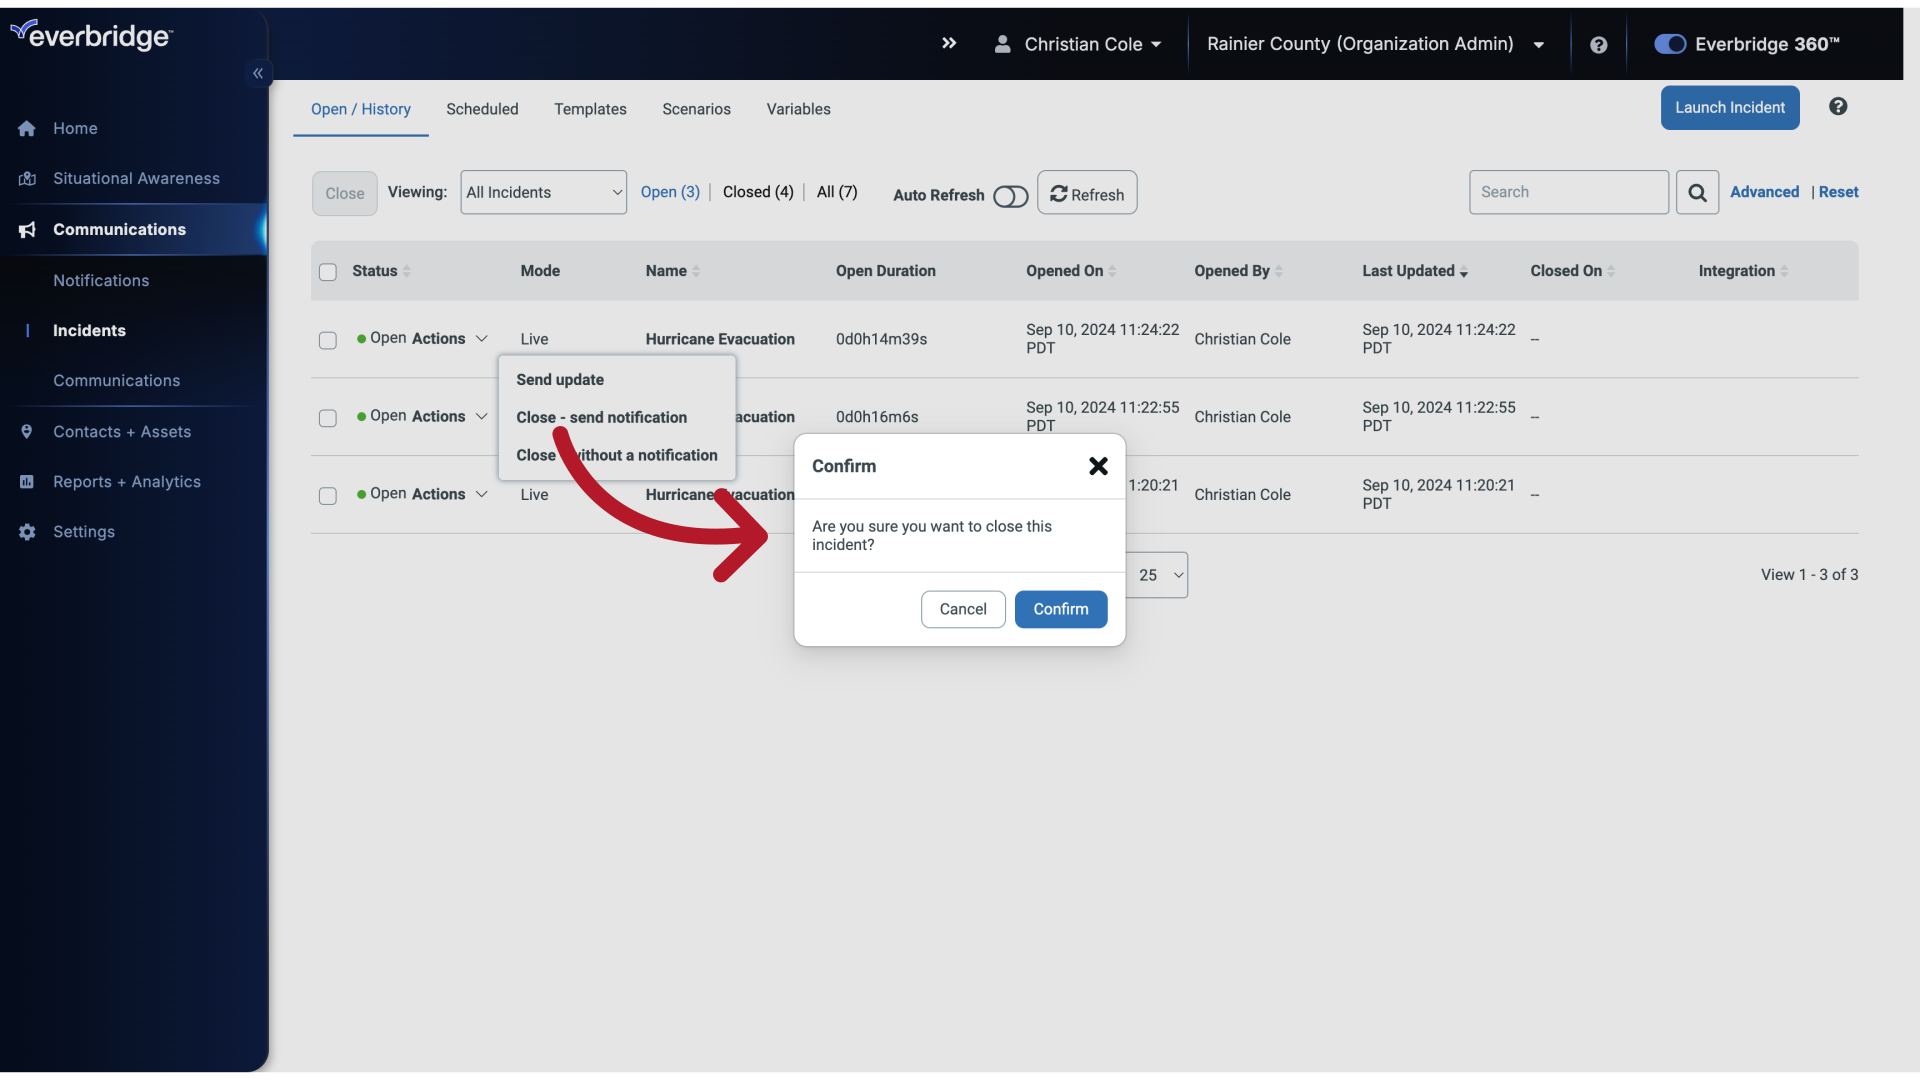
Next to your Incident, click the actions drop-down menu.

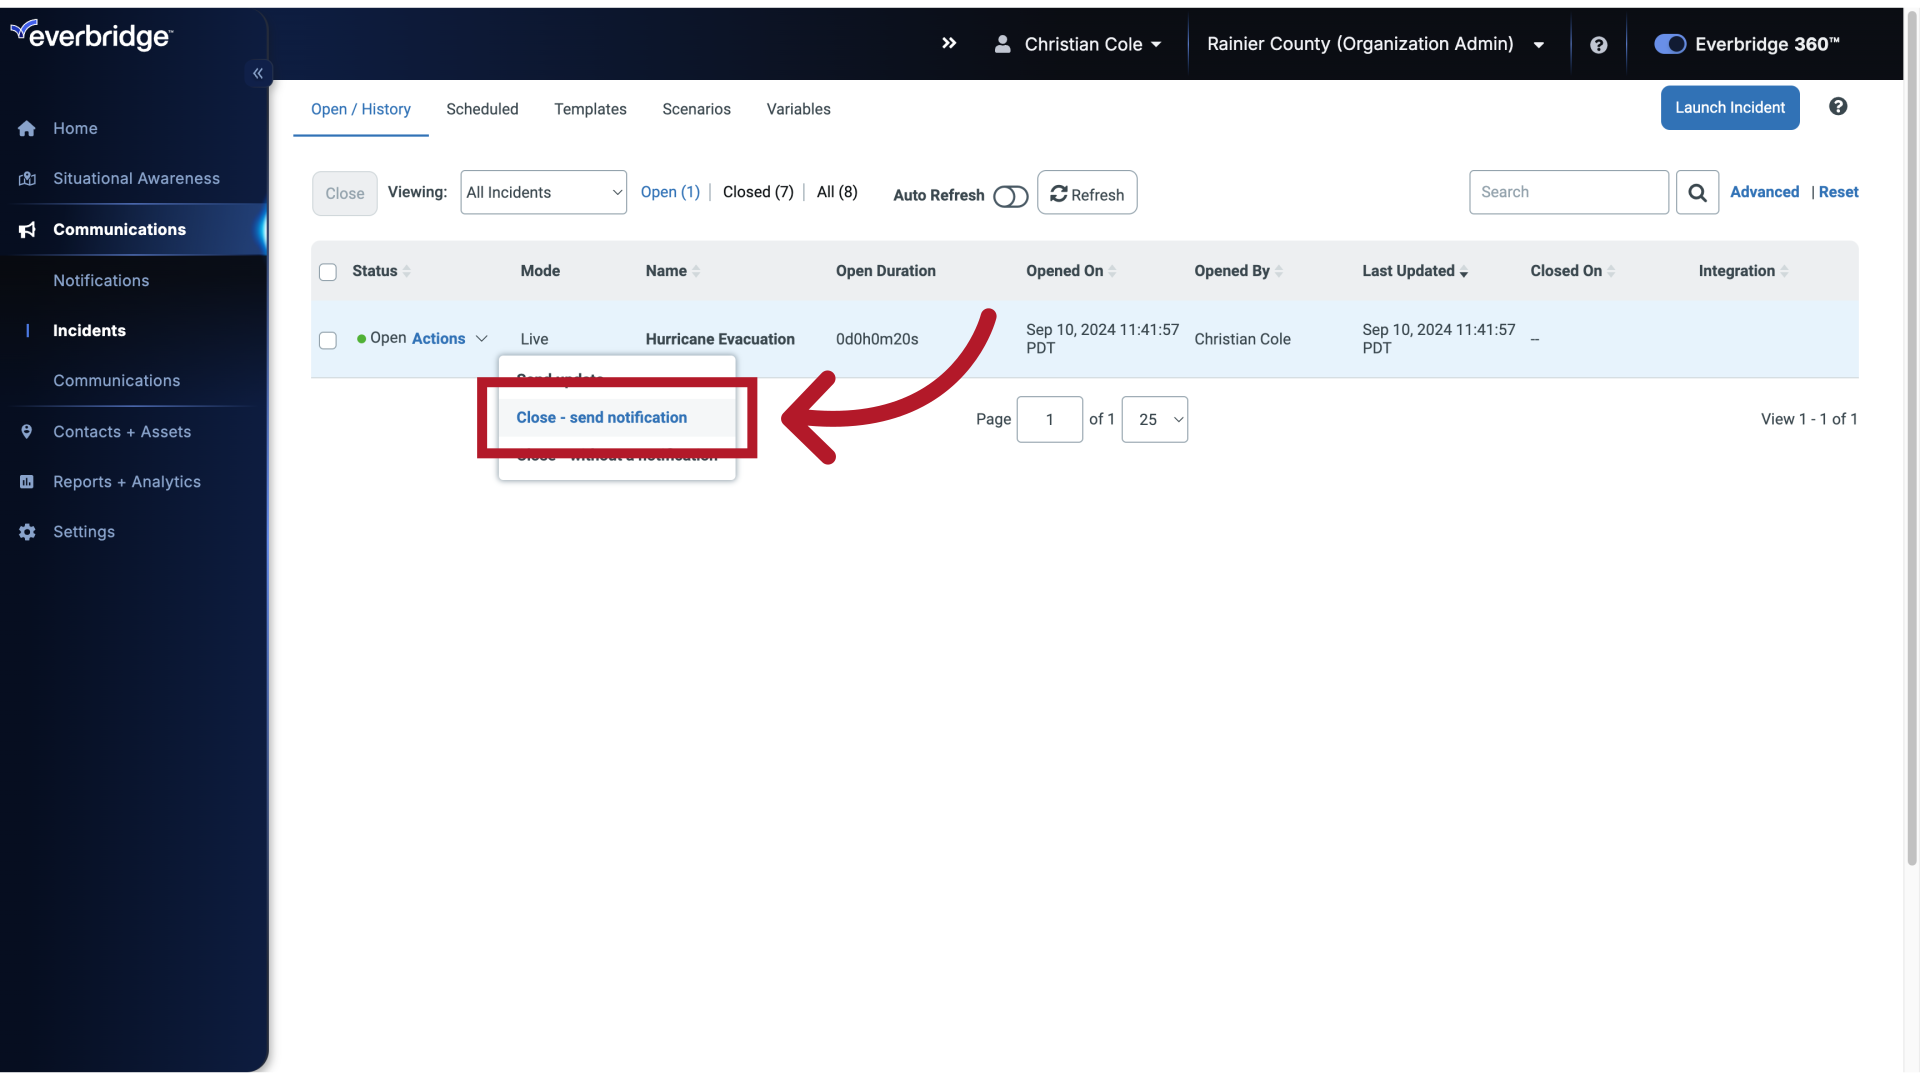
8. Open / History
You have two options to close your Incident. Close - Send Notification, and Close - Without a Notification.

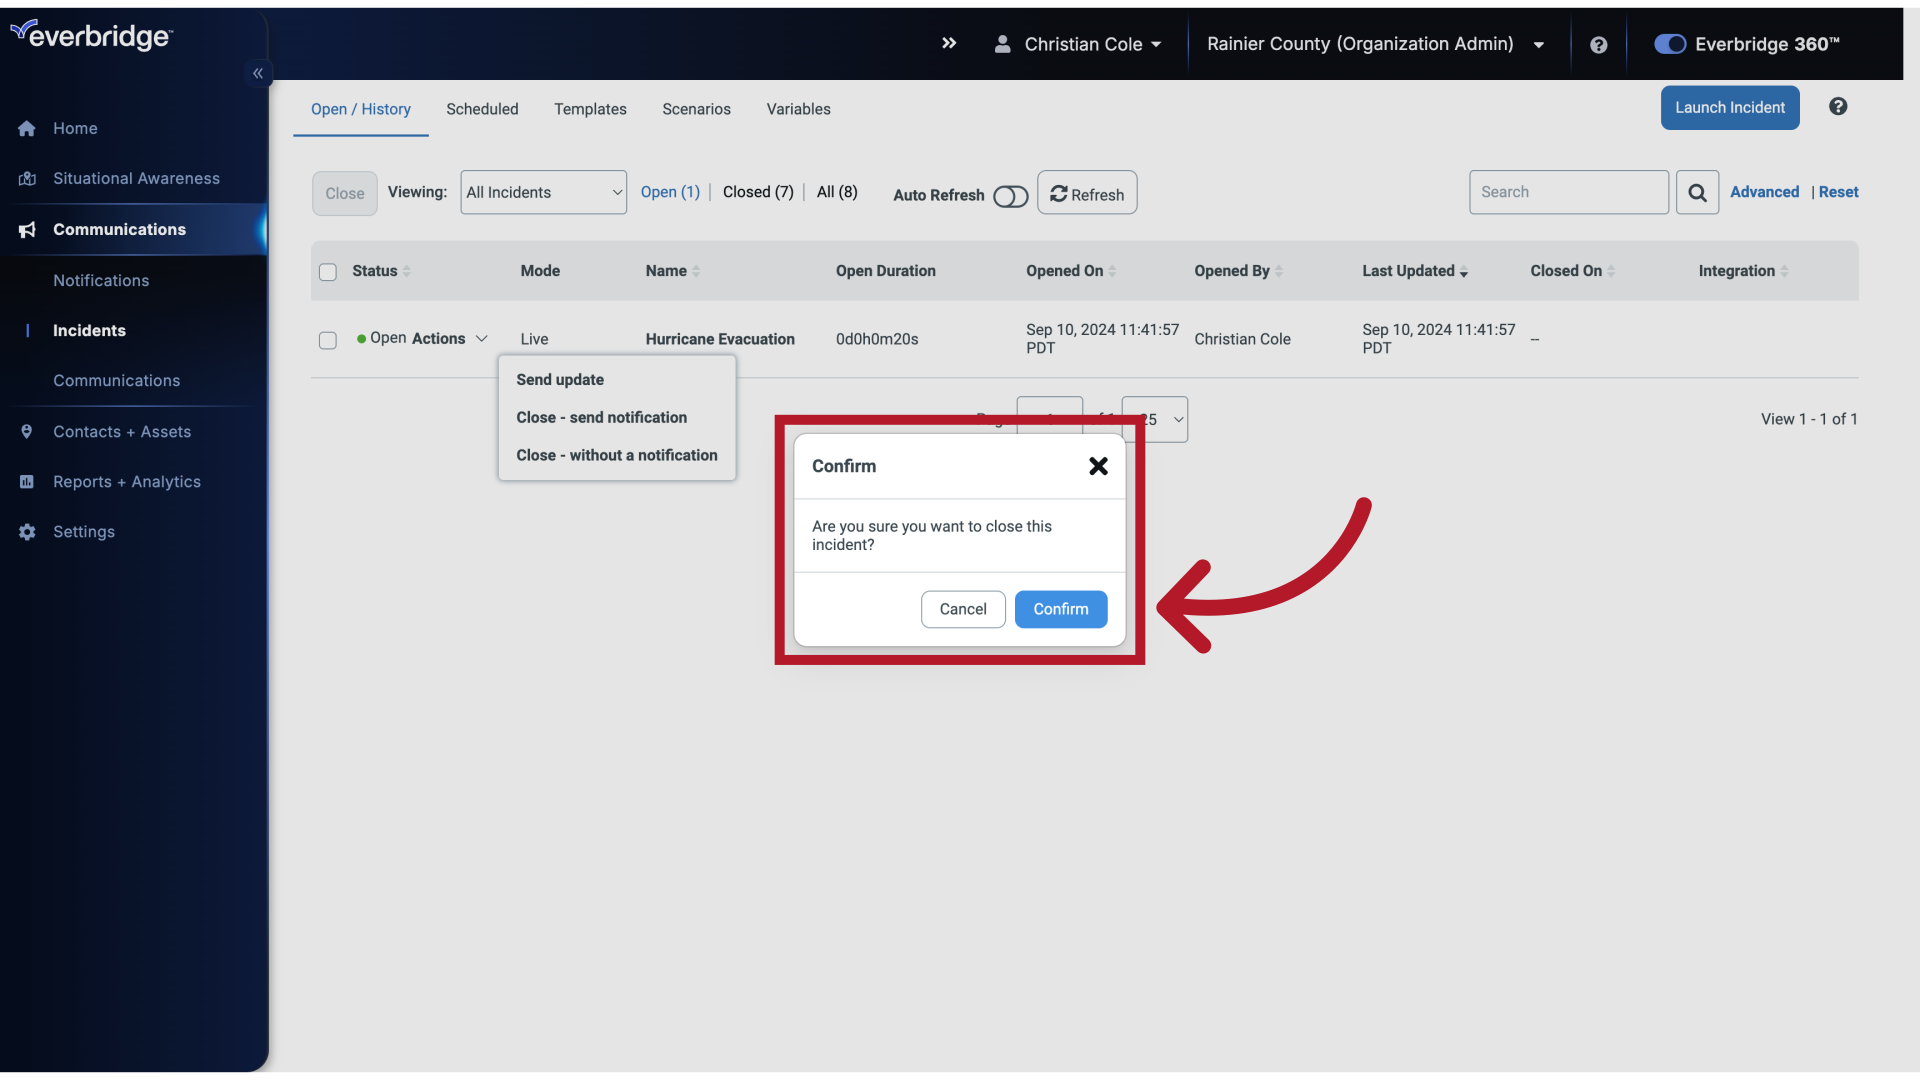
9. Close - Without a Notification
If you want to close the Incident out in the system. As the situation is resolved, but doesn't require a final message, you're prompted to confirm this choice.
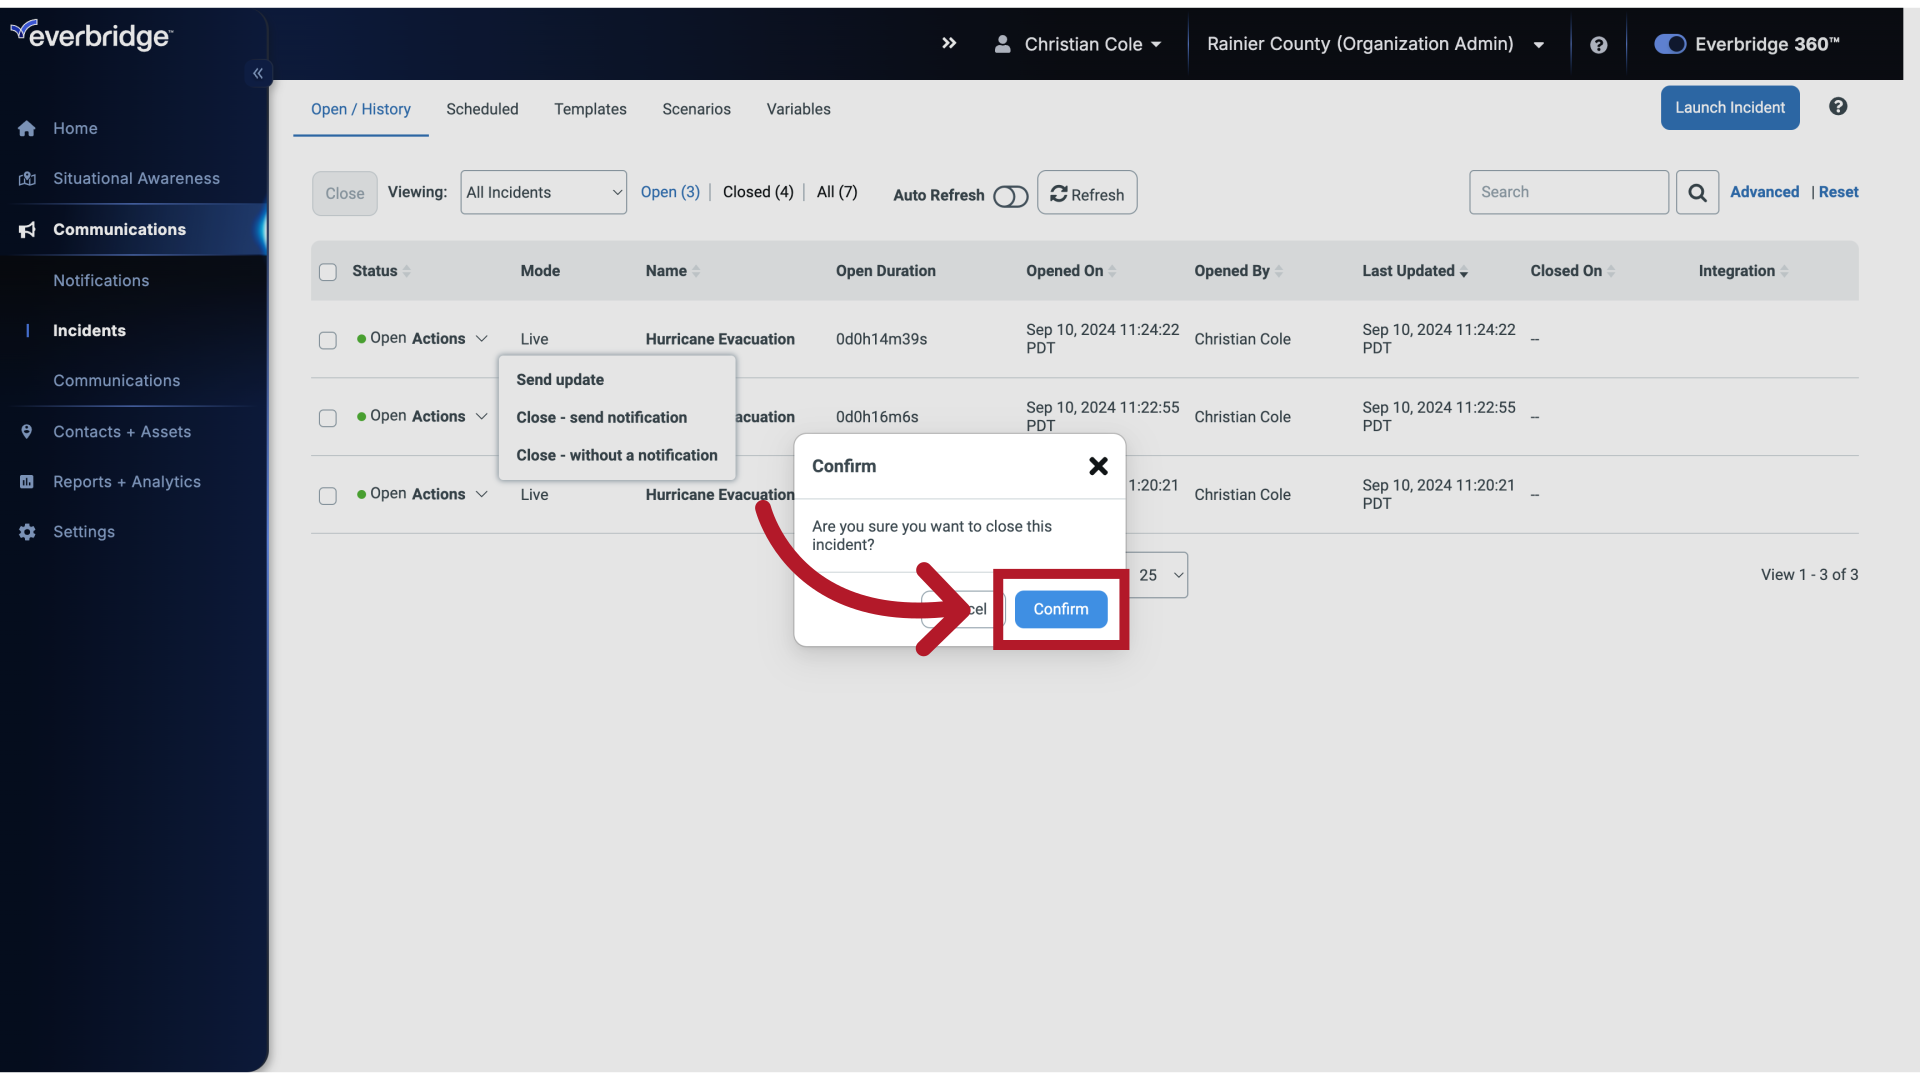
10. Close - Without a Notification
If you select Confirm, the Incident is immediately closed without further contact from the organization to your contacts.
11. Close - Without a Notification
12. Open / History

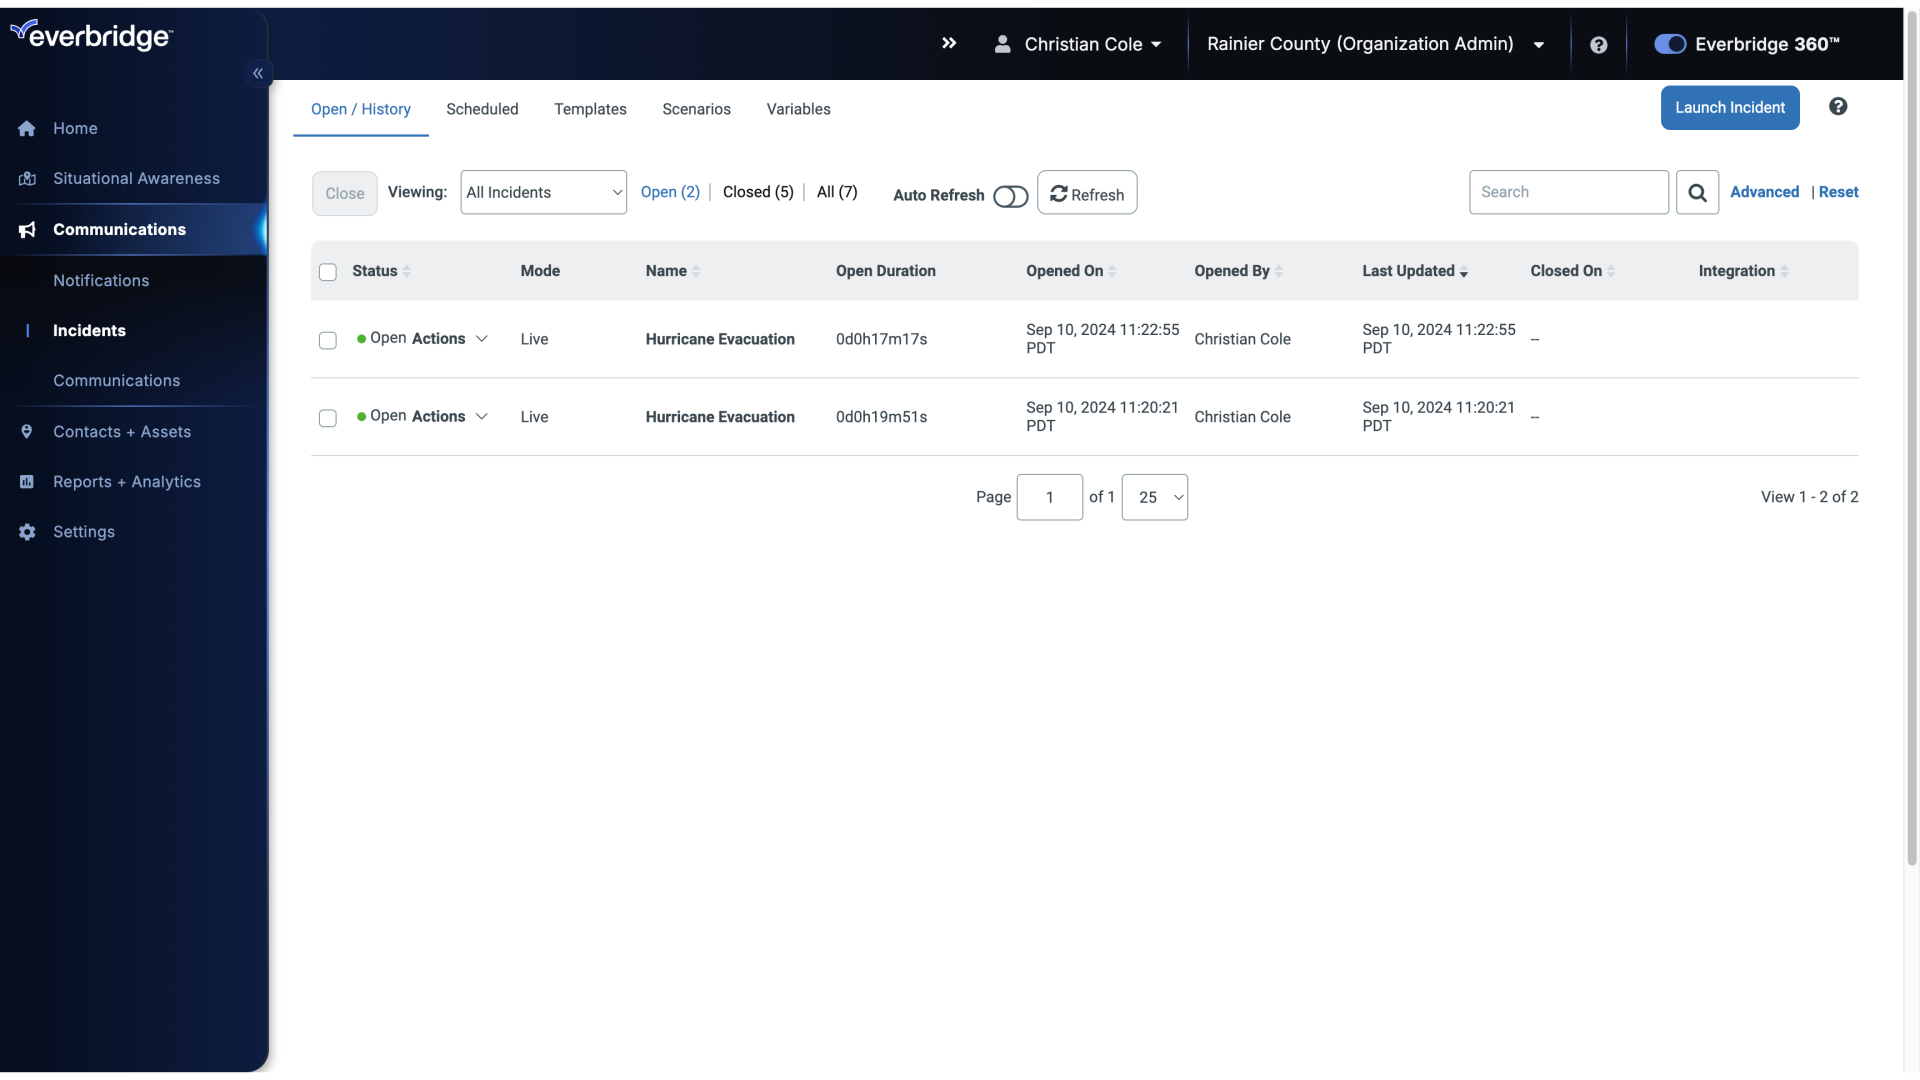
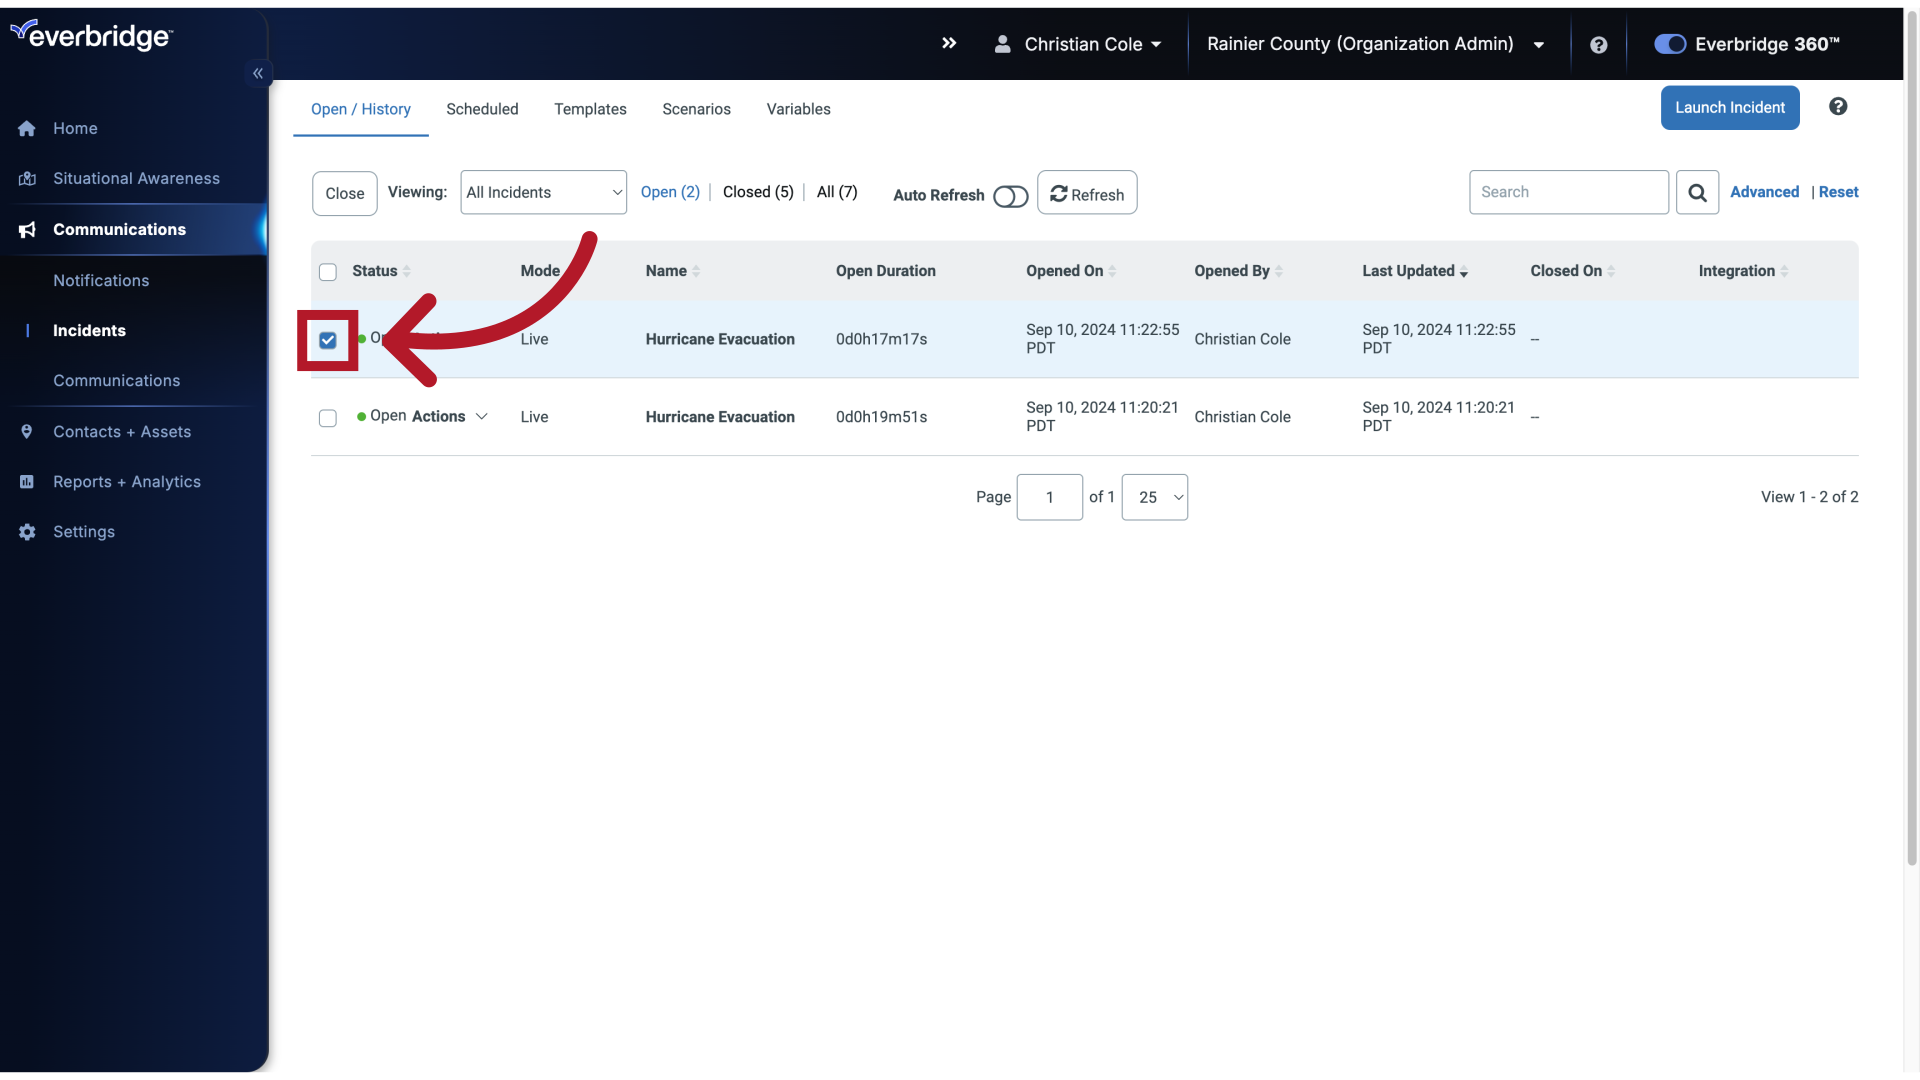
13. Close Multiple Incidents
You can also close multiple Incidents at once by selecting the Incidents.
14. Close Multiple Incidents
15. Close Multiple Incidents
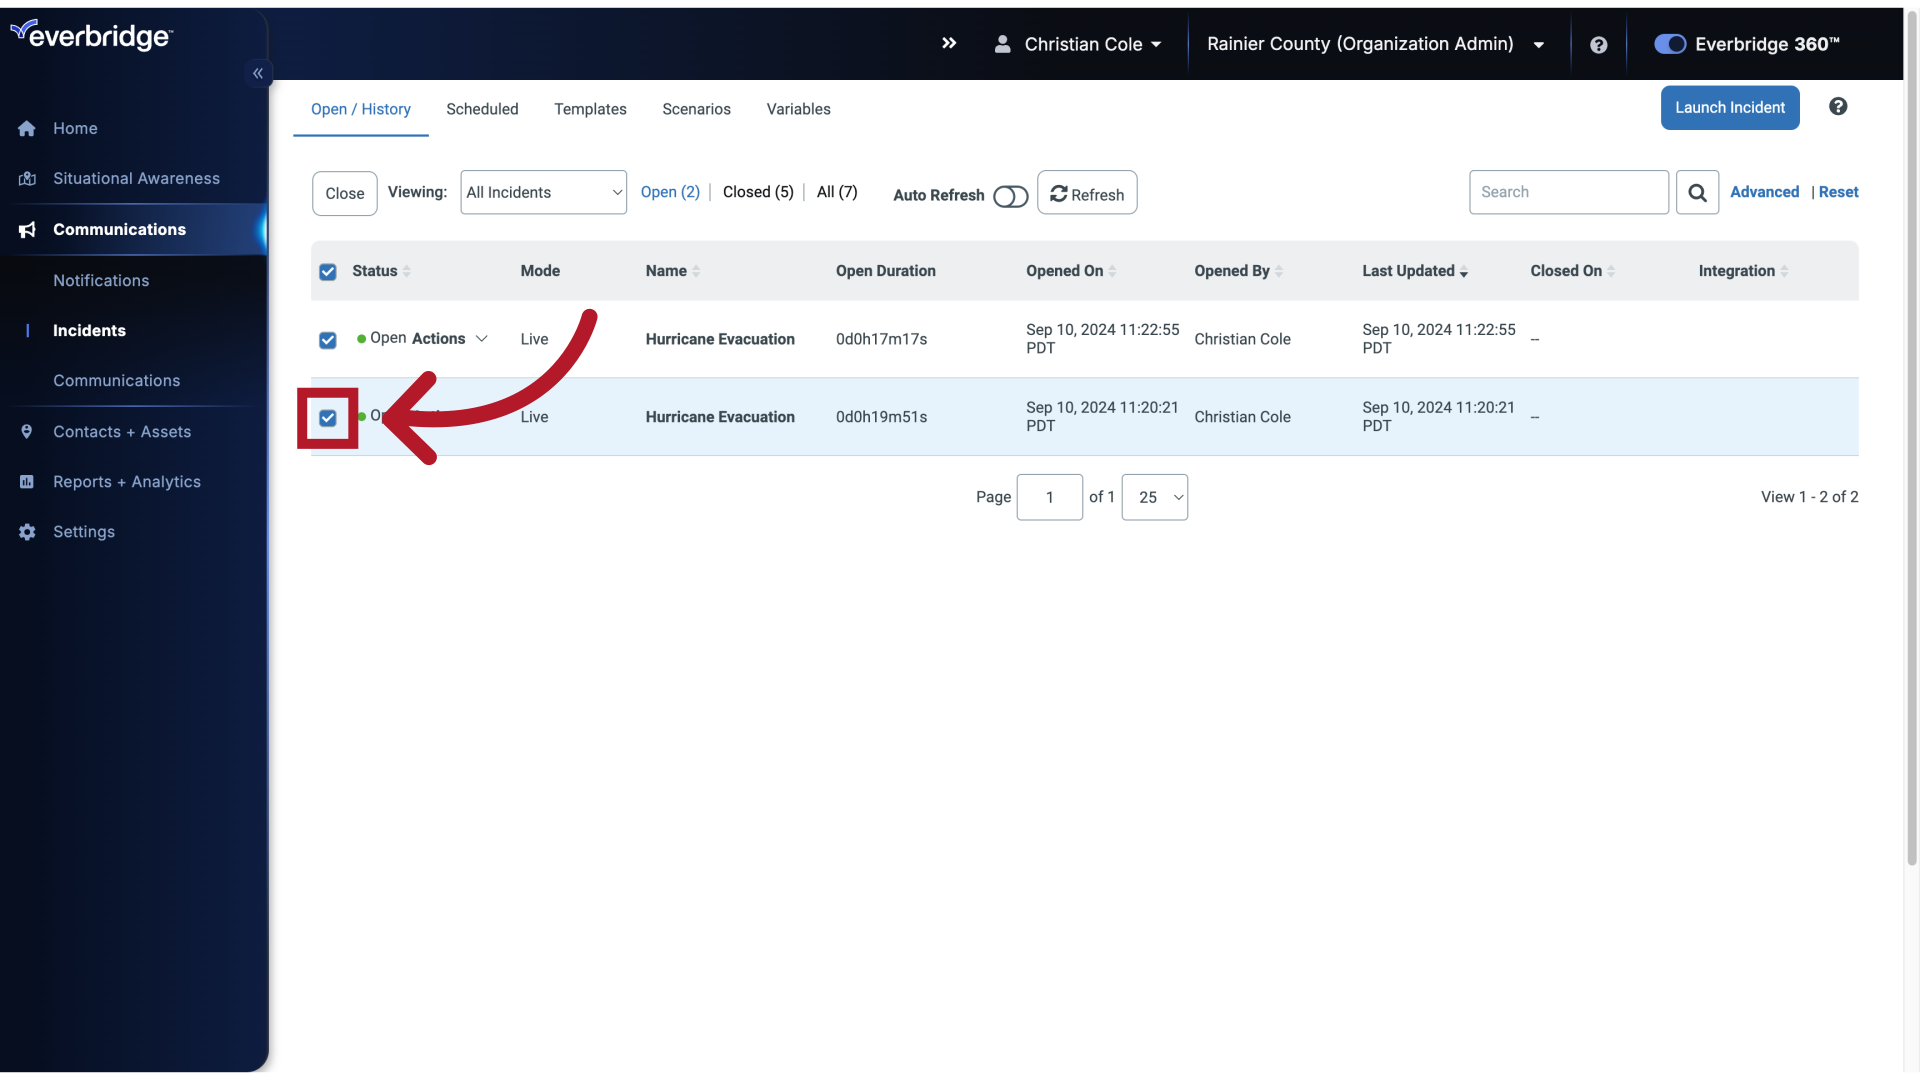
16. Close Multiple Incidents
And clicking Close.
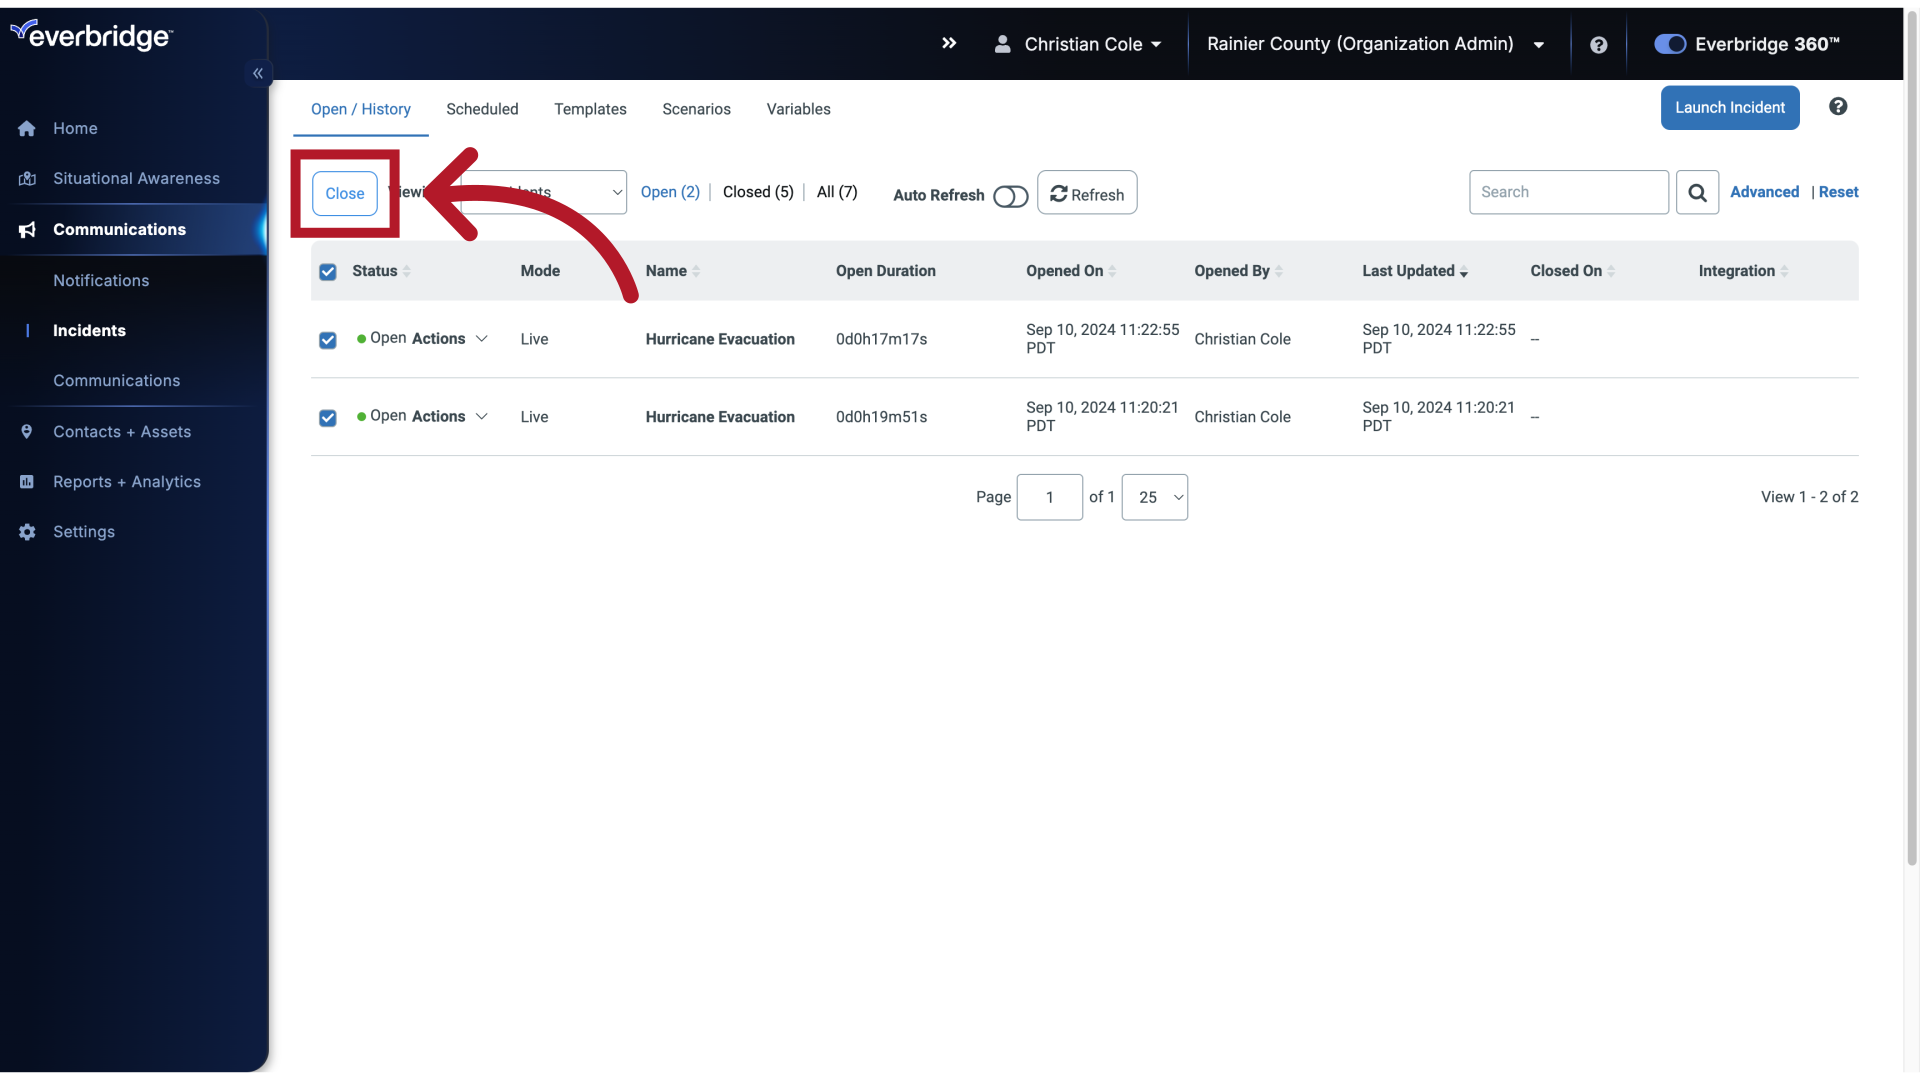
17. Close Multiple Incidents
A pop up appears asking you to confirm your decision.
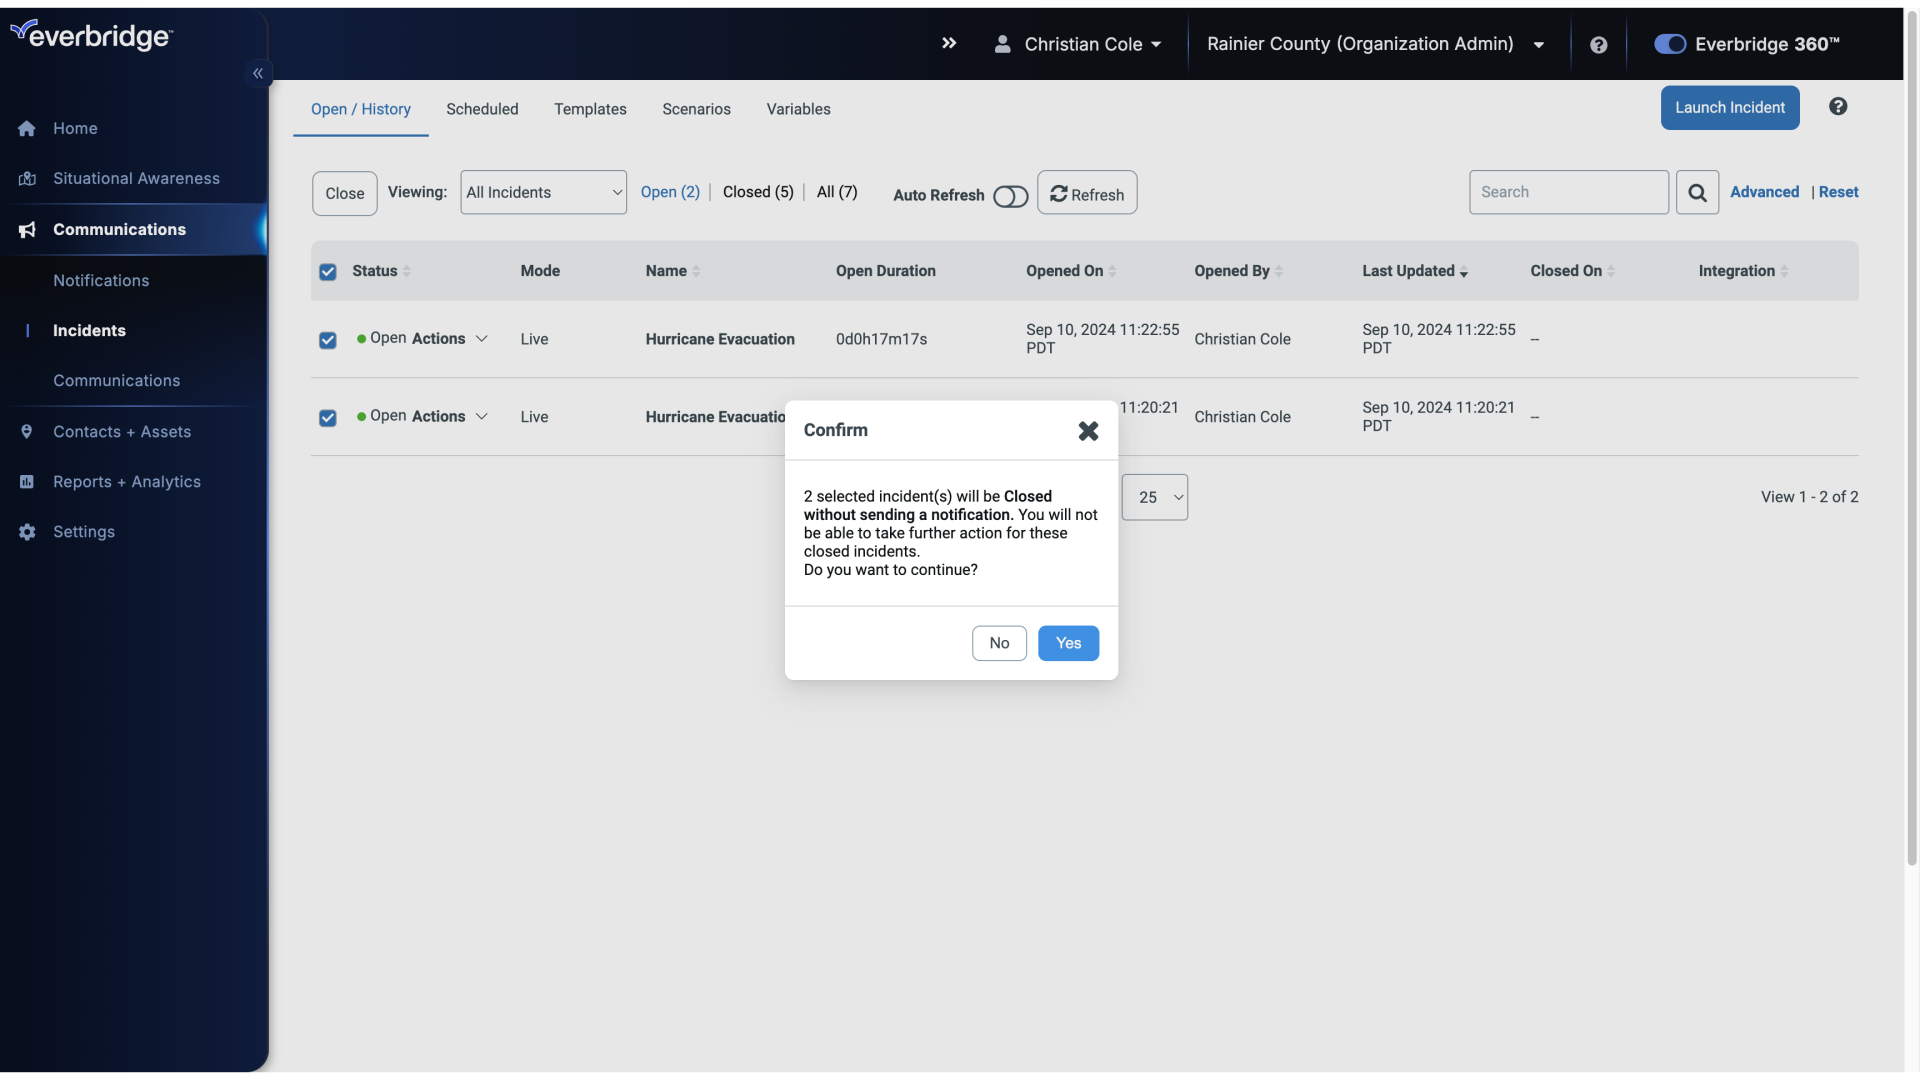
18. Close Multiple Incidents
19. Close - Send Notification
If you choose to send a final notification when closing your Incident.
20. Close - Send Notification
21. Close - Send Notification
22. Close - Send Notification
A pop up appears asking you to confirm your decision.
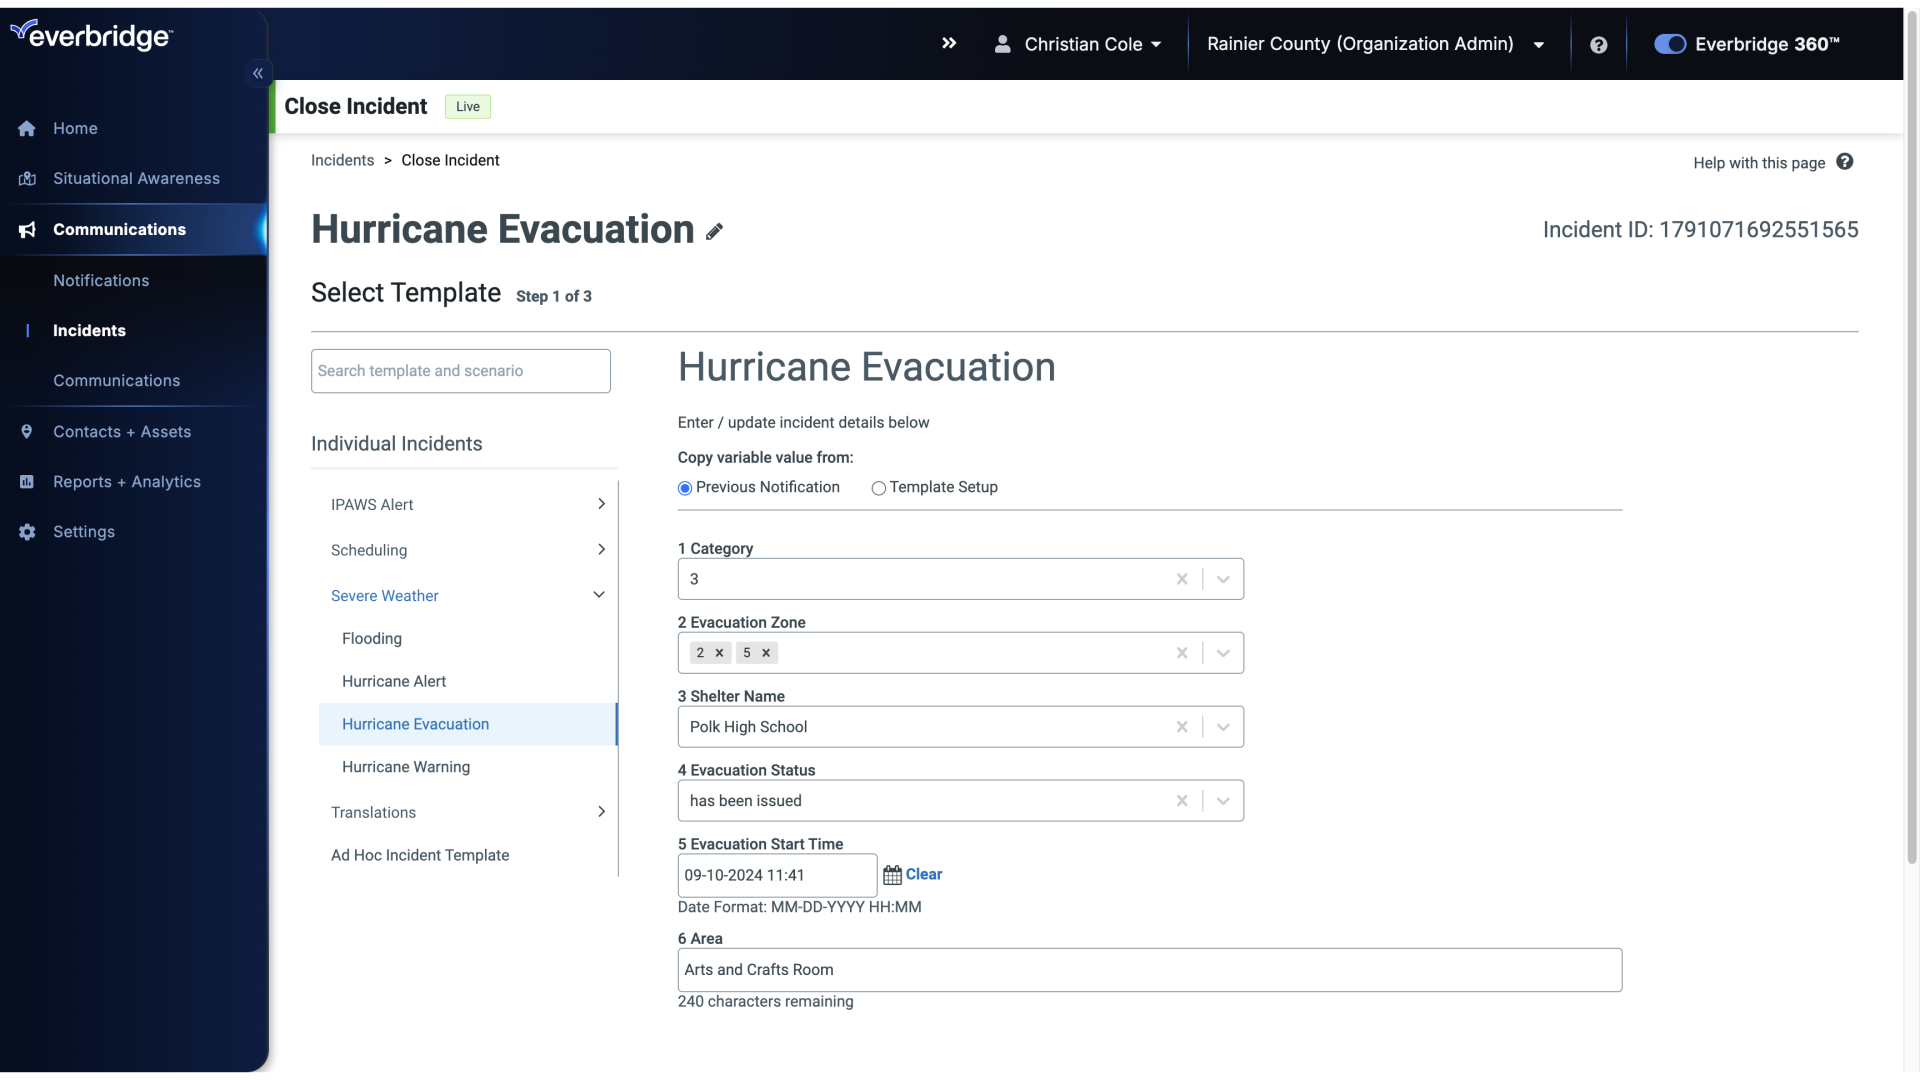
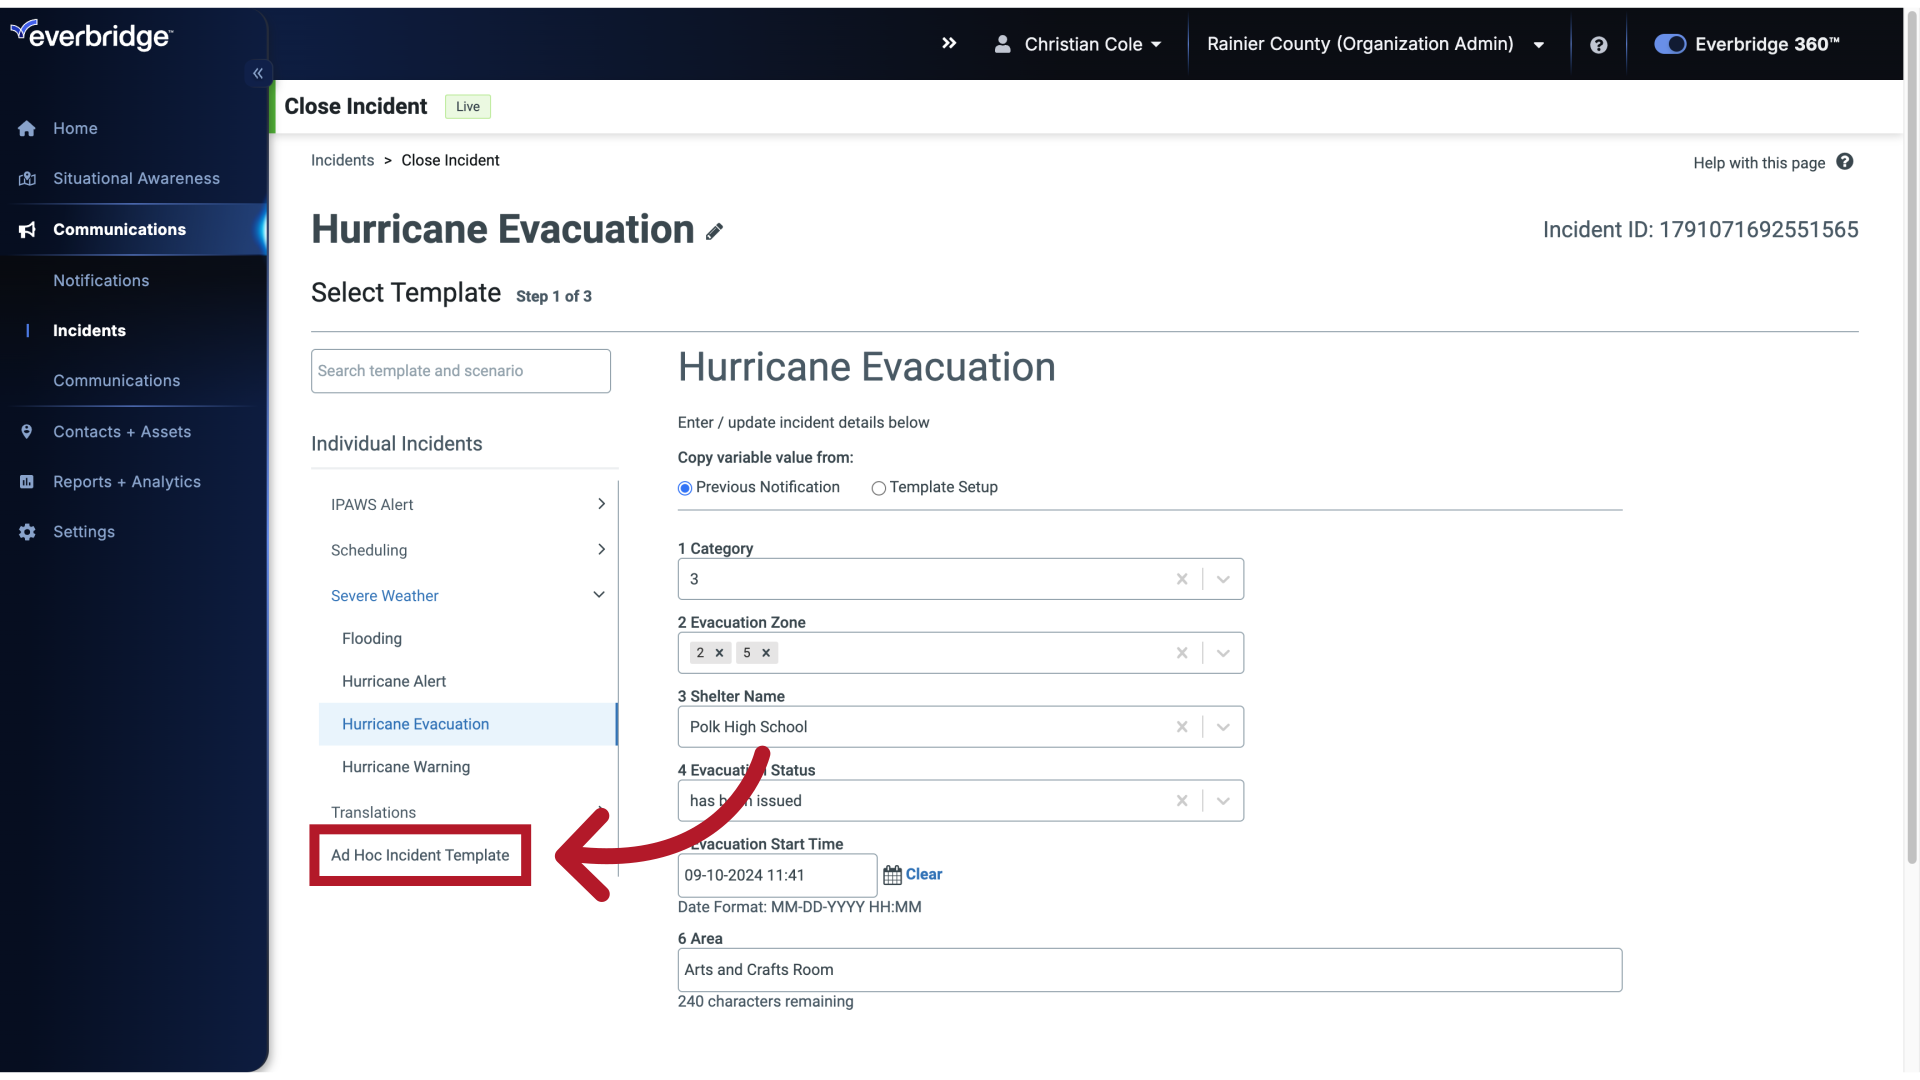
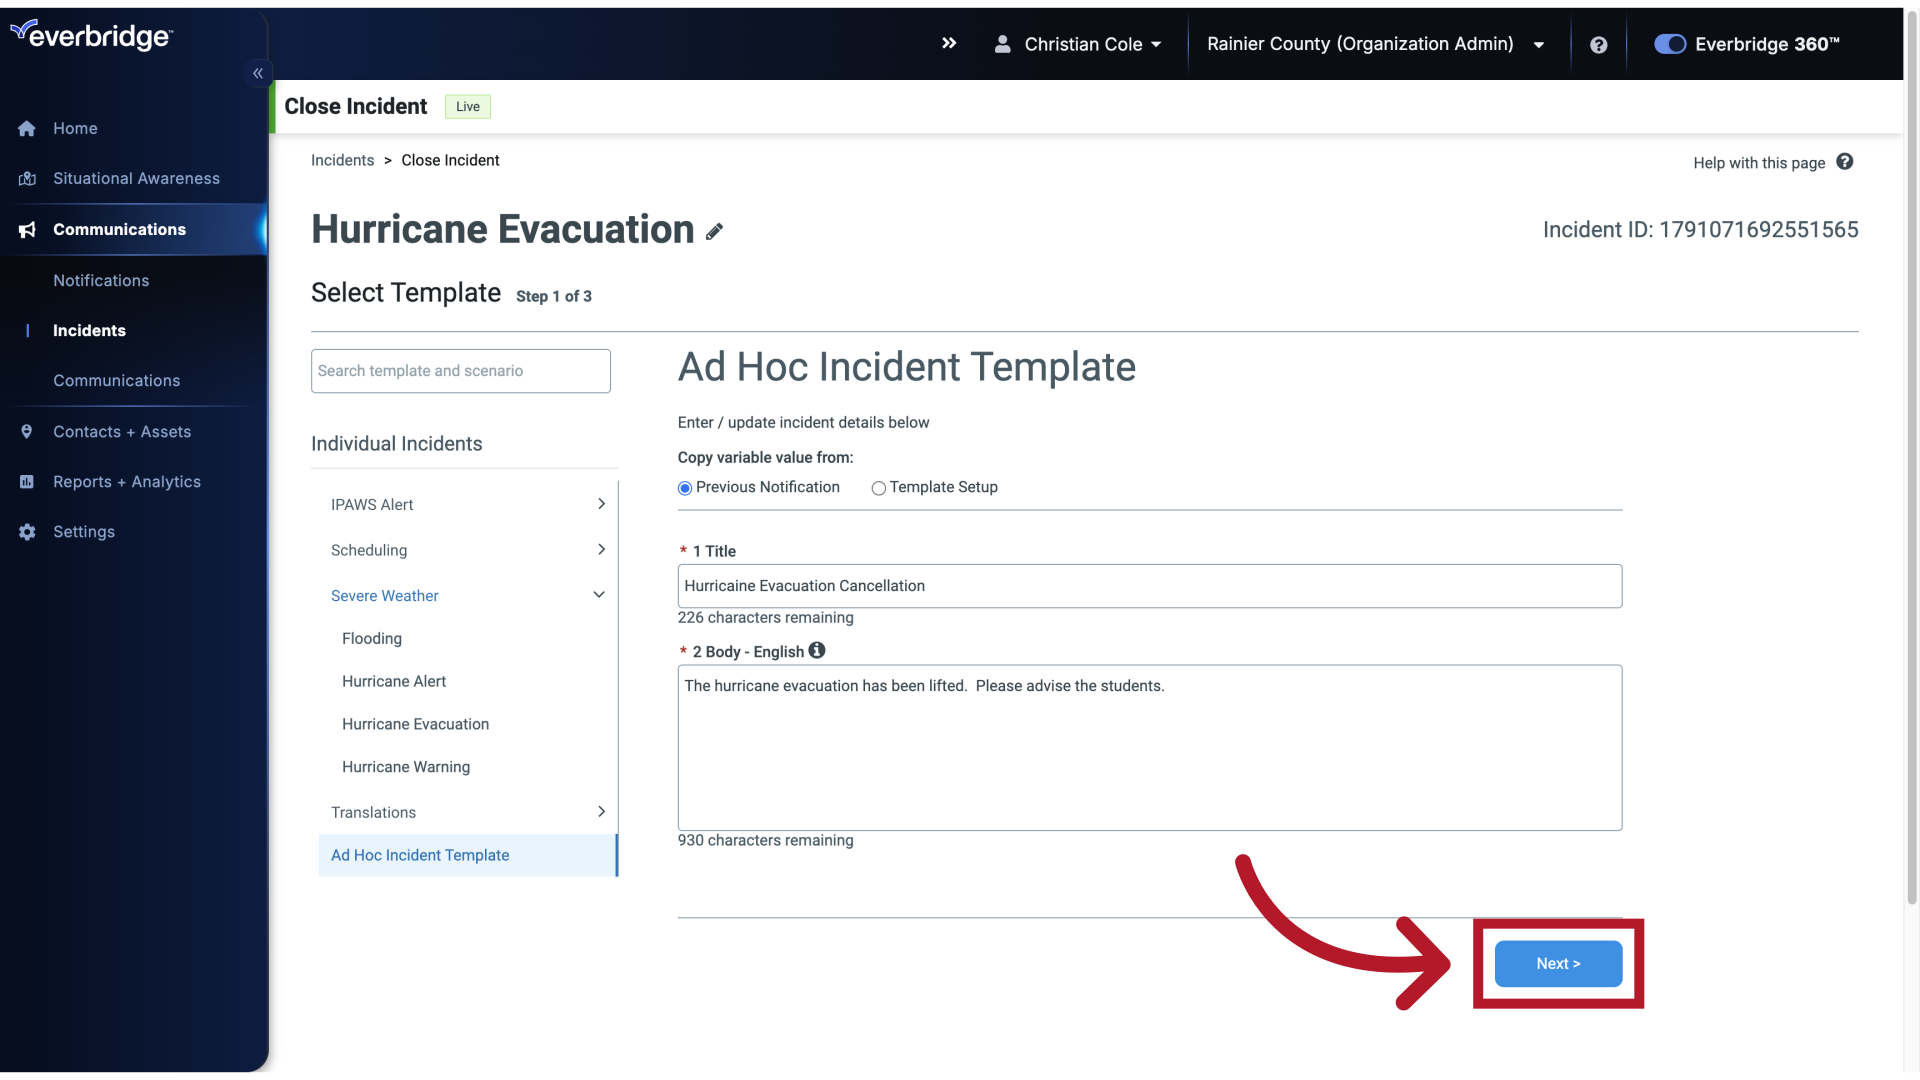
23. Close Incident
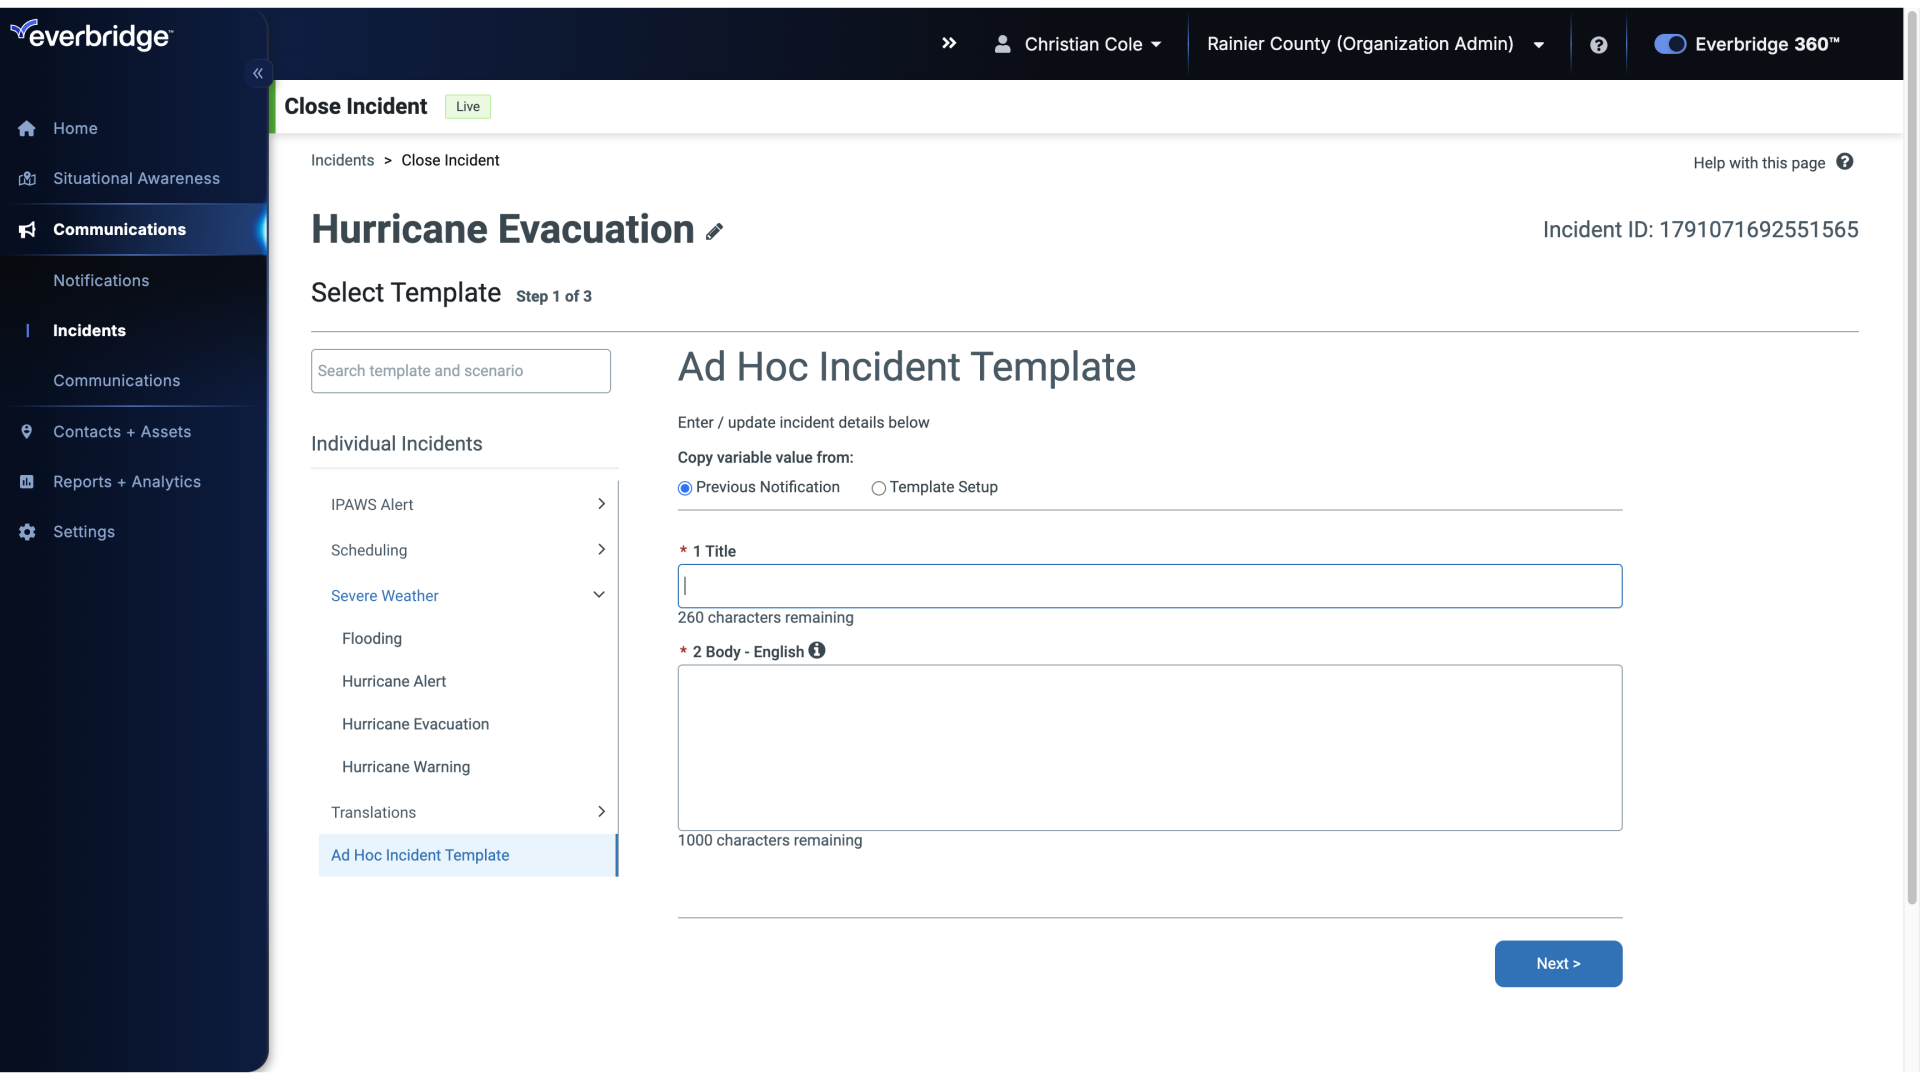
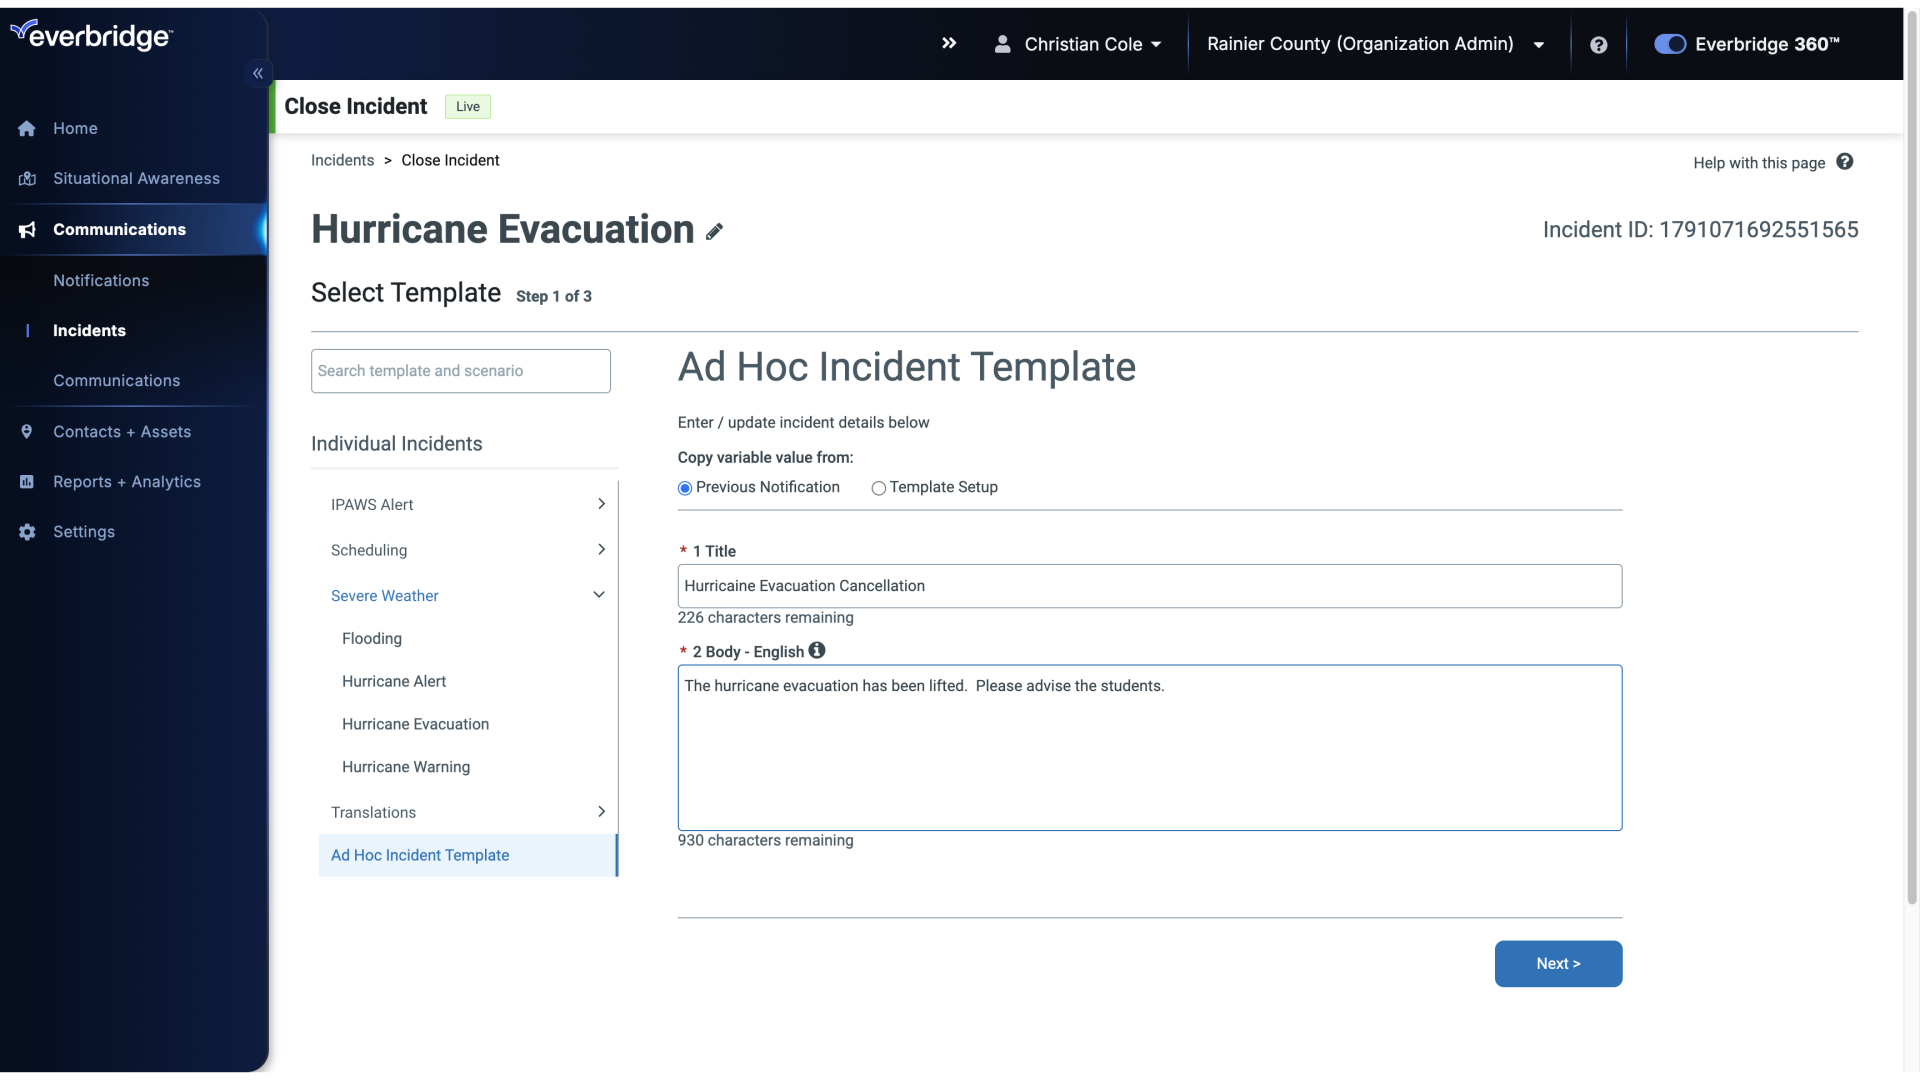
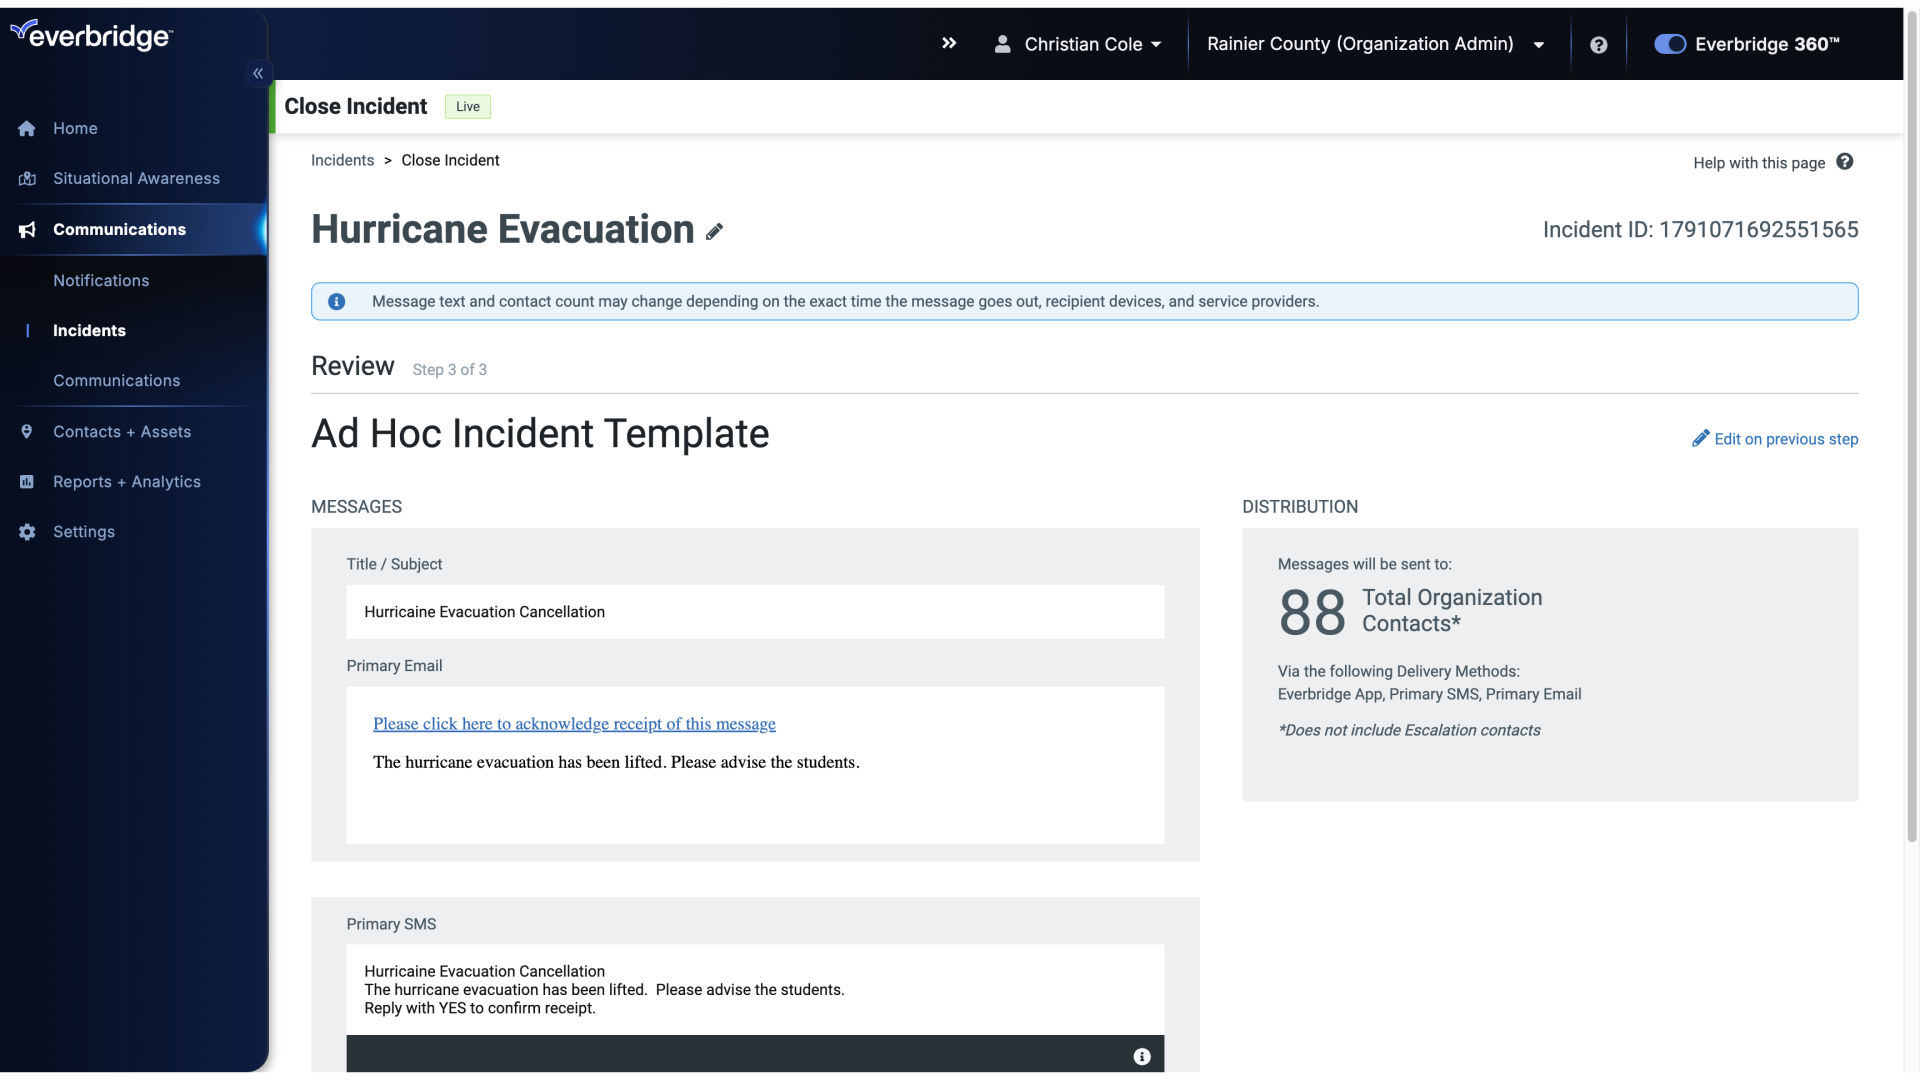
Click Confirm, and you're brought to the close Incident page. Your previous message is displayed and you can make any edits or changes to craft a final notification.
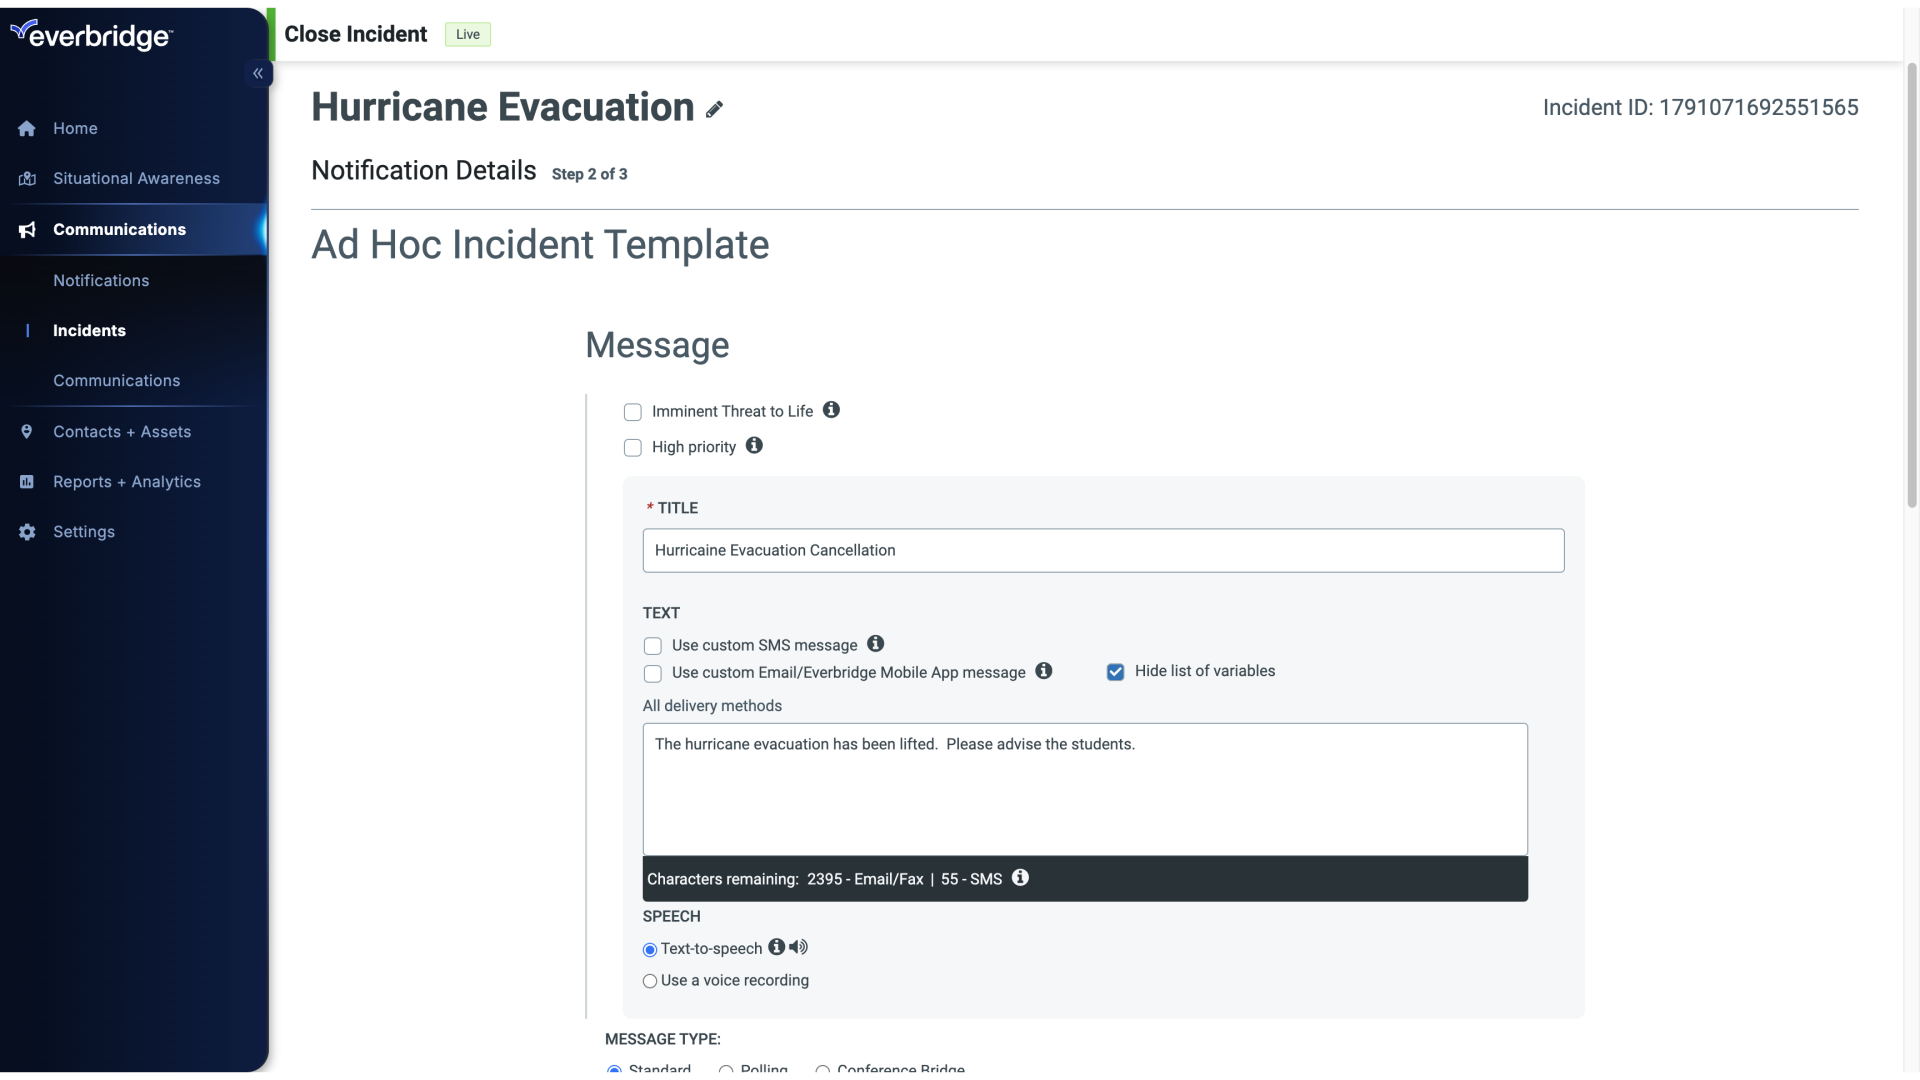
24. Close Incident
25. Close Incident
26. Close Incident
27. Close Incident
28. Close Incident
29. Close Incident
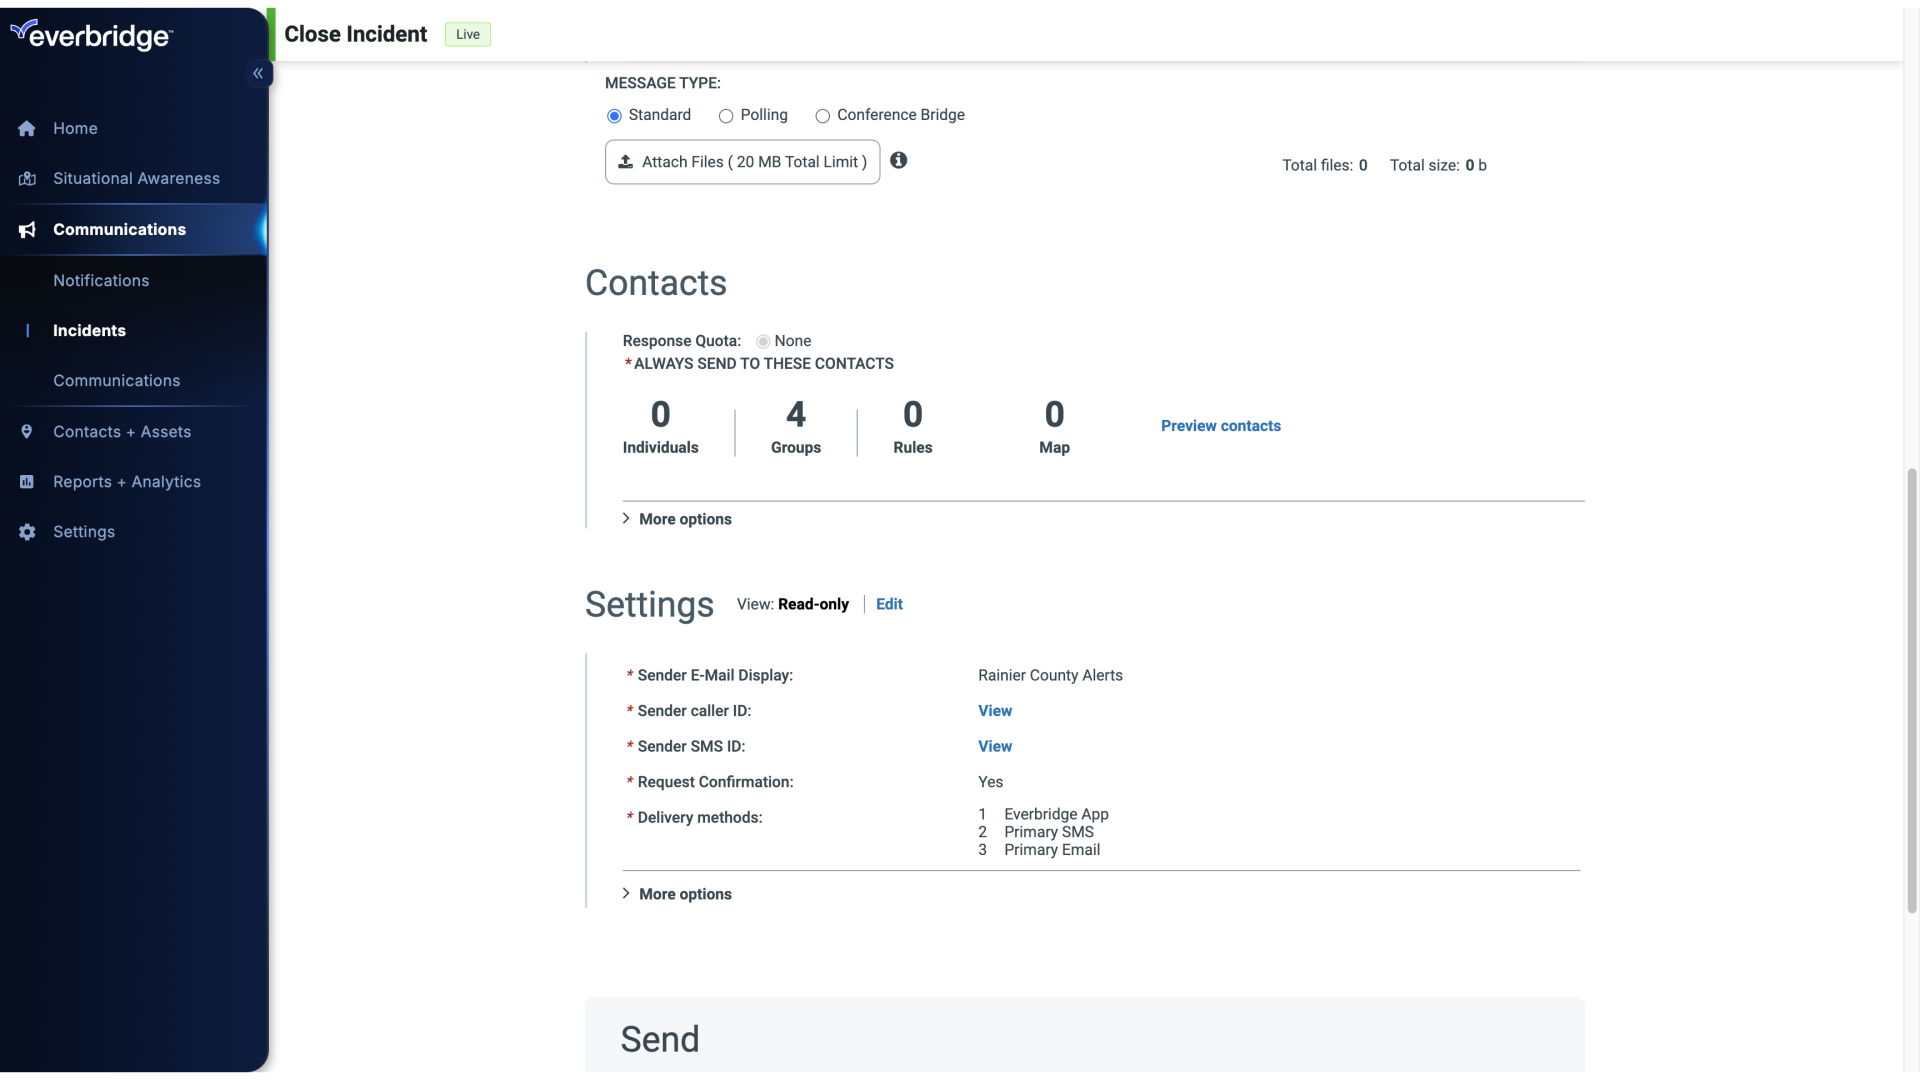
30. Close Incident
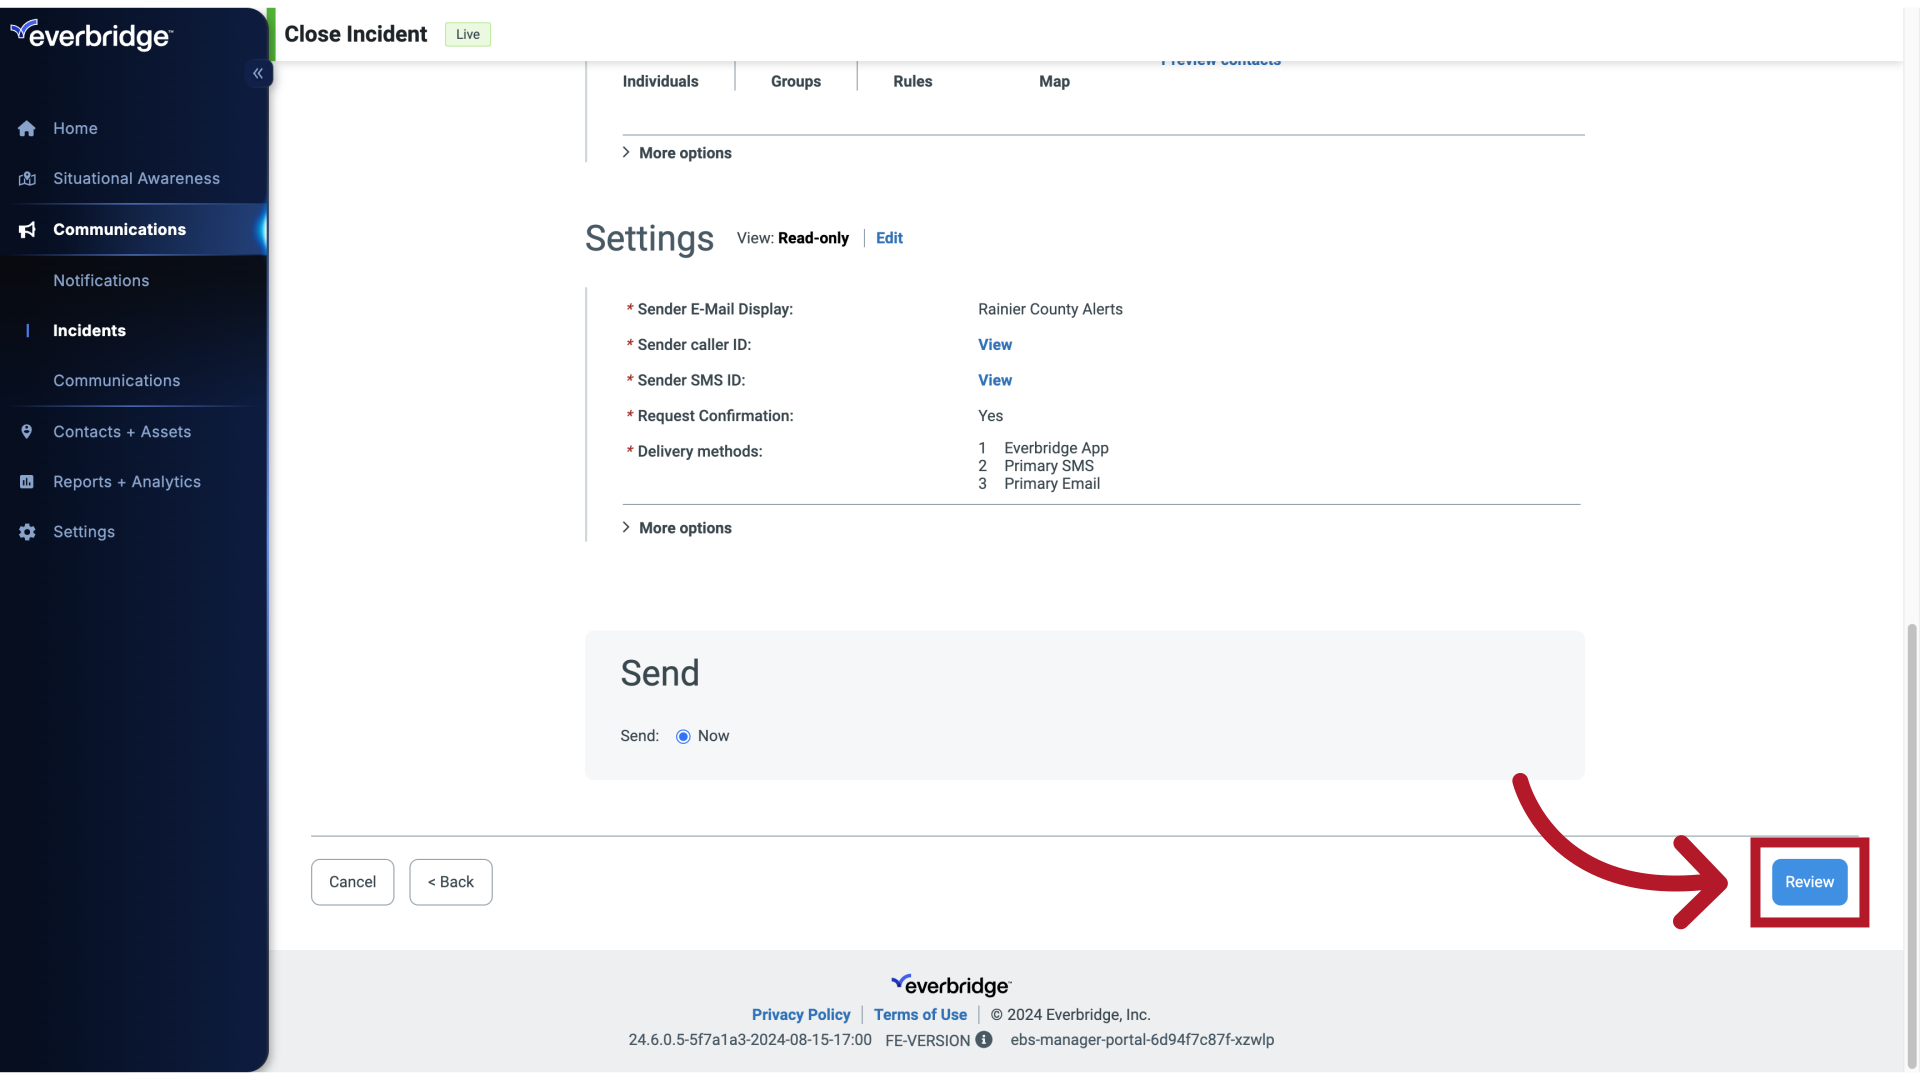
31. Close Incident
32. Close Incident
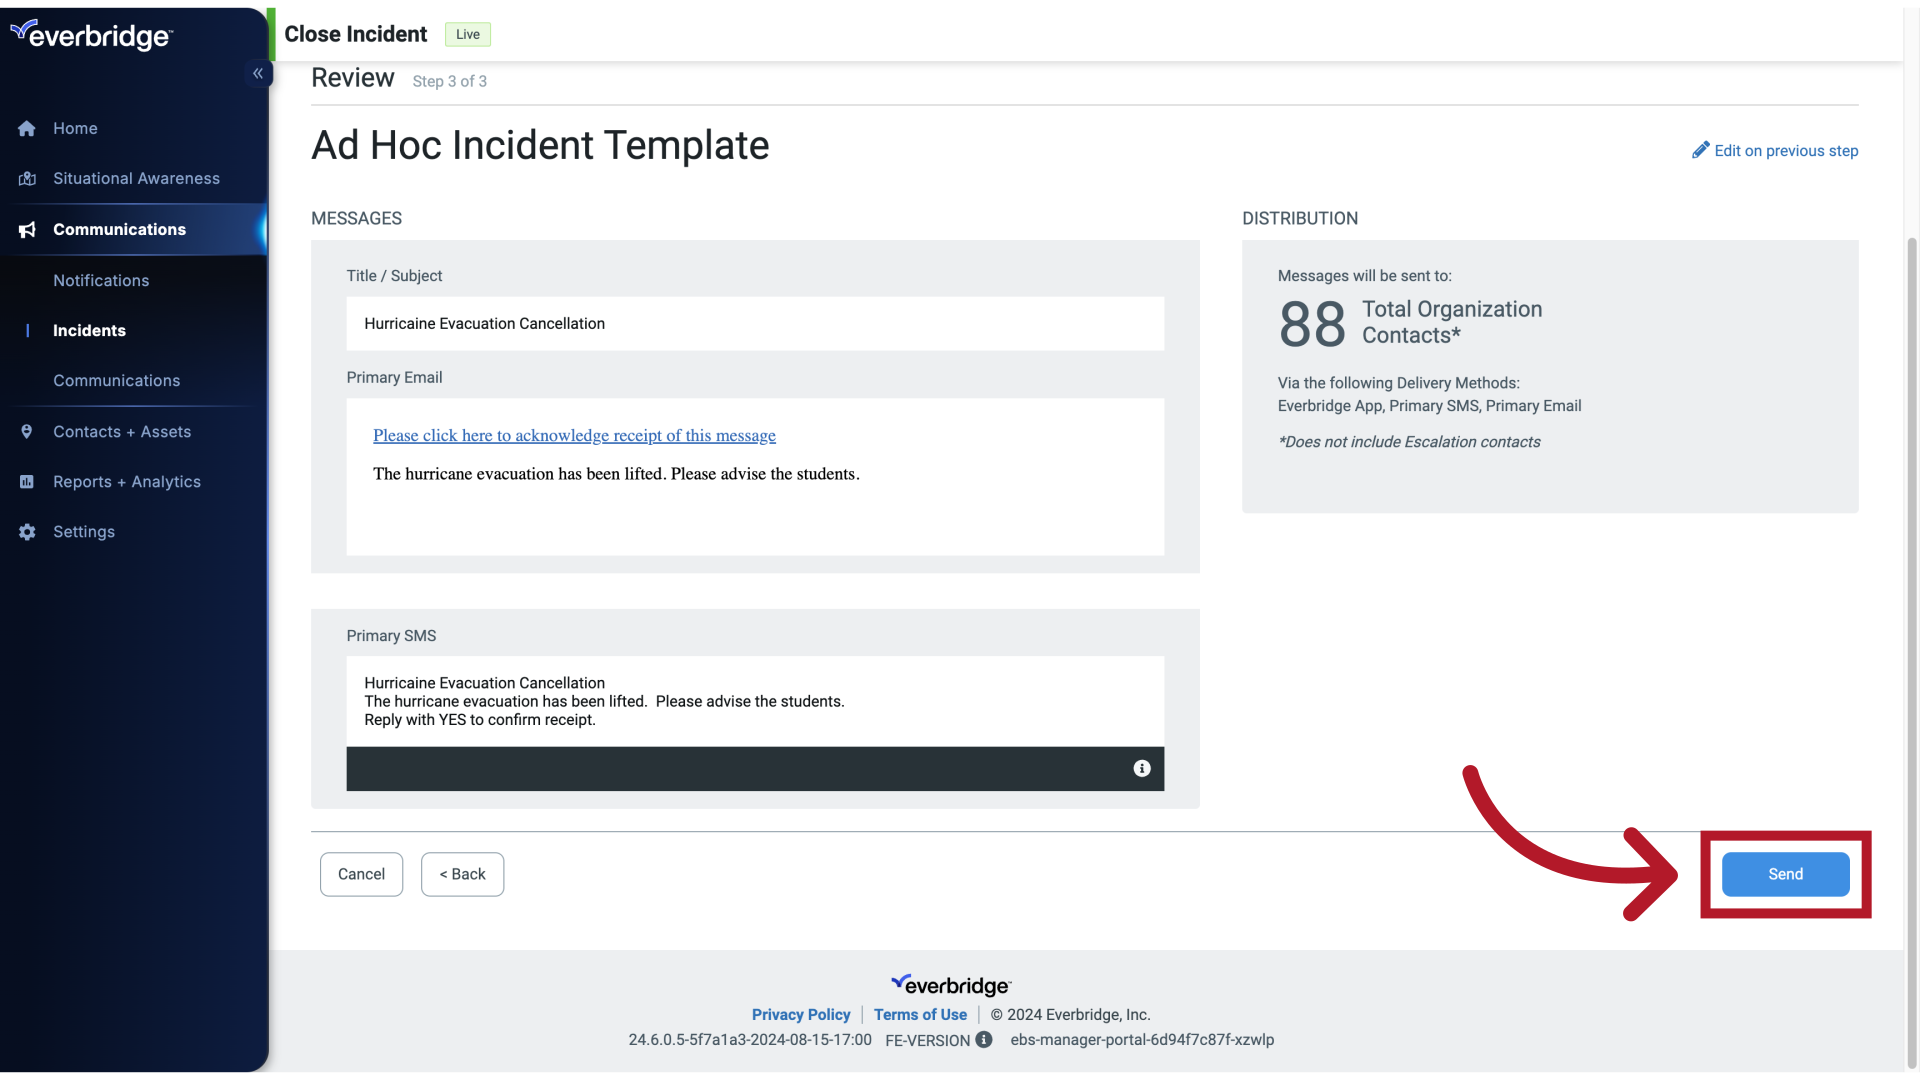
Once ready, click Send.
33. Incident Details
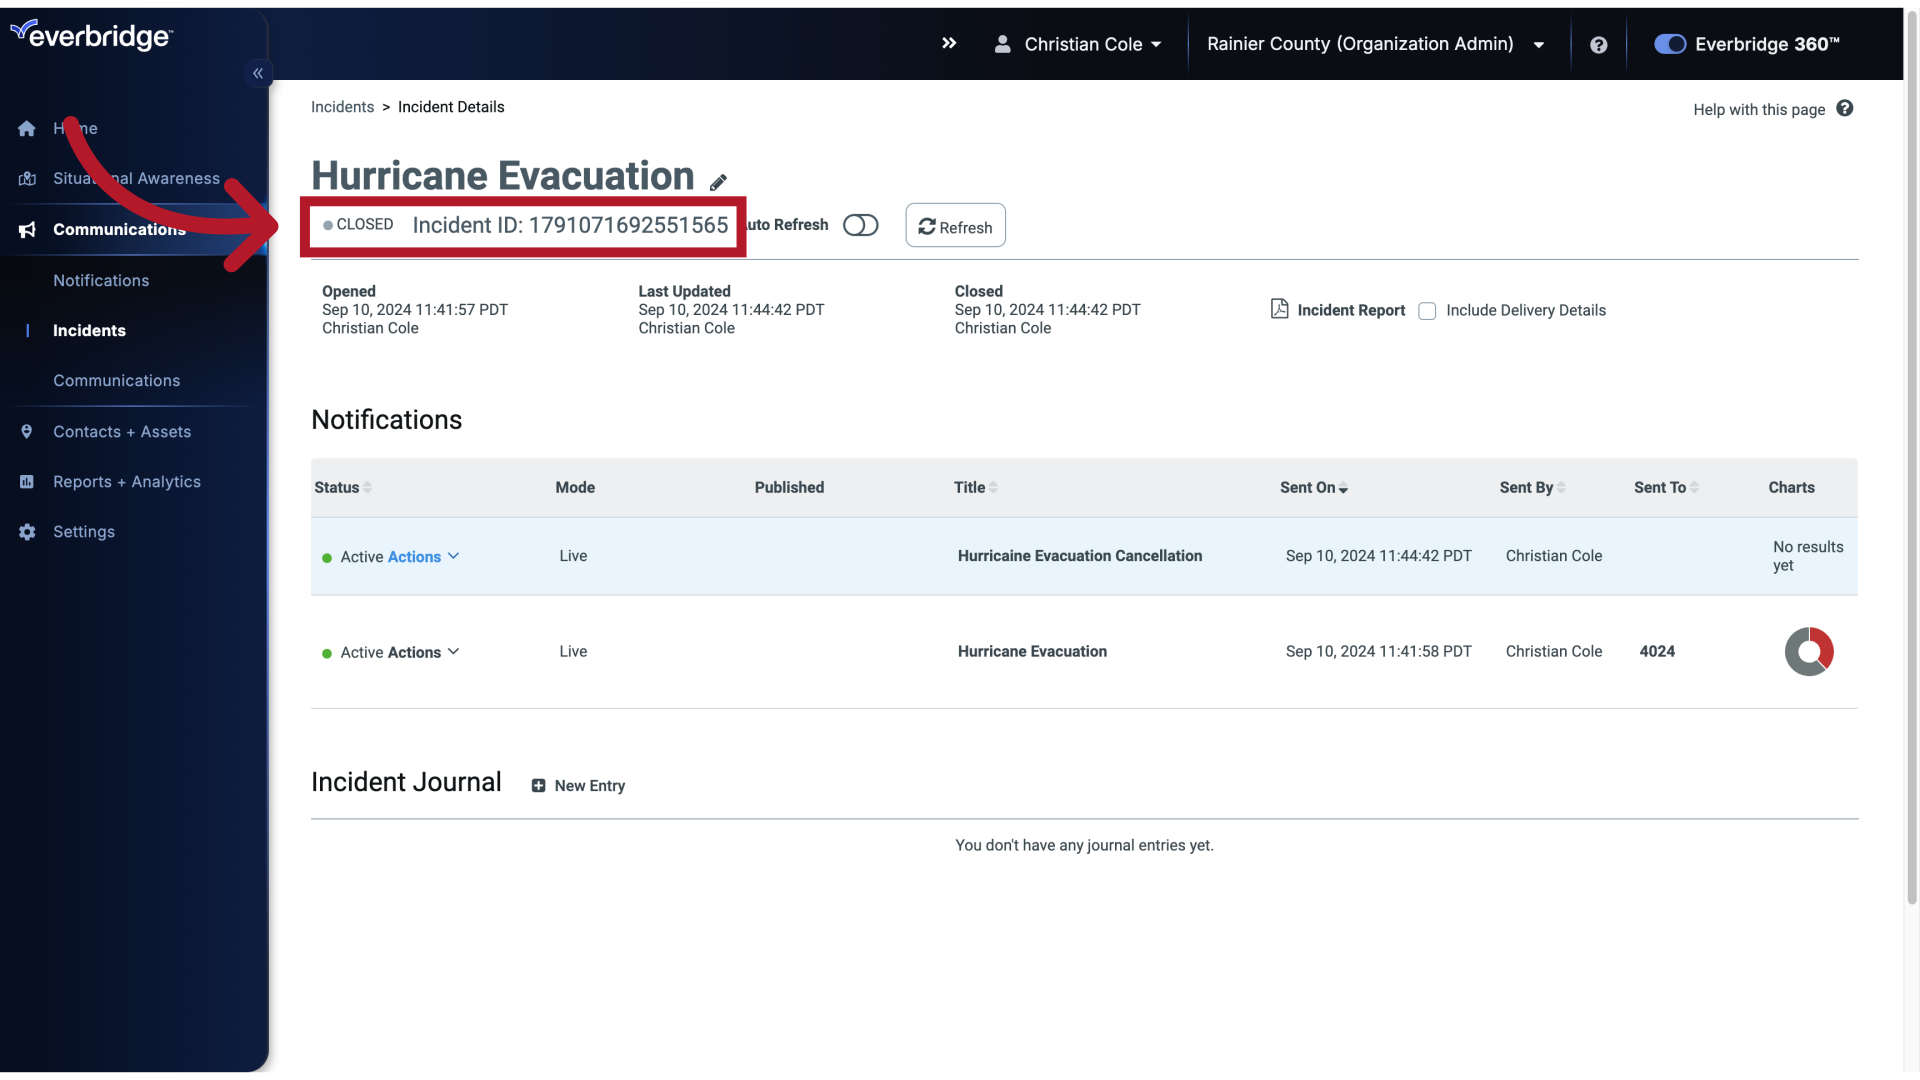
After sending the final notification you're brought to the Incident Details page where it shows the Incident with a closed status.
34. Incident Details
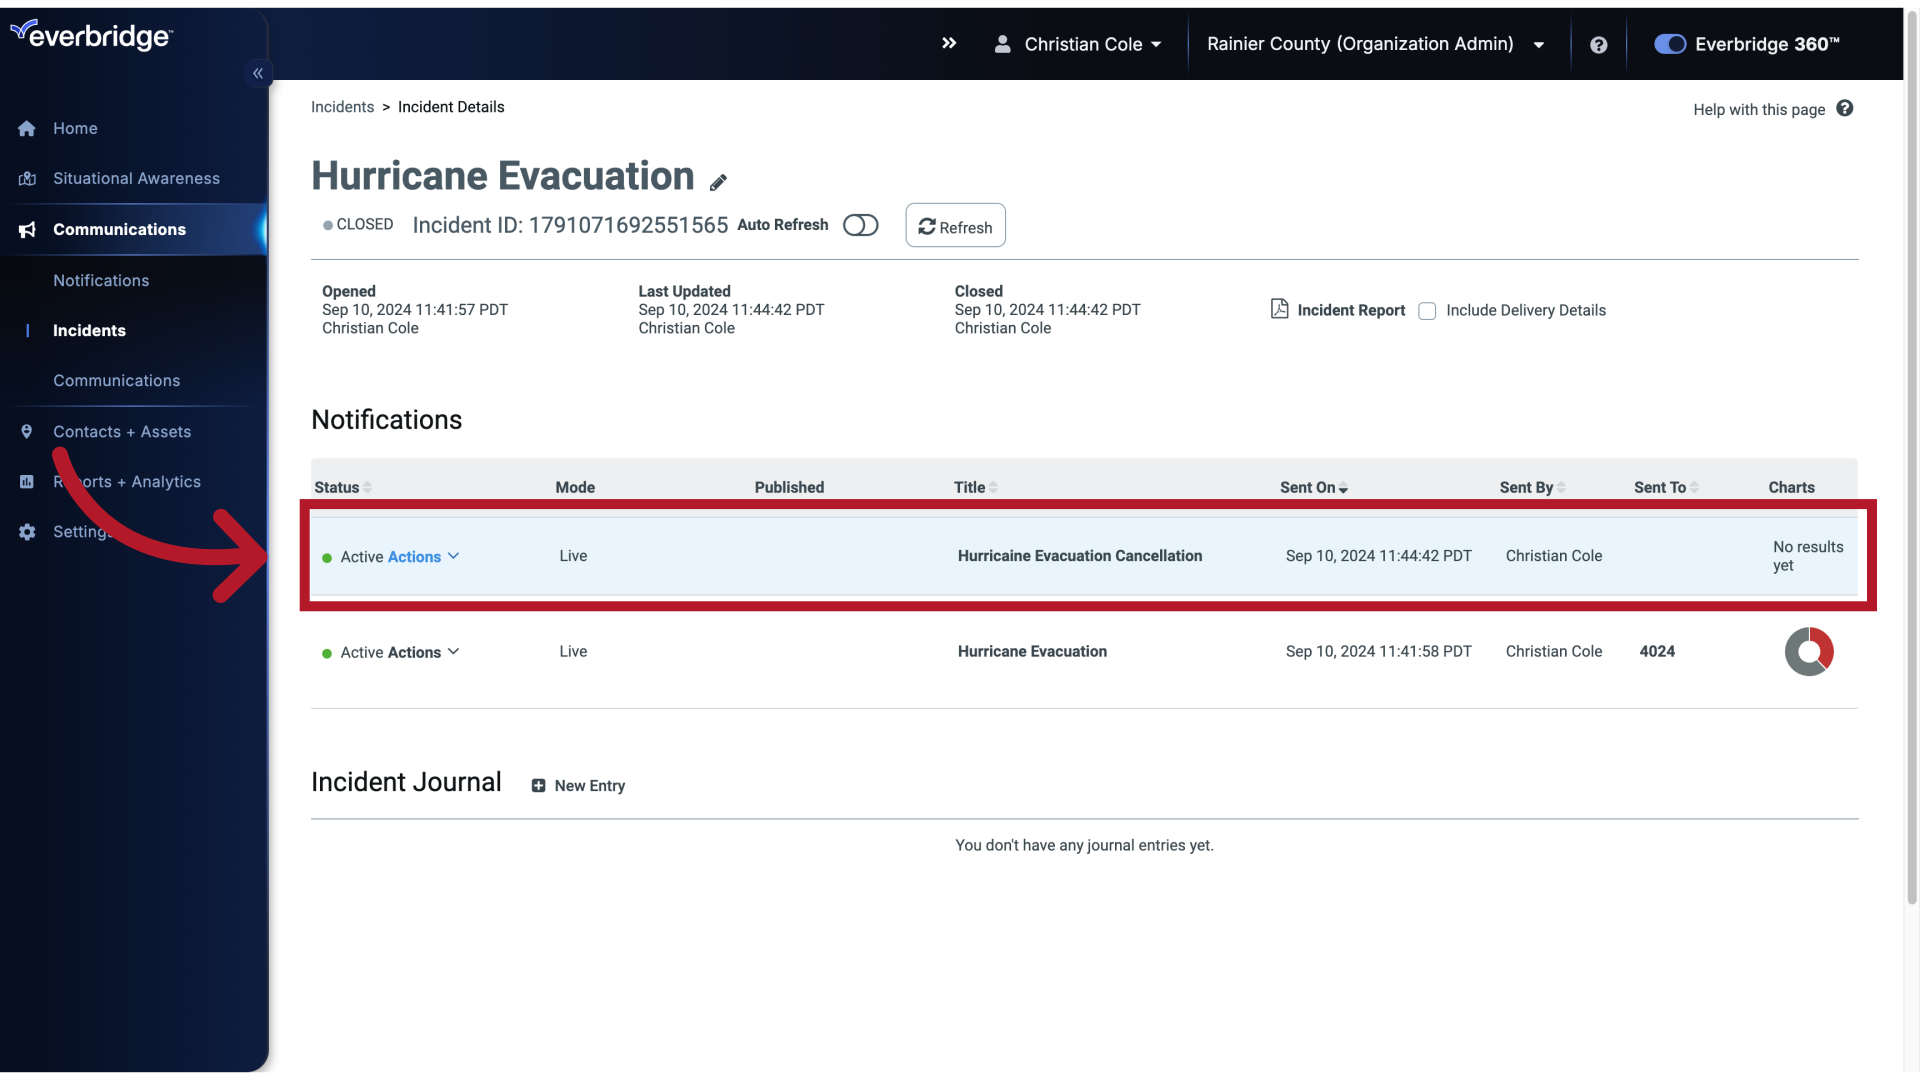
The last notification you sent is at the top of the table.

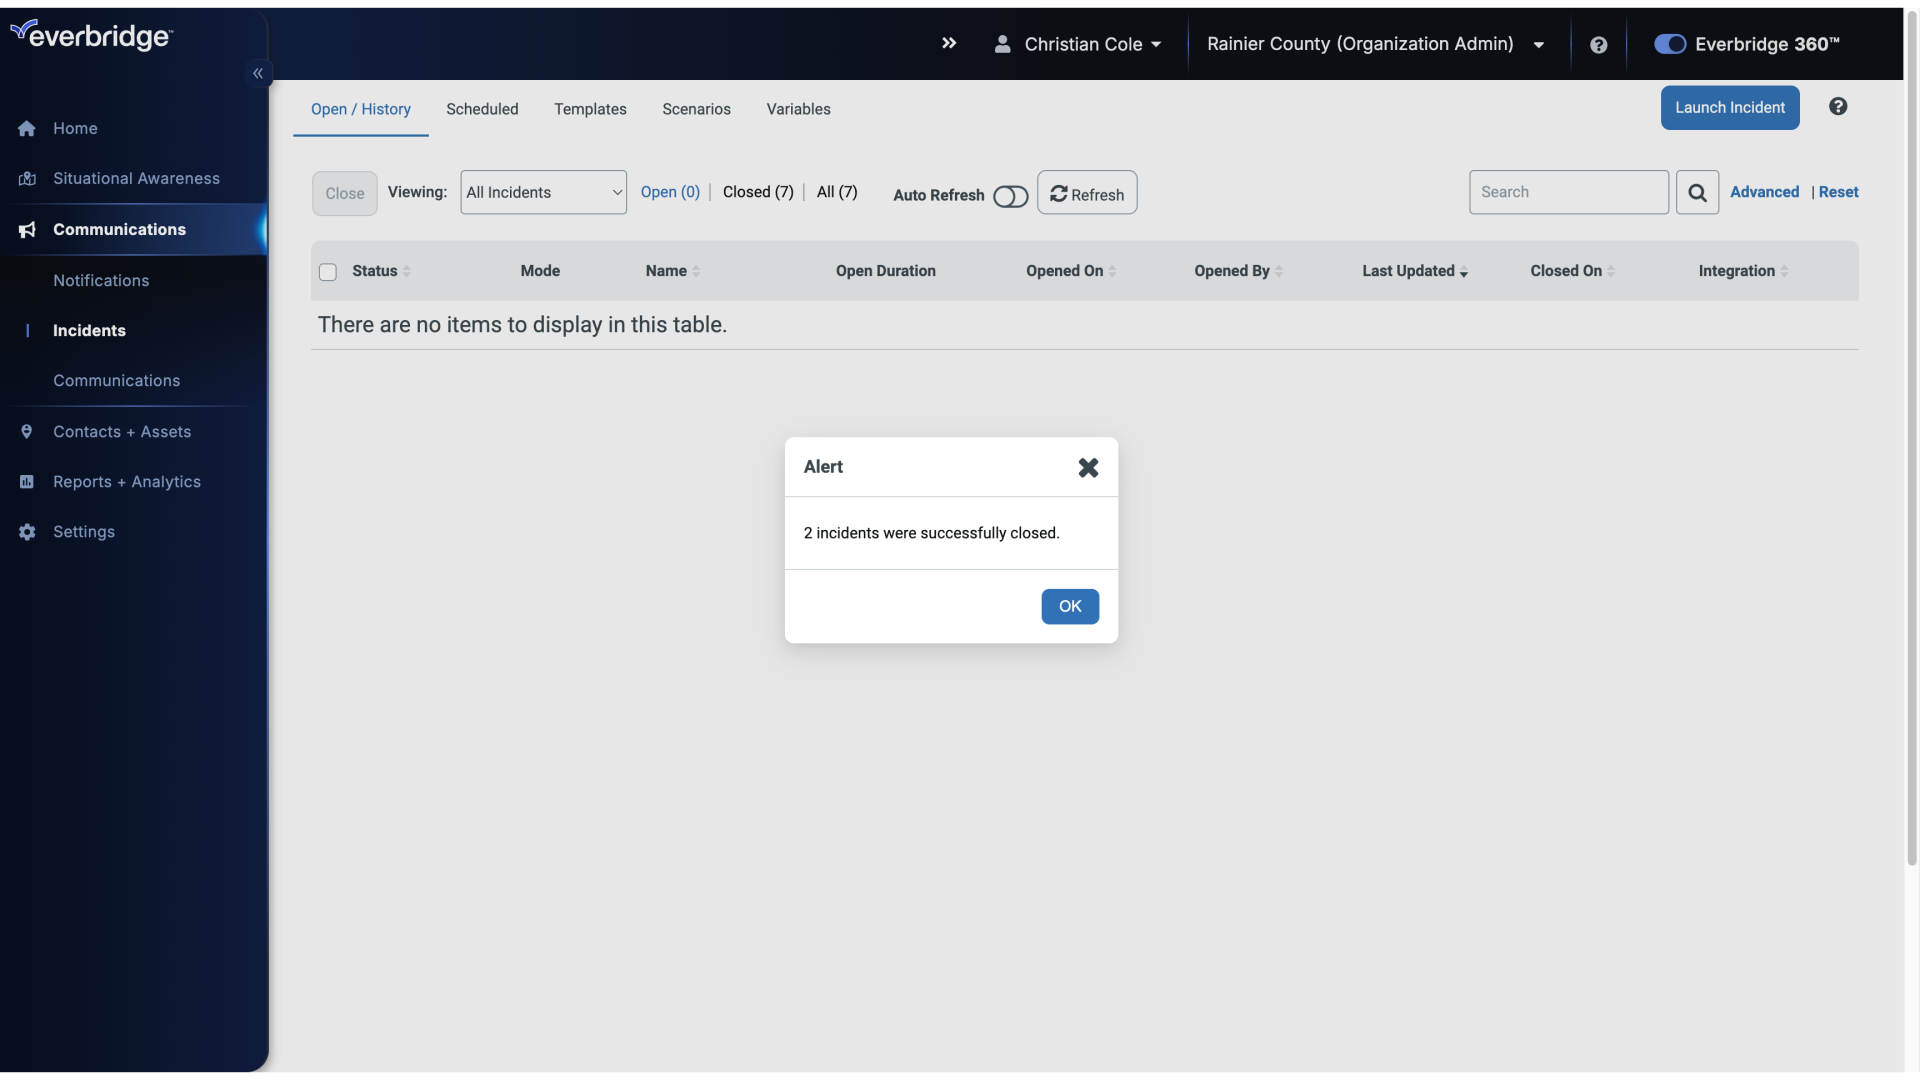
35. Incident Details
You can also see that the Incident has been closed from the Open / History page.
36. Open / History