Topic
How to launch an Incident in Everbridge Suite.
Description
Using Incident communications through Everbridge 360 is a useful way to alert your contacts to specific events, or scenarios by using quick template-based automated plans. These incidents are launched by operators within your organization. But how do you launch an incident with Everbridge 360? The process is simple because templates have been created for operators ahead of time.
Go to manager.everbridge.net
1. Dashboard
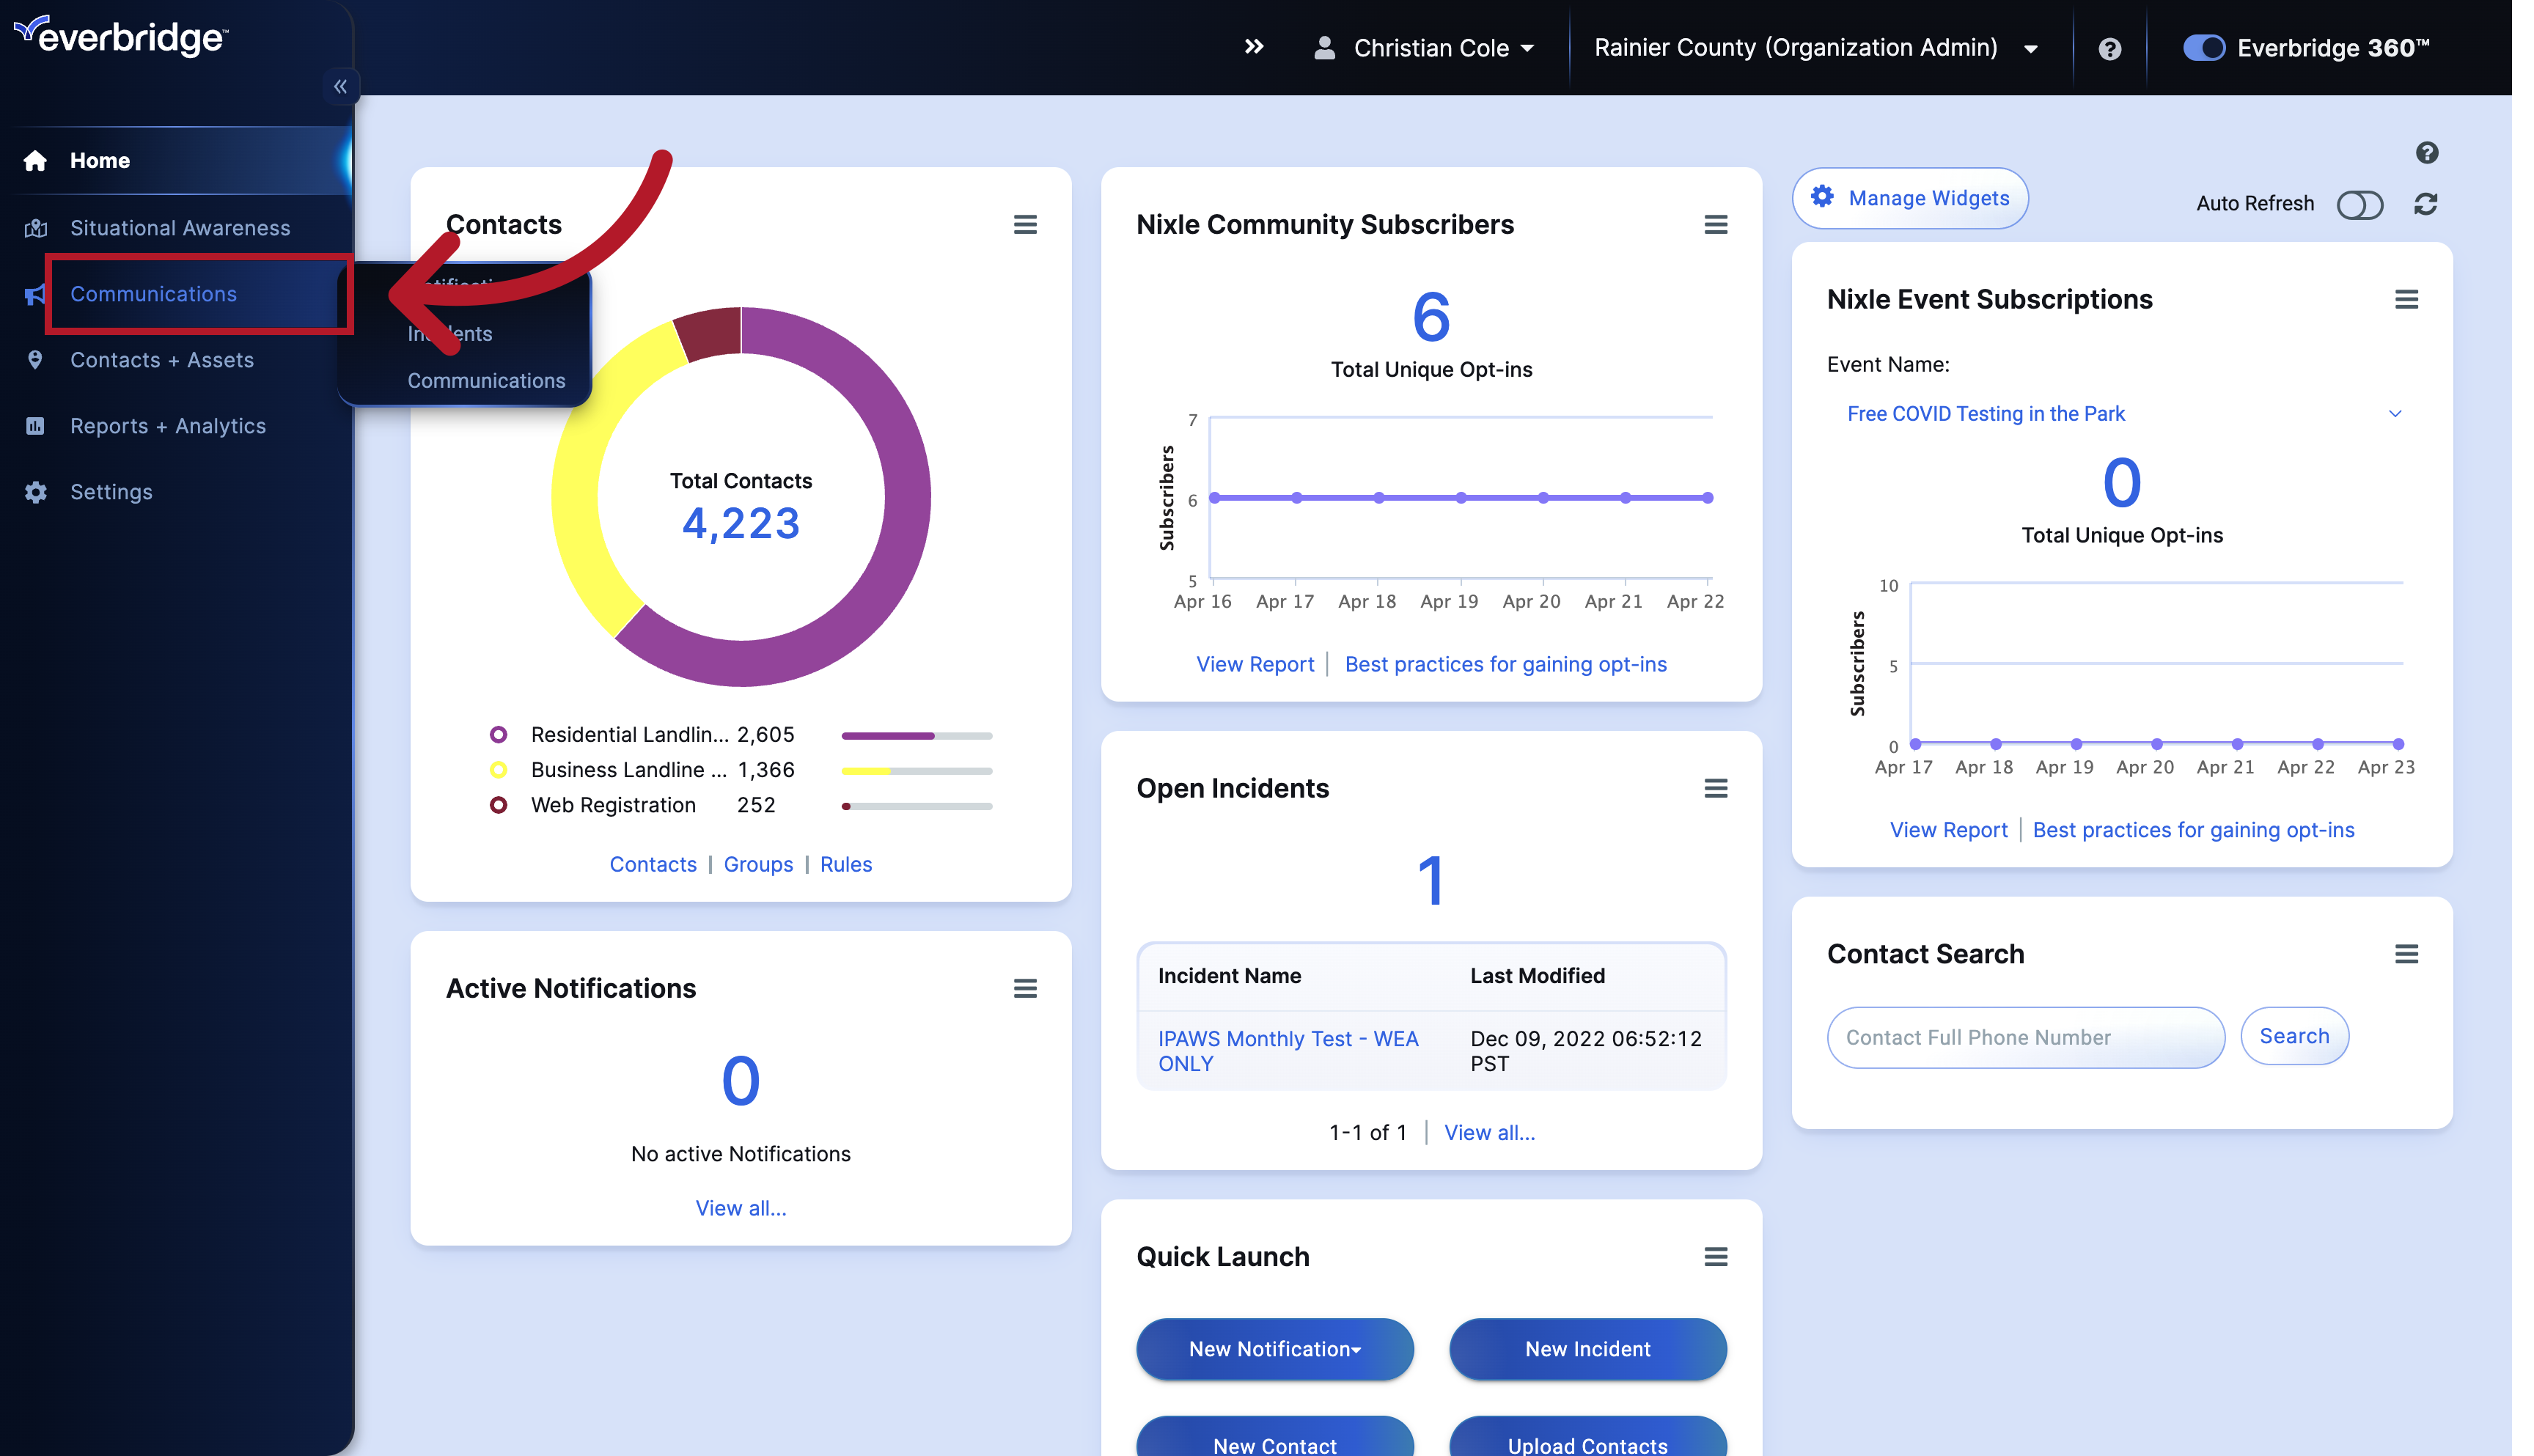
To launch an Incident, start by logging into the Everbridge Manager Portal.

2. Dashboard
From the dashboard, select Communications
3. Dashboard
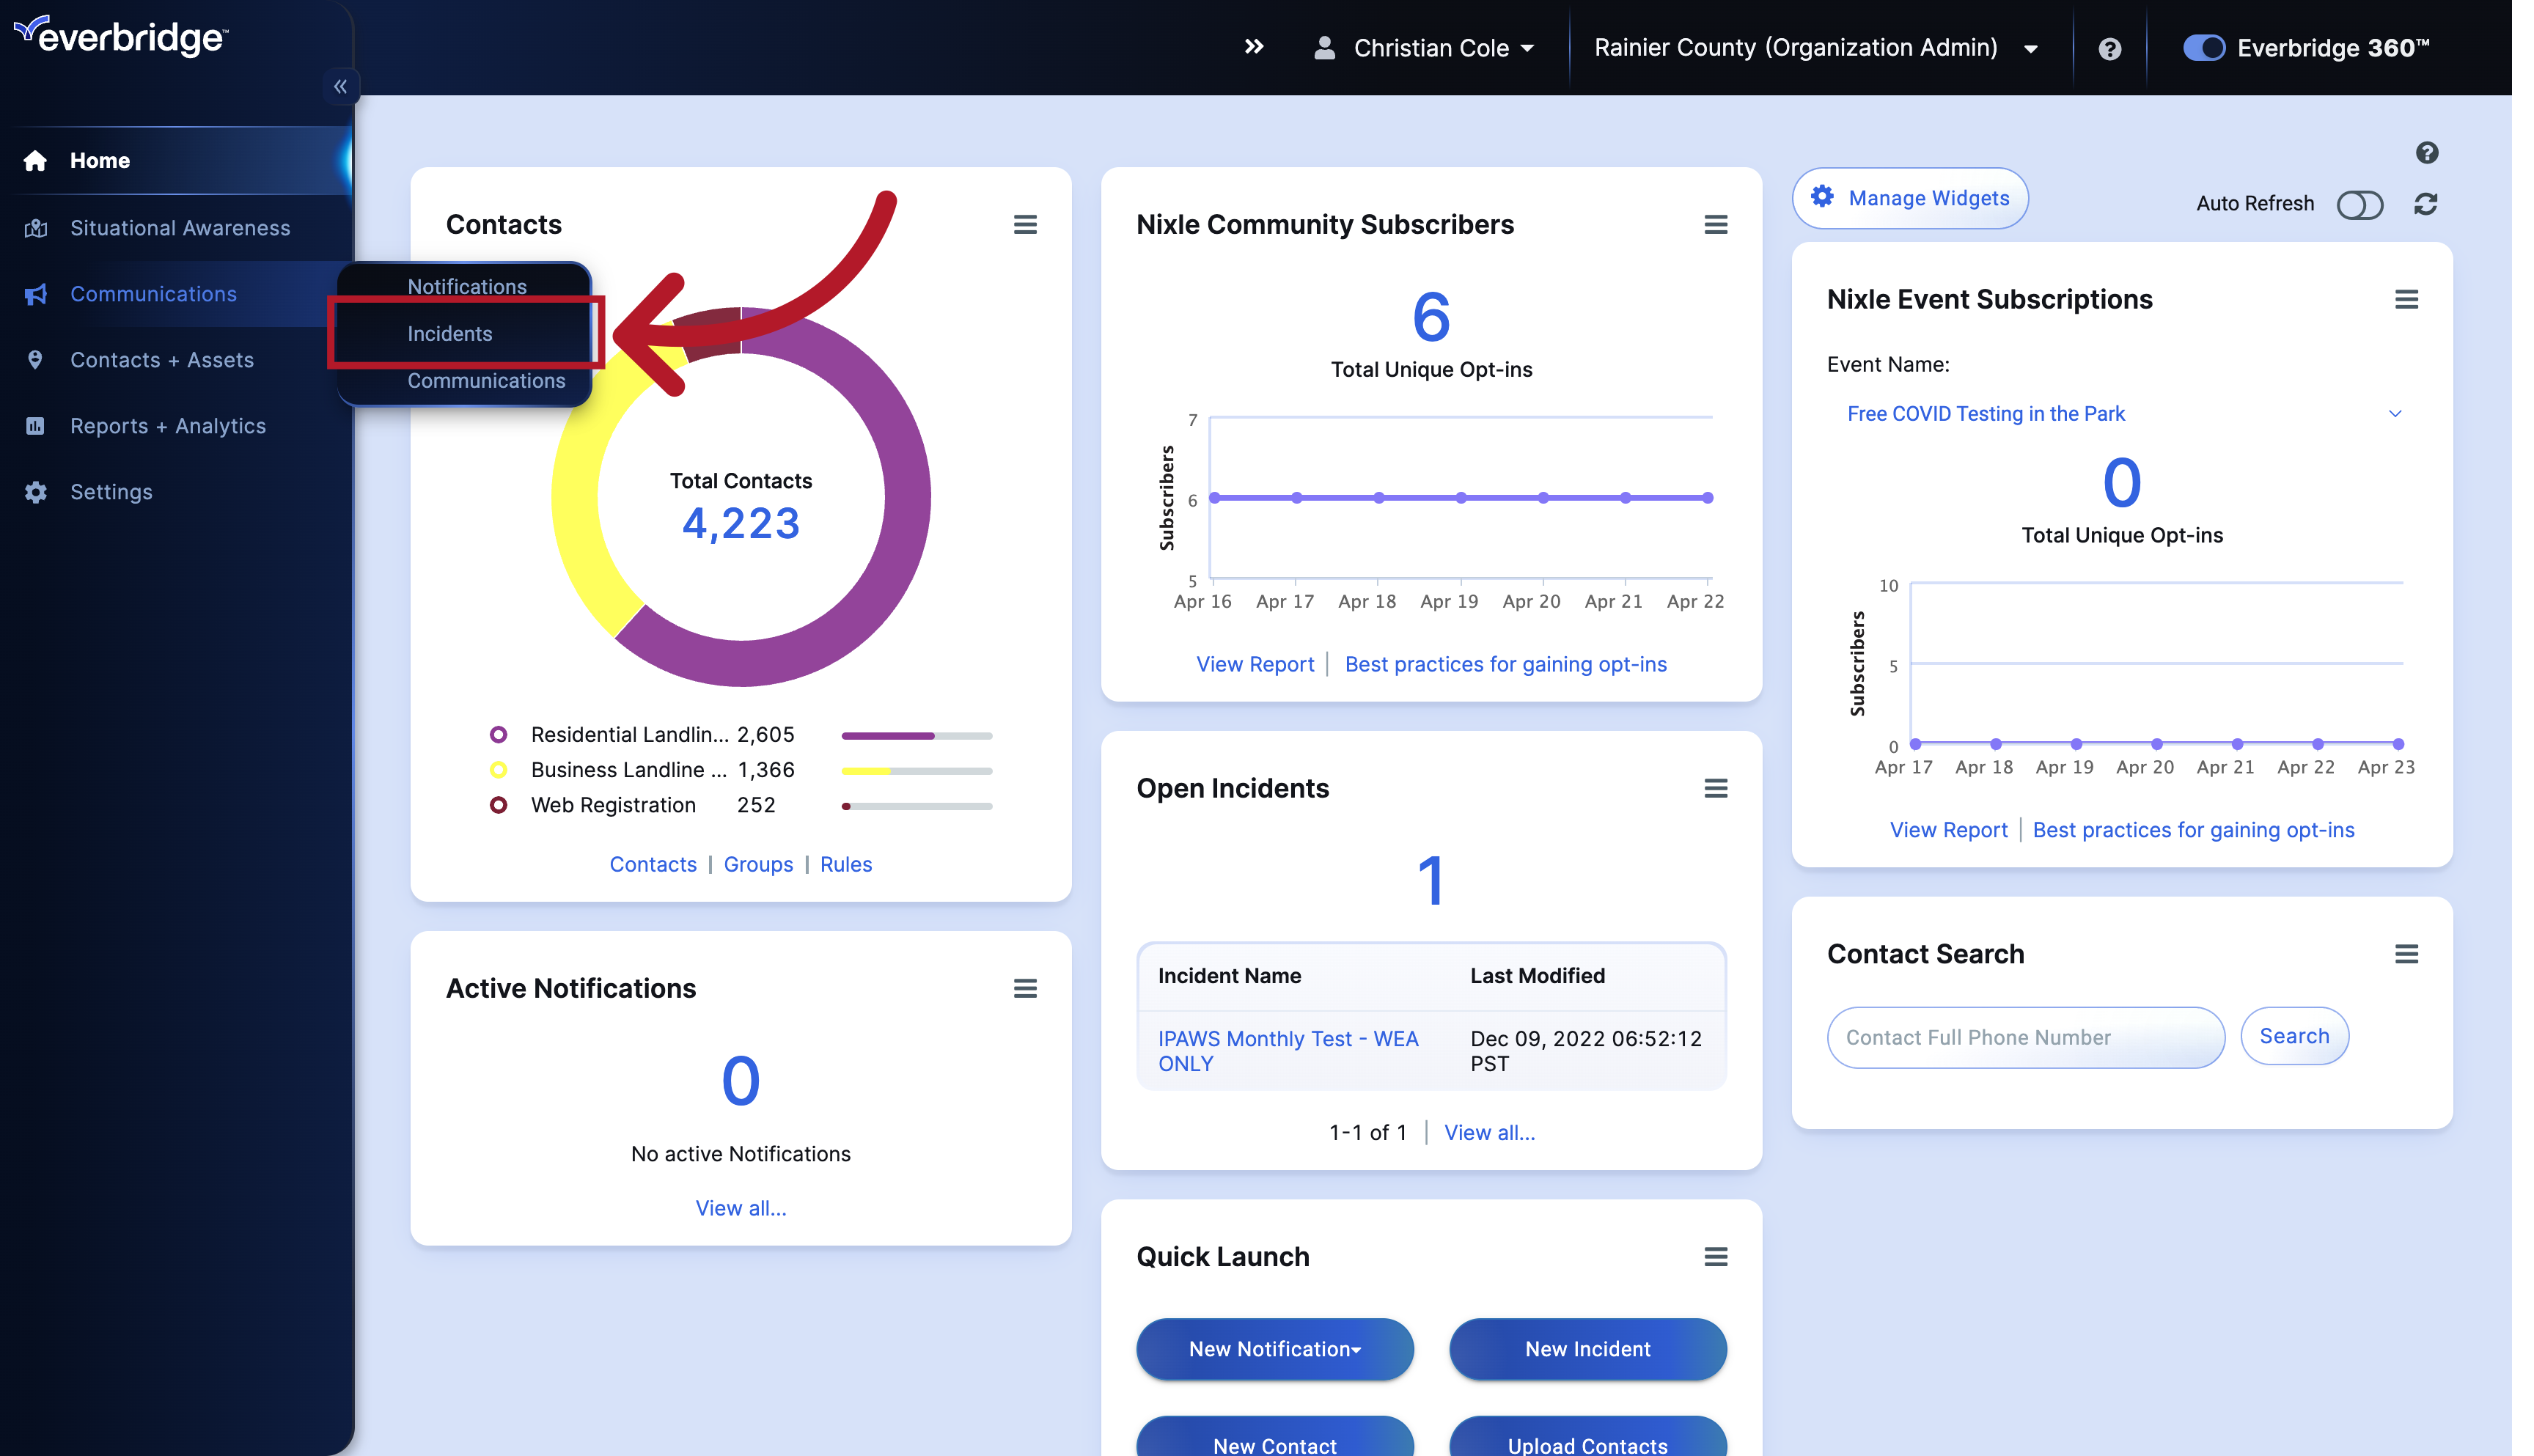
Hover over Incidents
4. Dashboard
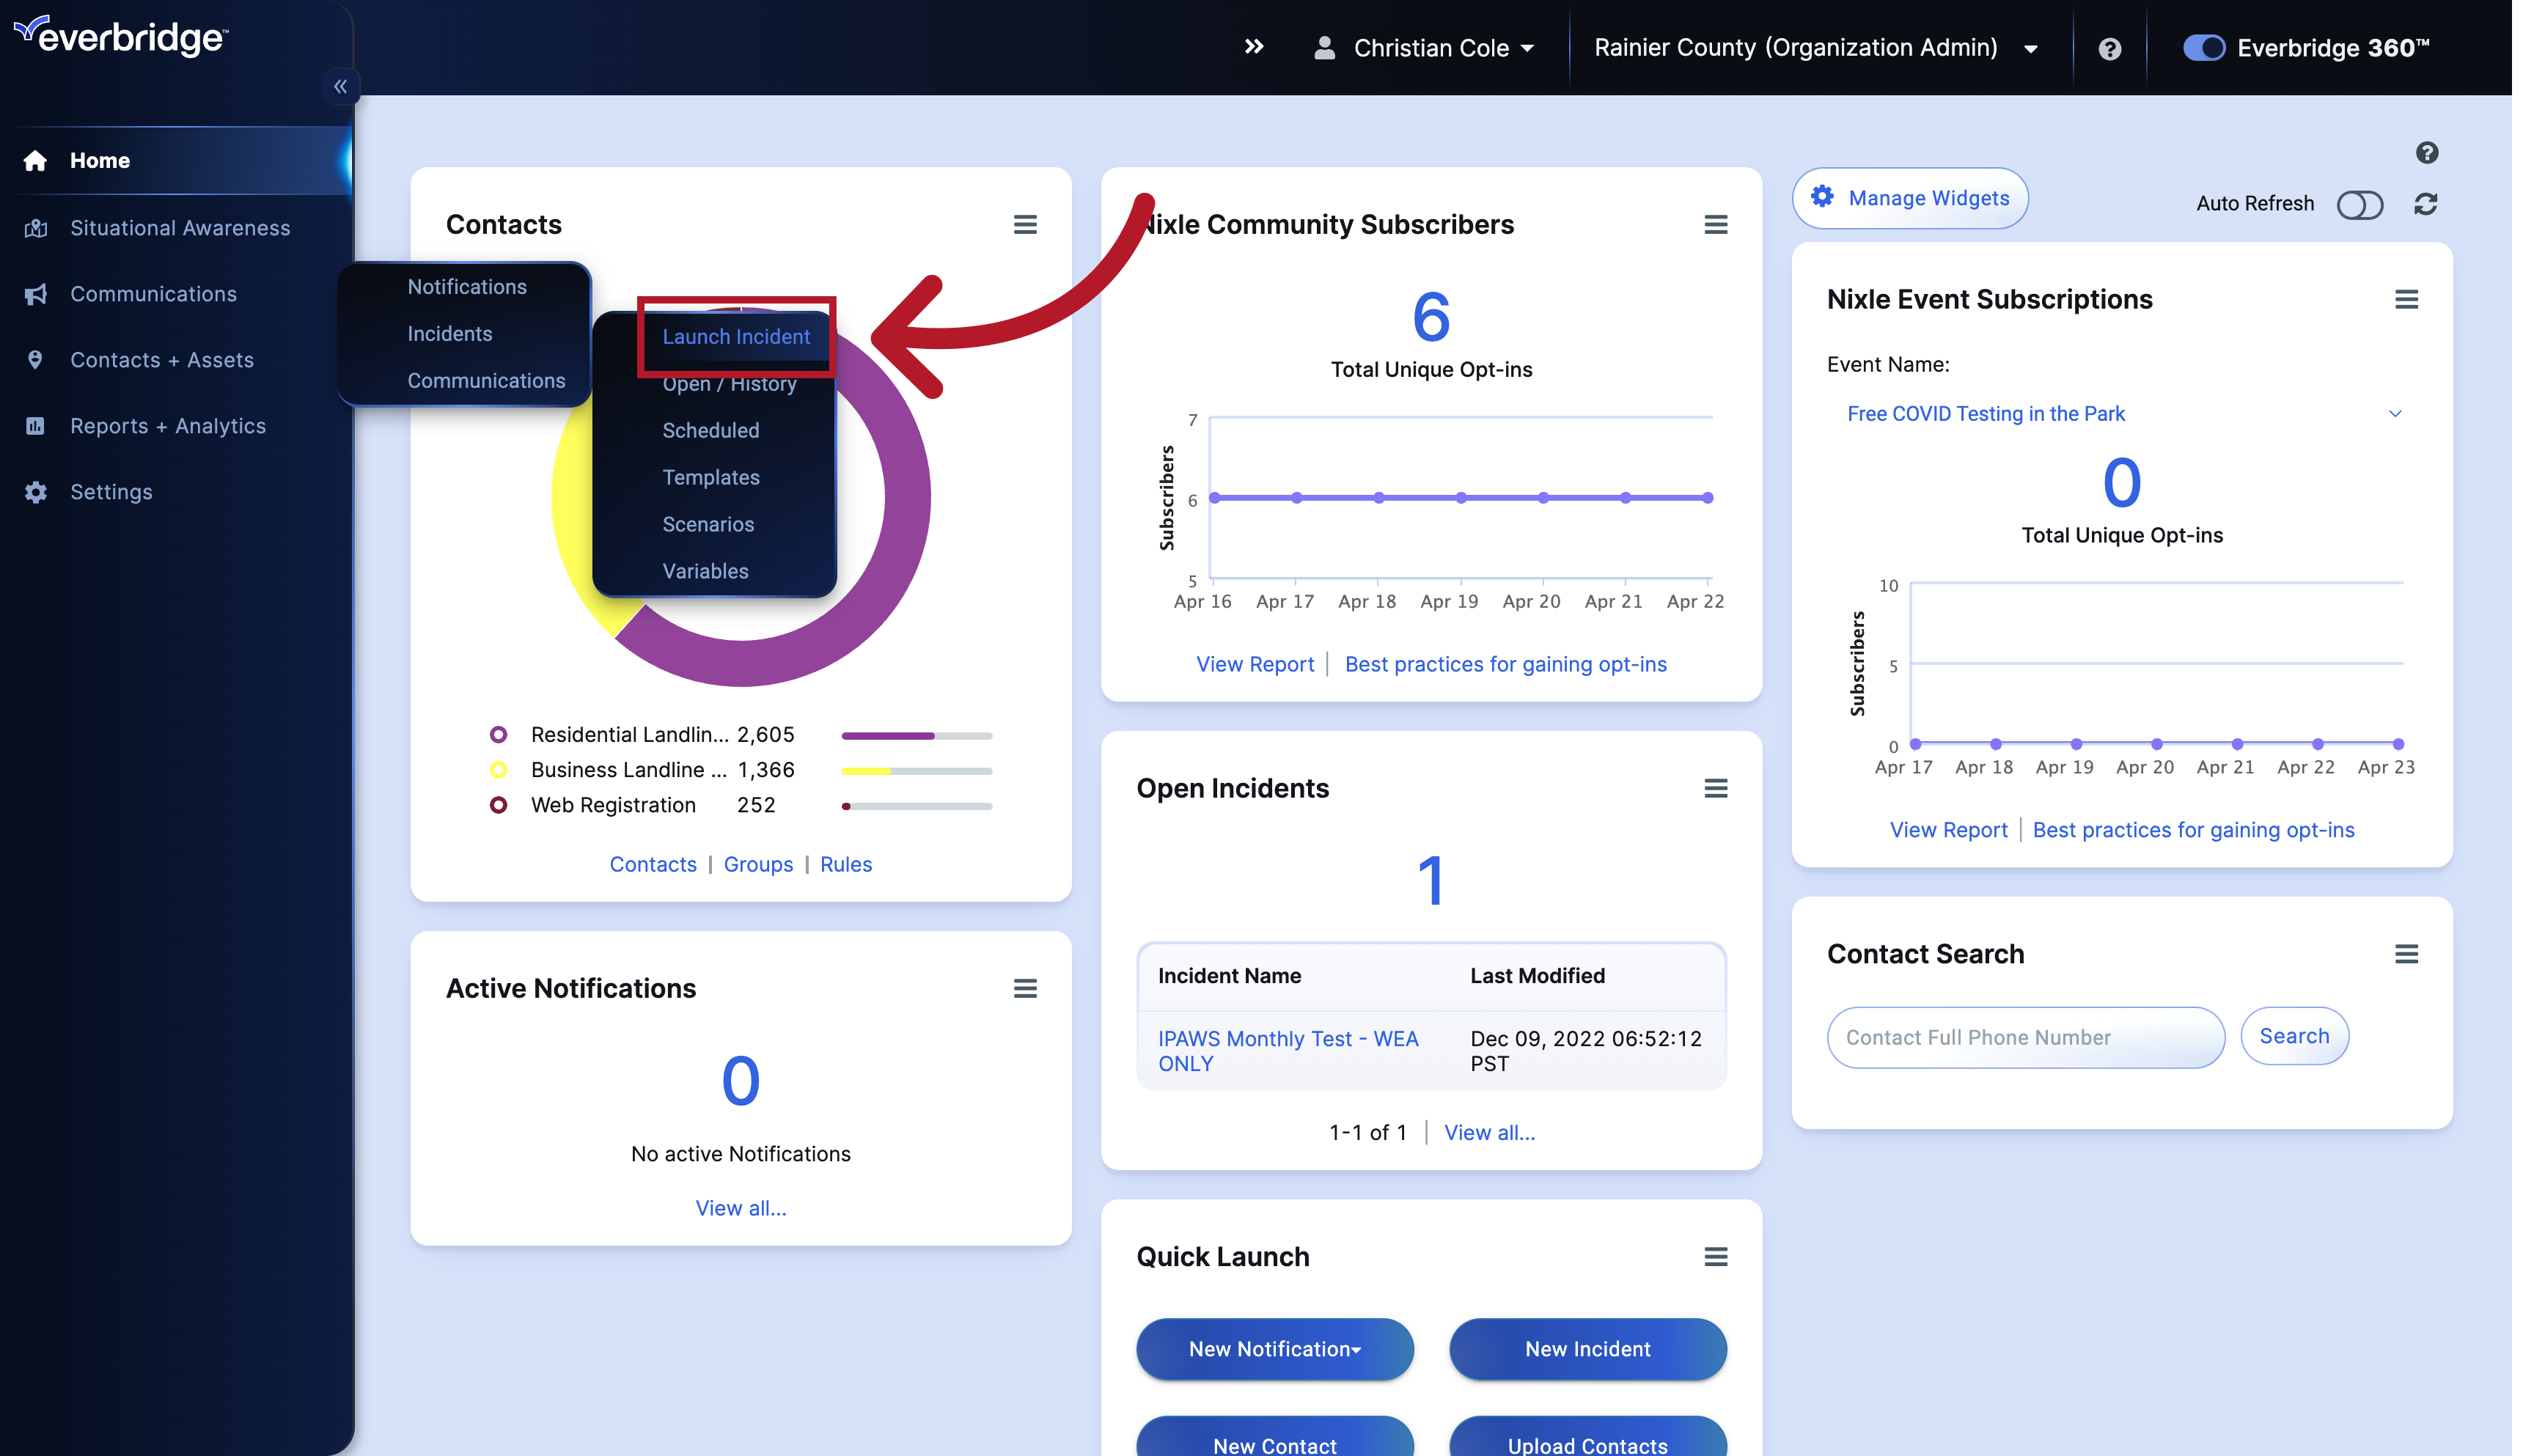
and click Launch incident.
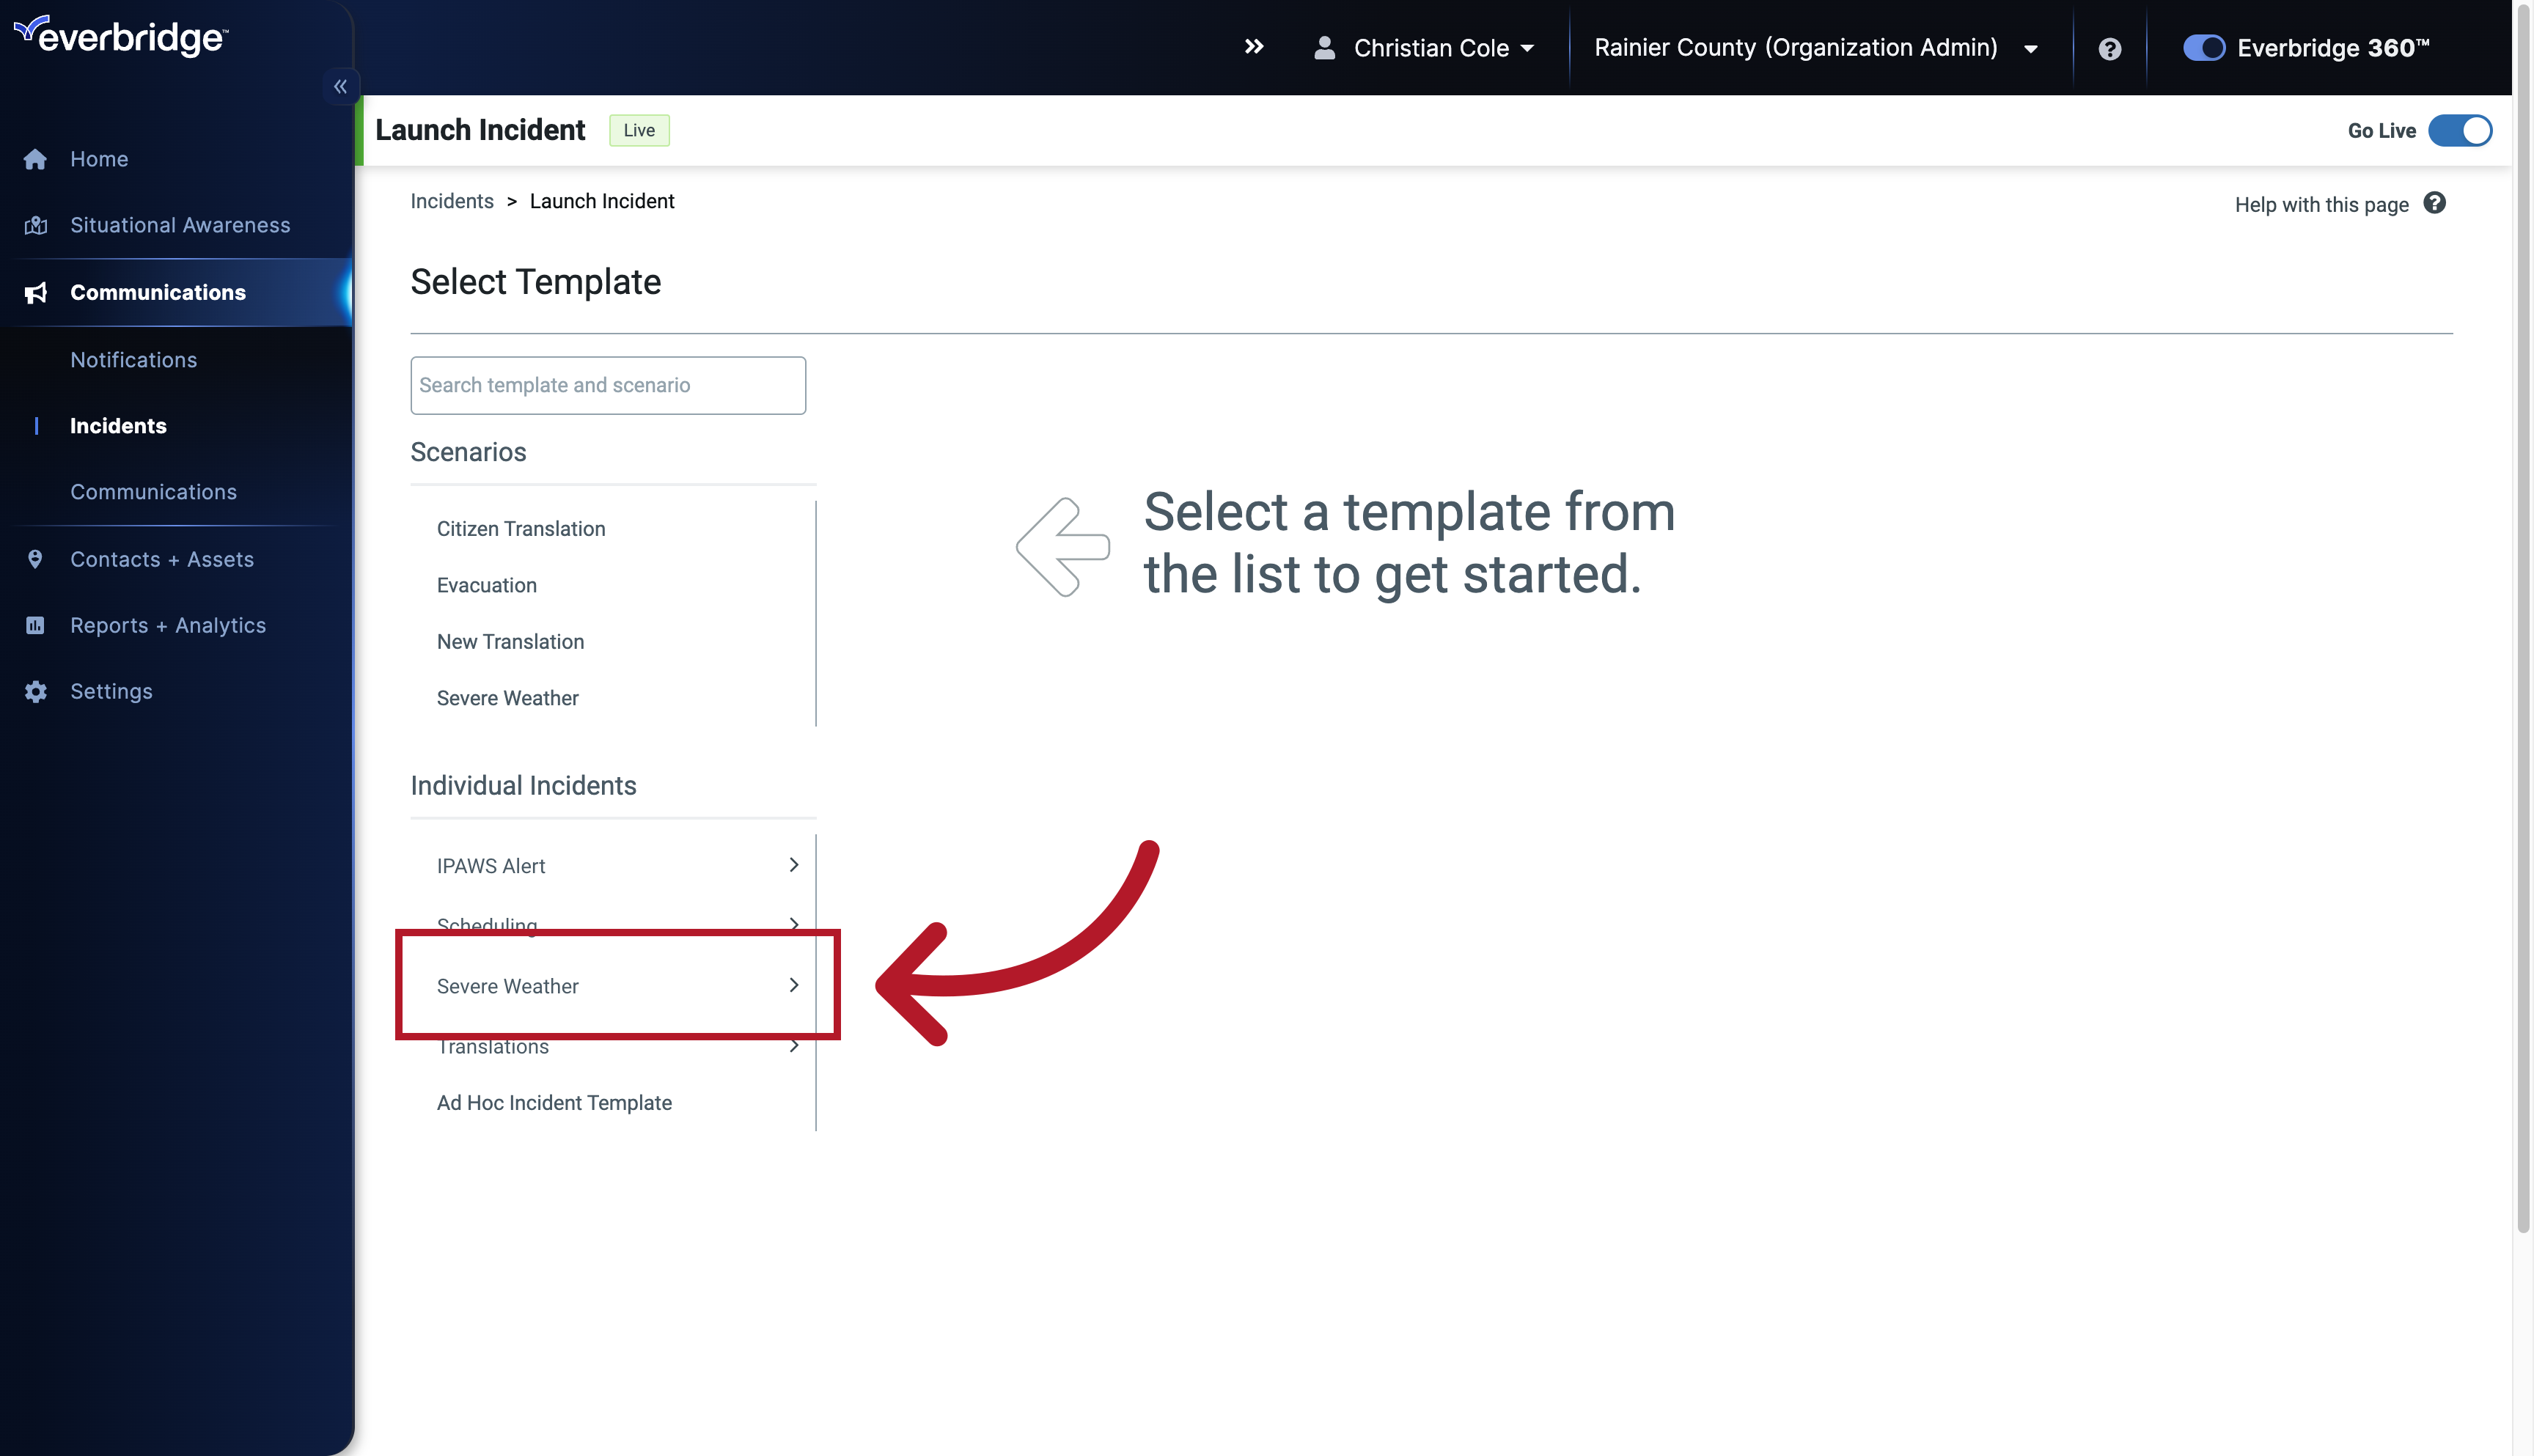
5. Select a Template
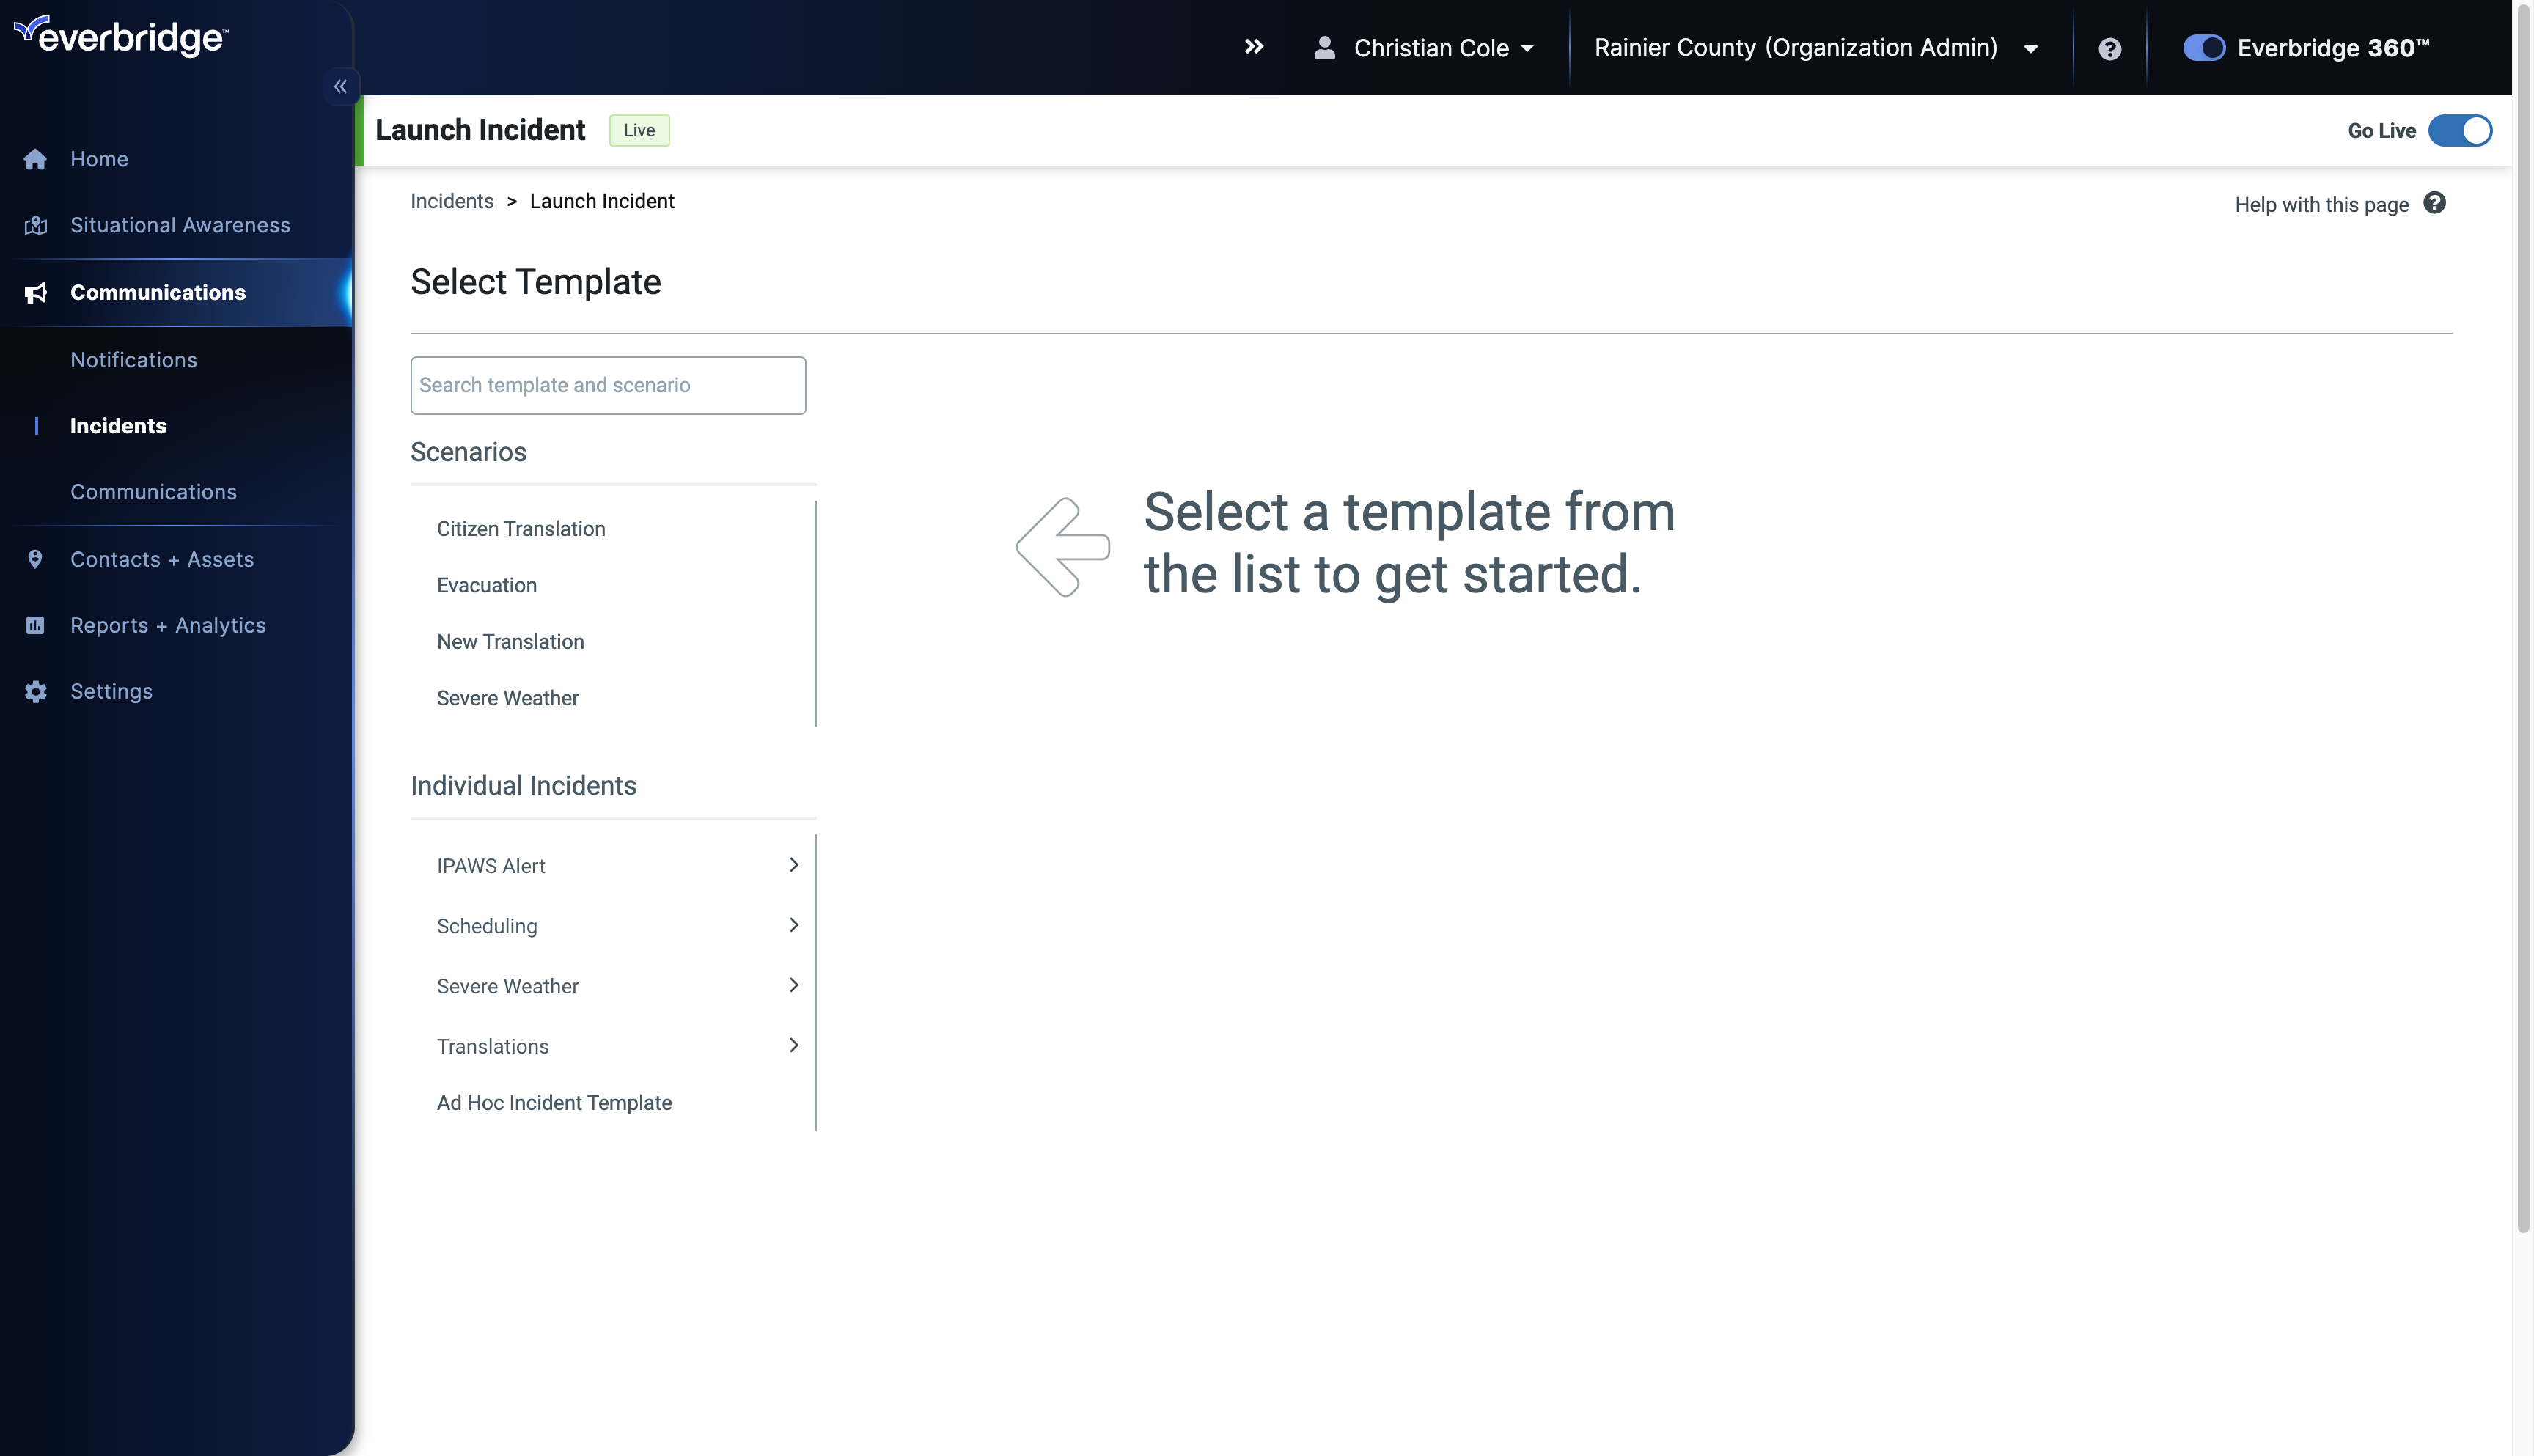
Select the Severe Weather option.
6. Select a Template
Select an Incident Template, or Incident Template Category from the left column.
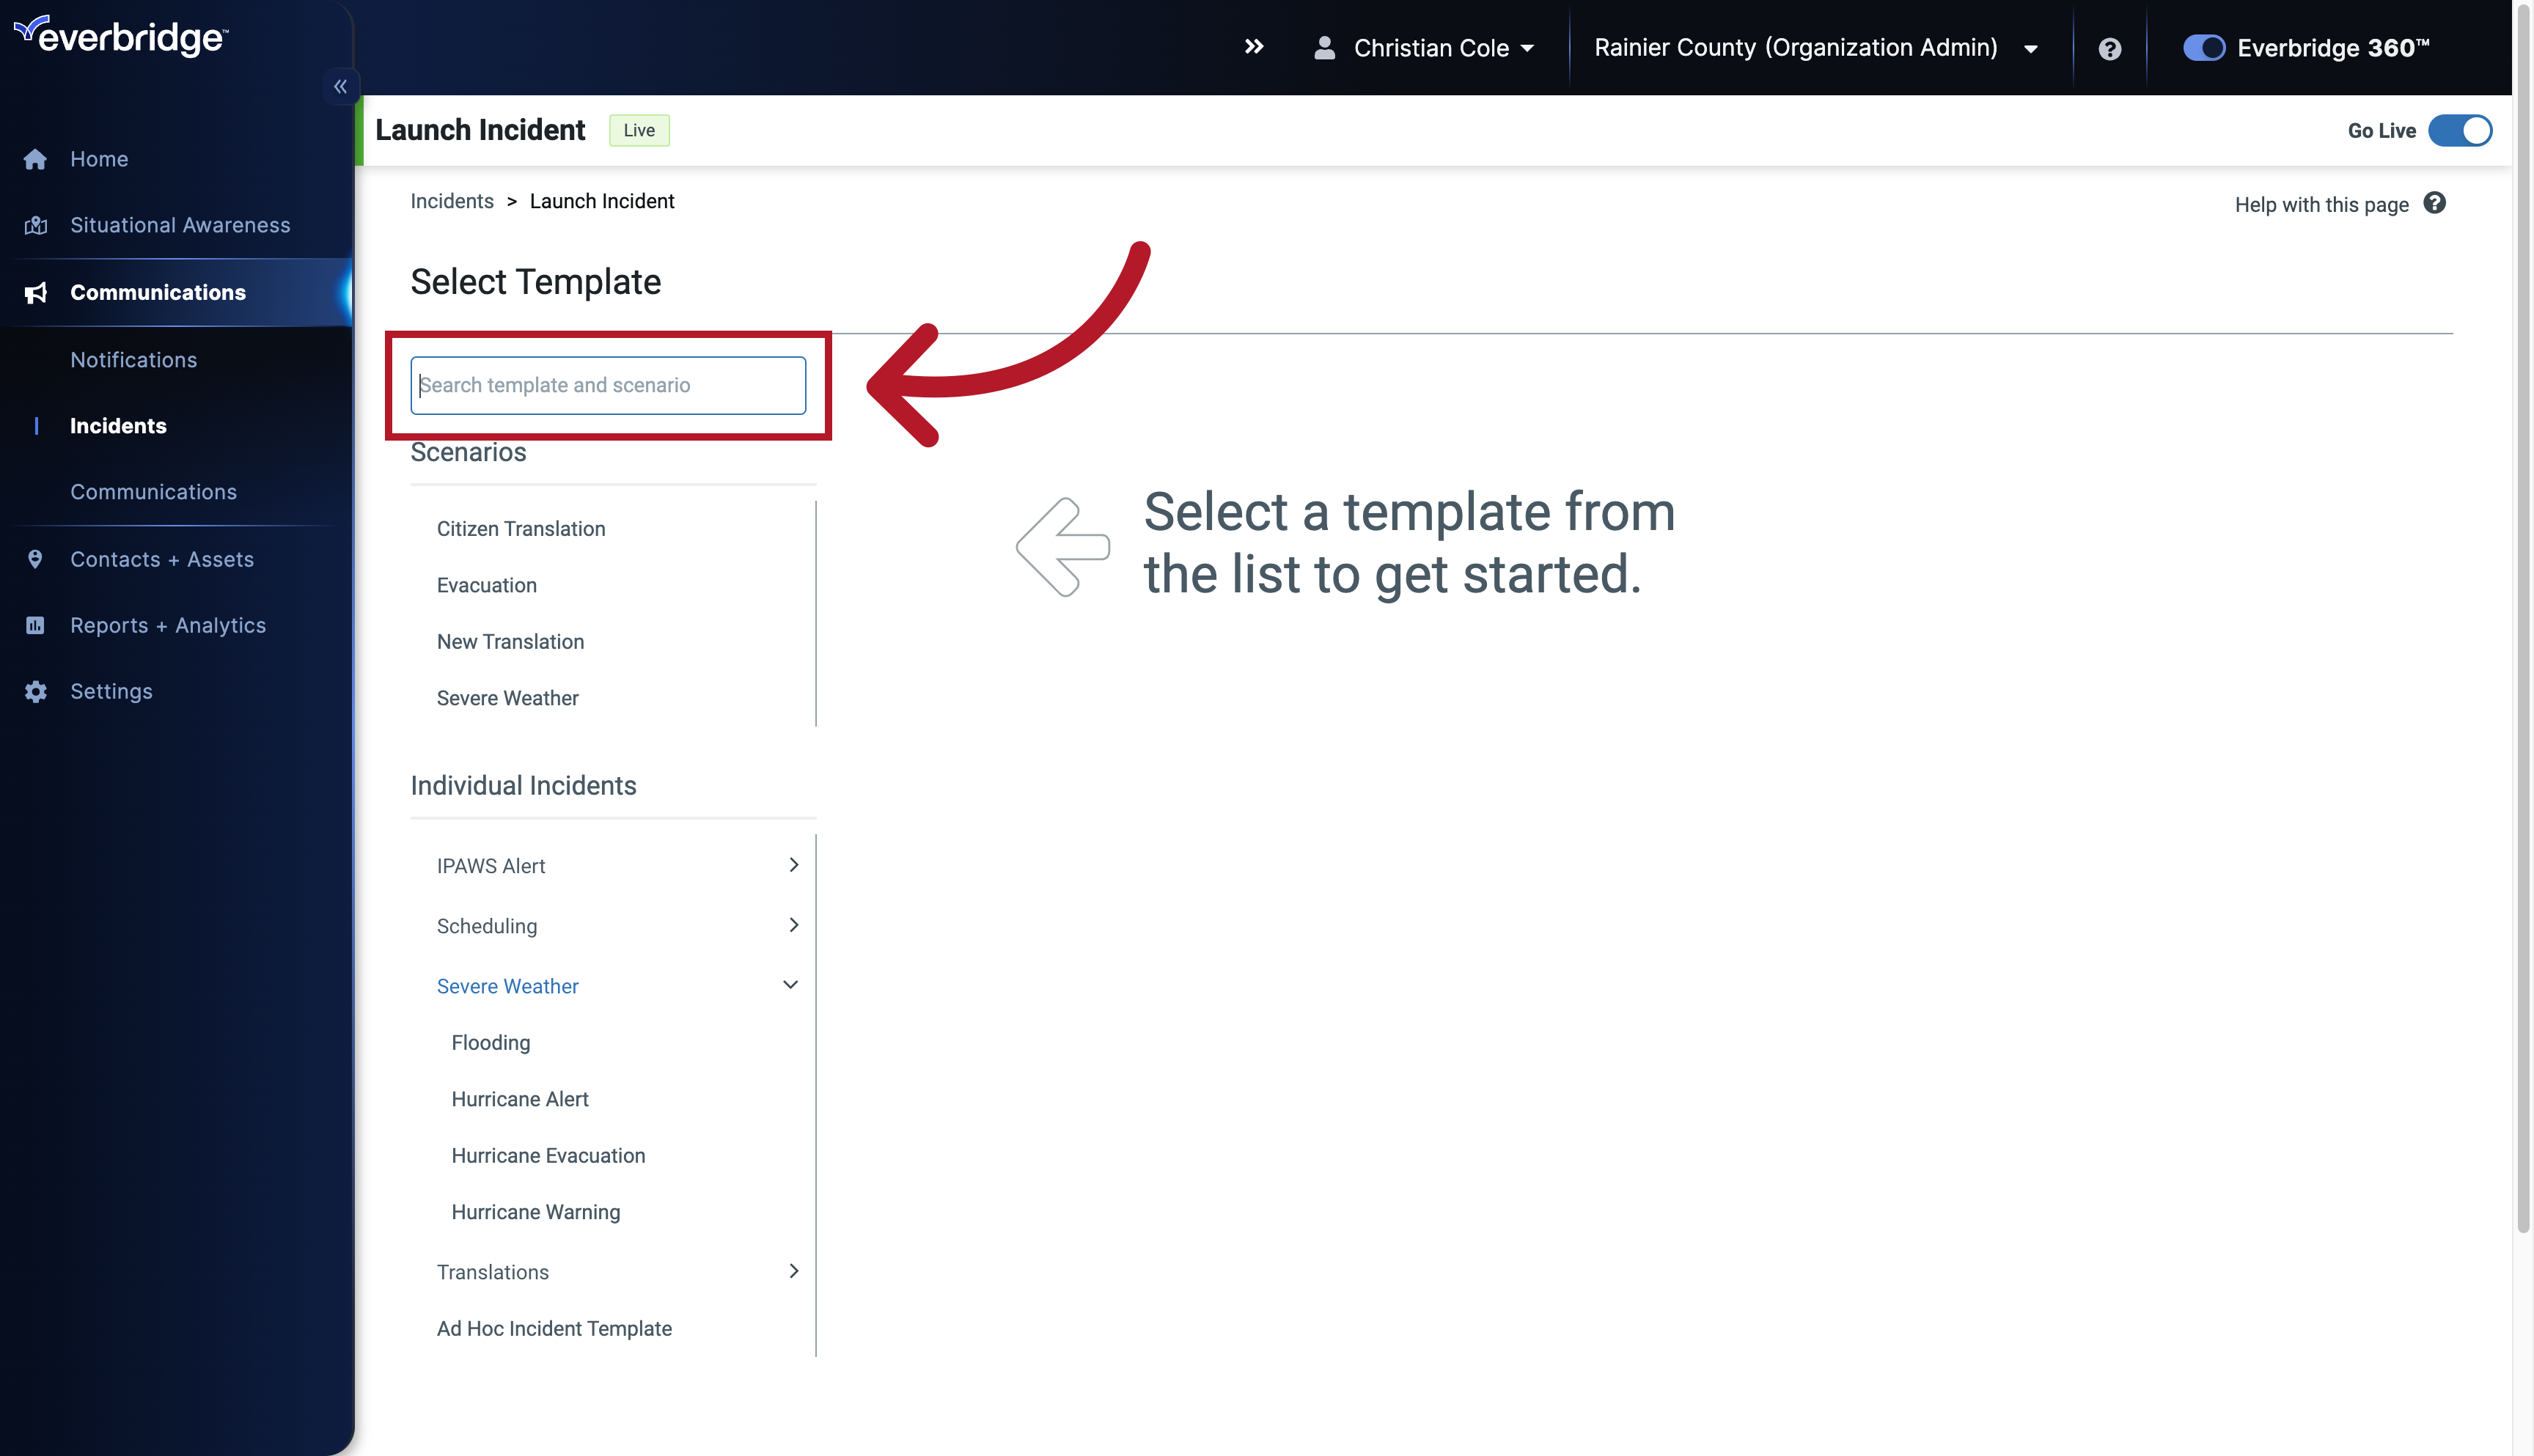
7. Select a Template
Or if you know exactly the template you're looking for, type it in the search bar to find it quickly.
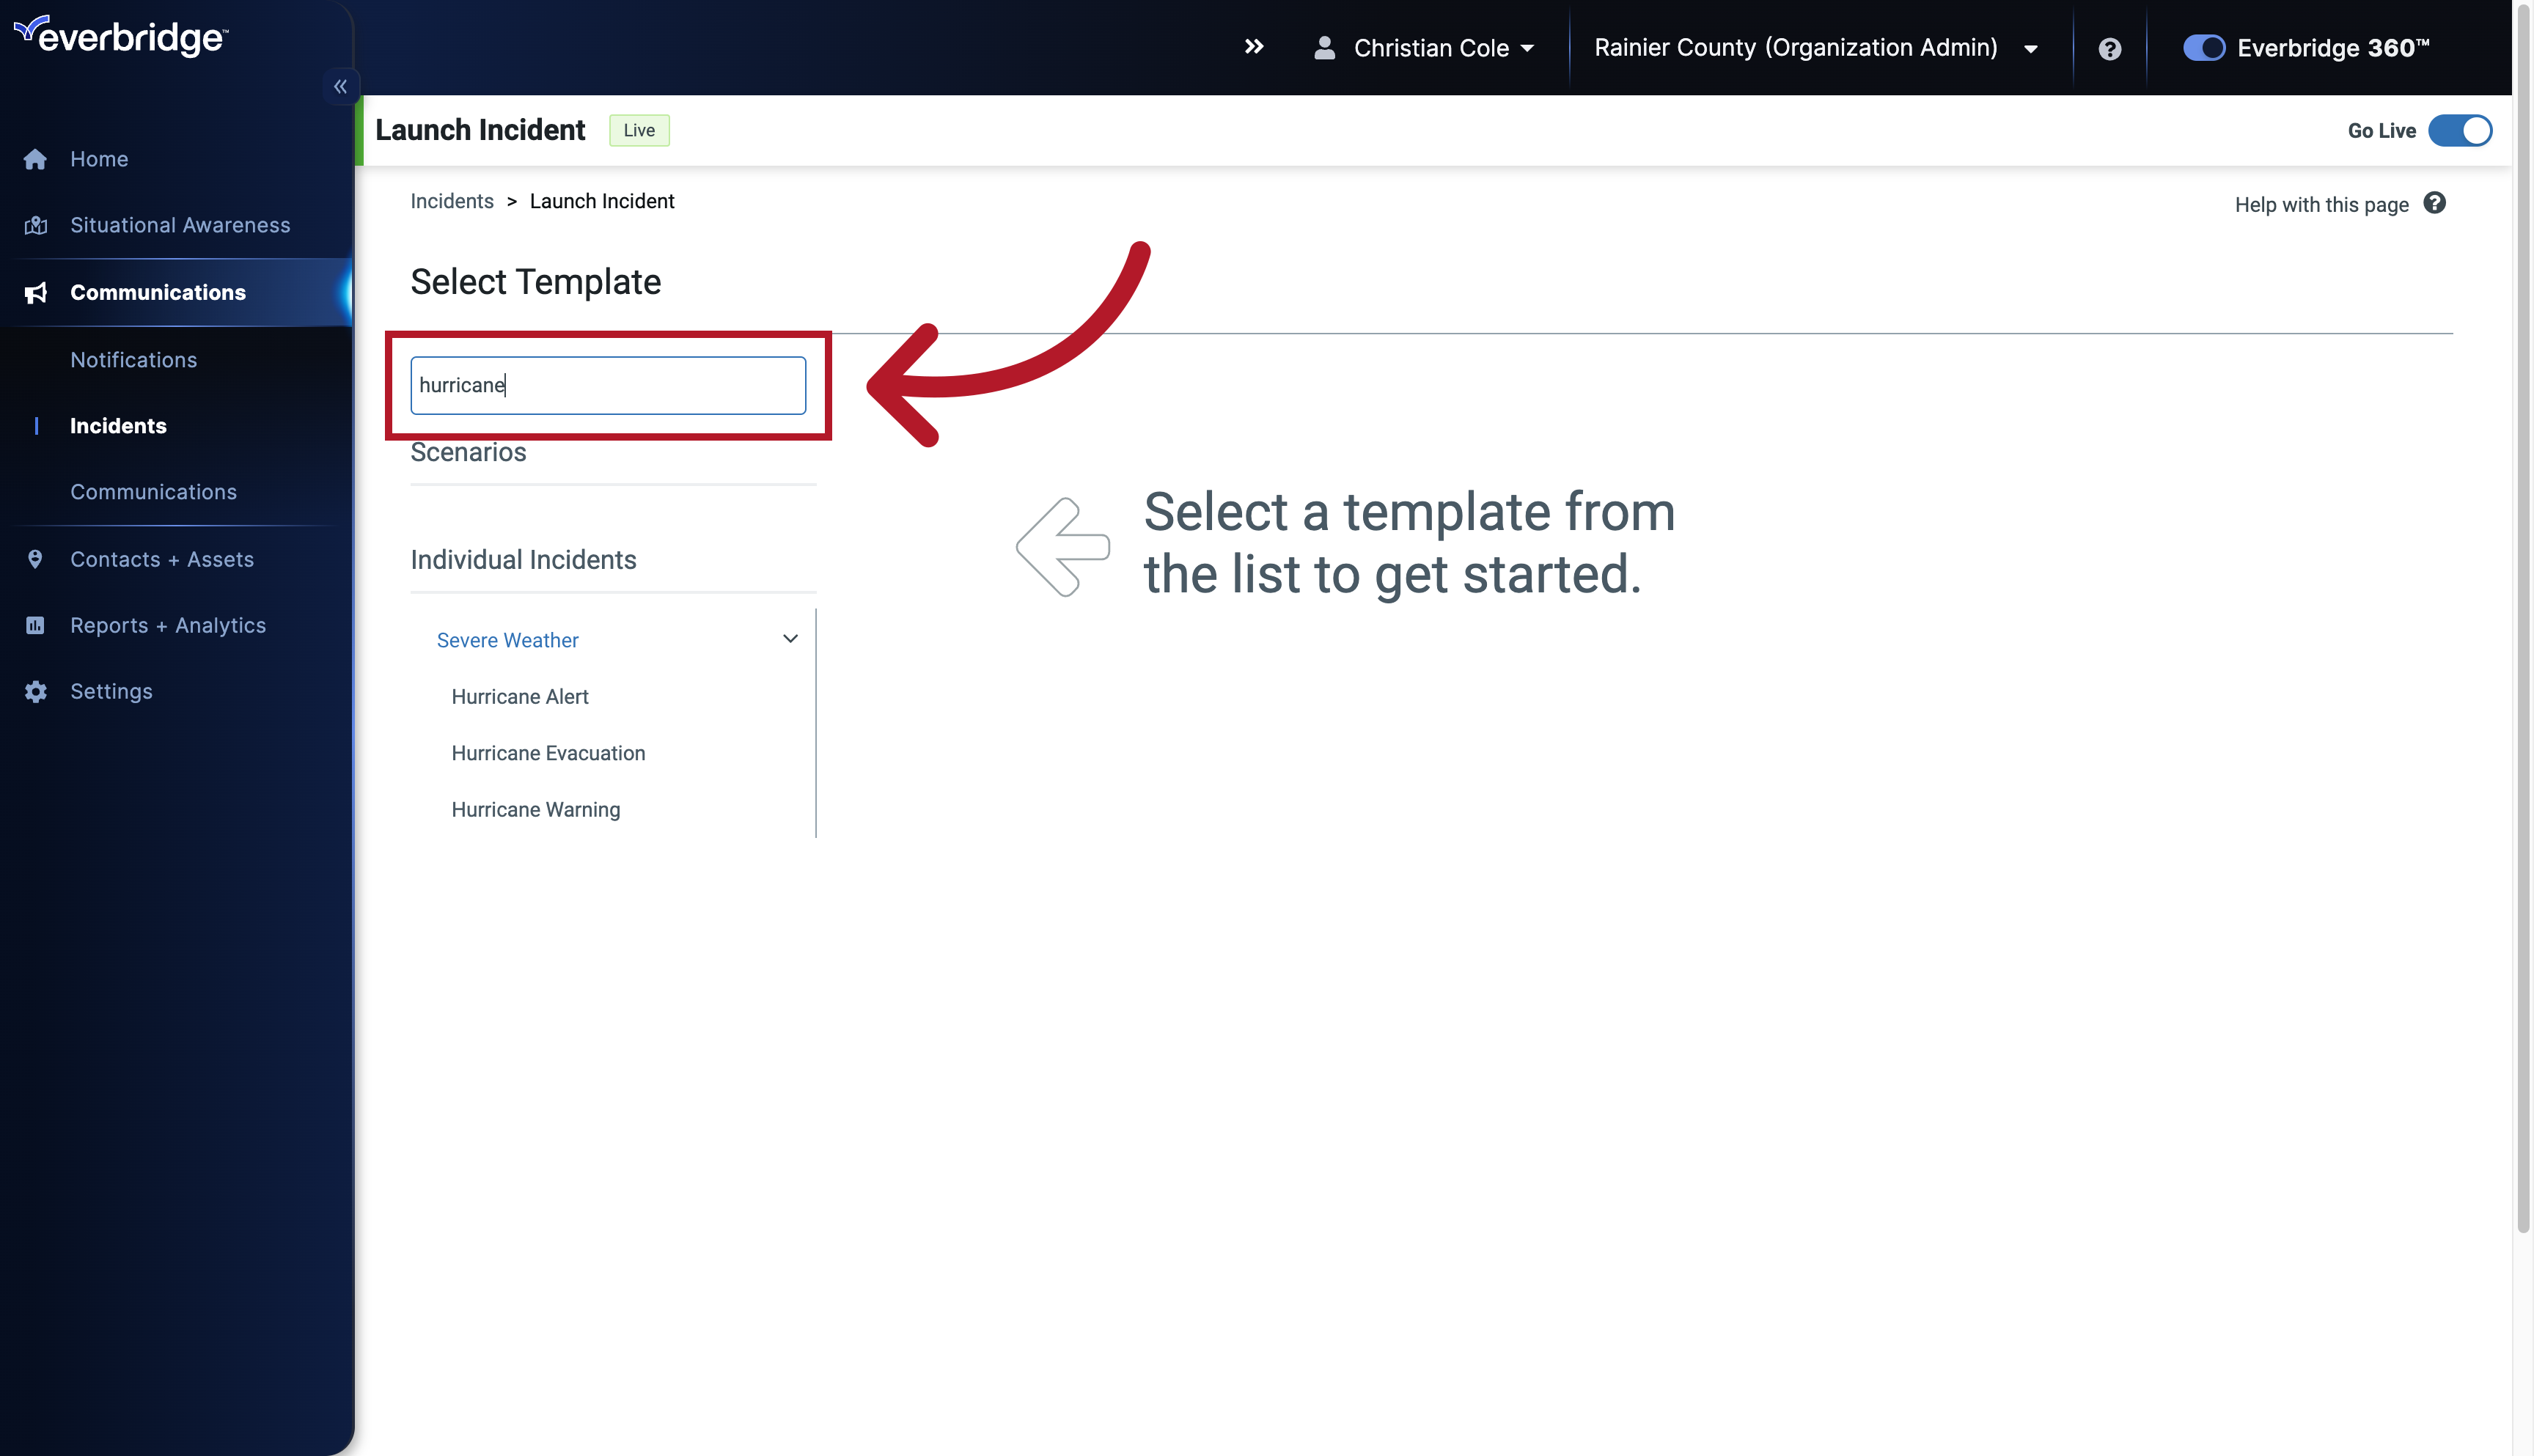
8. Select a Template
Input "hurricane" in the designated field.
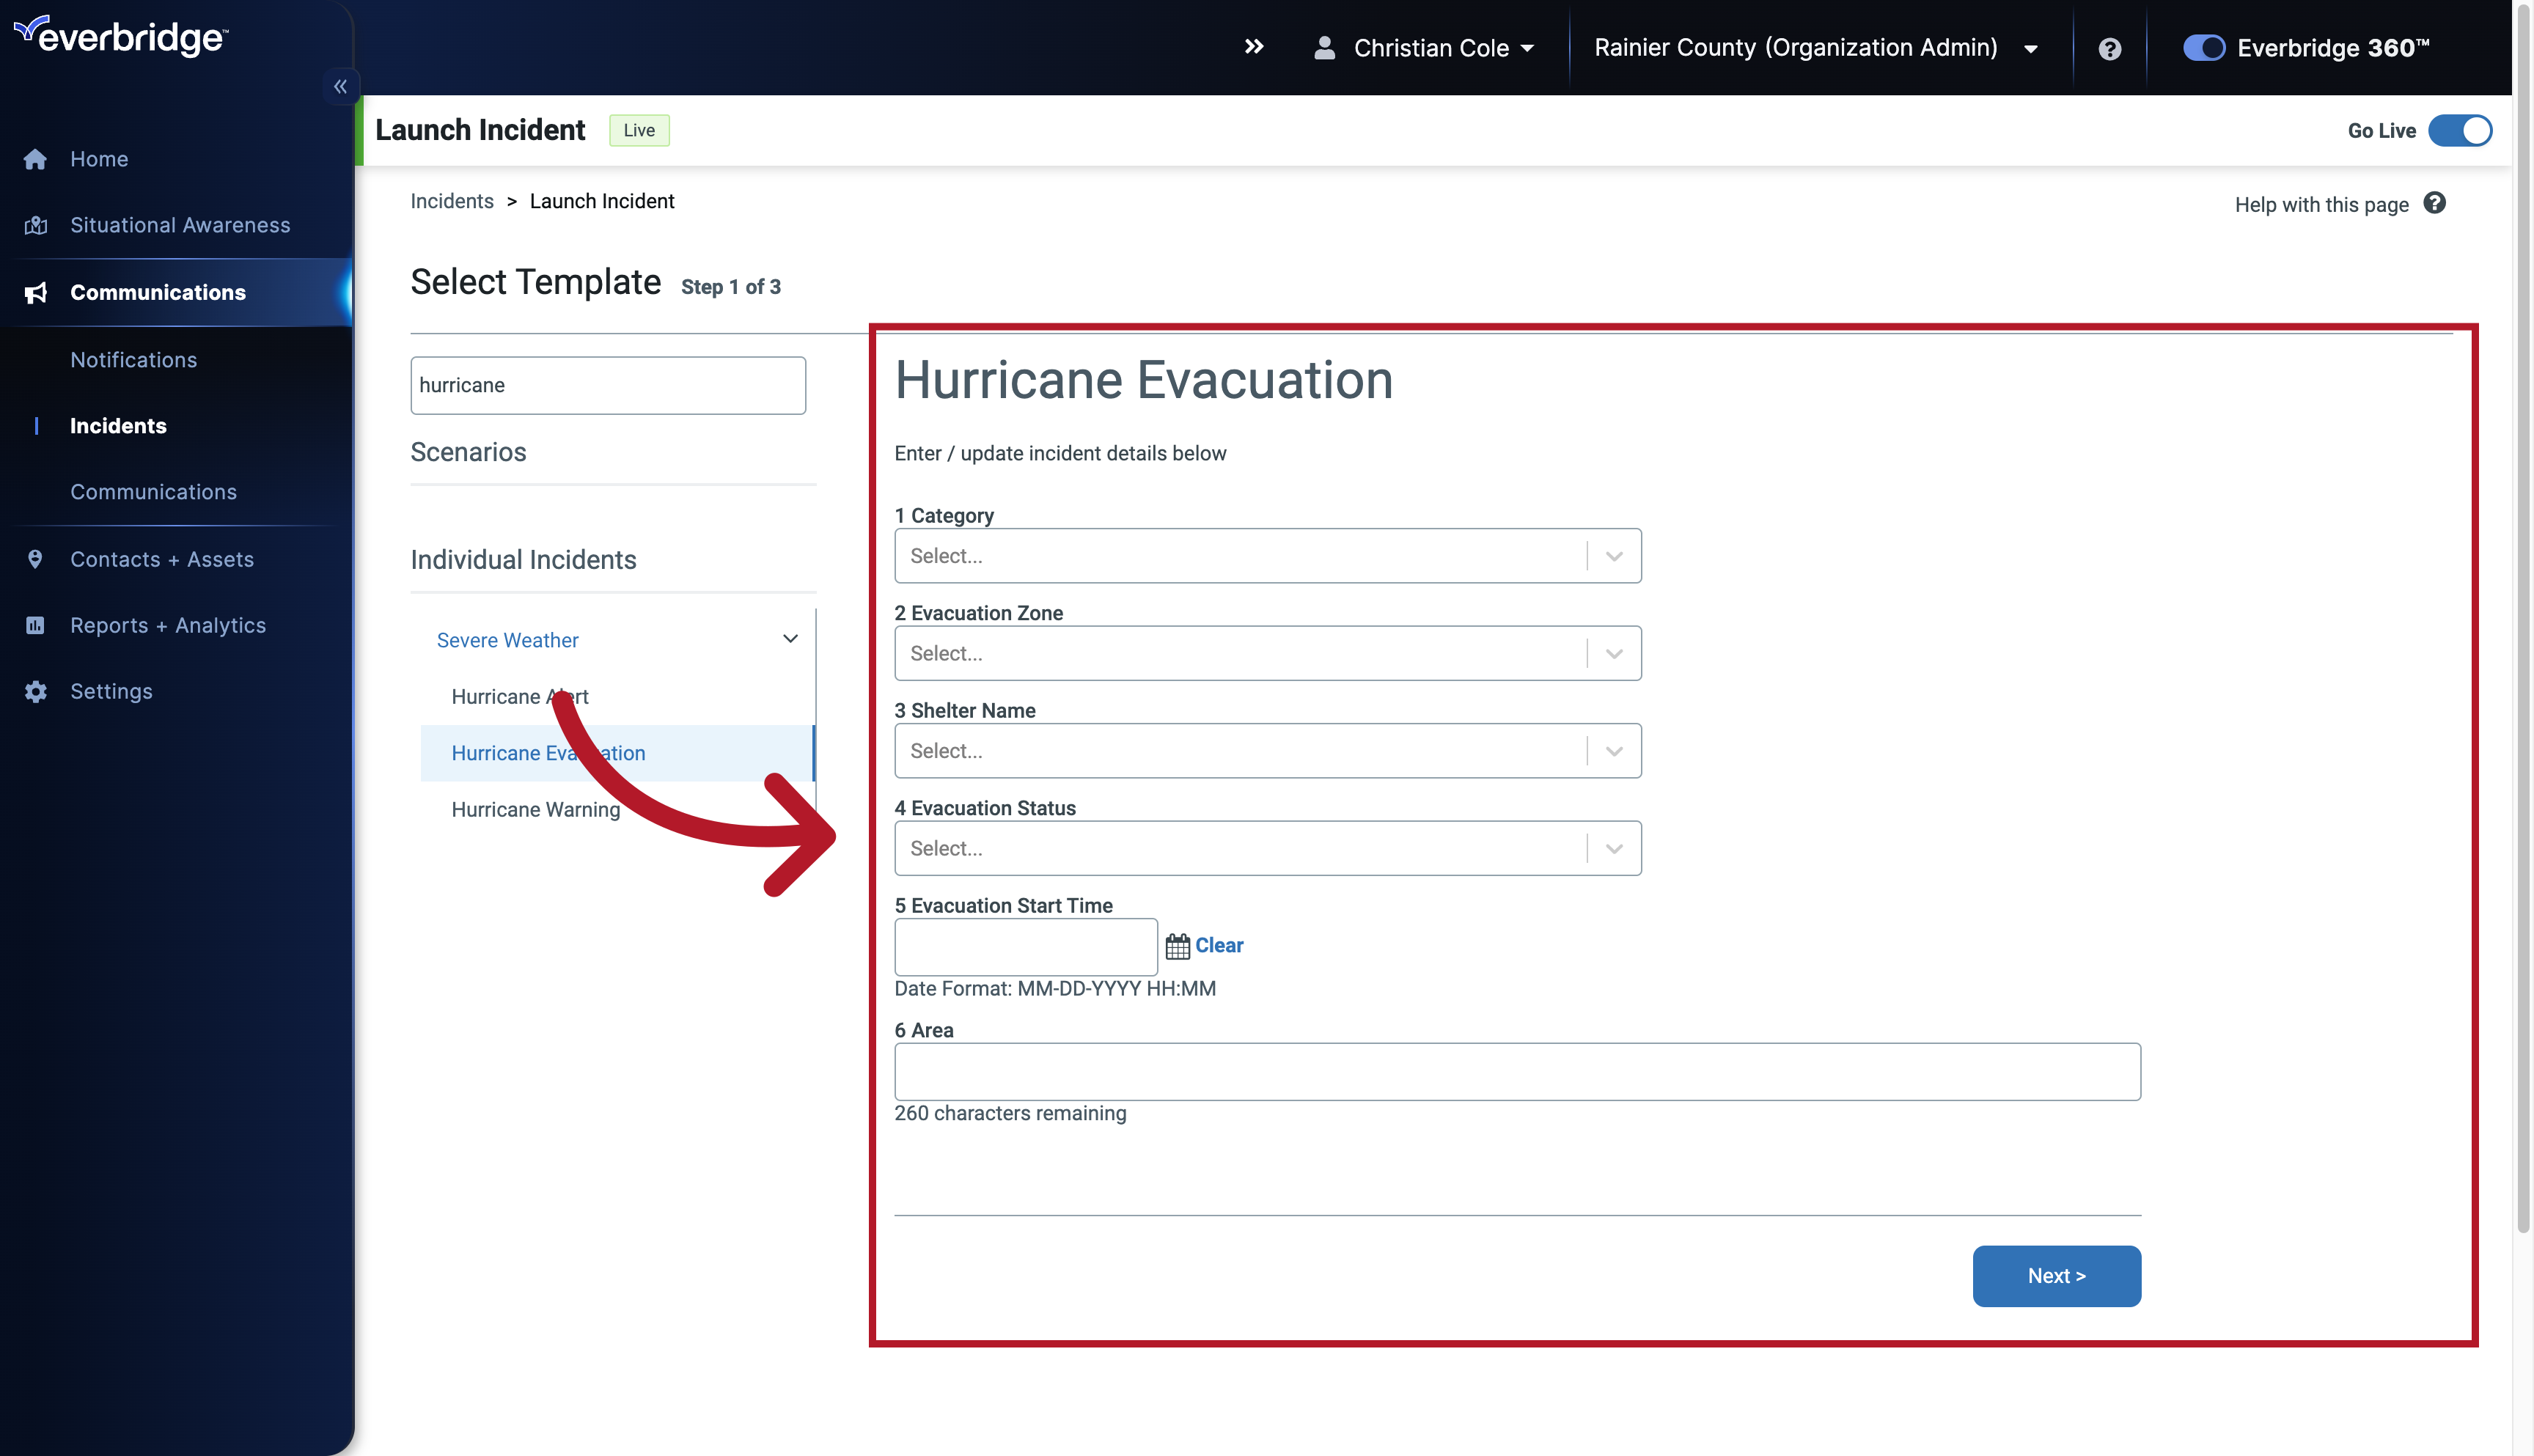
9. Select a Template
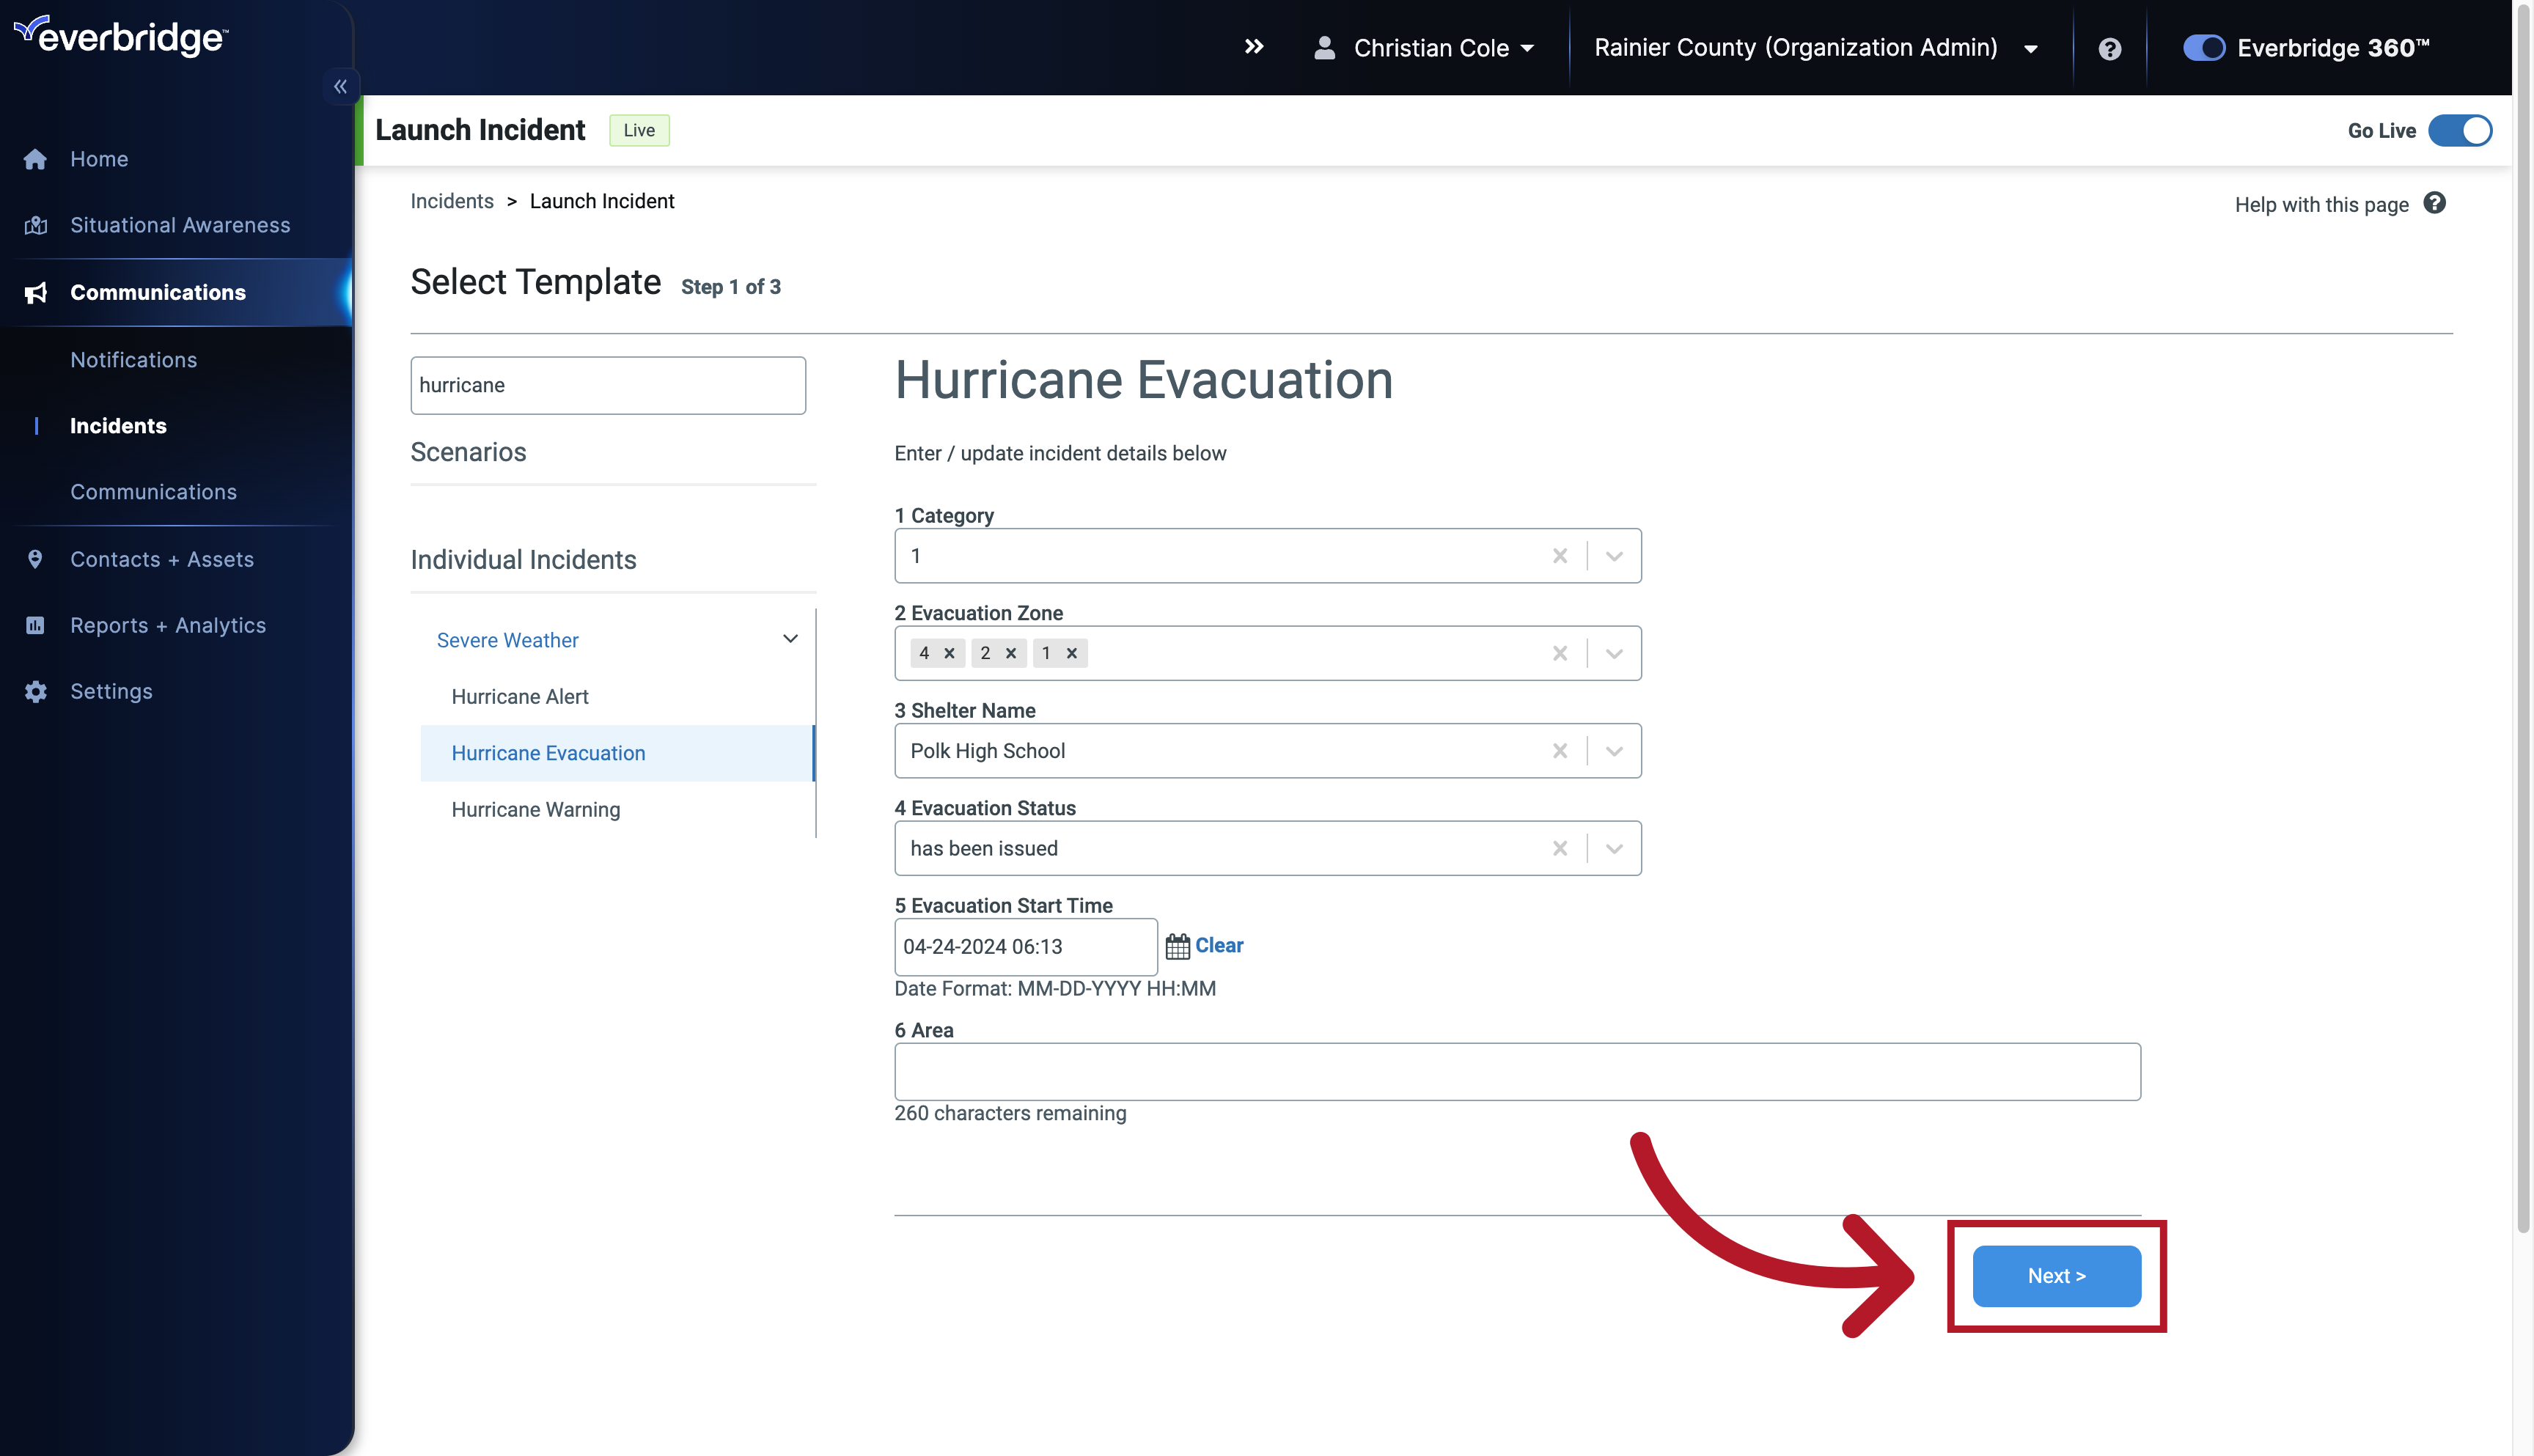
After selecting the desired incident template.

10. Select a Template
the template form is displayed to the right.
11. Select a Template
If your incident template is not displayed, it could be because the status of the incident template needs to be changed to live or, you may need to add this template to your role. If this occurs, reach out to your administrator for assistance, as they can adjust permissions and access.

12. Fill Template
Within the template fill out the generated fields
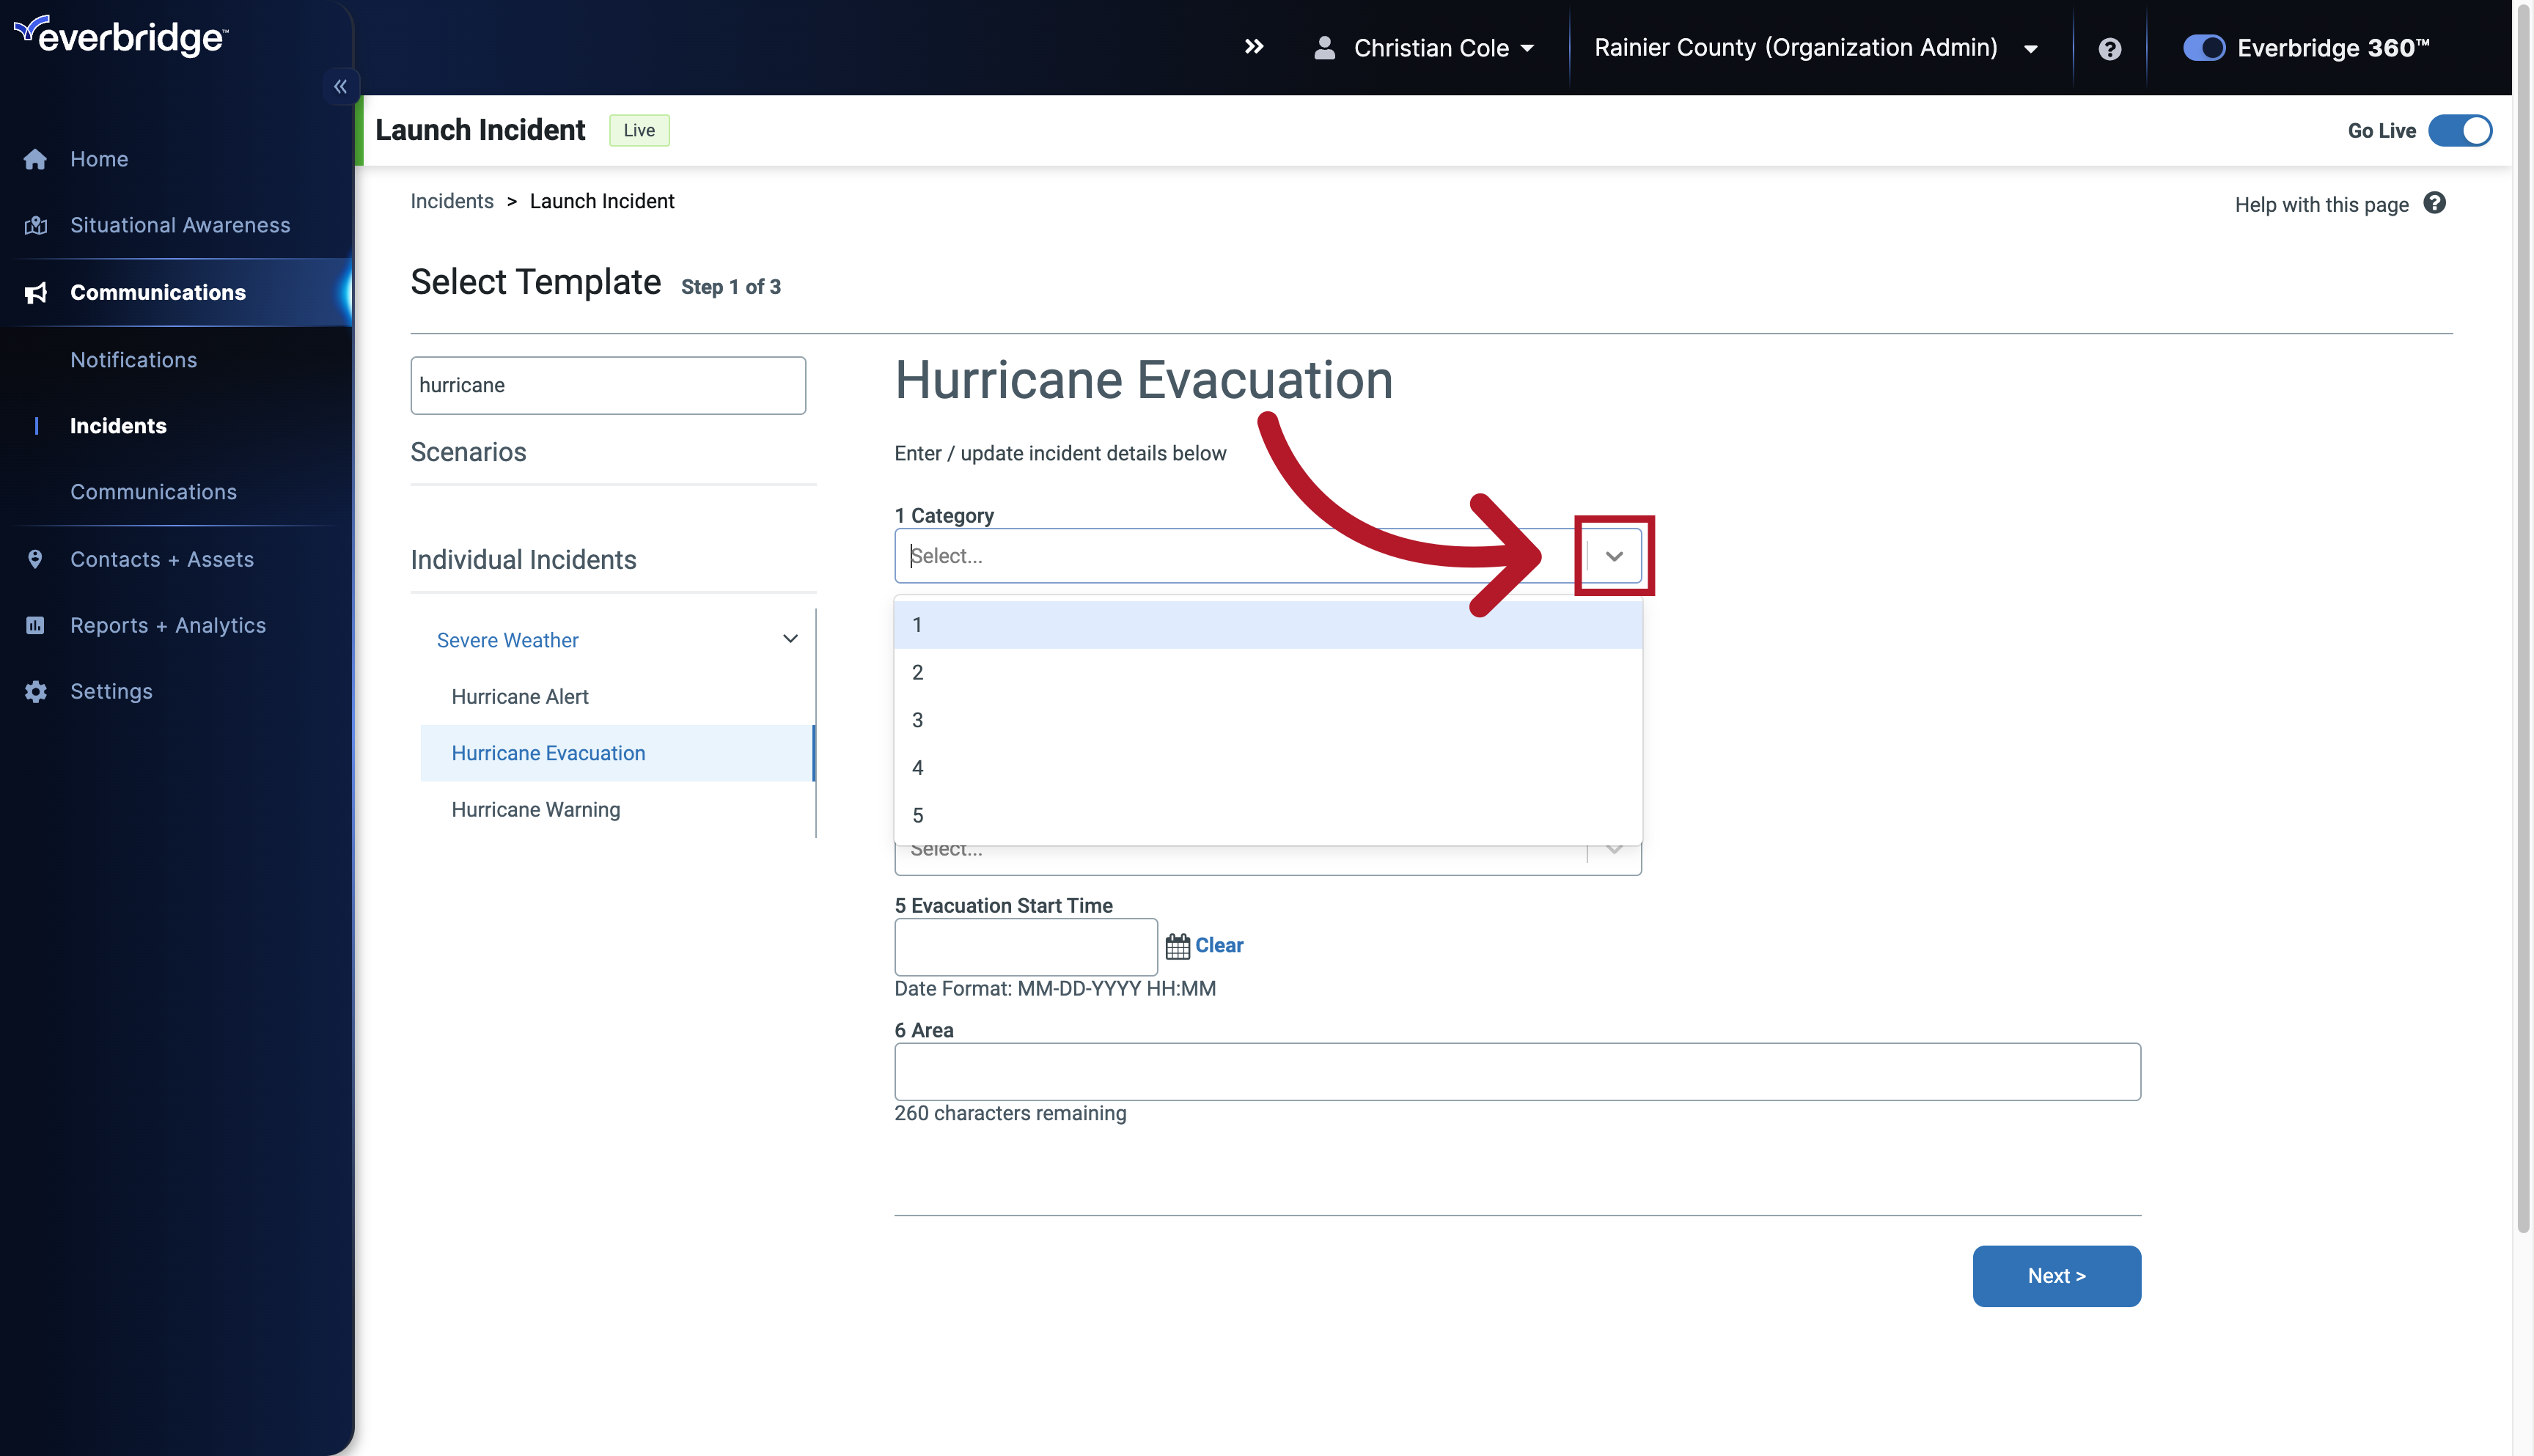
13. Fill Template
or choose options from generated drop down menus.
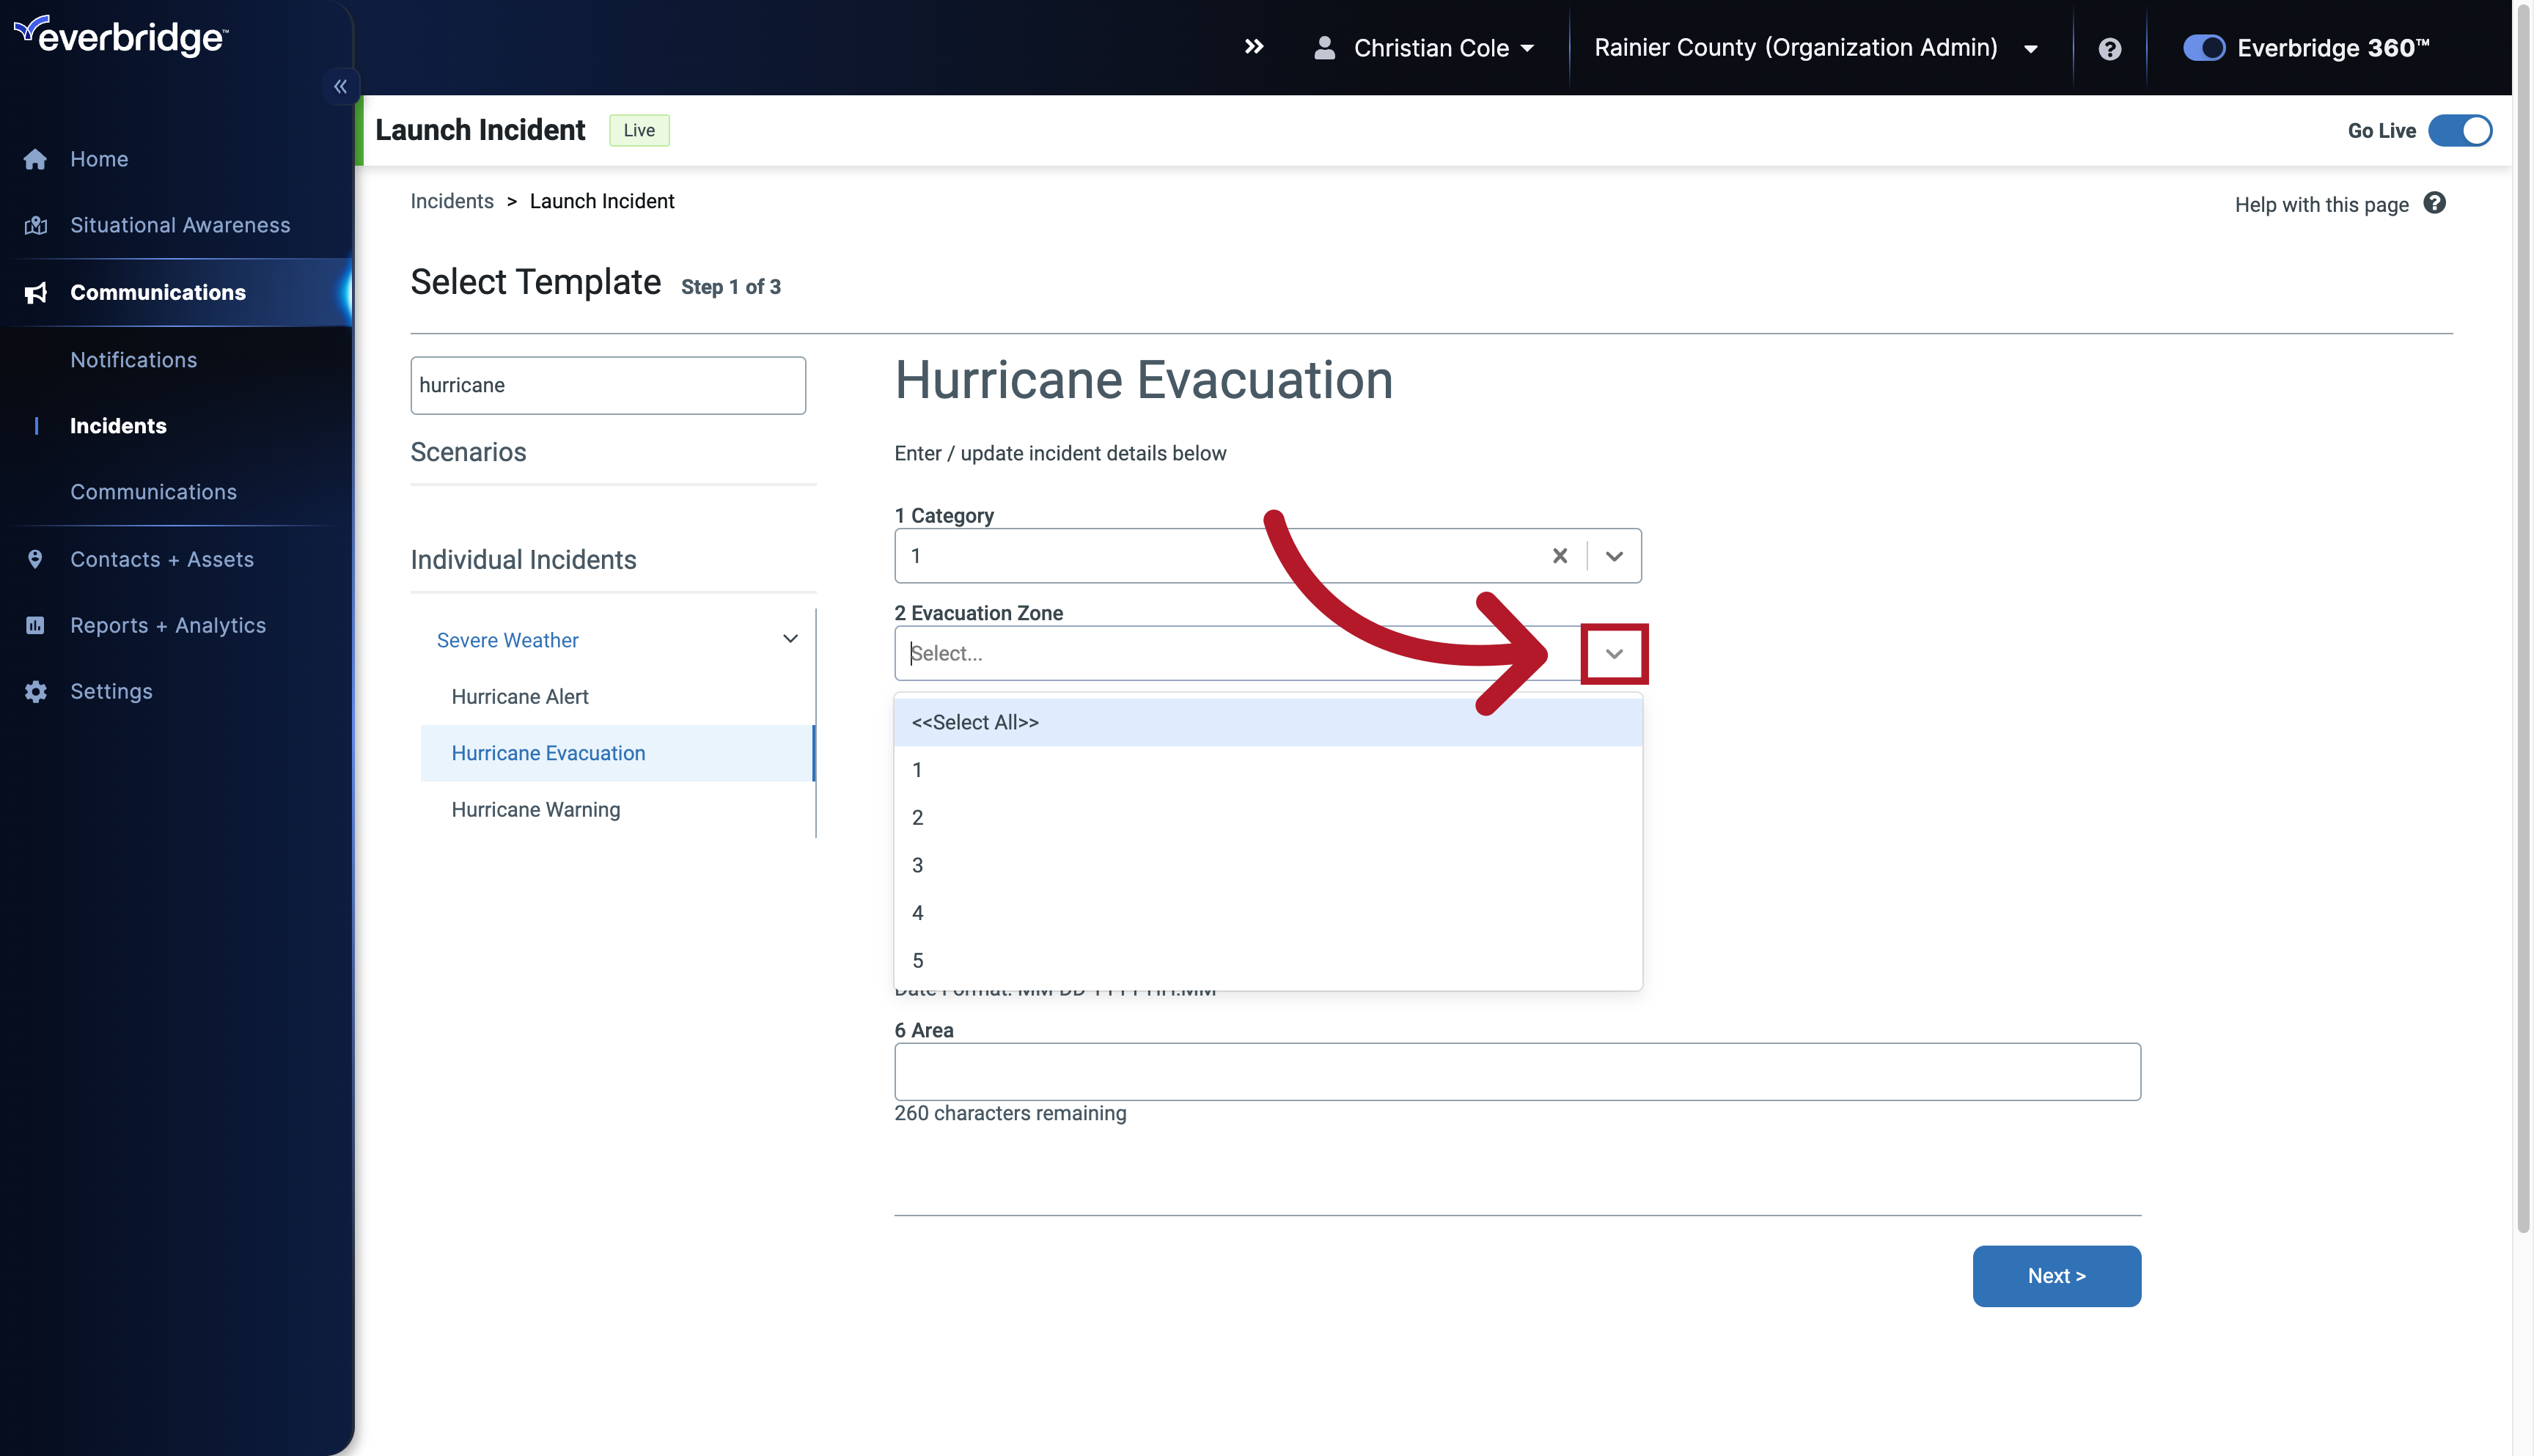
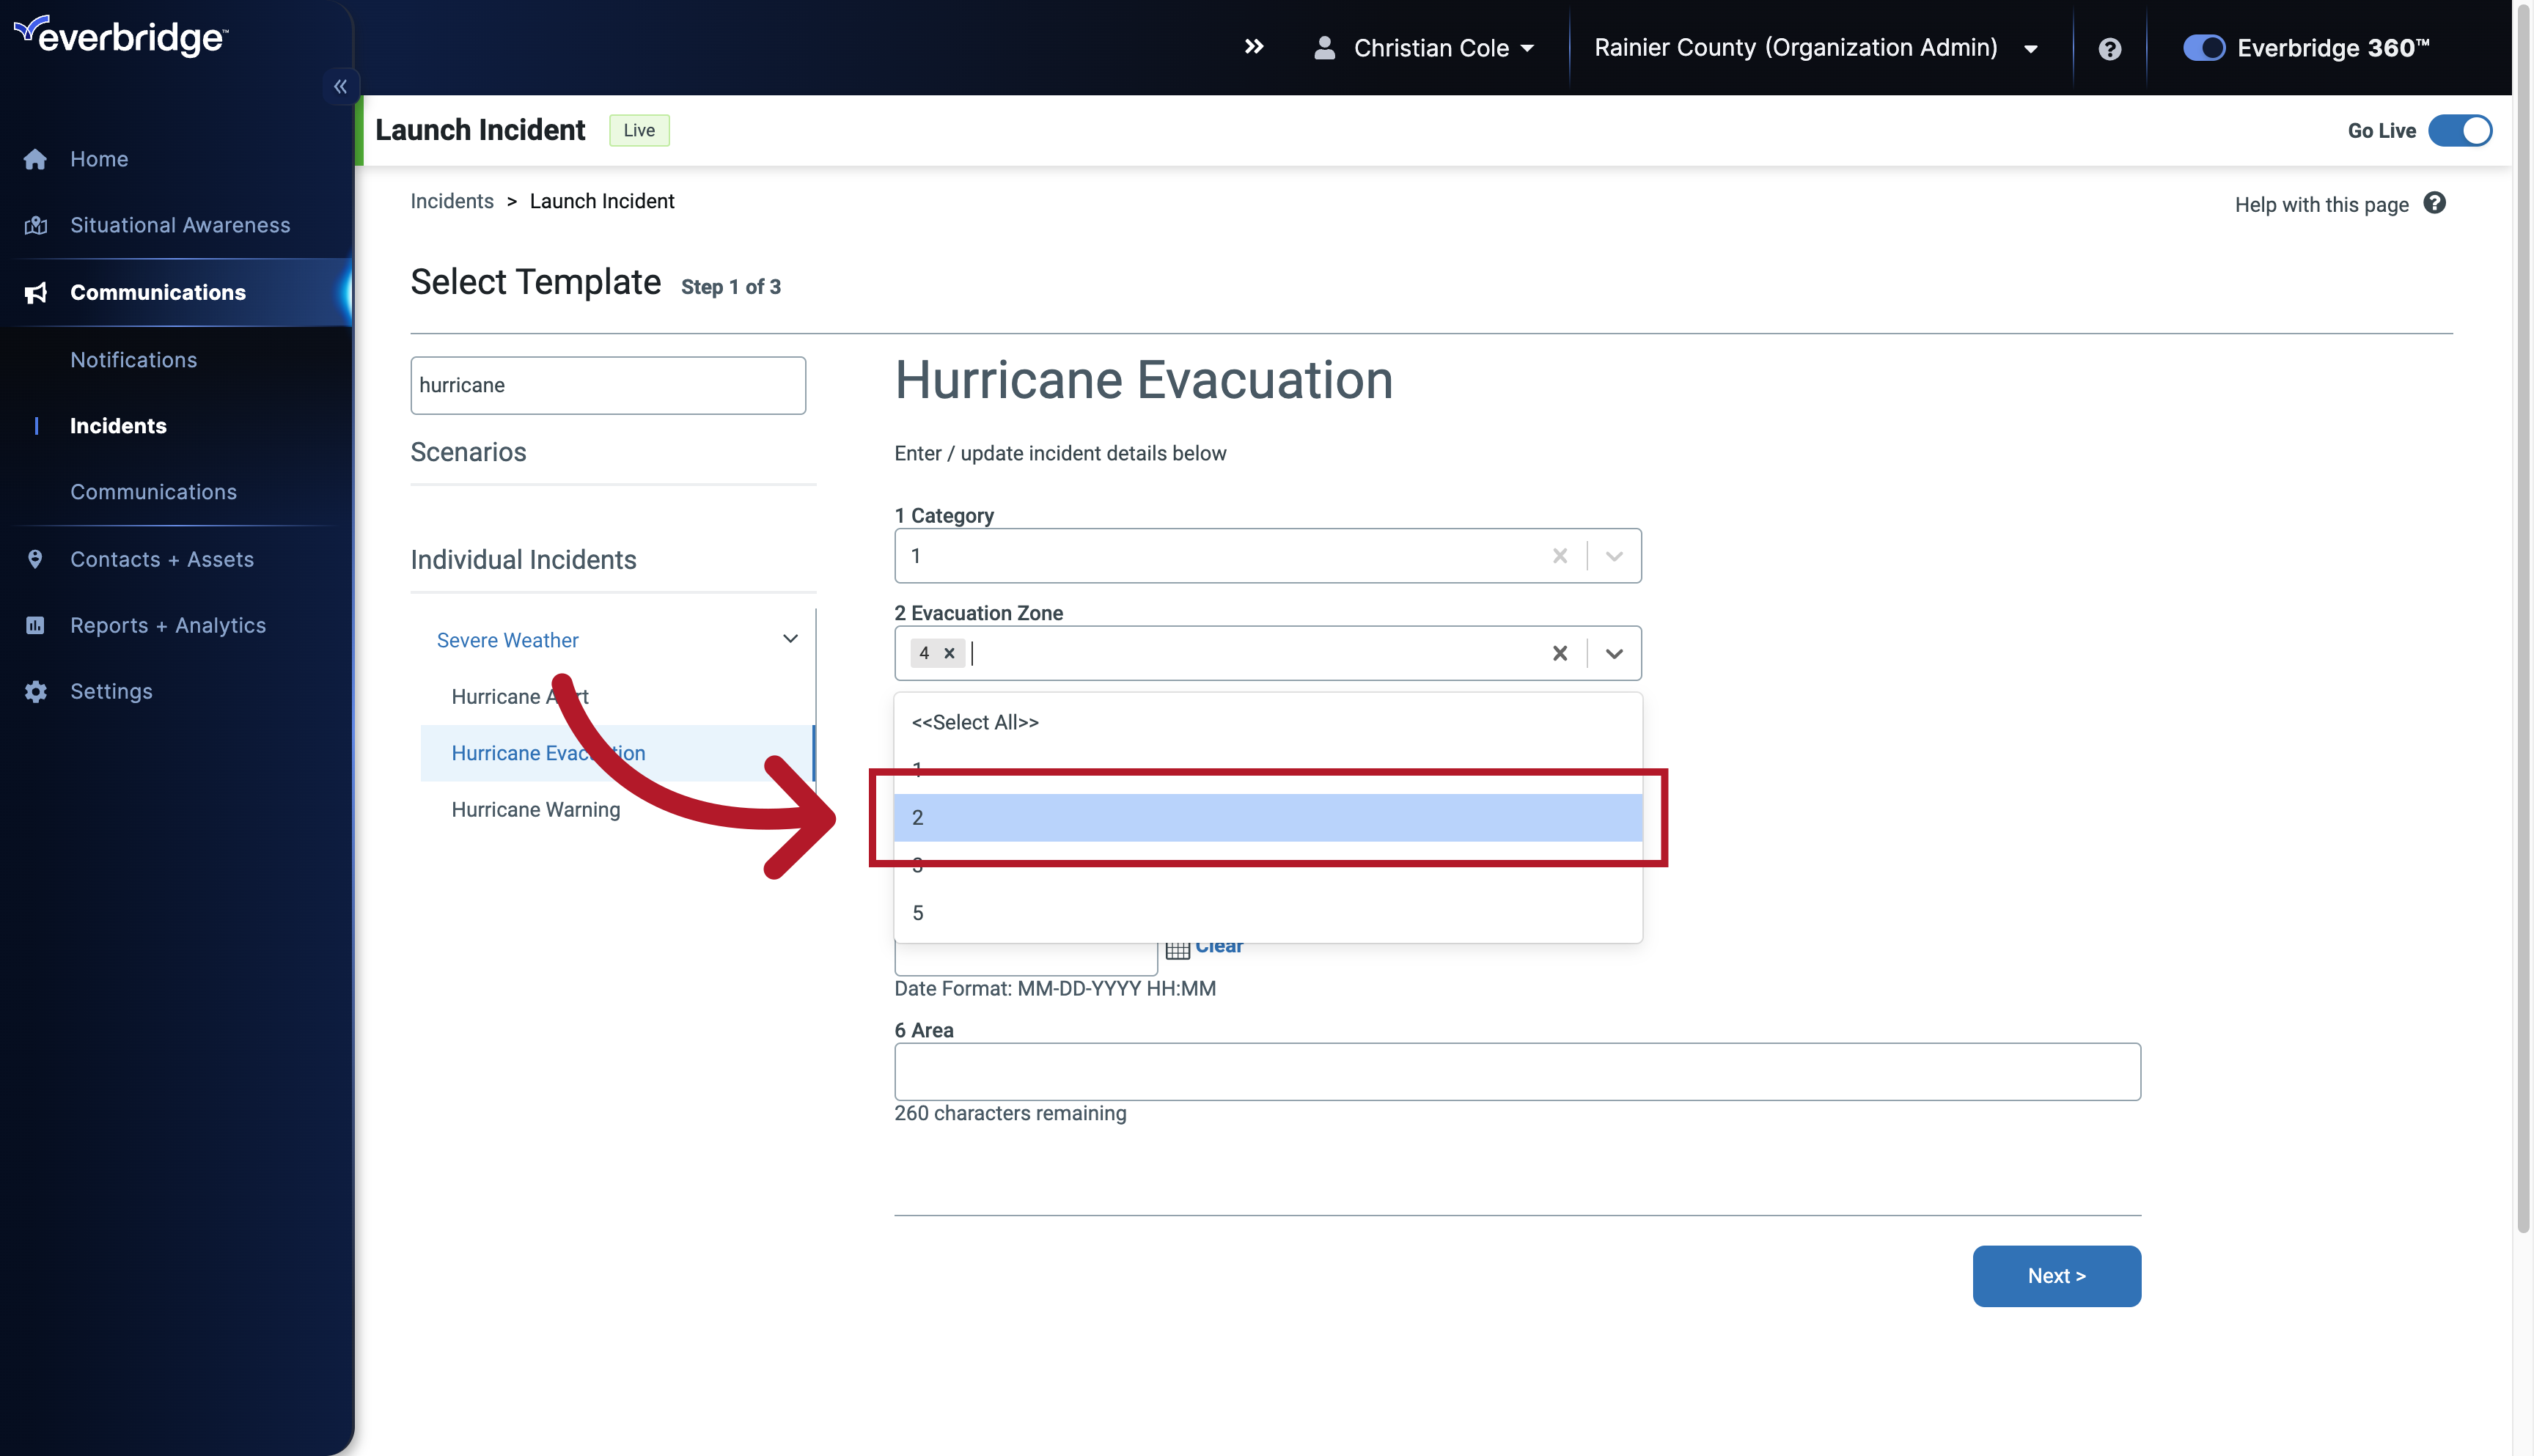
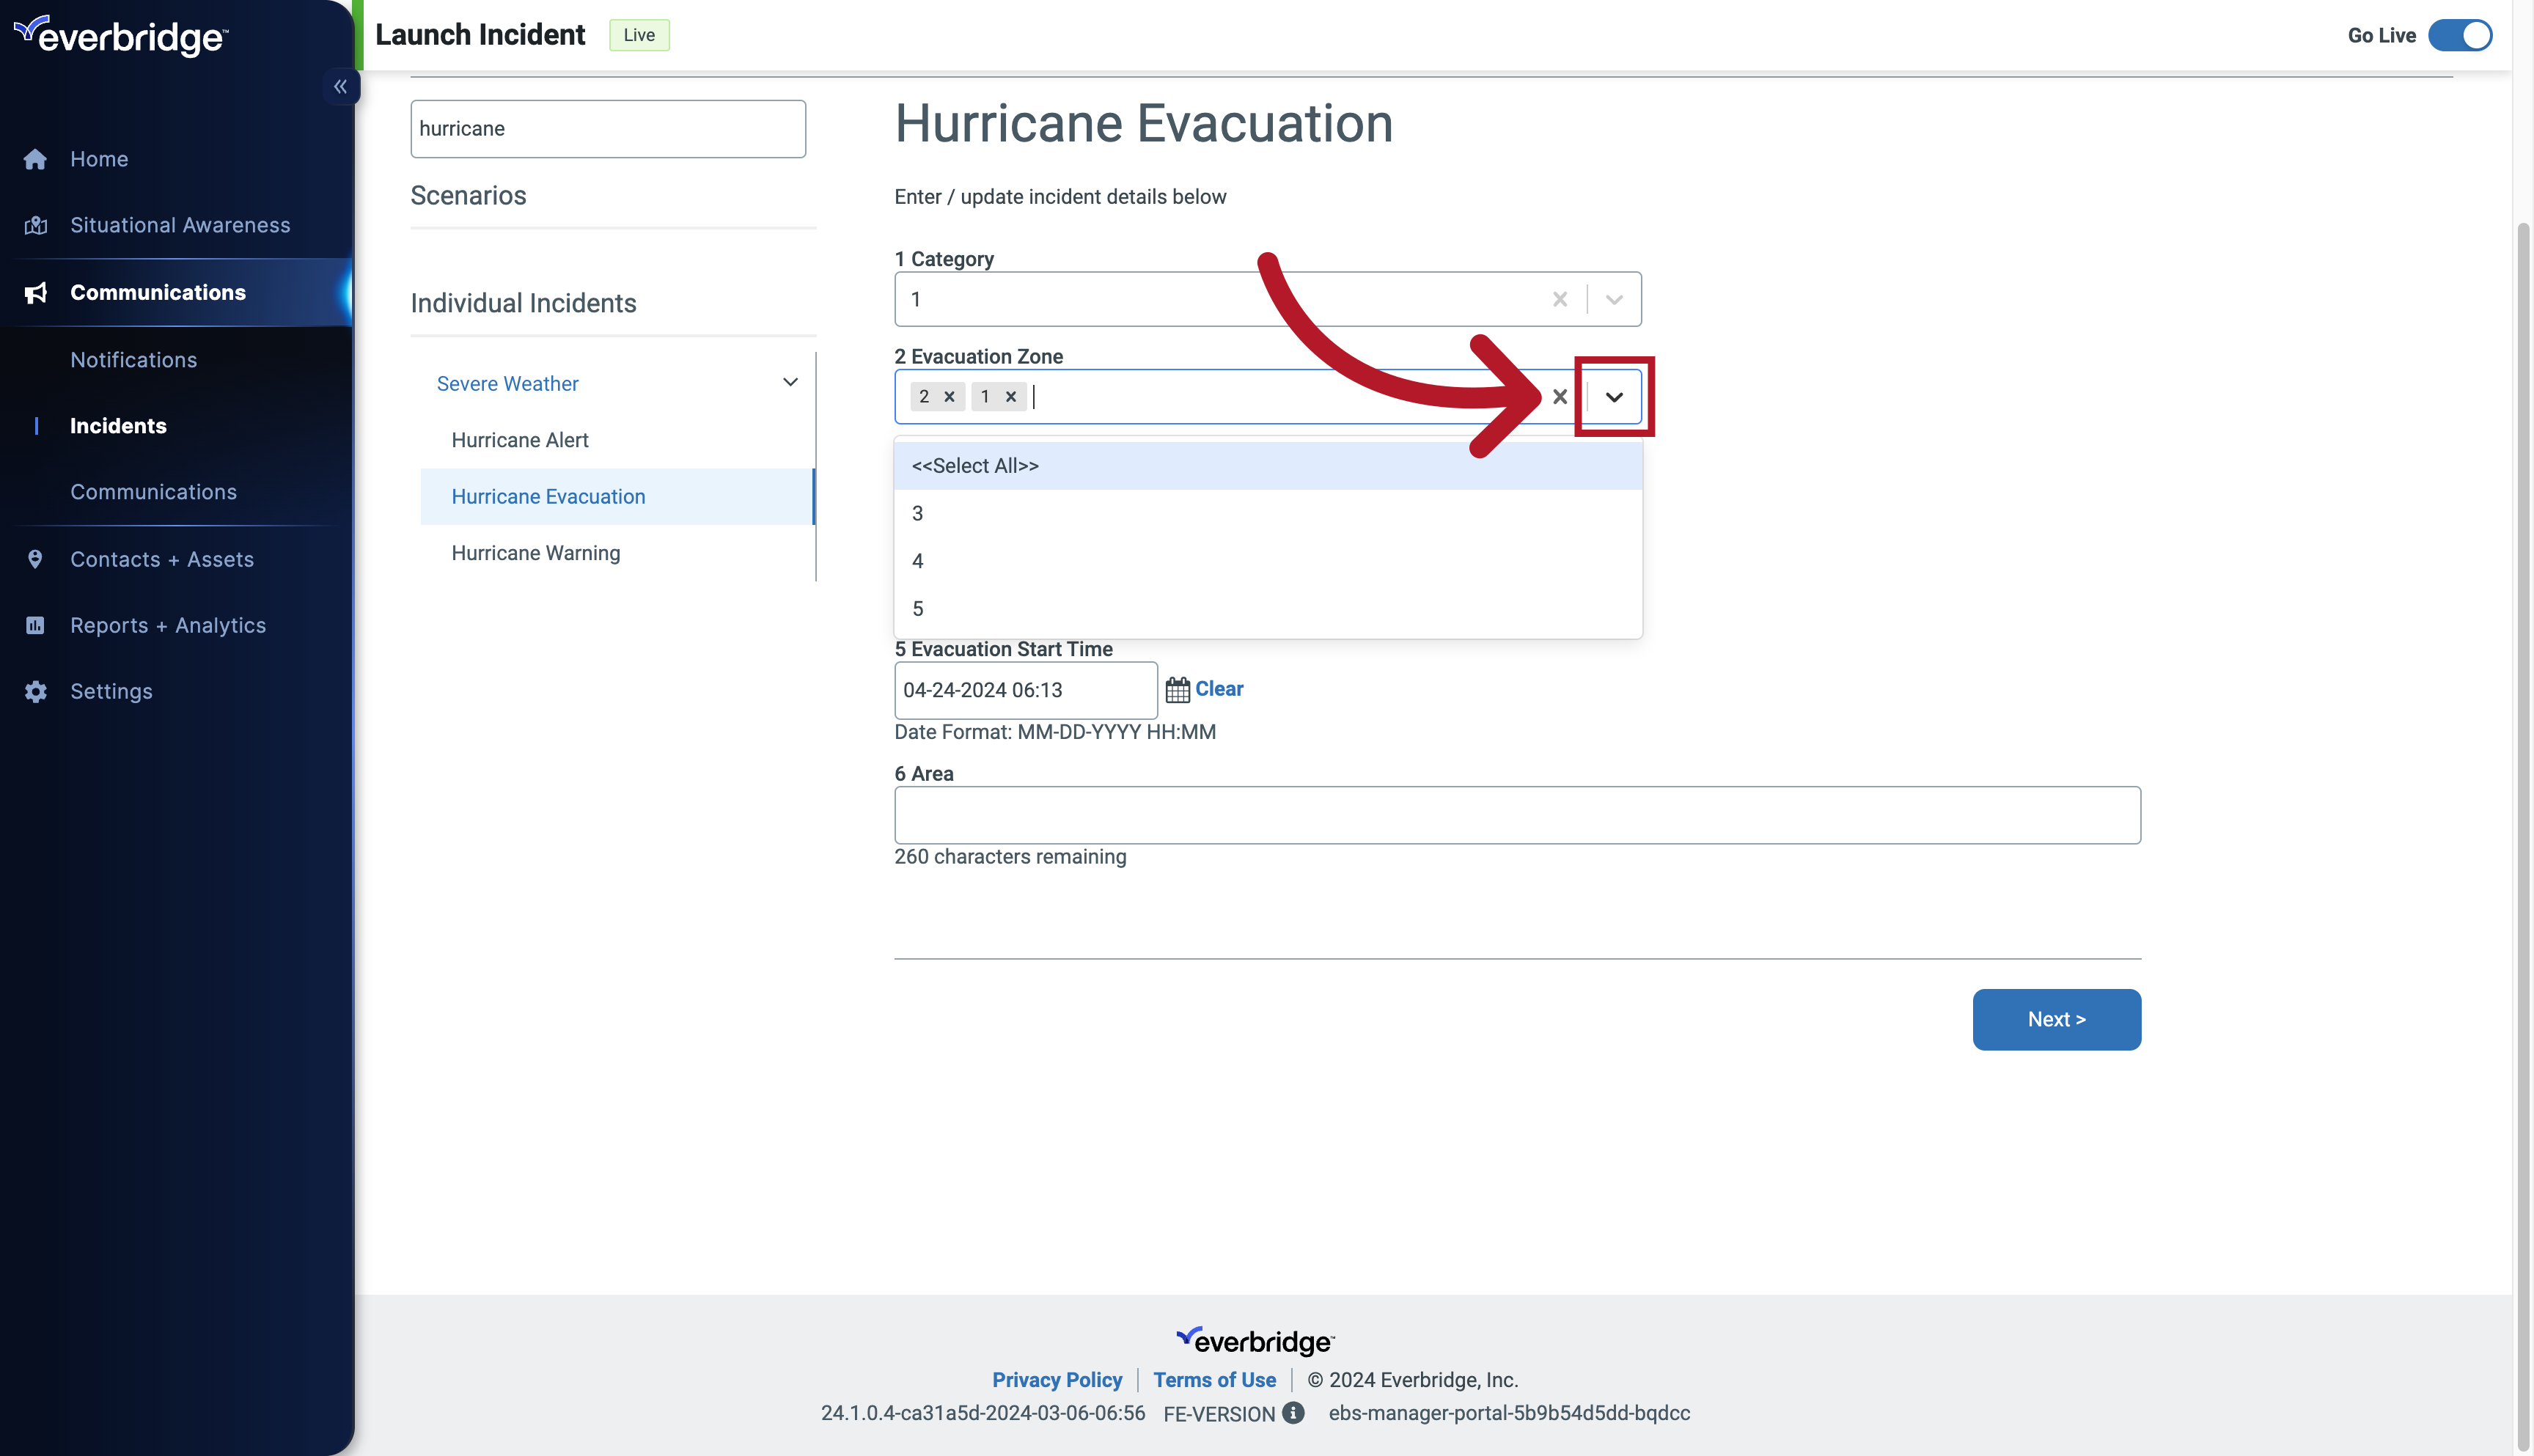
14. Fill Template
Click the selected button
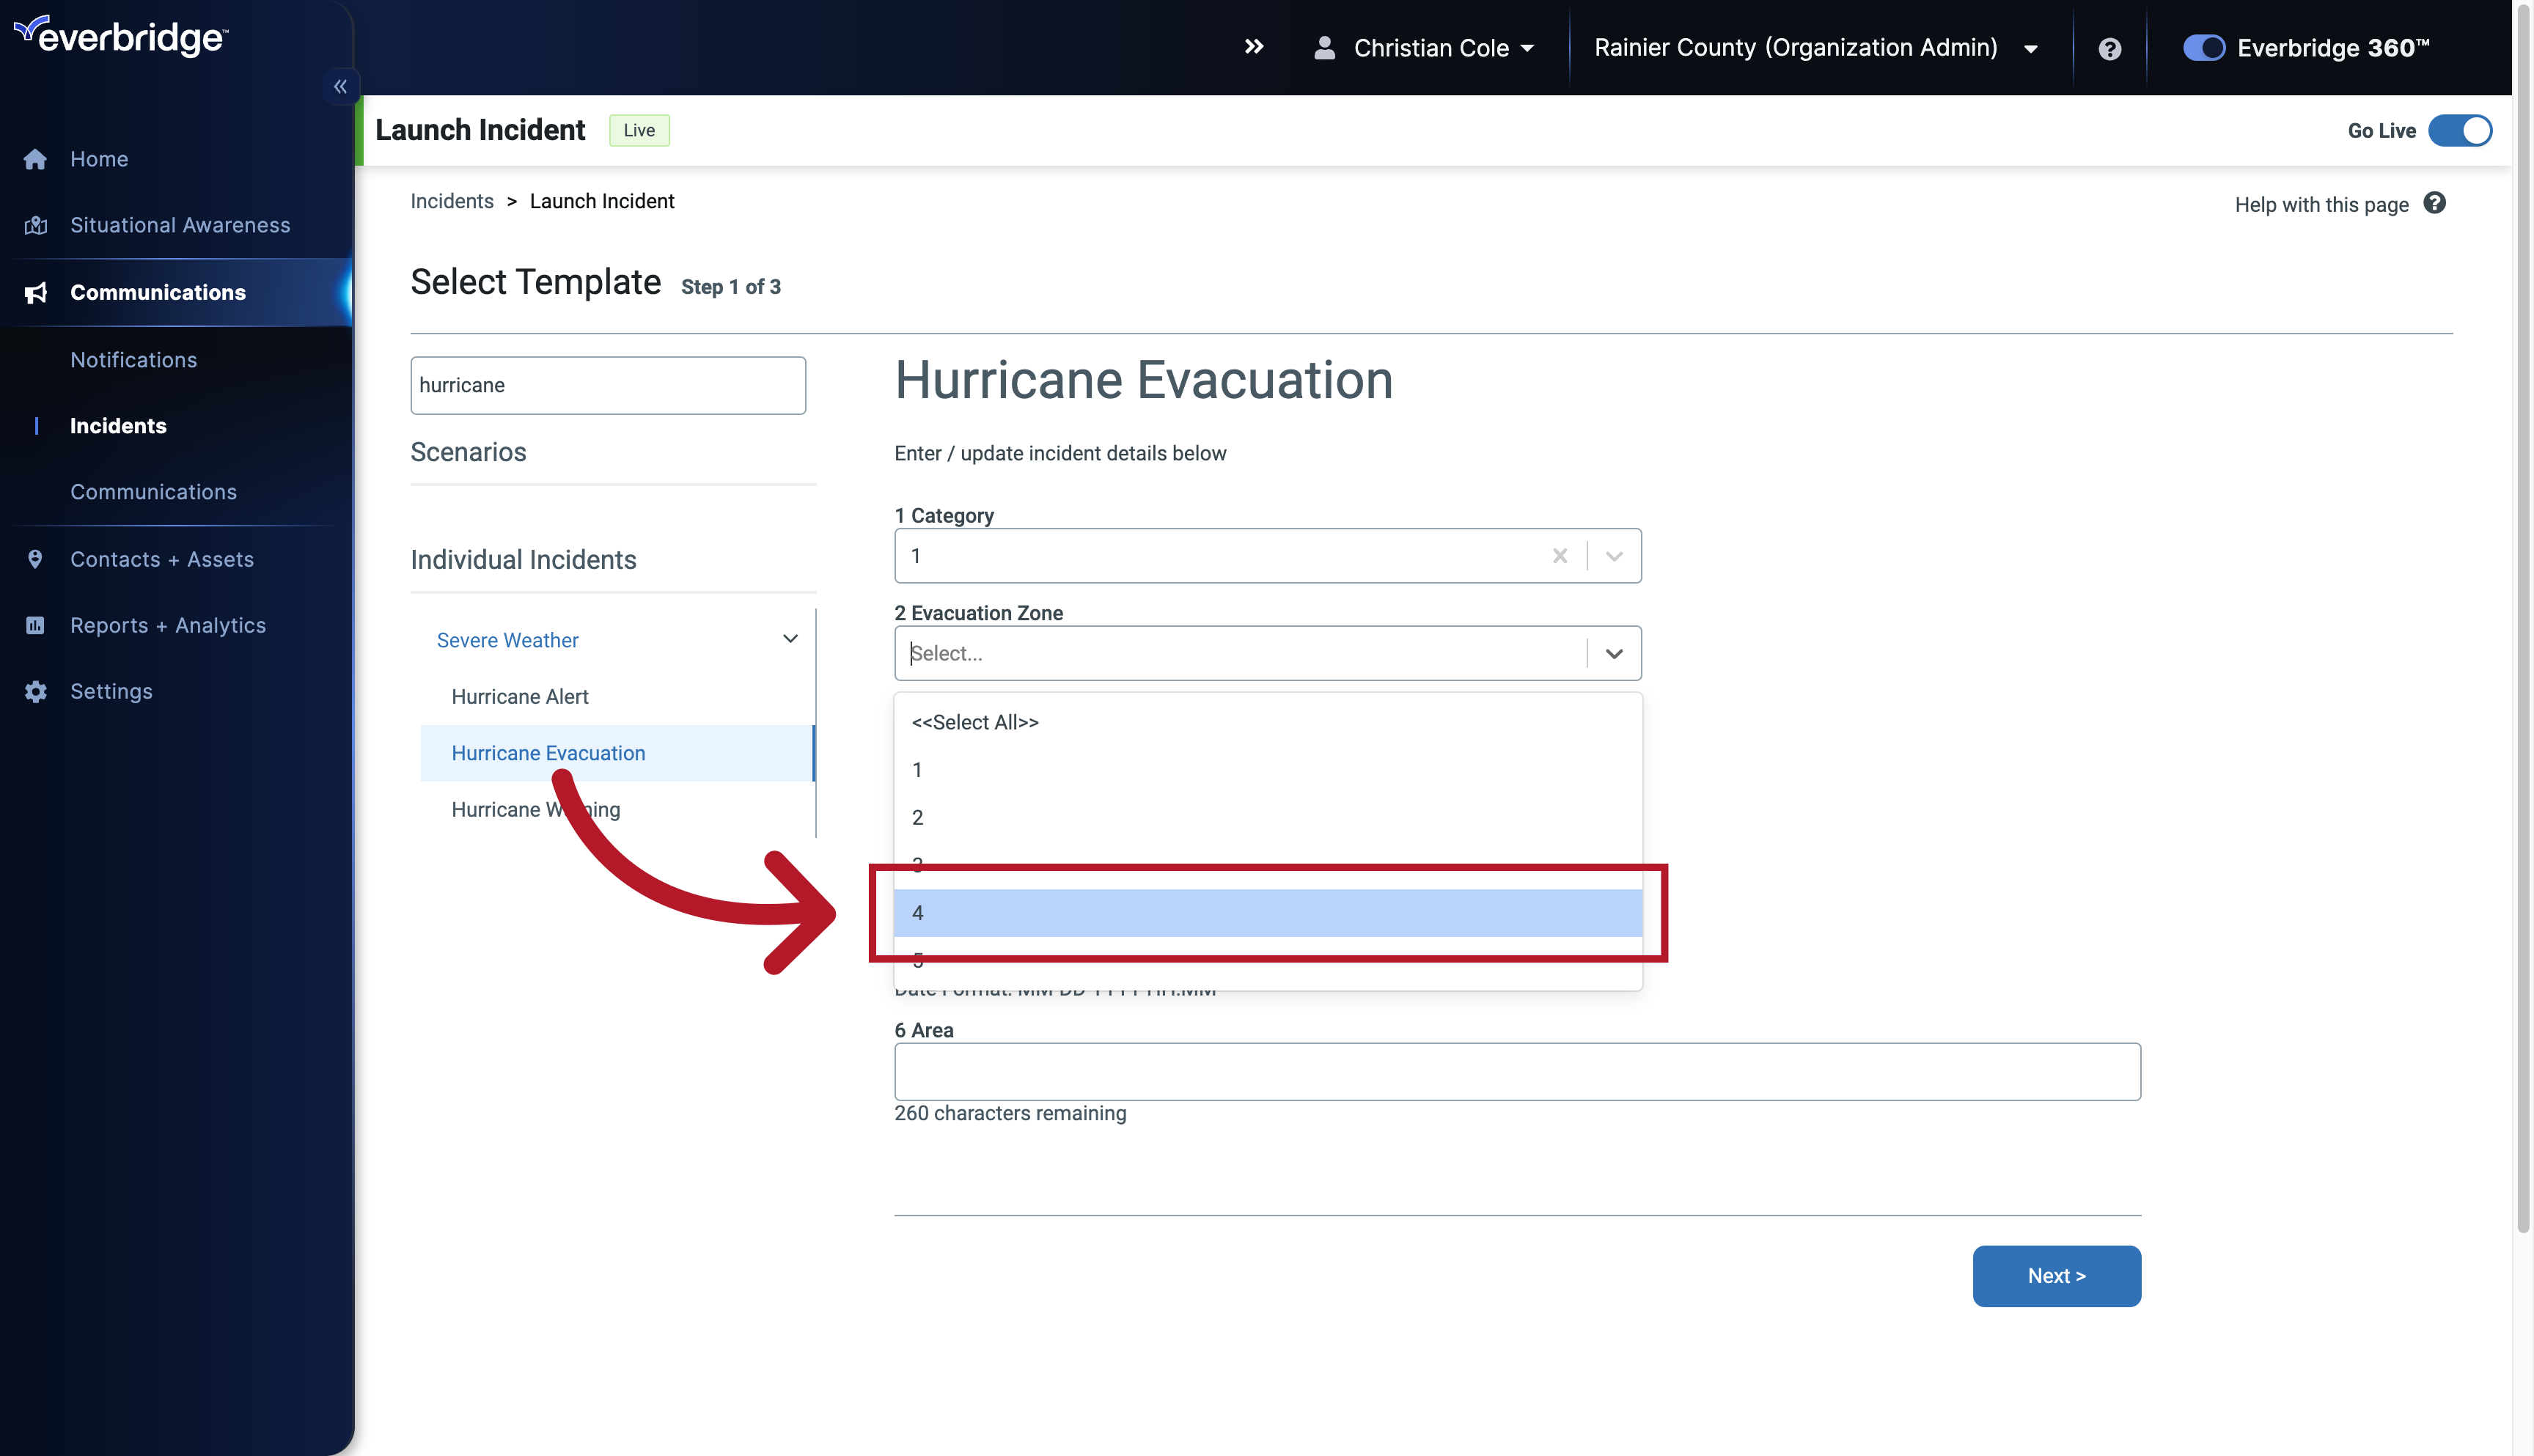
15. Fill Template
Select the number 4.
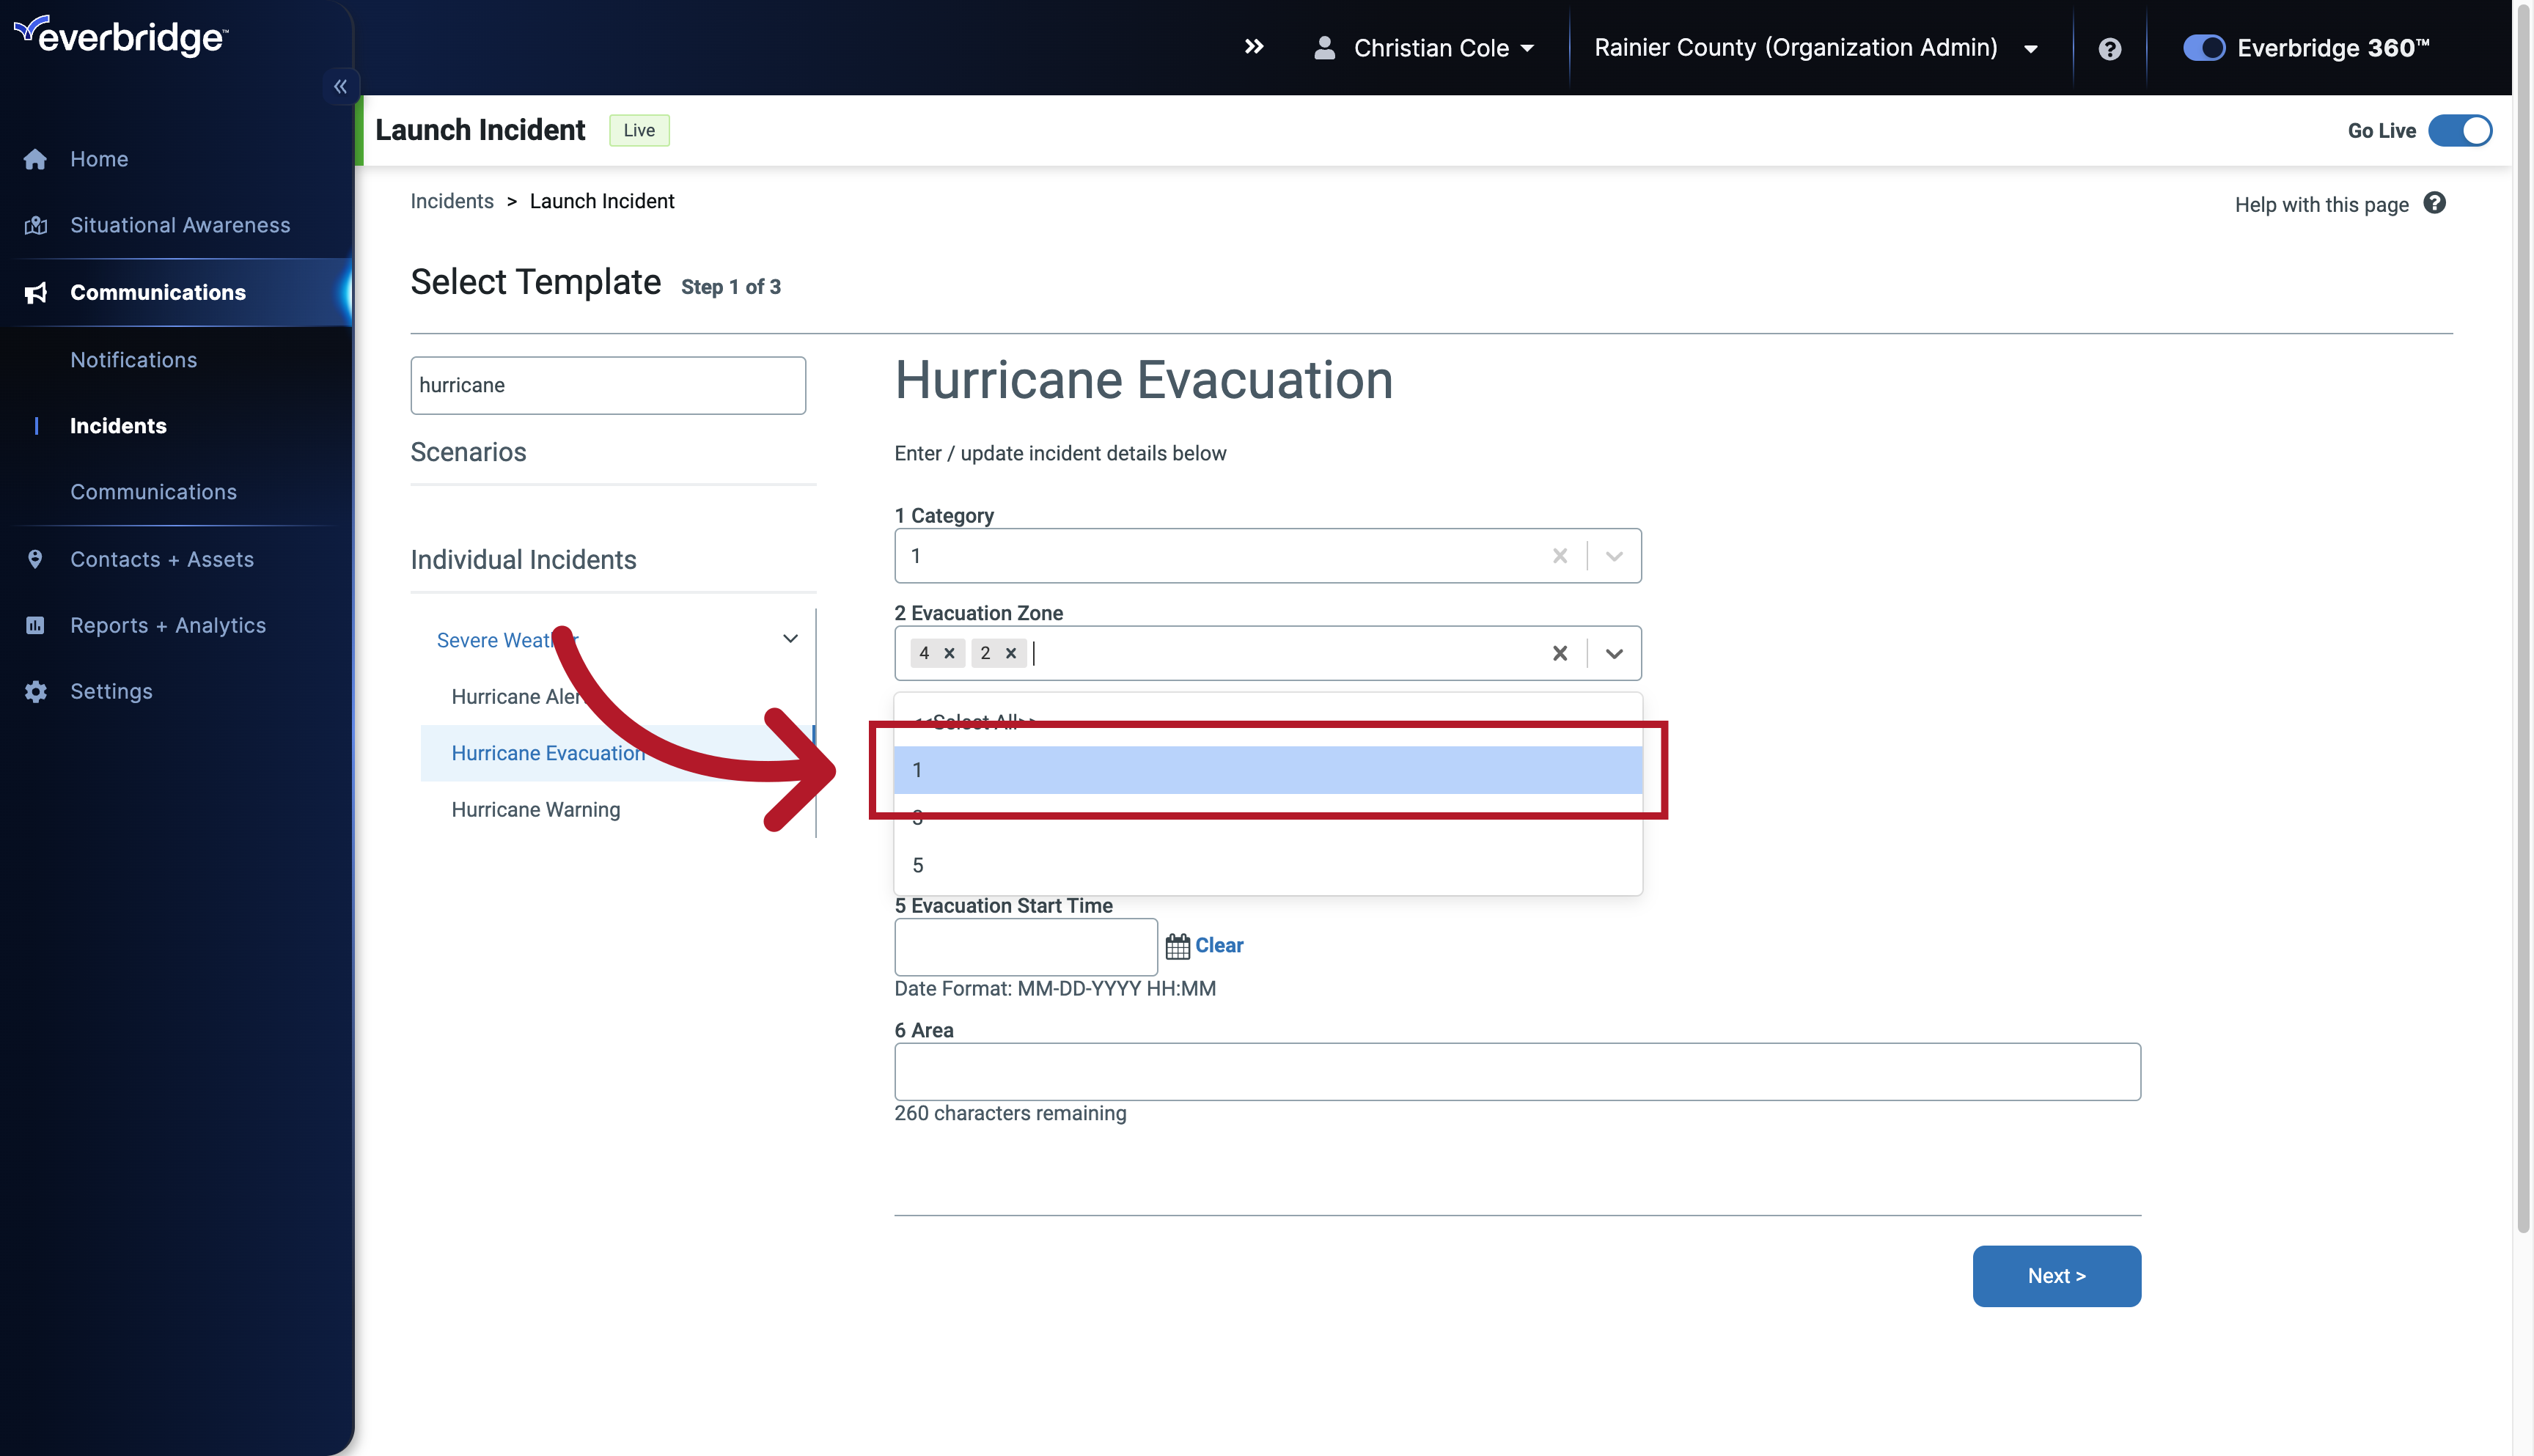
16. Fill Template
Select the number 2.
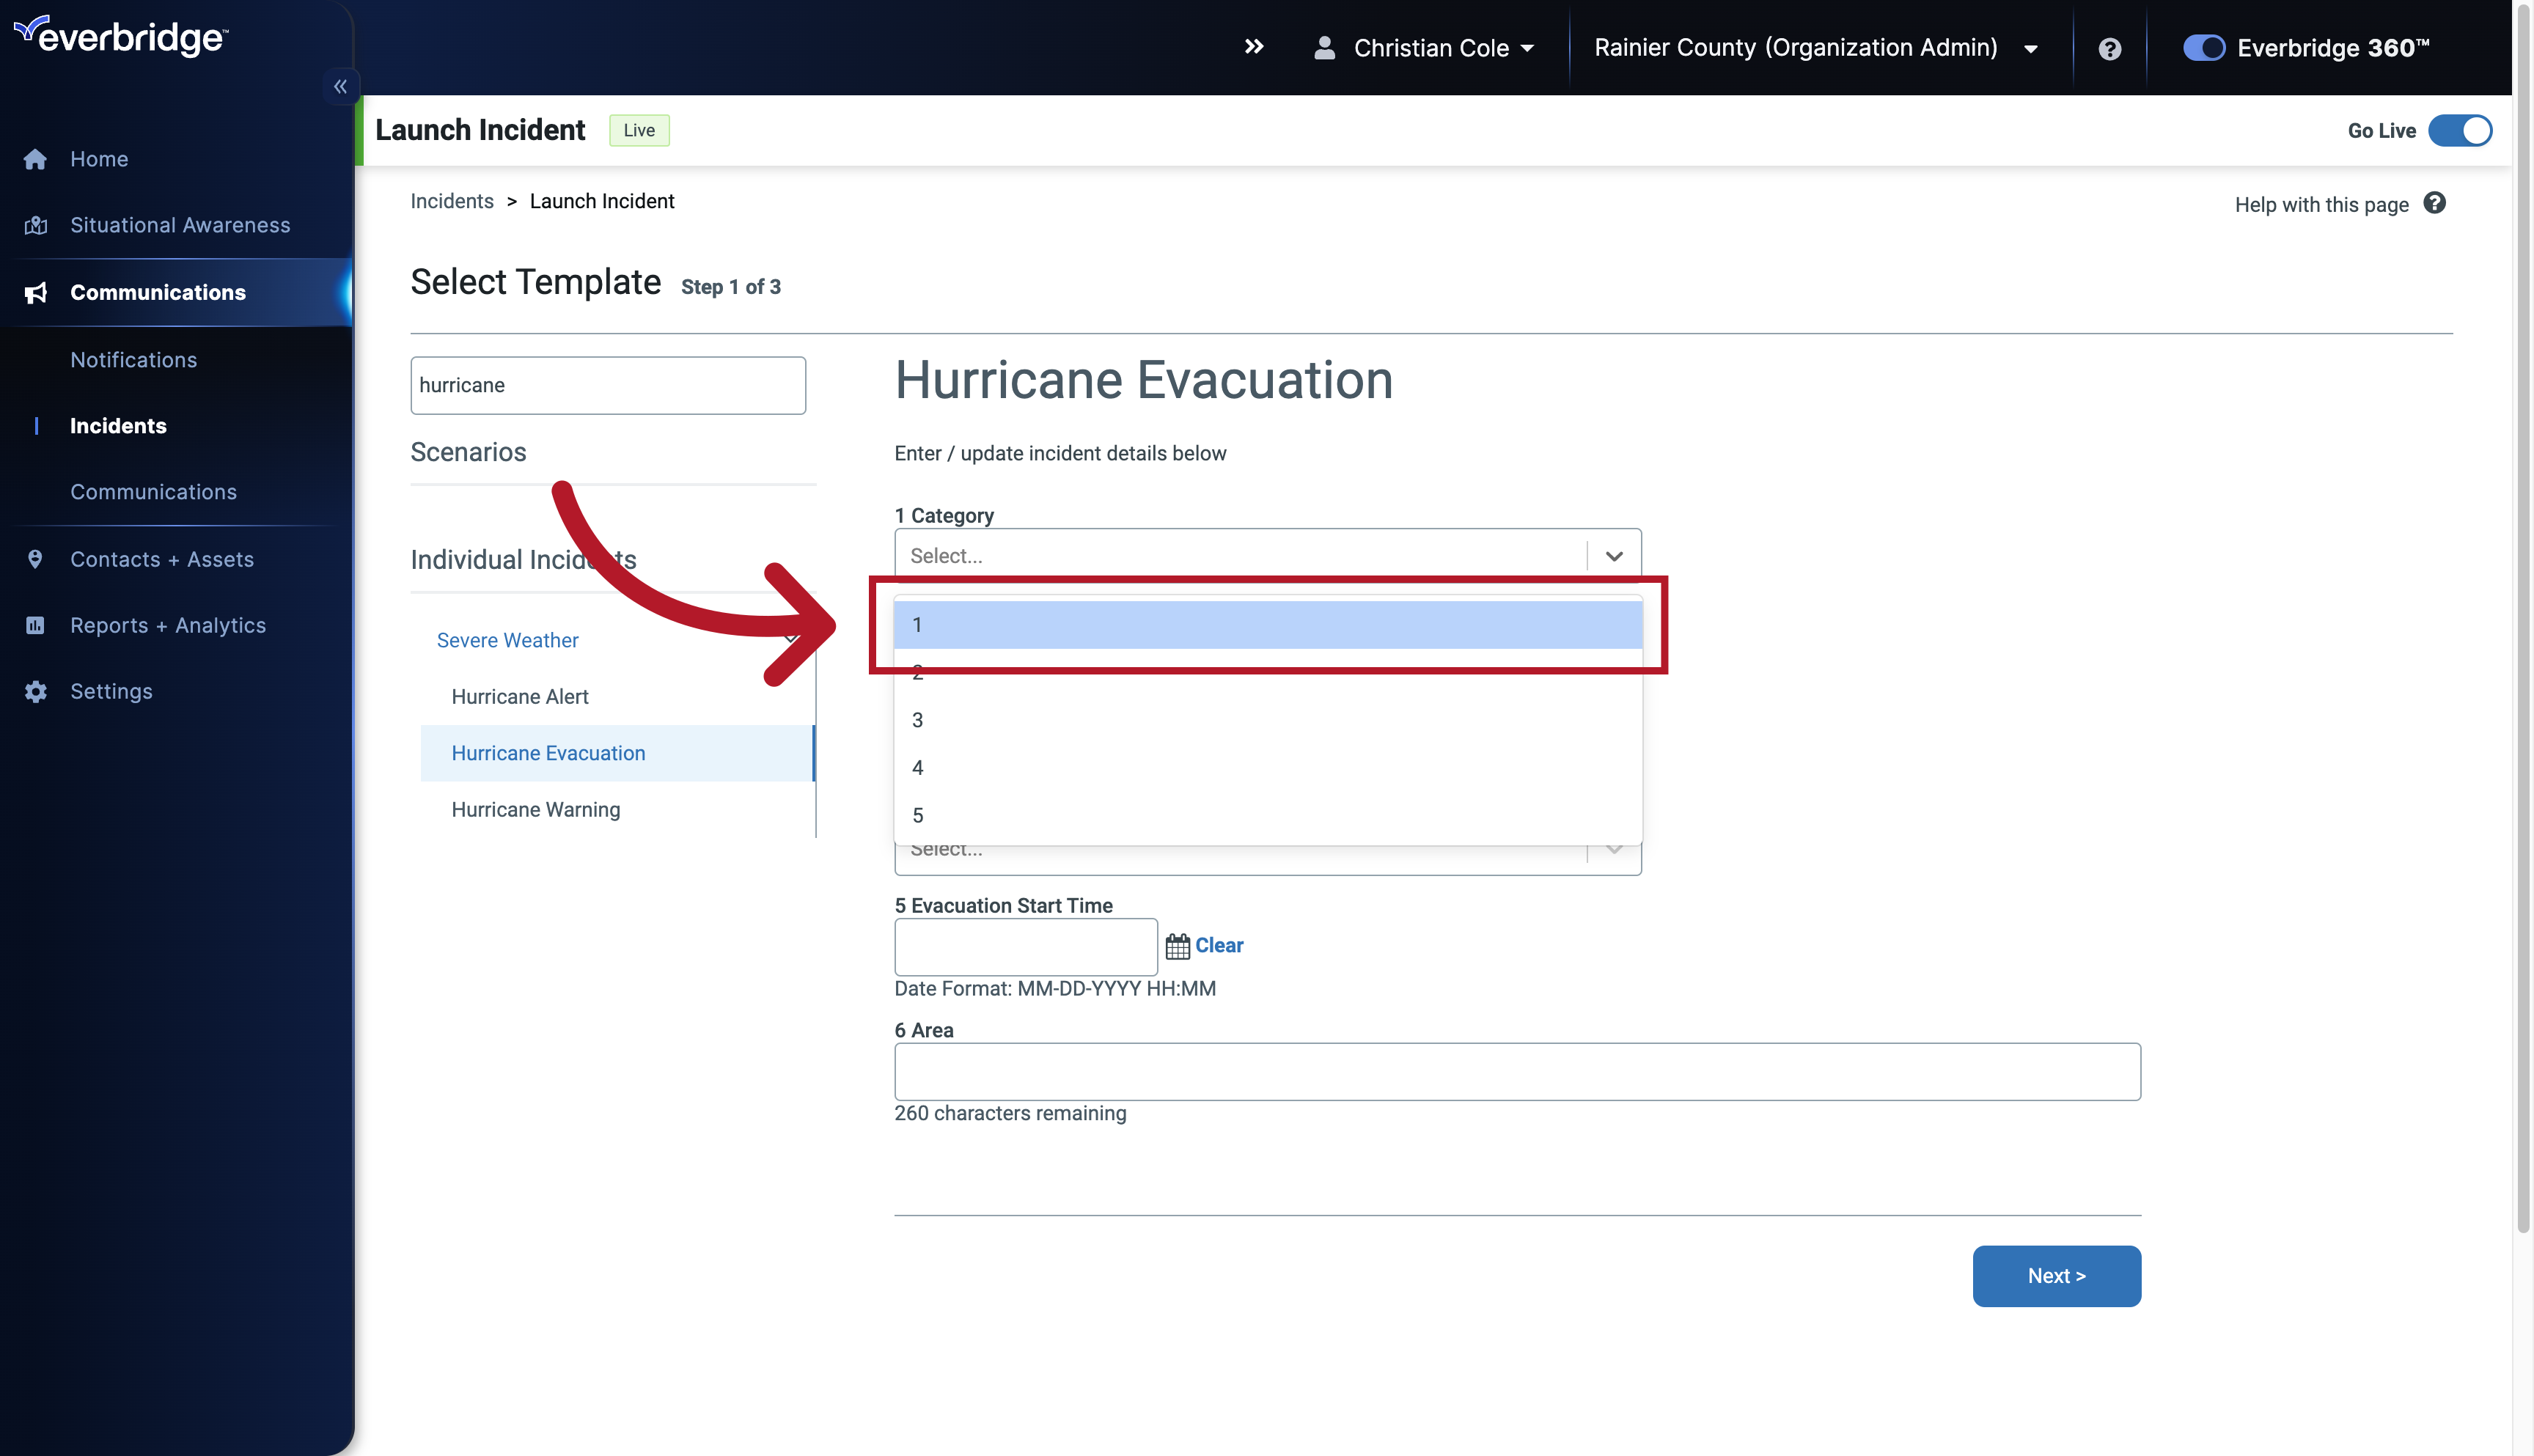
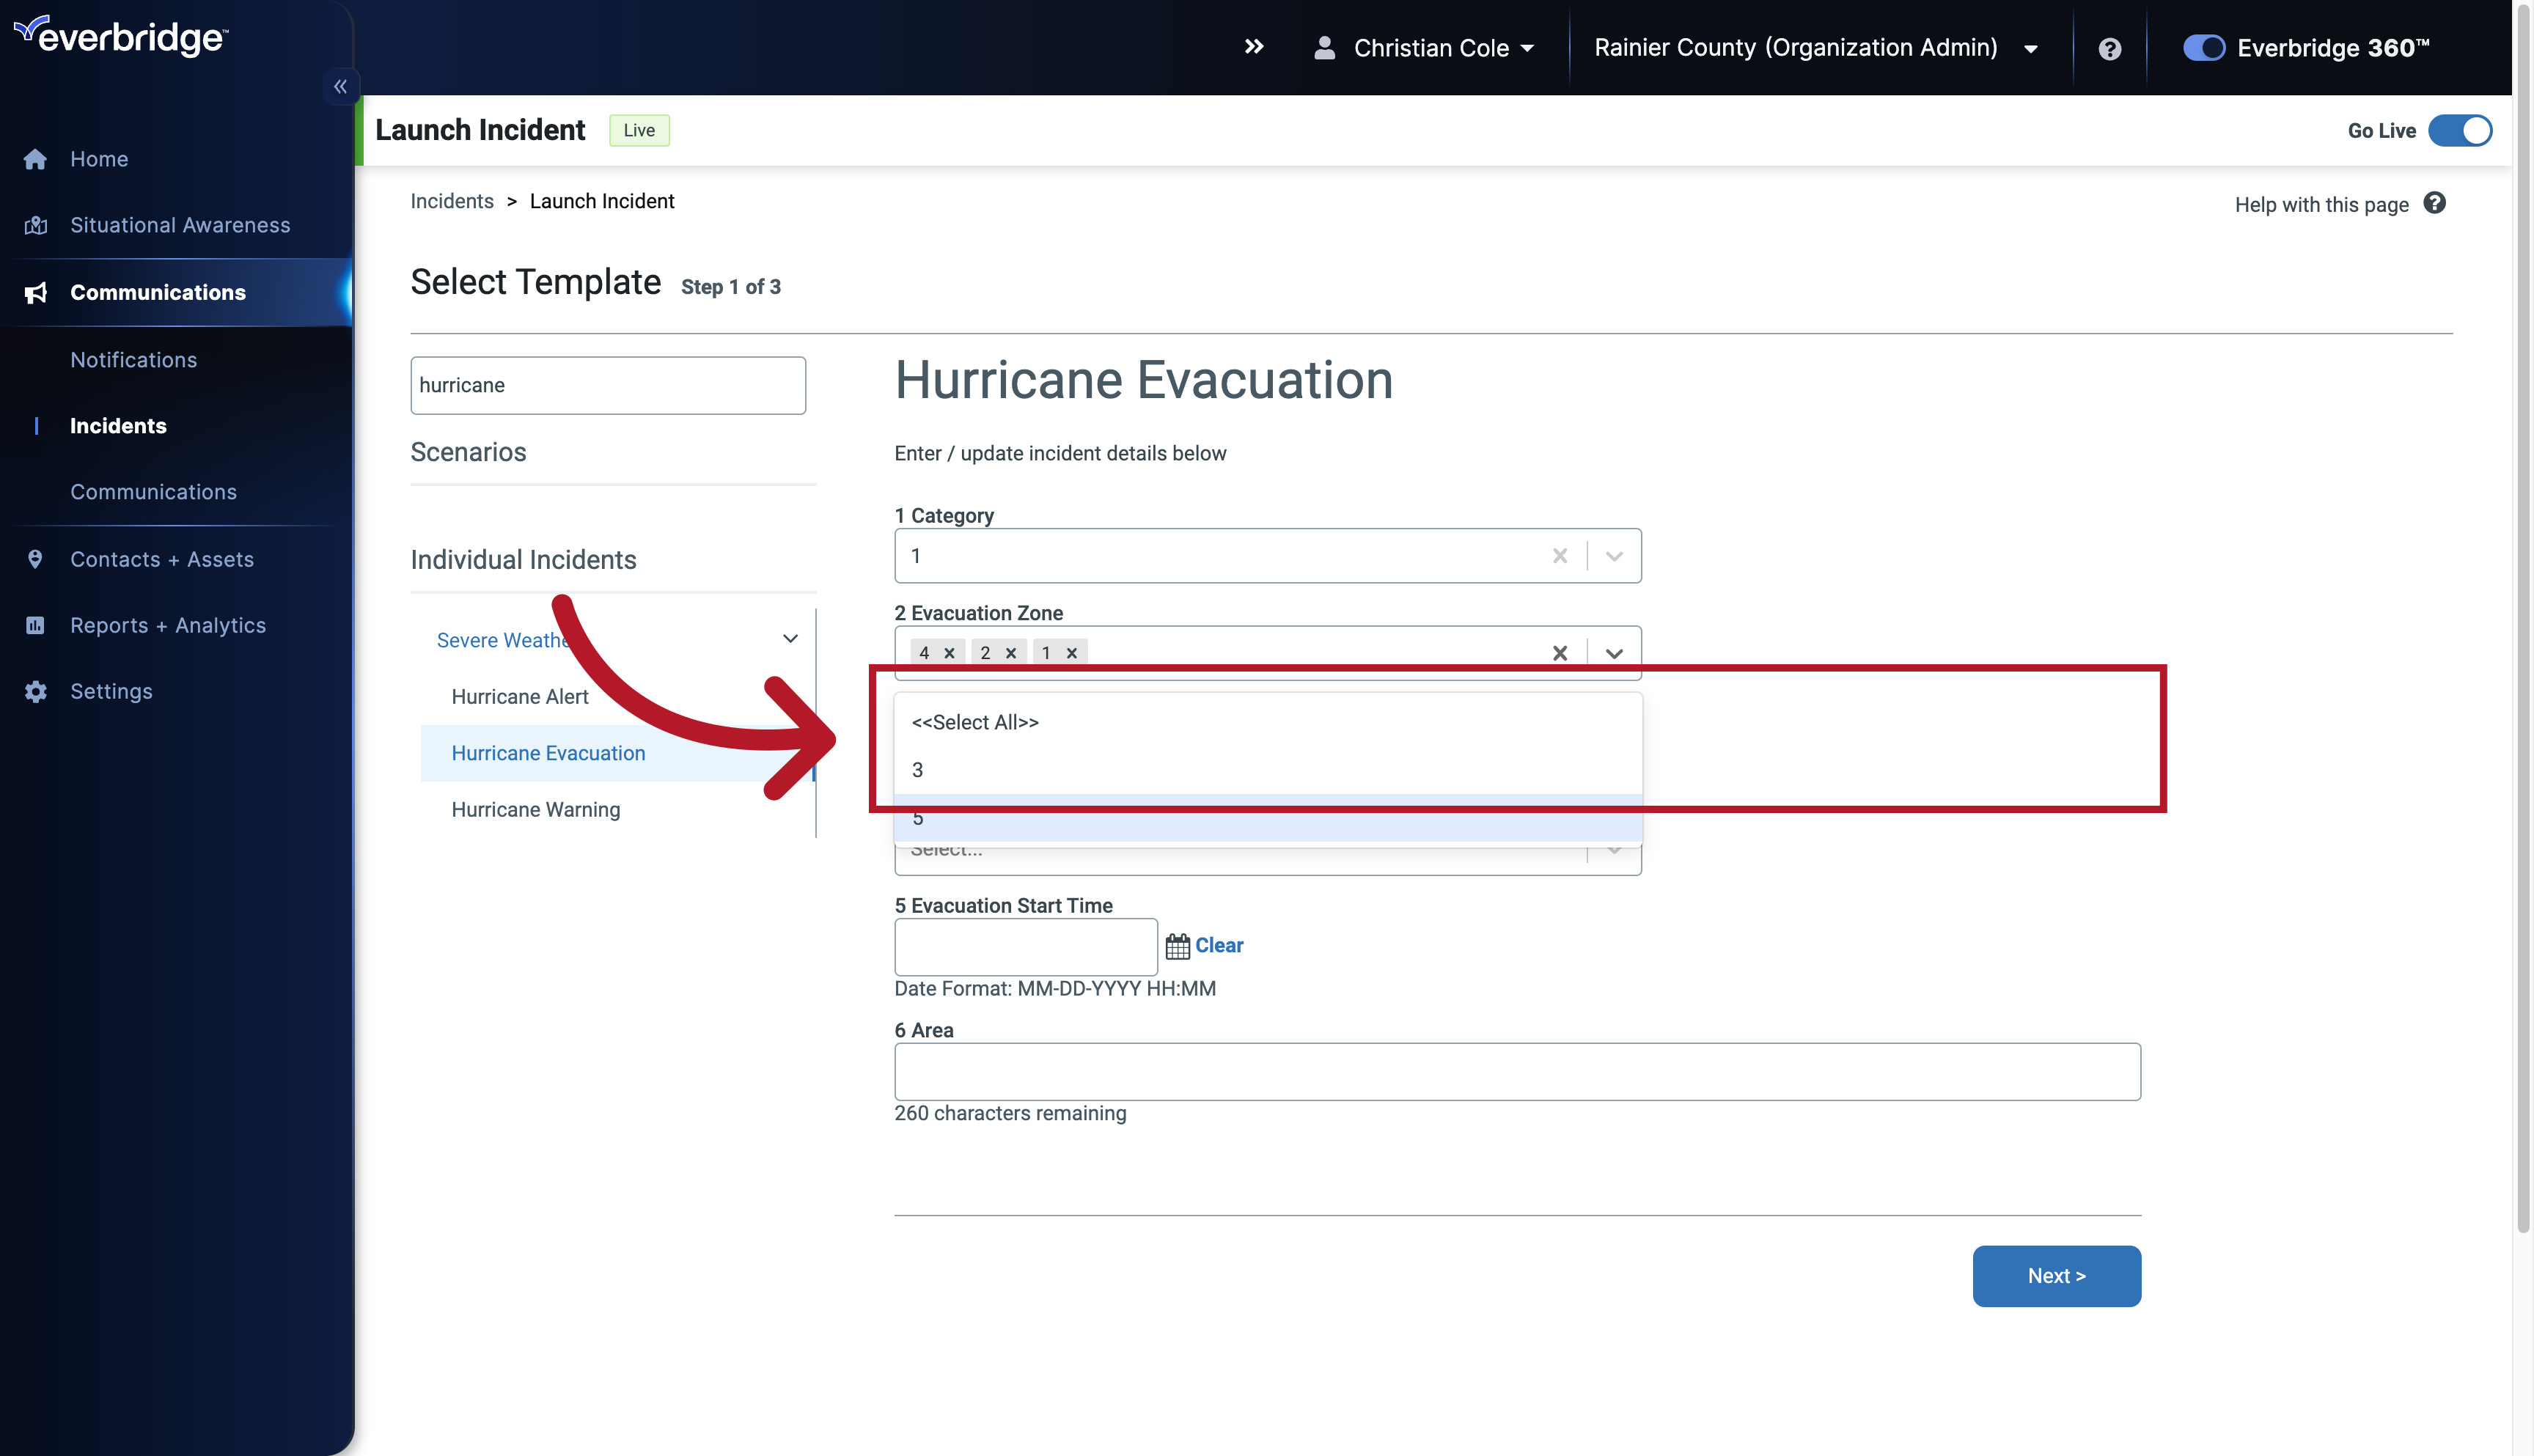
17. Fill Template
Select the number 1.
18. Fill Template
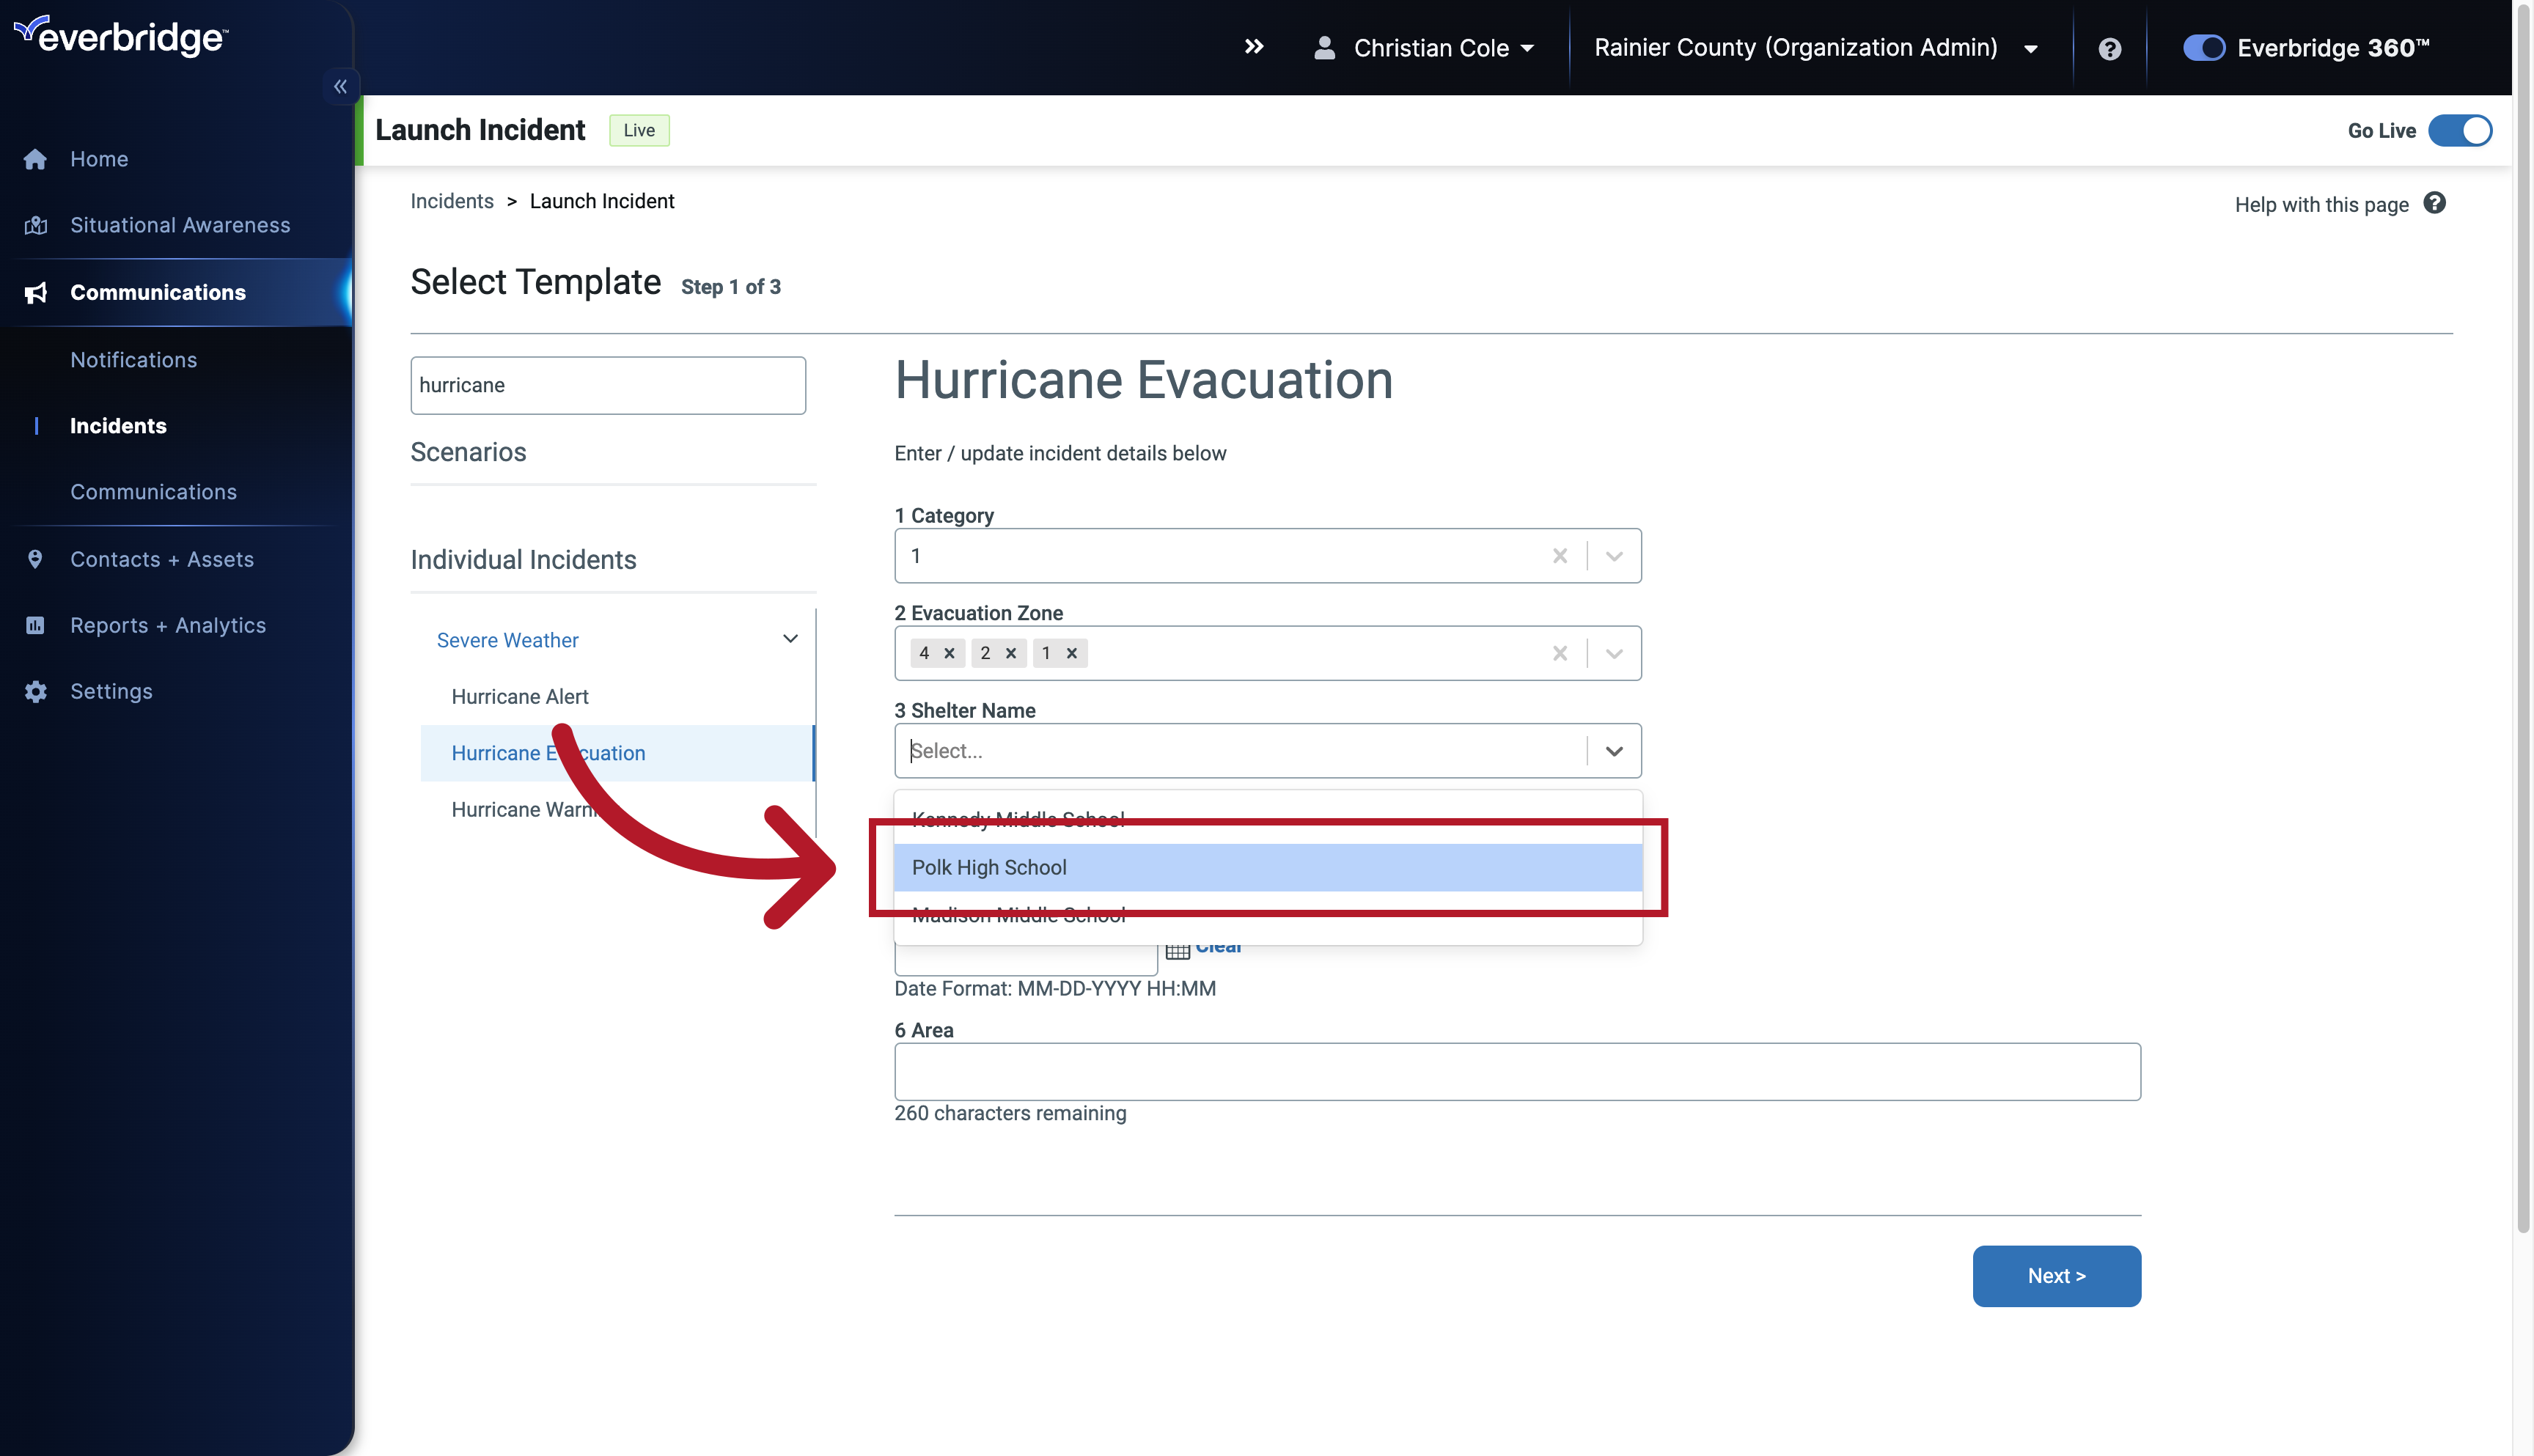
Choose the appropriate shelter.
19. Fill Template
Click the selected option
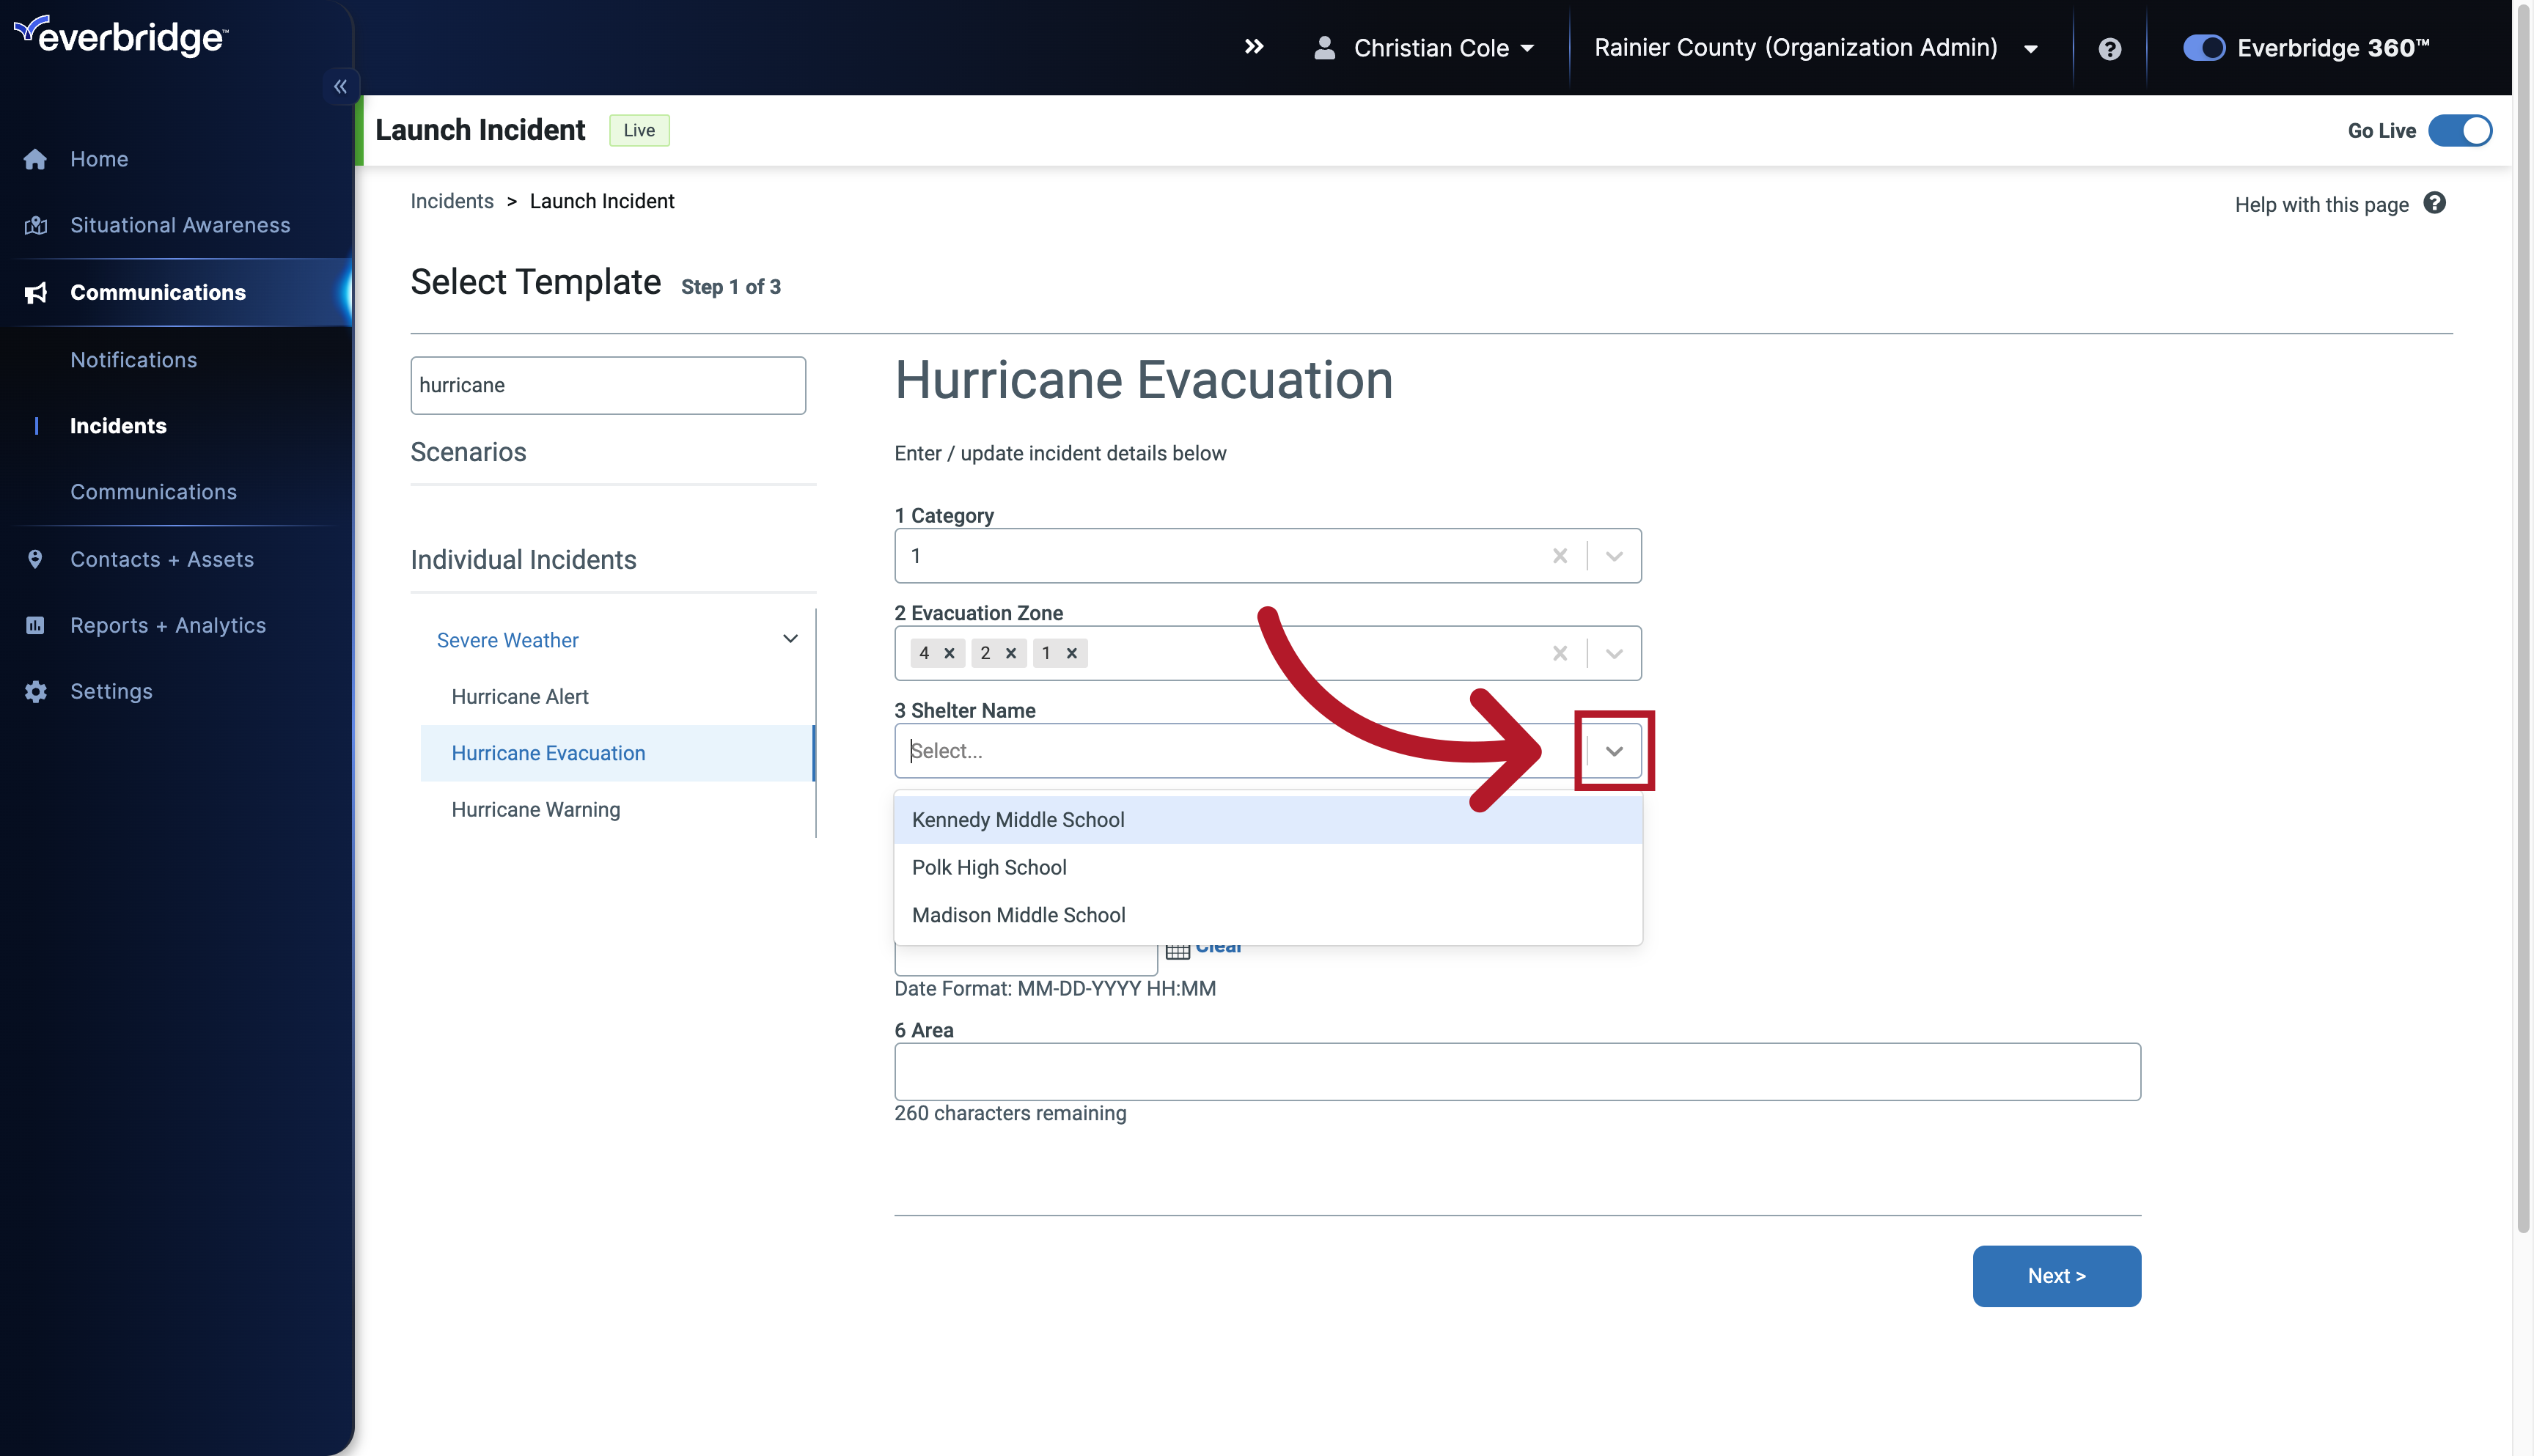
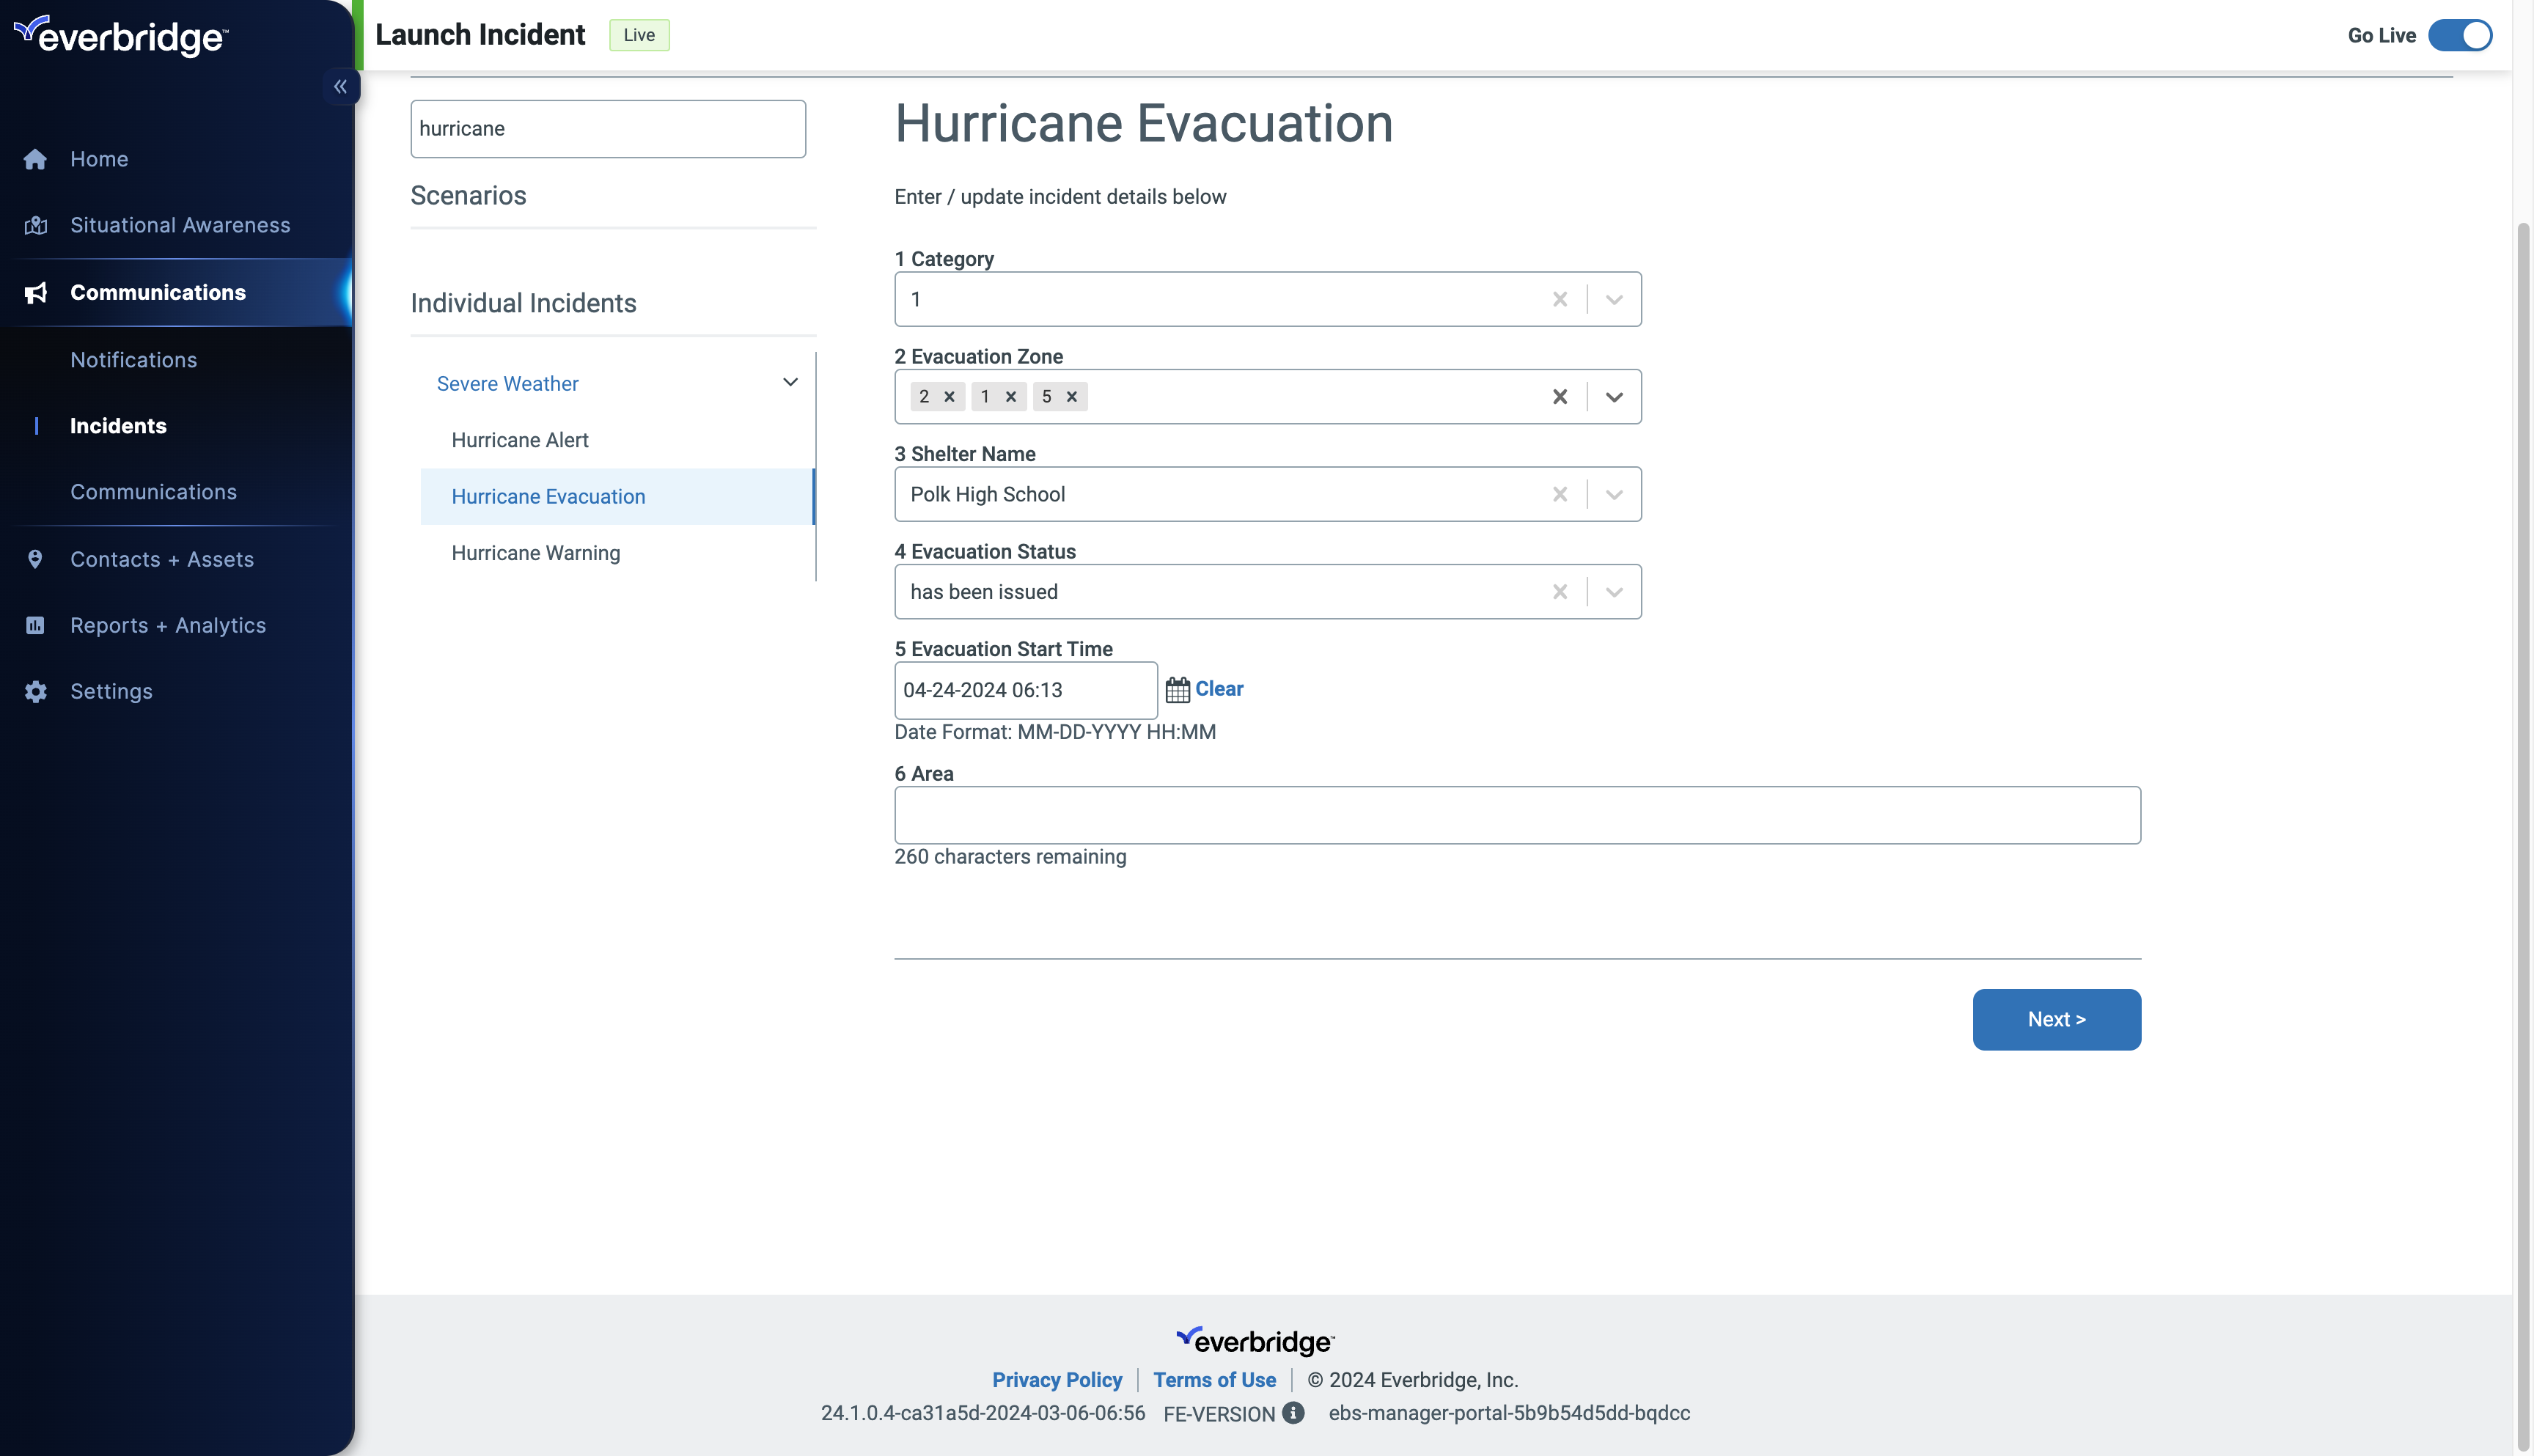
20. Fill Template
Select "Polk High School".
21. Fill Template
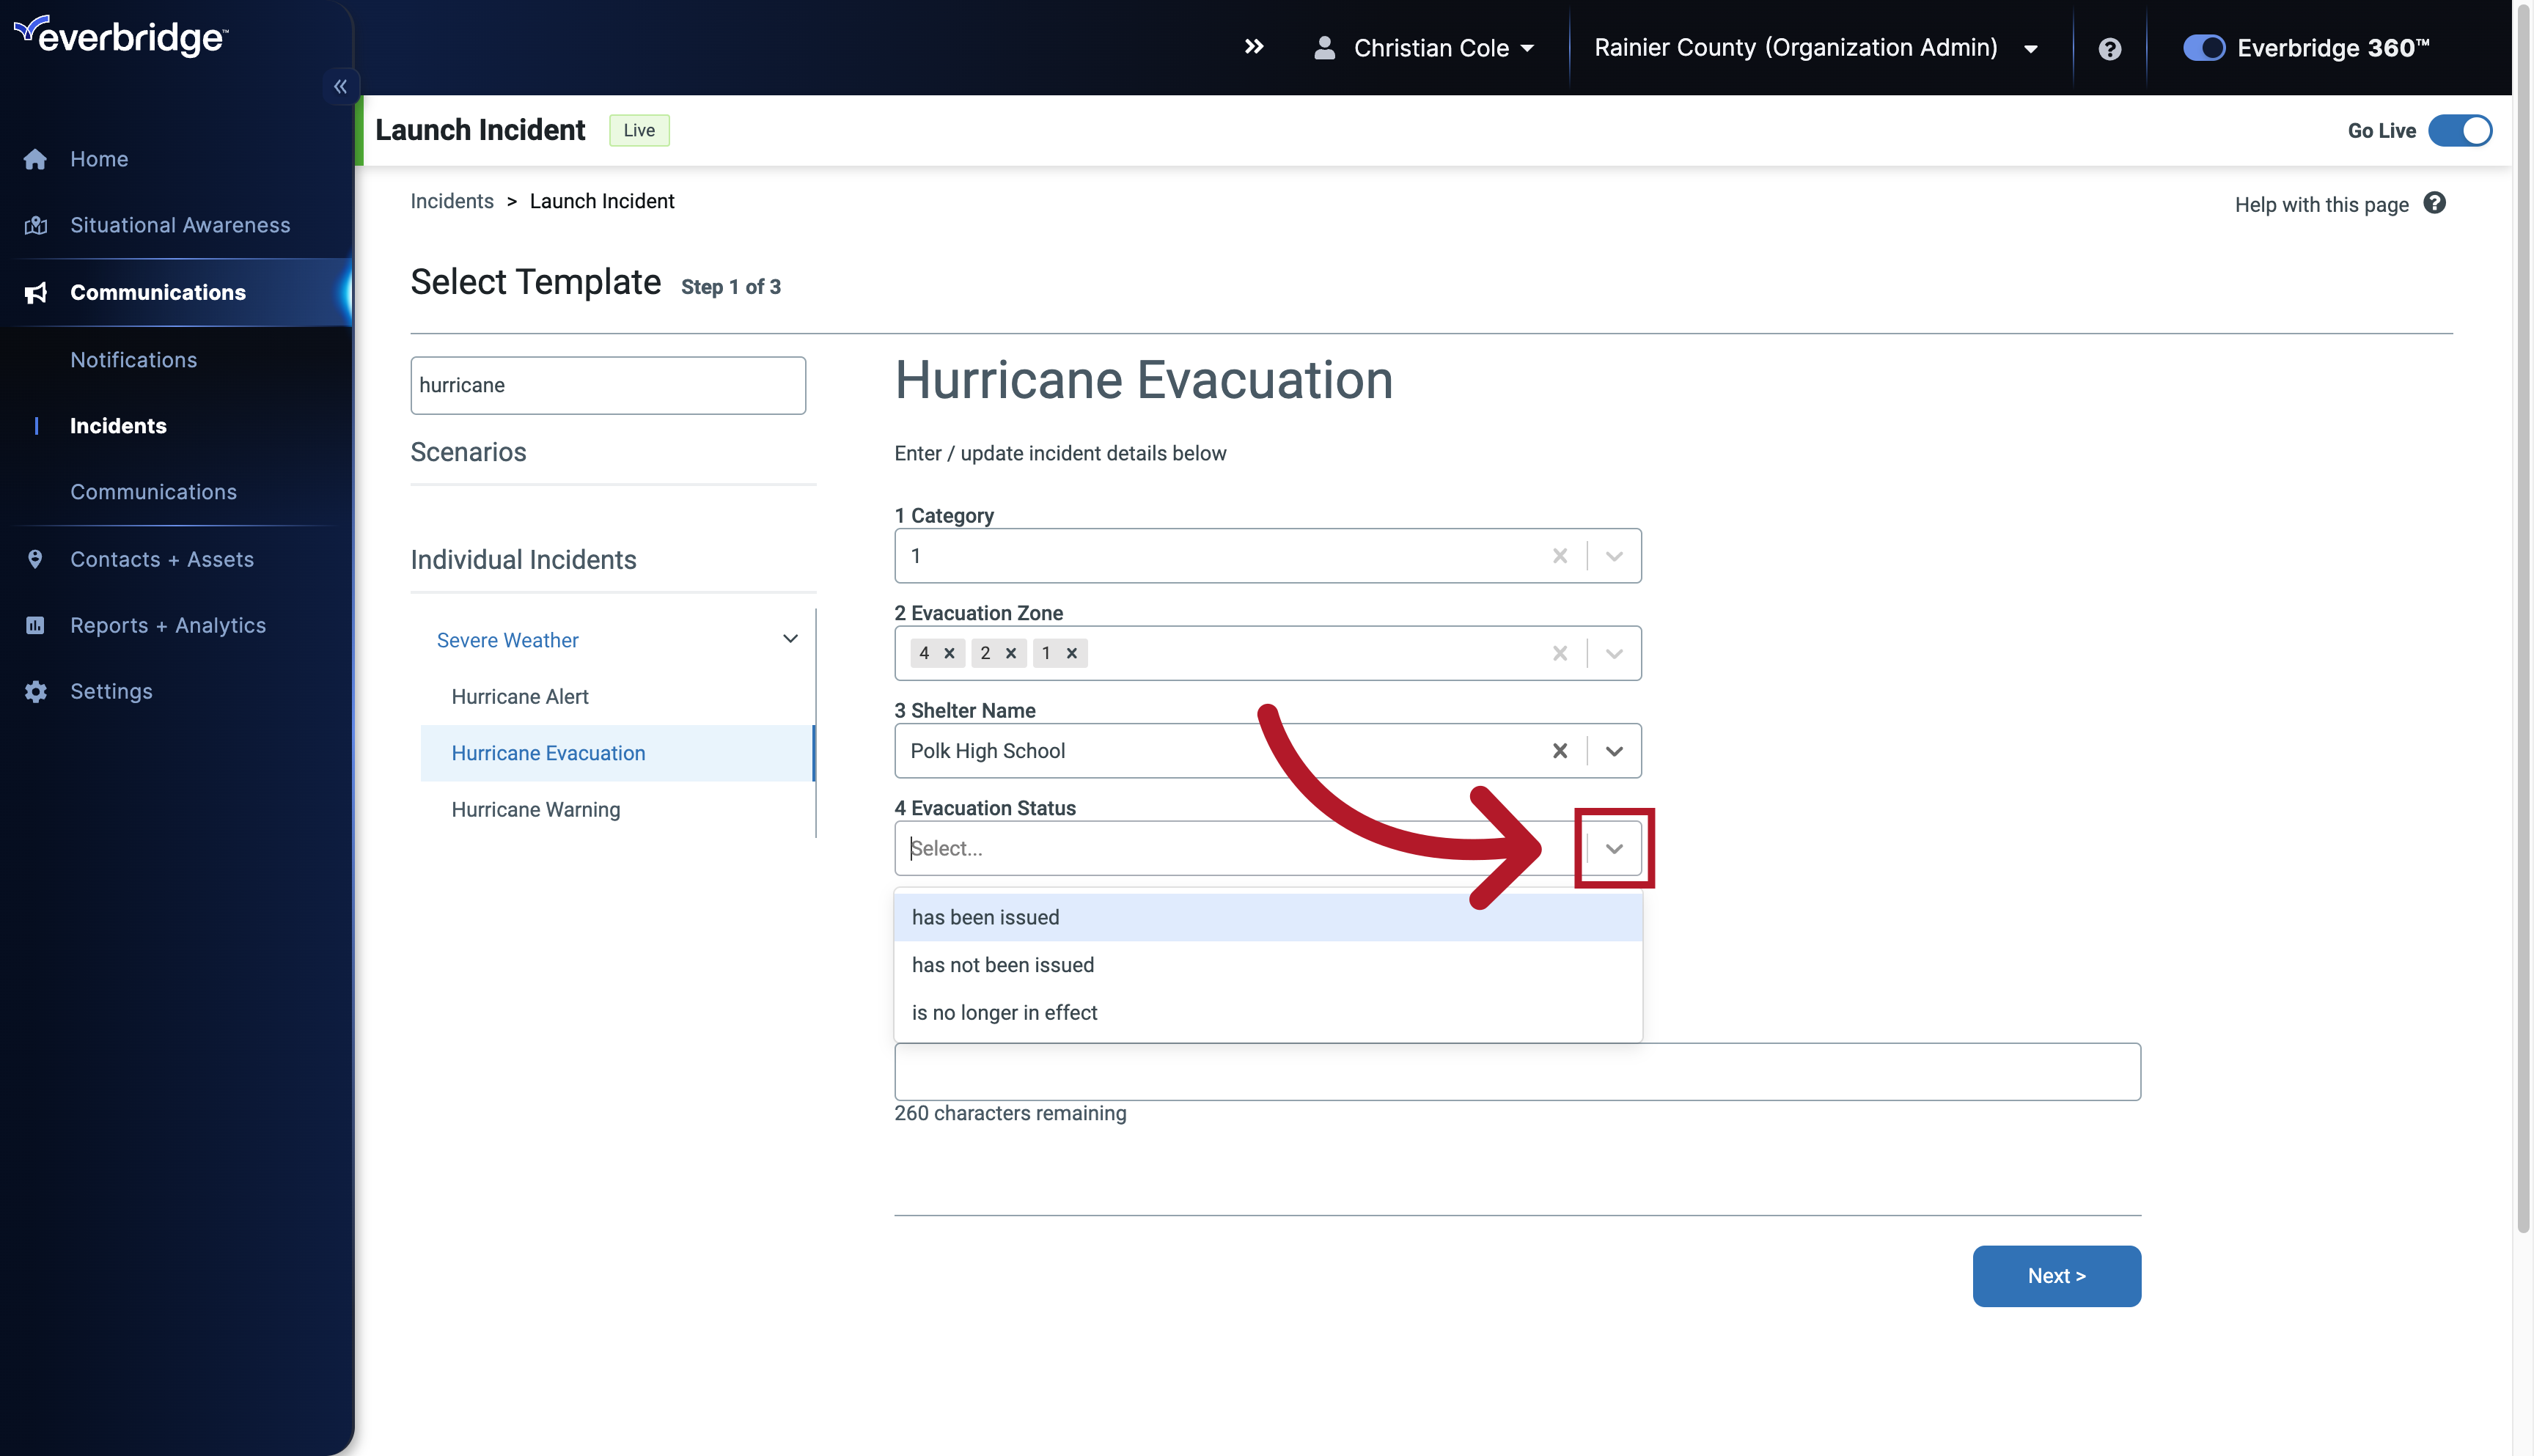
Select this field
22. Fill Template
Confirm that the evacuation order has been issued.

23. Fill Template
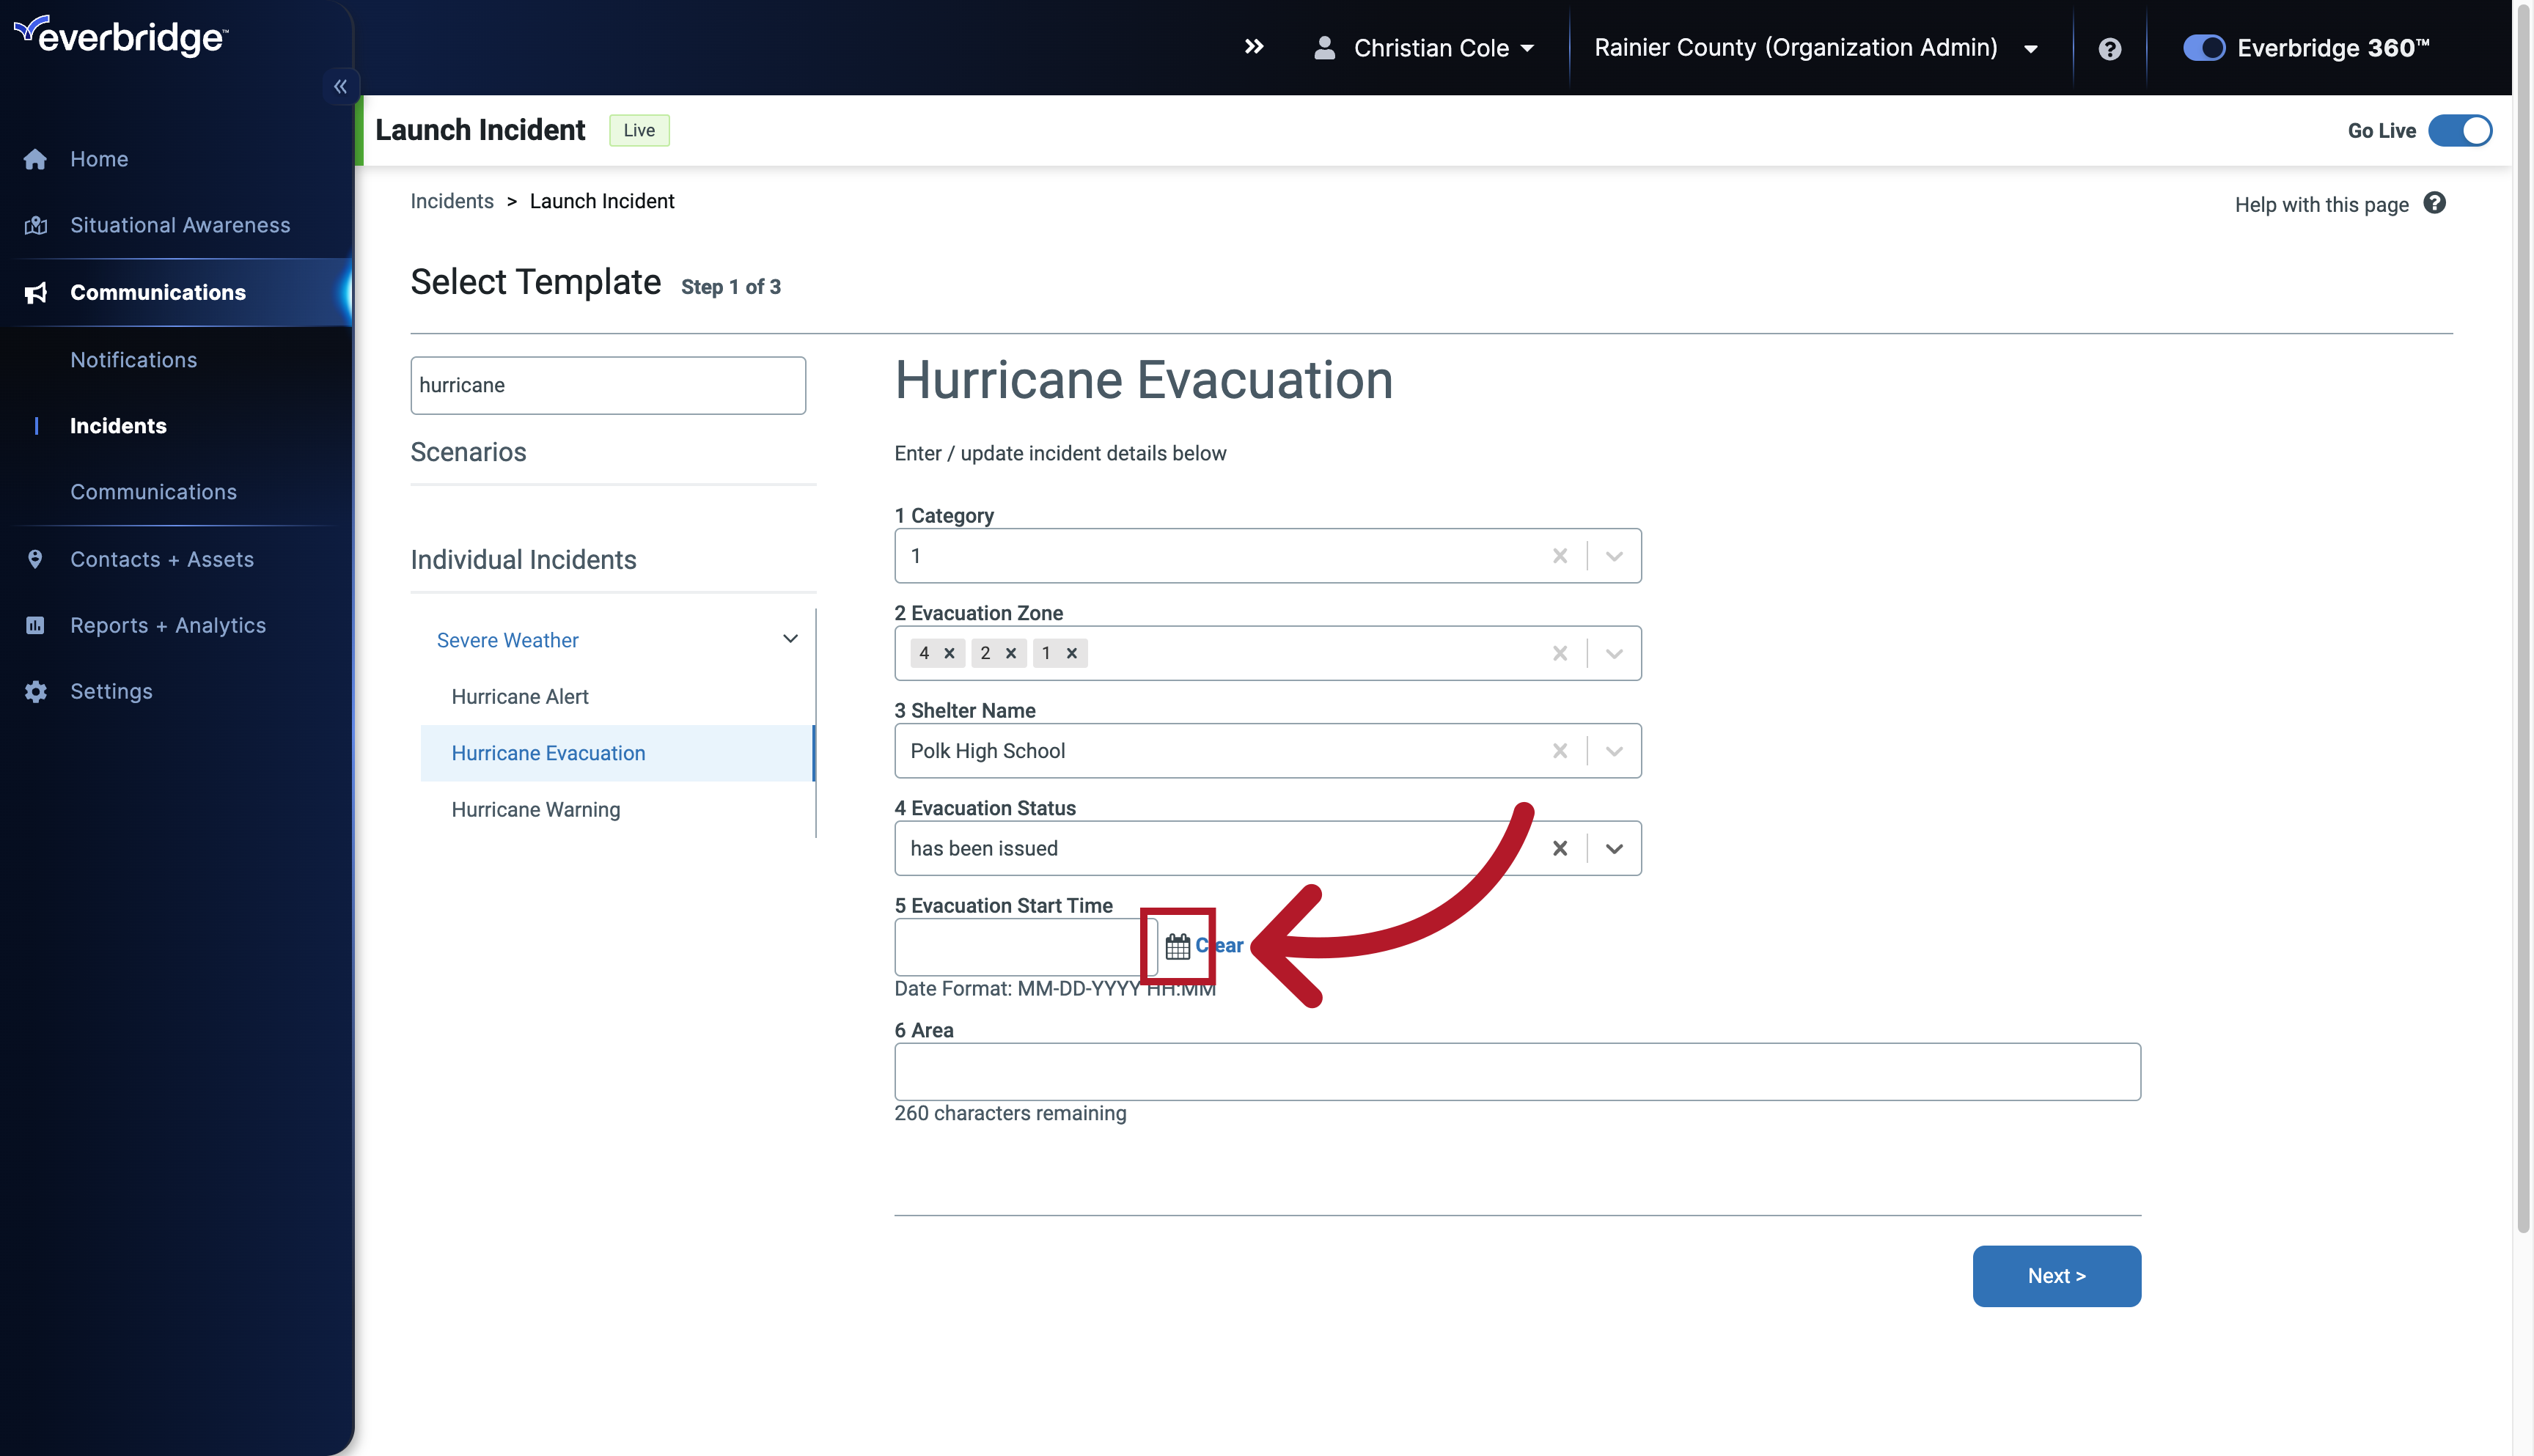
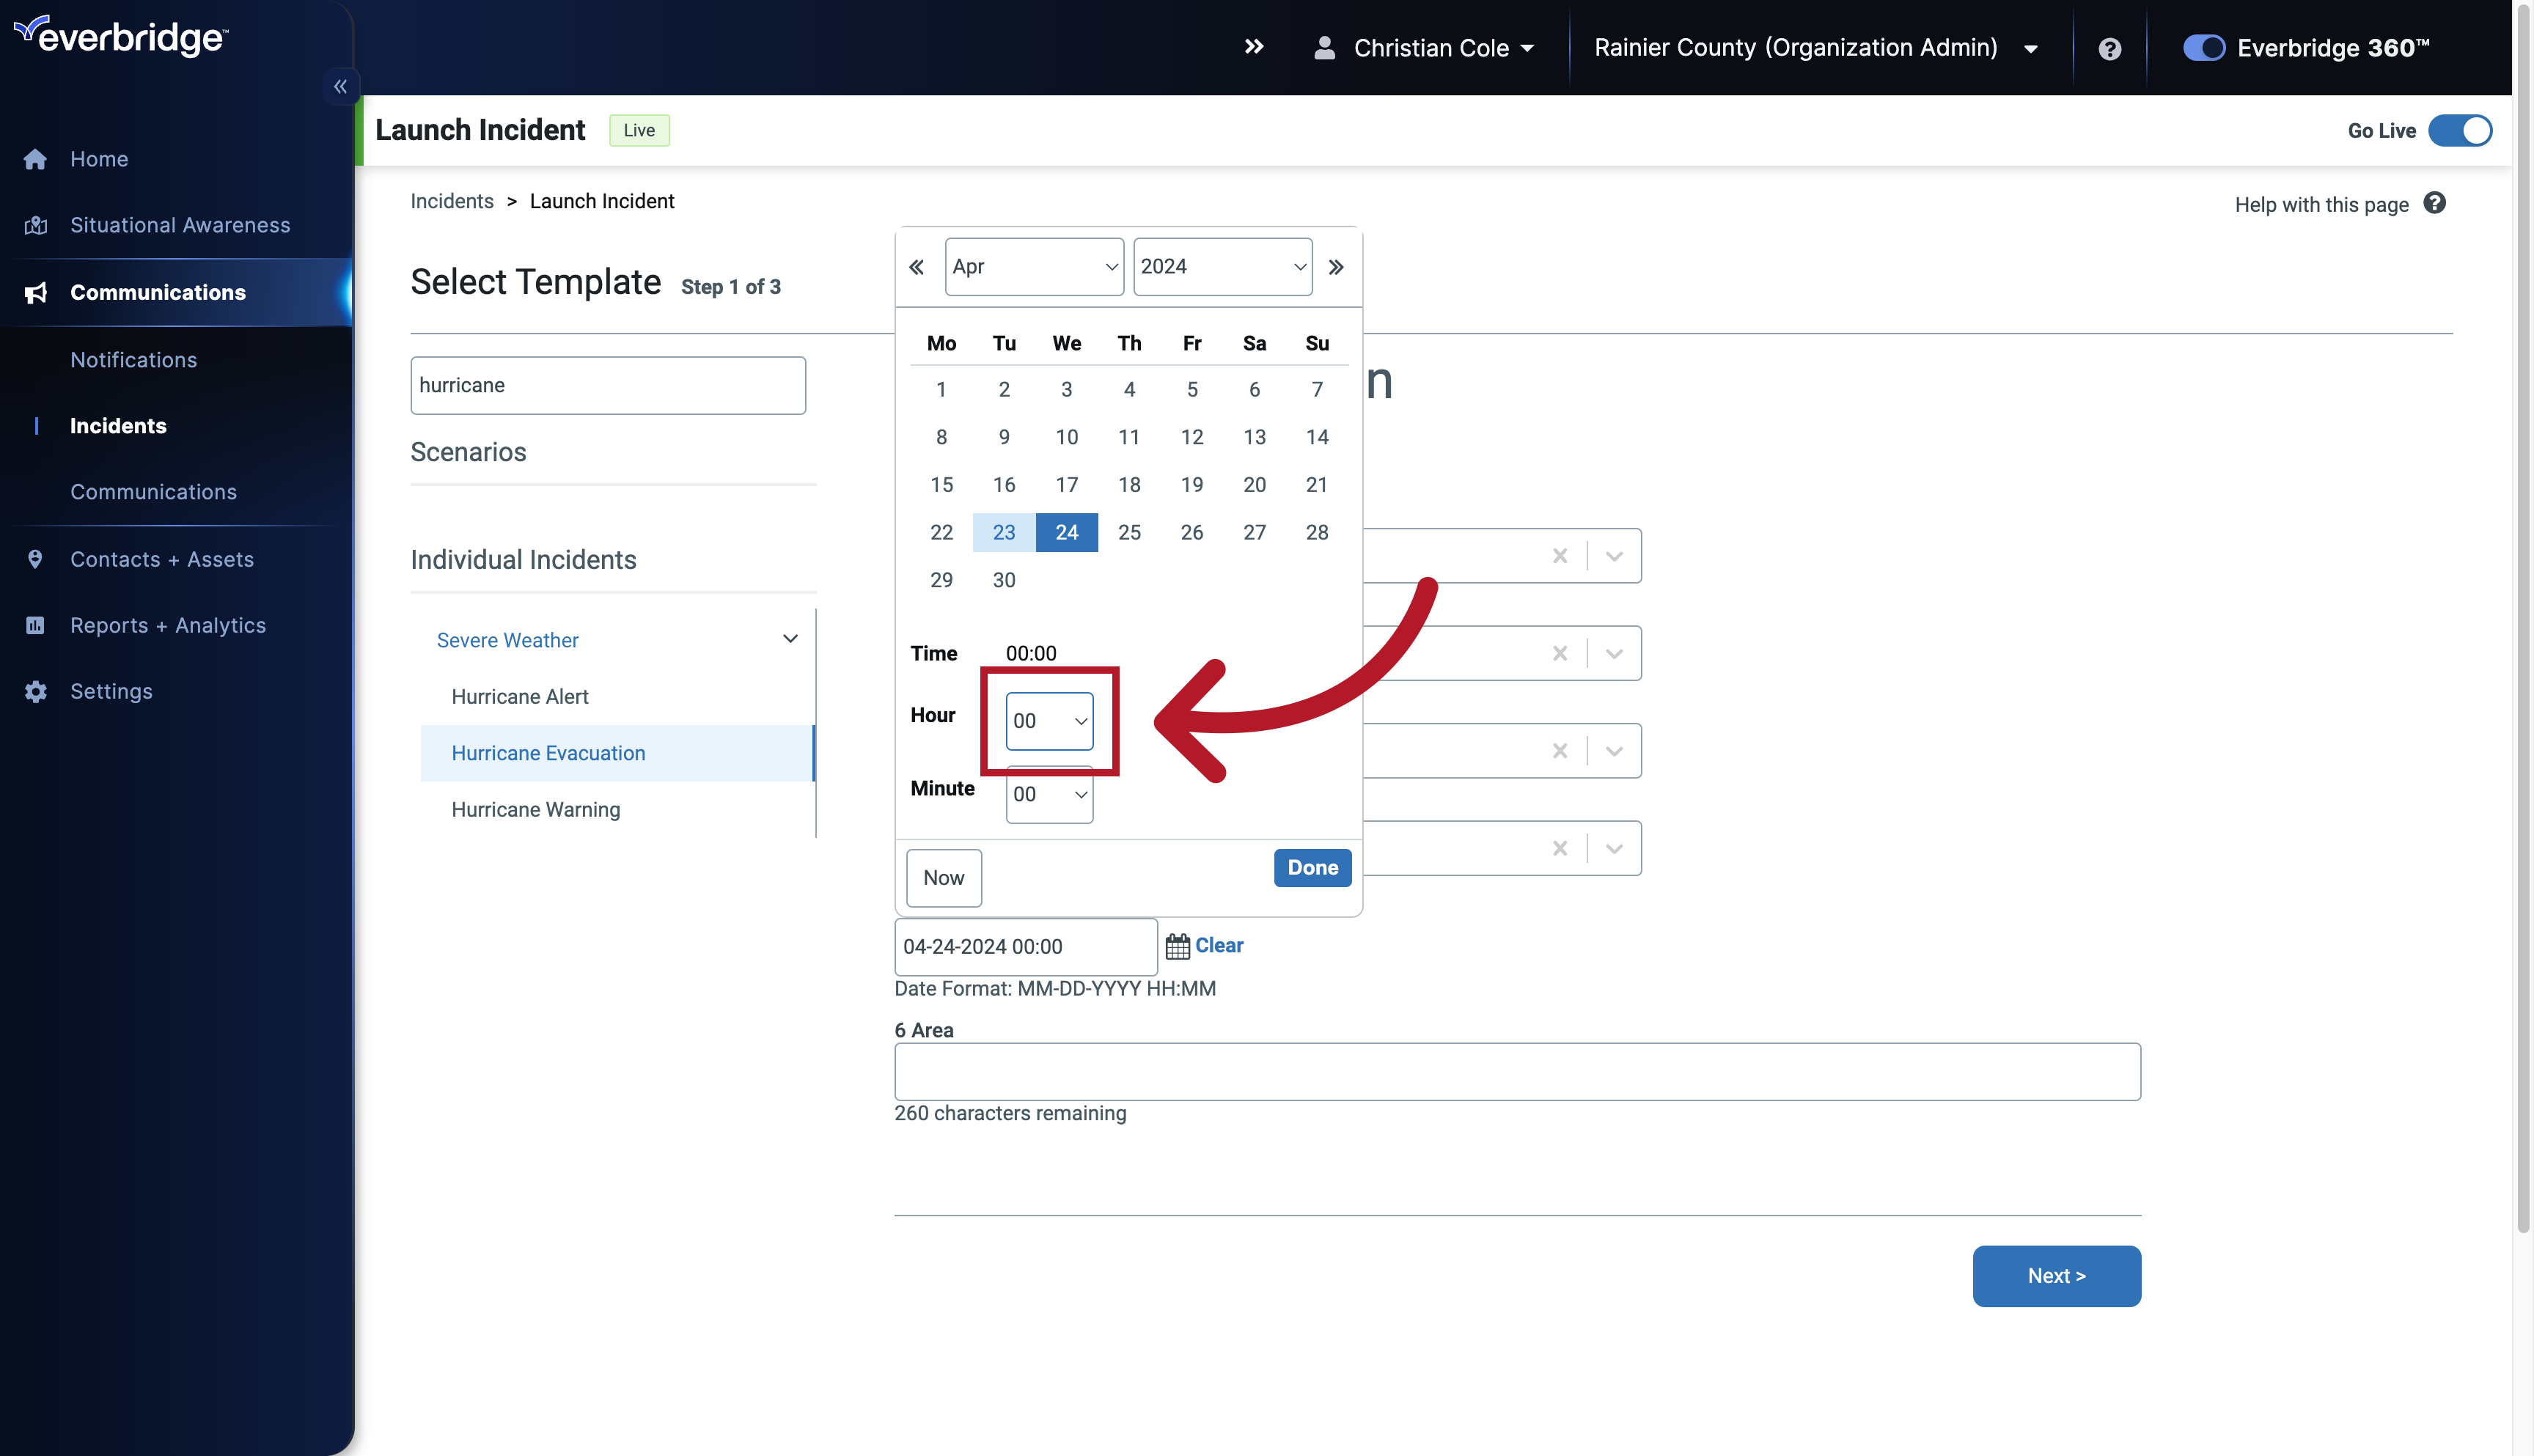
Navigate to this section
24. Fill Template
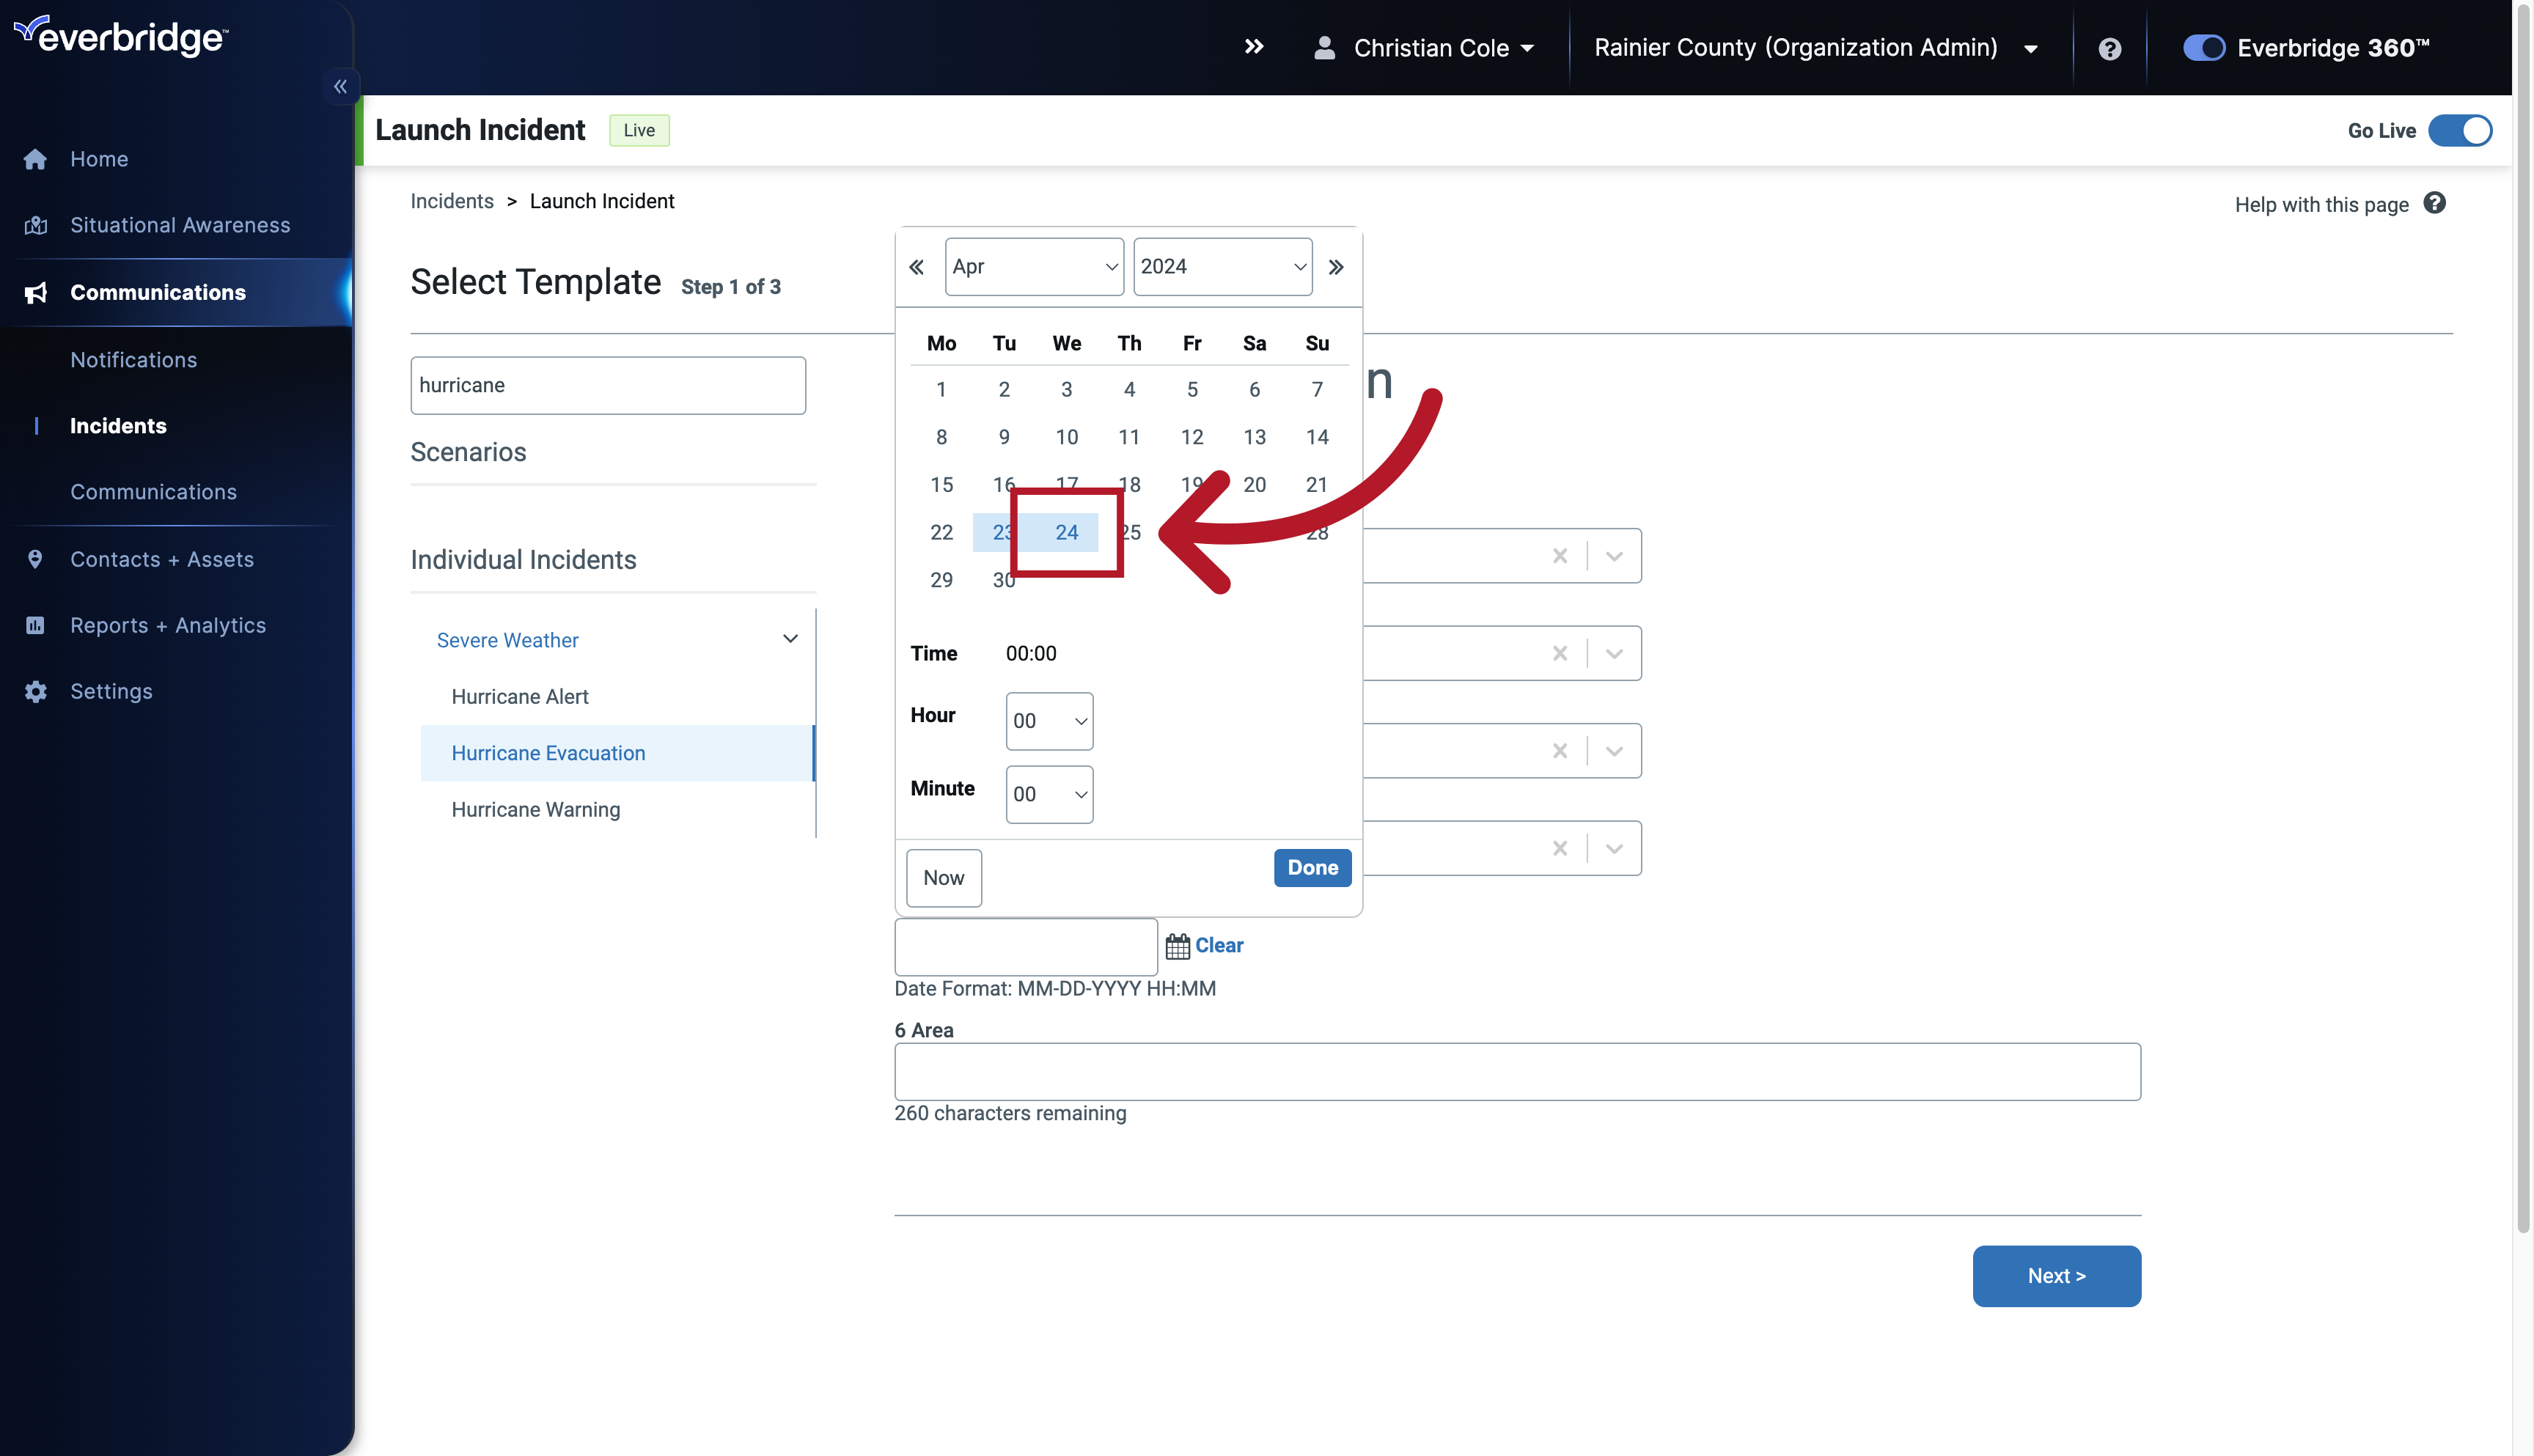
Select the number 24.
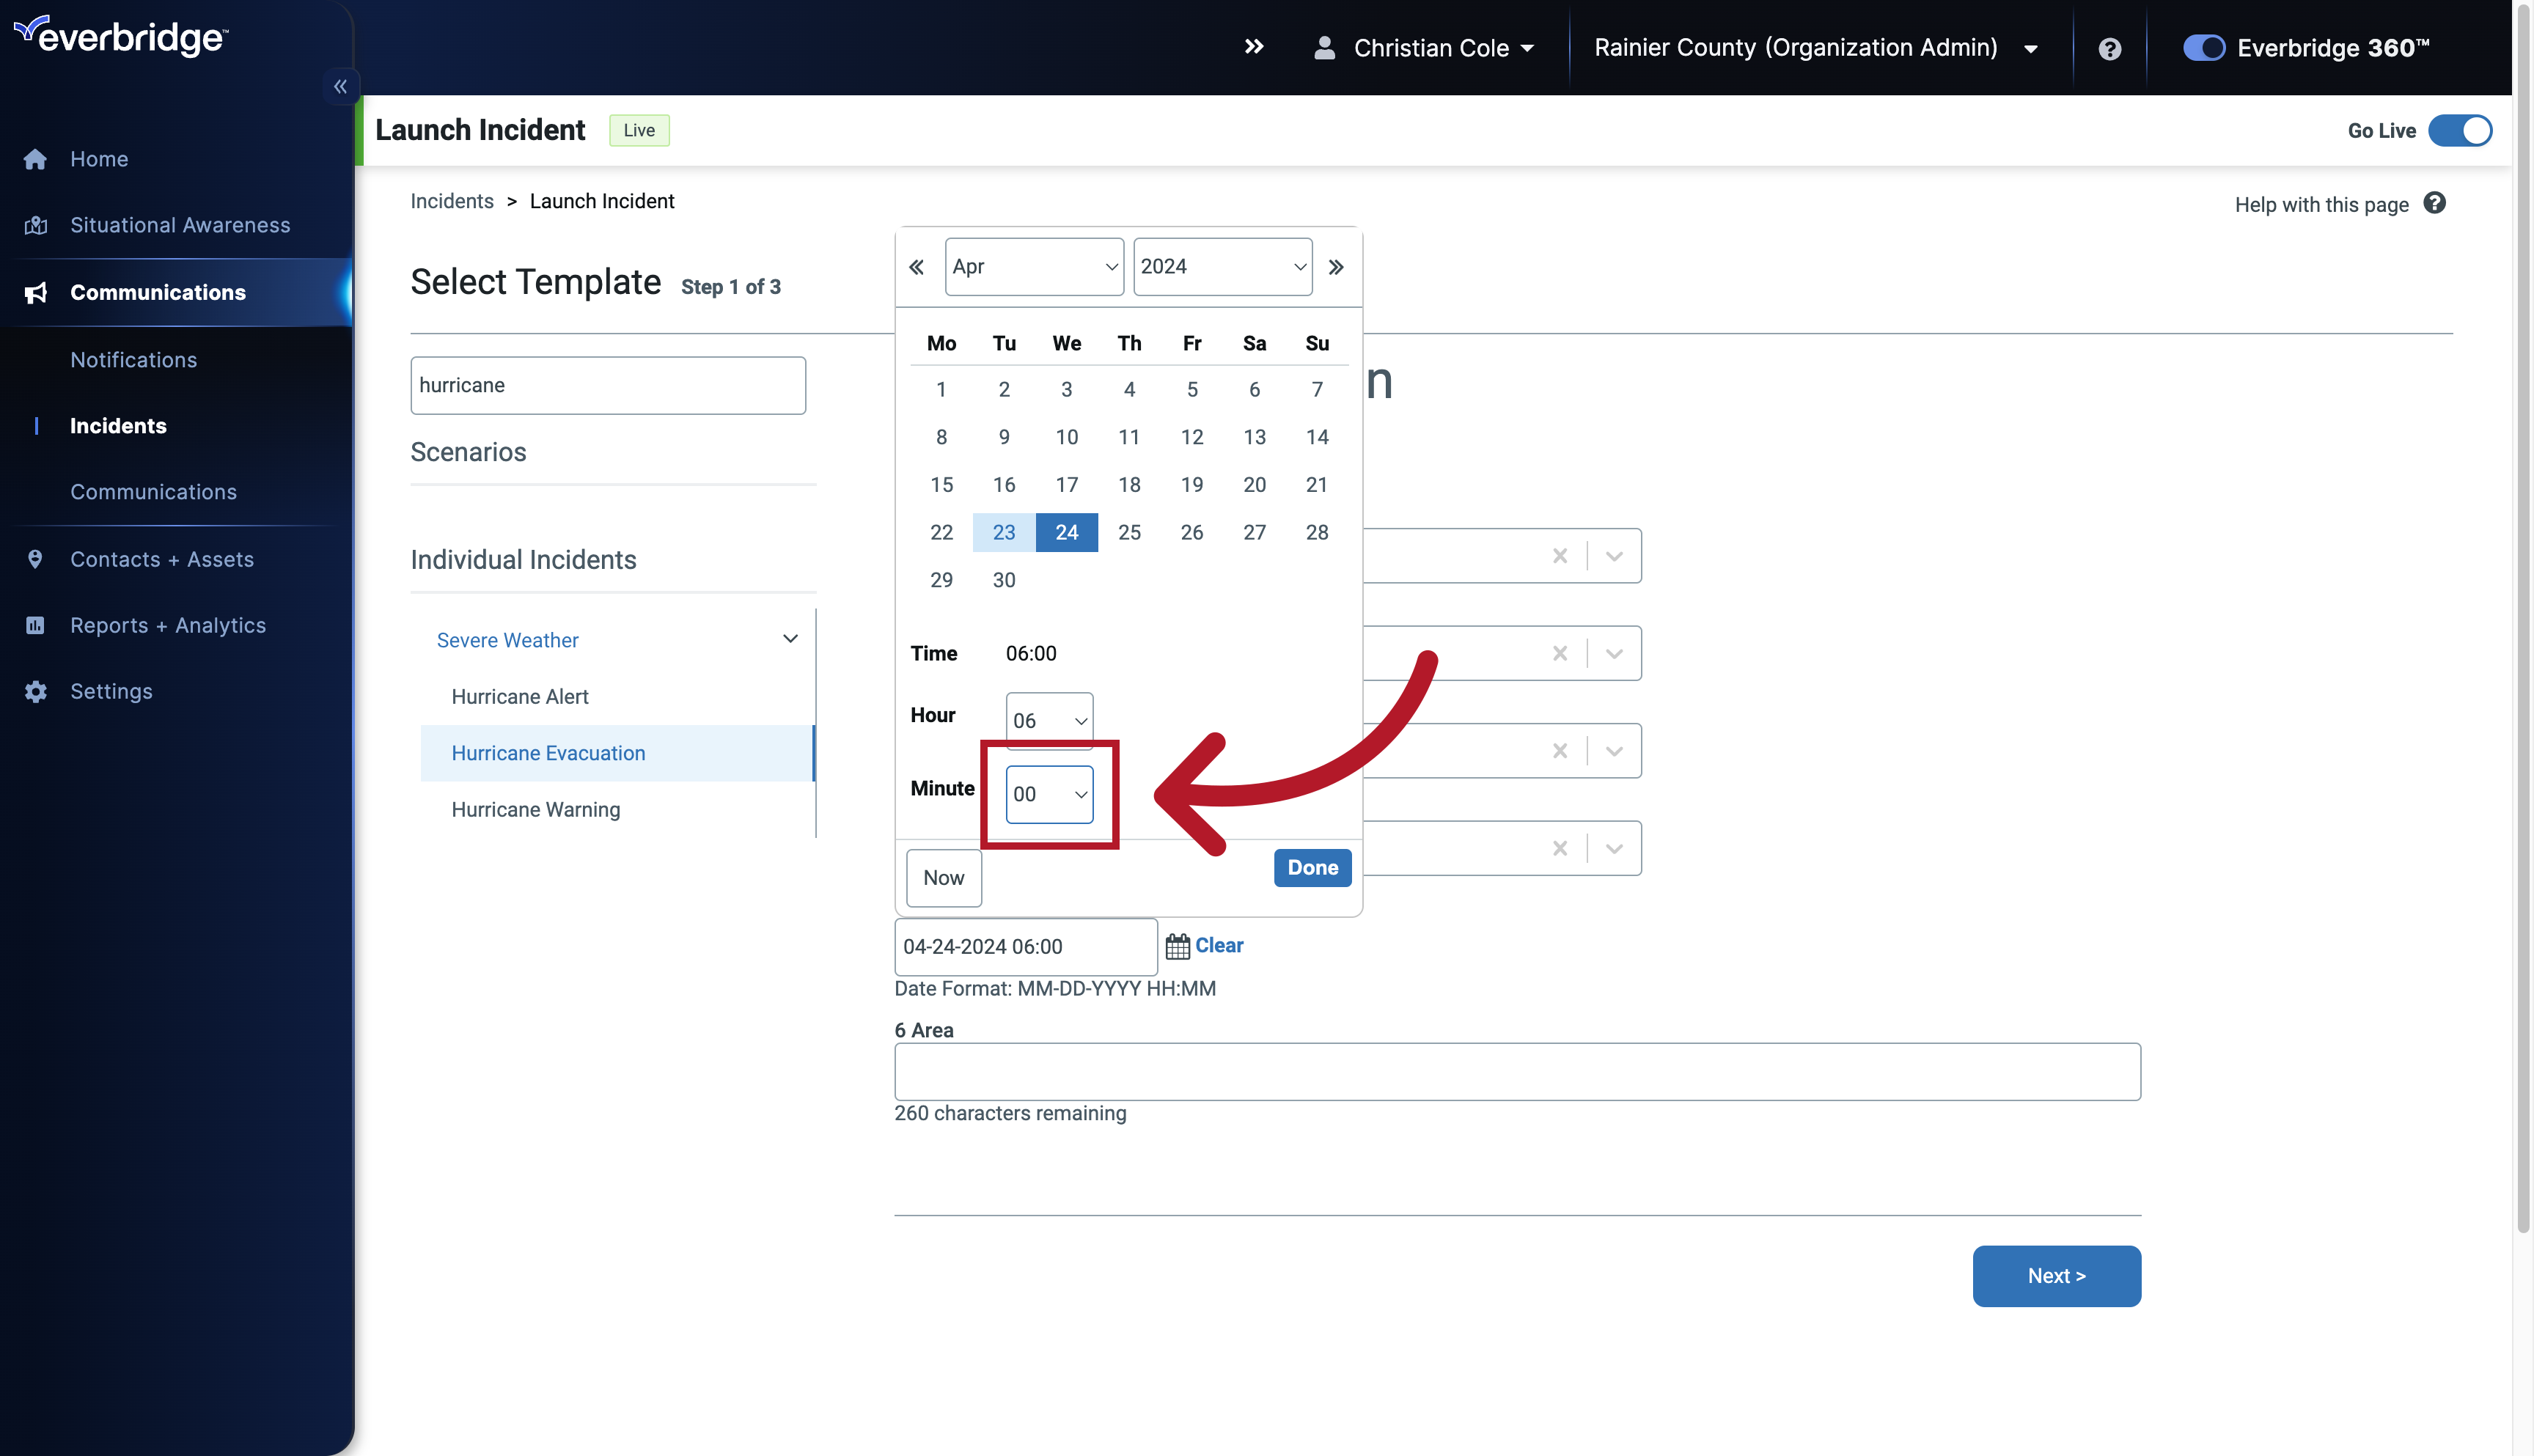
25. Fill Template
Enter the provided sequence of numbers.
26. Fill Template
Enter the provided sequence of numbers.
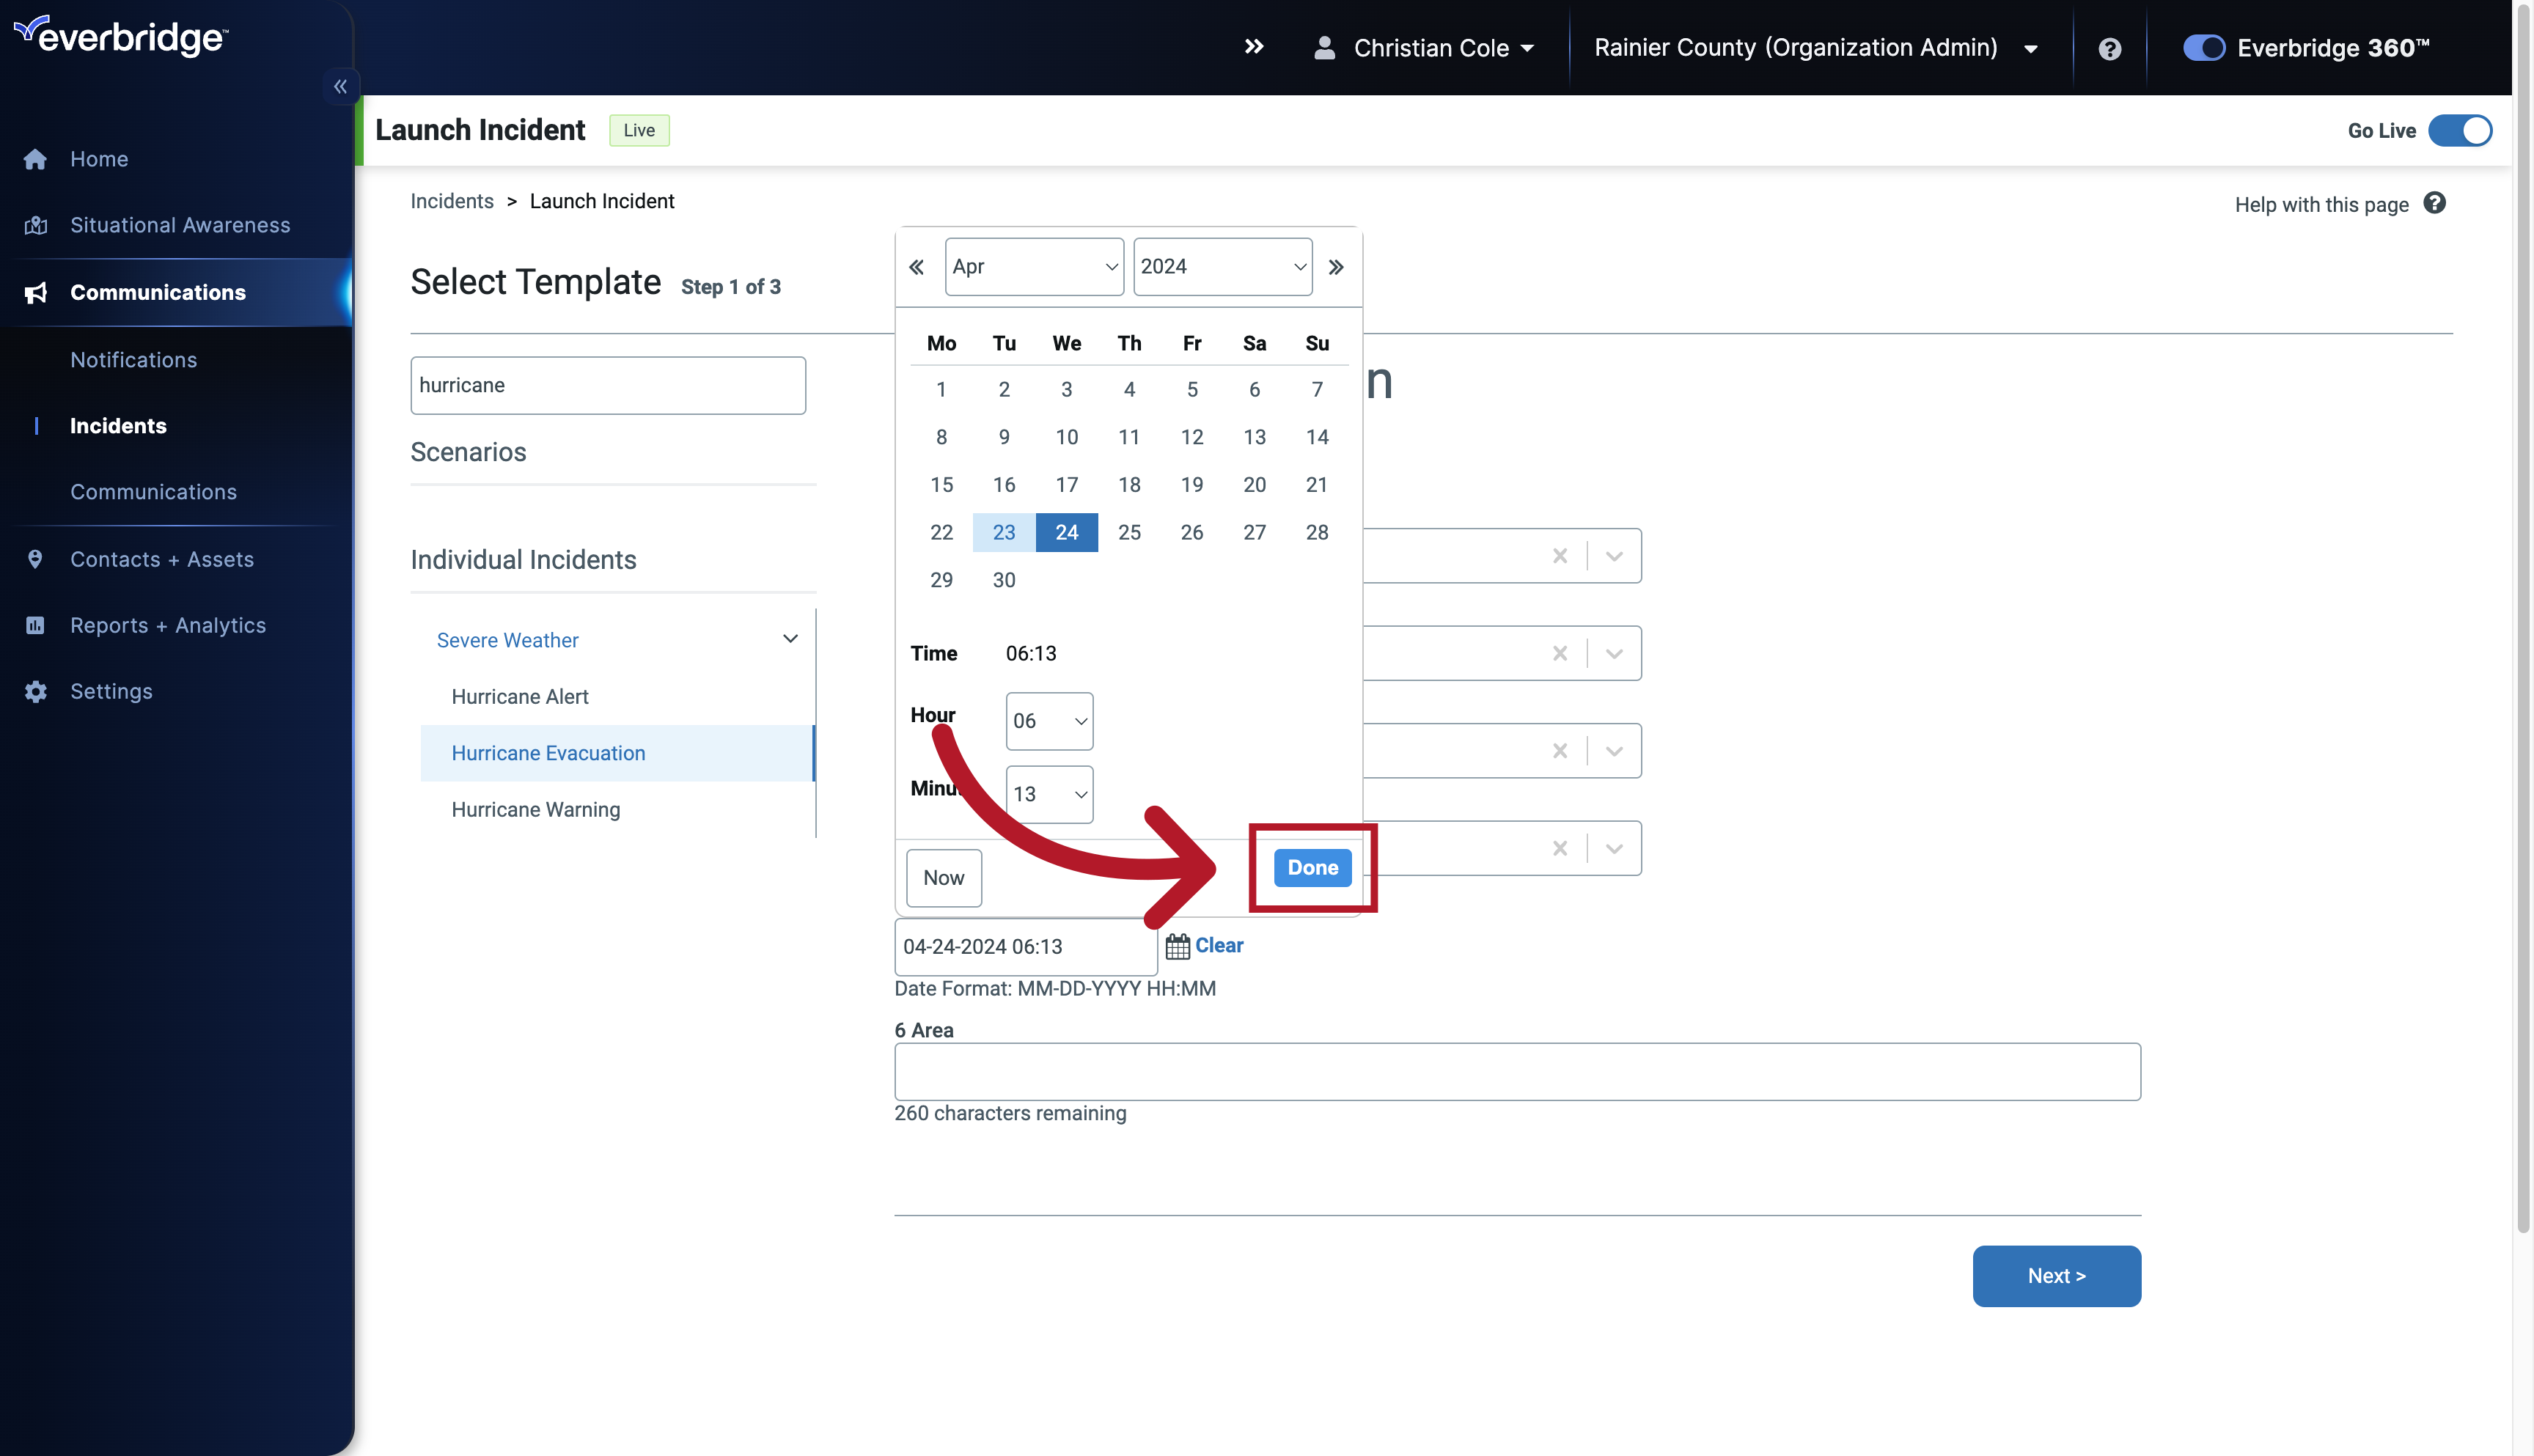
27. Fill Template
Finalize and confirm the information provided.
28. Fill Template
We'll leave this variable field blank
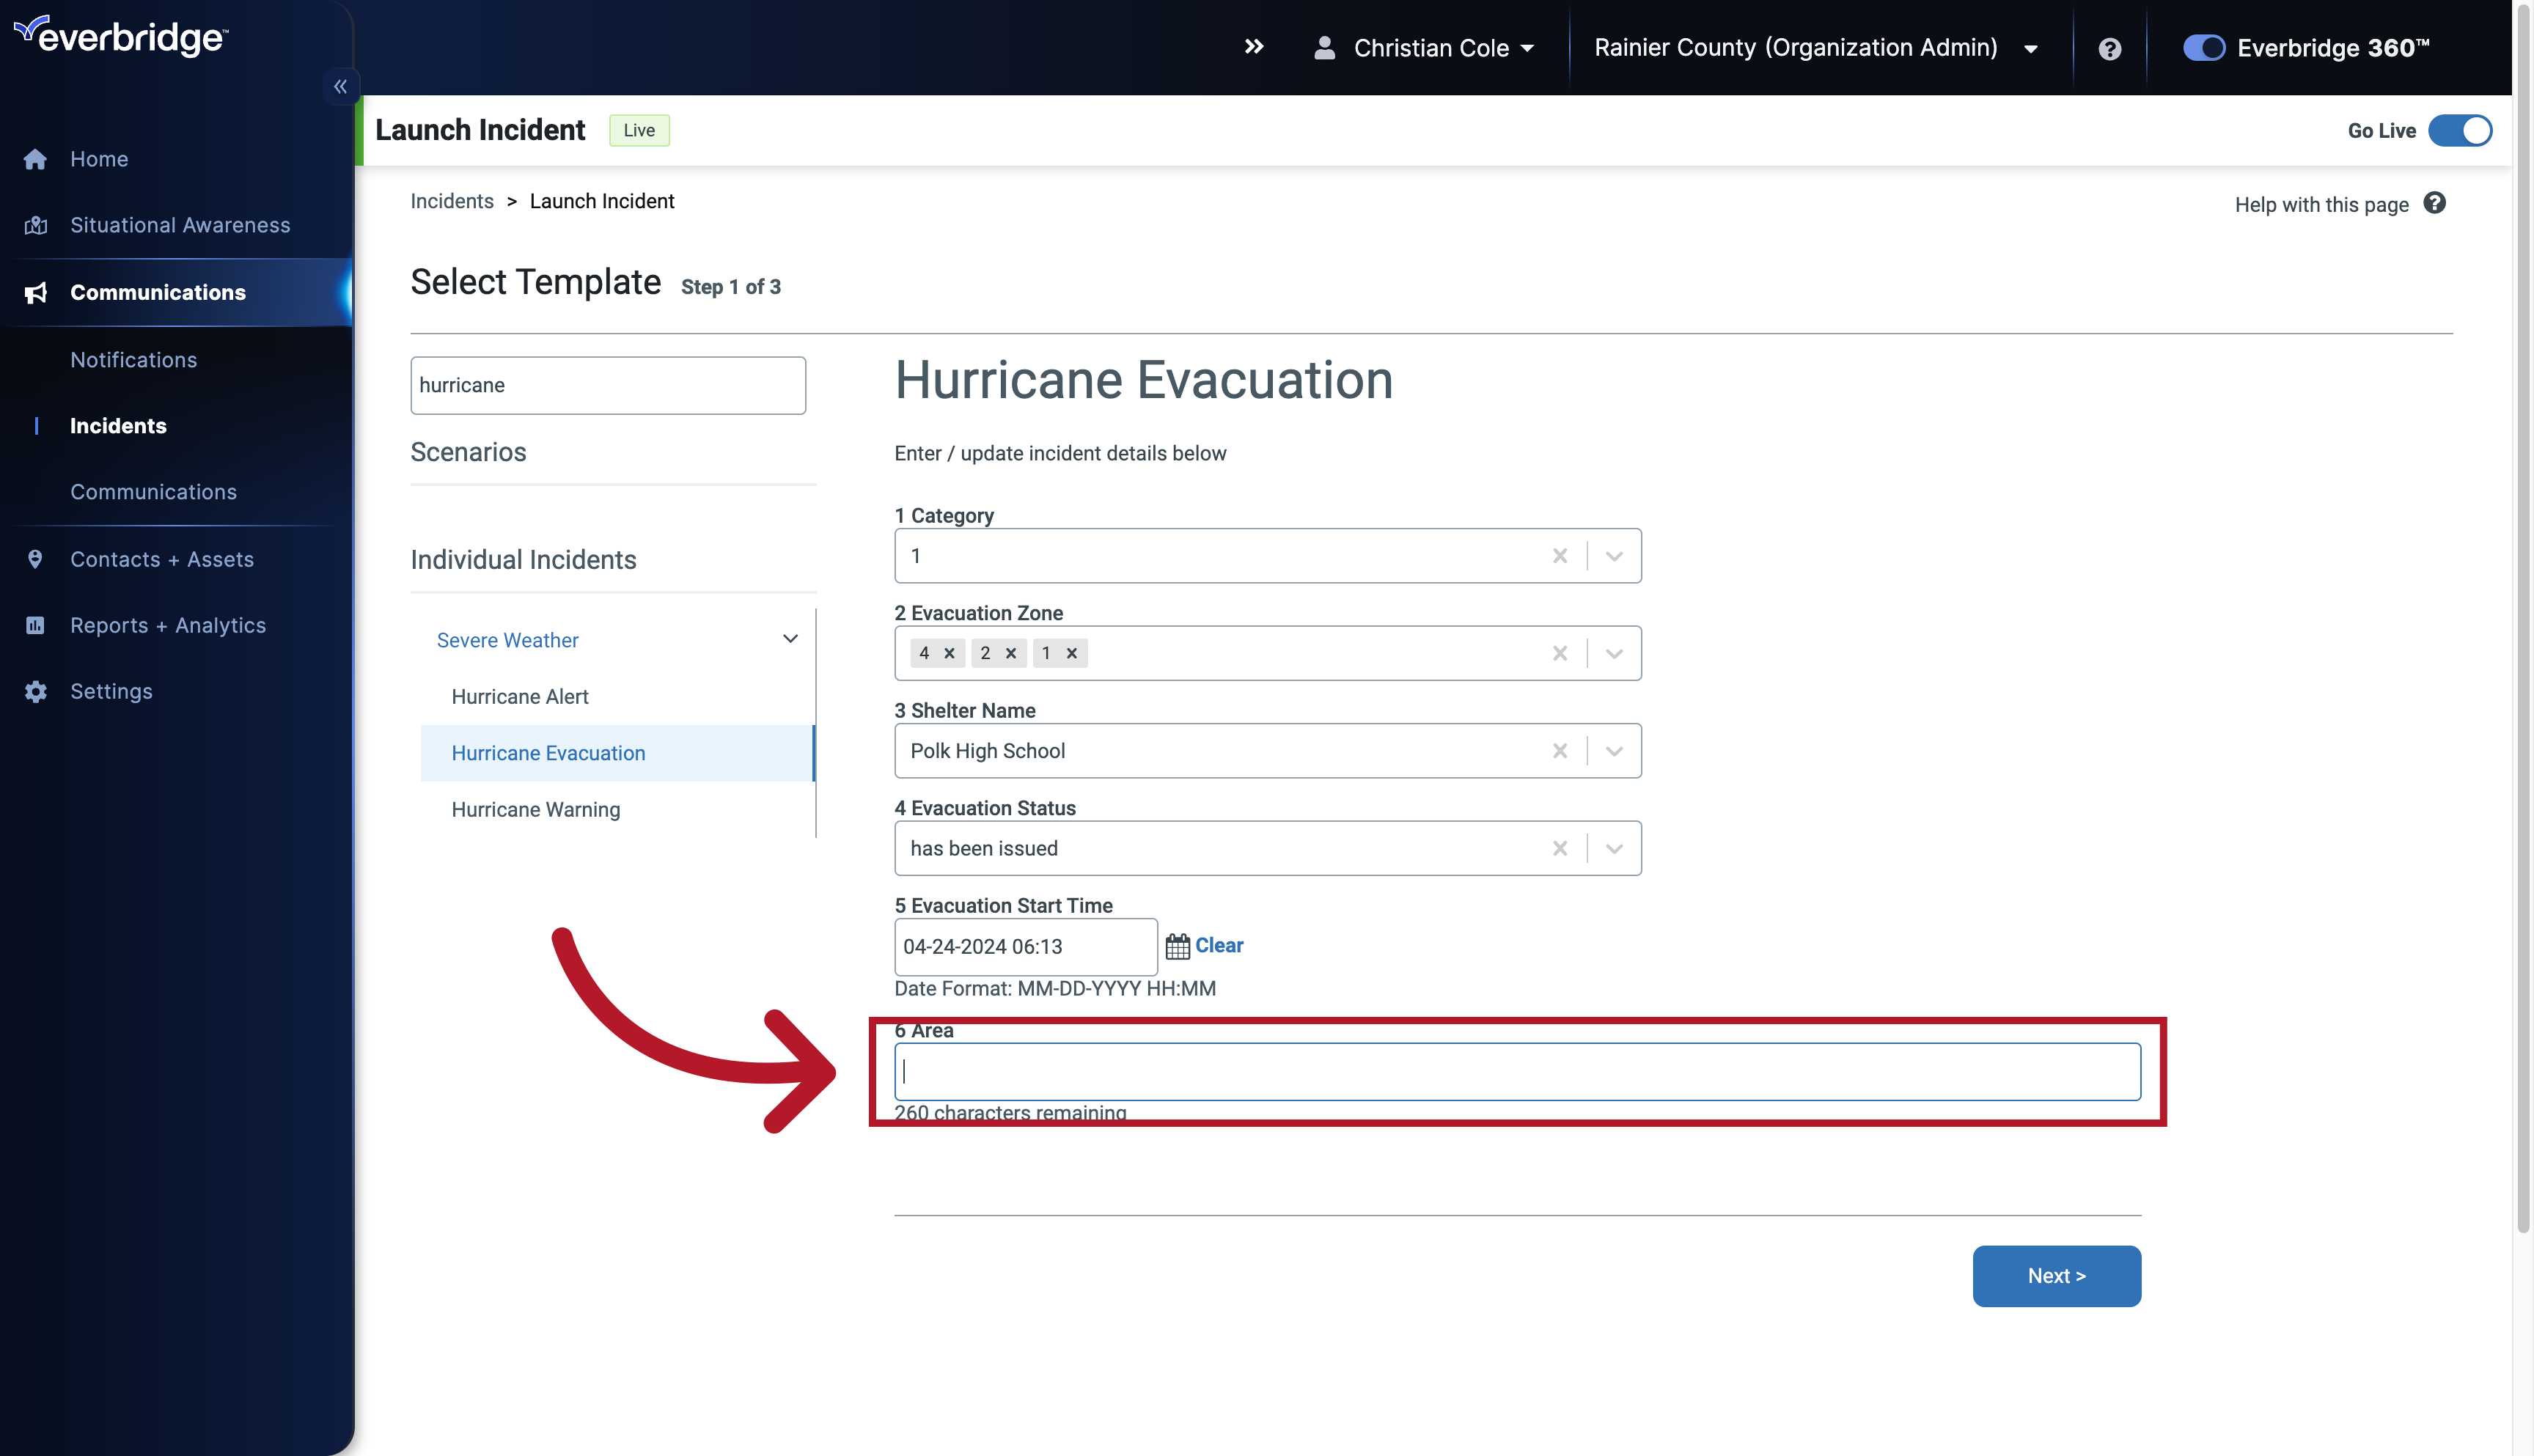
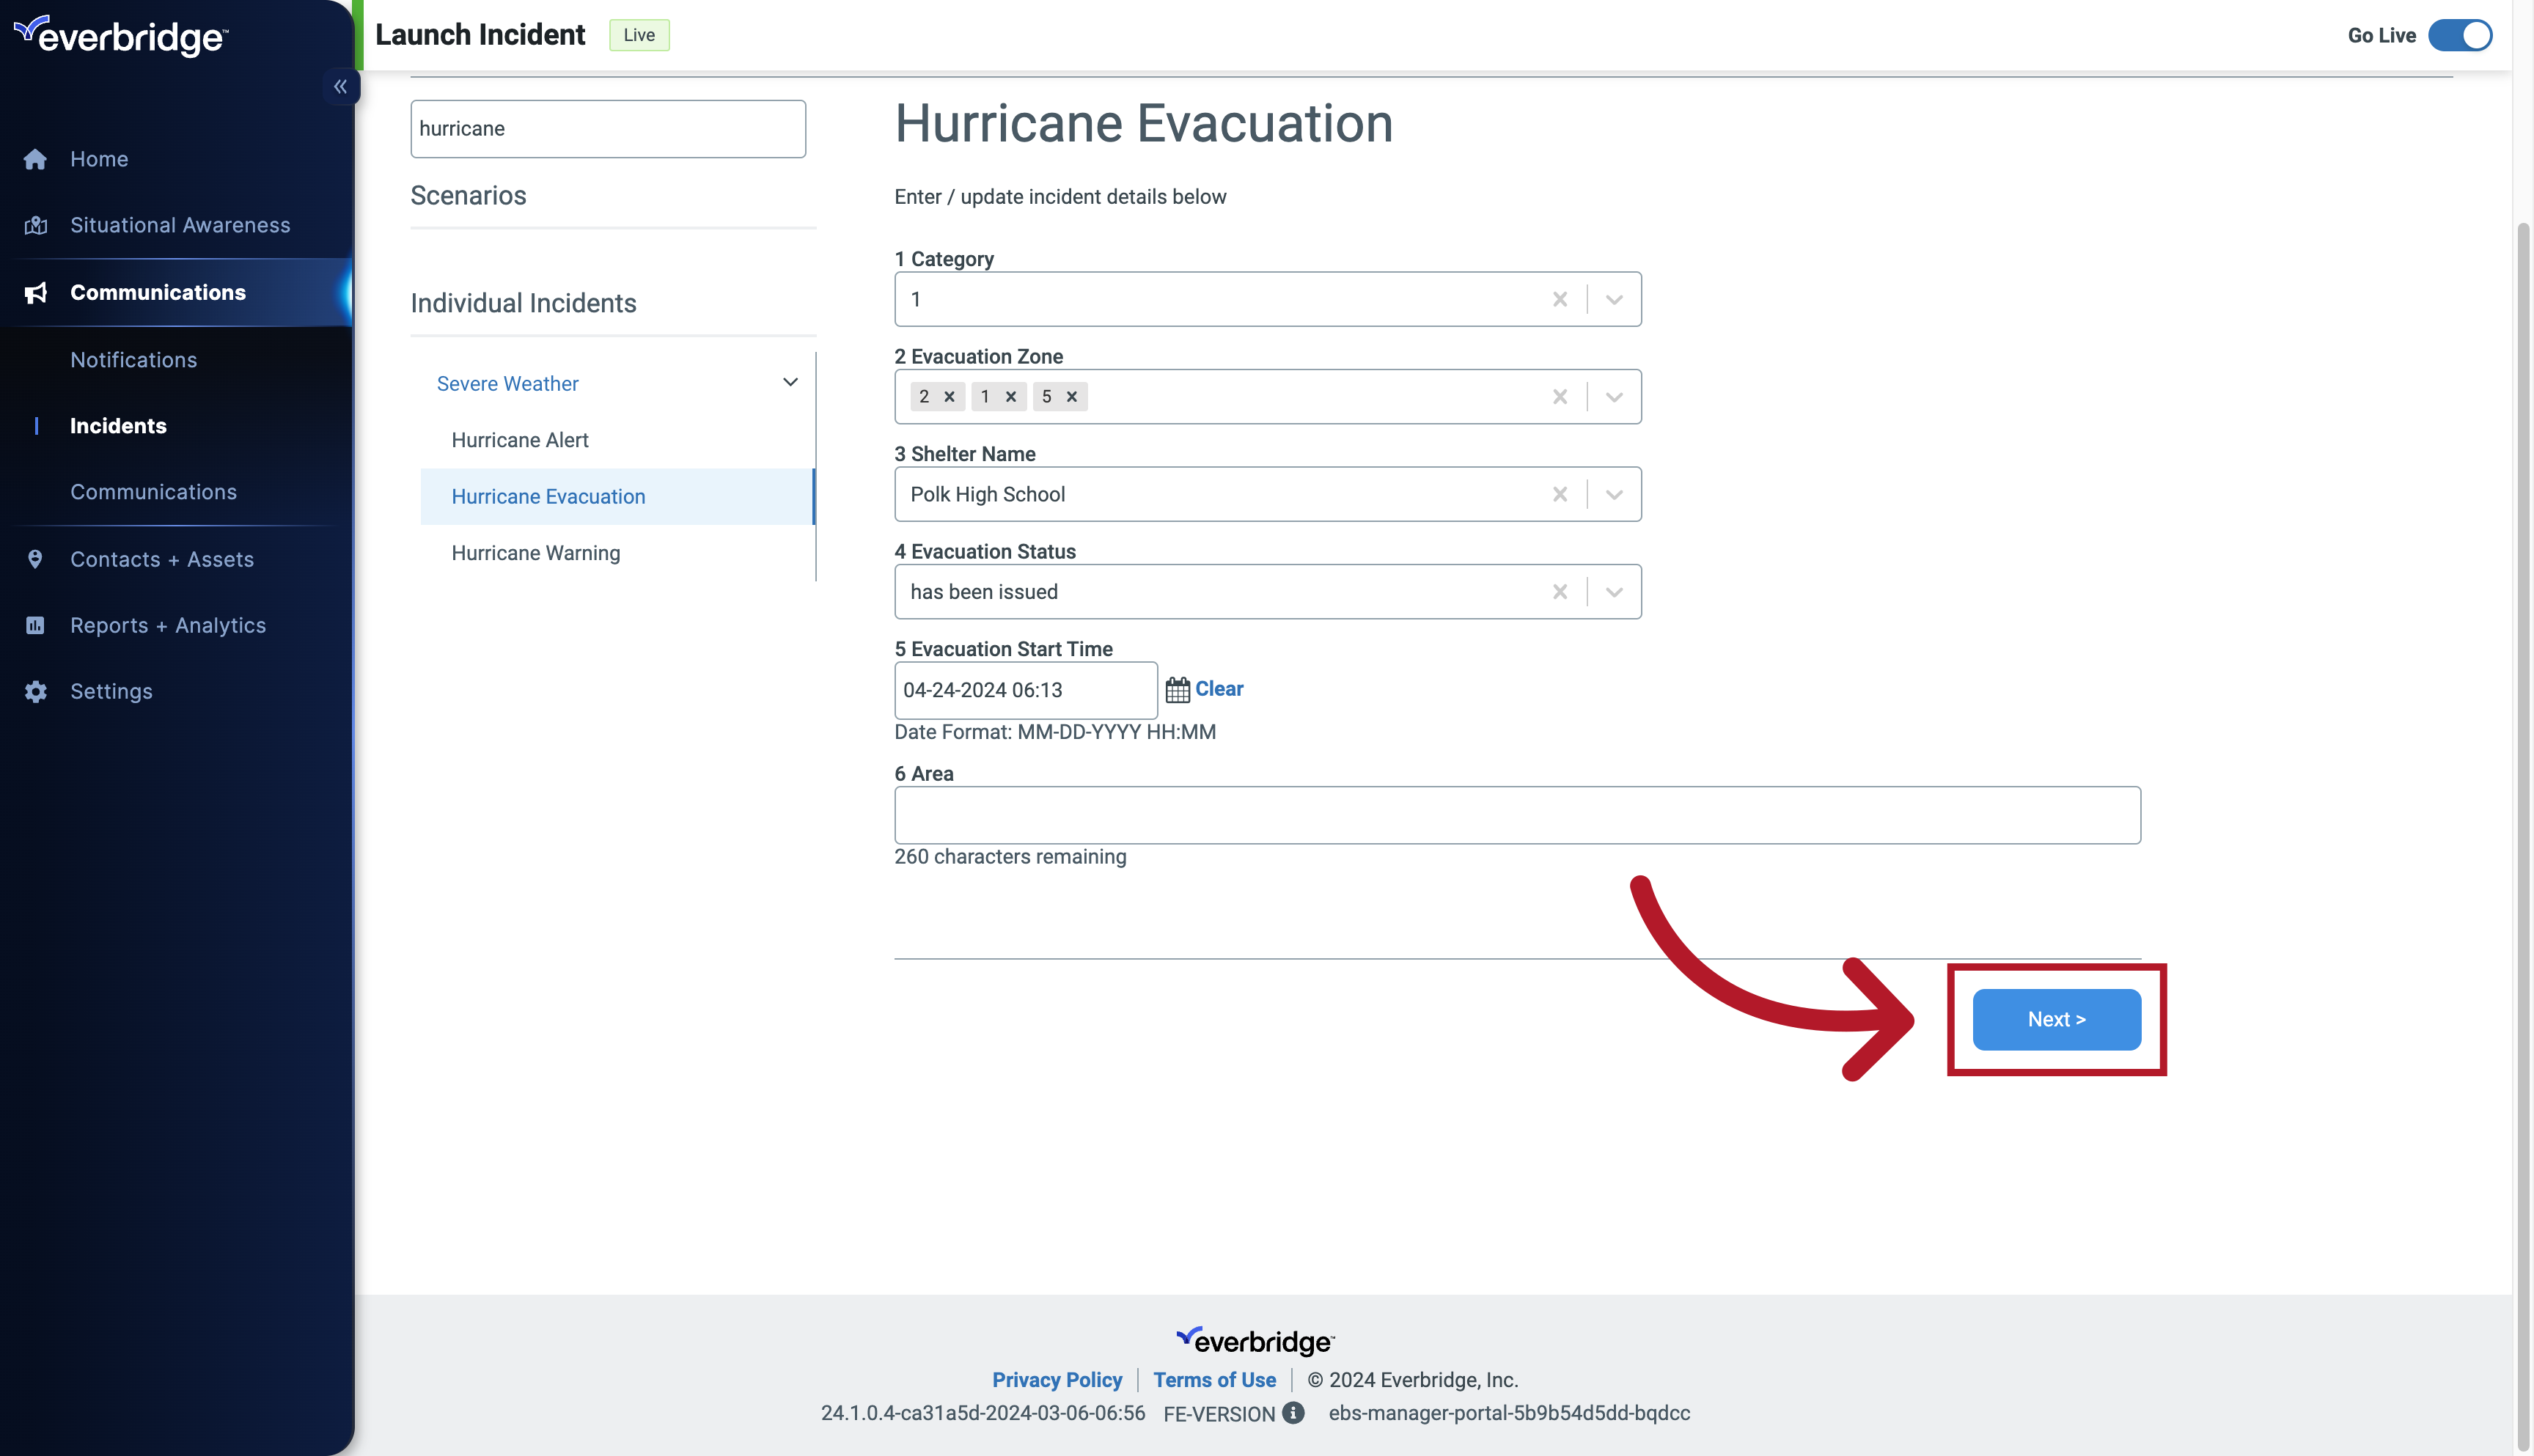
29. Fill Template
Once complete, click Next.
30. Incident Review
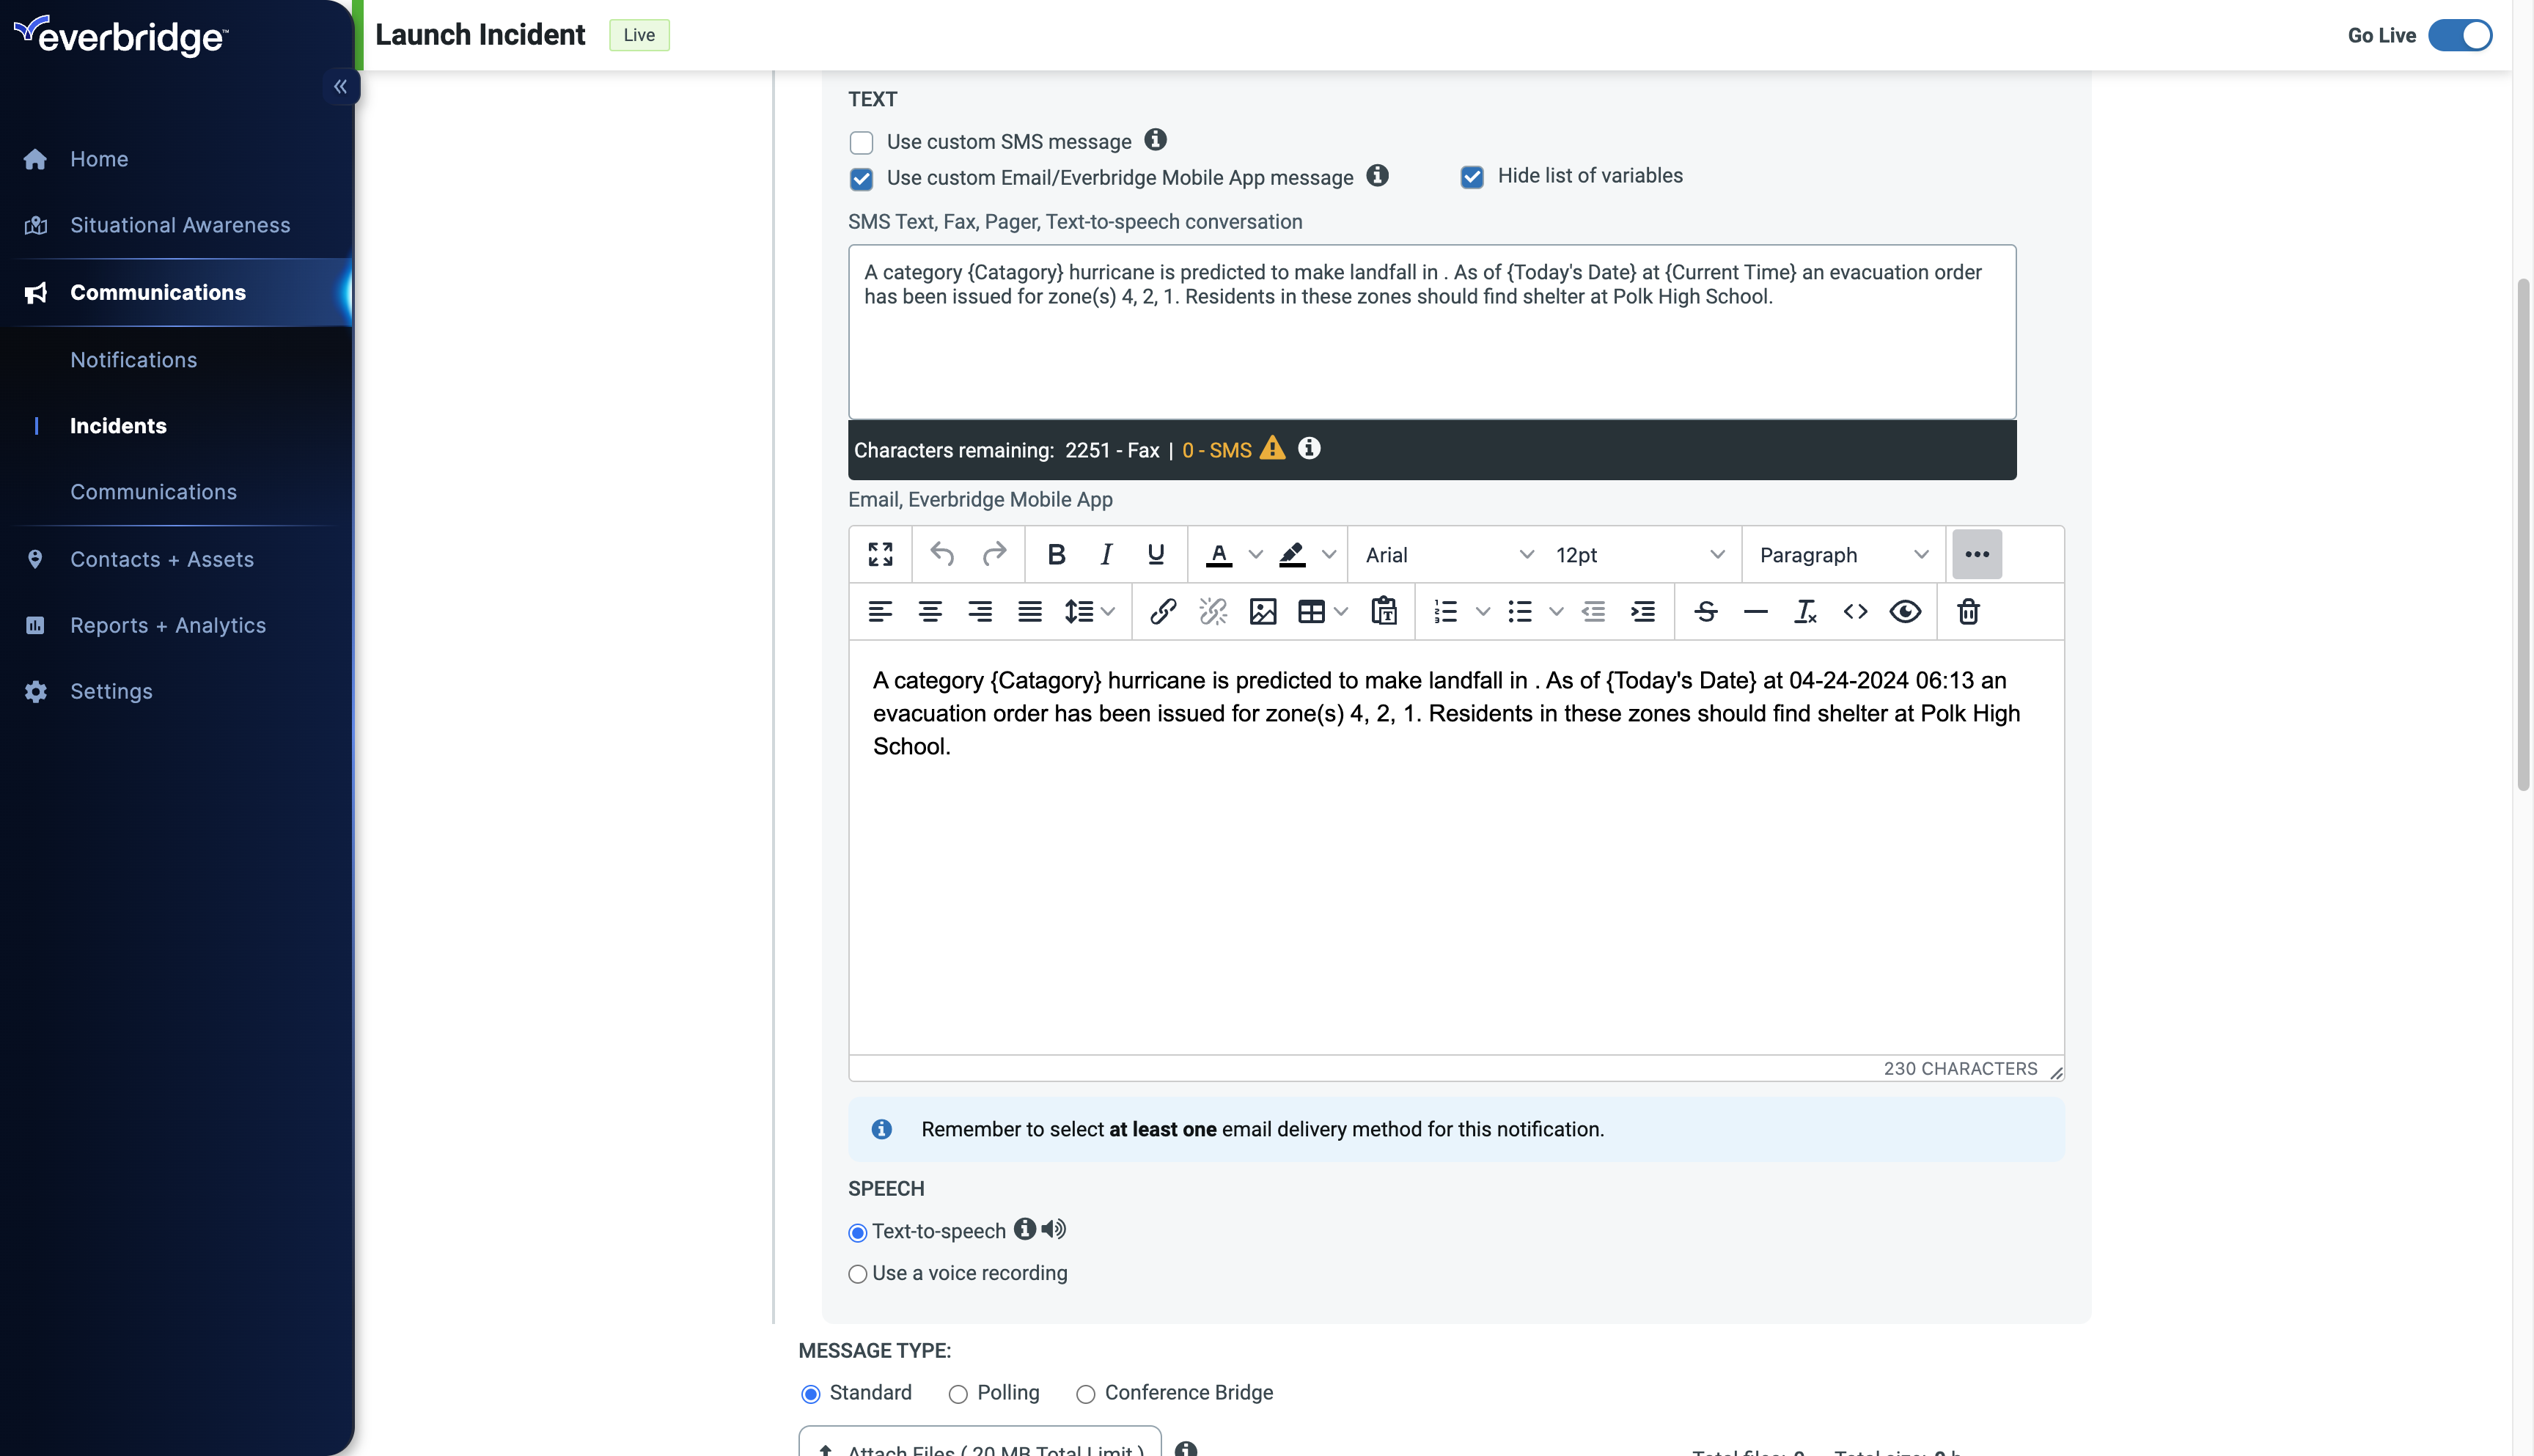
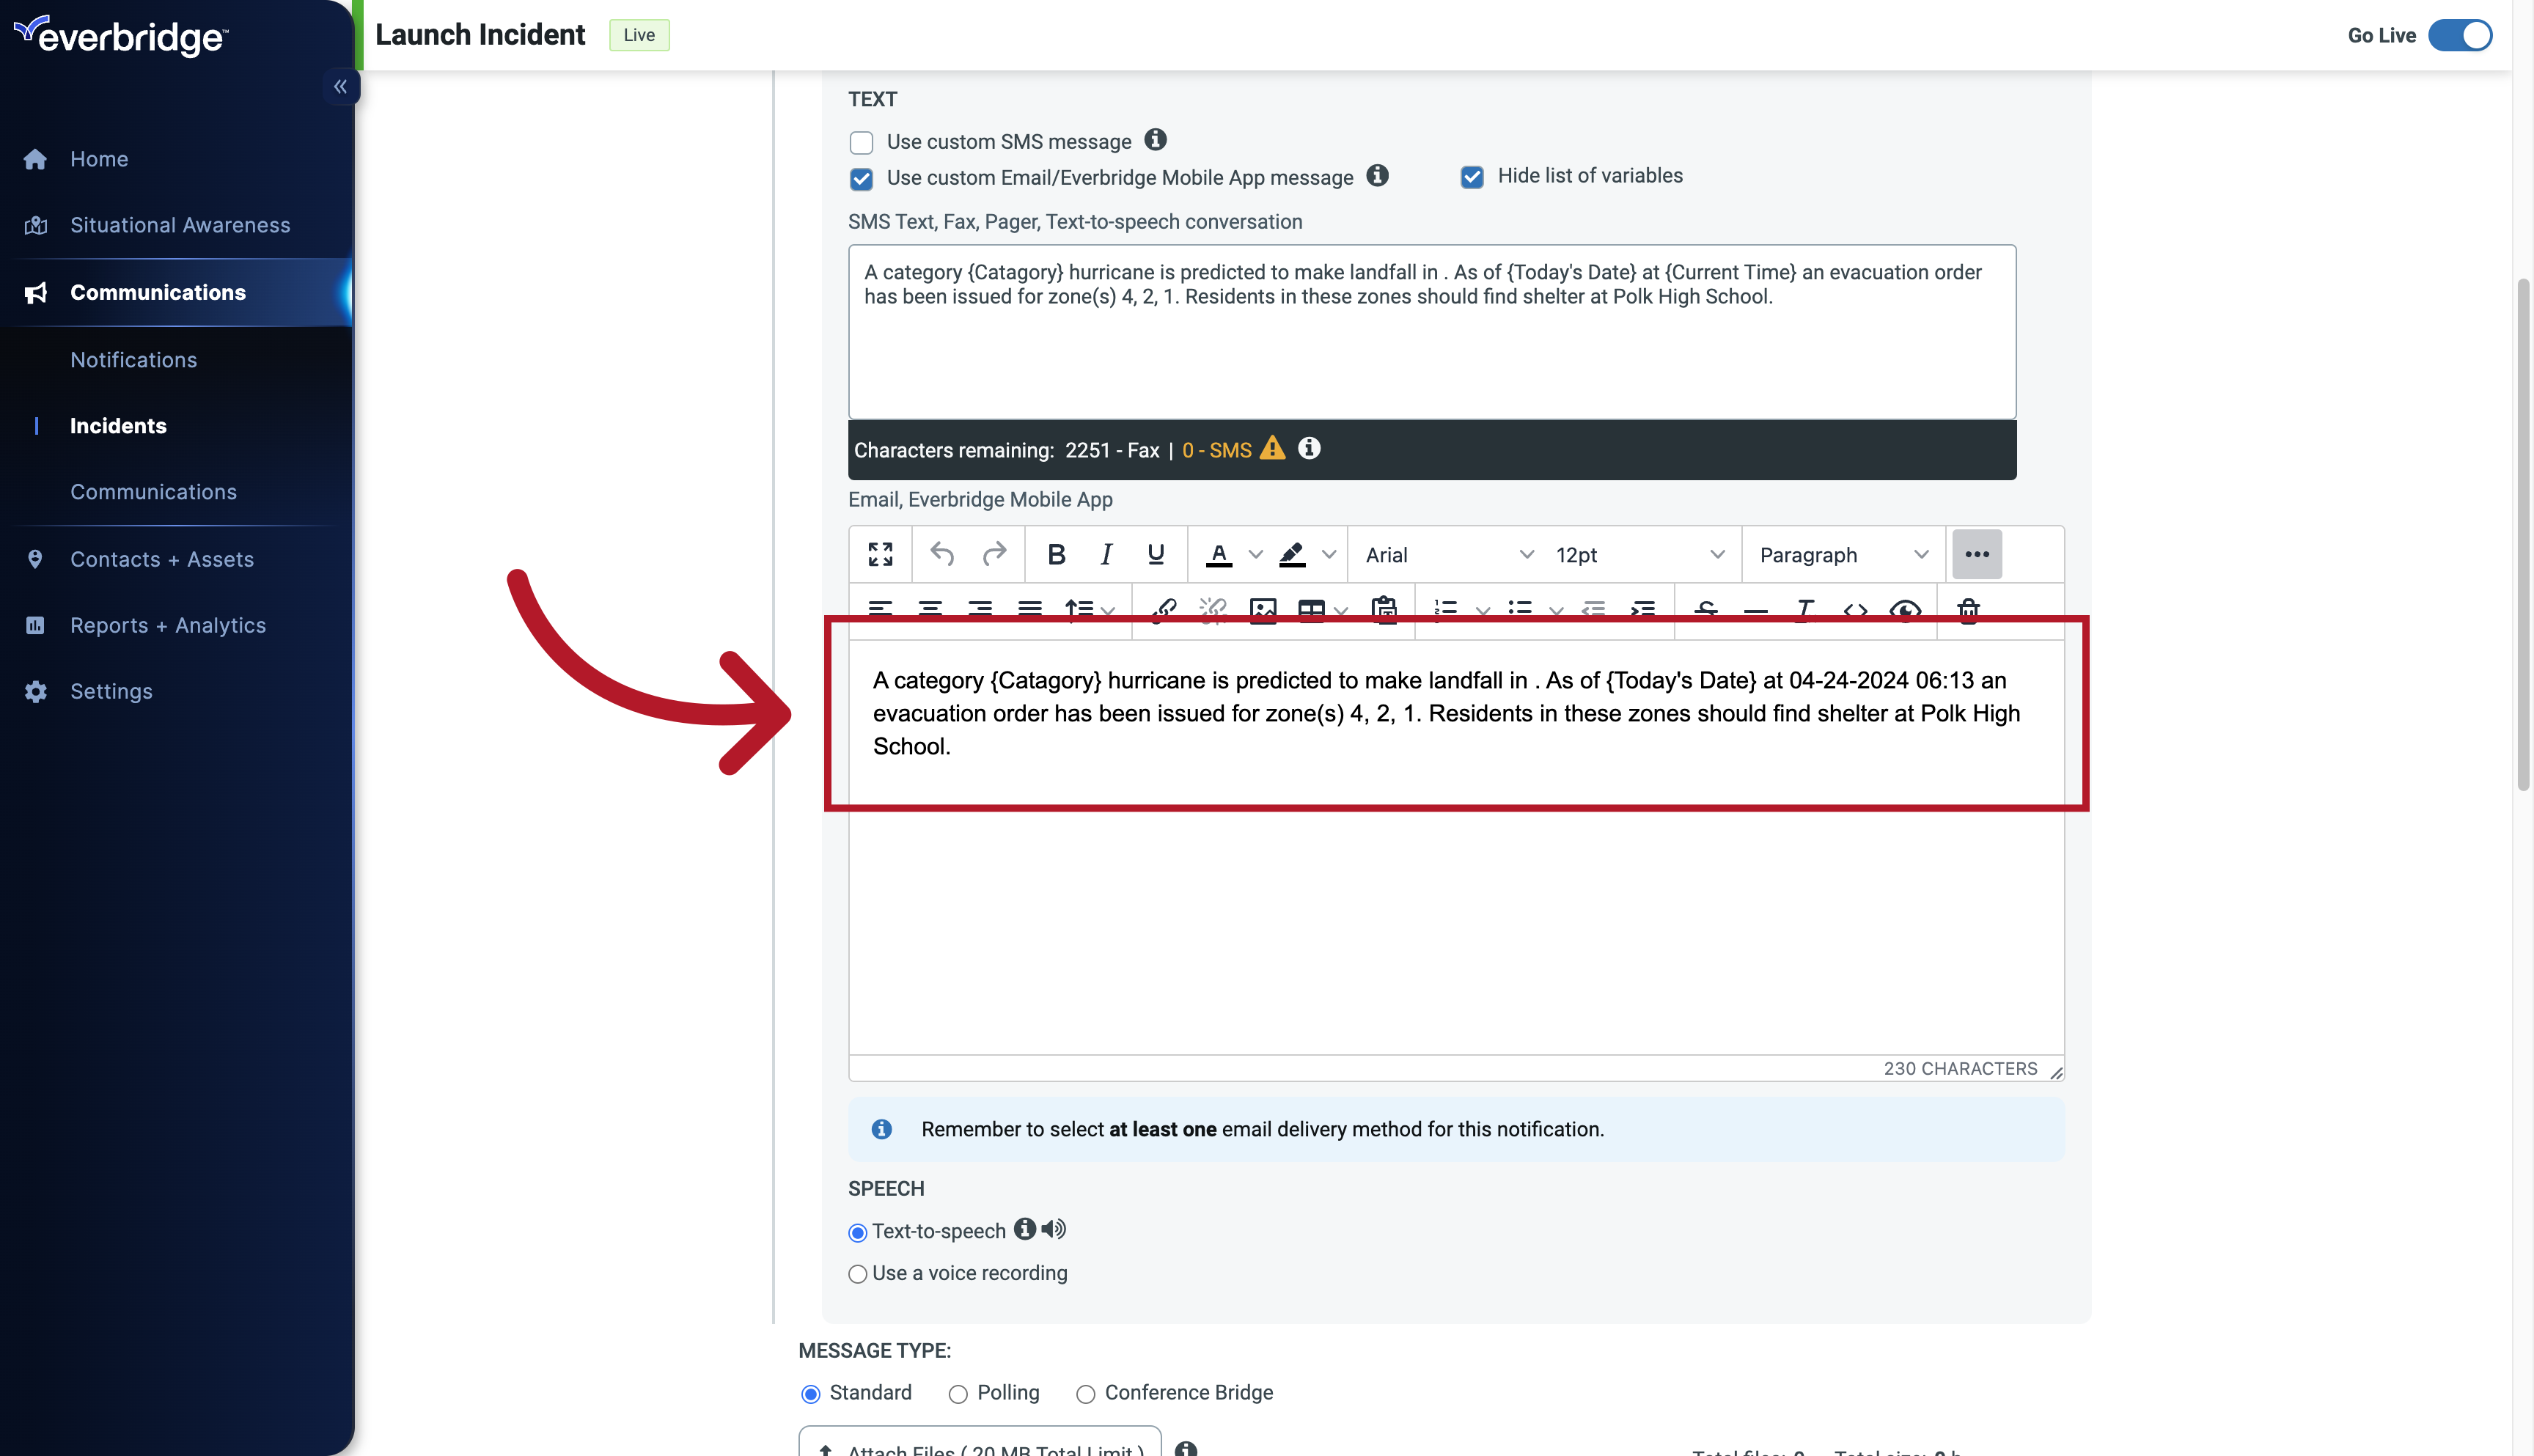
The notification Details page appears with a preview of the information selected and entered from the form on the previous page. Read over the preview to confirm the information that you entered is correct.
31. Incident Review
Review the incident details.
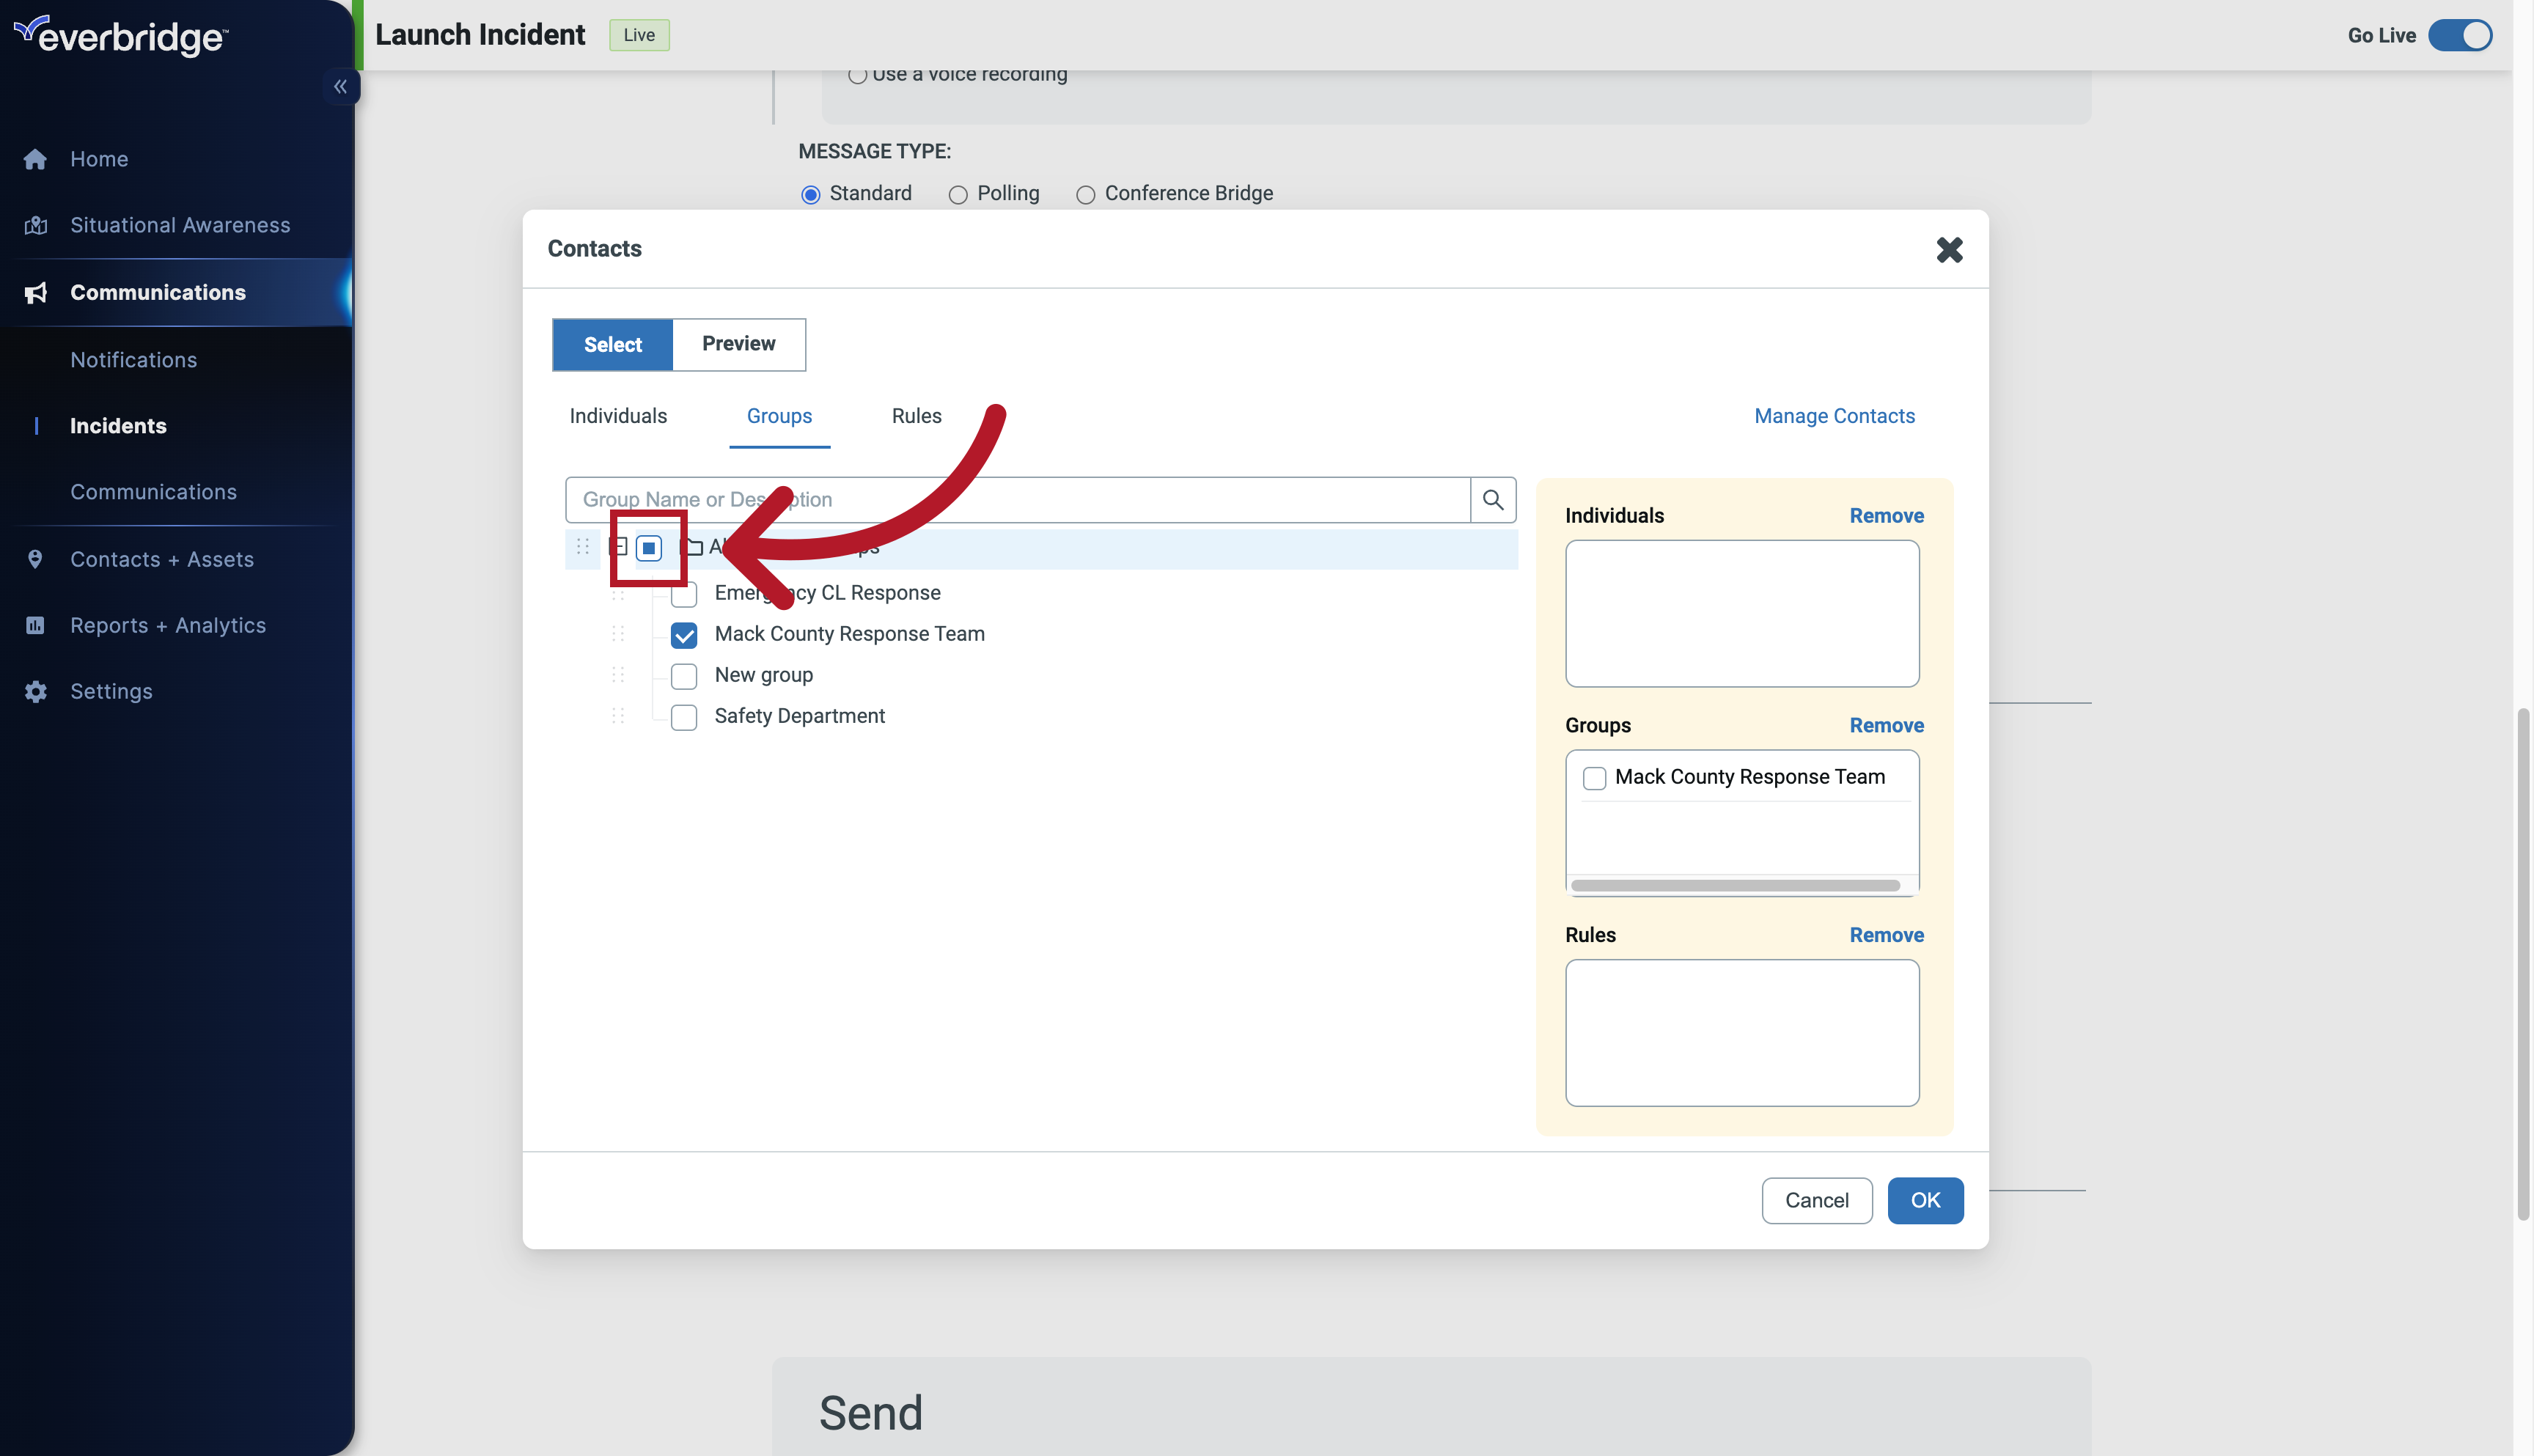
32. Contacts
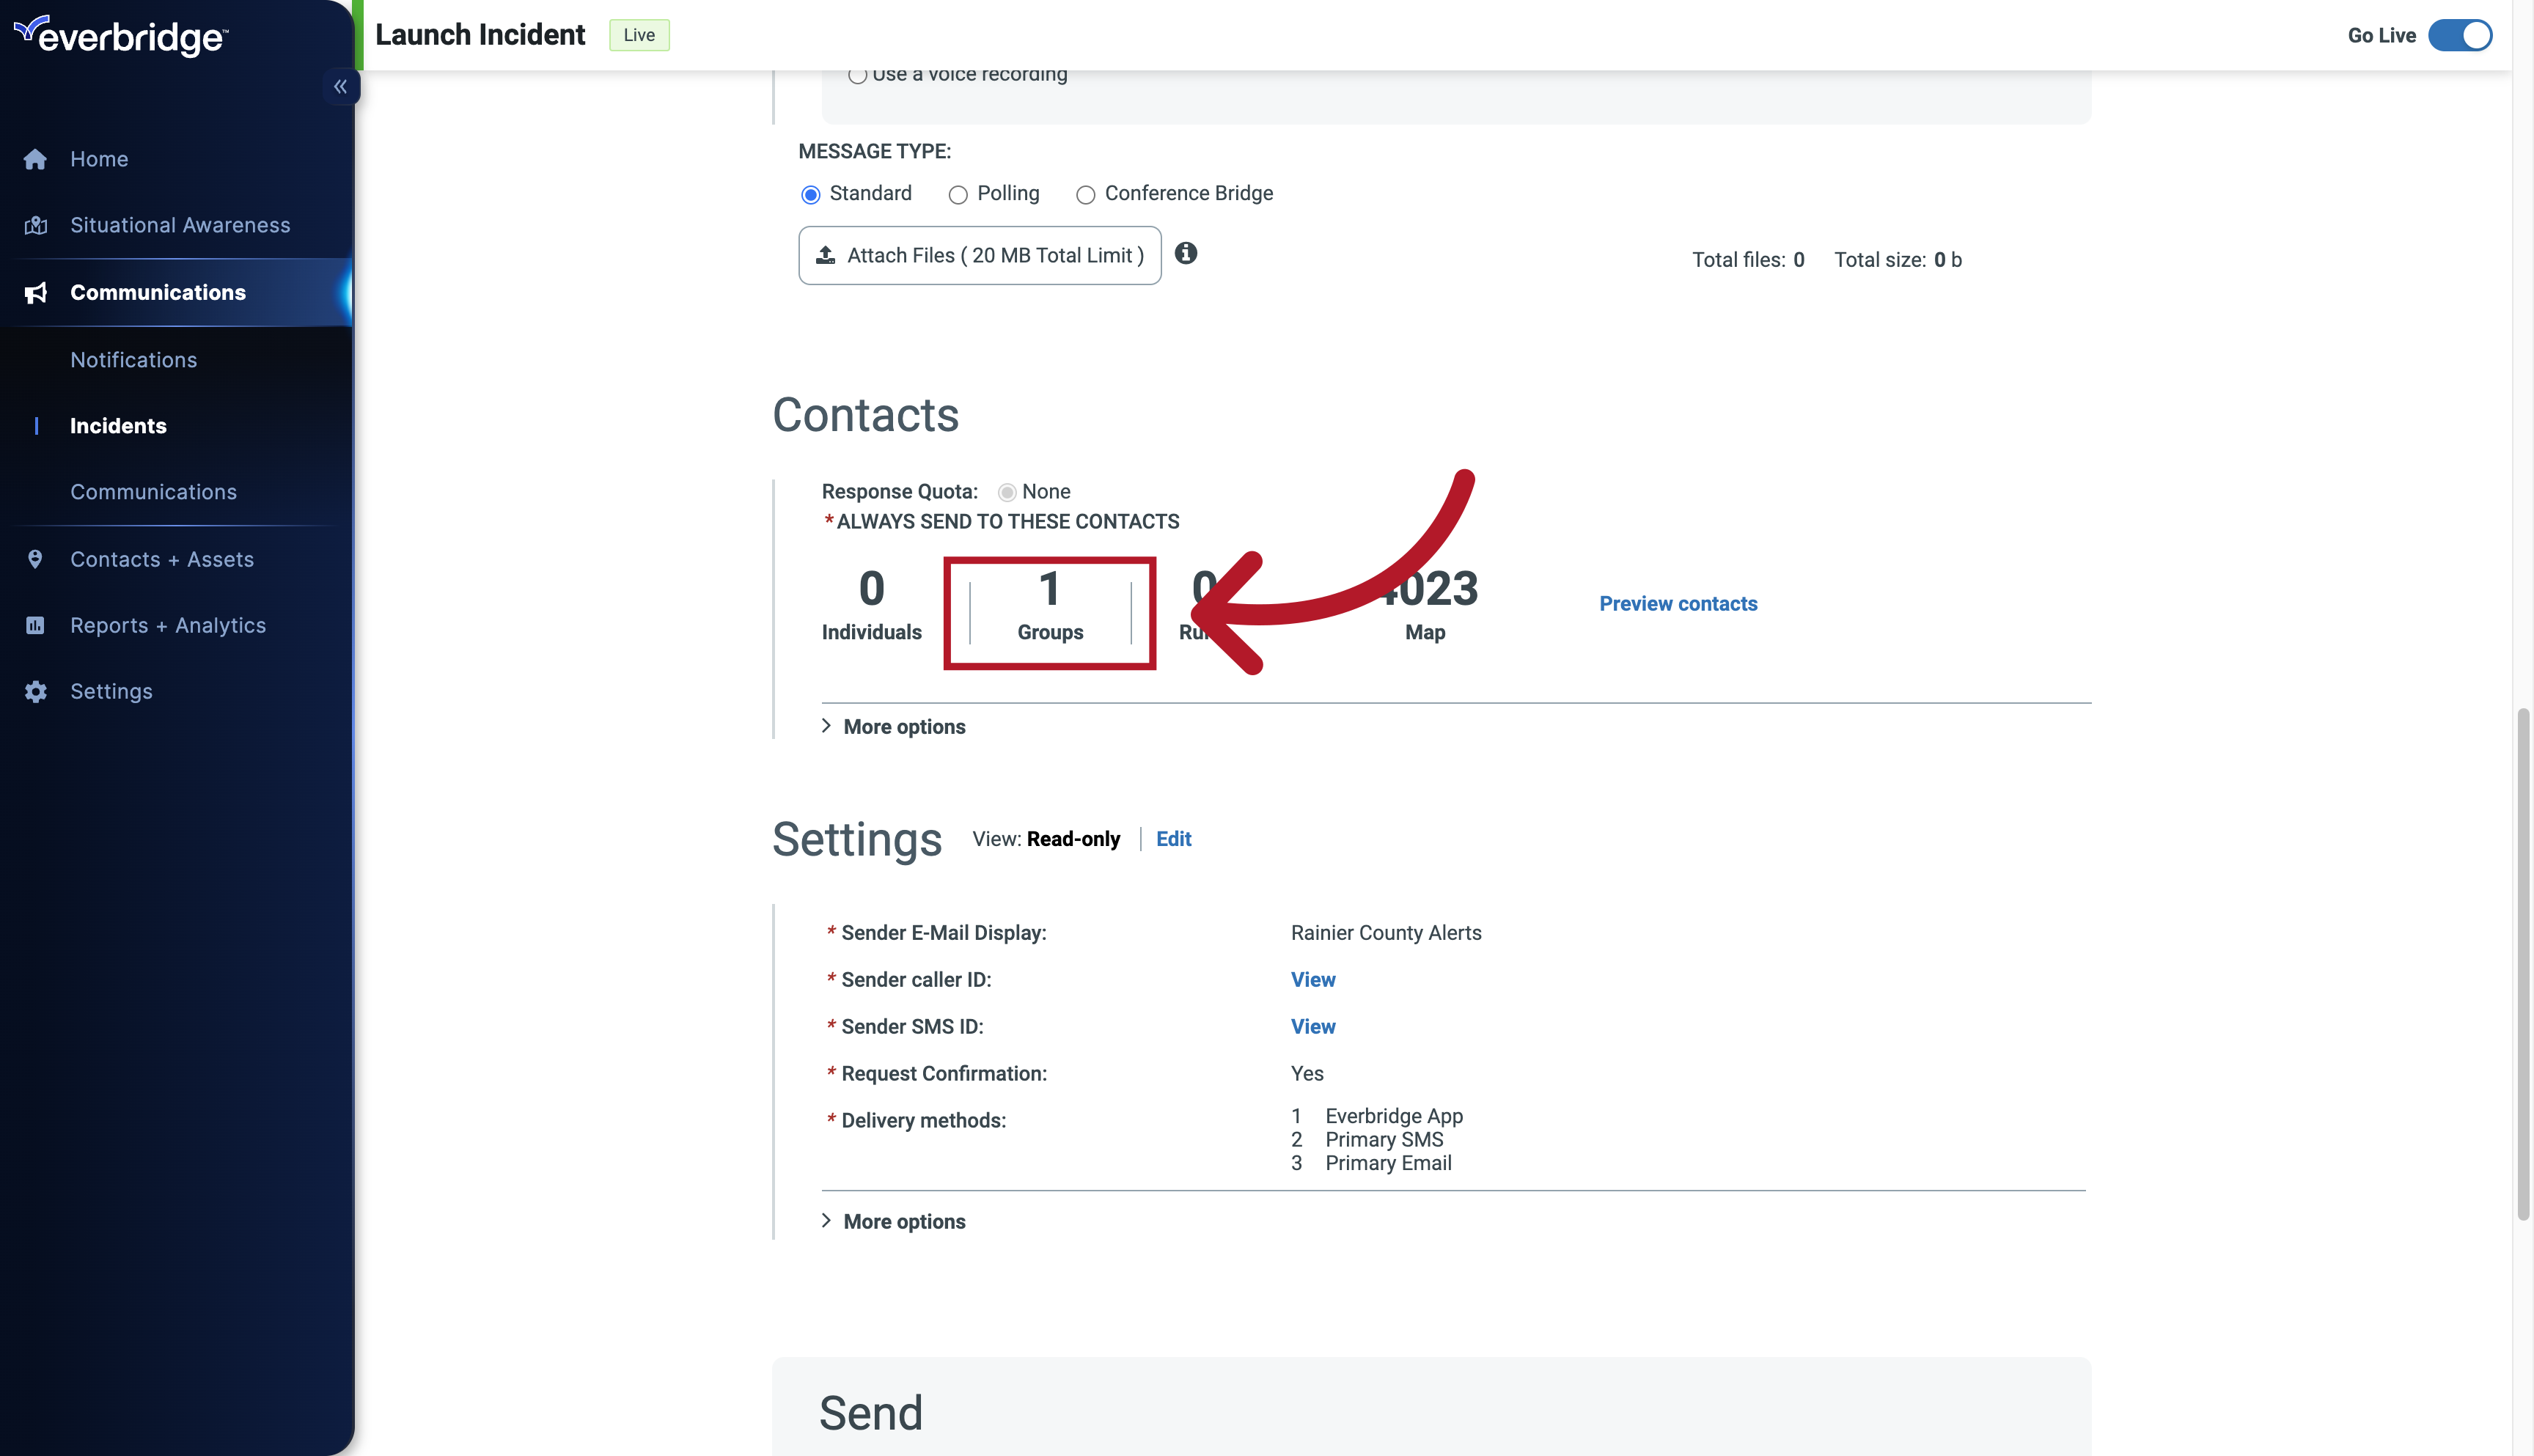
After scrolling down, I notice that I'm missing some contact groups, so I'll add them now
33. Contacts
Navigate here
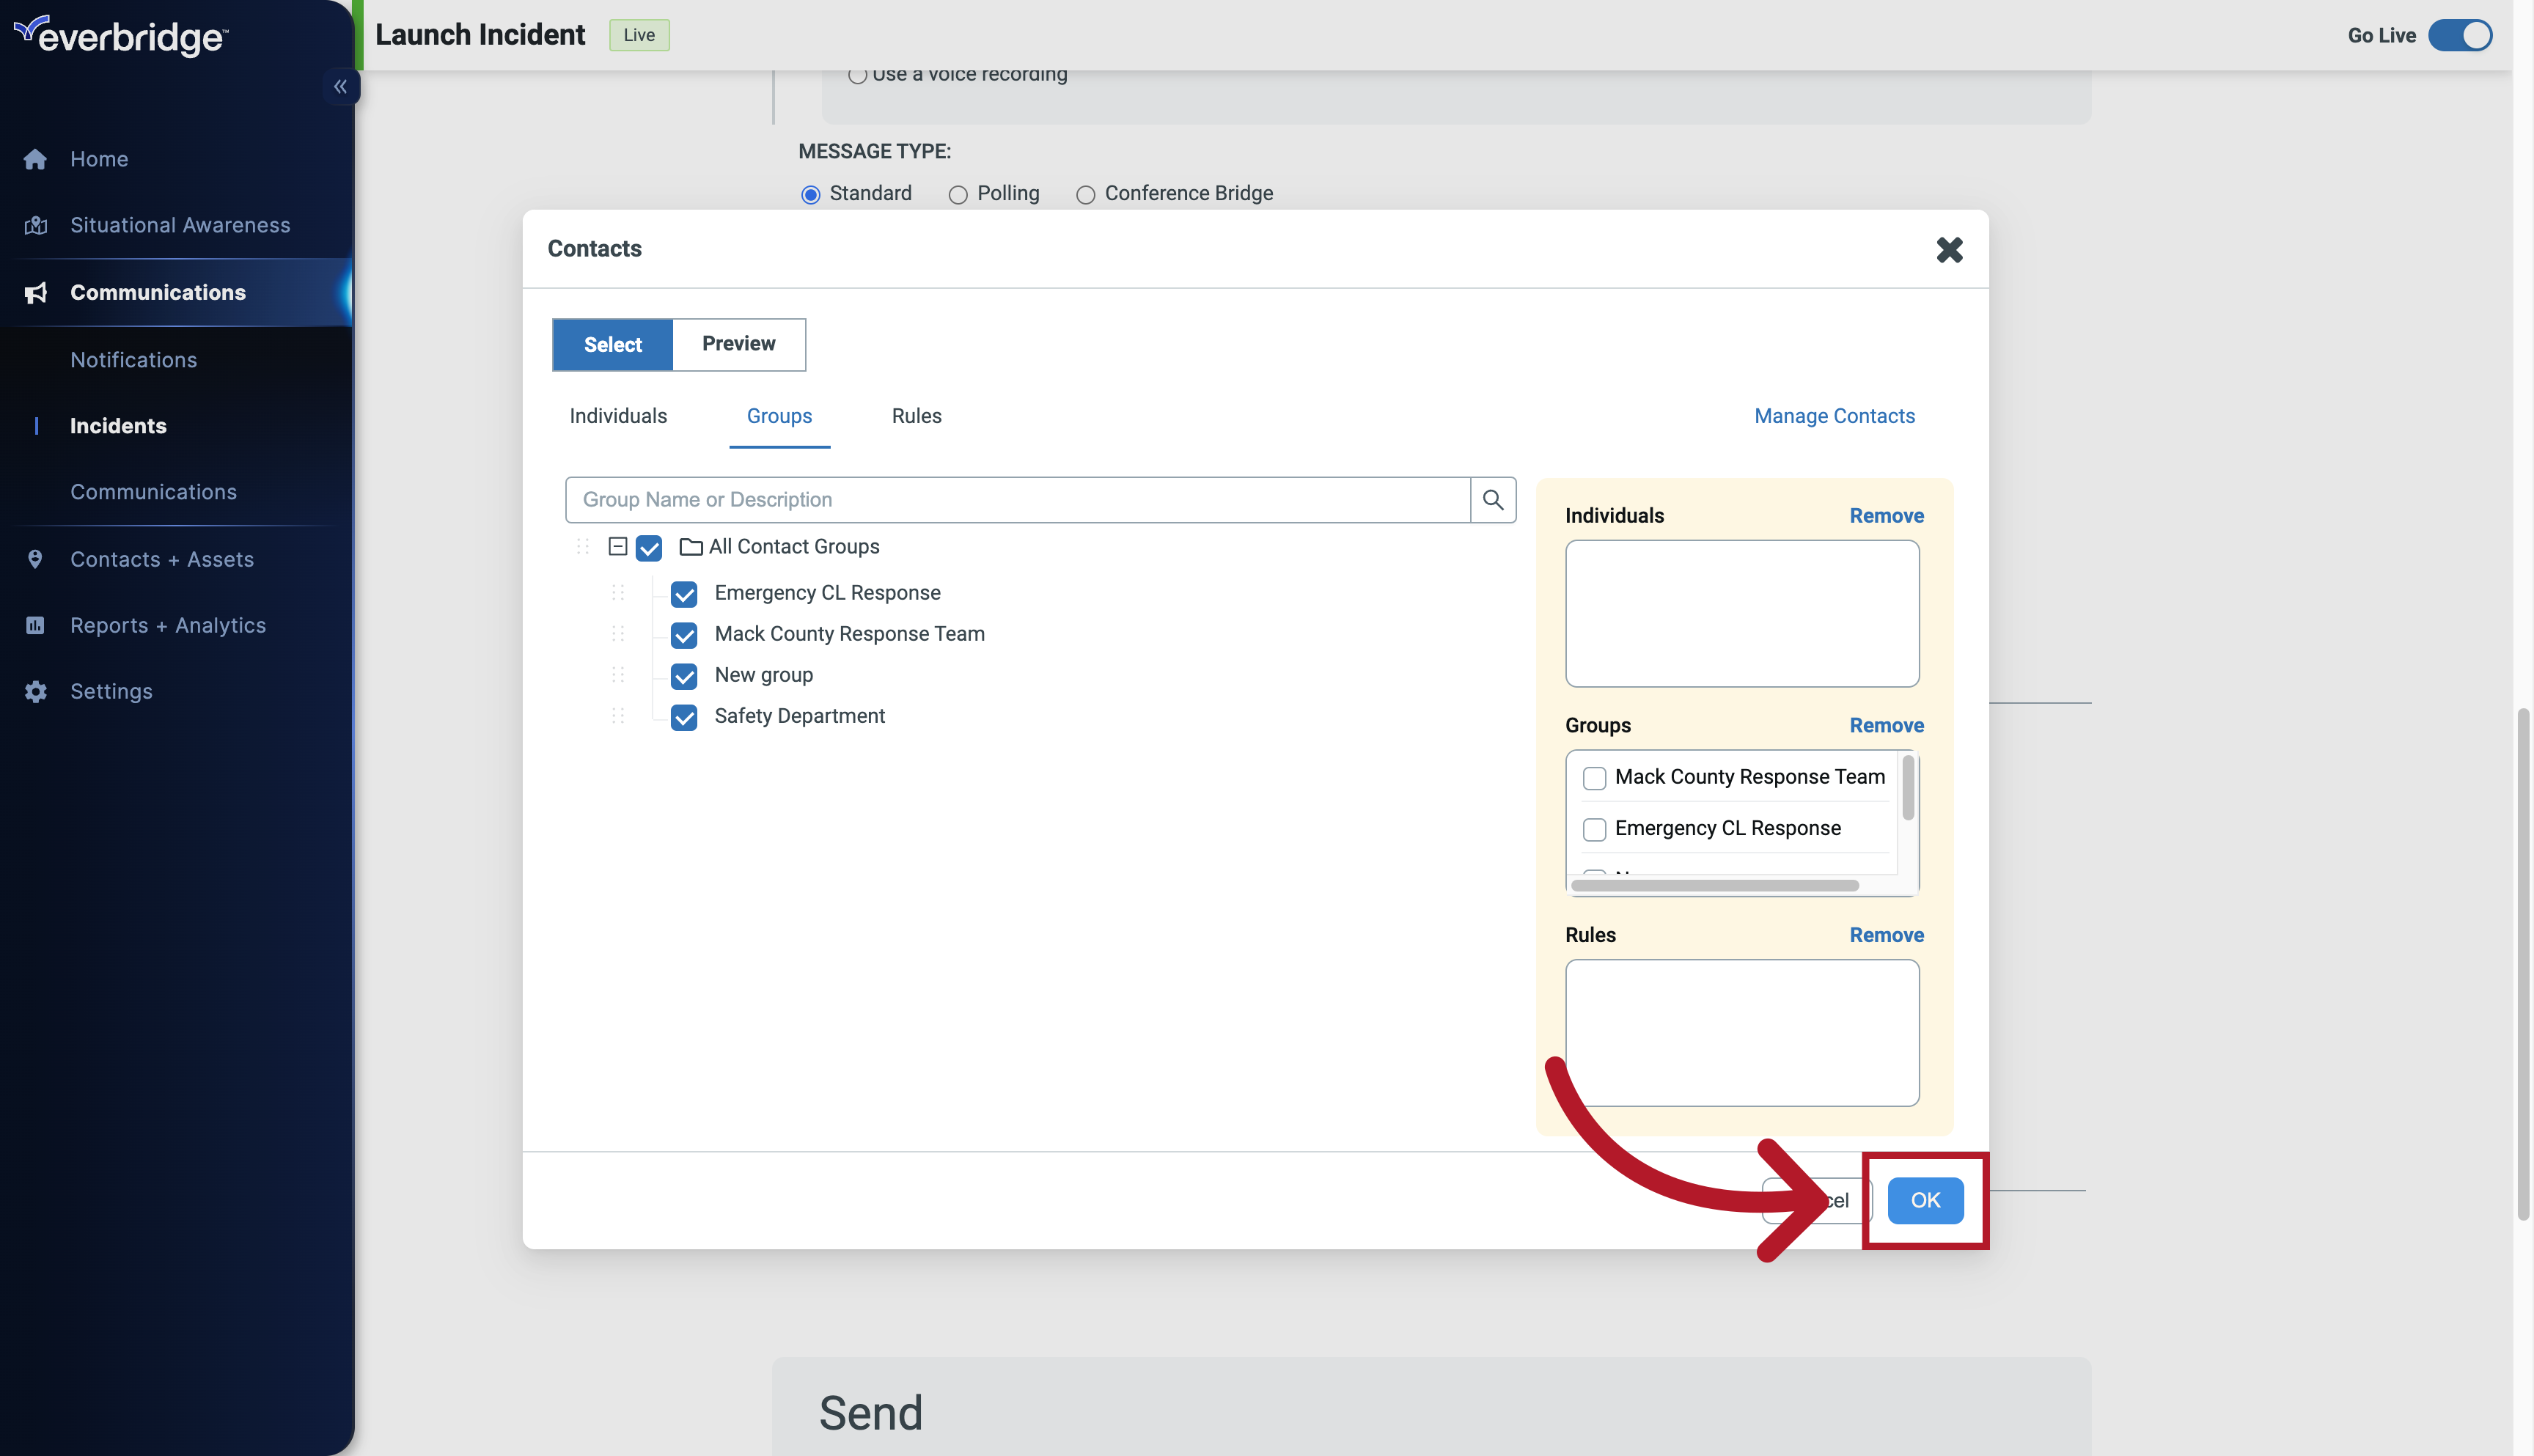
34. Contacts
Confirm the action.
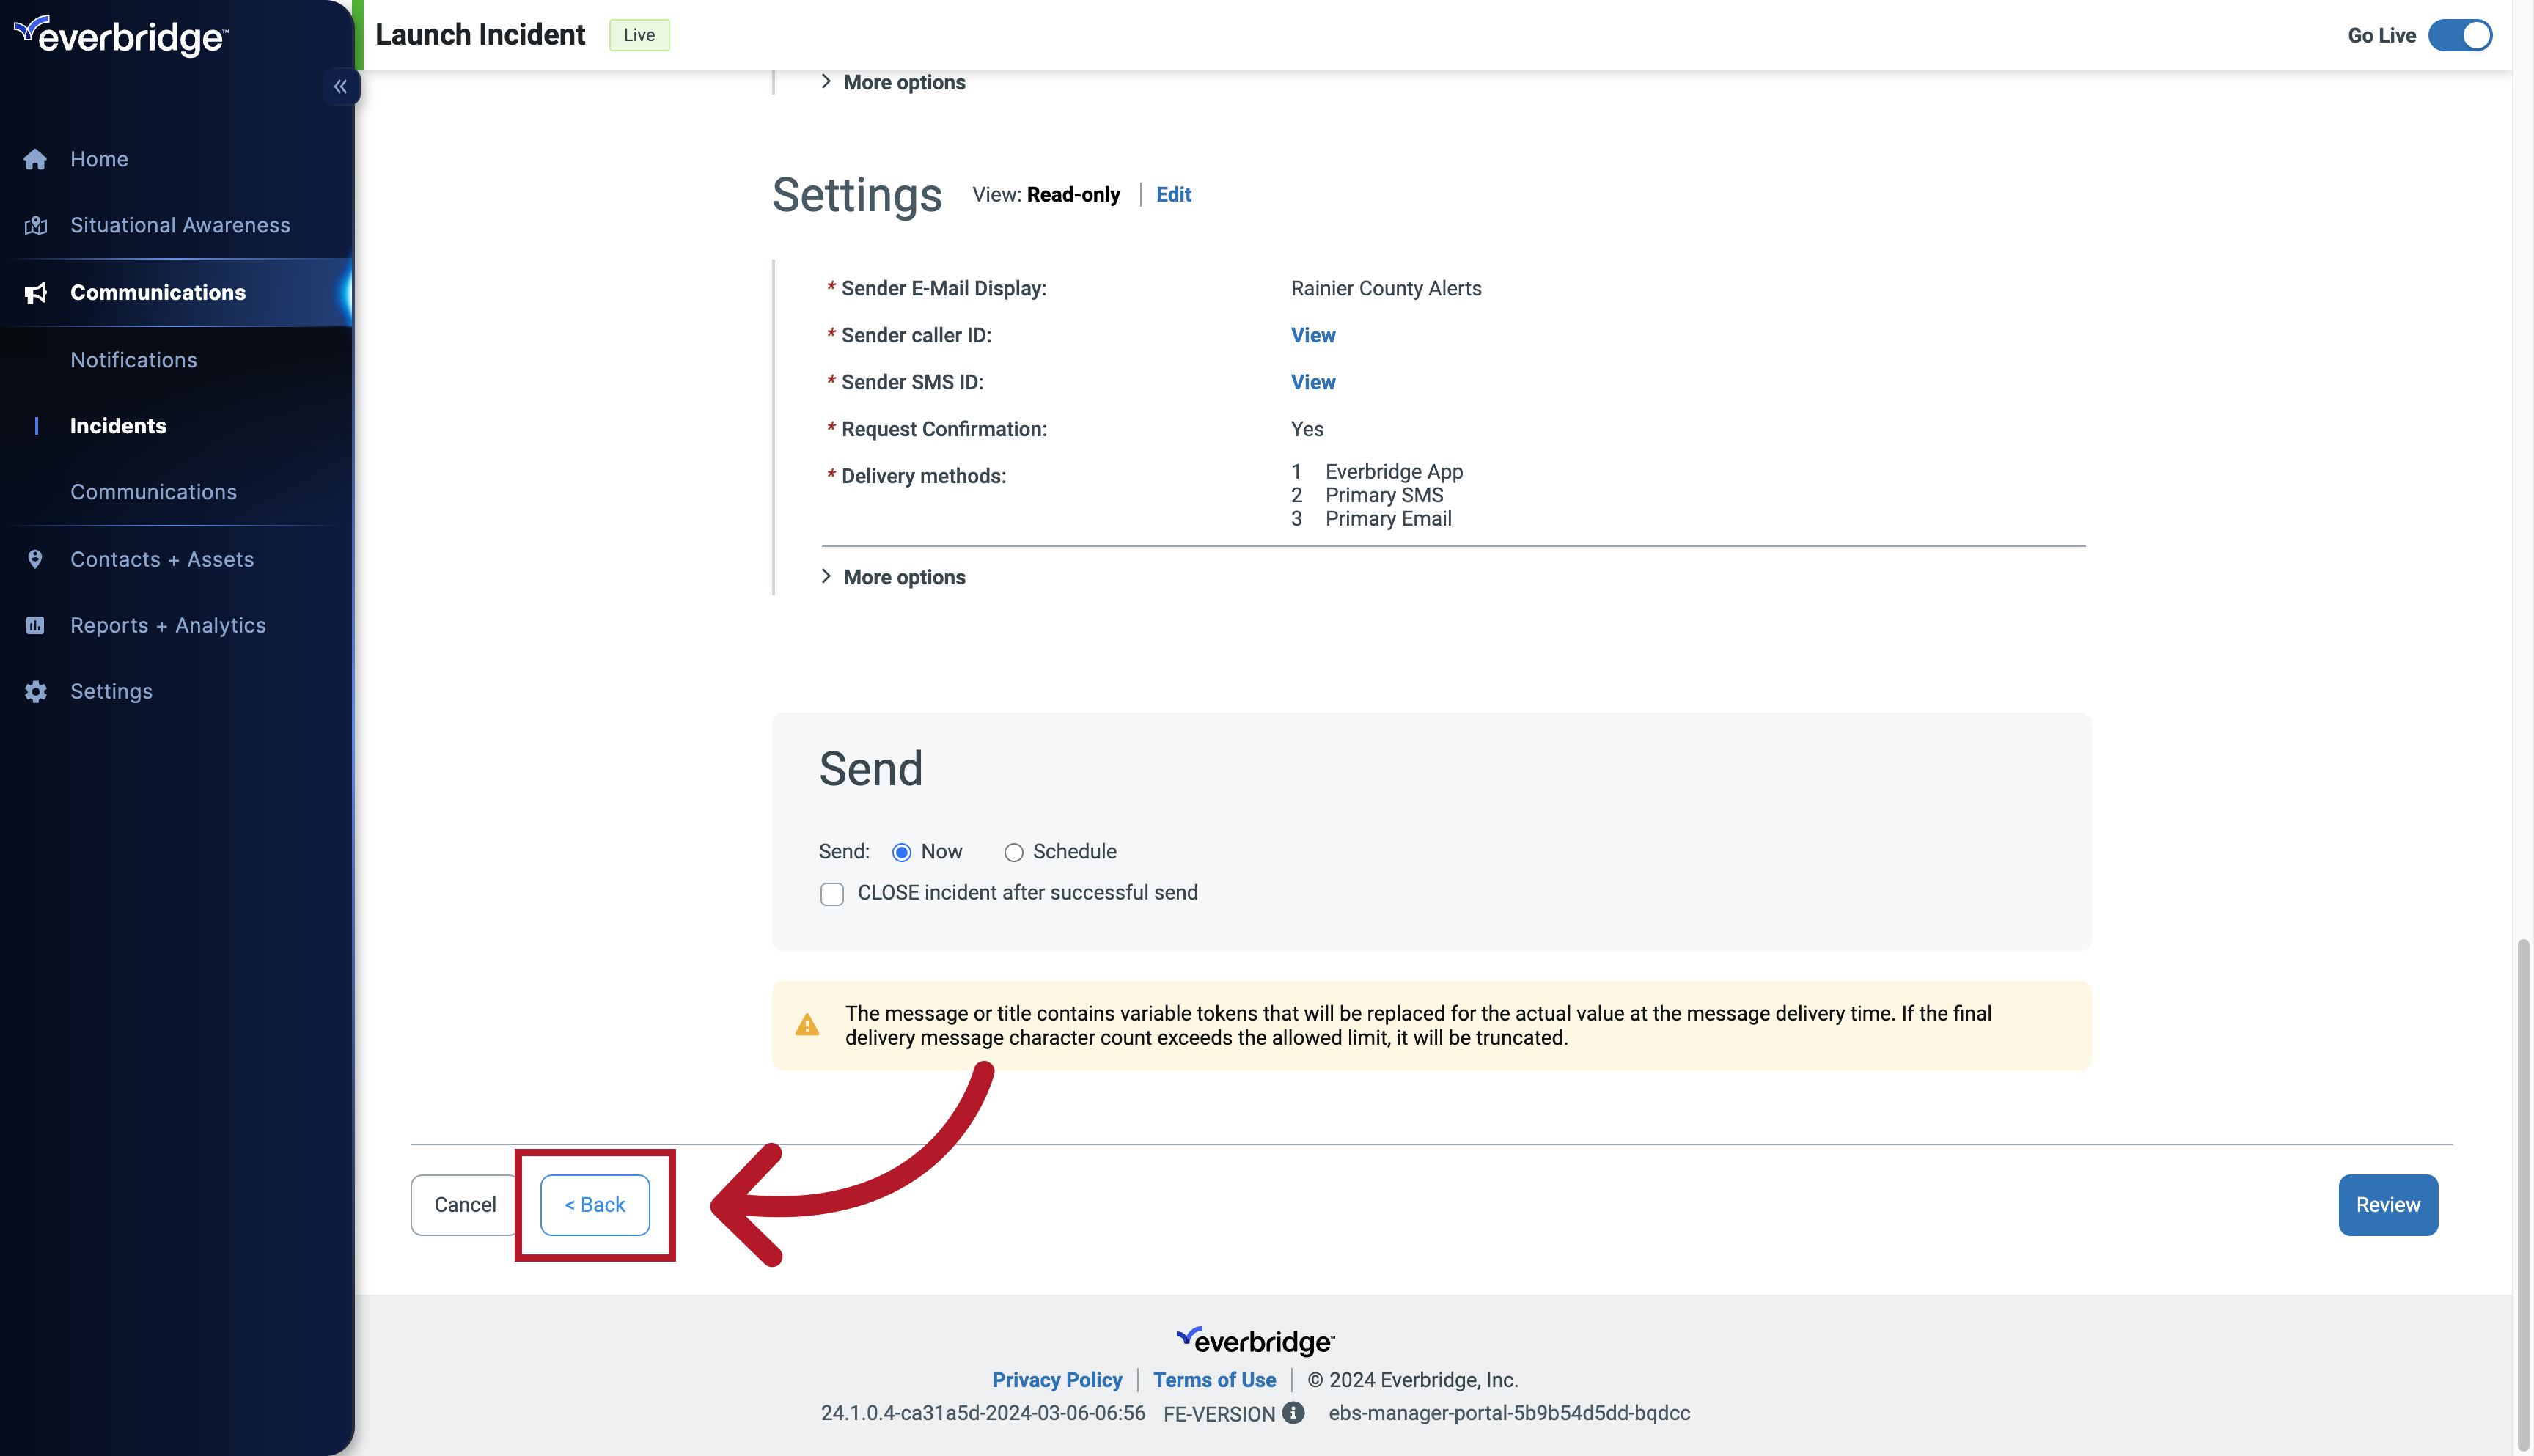
35. Incident Review
If there is a mistake or an adjustment that needs to be made, scroll down to the bottom of the page and click back. In this example, we have entered an incorrect evacuation zone. We'll click back
36. Fill Template
change the information
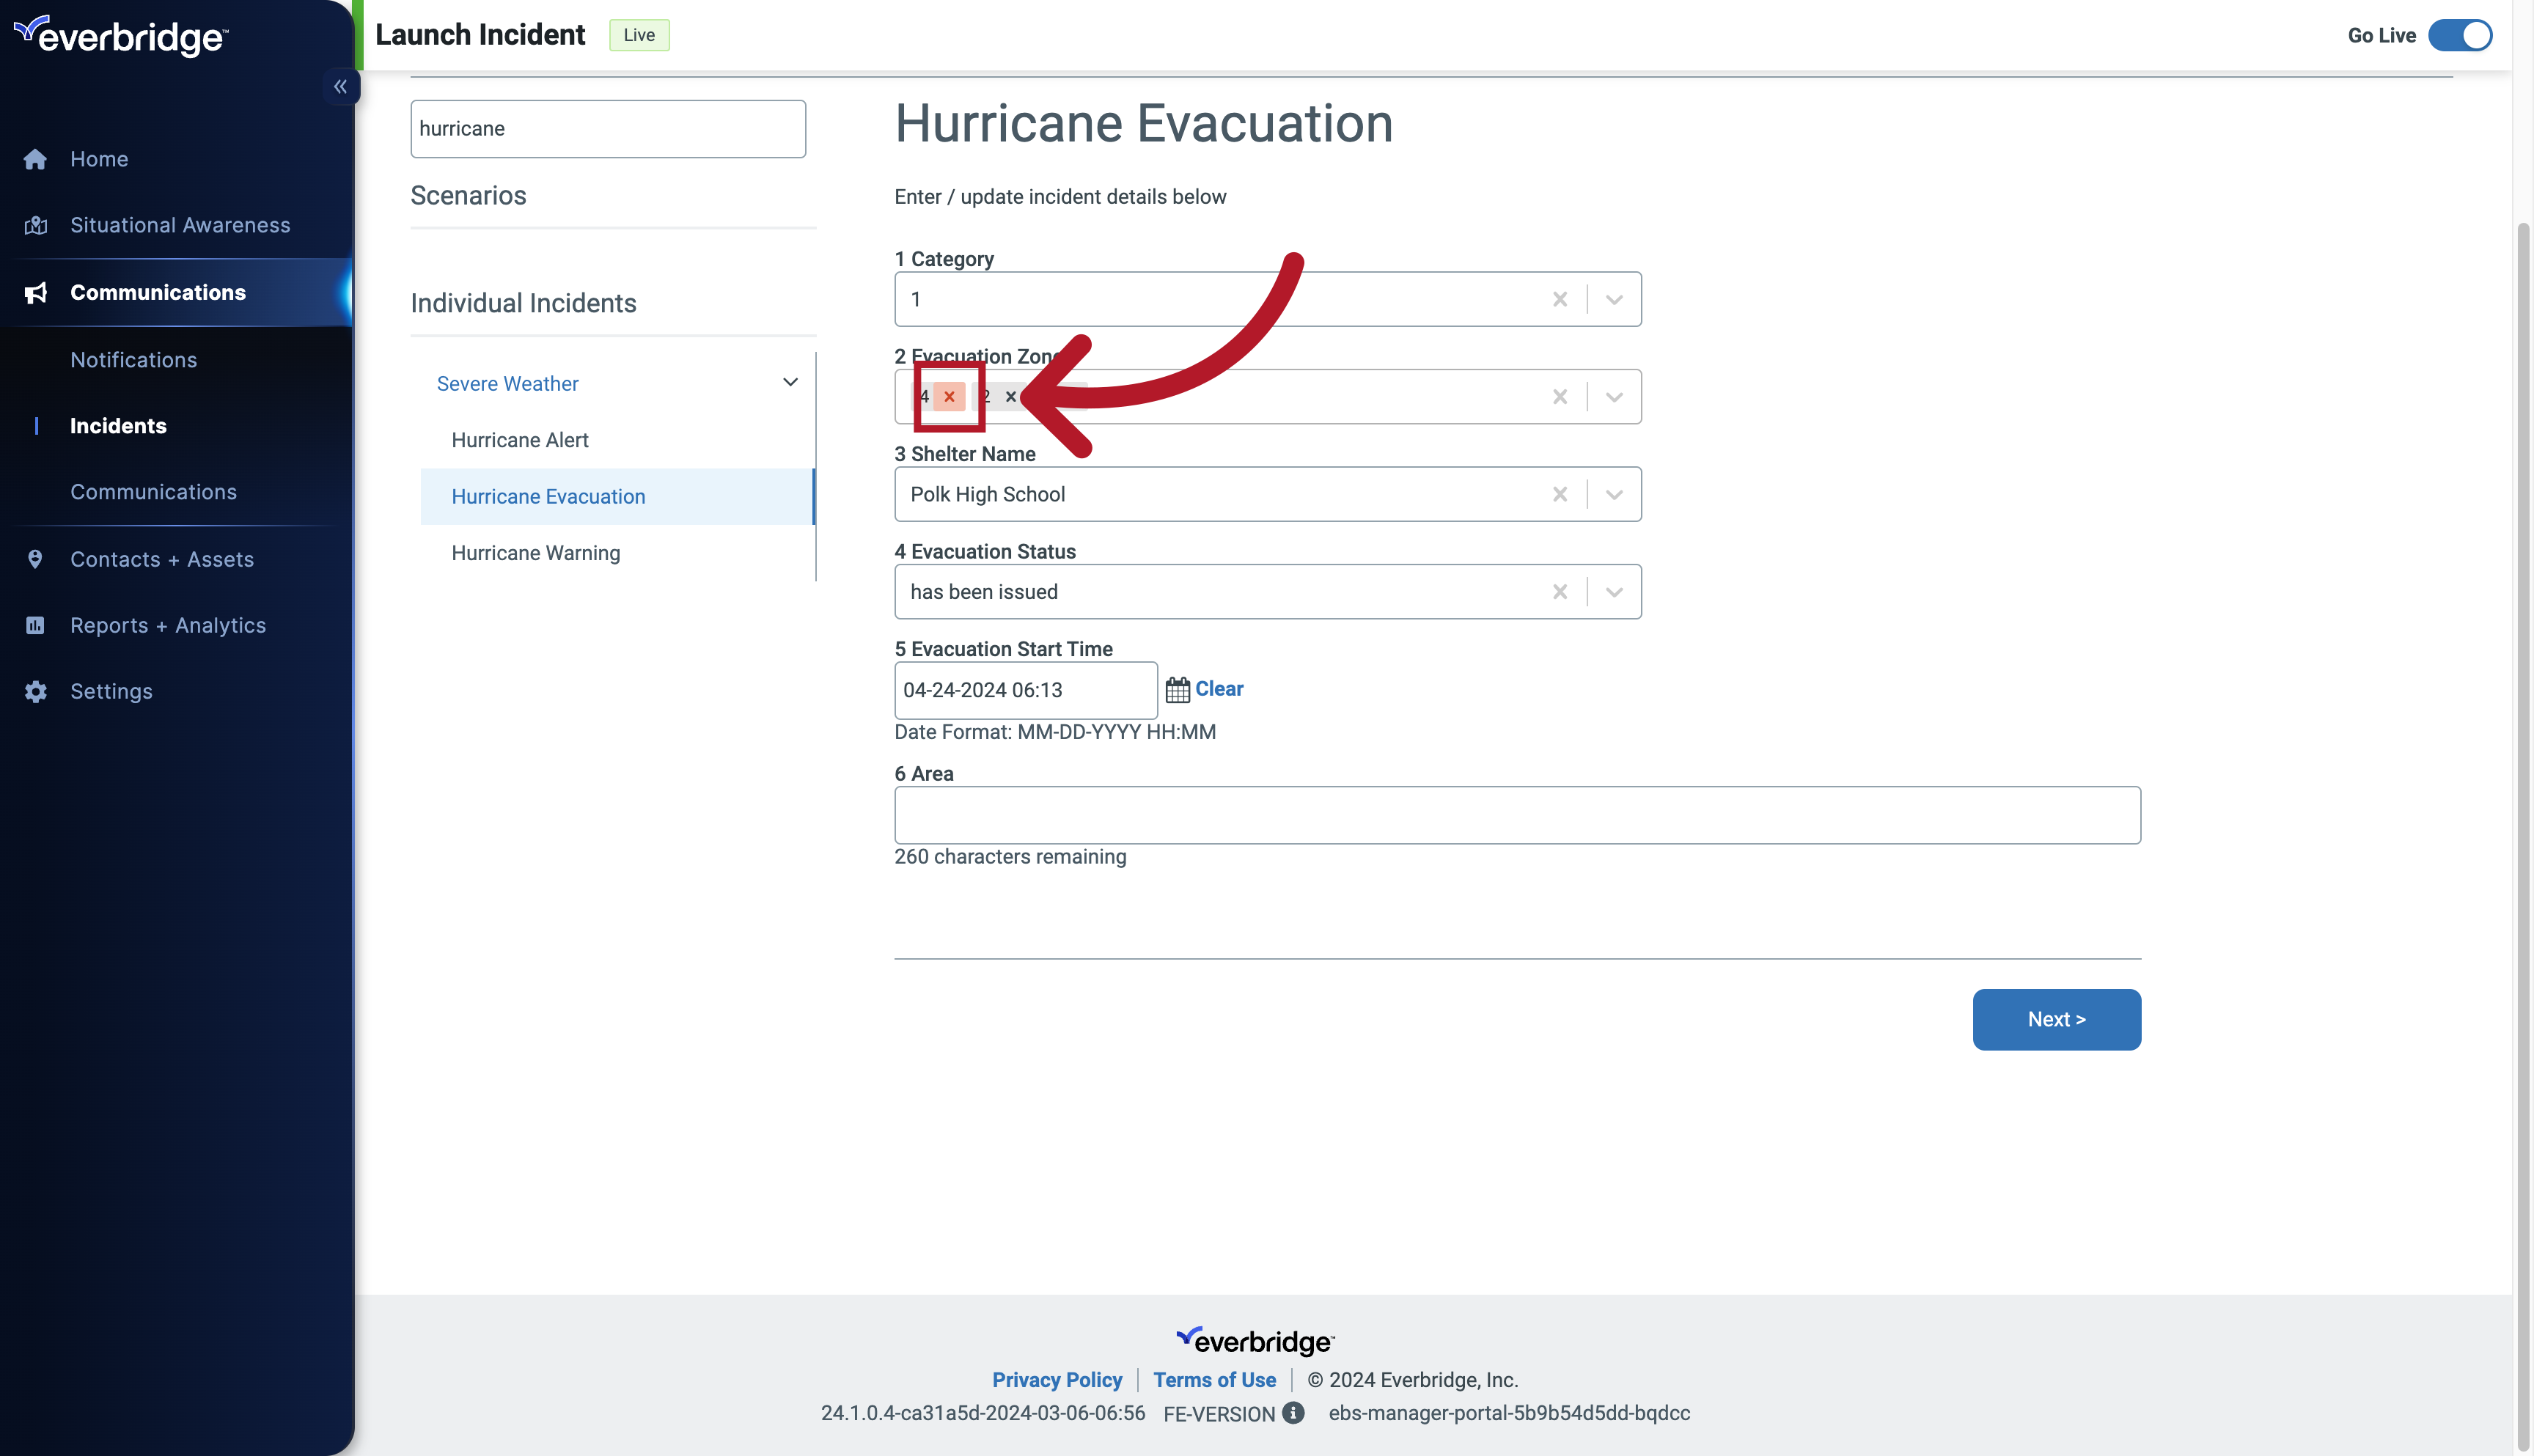
37. Fill Template
Click the selected button
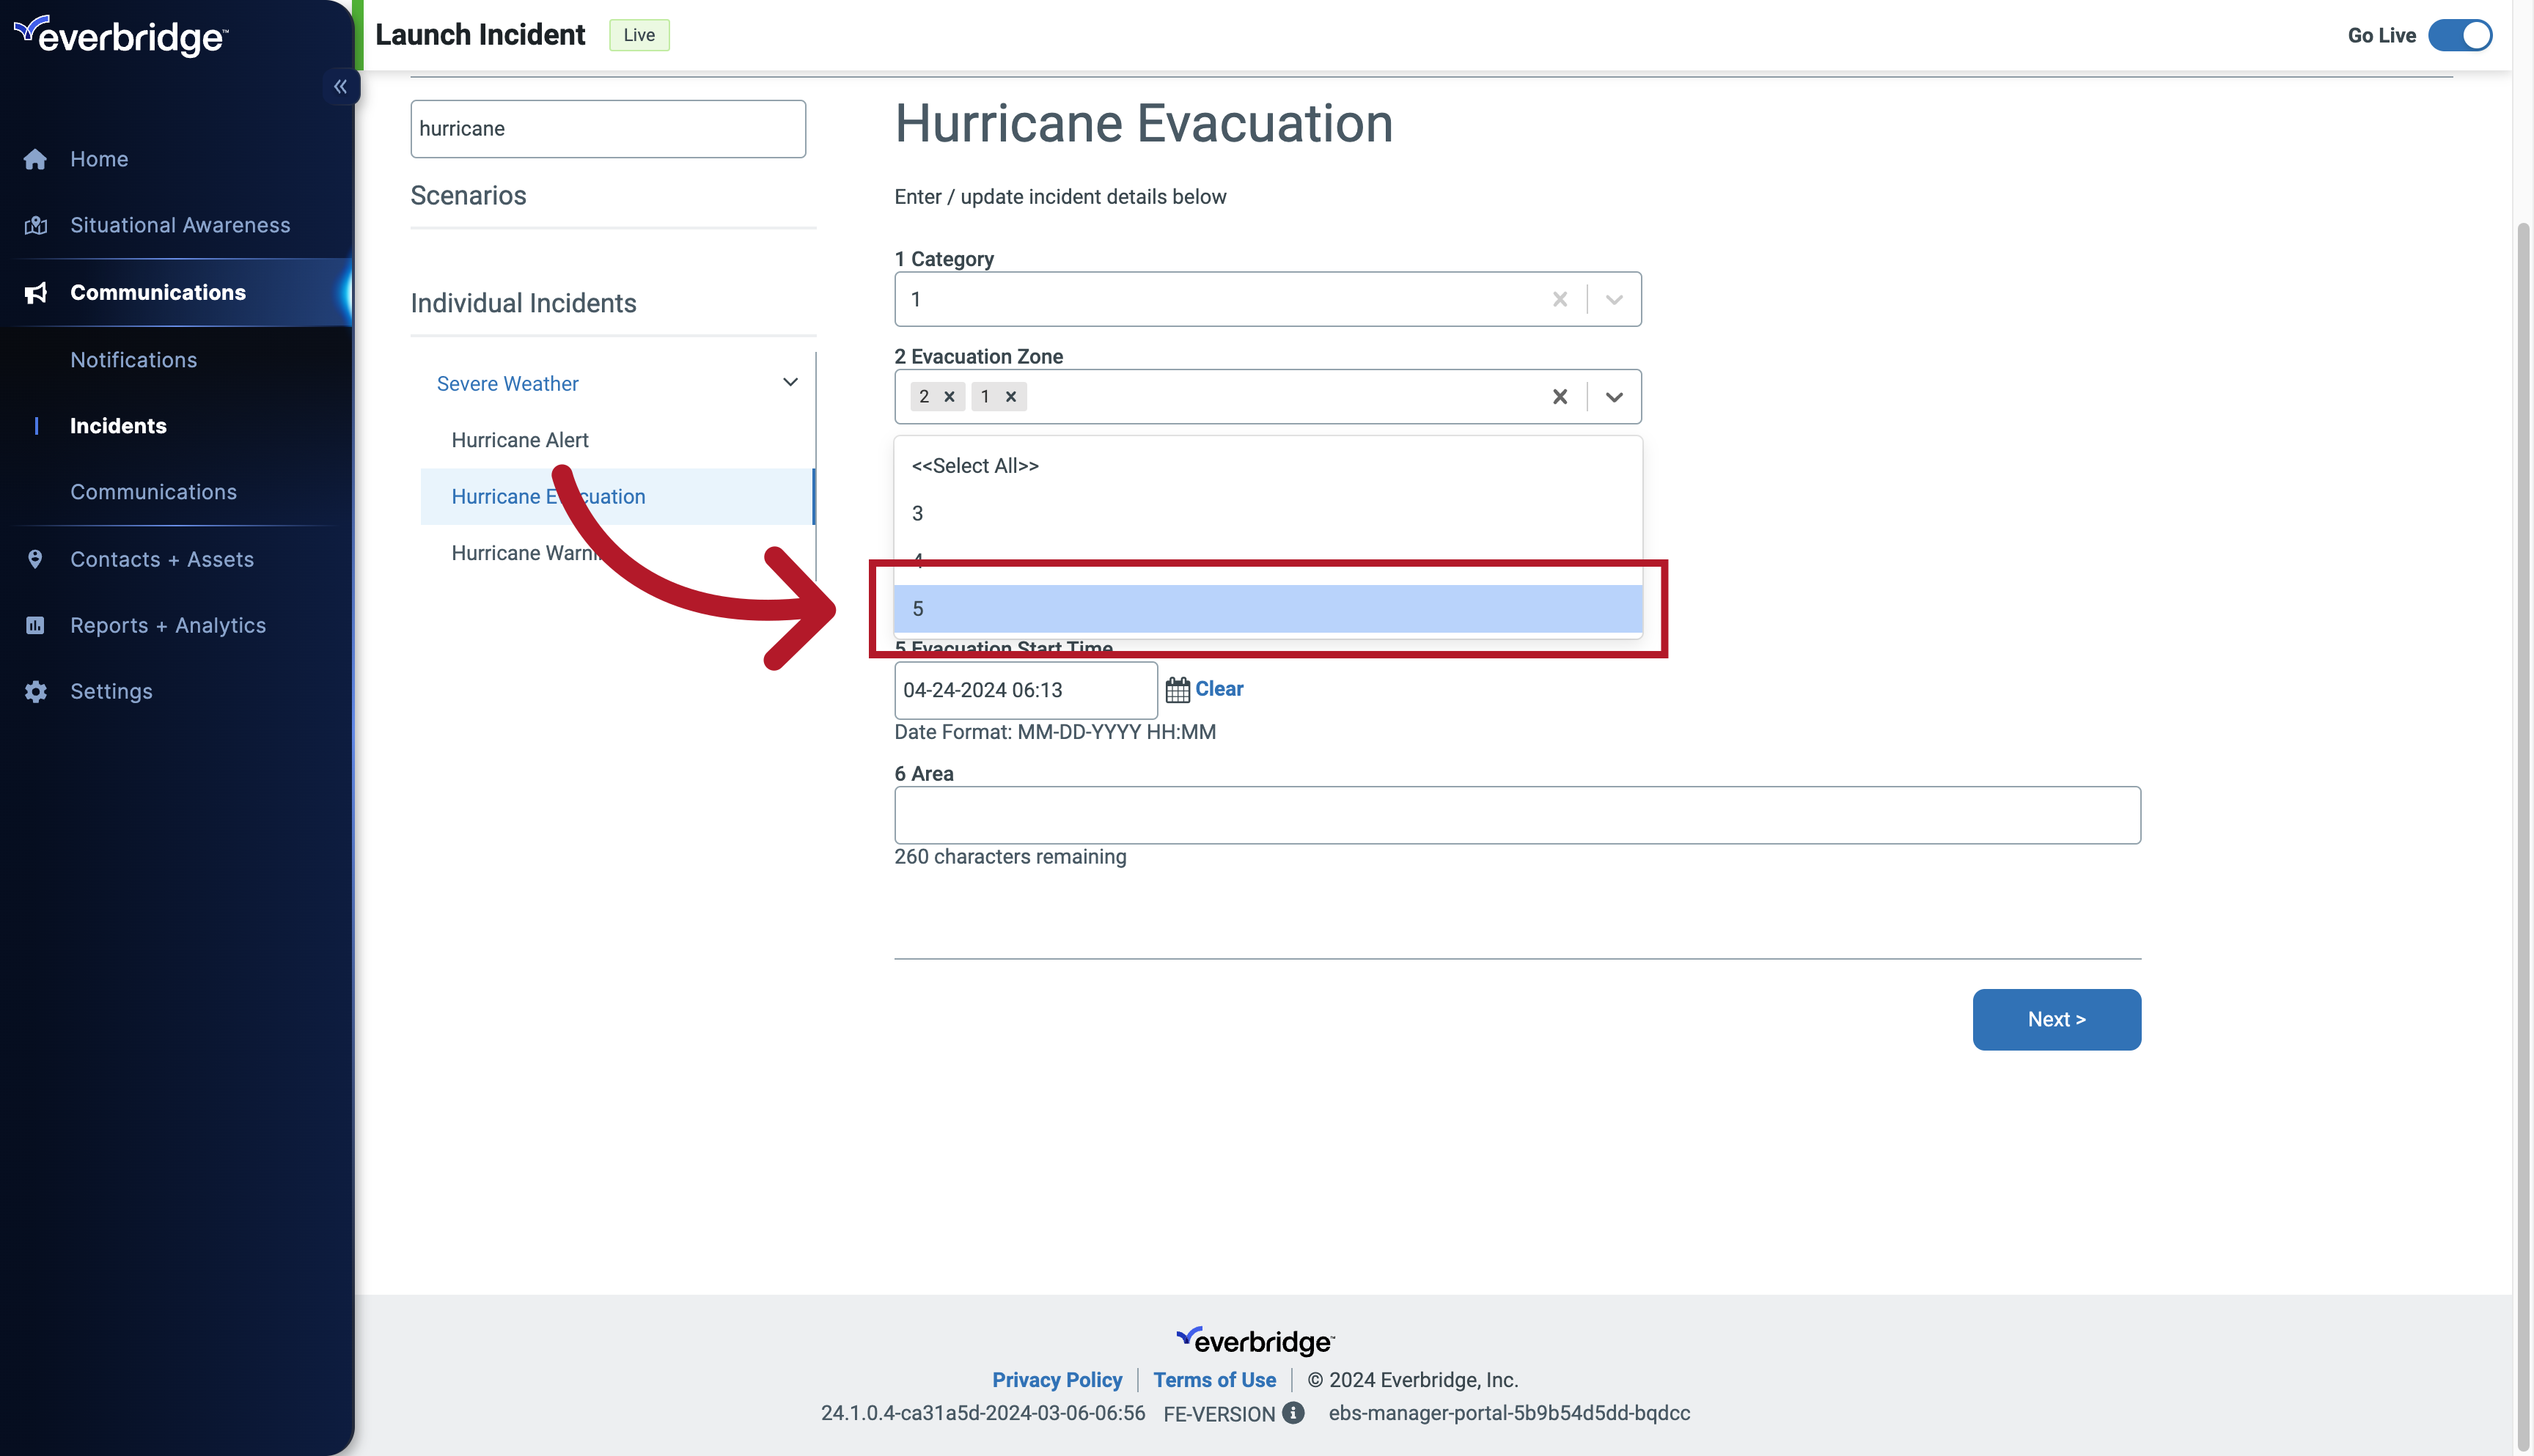
38. Fill Template
Select the number 5.
39. Fill Template
Choose the Polk High School shelter.
40. Fill Template
and click Next again.
41. Incident Review
Now scroll down to the bottom of the page
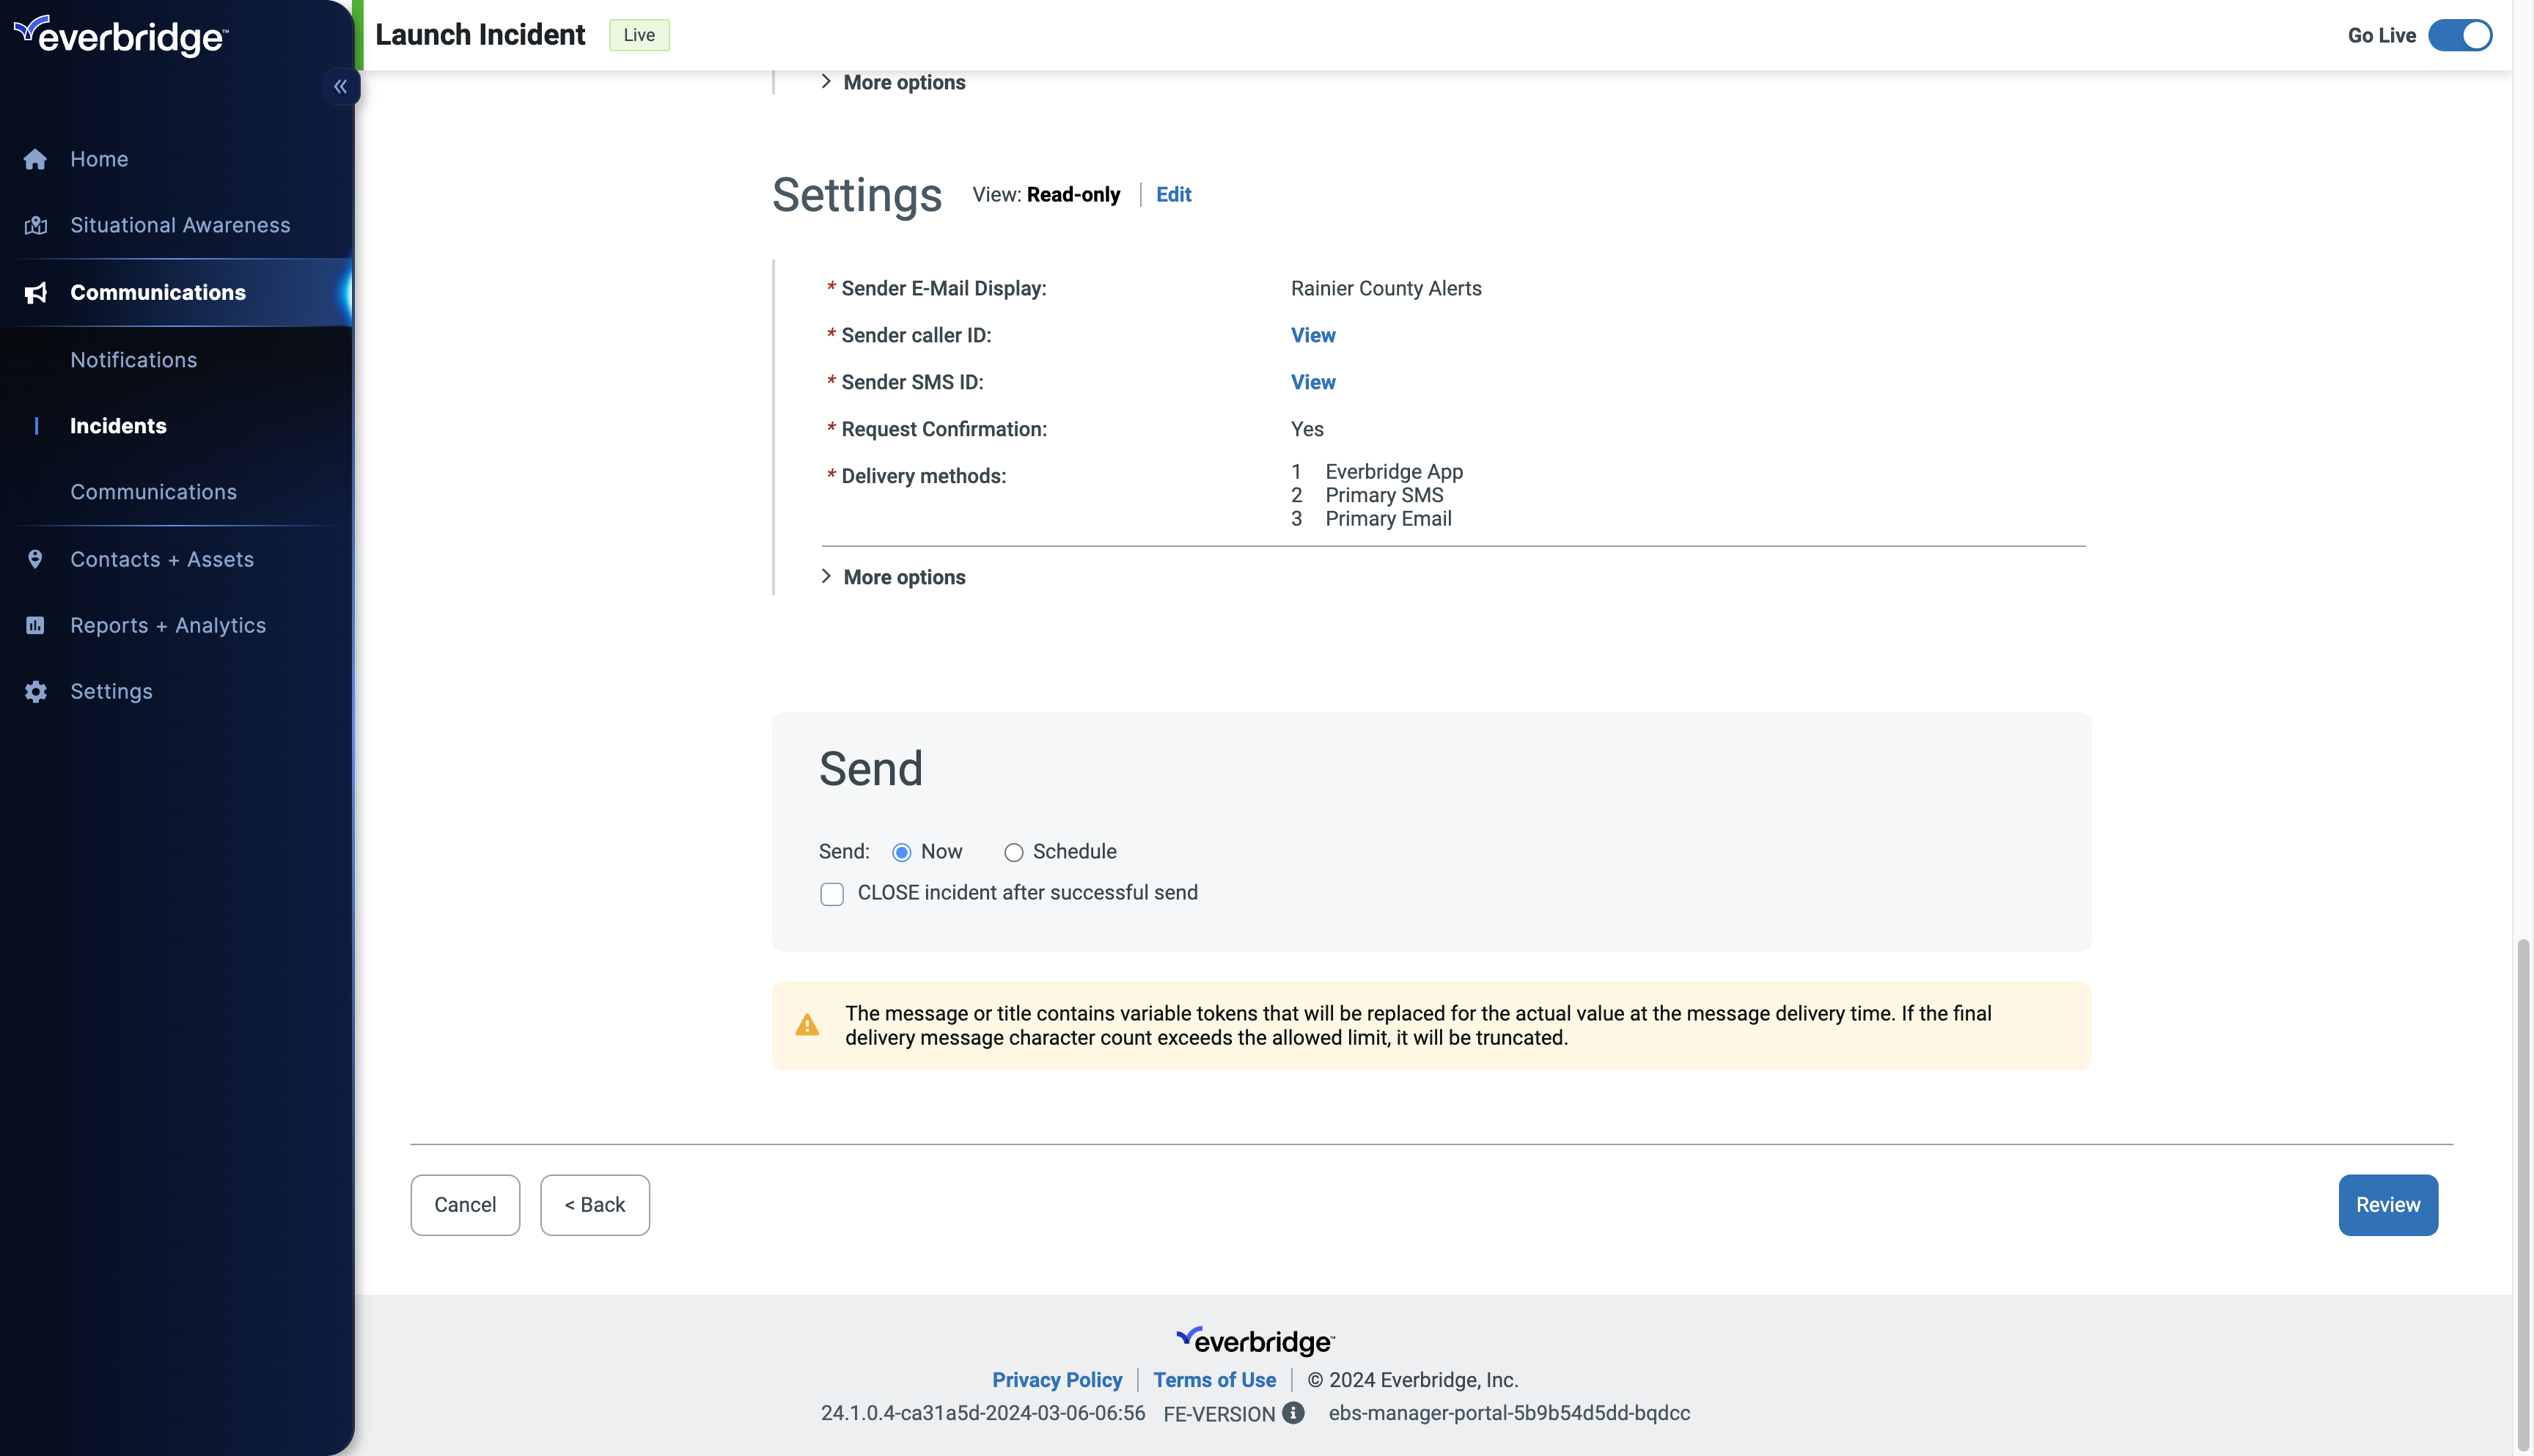
42. Incident Send
and choose whether to launch the incident immediately or to schedule it for a later time.
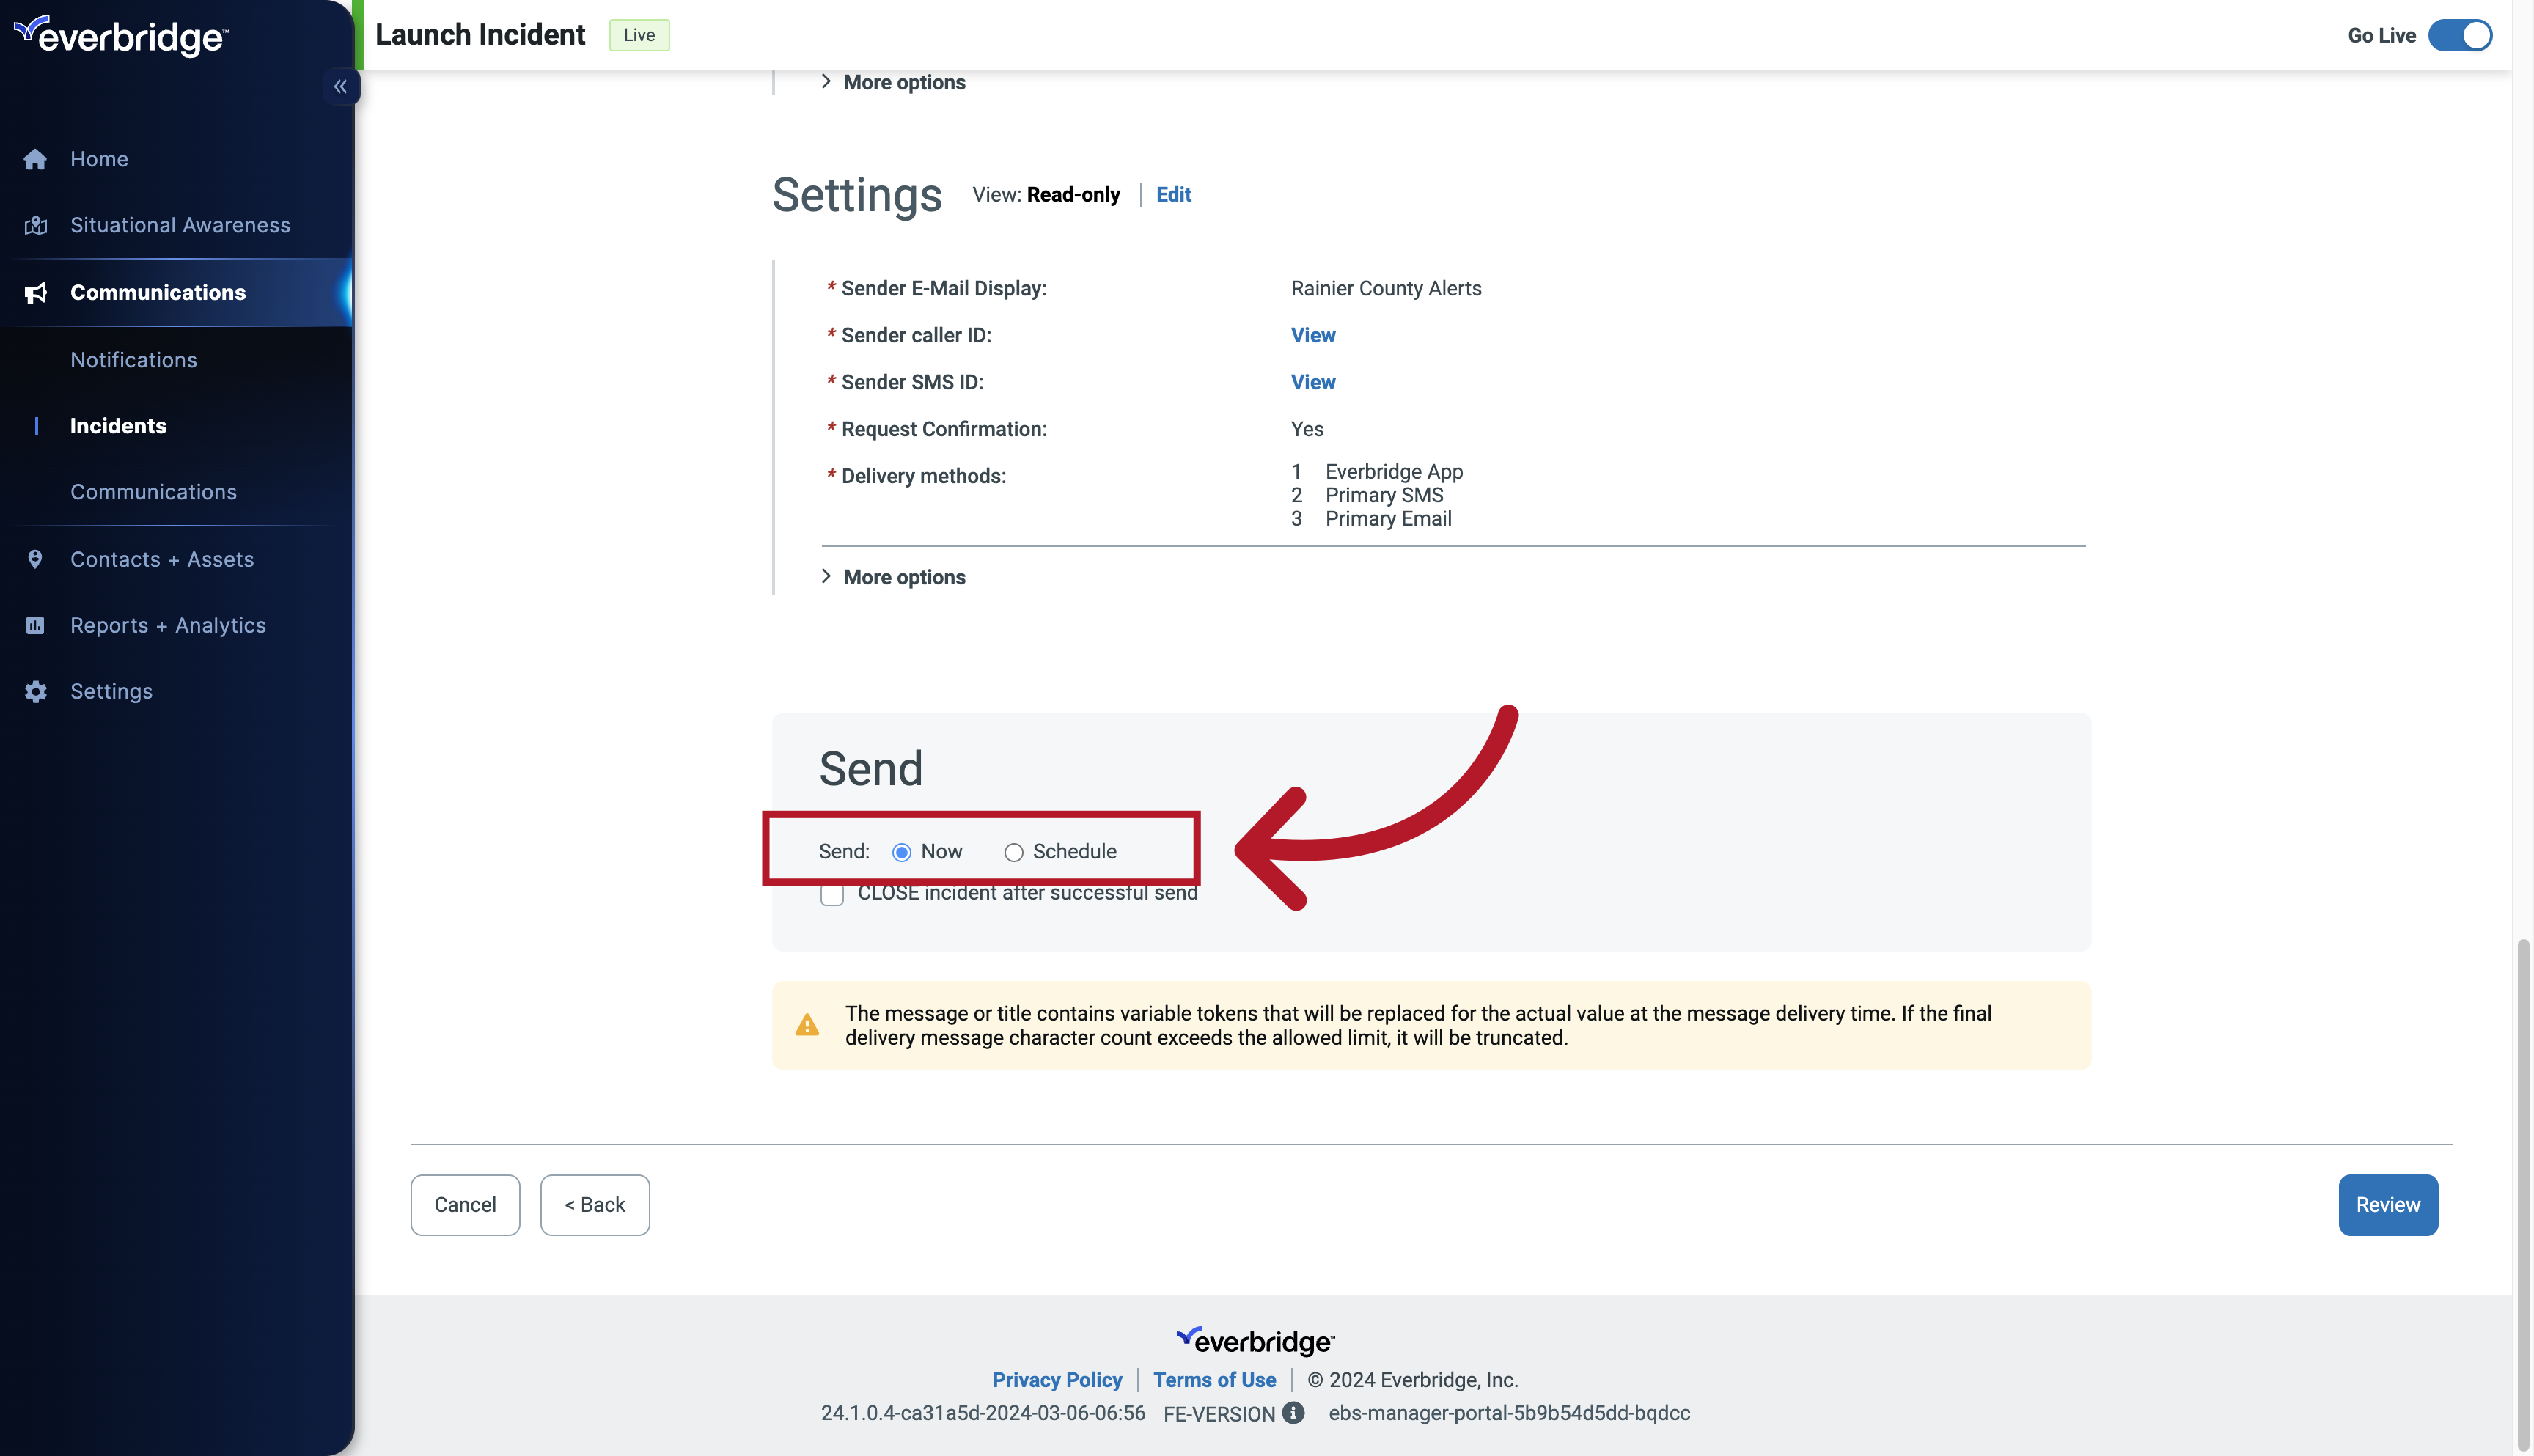
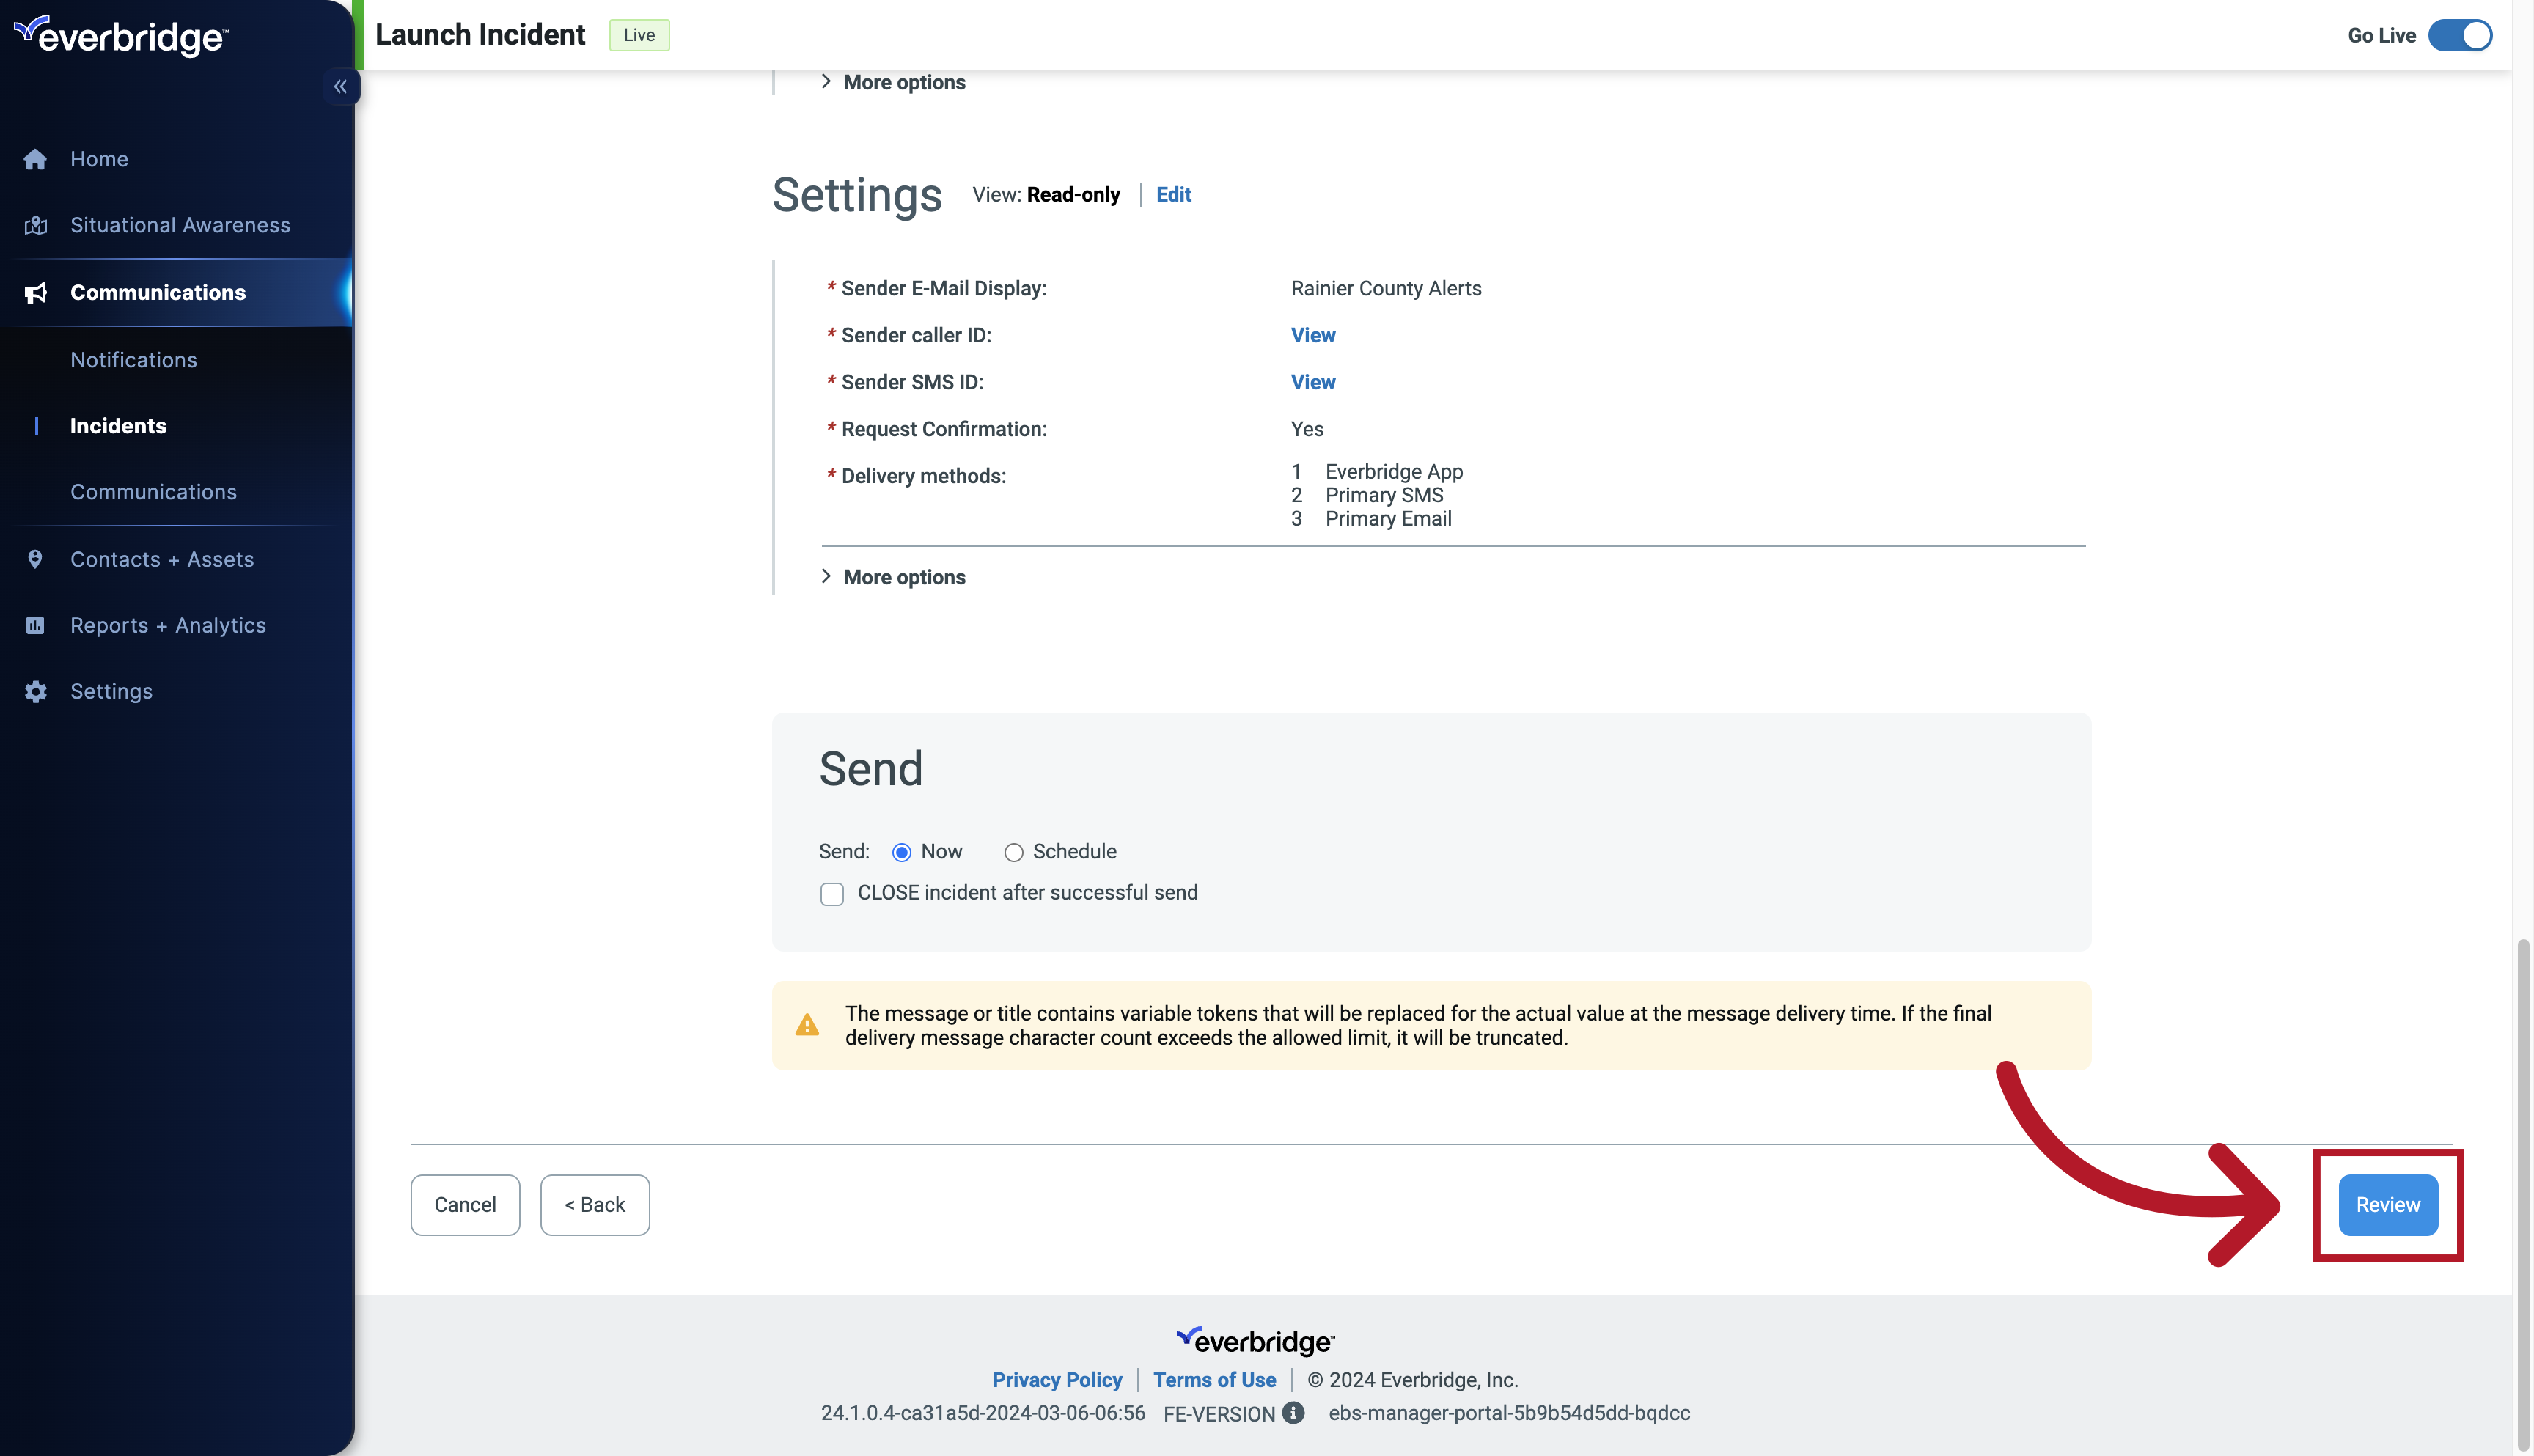
43. Incident Send
Next, click Review for a detailed overview of your message before it's sent. If you do not find this option, you can contact your administrator.
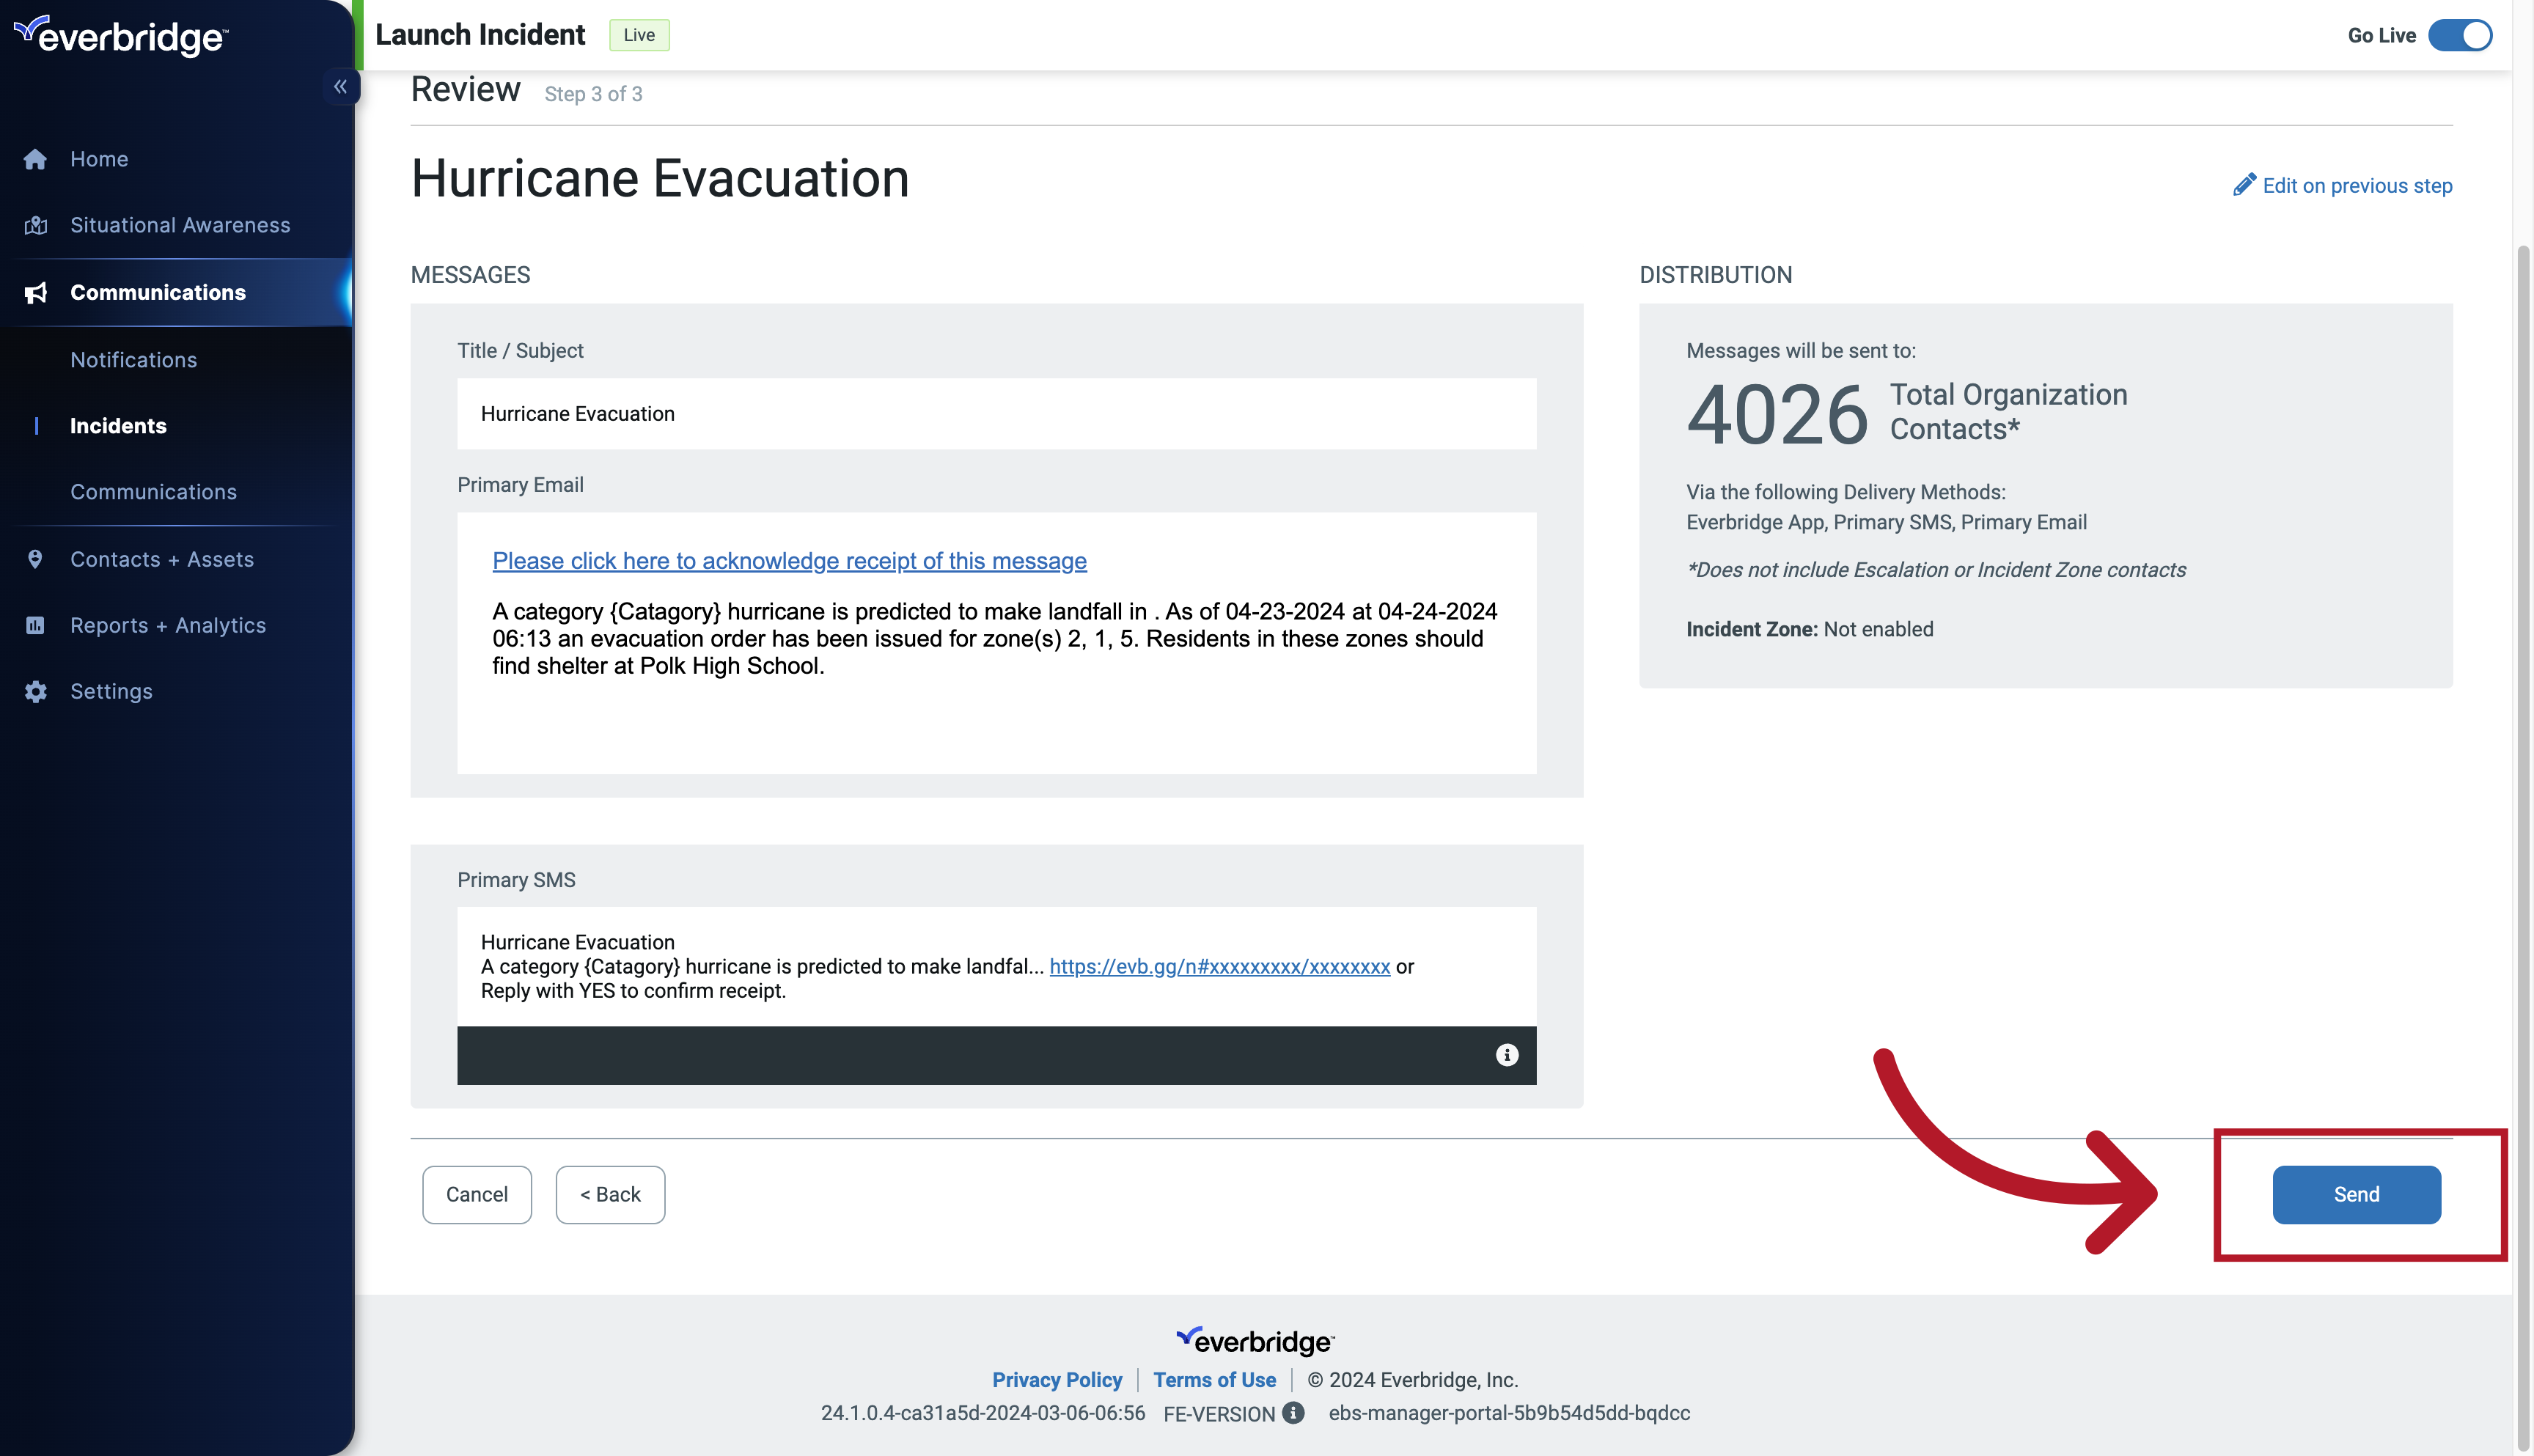
44. Incident Preview
and When ready, after reviewing, click send.
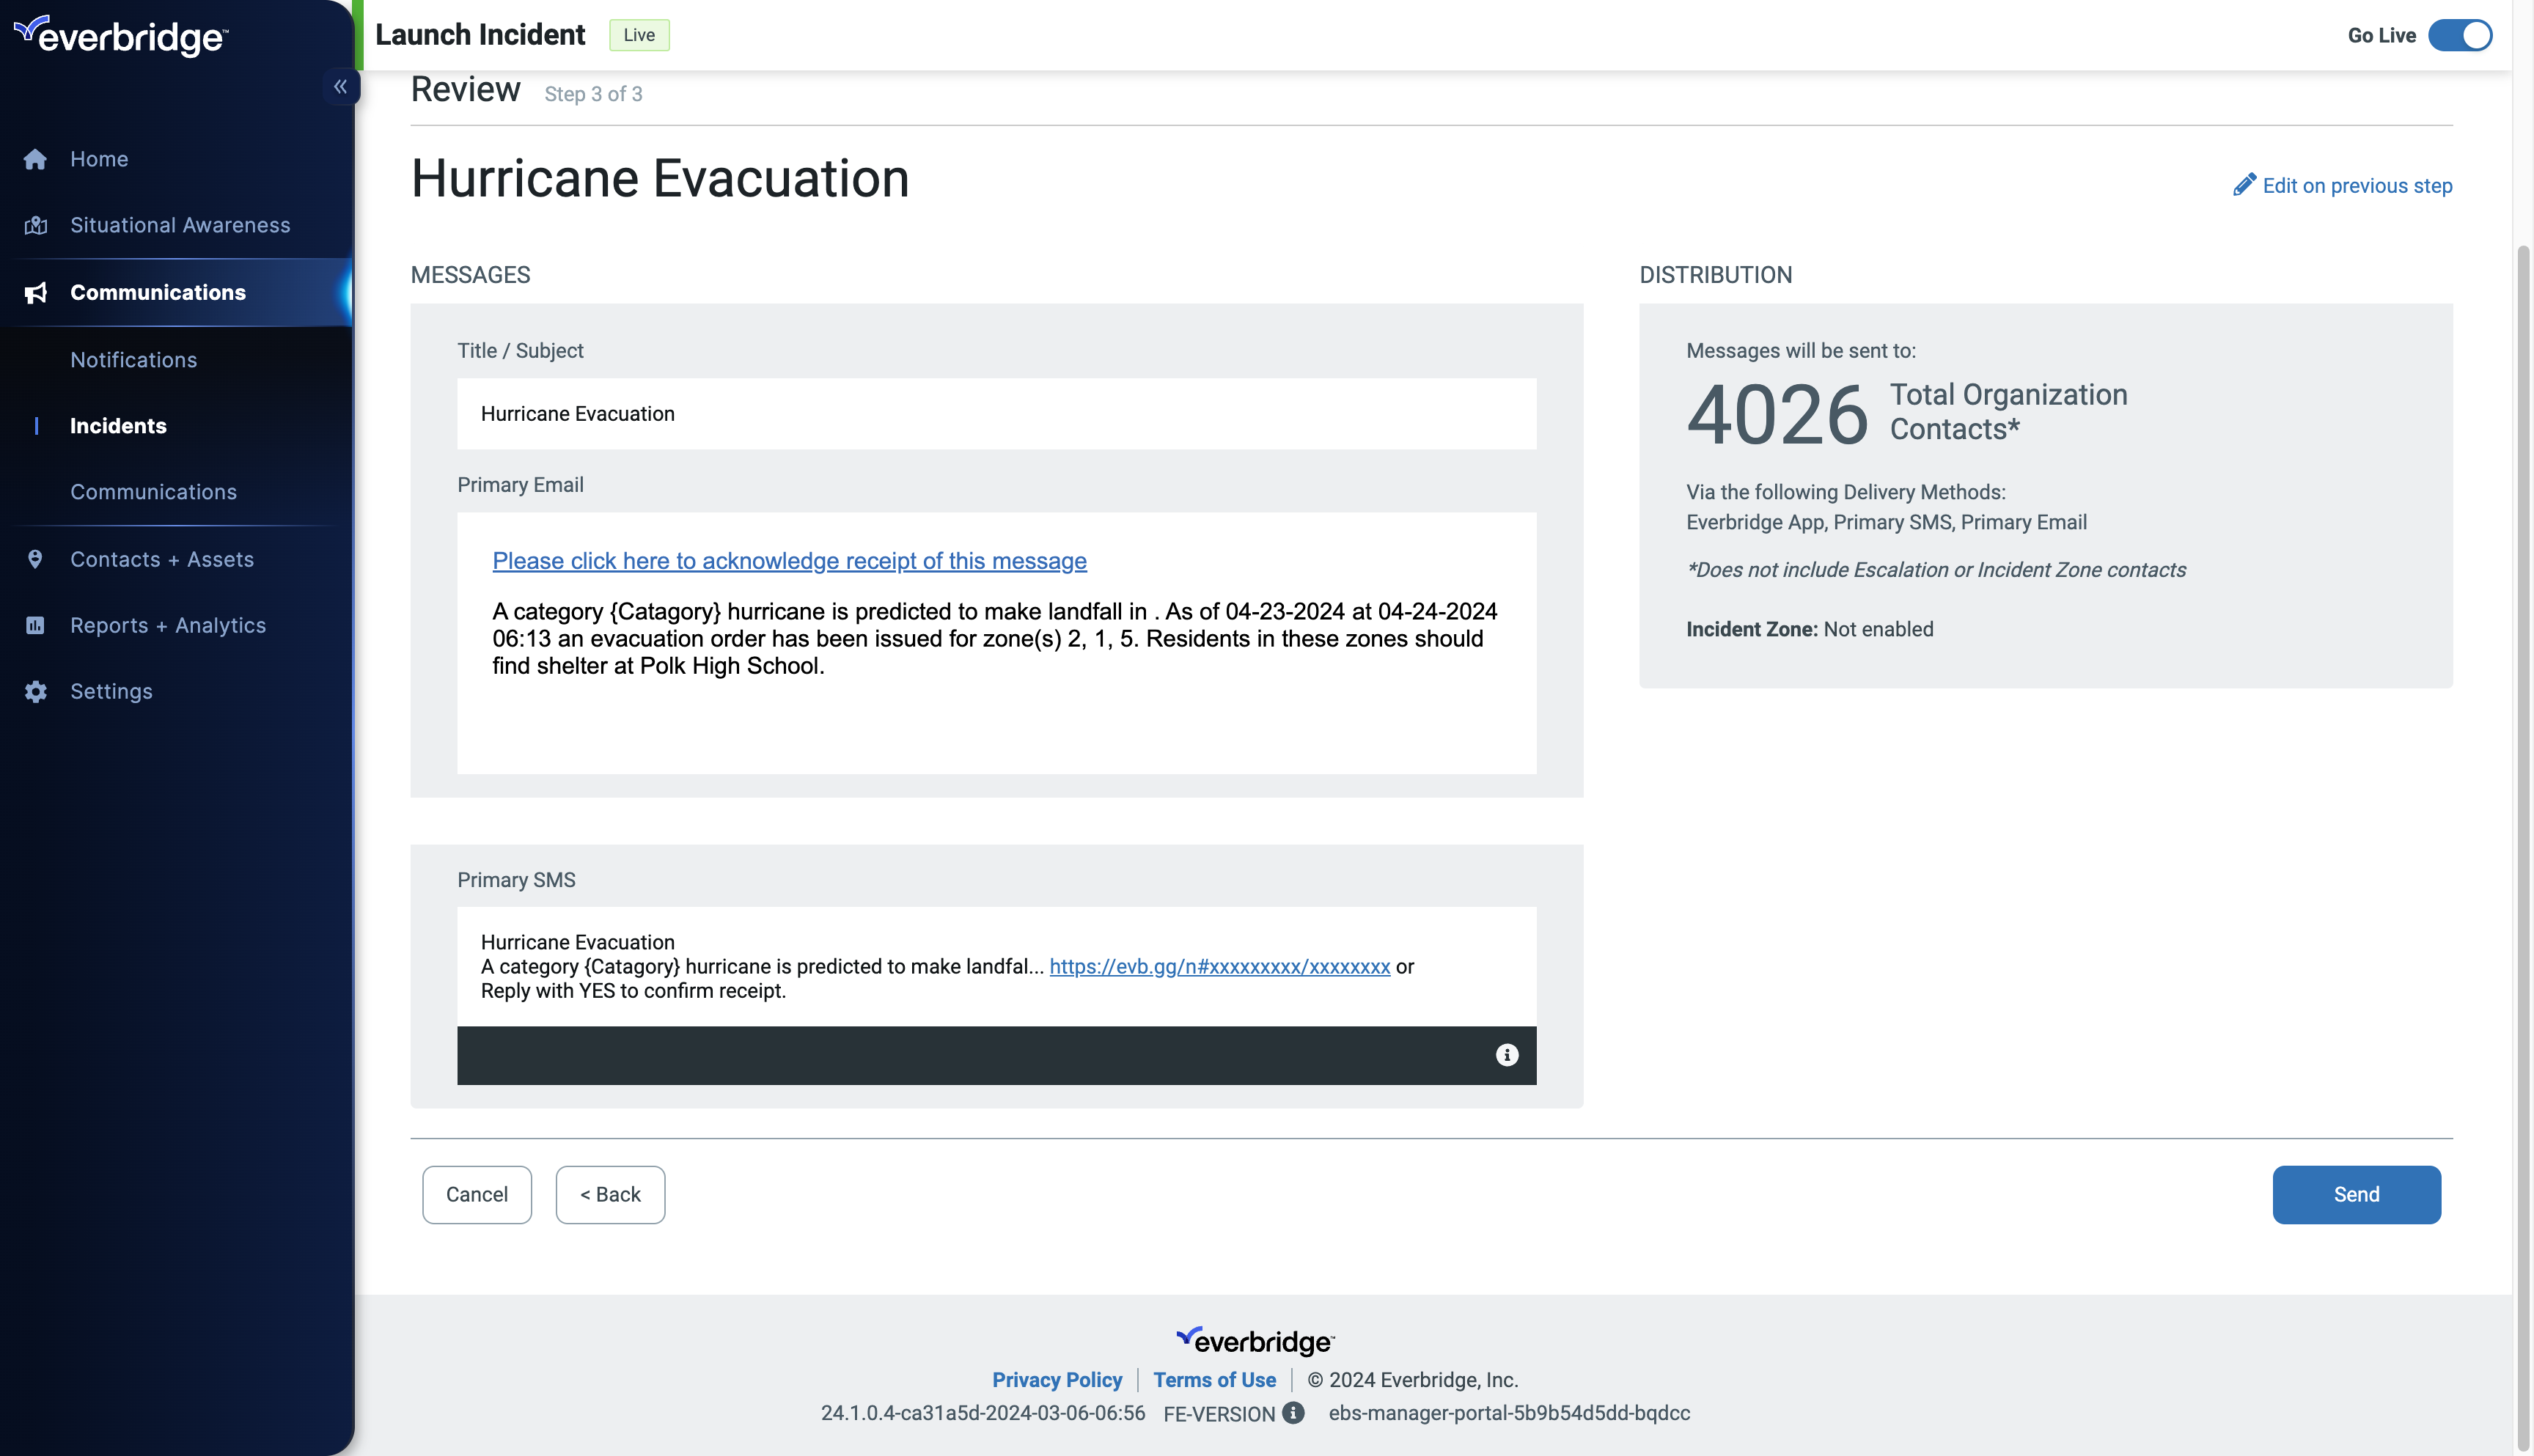
45. Incident Send
Choose to cancel, go back, or send the incident.
46. Incident Details
And with that you've successfully launched an incident within Everbridge 360!
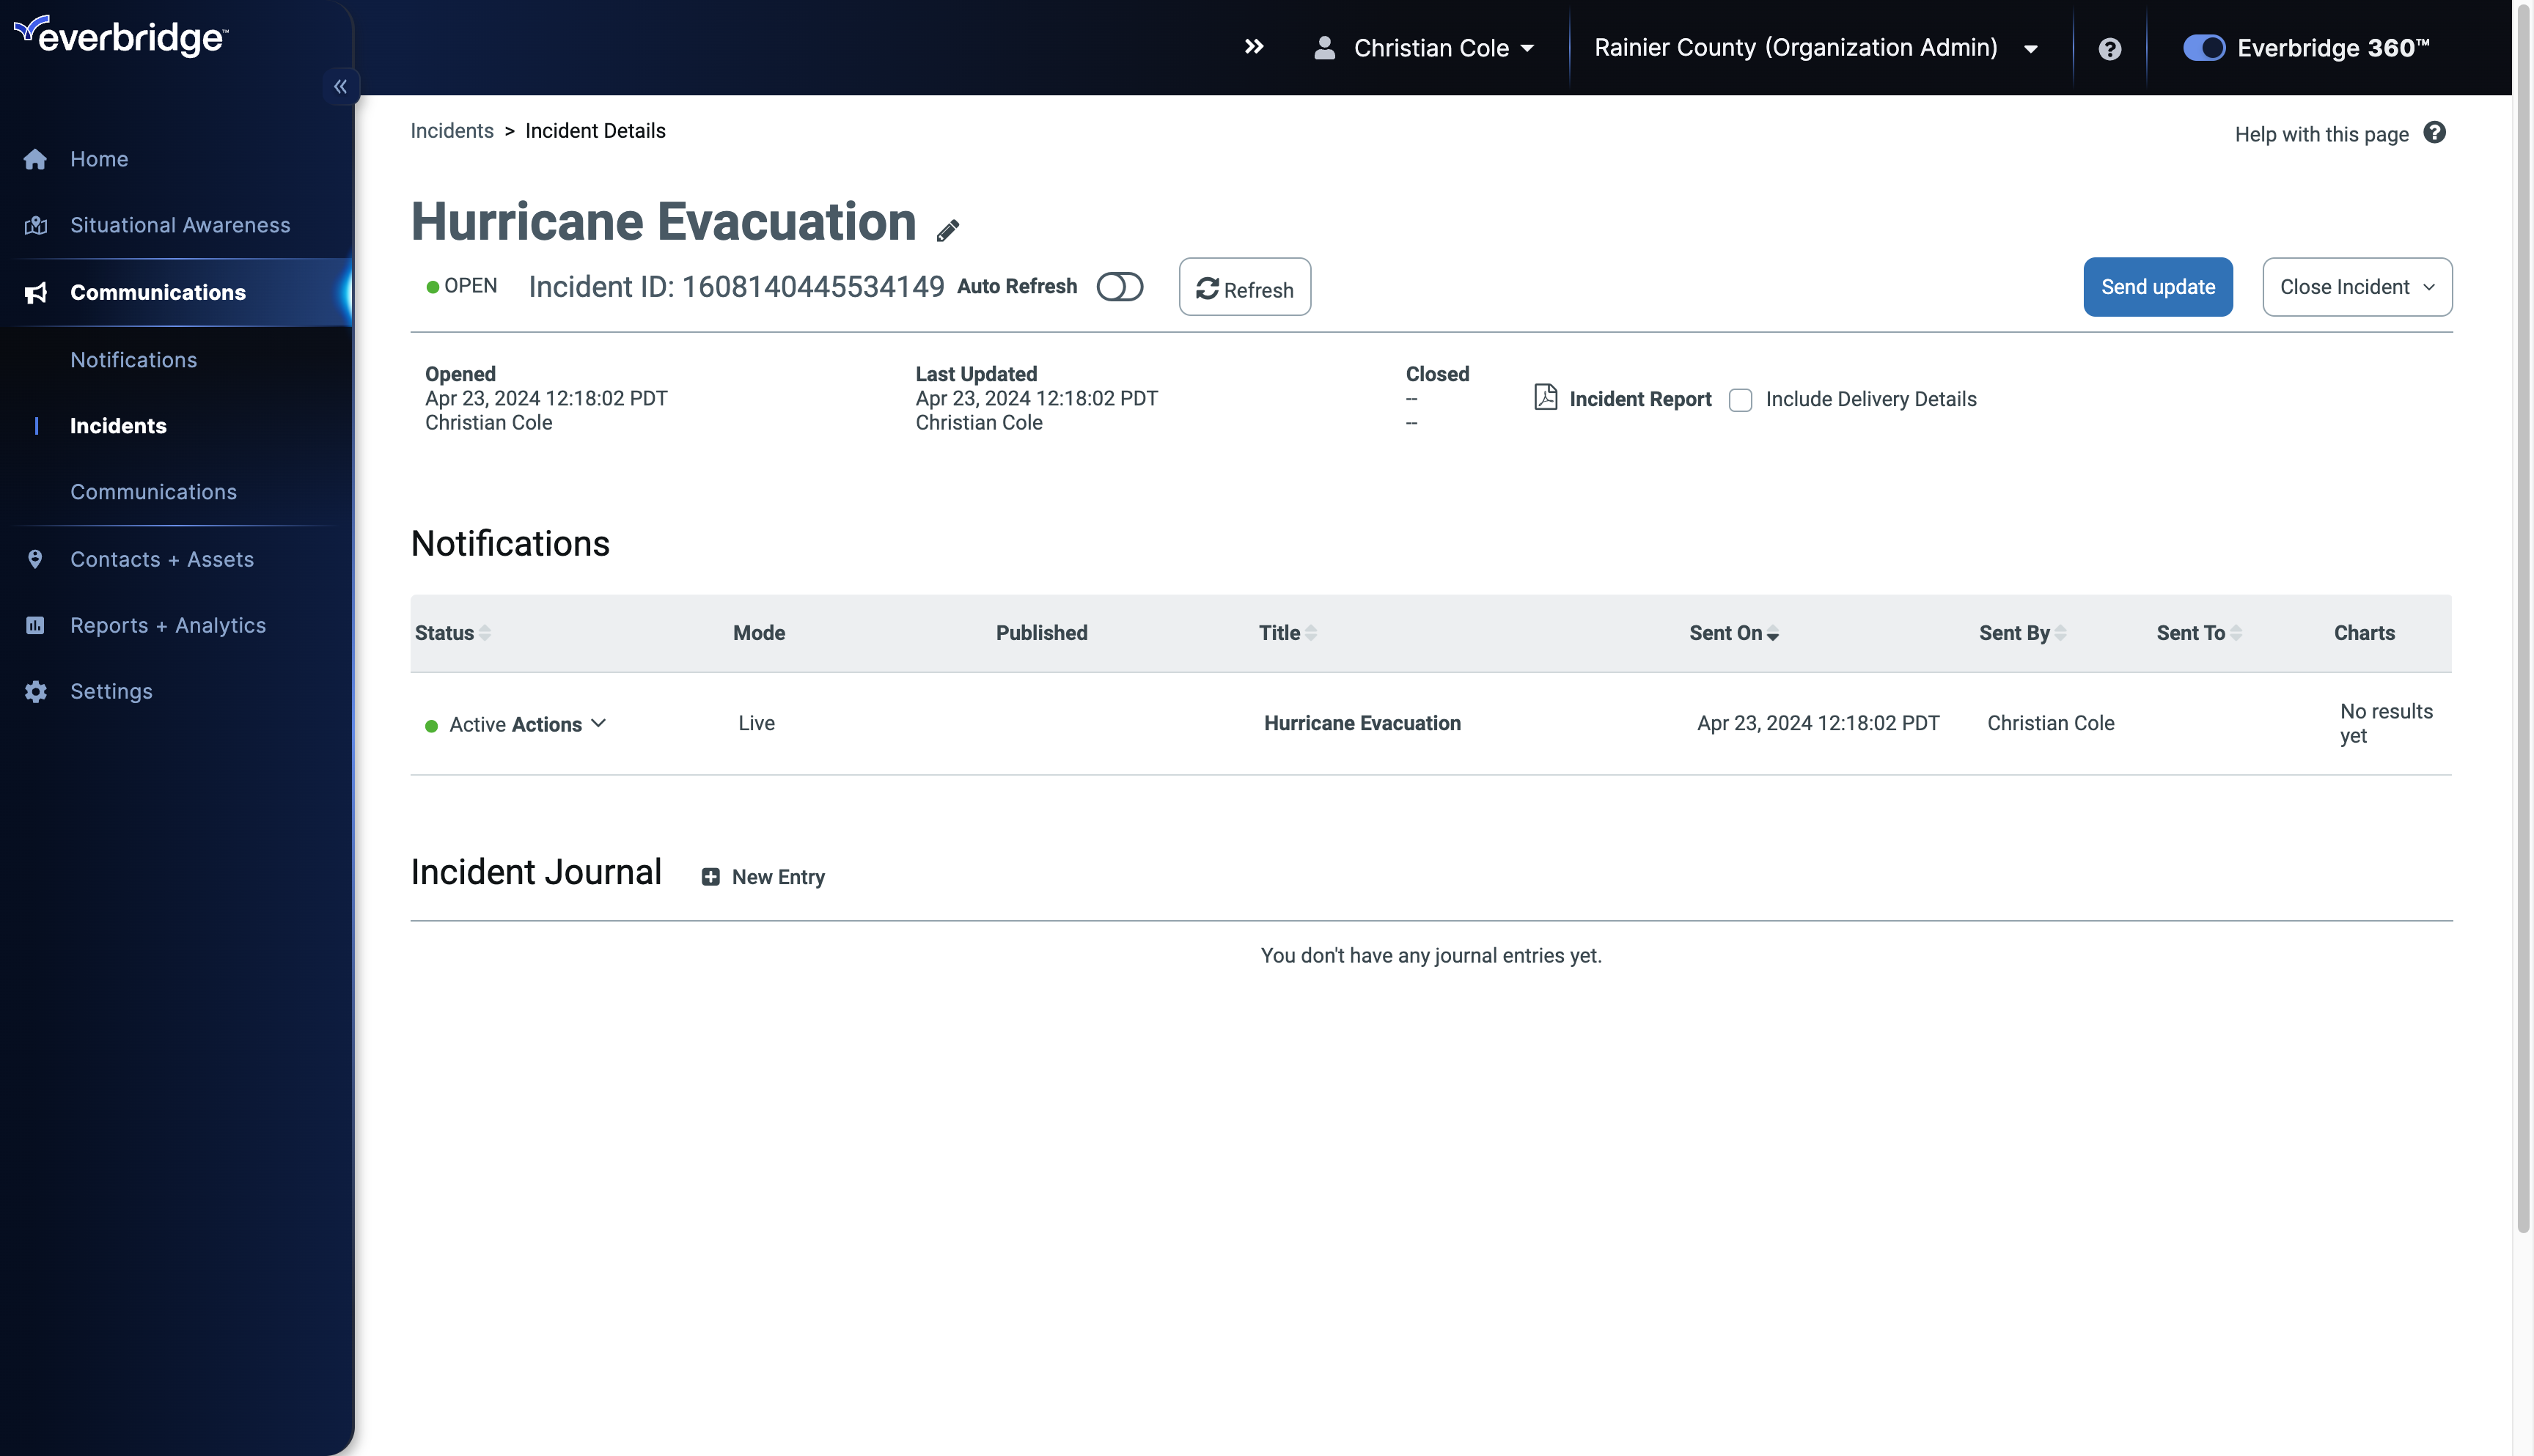
This guide covered the detailed steps to launch an incident in Everbridge, including selecting templates, shelters, reviewing incident details, and sending the incident.