Topic
Options for updating existing Contacts' information in Everbridge Suite.
Description
Updating Contact information can be done in several ways, including editing individual Contact records in the Manager Portal and using file uploads/SFTP to update multiple Contacts at once. Everbridge also supports targeted edits to delivery methods, so a full bulk refresh is not always required.
Go to manager.everbridge.net
1. Dashboard
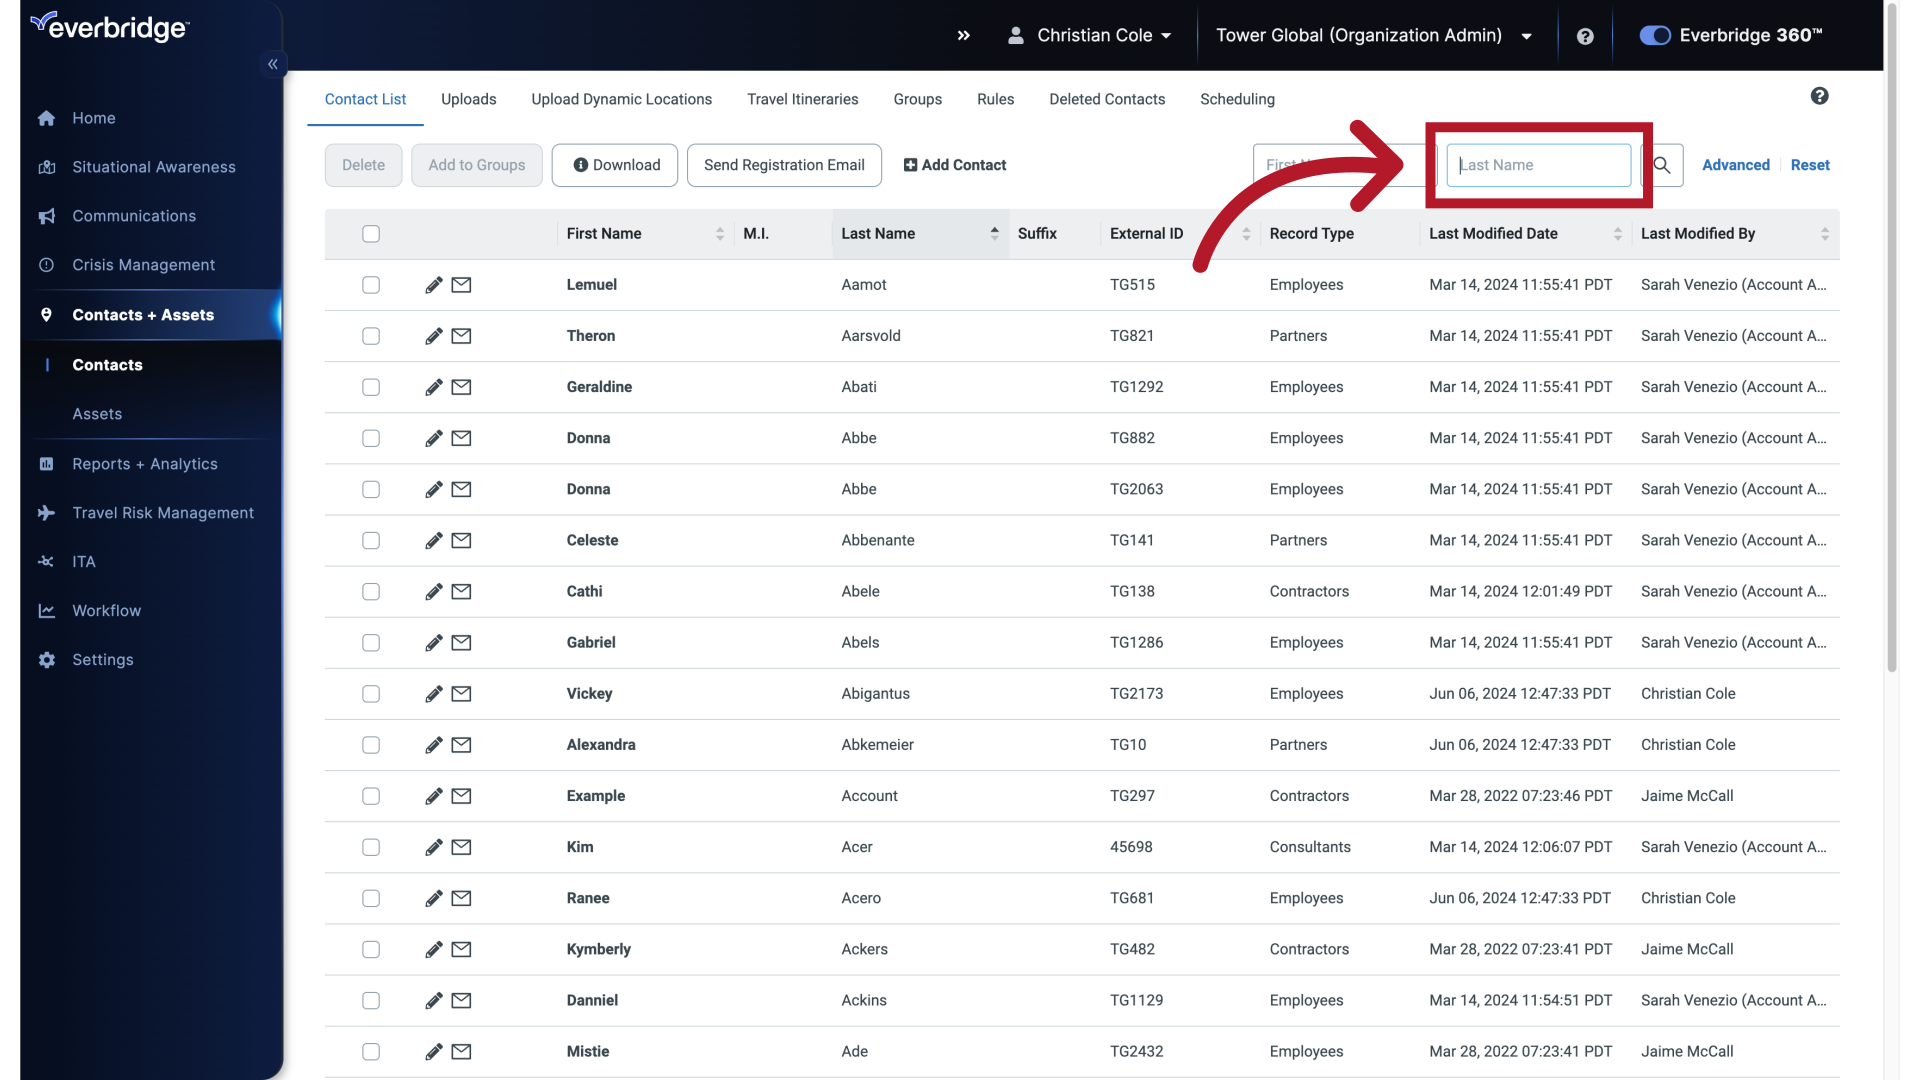
After signing in as an Organization Administrator, navigate to the Contacts area from the Dashboard and locate the search fields (for example, Last Name or First Name).
2. Search Contact
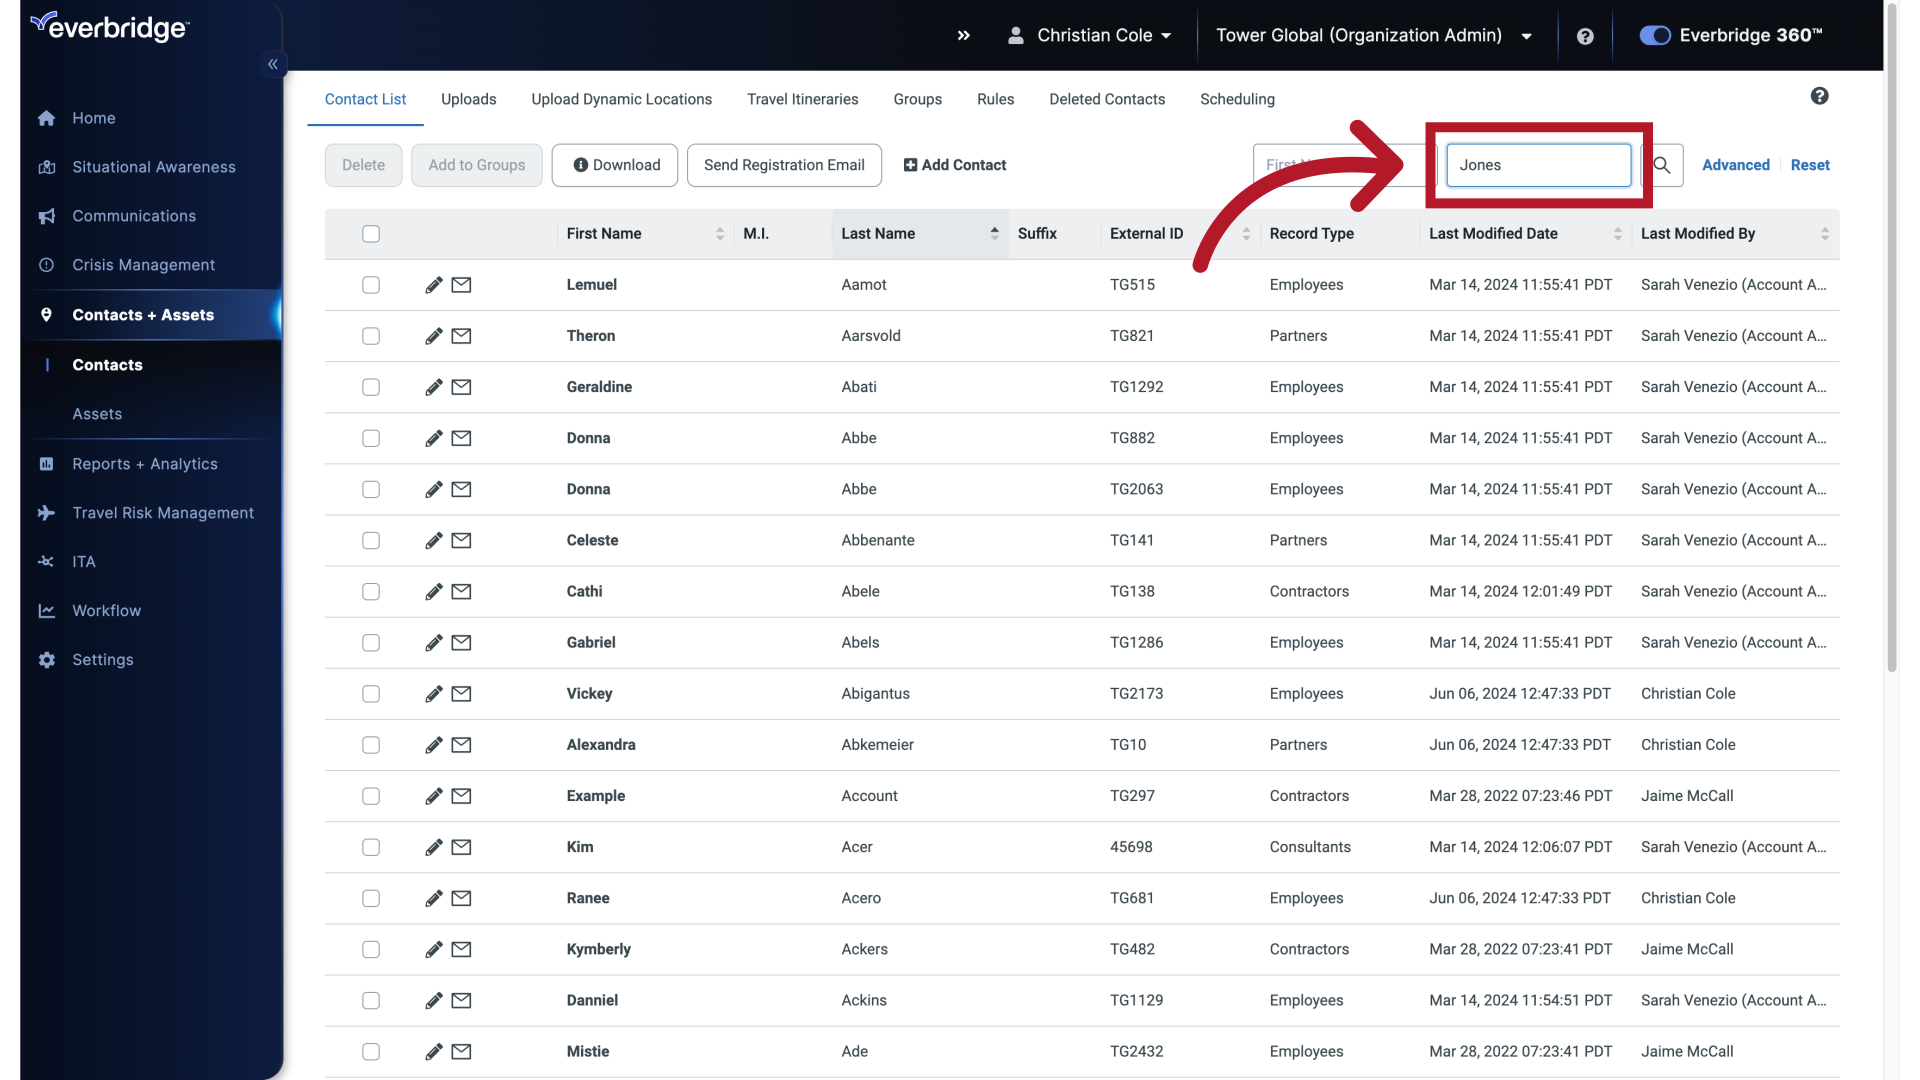
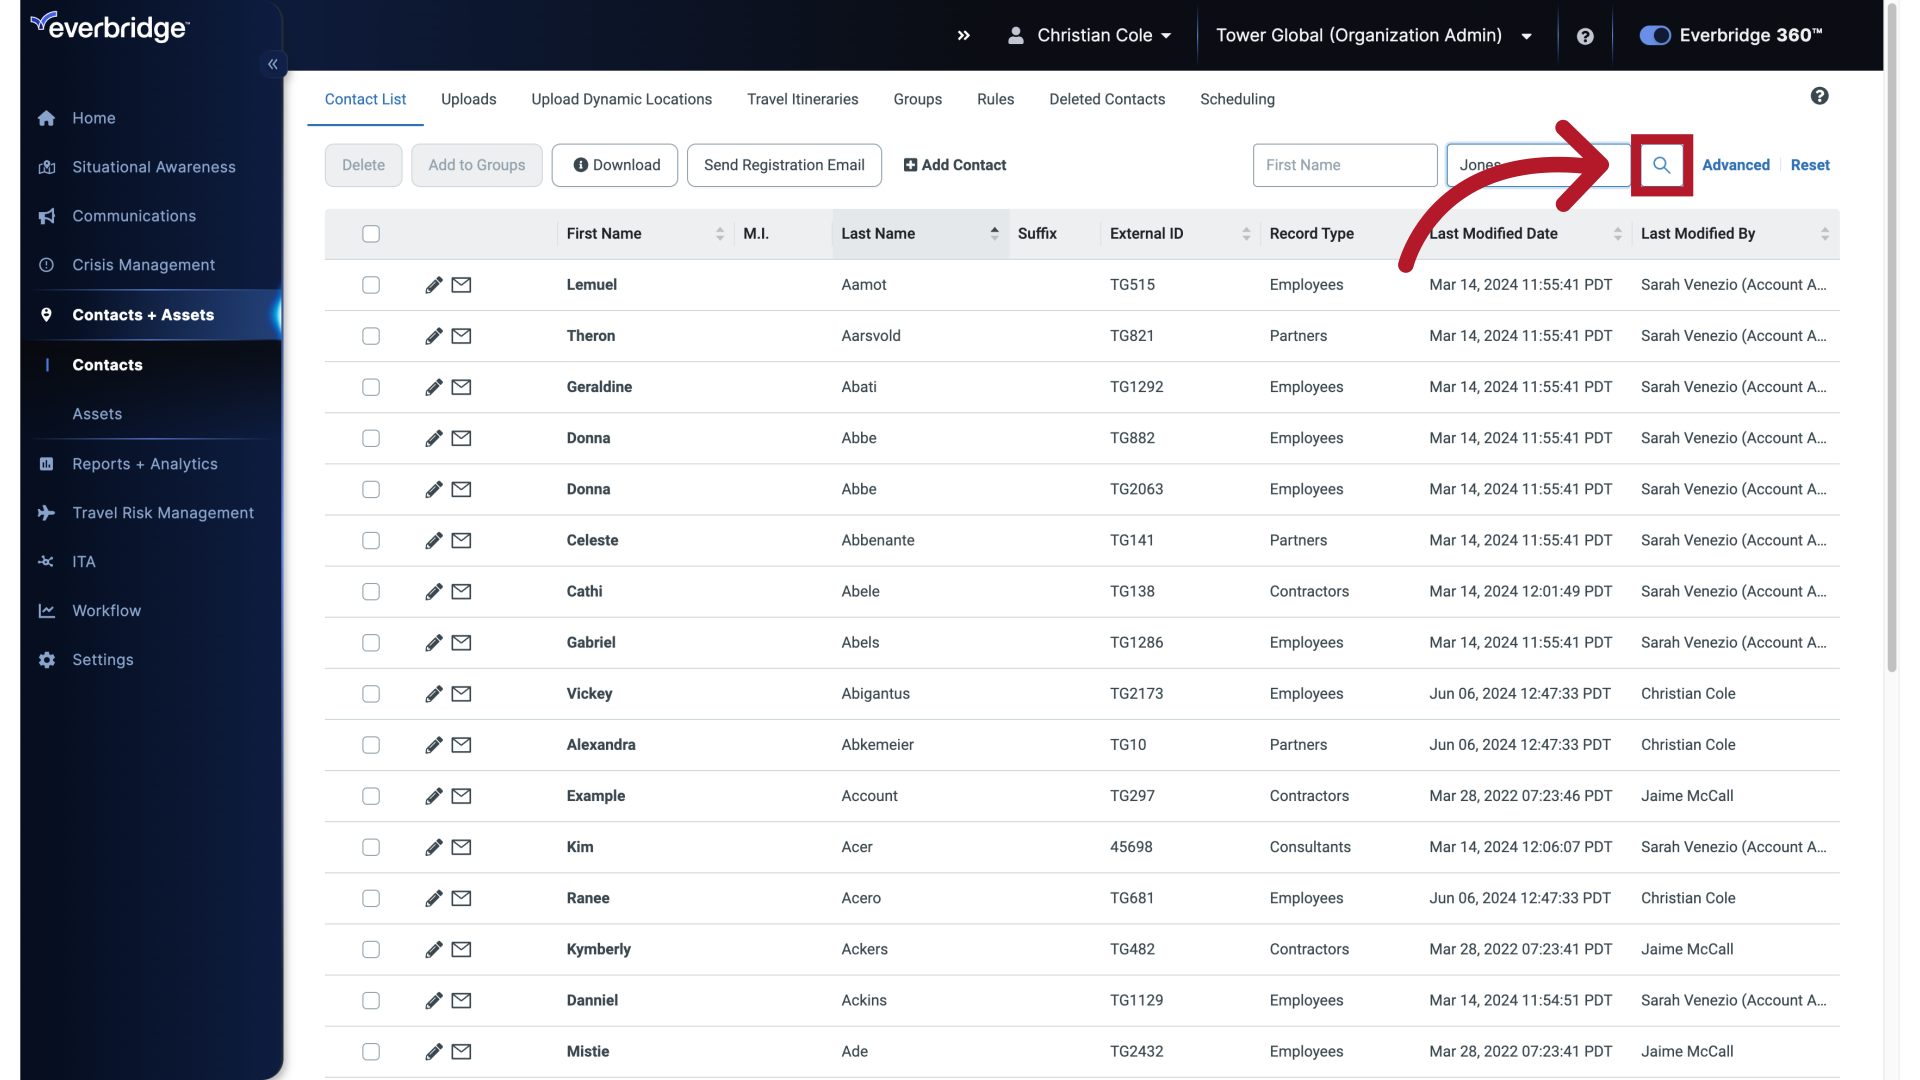
From Contacts > Contact List, search for the Contact in the Manager Portal using first name and or last name, then press Enter or click the search icon.
3. Search Contact
Click here
4. Edit Contact
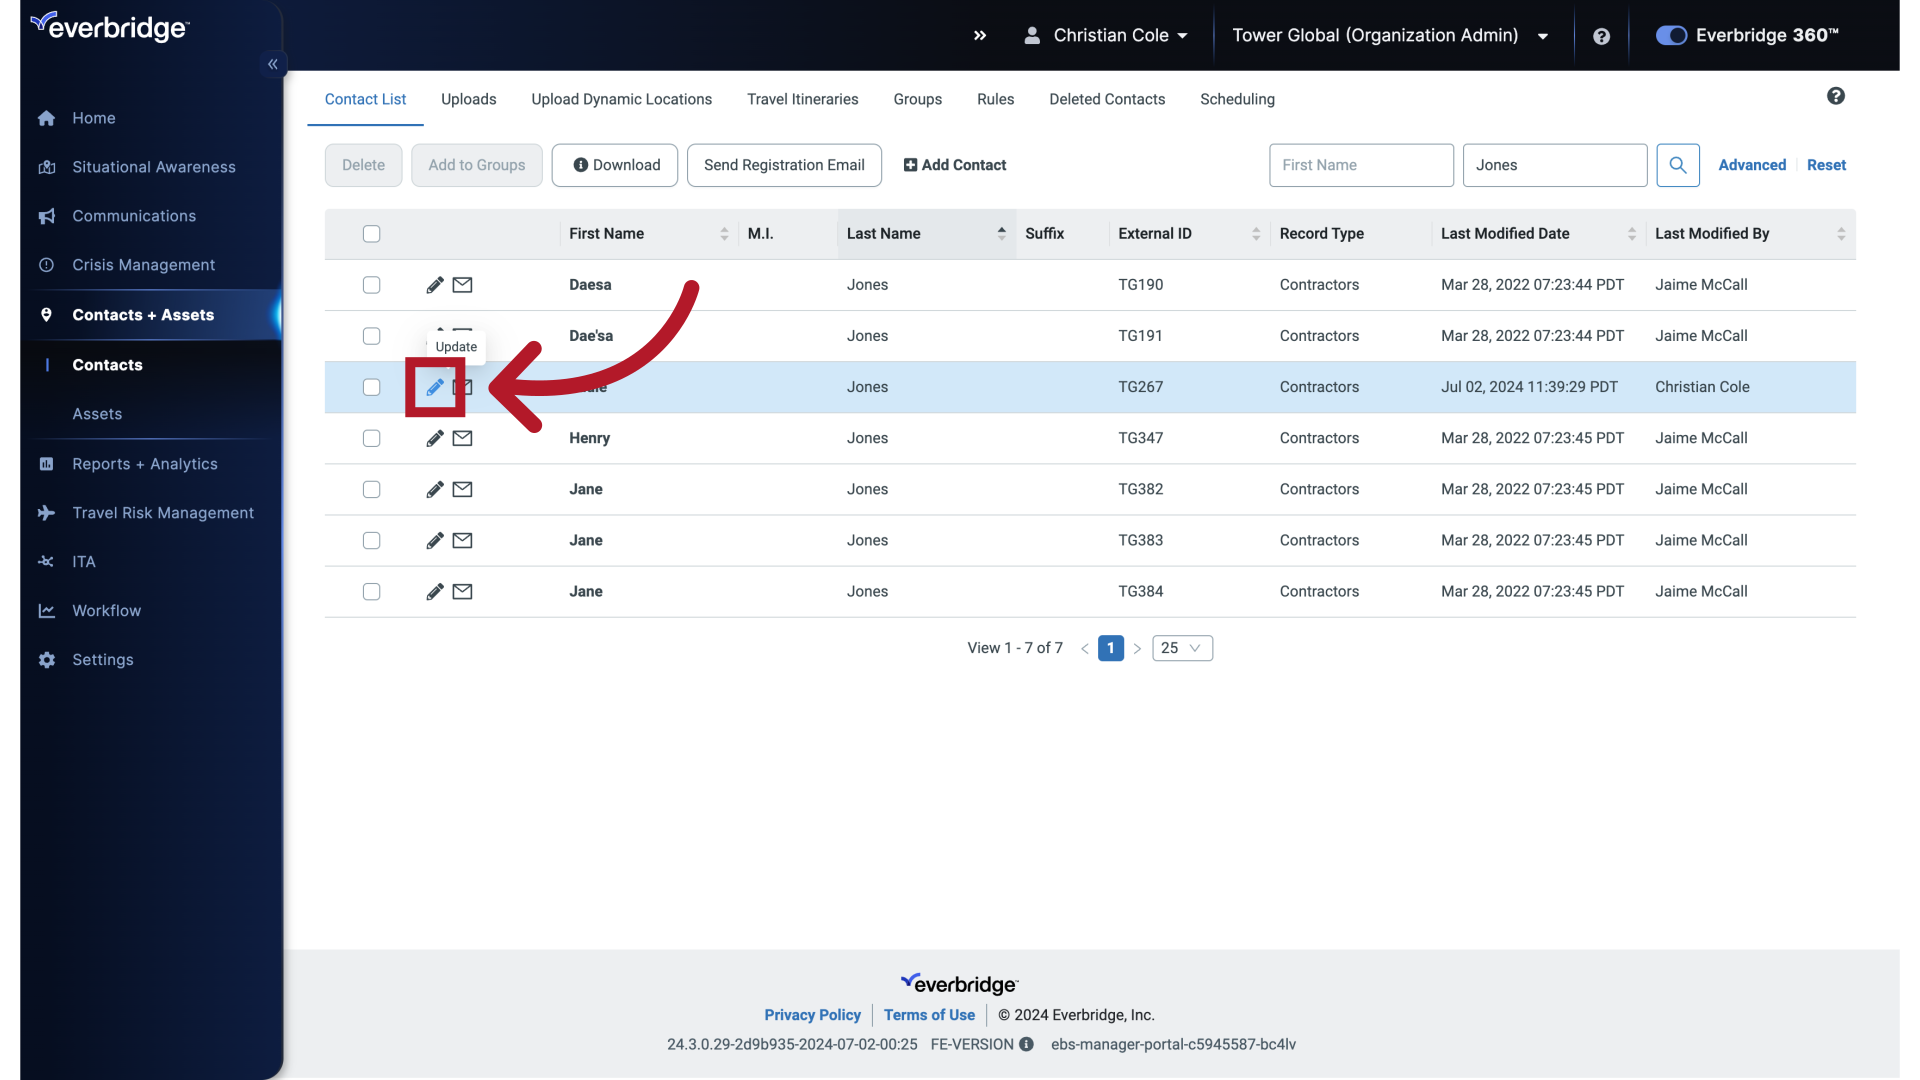
Click the selected Edit button.
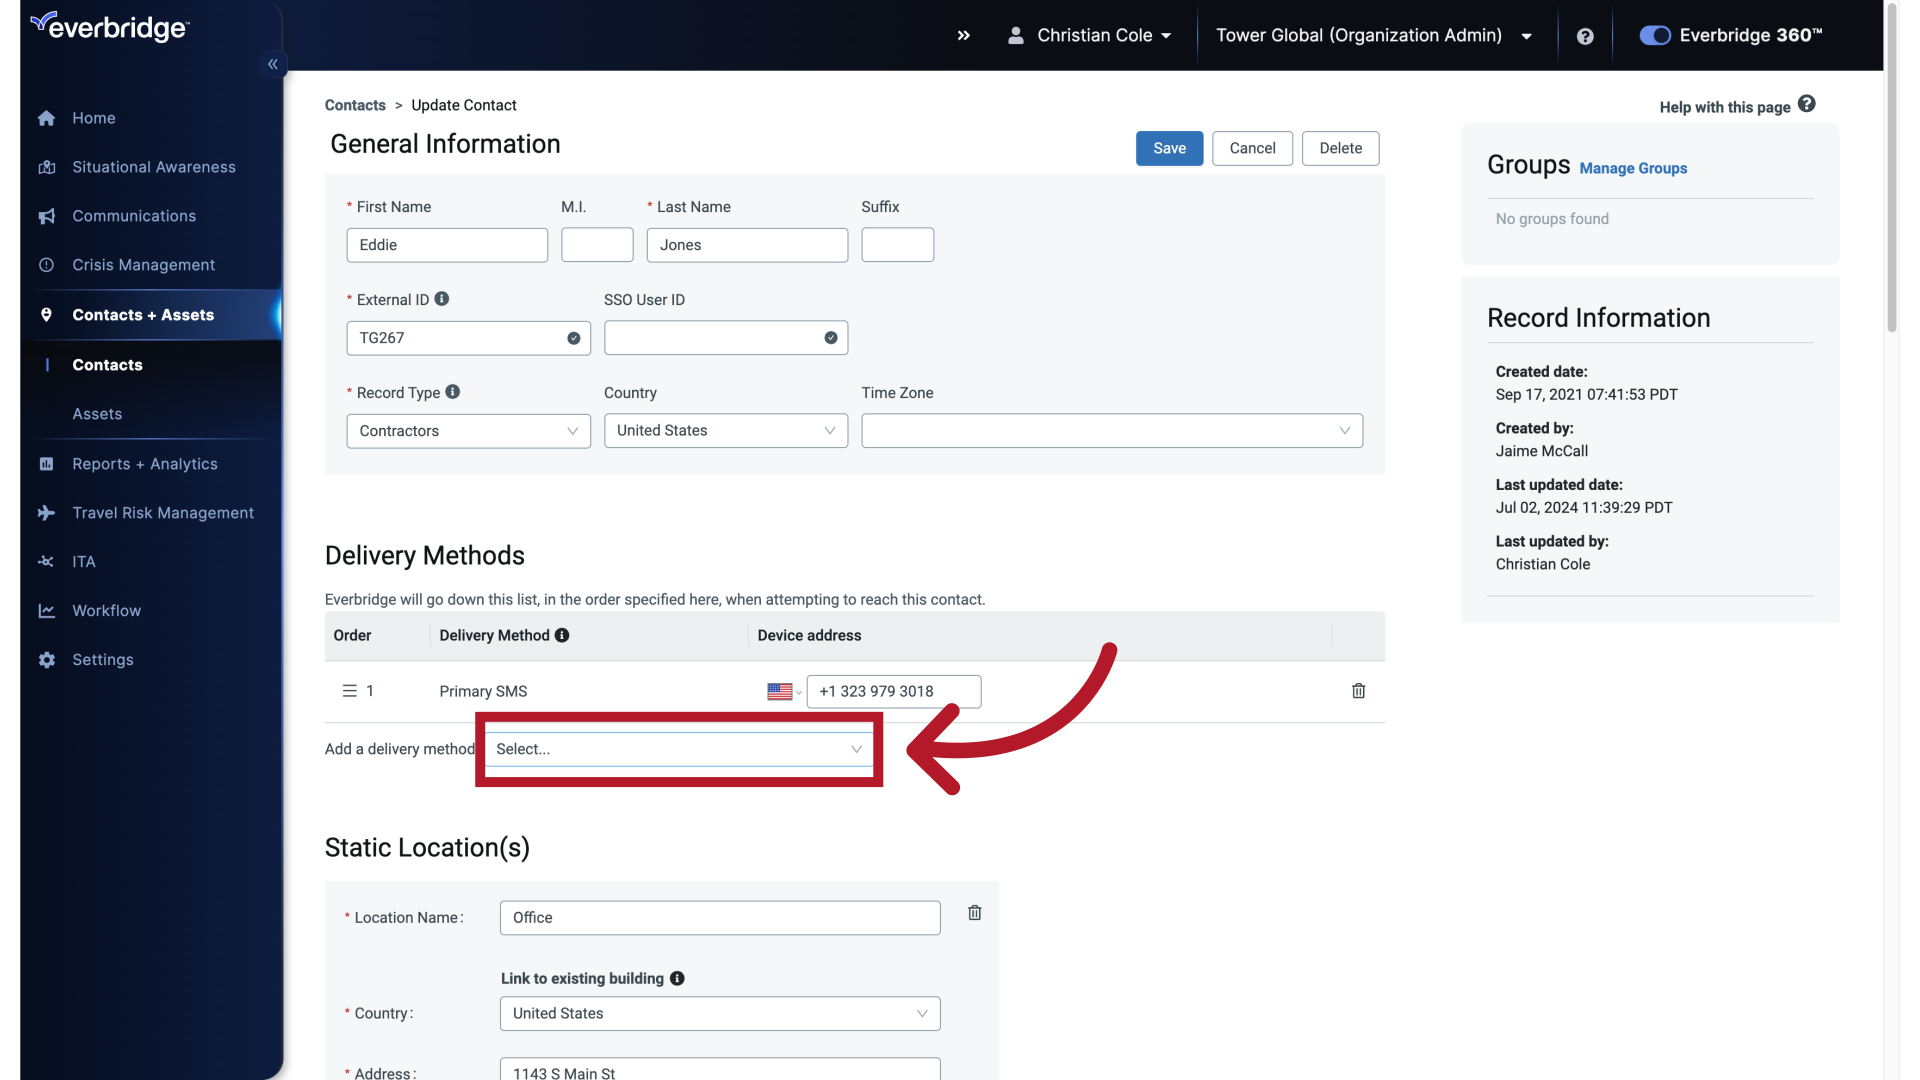
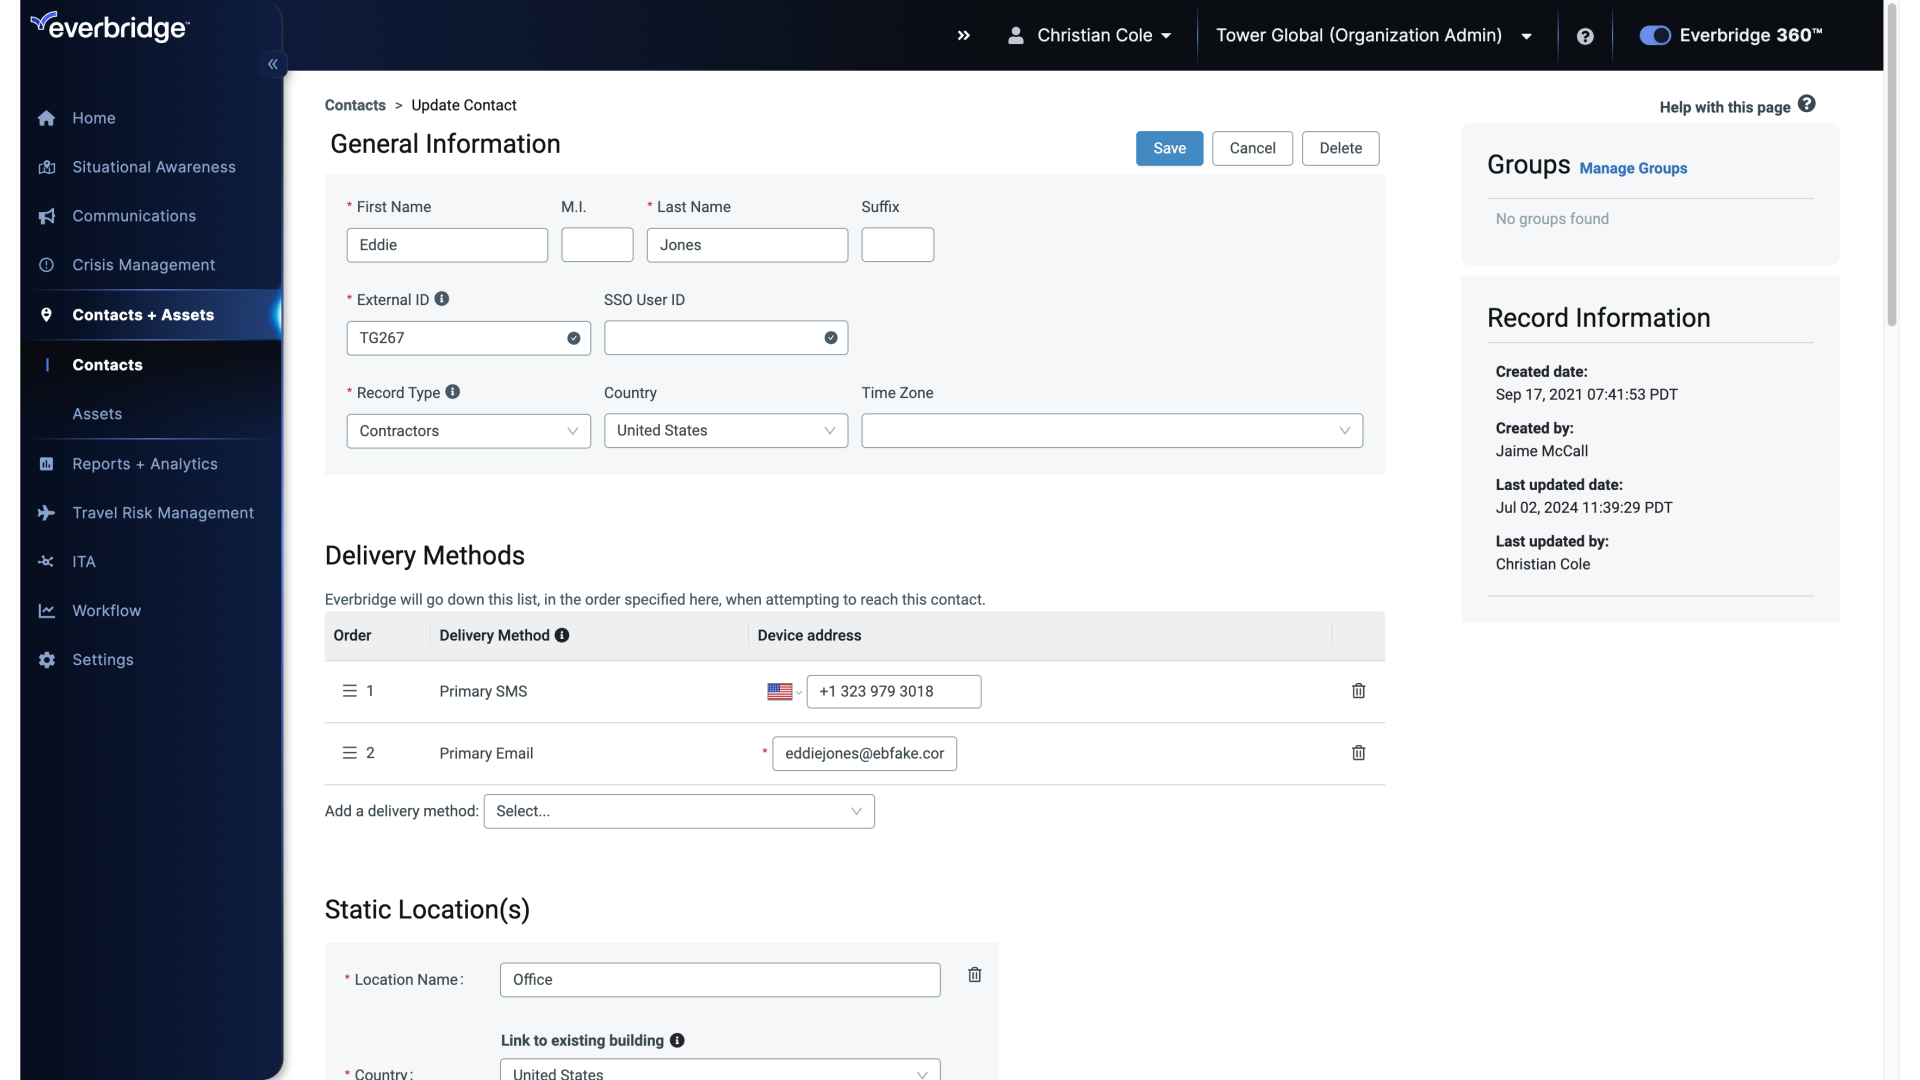
5. Add or update a Delivery Method
In the Contact record, scroll to the Delivery Methods section and choose the Select... option to add a new delivery method (for example, phone, Primary Email, or an Accounts Payable email) or edit an existing one.
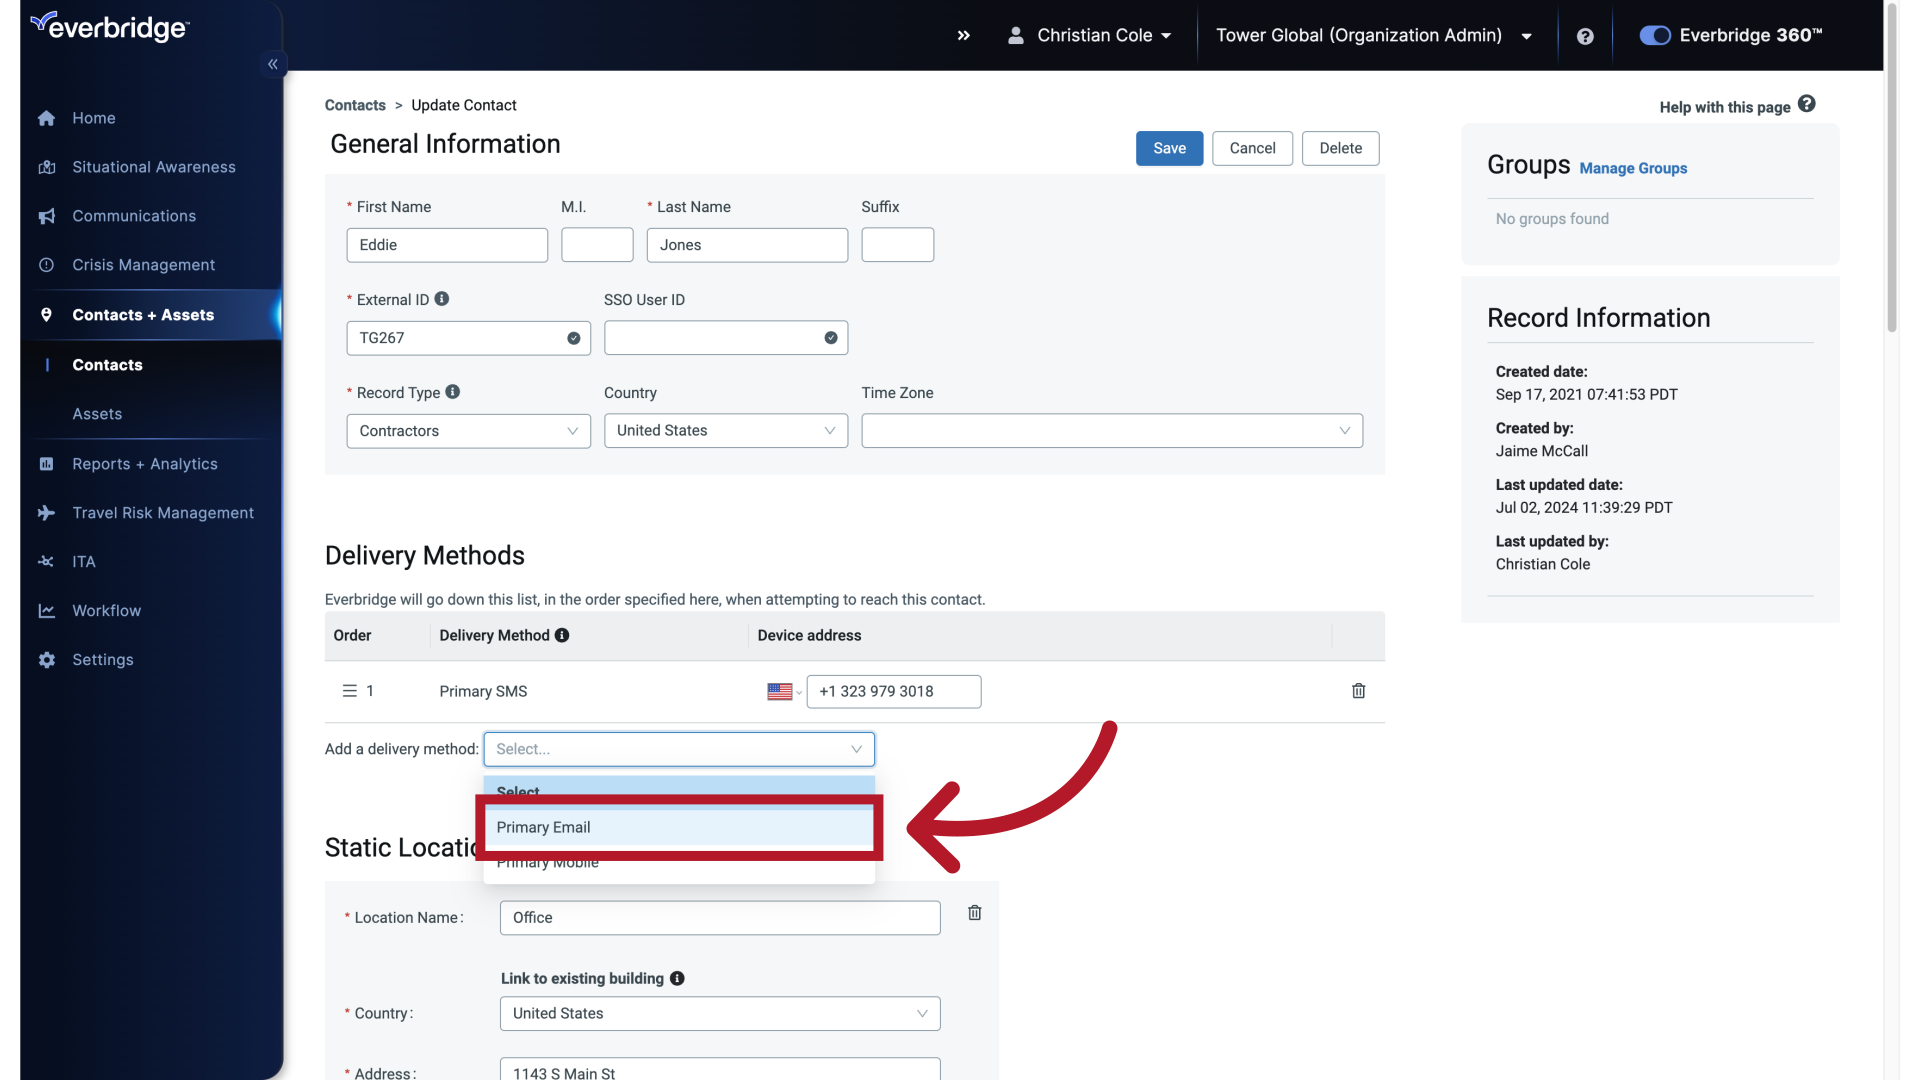
6. Add or edit a Delivery Method (example: Primary Email)
To update an existing delivery method, click the existing delivery method entry (such as Primary Email) in the Delivery Methods section of the Contact record.
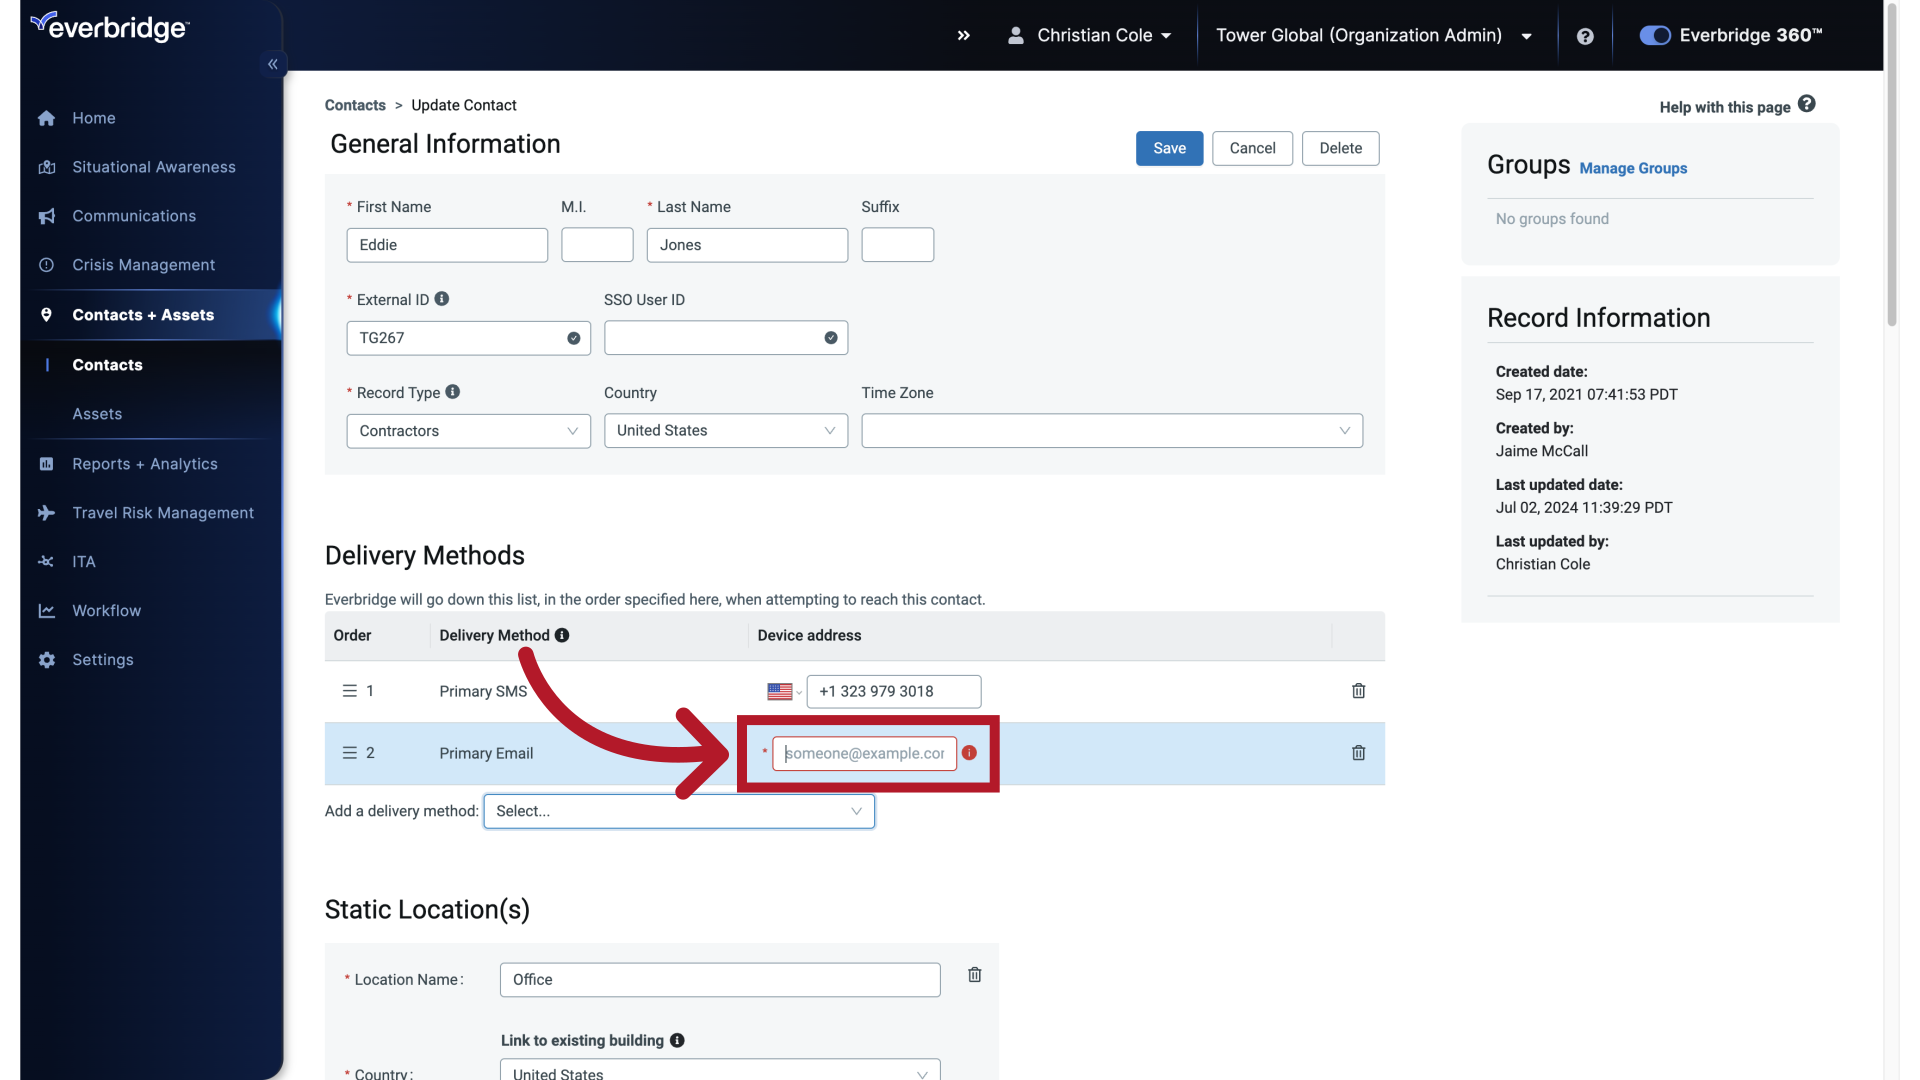
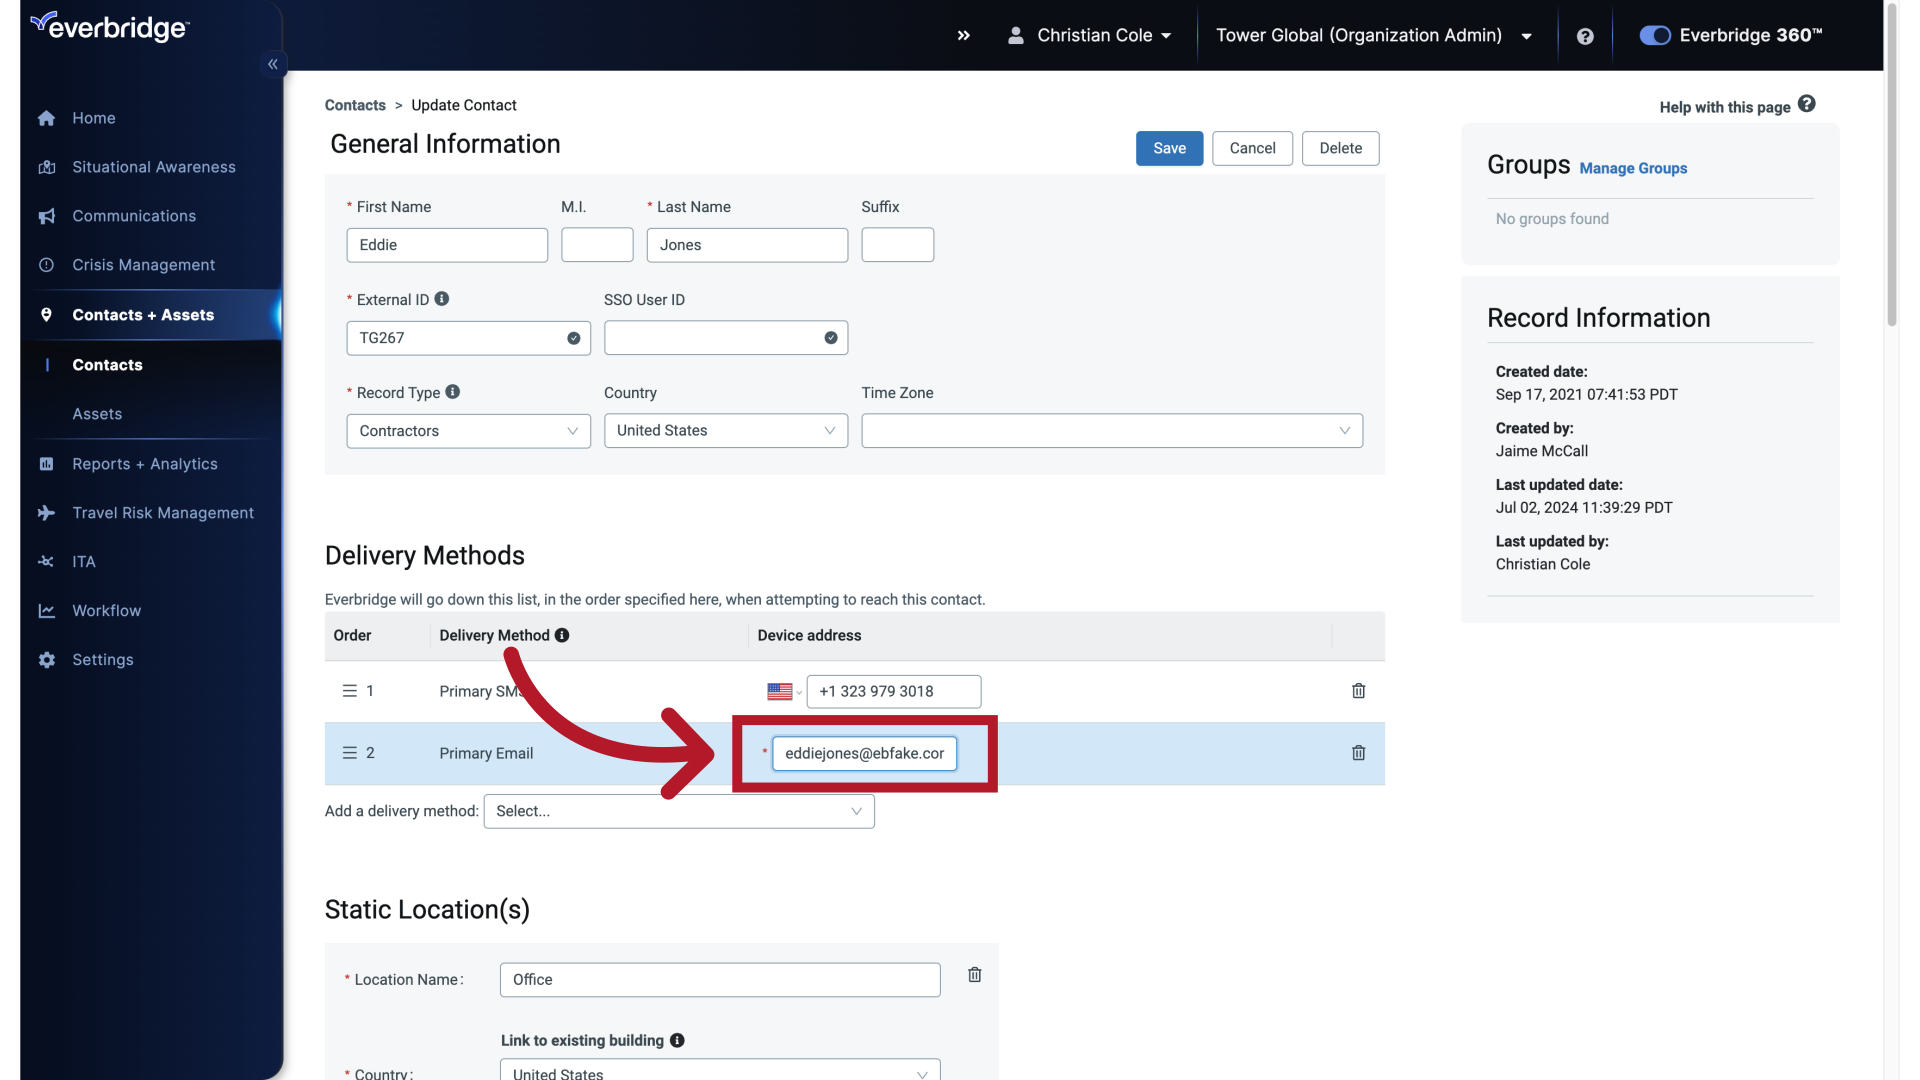
7. Change the delivery details
Edit the selected delivery method by updating the email address or phone number as needed, then click OK to apply the change.
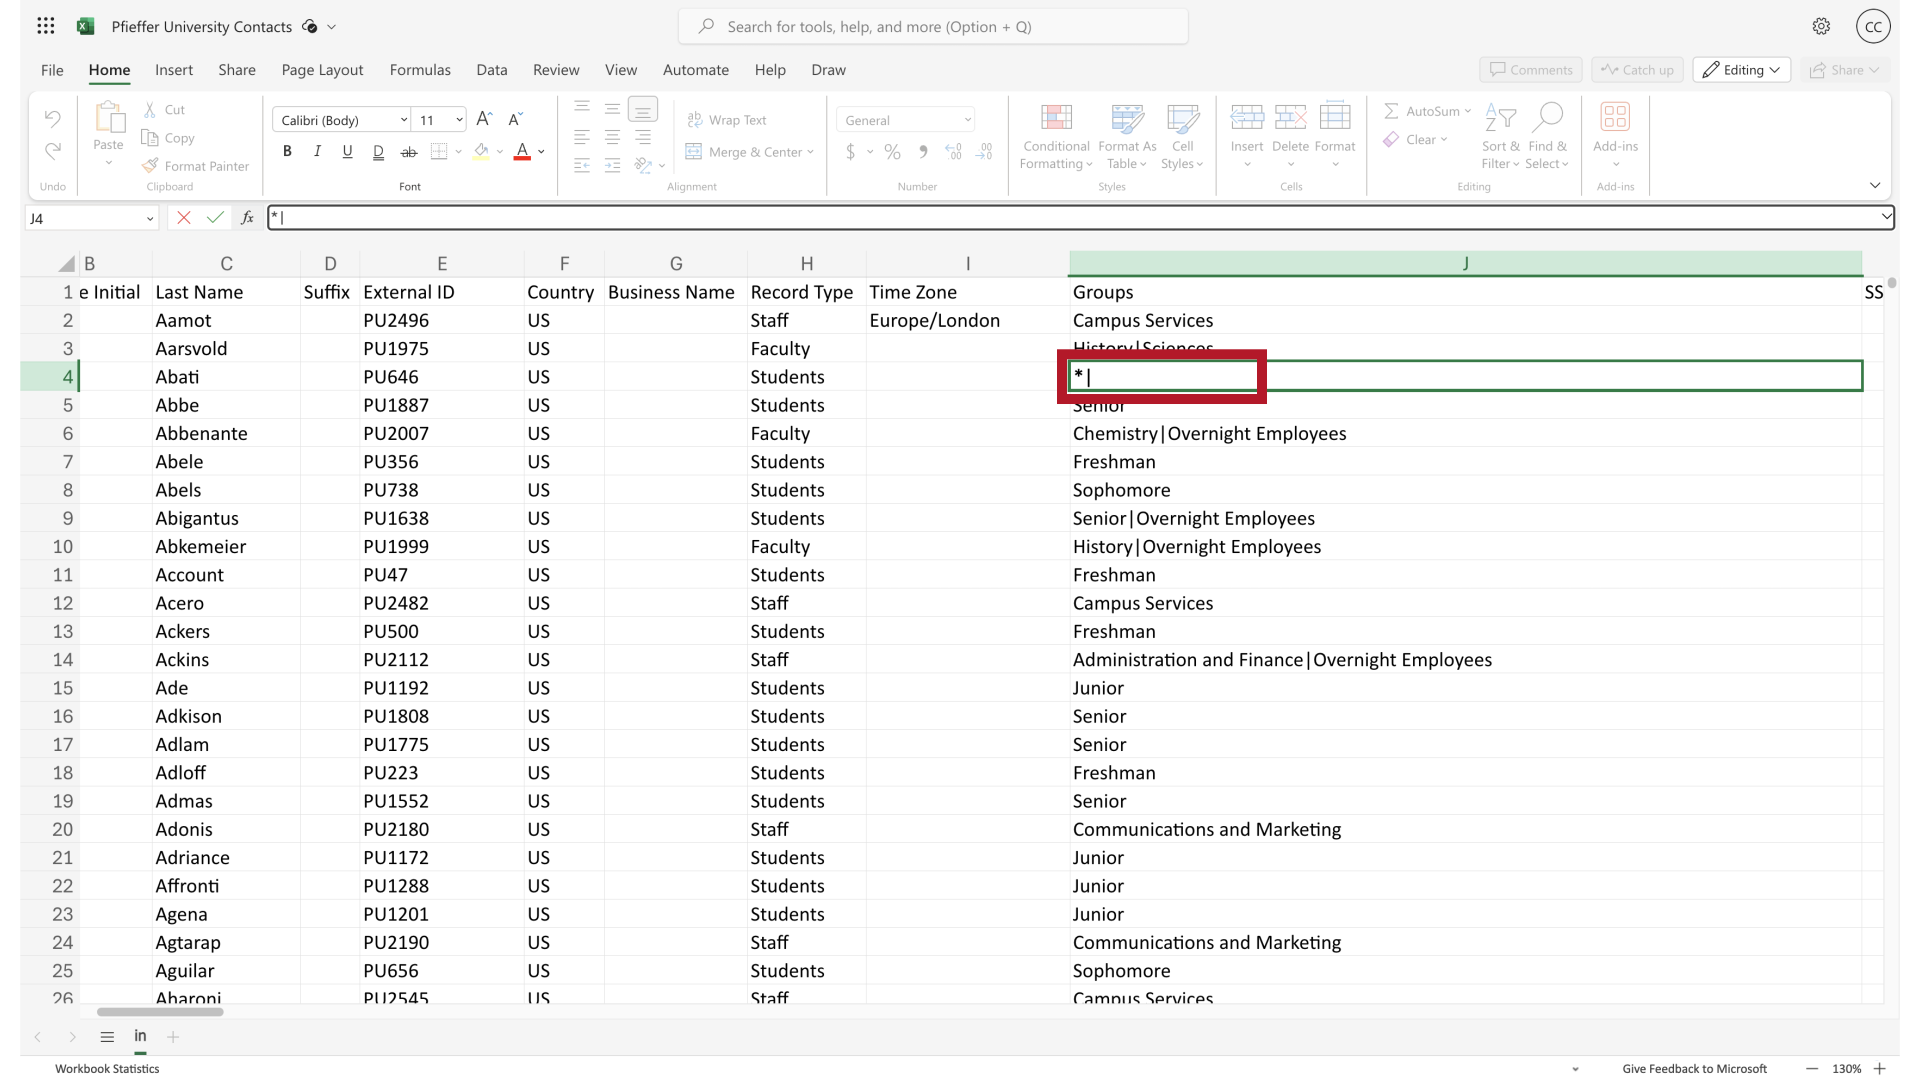
8. Use the asterisk to maintain existing values (optional)
When working with file uploads, the asterisk (*) symbol can be used in certain columns to maintain existing values in Everbridge while adding or changing specific fields. Click the asterisk symbol when applicable to indicate that the upload should preserve current data that is not explicitly updated in your file.
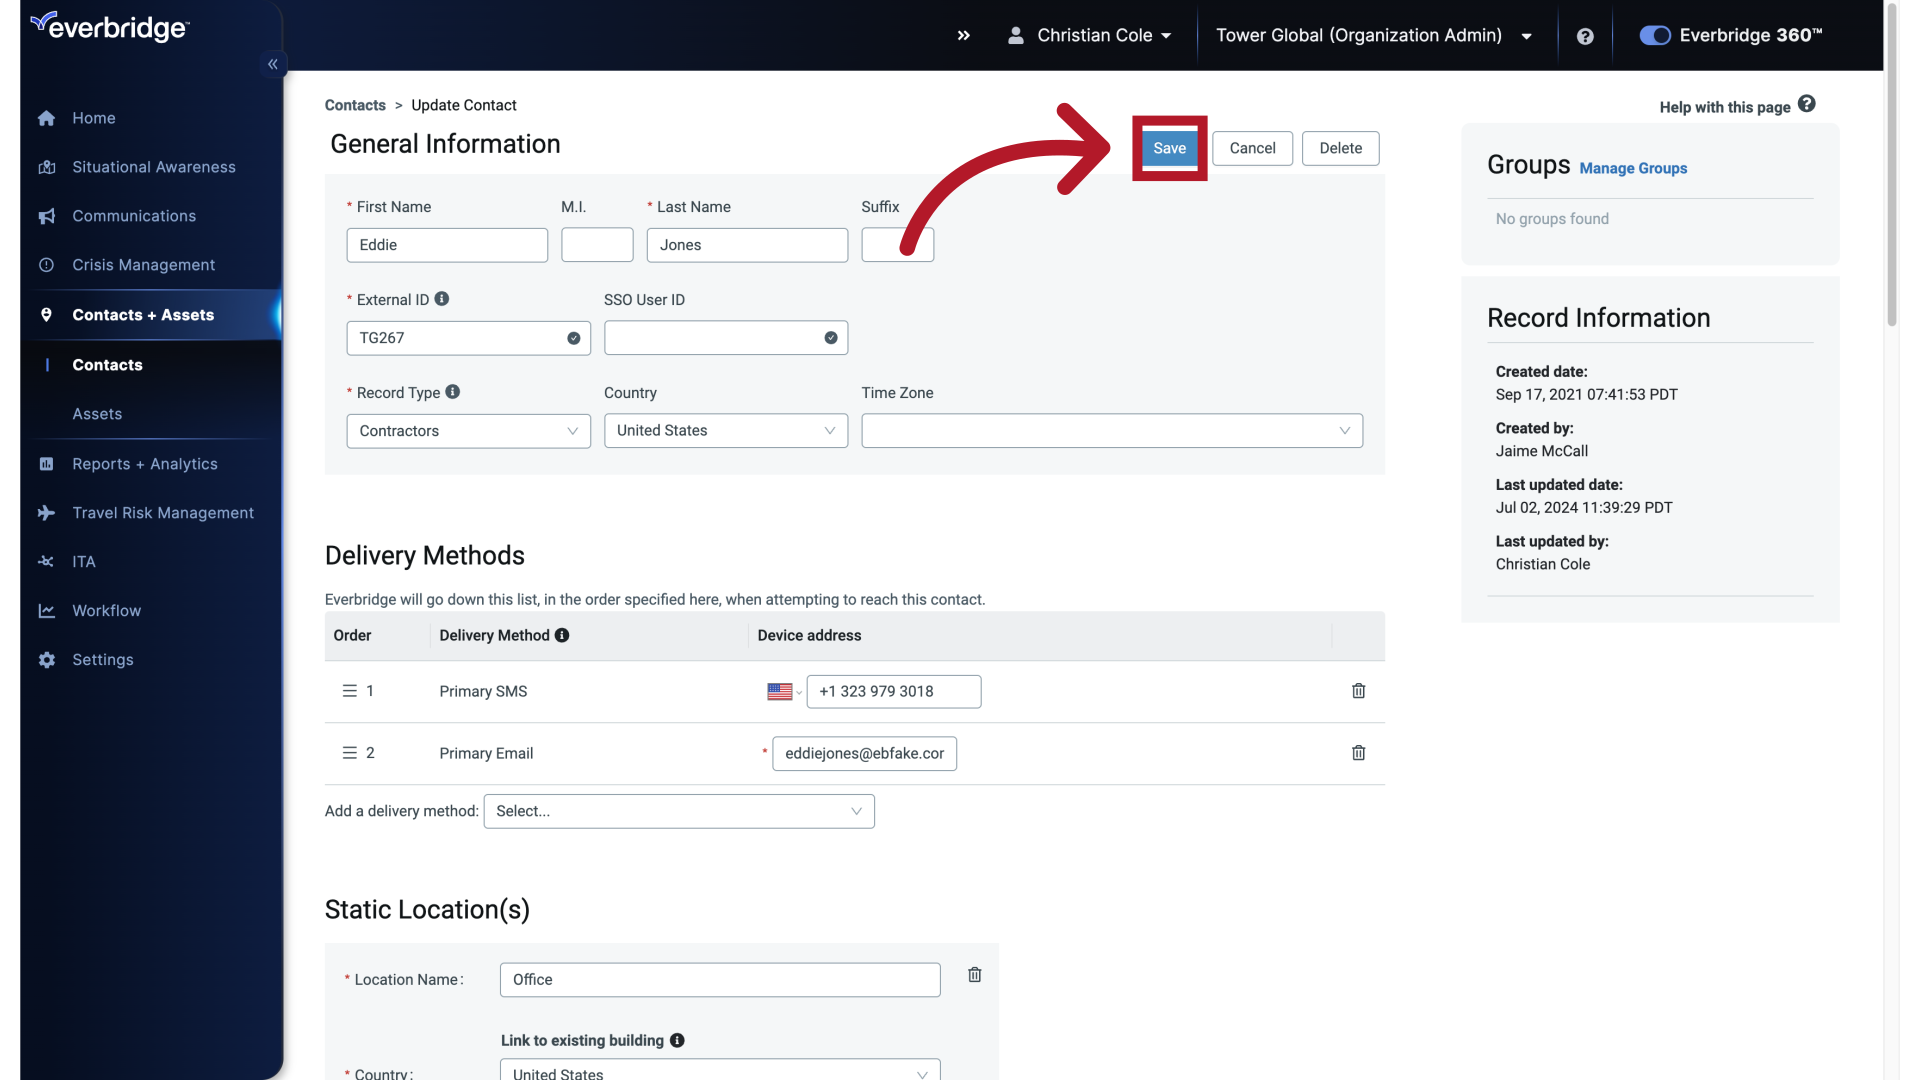
9. Save the Contact
After adding or updating the delivery method, save the Contact record by clicking Save.
10. Updating multiple Contacts via file upload (optional)
You do not need to perform a complete bulk refresh to change delivery methods. Everbridge supports targeted edits for delivery methods and other fields via upload. When preparing a CSV file, ensure that columns are correctly mapped to the appropriate delivery methods so only the intended values are updated for each Contact.
11. Leading Zeros
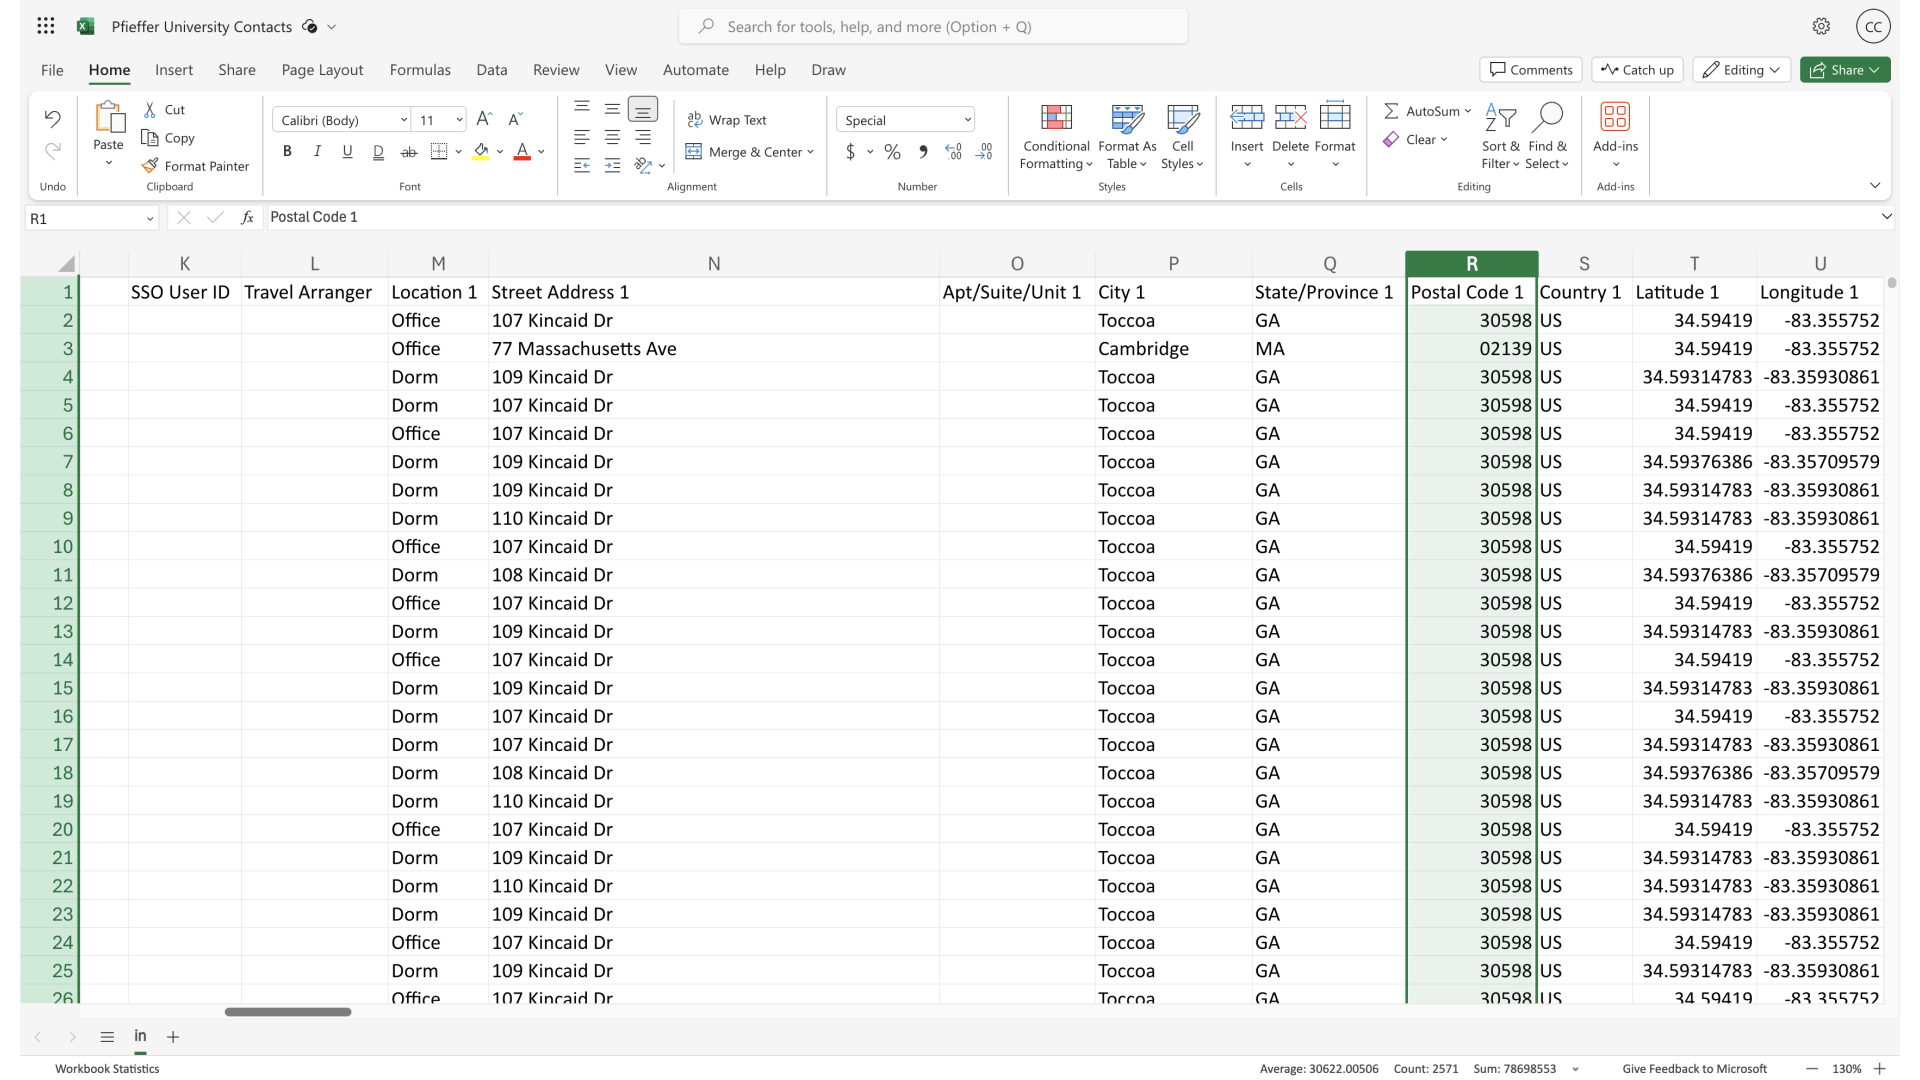
Contact updates can also be made through a file upload or automated SFTP process. When doing so, make sure the file with new or changed contact information is formatted correctly so important characters, such as leading zeros, are preserved.
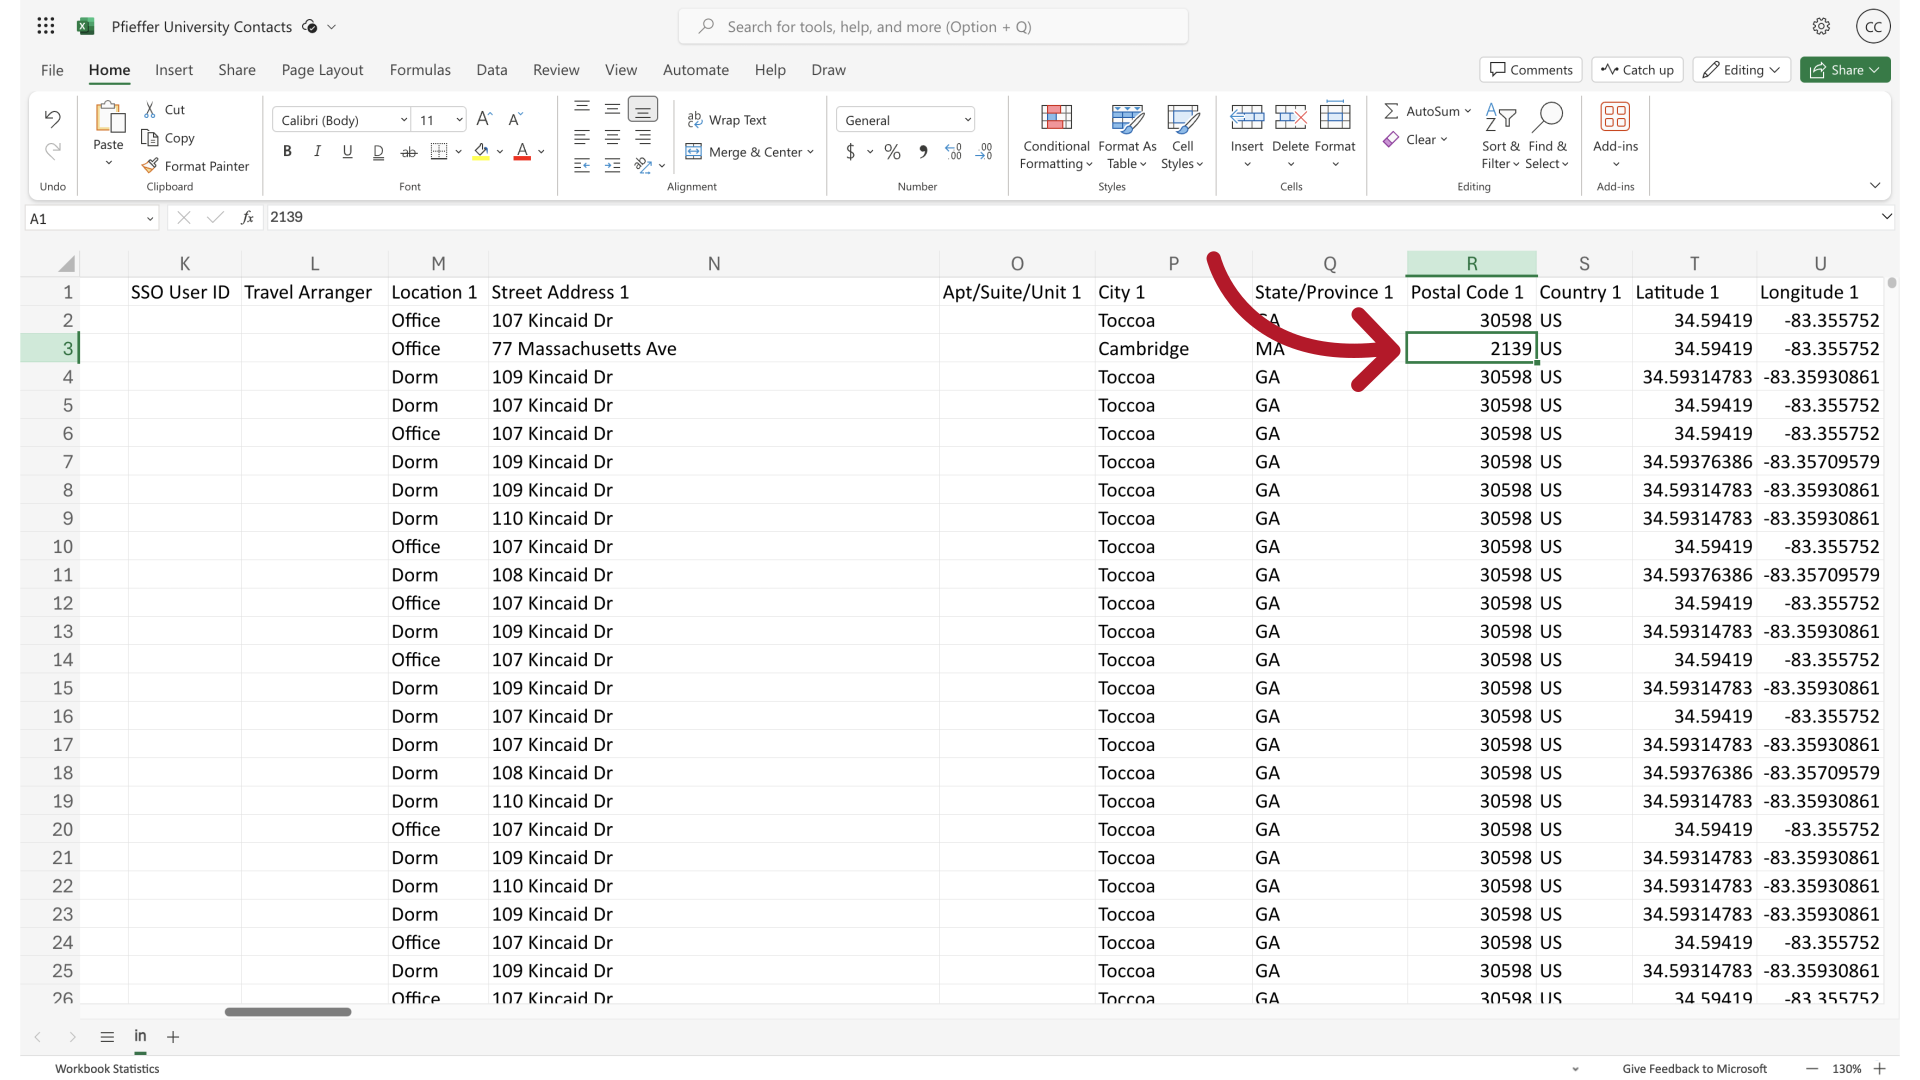
12. Leading zeros
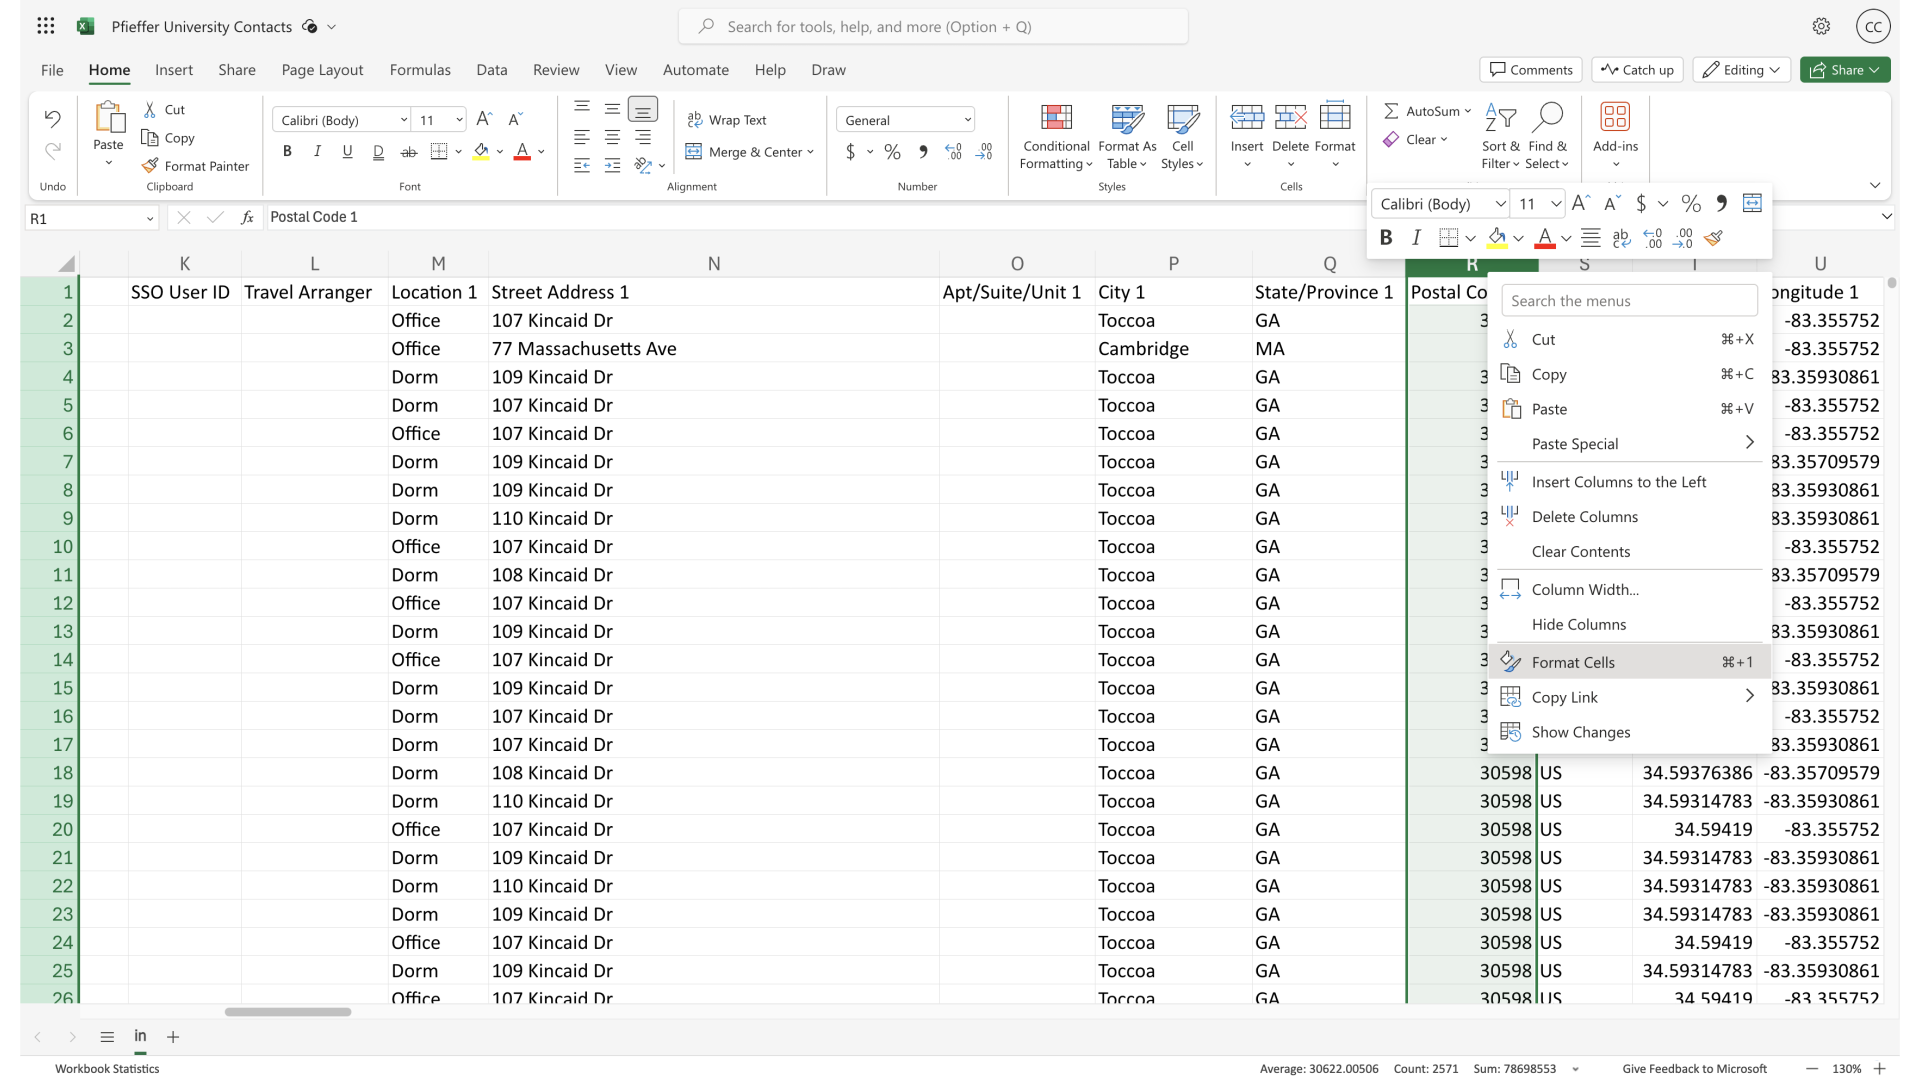
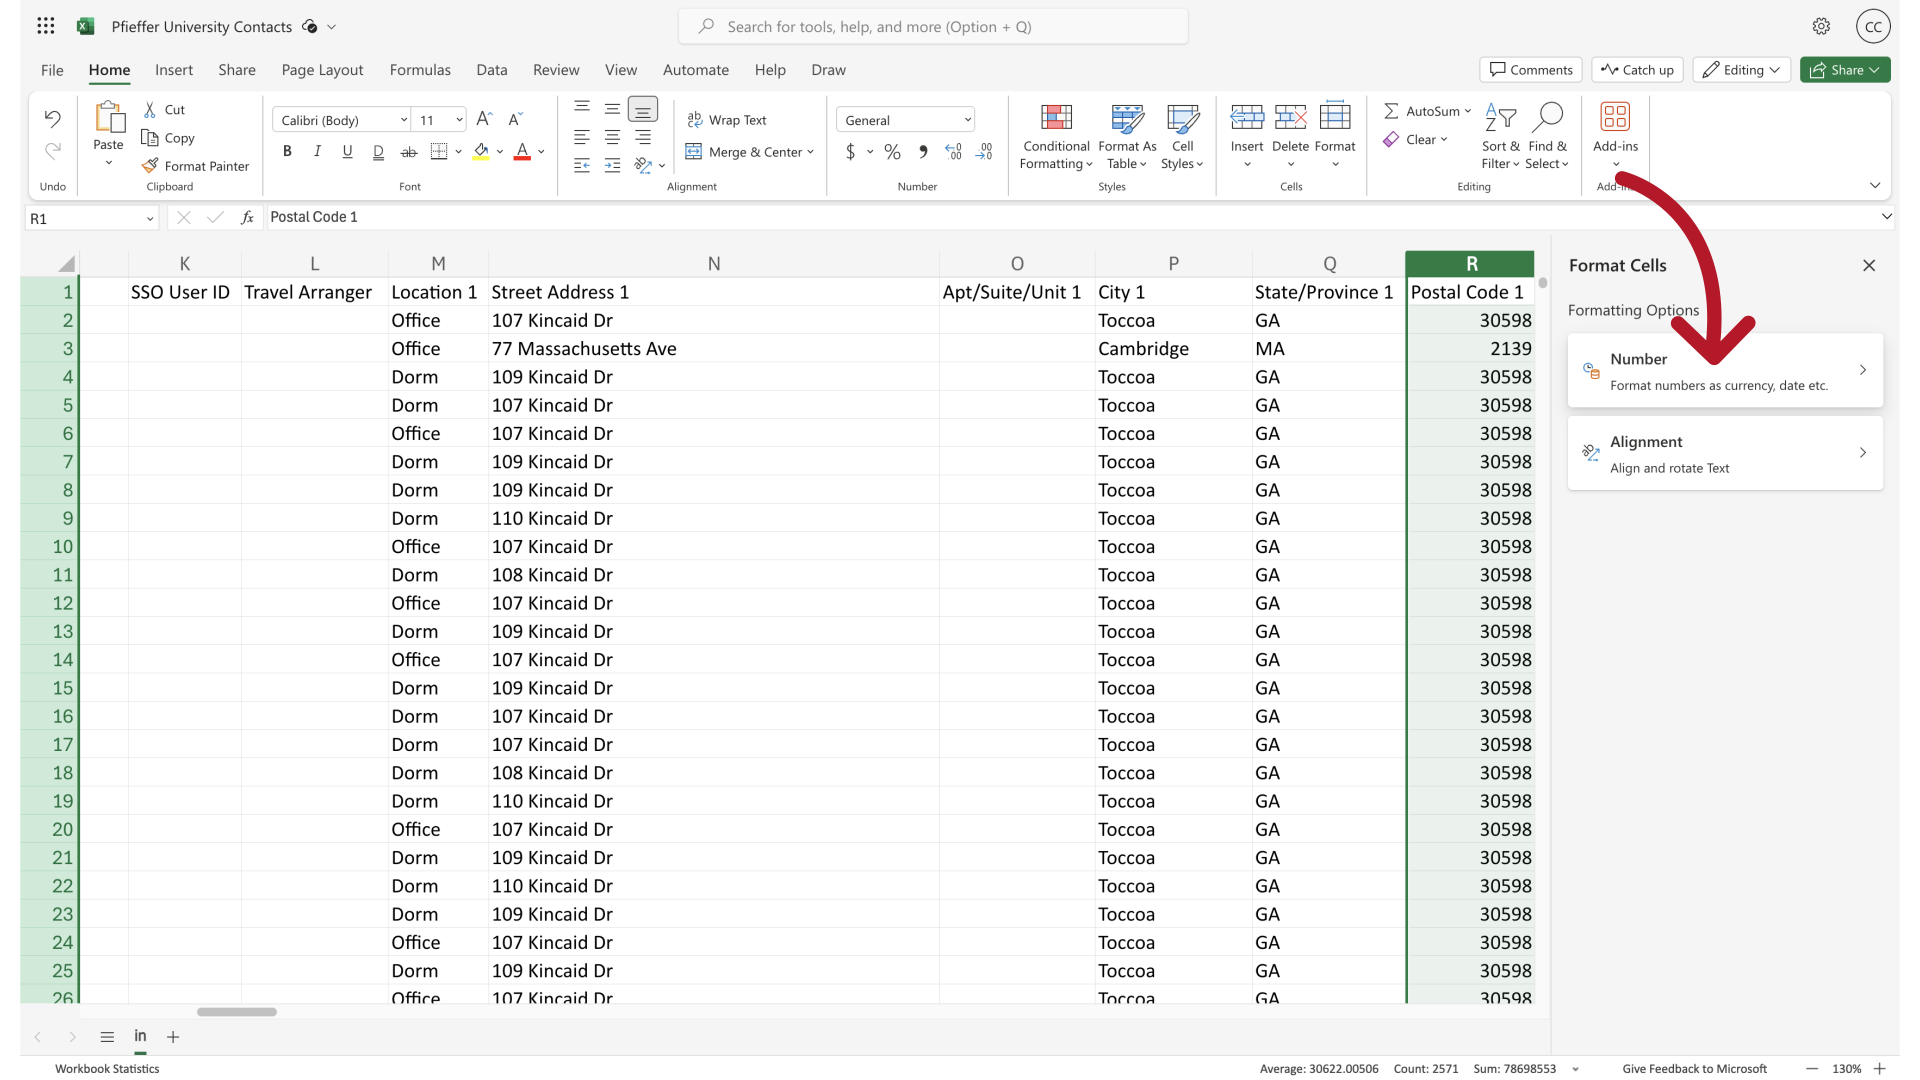
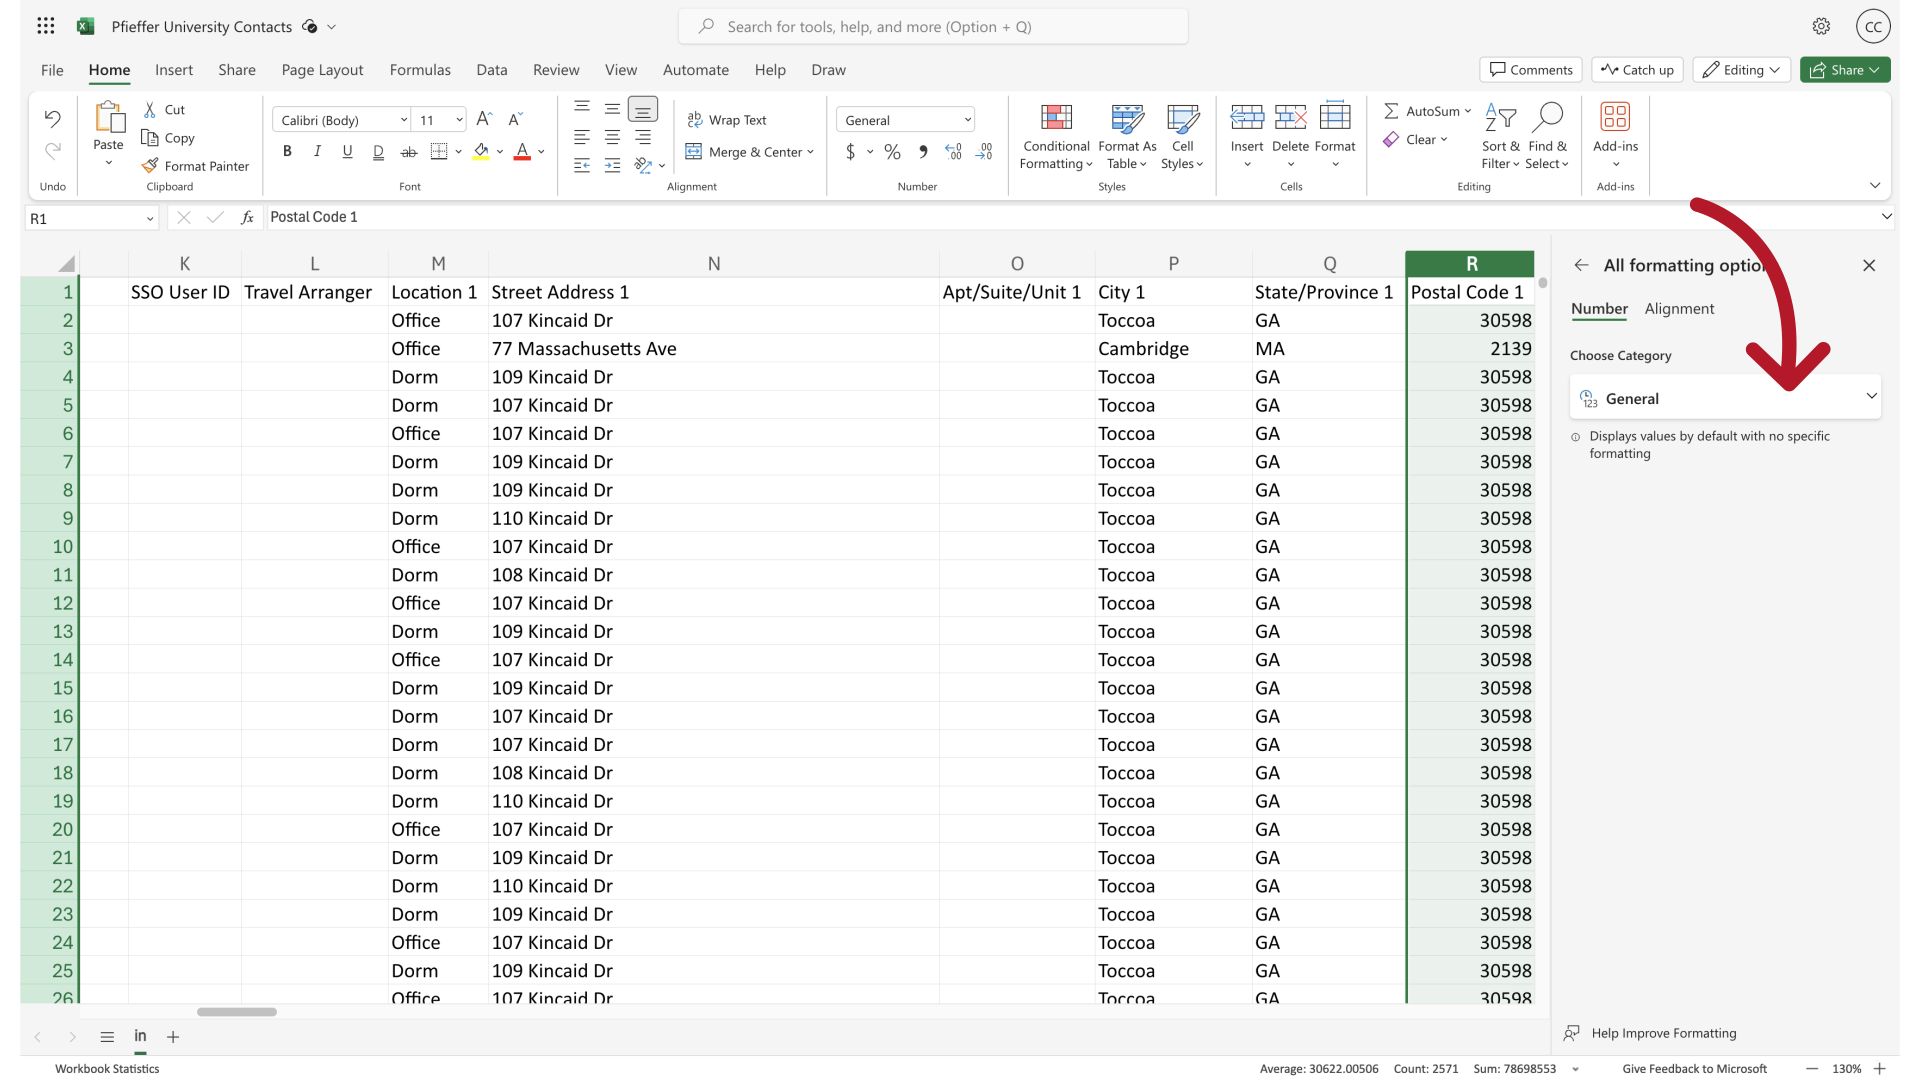
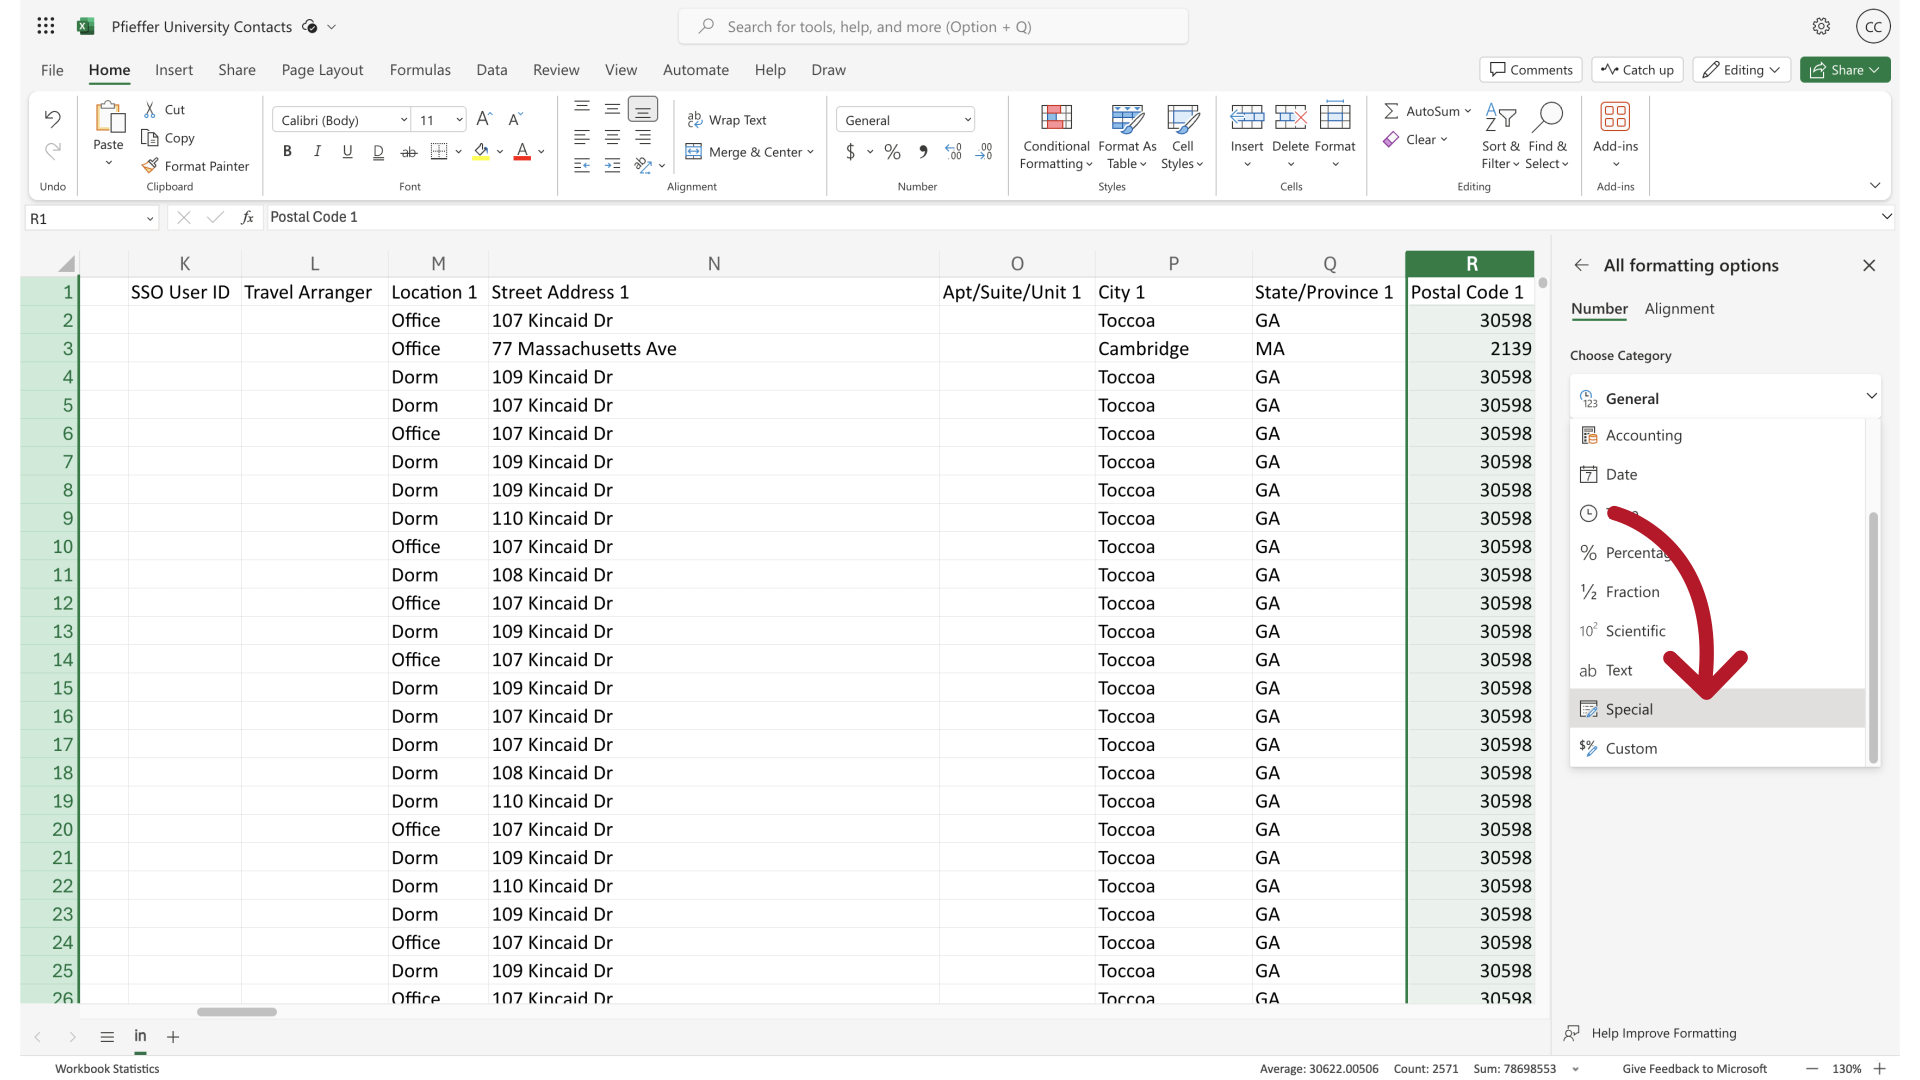
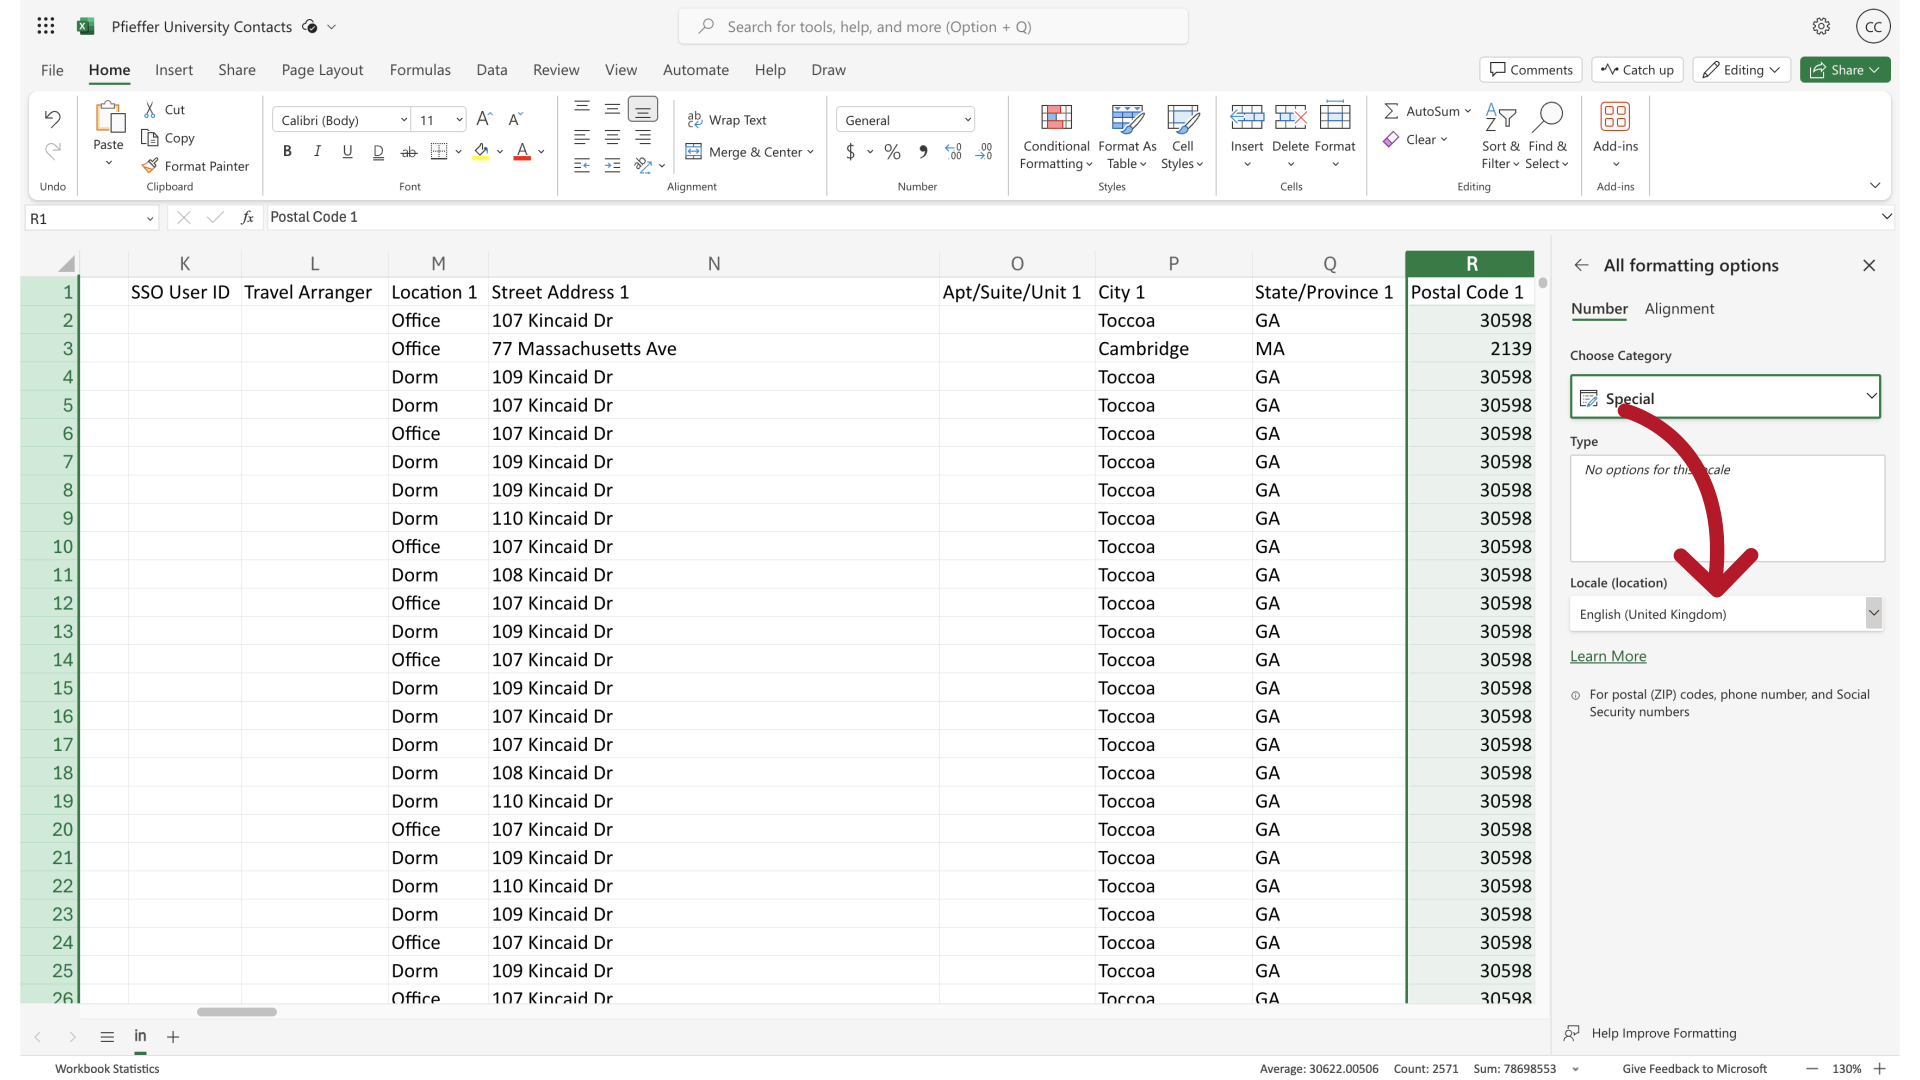
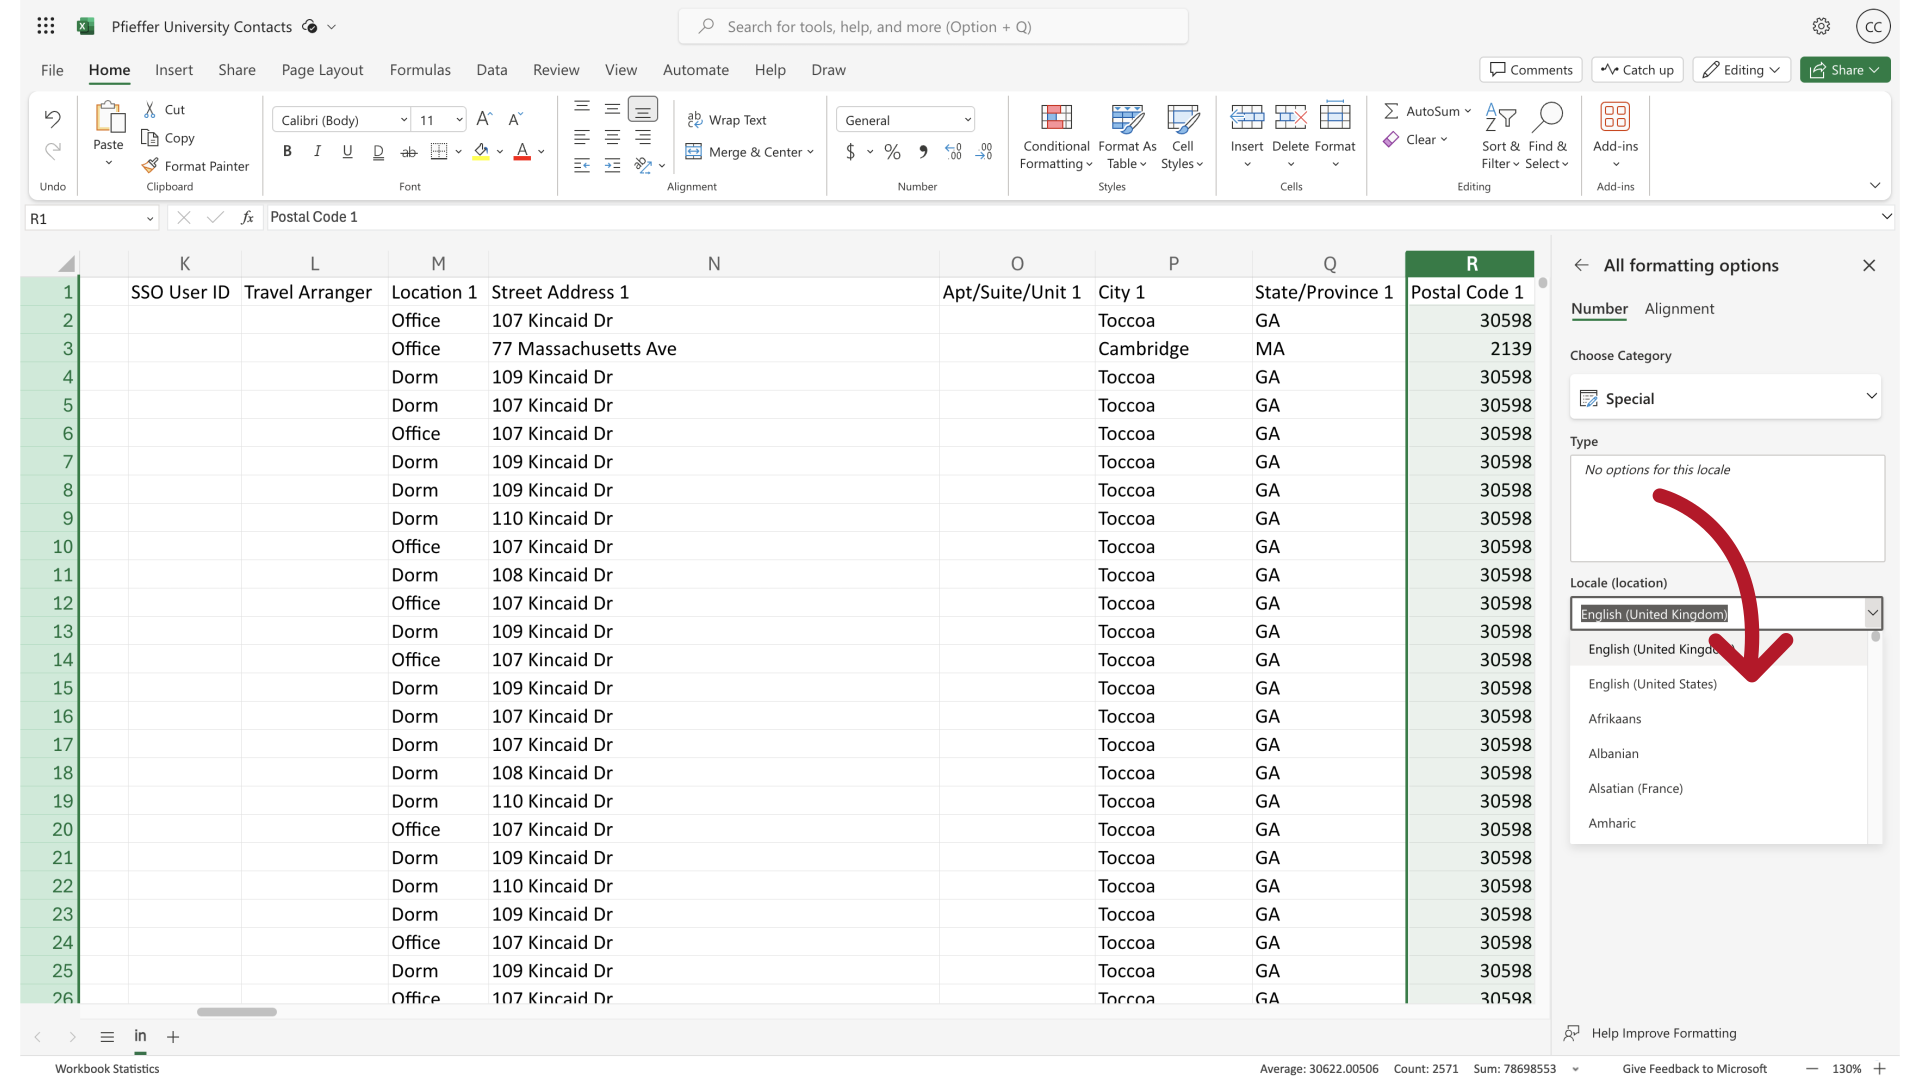
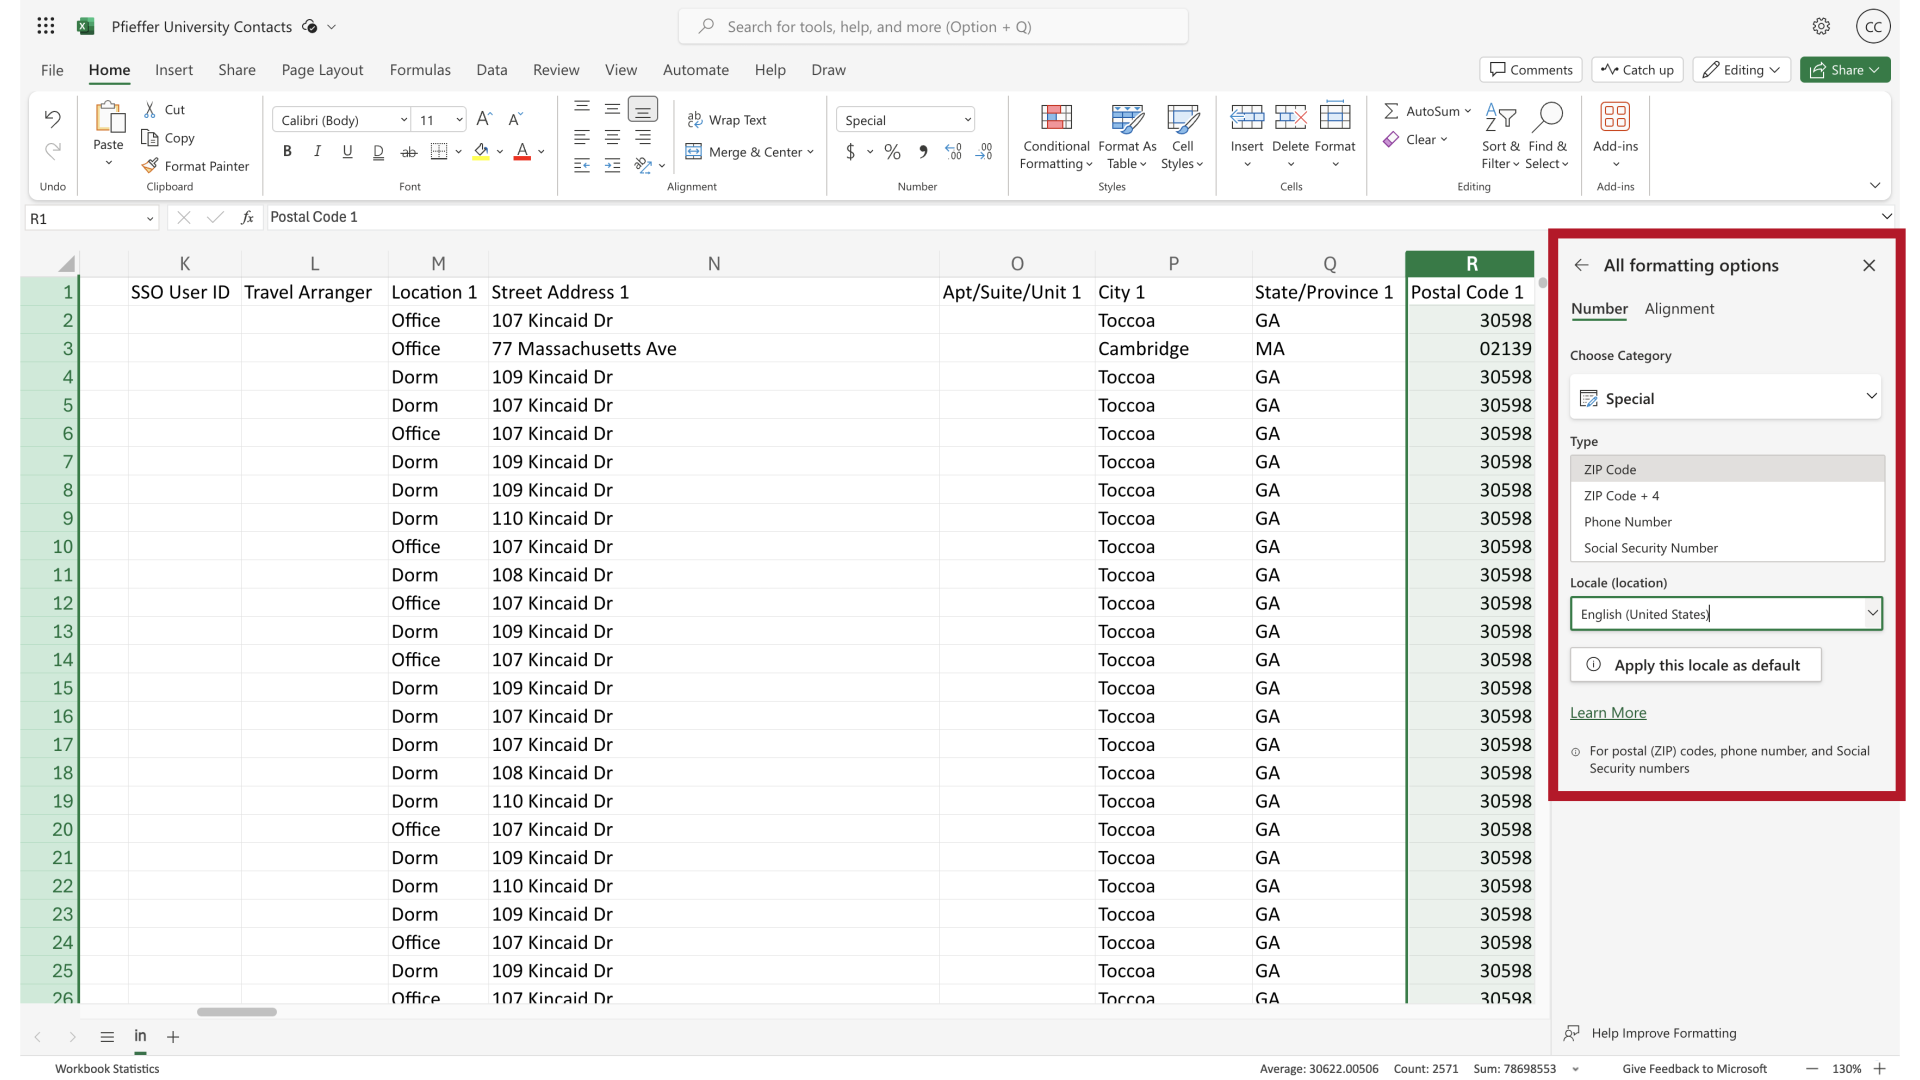
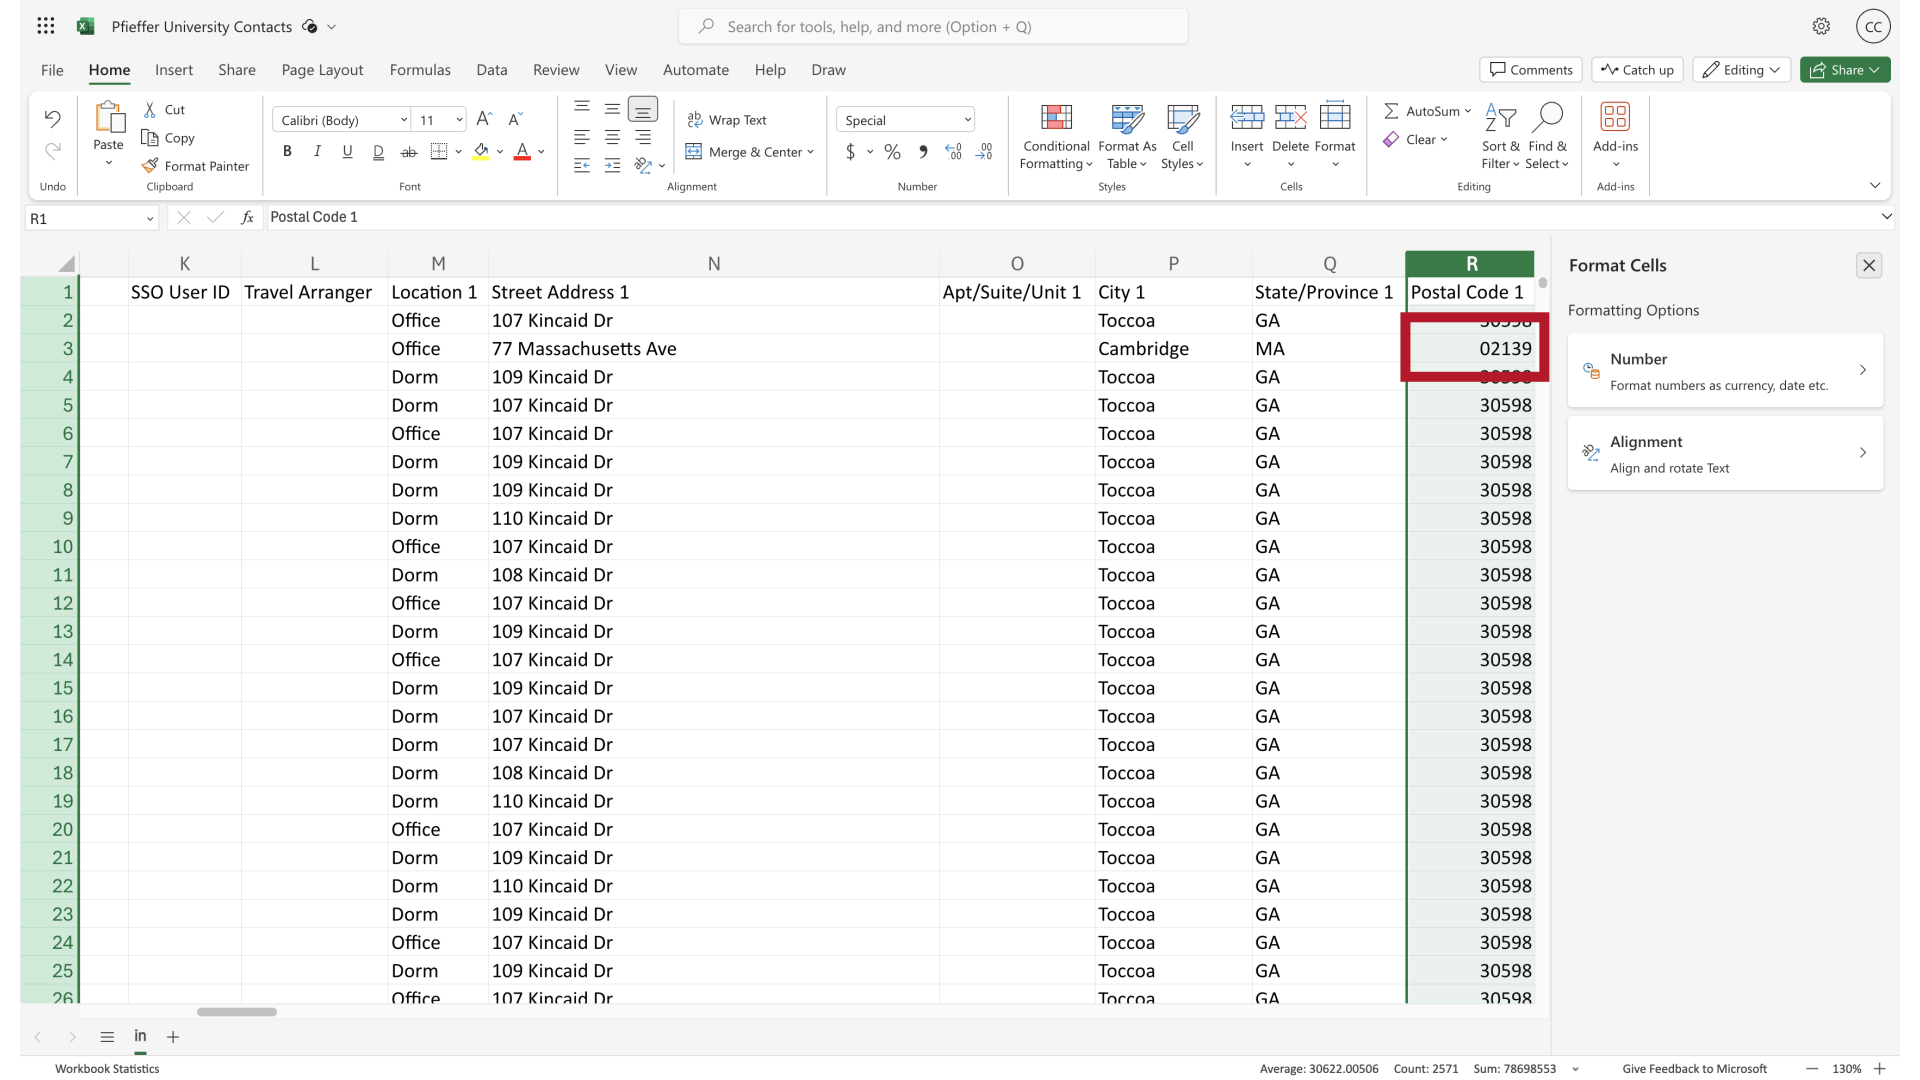
Before saving or uploading your CSV, ensure that any fields which begin with a zero (such as phone numbers or postal/ZIP codes) are formatted as text, Phone Number, or Zip/Postal Code in your spreadsheet program. This prevents the leading zeros from being dropped when the file is imported into Everbridge.
13. Leading Zeros
14. Leading Zeros
15. Leading Zeros
16. Leading Zeros
17. Leading Zeros
18. Leading Zeros
19. Leading Zeros
20. Leading Zeros
21. Leading Zeros
Click here
22. Separate Groups
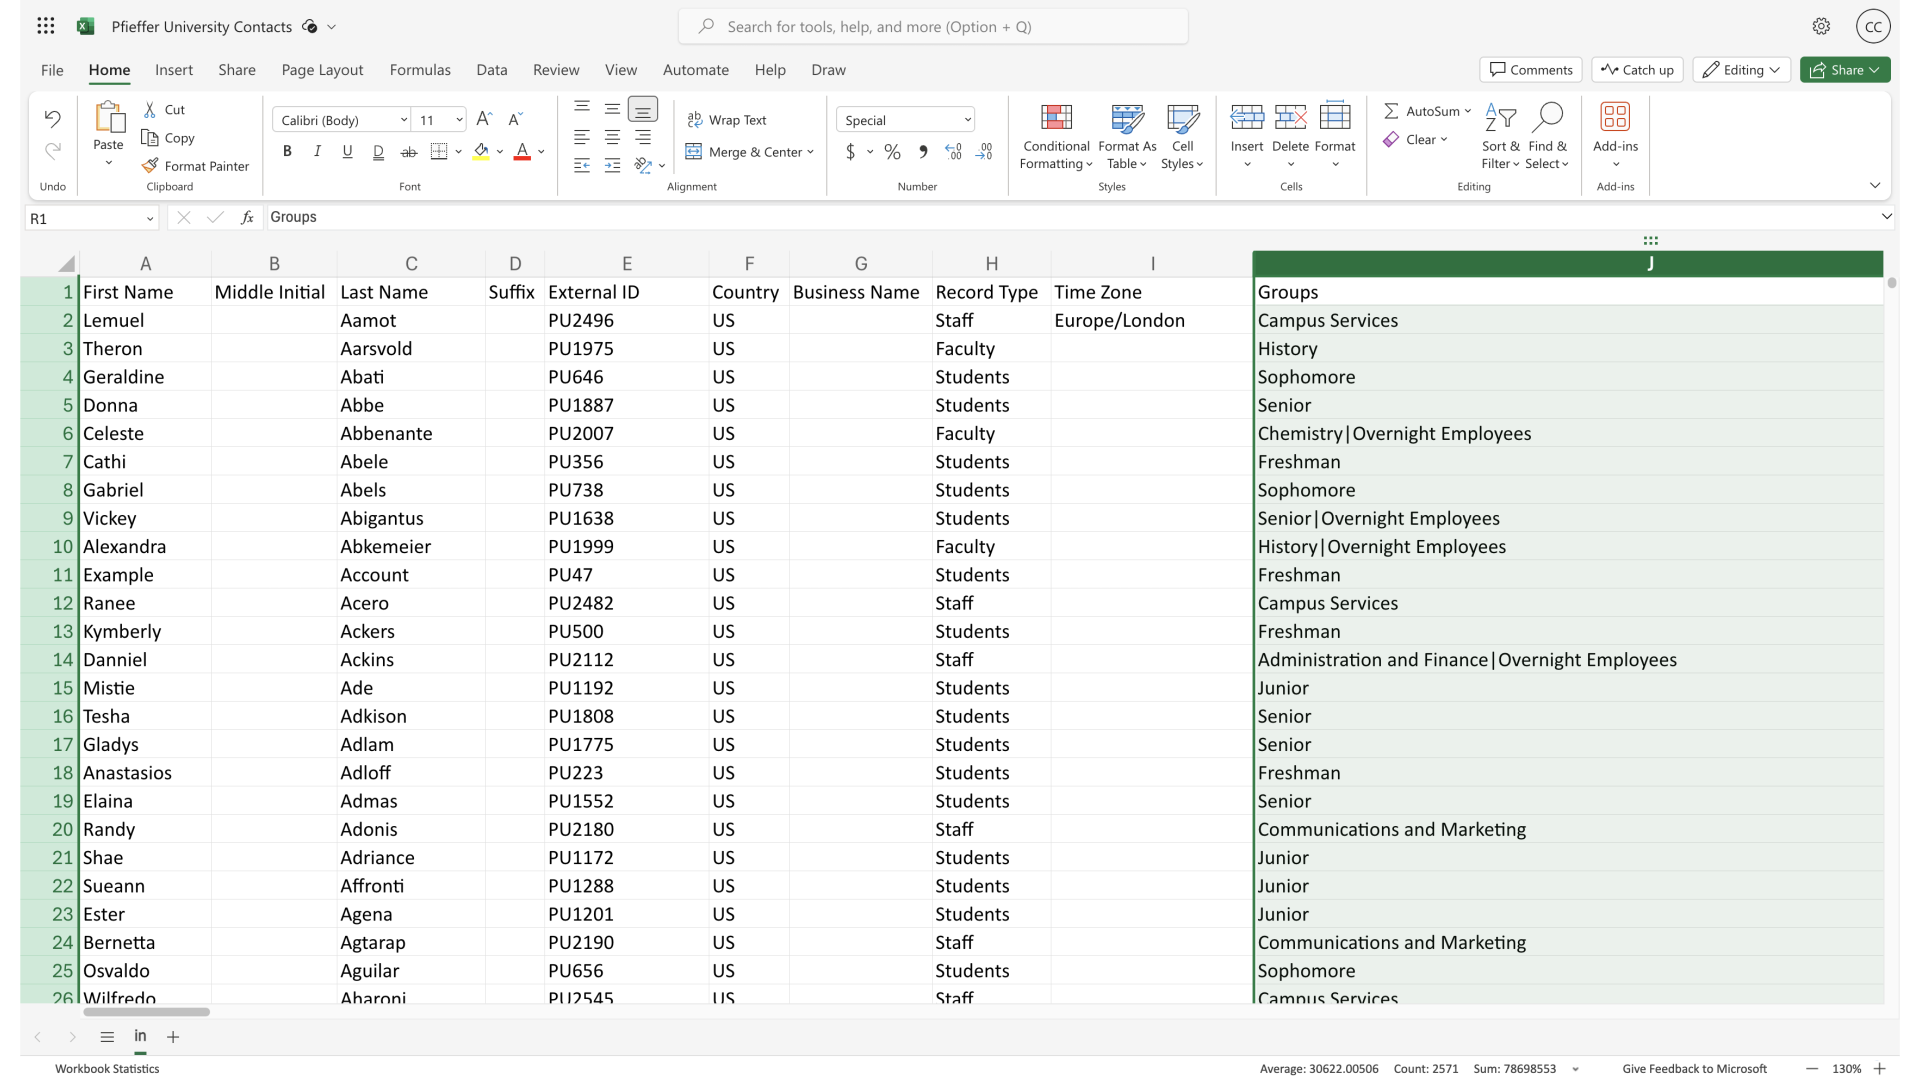
And that when adding Groups.
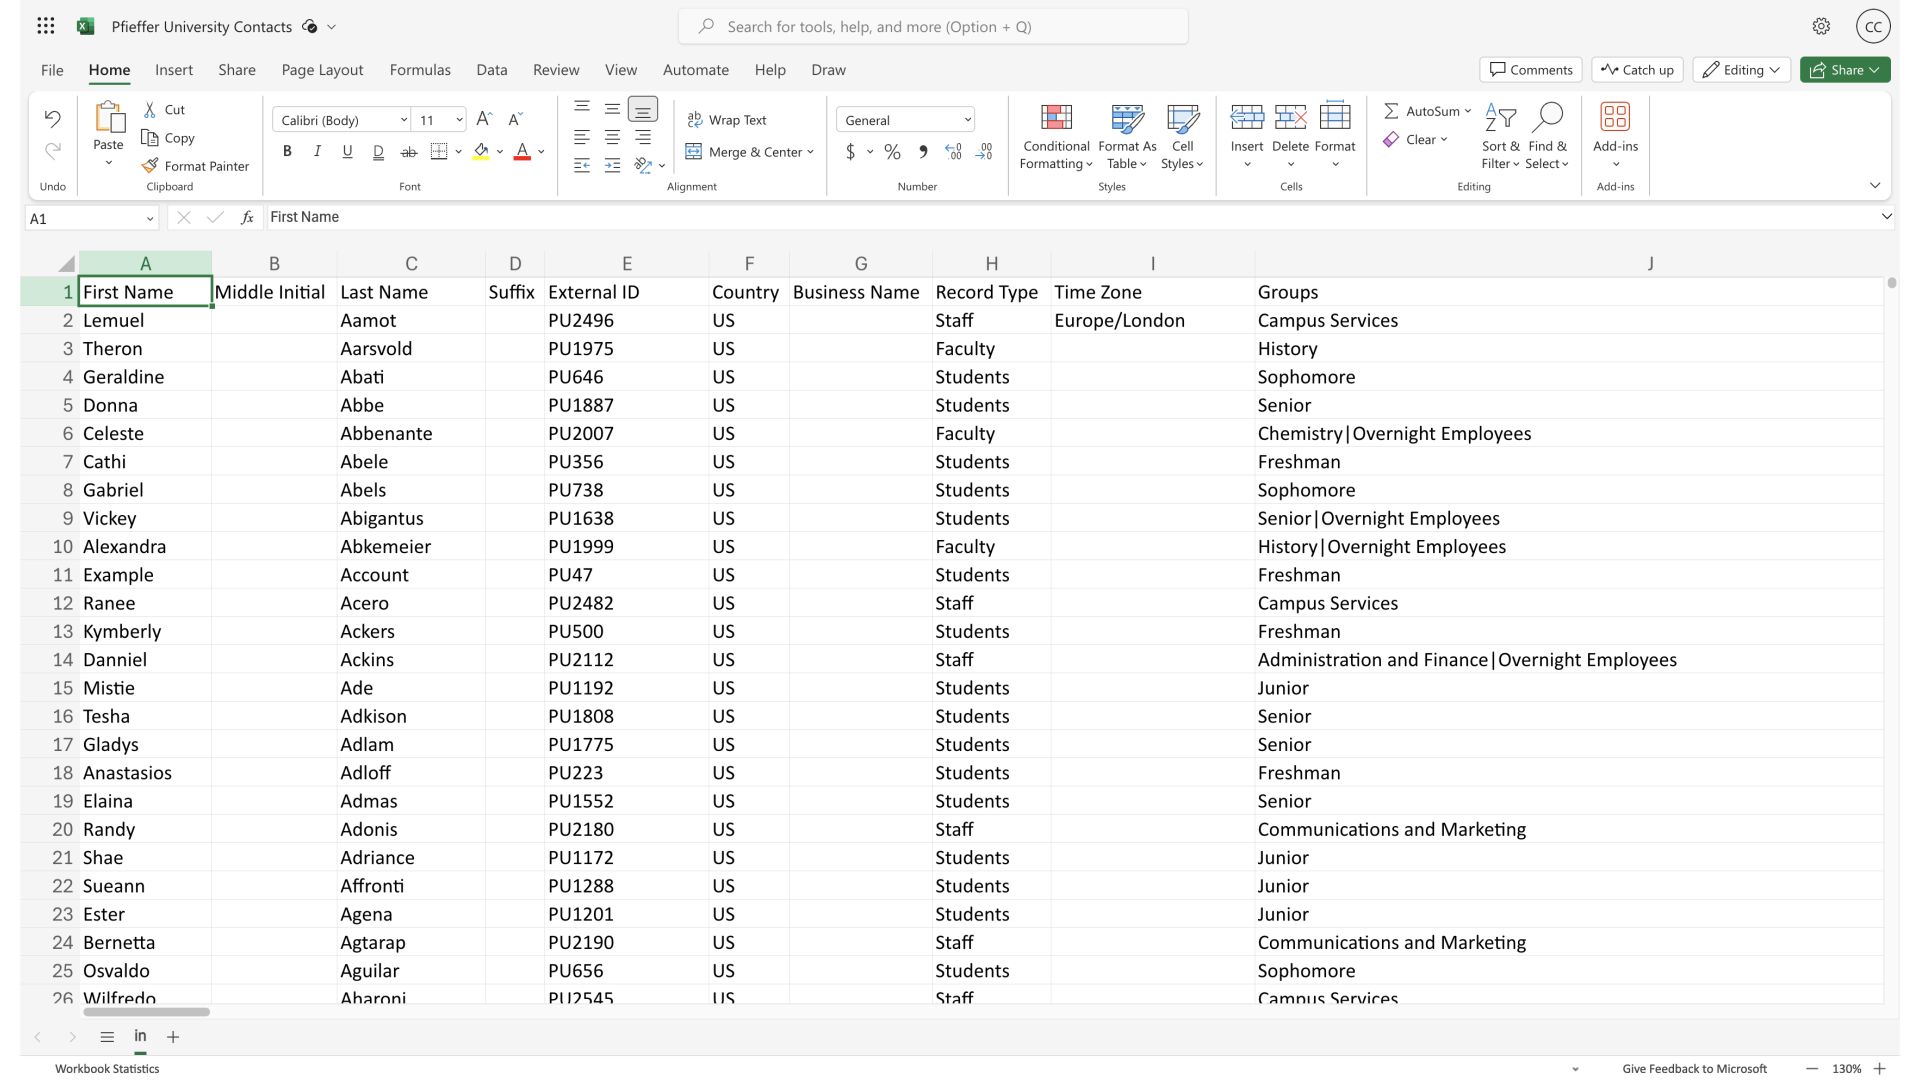
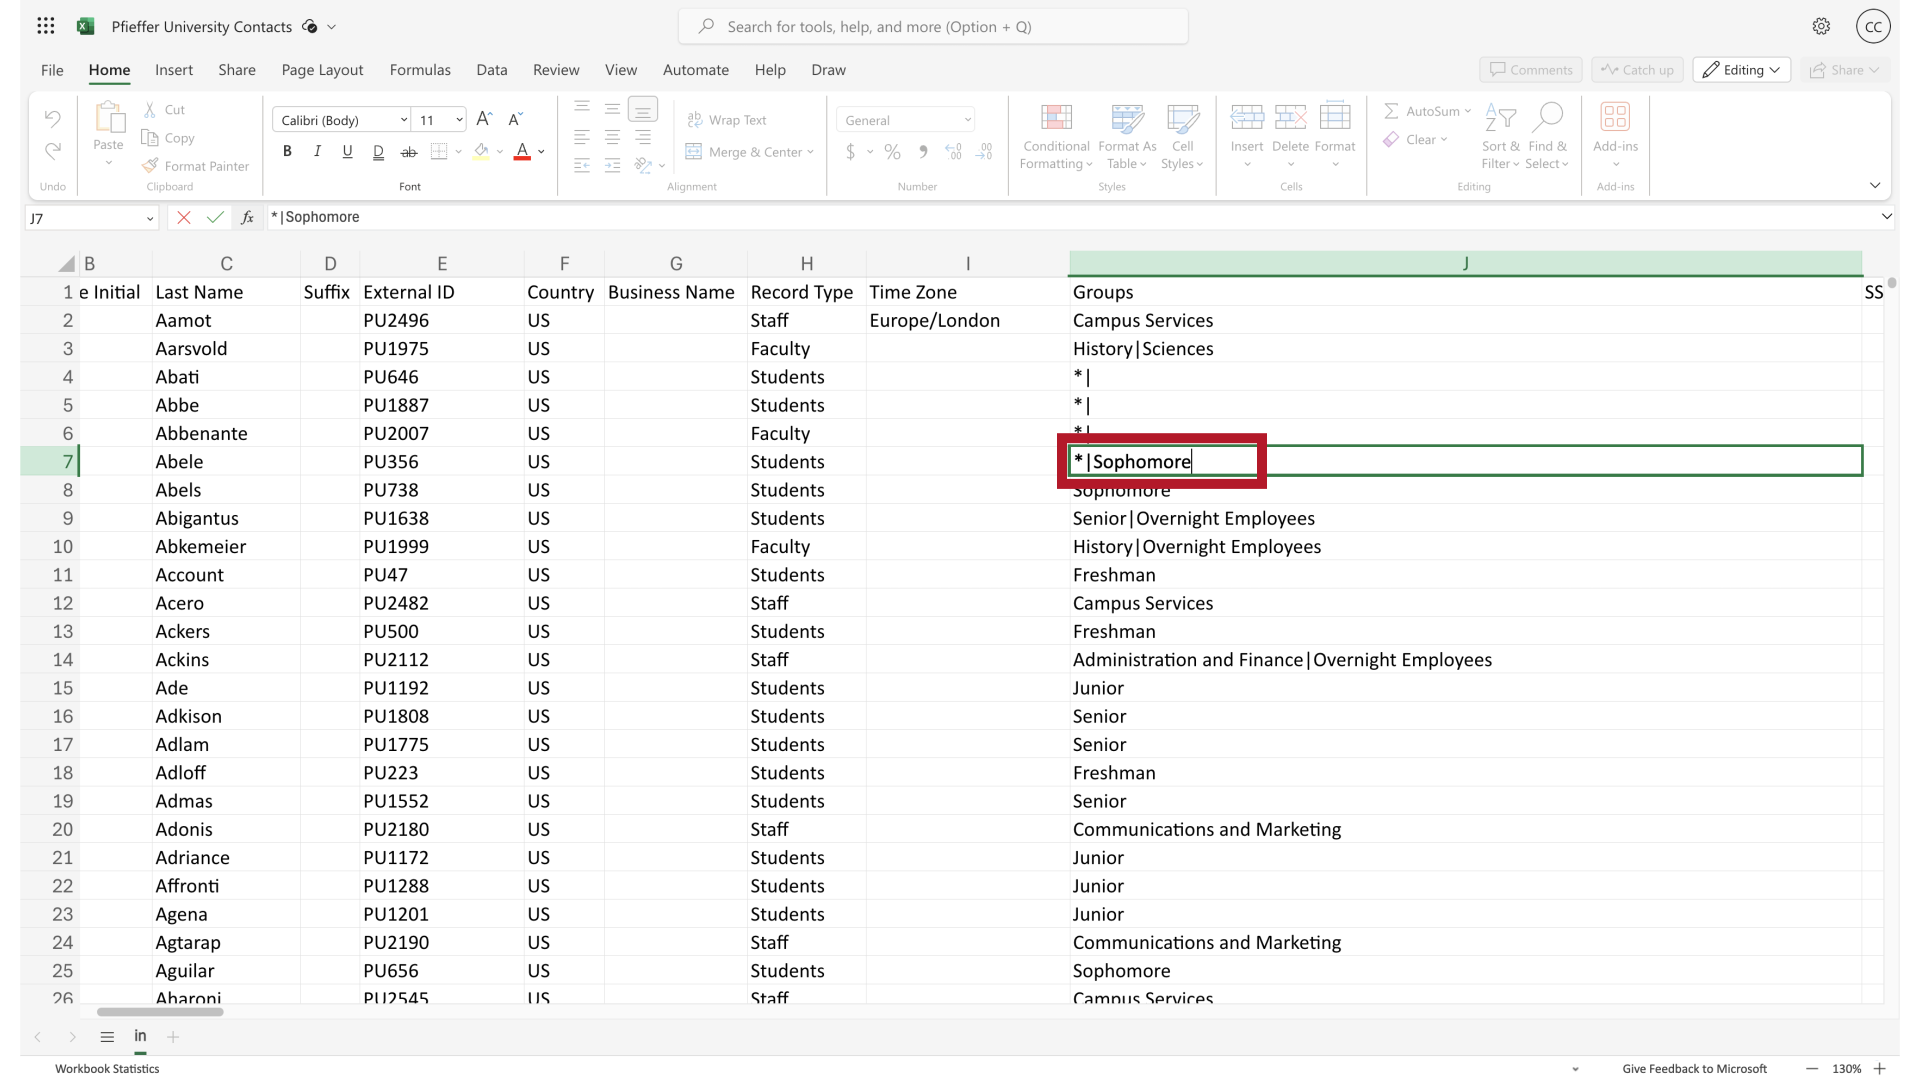
23. Separate Groups
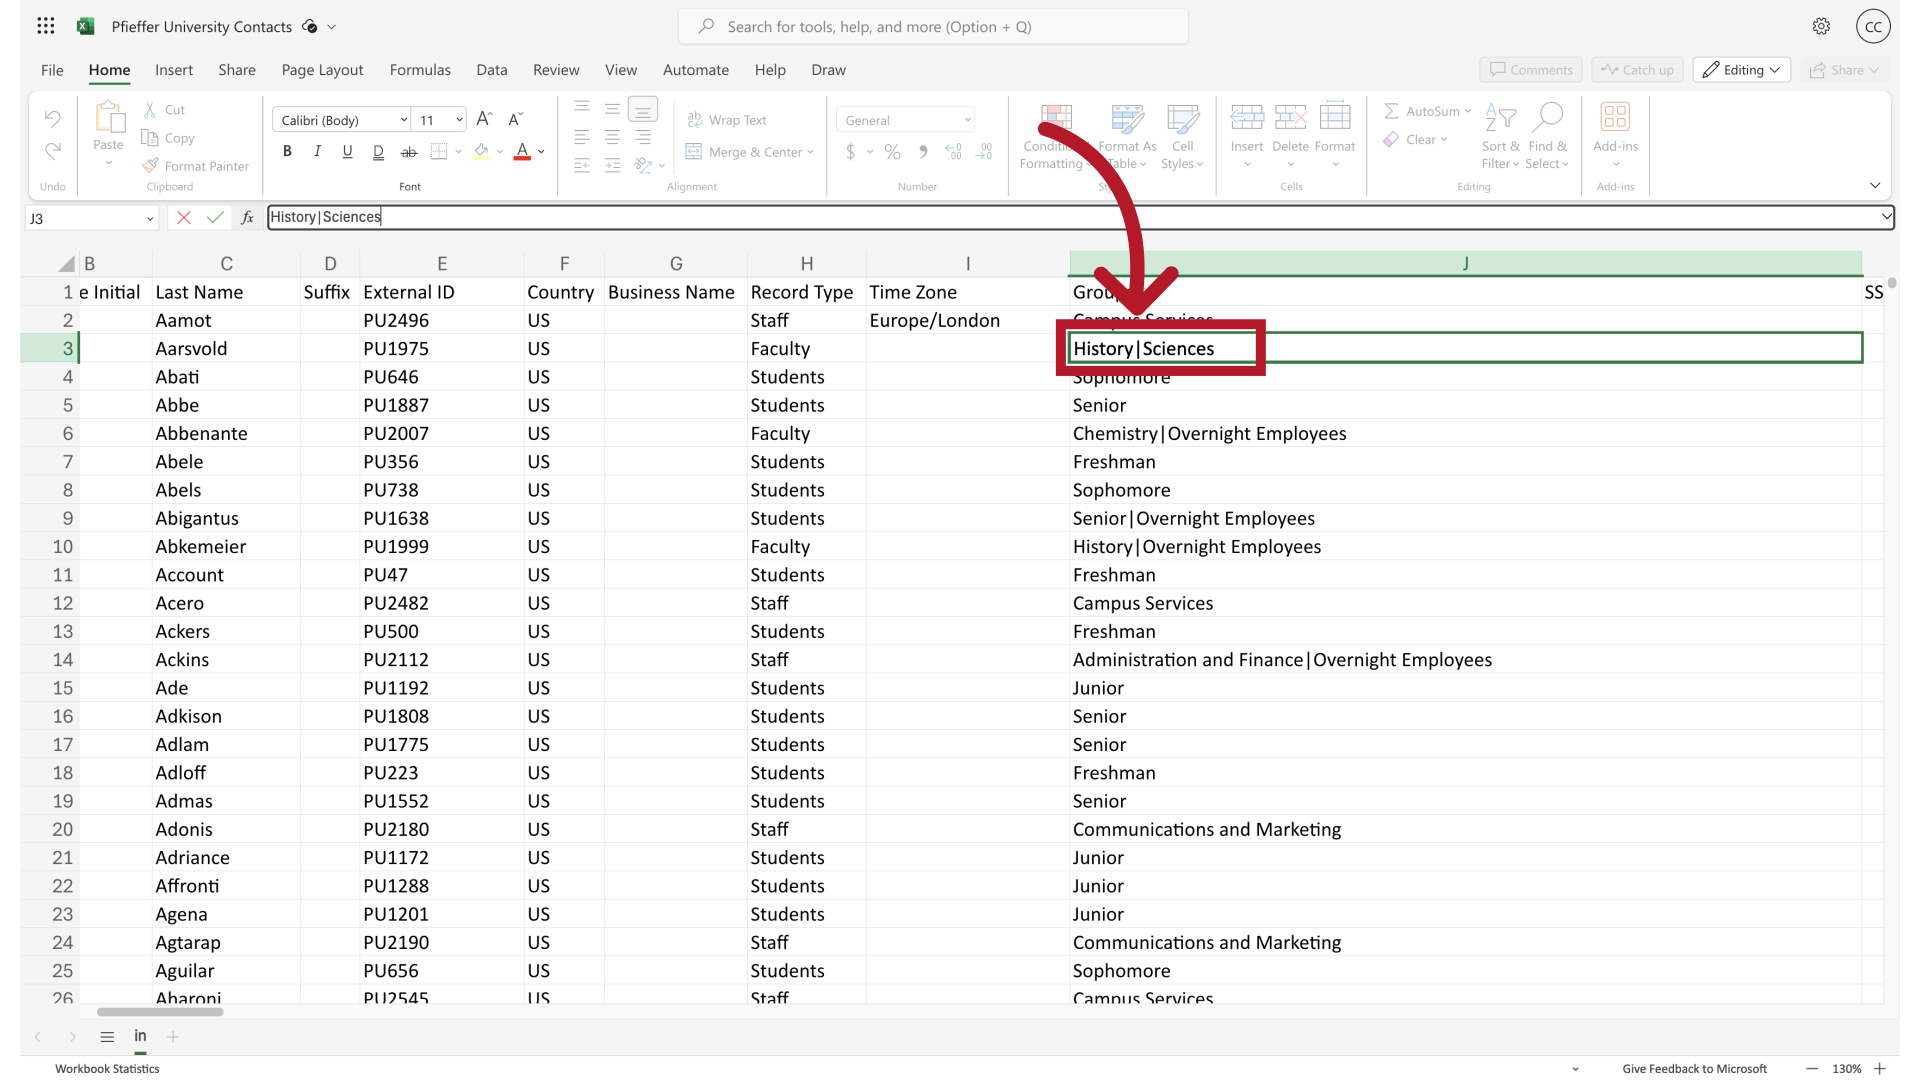
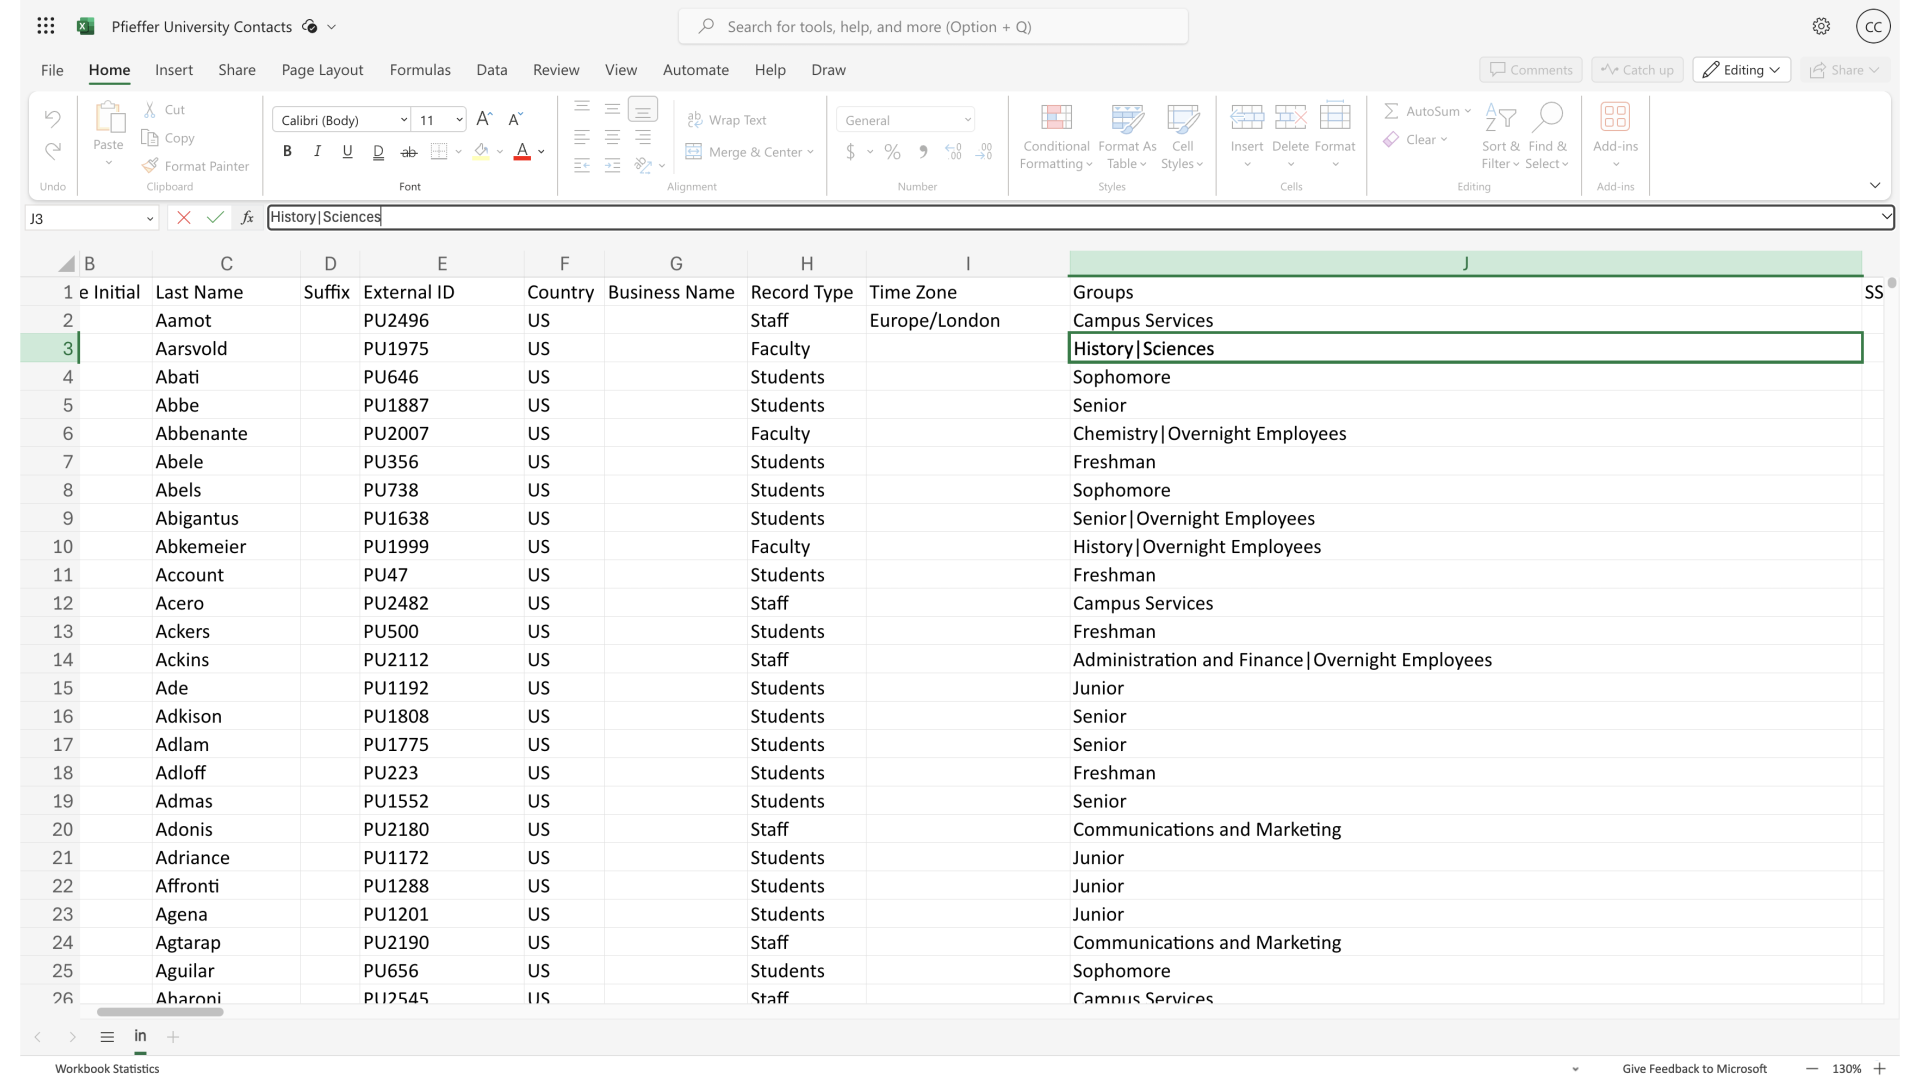
The pipe symbol is used, this symbol separates out multiple group names.
24. Separate Groups
Information in the Group field will overwrite the information in the Manager Portal.
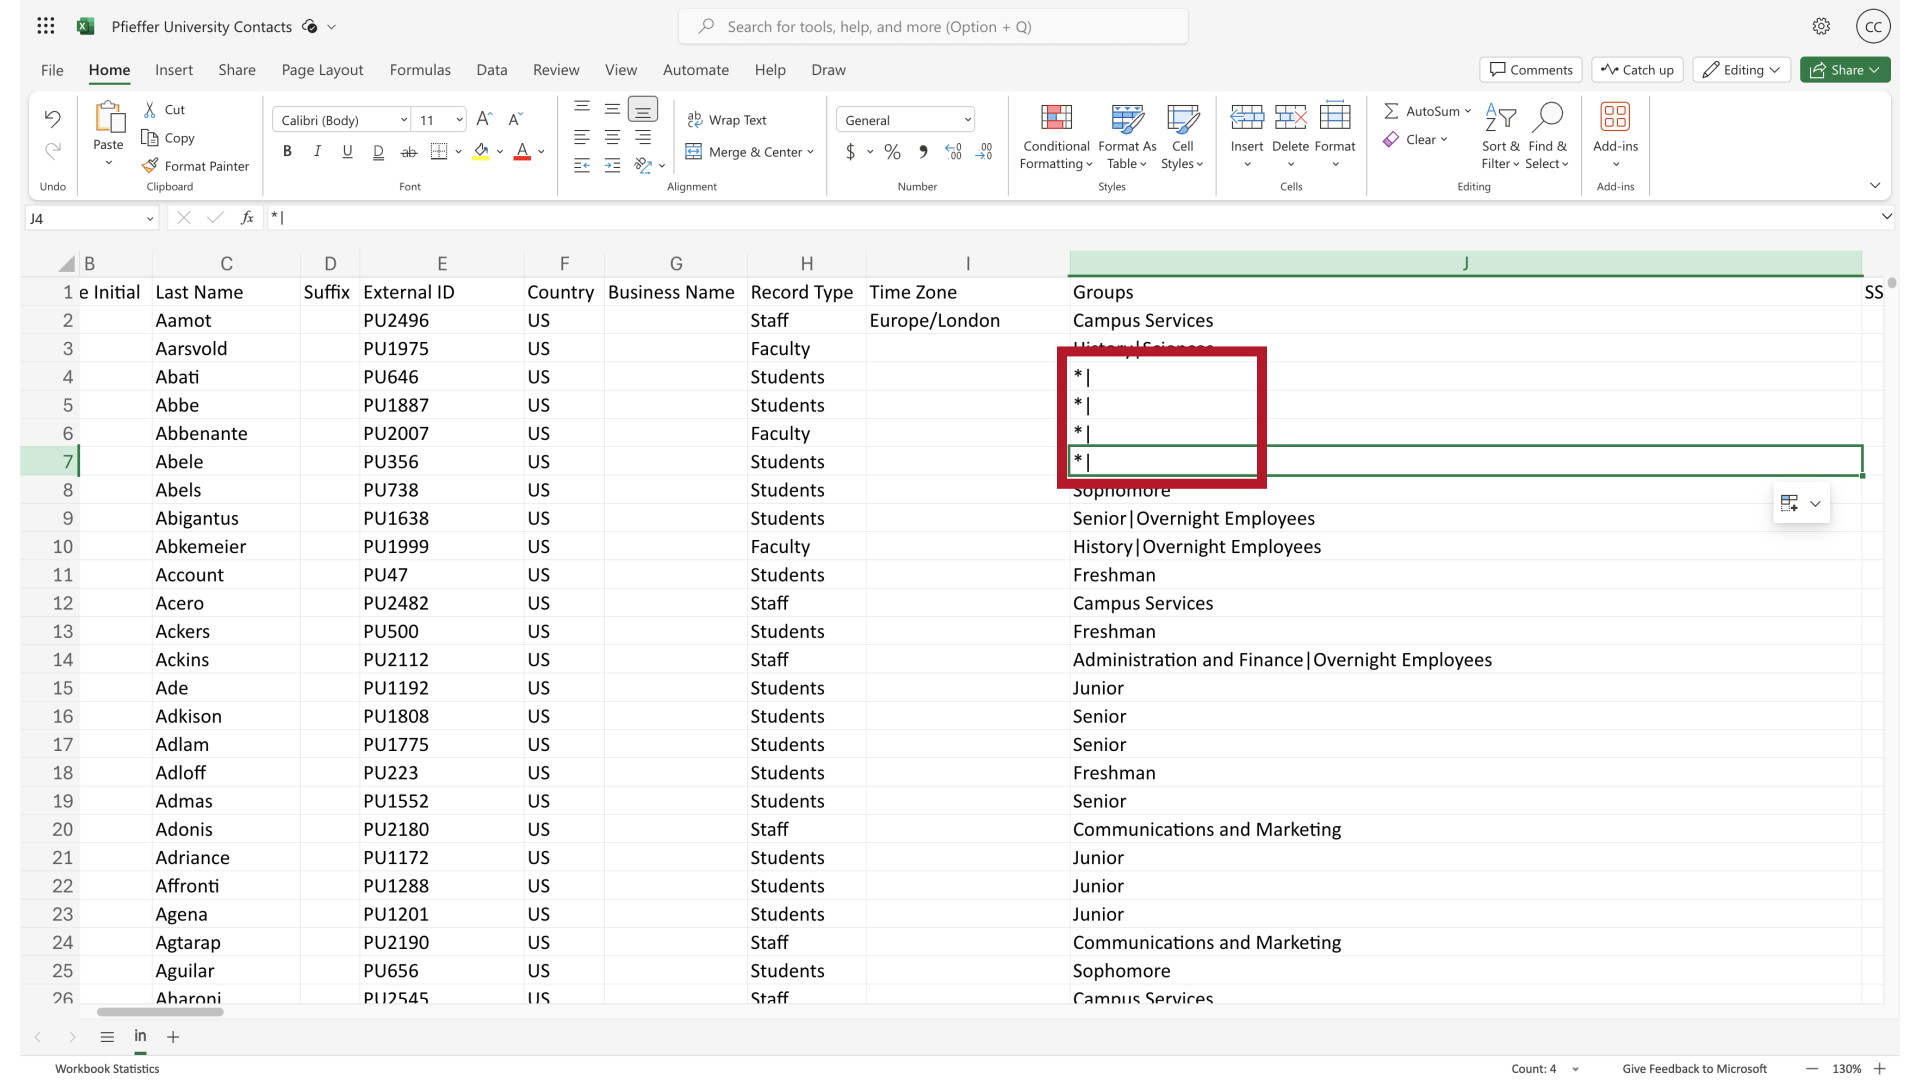
25. Maintain Groups
So make sure that if you simply wish to add a new Group to the Groups that the contact is already a part of, use the asterisk and pipe symbol to indicate that.
26. Maintain Groups
Click the selected option
27. Maintain & Add Groups
28. Contact Upload Files can be added via:
files can be added to an organization through an API SFTP or through the manager portal.

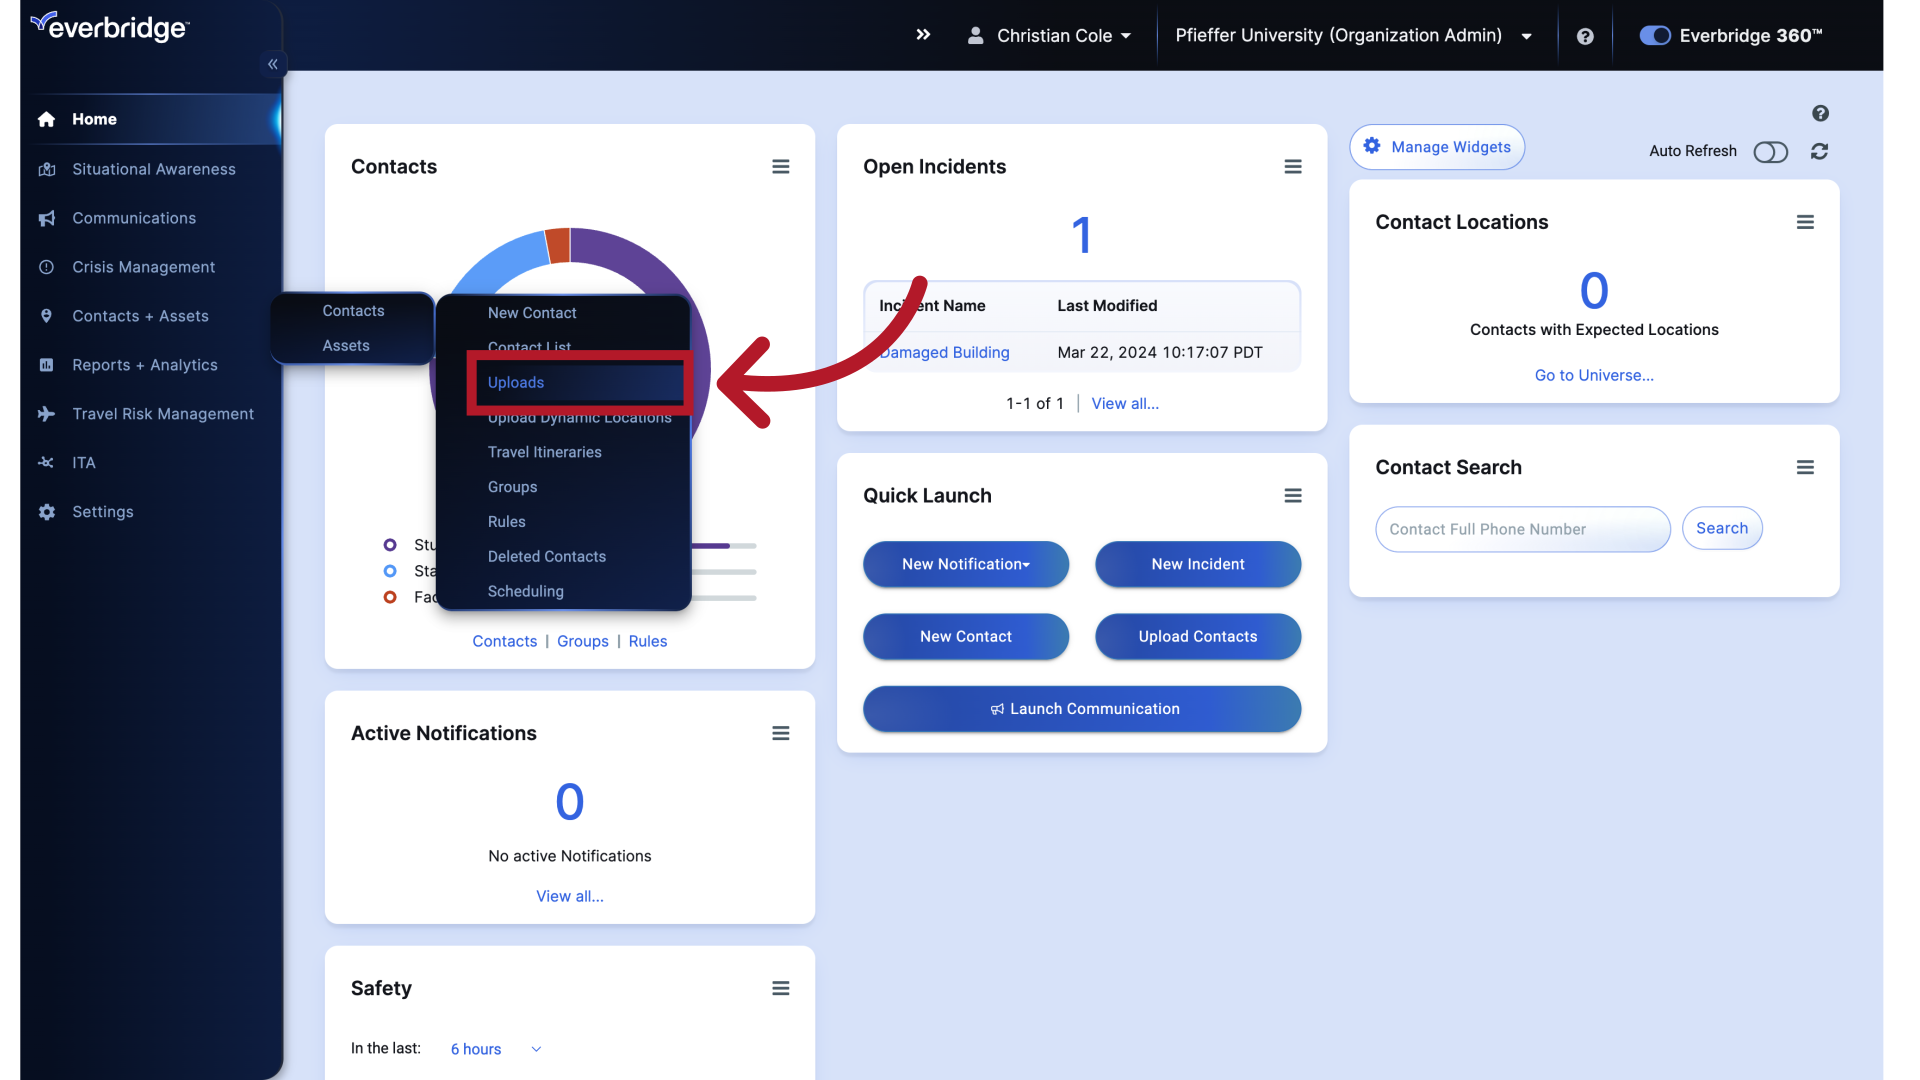
29. Uploads
From the Manager Portal. This option can be found under Contacts and Assets, and Uploads.
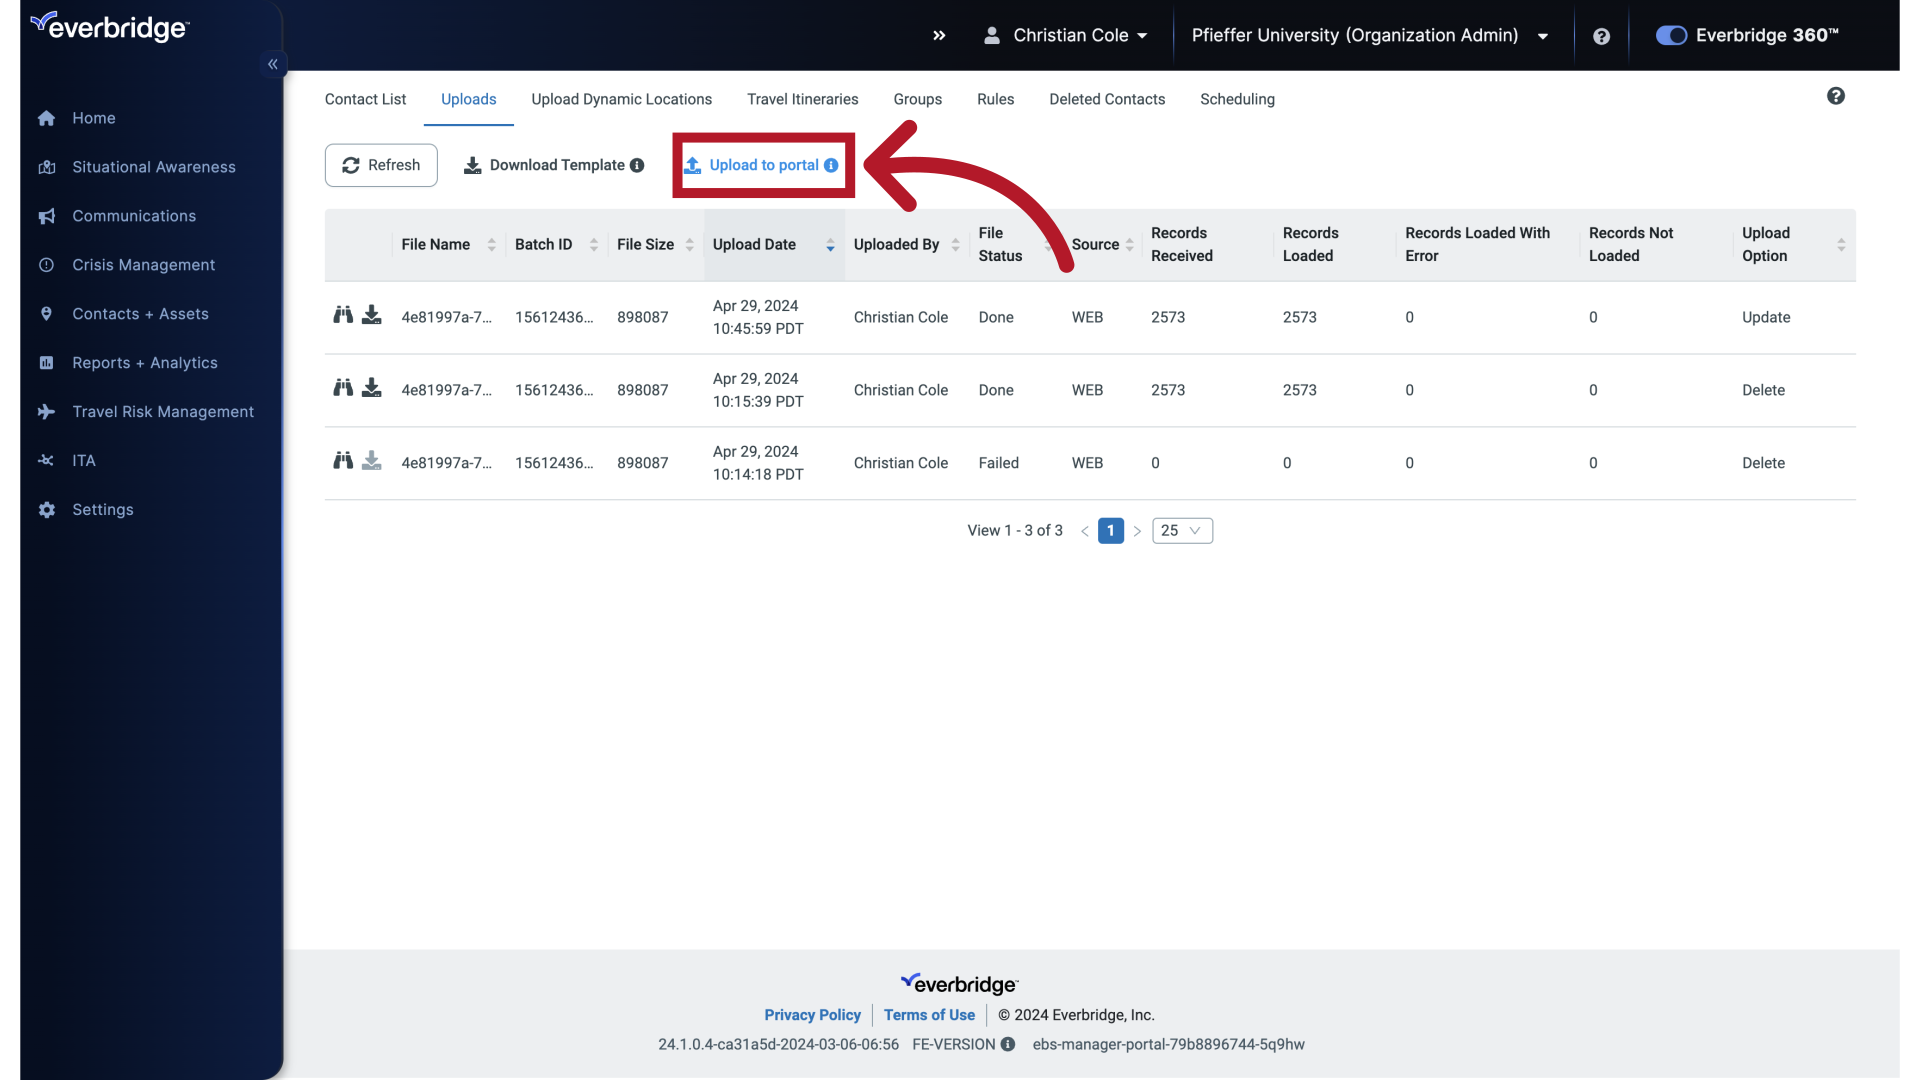
30. Upload to Portal
Once your CSV file is filled out and ready to upload, click the "Upload to Portal" text from the Uploads page.
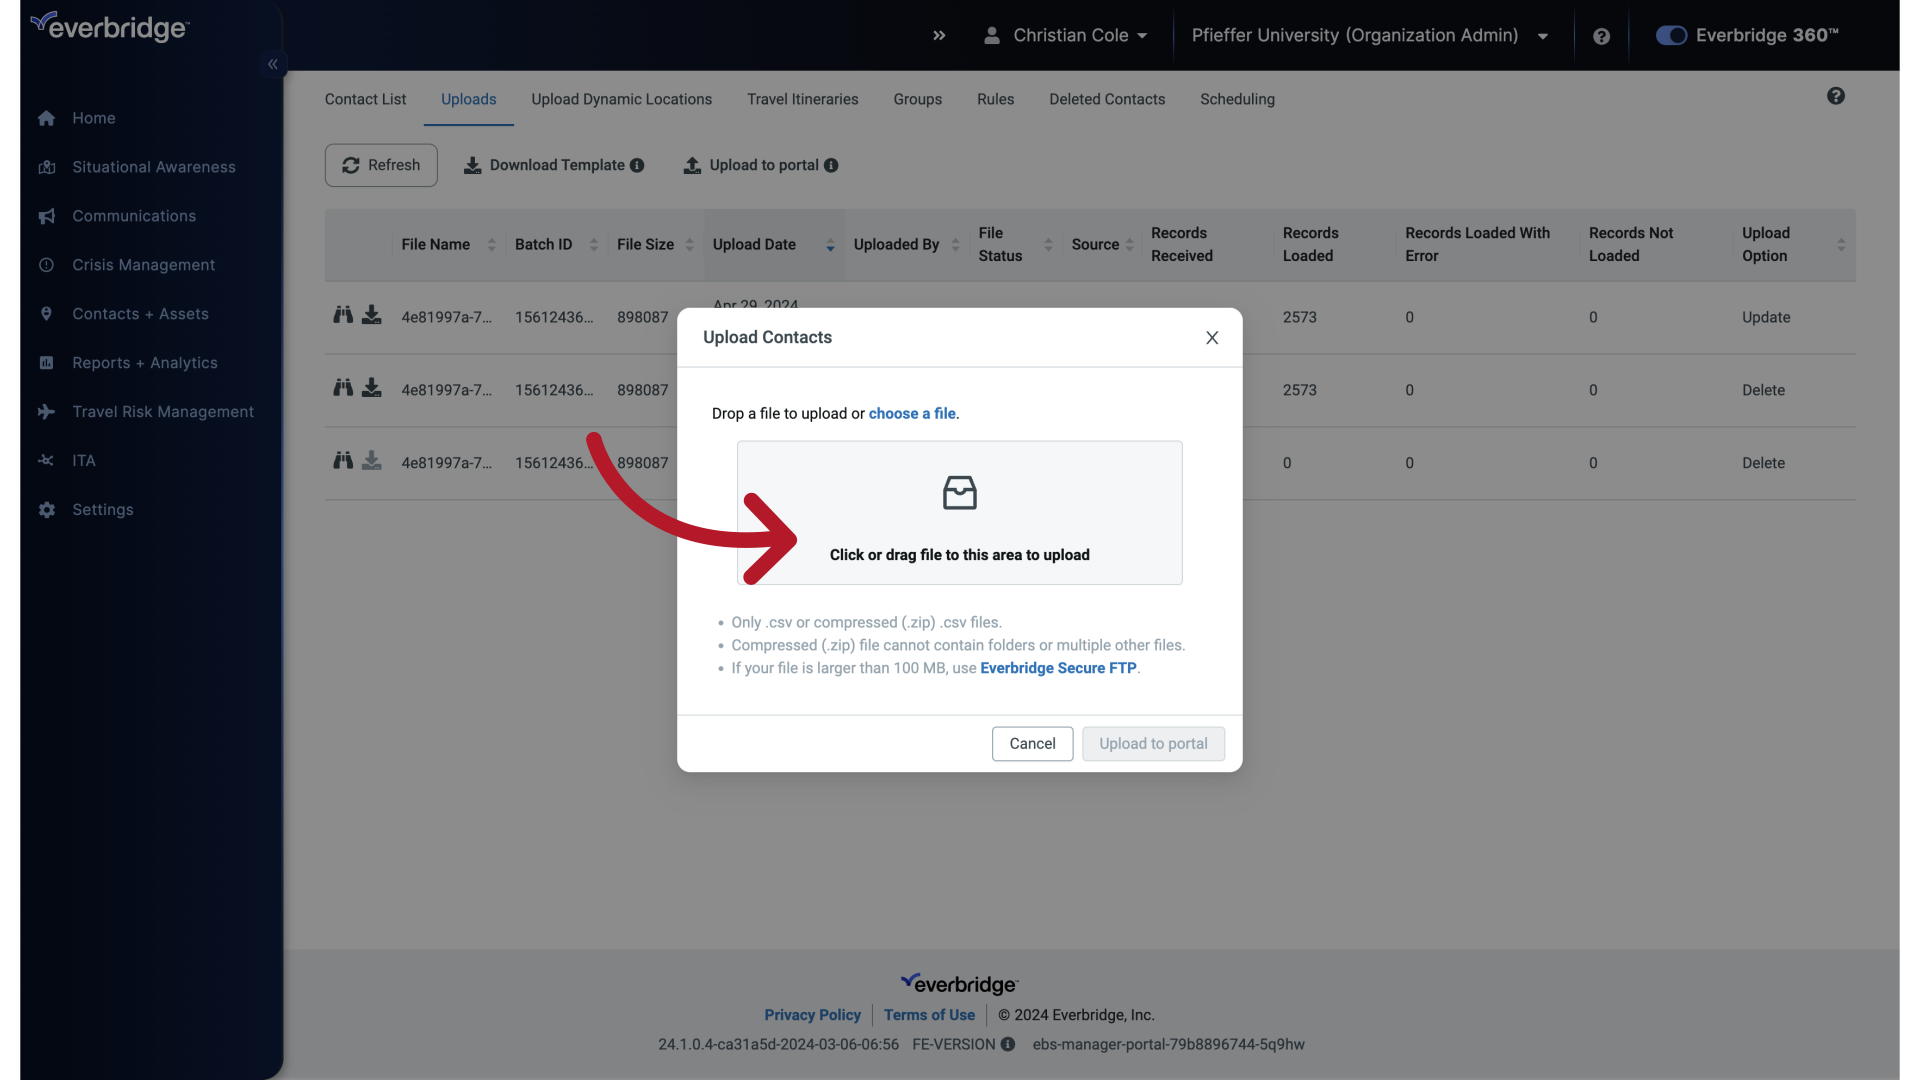
31. Drag File
Follow the prompts to indicate the correct file and choose what you want the system to do with the information.
32. File Attached
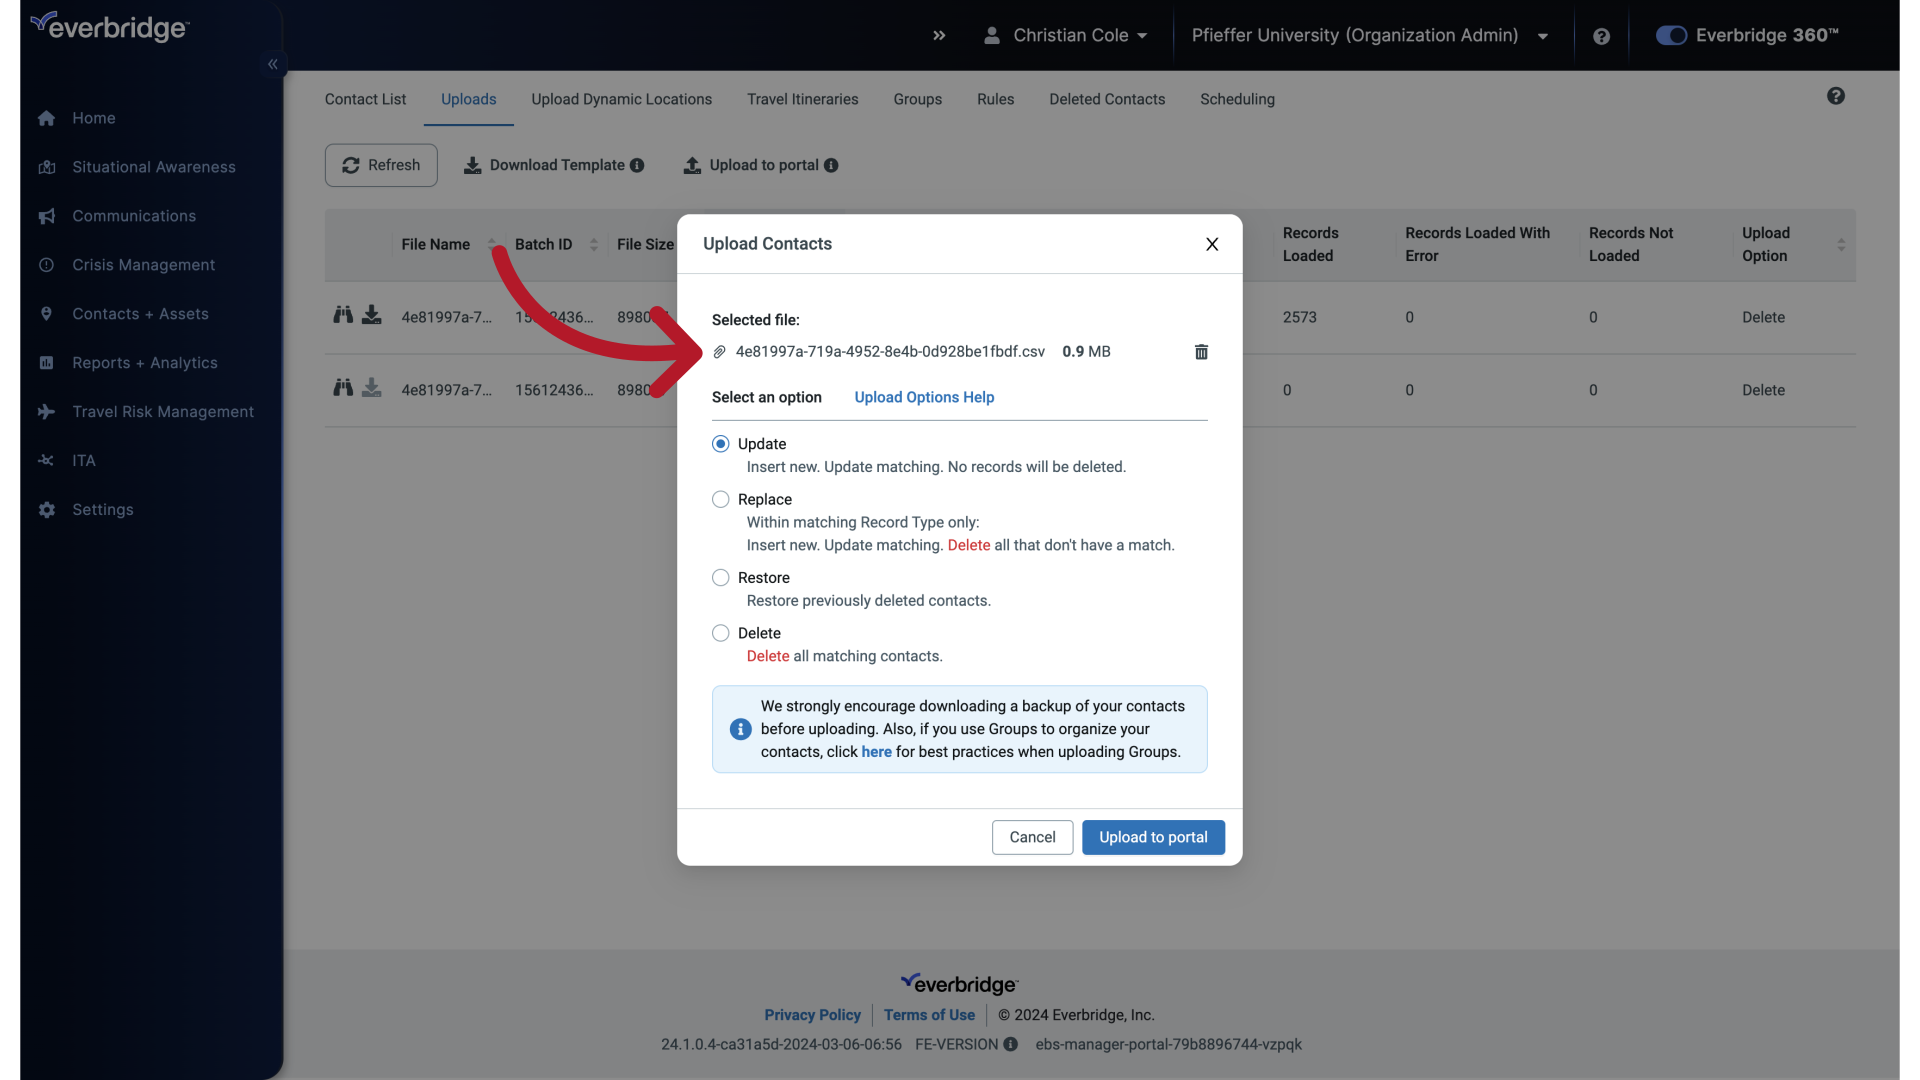
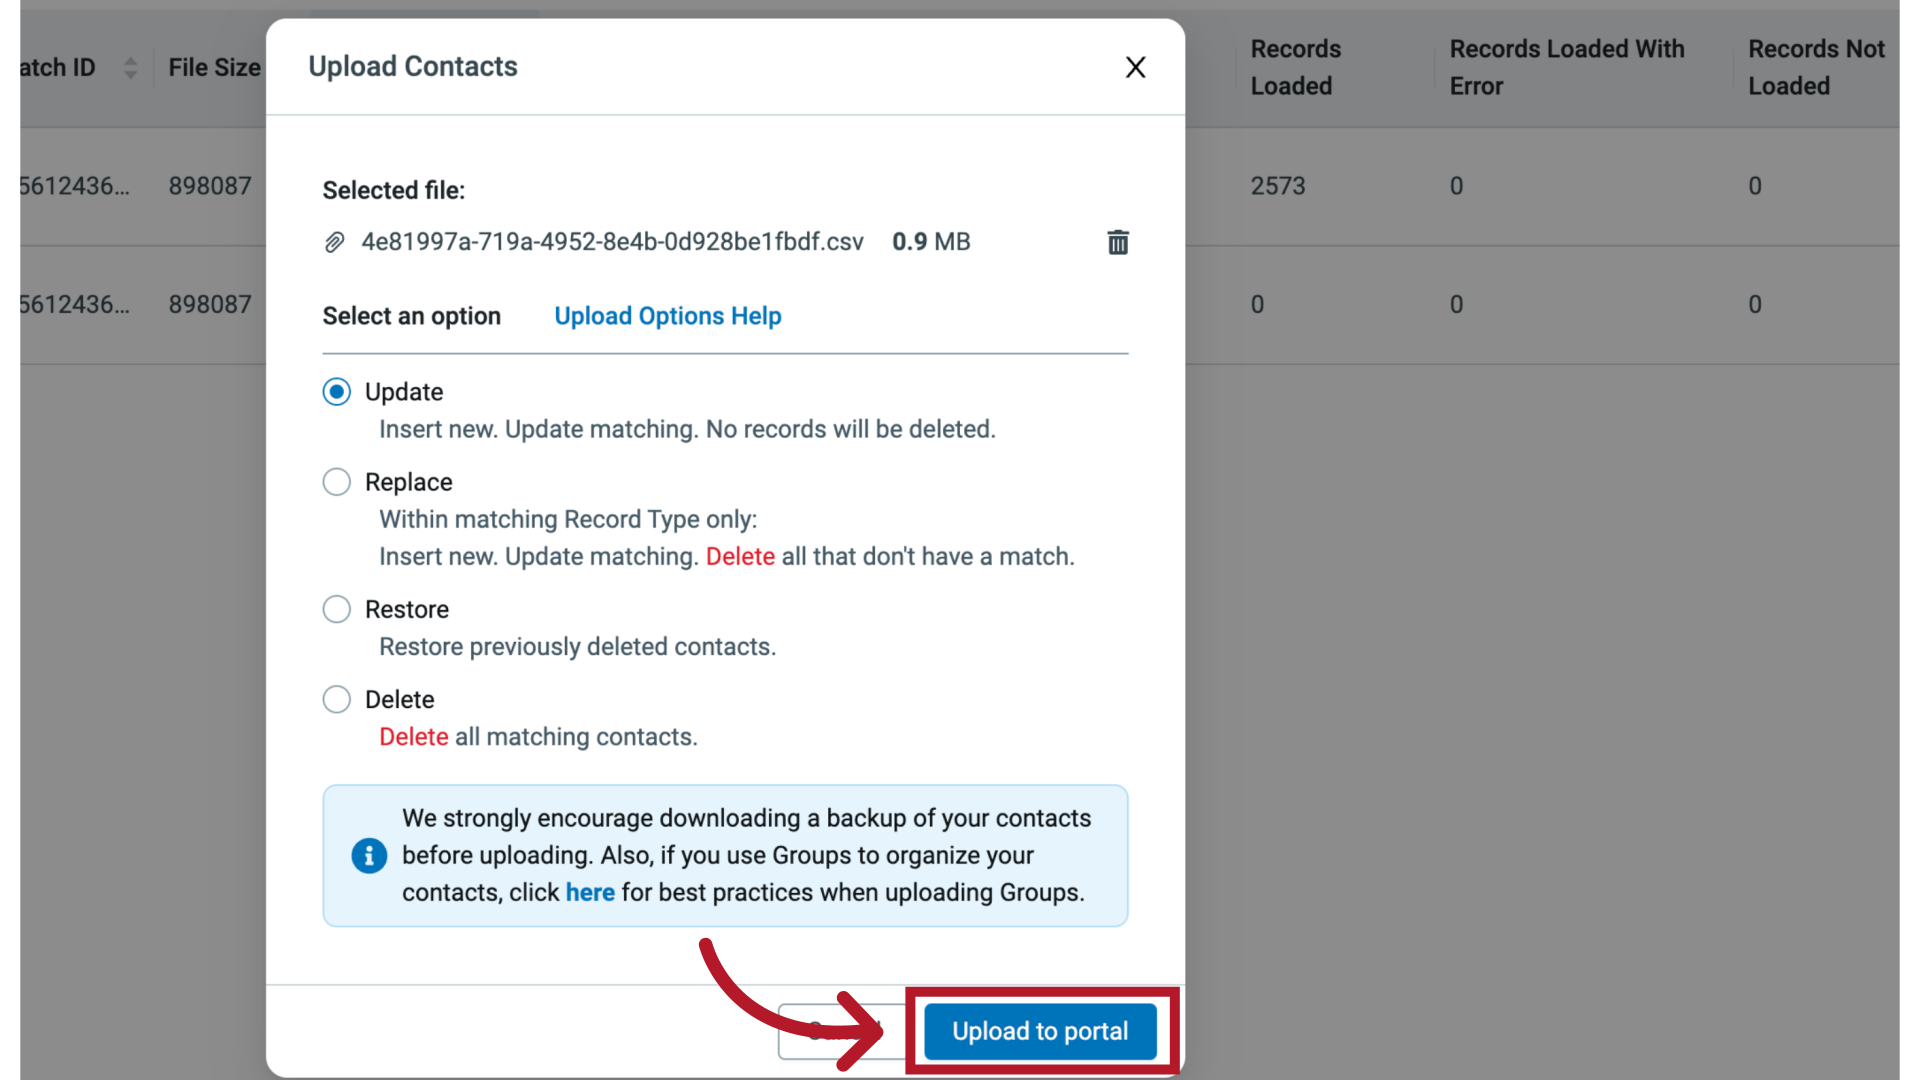
33. Upload Options
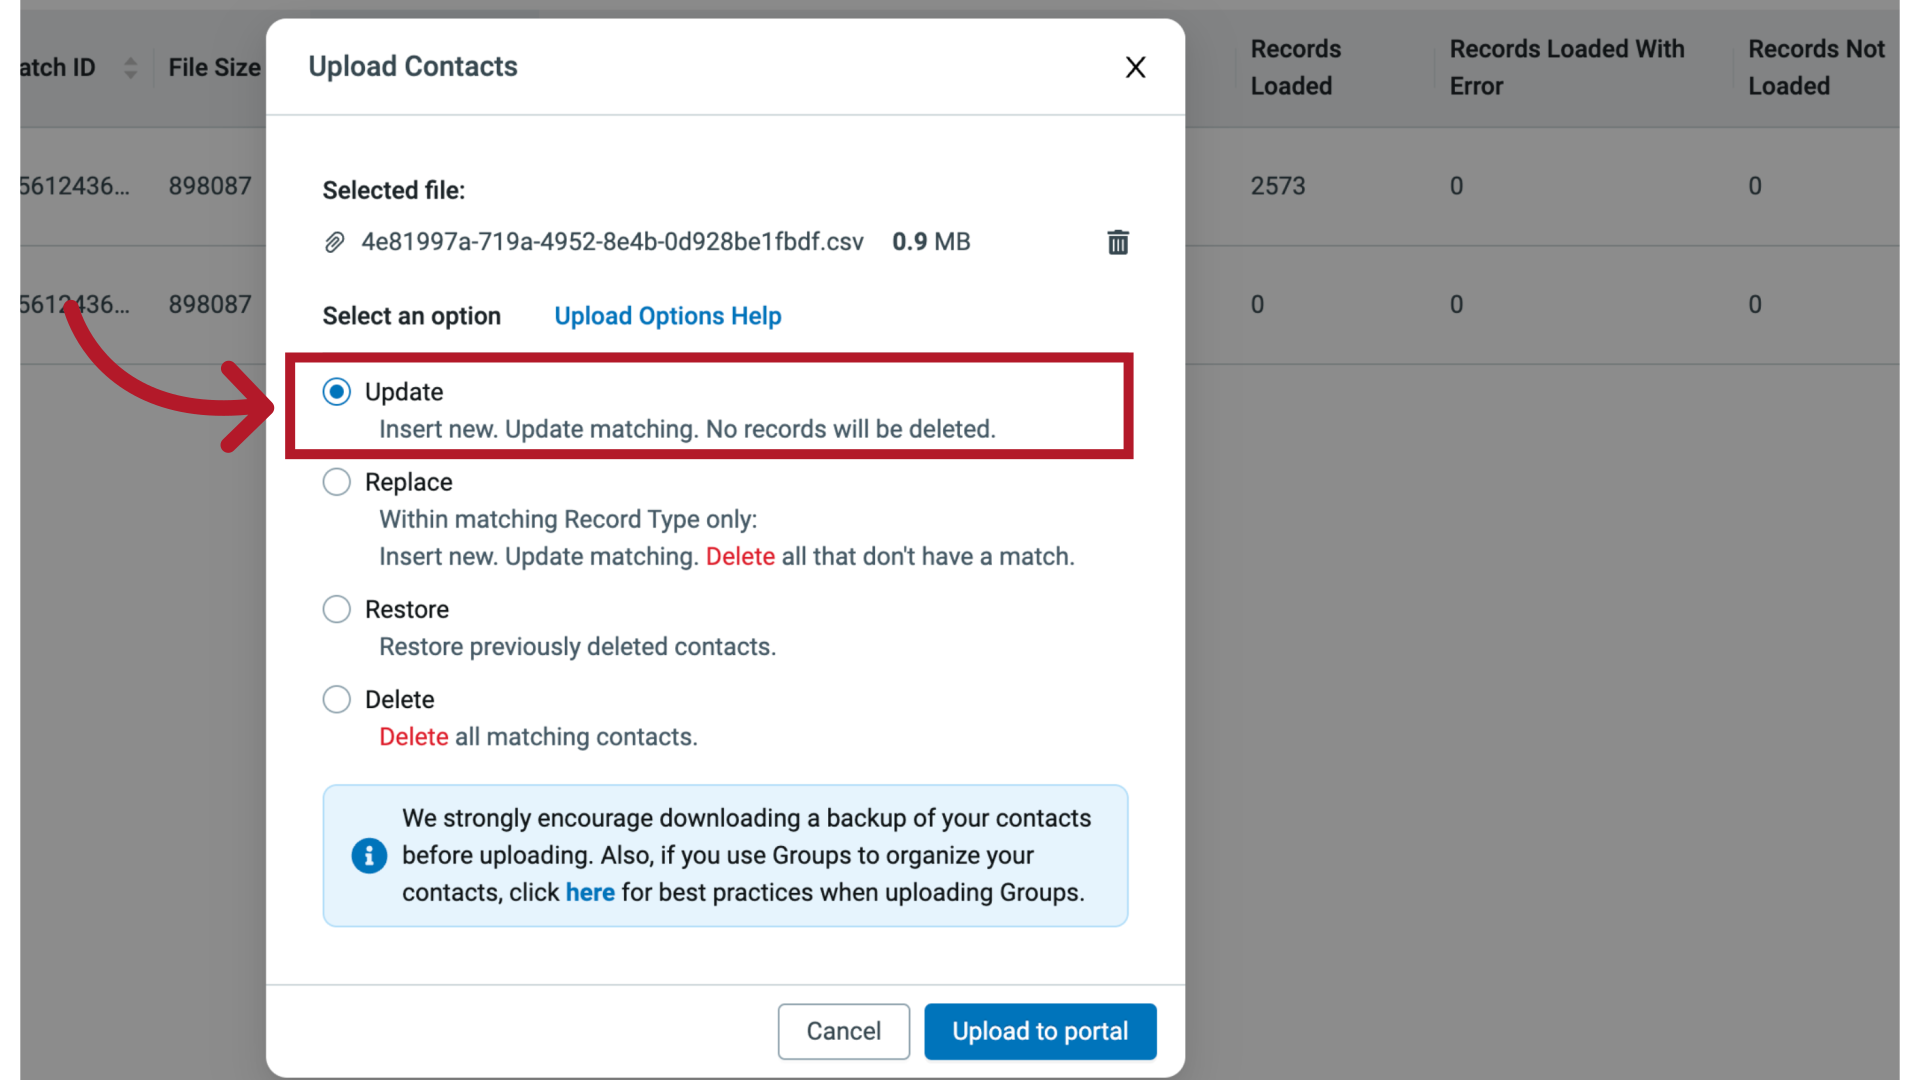
Below the selected file, we are provided with four different upload options, each with an explanation of its functionality below it.
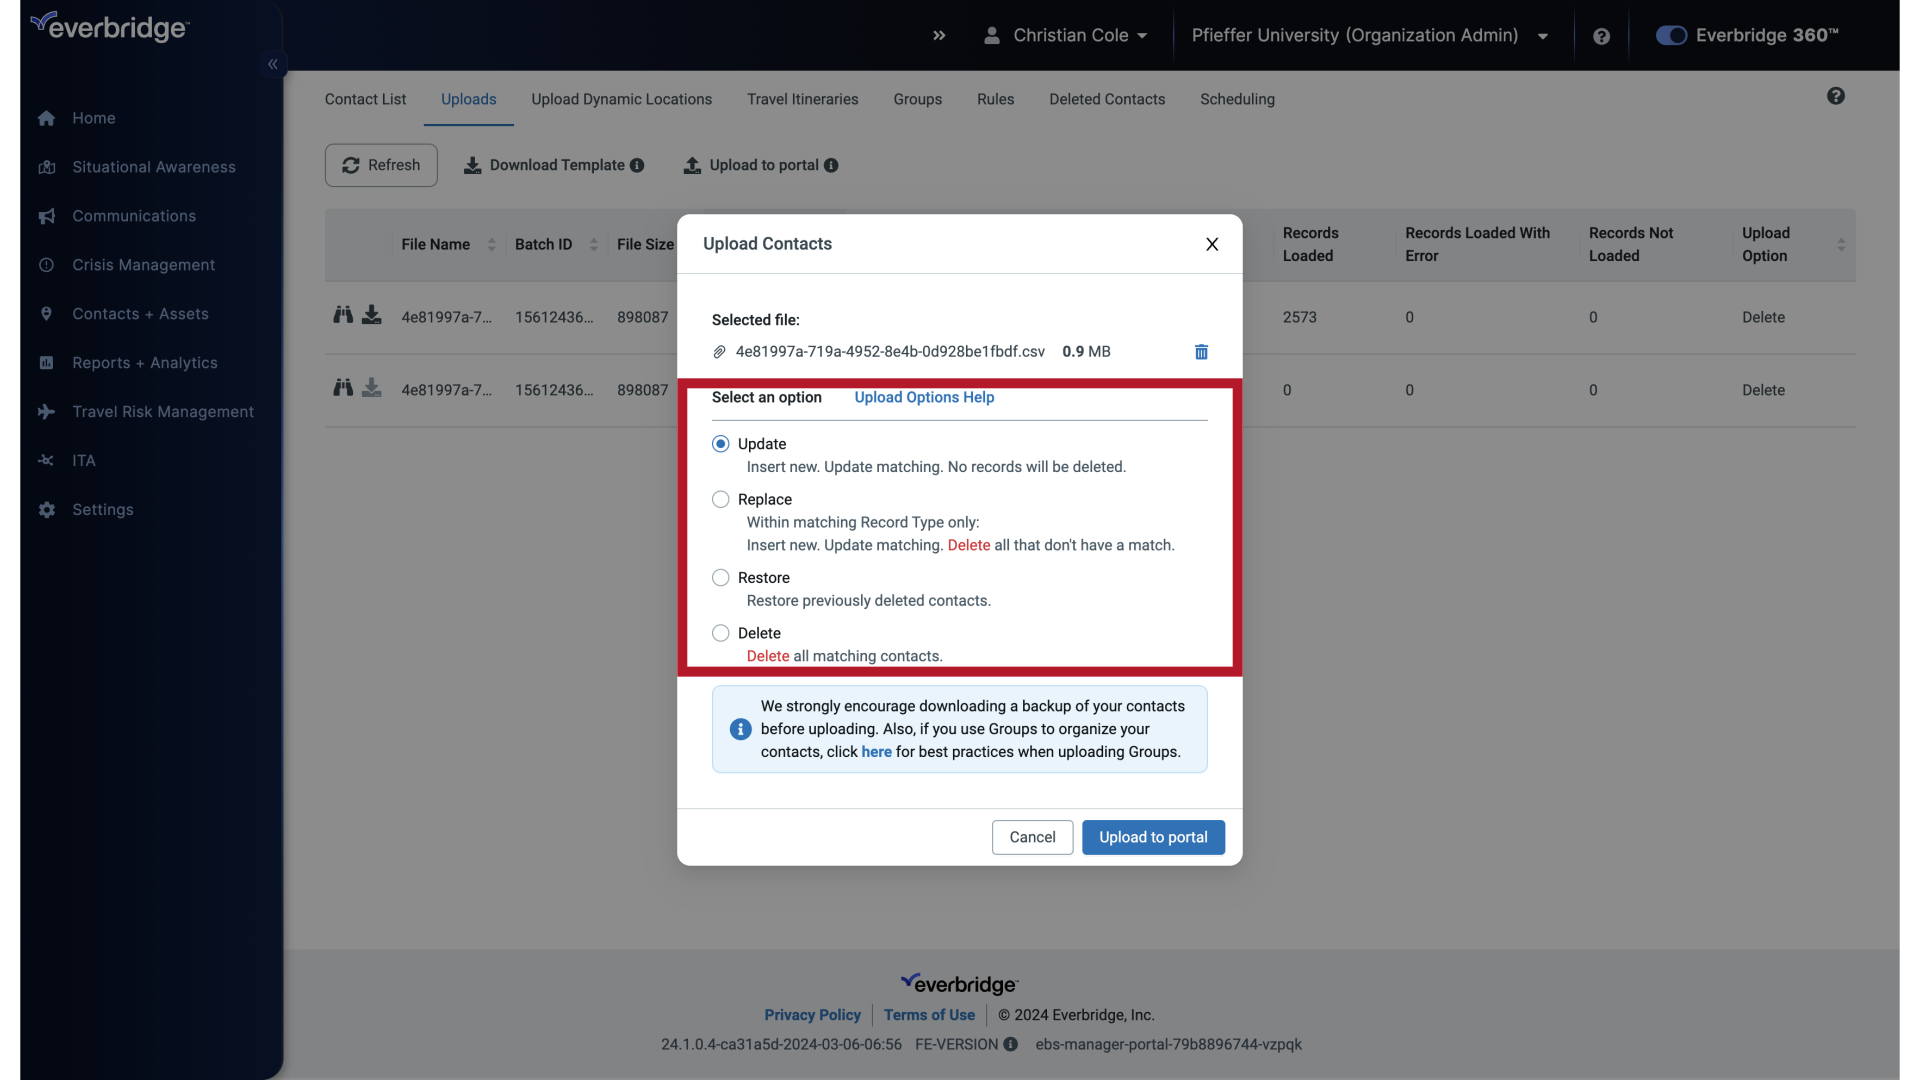
34. Update
The Update option only inserts new contact records and updates existing contact records. The Update option will not delete any contacts from your organization.
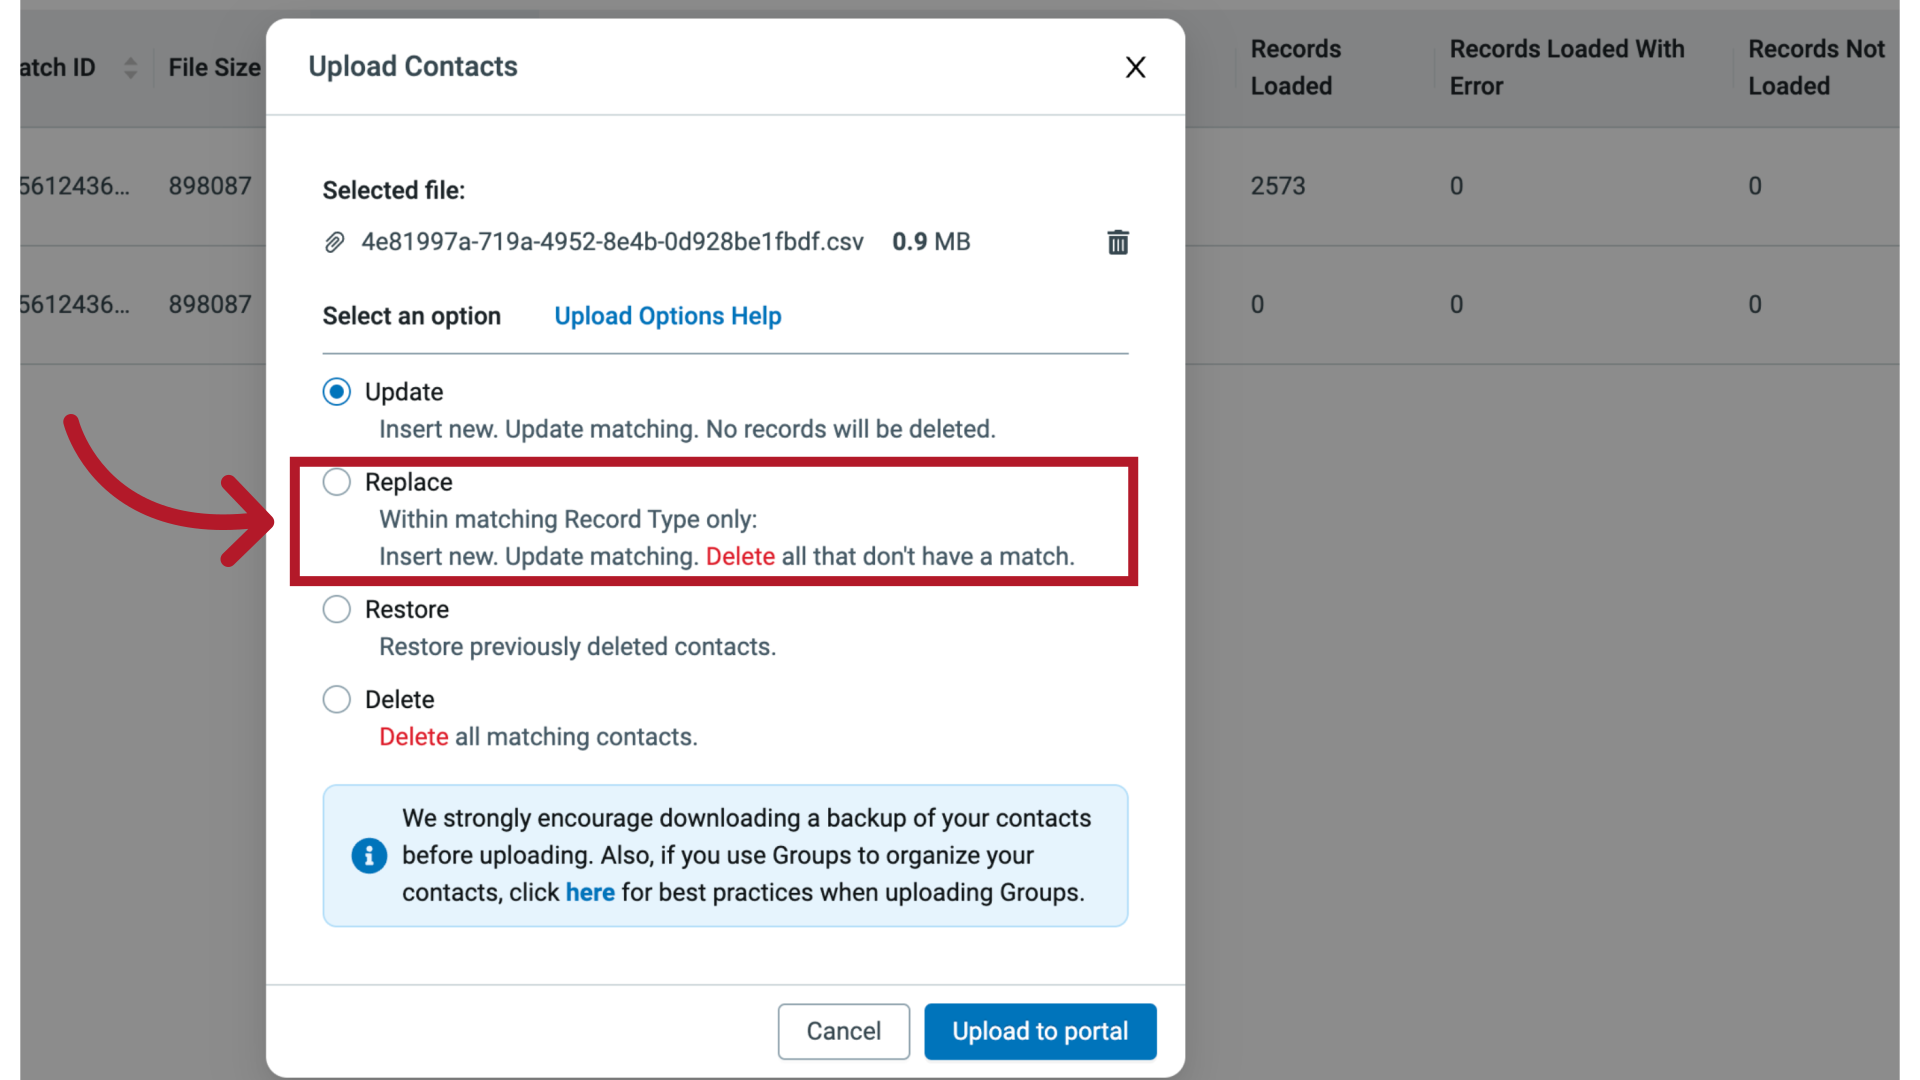
35. Replace
The Replace option replaces all contact records with the matching record type in your CSV file. This means the Replace option will delete all existing contacts in your organization that do not have a match within your file upload.
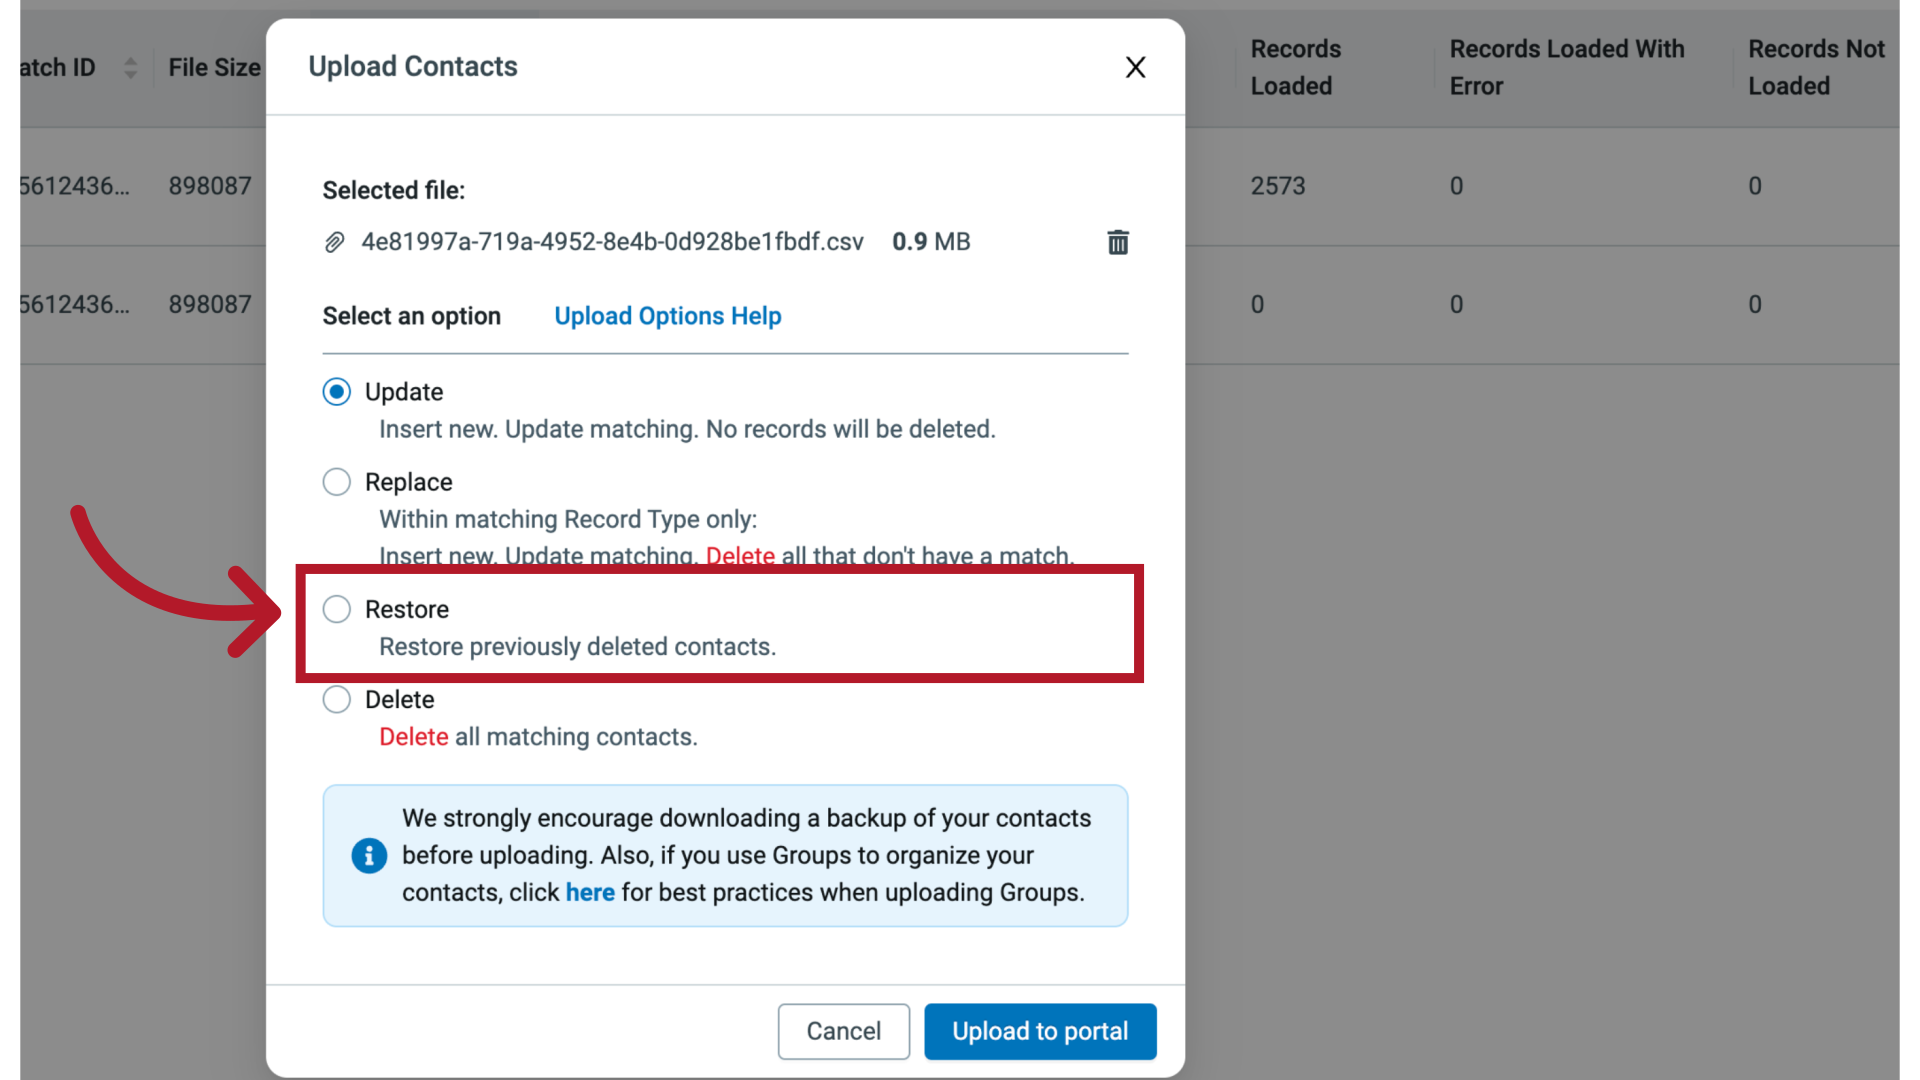
36. Restore
The Restore option lets you restore, or add back, previously deleted Contacts. This option reactivates deleted records based on matching External ID values and will overwrite any existing Contact records that share the same External ID. The Restore option does not update Contact information fields or delivery methods; it only reactivates deleted records. To change email addresses, phone numbers, or other details, use the Update upload option or edit Contacts directly in the Manager Portal.
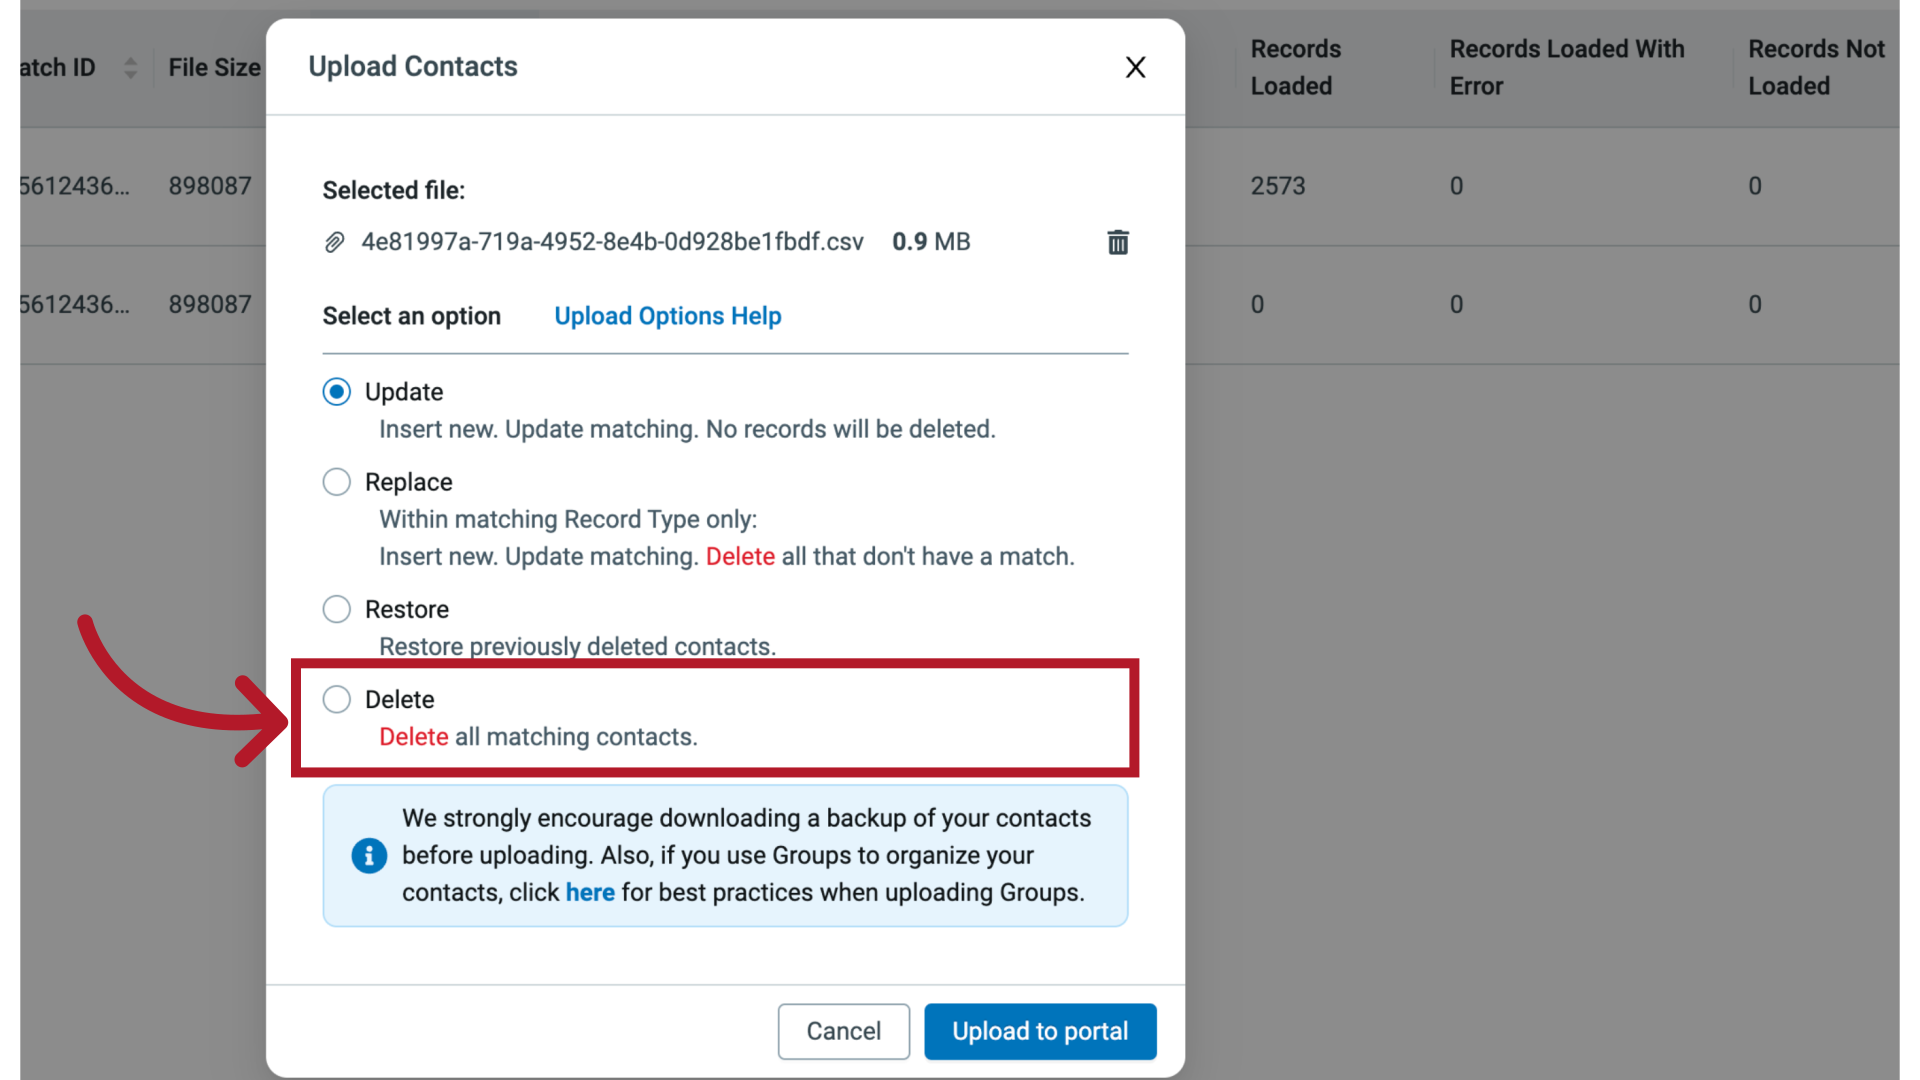
37. Delete
The Delete option removes all Contact records that match the records within your CSV file. Use this option with care; the selected Contacts will be deleted from your active database. Deleting Contacts does not remove them from historical reports—past notification and incident reports remain intact even after the Contact records are deleted. Deleted Contacts can later be reactivated, if needed, using the Restore upload option.
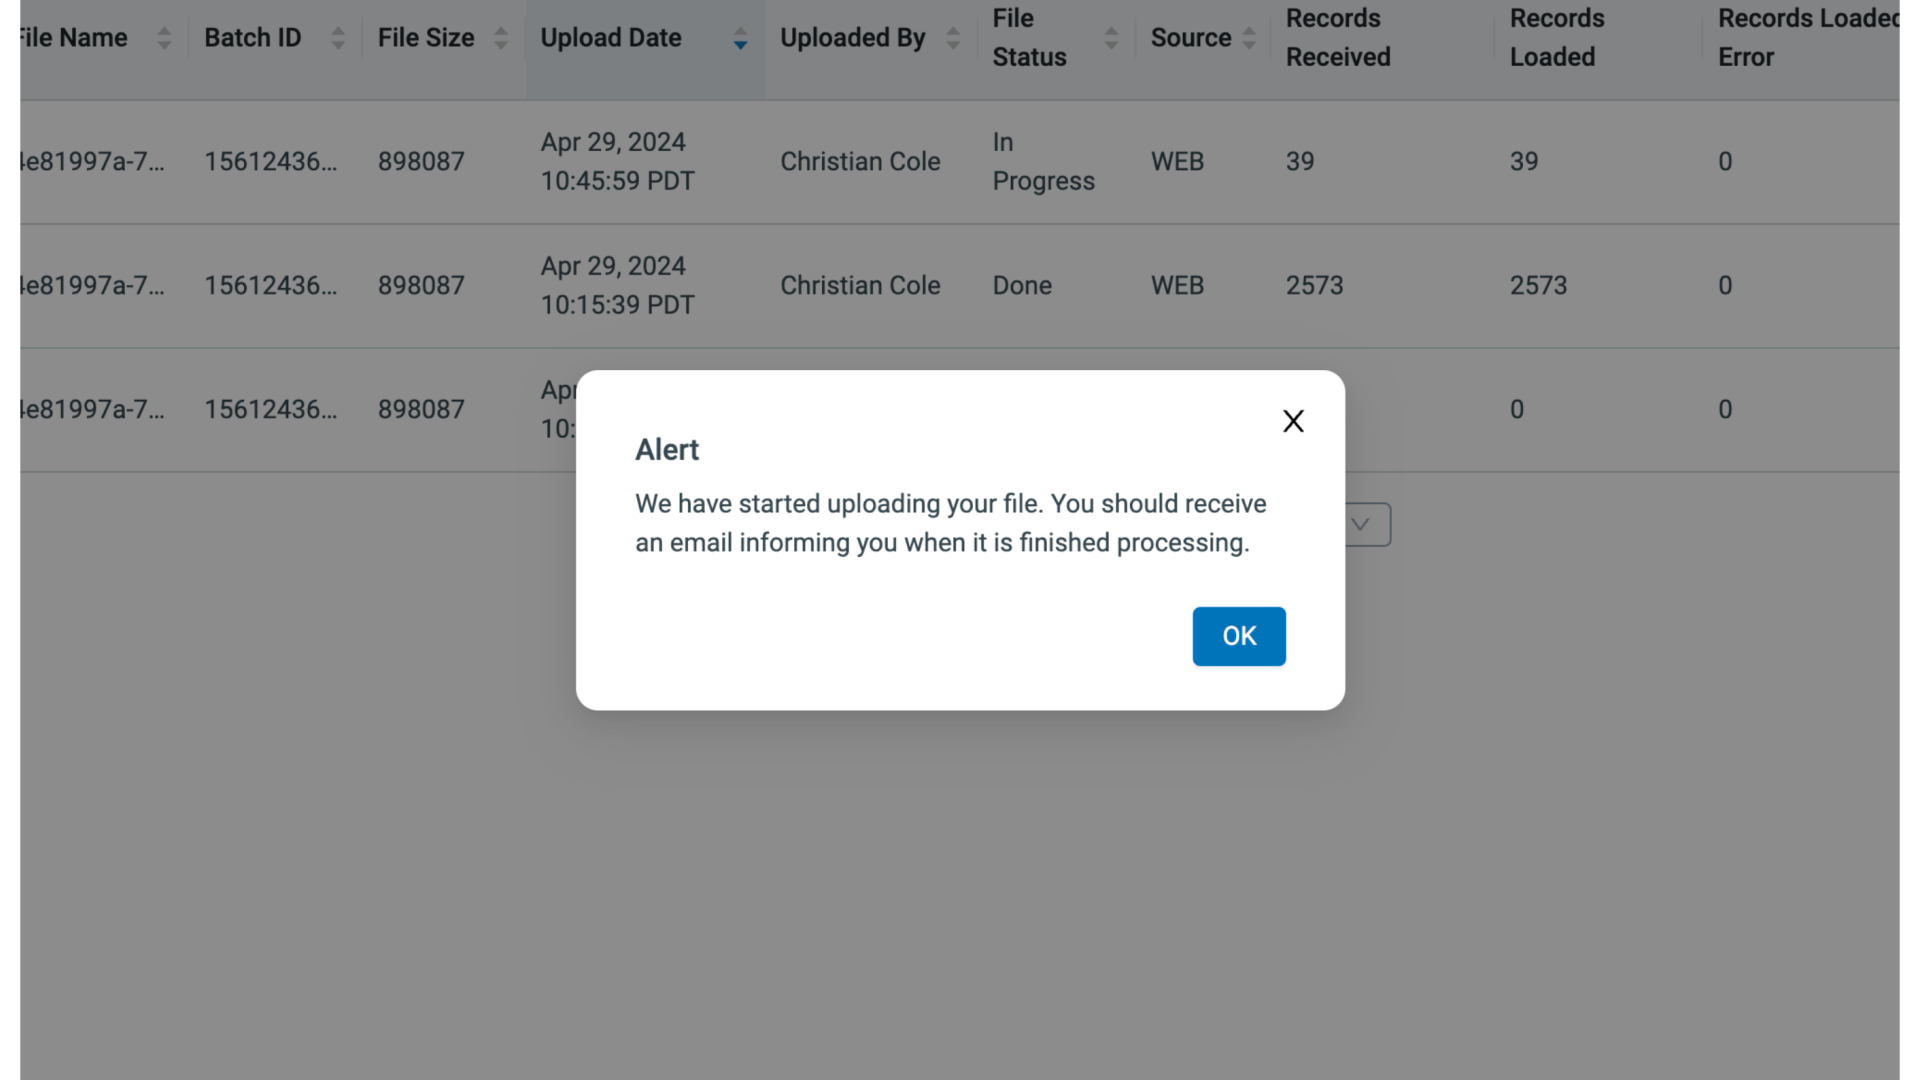
38. Upload to Portal
Once you have selected the appropriate upload option (Update, Replace, Restore, or Delete) based on how you want to manage existing Contact records, click Upload to Portal to process the file.
39. Upload to Portal
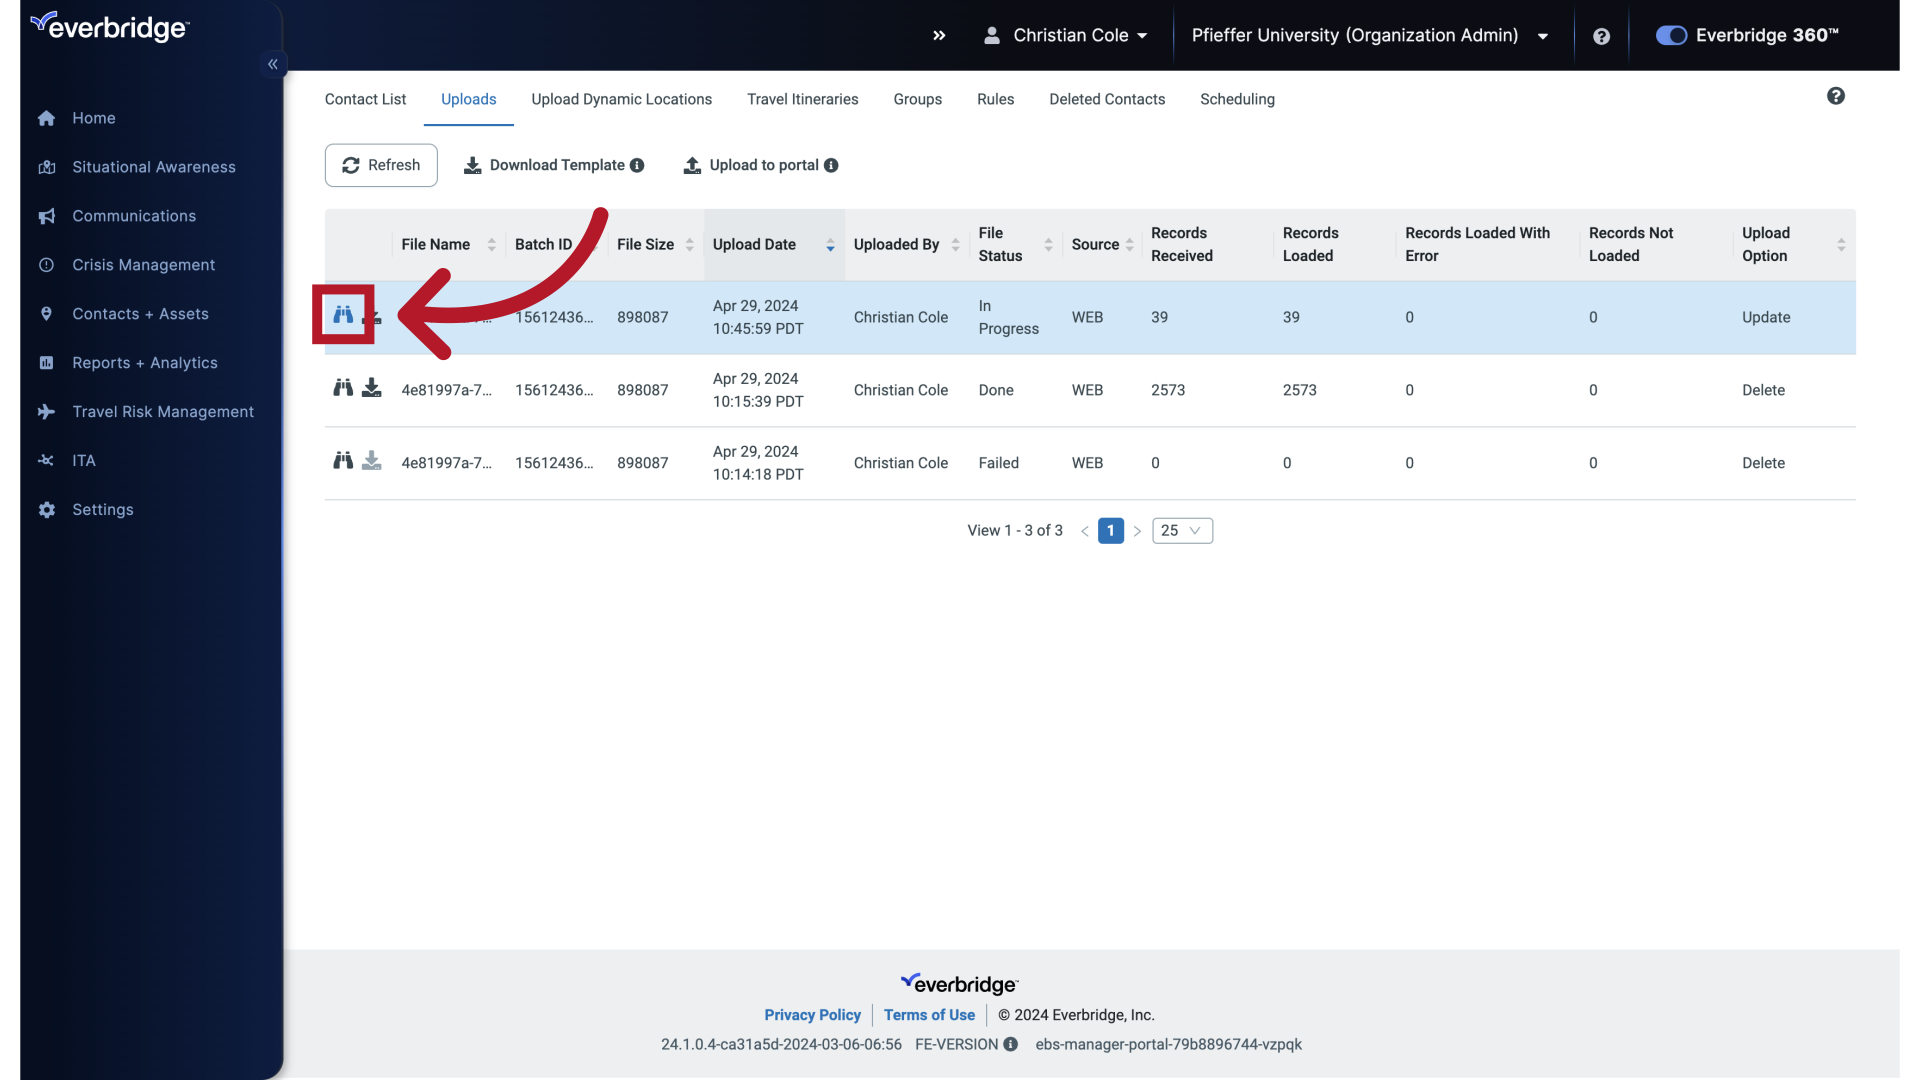
40. Review Upload
It is a best practice to confirm that the upload completed successfully and that the intended Contact updates were applied. On the Uploads page, click the binoculars icon next to your upload to review the results and verify that new records, updates, restores, or deletions occurred as expected.
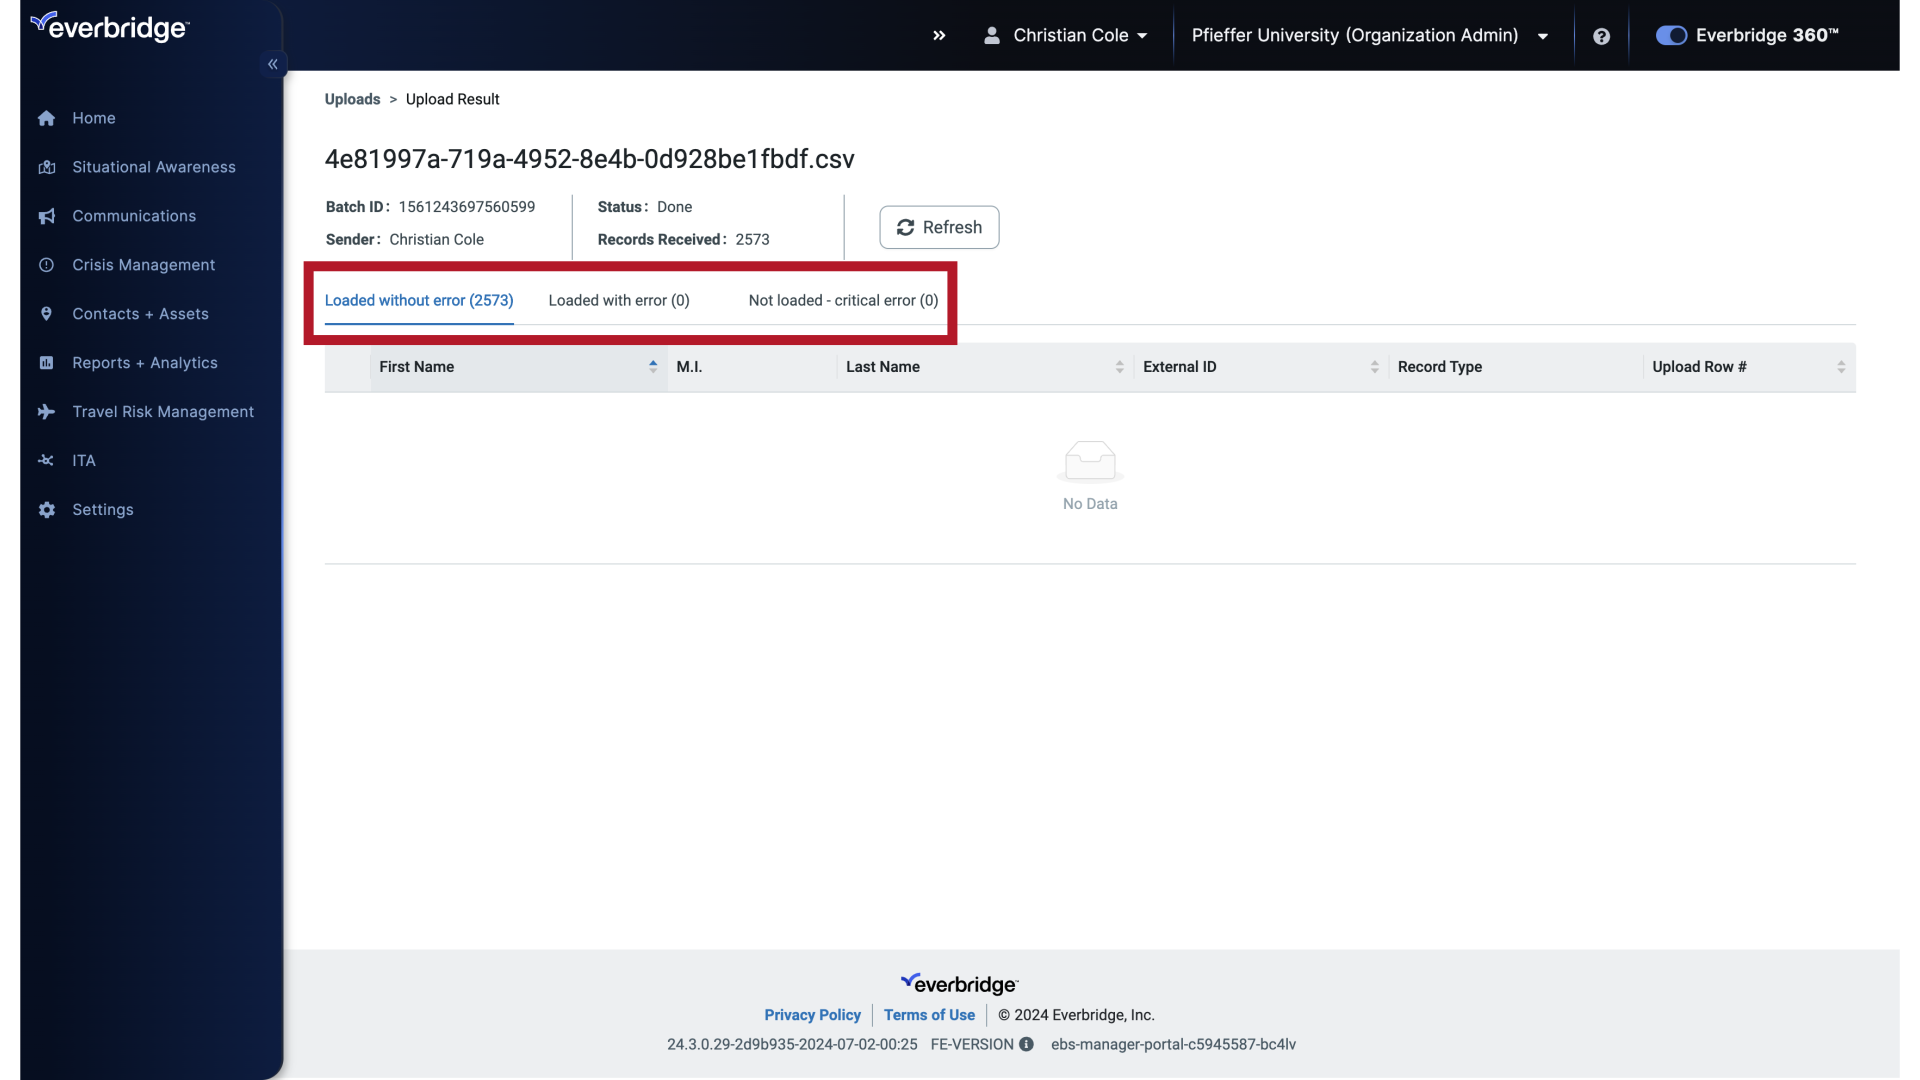
41. Upload Result
The upload results screen summarizes all possible outcomes. Click each tab to review which Contacts processed successfully and which rows had issues, along with details on what needs to be corrected.
This guide covered navigating the contact list, entering contact information, and saving changes in Everbridge for efficient employee training on managing contact details.