Topic
Overview of sending a Notification in Everbridge Suite.
Description
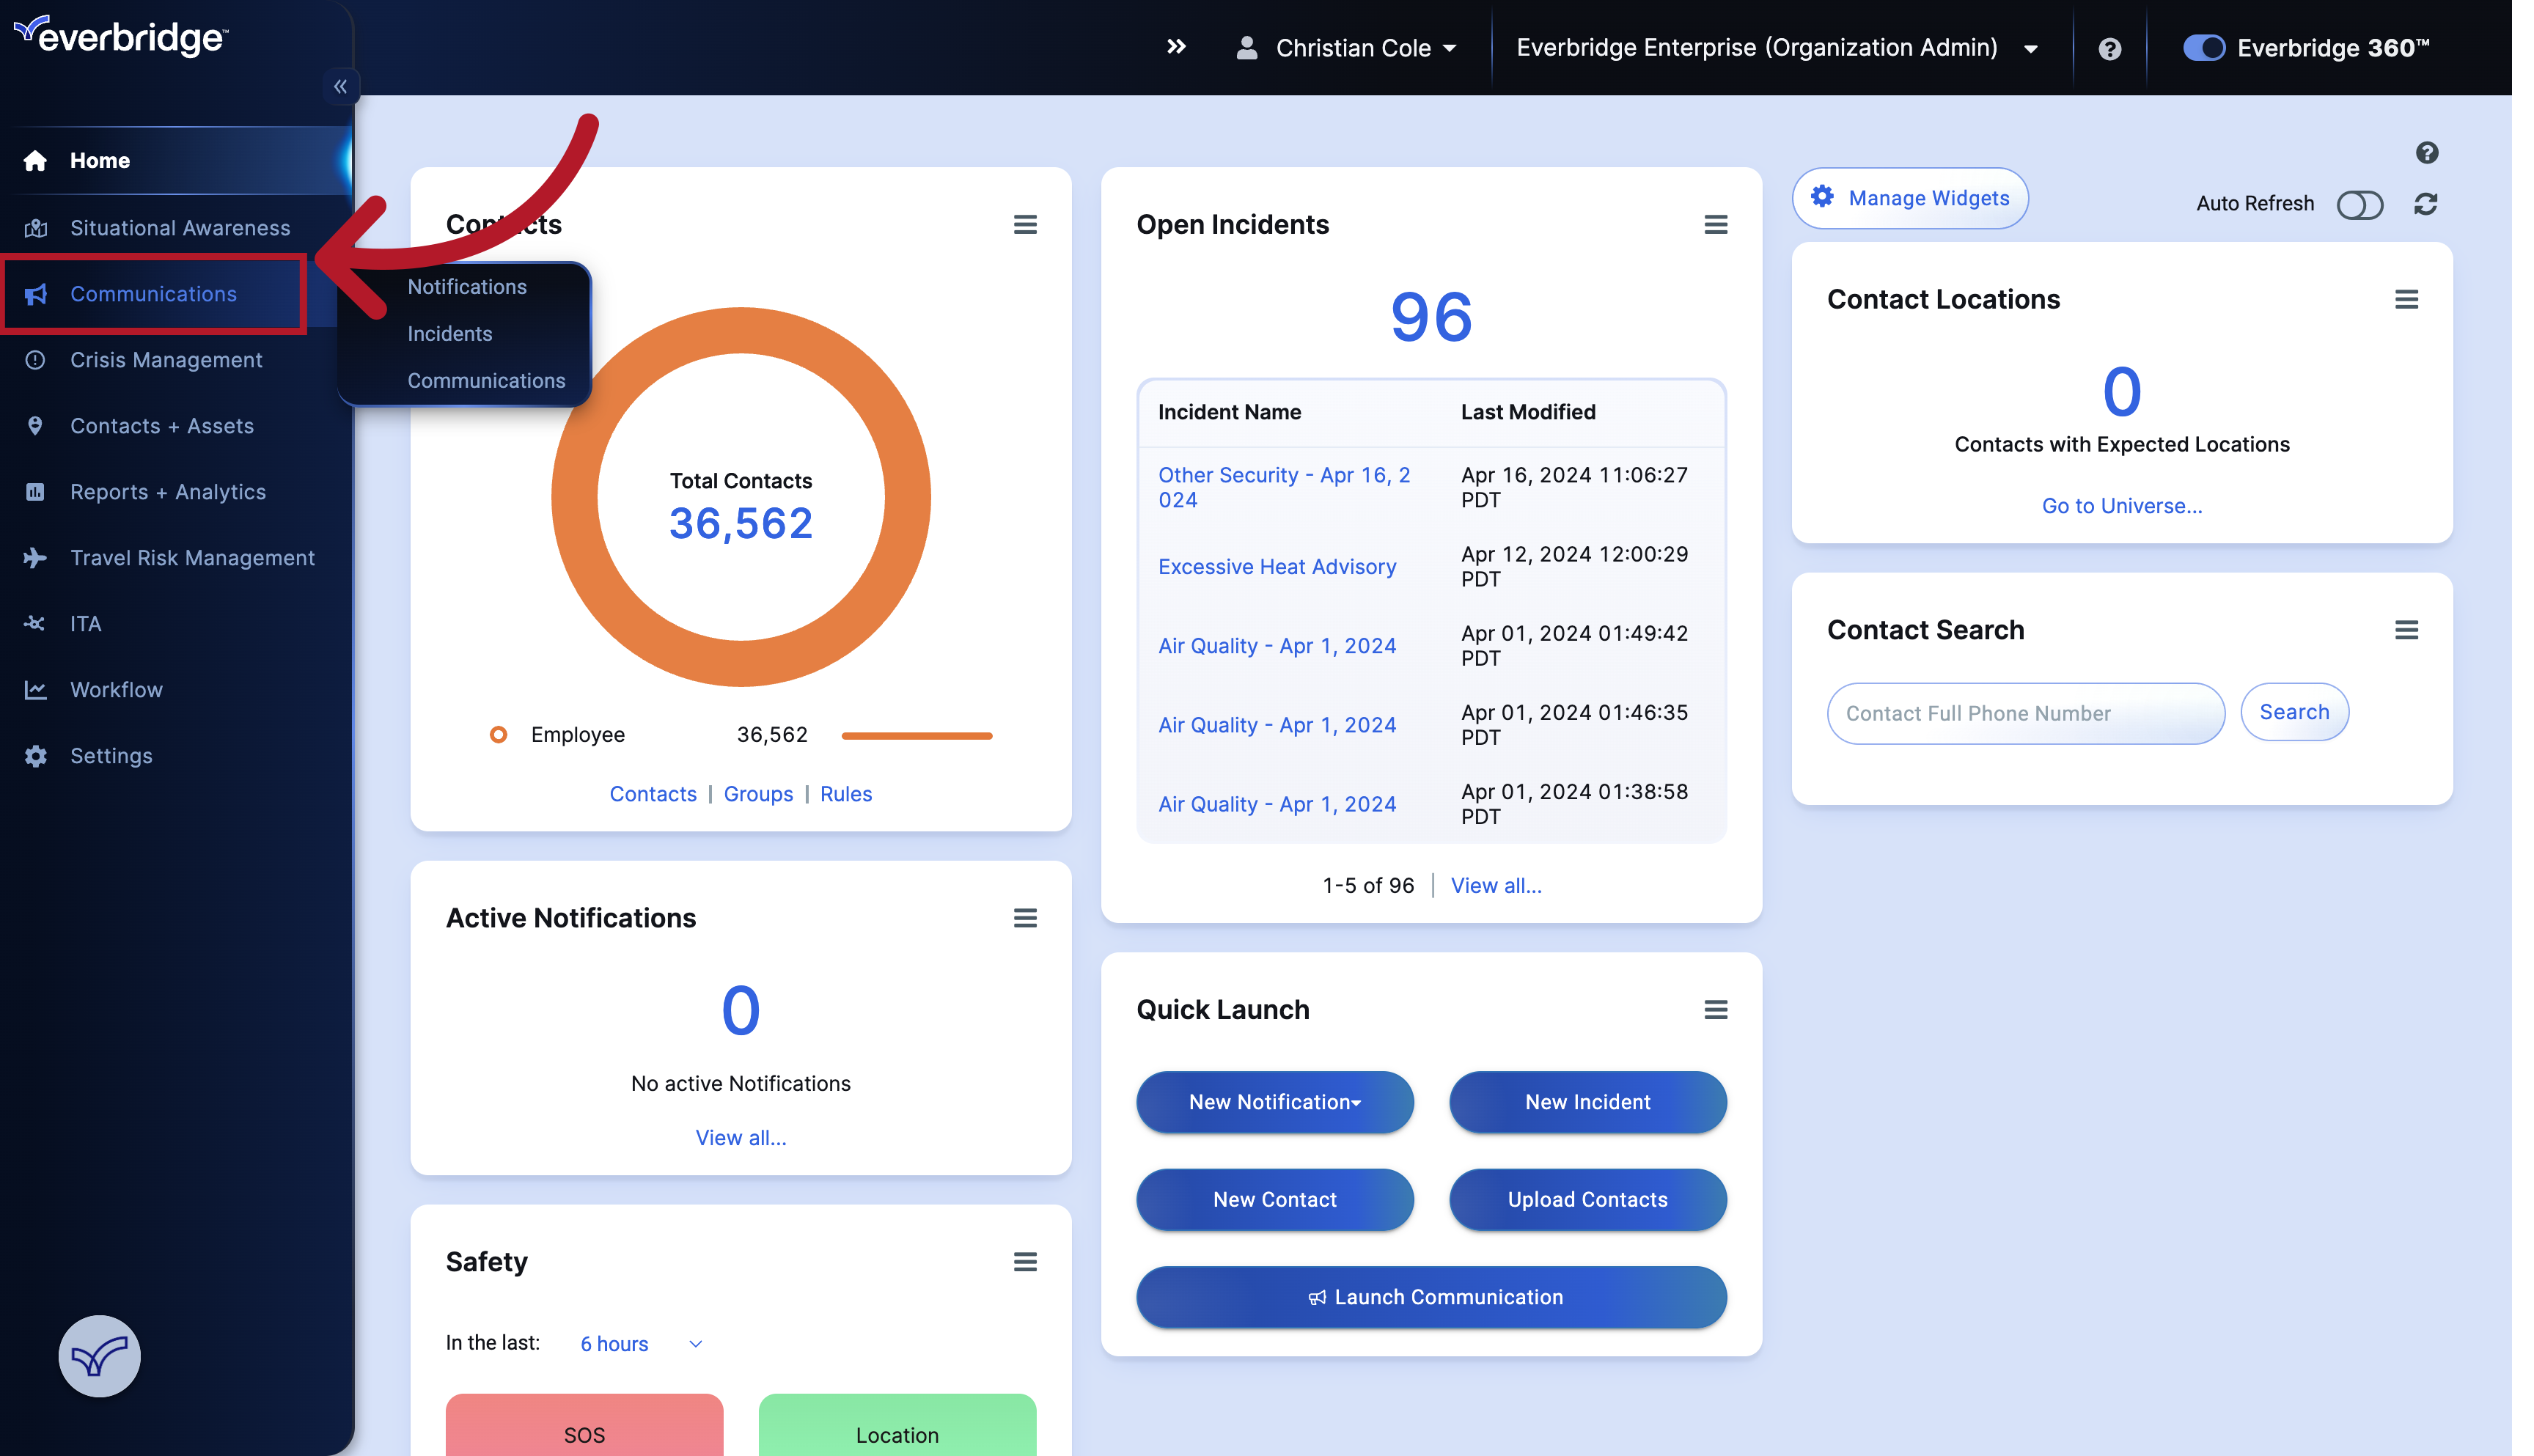
1. Dashboard
To create a Notification, start by selecting the Communications tab in the menu.
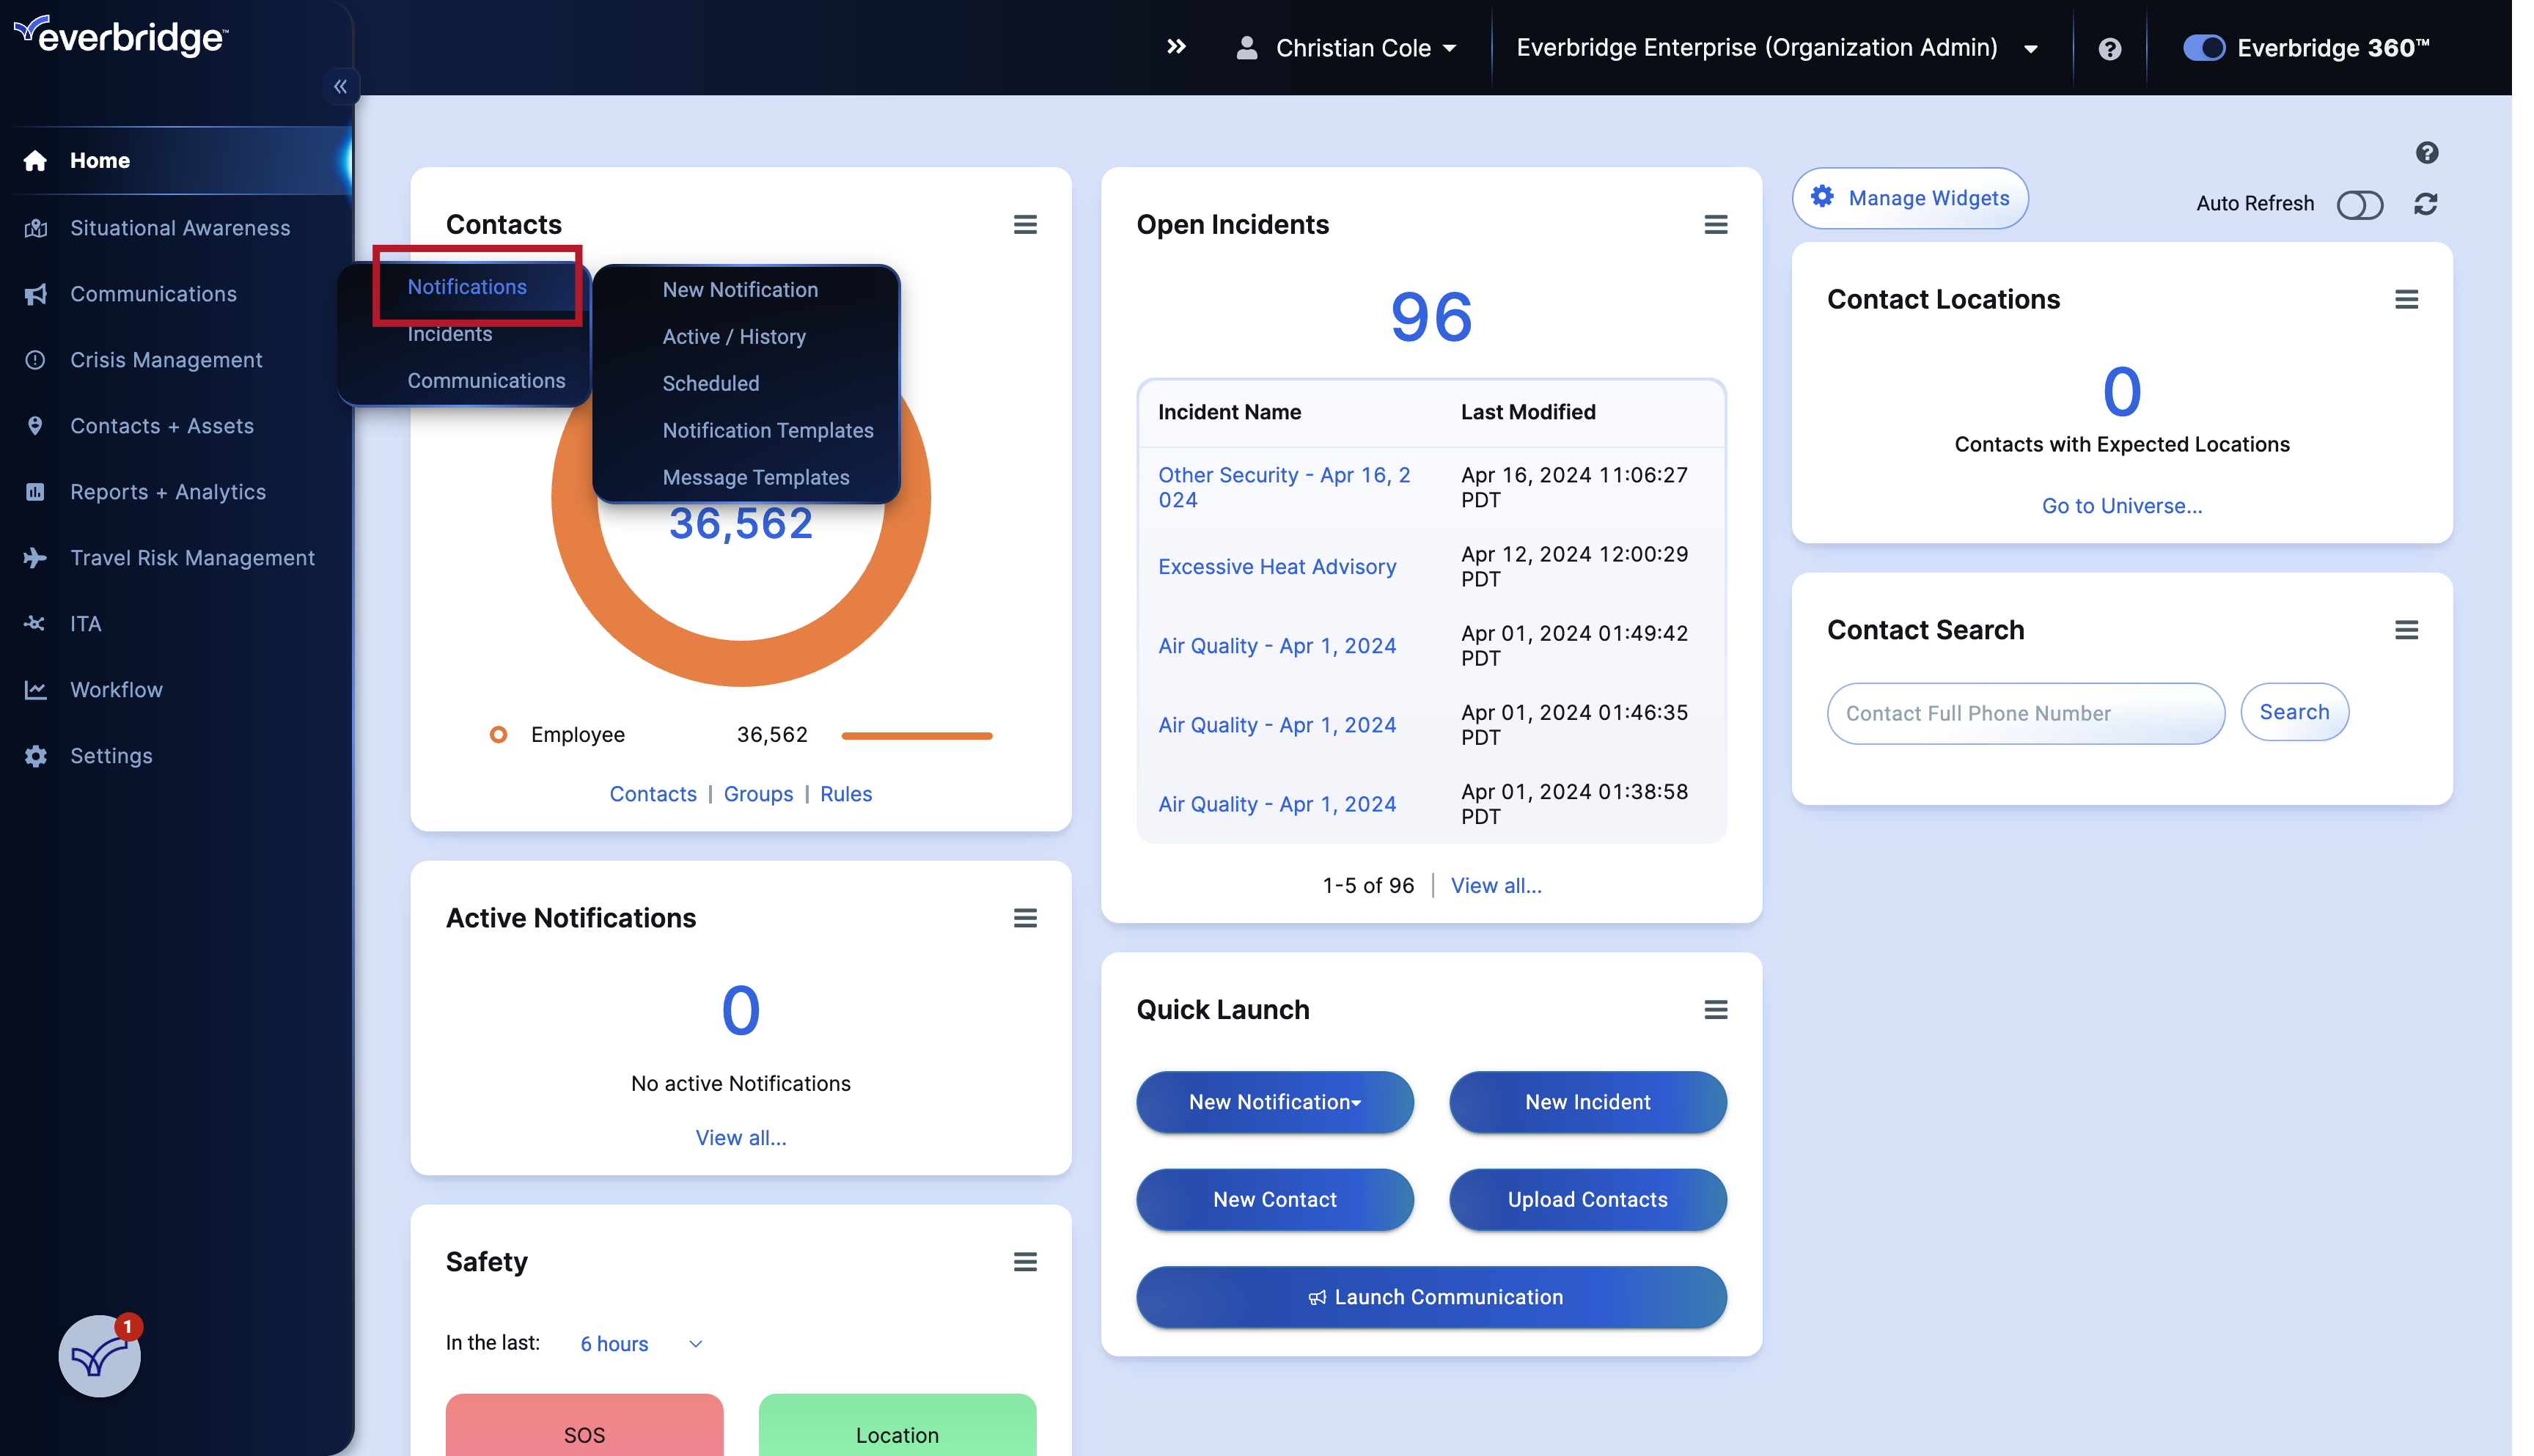
2. Dashboard
Hover over Notifications.
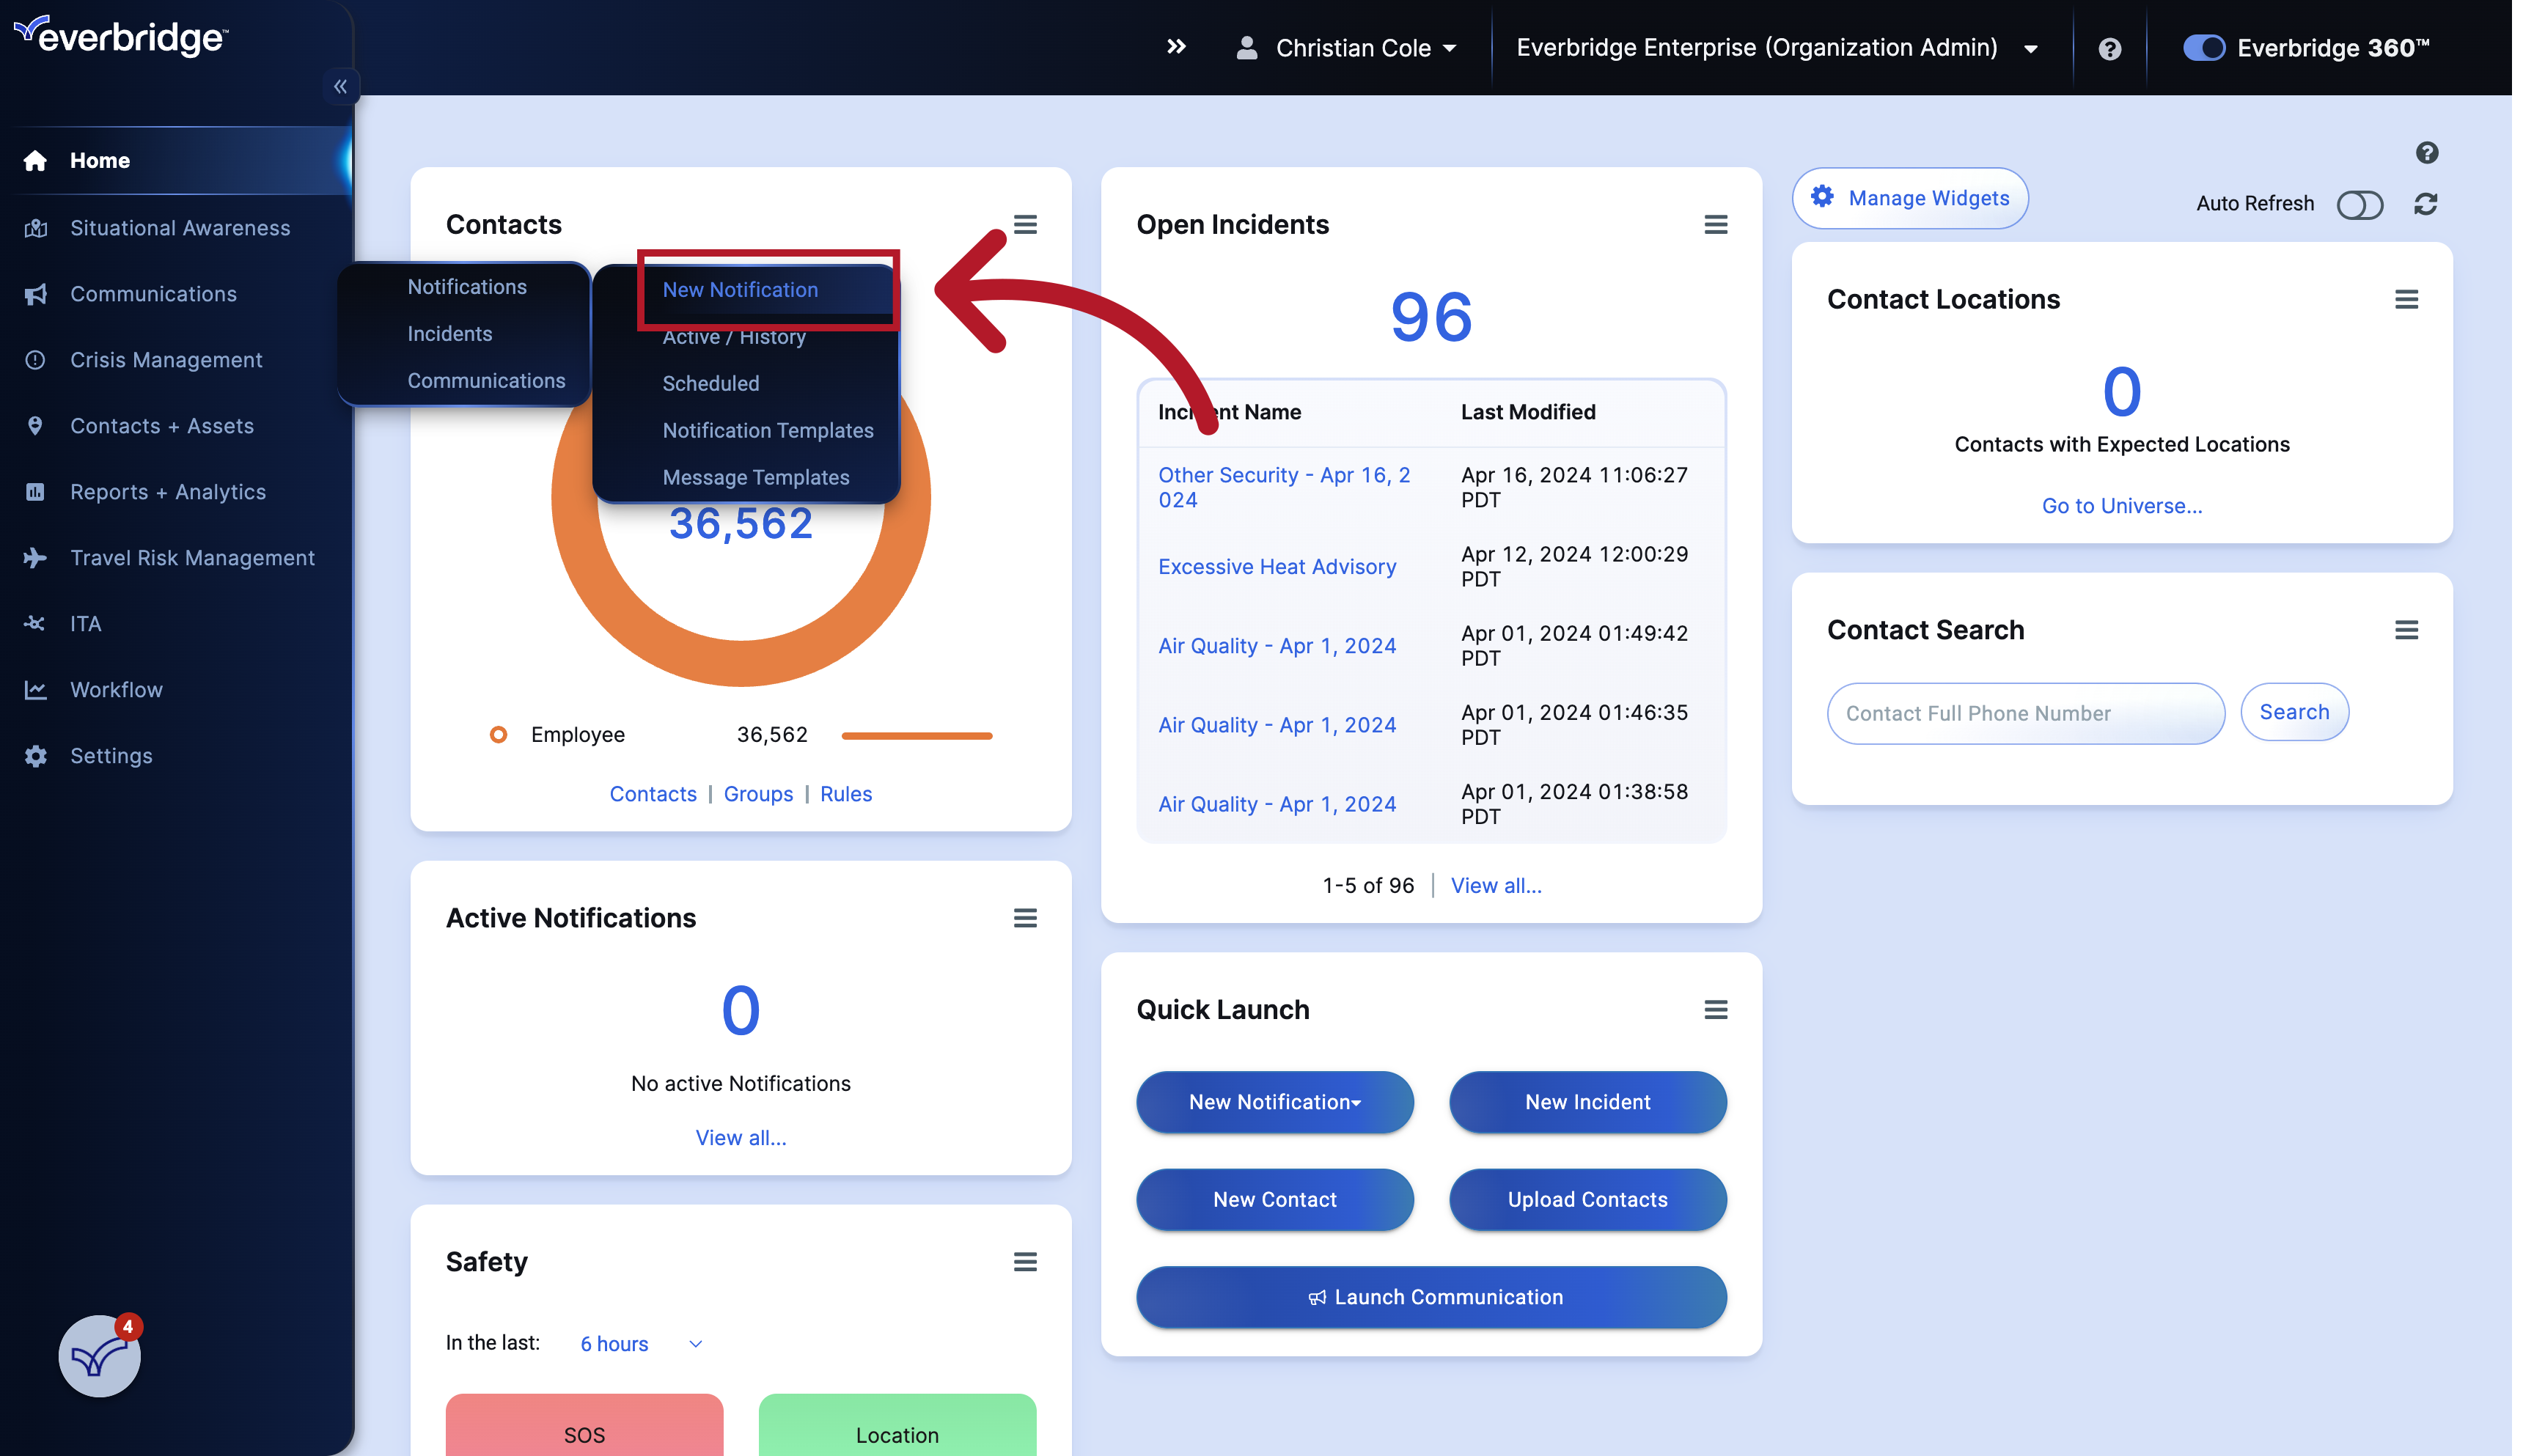
3. New Notification
and select New Notification.
4. Create Notification
Navigate to "Title/Subject"
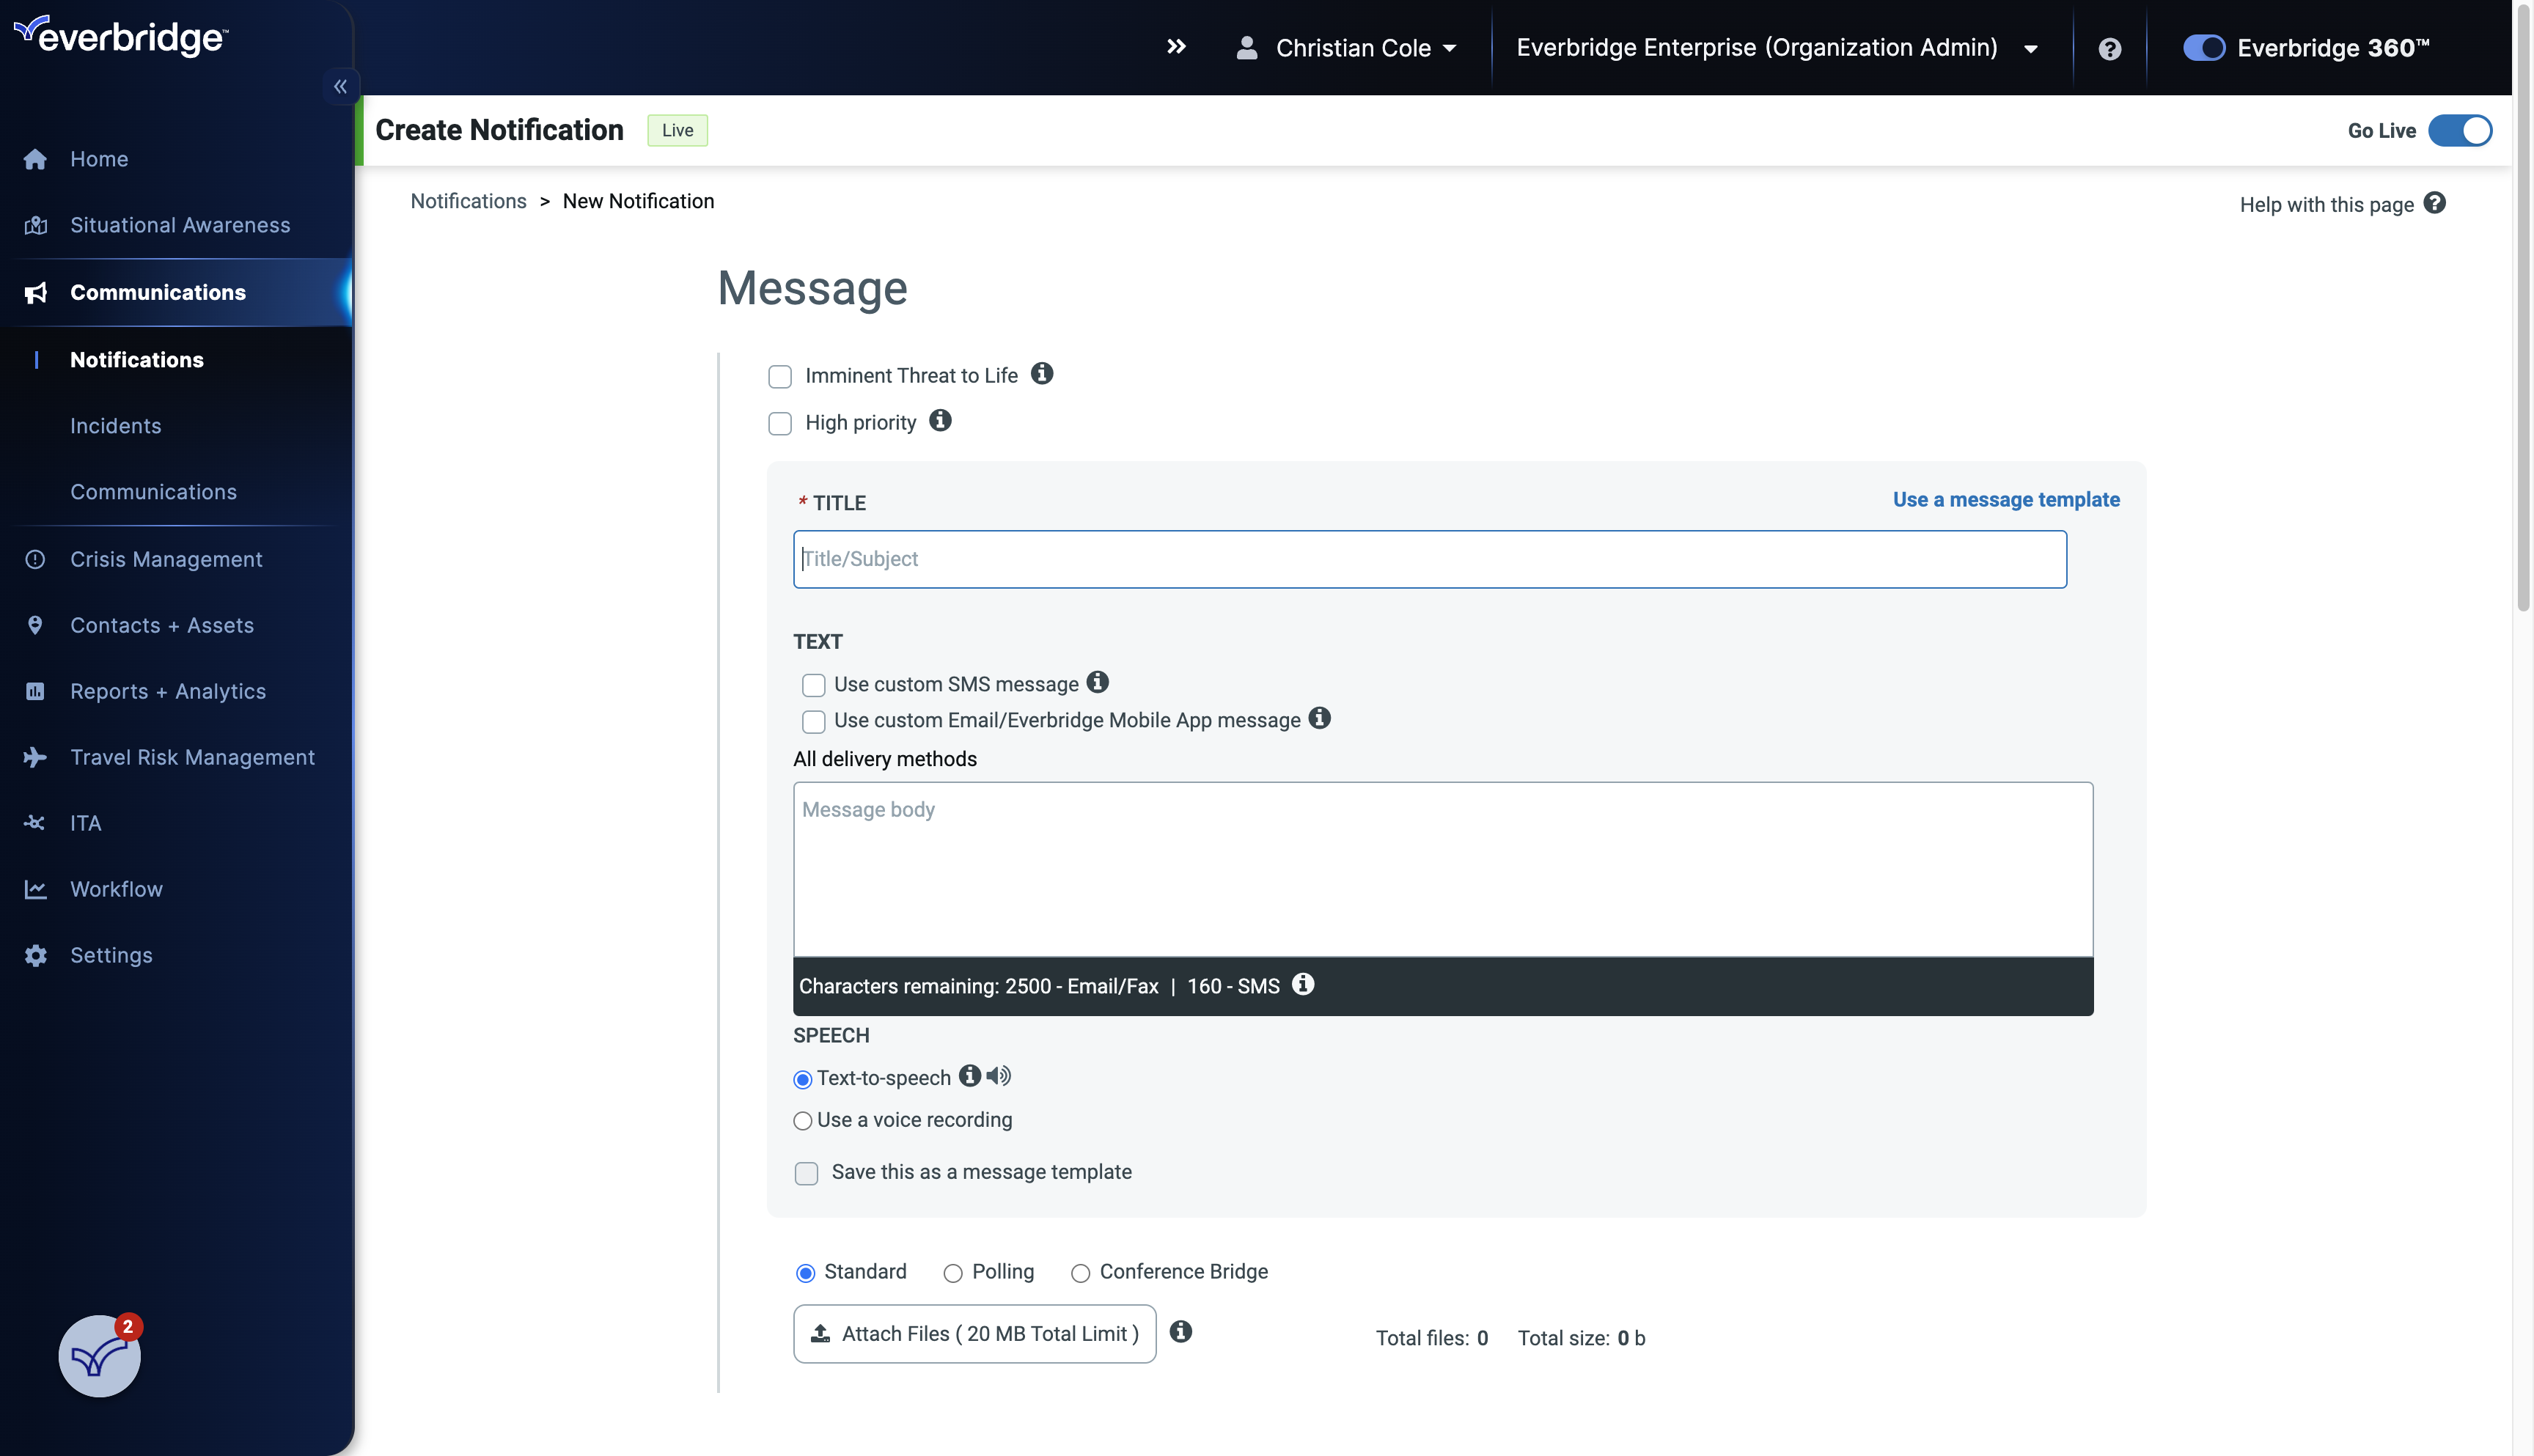
5. Title
First you'll need a title for your message.

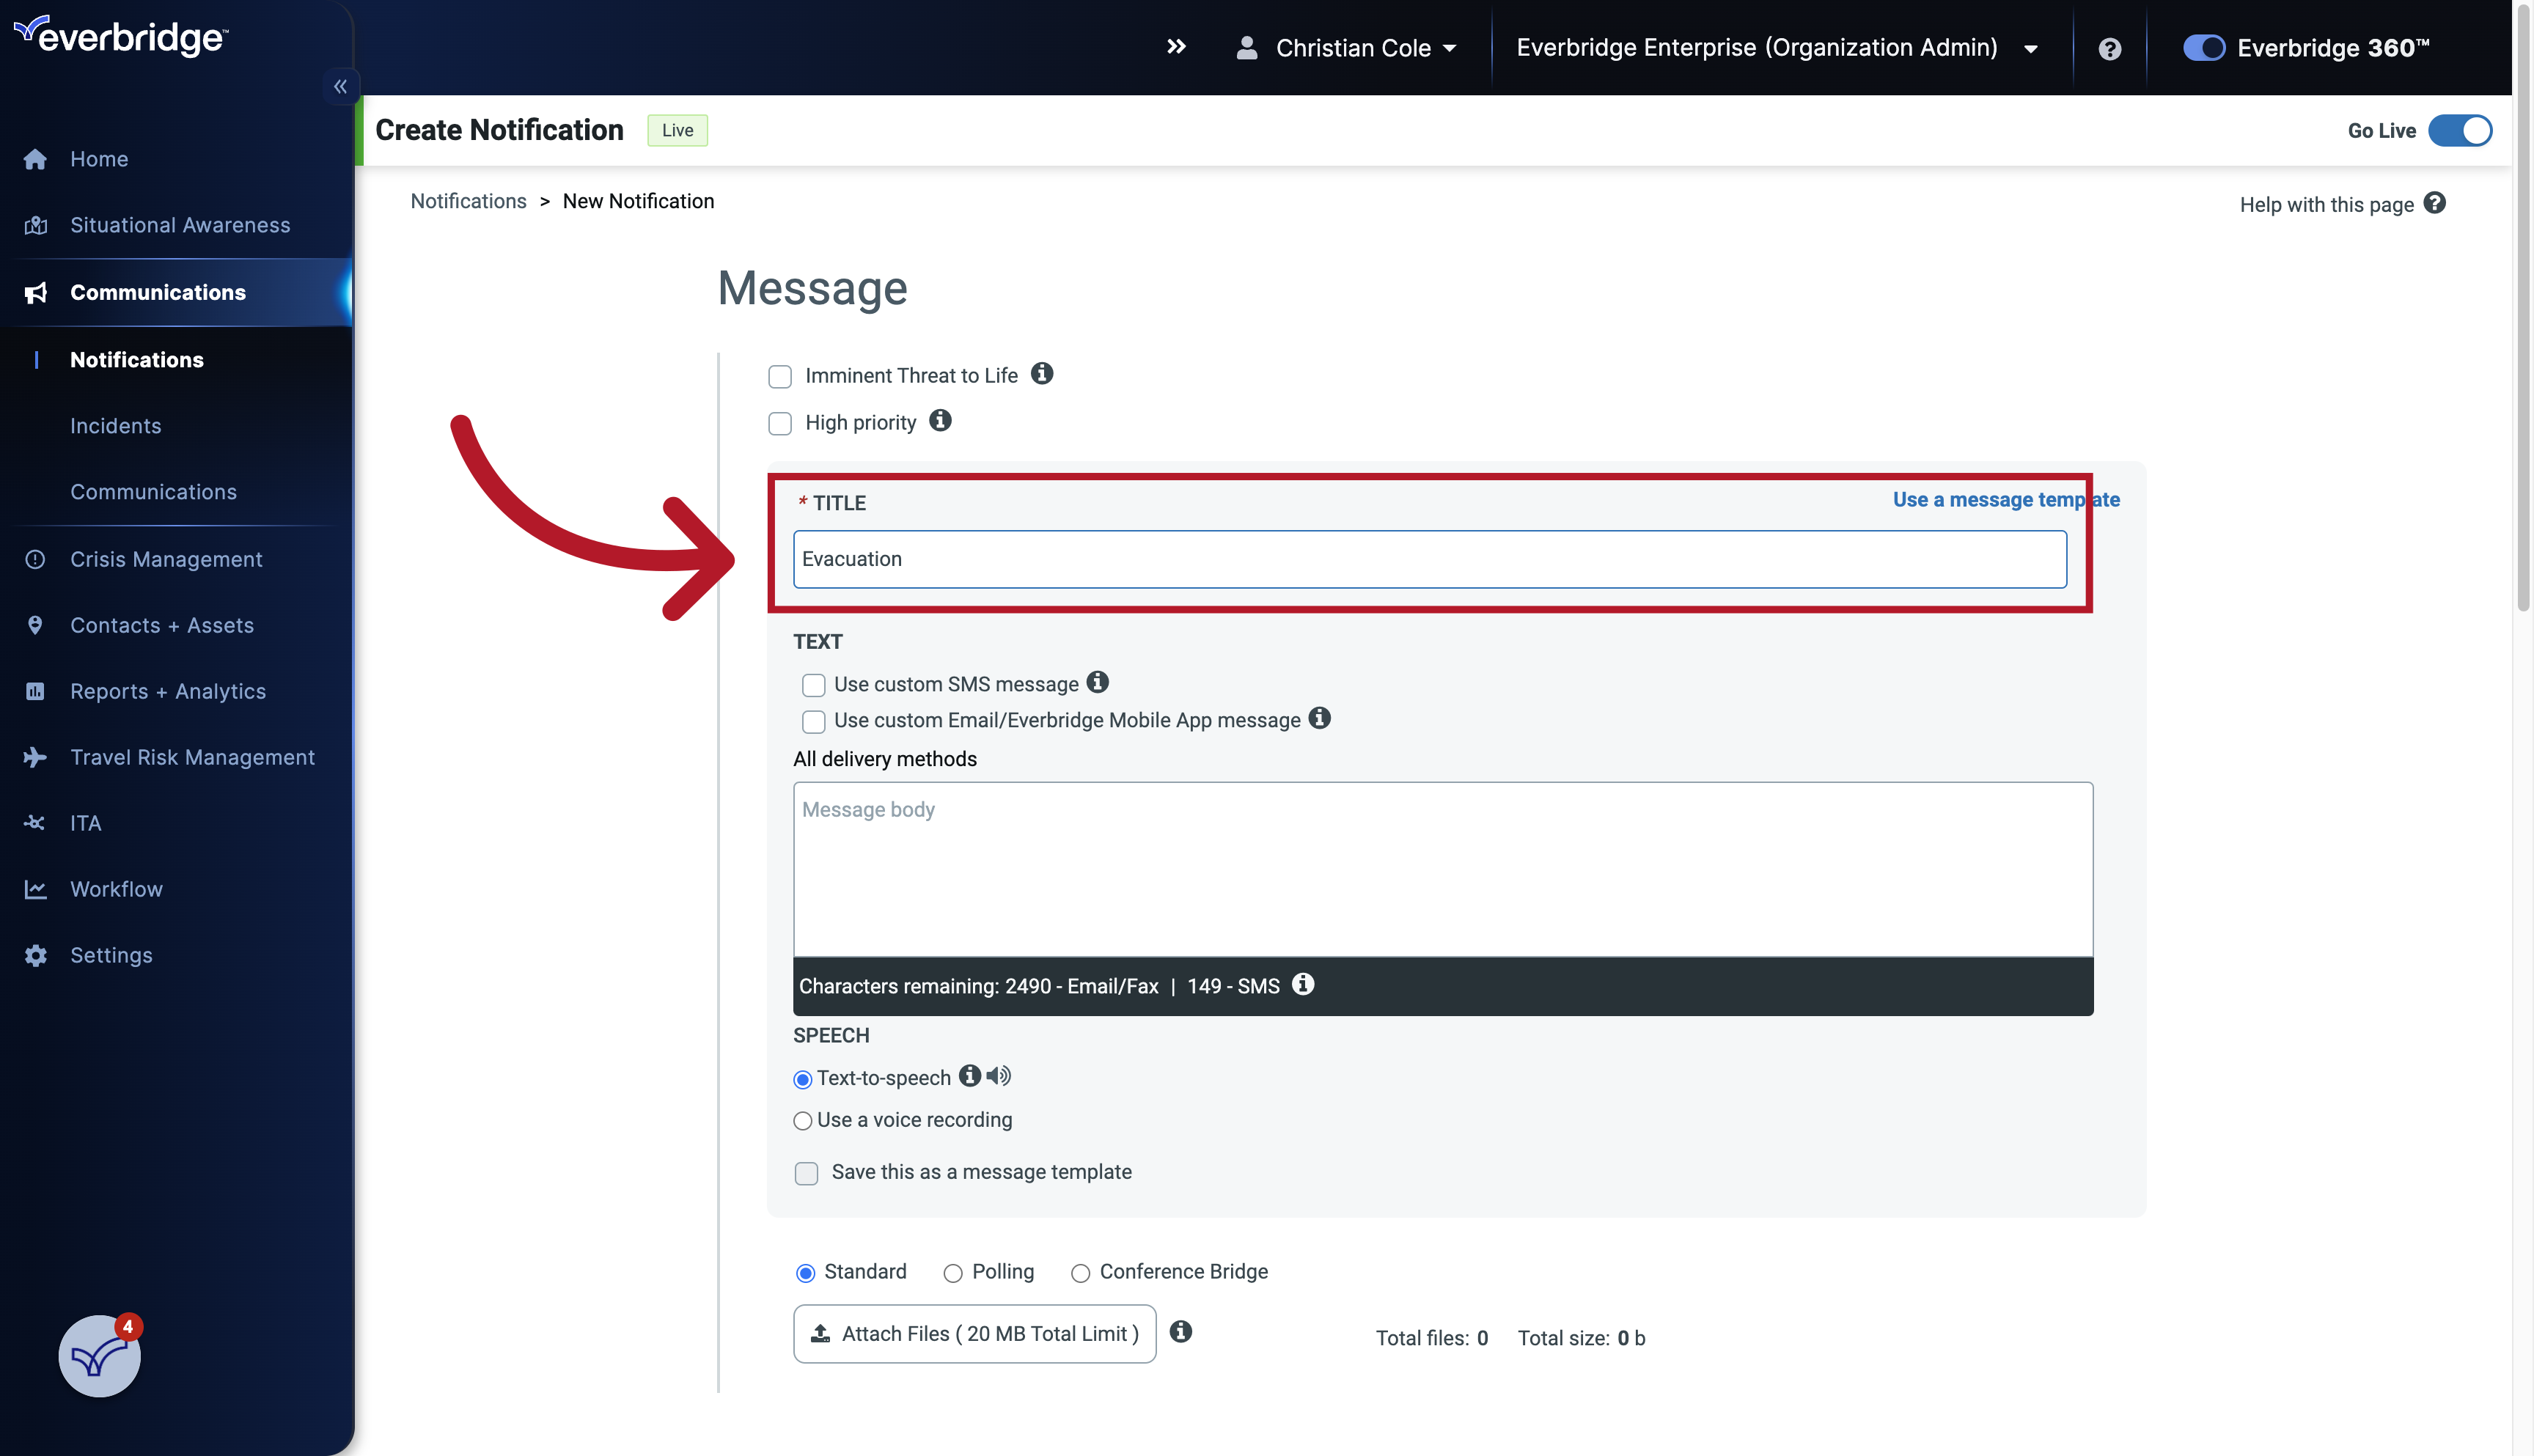
6. Title
Enter "Evacuation" in the designated field.
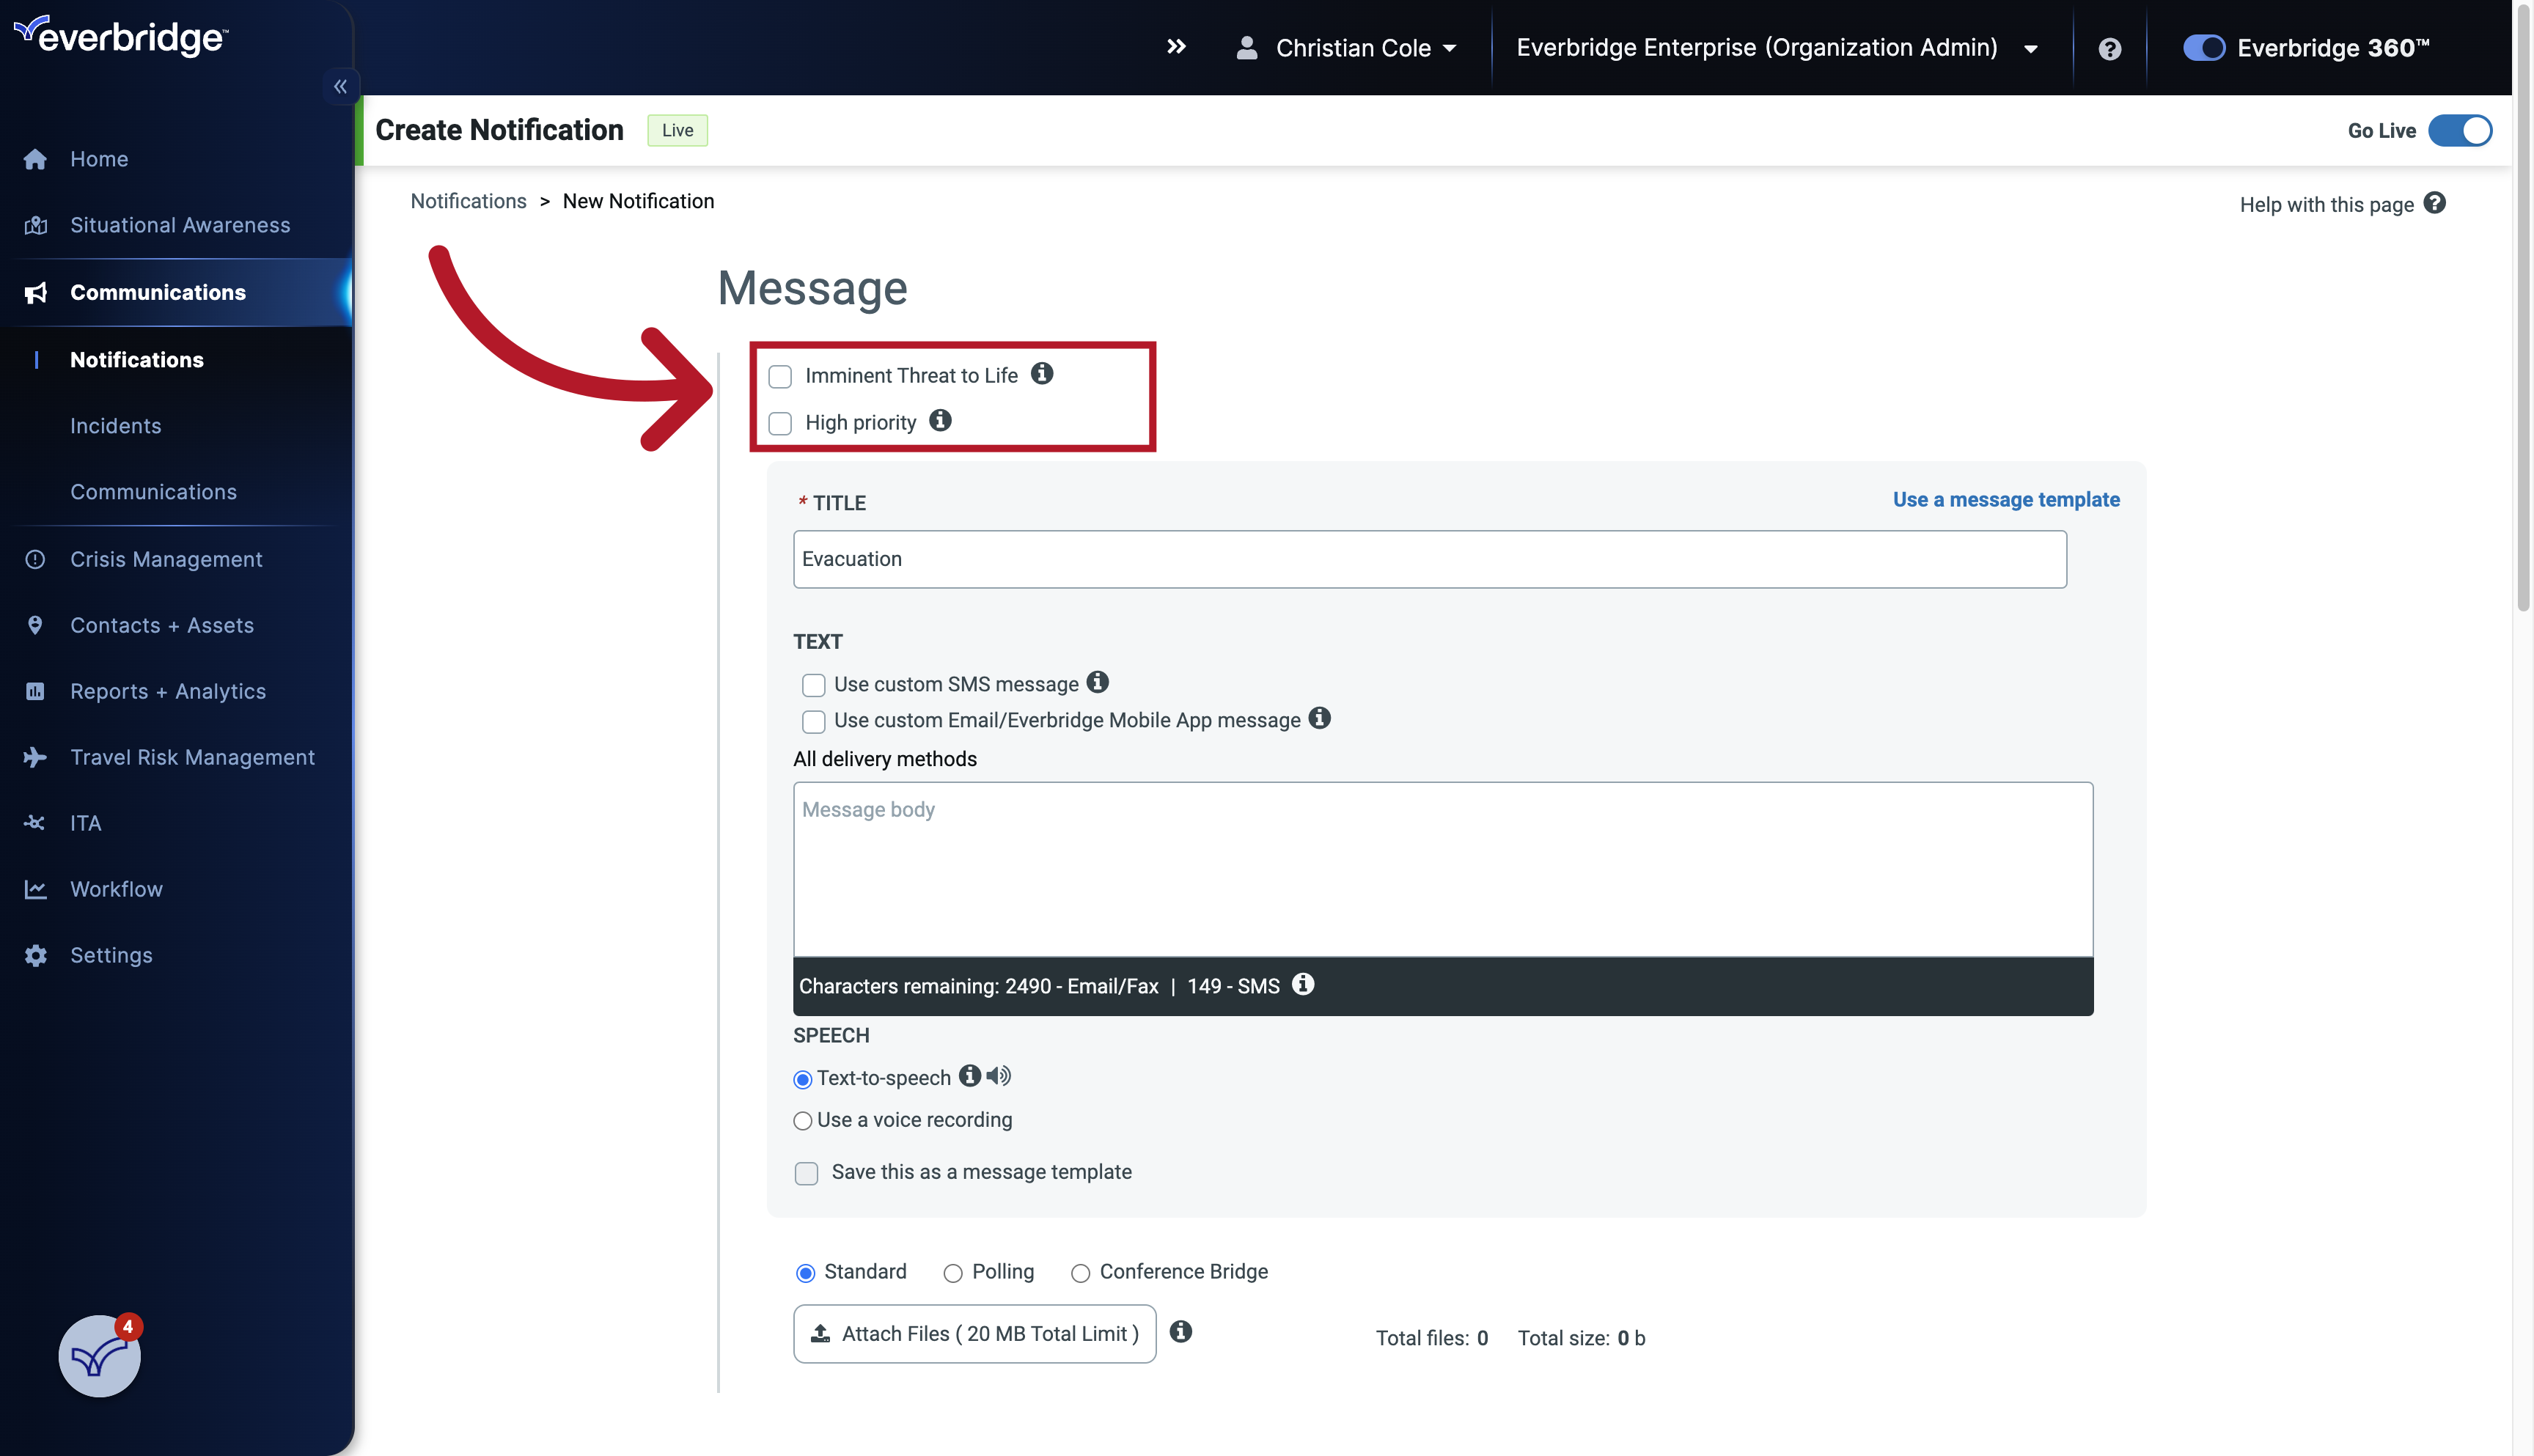
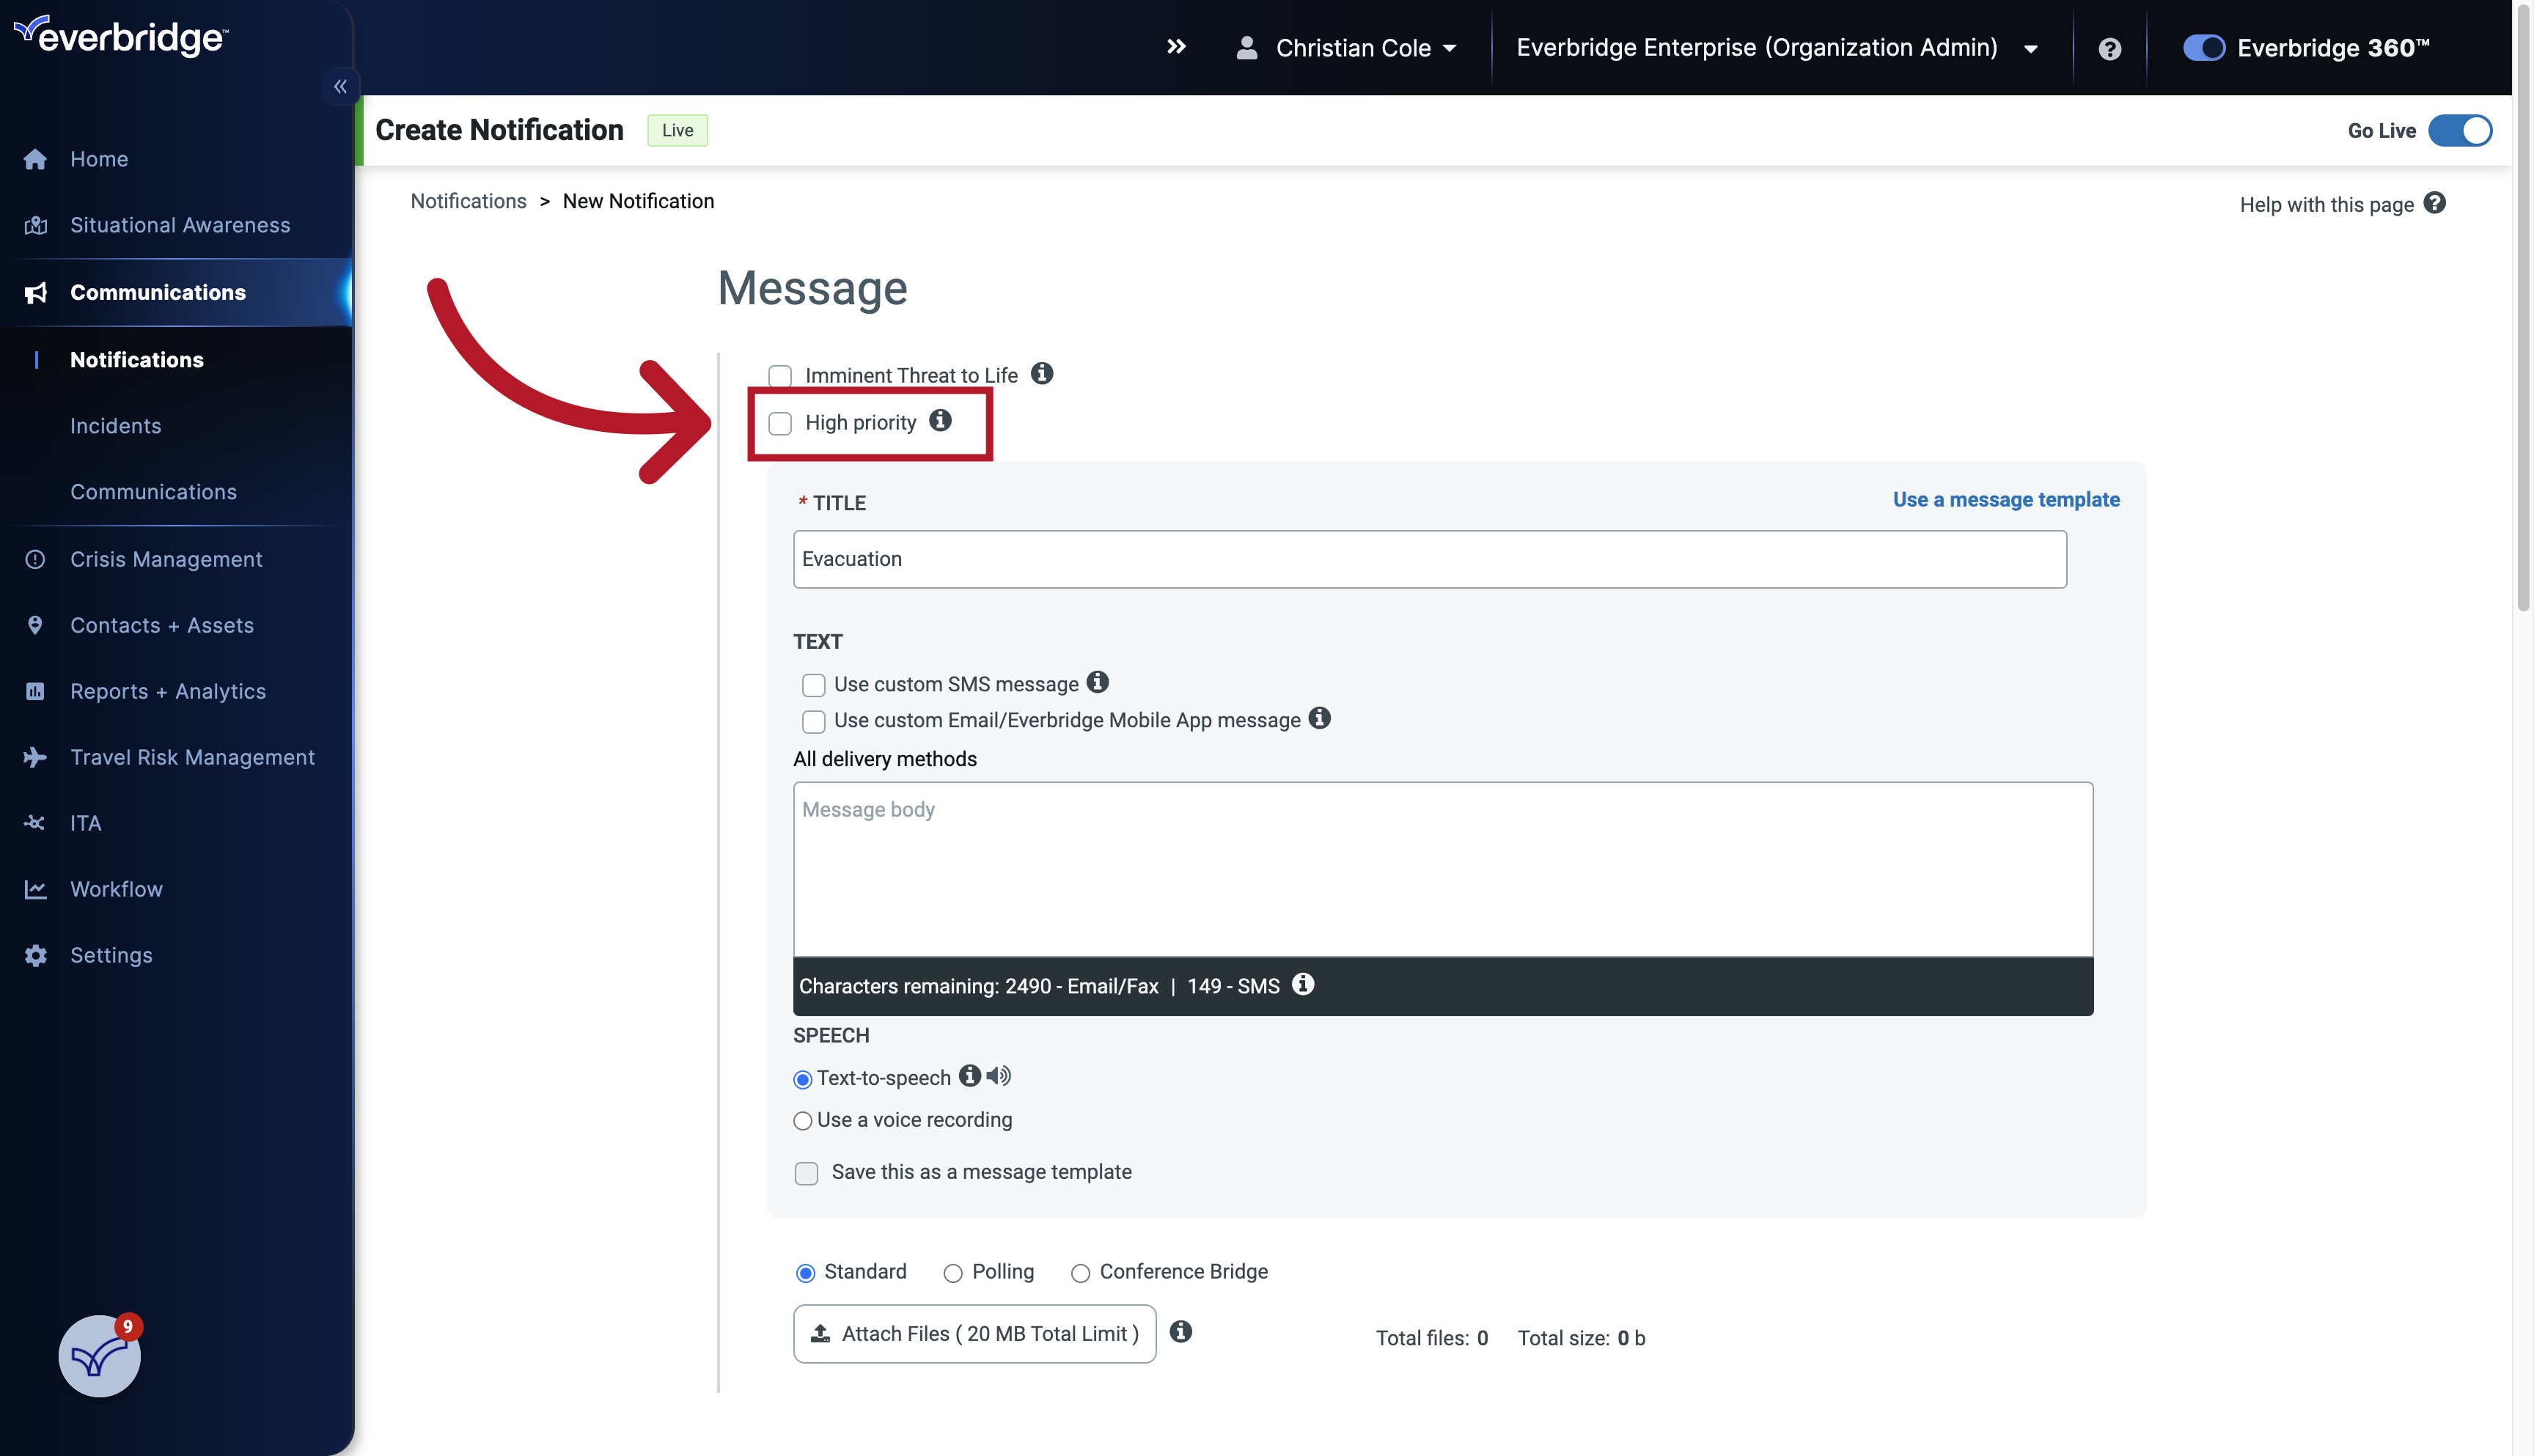
7. Priority
You can decide how high priority your message is by selecting from the options listed here.
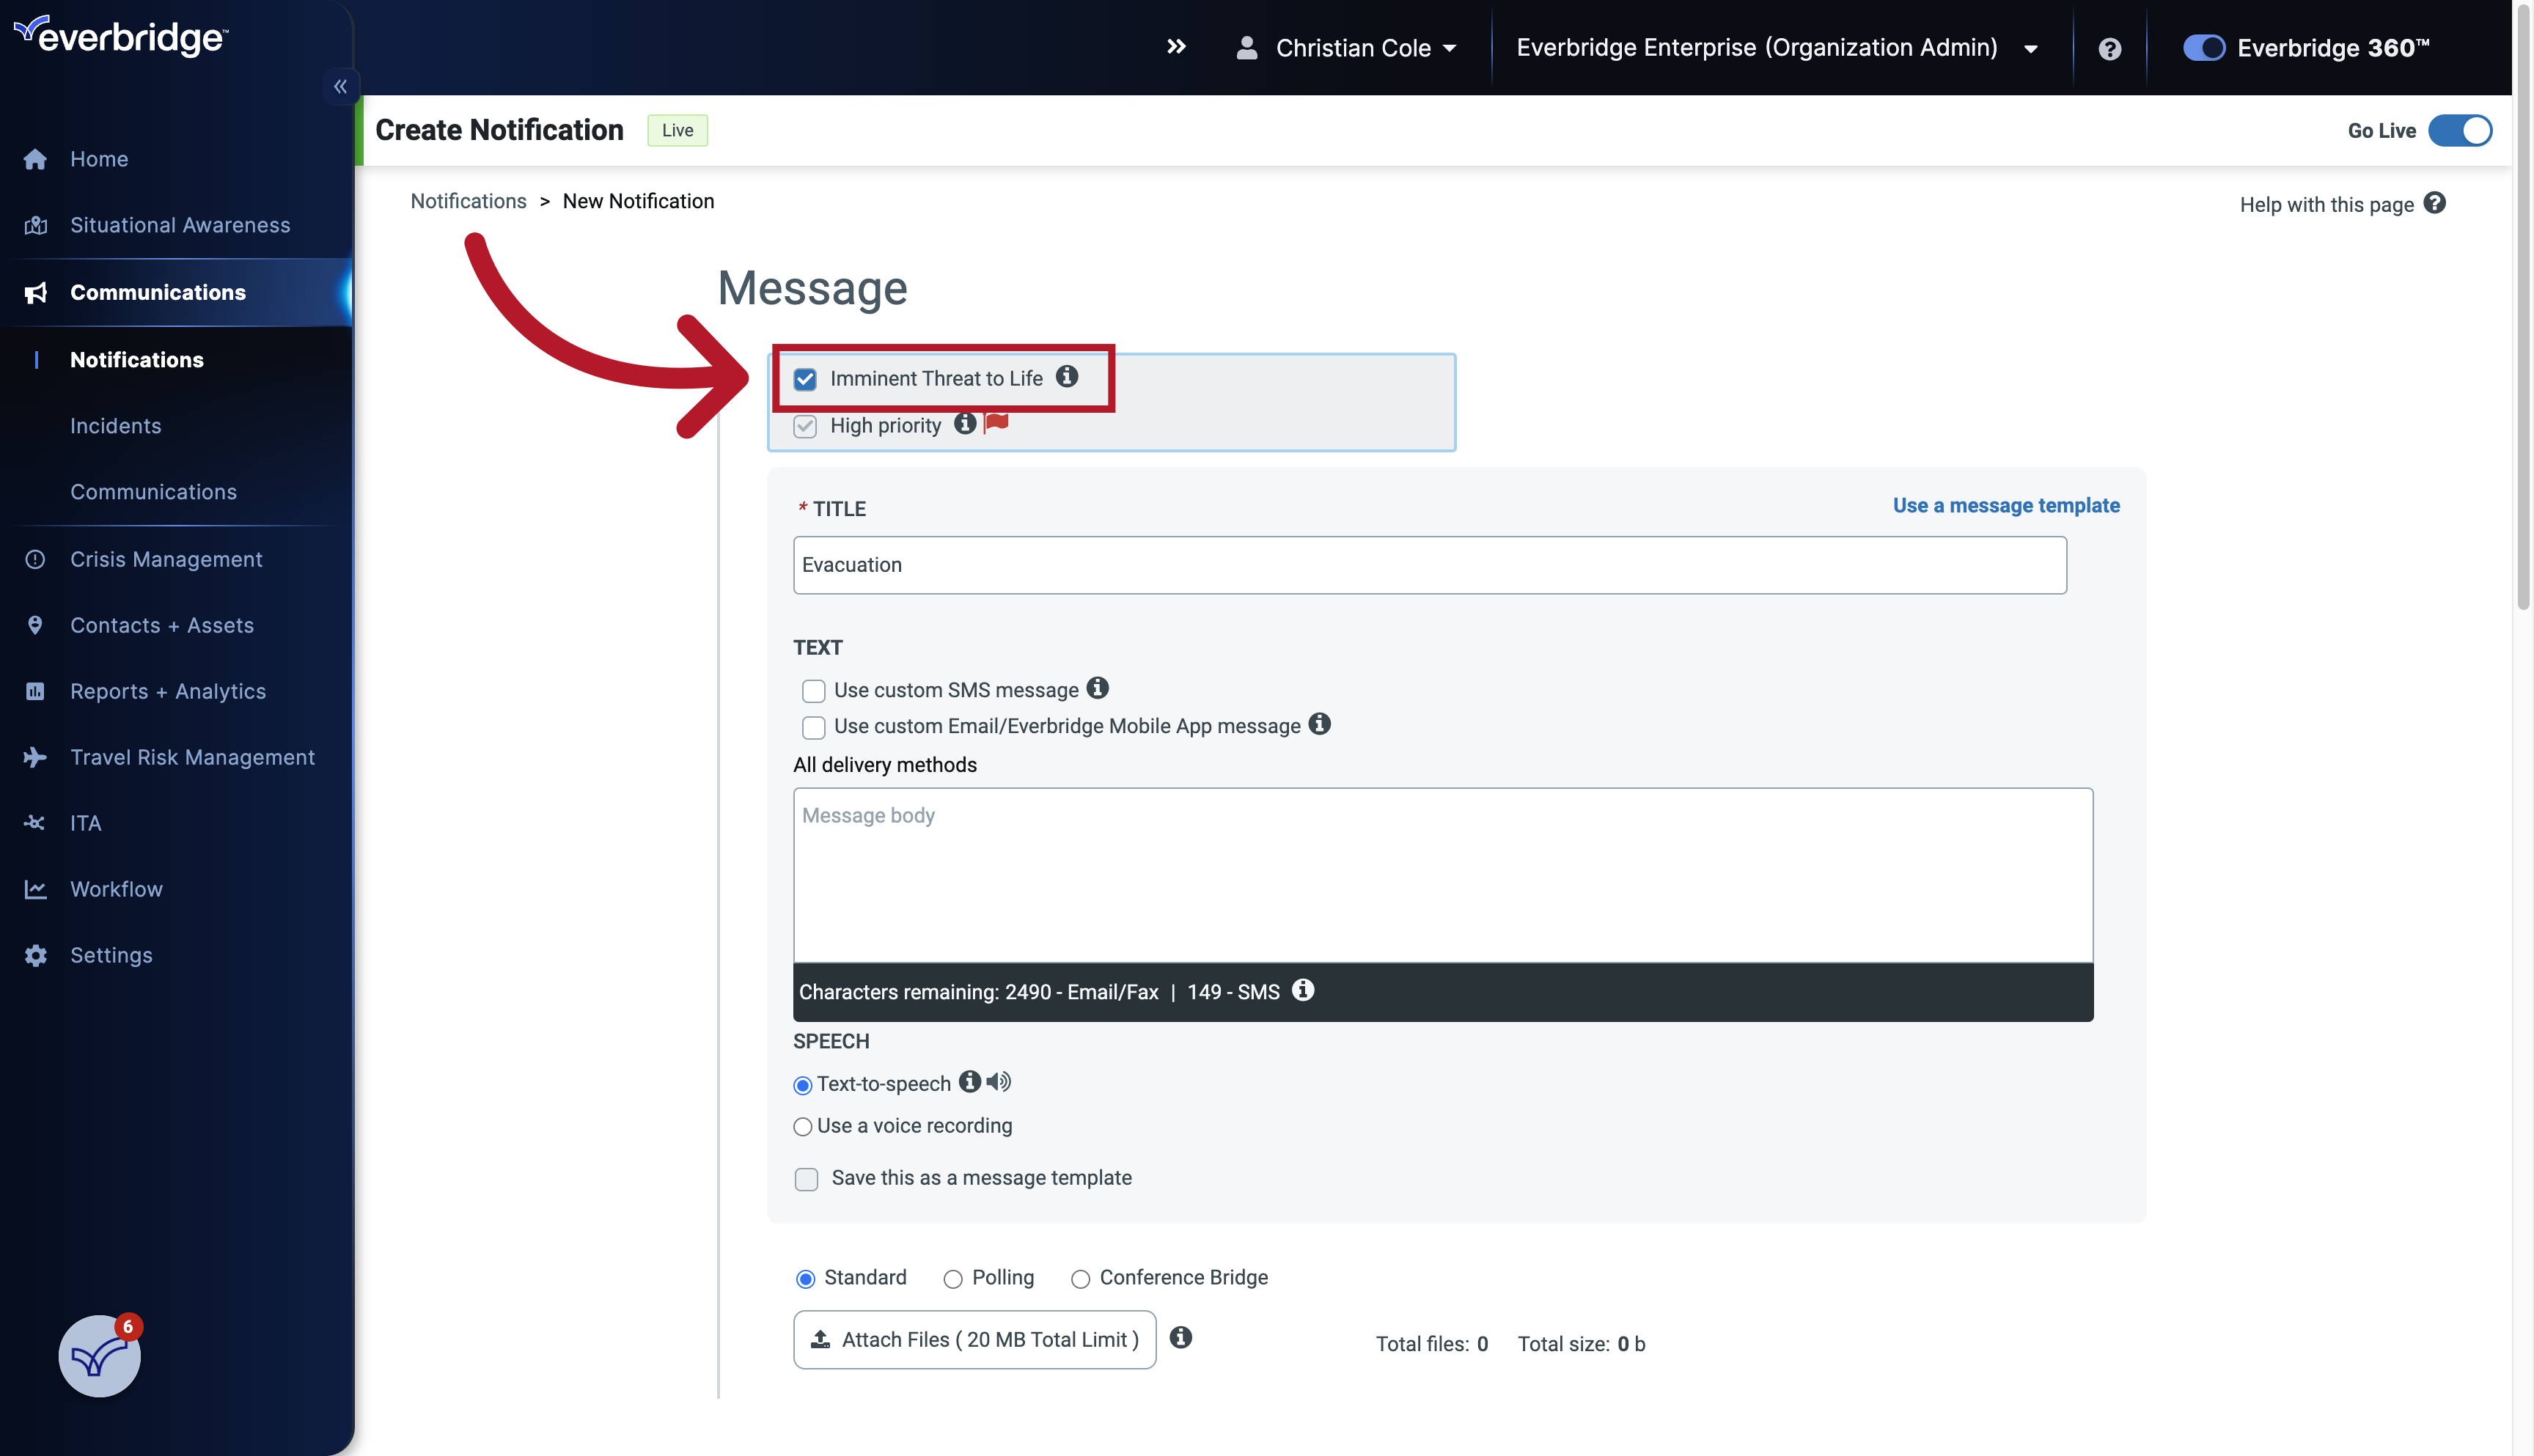
8. Imminent Threat to Life
The first option is imminent threat to life. Use this field for notifications that are for life-threatening events or incidents. If this option is selected these messages will be queued ahead of priority messages, and also override silenced notifications within the Everbridge mobile application.
9. High Priority
You can choose to select high priority, only when notifications require urgent attention but are not life-threatening. If this option is selected, these messages will be queued ahead of non-priority messages.
10. Message Body
Now, enter the message for your contacts.
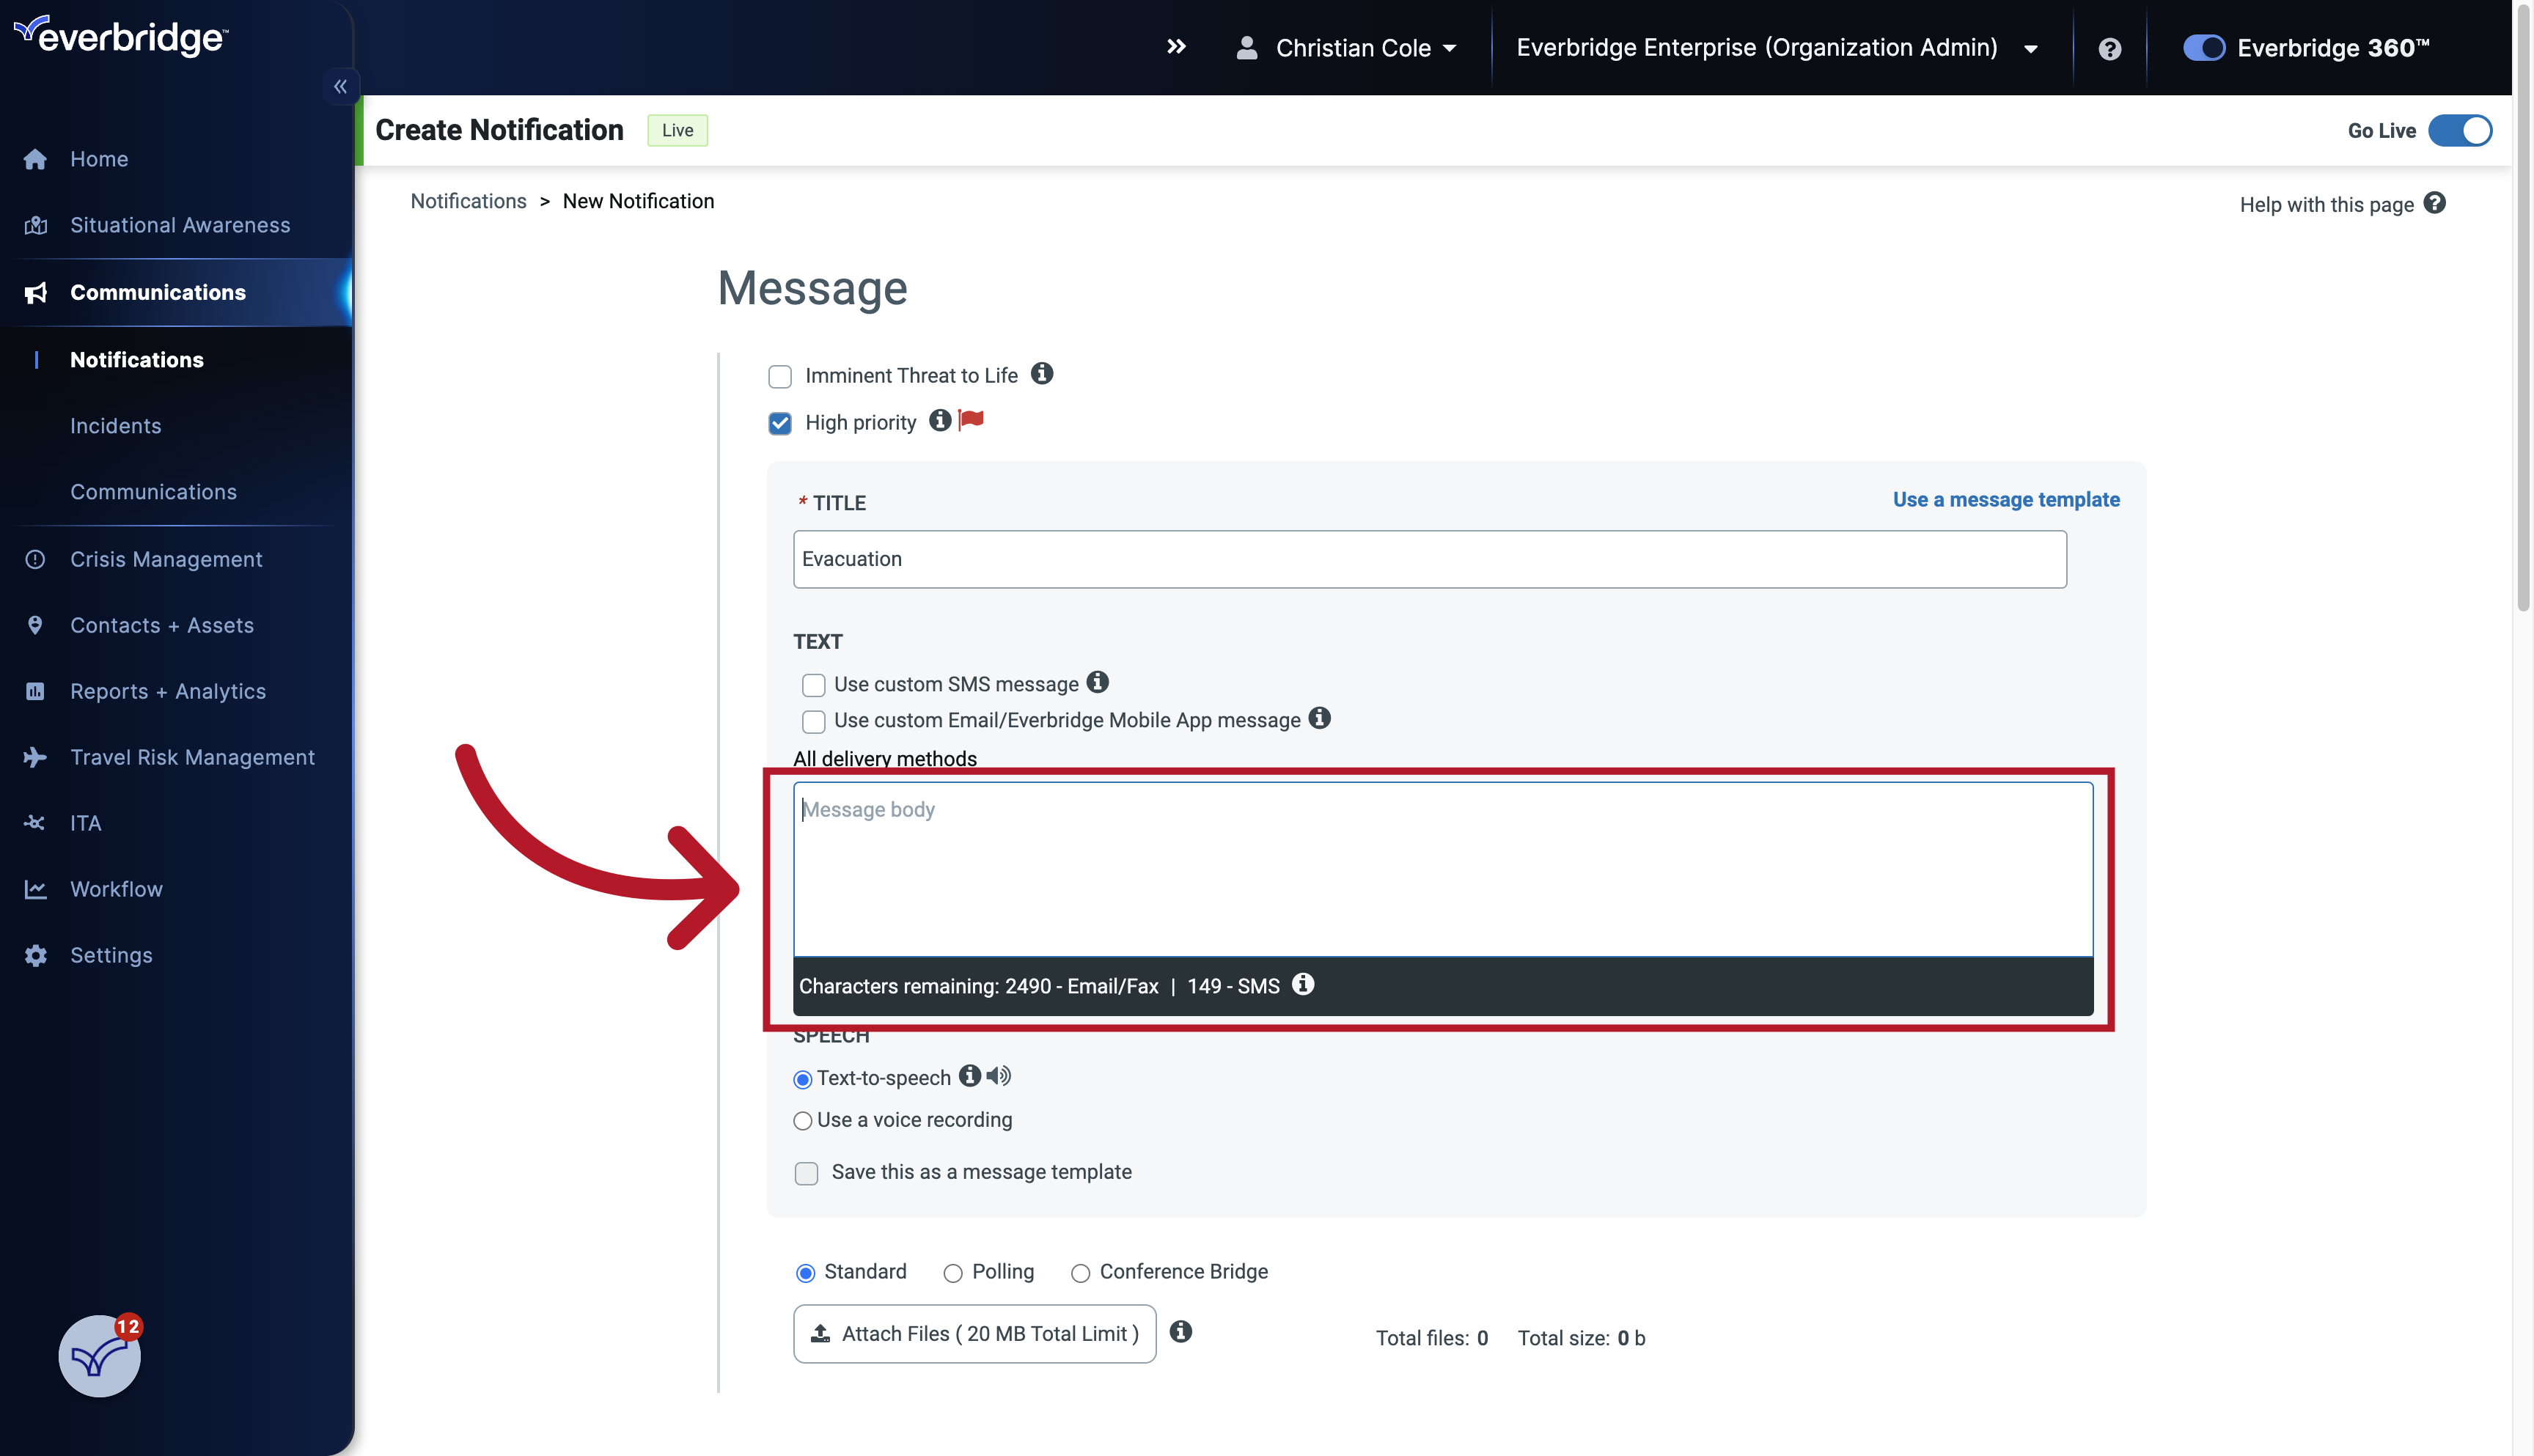
11. Message Body
If you would like to learn how to customize and format your message watch the formatting text in a notification video from our channel.

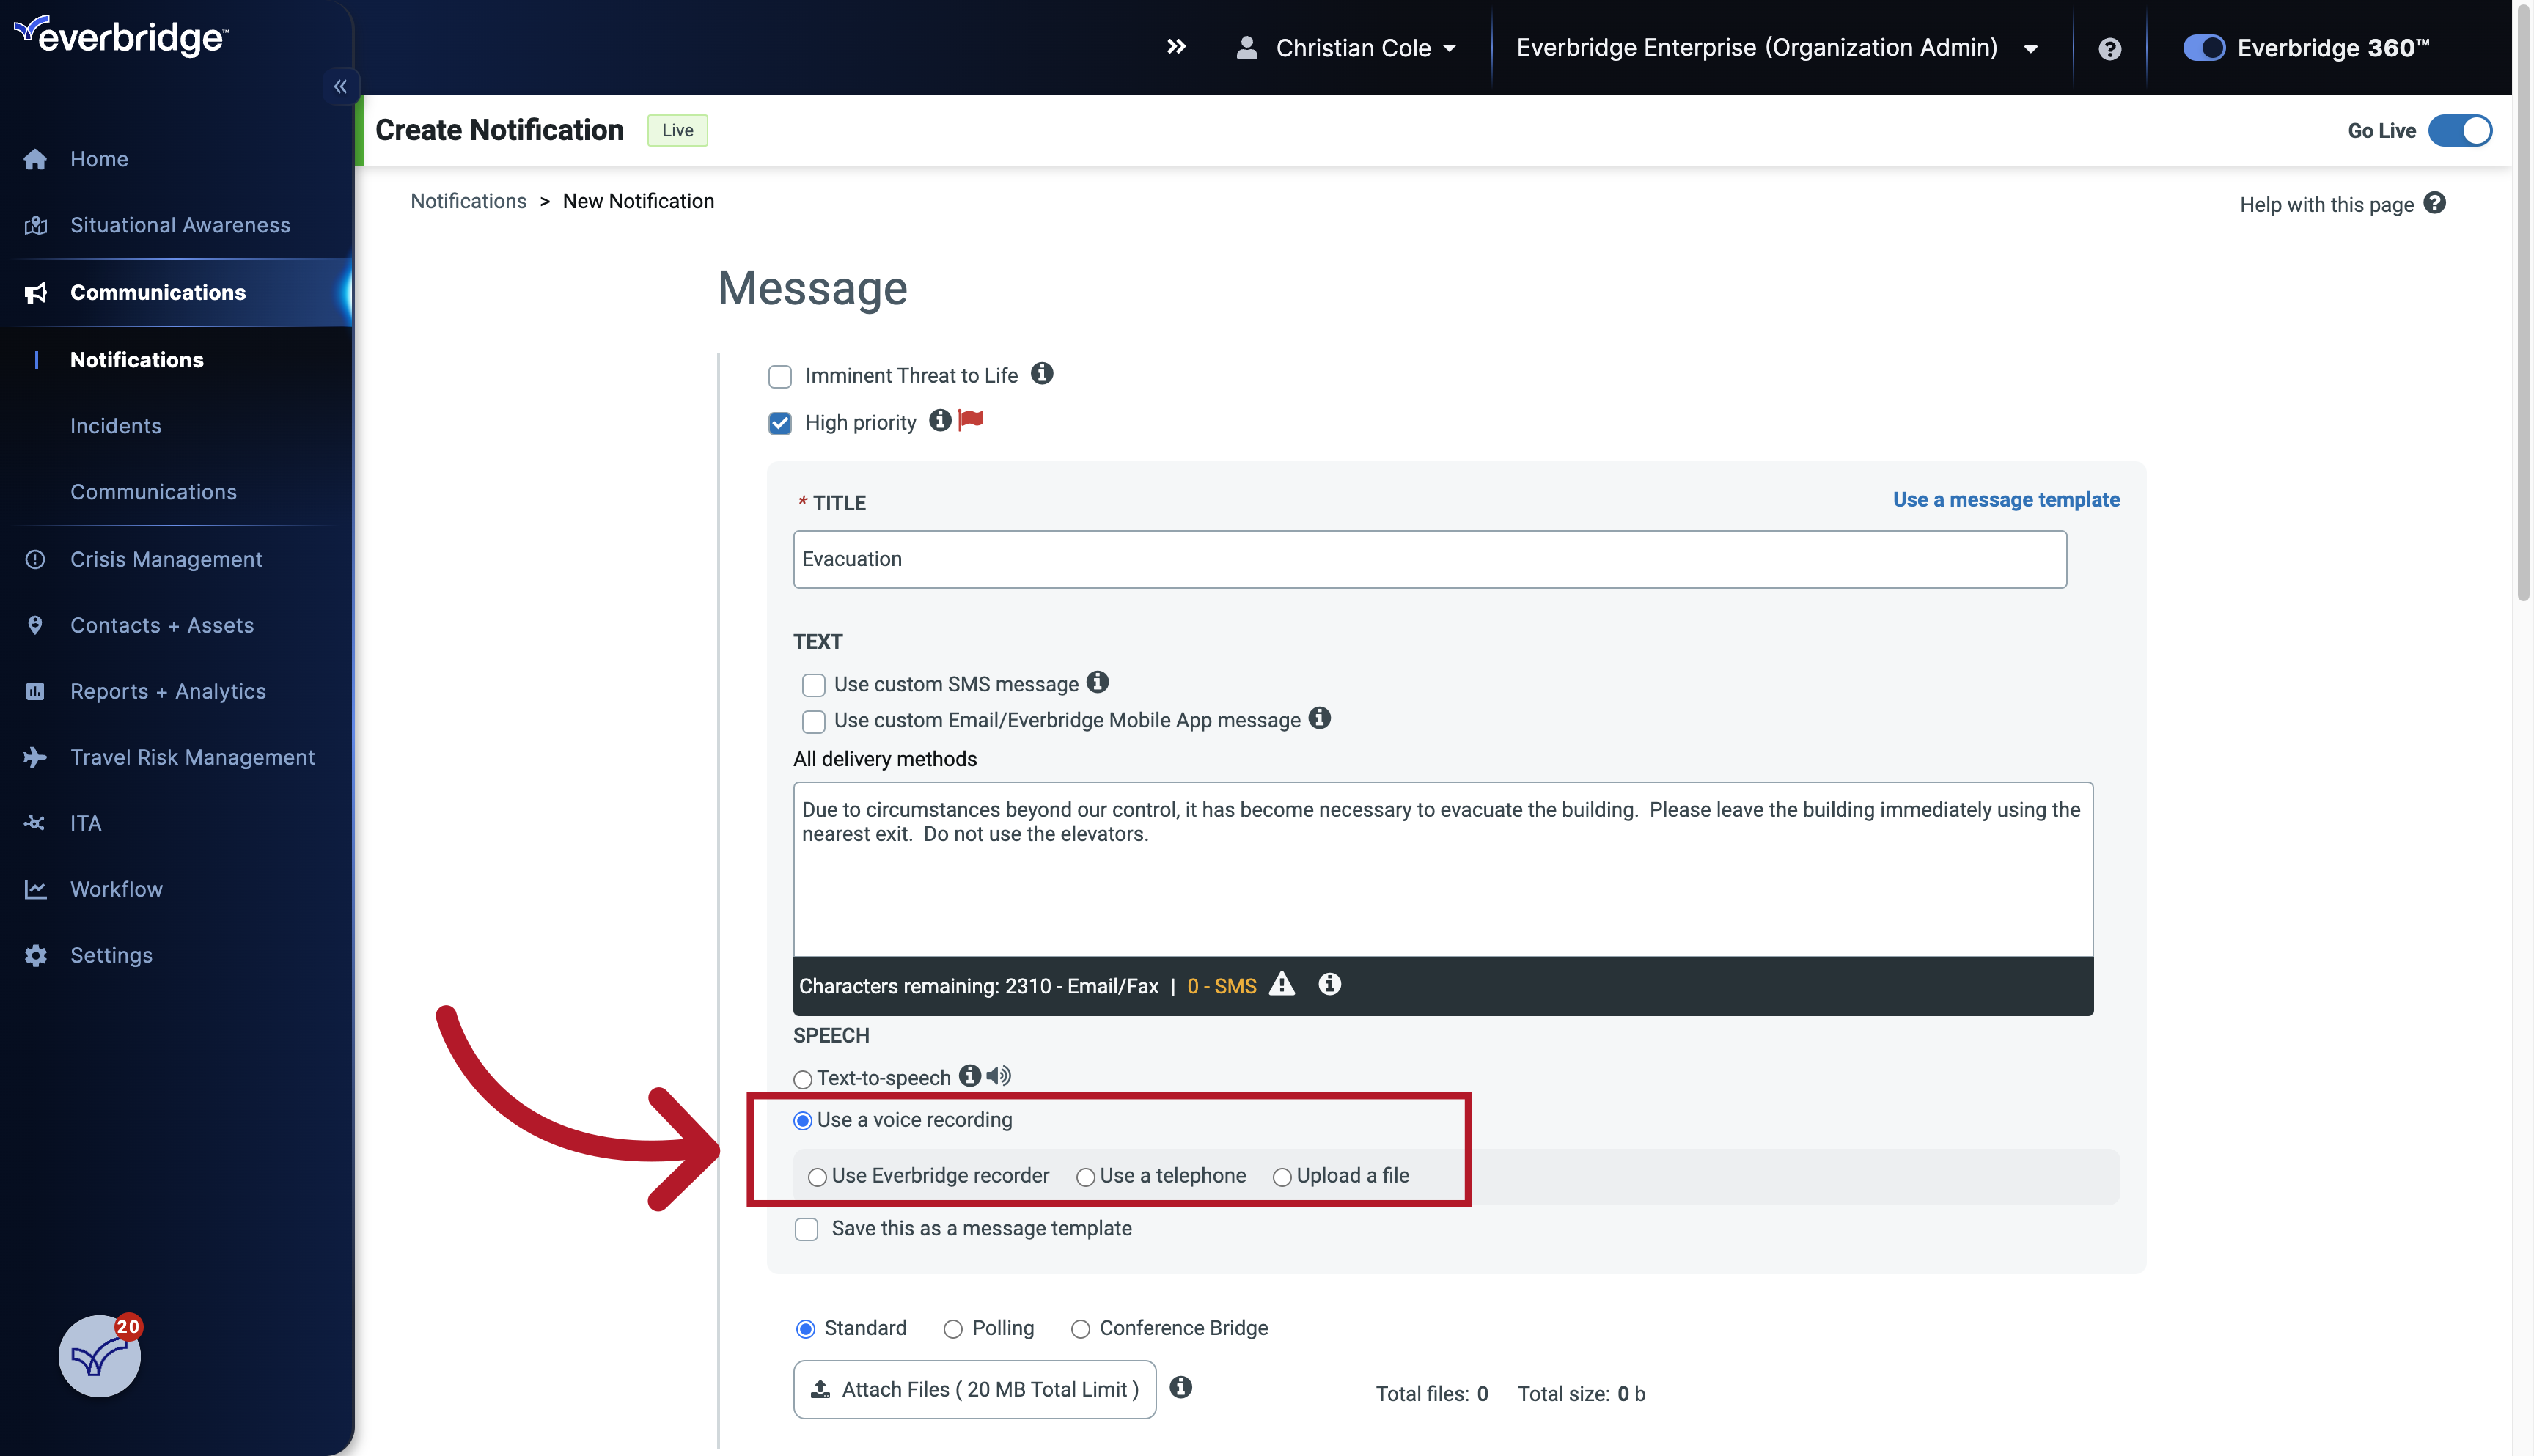
12. Text-to-speech
The message will also come with an audible version, this can come from a text-to-speech generator.

13. Voice Recording
Or be recorded separately using one of the options shown here.
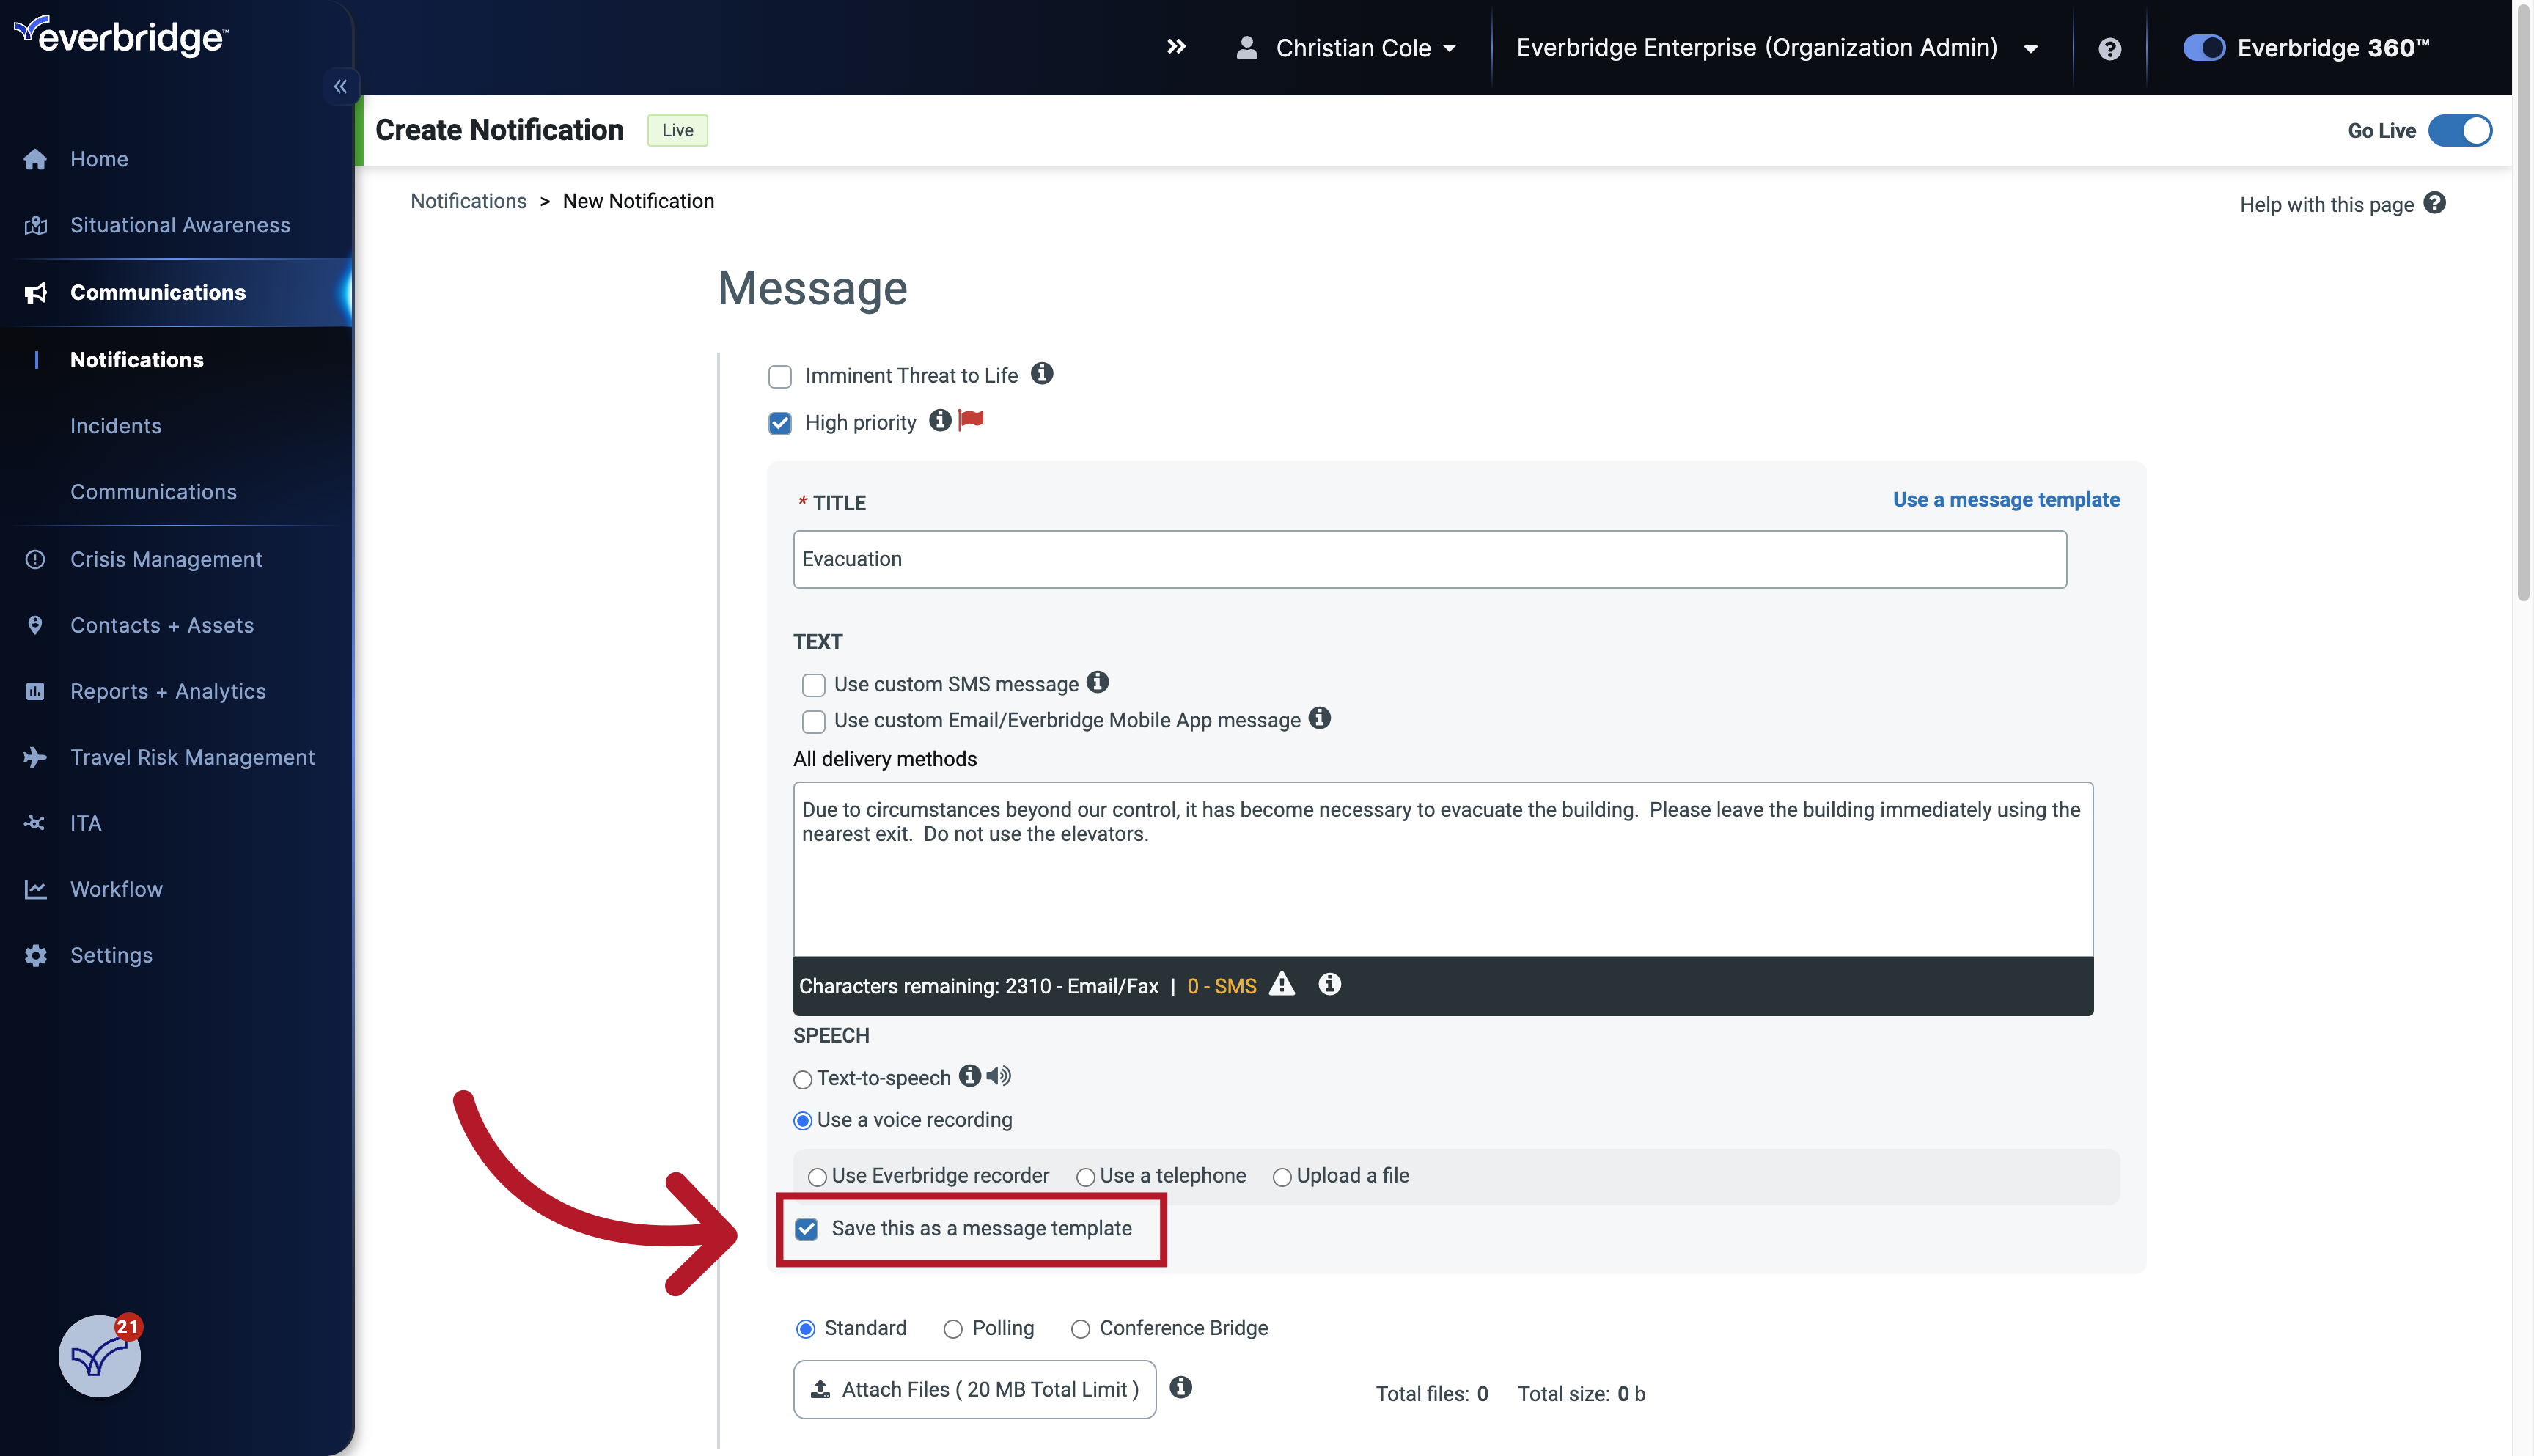
14. Message Template
You can also save this as a Message Template if you would like to use the same message later.
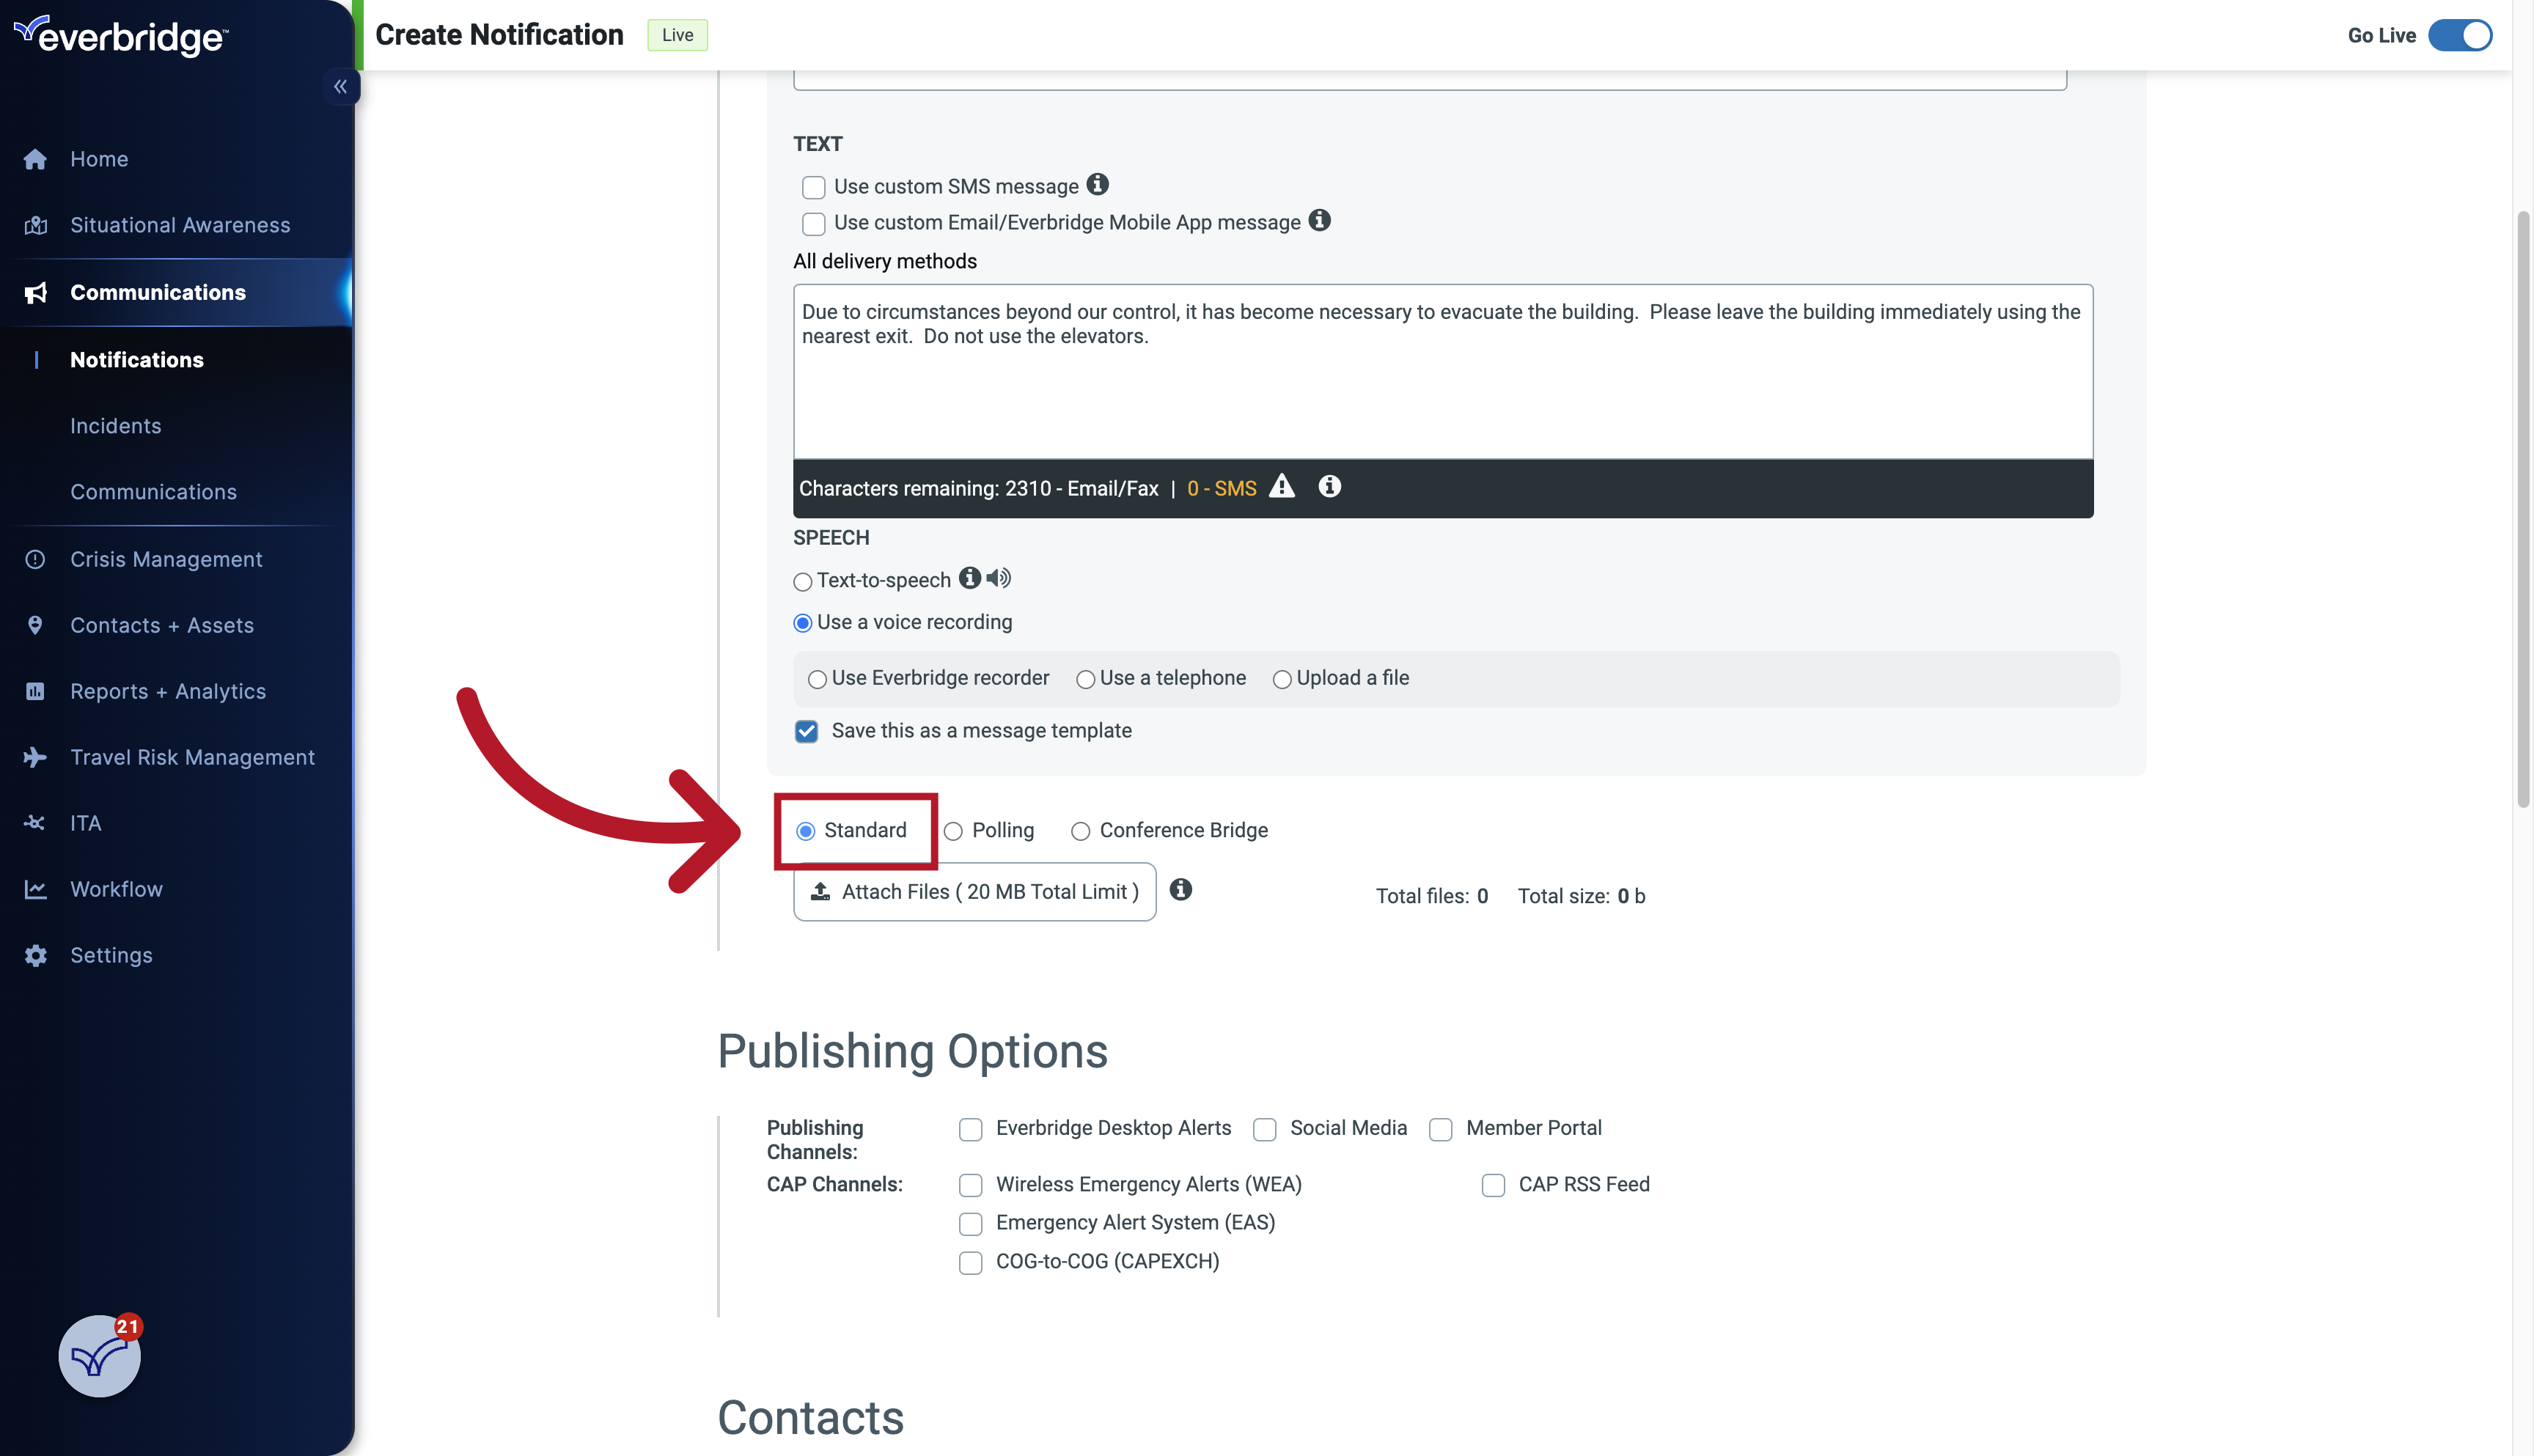
15. Standard Notification
By default the Standard Notification type is selected for you, you can find videos on different notification types and best practices for sending notifications in our channel as well.
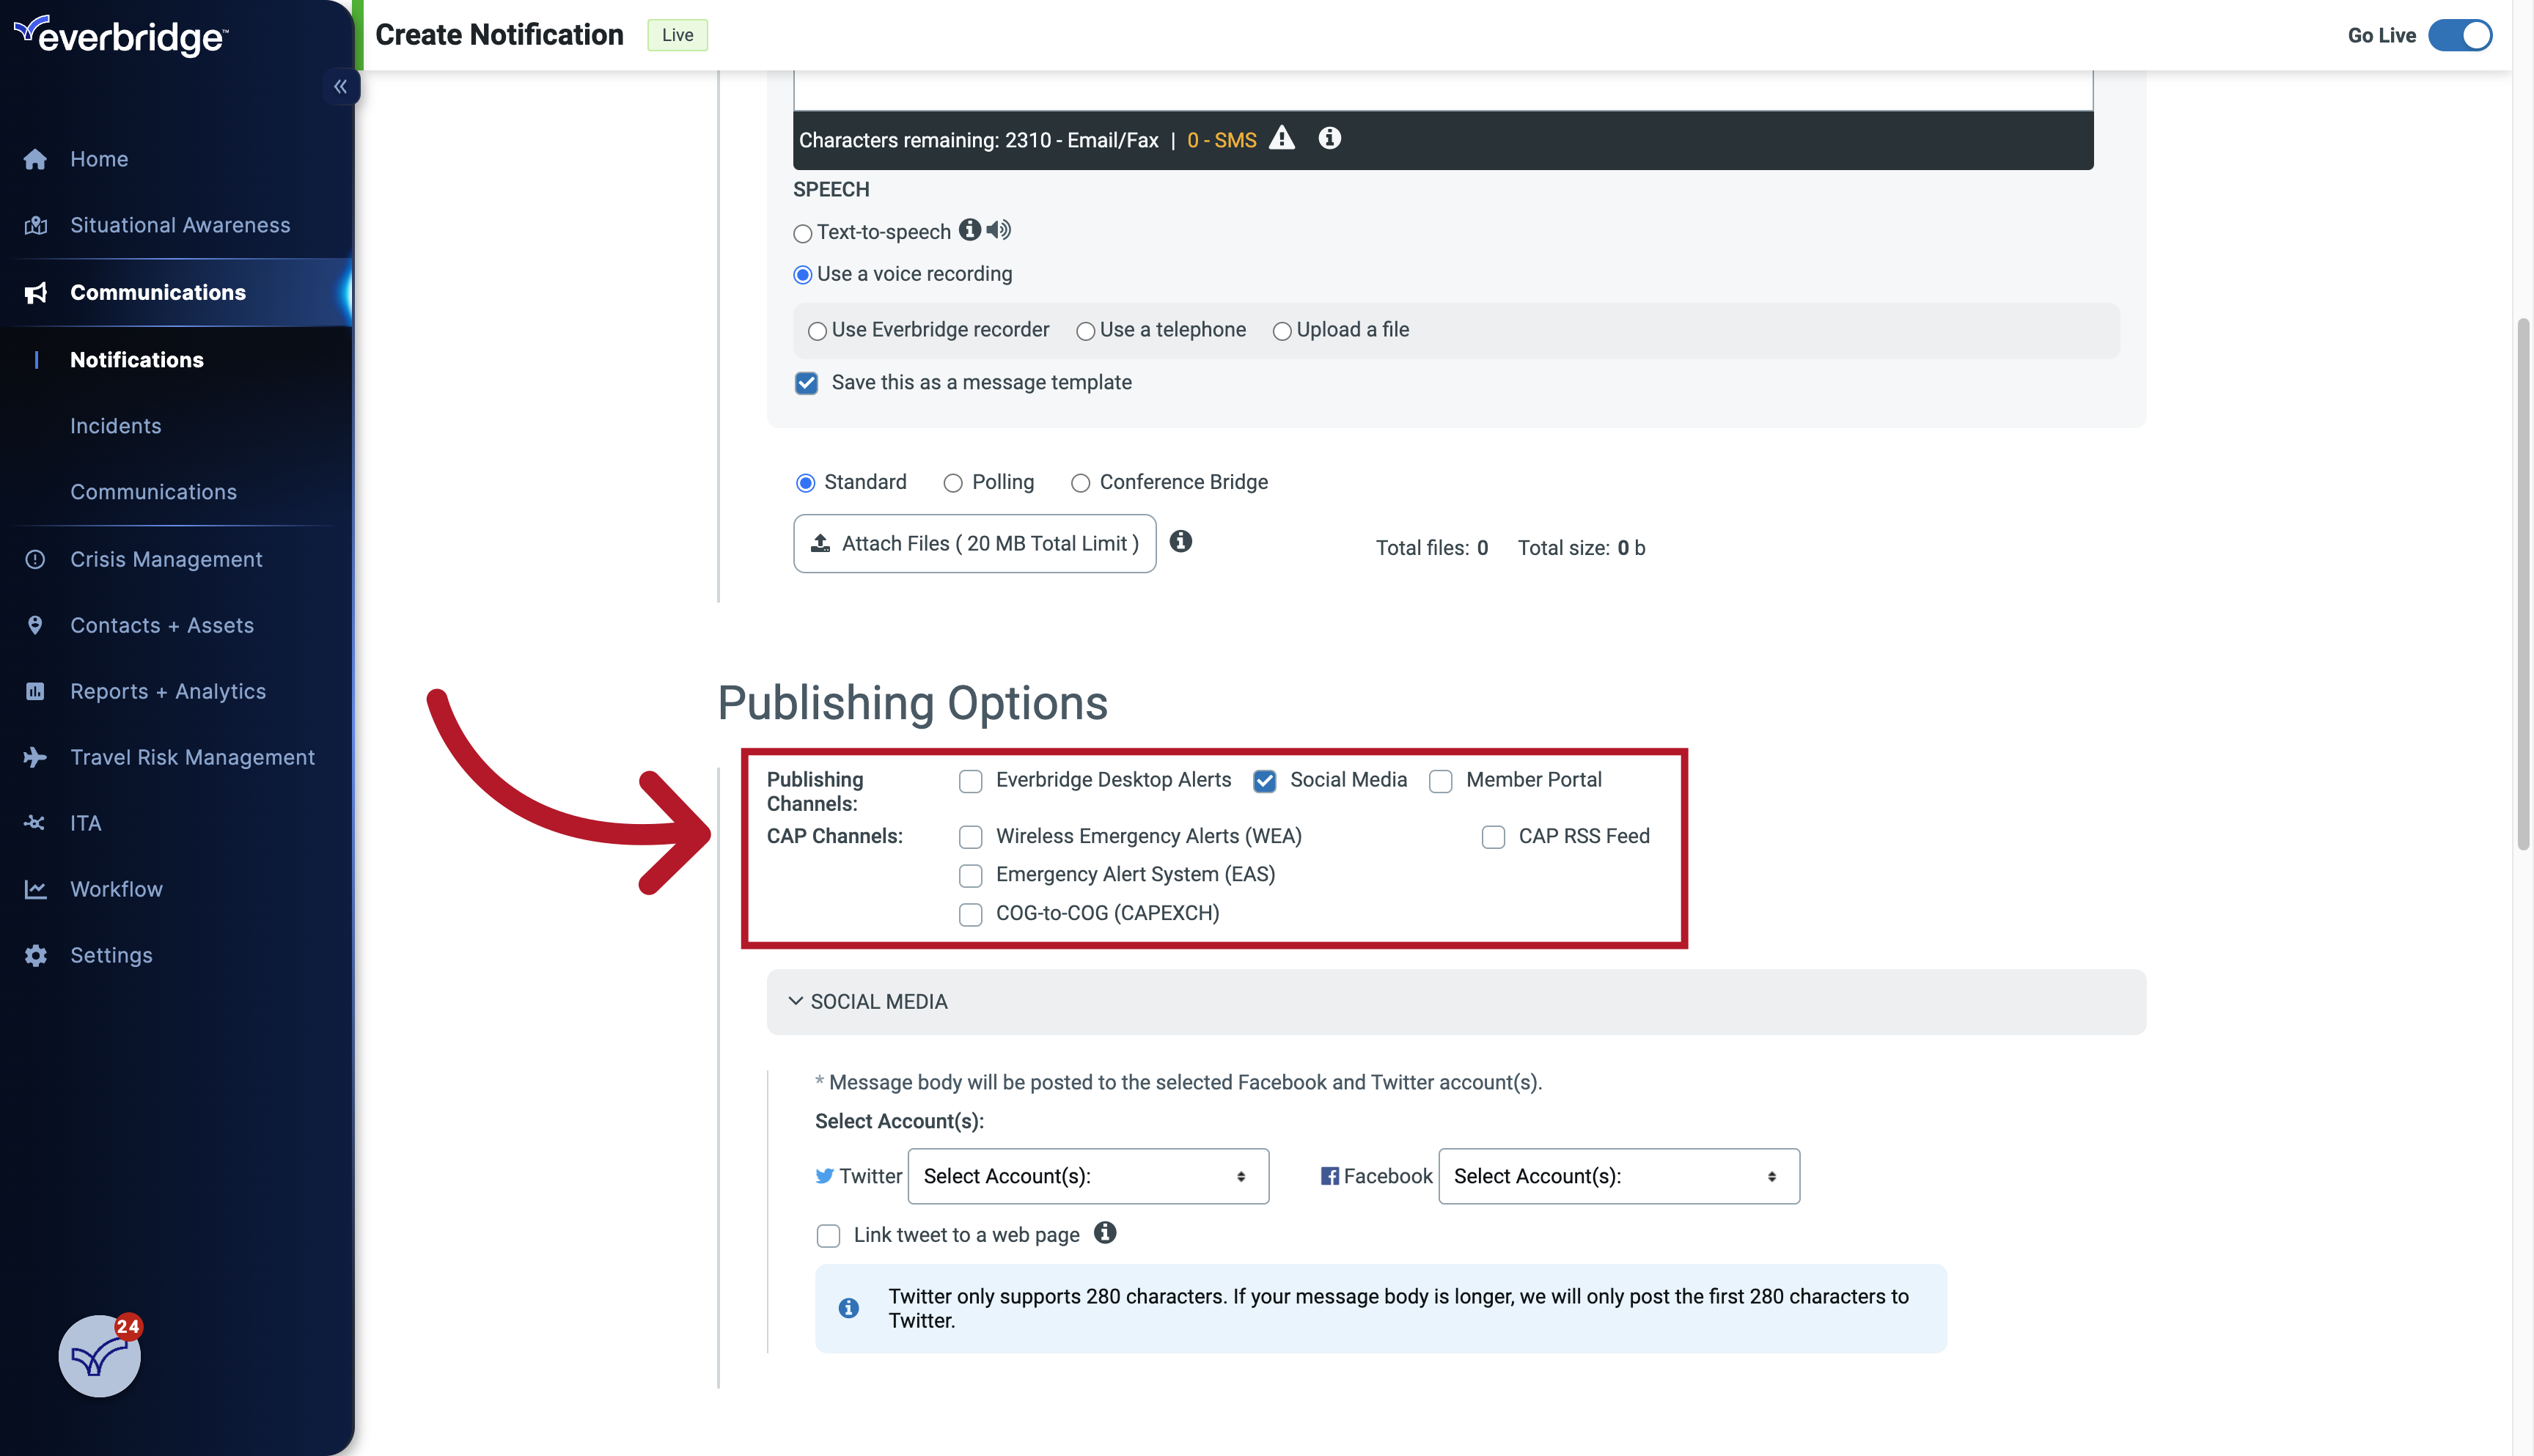
16. Publishing Options
Next, select relevant Publishing Options, note that if you're not sure of any of the options here, you do not have to select it.
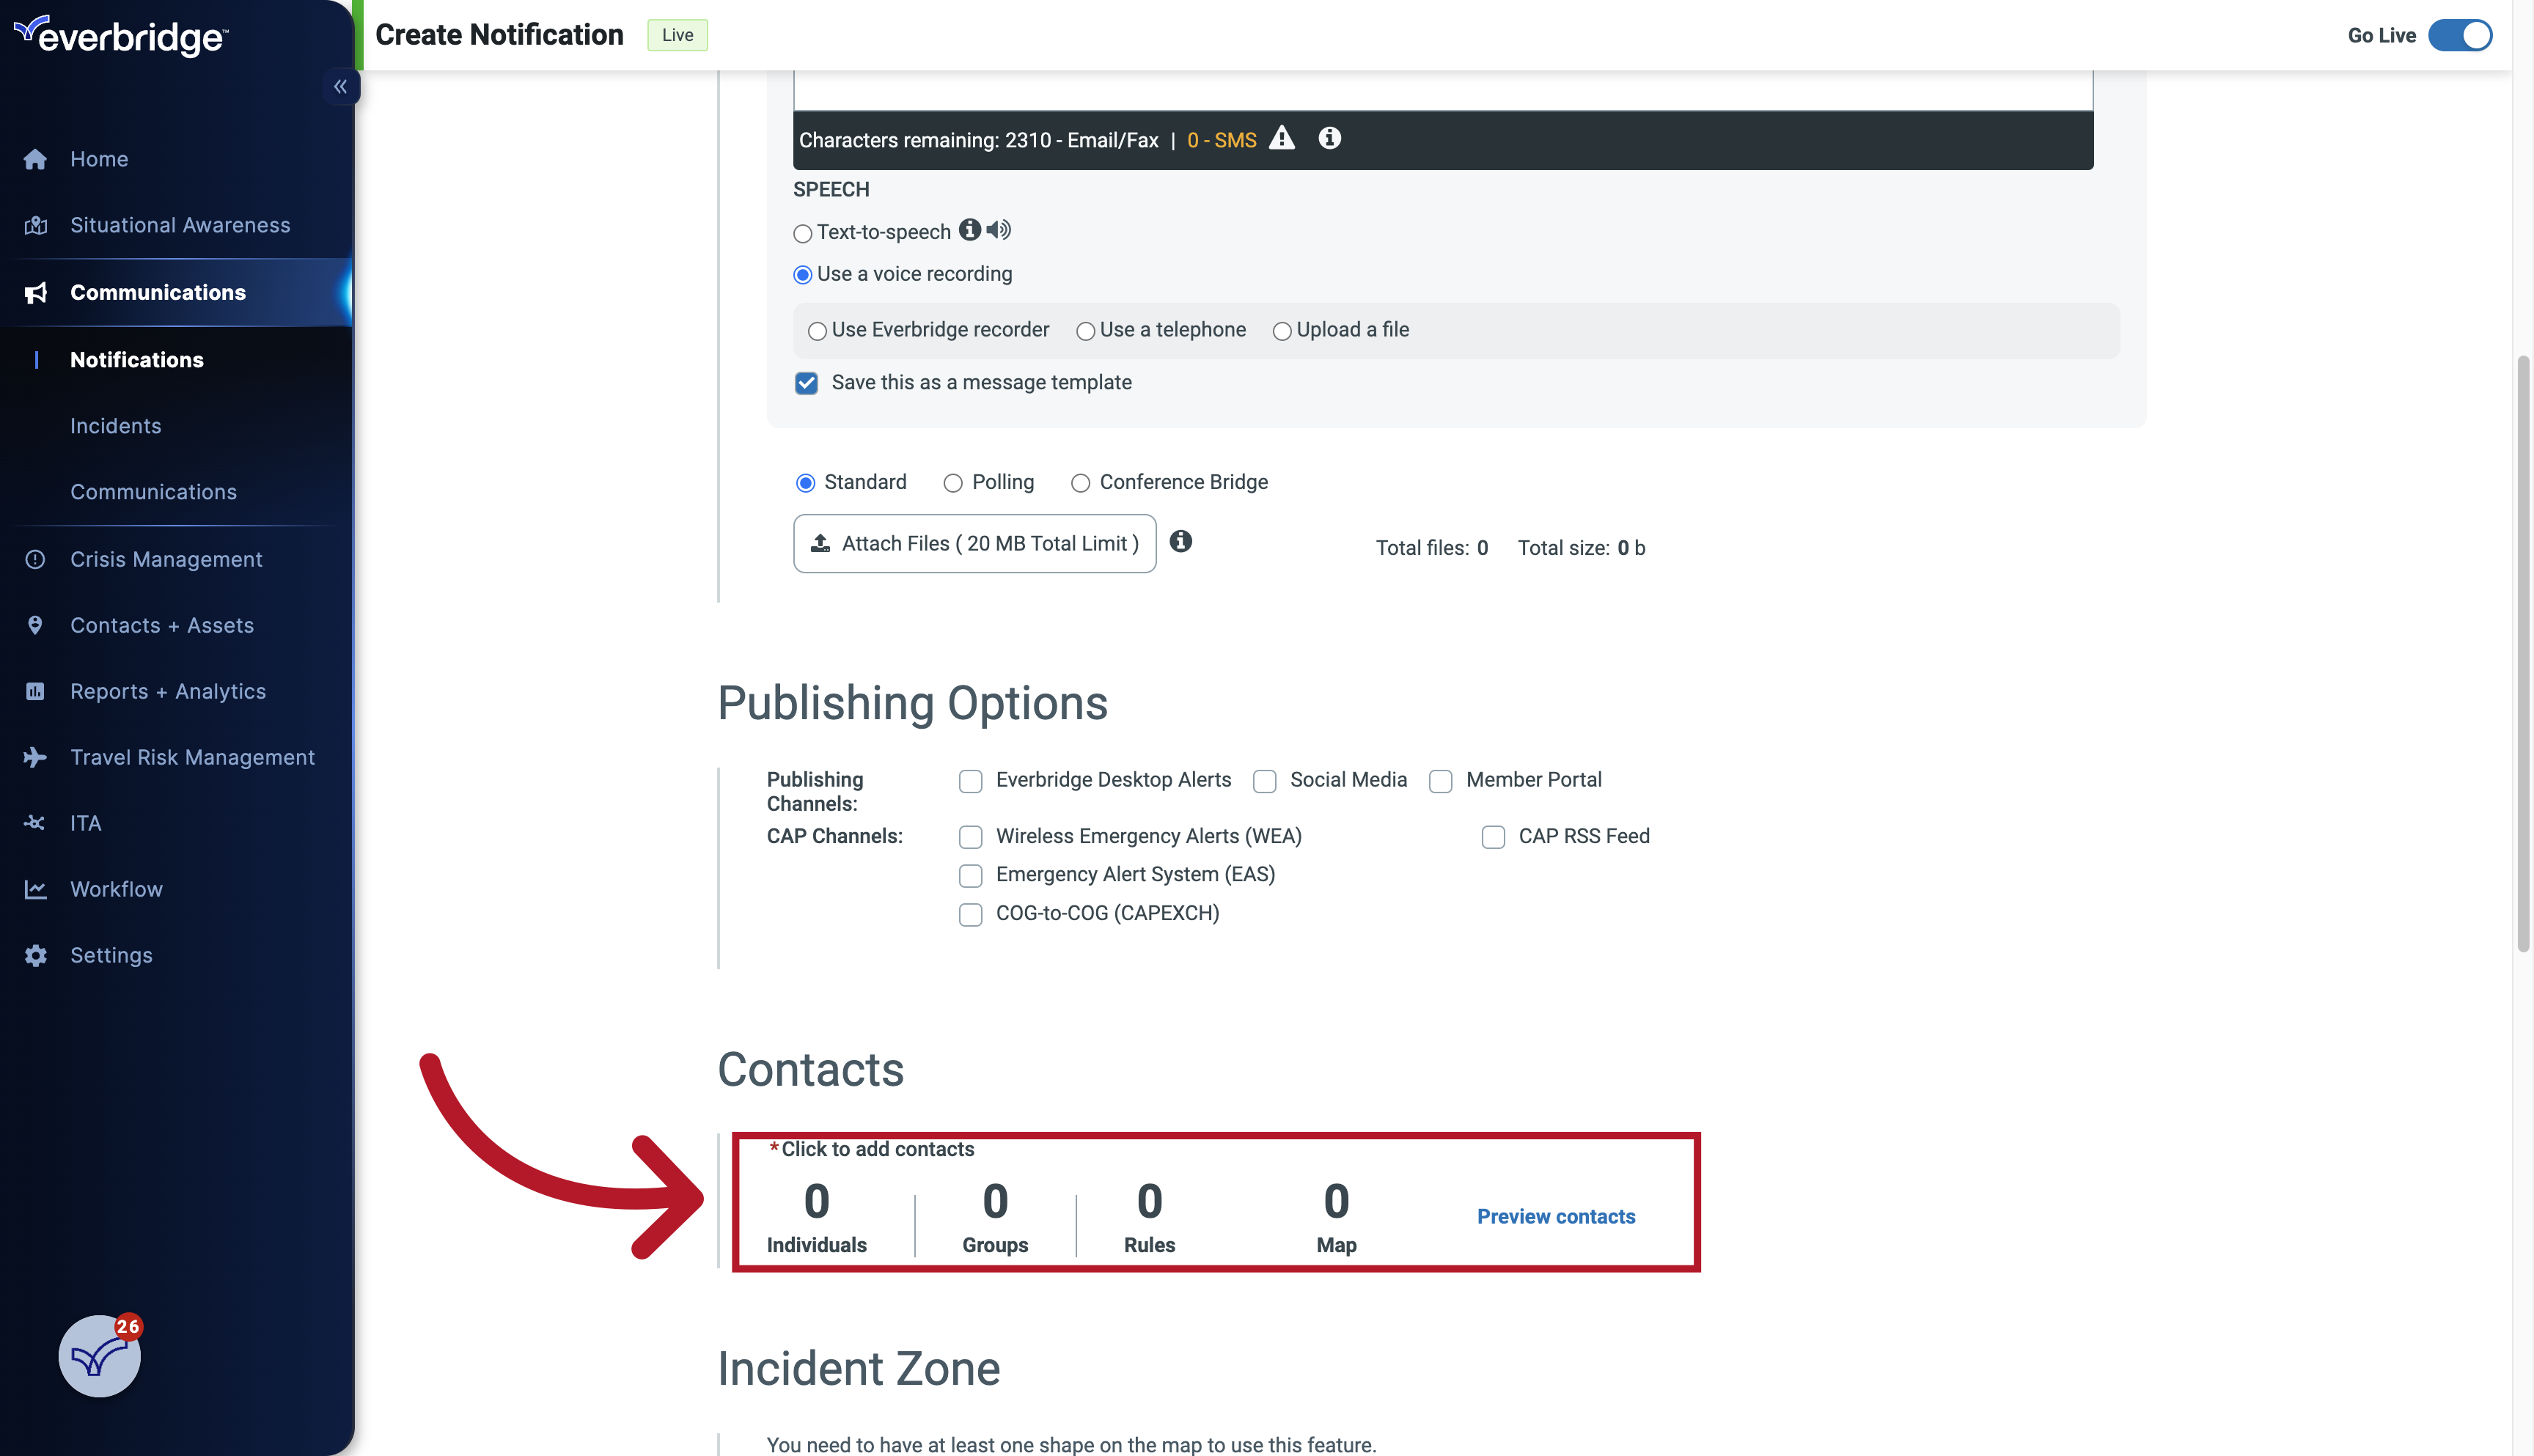
17. Contacts
And add your contacts by clicking either Individuals, Groups, or Rules
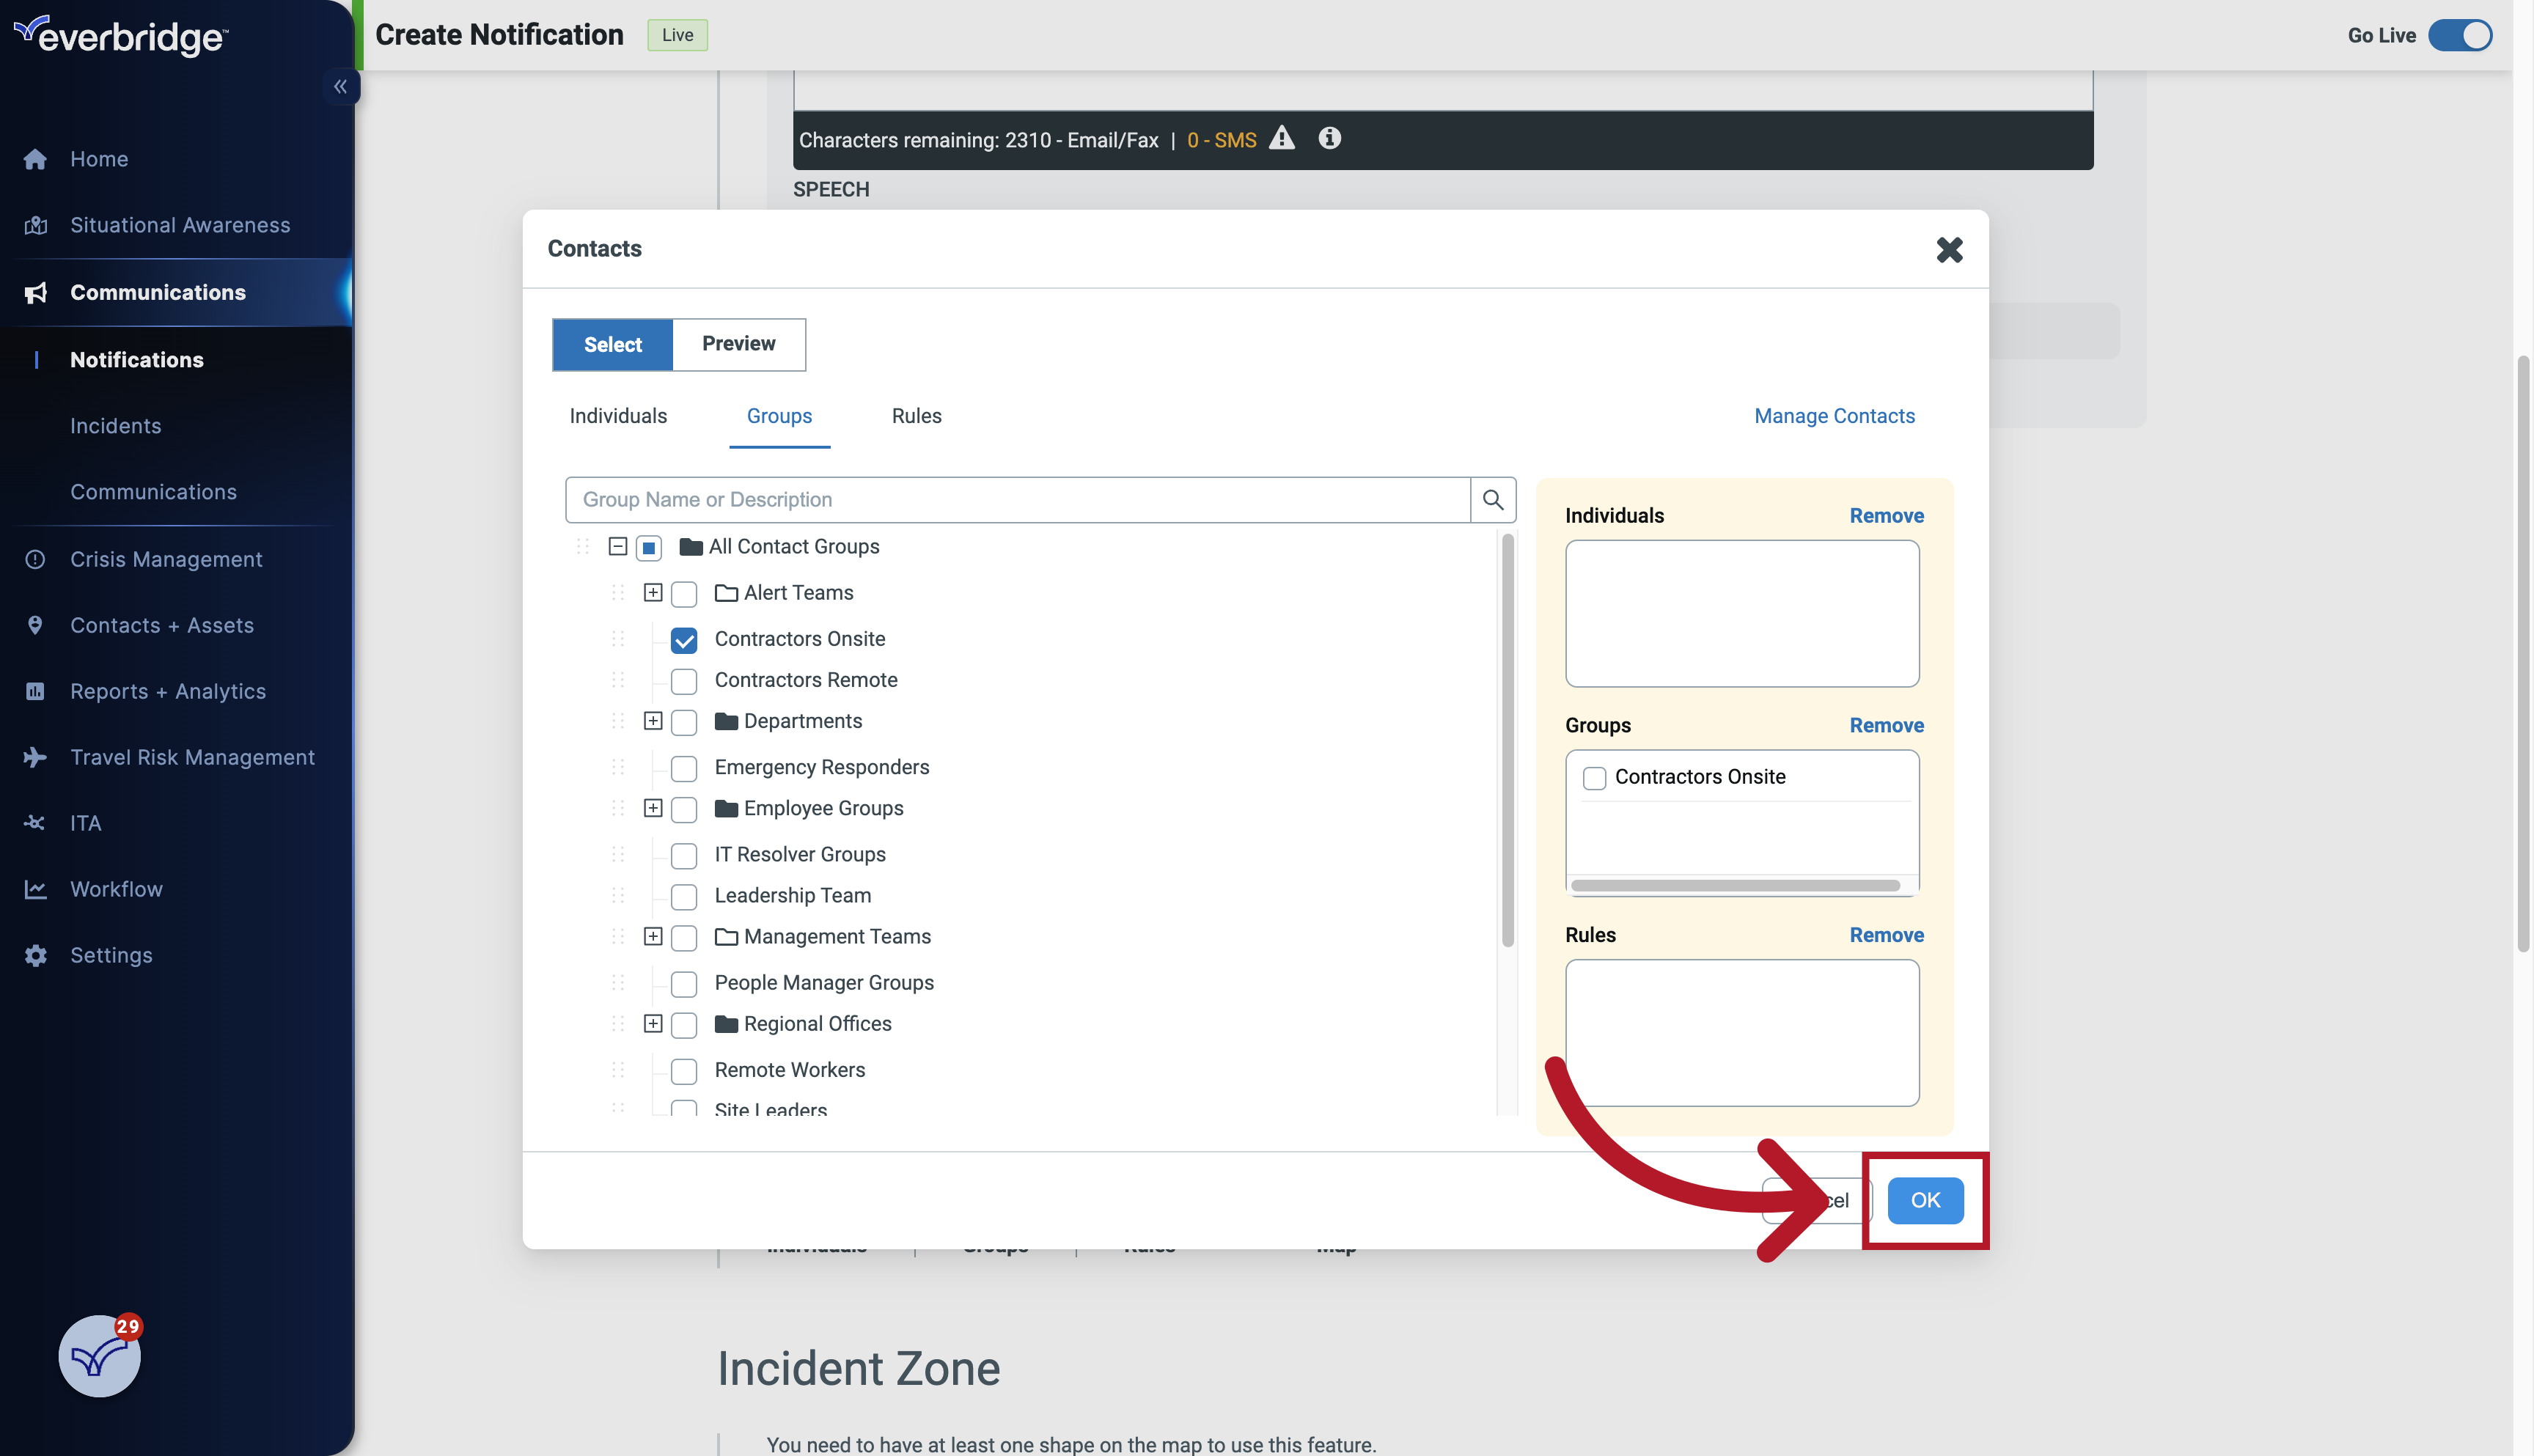
18. Select Groups
Select this field
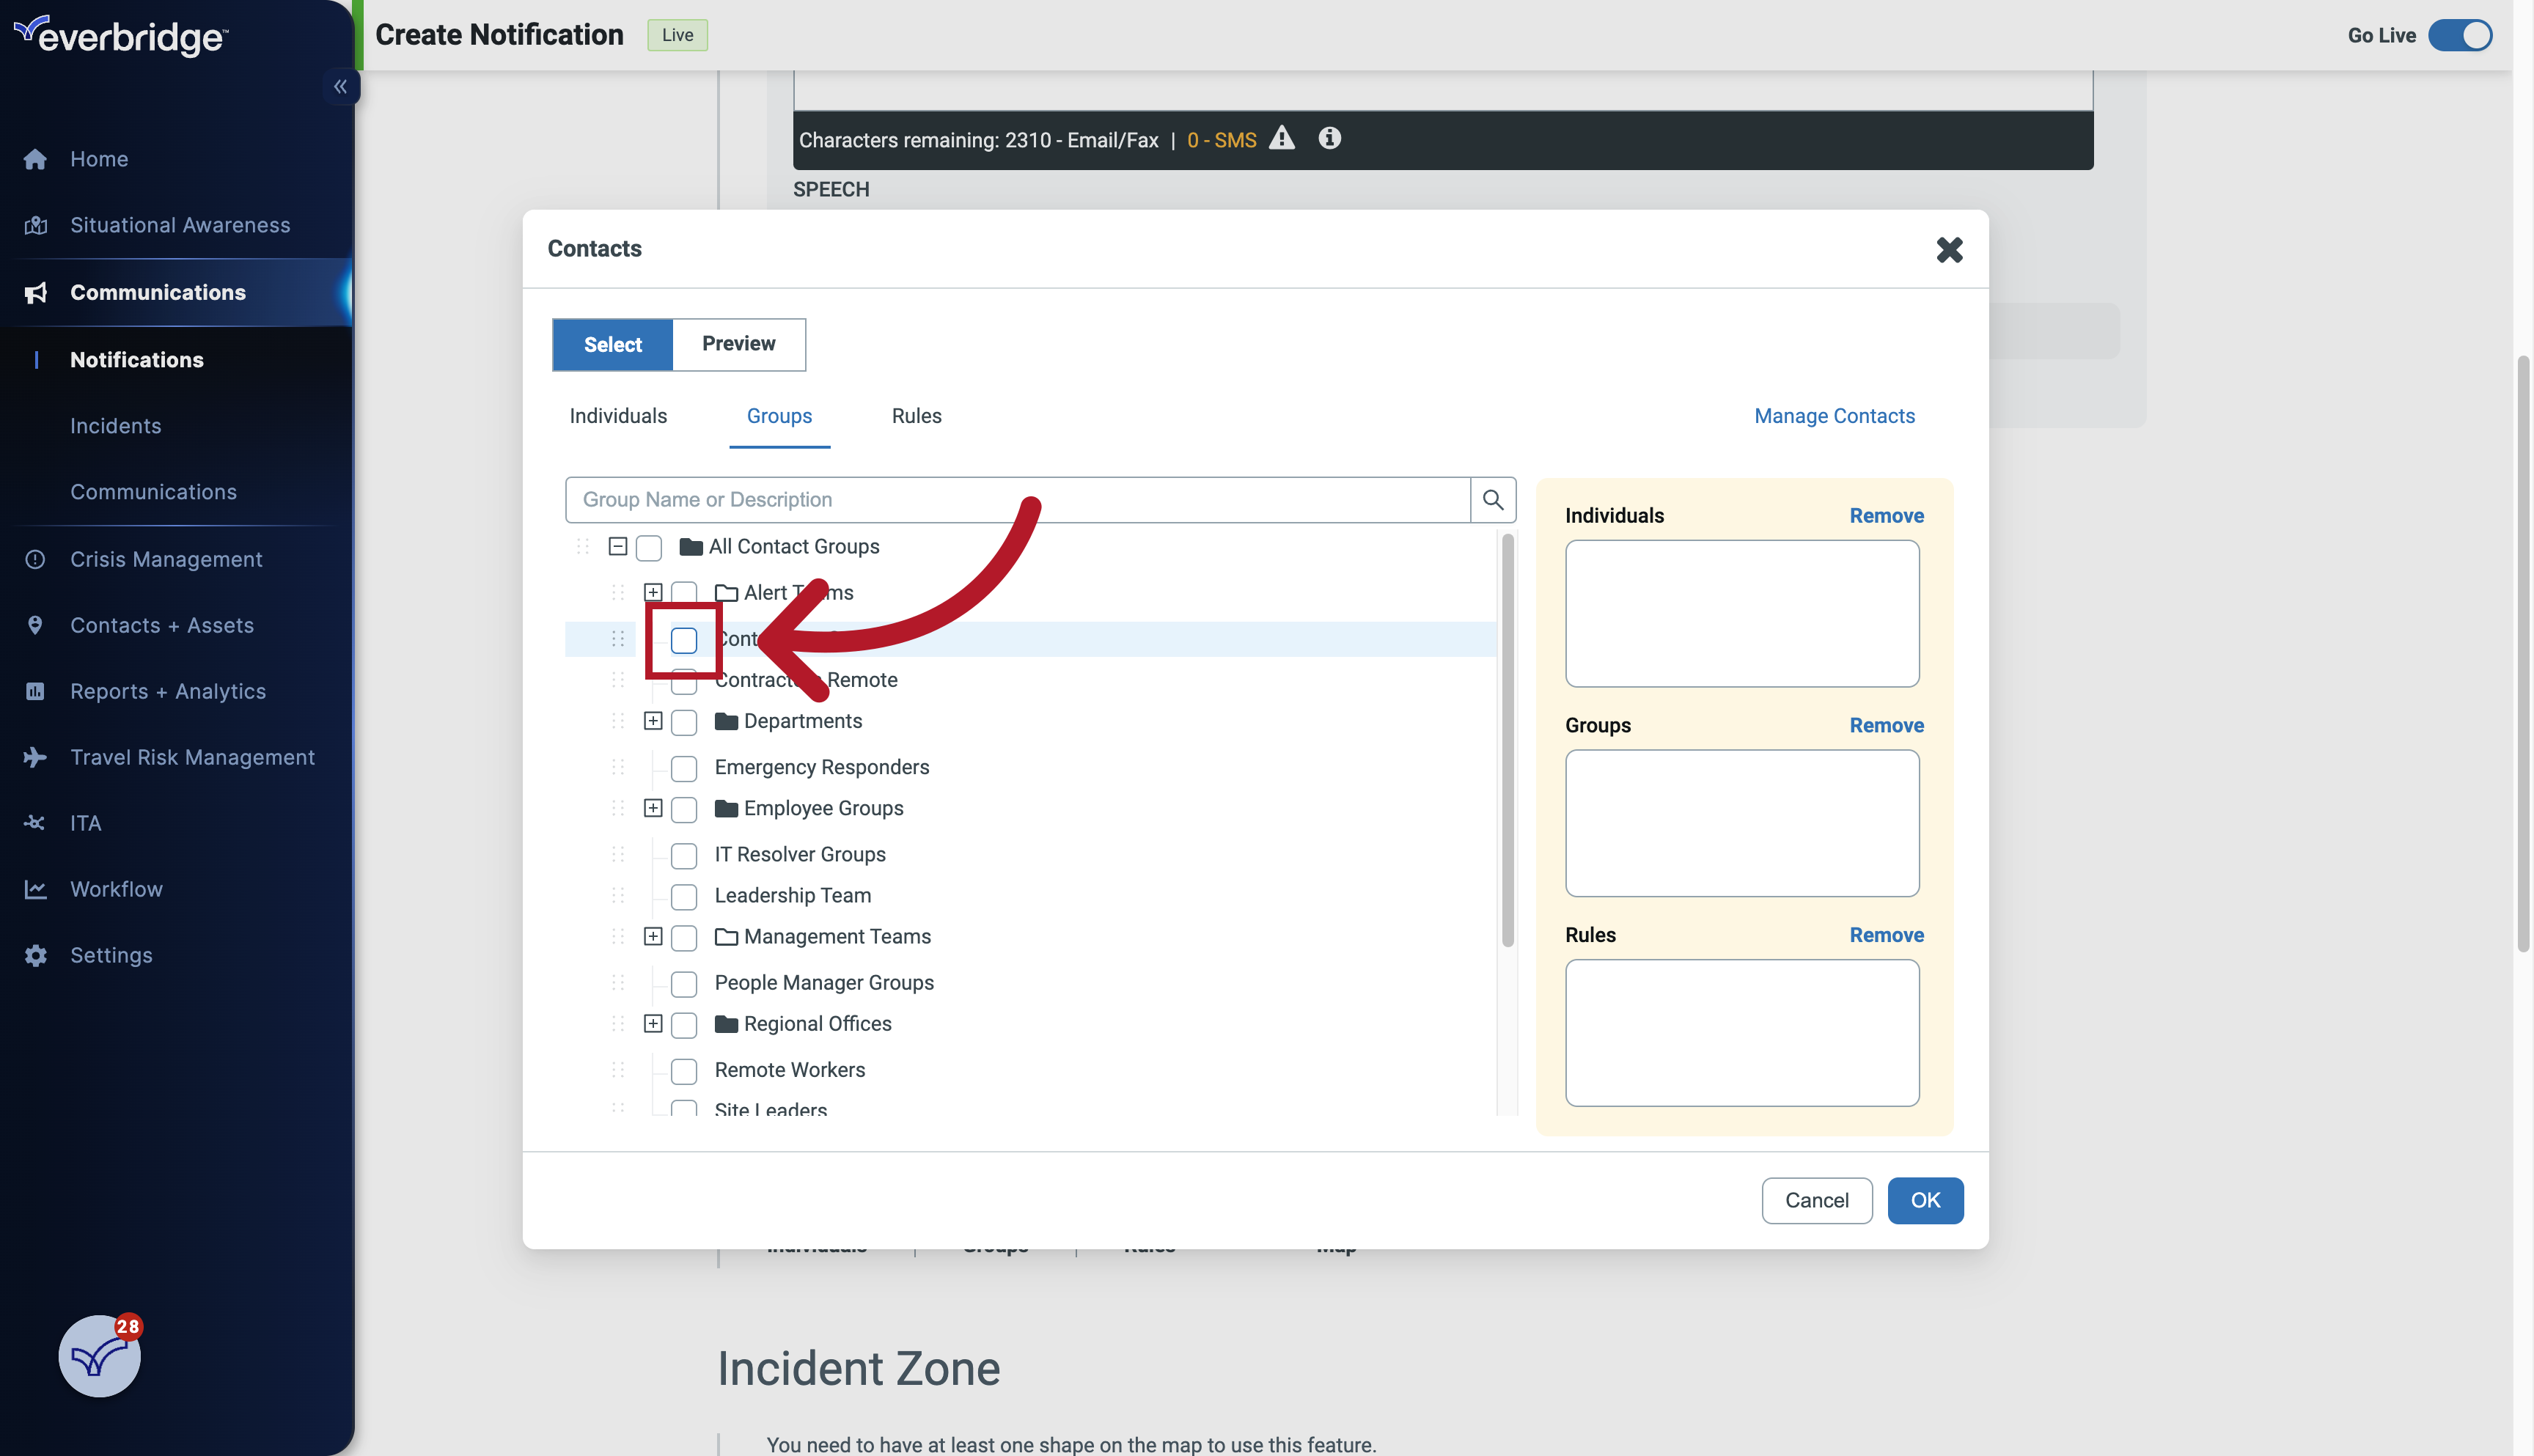
19. Select Groups
Select the "OK" option.
20. Notification Settings
When you go further, you'll see that the Settings have already been configured for you by your Administrator.
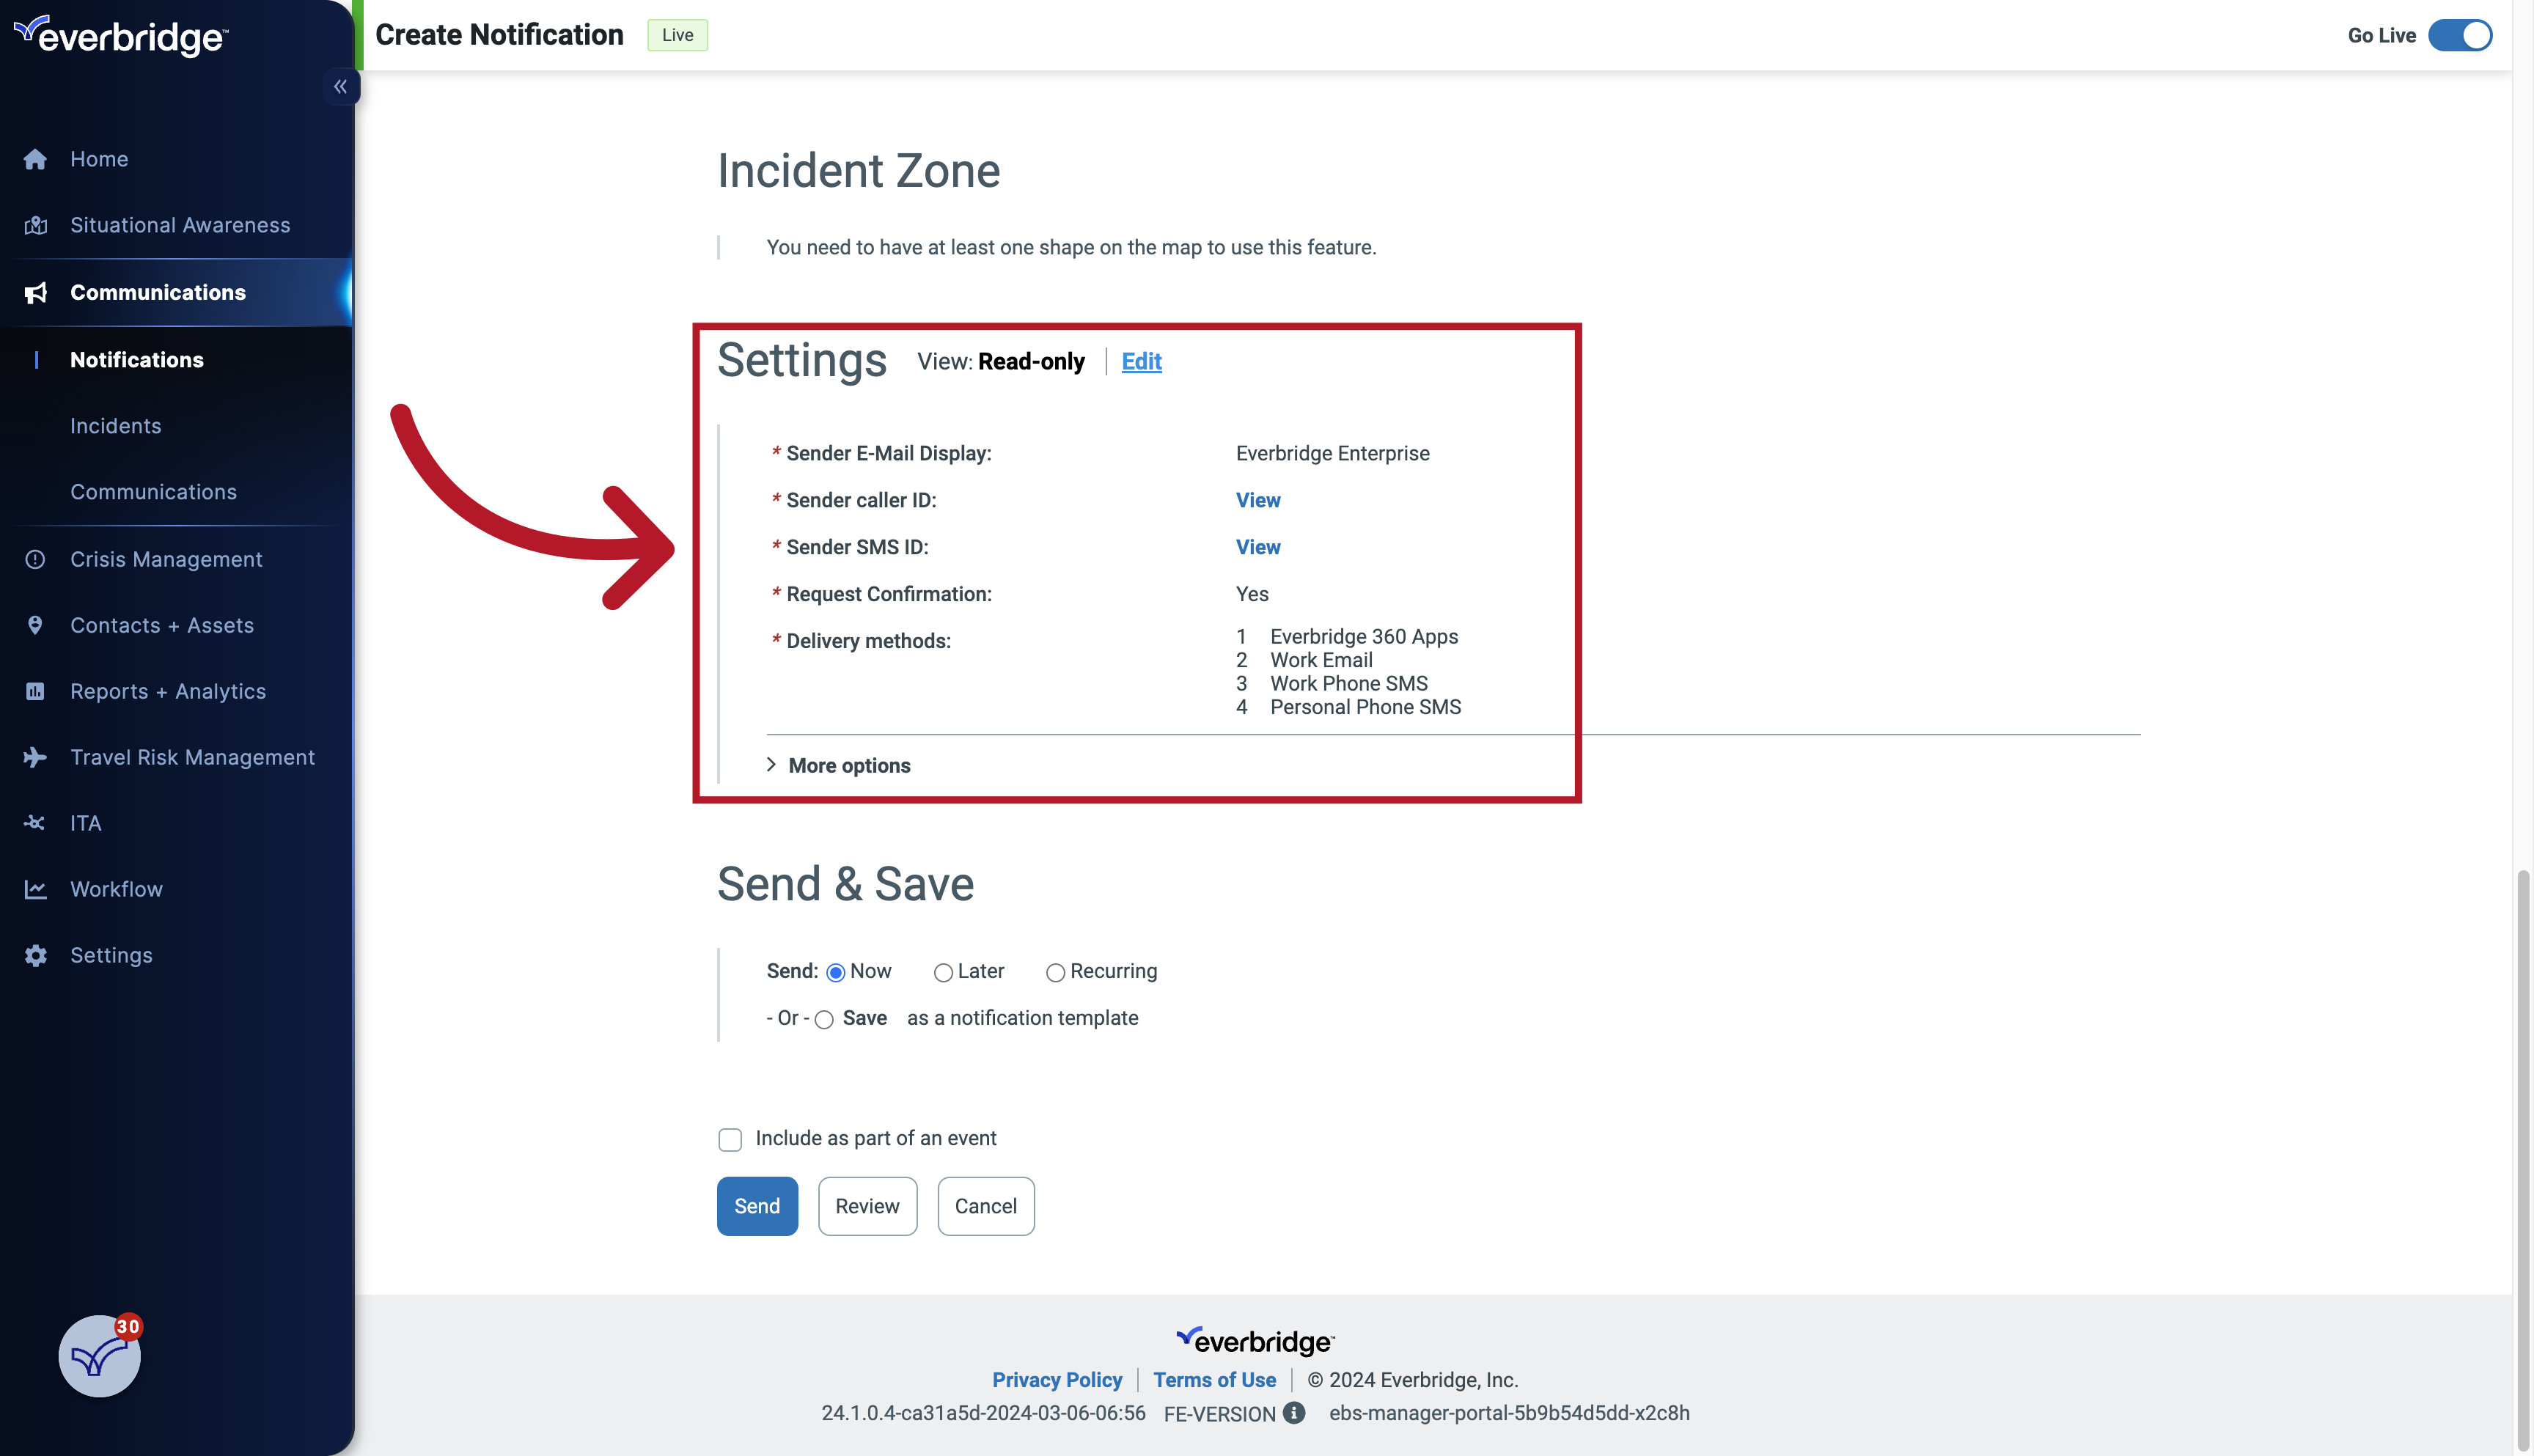
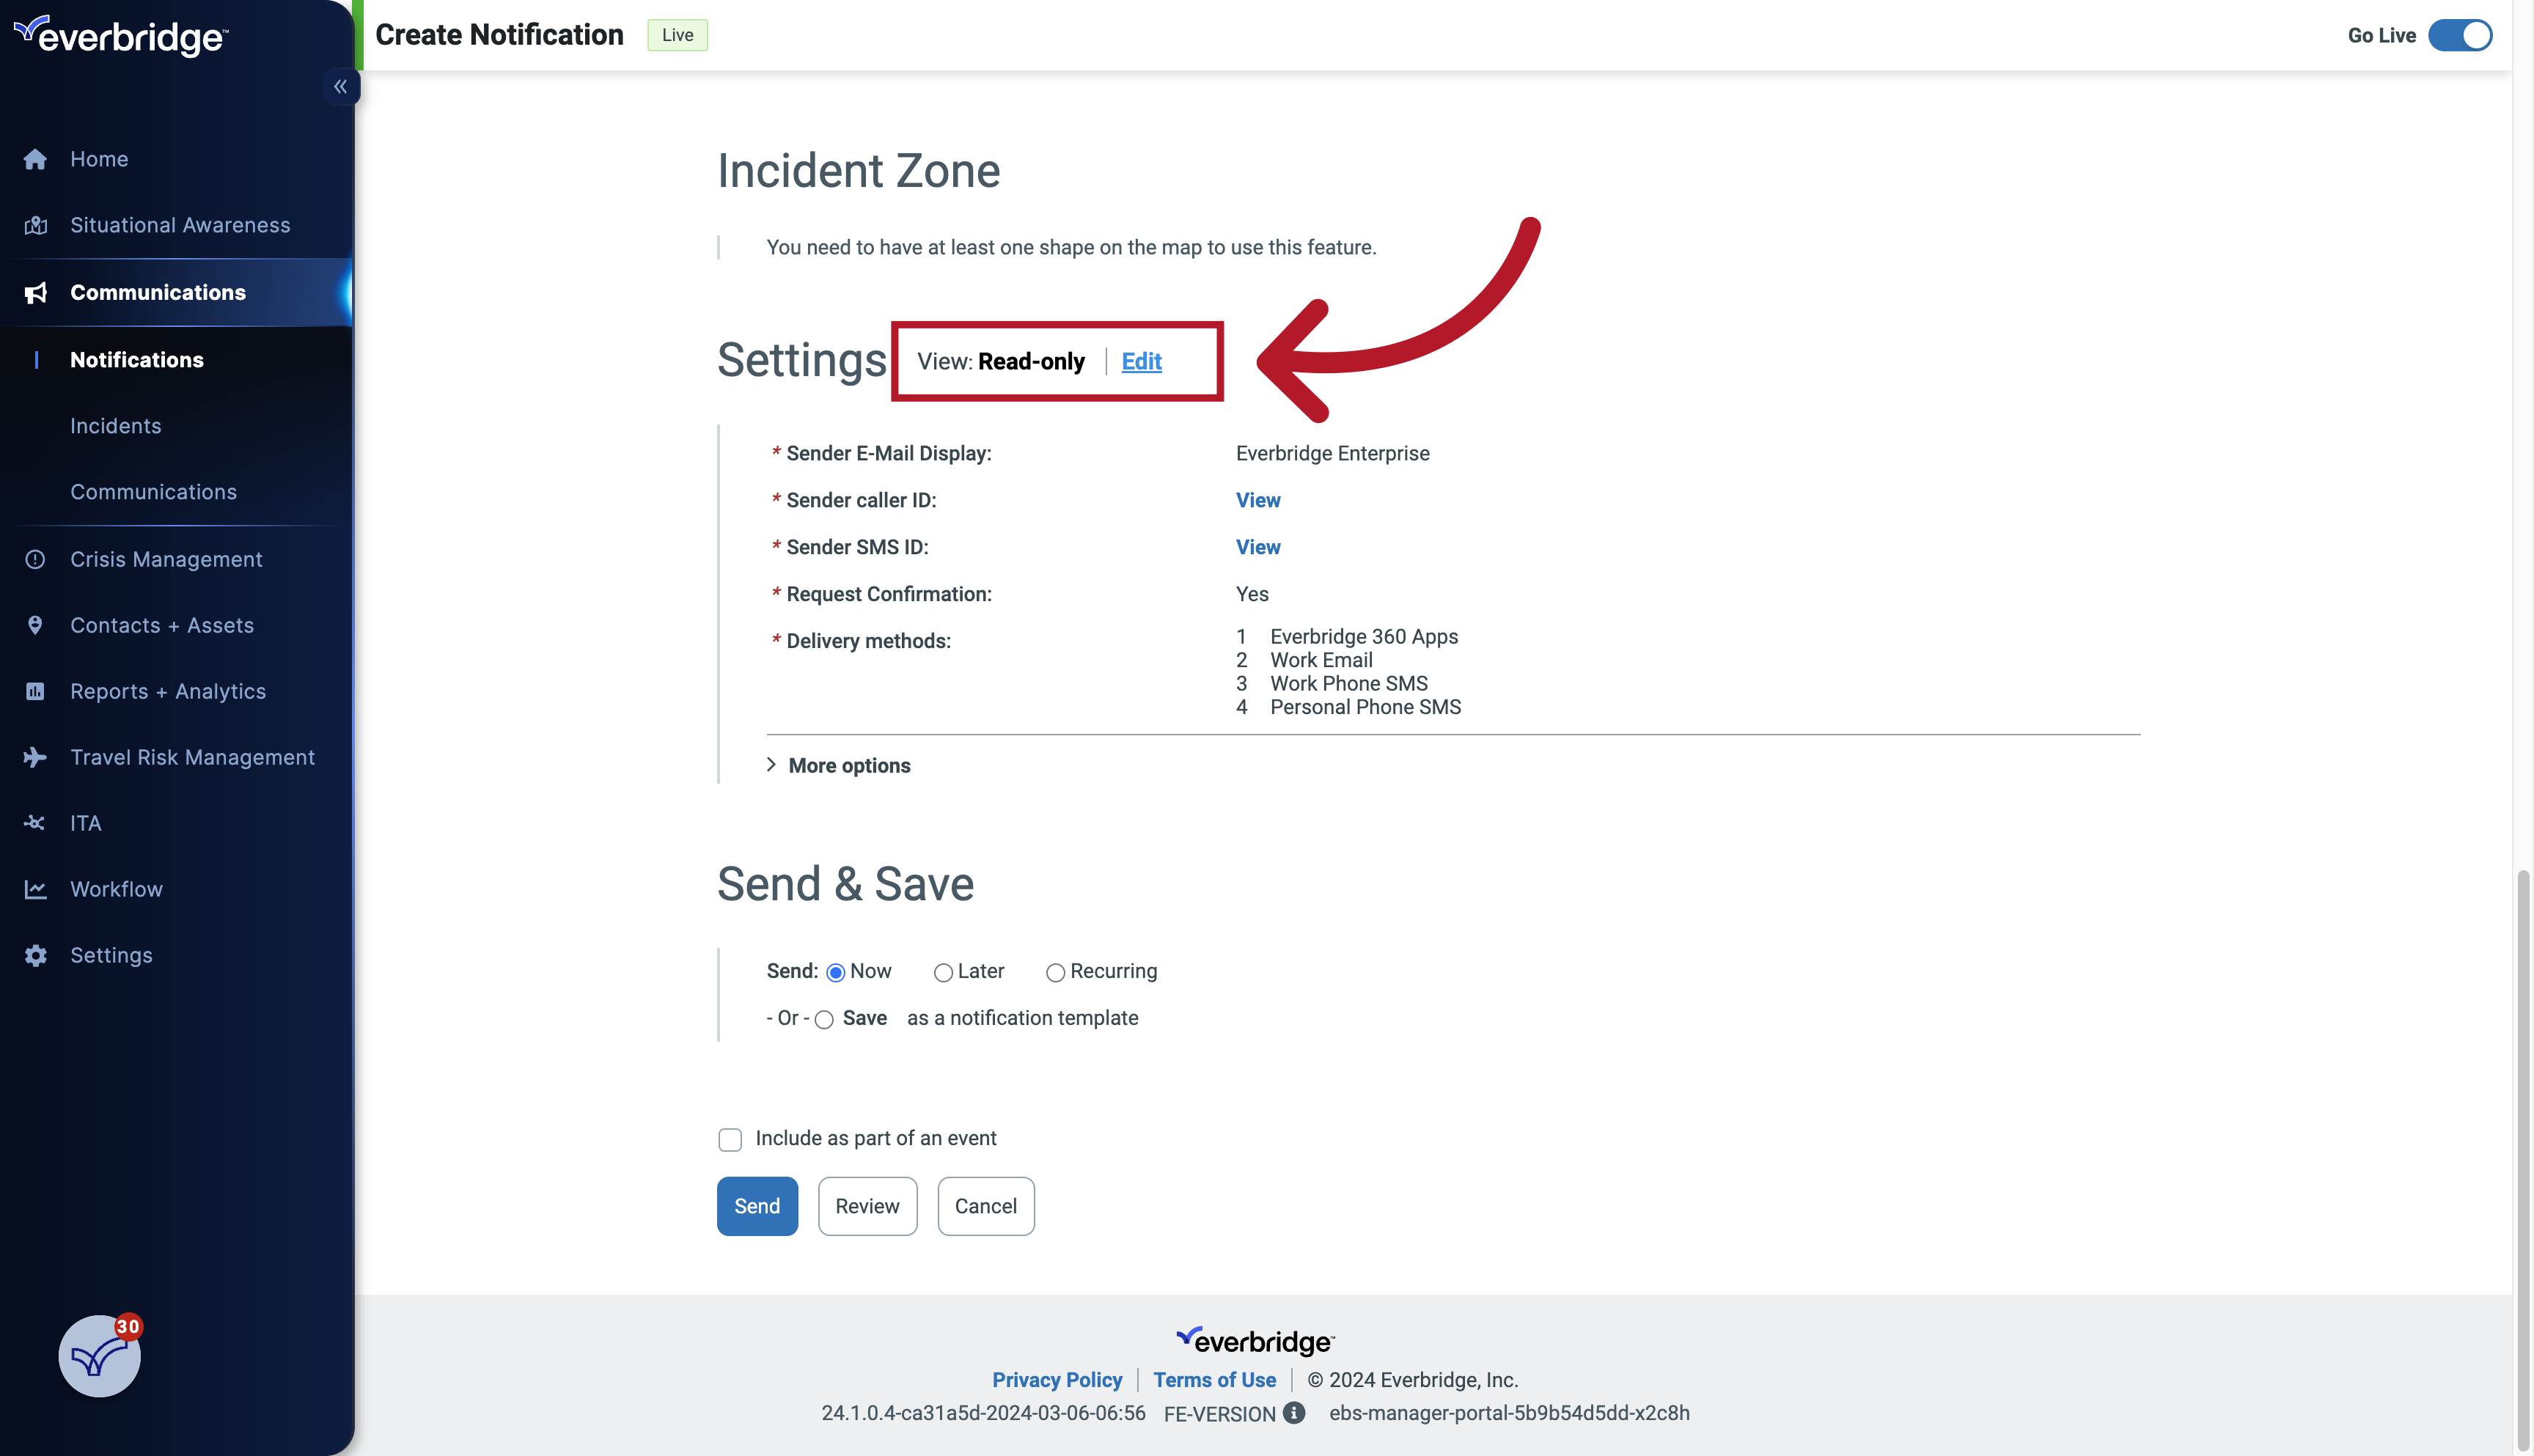
21. Edit Notification Settings
However, you can edit them if need be to best fit your Notification.
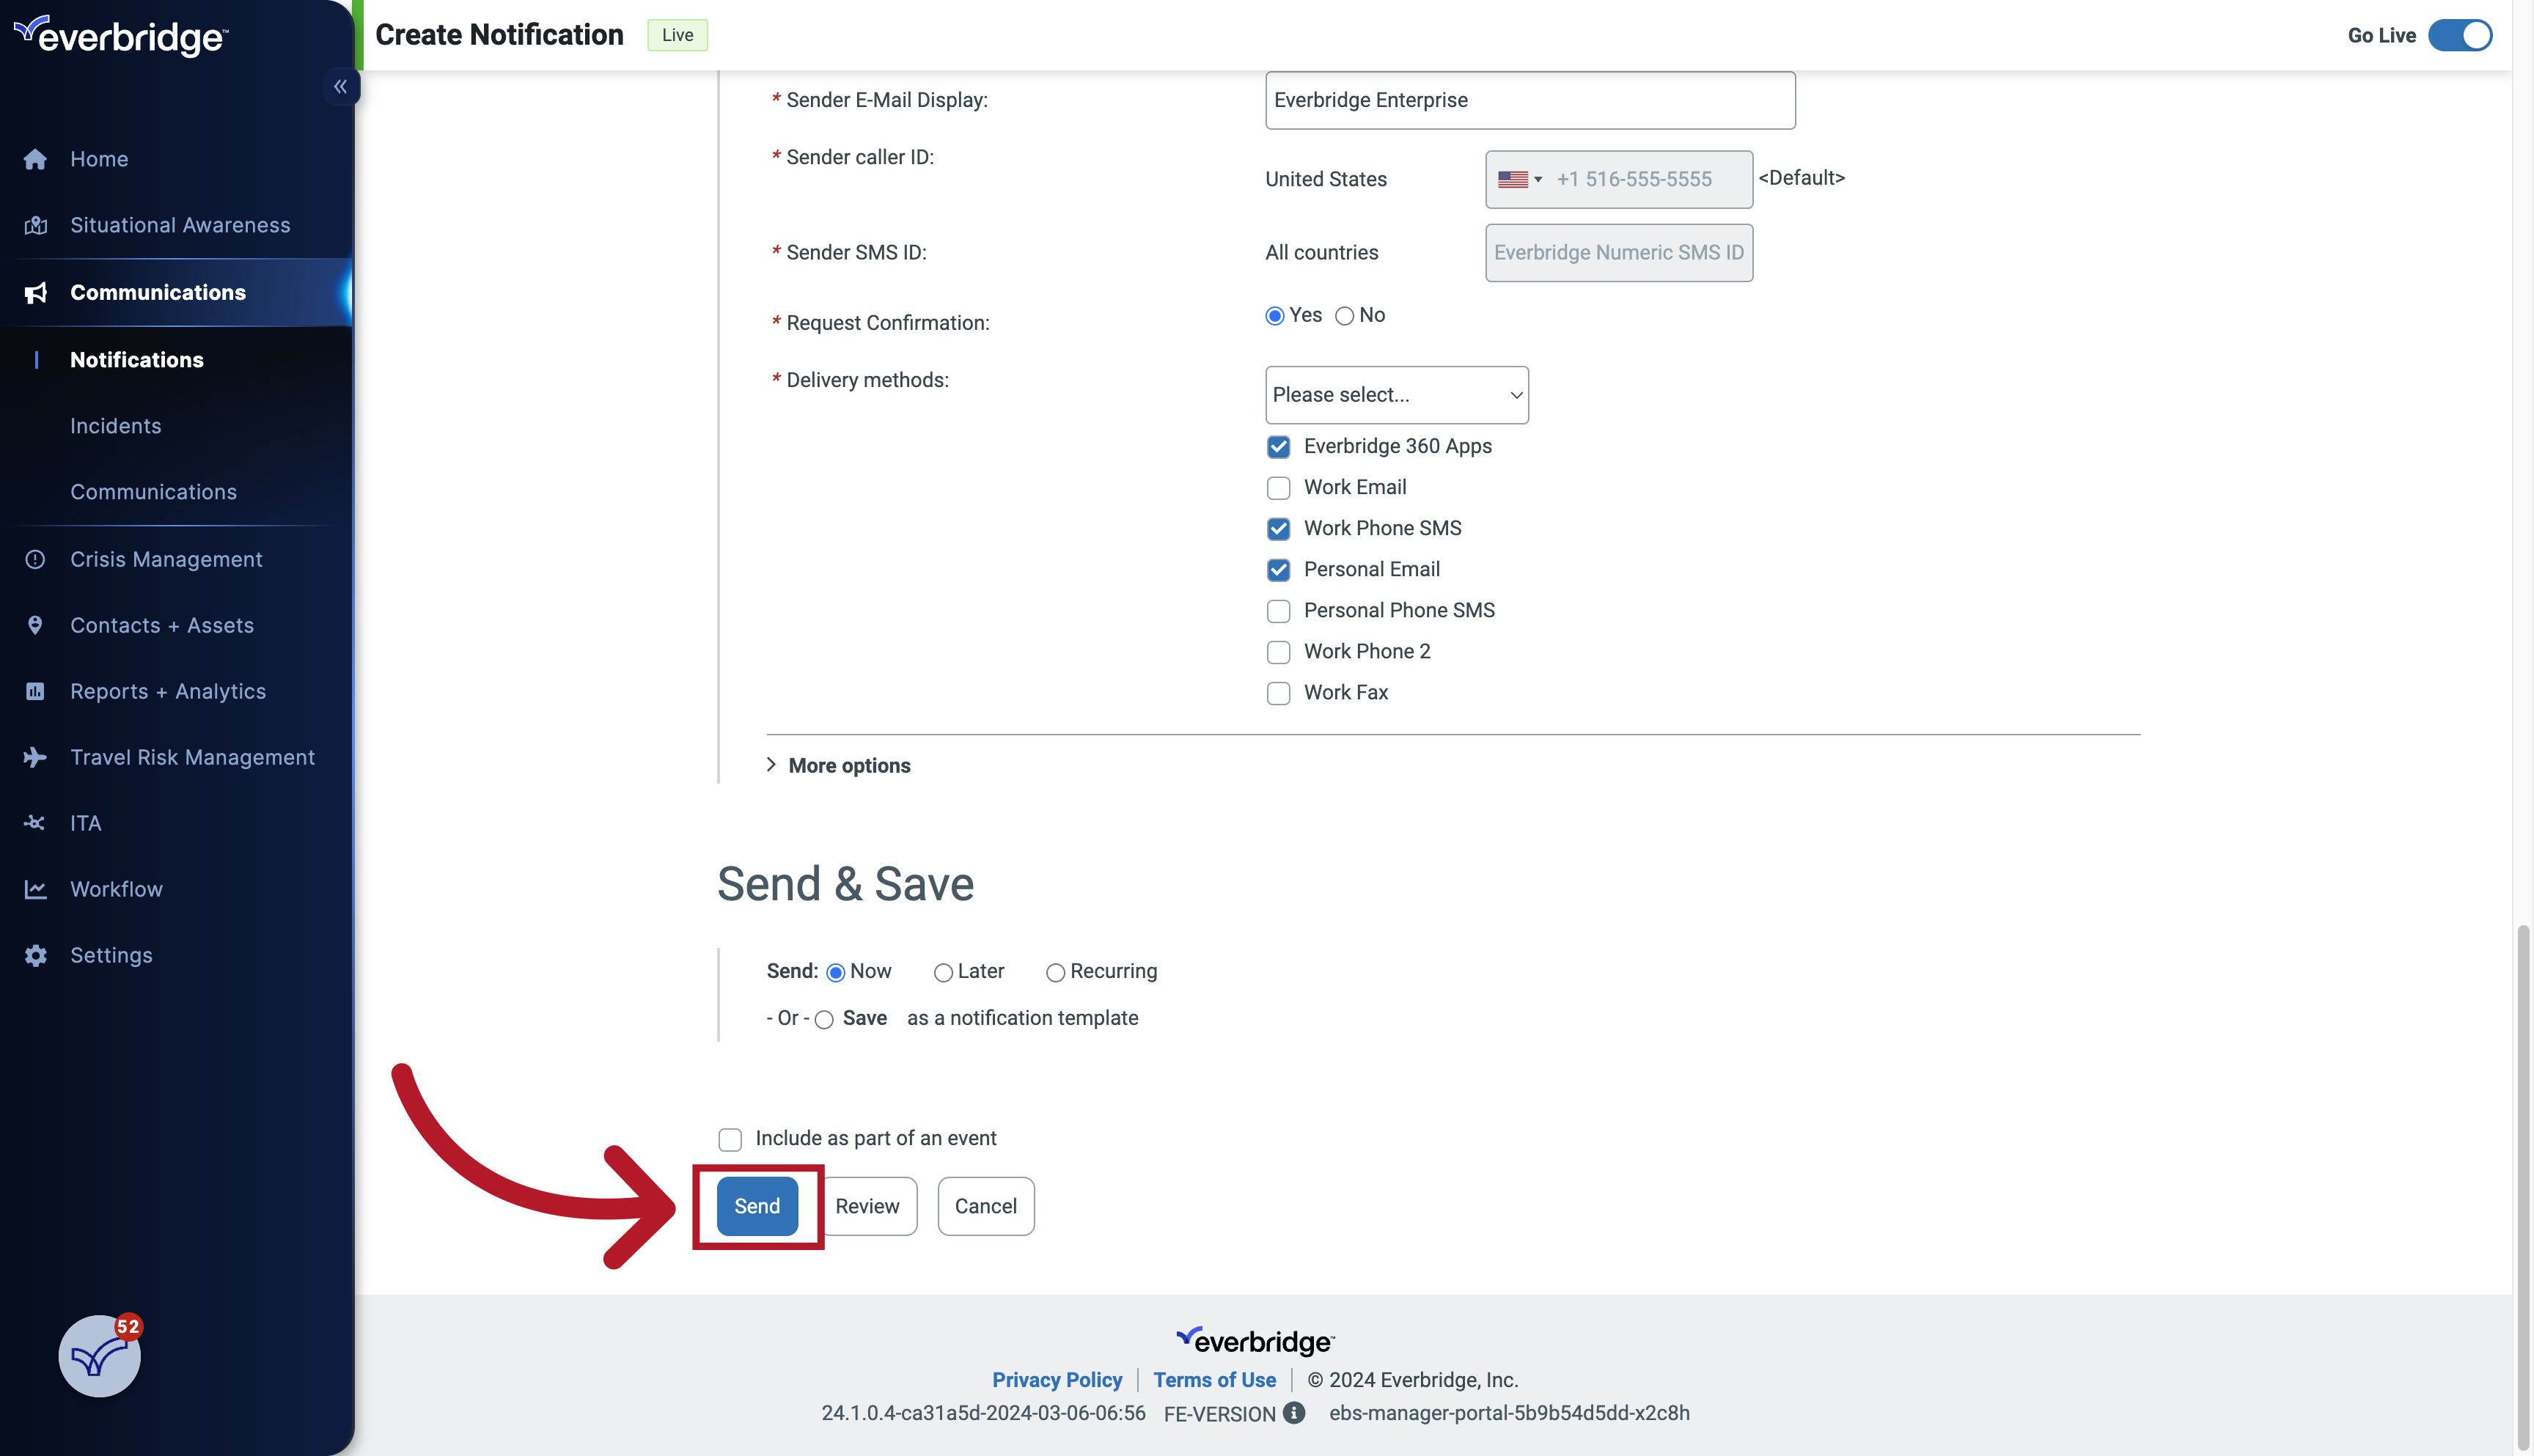
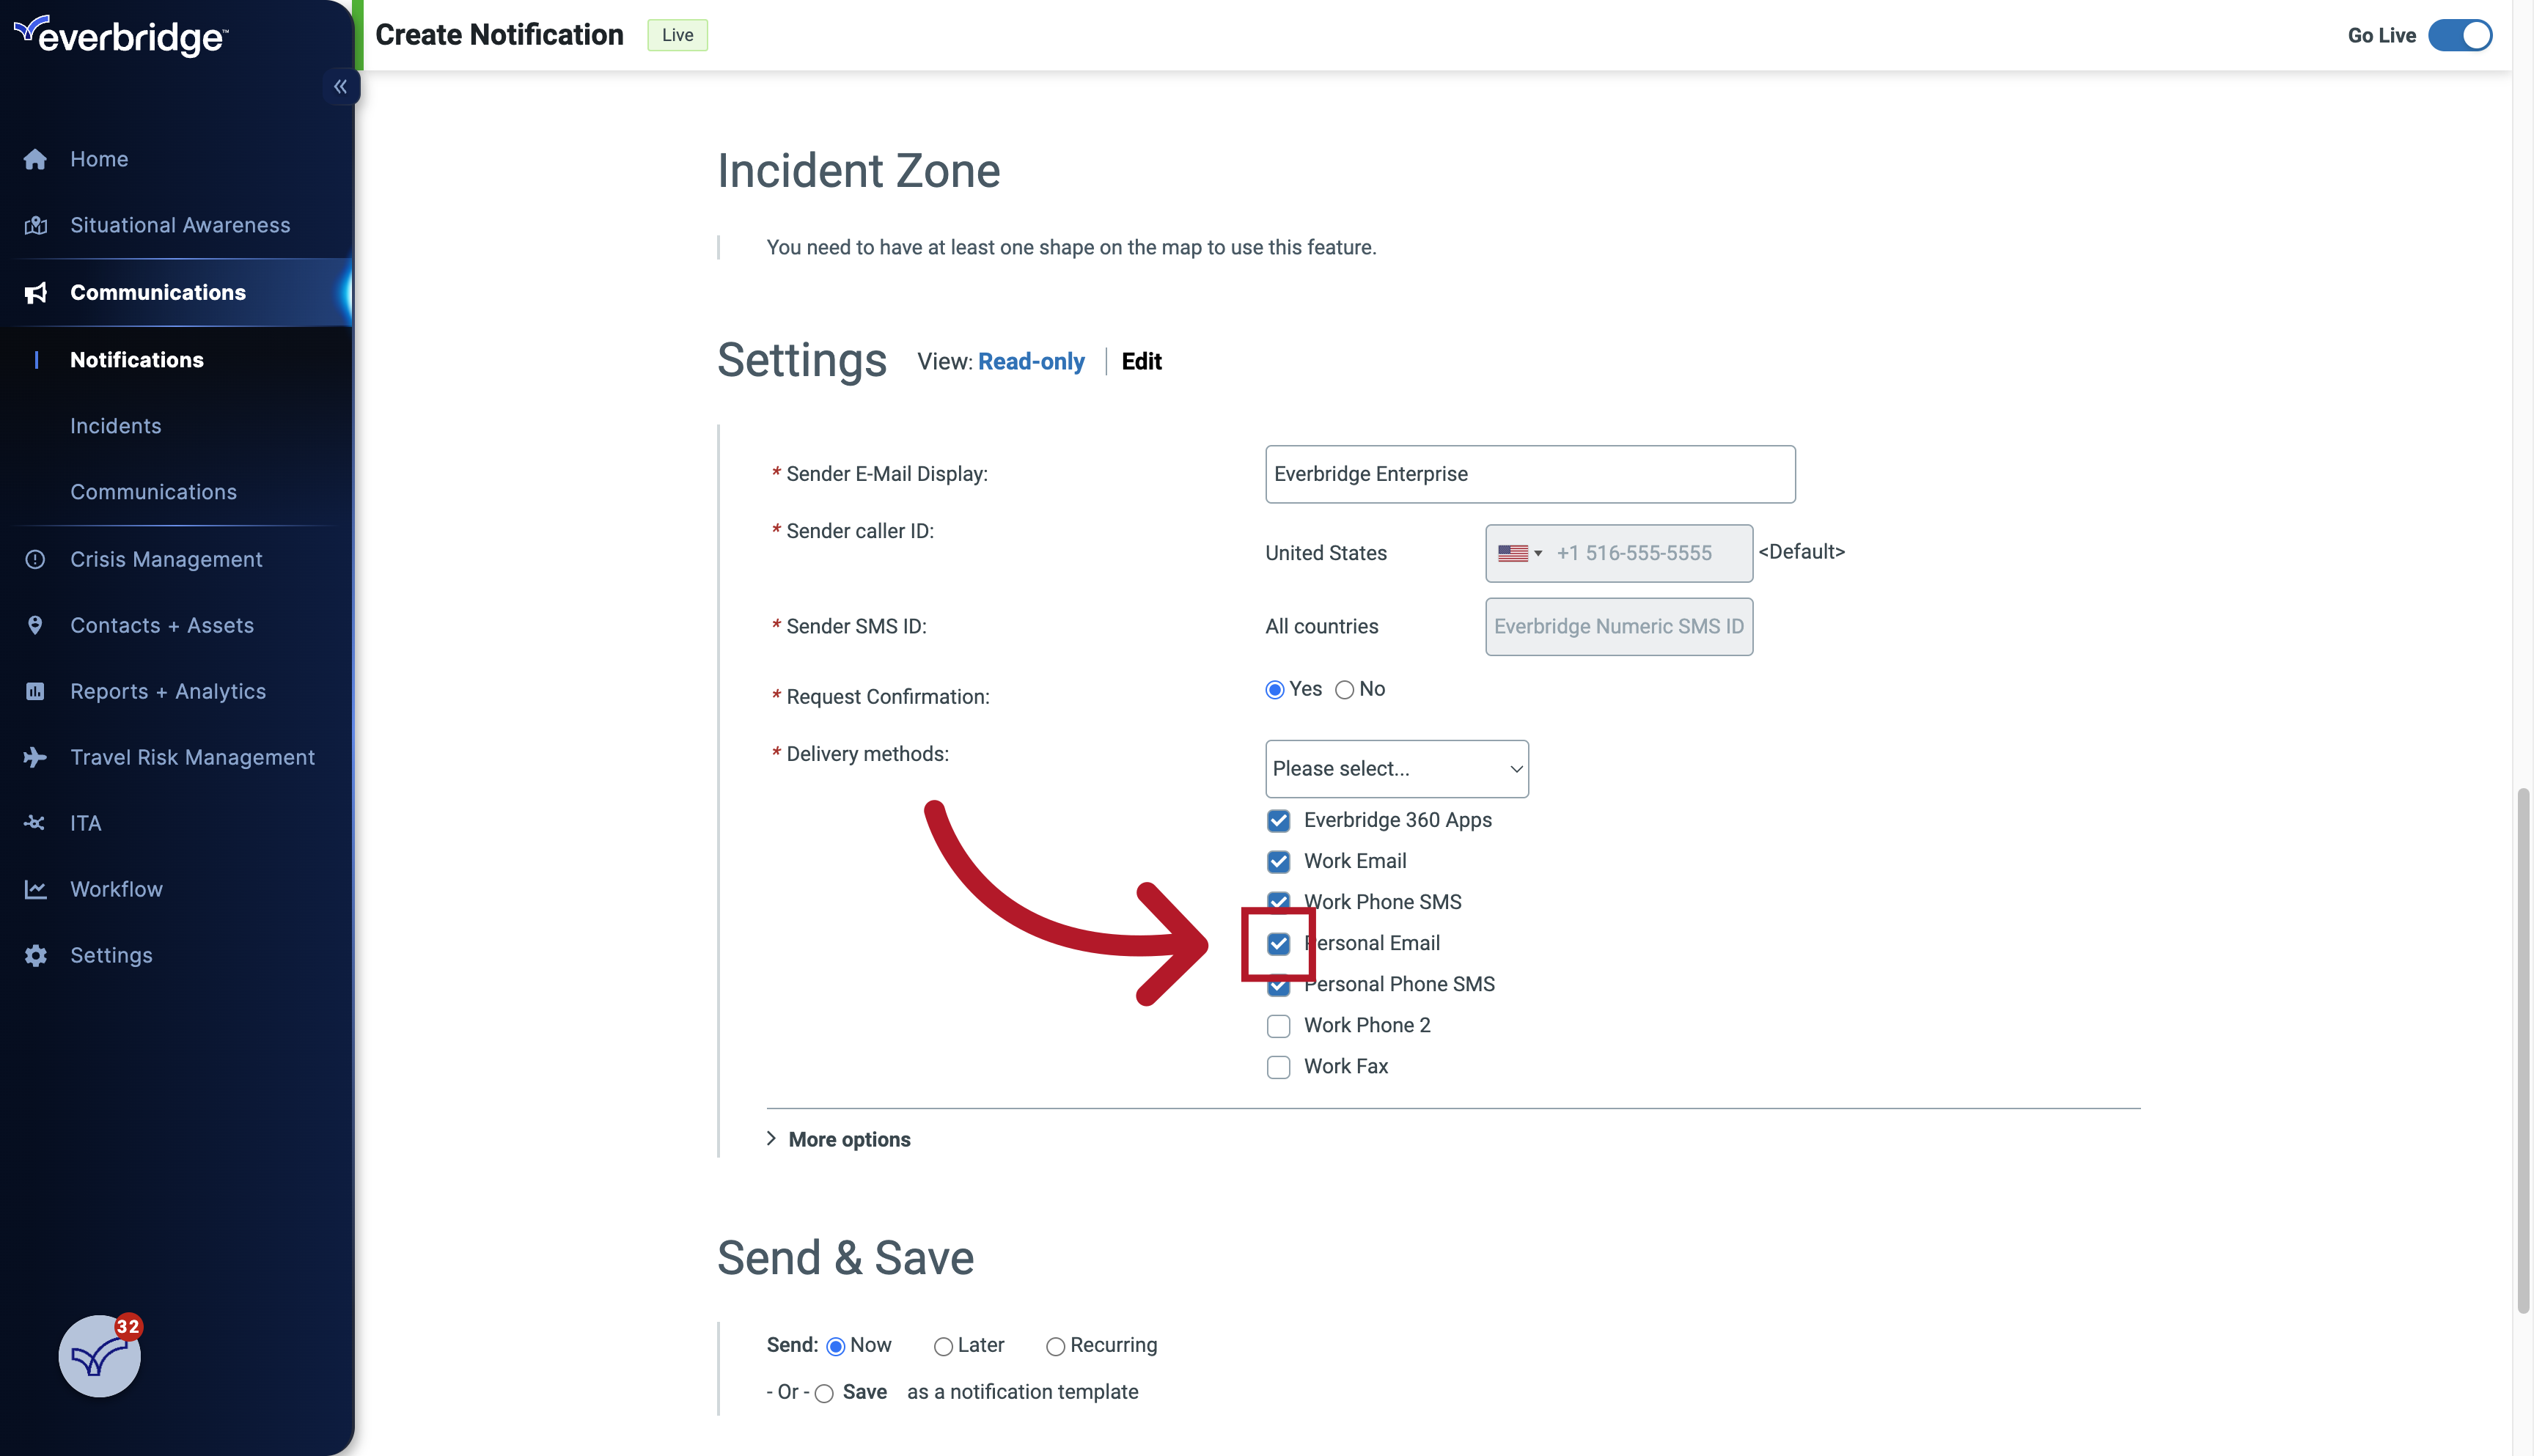
22. Delivery Methods
Select the specified numerical value.
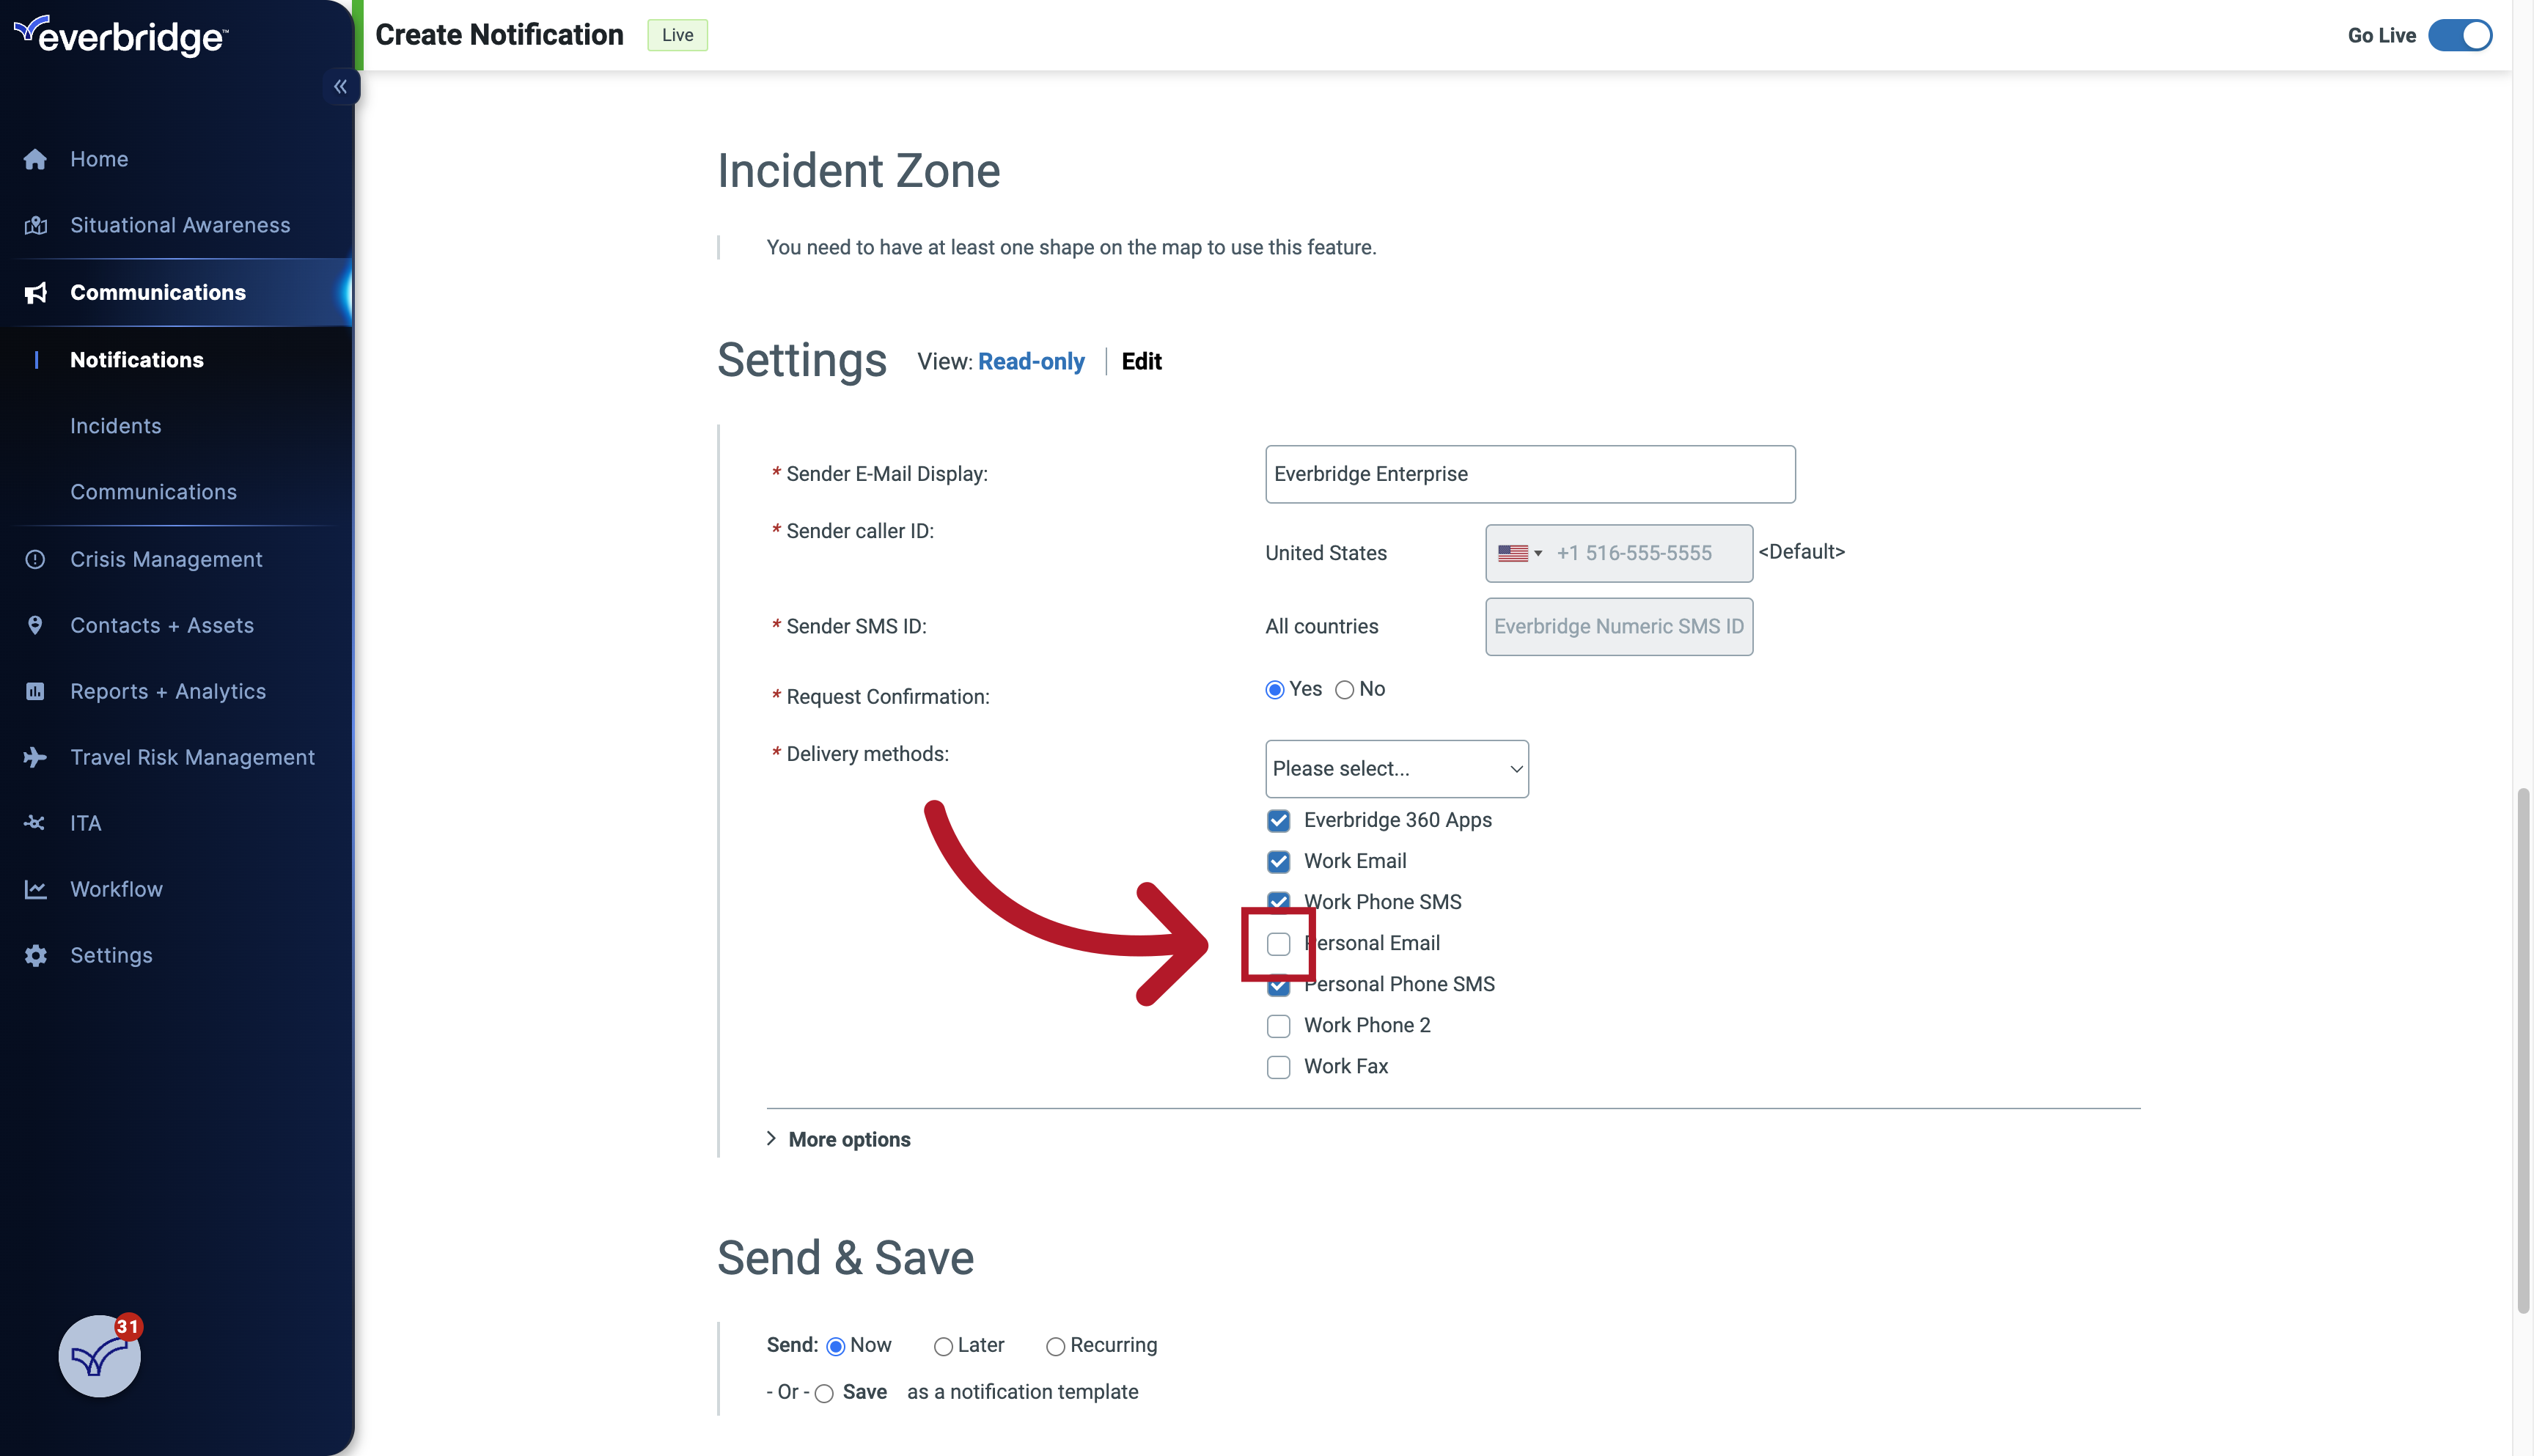
23. Delivery Methods
Enter the specified numerical value.
24. Send & Save
Once done, you'll see an option to either send the Notification Now, Later, or Recurring.
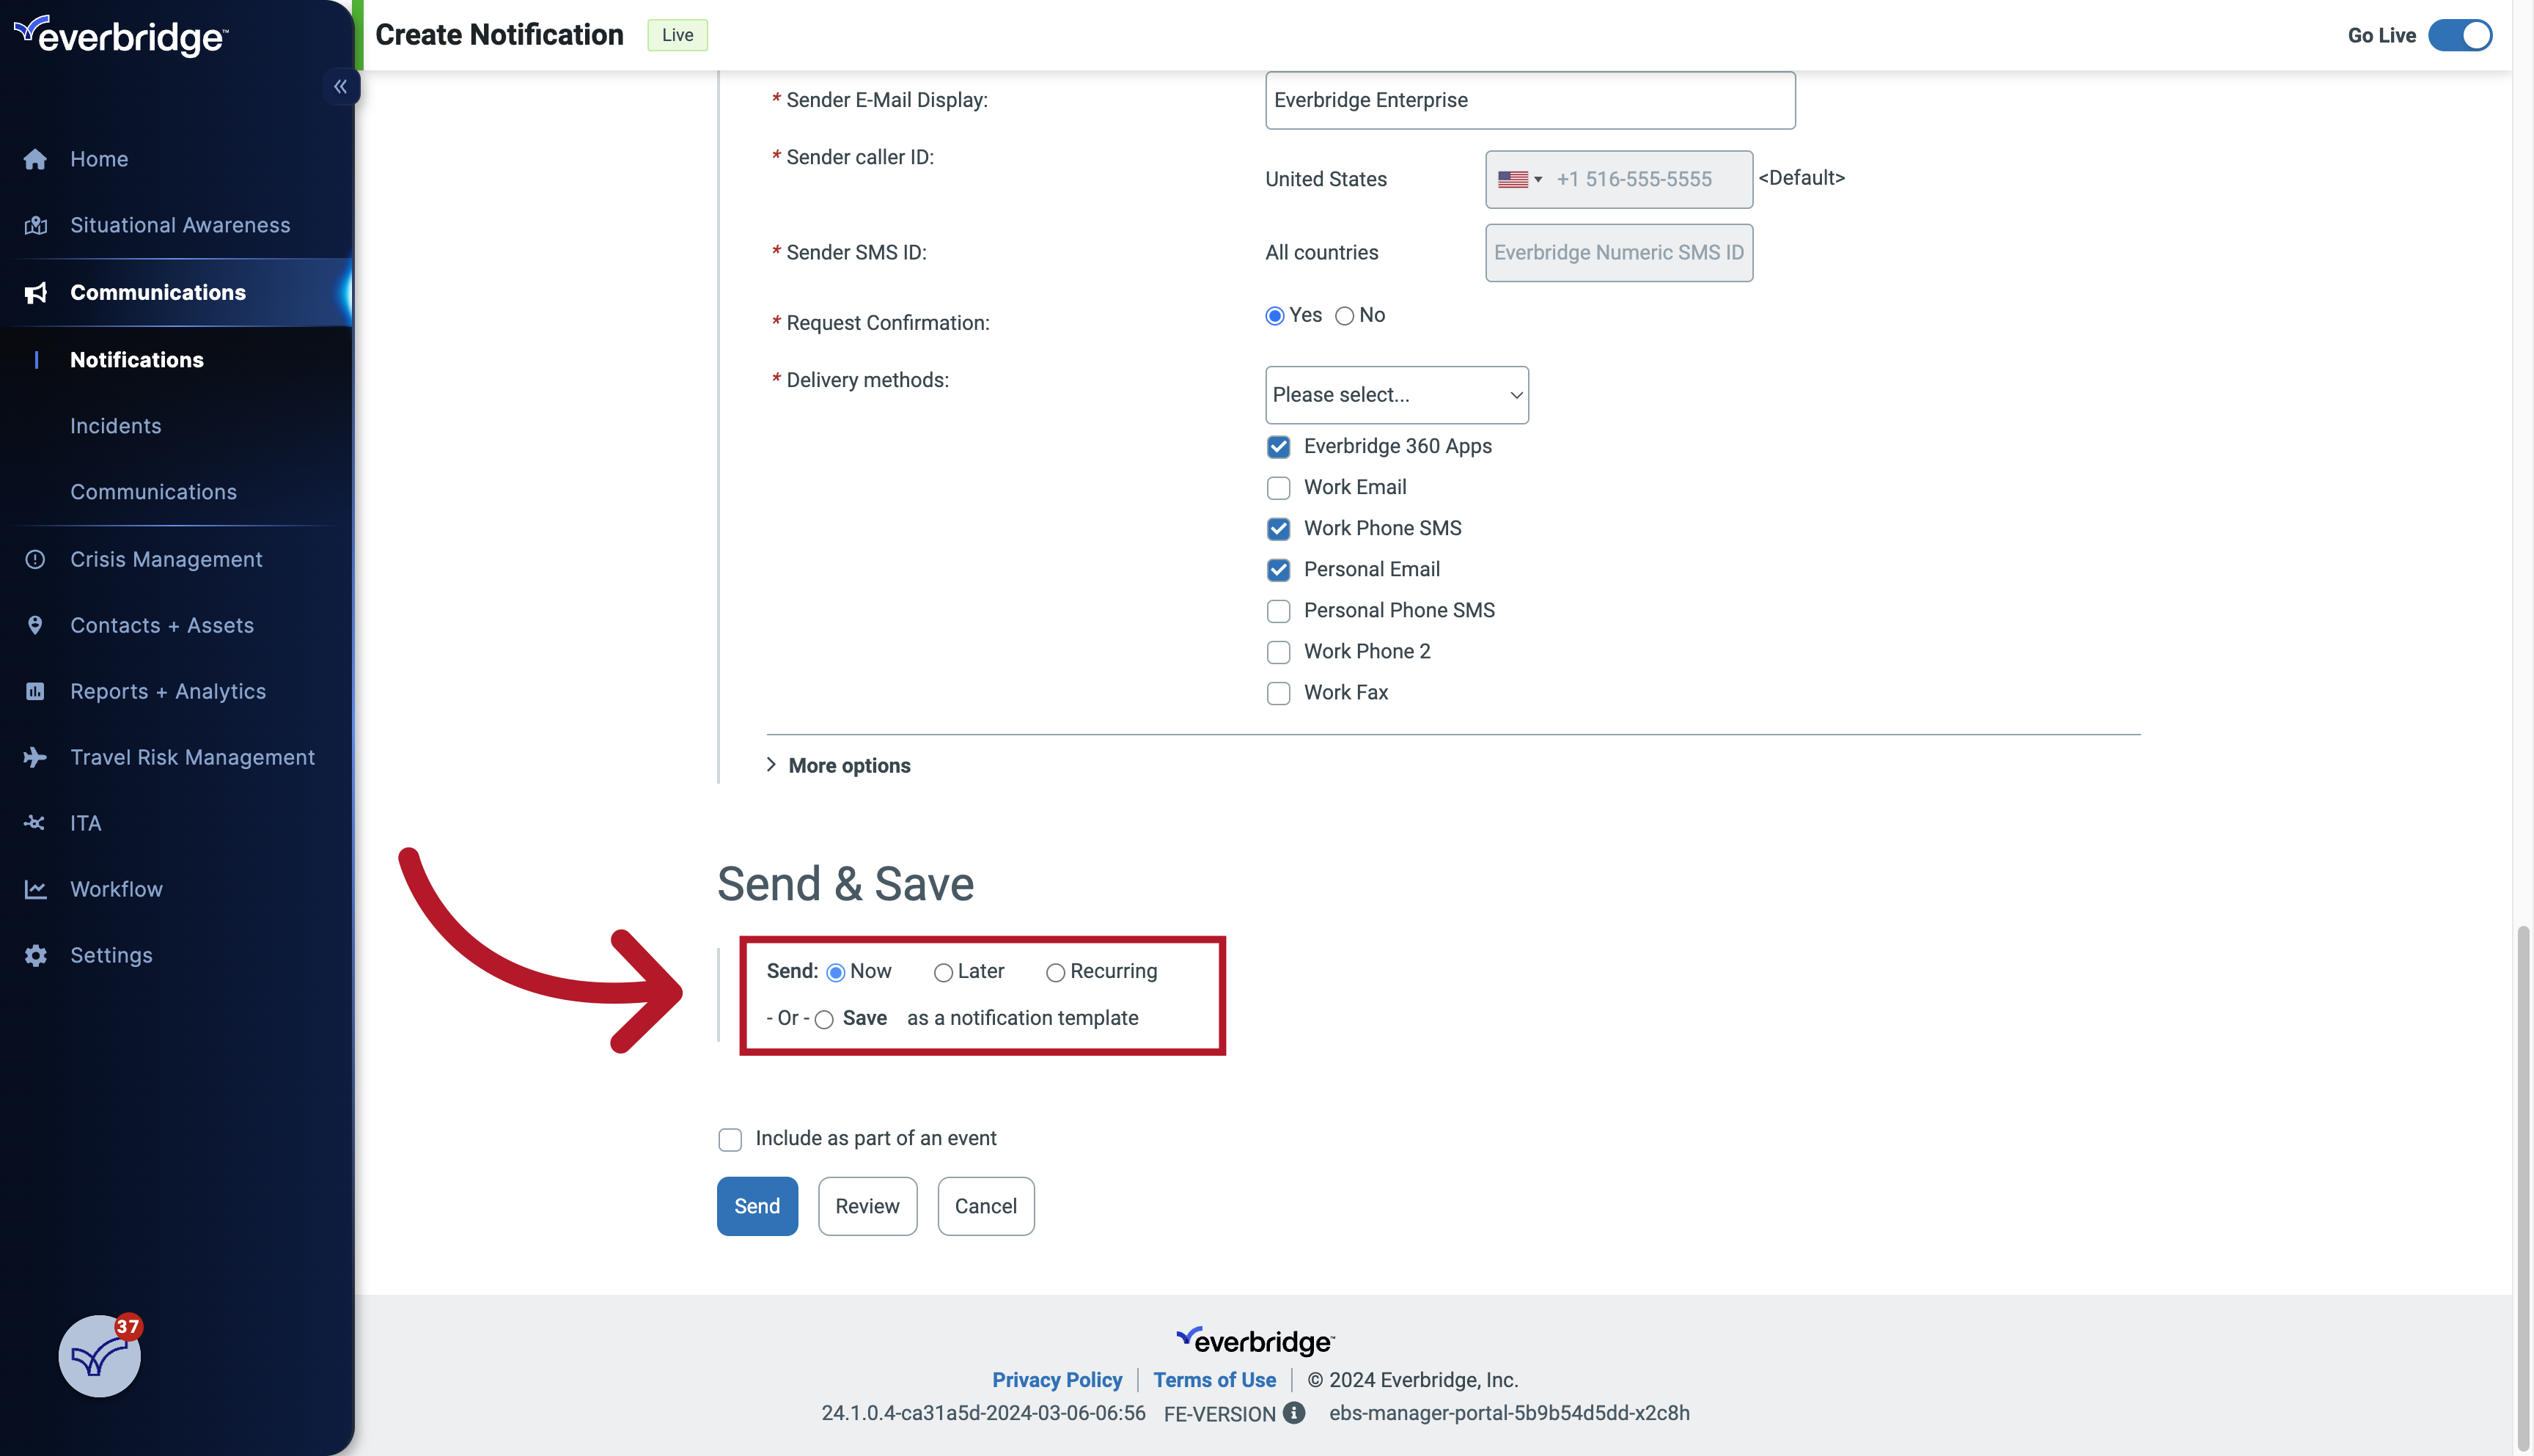
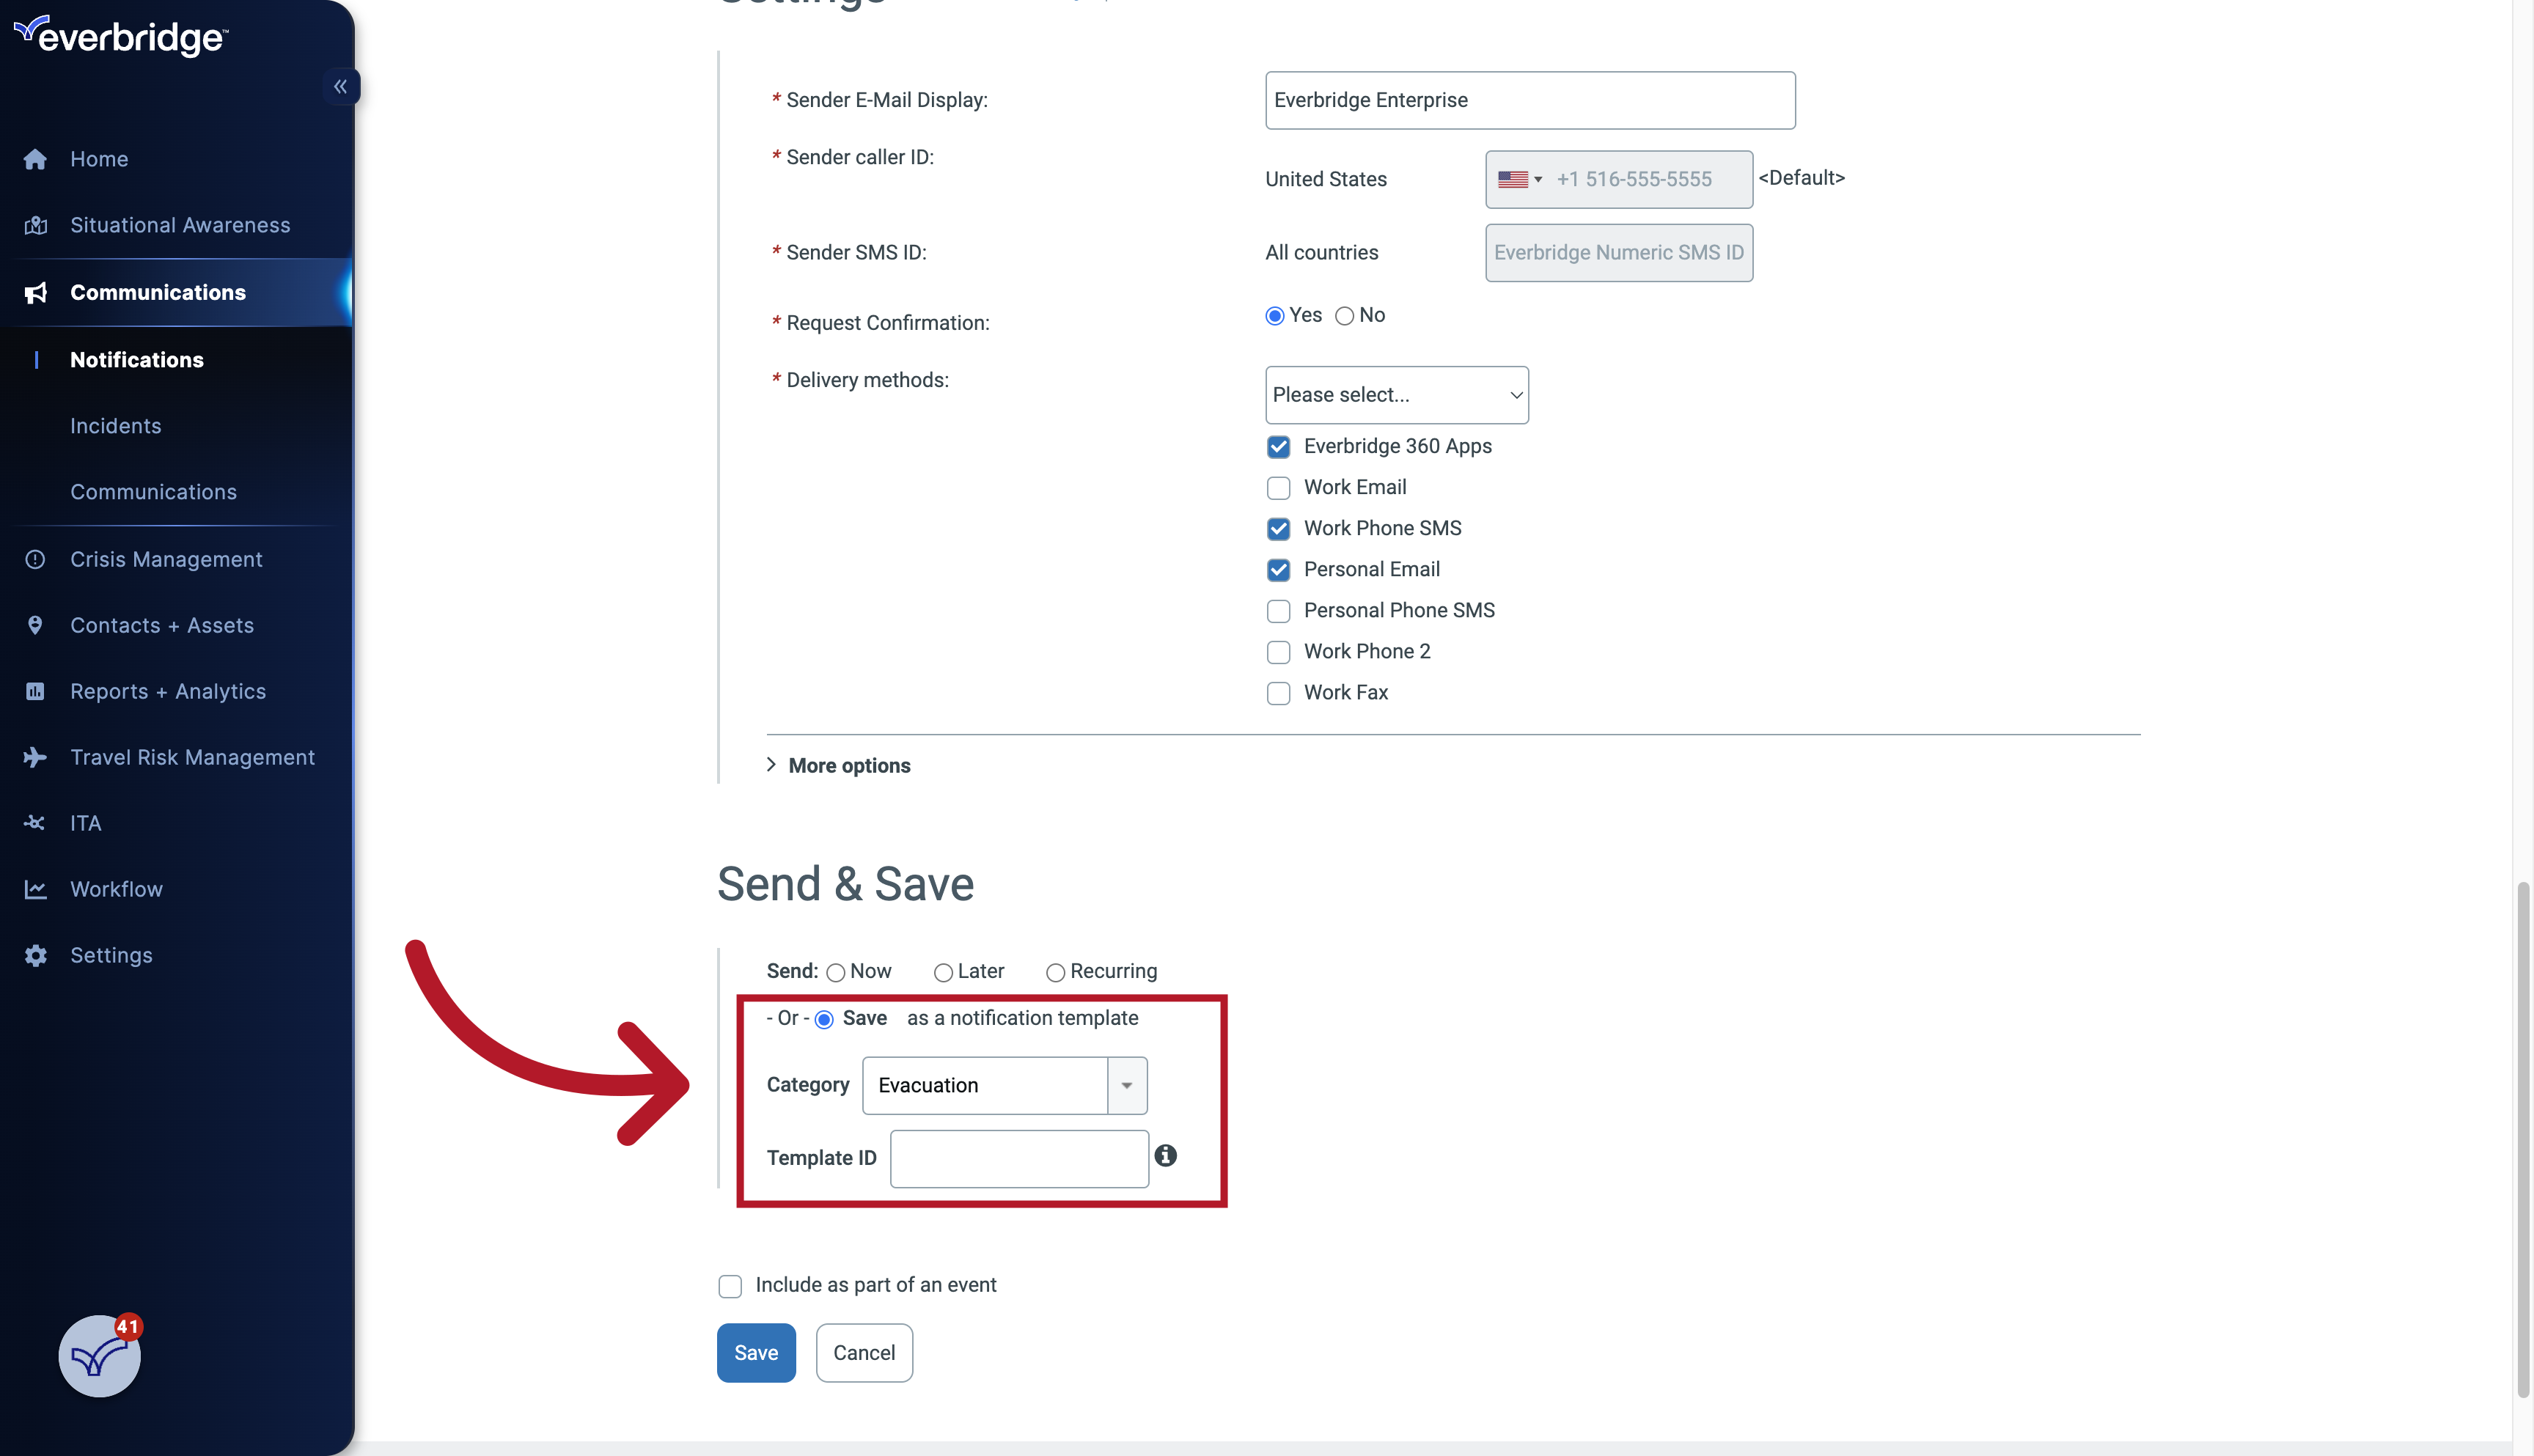
25. Notification Template
Furthermore, you can also save this as a Notification Template.
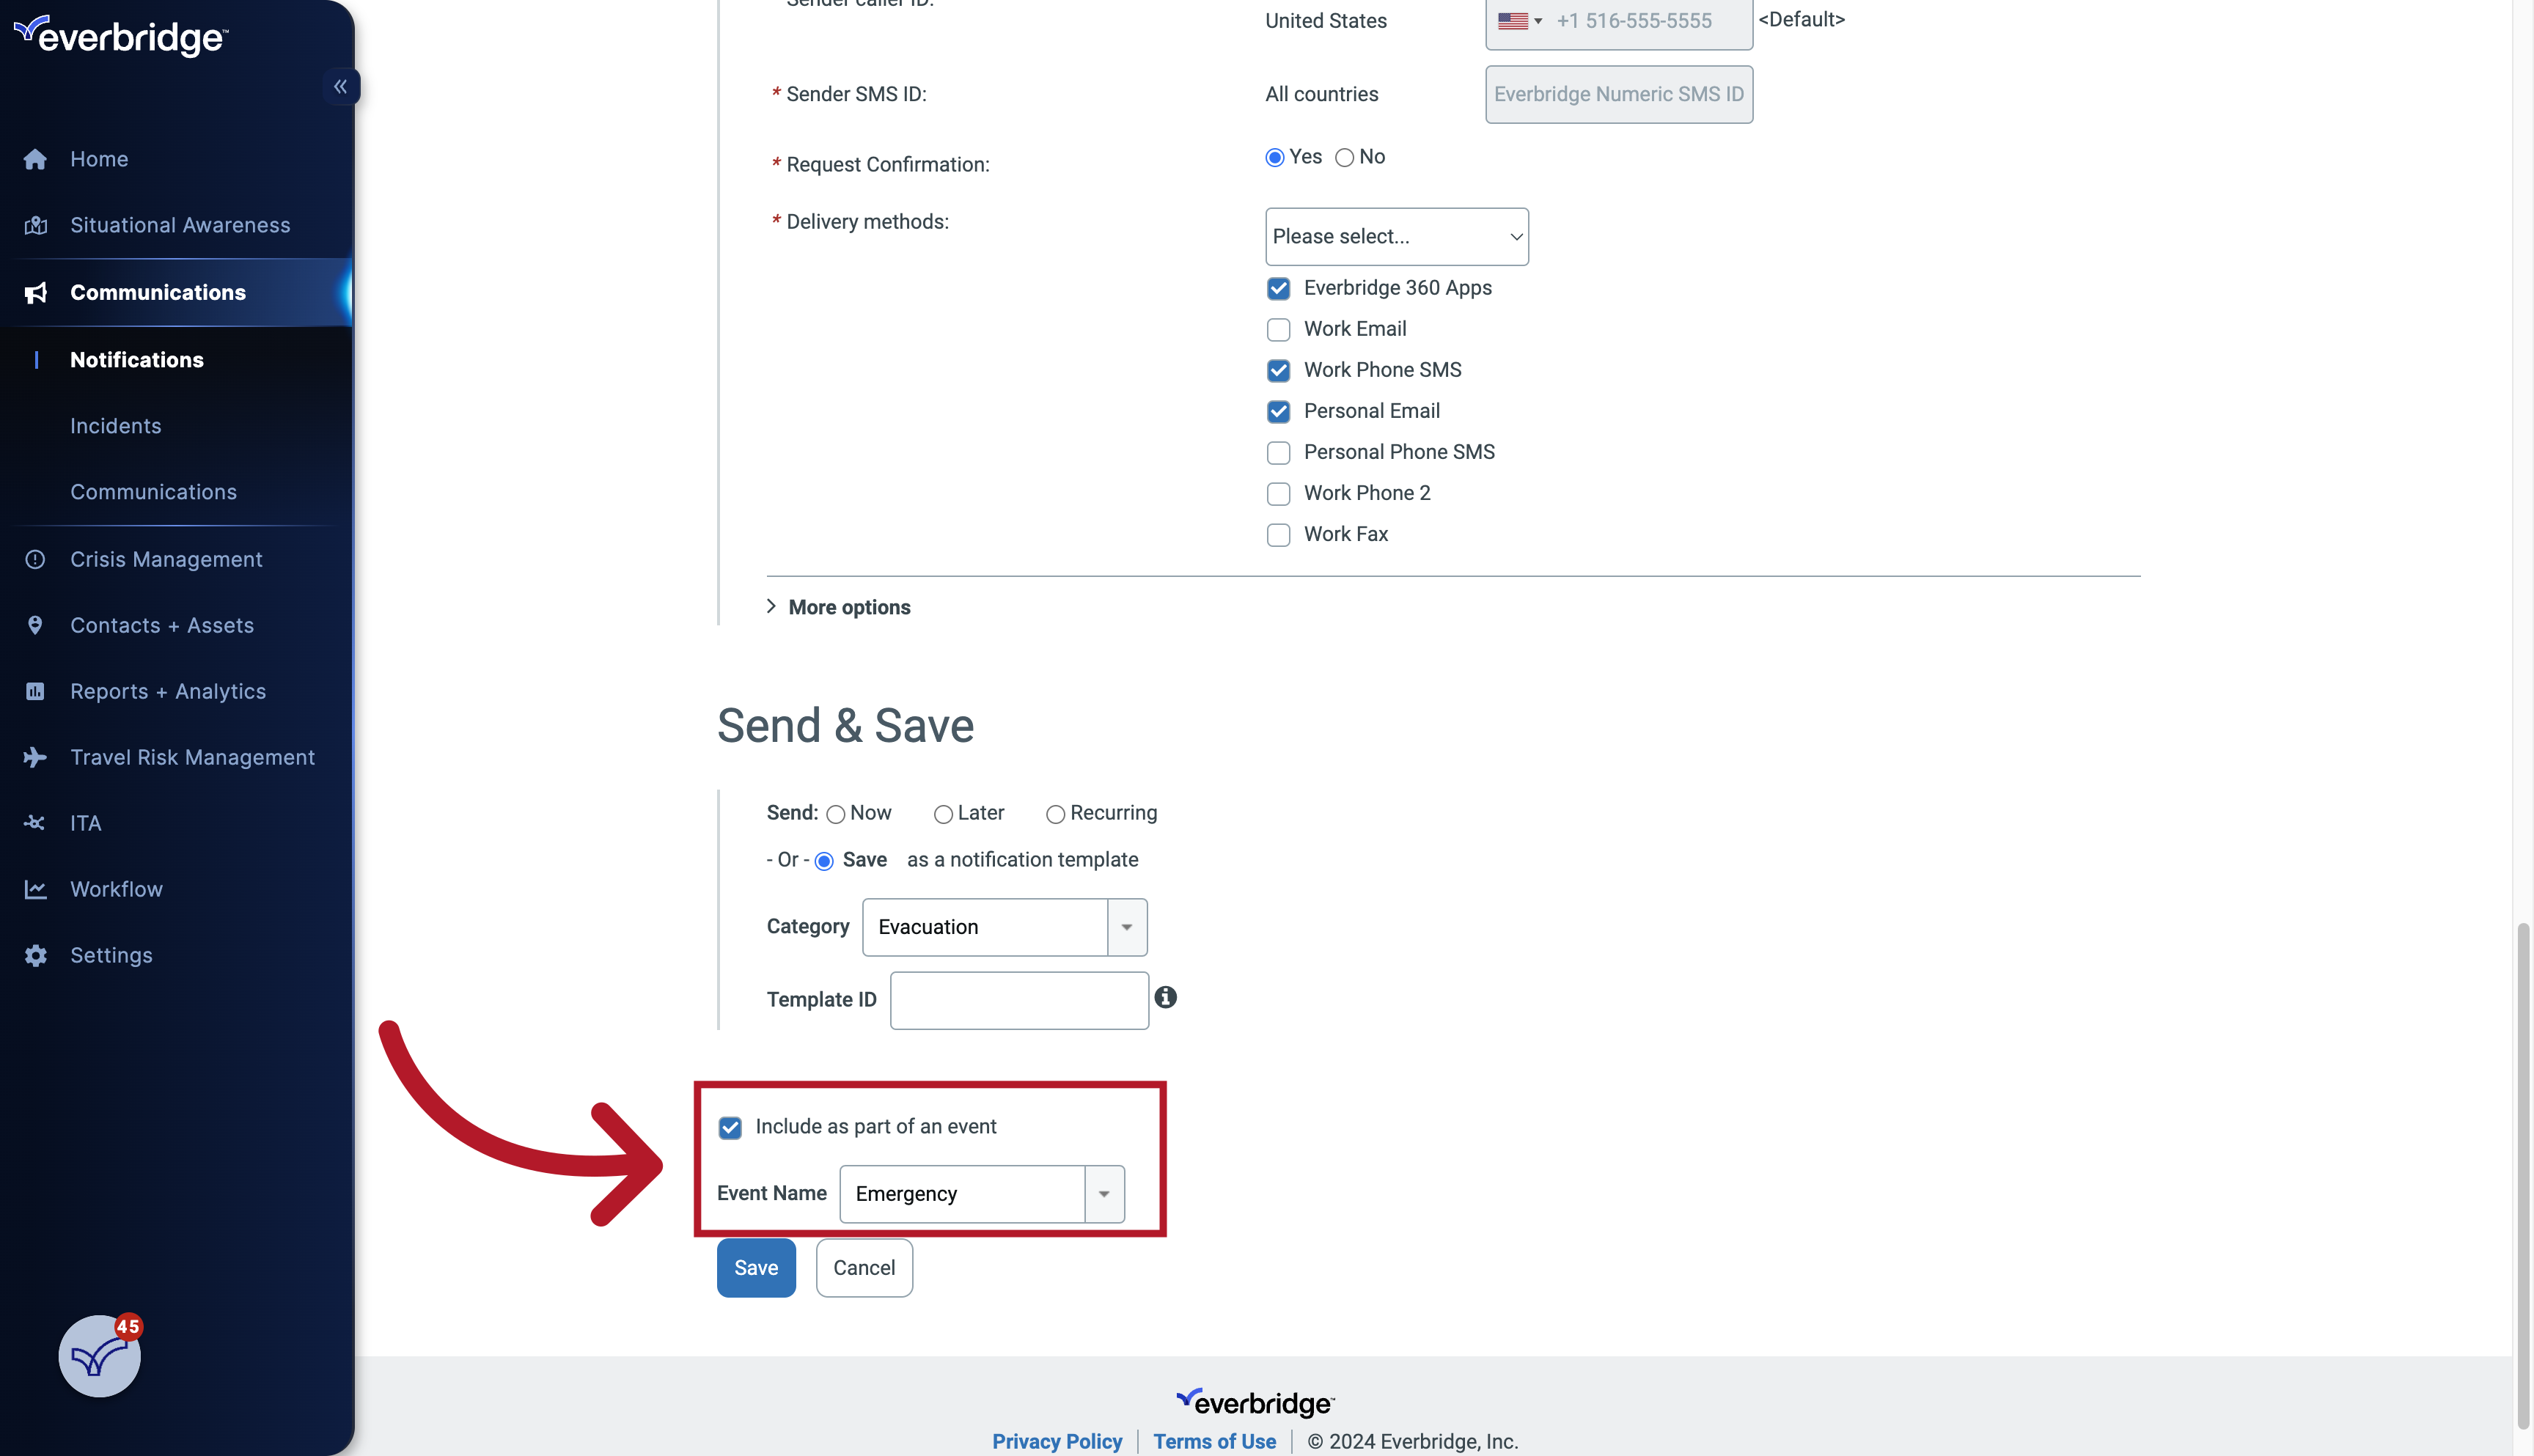
26. Event
Or, include it as part of an Event.
27. Send: Now
To send immediately select Now.
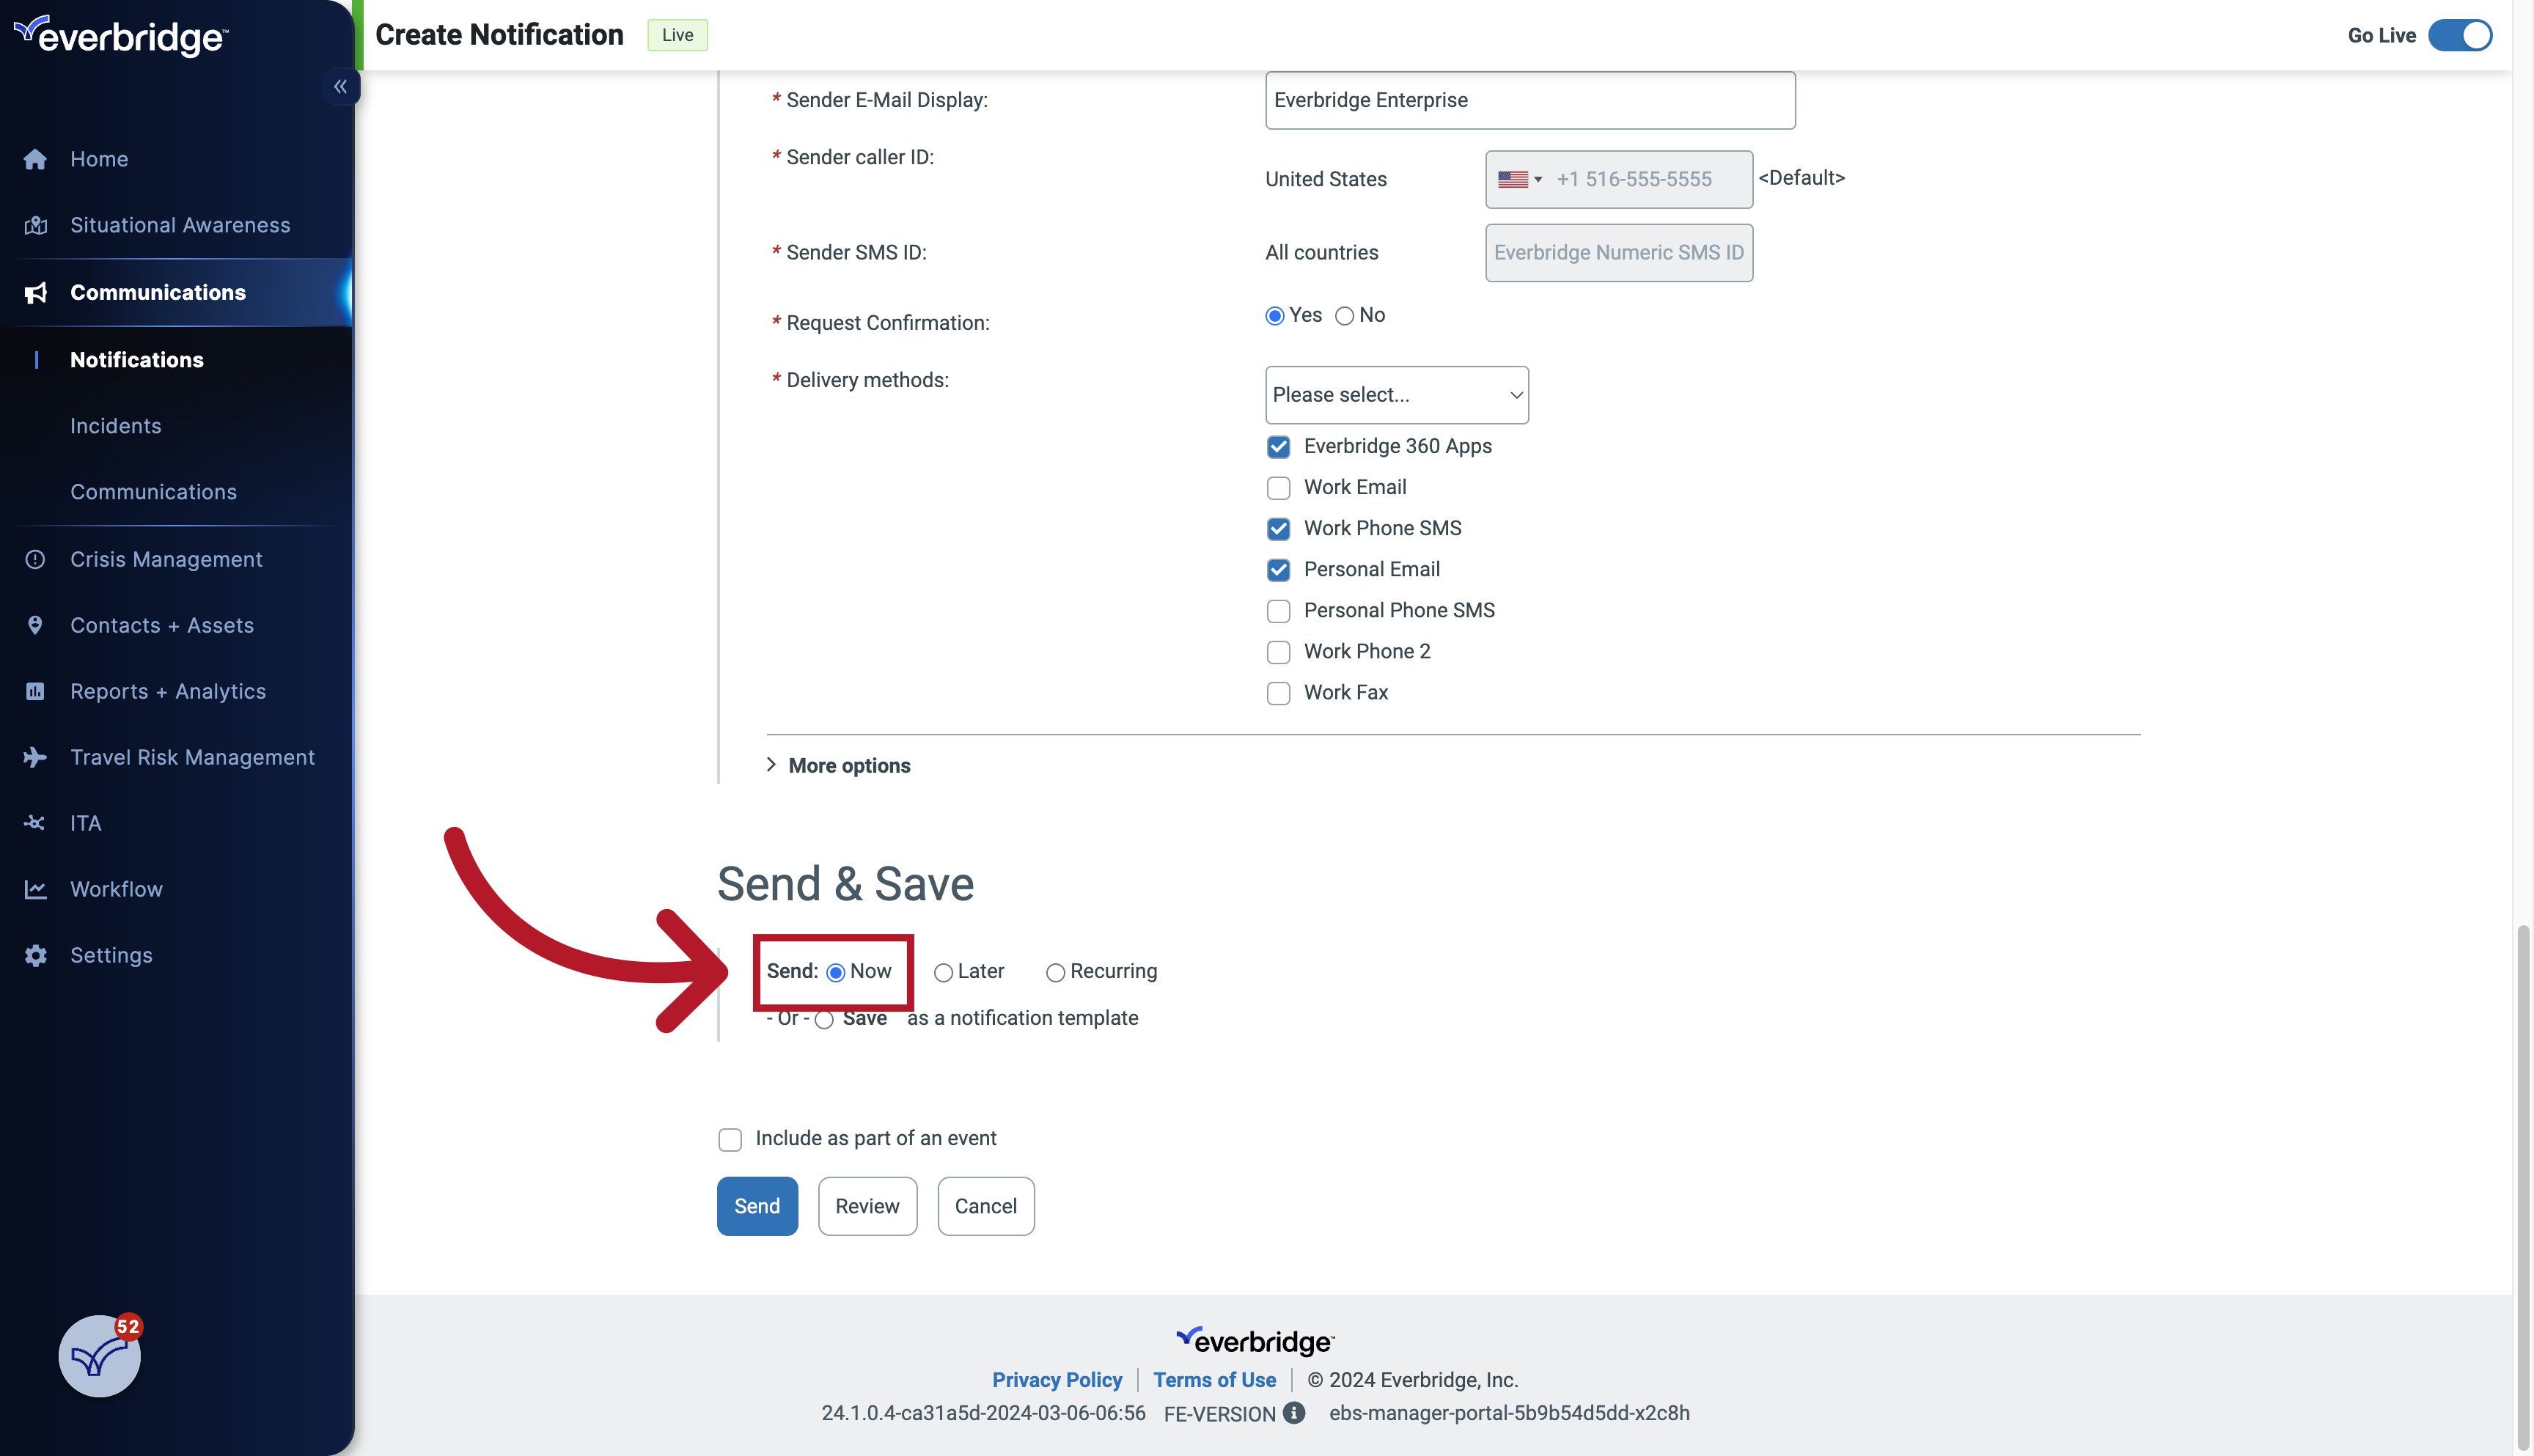
28. Send Notification
Then click Send to launch the Notification.