Topic
How to configure Public Member Portal settings in Everbridge Suite.
Description
This guide will walk you through configuring Public Member Portal settings in Everbridge. Member Portal settings must be configured before distributing access to Contacts.
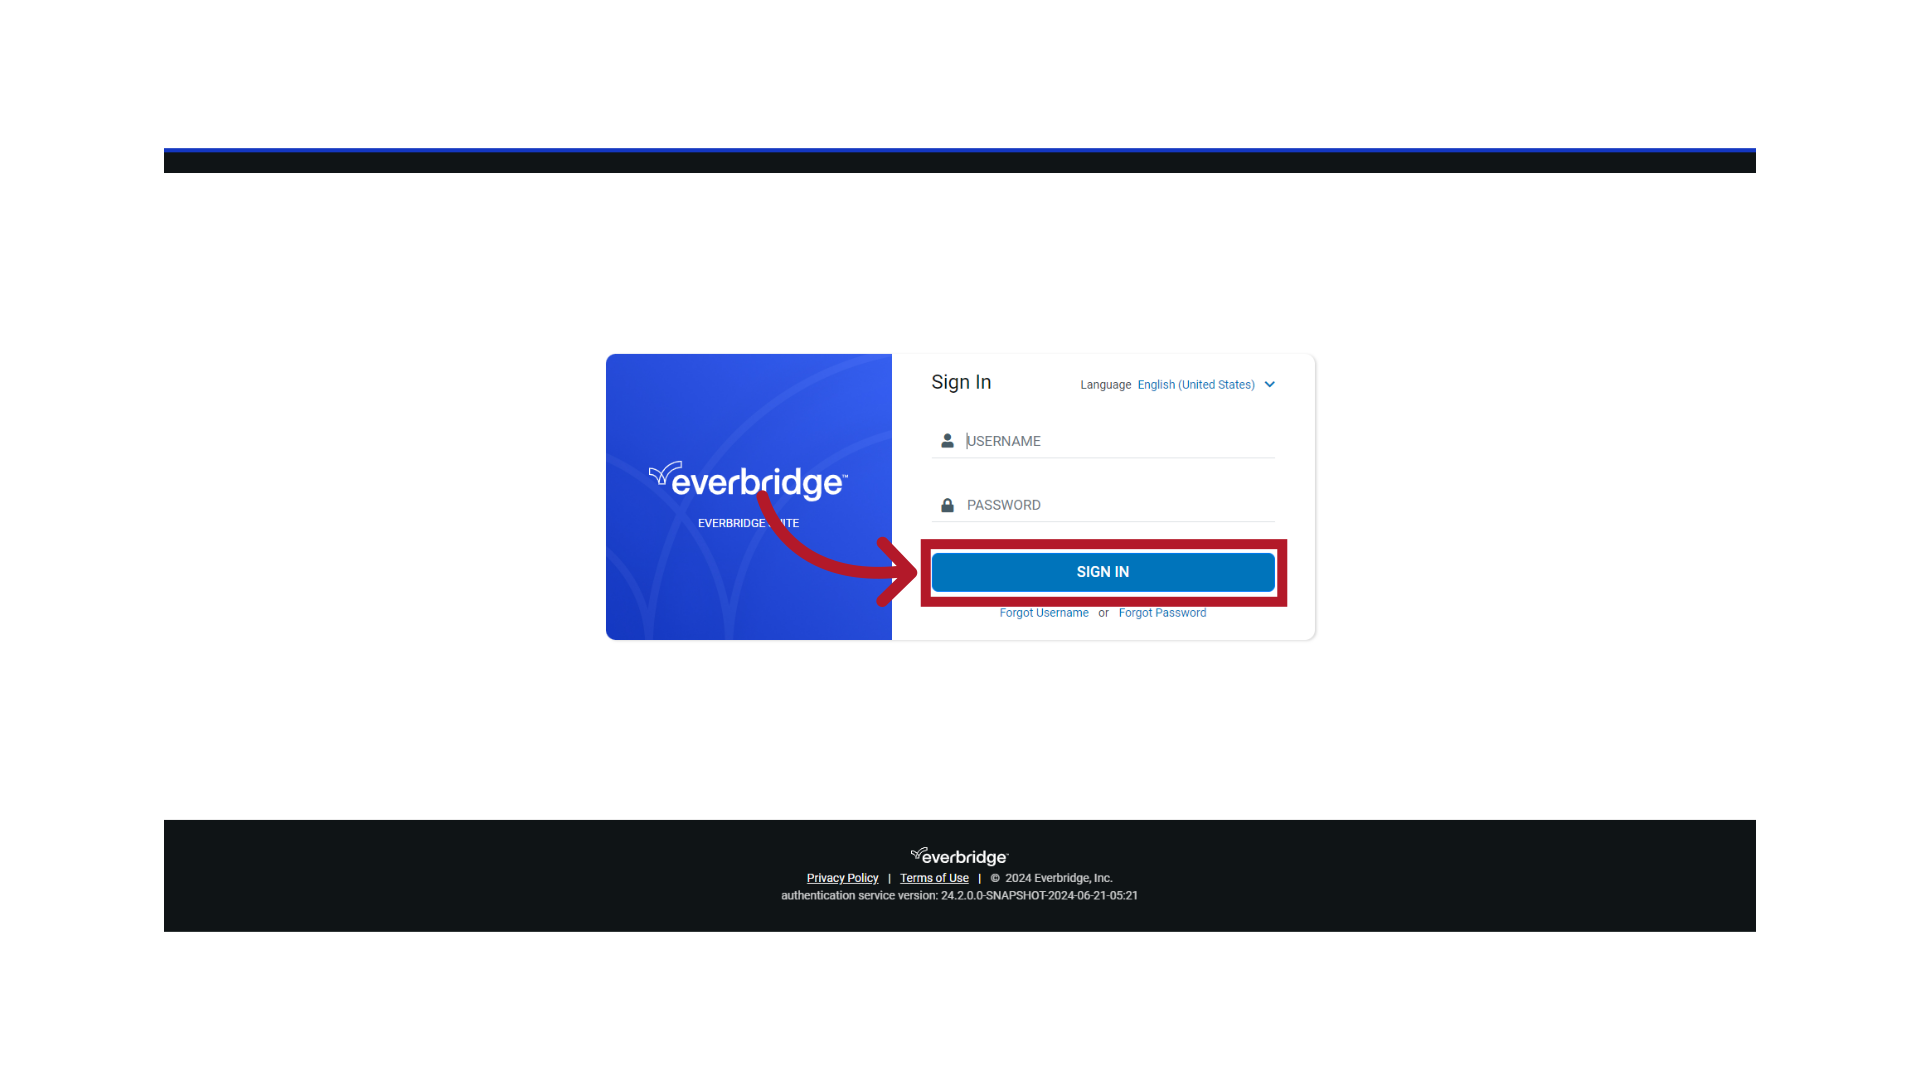
1. Login Page
Sign in to the Manager Portal and select your Organization.
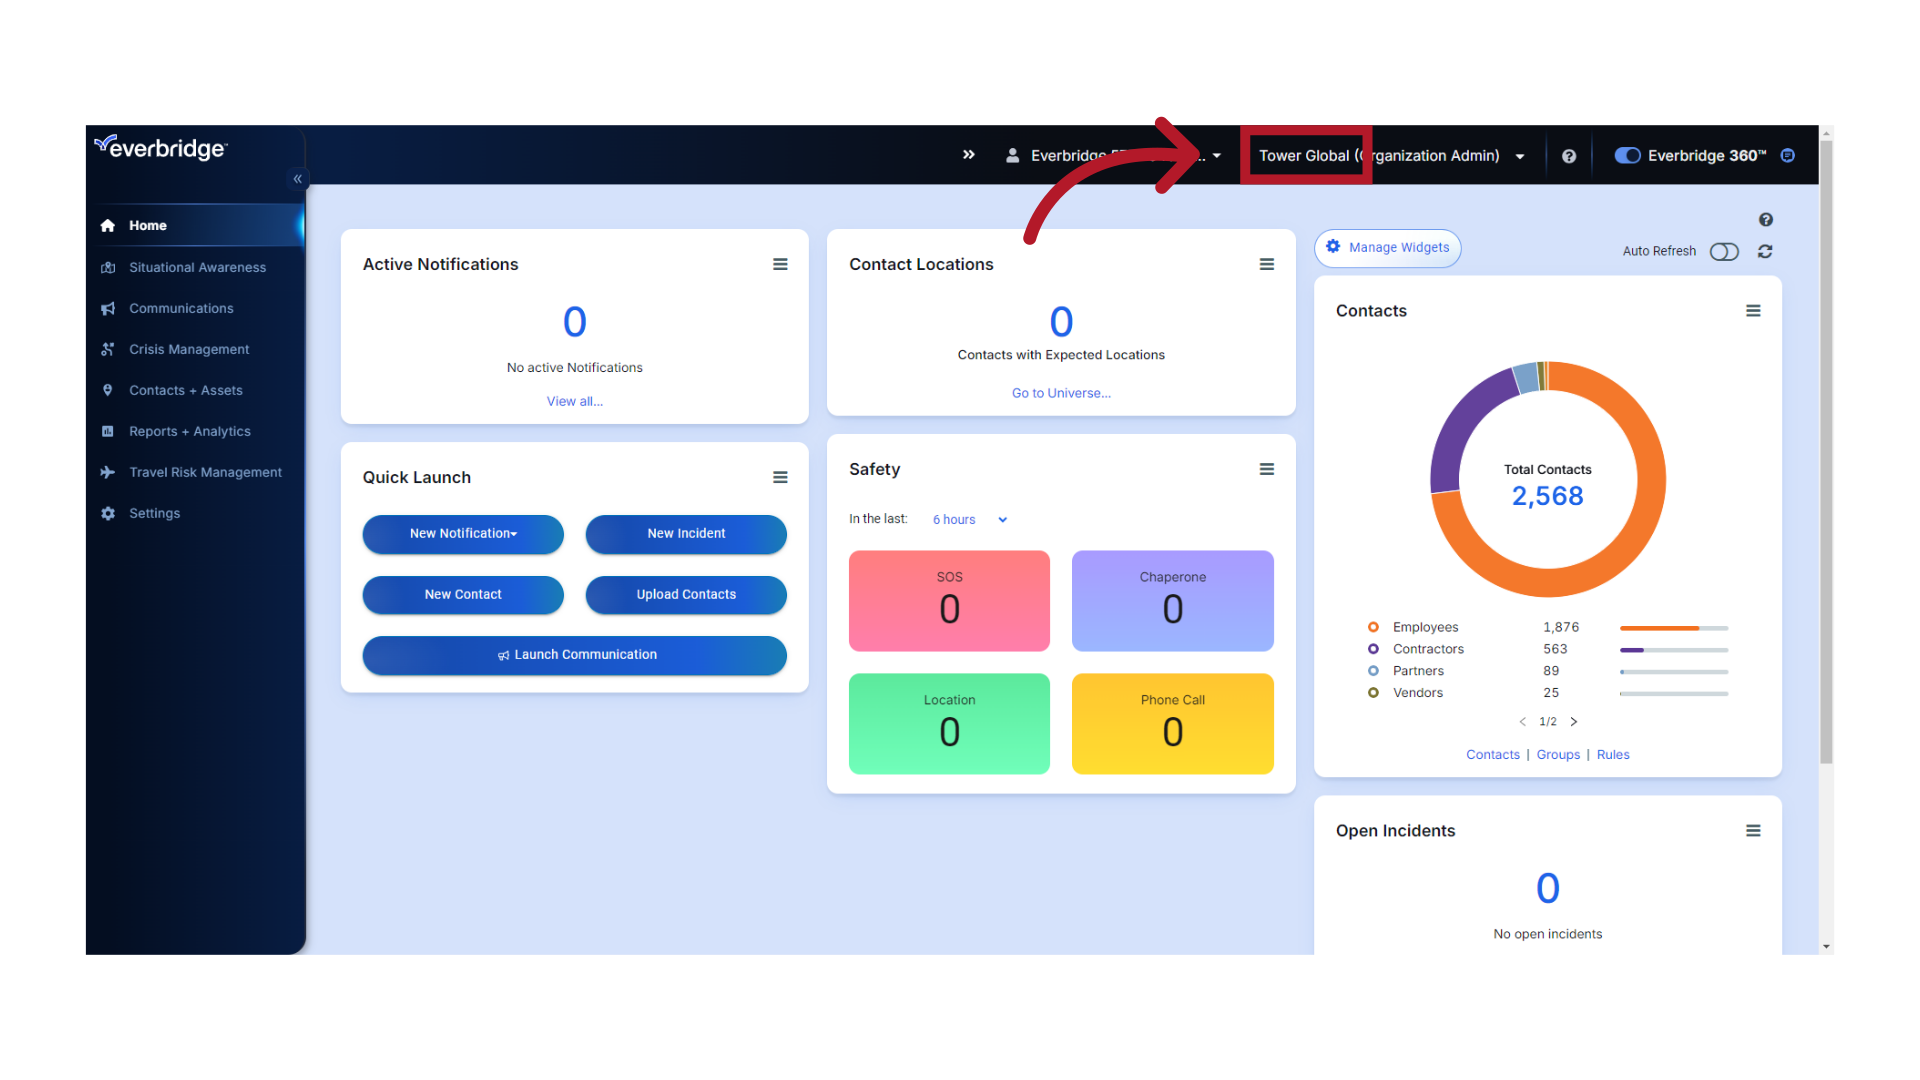
2. Manager Portal
Ensure you are at the Organization level.
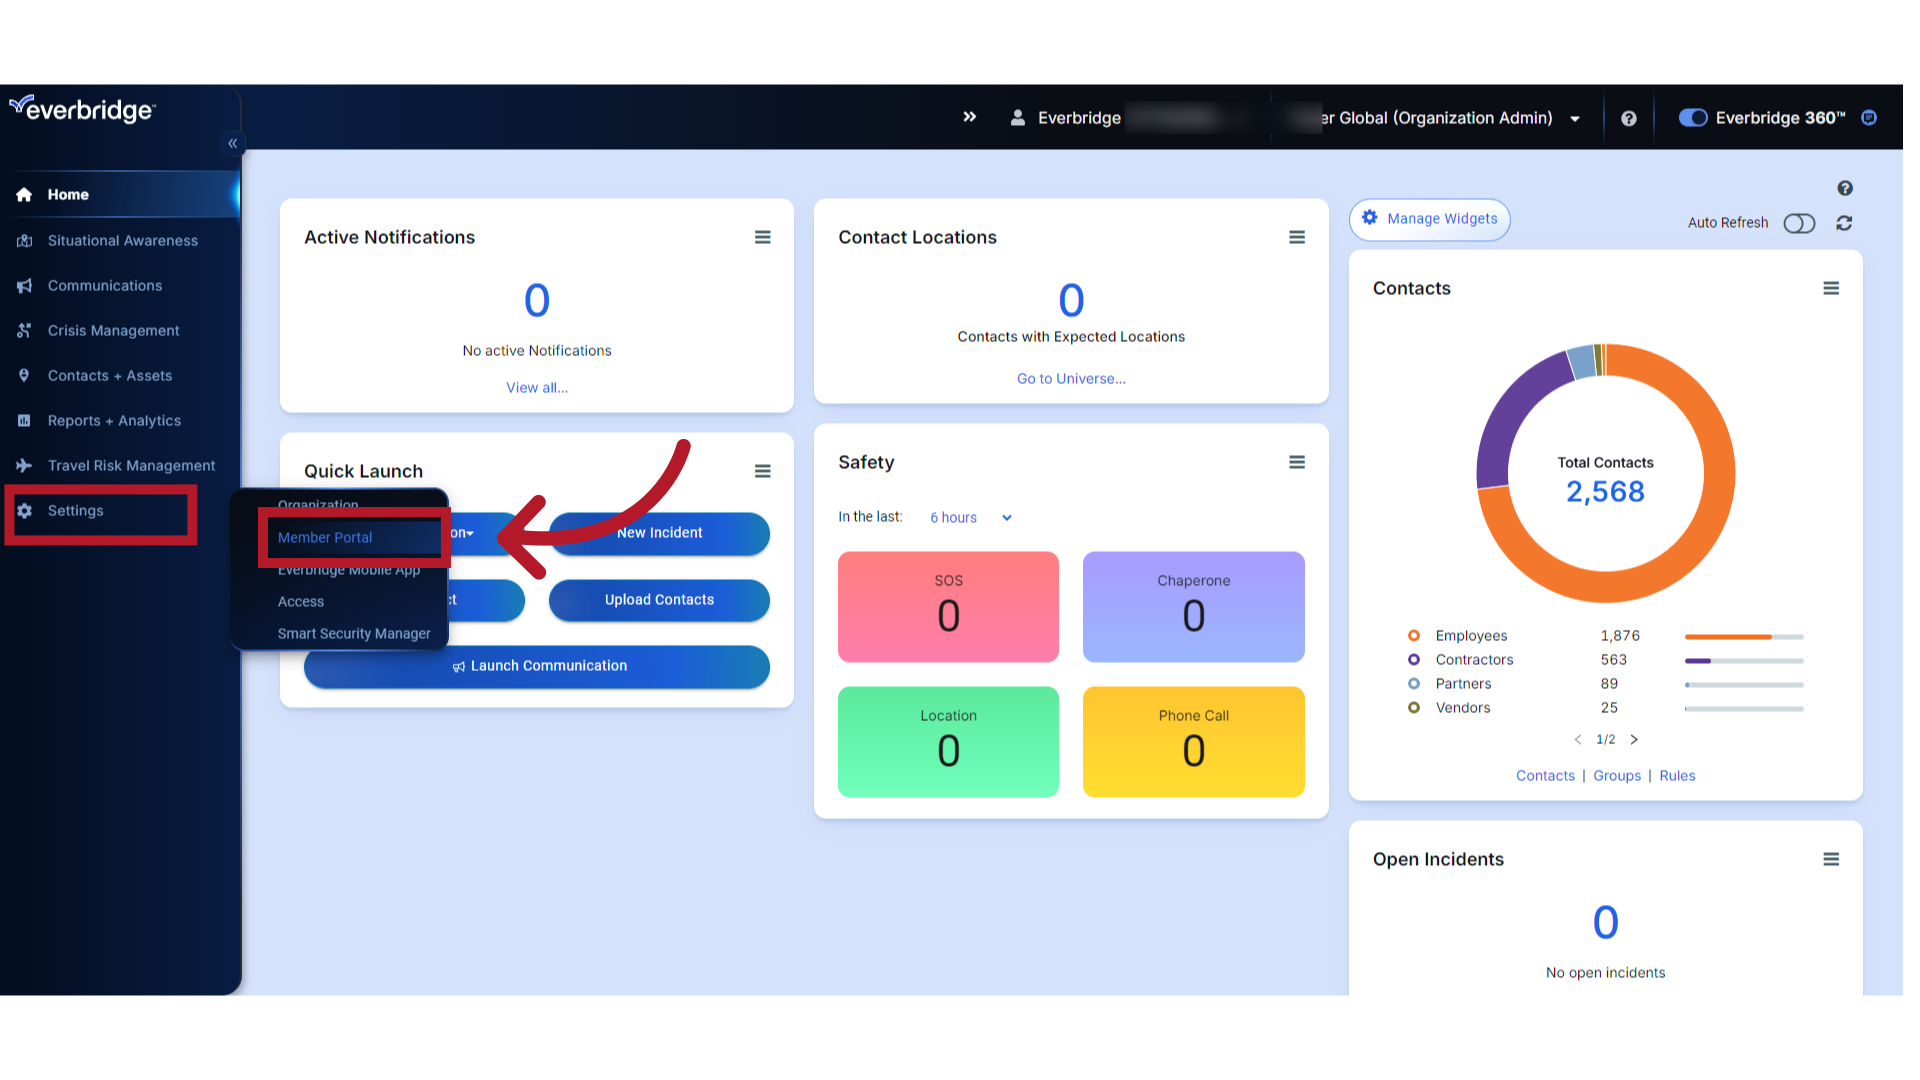
3. Settings
Under "Settings" select "Member Portal."
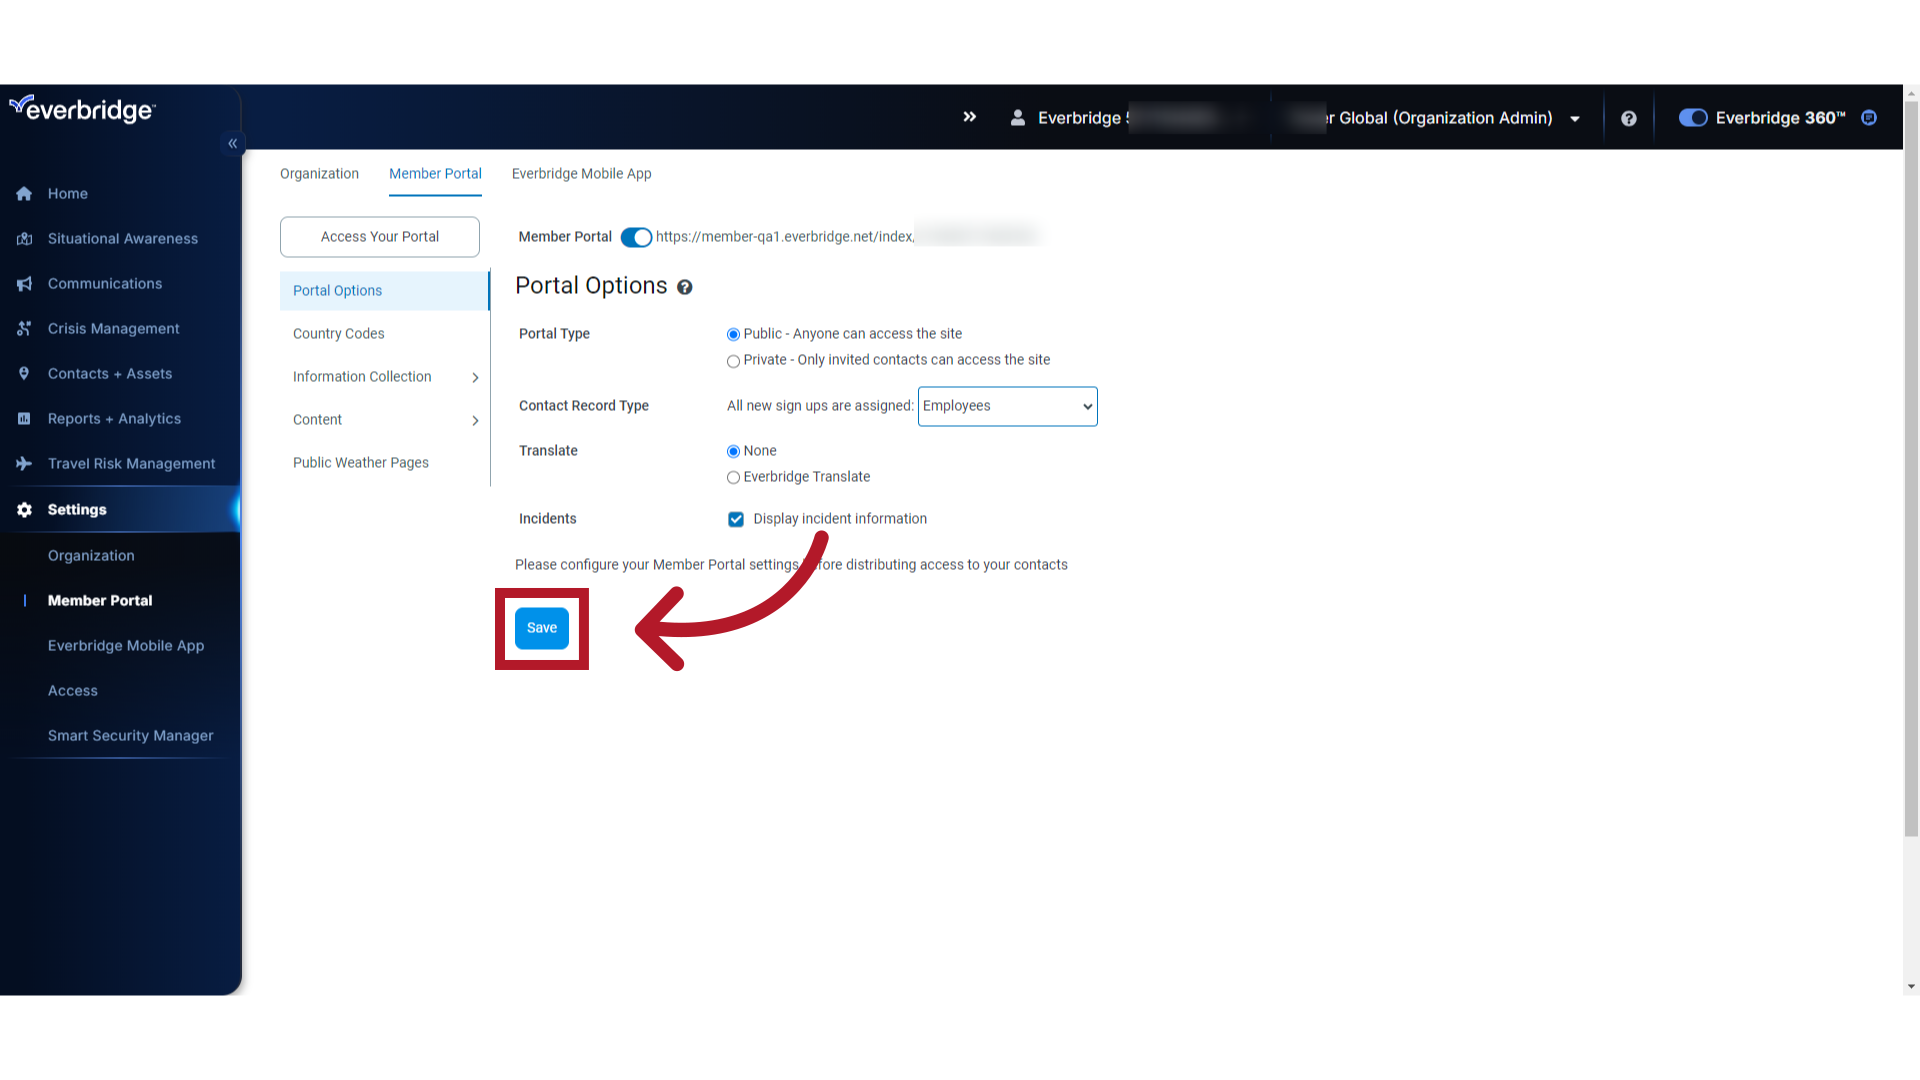
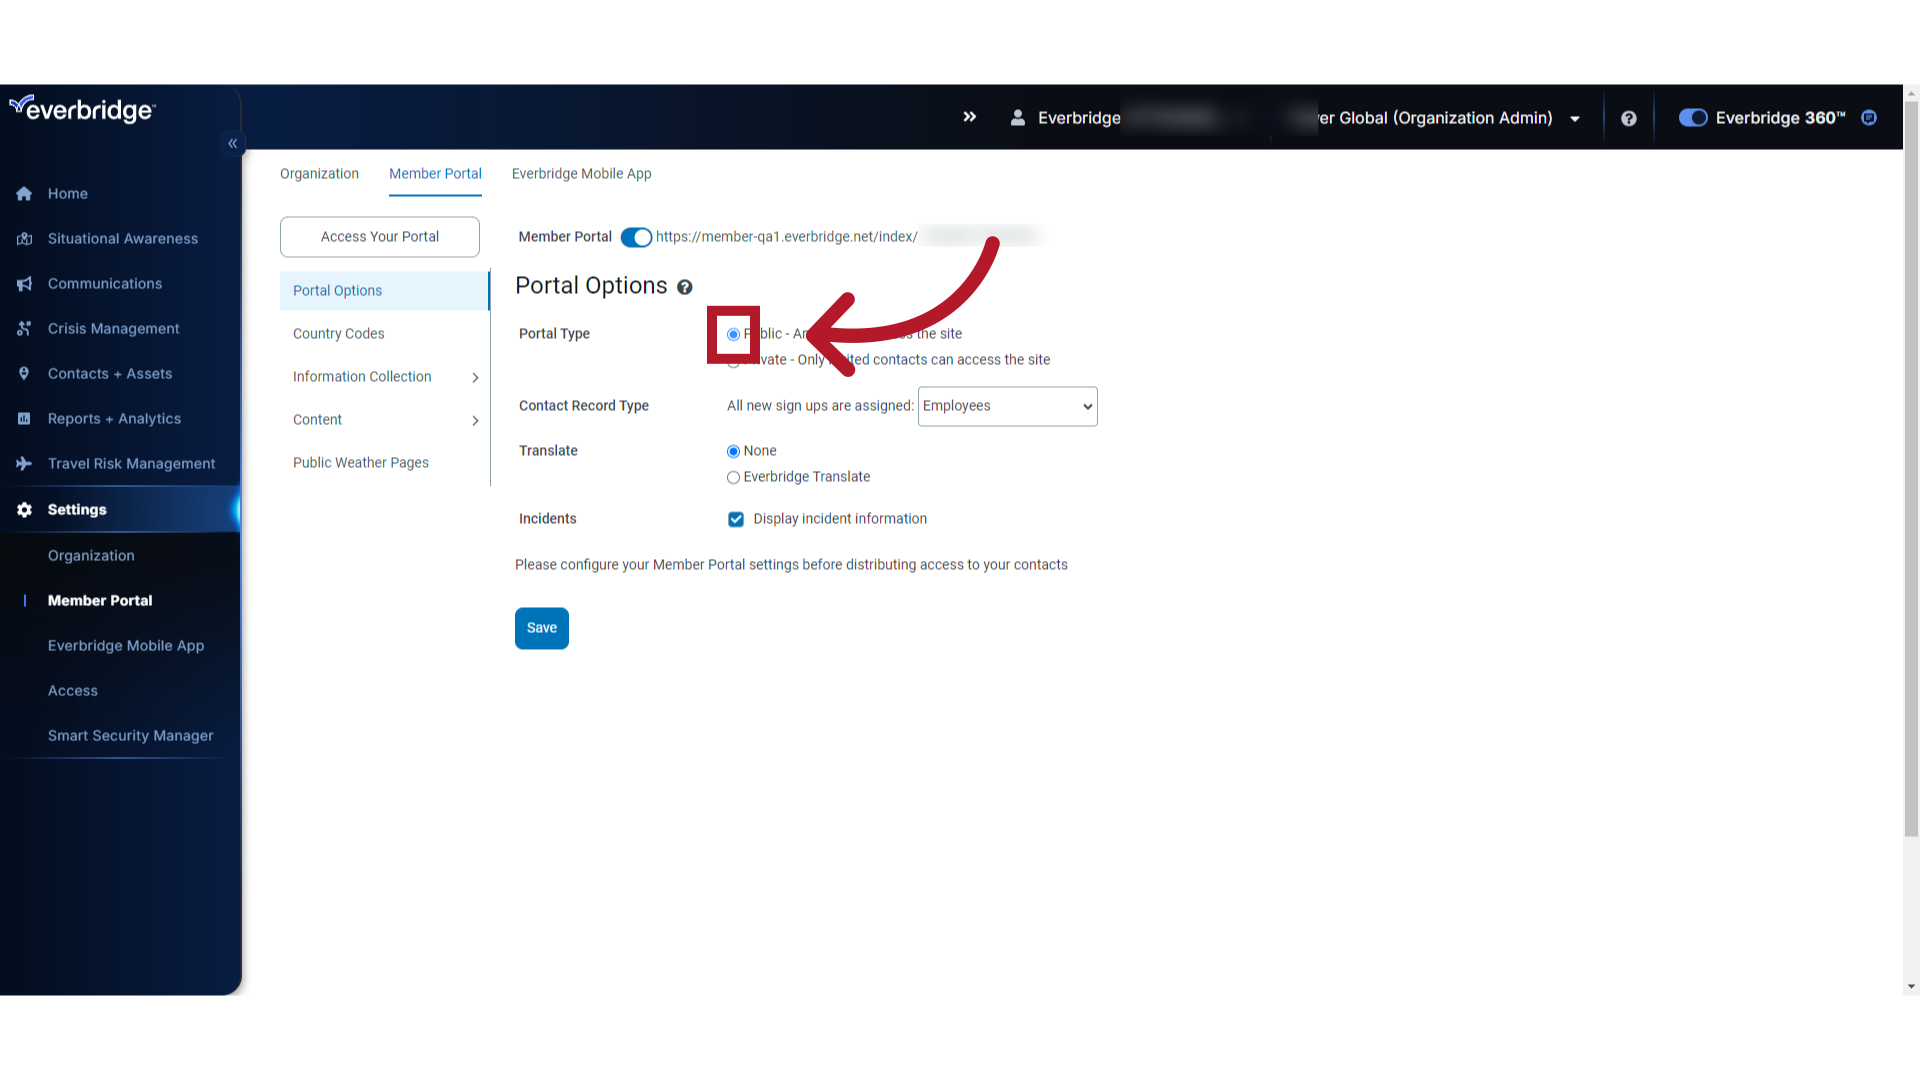
4. Portal Type
Select "Public" as the Portal Type. Members can add new records and can delete their own contact records.
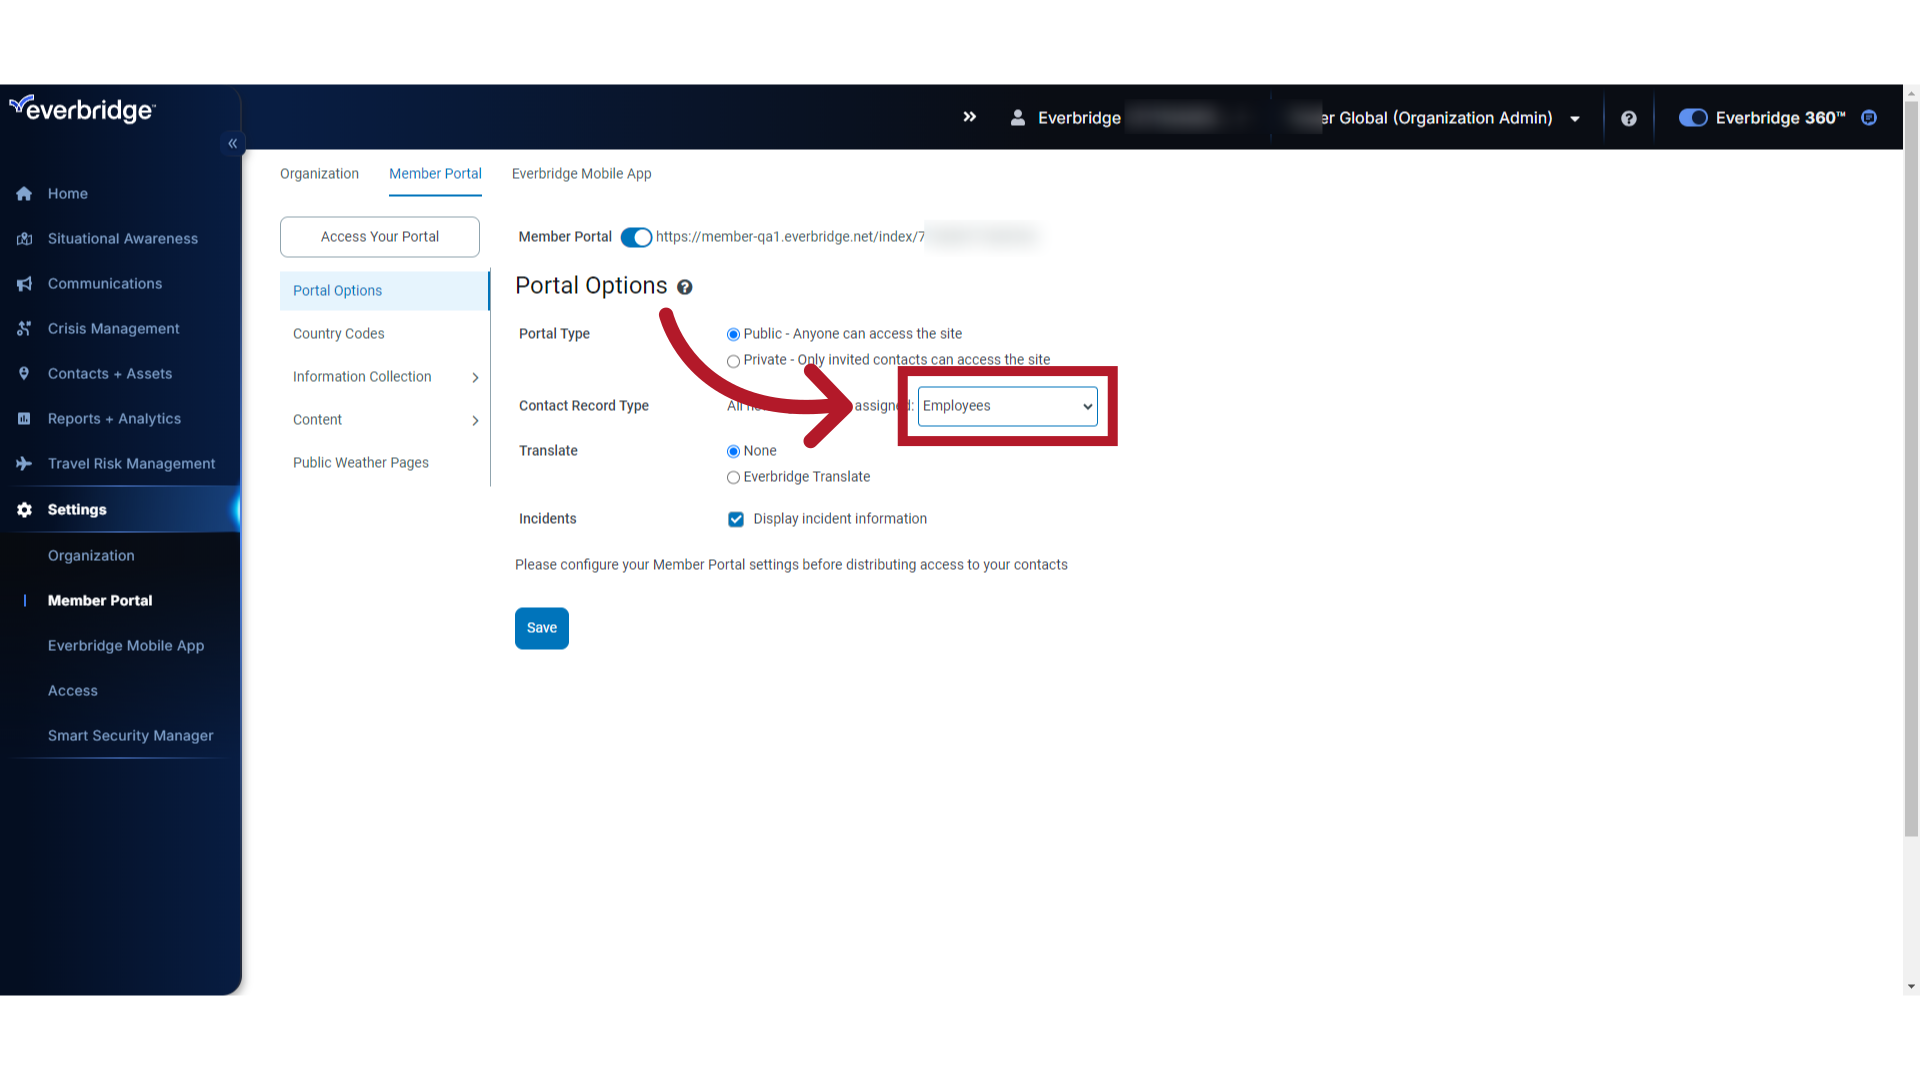
5. Contact Record Type
Select the Contact Record Type from the drop-down menu to which all new Contacts are assigned.
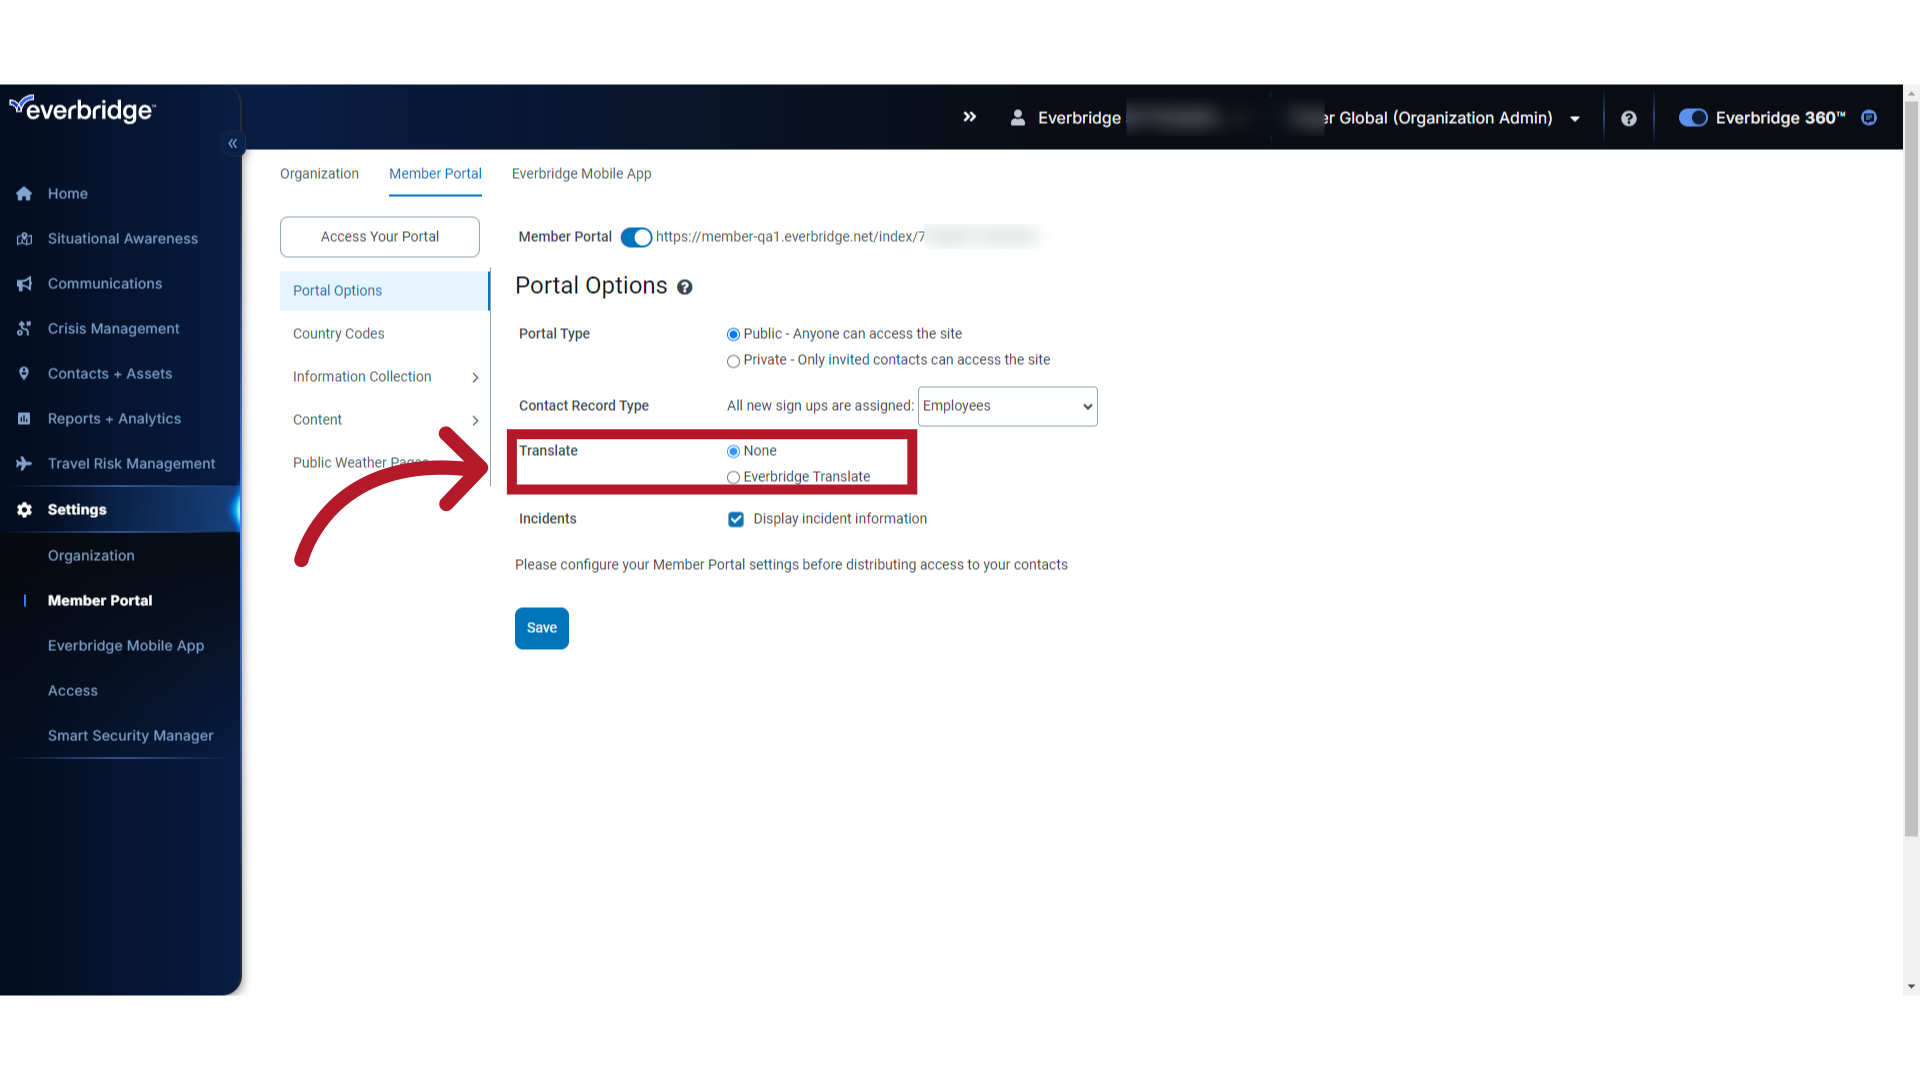
6. Translate
Next to Translate, select the radio button corresponding to the type of translations, if any, you prefer to use.
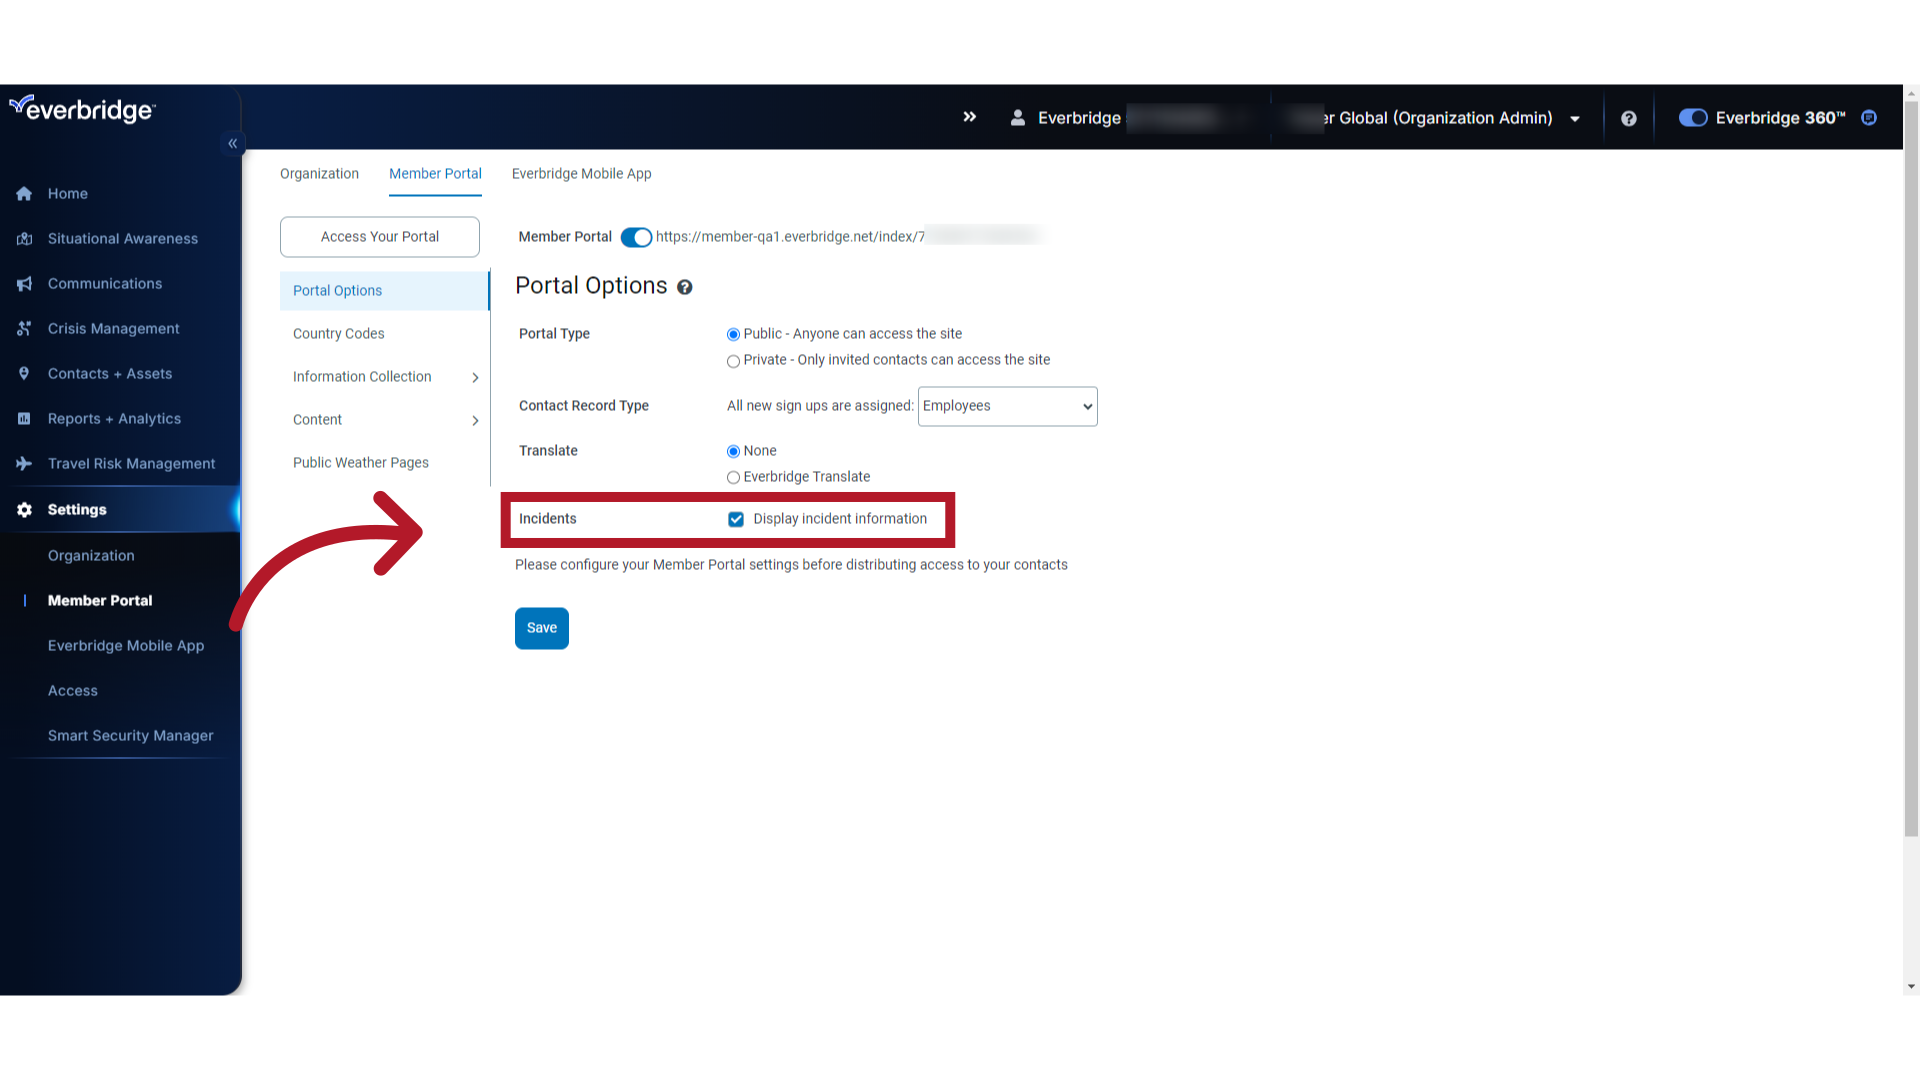
7. Incidents
Next to Incidents, check the "Display incident information" box if you want to display incident information in your Member Portal.
8. Save
Click "Save" to save your configuration changes.