Topic
How to configure custom safety buttons for the Everbridge Mobile App.
Description
In addition to the system Safety Buttons available for the Everbridge mobile app, you have the ability to create custom Safety Buttons. You may want to create a customized option if the provided system button does not meet your business requirements or if you simply want to provide your mobile app users with easy access to other important content. This tutorial will provide an overview of the button types and demonstrate the steps for easily configuring customizations through the Everbridge Manager Portal.
Go to manager.everbridge.net
1. System Buttons
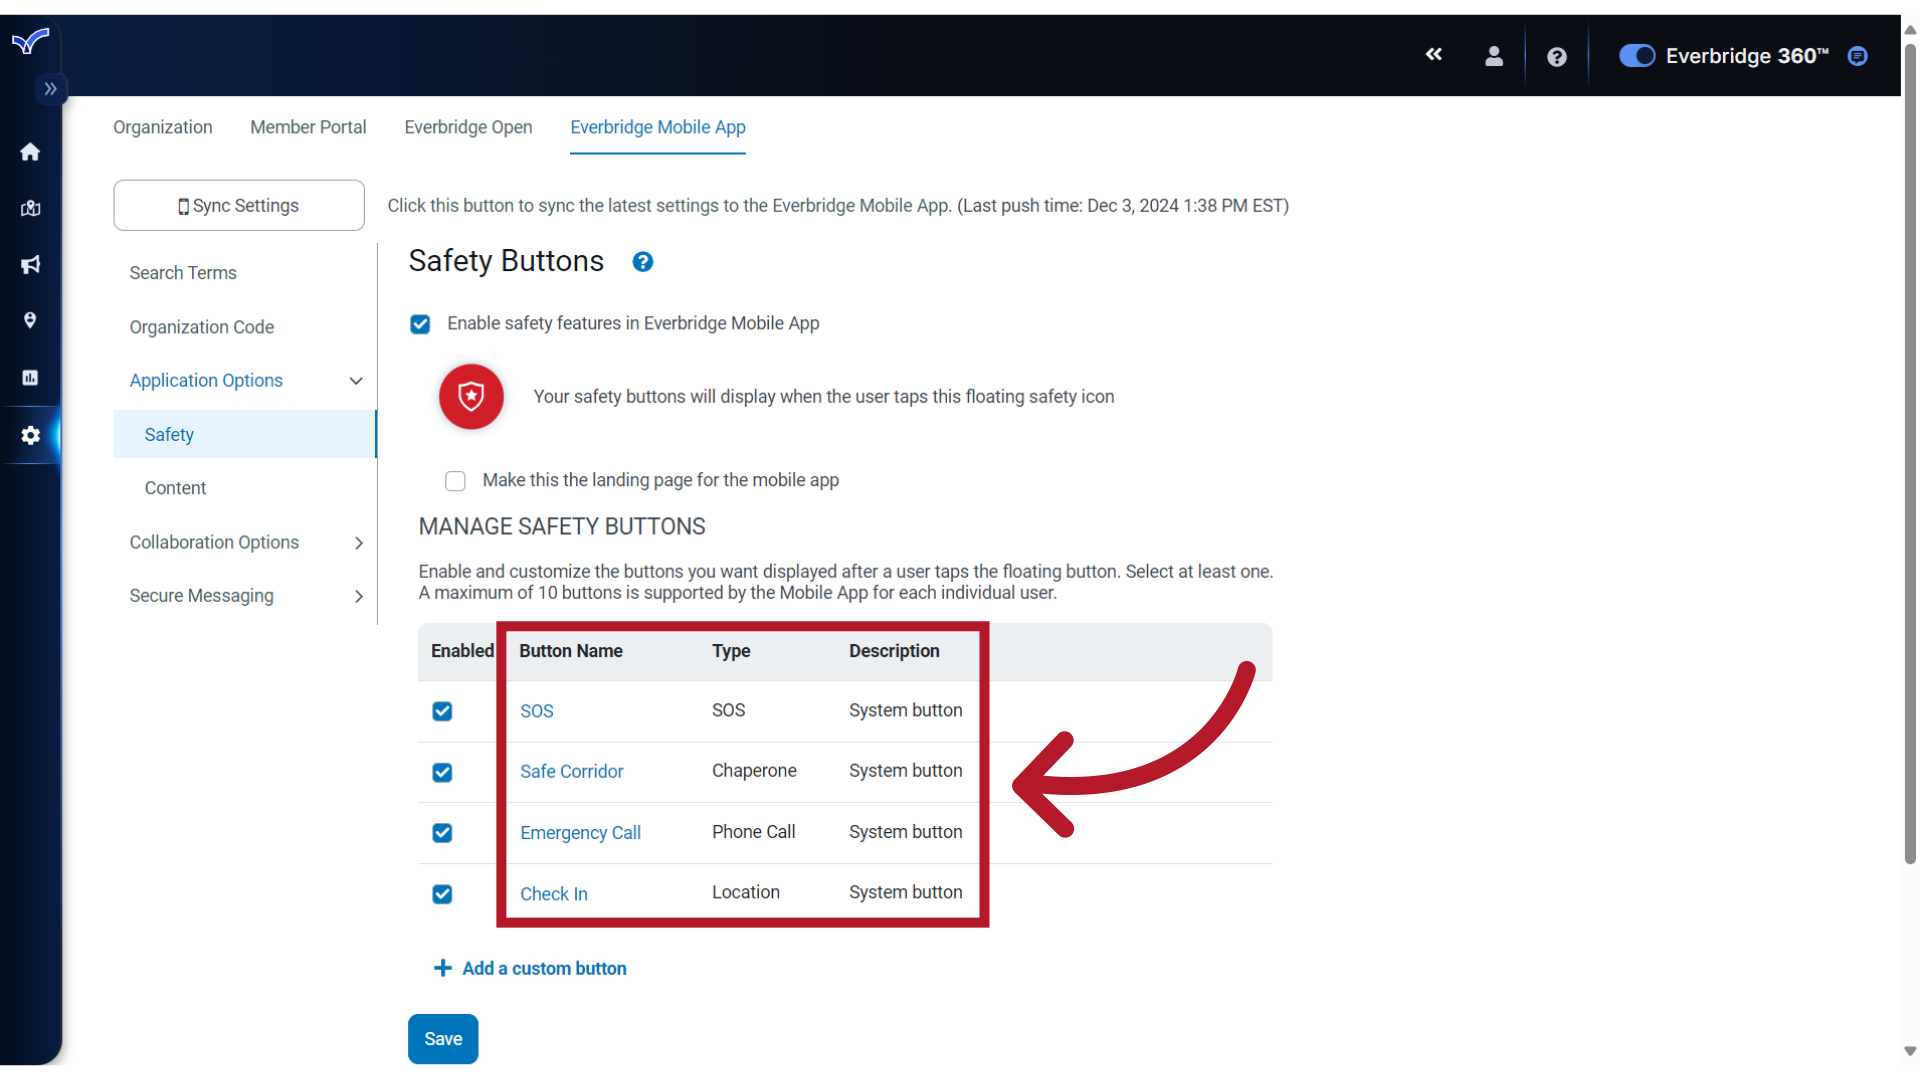
When the safety features are enabled for your organization's mobile app, the system buttons for SOS, Safe Corridor, Emergency Call and Check-In, display along with their button type.
2. Add
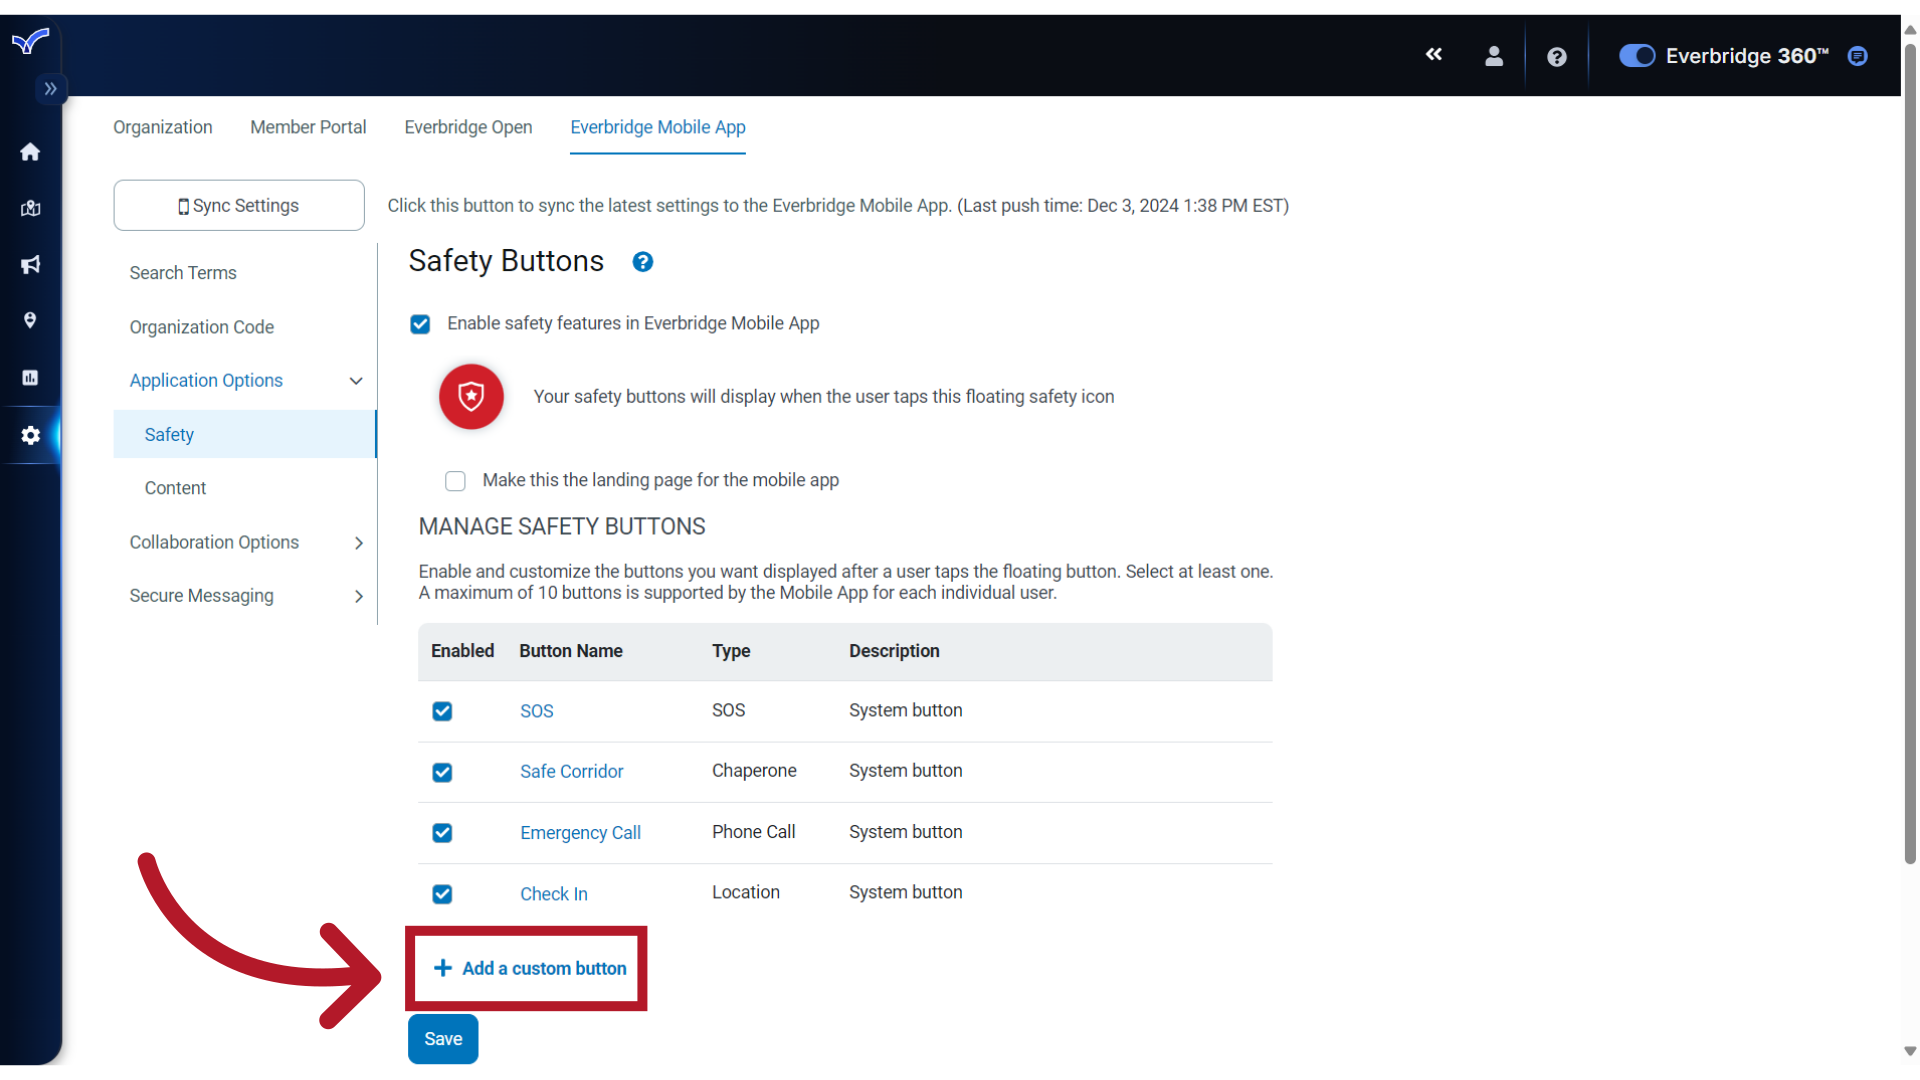
To create a new button, click "Add a Custom Button". Note that there is a maximum limit of 60 buttons on the Everbridge Safety page. If you reach this limit, you may need to remove existing buttons before adding new ones.
3. Type
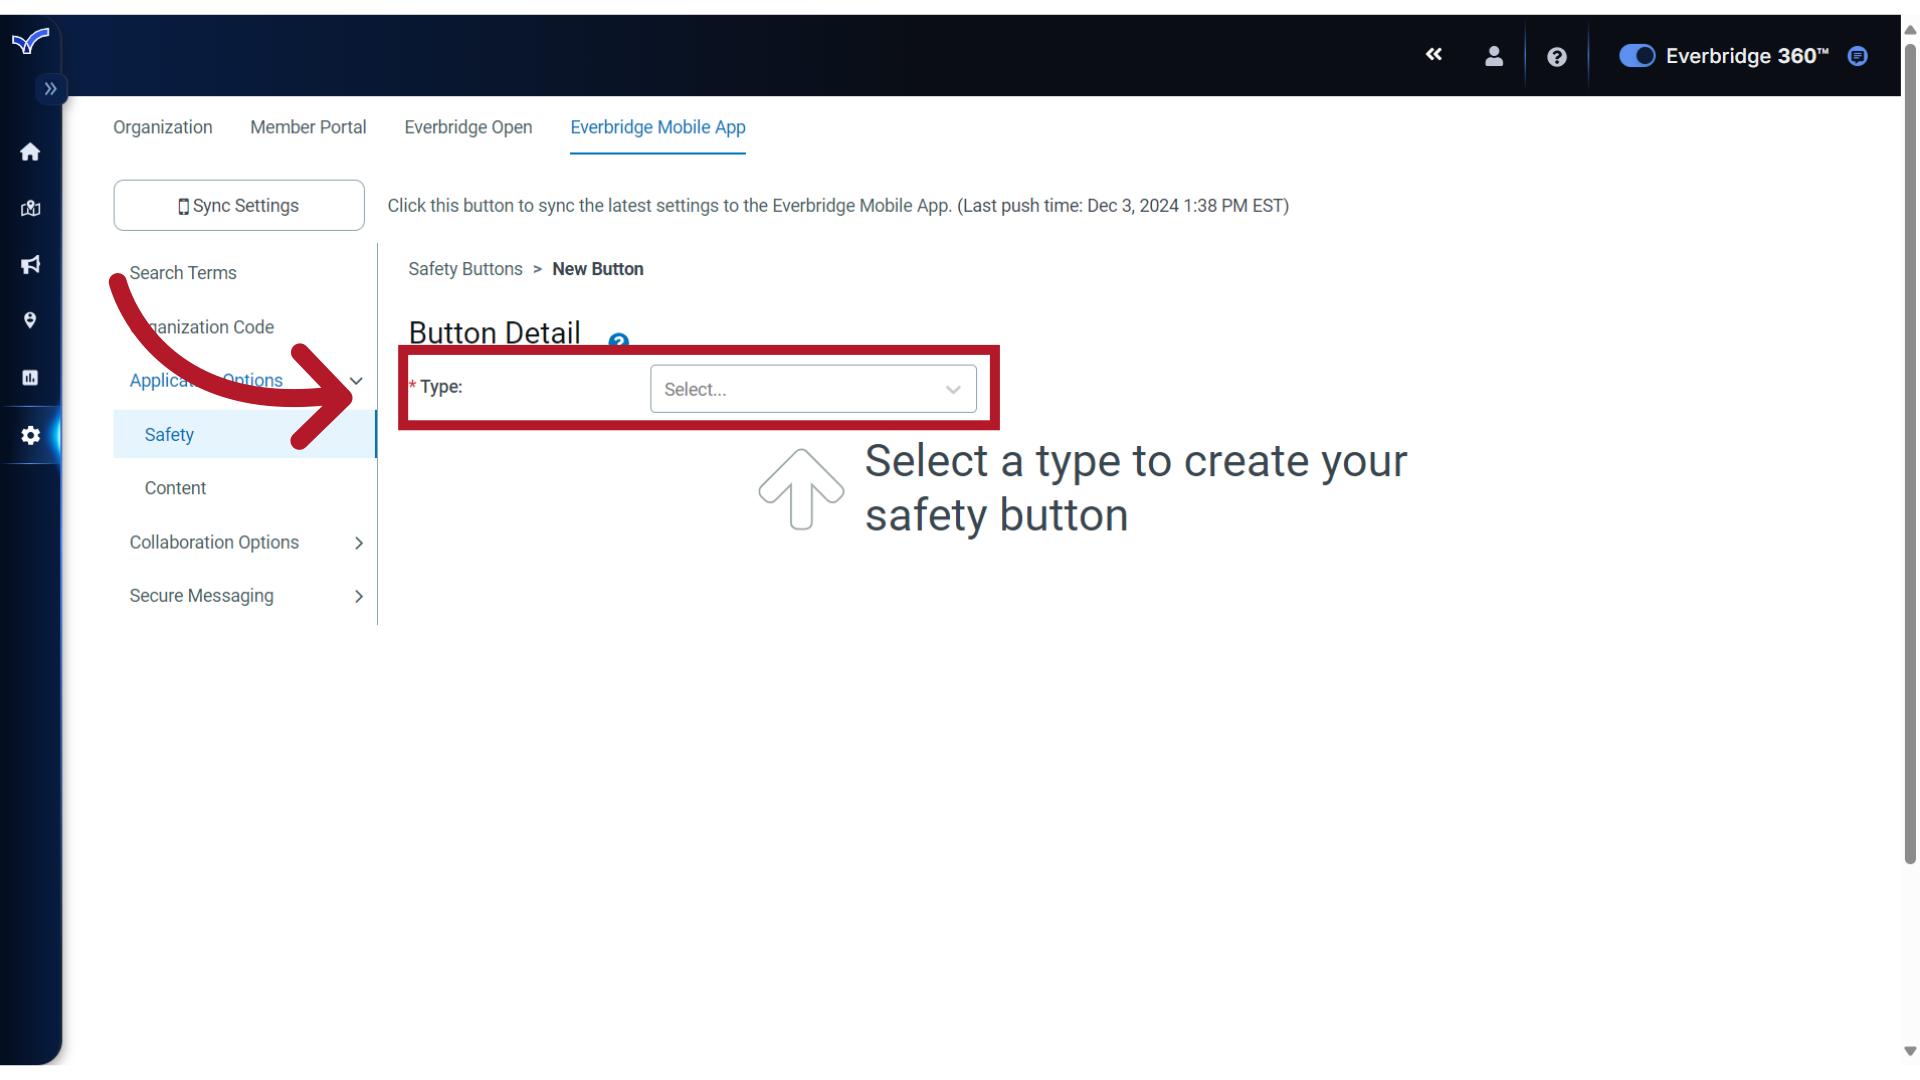
You will then be prompted to select a button Type to get started.
4. Options
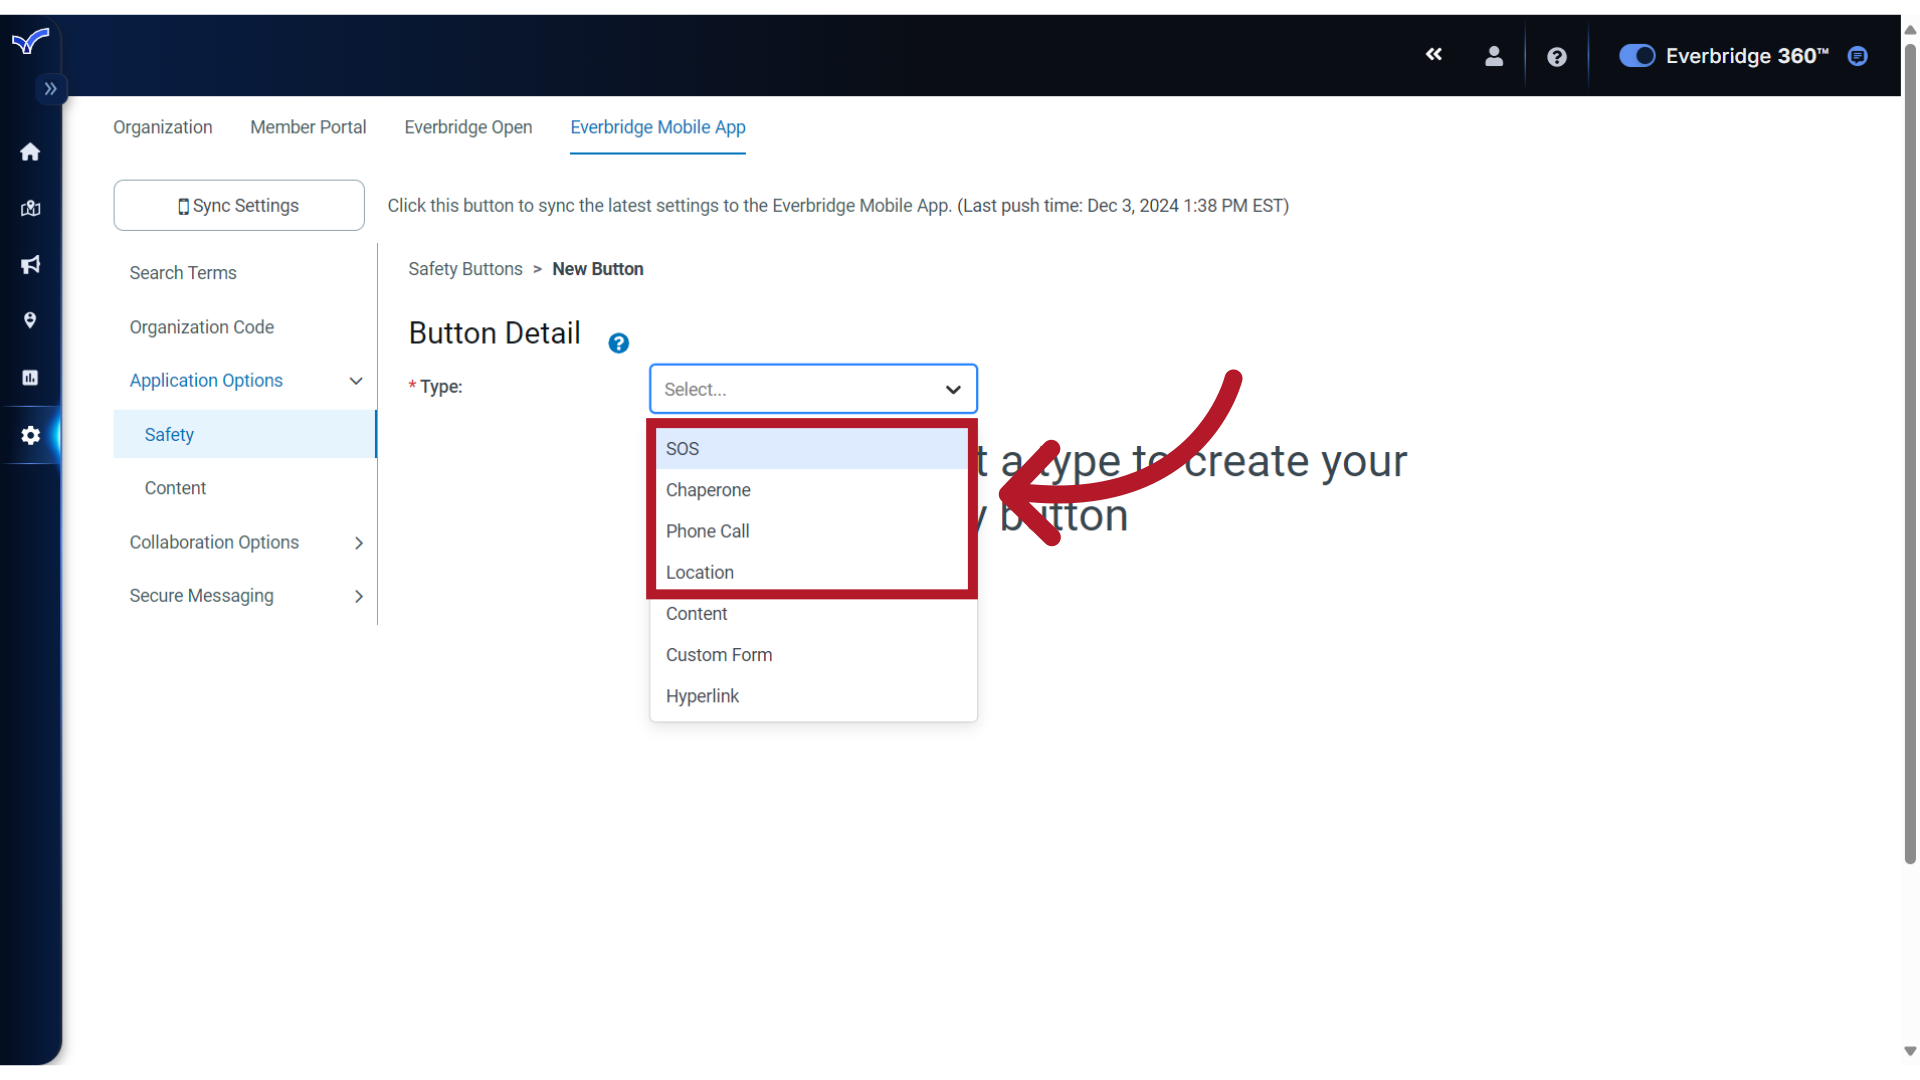
You can select one of the system button types to create a custom version that has different permissions, contacts selections and settings than the default system buttons already configured.
5. Options
Or select one of the alternate options for Content, Custom Form or Hyperlink.
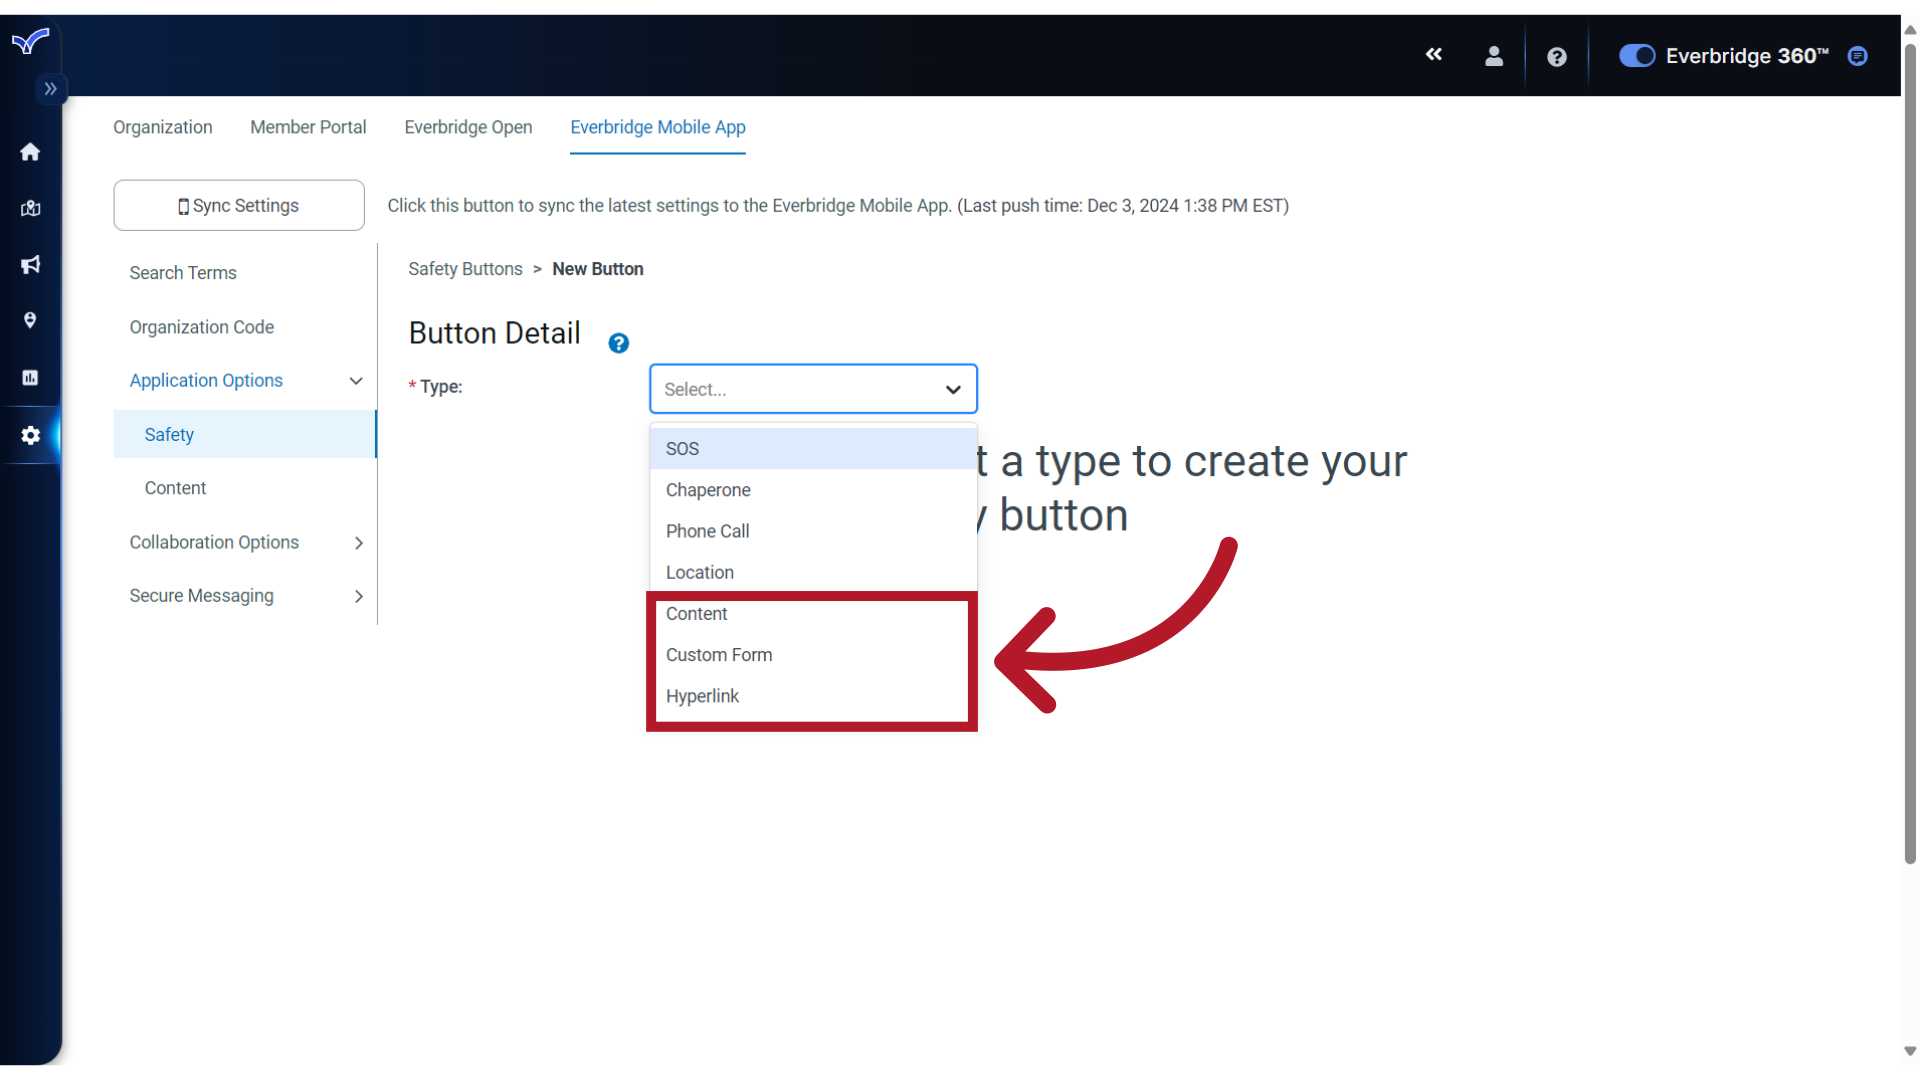
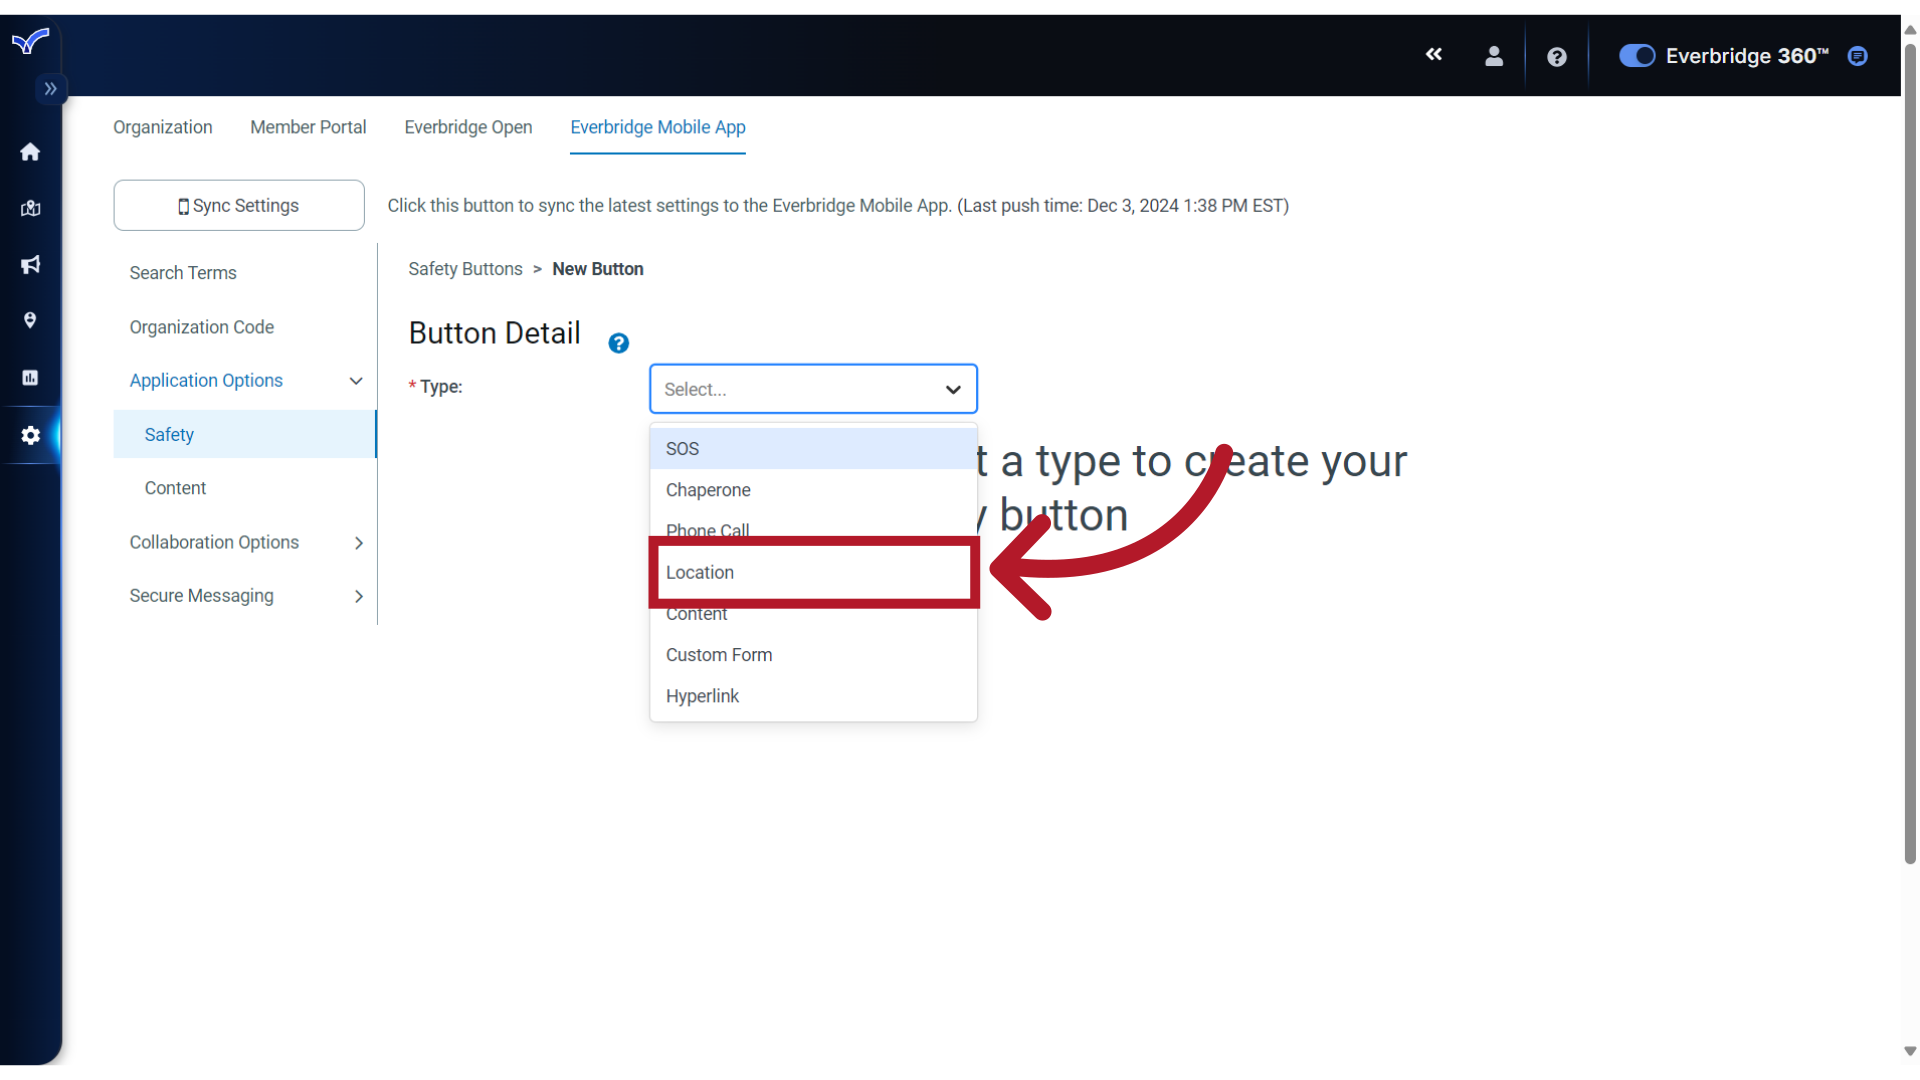
6. Location Type
For this first example, we will choose the Location type to make an alternate version of the system Check-In button for our Leadership team that does not include Auto Check-In.
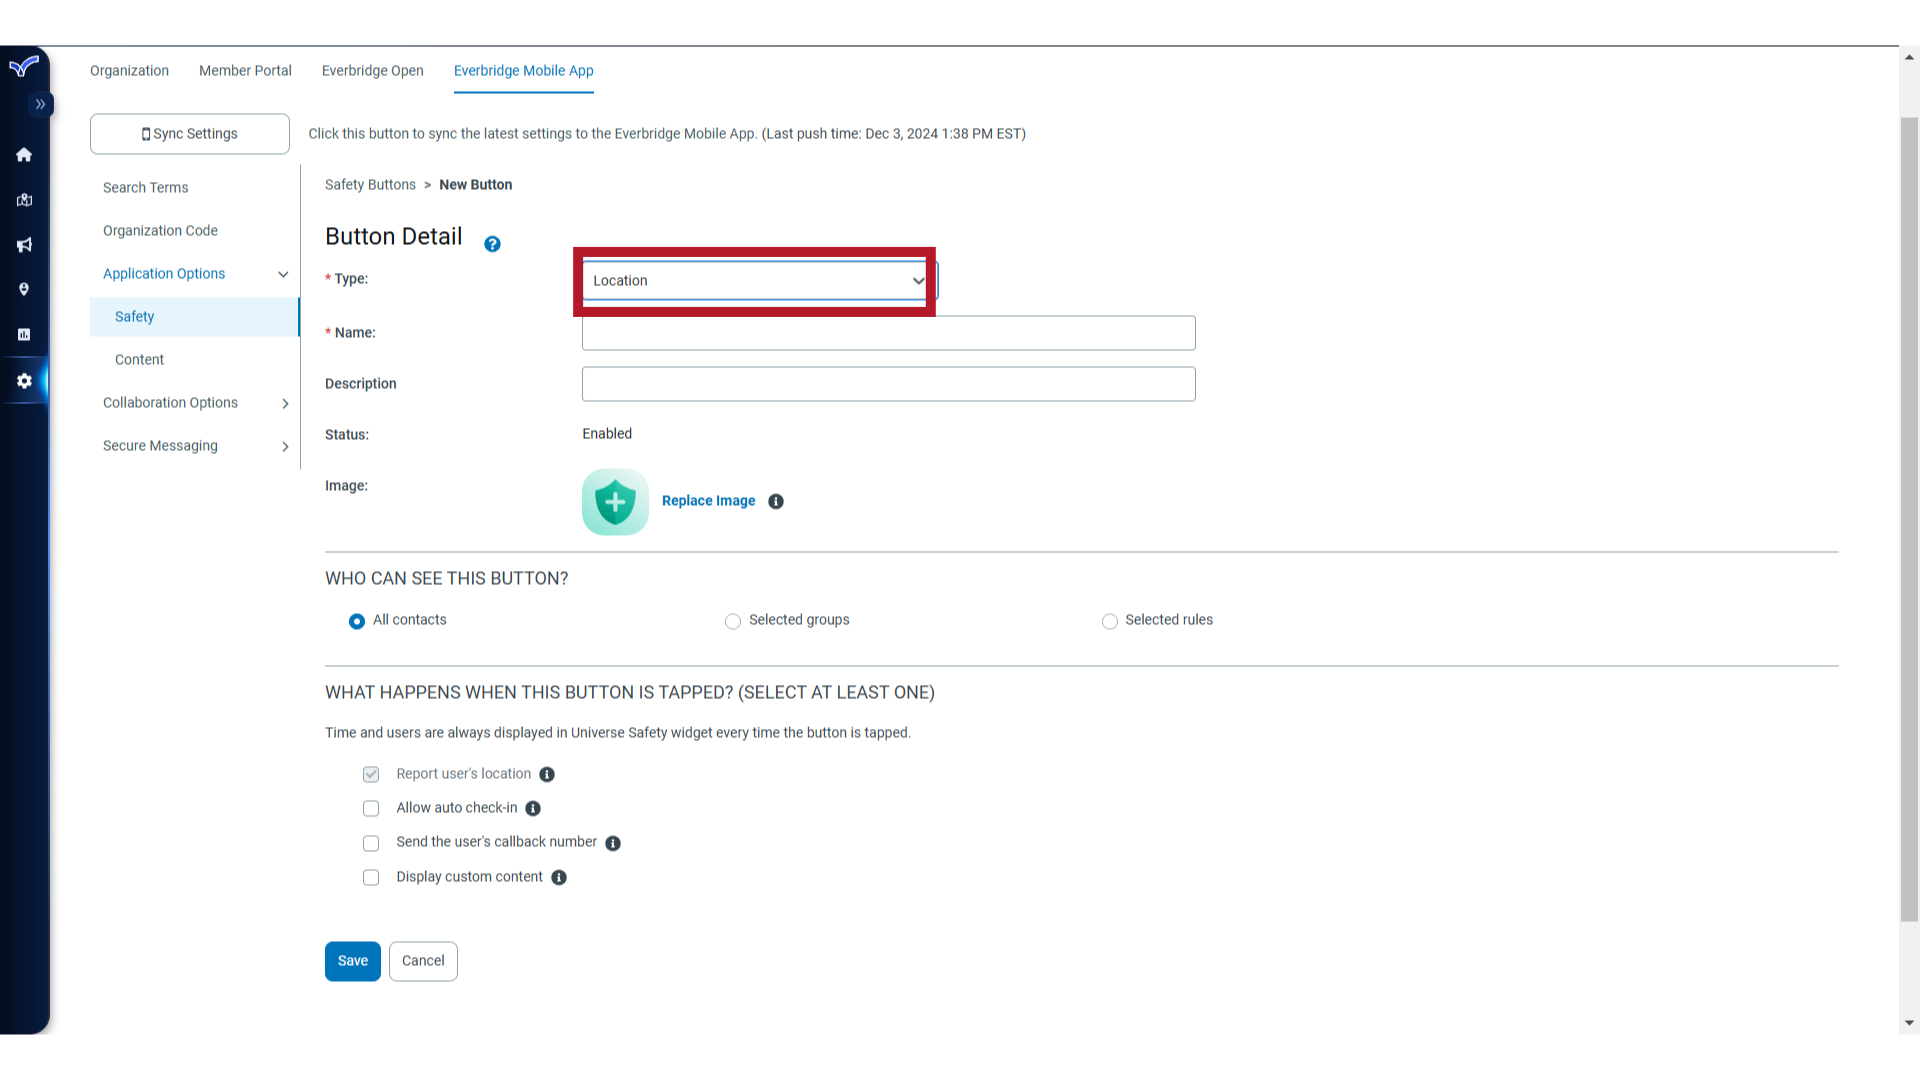
7. Button Detail
The Button Detail form will display with the available options for the Type selected.
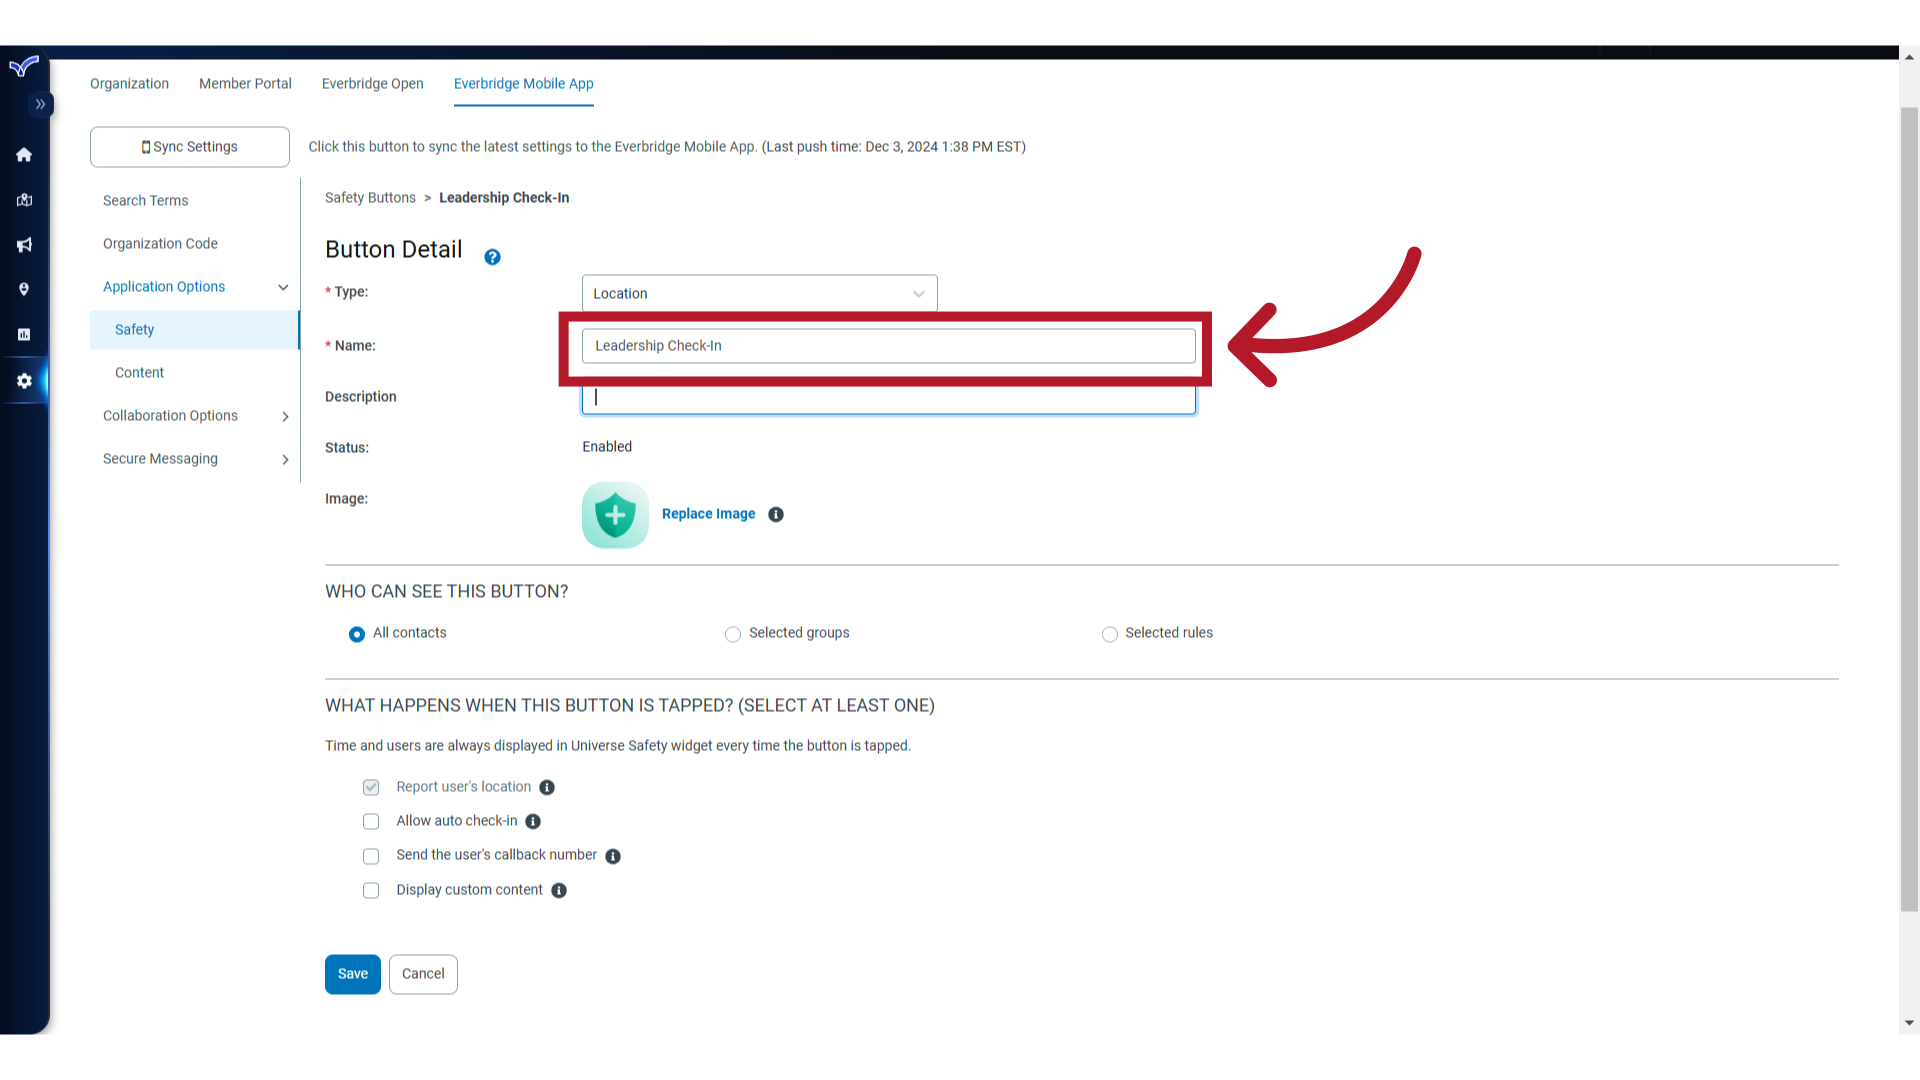
8. Name
Enter the name of the button as you want it to display in the mobile app. The maximum characters is 25.
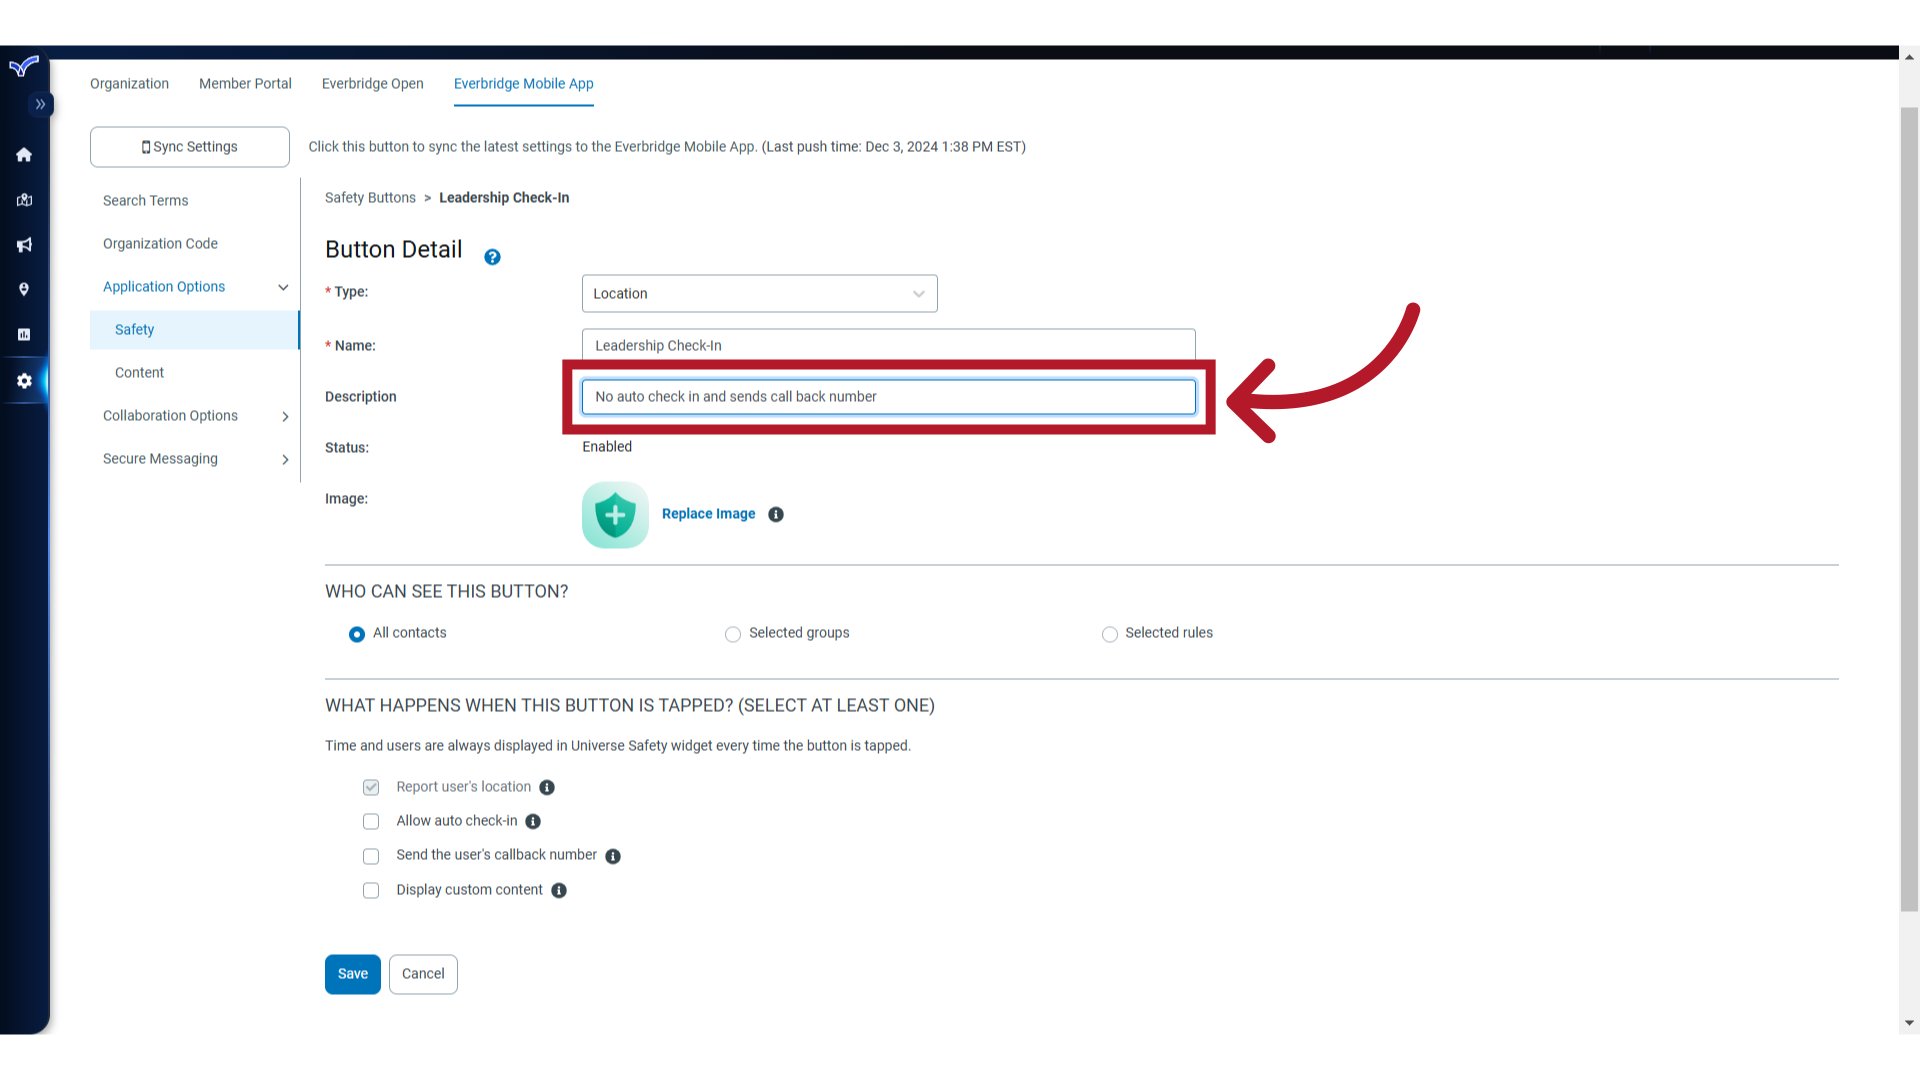
9. Description
Optionally, add an internal description. This is not exposed to the mobile app user.
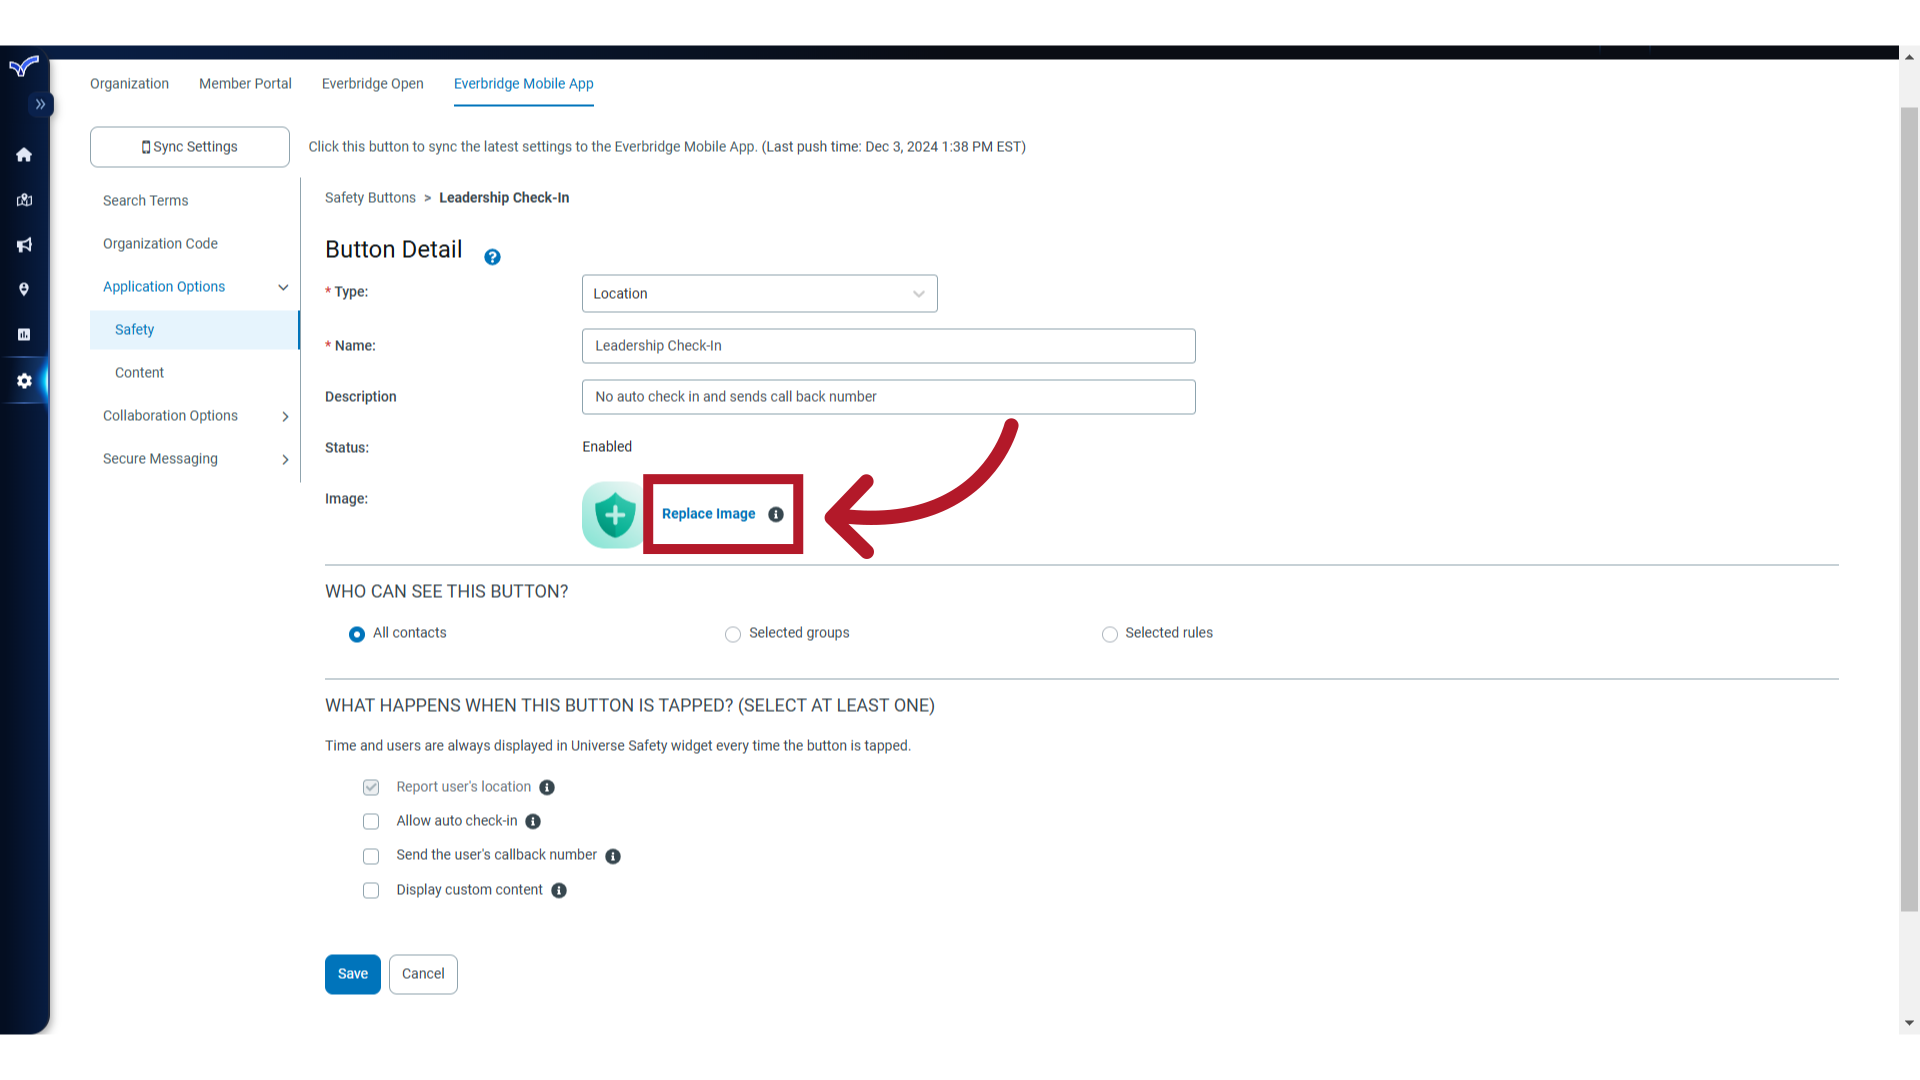
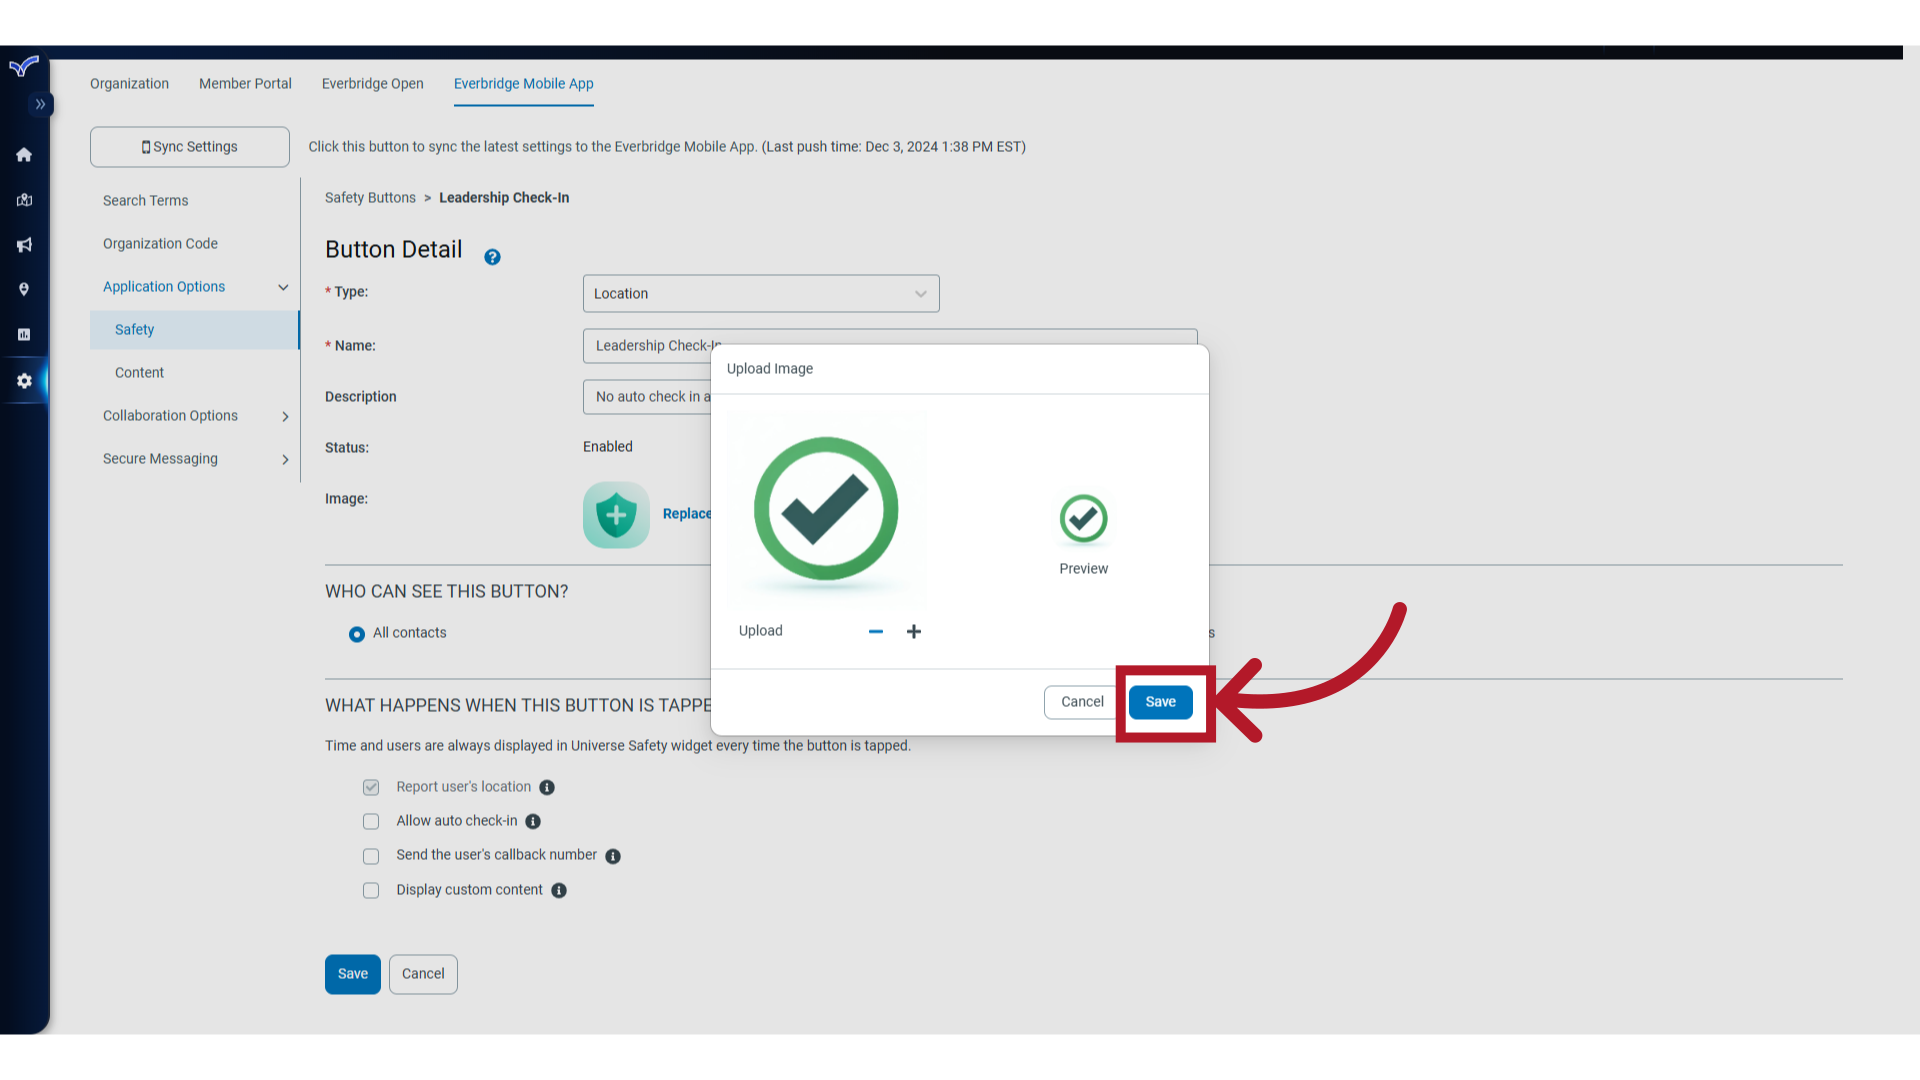
10. Replace Image
Next, click Replace Image to upload an icon for the button.
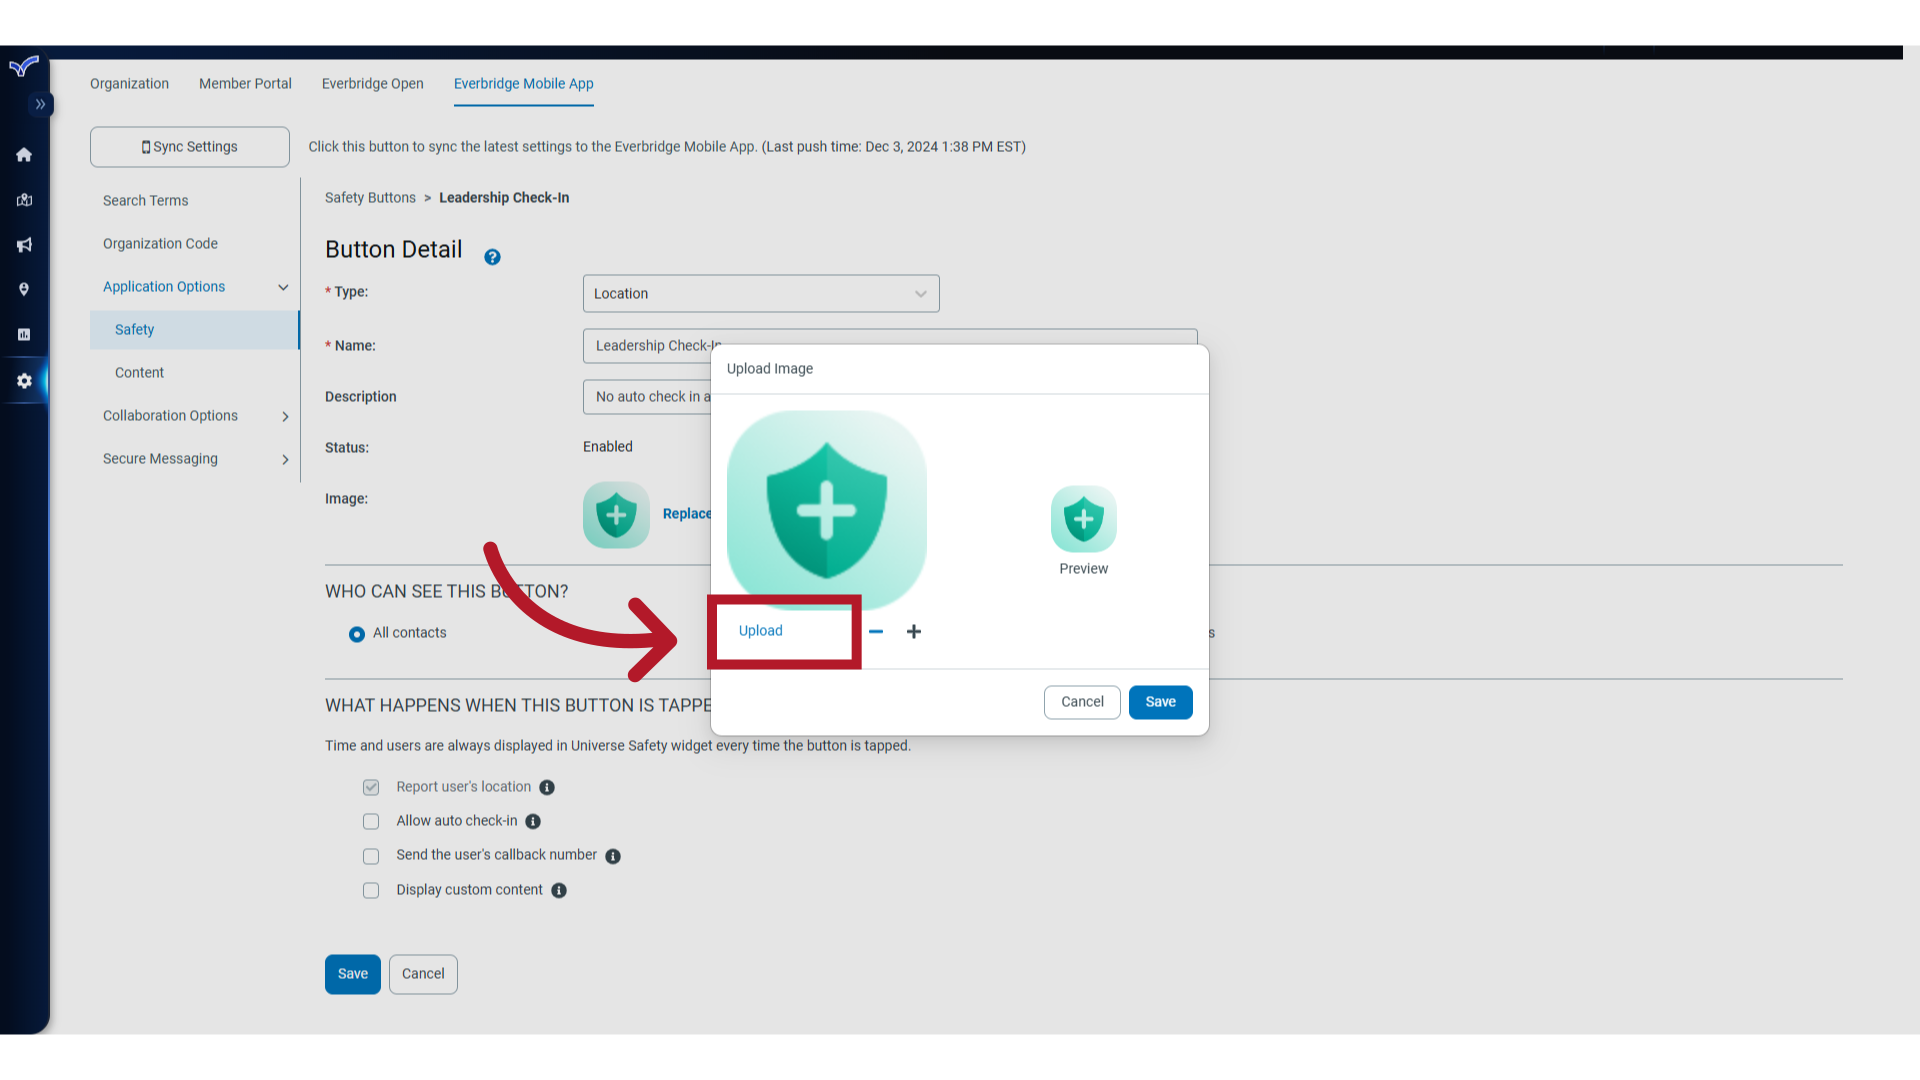
11. Upload
Click Upload to select an image file you have saved. The recommended size for an Everbridge Mobile App icon is 256x256 pixels.
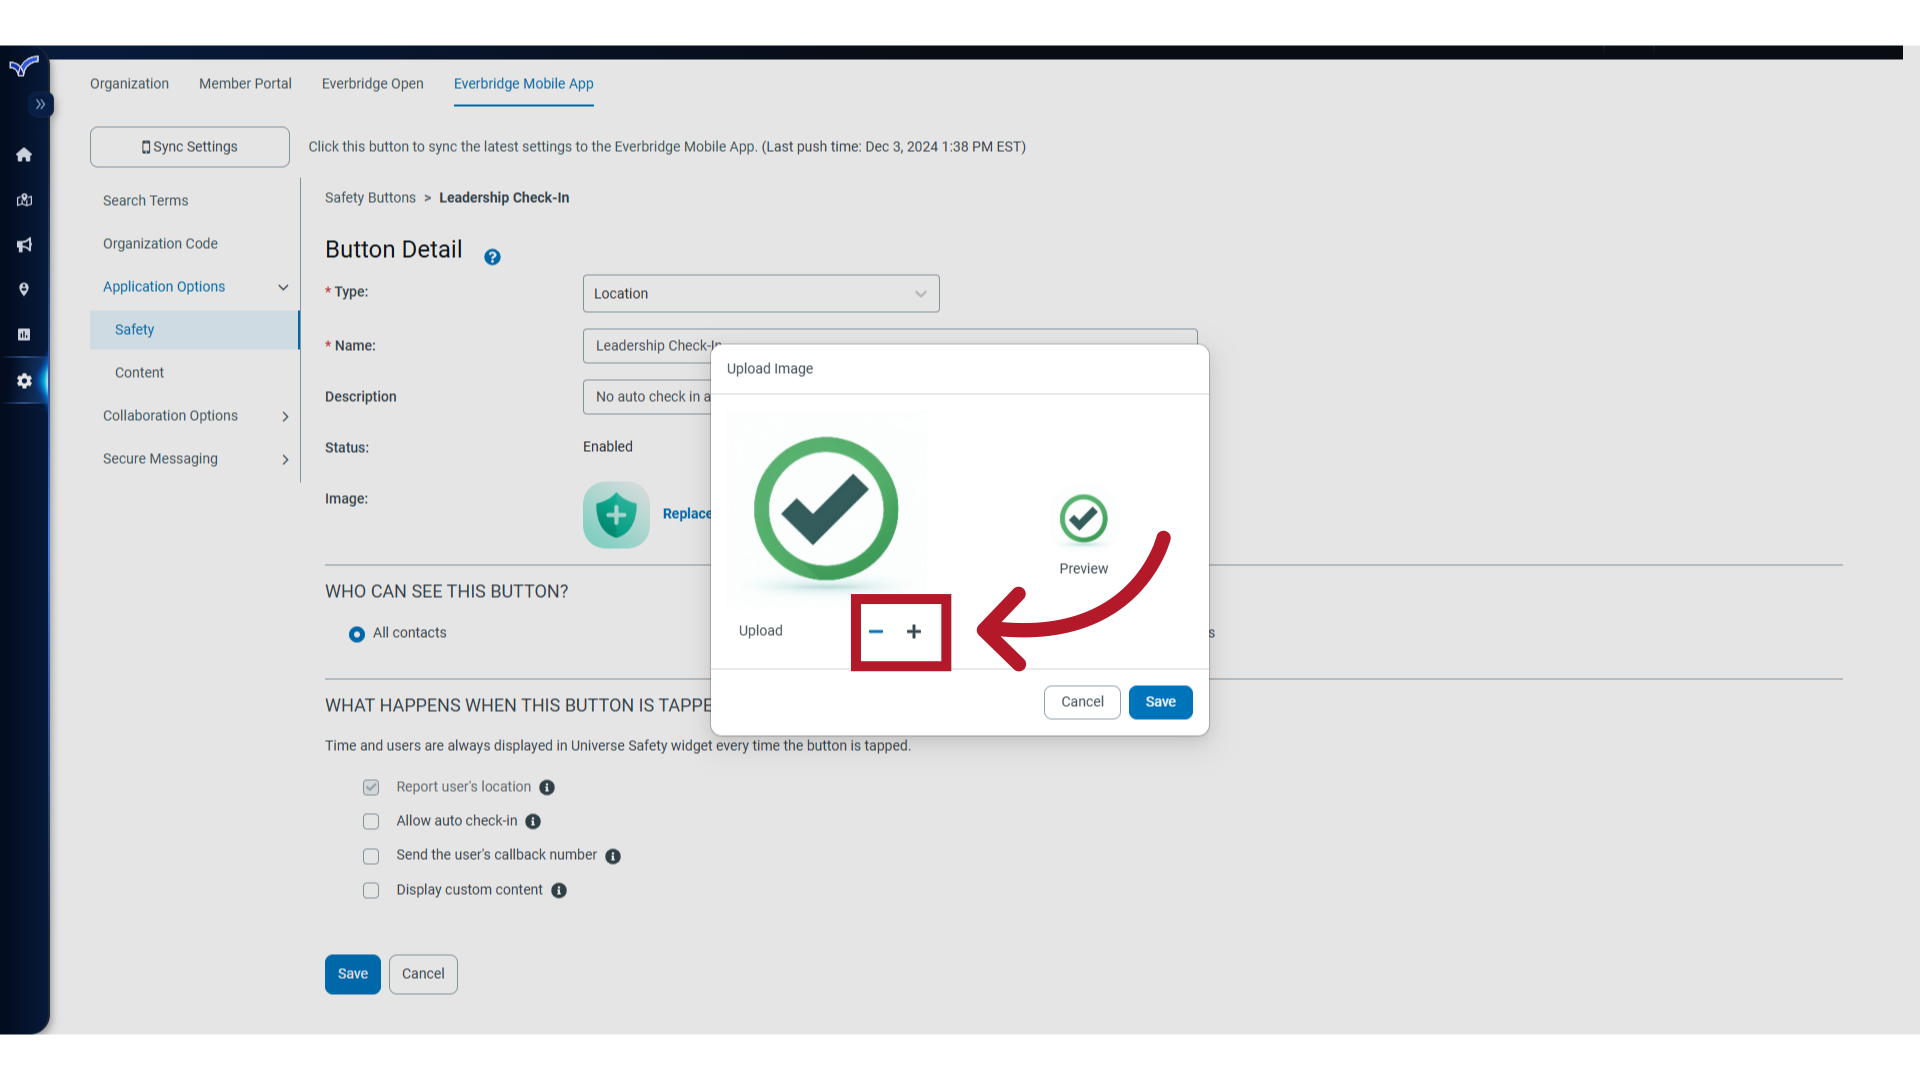
12. Resize
If needed, you can resize the image for a better fit within the button area. A preview of the button appears on the right.
13. Save
Click Save when done.
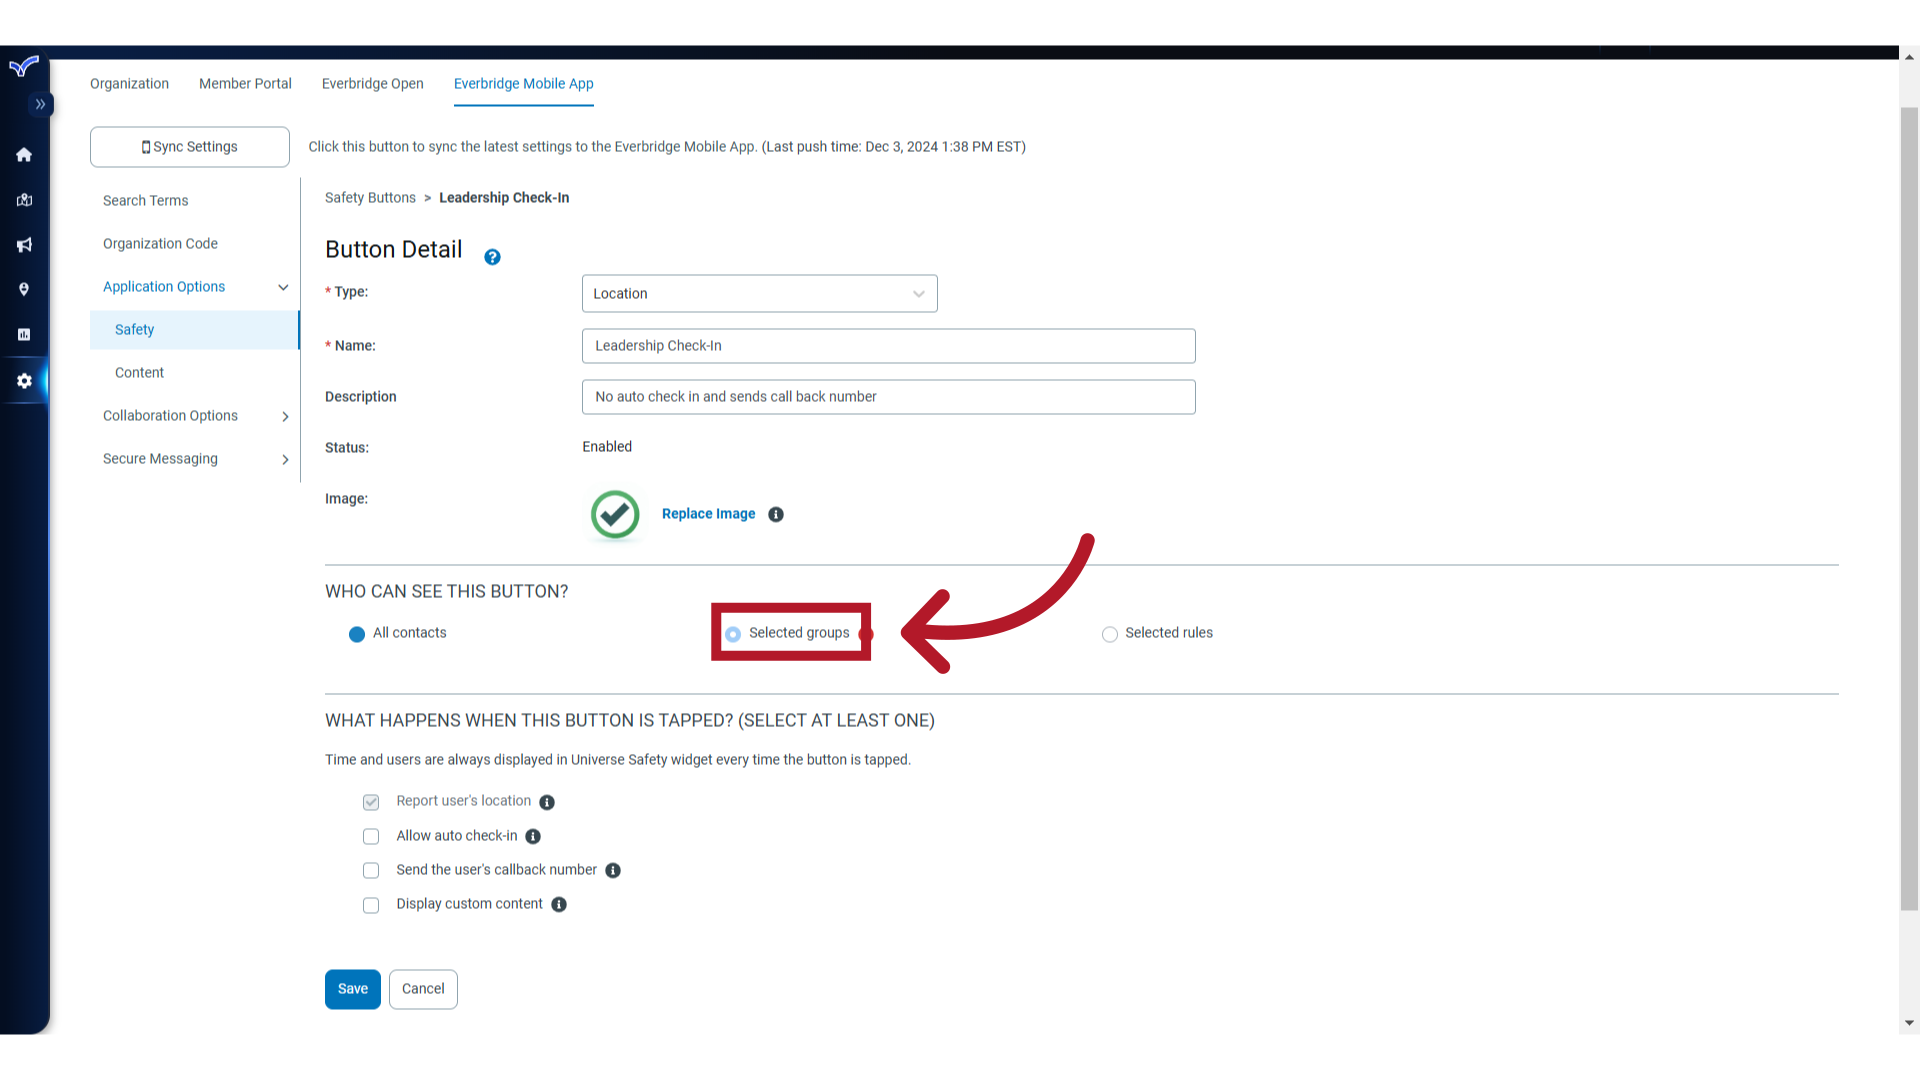
14. Set Access
Next, select which contacts should have access to the button. We have a group that represents our Leadership team, so will choose the groups option.
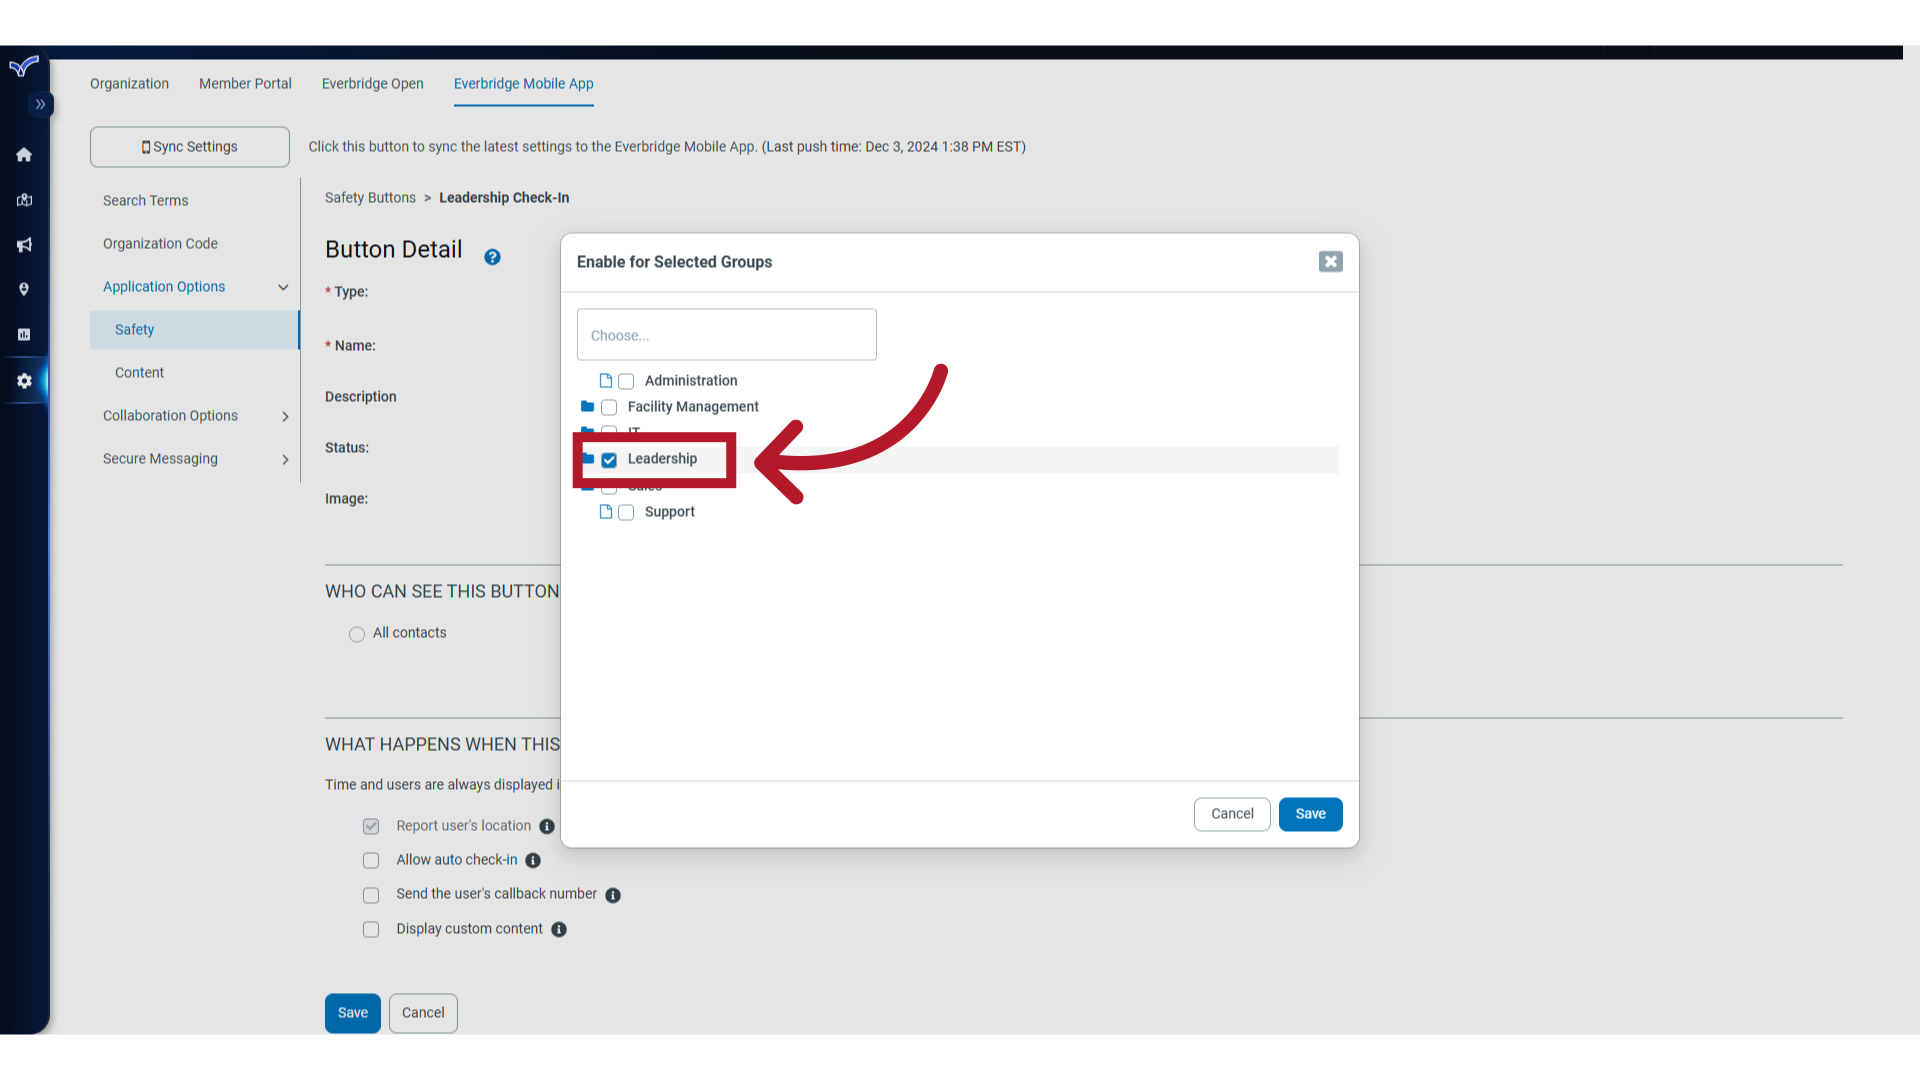
15. Select
We'll select the group from our preconfigured list
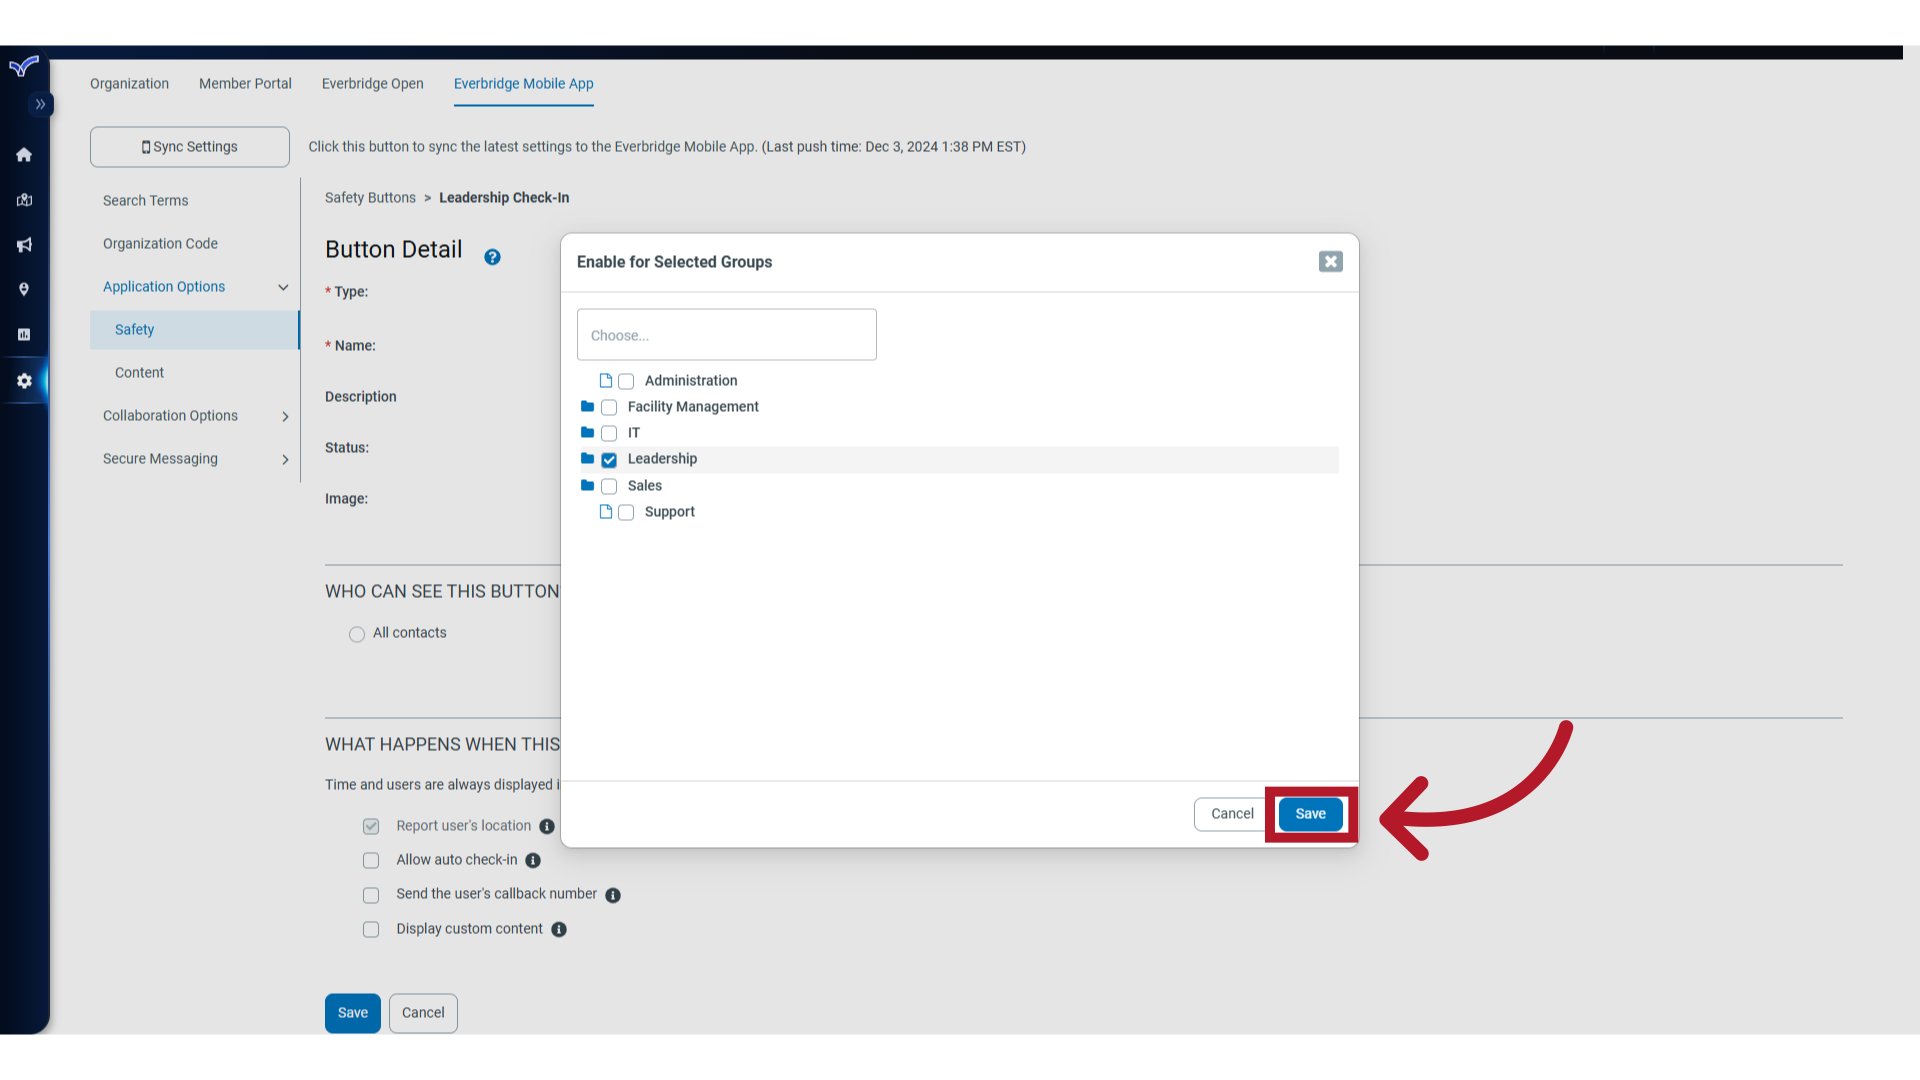
16. Save
and click Save.
17. Set Actions
Finally, select from the available options what should happen when this button is tapped. For this example, we will not enable auto check-in, but we will capture the user's callback number.
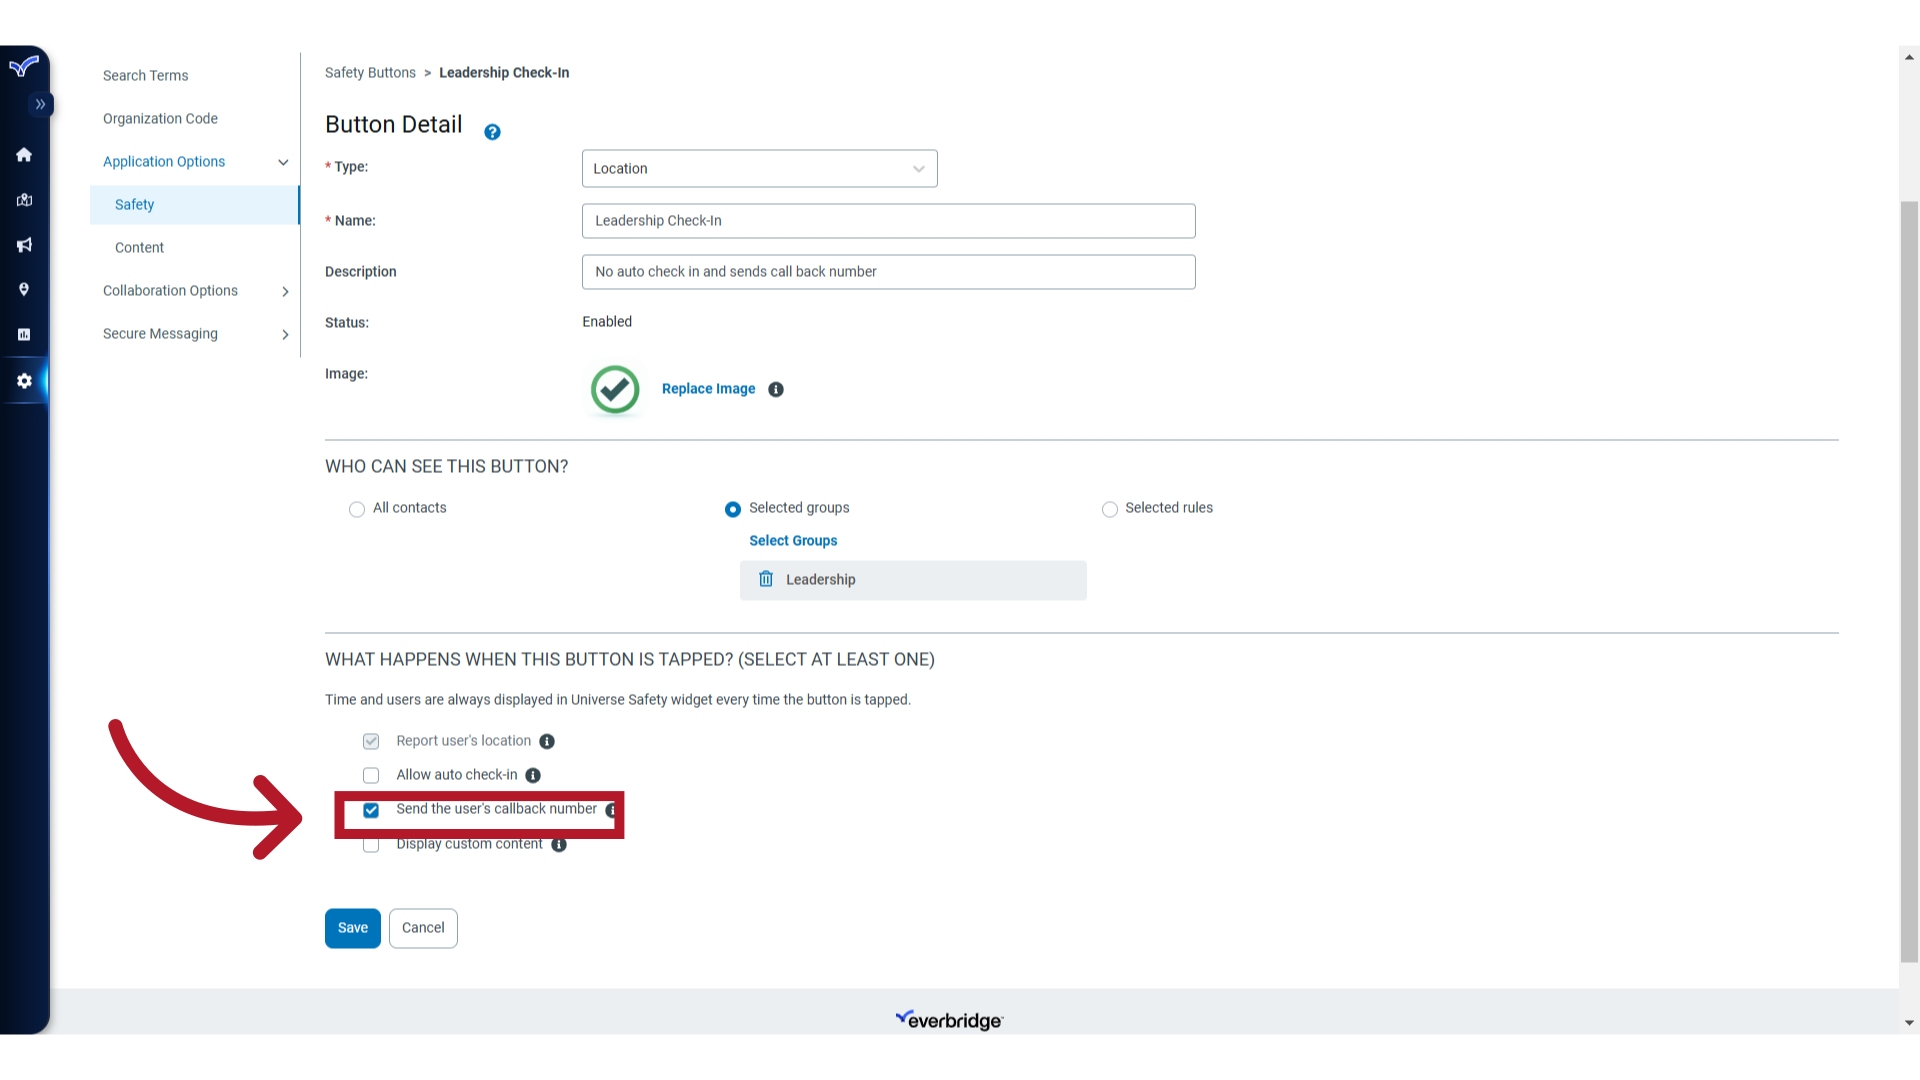
18. Save
When all button options have been configured, click Save.
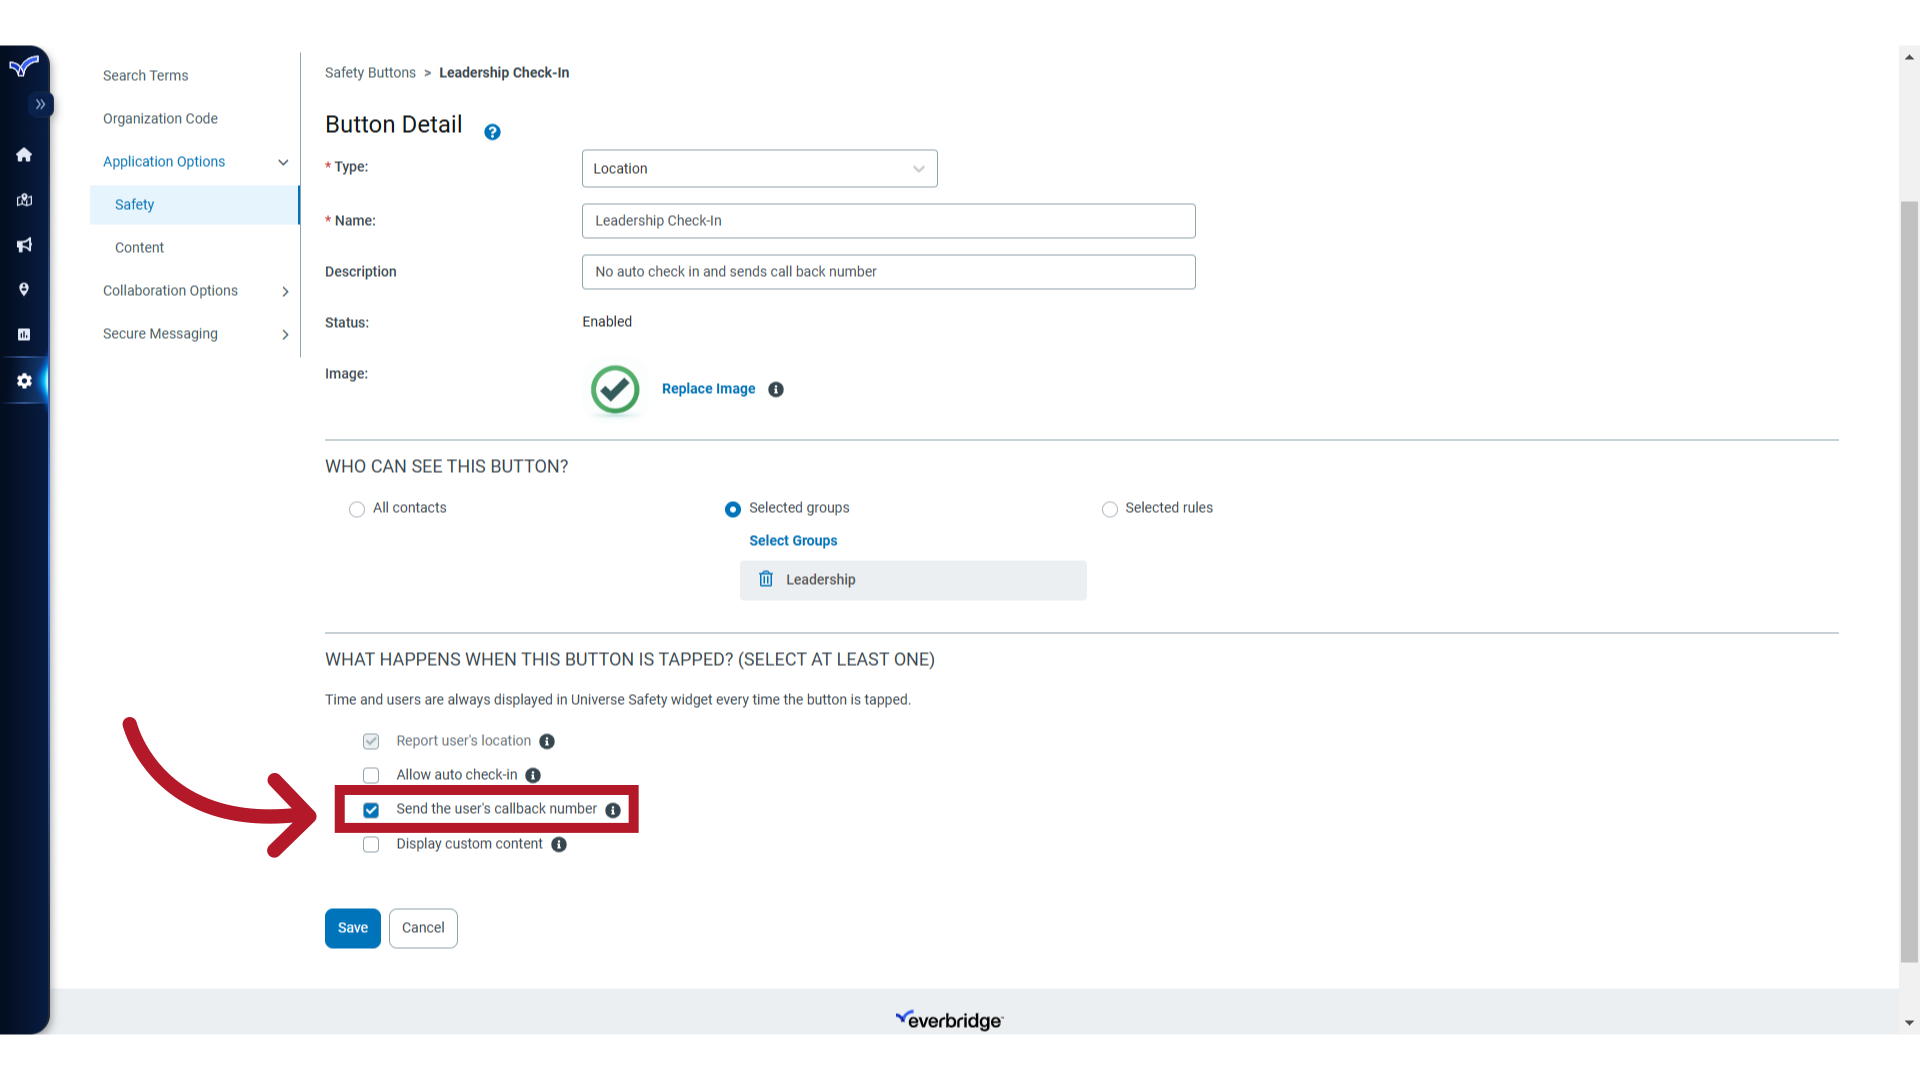
19. Options
These basic configuration concepts apply to the other button types as well. Let's continue by looking at a few completed examples.
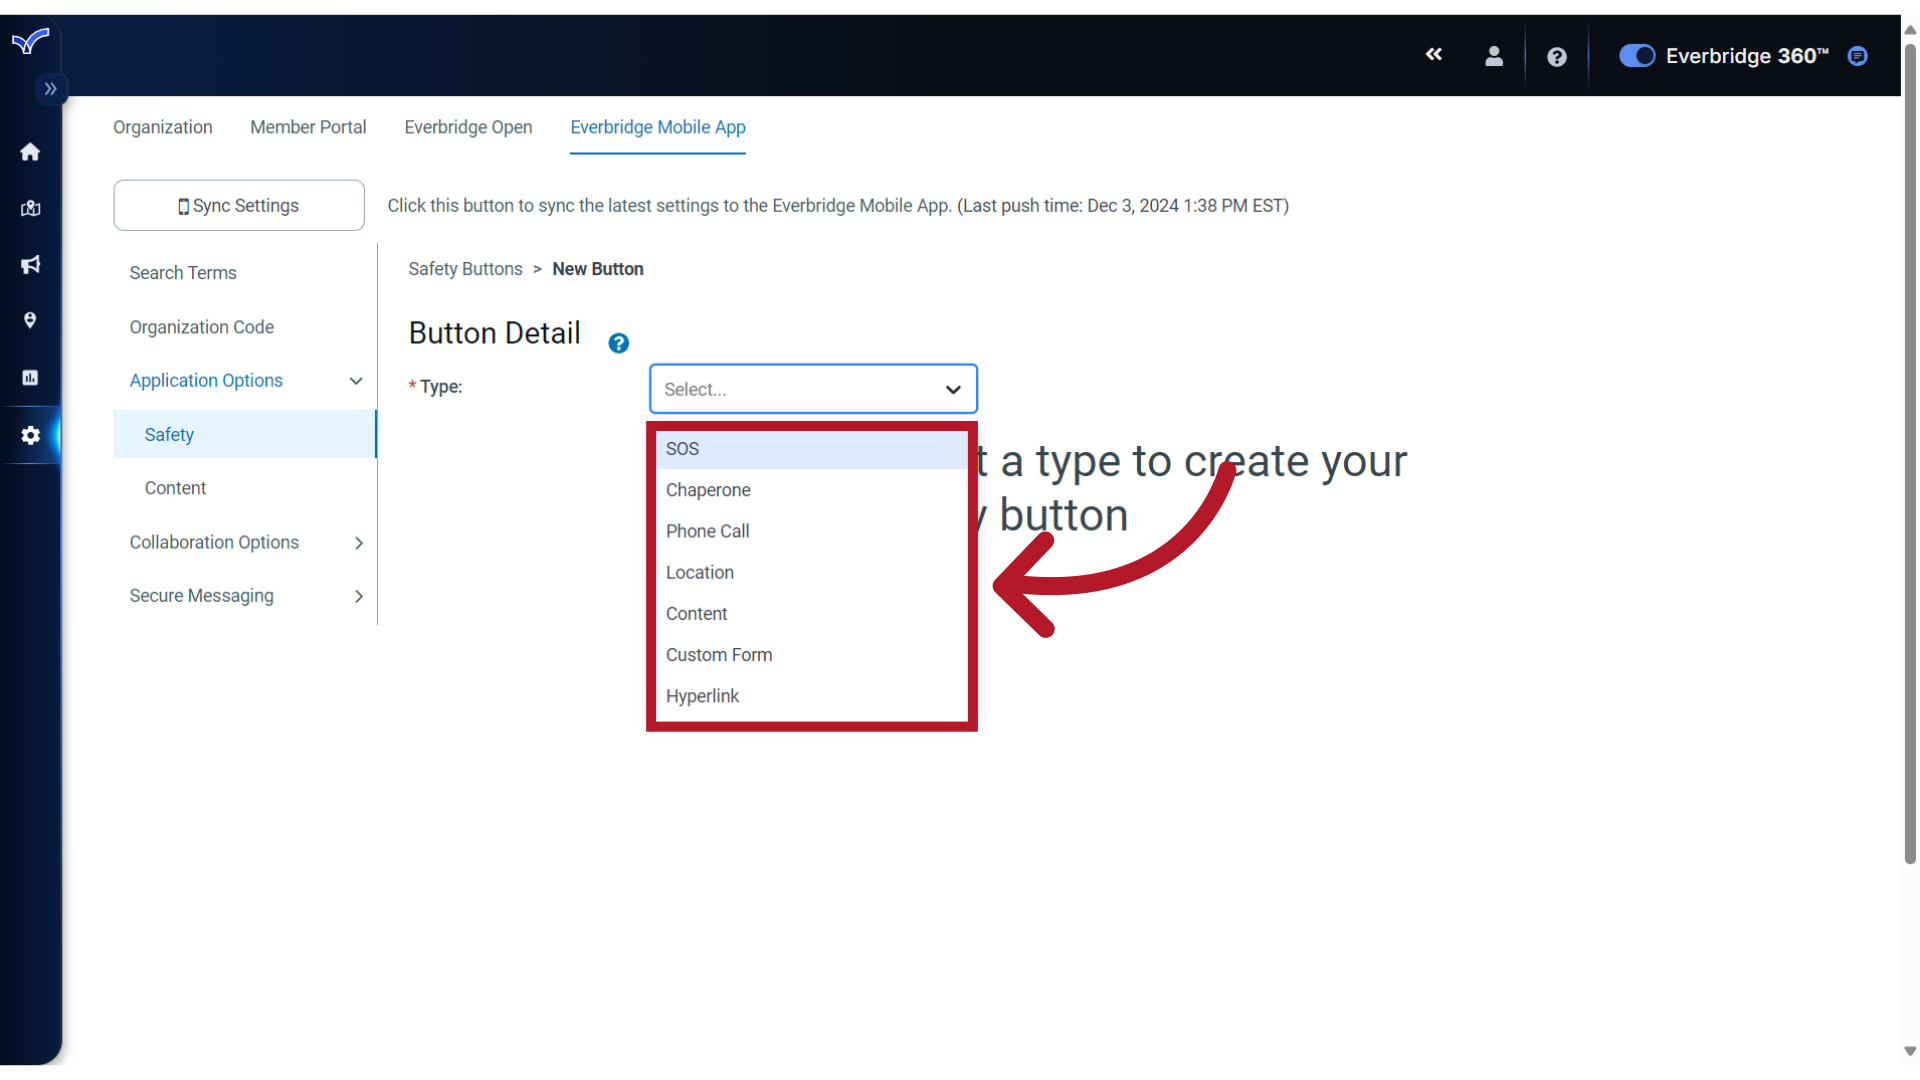
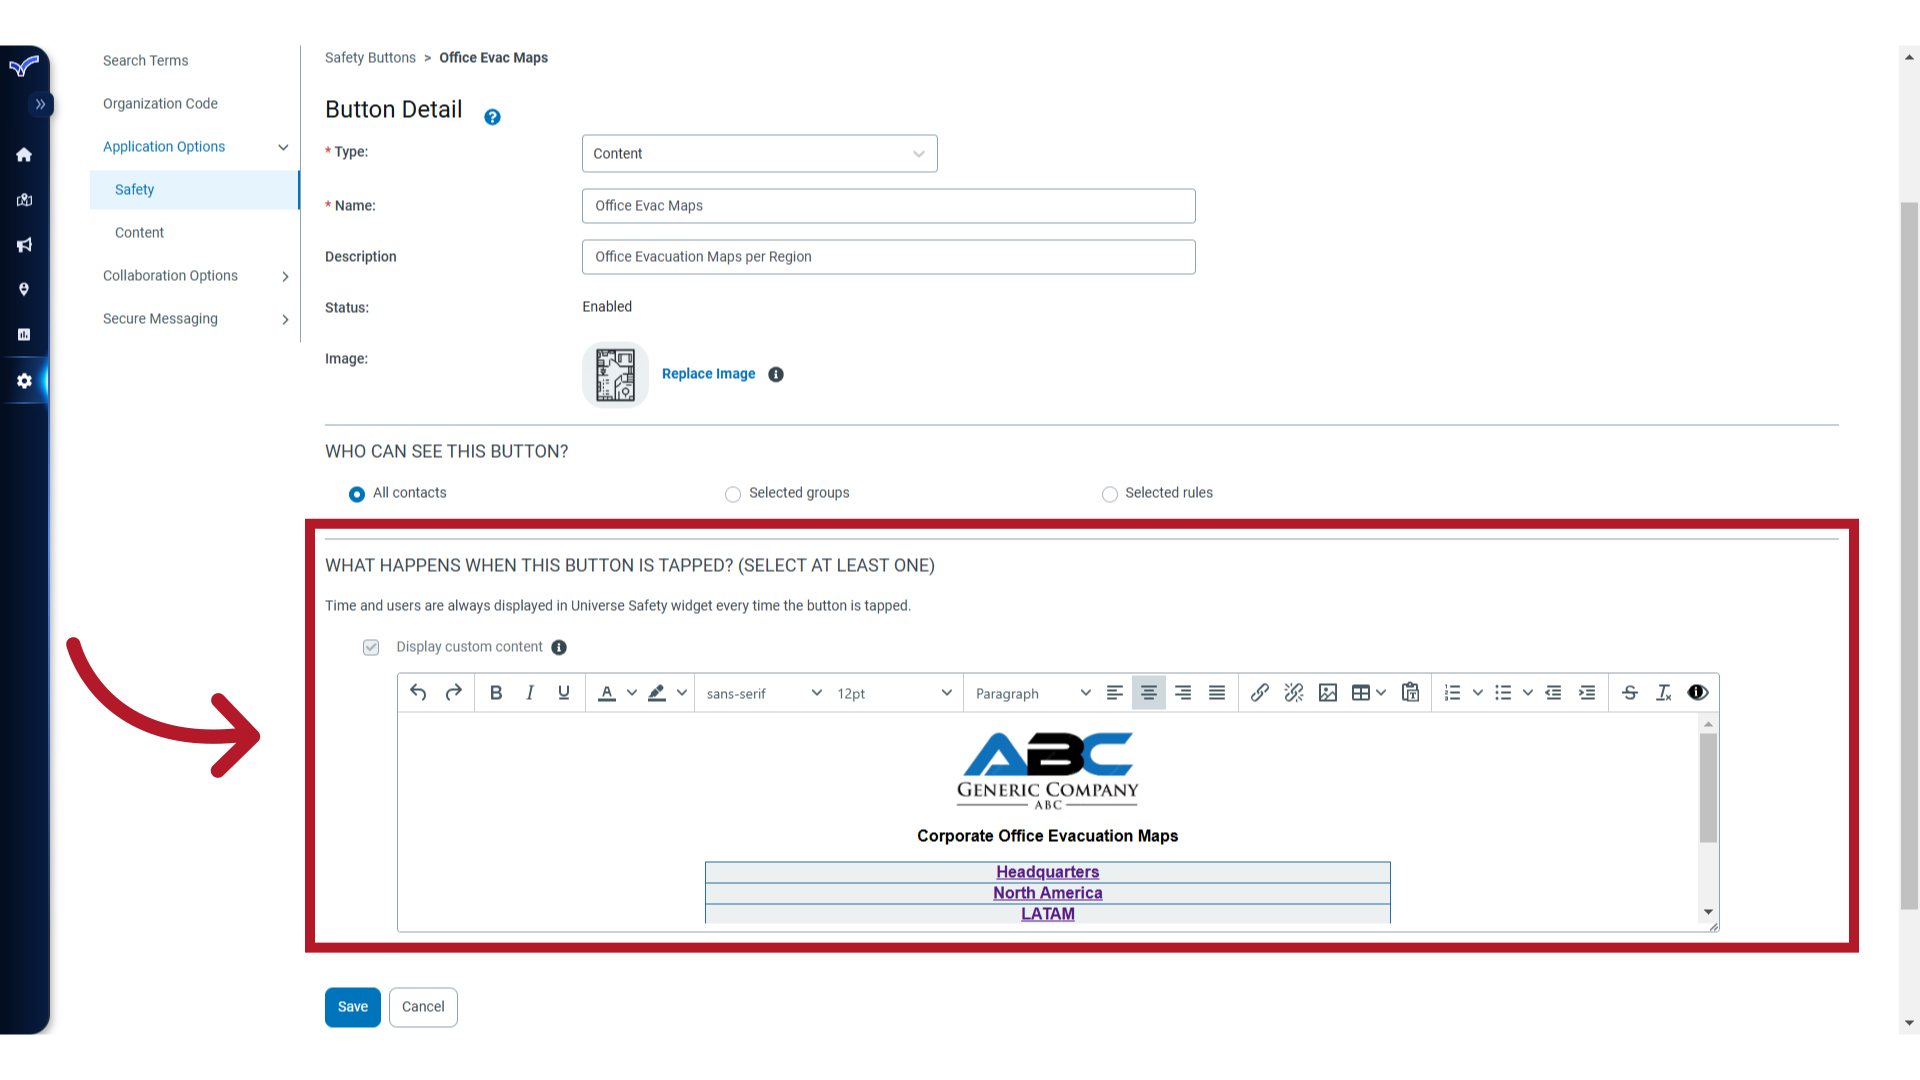
20. Content
With the Content option, you are provided with a rich text editor for adding custom content, including formatted text, images, links, tables and more.
21. Custom Form
Custom Form buttons display a questionnaire for the mobile app user to complete. The fields in the form are created from variables in a preconfigured Incident template. Once the end user completes and submits the form, a notification with the information they provided is automatically sent to preselected stakeholders.
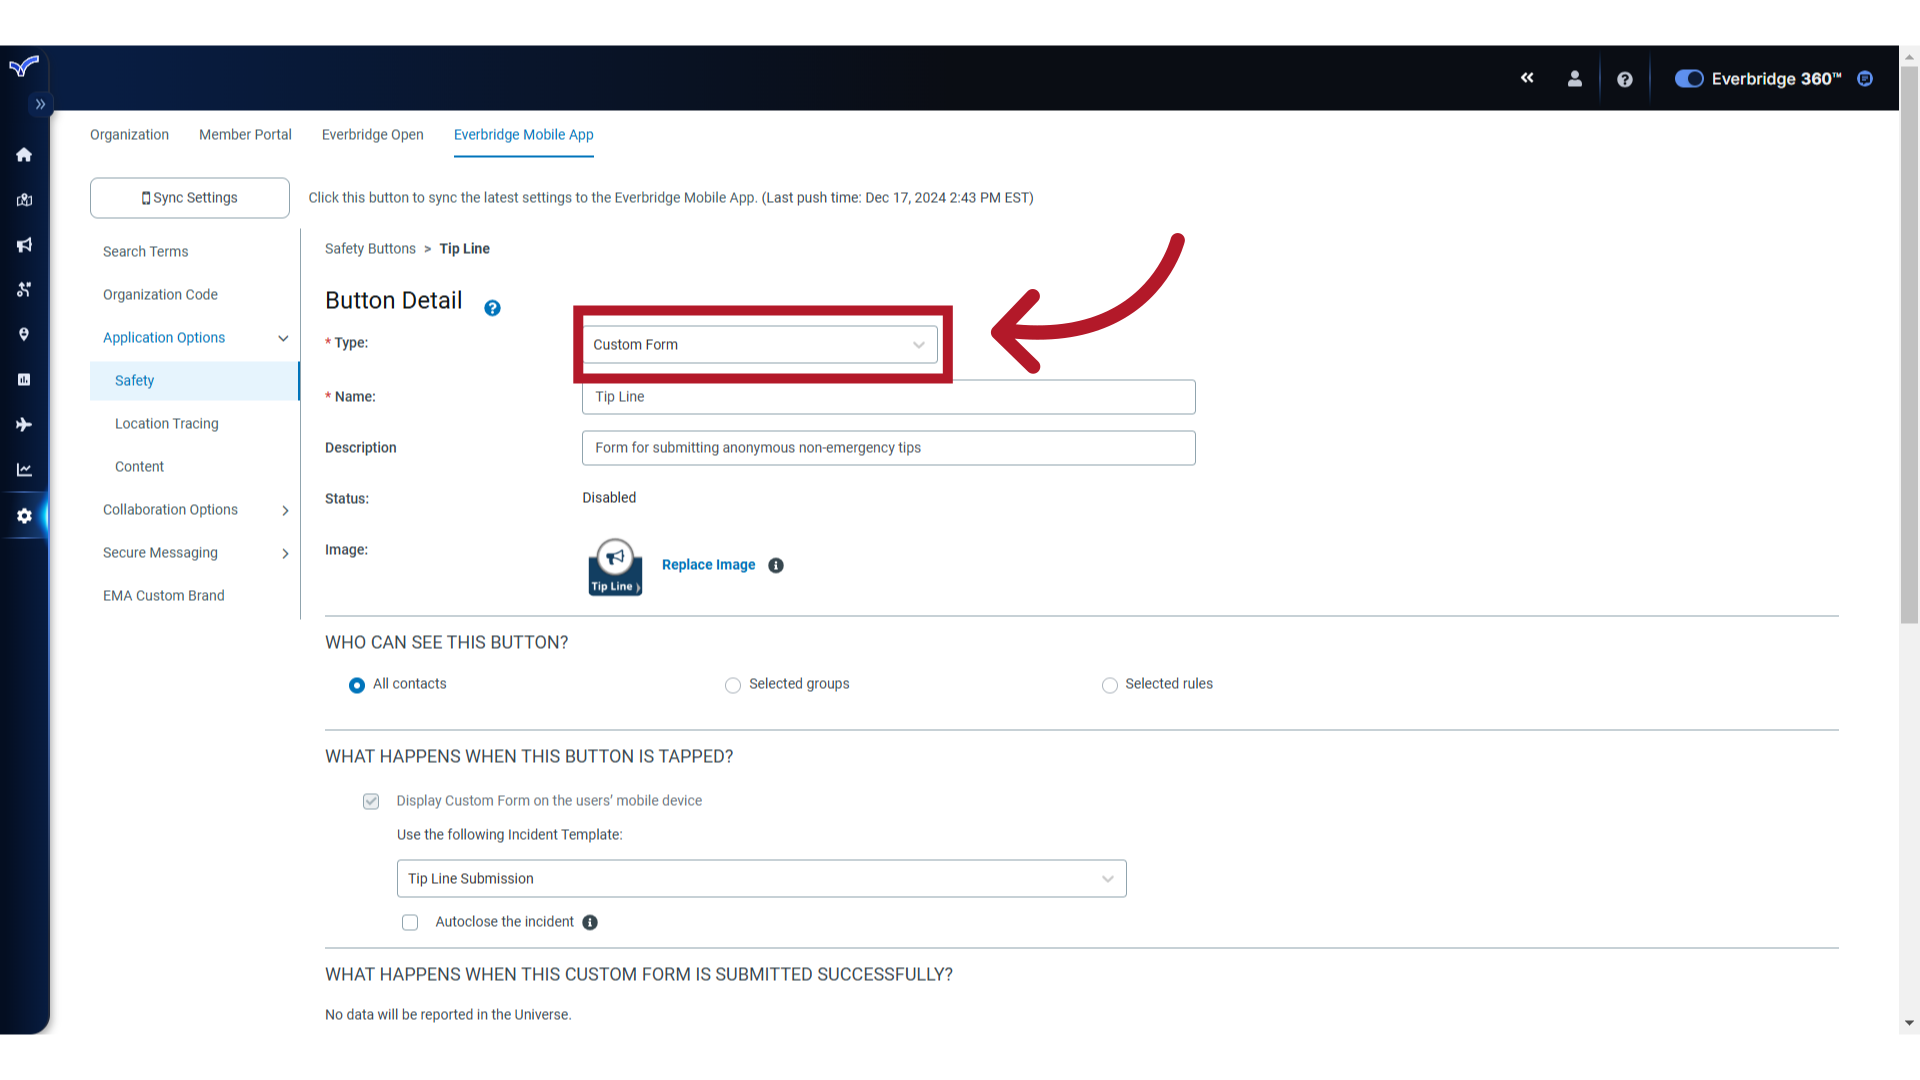
22. Template
In this example, a preconfigured incident template that contains fields for submitting information to a Tip Line has been selected.
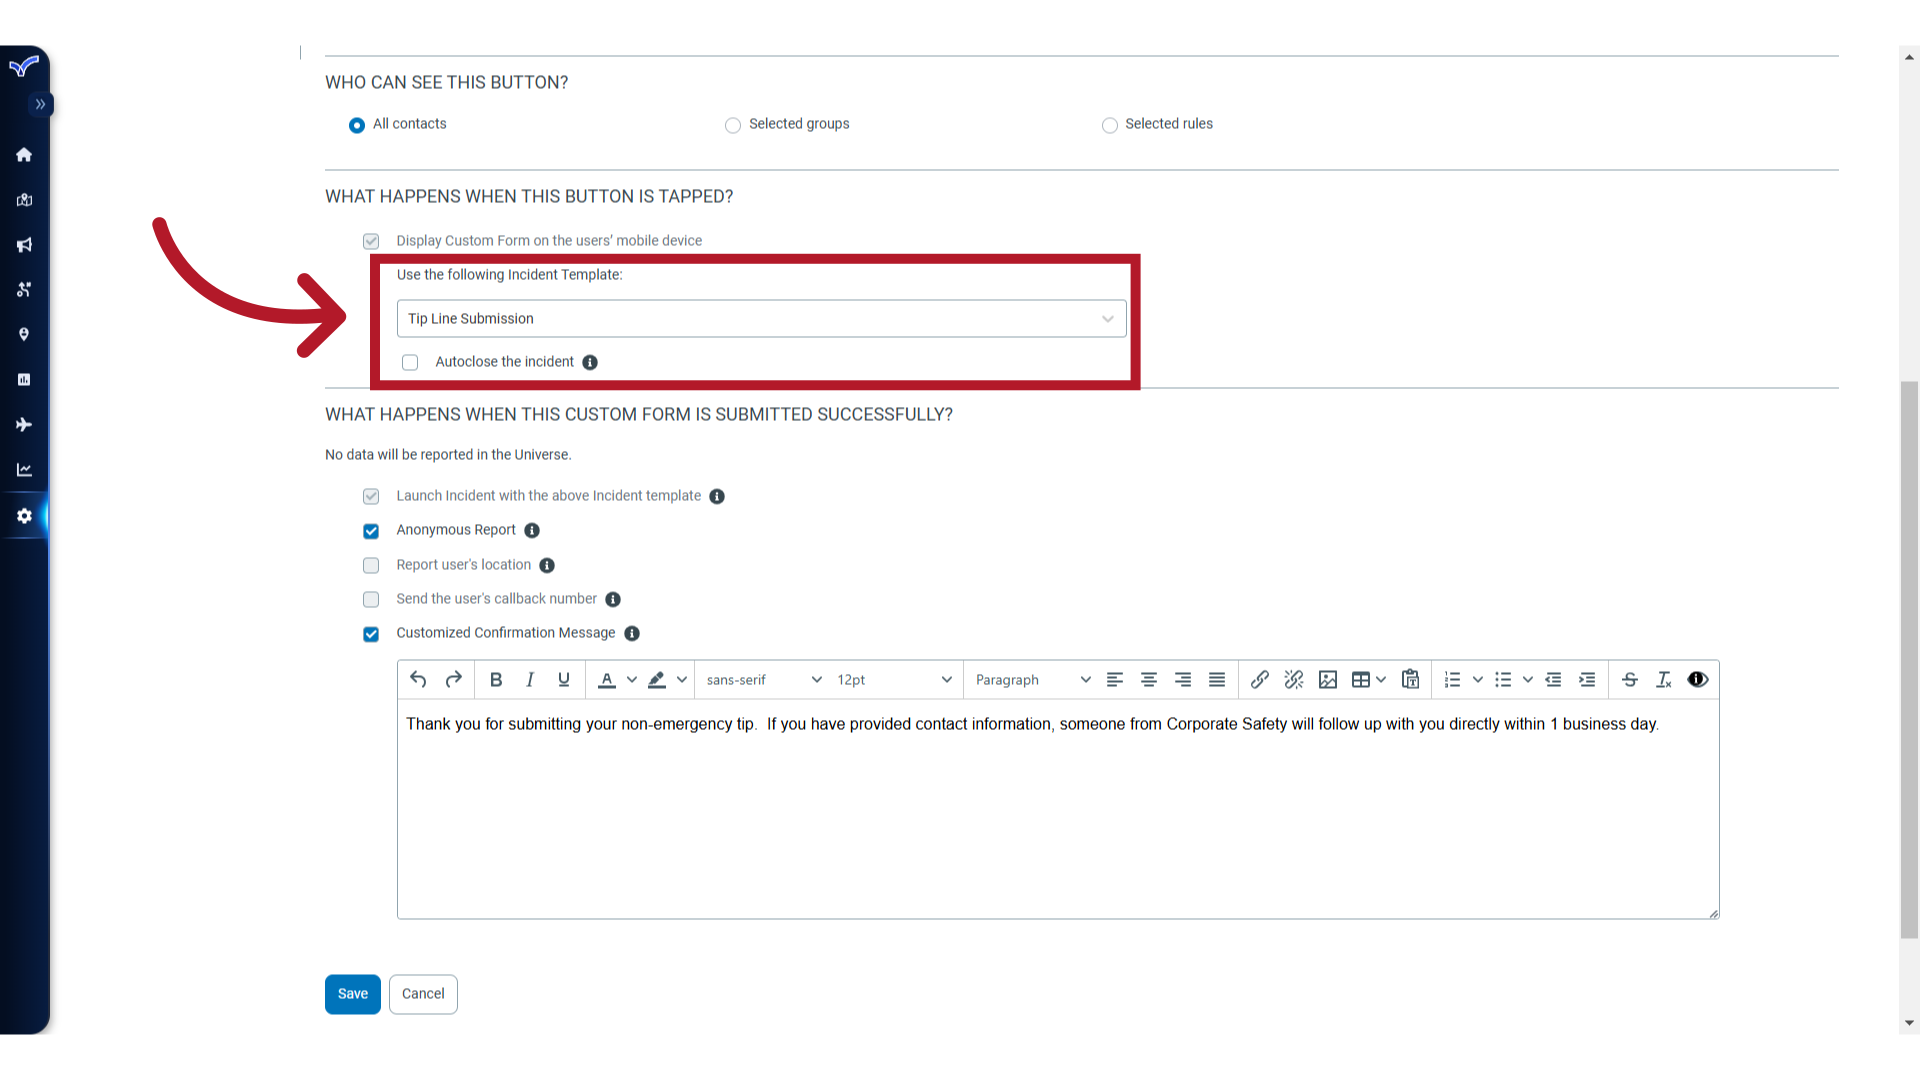
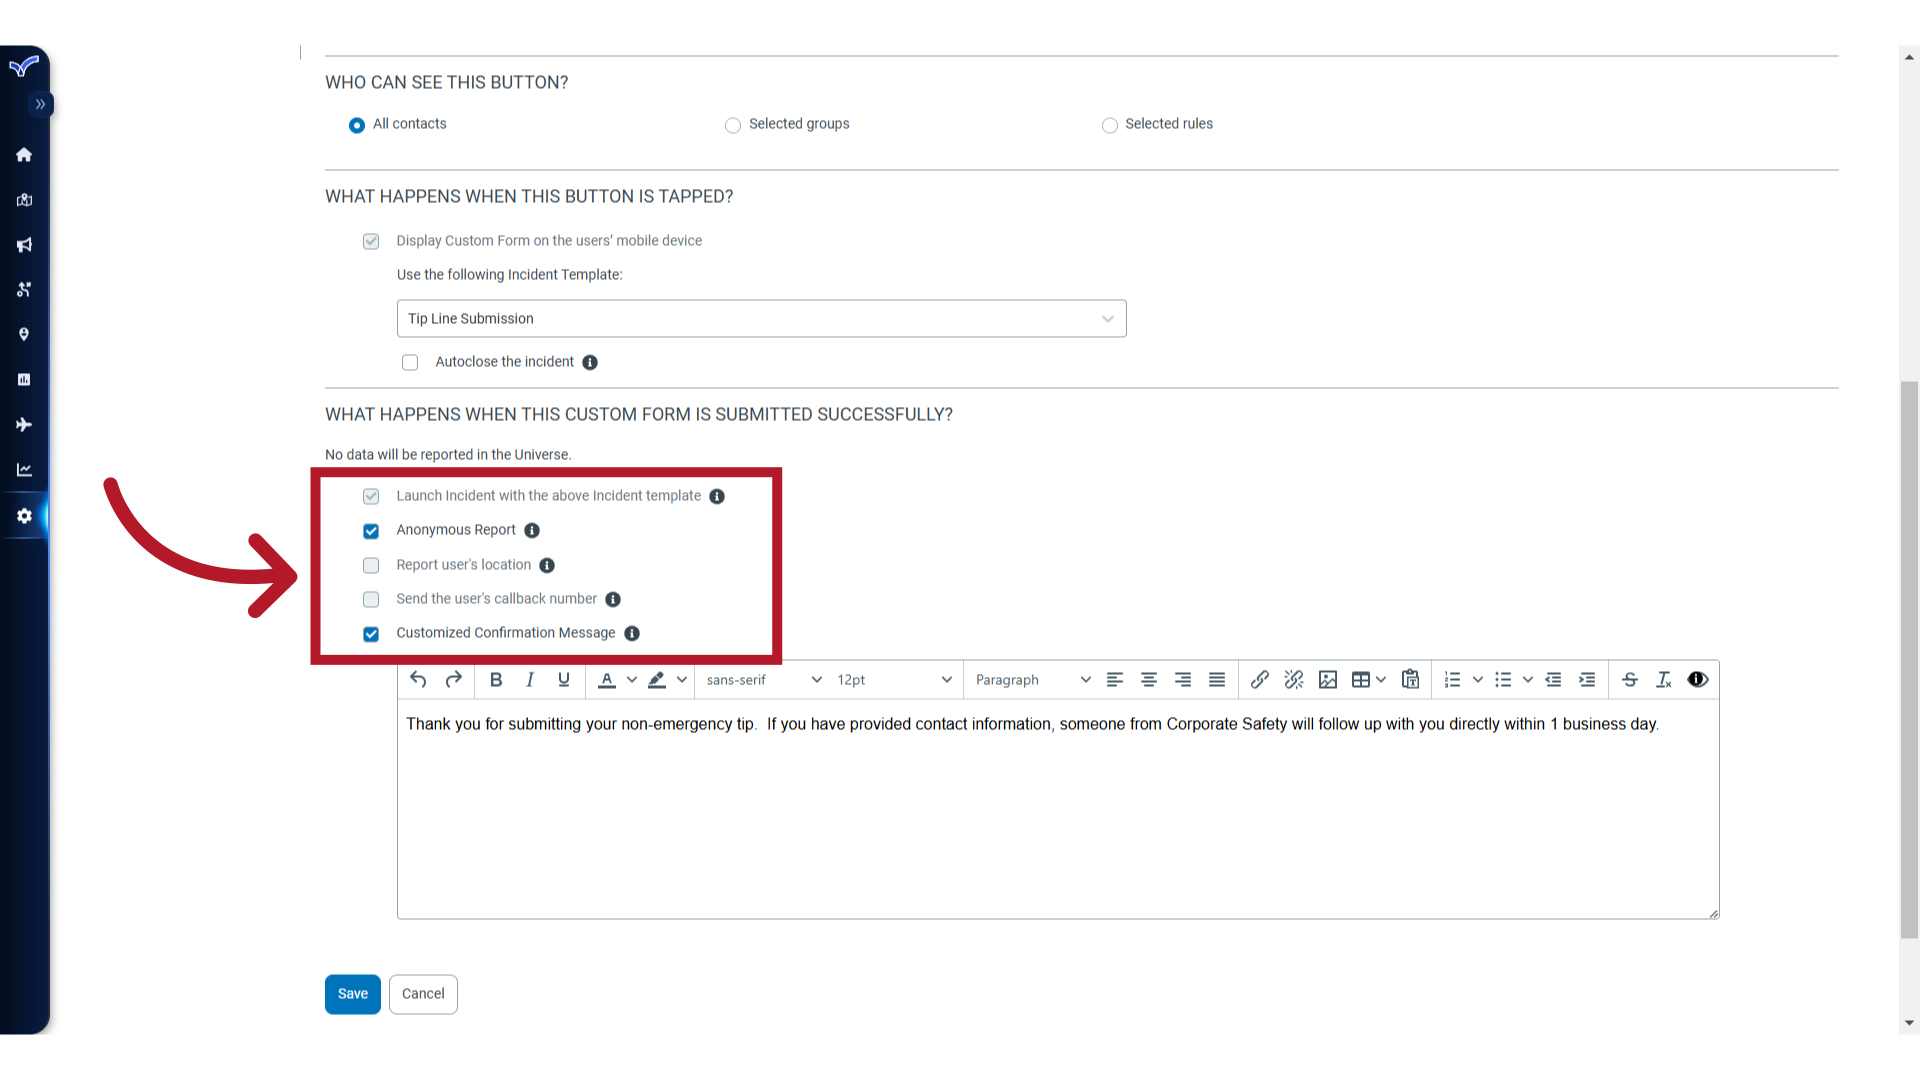
23. Actions
Custom Forms can capture similar information as the system buttons, with some additional options. Here, we have opted to make this an anonymous submission, so no identifying information is captured about the person submitting the Tip. We have also added a custom confirmation message to display after they have completed their submission.
24. Hyperlink
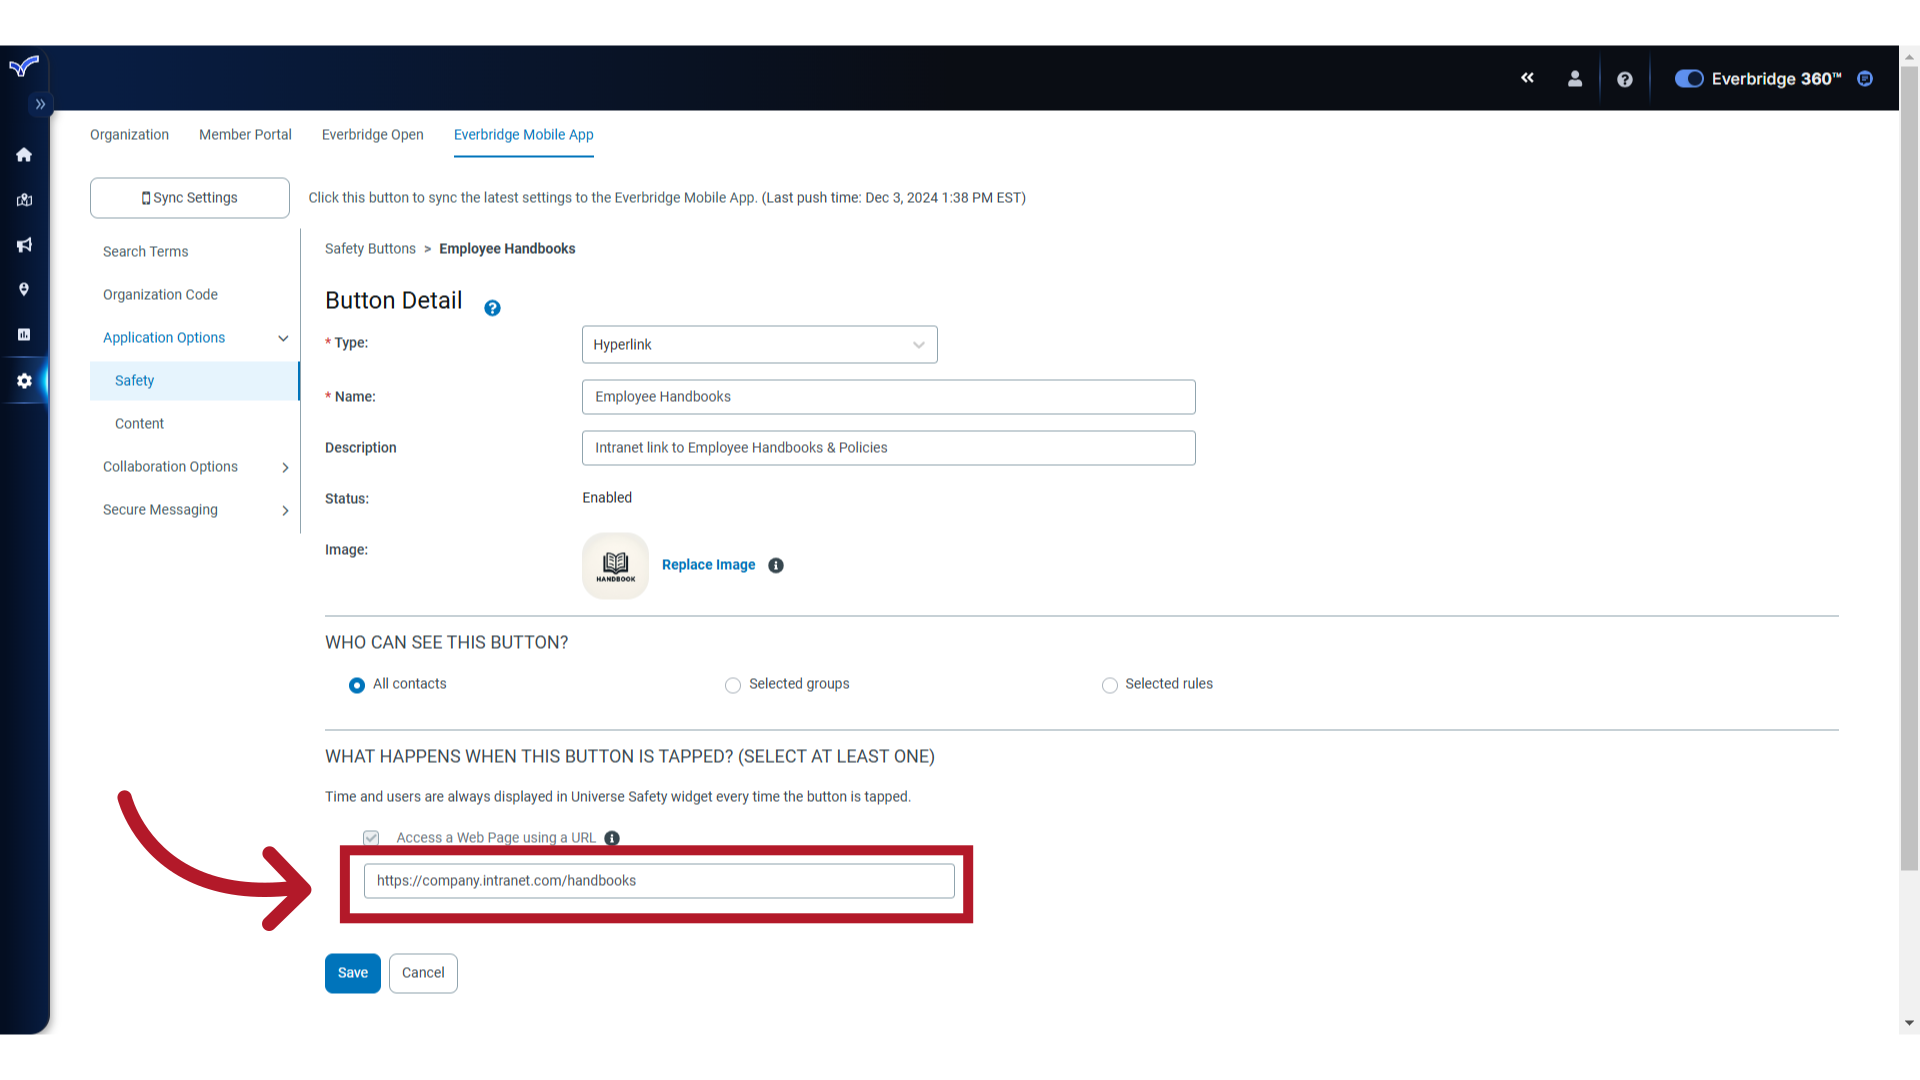
In this last example, we have used the Hyperlink option to create a button that provides easy access for all contacts to access the Employee Handbooks on our company's intranet site
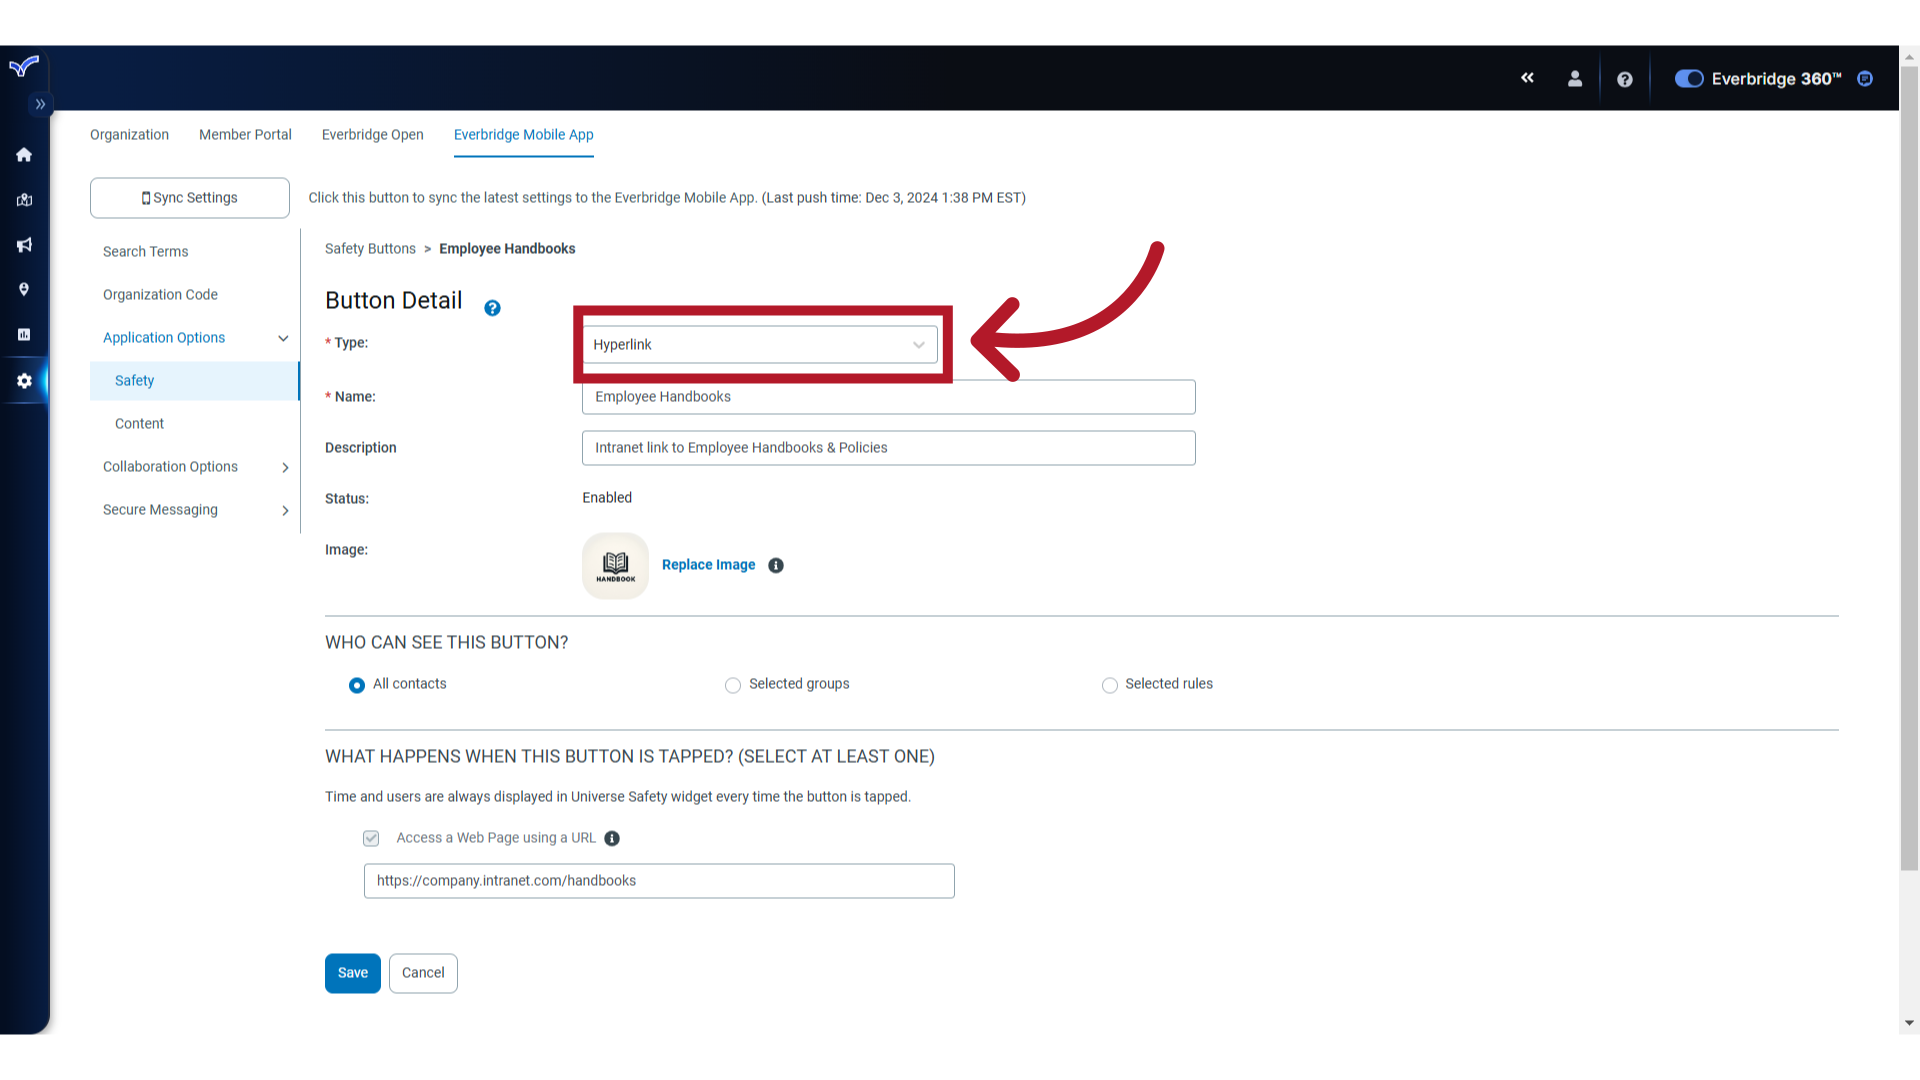
25. Hyperlink
When the user taps this button, they will be redirected through their mobile device's web browser to the URL provided.
26. Sync
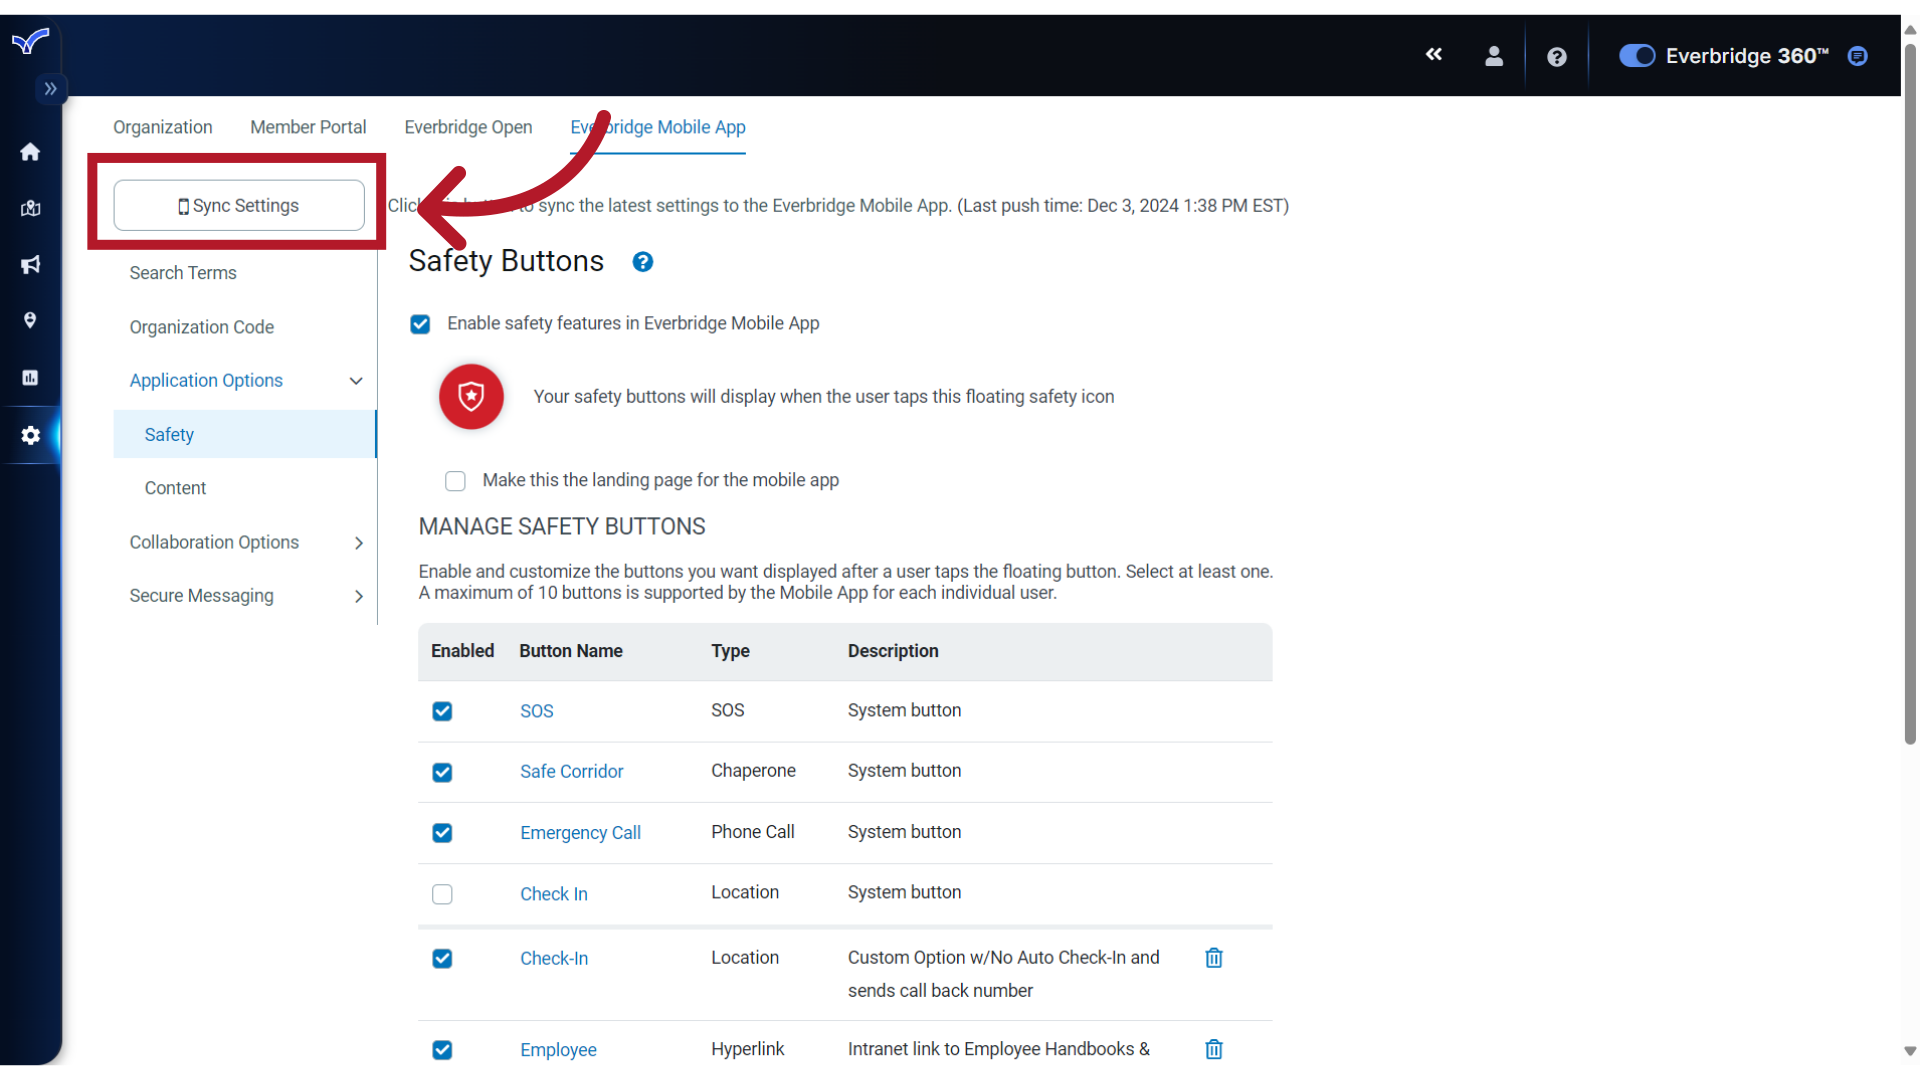
Finally, when any buttons have been created or modified, be sure to click Sync Settings to push the updates to your mobile app users.
27. Help
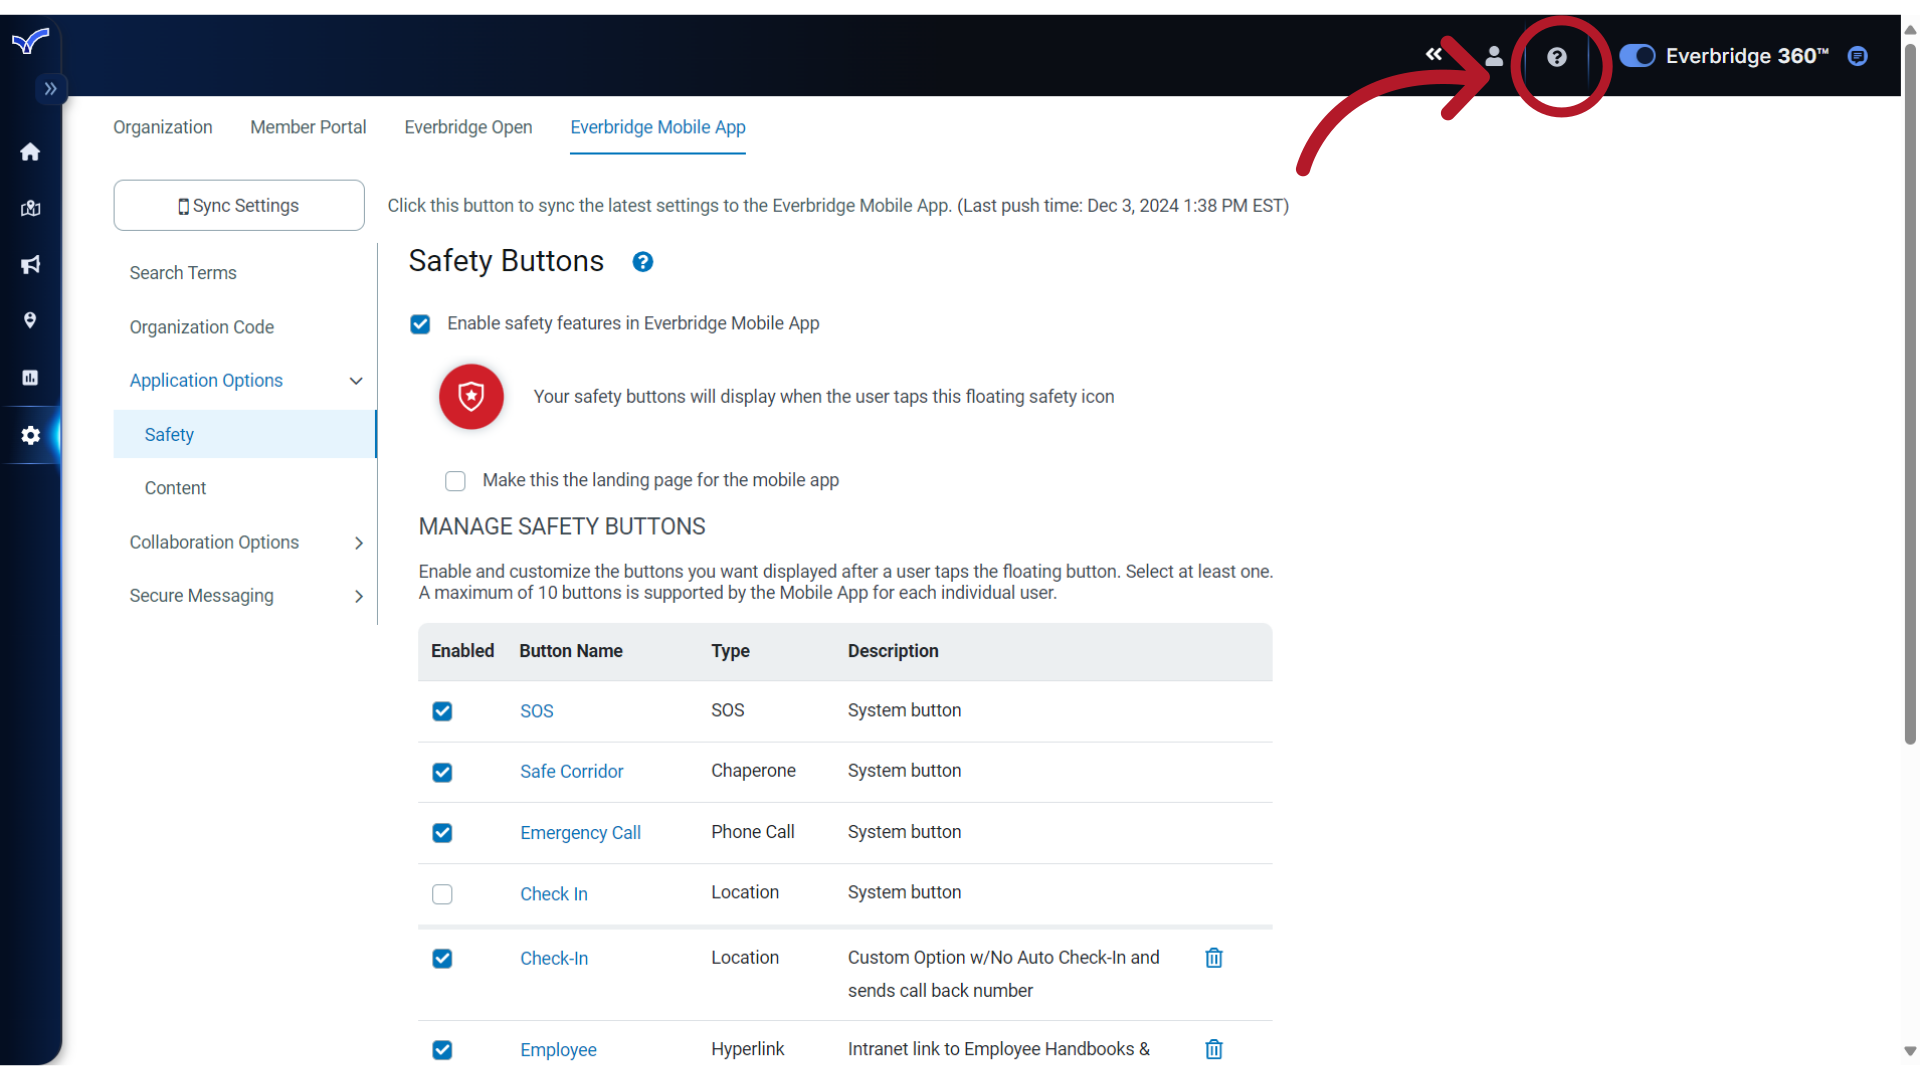
For more information on creating any of the custom Safety Buttons reviewed here, click the Help icon to access the Online Support guide.
Through this guide, you have learned how to create custom Safety Buttons for your Everbridge Mobile App users. Thank you for watching!