Topic
How to send a registration email to contacts in Everbridge Suite.
Organizations that use a private member portal as a way to communicate with a set of contacts. Must send a registration email inviting those contacts to register for access to that portal.
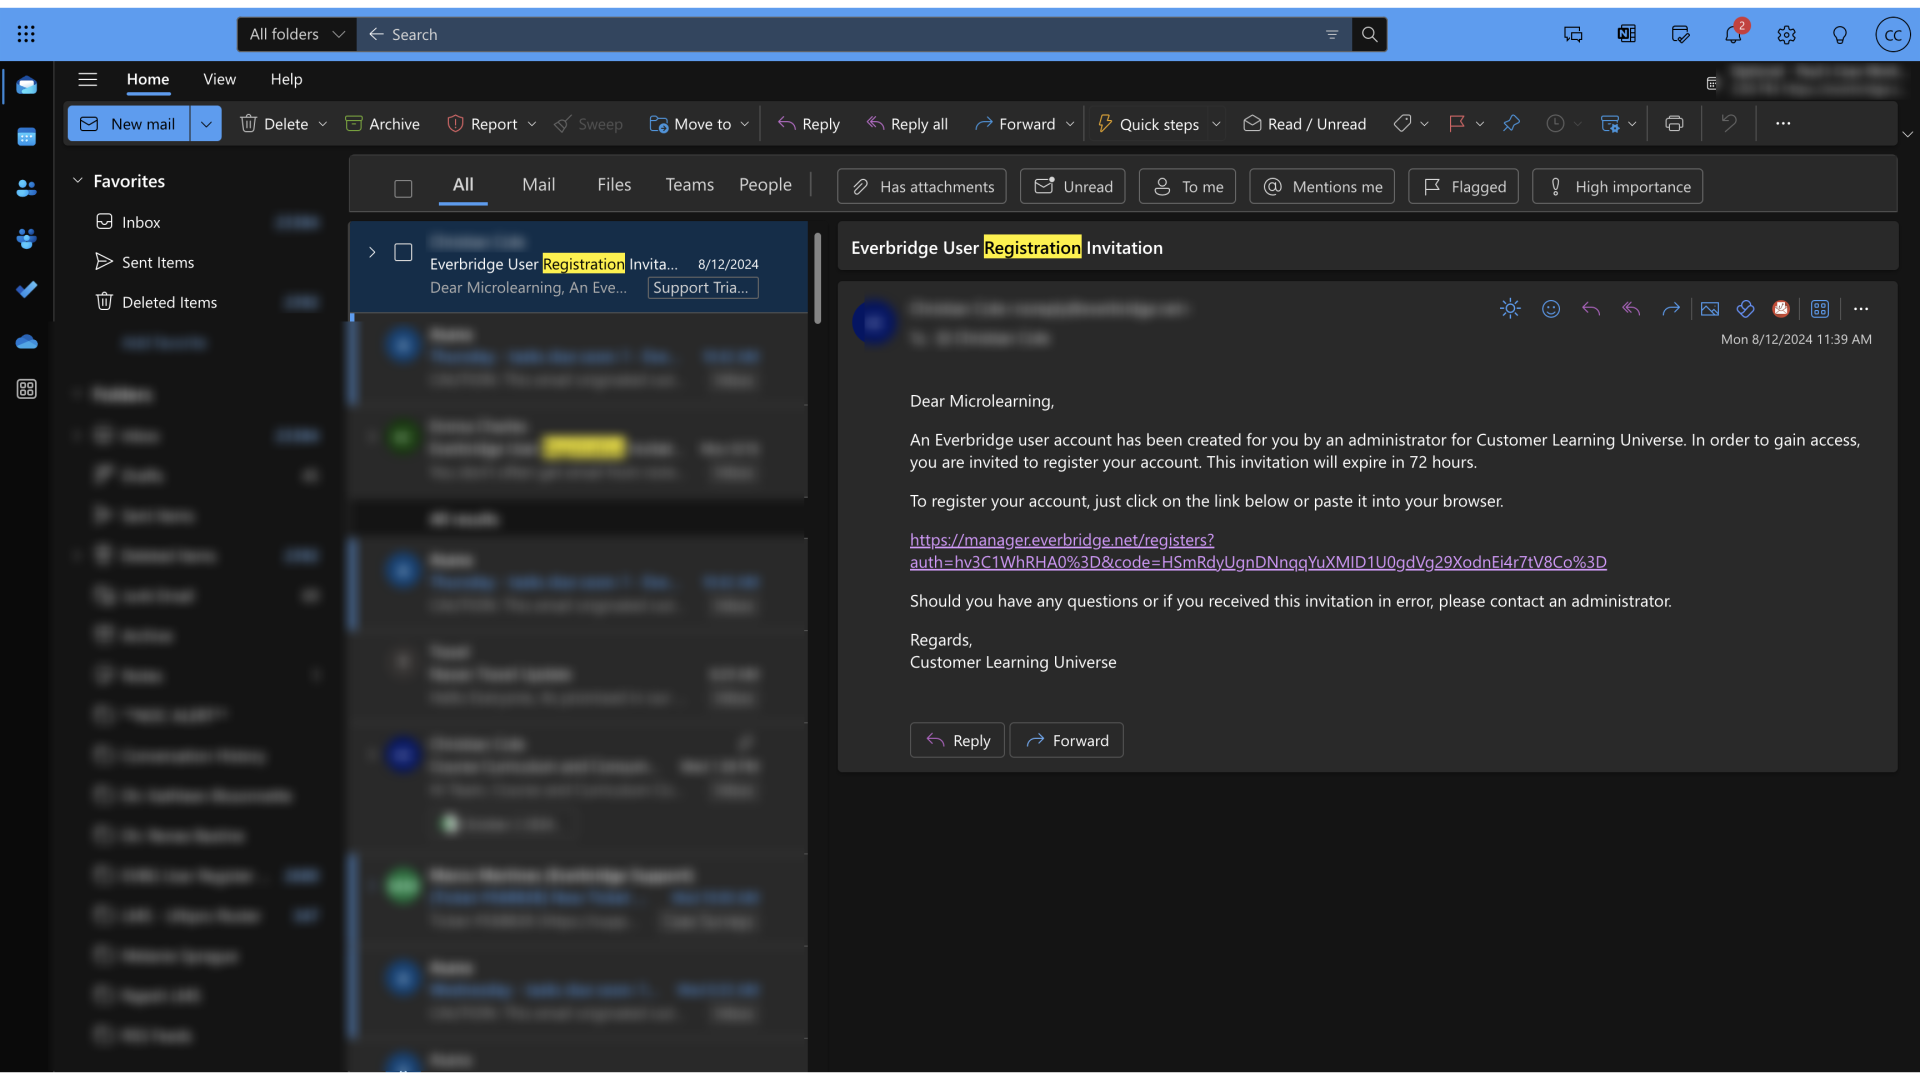
1. Everbridge User Registration Invitation
2. Dashboard
In order to customize, and send that email.
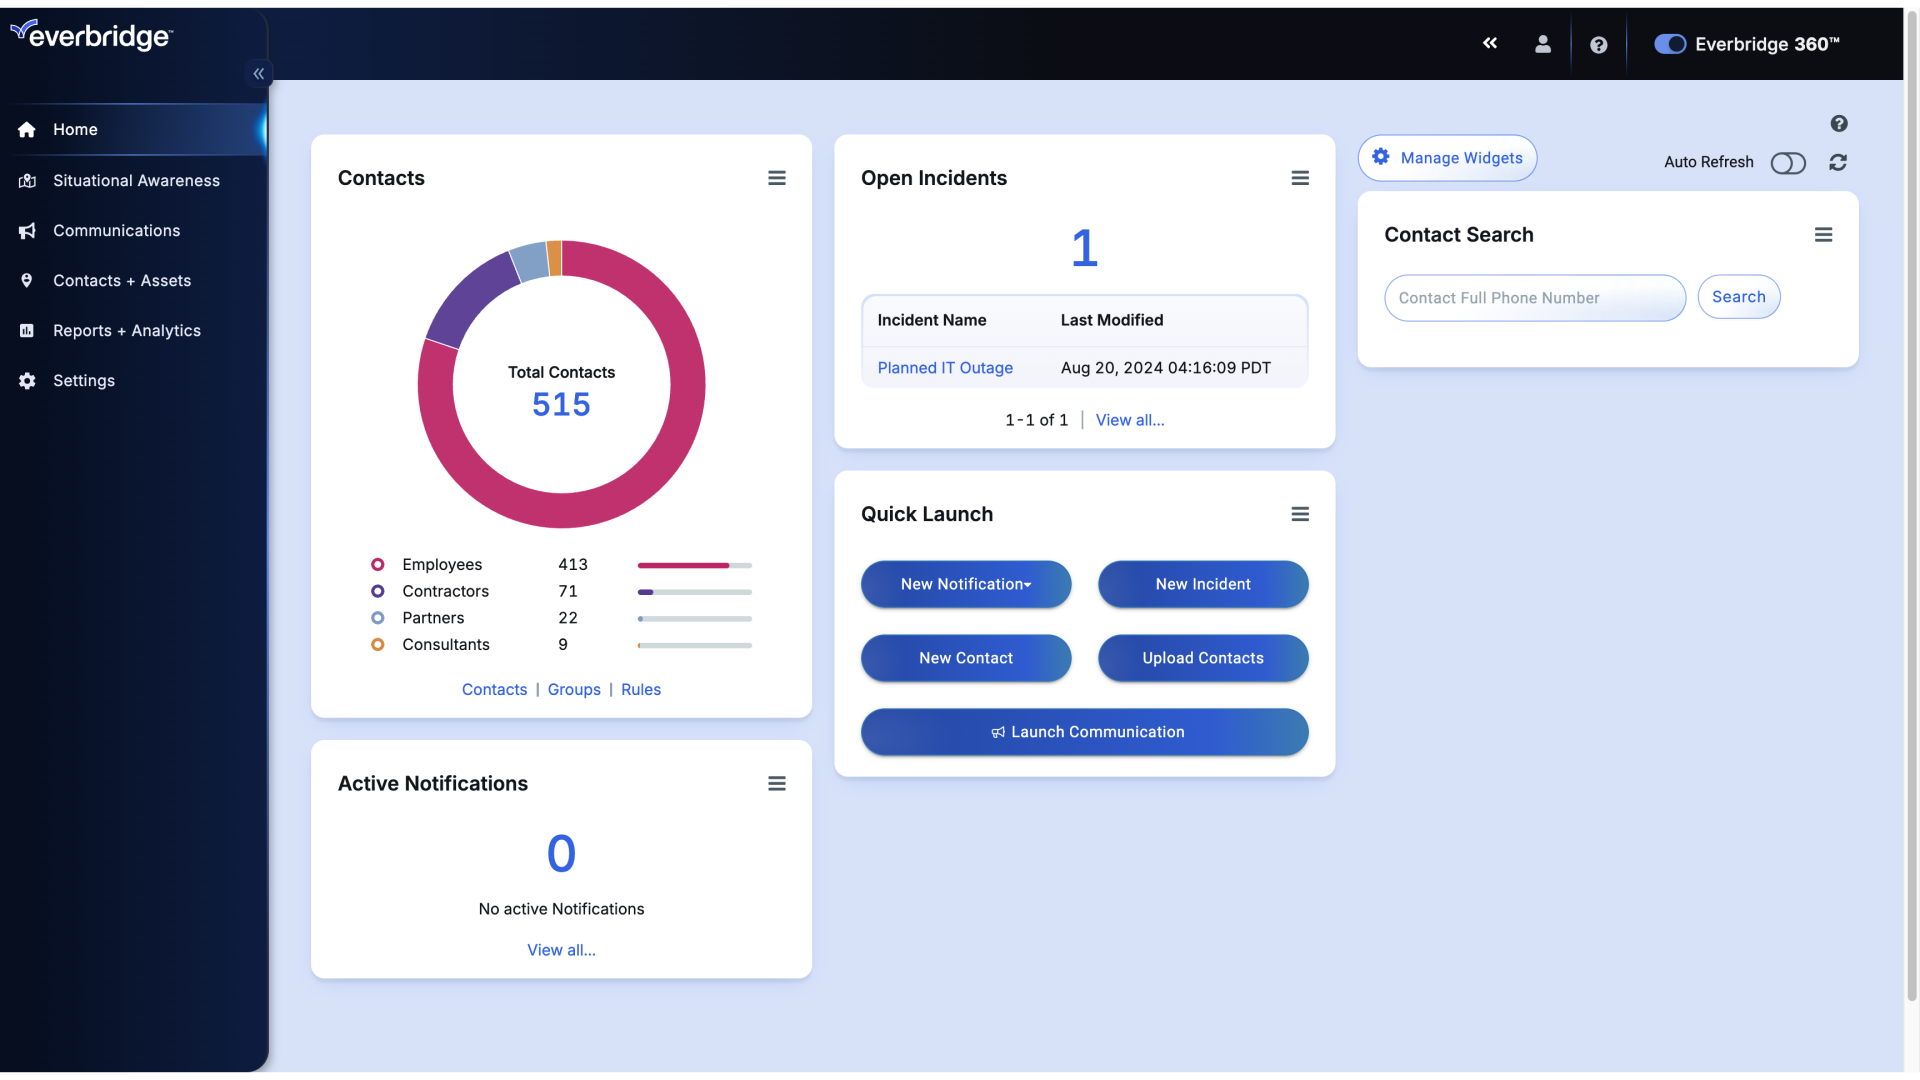
3. Dashboard
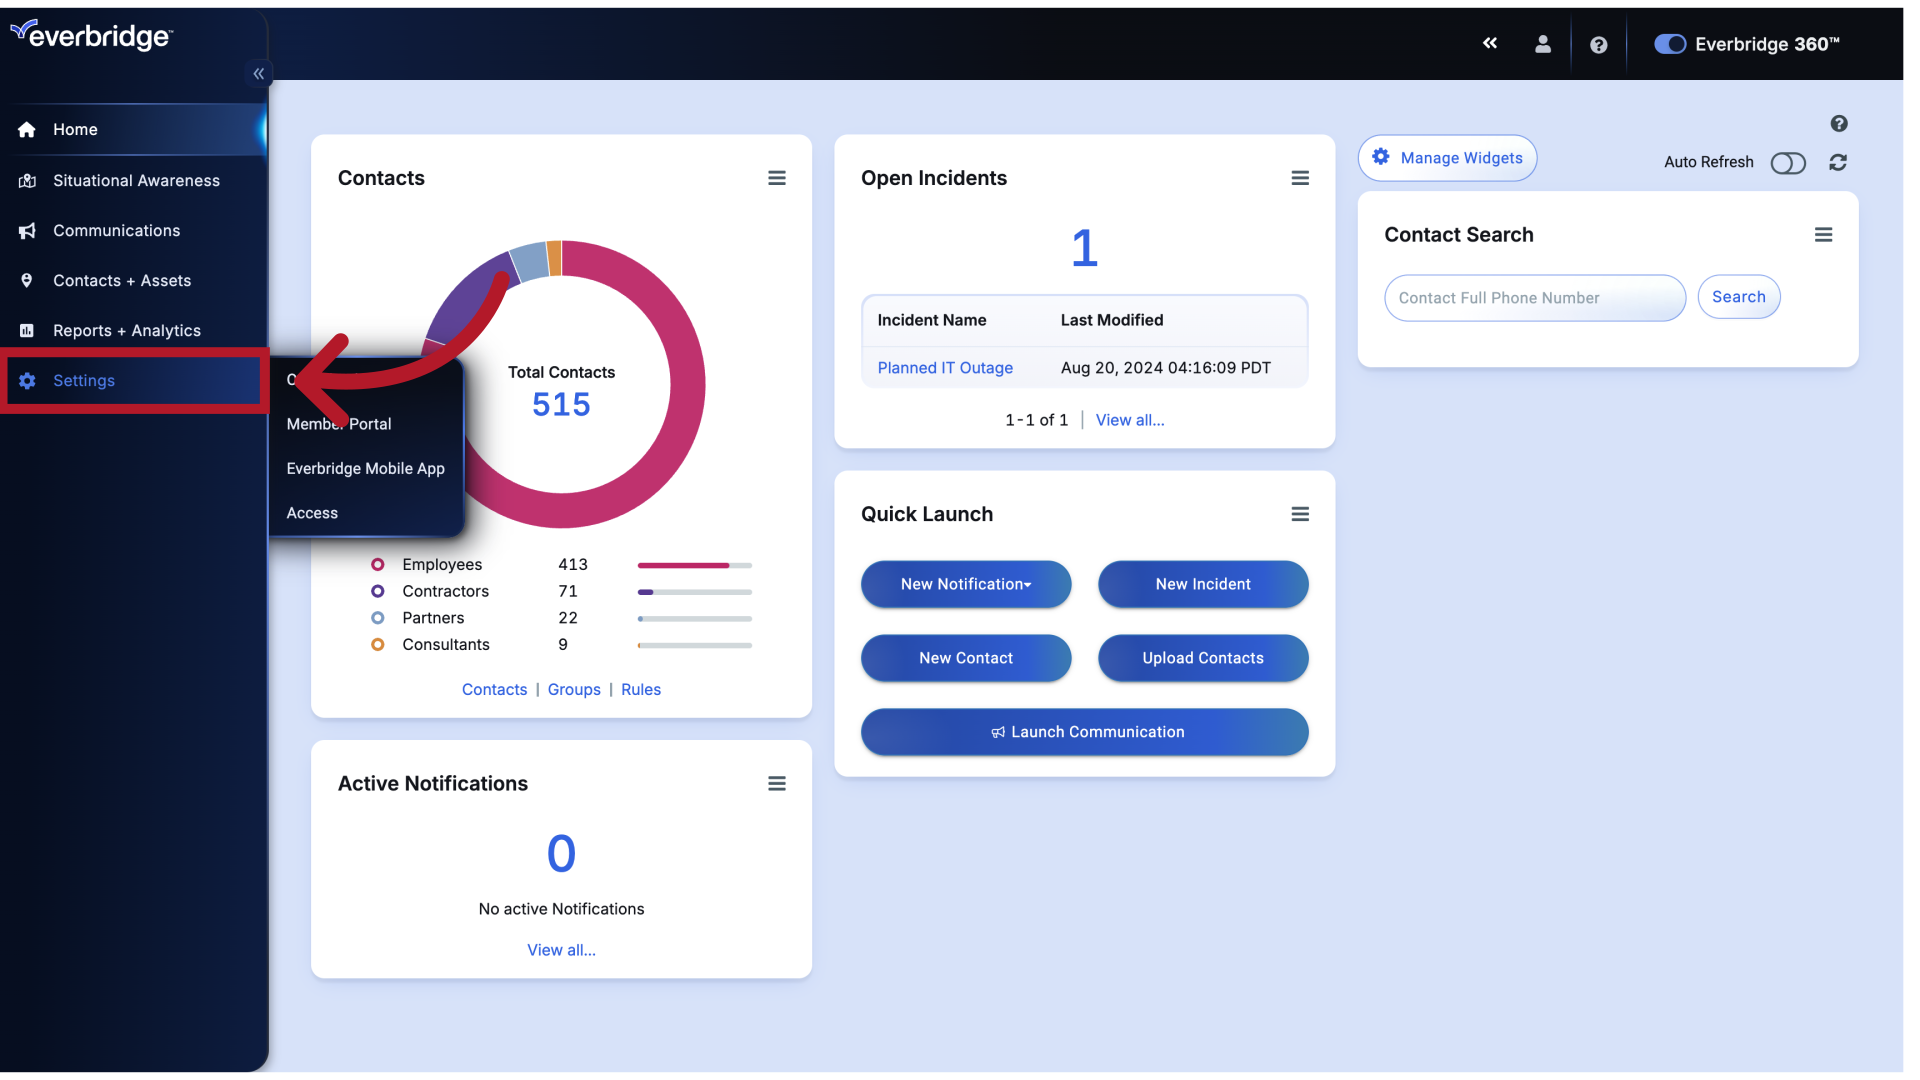
Begin by hovering over the Settings tab.
4. Dashboard
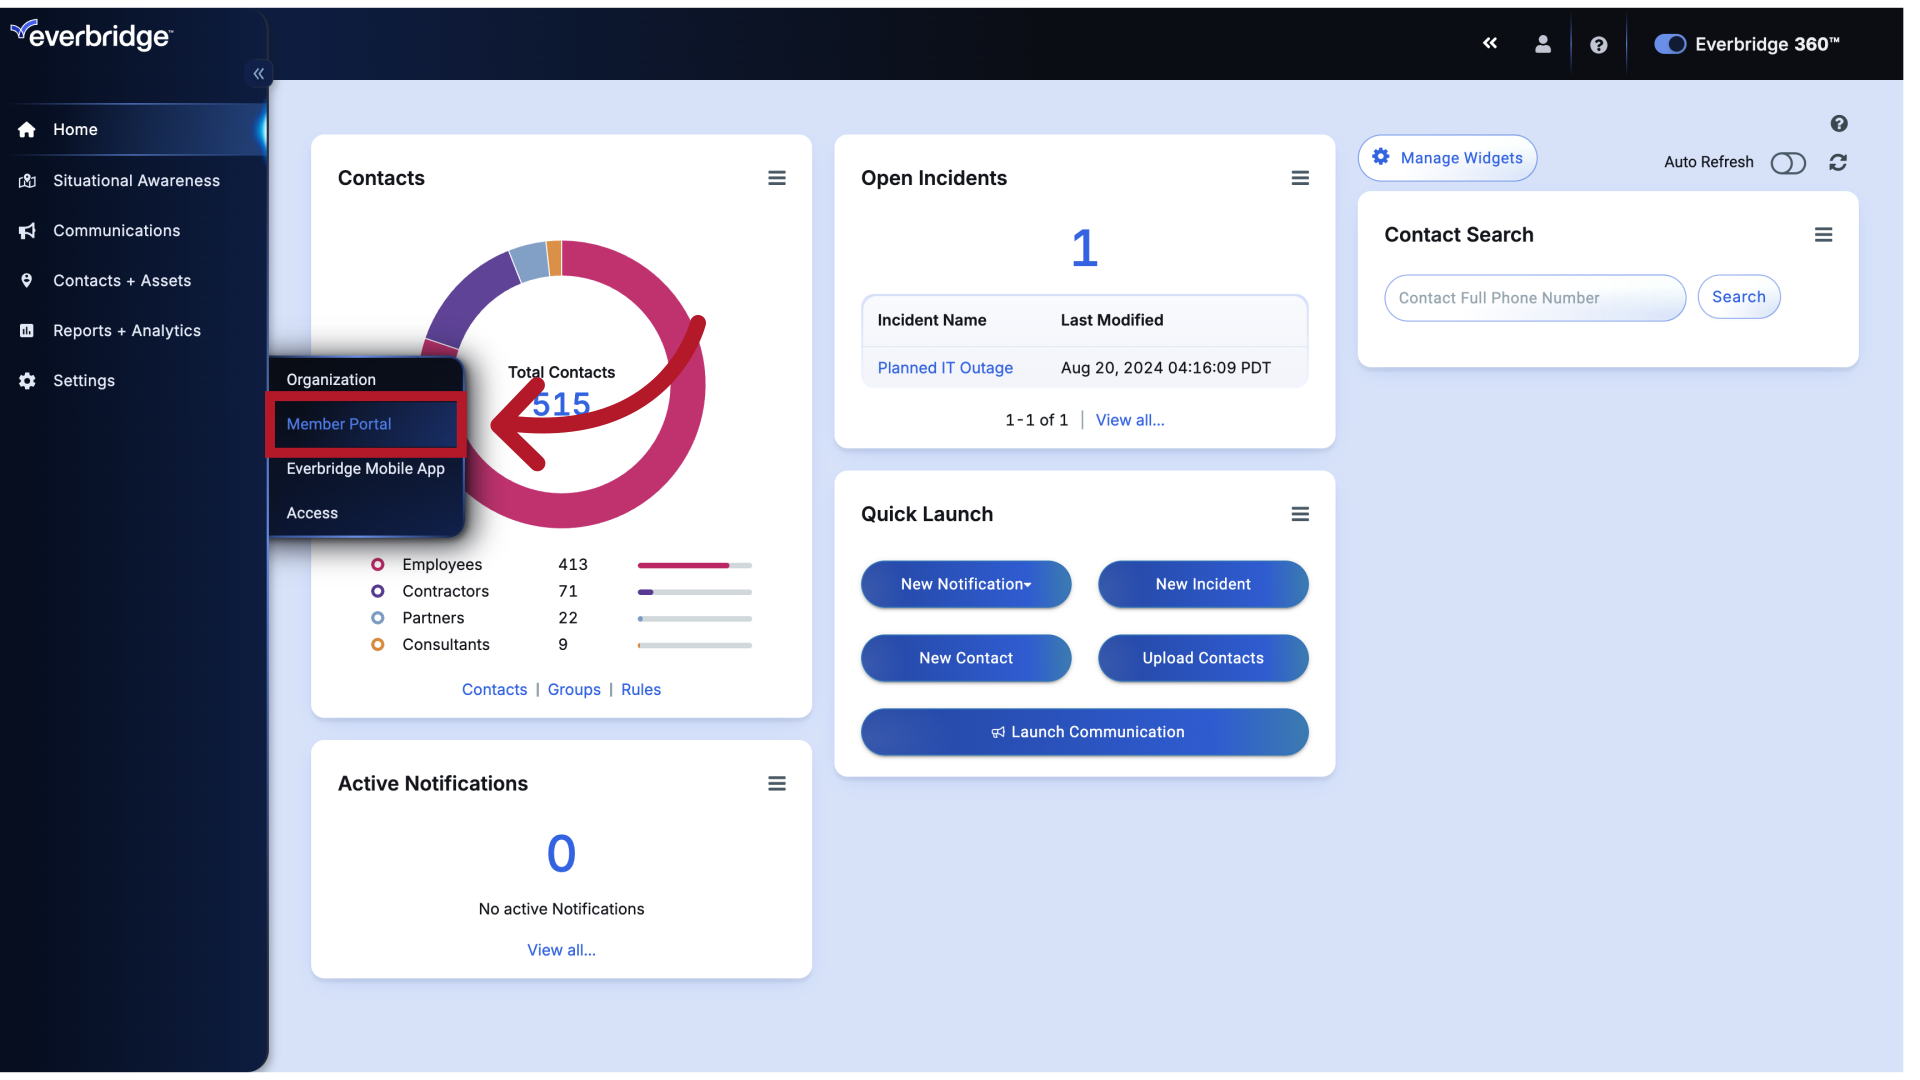
Click Member Portal.
5. Member Portal
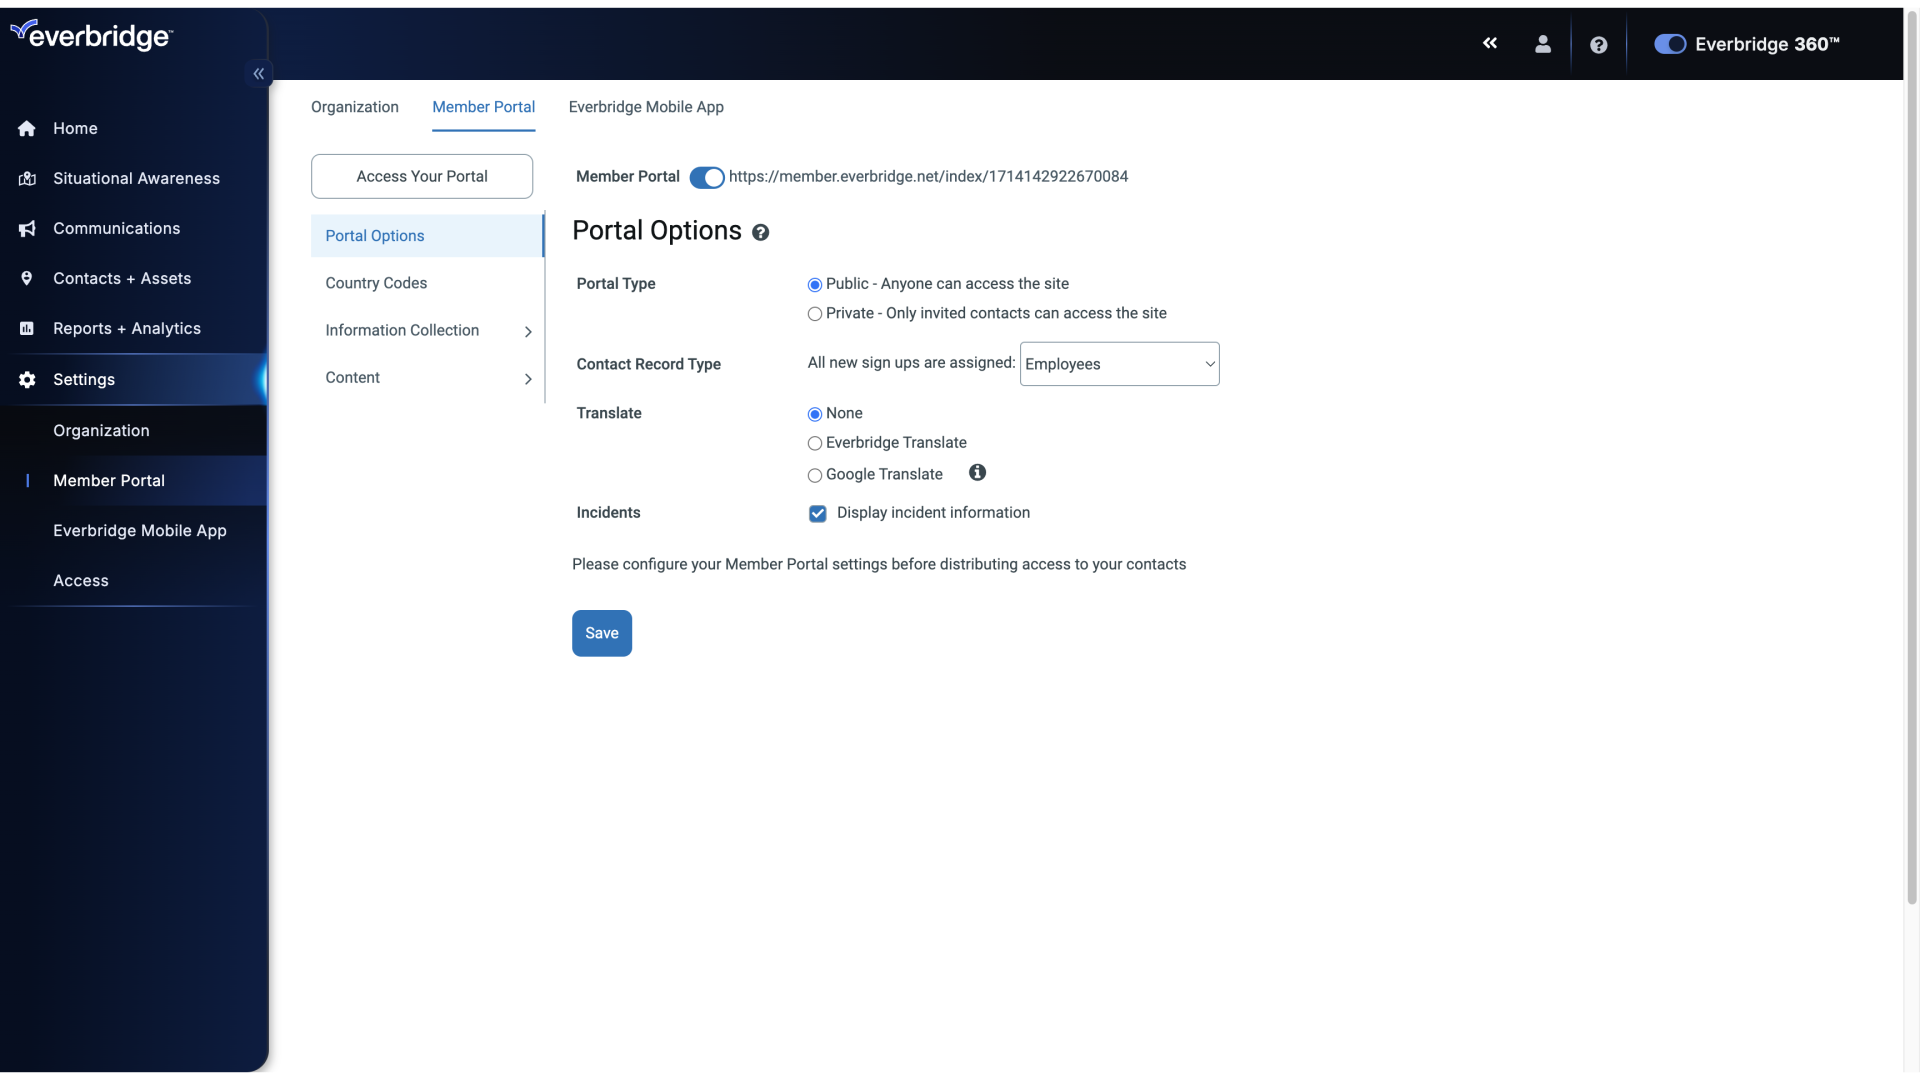
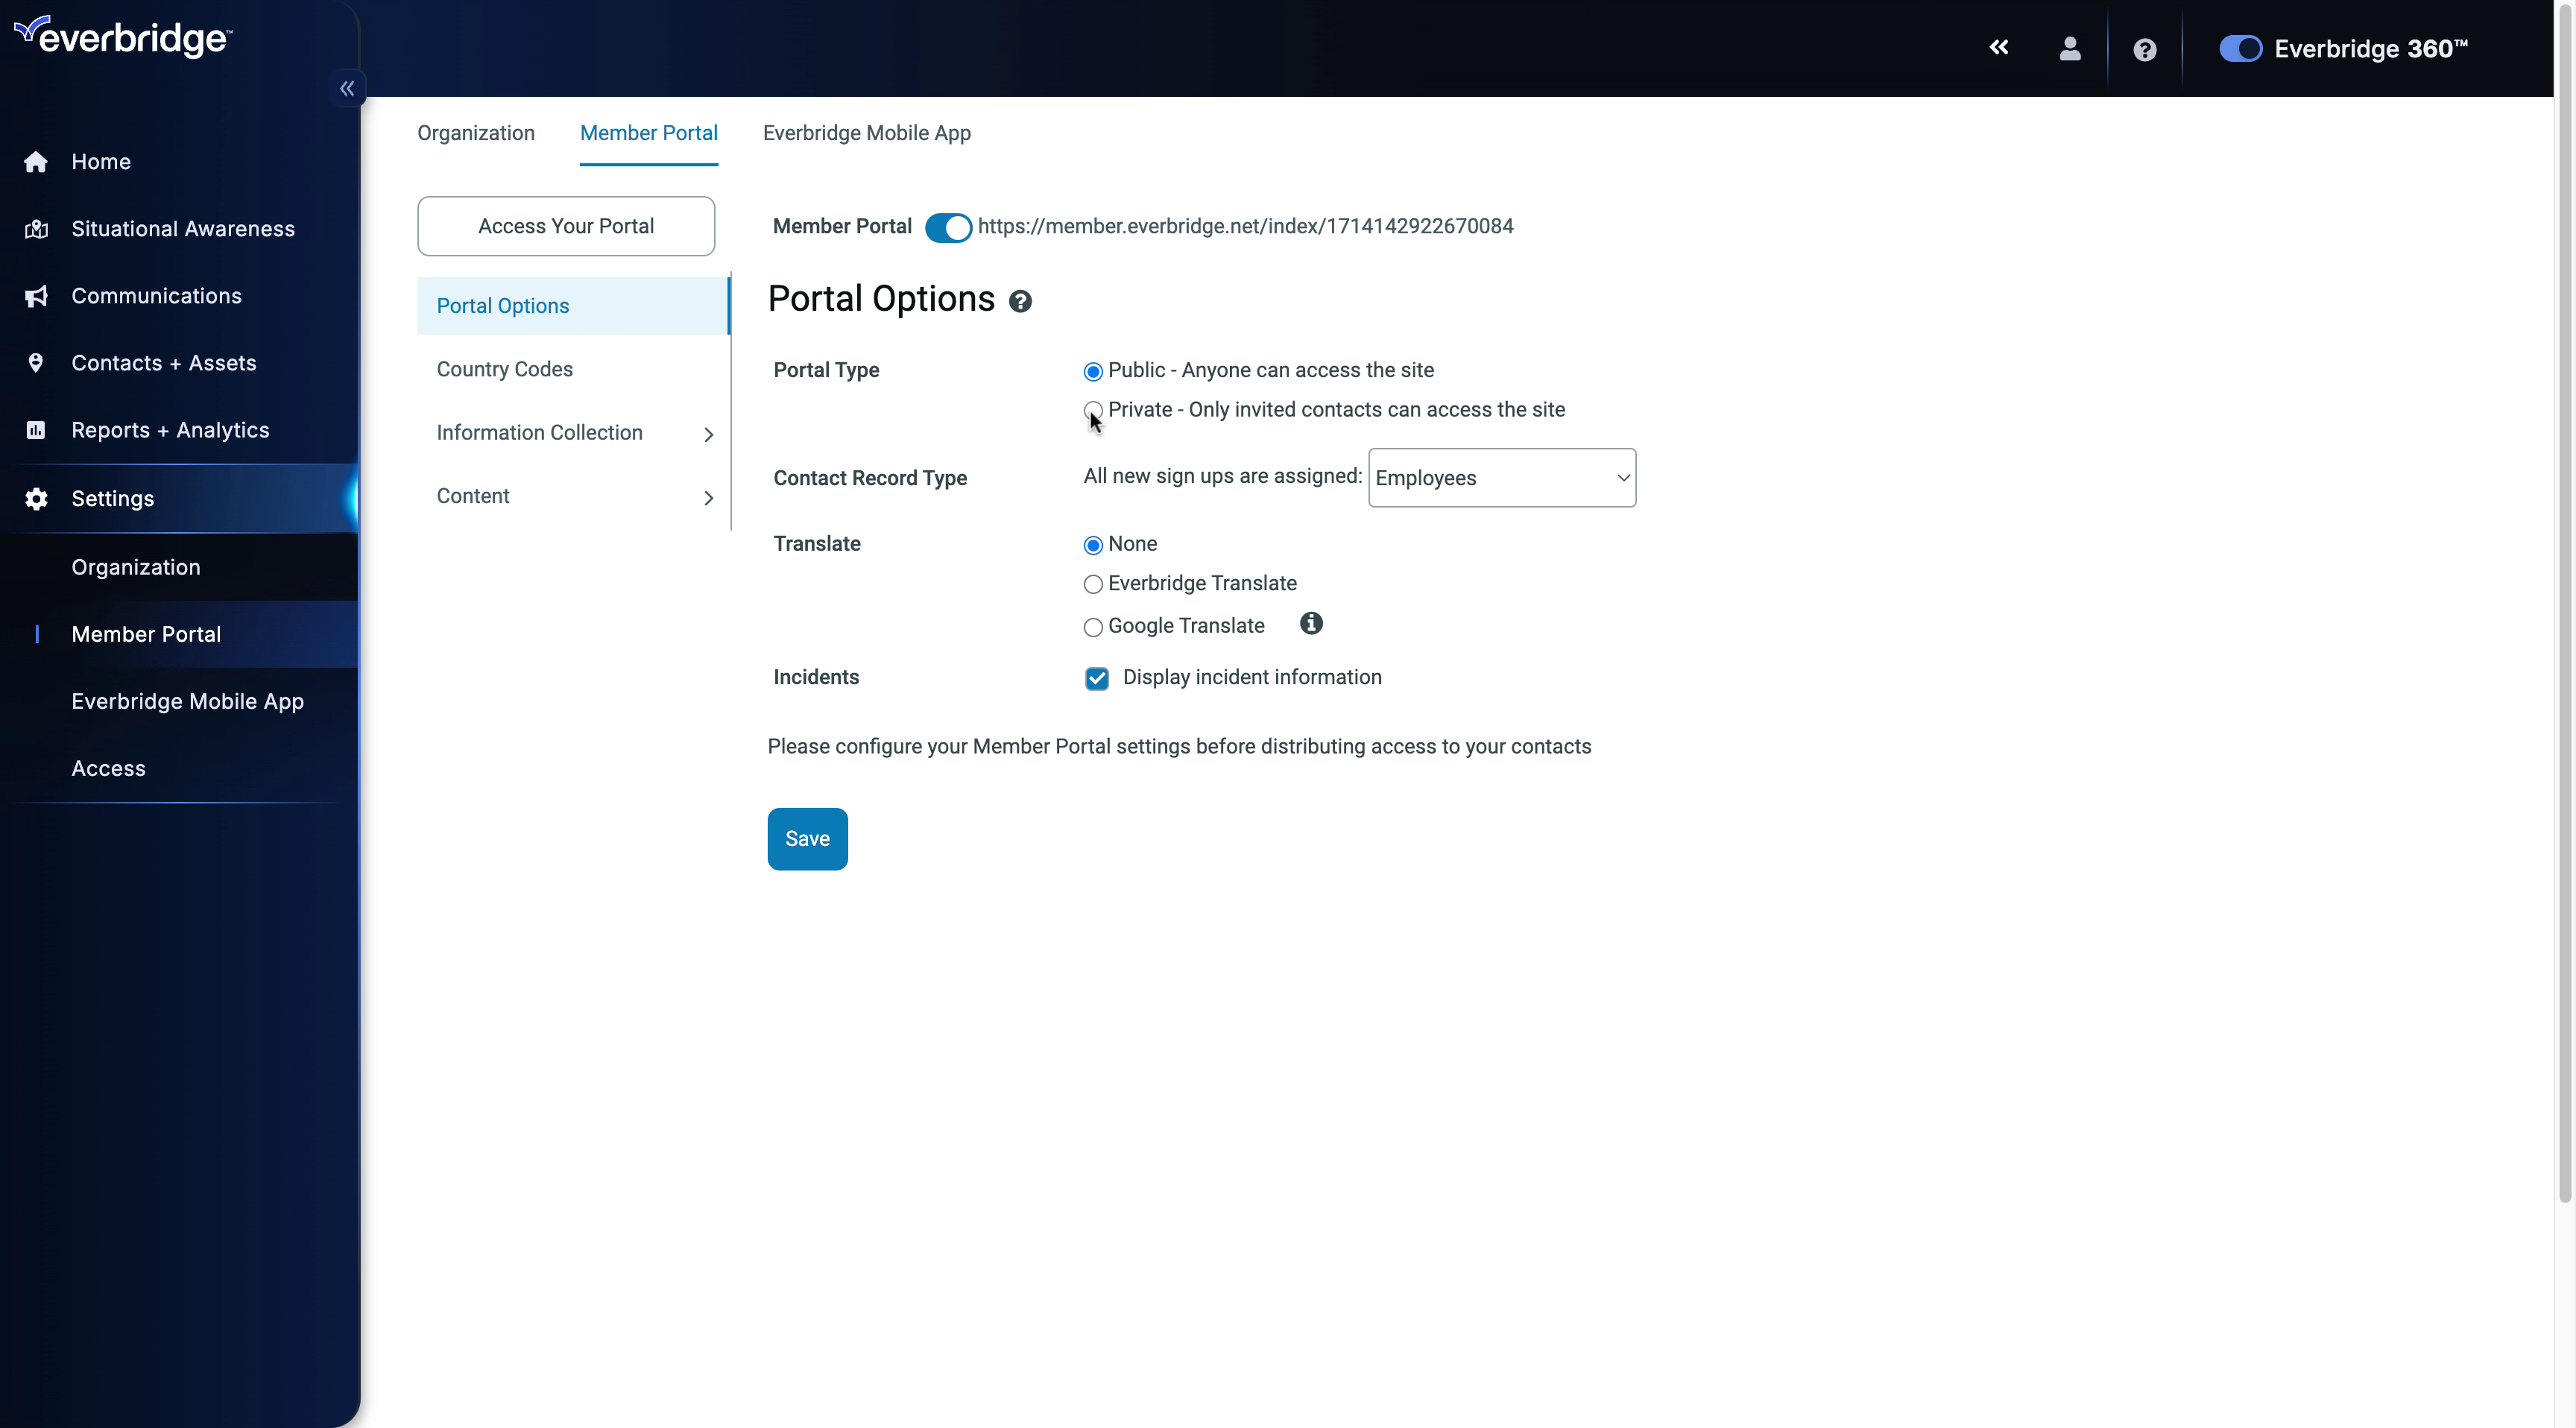
6. Portal Type - Private
Select Private as the portal type if it's not already selected.
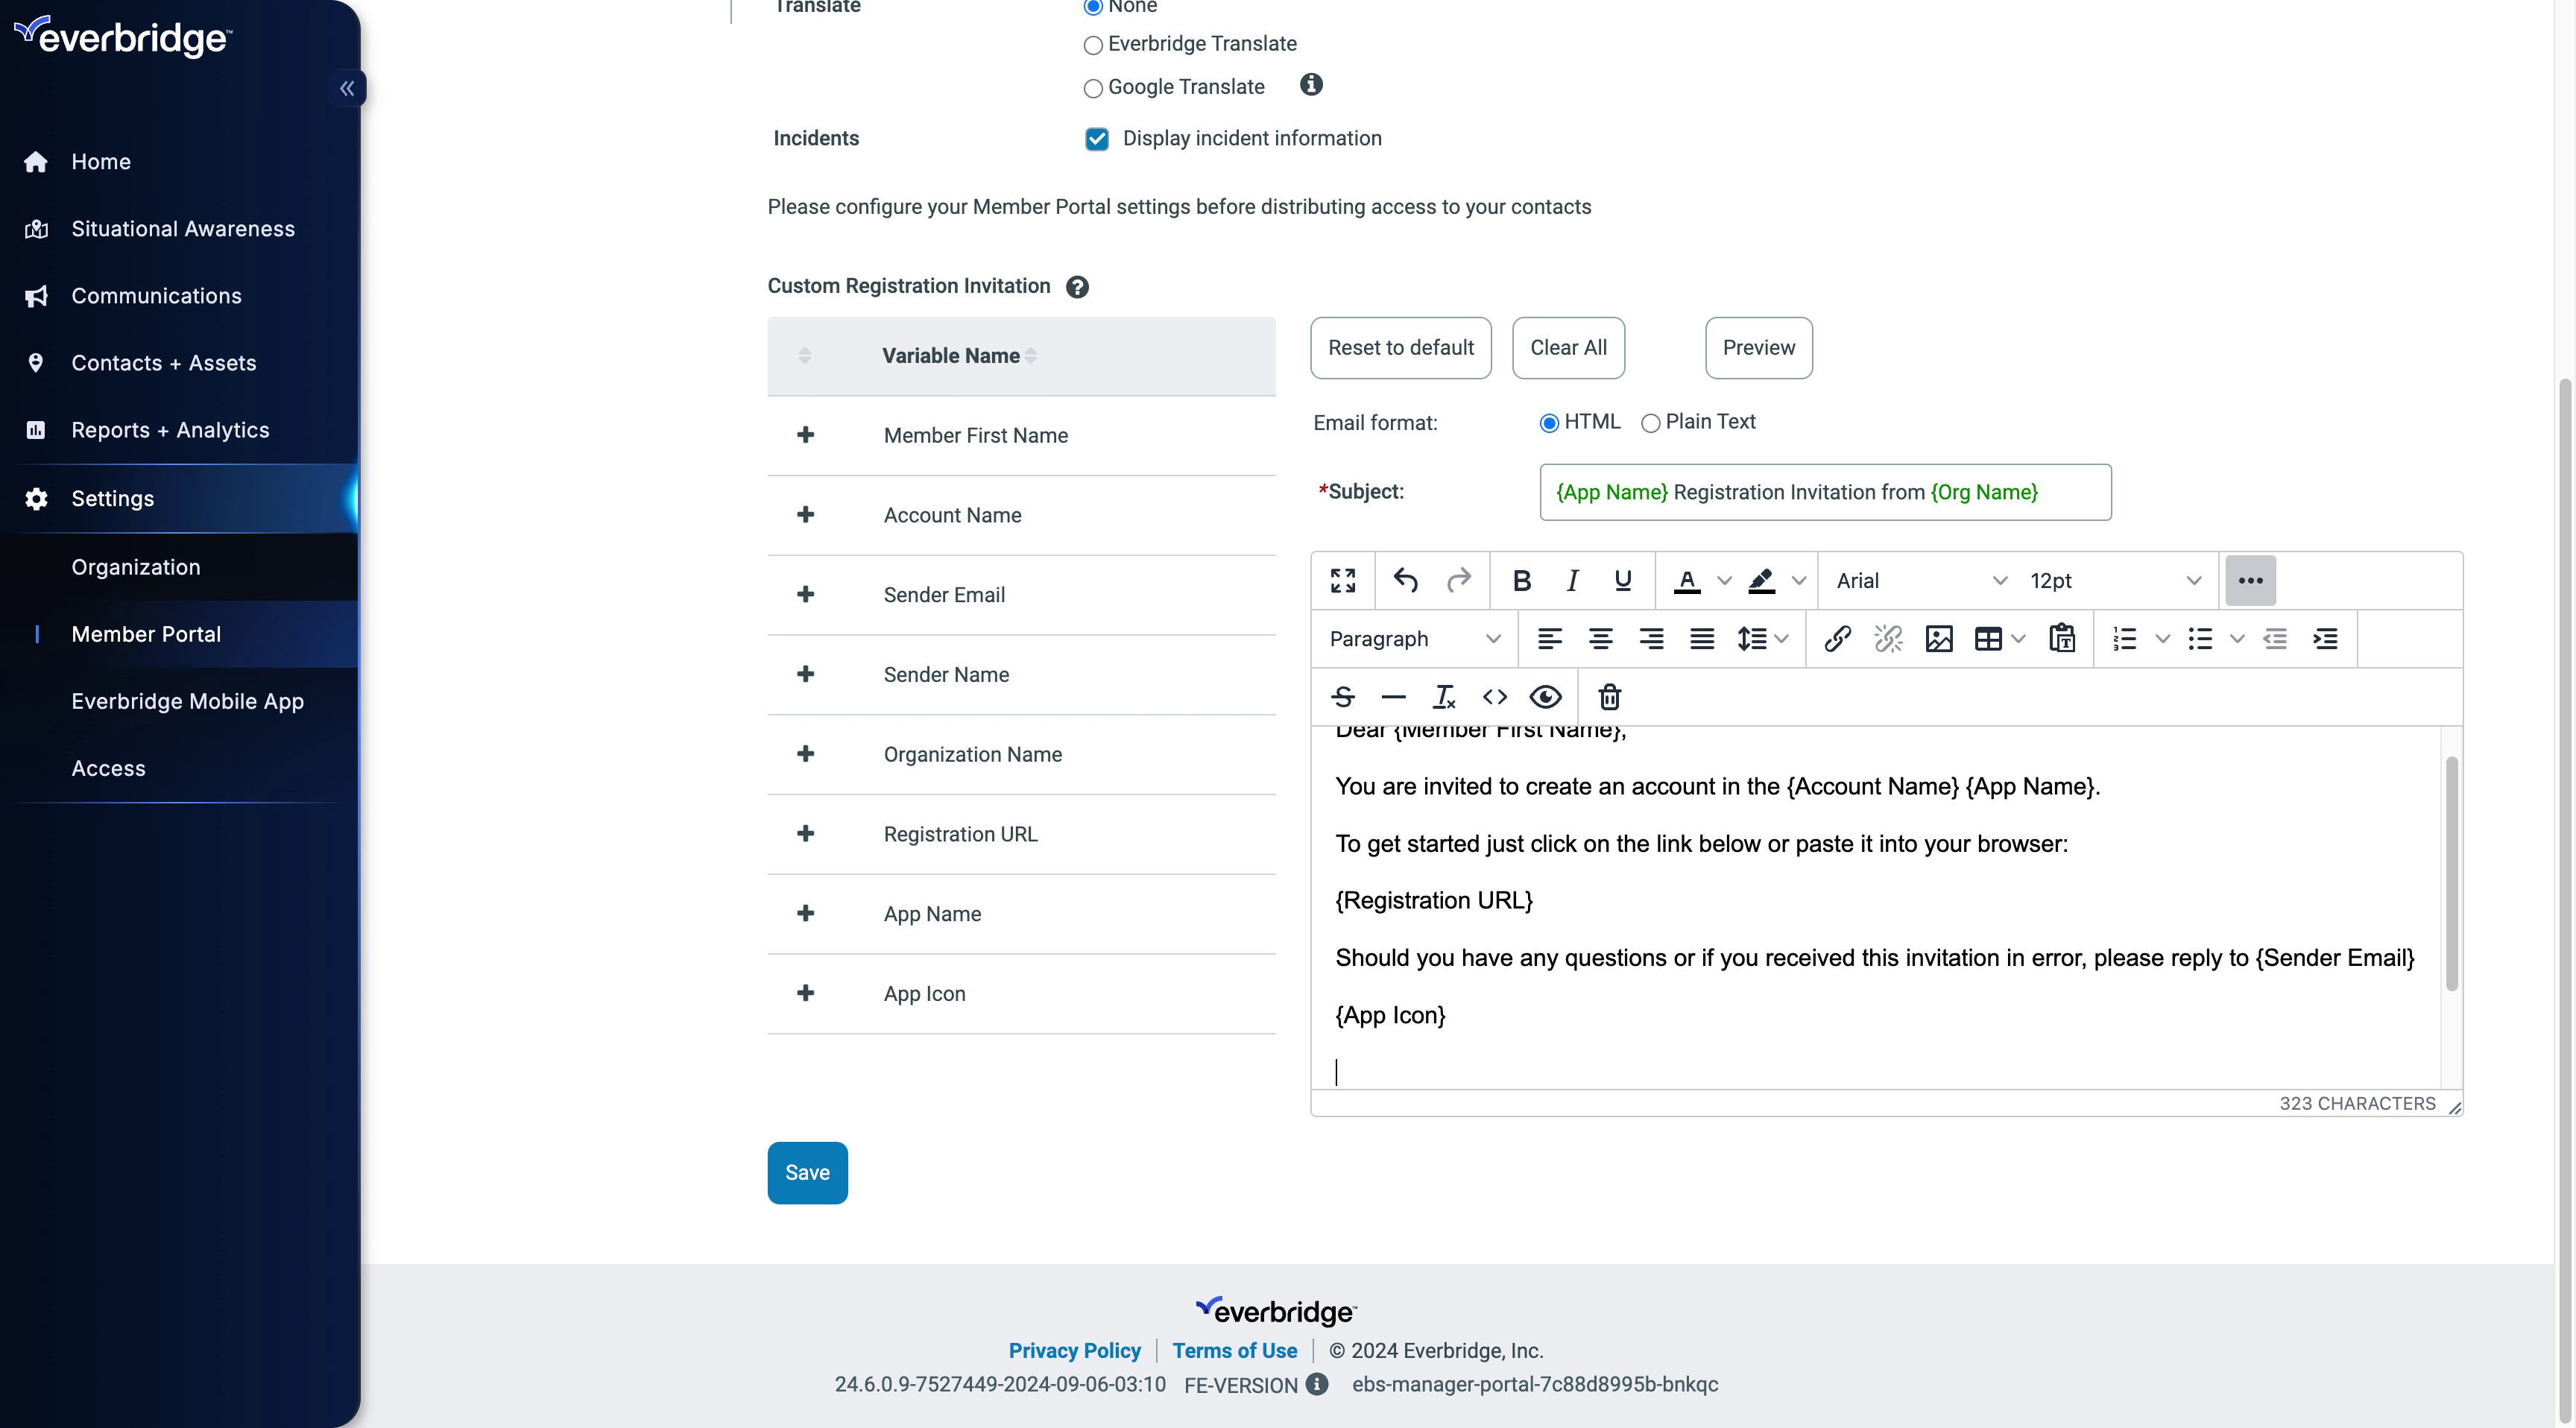
7. Custom Registration Invitation
To customize the registration email.
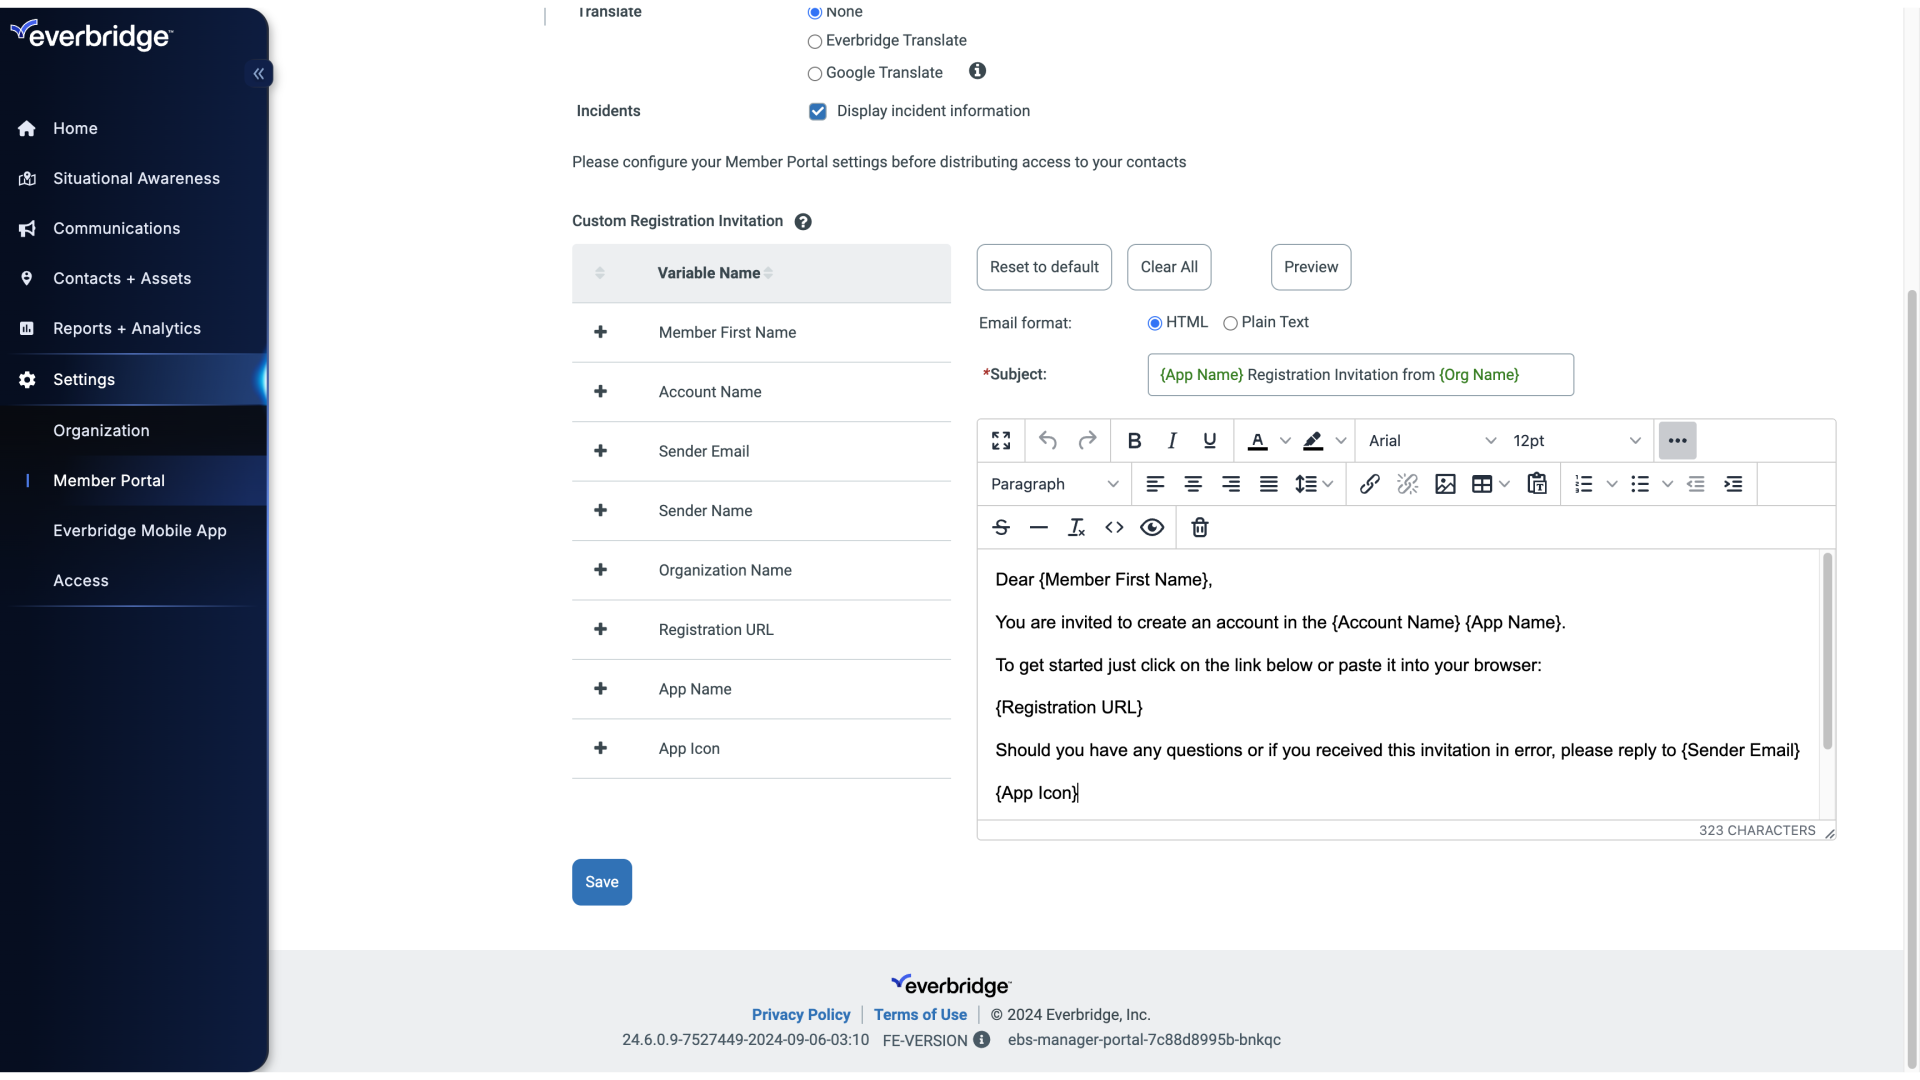
8. Custom Registration Invitation
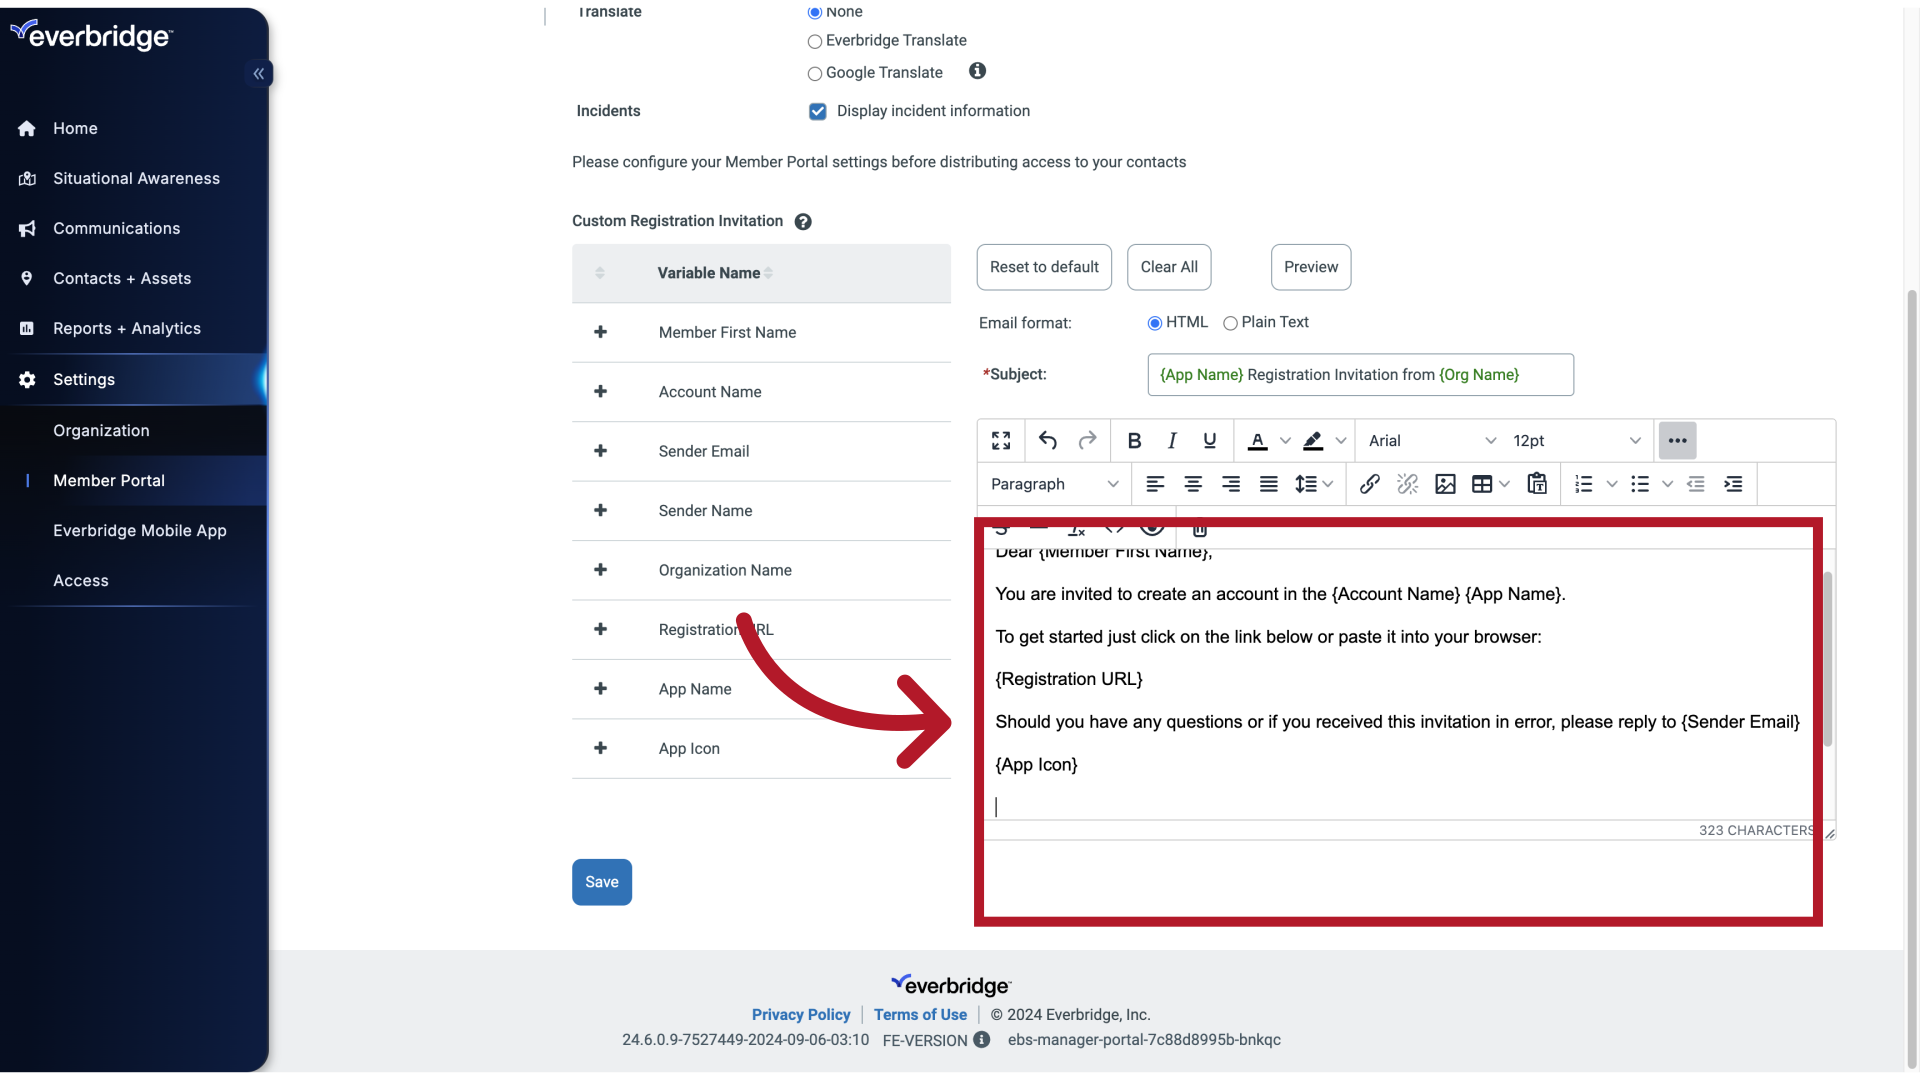
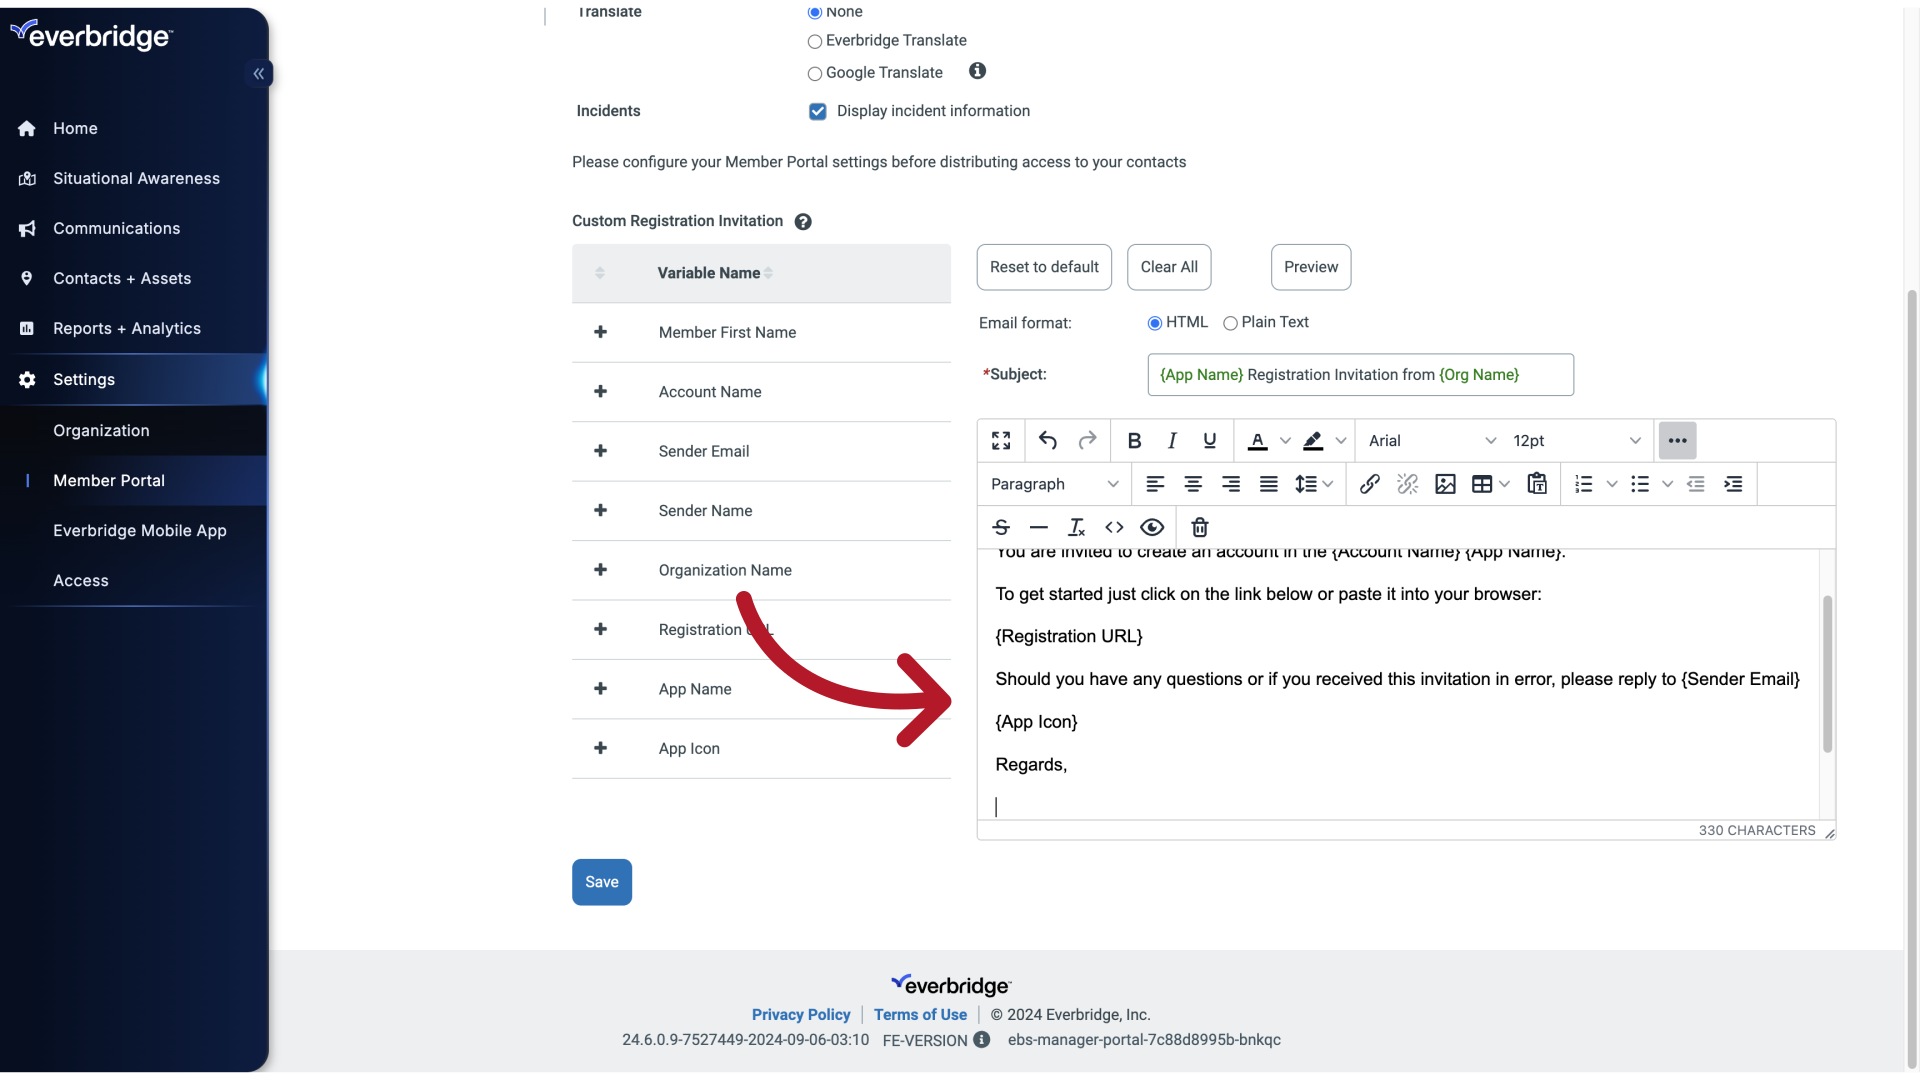
Simply click in the text box, and enter your text.
9. Custom Registration Invitation
10. Custom Registration Invitation
11. Custom Registration Invitation
12. Custom Registration Invitation
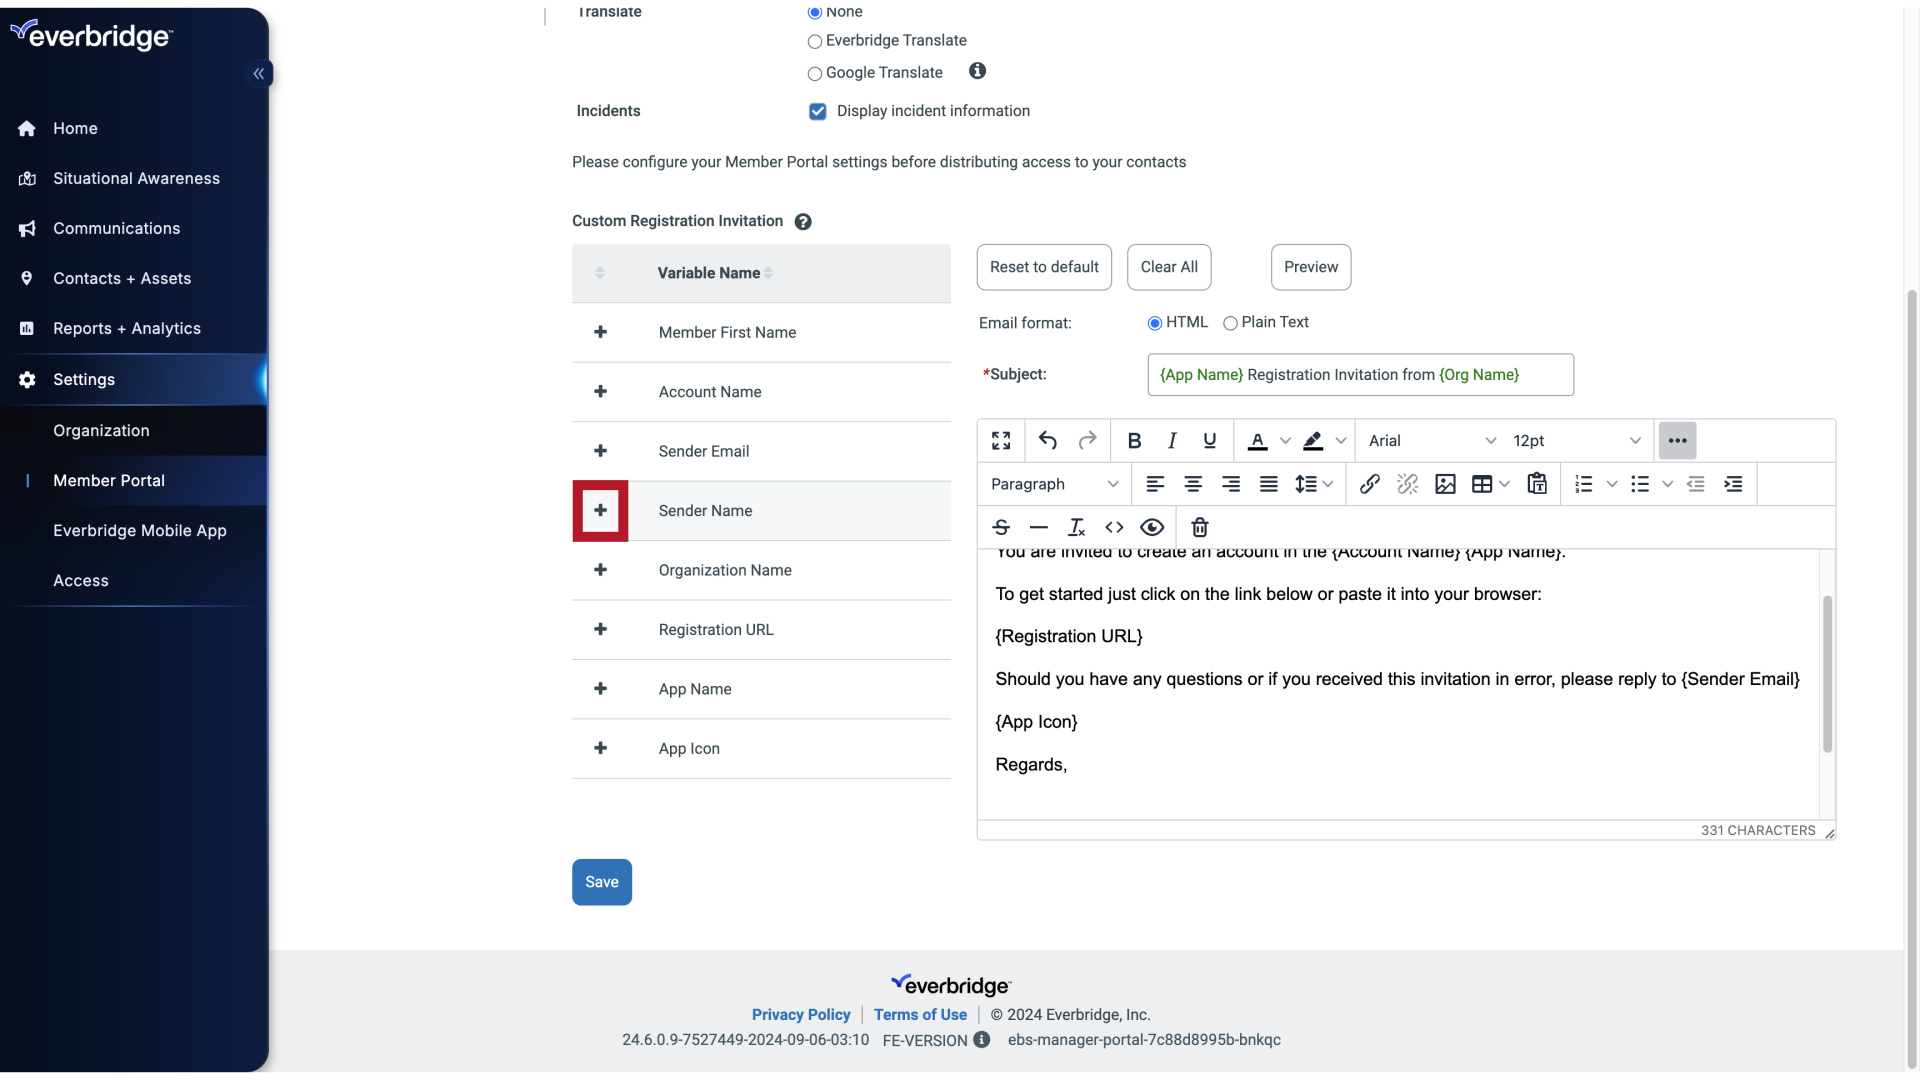
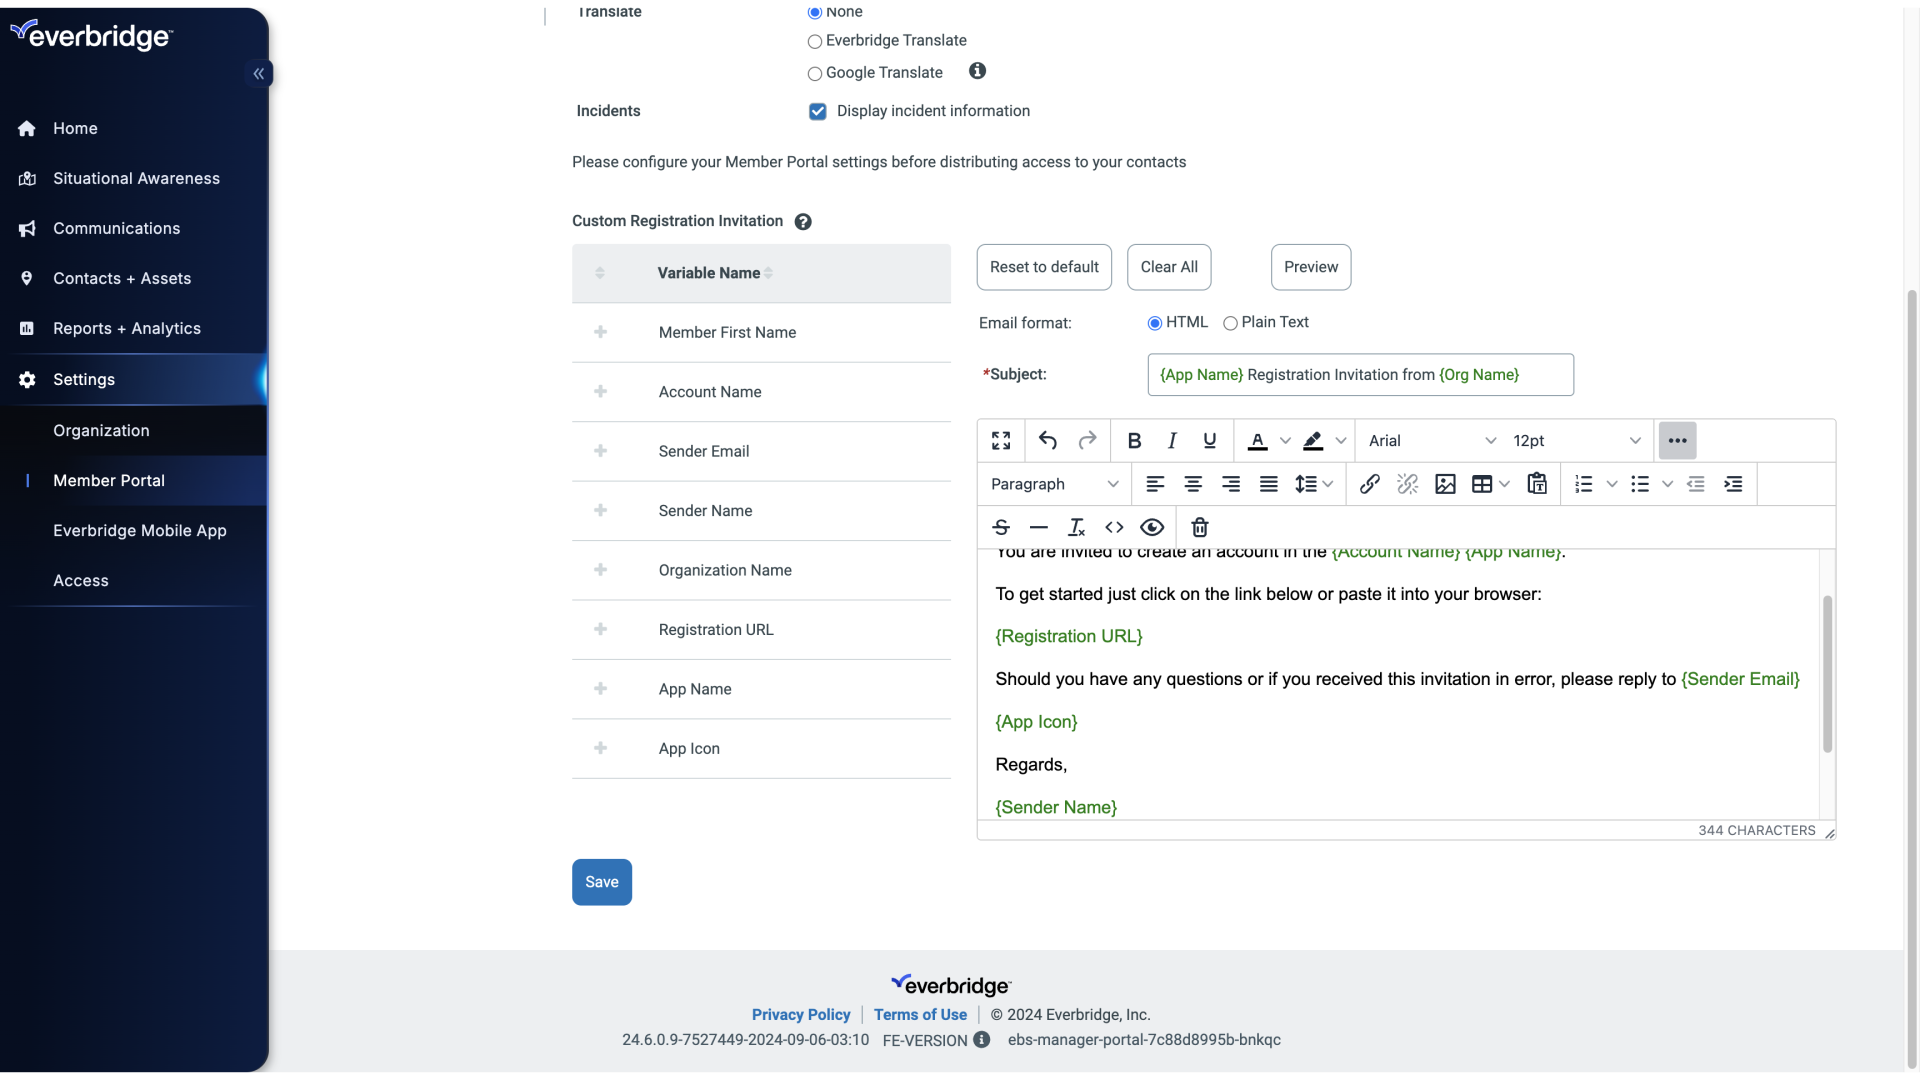
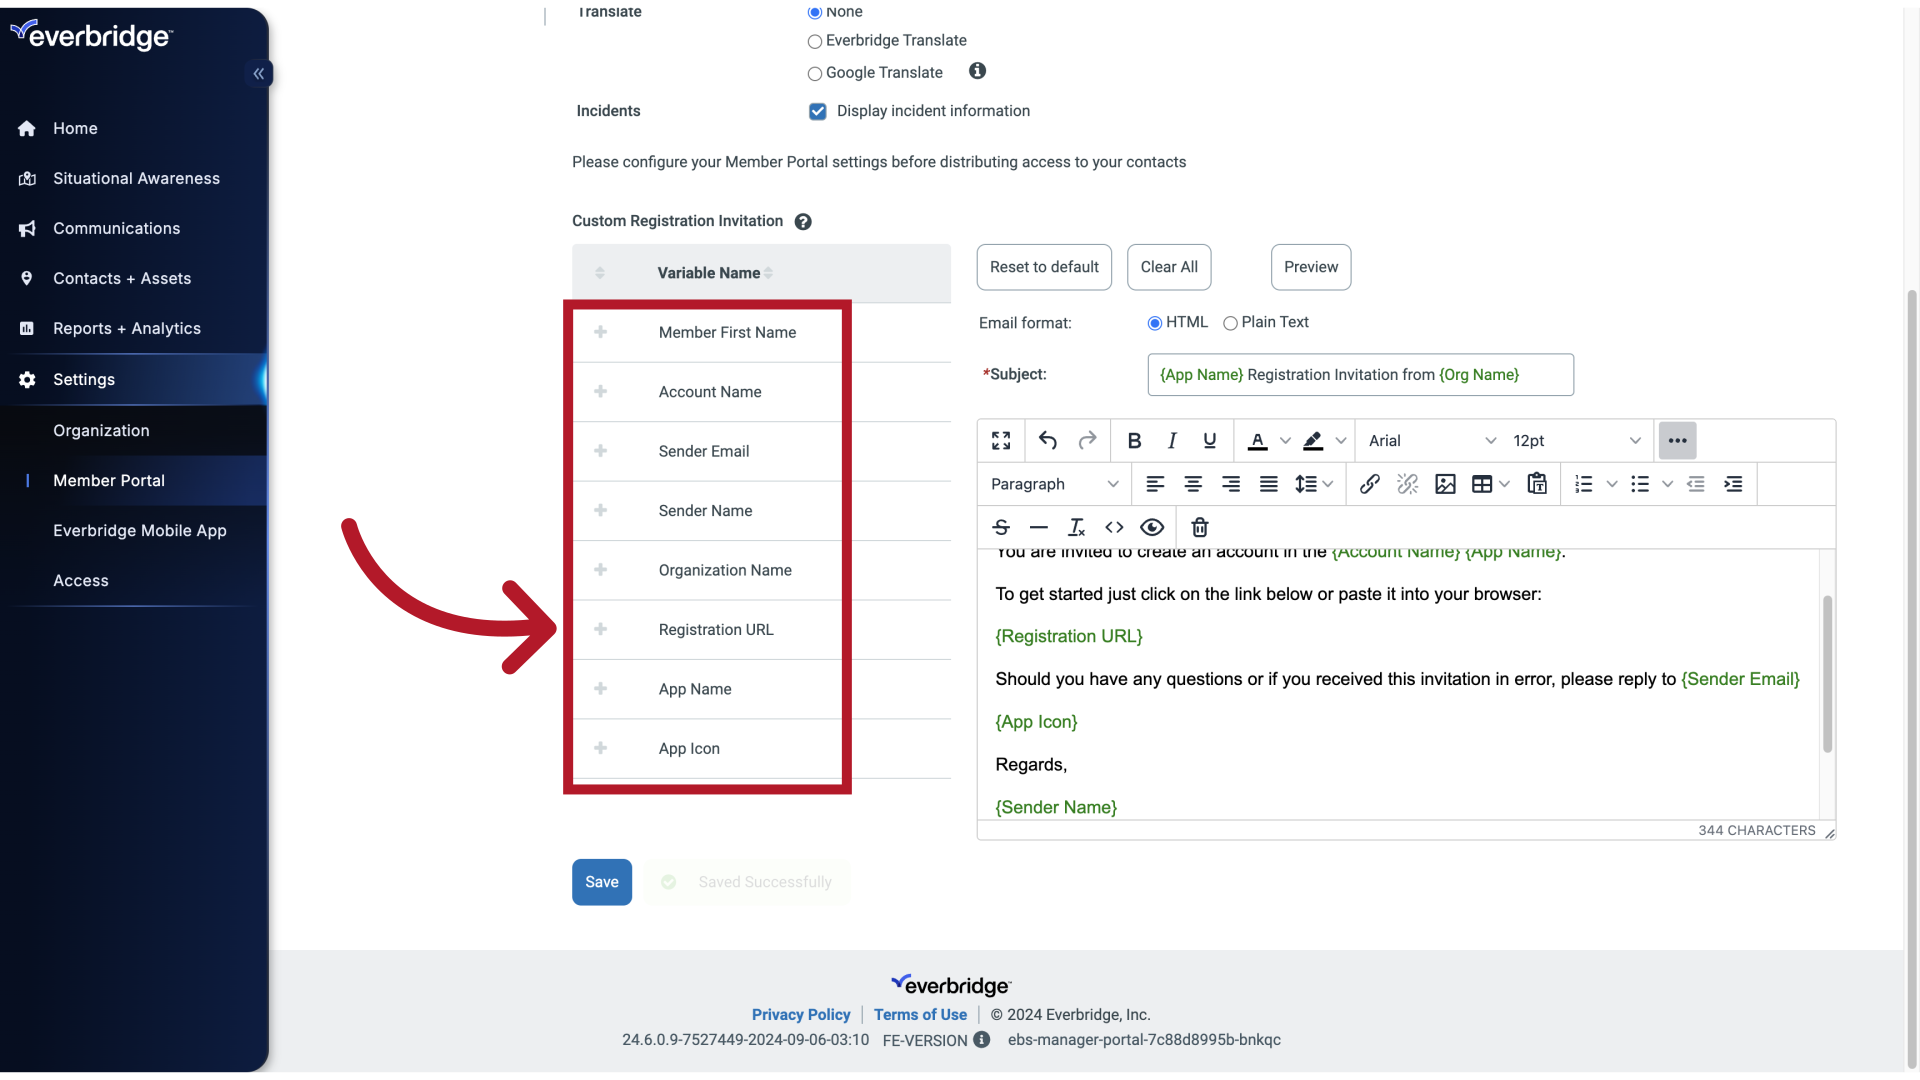
Just be mindful that you don't delete any of the key variable tokens, like the Registration URL.
13. Custom Registration Invitation
If that happens by accident, those tokens can be re added by clicking the plus sign by the appropriate variable.
14. Custom Registration Invitation
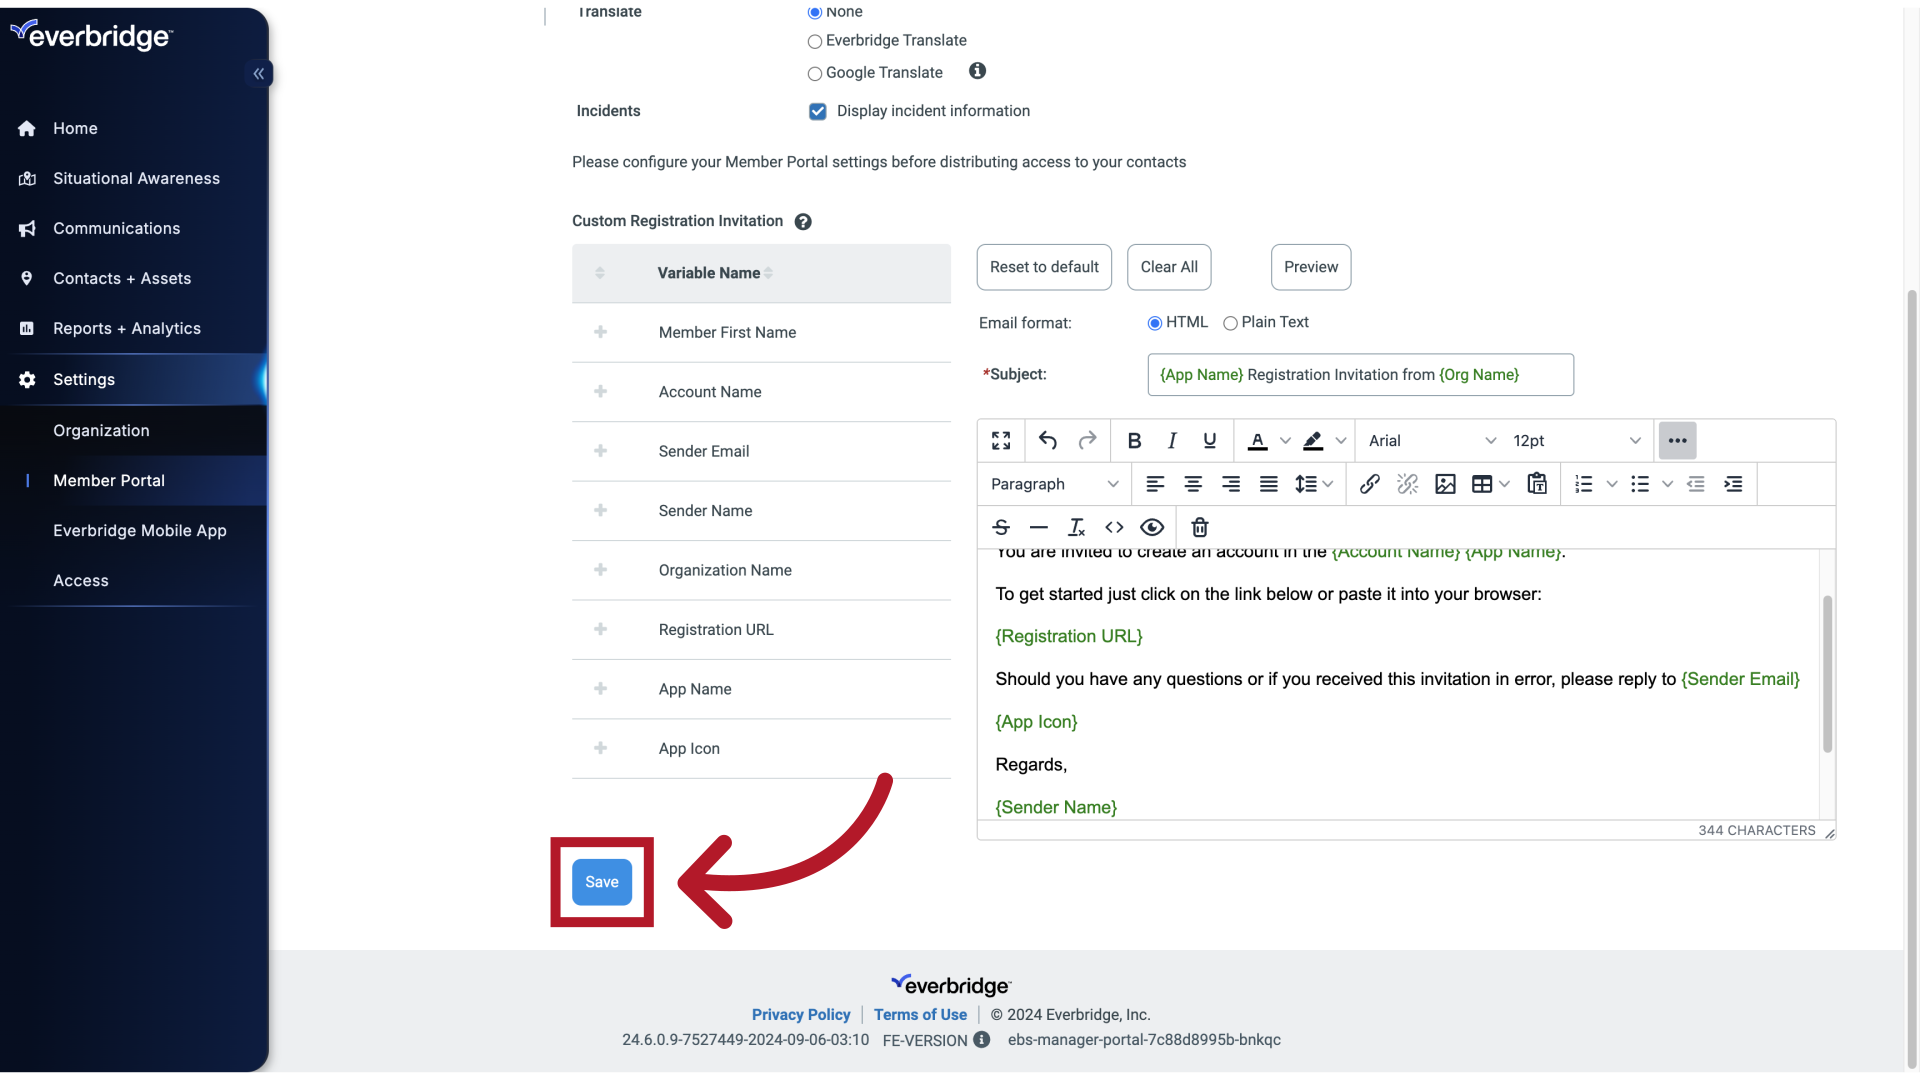
Click Save.
15. Custom Registration Invitation
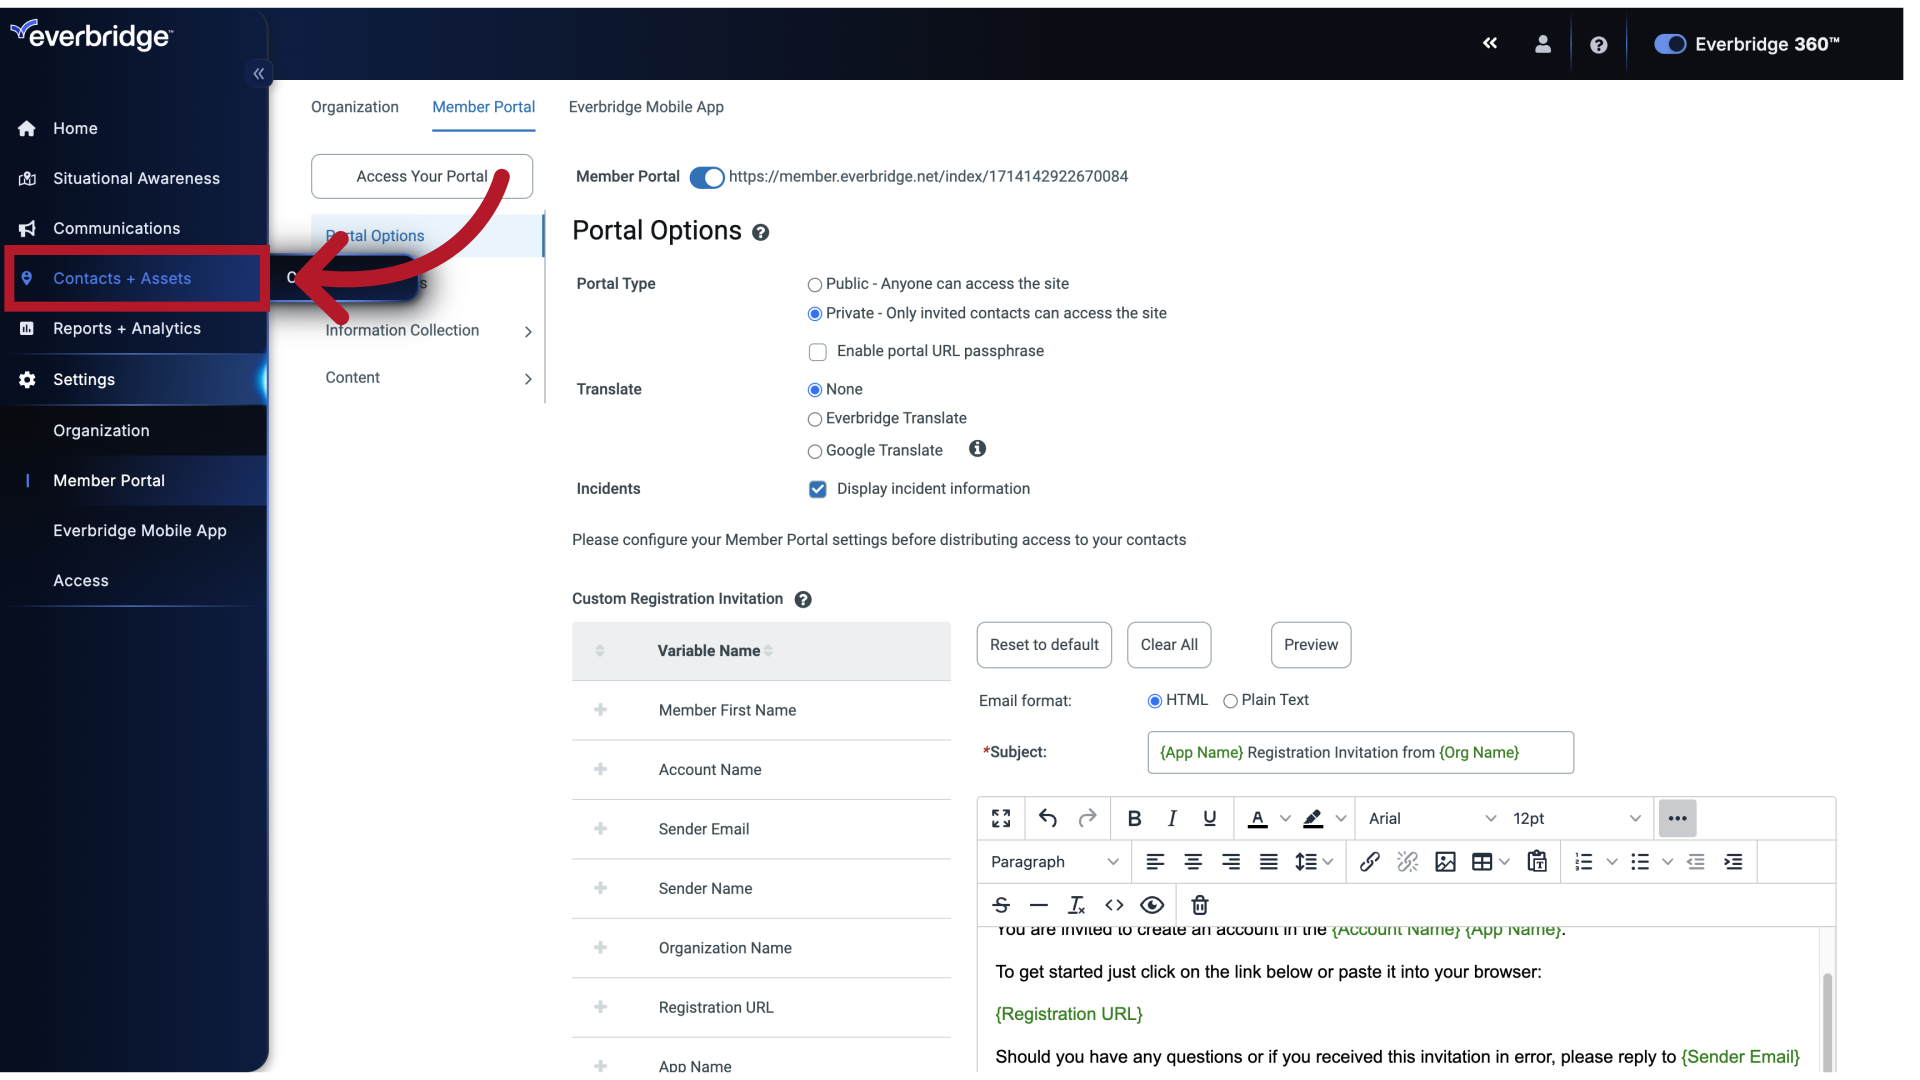
Now, to send the registration emails. Click Contacts.
16. Contact List
17. Contact List
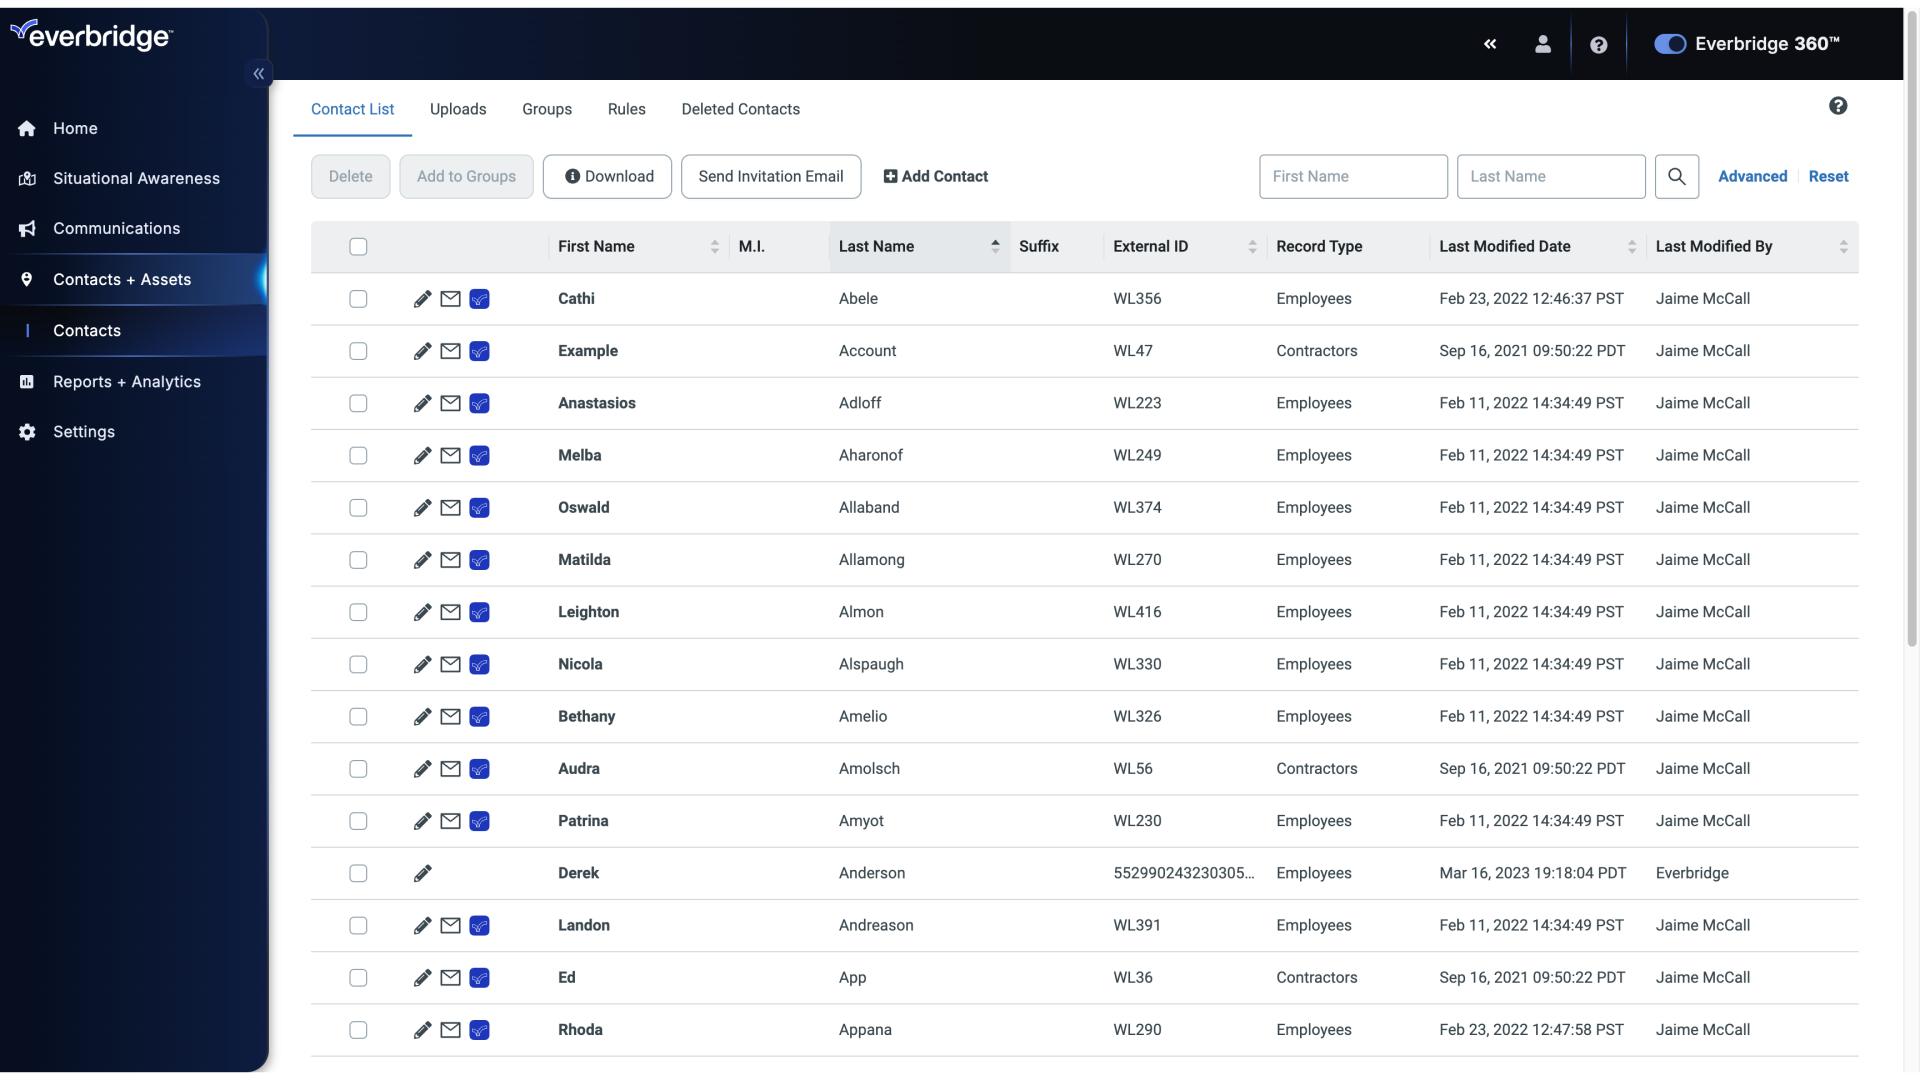
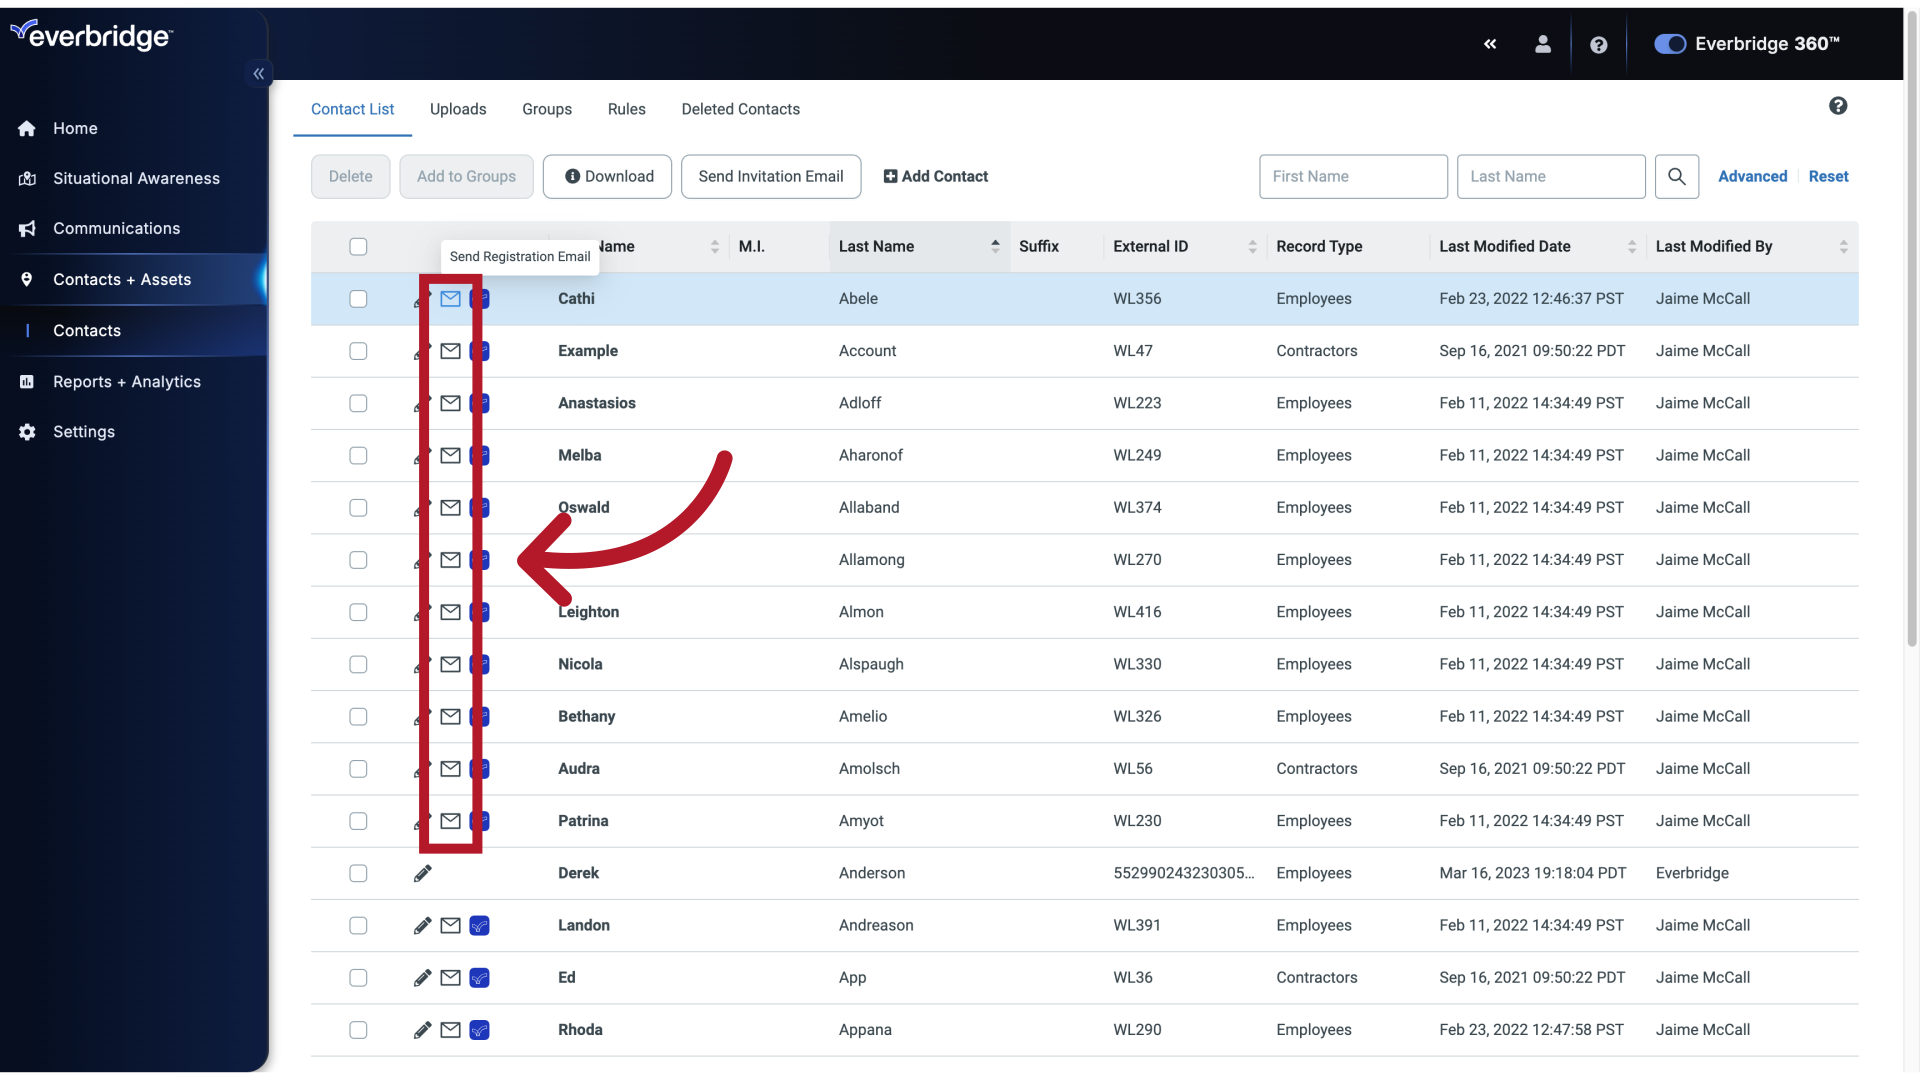
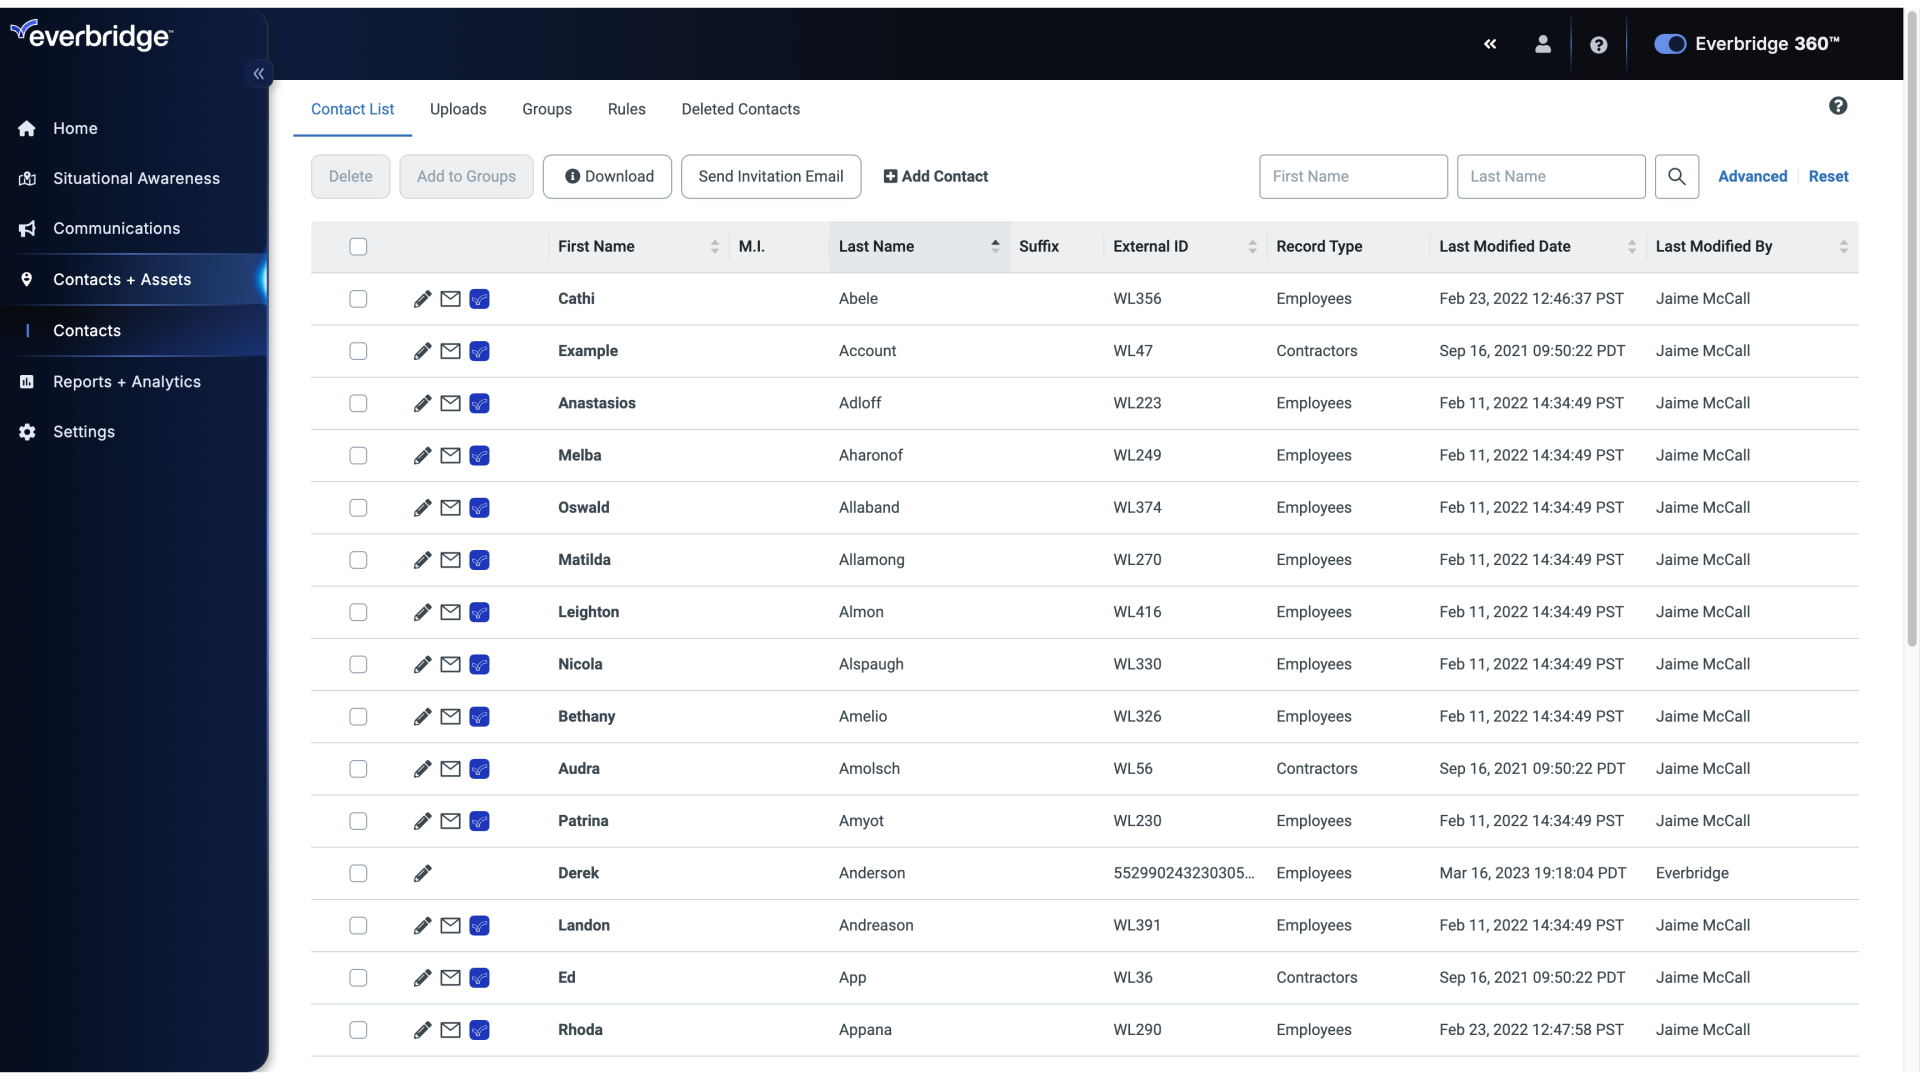
You'll notice that the contacts all have an envelope icon next to their name. The envelope icon will not appear if the contact has previously registered.
18. Send Registration Email
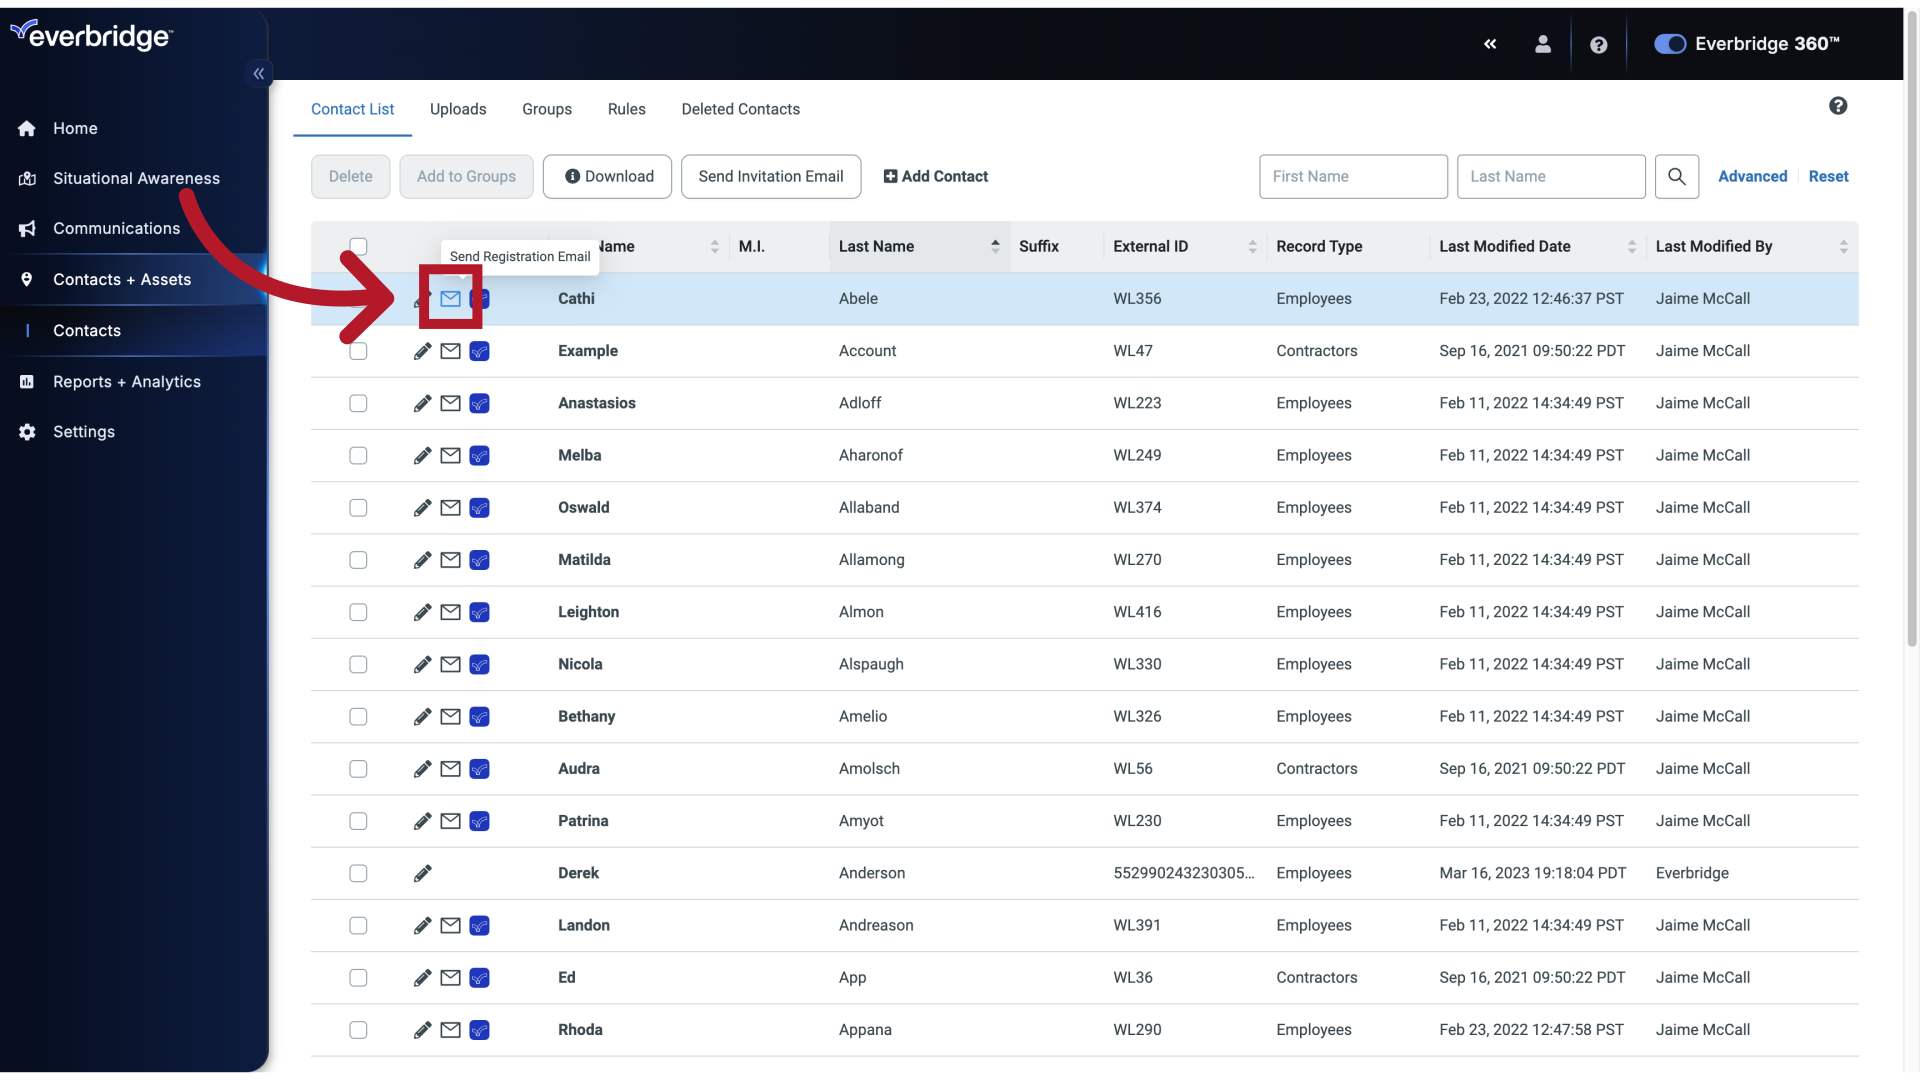
You can send a registration email to a specific contact by clicking the envelope icon by their name.
19. Send Registration Email
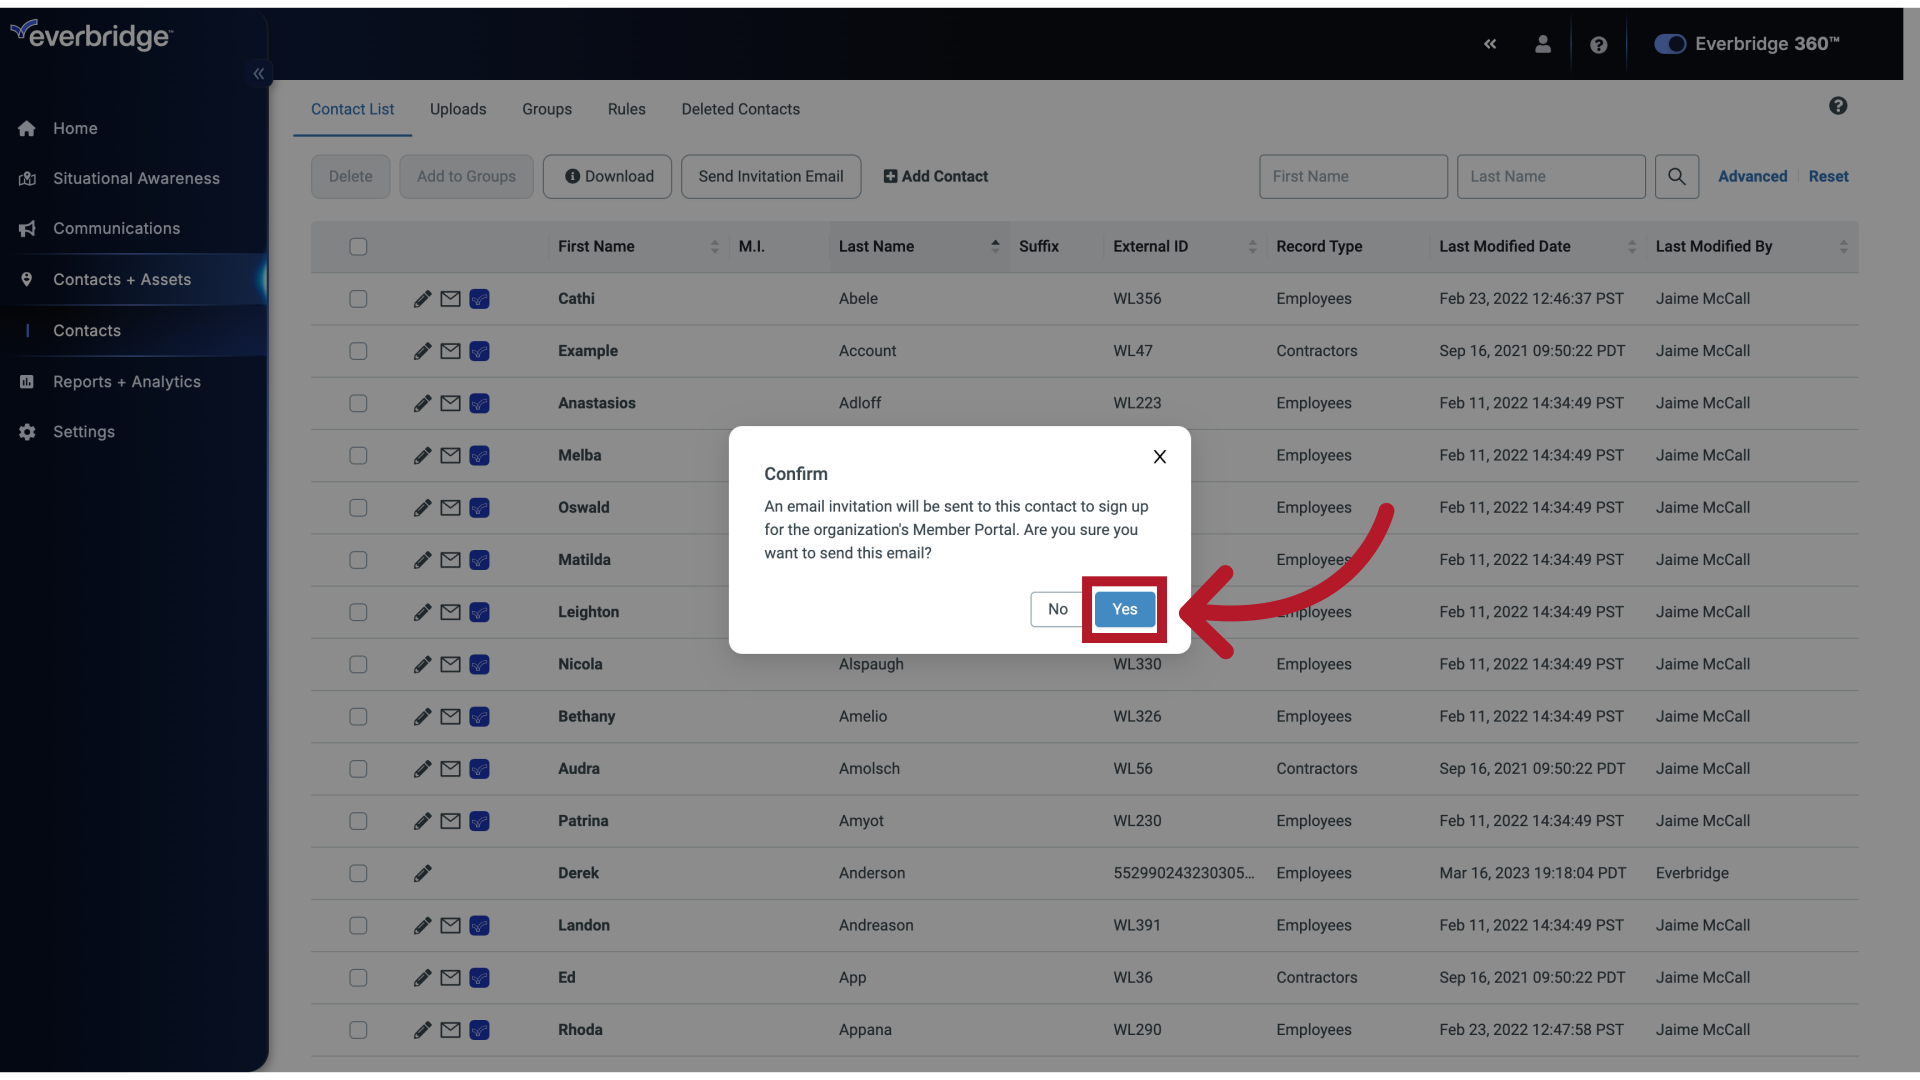
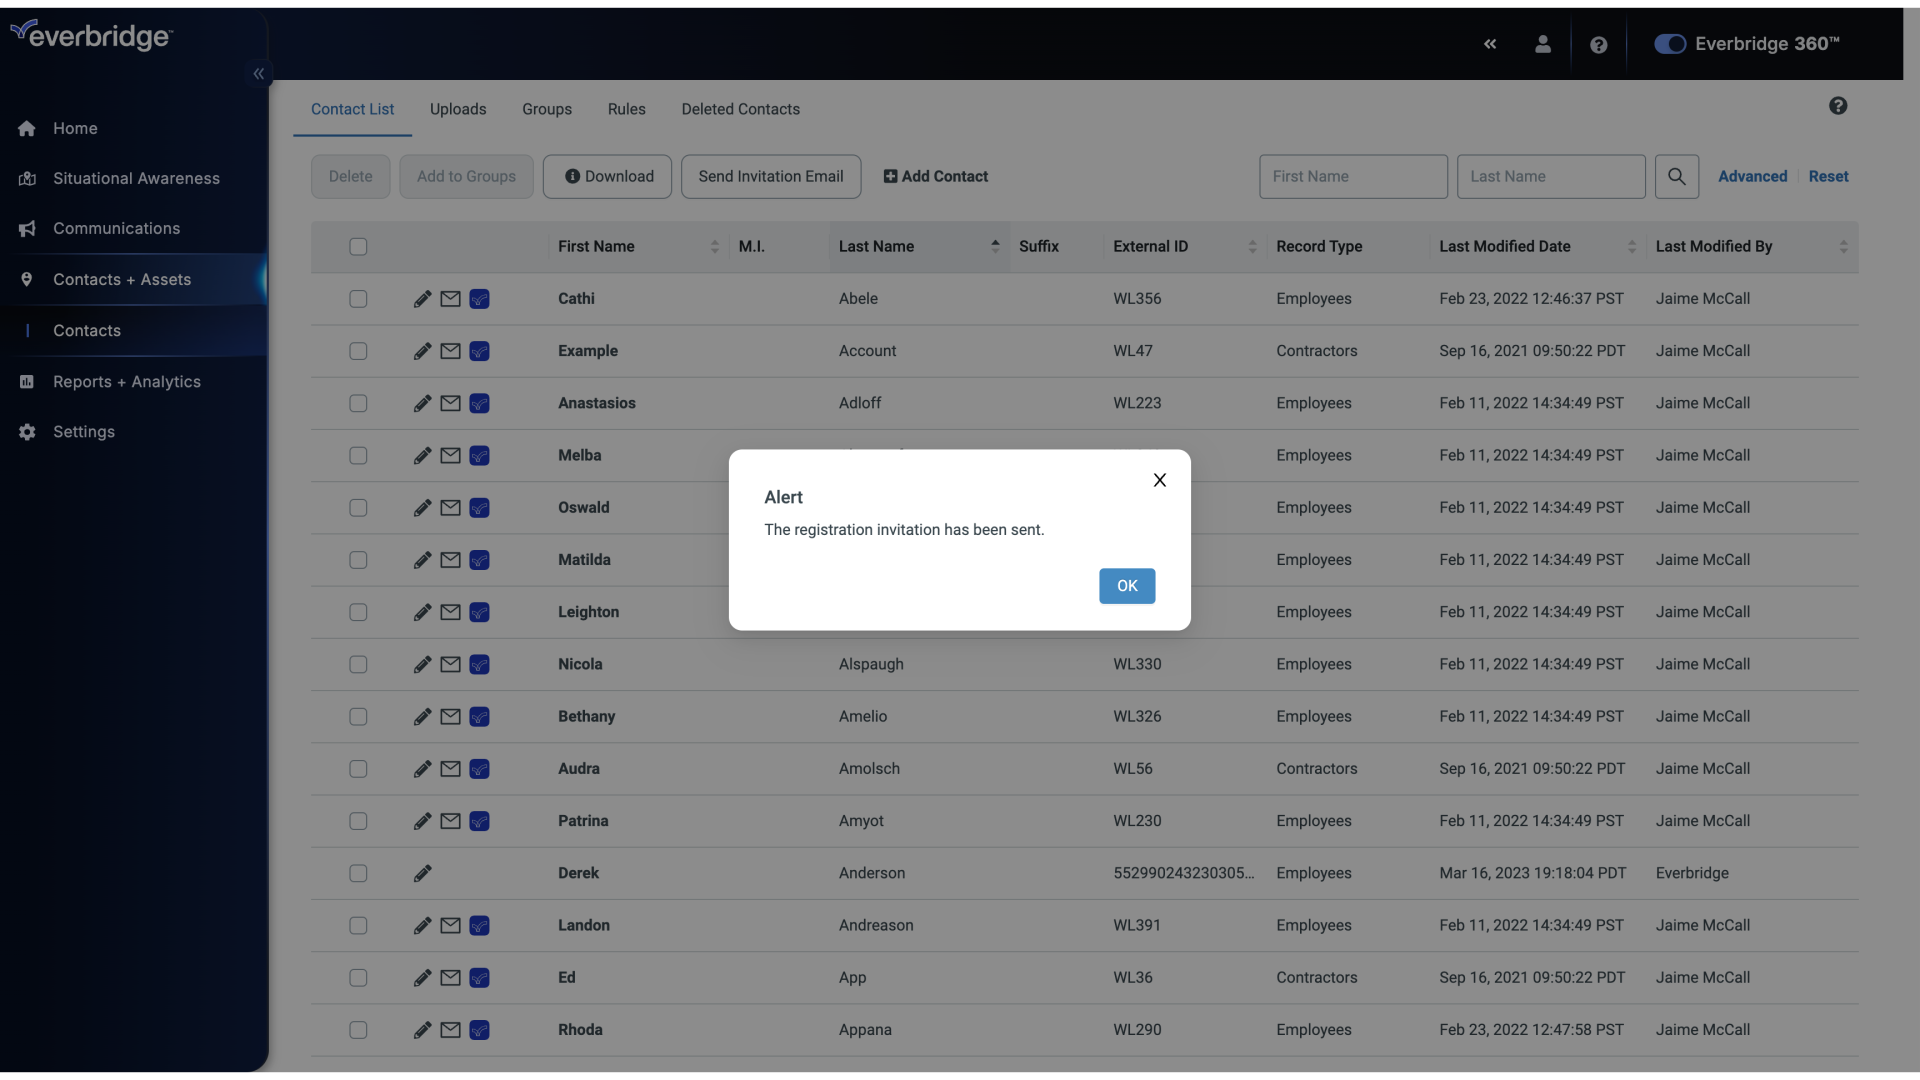
Click Yes to confirm.
20. Send Registration Email
21. Contact List
You can also send the registration email to all contacts listed.
22. Send Registration Email - All Contacts
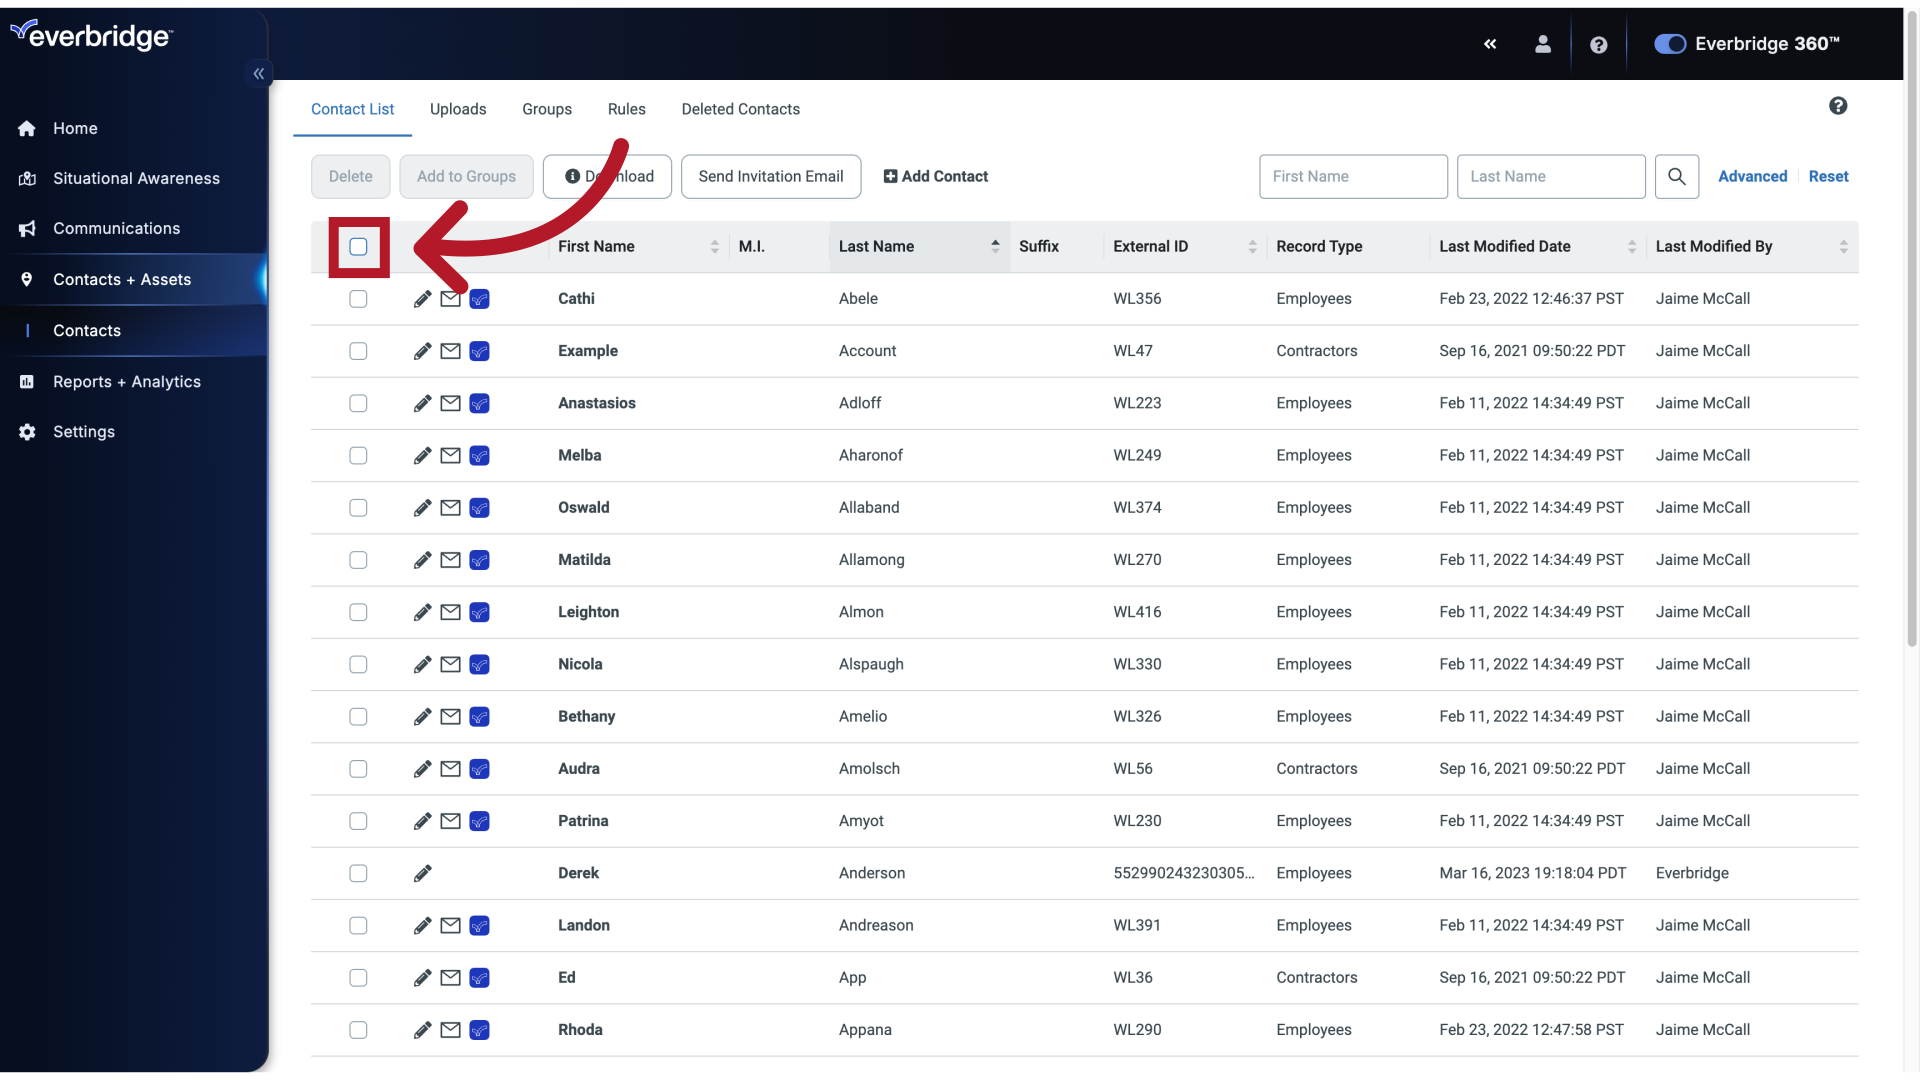
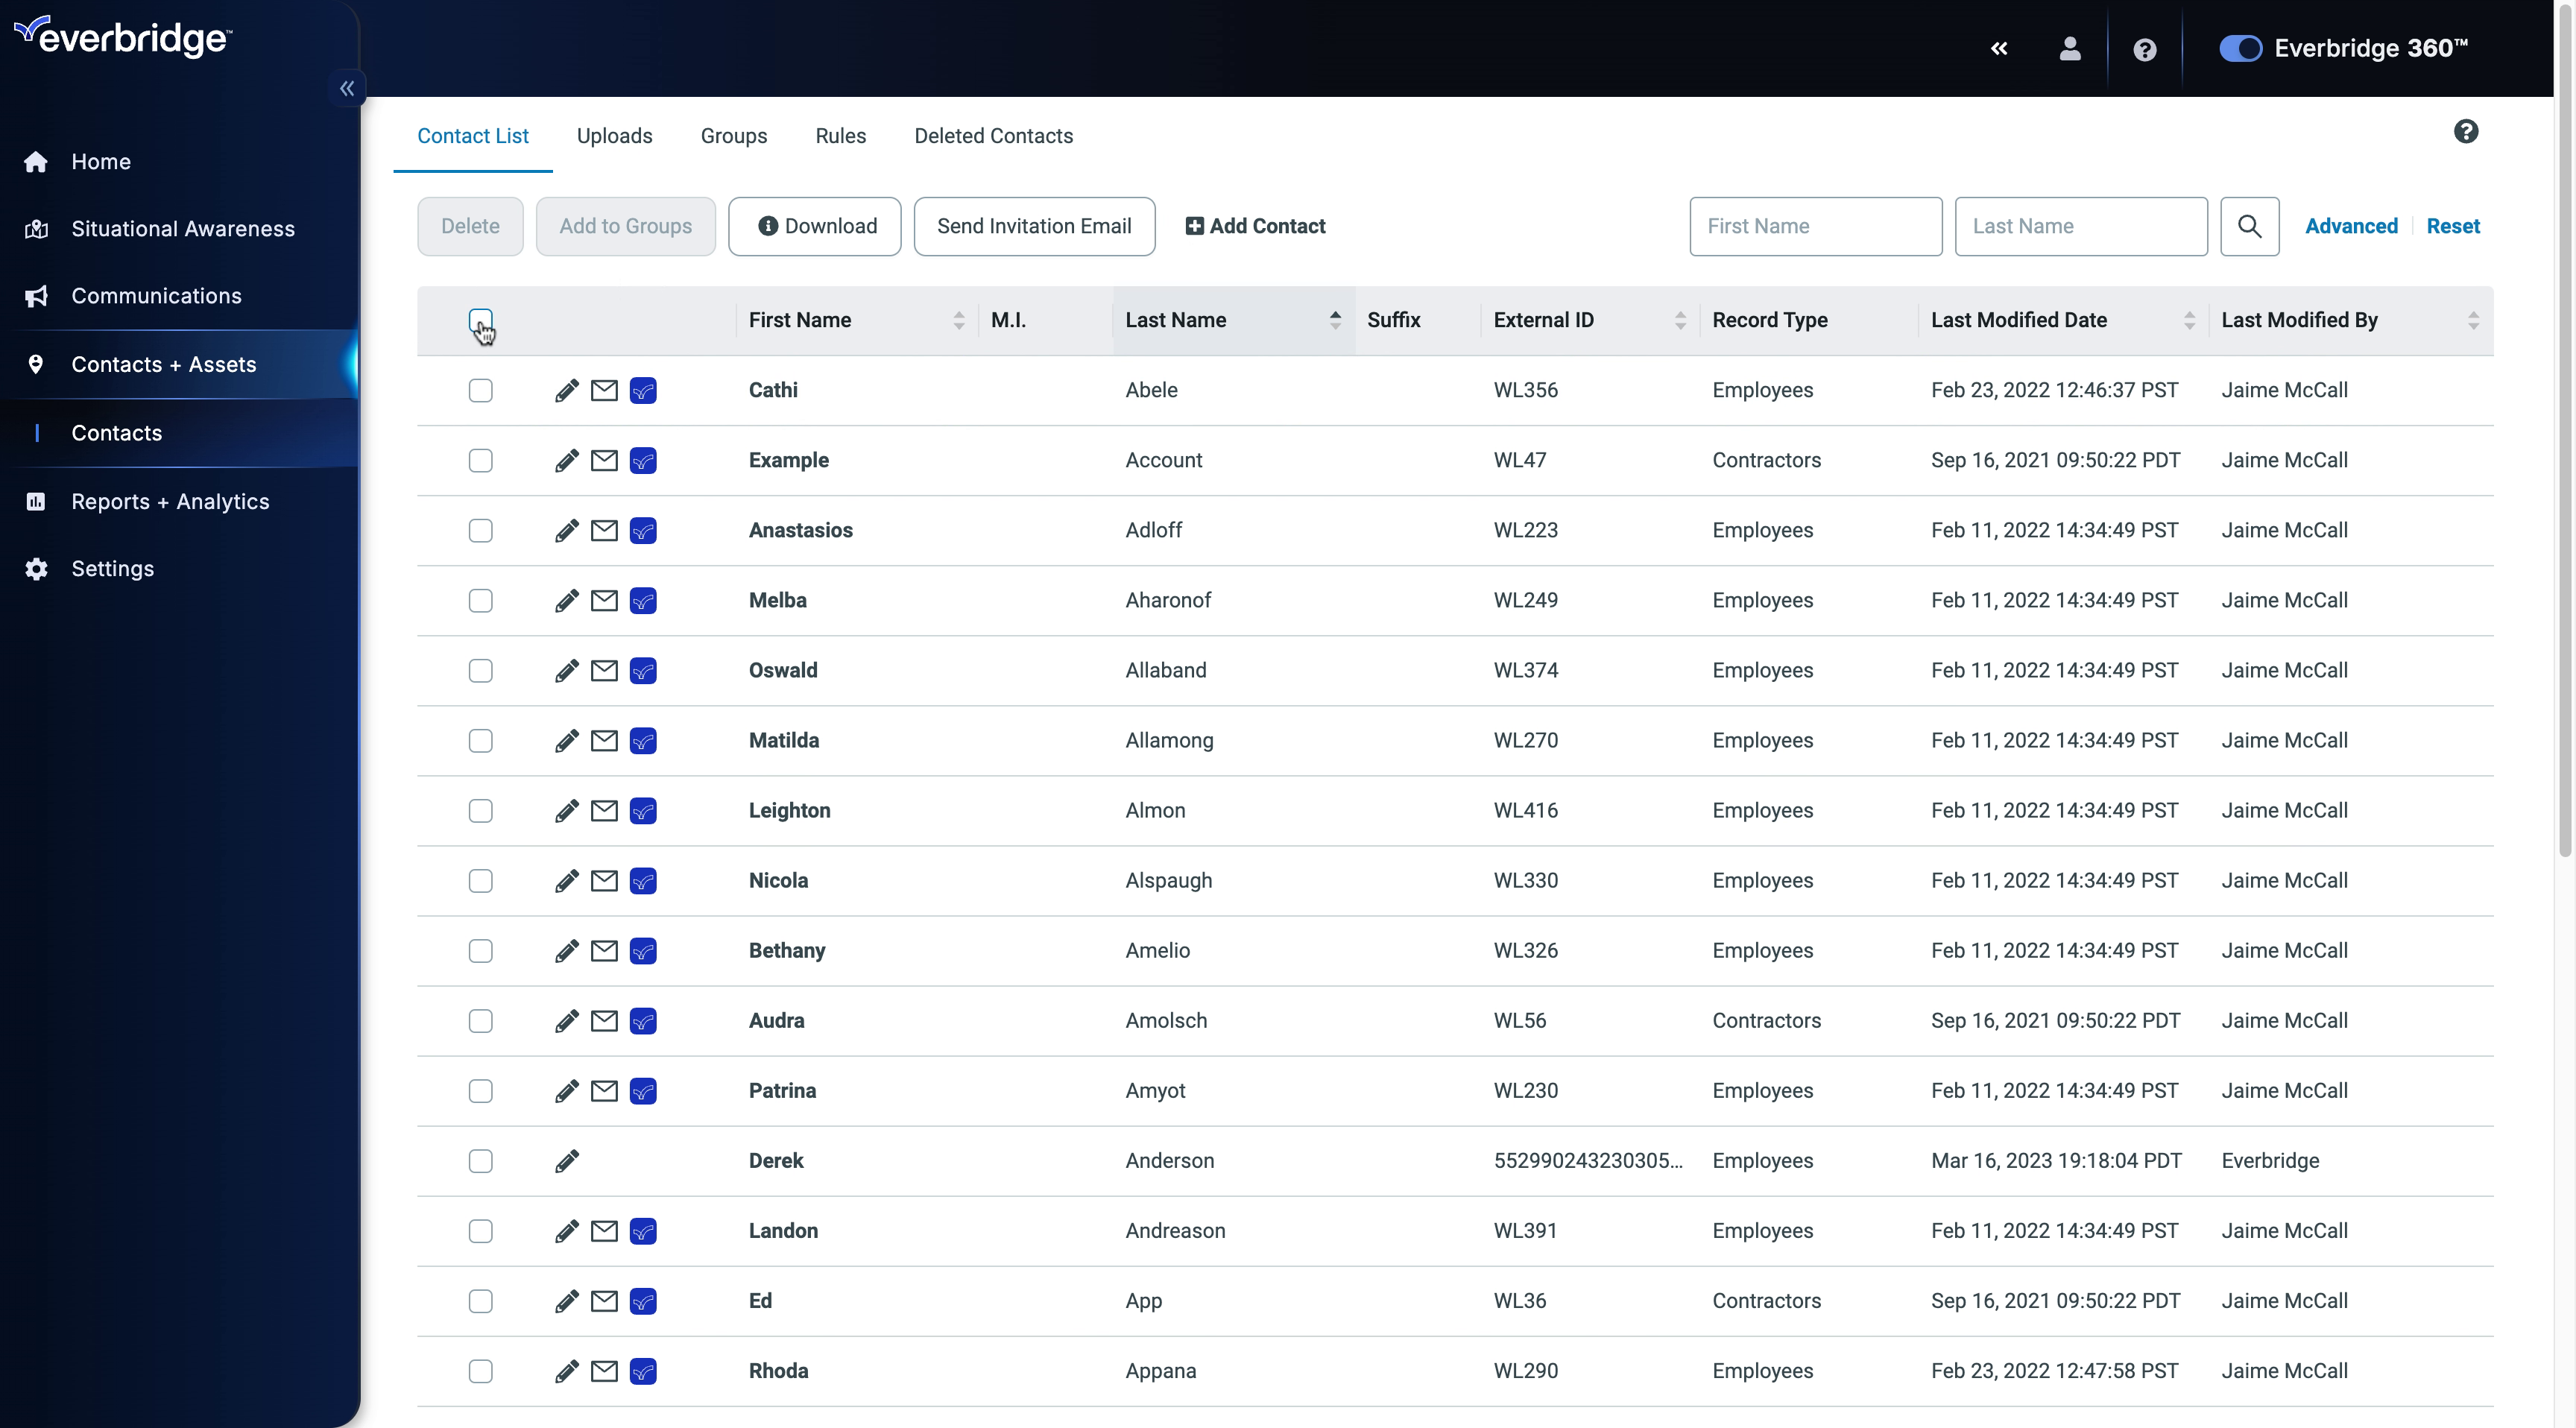
By checking the selection box at the top of the screen.
23. Send Registration Email - All Contacts
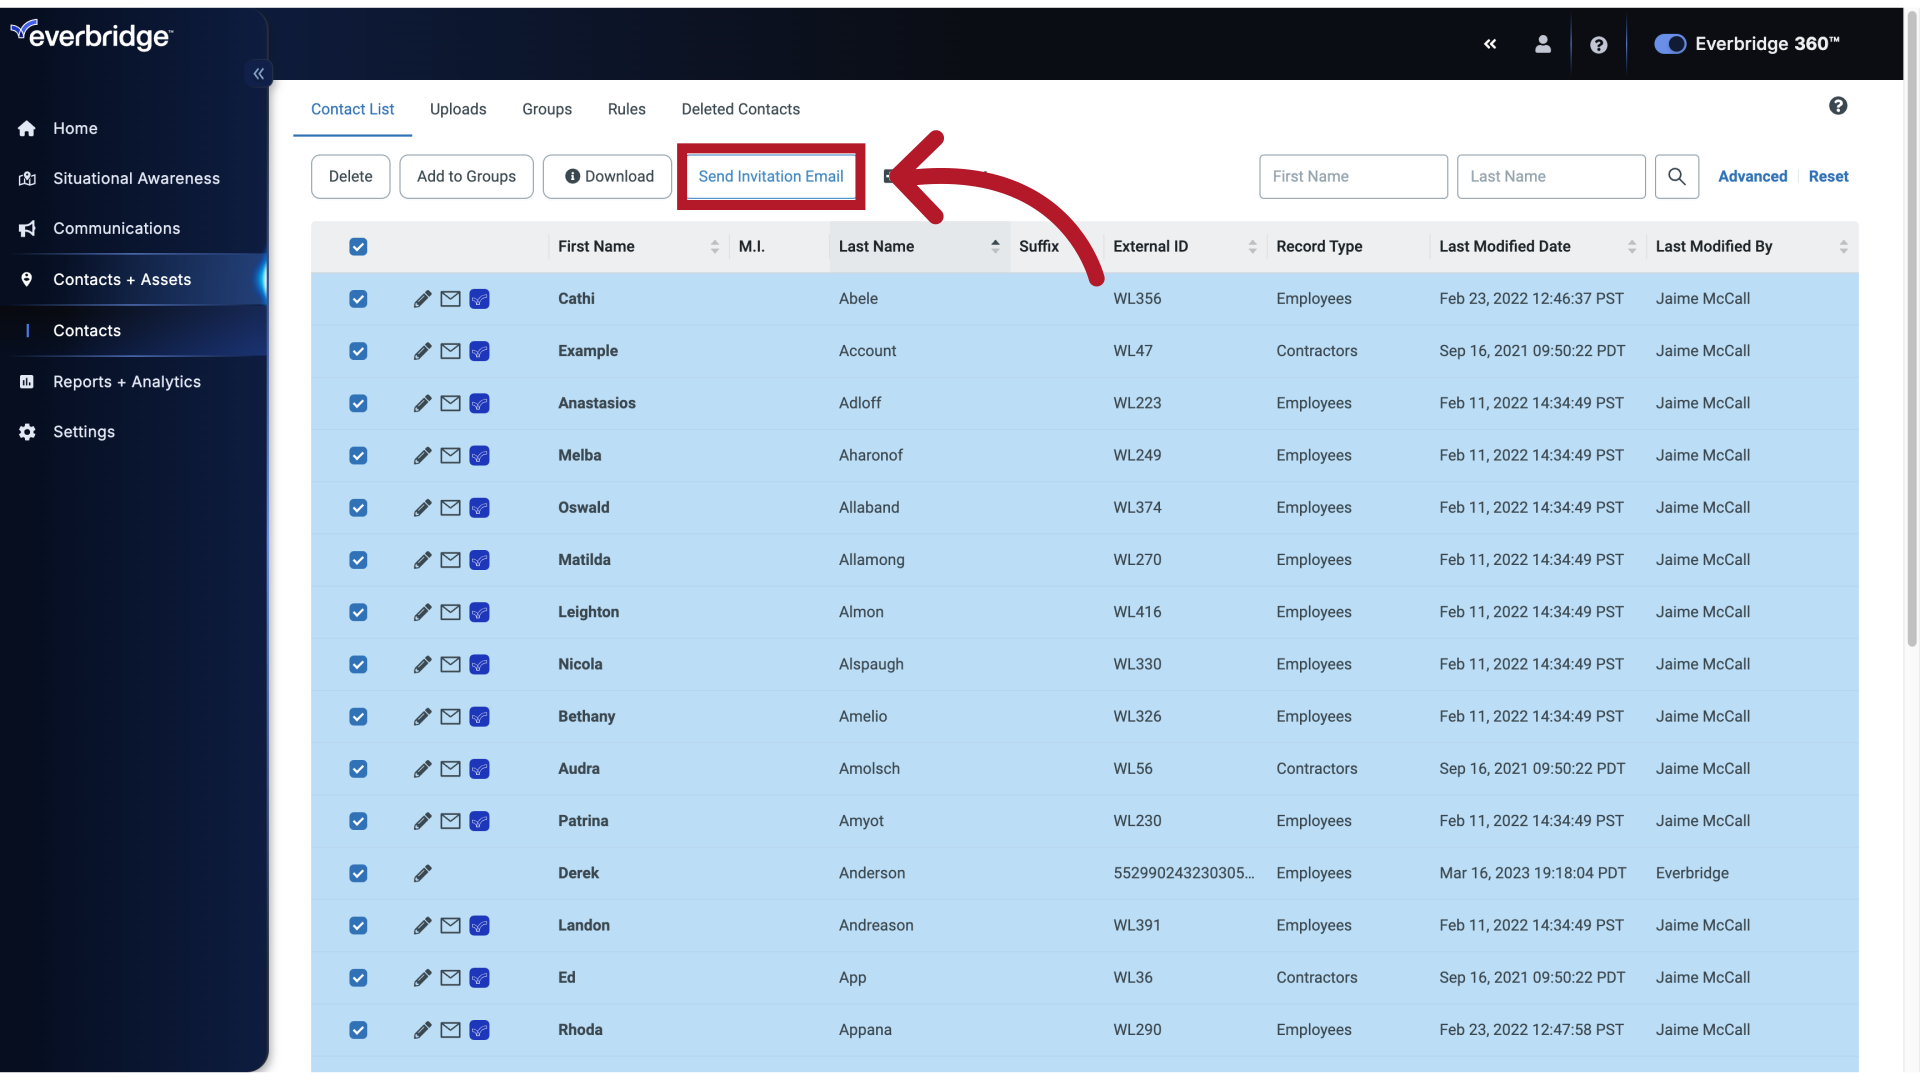
And then clicking Send Invitation Email.
24. Send Registration Email - All Contacts
25. Send Registration Email - All Contacts
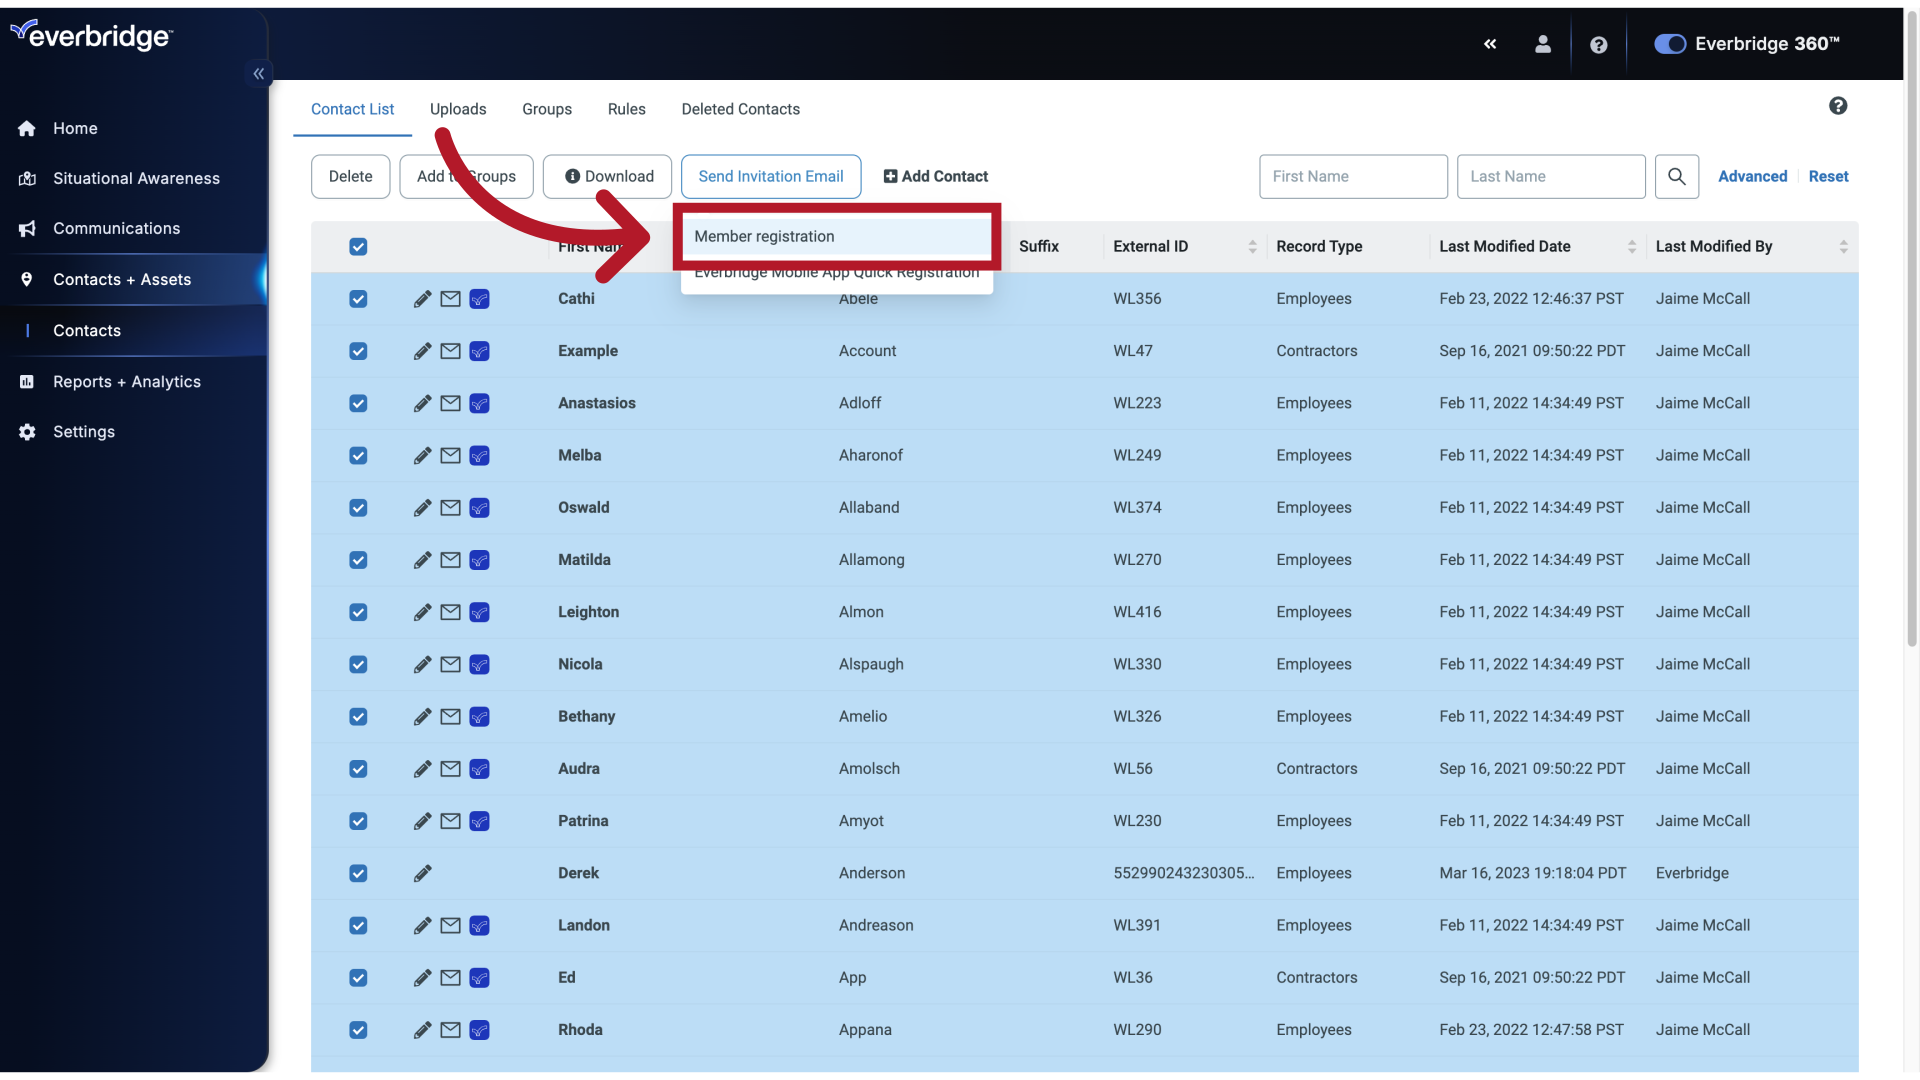
26. Send Registration Email - All Contacts
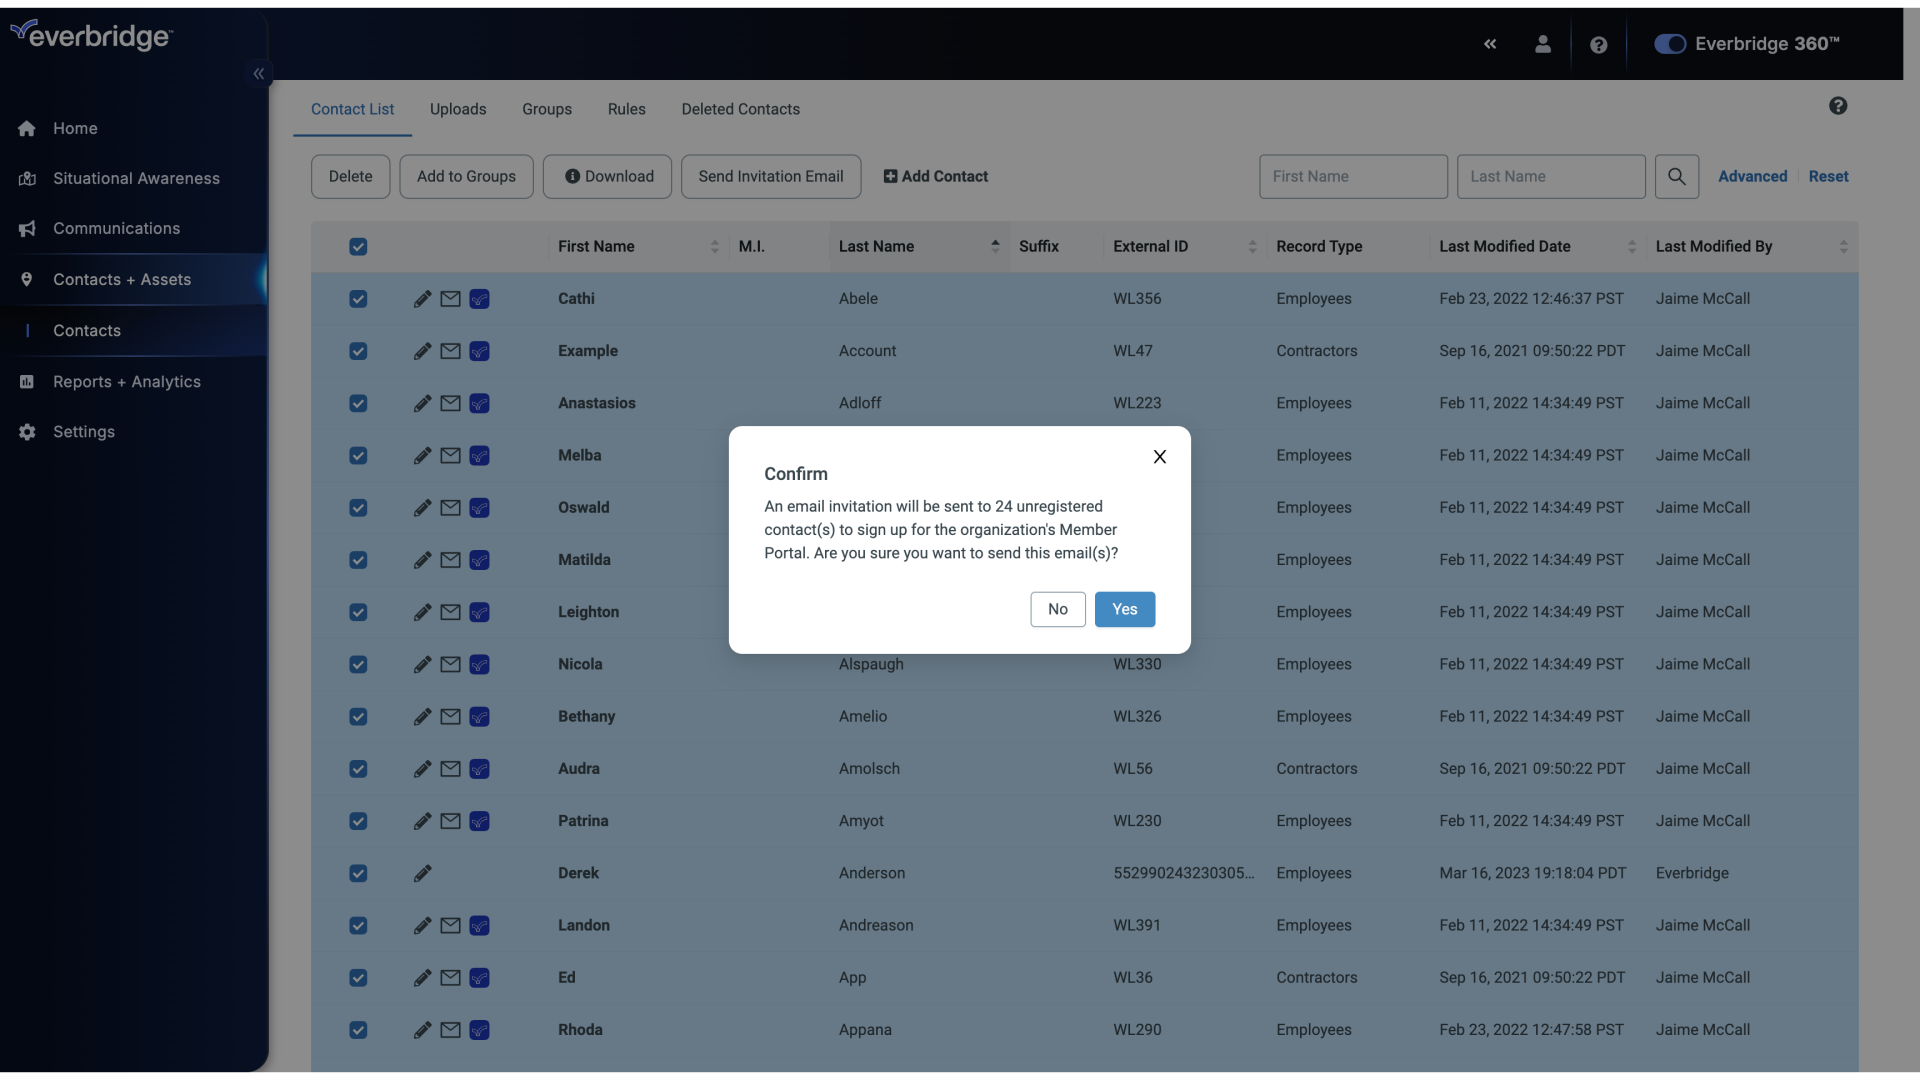
27. Send Registration Email - All Contacts
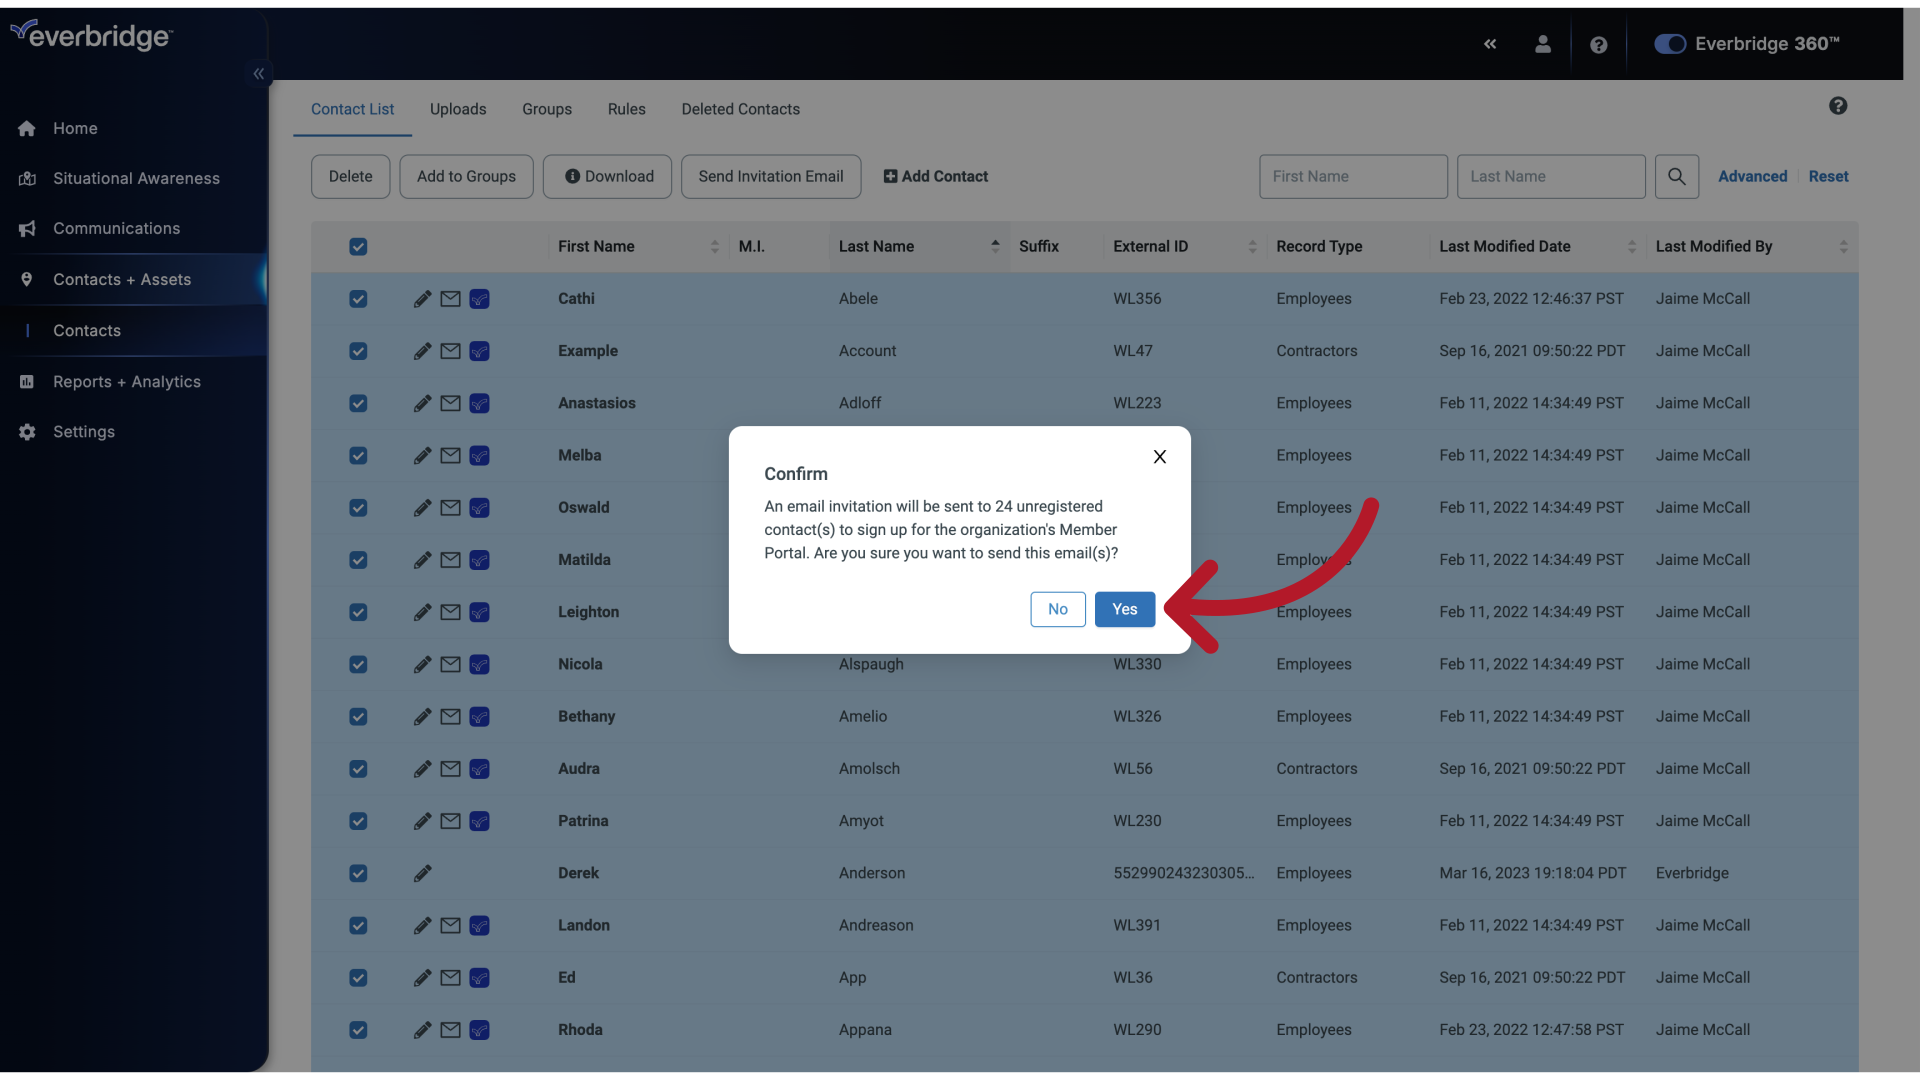
28. Tracking Registration Email Distribution
The system logs provide detailed information about email distribution. You can track how many registration emails were sent through system logs. Note that if multiple email addresses exist for a contact, each email address counts as a separate registration invite towards the total count.