Topic
Configuring an Everbridge Web Widget for publishing Notifications in Everbridge.
Description
The Everbridge Web Widget provides an easy and quick method for publishing your notifications to a web page. This tutorial will demonstrate how to enable and configure a widget, and how a published message appears once the widget has been embedded into a web page.
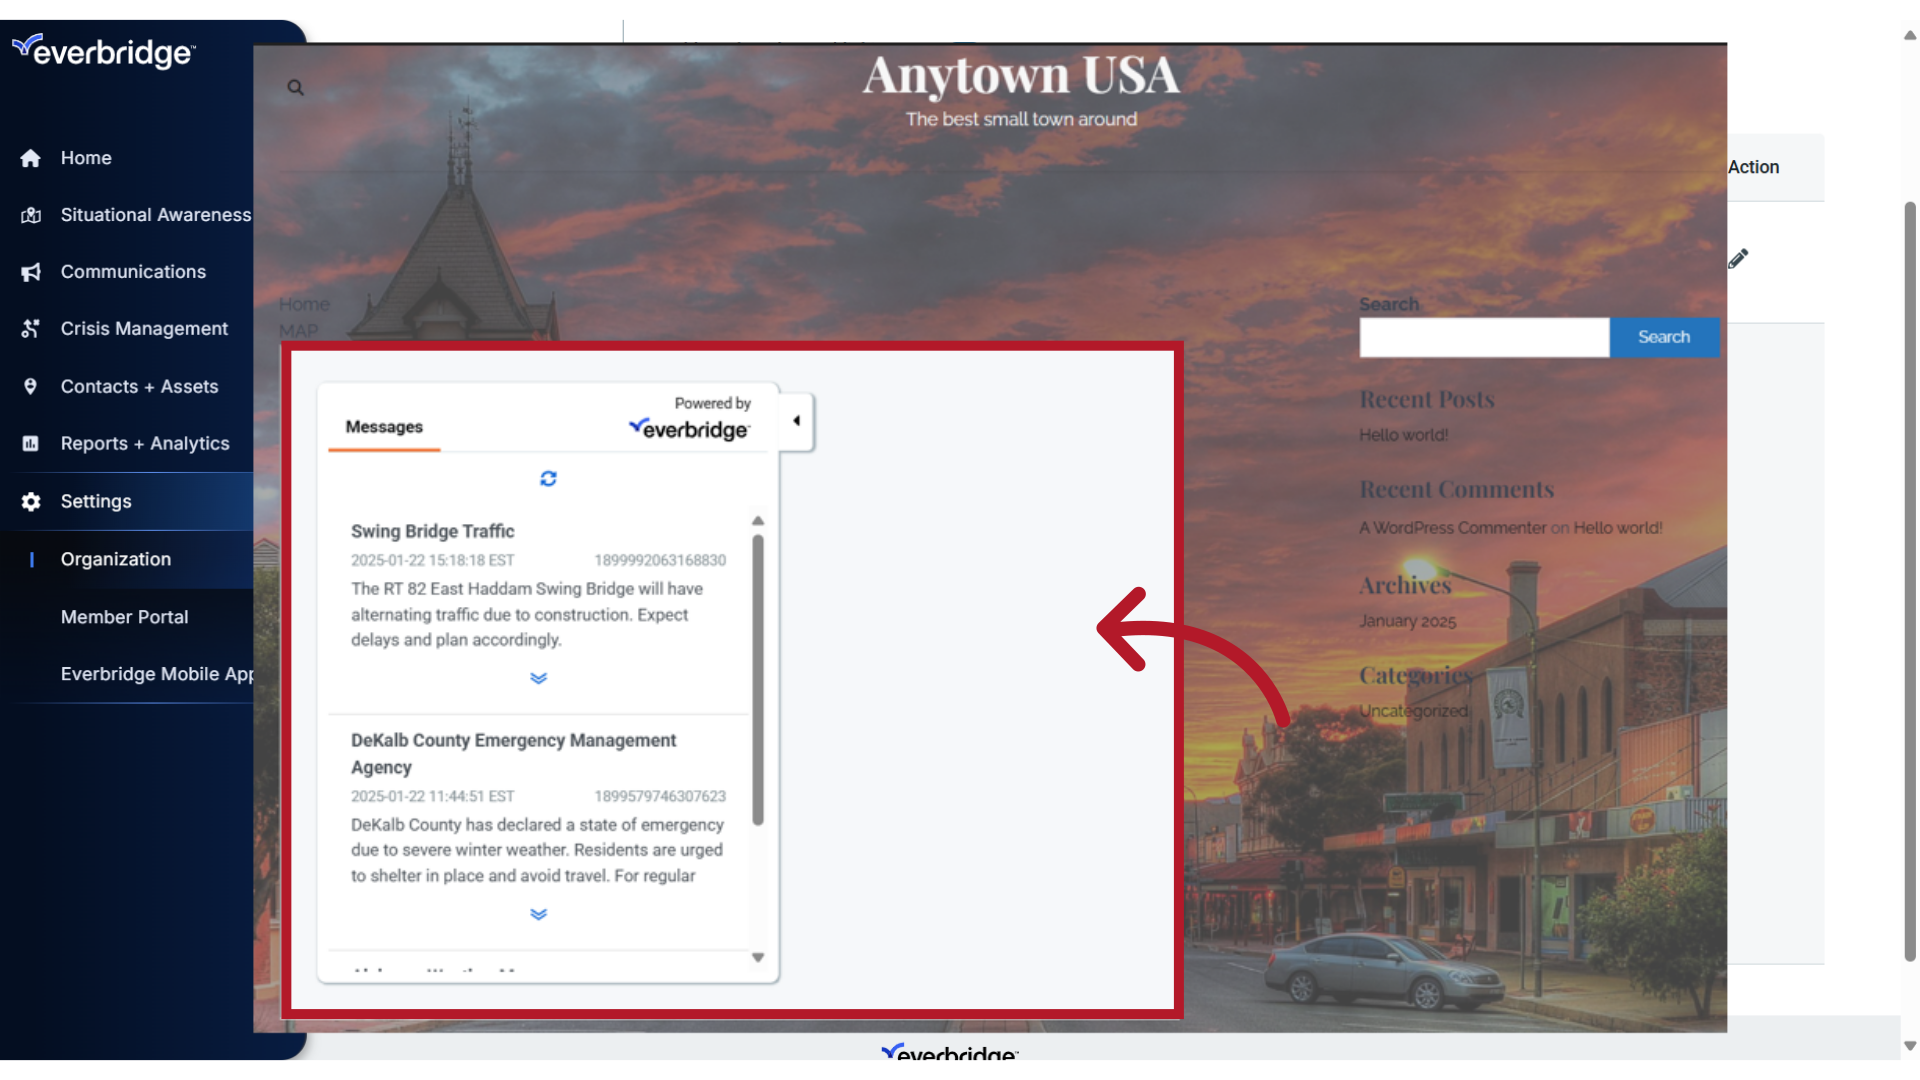
1. Web Display
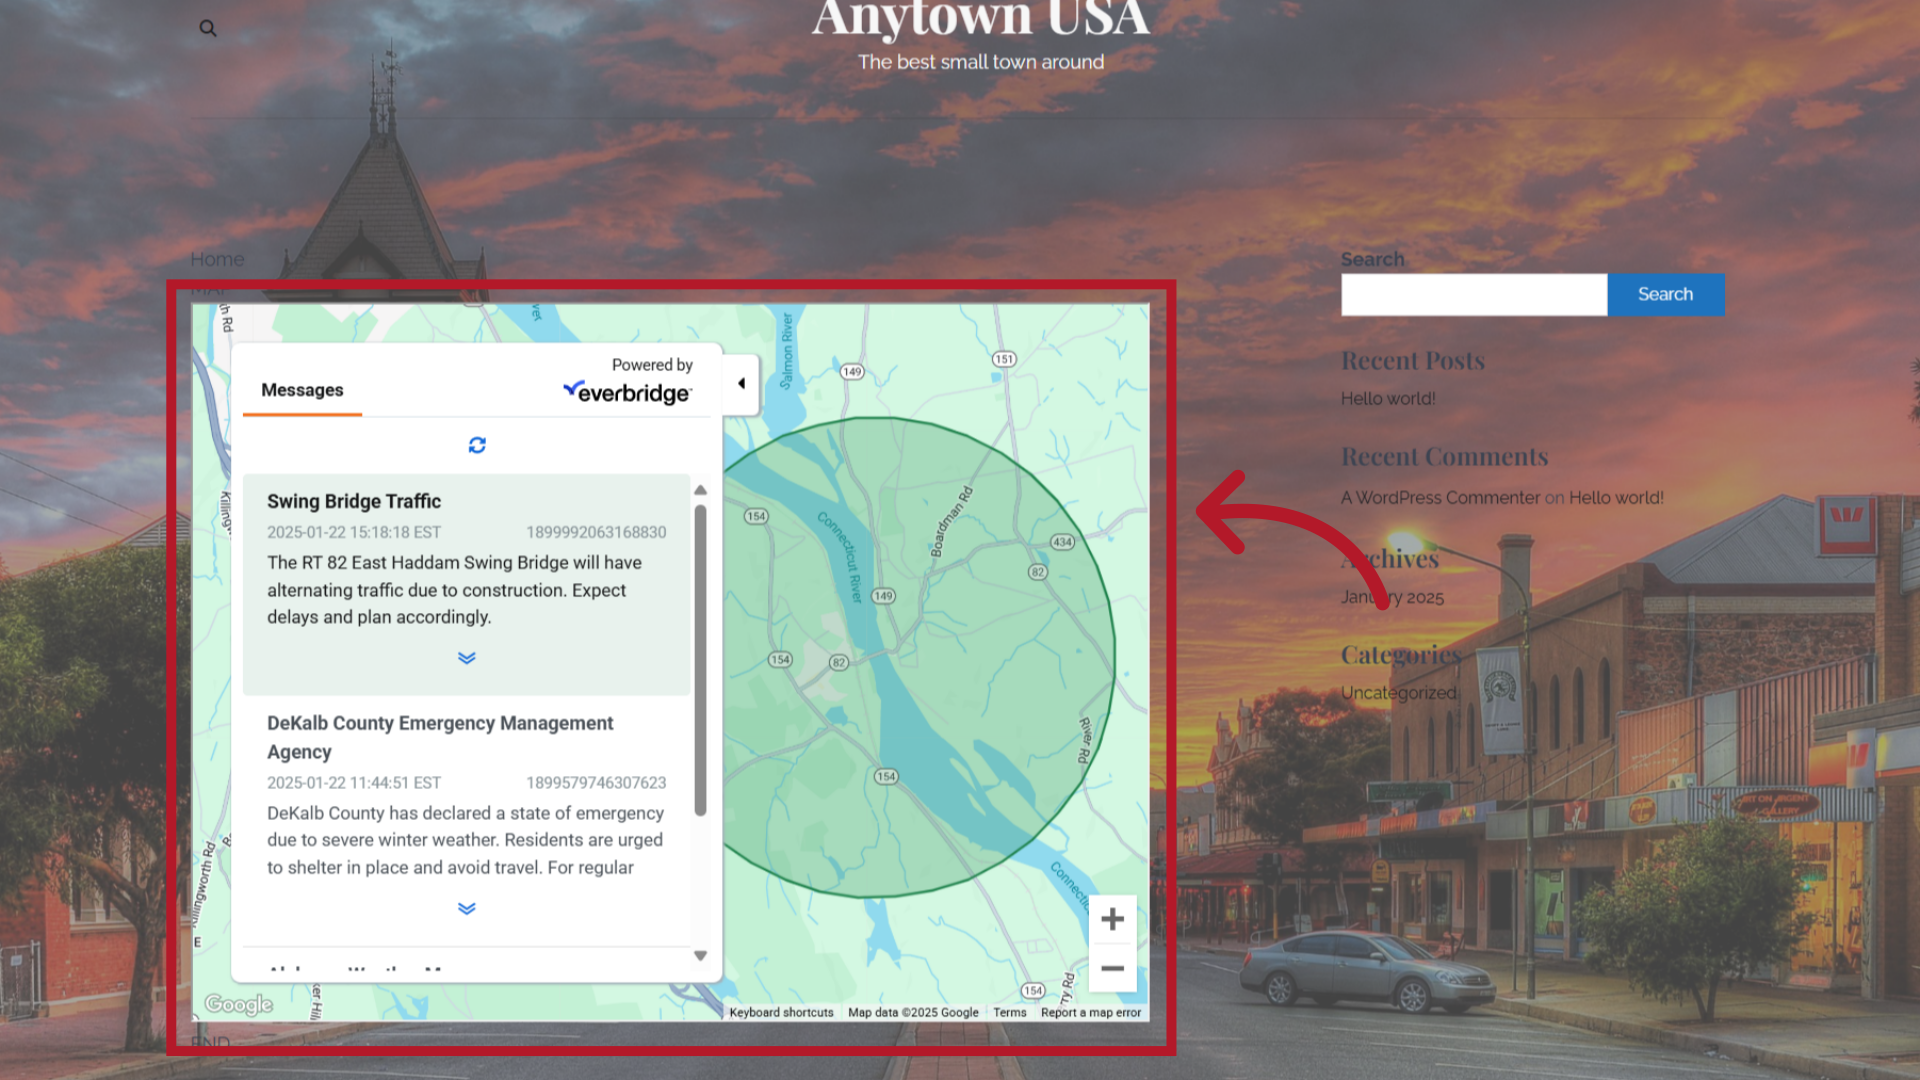
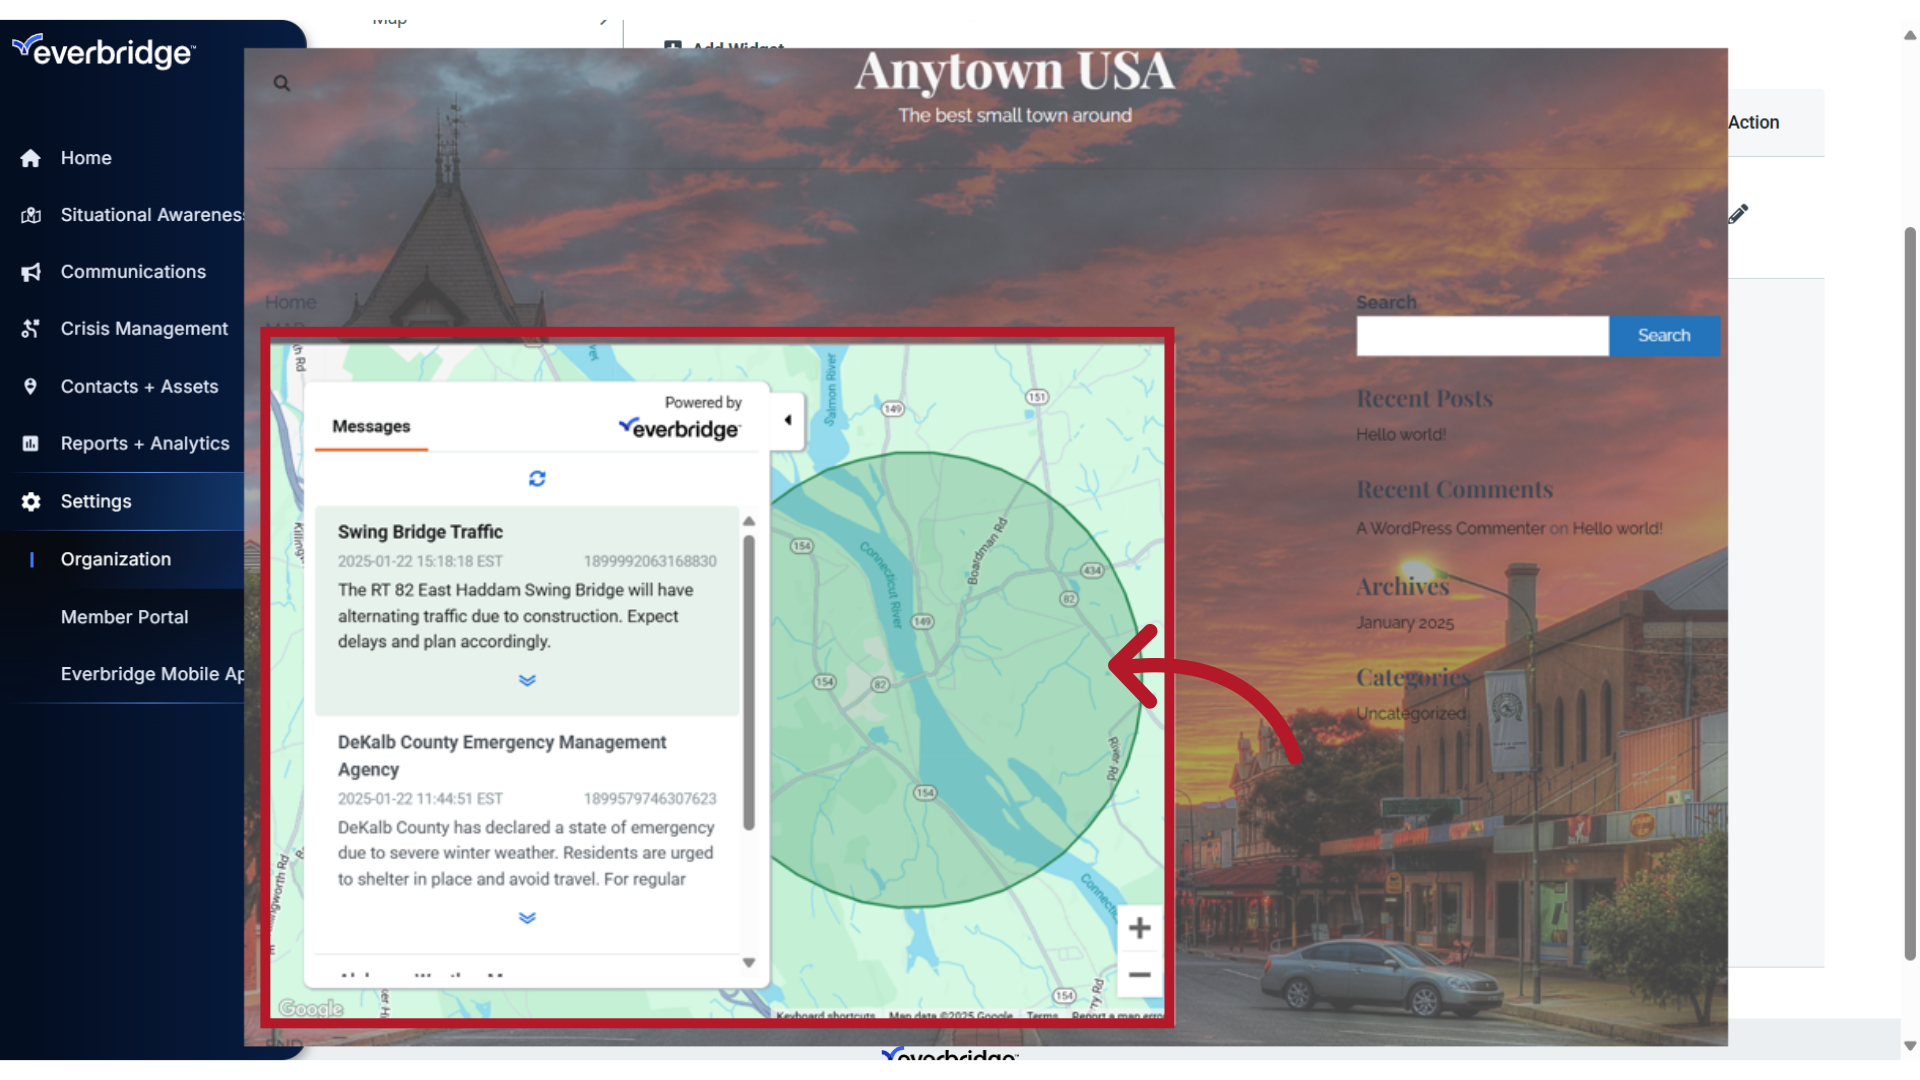
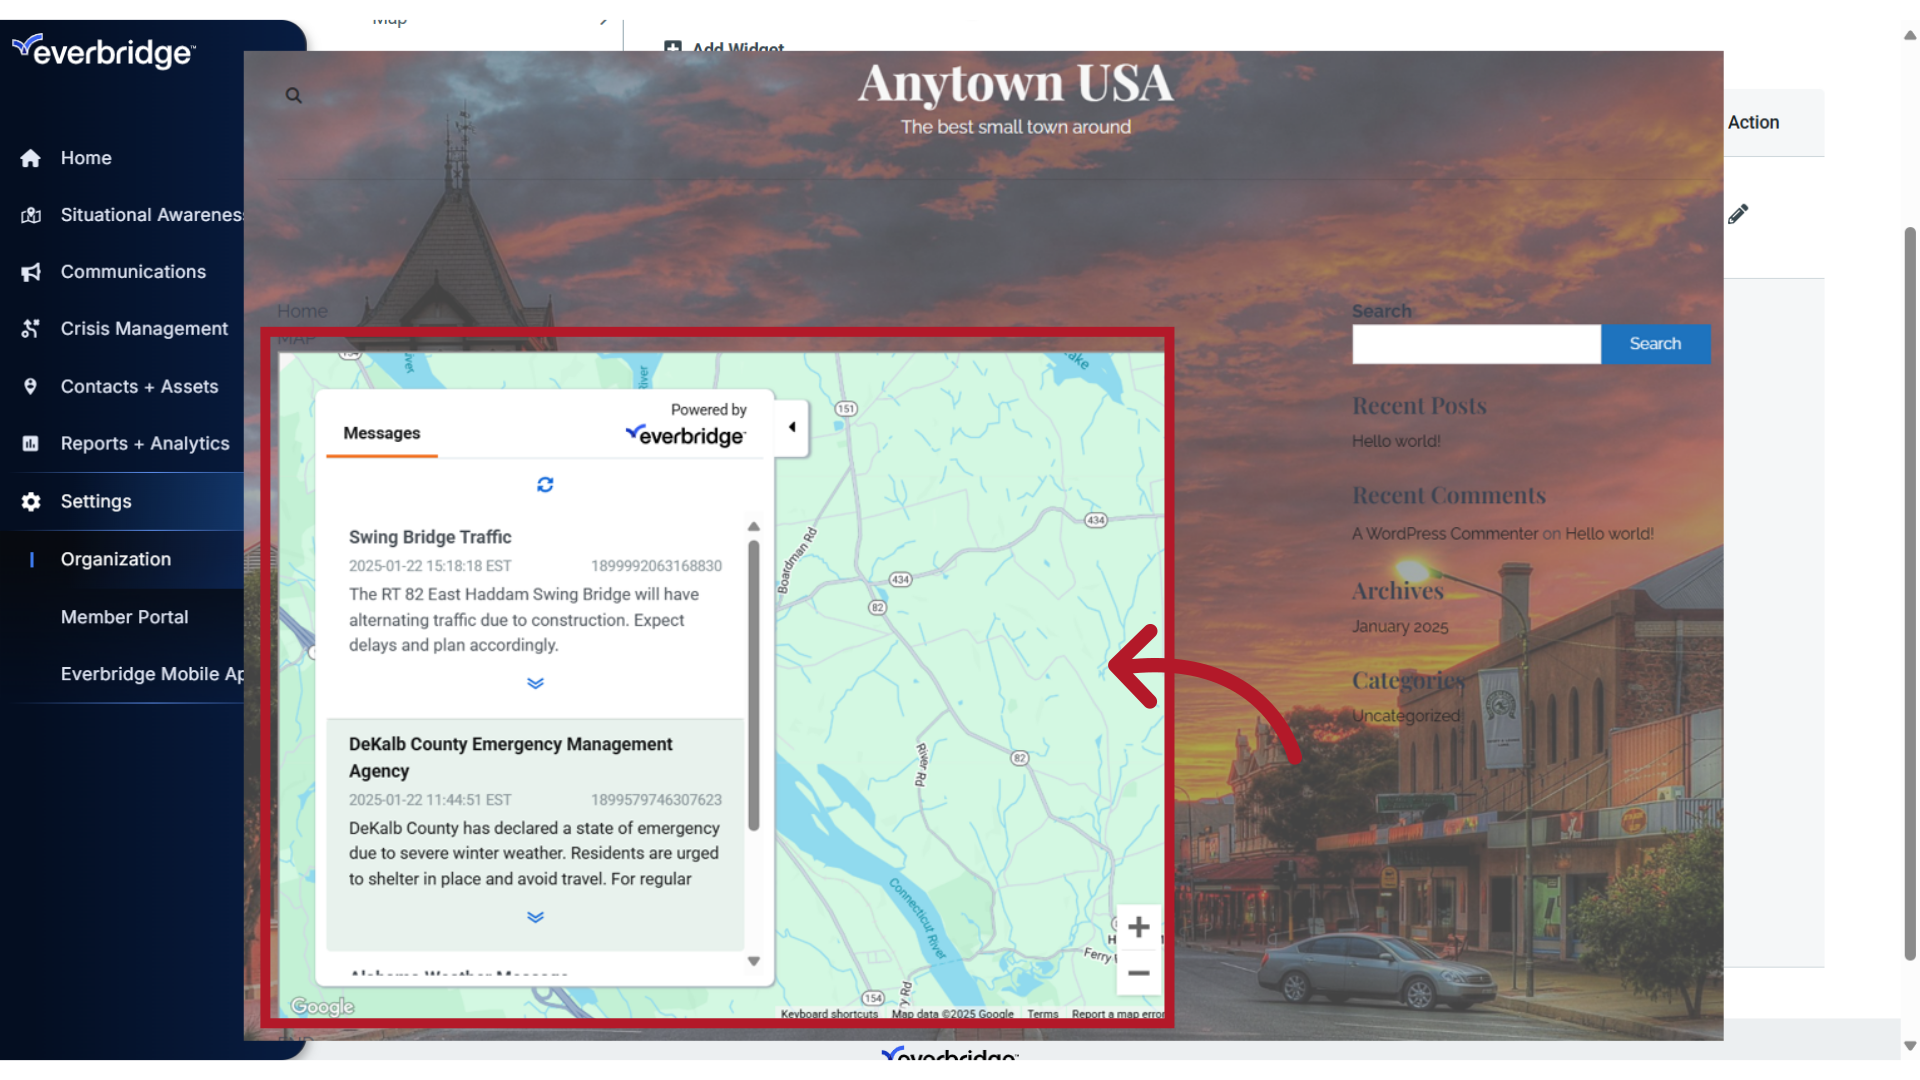
When a notification has been sent from your organization using the Web Widget publishing option, the message title, message body and map selection will display within the embedded widget, as seen in this example.
2. Navigate
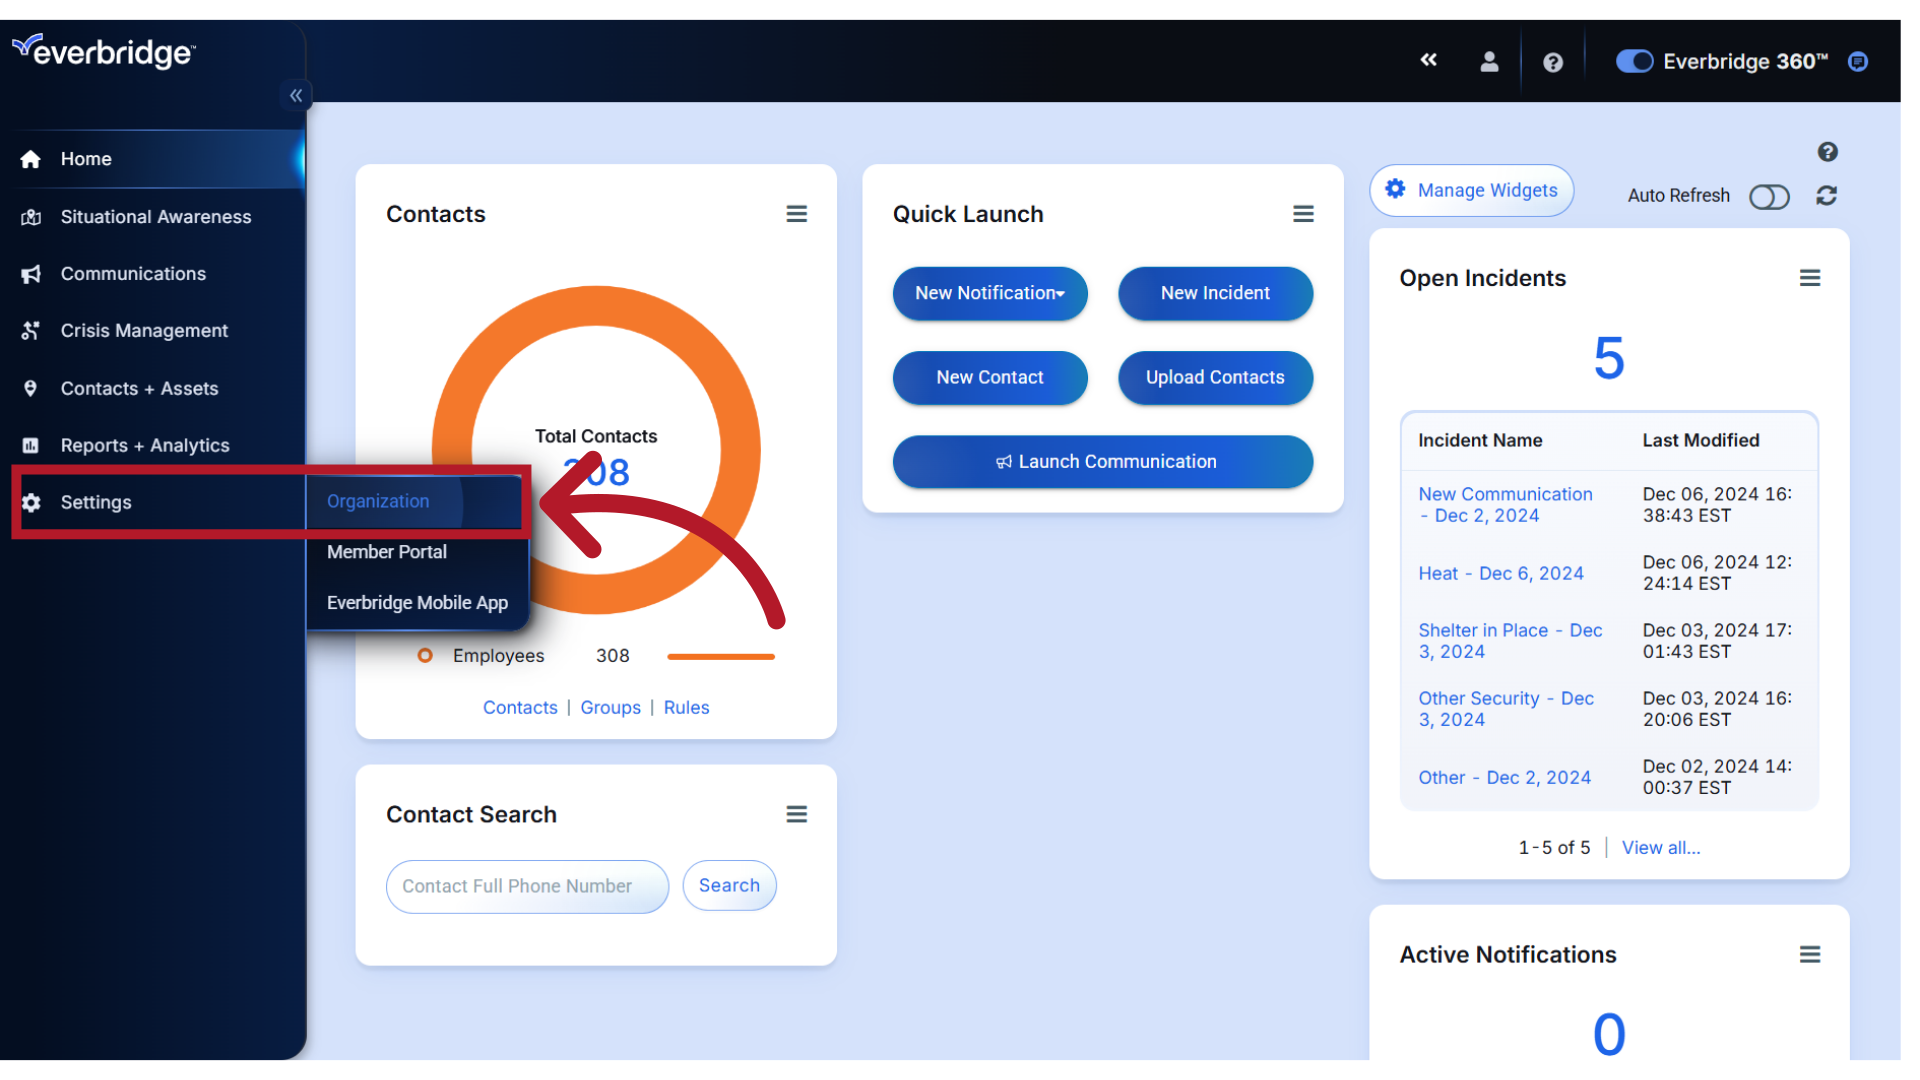
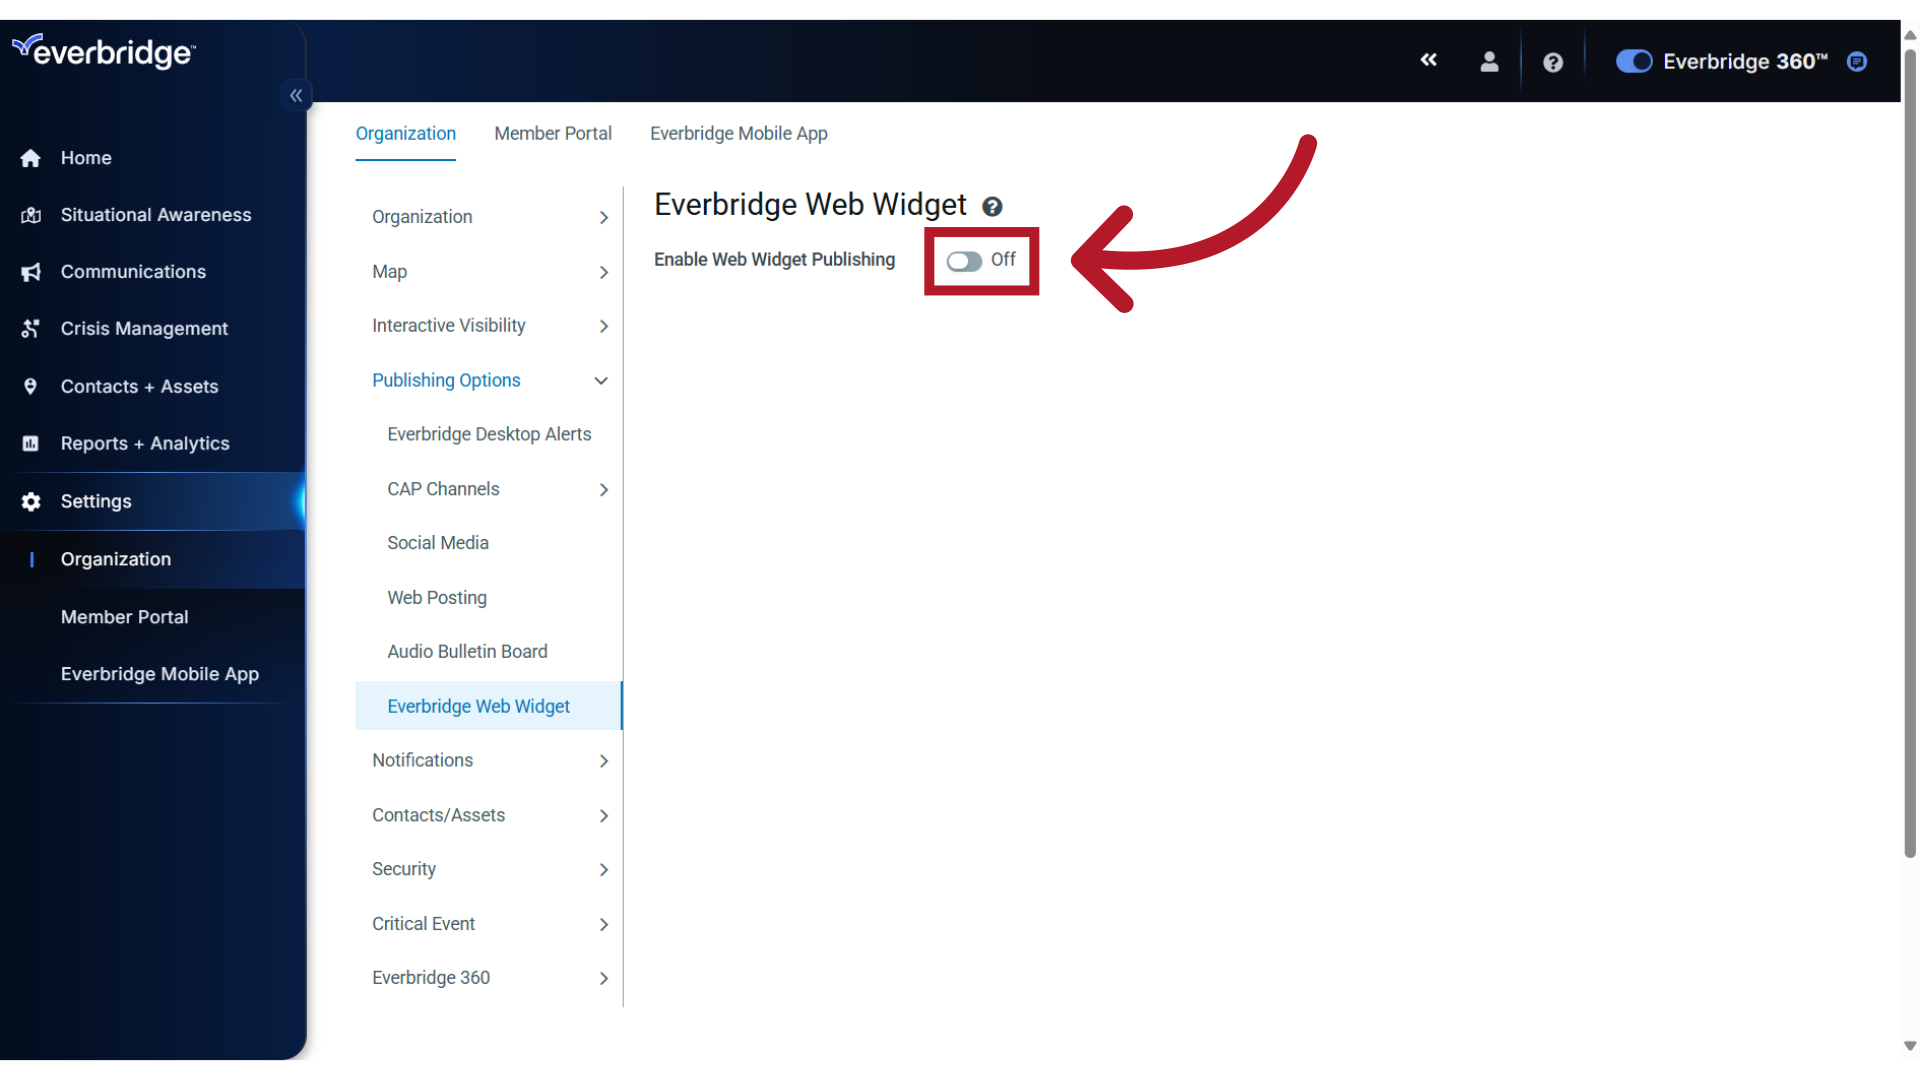
To enable the widget, start by navigating to the Settings menu in your Everbridge organization and select Organization.
3. Select
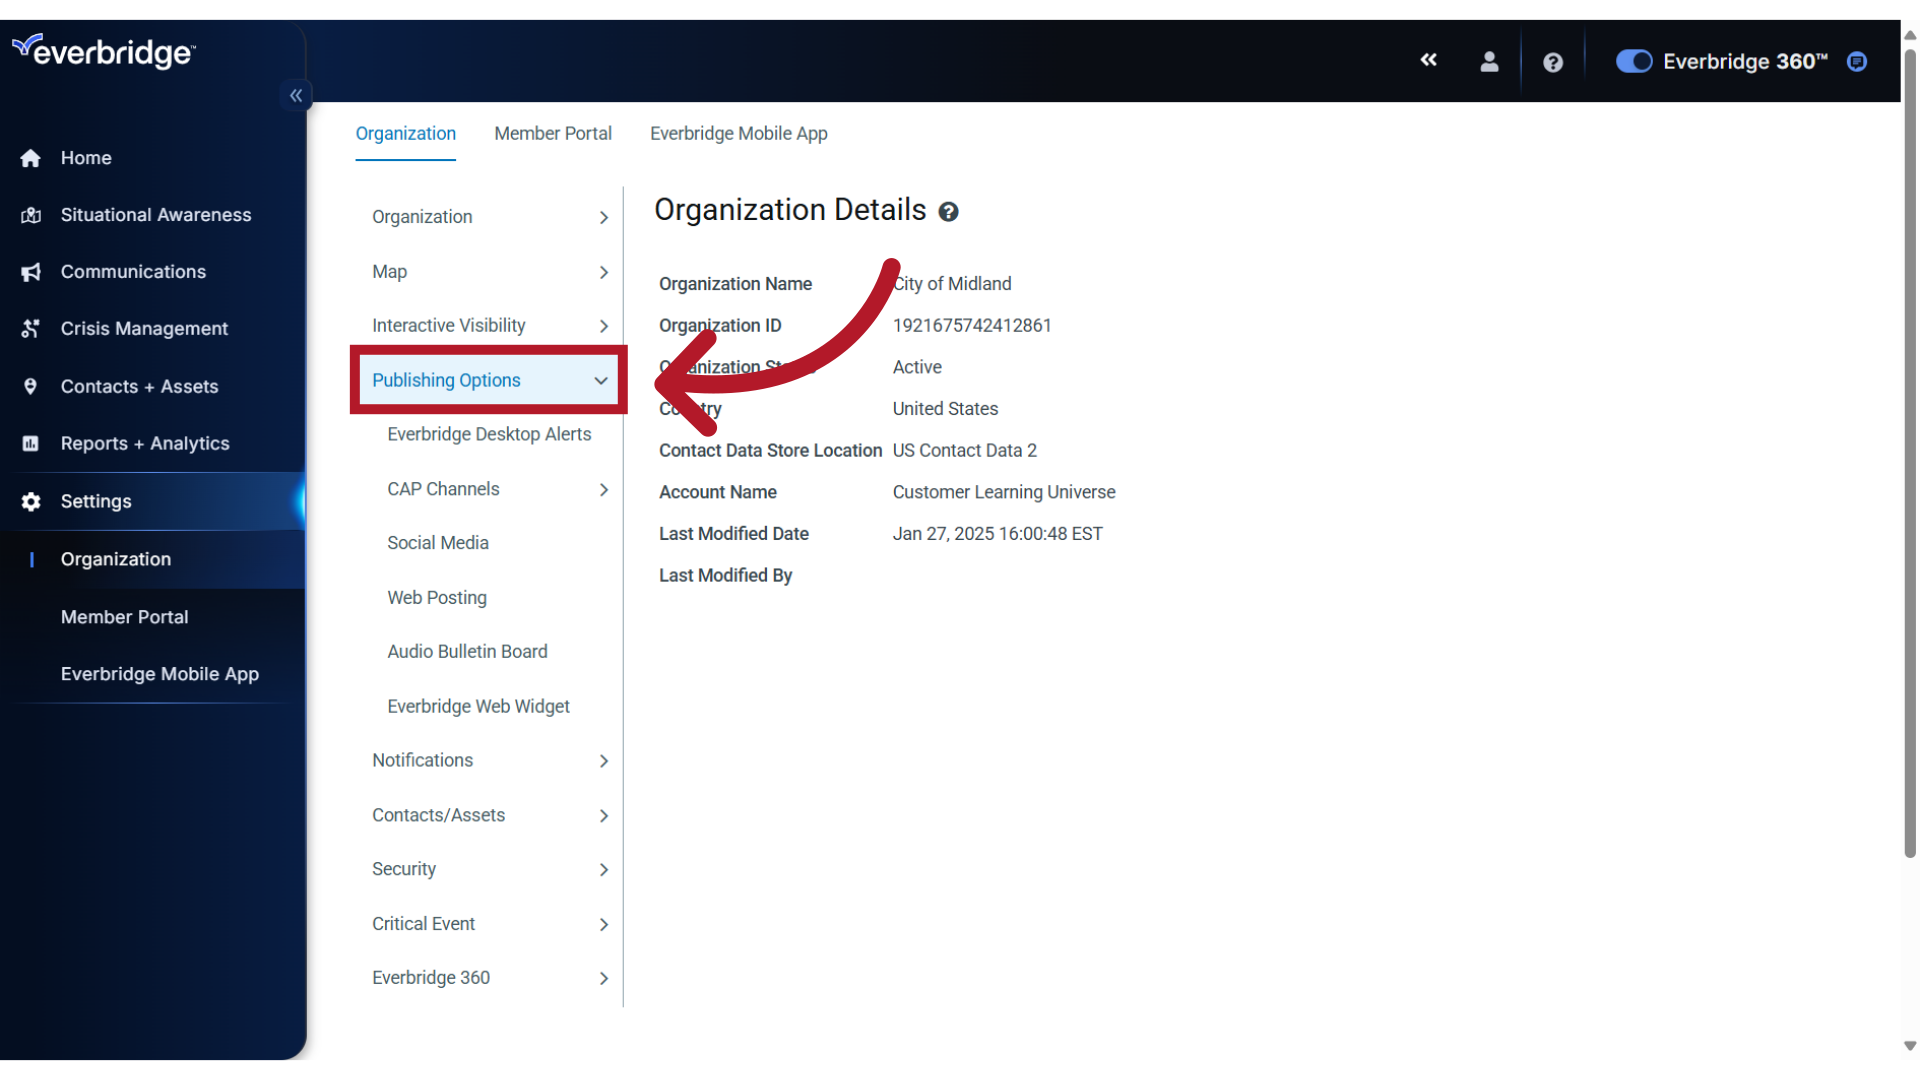
Then select Publishing Options
4. Select
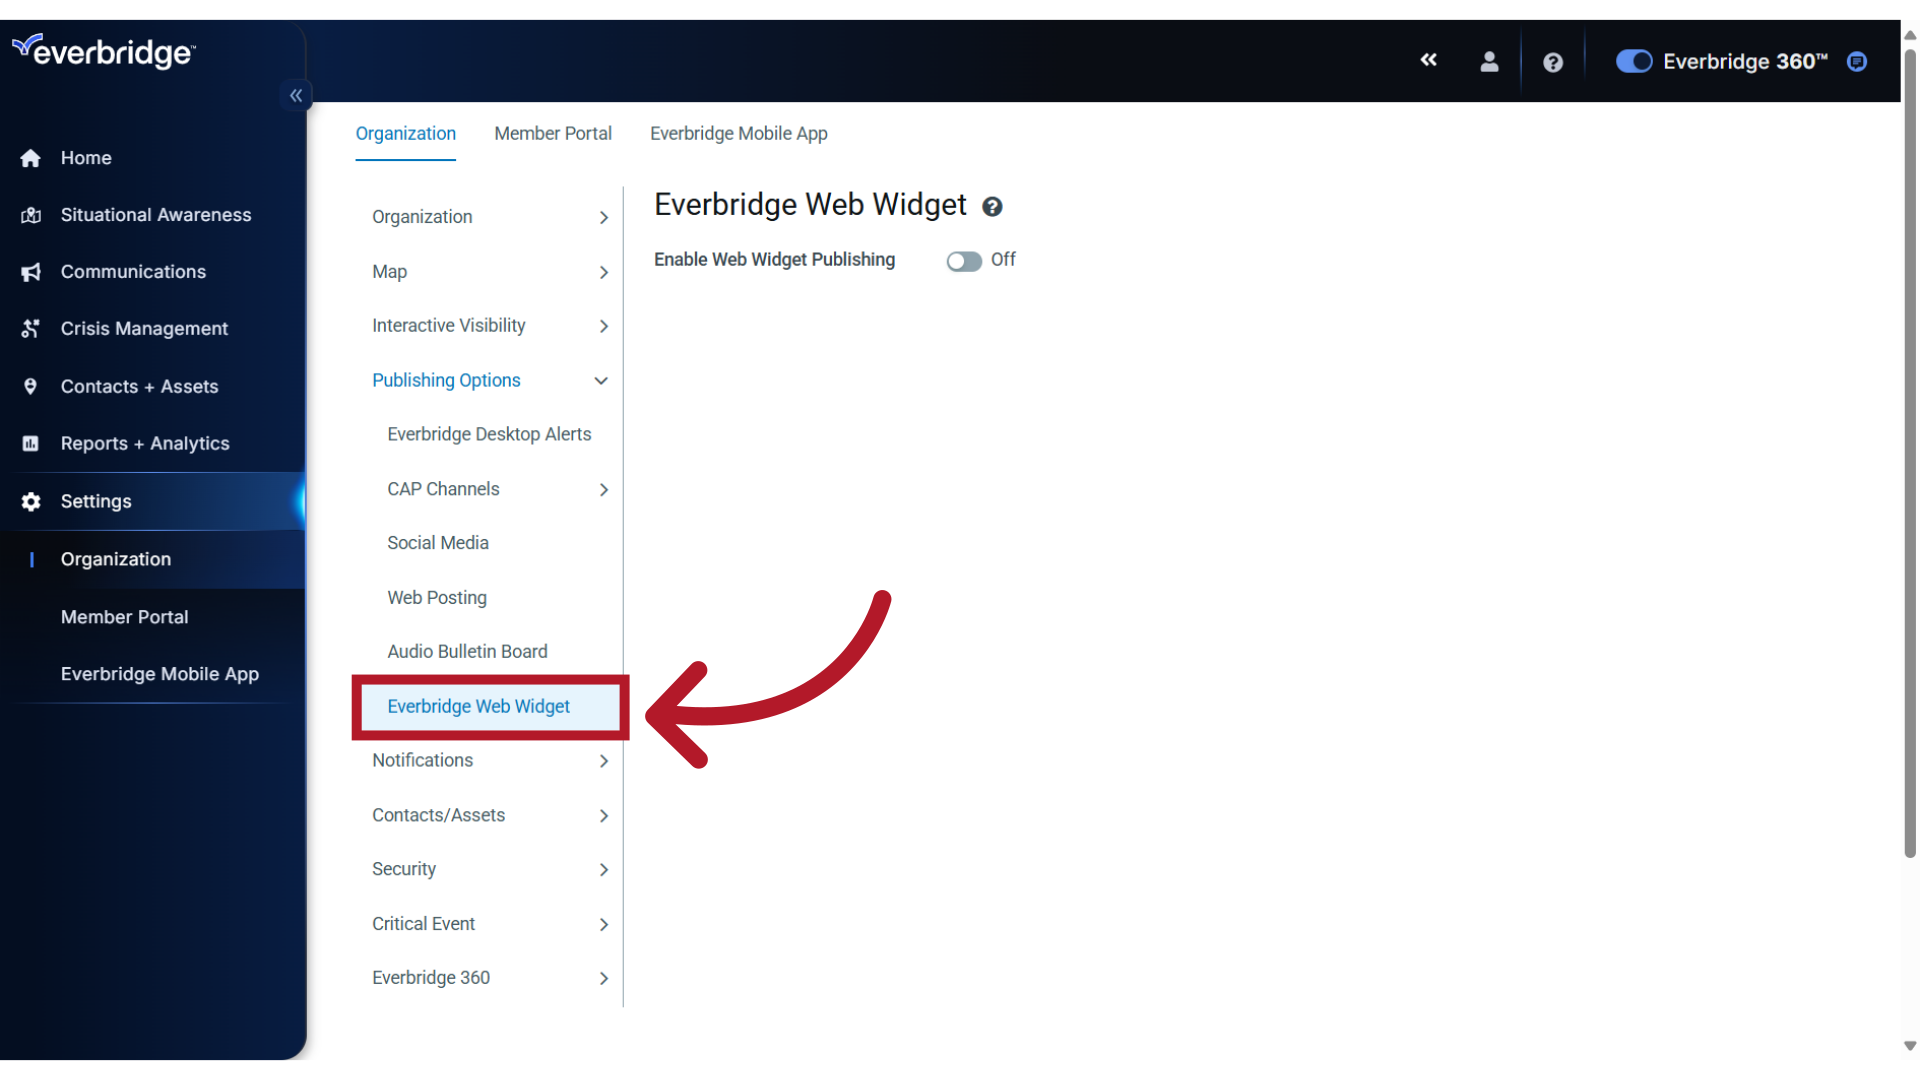
and Everbridge Web Widget.
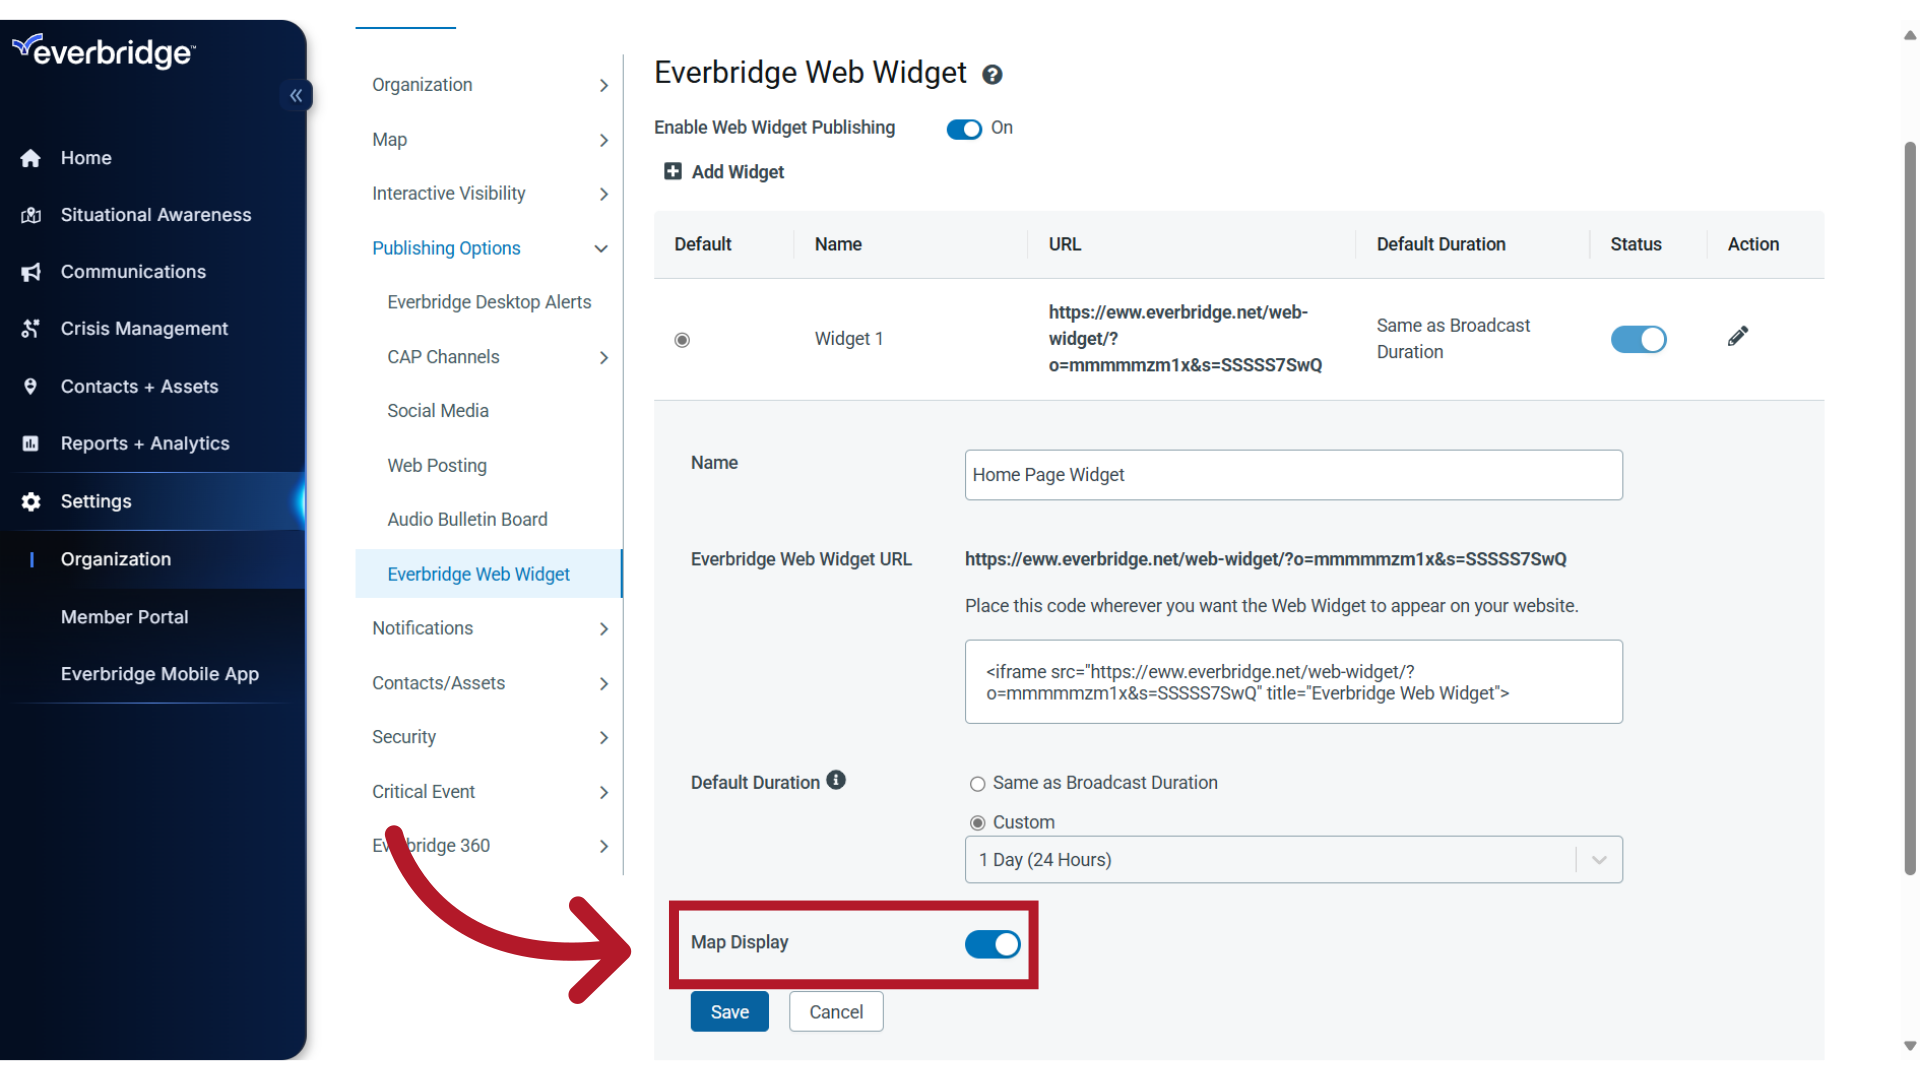
5. Enable
To enable Web Widget Publishing, slide the button to the On position.
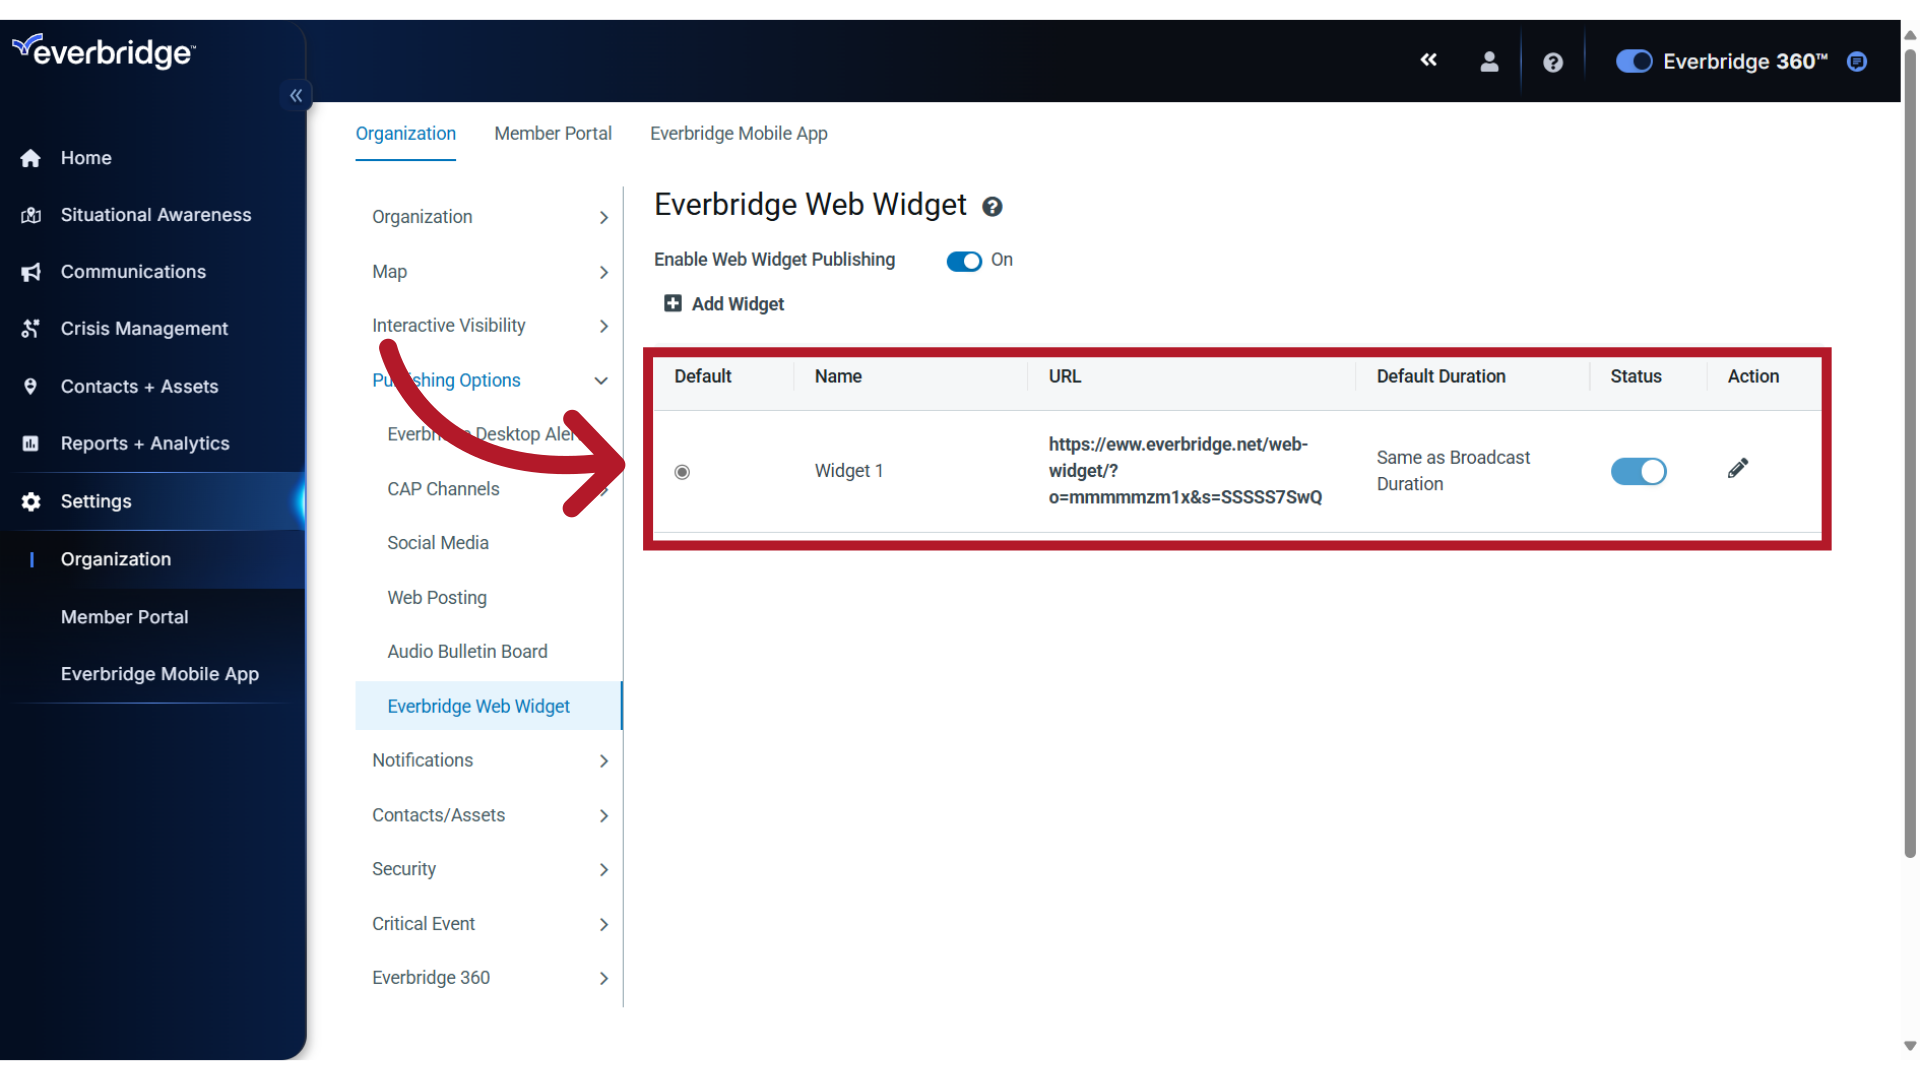
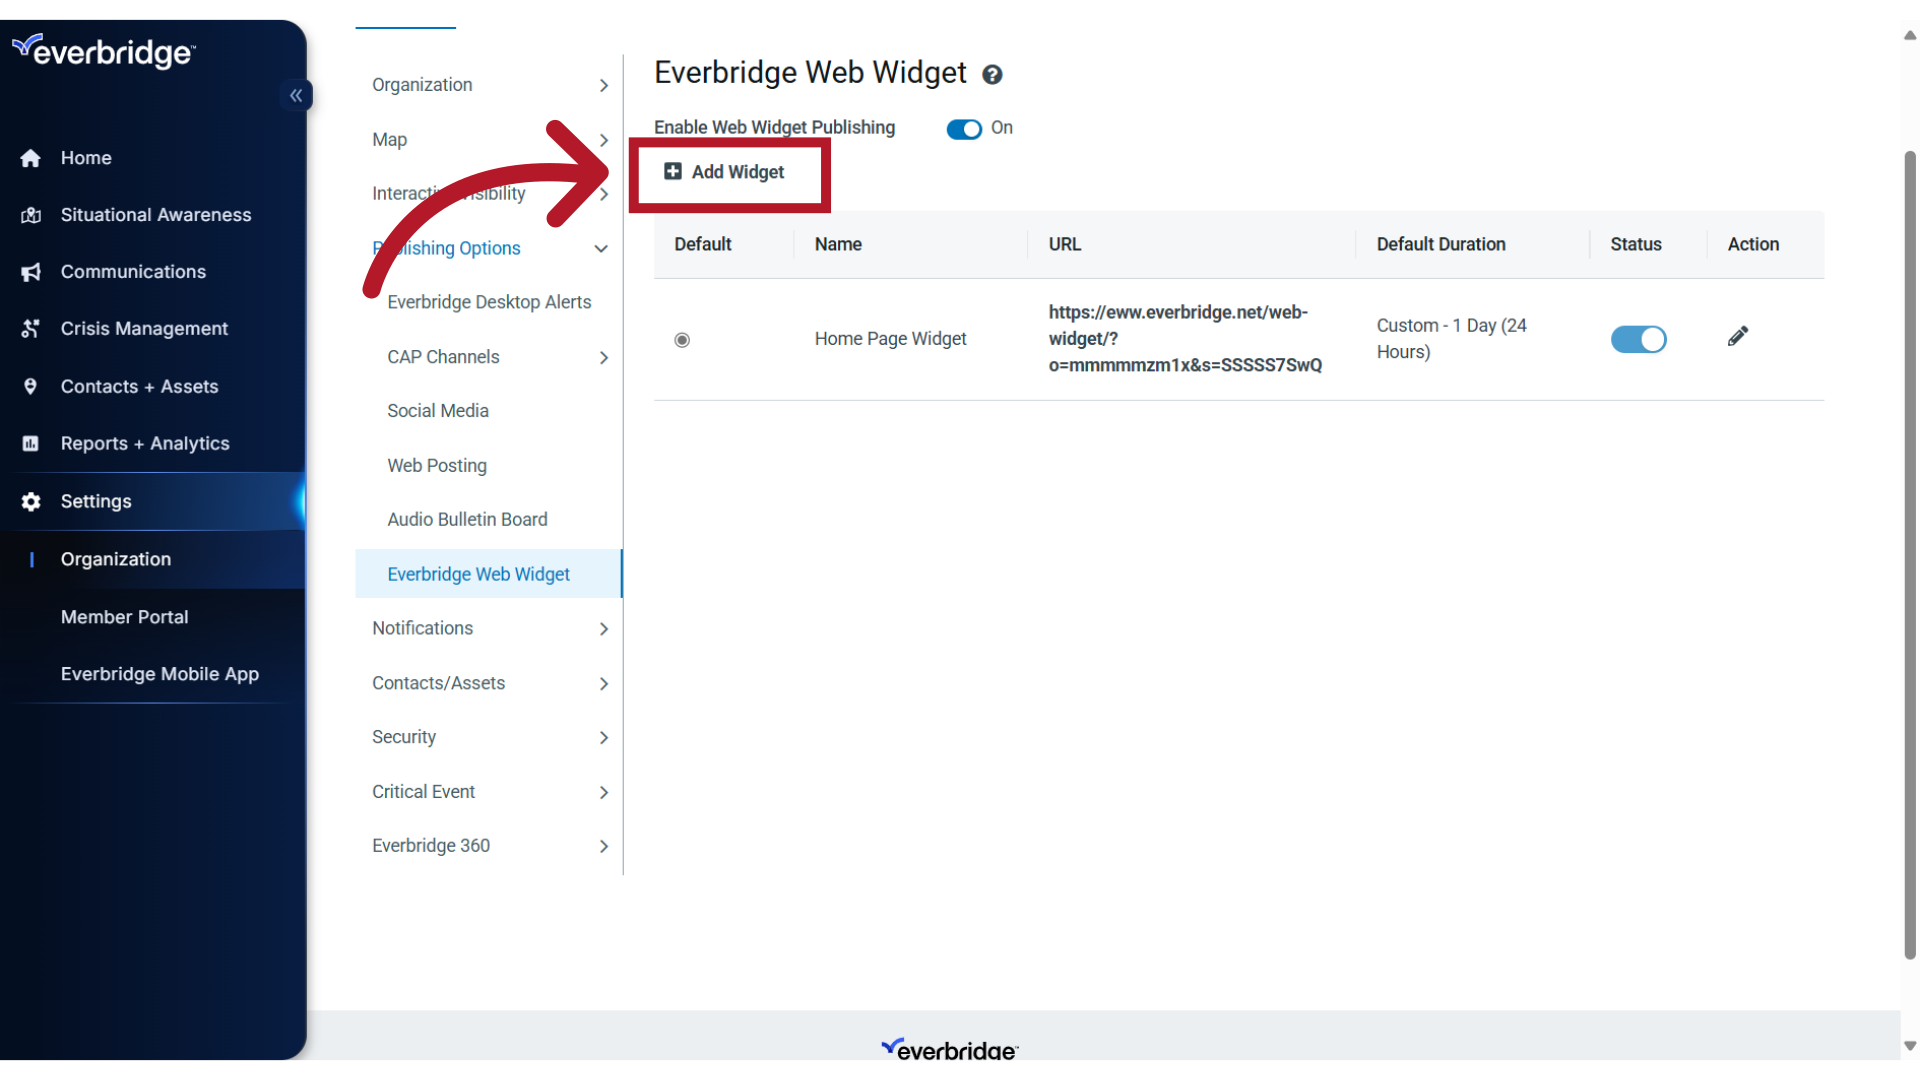
6. Default Widget
The default Web Widget will then display with an automatically generated URL. The widget is ready to be used with these default settings; simply provide the URL to your website administrator so they can embed it into a web page.
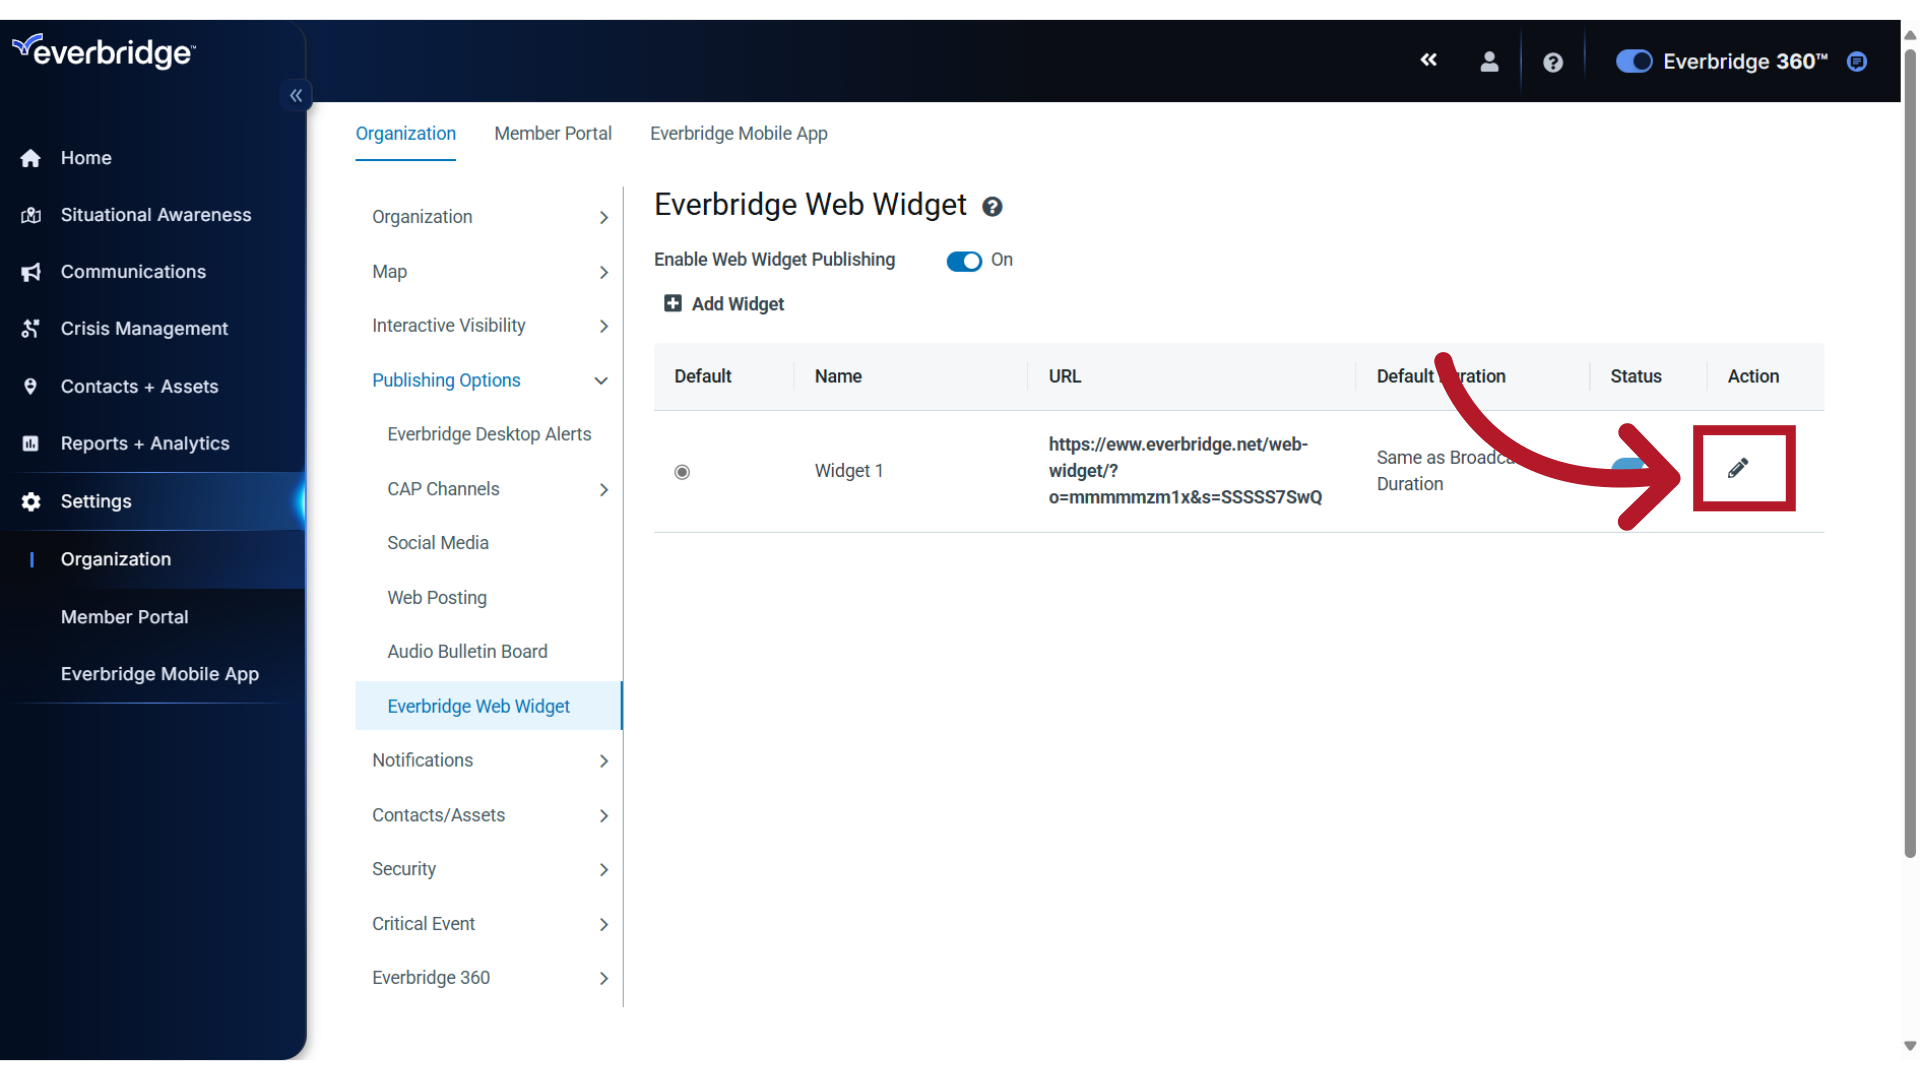
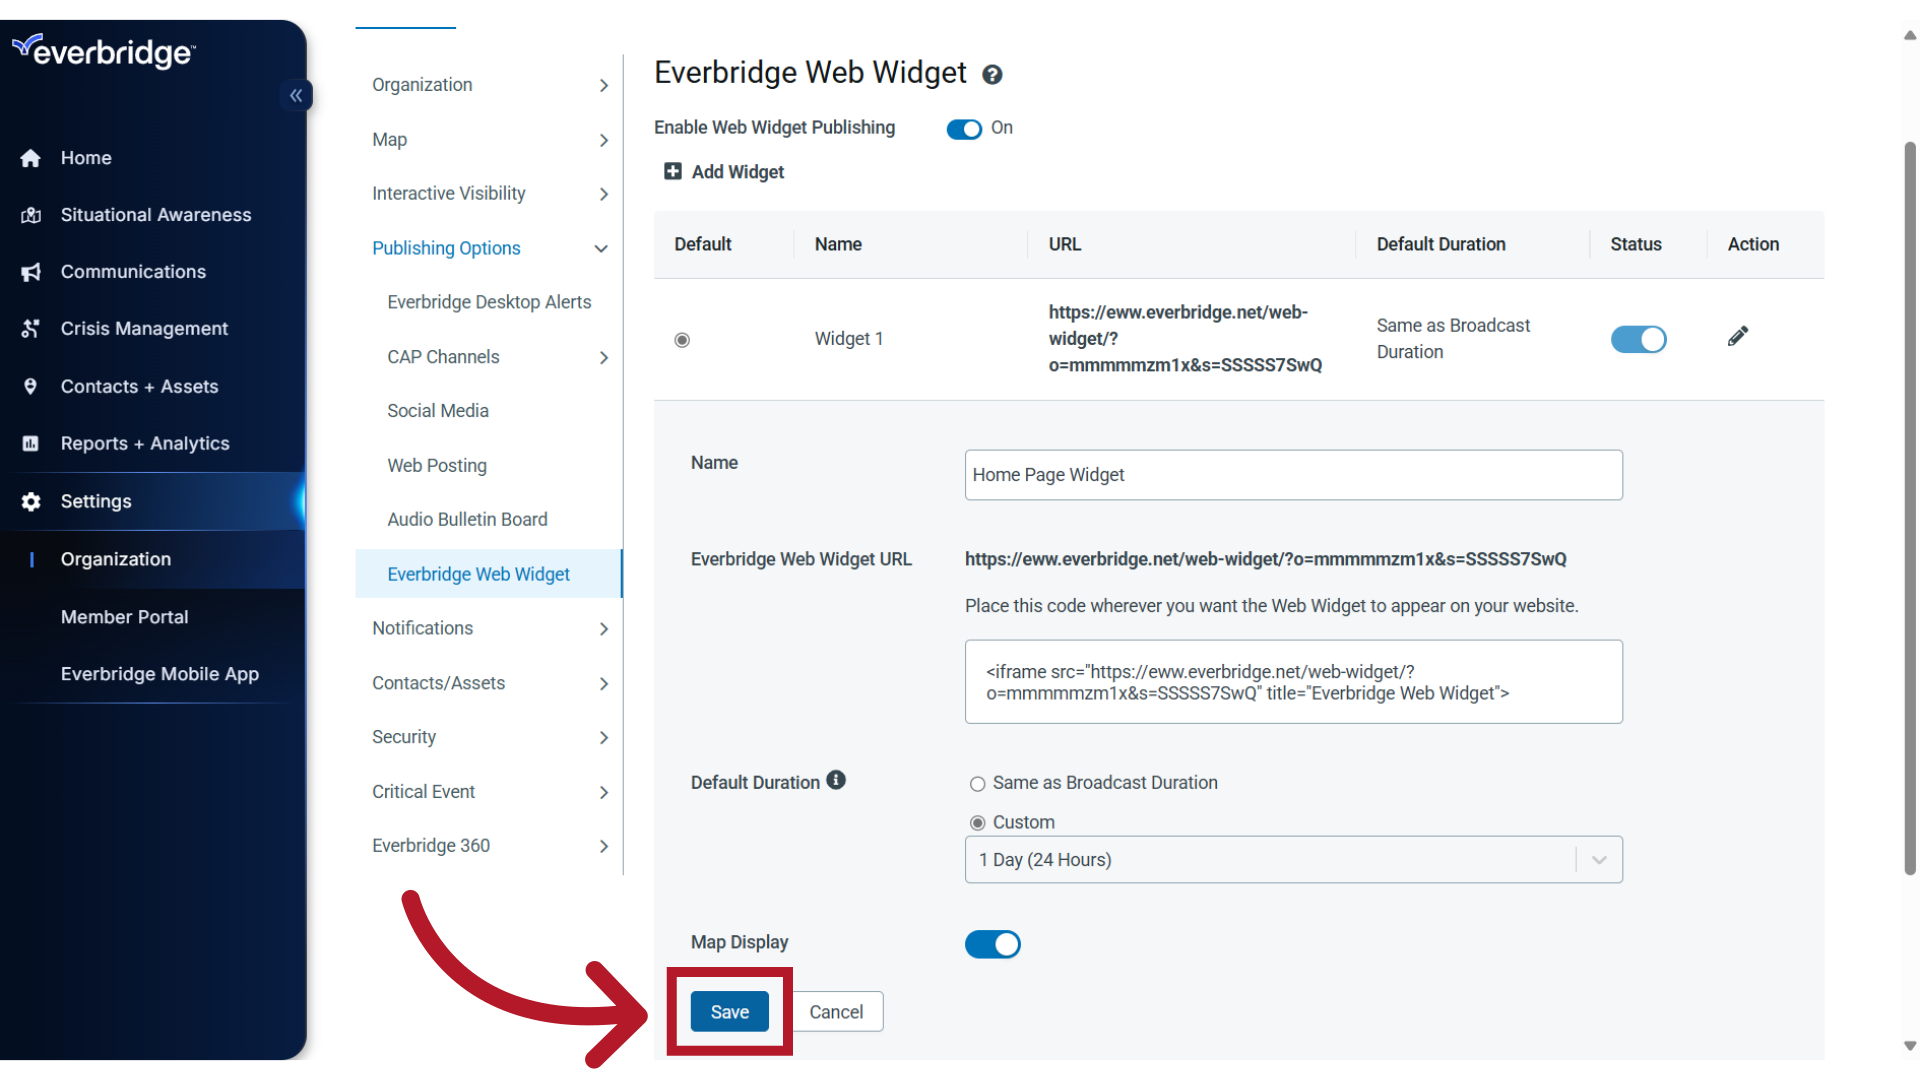
7. Customize
If needed, you can customize the widget settings. Click the pencil icon to open the editor.
8. Name
The Name is what appears when selecting the publishing option in your notification.
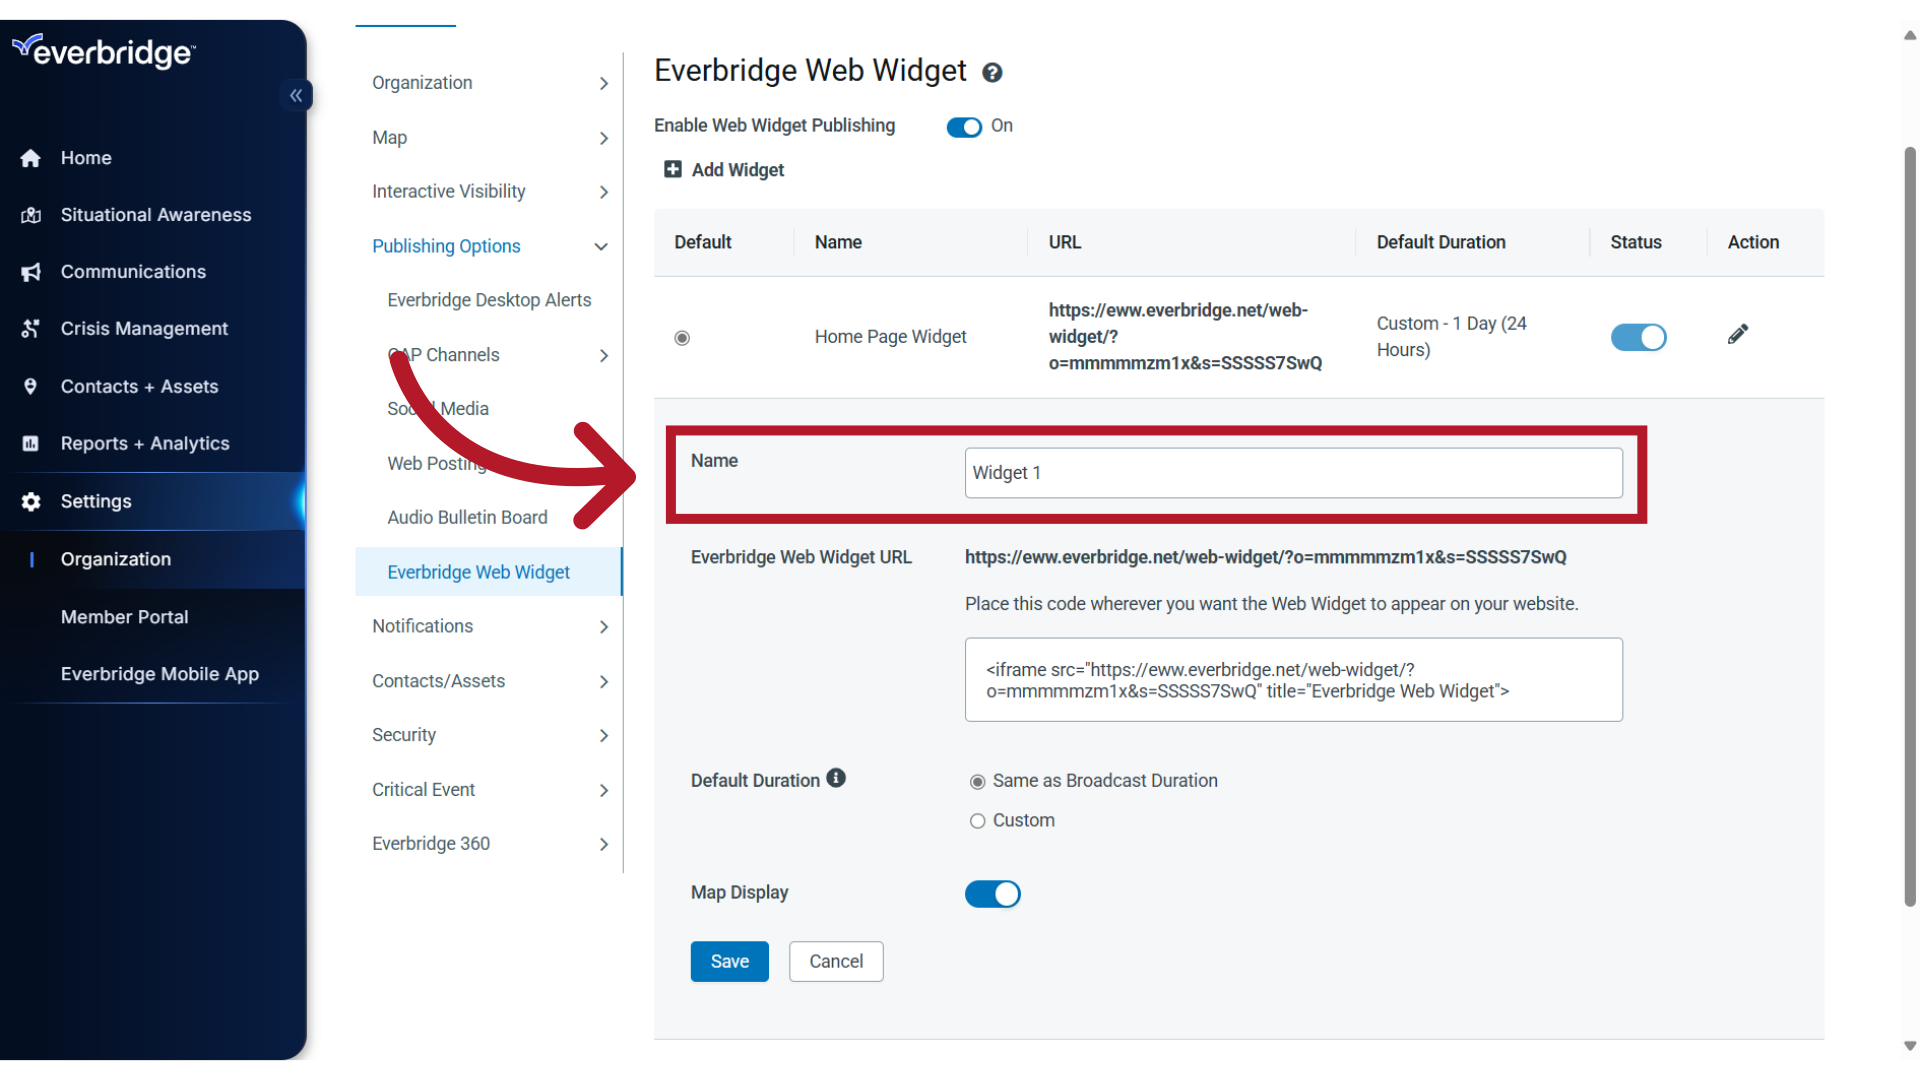
9. Custom Name
If desired, you can change this to a custom name that more accurately describes the selection.

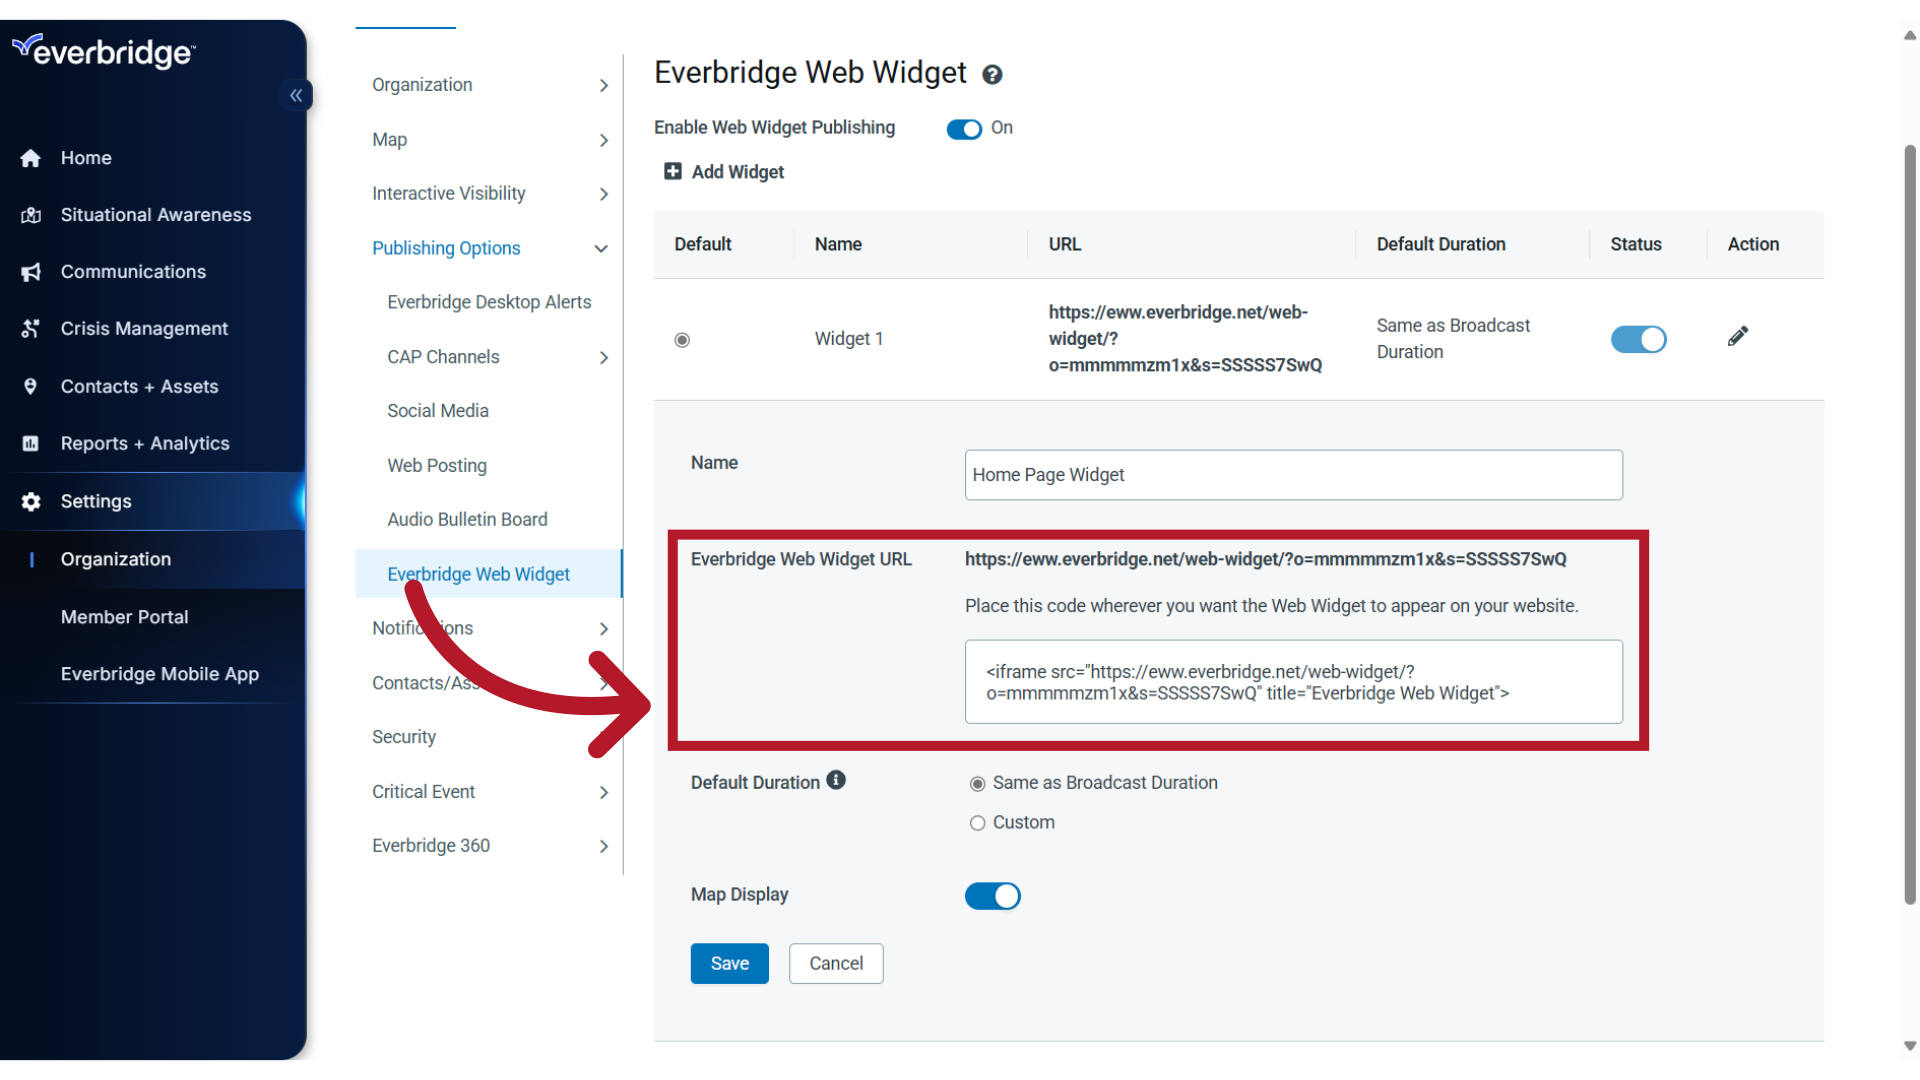
10. Source URL
Here, you can copy the iFrame source and provide it to your website administrator.
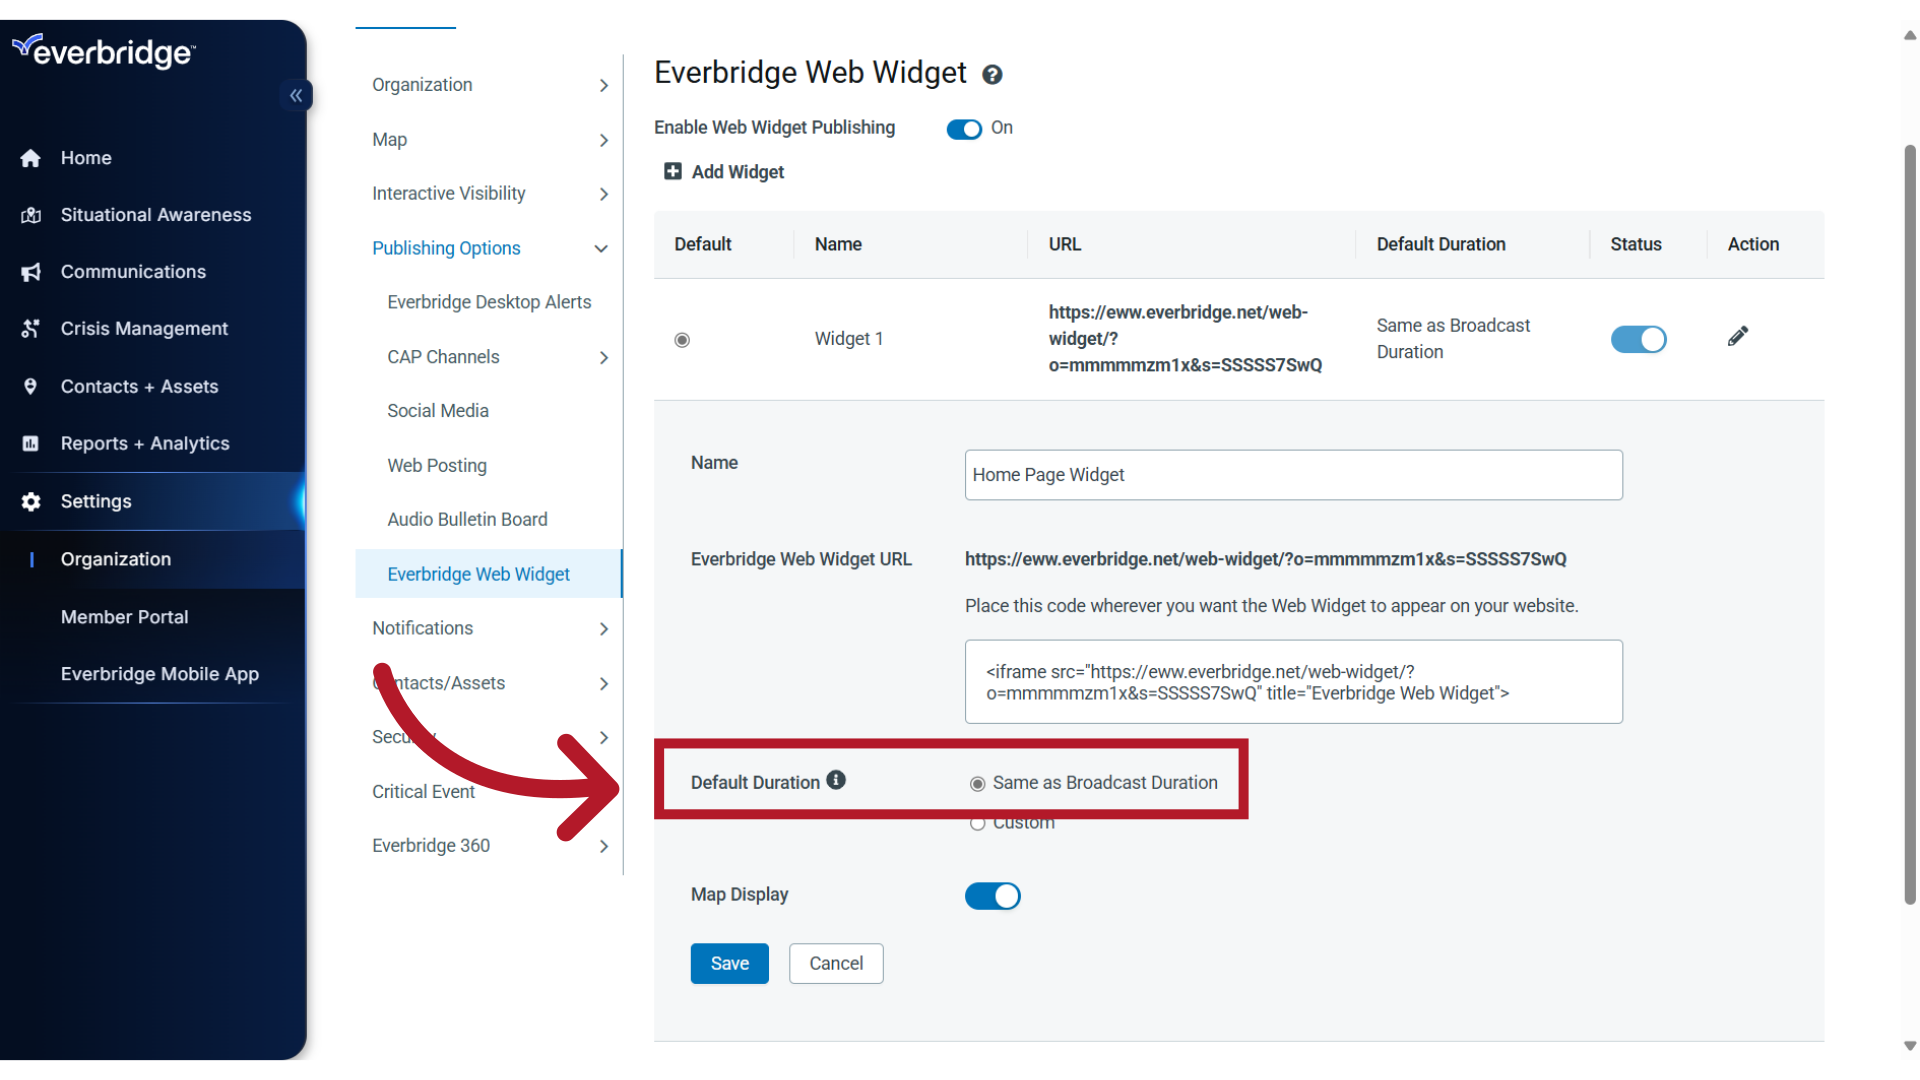
11. Default Duration
By default, the message content published using this web widget will display on the web for the same length of time as the notification's broadcast duration.
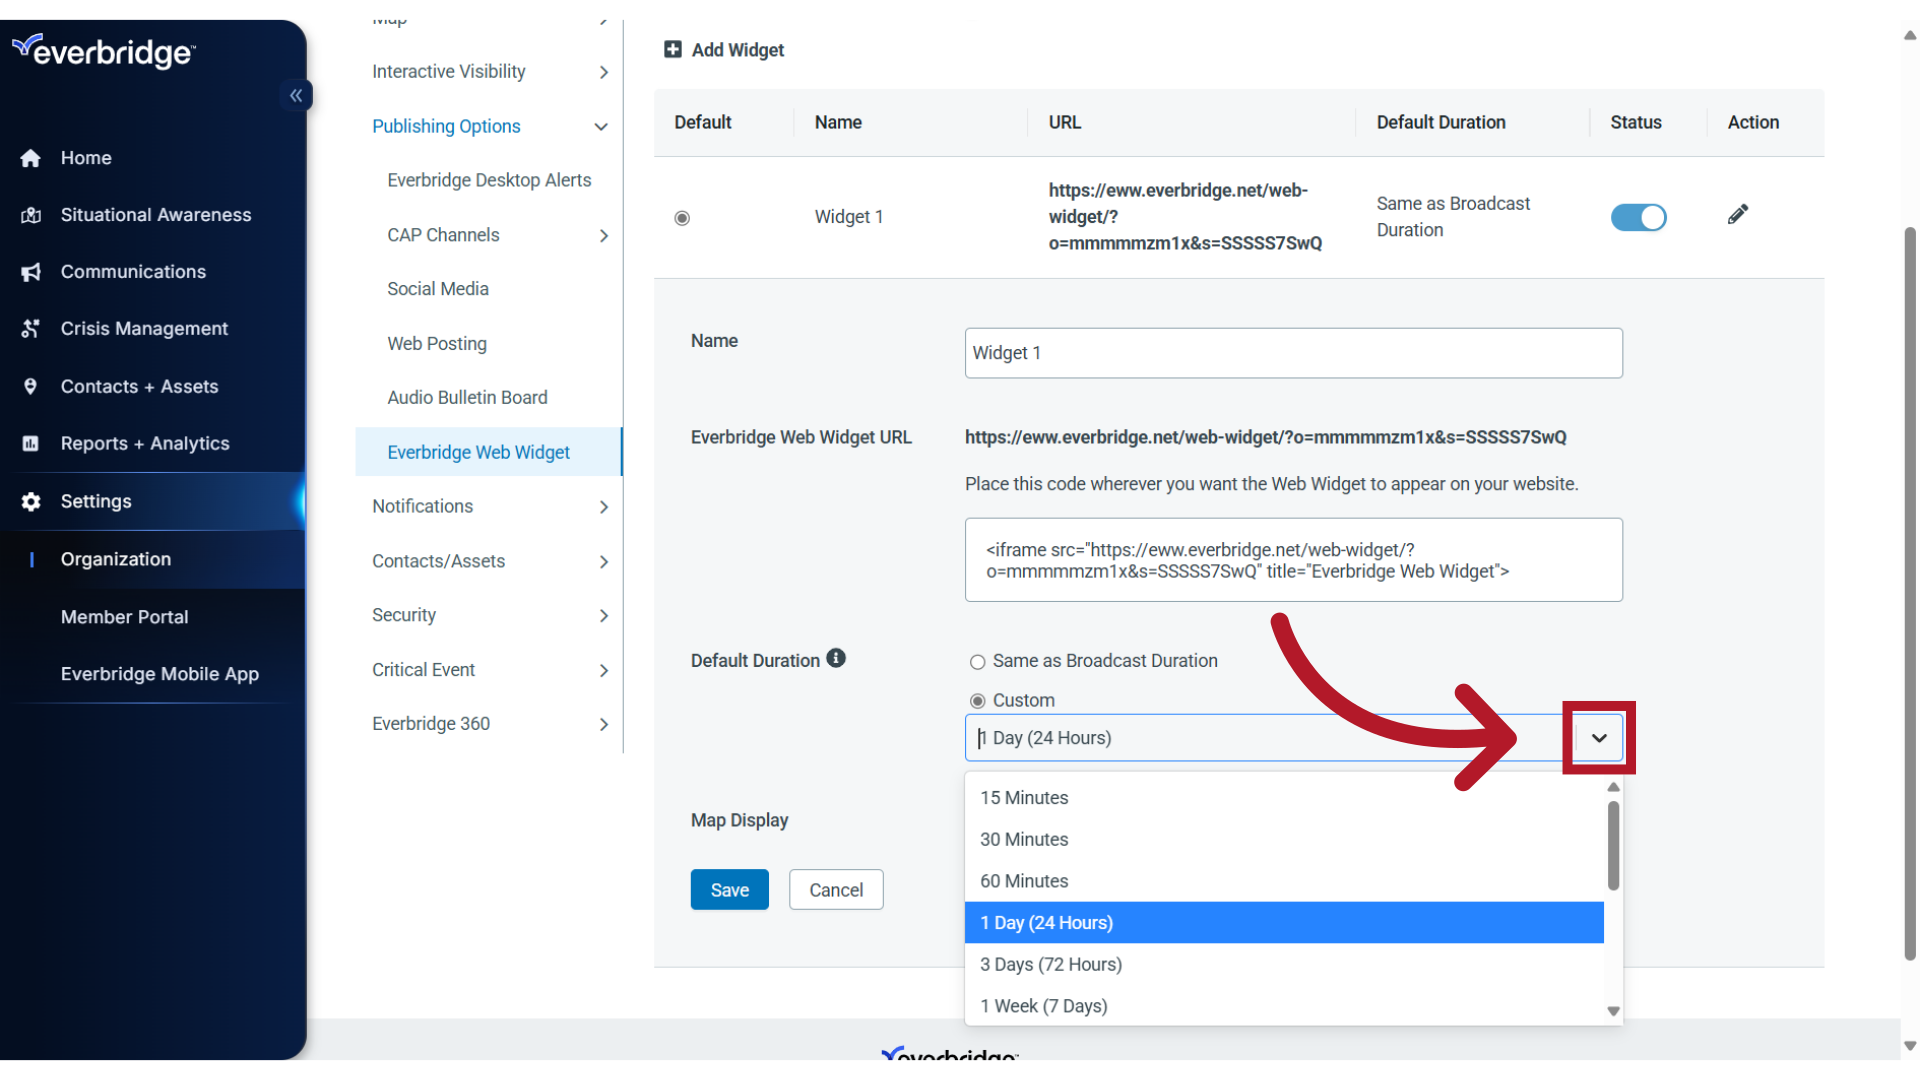
12. Custom Duration
Or, you can set a Custom duration by selecting from the drop-down list
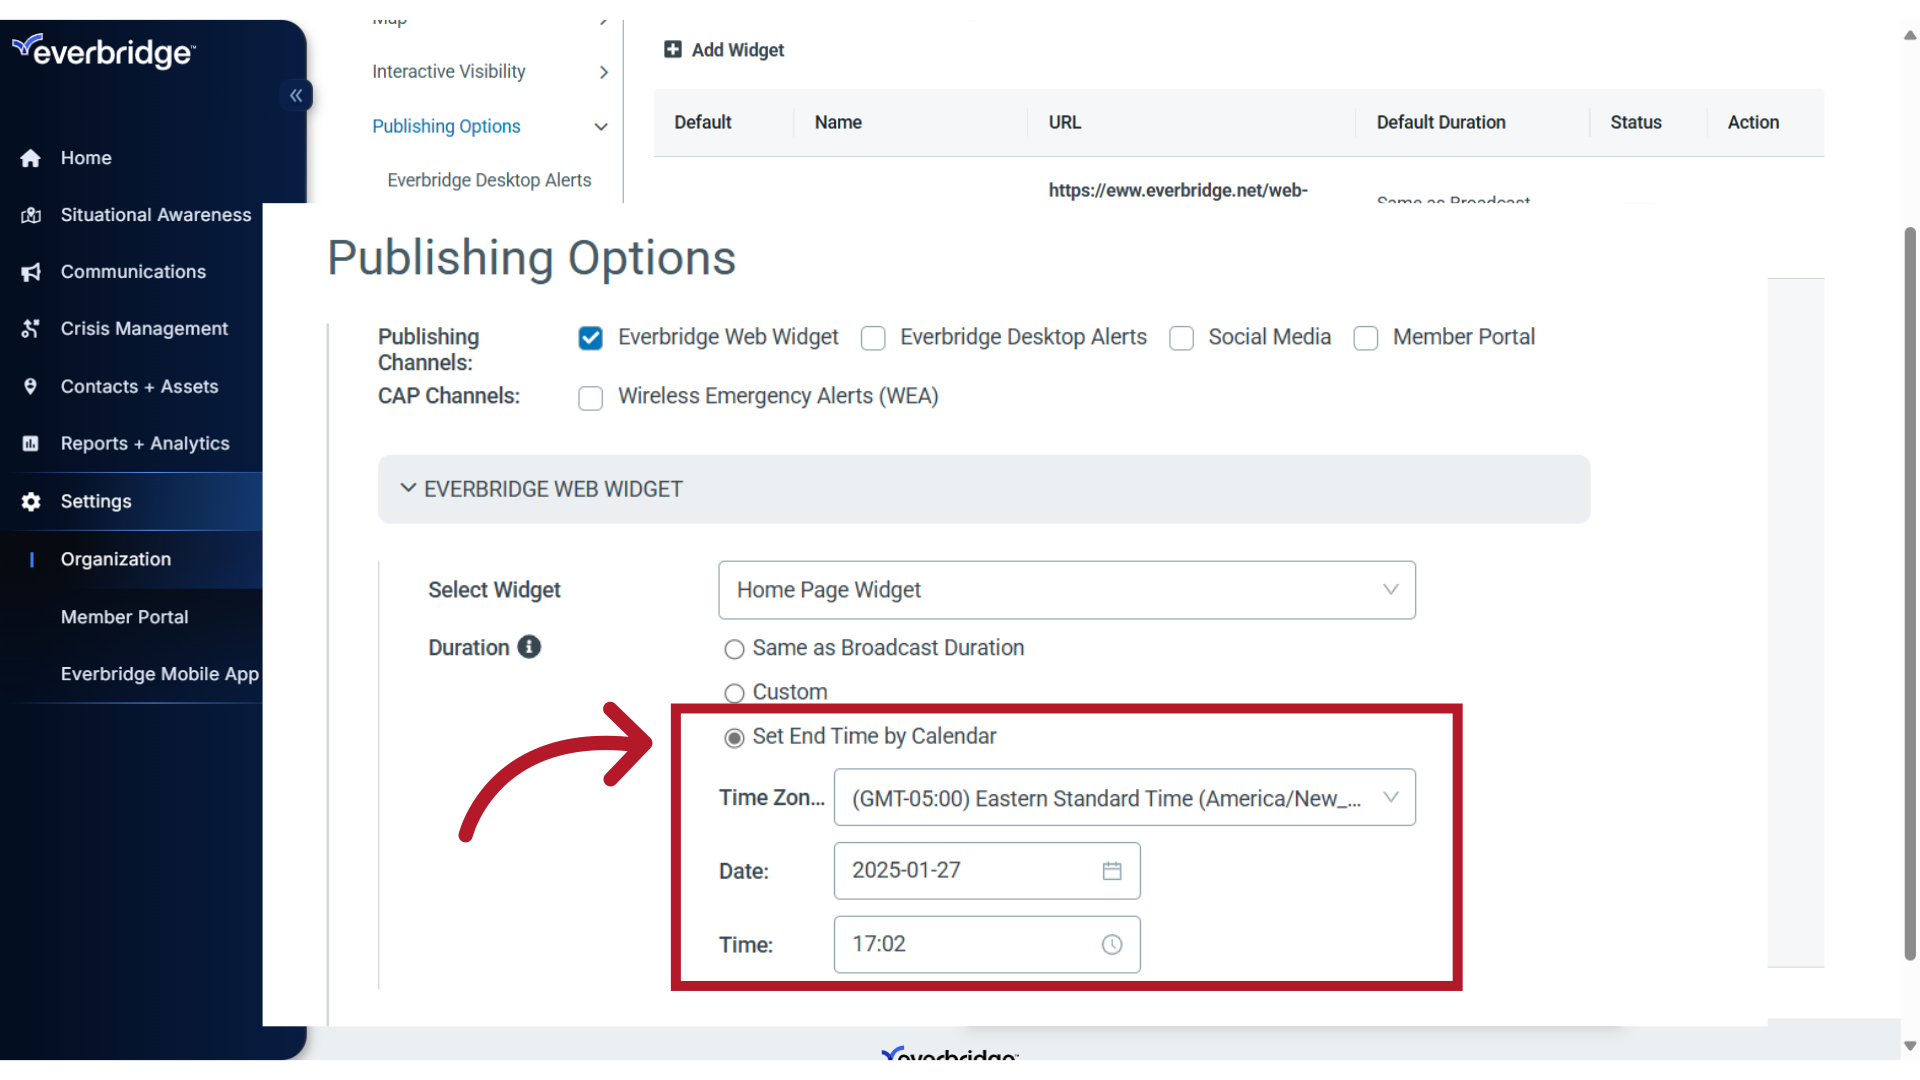
13. Set End Time by Calendar
During the launch of a Notification, you may override the Default or Custom Duration setting, or select a third option to "Set End Time by Calendar" where you can specify the date and time the Broadcast should end.
14. Map Display
When Map Display is enabled, the background of the widget will display a map area. This is recommended if your published content for this widget is primarily going to be used for location-based messages, as it provides visual context for them.
15. Notification With Map Selection
Now, when a Map selection is used within a notification, the shape and the surrounding map area will appear in the widget background.
16. Notification Without Map Selection
Or, if no Map selection is made in the notification, the widget will display the Default Map Center in the background, as defined in your organization's default map settings.
17. Disable Map Display
Consider disabling the Map Display option if you will be using this widget primarily for non-location-based messages.
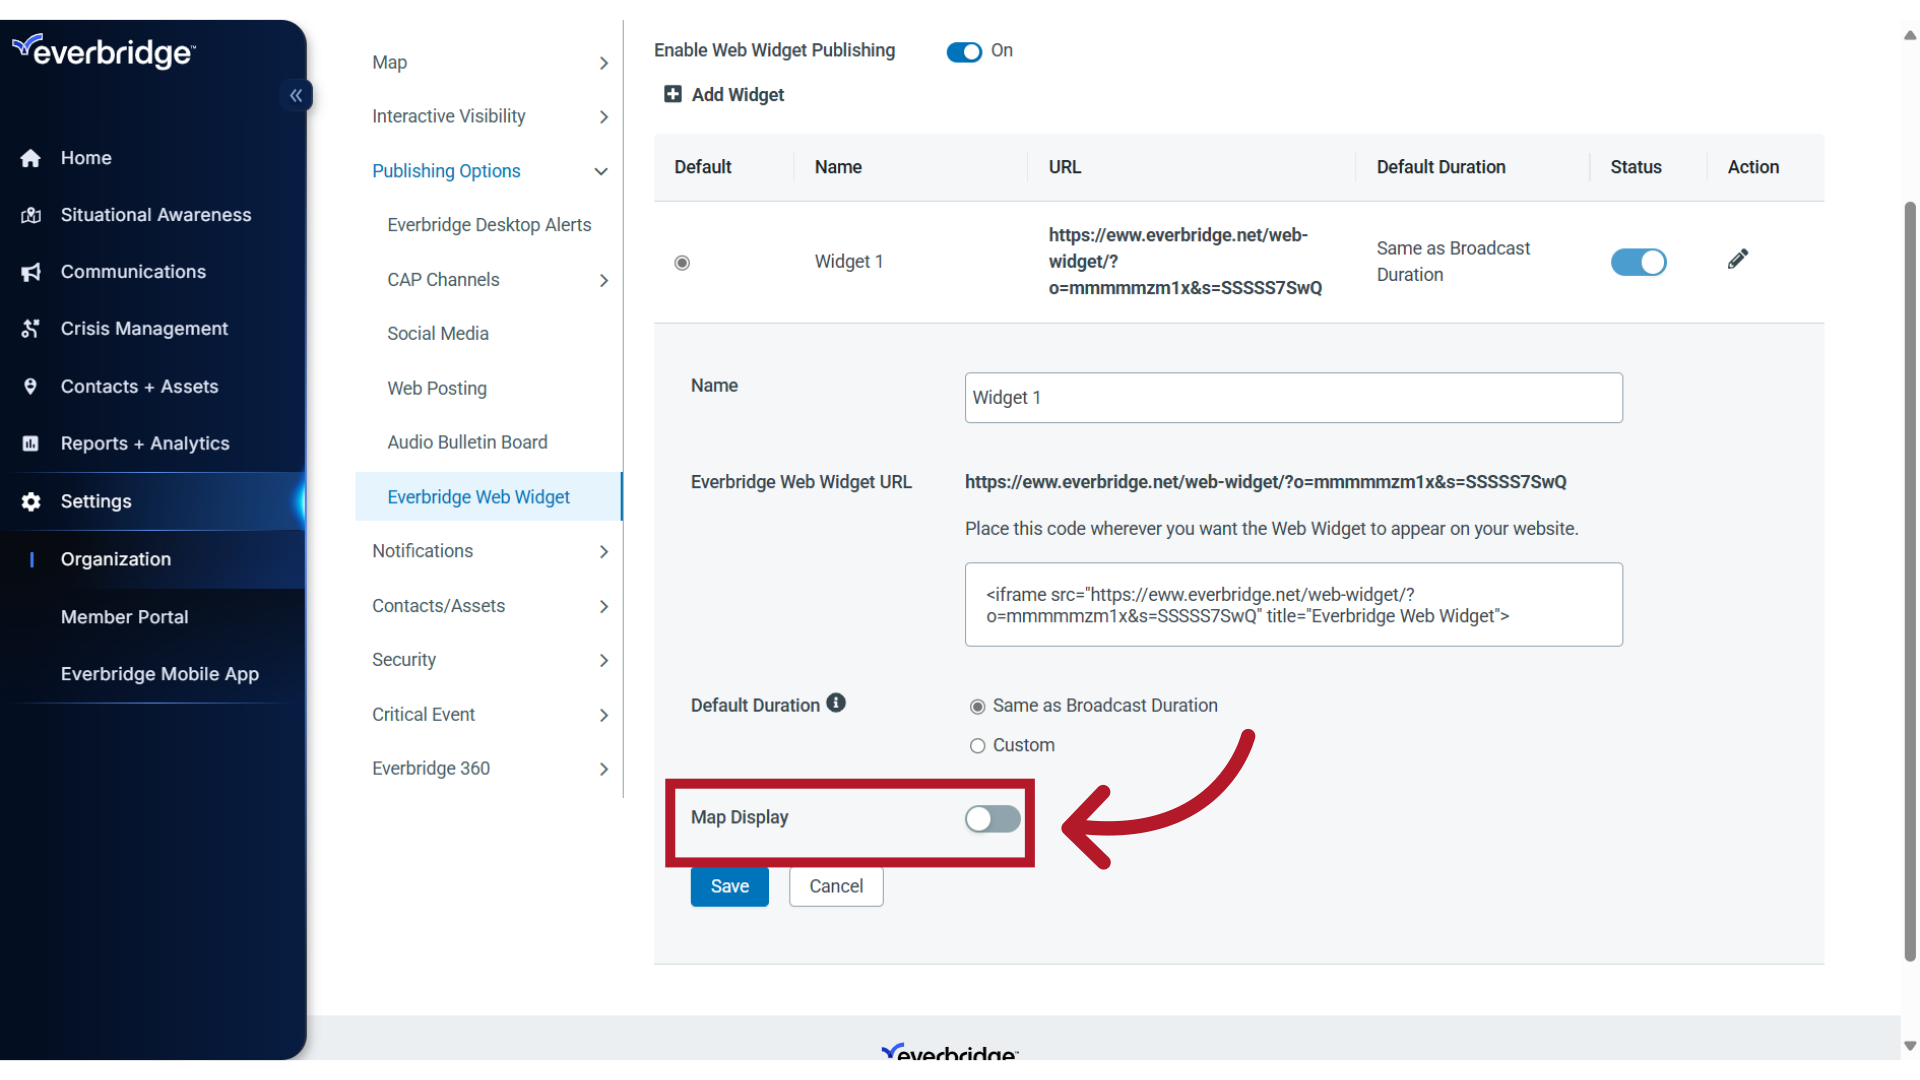
18. Map Display Disabled
When disabled, there will be no map in the background of the widget.
19. Save
If you have made any changes to the widget, click Save.
20. Add New
If needed, you can create additional widgets. Click Add Widget to create another. Note: Though multiple Web Widgets can be configured, only one can be chosen per notification.
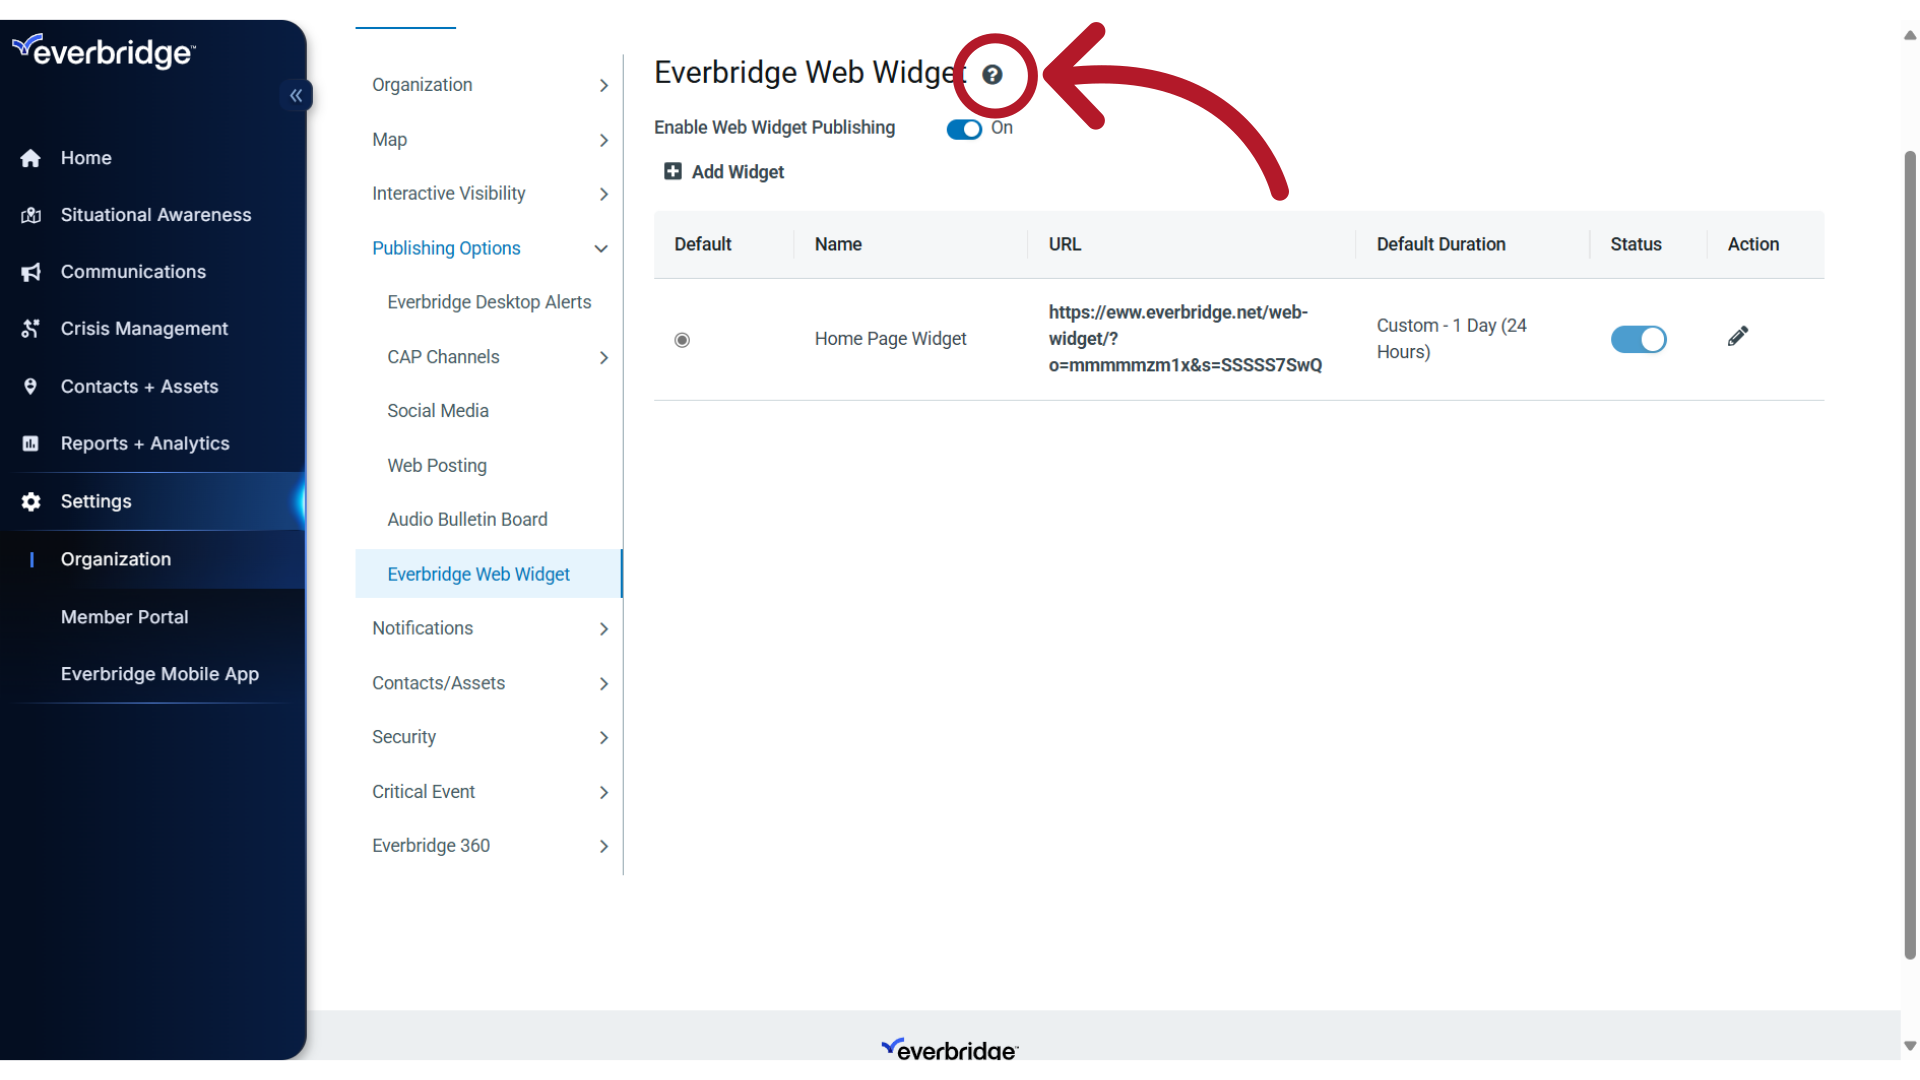
21. Help
For more information on creating or using Web Widgets, click the Help icon.
22. Ensuring Incident Updates Display on Website
To ensure incident updates appear on your website's alert ticker, you need to configure two key settings:
Enable Web Posting in the incident template's Publishing Options
Verify that the notification type is set to 'Web Posting'
If these settings are not correctly configured, updated incident information may not be pushed to your website.
Deactivating a Web Widget Message: To stop displaying a specific web widget message on your website, navigate to the related notification in Everbridge Suite and locate the Deactivate button under Publishing Options. You can only deactivate messages that are currently active; messages that have already expired will not present a deactivation option.
Updating an Existing Web Widget Message: You cannot directly edit the content of a web widget message once it has been published. To update what appears in the widget, you must either deactivate the current message and rebroadcast a new notification with the desired changes, or create and send a new notification to replace the existing one.
NOTE: The Everbridge Web Widget cannot be made private. It is designed to be a publicly accessible URL that a website administrator can embed into a web page. There are currently no built-in options to restrict access to the widget or its URL.
IMPORTANT: Everbridge does not provide direct embed codes for websites beyond the Web Widget functionality described in this article. For more advanced website integration options, most customers leverage Everbridge's APIs. If you need additional customization for displaying alerts on your website, you'll need to work with Everbridge's APIs to make the necessary data available.