Topic
How to publish Everbridge notifications to Facebook and Twitter accounts.
Description
|
To publish notifications to a Facebook or Twitter account, the account must be linked to the organization. Follow the steps below:
NOTE: If posting to Facebook, be sure to link Everbridge to at least one Facebook Fan page. For more information on Facebook Fan pages, see https://sproutsocial.com/insights/facebook-fan-page/ . Everbridge can only post to the walls of the Pages to which it is linked. If no Pages are linked (or linked but not selected), no post will occur. |
To publish a notification to a social media account, follow the steps listed below
Log in to the Manager Portal and select the desired organization from the upper right-hand corner.
Click on the Notifications tab from the top of the page.
Click the New Notification button from the upper left.
-
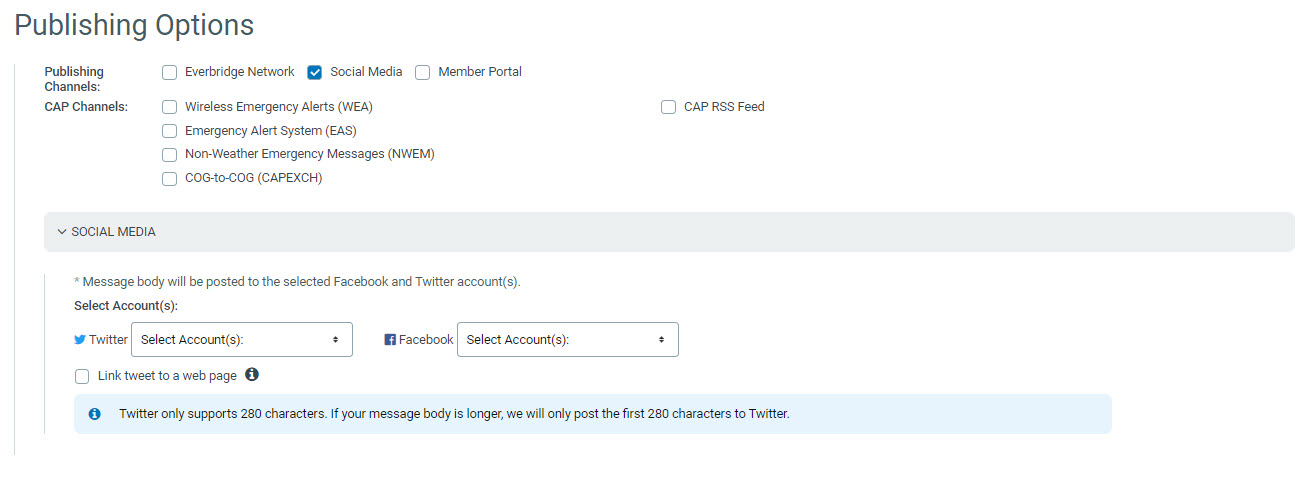
Create the notification as desired, and from the Publishing Options pane, select the checkbox for Social Media.
Click the Attach Files link (under the Message section) to add an image to the post.
-
Select the desired accounts from the Select Account(s) dropdowns.
Check the checkbox for Link tweet to a web page to provide followers a direct link to a publicly accessible web page that contains the entirety of the notification (title, body, Rich Text Formatting, and attachments). Linking to a web page is helpful for longer messages, as Twitter messages (tweets) only support 280 characters.
If files are attached in the Message section, then under Include an image, select the radio button(s) for the uploaded image(s) to add to the post.
Complete and click Send.
 Linking Multiple Facebook Pages
Log in to the Everbridge Manager Portal and select your Organization
Navigate to Settings > Organization > Publishing Options > Social Media.
Click the 'Settings' button next to the Facebook logo.
Follow the prompts to link multiple Facebook accounts, each associated with a different Facebook page (e.g., Police and Fire departments).
When sending notifications, you can now select which specific Facebook page to post to.
Troubleshooting
Issues with Facebook Publishing:
If you encounter error messages when attempting to change Facebook settings, try the following steps:
Unlink your old Facebook account.
Clear your browser's cache and cookies.
Link your Facebook account again and select the desired pages for publishing.
If using Facebook in Incident Templates, update the template to set the newly linked Facebook account.
Automatic Posting Issues:
If notifications are not automatically posting to your organization's Facebook and Twitter accounts:
Unlink your Facebook and Twitter accounts.
Clear your browser's cache and cookies.
Relink the accounts.
If the problem persists, contact Everbridge support for further assistance.